HP LaserJet P3010 Series Printers Service Manual. Additional product information:
|
|
|
- Amie Allison
- 6 years ago
- Views:
Transcription


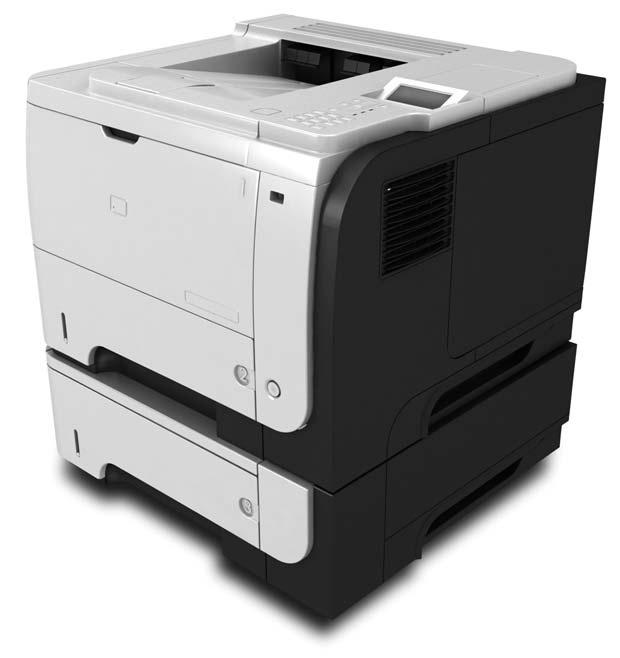
1 HP LaserJet P300 Series Printers Service Manual Additional product information:
2
3 HP LaserJet P300 Series Printers Service Manual
4 Copyright and License 2009 Copyright Hewlett-Packard Development Company, L.P. Reproduction, adaptation, or translation without prior written permission is prohibited, except as allowed under the copyright laws. The information contained herein is subject to change without notice. Trademark Credits Adobe is a trademark of Adobe Systems Incorporated. Microsoft, Windows, Windows XP, and Windows Vista are U.S. registered trademarks of Microsoft Corporation. ENERGY STAR and the ENERGY STAR mark are registered U.S. marks. The only warranties for HP products and services are set forth in the express warranty statements accompanying such products and services. Nothing herein should be construed as constituting an additional warranty. HP shall not be liable for technical or editorial errors or omissions contained herein. Part number: CE Edition, 7/2009
5 Conventions used in this guide TIP: Tips provide helpful hints or shortcuts. NOTE: Notes provide important information to explain a concept or to complete a task. CAUTION: product. Cautions indicate procedures that you should follow to avoid losing data or damaging the WARNING! Warnings alert you to specific procedures that you should follow to avoid personal injury, catastrophic loss of data, or extensive damage to the product. ENWW iii
6 iv Conventions used in this guide ENWW
7 Table of contents Theory of operation Basic operation... 2 Major printer systems... 2 Printer block diagram... 2 Sequence of operation... 3 Normal sequence of operation... 3 Formatter-control system... 4 Sleep mode... 4 Input/output... 4 CPU... 4 Memory... 5 Optional hard disk... 5 Firmware... 5 Nonvolatile memory... 5 PJL overview... 5 PML... 5 Control panel... 5 Engine-control system... 6 Motors, fans, clutches, solenoids, switches, and sensors... 7 DC controller operations... 4 Fuser-control circuit... 6 Fuser failure detection... 7 Fuser temperature control... 8 Fuser protective function... 9 Low-voltage power supply Overcurrent/overvoltage protection... 2 High-voltage power supply Formatter Formatter heartbeat LED DIMM slots Laser/scanner system Laser failure detection Image-formation system Electrophotographic process ENWW v
8 Image formation process Latent-image formation stage Primary charging Laser beam exposure Developing stage Print cartridge Transfer stage Fusing stage Cleaning stage... 3 Toner detection Pickup, feed, and delivery system Paper trays Photo sensors and switches Solenoids and clutches Tray or Tray Pickup and feed unit Cassette paper size detection/cassette paper detection Cassette pickup Tray paper pickup Paper pickup and feed Jam detection Additional tray... 4 Tray driver PCA... 4 Paper pickup and feed Media level and size detection Jam detection Removal and replacement Removal and replacement strategy General cautions during removal and replacement Electrostatic discharge Required tools Types of screws Service approach Before performing service After performing service Post-service test Print-quality test Parts removal order Removal and replacement procedures Print cartridge, cassettes, and sub cover Print cartridge Tray cassette (Tray 2, Tray 3, or Tray 4) vi ENWW
9 Sub cover External panels, covers, doors, formatter PCA, DIMM, and EIO disk EIO disk DIMM cover and DIMM Reinstall the DIMM Formatter cover and formatter PCA Rear-door assembly Left cover Right-rear cover Tray (multipurpose tray) cover Cartridge-door assembly... 7 Top-right cover Control panel Front-right and right-side cover assembly Lower-right cover and bracket Reinstall the lower-right cover Top cover Main assemblies Tray (multipurpose tray) pickup roller Tray (multipurpose tray) separation pad Tray 2, Tray 3, or Tray 4 pickup roller Tray 2, Tray 3, or Tray 4 separation pad Tray 2, Tray 3, or Tray 4 base-plate roller assembly... 9 Transfer roller USB port PCA Power-switch assembly Main fan, fan duct, and environmental sensor Fuser Registration assembly Duplex media-feed assembly Laser/scanner Engine control unit (ECU)... 0 Cassette pickup (Tray 2) solenoid or Tray (multipurpose tray) pickup solenoid... 5 Fuser motor... 7 Sub fan and fan duct... 8 High-voltage power supply (HVPS) Solve problems Solve problems checklist Menu map Troubleshooting process... 3 Determine the problem source... 3 Power subsystem ENWW vii
10 Power-on checks Tools for troubleshooting Individual component diagnostics LED diagnostics LED indicators Formatter heartbeat LED HP Jetdirect LEDs Engine diagnostics Engine-test button Fuser test page Paper-path test (and automatic sensors test) Sensor test (interactive) A TOP (Top-of-Page) sensor B Fuser output sensor... 4 C Duplex sensor D Paper width sensor E Tray 3 feed sensor F Tray 4 feed sensor G FD tray full sensor H Face up detect sensor I Cartridge-door open switch J Rear cover open sensor K Tray paper sensor L Tray 2 paper sensor... 5 M Tray 2 detect switch N Tray 3 paper sensor O Tray 3 detect switch P Tray 4 paper sensor Q Tray 4 detect switch Print/stop test Component tests Half self-test Drum rotation test check Diagnostics menu components test Diagrams Block diagrams Plug/jack locations Location of connectors ECU controller connections Locations of major components General timing charts General circuit diagram Internal print quality test pages... 7 Cleaning page viii ENWW
11 Configuration page Print quality troubleshooting tools Repetitive image-defect ruler Control-panel menus Use the menus Show Me How menu Retrieve job menu Information menu Paper handling menu Manage supplies menu Configure device menu Printing menu Print Quality menu System setup menu I/O menu Resets menu Diagnostics menu Service menu Interpret control-panel messages Control-panel message types Control-panel messages Event-log messages Print an event log Show an event log Sample event-log page Clear an event log Event-log messages Clear jams Common causes of jams Jam locations Clear jams from the input trays Clear jams from the duplexer Clear jams from the output areas Clear jams from inside the product Registration and transfer area Jam causes and solutions Avoid repeated jams Change jam recovery Solve paper-handling problems Product feeds multiple sheets Product feeds incorrect page size Product pulls from incorrect tray Paper does not feed automatically Paper does not feed from Tray 2, 3, or ENWW ix
12 Transparencies or glossy paper will not feed Envelopes jam or will not feed in the product Output is curled or wrinkled Product does not duplex or duplexes incorrectly (duplex models) Solve image-quality problems Image defect examples Clean the product Solve performance problems Solve connectivity problems Solve direct-connect problems Solve network problems Service mode functions Service menu Product resets Restore factory settings Hard disk initialization Skip disk-load NVRAM initialization Service ID Restore service ID Convert the service ID to an actual date Reset serial number Reset page counts Product cold reset Product updates Determine the current firmware version Download new firmware from the HP Web site Transfer the new firmware to the product Use the flash executable file to update the firmware Use FTP to upload the firmware through a browser Use FTP to upgrade the firmware on a network connection Use HP Web Jetadmin to upgrade the firmware Use Microsoft Windows commands to upgrade the firmware Upgrade the HP Jetdirect firmware Parts and diagrams Order parts by authorized service providers Order parts, accessories, and supplies Related documentation and software Supplies part numbers Accessories part numbers Whole-unit replacement part numbers How to use the parts lists and diagrams x ENWW
13 Assembly locations Base product (no optional trays or accessories) Base product (optional trays or accessories) Covers Internal assemblies ( of 6) Internal assemblies (2 of 6) Internal assemblies (3 of 6) Internal assemblies (4 of 6) Internal assemblies (5 of 6) Internal assemblies (6 of 6) Input devices sheet input tray (Tray 3 and Tray 4) Alphabetical parts list Numerical parts list Appendix A Service and support Hewlett-Packard limited warranty statement HP's Premium Protection Warranty: LaserJet print cartridge limited warranty statement End User License Agreement Customer self-repair warranty service Customer support Repack the product Service information form Appendix B Specifications Physical specifications Electrical specifications Acoustic specifications Environmental specifications Appendix C Regulatory information FCC regulations Environmental product stewardship program Protecting the environment Ozone production Power consumption Toner consumption Paper use Plastics HP LaserJet print supplies Return and recycling instructions United States and Puerto Rico Multiple returns (more than one cartridge) ENWW xi
14 Single returns Shipping Non-U.S. returns Paper Material restrictions Disposal of waste equipment by users in private households in the European Union Chemical substances Material Safety Data Sheet (MSDS) For more information Declaration of conformity Safety statements Laser safety Canadian DOC regulations VCCI statement (Japan) Power cord statement (Japan) EMC statement (Korea) Laser statement for Finland Substances Table (China) Index xii ENWW
15 Theory of operation Basic operation Formatter-control system Engine-control system Image-formation system Pickup, feed, and delivery system Tray or Tray 2 Additional tray ENWW
16 Basic operation Major printer systems The product contains the following five systems: Engine-control system Laser/scanner system Image-formation system Media feed system Option Printer block diagram Figure - Printer block diagram LASER SCANNER SYSTEM IMAGE-FORMATION SYSTEM ENGINE CONTROL SYSTEM MEDIA FEED SYSTEM OPTION 2 Chapter Theory of operation ENWW
17 Sequence of operation The DC controller in the engine-control system controls the operational sequences of the printer. The table below describes durations and operations for each period of a print operation from when the printer is turned on until the motor stops rotating Normal sequence of operation Table - Sequence of operation Name Timing Purpose WAIT STBY (standby) INTR (initial rotation) PRINT LSTR (last rotation) From the time the power switch is turned on or the door is closed until the printer is ready for a print operation. From the end of the WAIT or LSTR period until either a print command is sent or the power switch is turned off. From the time the print command is received until the temperature of the fuser unit reaches its targeted temperature. From the end of the INTR period until the last sheet completes the fuser operation. From the end of the PRINT period until the main motor stops rotating. Brings the product to printable condition. The product performs the following during the operation: Detects the print cartridge Maintains the product in printable condition. Starts up the high-voltage biases, the laser/scanner and the fuser unit for printing. Forms the image on the photosensitive drum based on the VIDEO signals from the formatter. Transfers and fuses the toner image to the paper. Moves the last printed sheet out of the product. The product enters the INTR period as the LSTR period is completed, if the formatter sends another print command. ENWW Basic operation 3
18 Formatter-control system Sleep mode The formatter is responsible for the following procedures: Controlling sleep mode Receiving and processing print data from the various product interfaces Monitoring control-panel functions and relaying product-status information (through the control panel and the network or bidirectional interface) Developing and coordinating data placement and timing with the DC controller PCA Storing font information Communicating with the host computer through the network or the bidirectional interface The formatter receives a print job from the network or bidirectional interface and separates it into image information and instructions that control the printing process. The DC controller PCA synchronizes the image-formation system with the paper-input and -output systems, and then signals the formatter to send the print-image data. The formatter also provides the electrical interface and mounting locations for one EIO card and an additional DIMM. NOTE: In the SYSTEM SETUP menu, this item is termed SLEEP DELAY. Input/output CPU This feature conserves power after the product has been idle for an adjustable period of time. When the product is in SLEEP DELAY, the control-panel backlight is turned off, but the product retains all settings, downloaded fonts, and macros. The default setting is for SLEEP DELAY to be enabled, and the product enters SLEEP DELAY after a 30-minute idle time. The product exists SLEEP DELAY and enters the warm-up cycle when any of the following events occur: A print job, valid data, or a PML or PJL command is received A control-panel button is pressed A cover is opened A paper tray is opened The engine-test switch is pressed NOTE: Product error messages override the Sleep message. The product enters SLEEP DELAY at the appropriate time, but the error message continues to appear. The product receives print data primarily from the embedded HP Jetdirect print server. The product also has a USB 2.0 port for connecting directly to a computer. The formatter incorporates a 540 MHz Coldfire processor. 4 Chapter Theory of operation ENWW
19 Memory The random access memory (RAM) on the formatter PCA contains the page, I/O buffers, and the font storage area. It stores printing and font information received from the host system, and can also serve to temporarily store a full page of print-image data before the data is sent to the print engine. Memory capacity can be increased by adding a DIMM to the formatter. Note that adding memory might also increase the print speed for complex graphics. NOTE: If the product encounters a problem when managing available memory, a clearable warning message appears on the control-panel display. Optional hard disk Firmware This product supports an optional EIO hard disk or an optional secure hard disk as an accessory. The firmware is contained on NAND flash memory soldered on the formatter board. A remote firmware upgrade process is available, which overwrites the firmware in the NAND flash. Nonvolatile memory The product uses nonvolatile memory (NVRAM) to store device and user configuration settings. The contents of NVRAM are retained when the product is turned off or disconnected. PJL overview PML The printer job language (PJL) is an integral part of configuration, in addition to the standard printer command language (PCL). With standard cabling, the product can use PJL to perform a variety of functions such as these: Two-way communication with the host computer through a network connection or a USB connection. The product can inform the host about such things as the control-panel settings, and the control-panel settings can be changed from the host. Dynamic I/O switching. The product uses this switching to be configured with a host on each I/O. The product can receive data from more than one I/O simultaneously, until the I/O buffer is full. This can occur even when the product is offline. Context-sensitive switching. The product can automatically recognize the personality (PS or PCL) of each job and configure itself to serve that personality. Isolation of print environment settings from one print job to the next. For example, if a print job is sent to the product in landscape mode, the subsequent print jobs print in landscape mode only if they are formatted for landscape printing. The printer management language (PML) allows remote configuration and status read-back through the I/O ports. Control panel The formatter sends and receives product status and command data to and from the control-panel PCA. ENWW Formatter-control system 5
20 Engine-control system The engine-control system coordinates all product functions, according to commands that the formatter sends. The engine-control system drives the laser/scanner system, the image formation system, and the pickup/feed/delivery system. The engine control system contains the following major components: Engine-control unit (ECU) DC controller Low-voltage power supply High-voltage power supply Figure -2 Engine-control system ENGINE CONTROL SYSTEM Engine controller LASER SCANNER SYSTEM DC controller Formatter Low-voltage power supply IMAGE-FORMATION SYSTEM MEDIA FEED SYSTEM High-voltage power supply OPTION 6 Chapter Theory of operation ENWW
21 Motors, fans, clutches, solenoids, switches, and sensors Figure -3 Motors Fuser motor Main motor Table -2 Motors Description Components driven Fault detection Main motor (M800) Pickup roller Yes Feed roller Transfer roller Photosensitive drum Developing roller Duplex repickup roller (duplex models only) Fuser motor (M8002) Pressure roller Yes Delivery roller Fuser-delivery roller Duplex-feed roller (duplex models only) ENWW Engine-control system 7
22 Figure -4 Fans Main fan Sub fan Table -3 Fans Description Area cooled Type Speed Main fan (FM) Inside the product Intake Full Sub fan (FM2) Inside the product Intake Full Figure -5 Solenoids and clutches (product) PS PS4 M800 SW50 PS800 SL PS2 PS225 PS25 PS205 PS502 M8002 SL2 PS3 SW235 Table -4 Solenoids and clutches (product) Item Description SL SL2 Tray (multipurpose tray) pickup solenoid Cassette (Tray 2) pickup solenoid 8 Chapter Theory of operation ENWW
23 Figure -6 Solenoids and clutches (Tray 3 and Tray 4) M800 CL PS45 SL3 PS8008 SW46 Table -5 Solenoids and clutches (Tray 3 and Tray 4) Item SL3 CL Description Paper feeder pickup solenoid Paper feeder pickup clutch Tray 3 and Tray 4 are identical 500-sheet input trays. ENWW Engine-control system 9
24 Figure -7 Switches (product) PS PS4 M800 SW50 PS800 SL PS2 PS225 PS25 PS205 PS502 M8002 SL2 PS3 SW235 Table -6 Switches (product) Item SW235 SW50 Description Cassette presence switch Cartridge-door switch 0 Chapter Theory of operation ENWW
25 Figure -8 Switches (Tray 3 and Tray 4) M800 CL PS45 SL3 PS8008 SW46 Table -7 Switches (Tray 3 and Tray 4) Item SW46 Description Paper feeder cassette presence switch Tray 3 and Tray 4 are identical 500-sheet input trays. ENWW Engine-control system
26 Figure -9 Sensors PS PS4 PS2 PS225 PS25 PS205 PS800 PS502 PS3 PS45 PS8008 PS45 PS8008 Table -8 Sensors Item Description Item Description PS Face-up sensor PS225 Media width sensor PS2 Fuser delivery sensor PS502 Duplex media-feed sensor (duplex models only) PS3 Cassette media-presence sensor PS45 Paper feeder cassette media-presence sensor NOTE: PS45 is used in Tray 3, and Tray 4 2 Chapter Theory of operation ENWW
27 Table -8 Sensors (continued) Item Description Item Description PS4 Face-down tray media-full sensor PS800 Rear door sensor PS205 Tray (multipurpose tray) media-presence sensor PS8008 Paper feeder media-feed sensor NOTE: PS8008 is used in Tray 3, and Tray 4 PS25 Top-of-Page (TOP) sensor ENWW Engine-control system 3
28 DC controller operations The DC controller controls the operational sequences of the product systems. Figure -0 DC controller block diagram Engine controller Motor AC input Low-voltage power supply Fan Solenoid Fuser DC controller Photointerrupter Switch Print cartridge High-voltage power supply Optional paper-feeder Formatter Laser/scanner Control panel Table -9 DC controller controlled components Component Designator Description Motor M800 Main motor M8002 Fuser motor Fan FM Main fan FM2 Sub fan Solenoid SL Tray (multipurpose tray) pickup solenoid SL2 Cassette (Tray 2) pickup solenoid 4 Chapter Theory of operation ENWW
29 Table -9 DC controller controlled components (continued) Component Designator Description Photointerrupter PS Face-up sensor PS2 PS3 PS4 PS205 PS25 PS225 PS45 Fuser delivery sensor Cassette media presence sensor Face-down tray (output bin) media-full sensor Tray (multipurpose tray) presence sensor Top-Of-Page (TOP) sensor Media width sensor Paper feeder cassette media-presence sensor NOTE: PS45 is used in Tray 3, and Tray 4 PS502 PS800 PS8008 Duplex media-feed sensor (duplex models only) Rear door sensor Paper feeder media-feed sensor Switch SW235 Cassette-presence switch NOTE: PS8008 is used in Tray 3, and Tray 4 SW240 SW250 SW50 Power switch Test Print switch Cartridge-door switch ENWW Engine-control system 5
30 Fuser-control circuit The fuser-control circuit monitors and controls the temperature in the fuser. The product uses ondemand fusing. The fuser-control circuit consists of the following major components: Fuser heater (H); heats the fusing film Thermistor (TH and TH2); detects the fuser temperature (contact type) Main thermistor (TH); controls the temperature in the fuser (contact type) Sub thermistor (TH2); detects a one-sided temperature rise in the fuser and controls the temperature in the fuser (contact type) Thermoswitch (TP); prevents abnormal temperature rise in the fuser (contact type) Figure - Fuser control circuit TH TP H Fuser film Pressure roller TH2 FUSER TEMPERATURE signal FUSER HEATER CONTROL signal DC controller Fuser heater control circuit Fuser heater safety circuit Fuser control circuit Engine controller unit 6 Chapter Theory of operation ENWW
31 Fuser failure detection The DC controller determines a fuser unit failure, deactivates the FUSER HEATER CONTROL signal, releases the relay to interrupt power supply to the fuser heater and notifies the formatter of a failure state when it encounters the following conditions: Start-up failure If the main thermistor does not detect a specified temperature during the start-up process of the heater in the wait period. If the main thermistor does not detect a specified temperature during the heater temperature control in the initial rotation period. Abnormal low temperature If the main thermistor detects an abnormal low temperature of the fuser unit during the printing operation. If the sub thermistor detects an abnormal low temperature of the fuser unit during the printing operation. Abnormal high temperature If the main thermistor detects an abnormal high temperature of the fuser unit. If the sub thermistor detects an abnormal high temperature of the fuser unit. Frequency detection circuit failure If a specified frequency of the ZERO CROSSING signal is not detected within a specified period after the product is turned on. ENWW Engine-control system 7
32 Fuser temperature control The fuser temperature control maintains the temperature of the fuser heater at its targeted temperature. The DC controller monitors the FUSER TEMPERATURE (FSRTH, FSRTH2) signals and sends the FUSER HEATER CONTROL (FSRD) signal according to the detected temperature. The fuser heater control circuit controls the fuser heater depending on the signal so that the heater remains at the targeted temperature. Figure -2 Fuser-heater control circuit Fuser control circuit Engine controller unit DC controller Frequency detection circuit ZEROX RL00 RL002 Relay control circuit RLYD Fuser heater control circuit Fuser heater safety circuit FSRTH2 FSRTH FSRD Fuser film TH2 TP TH H Pressure roller H: Fuser heater TP: Thermoswitch TH: Main thermistor TH2: Sub thermistor Fuser 8 Chapter Theory of operation ENWW
33 Fuser protective function The protective function detects an abnormal temperature rise of the fuser unit and interrupts power supply to the fuser heater. The following three protective components prevent an abnormal temperature rise of the fuser heater: DC controller The DC controller interrupts power supply to the fuser heater when it detects an abnormal temperature of the fuser heater. Fuser heater safety circuit The fuser heater safety circuit interrupts power supply to the fuser heater when the detected temperature of the main and sub thermistors is abnormal. Thermoswitch The contact of the thermoswitch is broken to interrupt power supply to the fuser heater when the thermoswitch detects an abnormal temperature of the fuser heater. ENWW Engine-control system 9
34 Low-voltage power supply The low-voltage power supply (LVPS) converts ac input voltage to dc voltage. The LVPS has two fuses on the PCA. The LVPS 24 V output is interrupted to the fuser and the high-voltage power supply if the cartridge-door interlock switch (SW50) is in the off position (cover open). WARNING! The product power switch only interrupts dc voltage from the LVPS. The ac voltage is present in the product when the power cord is plugged into a power receptacle and the power switch is in the off position. You must unplug the product power cord before servicing the product. Figure -3 Low-voltage power supply (LVPS) Engine controller unit Low-volt age power supply Fuse(FU00) Noise filter Fuser control circuit Fuser Fuse(FU002) Power-switch control circuit Noise filter Power switch (SW240) /FDOORSNS High-voltage power supply +24R +24V generation circuit +24V REM24 Door switch (SW50) Protection circuit +3.3V generation circuit +5V generation circuit +3.3V DC controller +24U +3.3V +5V 20 Chapter Theory of operation ENWW
35 Overcurrent/overvoltage protection The low-voltage power supply has a protective function against overcurrent and overvoltage to prevent failures in the power supply circuit. If an overcurrent or overvoltage condition occurs, the system automatically cuts off the output voltage. If the DC power is not being supplied from the low-voltage power supply, the protective function might be running. In such case, turn off the power switch and unplug the power cord. Do not plug in the power cord or turn on the power switch again until the cause is found. WARNING! If you believe the overcurrent or overvoltage protection circuits have been activated, do not plug in the product power cord or turn on the product power until the cause of the failure is found and corrected. In addition, two fuses in the low-voltage power supply protect against overcurrent. If overcurrent flows into the AC line, the fuses melt and cut off the power distribution. ENWW Engine-control system 2
36 High-voltage power supply The high-voltage power supply (HVPS) applies biases to the following components: Primary charging roller Developing roller Transfer roller Fusing film Figure -4 High-voltage power supply Engine controller unit High-voltage power supply Fuser DC controller Fuser film bias circuit FSRB FILMB Fuser film Pressure roller Cartridge Primary charging bias circuit PRI To primary charging roller To developing roller Developing bias circuit DEV Photosensitive drum Transfer roller Transfer bias circuit TR 22 Chapter Theory of operation ENWW
37 Formatter Formatter heartbeat LED DIMM slots The heartbeat LED indicates that the formatter is functioning correctly. While the product is initializing after you turn the product on, the LED blinks rapidly, and then turns off. When the product has finished the initialization sequence, the heartbeat LED pulses on and off. For more information abut the heartbeat LED see Formatter heartbeat LED on page 33. CAUTION: Single inline memory modules (SIMMs) used in previous HP LaserJet products are not compatible with the product. The formatter has one dual inline memory module (DIMM) slot for upgrading the product with more memory. To find out how much memory is installed in the product, print a configuration page. For more information about memory, see DIMM cover and DIMM on page 57. ENWW Engine-control system 23
38 Laser/scanner system The laser/scanner system receives VIDEO signals from the ECU and the formatter and converts the signals into latent images on the photosensitive drum. The main components of the laser/scanner are the laser unit and the scanner motor unit. The DC controller sends signals to the laser/scanner to control the functions of these components. Figure -5 Laser/scanner system Formatter Engine controller unit DC controller SCANNER MOTOR CONTROL signal LASER CONTROL signal VIDEO signal Laser unit BDI signal Scanning mirror BD sensor Scanner motor unit Photosensitive drum 24 Chapter Theory of operation ENWW
39 Laser failure detection The DC controller determines an optical unit failure and notifies the formatter, if the laser/scanner encounters the following conditions: The scanner motor does not reach a specified rotation within a specified period of the scanner motor start up. The rotation of the scanner motor is out of specified range for a specified period during the scanner motor drive. The BD interval is out of a specified value during a print operation. ENWW Engine-control system 25
40 Image-formation system Electrophotographic process The electrophotographic process forms an image on the paper. Following are the major components used in the process: Print cartridge Transfer roller Fuser Laser/scanner The DC controller uses the laser/scanner and HVPS to form the toner image on the photosensitive drum. The image is transferred to the print media and then fused onto the paper. Figure -6 Electrophotographic process block diagram Laser beam Laser scanner Cartridge Fuser Transfer roller High-voltage power supply DC controller Engine controller unit 26 Chapter Theory of operation ENWW
41 Image formation process Each of the following process function independently and must be coordinated with the other product processes. Image formation consists of the following processes: Latent-image formation block Step : primary charging Step 2: laser-beam exposure Developing block Step 3: developing Transfer block Step 4: transfer Step 5: separation Fusing block Step 6: fusing Drum cleaning block Step 7: drum cleaning Figure -7 Image formation process : Media path : Direction of drum rotation : Block : Step Latent image formation 2. Laser-beam exposure. Primary charging 3. Developing Developing Drum cleaning 7. Drum cleaning Delivery 6. Fusing (Fixing) 5. Separation 4. Transfer Pickup Fusing (Fixing) Transfer ENWW Image-formation system 27
42 Latent-image formation stage During the latent-image formation stage, the laser/scanner forms an invisible image on the photosensitive drum in the print cartridge. Primary charging Step : DC and AC biases are applied to the primary charging roller, which transfers a uniform negative potential to the photosensitive drum. Figure -8 Primary charging Primary charging roller Photosensitive drum Primary charging bias Laser beam exposure Step 2: The laser beam scans the photosensitive drum to neutralize negative charges on parts of the drum surface. An electrostatic latent image is formed on the drum where negative charges were neutralized. Figure -9 Laser beam exposure Laser beam Unexposed area Exposed area 28 Chapter Theory of operation ENWW
43 Developing stage Print cartridge Step 3: In the print cartridge, the developing cylinder comes in contact with the photosensitive drum to deposit toner onto the electrostatic latent image. Figure -20 Print cartridge Blade Developing roller Exposed area Unexposed area Unexposed area Exposed area Developing bias Photosensitive drum Toner acquires a negative charge from the friction that occurs when the developing roller rotatesagainst the developing blade. The developing bias is applied to the developing roller to make a potential difference between the developing roller and the photosensitive drum. The negatively charged toner is attracted to the latent image on the photosensitive drum because the drum surface has a higher potential. ENWW Image-formation system 29
44 Transfer stage Step 4: The transfer charging roller, to which a DC positive bias is applied, imparts a positive charge on the print media. When the print media comes in contact with the photosensitive drum, the toner is transferred to the print media. Figure -2 Transfer Photosensitive drum Transfer roller Media Transfer bias Step 5: The elasticity of the print media causes its separation from the photosensitive drum. A static charge eliminator aids separation by weakening any electrostatic adhesion. Figure -22 Separation Photosensitive drum Static charge eliminator Media Transfer roller Fusing stage Step 6: The DC negative bias applied to the fusing film strengthens the holding force of the toner on the print media and prevents the toner from scattering. 30 Chapter Theory of operation ENWW
45 The product uses an on-demand fuser method. The toner image is permanently affixed to the printing paper by heat and pressure. Figure -23 Fusing Fuser heater Brush Fuser film Toner Media Pressure roller Fuser bias Cleaning stage Step 7: The cleaning blade scrapes the residual toner off of the photosensitive drum and deposits it into the waste toner case. Figure -24 Drum cleaning Cleaning blade Toner collection box Photosensitive drum ENWW Image-formation system 3
46 Toner detection The product uses a nonvolatile memory tag built into the print cartridge. Print-cartridge detection happens when the engine controller detects the presence of a genuine HP print-cartridge that contains a memory tag. Toner detection happens as the engine controller reads or writes the data that is stored on the memory tag. The engine controller renews the information in the prescribed timing and reads or writes it from or to the memory tag. The engine controller commands the memory tag to read or write with the following conditions: Read Power is on The cartridge door is closed A command is received from the formatter Write A page of media is printed A command is received from the formatter When the engine controller fails to read or write three times in a row, it determines that the memory tag is abnormal and sends a cartridge memory abnormality warning to the formatter. Figure -25 Print cartridge memory tag 32 Chapter Theory of operation ENWW
47 Pickup, feed, and delivery system Paper trays The pickup/feed/delivery system consists of several types of feed rollers and sensors. The ECU uses a motor and two solenoids to drive the rollers. Three media-detection sensors detect paper as it passes through the product. If media does not reach or pass each sensor within a specified time, the ECU determines that a jam has occurred and alerts the formatter. The product has the following paper trays: Tray (multipurpose tray; all models) Tray 2 (500-sheet tray; all models) Tray 3 (optional 500-sheet input tray; HP LaserJet P305x) Tray 4 (optional 500-sheet input tray) ENWW Pickup, feed, and delivery system 33
48 Photo sensors and switches Figure -26 Photo sensors and switches (product) PS4 PS M800 SW50 PS800 SL PS2 PS225 PS25 PS205 PS502 M8002 SL2 PS3 SW235 Table -0 Photo sensors and switches (product) Item Description Item Description PS Face-up sensor PS25 Top-of-Page (TOP) sensor PS2 Fuser delivery sensor PS225 Media width sensor PS3 Cassette media-presence sensor PS502 Duplex media-feed sensor (duplex models only) PS4 Face-down tray media-full sensor PS800 Rear door sensor PS205 Tray (MP tray) media-presence sensor SW235 Cassette presence sensor 34 Chapter Theory of operation ENWW
49 Figure -27 Photo sensors and switches (Tray 3 and Tray 4) M800 CL PS45 SL3 PS8008 SW46 Table - Photo sensors and switches (Tray 3 and Tray 4) Item PS45 PS8008 SW46 Description Paper feeder cassette-media presence sensor Paper feeder media-feed sensor Paper feeder cassette presence switch Tray 3 and Tray 4 are identical 500-sheet input trays. ENWW Pickup, feed, and delivery system 35
50 Solenoids and clutches Figure -28 Solenoids and clutches (product) PS4 PS M800 SW50 PS800 SL PS2 PS225 PS25 PS205 PS502 M8002 SL2 PS3 SW235 Table -2 Solenoids and clutches (product) Item Description SL SL2 Tray (multipurpose tray) pickup solenoid Cassette (Tray 2) pickup solenoid 36 Chapter Theory of operation ENWW
51 Figure -29 Solenoids and clutches (Tray 3 and Tray 4) M800 CL PS45 SL3 PS8008 SW46 Table -3 Solenoids and clutches (Tray 3 and Tray 4) Item SL3 CL Description Paper feeder pickup solenoid Paper feeder pickup clutch Tray 3 and Tray 4 are identical 500-sheet input trays. ENWW Pickup, feed, and delivery system 37
52 Tray or Tray 2 Pickup and feed unit The pickup and feed unit uses the following components and processes. Cassette paper size detection/cassette paper detection NOTE: To find the following components, see Photo sensors and switches on page 34. PS3; cassette media-presence sensor PS225; media width sensor (detects media width after the media enters the paper path) Cassette pickup NOTE: To find the following components, see Solenoids and clutches on page 36. SL2; cassette (Tray 2) pickup solenoid Tray paper pickup NOTE: To find the following components, see Photo sensors and switches on page 34 and Solenoids and clutches on page 36. PS205; Tray (multipurpose tray) media-presence sensor SL; Tray (multipurpose tray) pickup solenoid 38 Chapter Theory of operation ENWW
53 Paper pickup and feed The following figure shows the pickup and feed paper path. NOTE: Duplex models include a duplex media-feed path for automatic two-sided printing. Figure -30 Pickup, feed, and delivery block diagram Delivery roller Fuser film Photosensitive drum MP tray pickup roller Pressure roller Transfer roller MP tray separation pad Cassette pickup roller Cassette separation pad Simplex media path Duplex media ath p ENWW Tray or Tray 2 39
54 Jam detection The product uses the following sensors to detect the presence of media and to check for jams. If media does not reach or pass each sensor within a specified time, the ECU determines that a jam has occurred and alerts the formatter. NOTE: To find the following components, see Photo sensors and switches on page 34. PS2; fuser delivery sensor PS4; face-down tray media-full sensor PS25; Top-of-Page (TOP) sensor PS225; media width sensor PS502; duplex media-feed sensor (duplex models only) PS8008; paper feeder media-feed sensor NOTE: PS8008 is used in Tray 3 and Tray 4. The product detects the following jams: Pickup delay jam Pickup stationary jam Delivery delay jam Delivery stationary jam Fuser wrapping jam Door open jam Residual media jam Duplex repickup jam (duplex models only) 40 Chapter Theory of operation ENWW
55 Additional tray NOTE: This product supports identical 500-sheet input trays (Tray 3 and Tray 4). Tray driver PCA The following figure shows the signals between the DC controller and the tray driver PCA. Figure -3 Tray 3 and Tray 4 driver PCA block diagram Optional paper feeder Clutch DC controller +24V Paper feeder connector PCB Solenoid Photointerrupter Switch ENWW Additional tray 4
56 Paper pickup and feed NOTE: Tray 3 and Tray 4 are identical 500-sheet input trays. The following figure shows the pickup and feed paper path (Tray 3 shown). Figure -32 Tray 3 and Tray 4 pickup, feed, and delivery block diagram Optional paper feeder pickup roller Optional paper feeder separation pad Optional paper feeder feed roller 42 Chapter Theory of operation ENWW
57 Media level and size detection PS45; paper feeder media-presence sensor detects if media is present in the tray. NOTE: PS45 is used in Tray 3 and Tray 4. Media size is detected after the page enters the product. See Cassette paper size detection/ cassette paper detection on page 38. Jam detection PS8008; paper feeder media-feed sensor detects jams in the paper feeder. ENWW Additional tray 43
58 44 Chapter Theory of operation ENWW
59 2 Removal and replacement Removal and replacement strategy Service approach Removal and replacement procedures ENWW 45
60 Removal and replacement strategy General cautions during removal and replacement This chapter describes the removal and replacement of field-replaceable units (FRUs) only. Replacing FRUs is generally the reverse of removal. Occasionally, notes and tips are included to provide directions for difficult or critical replacement procedures. HP does not support repairing individual subassemblies or troubleshooting to the component level. WARNING! Turn the product off, wait 5 seconds, and then remove the power cord before attempting to service the product. If this warning is not followed, severe injury can result, in addition to damage to the product. The power must be on for certain functional checks during troubleshooting. However, disconnect the power supply during parts removal. Never operate or service the product with the protective cover removed from the laser/scanner assembly. The reflected beam, although invisible, can damage your eyes. The sheet-metal parts can have sharp edges. Be careful when handling sheet-metal parts. CAUTION: Do not bend or fold the flat flexible cables (FFCs) during removal or installation. Also, do not straighten prefolds in the FFCs. You must fully seat all FFCs in their connectors. Failure to fully seat an FFC into a connector can cause a short circuit in a PCA. Incorrectly routed or loose wire harnesses can interfere with other internal components and can become damaged or broken. Frayed or pinched harness wires can be difficult to find. When replacing wire harnesses, always use the provided wire loops, lance points, or wire-harness guides and retainers. NOTE: To install a self-tapping screw, first turn it counterclockwise to align it with the thread pattern, and then carefully turn it clockwise to tighten. Do not overtighten. If a self-tapping screw-hole becomes stripped, repair the screw-hole or replace the affected assembly. Note the length, diameter, color, type, and location of each screw. Be sure to return each screw to its original location during reassembly. TIP: For clarity, some photos in this chapter might show components removed that would not be removed to service the product. If necessary, remove the components listed at the beginning of a procedure before proceeding to service the product. Electrostatic discharge Required tools CAUTION: Some parts are sensitive to electrostatic discharge (ESD). Look for the ESD reminder when removing product parts. Always perform service work at an ESD-protected workstation or mat, or use an ESD strap. If an ESD workstation, mat, or strap is not available, ground yourself by touching the sheet-metal chassis before touching an ESD-sensitive part. Protect the ESD-sensitive parts by placing them in ESD pouches when they are out of the product. #2 Phillips 52 mm (6 in) screwdriver with magnetic tip #2 Phillips 76 mm (3 in) screwdriver with magnetic tip Small flat blade screwdriver 46 Chapter 2 Removal and replacement ENWW
61 Small needle-nose pliers ESD mat Penlight CAUTION: Always use a Phillips screwdriver (callout ). Do not use a pozidrive screwdriver (callout 2) or any motorized screwdriver. These can damage screws or screw threads. Figure 2- Phillips and pozidrive screwdriver comparison Types of screws NOTE: The illustration in this section are for reference only. The screws in your product might look slightly different. Illustration Description Size Part number Use Screw with washer M3X6 XB CN Used to secure metal components to metal components (for example, a ground wire to the frame) Screw, tapping M3X6 XA CN Screw D-M3X6 XA CN Screw P-M3X8 XB CN Screw, tapping, truss head M4X0 XB CN Used to secure anything to plastic ENWW Removal and replacement strategy 47
62 Service approach Product repair normally begins by using the product internal diagnostics and the following two-step process:. Isolate the problem to the major system (for example, the network or server, or the product). 2. Troubleshoot the problem by using the procedures in chapter 6. After you find a faulty part, the product can usually be repaired at the assembly level by replacing fieldreplaceable units (FRUs). Some mechanical assemblies might need to be repaired at the subassembly level. Before performing service Remove all media from the product. Turn off the power using the power switch. Unplug the power cable and interface cable or cables. Place the product on an ESD workstation or mat, or use an ESD strap (if one is available). If an ESD workstation, mat, or strap is not available, ground yourself by touching the sheet-metal chassis before touching an ESD-sensitive part. Remove the print cartridges. See Print cartridge on page 52. Remove the tray cassette or cassettes. See Tray cassette (Tray 2, Tray 3, or Tray 4) on page 54. After performing service Plug in the power cable. Reinstall the print cartridges. Reinstall the tray cassette or cassettes. If an optional paper feeder was installed, place the product on the feeder. Post-service test Perform the following test to verify that the repair or replacement was successful. Print-quality test. Verify that you have completed the necessary reassembly steps. 2. Make sure that the tray contains clean, unmarked paper. 3. Attach the power cord and interface cable or interface cables, and then turn on the product. 4. Verify that the expected start-up sounds occur. 5. Print a configuration page, and then verify that the expected printing sounds occur. 6. Print a demo page, and then verify that the print quality is as expected. 48 Chapter 2 Removal and replacement ENWW
63 7. Send a print job from the host computer, and then verify that the output meets expectations. 8. If necessary, restore any customer-specified settings. 9. Clean the outside of the product with a damp cloth. ENWW Service approach 49
64 Parts removal order Figure 2-2 Parts removal order ( of 2) Component Remove Remove Remove Remove Remove Remove Print cartridges Tray cassette (Tray 2, Tray 3, or Tray 4) Sub cover DIMM cover and DIMM Formatter cover and formatter PCA DIMM cover Rear-door assembly Left Cover Rear-door assembly Right-rear cover Tray (multipurpose tray) cover Rear-door assembly Left Cover Cartridge door assembly Rear-door assembly Left Cover Tray cover Top-right cover DIMM cover Formatter cover Control panel DIMM cover Formatter cover Front-right and right-side cover assembly DIMM cover Formatter cover Top-cover assembly Lower-right cover and bracket DIMM cover Formatter cover Control panel Front-right and right-side cover assembly Top cover DIMM cover Formatter cover Rear-door assembly Left Cover Top-right cover Control panel Tray (multipurpose tray) pickup roller Tray (multipurpose tray) separation pad Tray 2, Tray 3, or Tray 4 pickup roller Tray 2, Tray 3, or Tray 4 separation pad Tray 2, Tray 3, or Tray 4 base-plate roller assembly Transfer roller USB port PCA DIMM cover Formatter cover Top-right cover Control panel Front-right and right-side cover assembly Power-switch assembly DIMM cover Formatter cover Top-right cover Control panel Front-right and right-side cover assembly Main Fan, fan duct, and environmental sensor DIMM cover Formatter cover Top-right cover Control panel Front-right Fuser Rear-door assembly Right-rear cover and right-side cover assembly Registration assembly Rear-door assembly Left Cover Duplex media-feed guide Rear-door assembly Right-rear cover Laser/scanner assembly DIMM cover Formatter cover Rear-door assembly Left Cover Top-right cover Control panel Engine control unit (ECU) DIMM cover Formatter cover Rear-door assembly Left Cover Top-right cover Control panel Cassette pickup (Tray 2) solenoid or Tray (multipurpose tray) pickup solenoid DIMM cover Formatter cover Rear-door assembly Left Cover Top-right cover Control panel Pickup assembly DIMM cover Formatter cover Rear-door assembly Left Cover Top-right cover Control panel Fuser motor DIMM cover Formatter cover Rear-door assembly Left Cover Top-right cover Control panel Sub fan and fan duct DIMM cover Formatter cover Rear-door assembly Left Cover Top-right cover Control panel High-voltage power supply DIMM cover Formatter cover Rear-door assembly Left Cover Top-right cover Control panel 50 Chapter 2 Removal and replacement ENWW
65 Figure 2-3 Parts removal order (2 of 2) Remove Remove Remove Remove Remove Remove Remove Top cover Front-right and right-side cover assembly Lower-right cover and bracket Top cover Power-switch assembly Front-right and right-side cover assembly Front-right and right-side cover assembly Front-right and right-side cover assembly Front-right and right-side cover assembly Lower-right cover and bracket Lower-right cover and bracket Lower-right cover and bracket Lower-right cover and bracket Top cover Top cover Top cover Top cover Power-switch assembly Power-switch assembly Power-switch assembly Power-switch assembly Engine control unit (ECU) Engine control unit (ECU) Engine control unit (ECU) Engine control unit (ECU) Front-right and right-side cover assembly Lower-right cover and bracket Top cover Power-switch assembly Duplex media-feed guide (duplex models only) Engine control unit (ECU) Sub fan and fan duct ENWW Service approach 5
66 Removal and replacement procedures Print cartridge, cassettes, and sub cover Print cartridge CAUTION: If toner gets on your clothing, wipe it off with a dry cloth and wash clothing in cold water. Hot water sets toner into fabric.. Press the cartridge-door release button, and then open the cartridge door. Make sure that the door is completely open. Figure 2-4 Remove the print cartridge ( of 2) 52 Chapter 2 Removal and replacement ENWW

67 2. Grasp the print-cartridge handle and pull it out of the product. CAUTION: Do not touch the green roller. Doing so can damage the cartridge. Do not expose the cartridge to strong light. Cover the cartridge with a sheet of paper to protect it from light. Reinstallation tip into place. Align the print cartridge with its slot and insert the print cartridge until it clicks Figure 2-5 Remove the print cartridge (2 of 2) ENWW Removal and replacement procedures 53
 2. Carefully lift up on the tray to release it, and then remove the tray.")
68 Tray cassette (Tray 2, Tray 3, or Tray 4) NOTE: Use this procedure to remove the Tray 2 or optional Tray 3 or Tray 4 cassette.. Pull the tray straight out of the product until it stops. Figure 2-6 Remove the tray cassette ( of 2) 2. Carefully lift up on the tray to release it, and then remove the tray. Figure 2-7 Remove the tray cassette (2 of 2) 54 Chapter 2 Removal and replacement ENWW

69 Sub cover NOTE: Duplex models only. The space under the sub cover is used by third-party manufacturers to install optional devices for this product (for example, a security card reader). Use a small flat blade screwdriver to carefully separate the sub cover from the product. CAUTION: There are two tabs along the each of the long edges of the cover that fasten the cover to the product. Do not breack the tabs when the cover is removed. Figure 2-8 Remove the sub cover ENWW Removal and replacement procedures 55
.")

70 External panels, covers, doors, formatter PCA, DIMM, and EIO disk EIO disk WARNING! ESD sensitive component.. Loosen two thumb screws (callout ). Figure 2-9 Remove the EIO disk ( of 2) 2. Pull the EIO disk straight out of the product to remove it. Figure 2-0 Remove the EIO disk (2 of 2) 56 Chapter 2 Removal and replacement ENWW


71 DIMM cover and DIMM WARNING! ESD sensitive component.. Slide the DIMM cover toward the back of the product to release it. Figure 2- Remove the DIMM cover and DIMM ( of 3) 2. Lift the cover away from the product. Figure 2-2 Remove the DIMM cover and DIMM (2 of 3) ENWW Removal and replacement procedures 57
 and rotate the top of the DIMM away from the formatter. Lift up on the DIMM to remove it.")
72 XOXOXO XIOXIO XIOXIO XIOXIOXIXO XIOXIO XIOXIOXIXO XIOXIO OXIXO XIOXIOXIXO XIOXIOXIXO OXIXO OXIXO OXIXO XOXOXO XOXOXO 3. Release two tabs (callout ) and rotate the top of the DIMM away from the formatter. Lift up on the DIMM to remove it. Figure 2-3 Remove the DIMM cover and DIMM (3 of 3) XOXOXOXOXOXO XOXOXOXOXOXO XOXO XOXOXO XOXOXO XOXOXO XOXOXO XOXOXO XOXOXO XOXOXO XOXOXO XOXOXO XOXOXOXO XOXOXO Reinstall the DIMM. Position the DIMM at an angle to the DIMM slot, and rotate the top of the DIMM toward the formatter. Figure 2-4 Reinstall the DIMM ( of 2) 58 Chapter 2 Removal and replacement ENWW

73 2. Push down to seat it in the DIMM slot. The DIMM must snap into the locking tabs on the DIMM slot. Figure 2-5 Reinstall the DIMM (2 of 2) ENWW Removal and replacement procedures 59

 3. Lift the cover away from the product.")
74 Formatter cover and formatter PCA WARNING! ESD sensitive component.. Remove the DIMM cover. See DIMM cover and DIMM on page Remove one screw (callout ), and then slide the formatter cover toward the back of the product to release it. Figure 2-6 Remove the formatter cover and formatter PCA ( of 4) 3. Lift the cover away from the product. Figure 2-7 Remove the formatter cover and formatter PCA (2 of 4) 60 Chapter 2 Removal and replacement ENWW
. Figure 2-8 Remove the formatter cover and formatter PCA (3 of 4) 2 5.")
 ENWW Removal and")
75 4. Disconnect three connectors (callout ; J4, J7, and J6) and one FFC (callout 2; J8). Figure 2-8 Remove the formatter cover and formatter PCA (3 of 4) 2 5. Remove seven screws (callout ), and then carefully remove the formatter PCA. Figure 2-9 Remove the formatter cover and formatter PCA (4 of 4) ENWW Removal and replacement procedures 6

76 Rear-door assembly. Open the rear door. Figure 2-20 Remove the rear-door assembly ( of 8) 2. Gently pull down on the door and lower the door until it is fully open. Figure 2-2 Remove the rear-door assembly (2 of 8) 62 Chapter 2 Removal and replacement ENWW
77 3. Push up on the link arm to release it. CAUTION: The link arm is under spring tension. Do not let the link arm snap back toward the product when you release it. Figure 2-22 Remove the rear-door assembly (3 of 8) 4. Remove two screws (callout ). Figure 2-23 Remove the rear-door assembly (4 of 8) ENWW Removal and replacement procedures 63
.")

78 5. Open the lower-rear door, and then release one tab (callout ). Figure 2-24 Remove the rear-door assembly (5 of 8) 6. Release one tab (callout ). Figure 2-25 Remove the rear-door assembly (6 of 8) 64 Chapter 2 Removal and replacement ENWW
 8.")
 ENWW Removal")
79 7. Rotate the bottom of the rear-door assembly away from the product. Figure 2-26 Remove the rear-door assembly (7 of 8) 8. Pull down on the rear-door assembly to remove it. Figure 2-27 Remove the rear-door assembly (8 of 8) ENWW Removal and replacement procedures 65
 3. Release three tabs (callout ).")

80 Left cover. Remove the rear-door assembly. See Rear-door assembly on page Remove one screw (callout ). Figure 2-28 Remove the left cover ( of 4) 3. Release three tabs (callout ). TIP: The tab inside the cassette cavity is located below the plastic cassette rail. It might be easier if slightly lift up the left side of the product, and use a small flat blade screwdriver to release this tab. Figure 2-29 Remove the left cover (2 of 4) 66 Chapter 2 Removal and replacement ENWW
 5.")

81 4. Release one tab (callout ). Figure 2-30 Remove the left cover (3 of 4) 5. Rotate the rear of the cover slightly away from the product, and then slide the cover toward the front of the product to remove it. Figure 2-3 Remove the left cover (4 of 4) ENWW Removal and replacement procedures 67


82 Right-rear cover. Remove the rear-door assembly. See Rear-door assembly on page Slide the right-rear cover toward the inside of the product to release it. Figure 2-32 Remove the right-rear cover ( of 2) 3. Rotate the bottom of the cover away from the product, and then pull down on the cover to remove it. Figure 2-33 Remove the right-rear cover (2 of 2) 68 Chapter 2 Removal and replacement ENWW
.")

83 Tray (multipurpose tray) cover. Before proceeding, remove the following components: Rear-door assembly. See Rear-door assembly on page 62. Left cover. See Left cover on page Carefully release two retaining arms (callout ). Figure 2-34 Remove Tray cover ( of 3) 3. Slightly lower the cover, and then slide it toward the left side of the product. TIP: If you lower the tray too far, it will not slide off of the hinge pins. Figure 2-35 Remove Tray cover (2 of 3) ENWW Removal and replacement procedures 69
 70 Chapter 2")
84 4. Remove the Tray cover. Figure 2-36 Remove Tray cover (3 of 3) 70 Chapter 2 Removal and replacement ENWW
 cover. See Tray (multipurpose tray) cover on page 69. TIP: The cartridge-door assembly can be removed without removing the Tray cover.")
85 Cartridge-door assembly. Before proceeding, remove the following components: Rear-door assembly. See Rear-door assembly on page 62. Left cover. See Left cover on page 66. Tray (multipurpose tray) cover. See Tray (multipurpose tray) cover on page 69. TIP: The cartridge-door assembly can be removed without removing the Tray cover. However, it is easier to remove and reinstall the door assembly when the Tray cover is not installed. 2. Remove one spring (callout ). Figure 2-37 Remove the cartridge-door assembly ( of 3) ENWW Removal and replacement procedures 7
86 3. Slightly slide the assembly toward the left side of the product to release it from the hinge pins. CAUTION: Do not damage the plastic link arm (callout ). Figure 2-38 Remove the cartridge-door assembly (2 of 3) 4. Rotate the assembly down, and then separate the plastic link arm (callout ) from the assembly. Remove the cartridge-door assembly. Figure 2-39 Remove the cartridge-door assembly (3 of 3) 72 Chapter 2 Removal and replacement ENWW

 3. Lift the cover off of the product to remove it.")
87 Top-right cover. Before proceeding, remove the following components: DIMM cover. See DIMM cover and DIMM on page 57. Formatter cover. See Formatter cover and formatter PCA on page Remove two screws (callout ). Figure 2-40 Remove the top-right cover ( of 2) 3. Lift the cover off of the product to remove it. Figure 2-4 Remove the top-right cover (2 of 2) ENWW Removal and replacement procedures 73

88 Control panel WARNING! ESD sensitive component.. Before proceeding, remove the following components: DIMM cover. See DIMM cover and DIMM on page 57. Formatter cover. See Formatter cover and formatter PCA on page Press the cartridge-door release button, and then open the cartridge door. Make sure that the door is completely open. Figure 2-42 Remove the control panel ( of 4) 3. Disconnect one connector (callout ), and then remove one screw (callout 2). Figure 2-43 Remove the control panel (2 of 4) 2 74 Chapter 2 Removal and replacement ENWW
 5.")
 ENWW Removal and")
89 4. Slide the control panel toward the front of the product to release it. Figure 2-44 Remove the control panel (3 of 4) 5. Lift the control panel off of the product. Figure 2-45 Remove the control panel (4 of 4) ENWW Removal and replacement procedures 75

90 Front-right and right-side cover assembly. Before proceeding, remove the following components: DIMM cover. See DIMM cover and DIMM on page 57. Formatter cover. See Formatter cover and formatter PCA on page 60. Cartridge-door assembly. See Cartridge-door assembly on page 7. NOTE: The figures in this section show the cartridge-door assembly installed. However, it might be easier to reinstall the front-right and right-side cover assembly if the cartridge-door assembly is removed. Control panel. See Control panel on page Remove two screws (callout ). Figure 2-46 Remove the front-right and right-side cover assembly ( of 6) 76 Chapter 2 Removal and replacement ENWW
 3 2 4.")
 when you rotate the cover assembly away from the product.")
91 3. Disconnect one connector (callout ; J4), release the wire harness from the guide (callout 2), and then remove two screws (callout 3). Figure 2-47 Remove the front-right and right-side cover assembly (2 of 6) Slightly push the cover assembly toward the front of the product to release it, and then carefully rotate the cover away from the product. CAUTION: Do not damage the covers or the cartridge-door assembly (if you did not remove it) when you rotate the cover assembly away from the product. Do not dislodge the power-switch assembly (callout ) when you rotate the cover assembly away from the product. Figure 2-48 Remove the front-right and right-side cover assembly (3 of 6) ENWW Removal and replacement procedures 77

, release two tabs (callout 2), and then slide the frontright cover toward the top of the right-side cover to release")
92 5. Remove the cover assembly. Reinstallation tip The figures in this section show the cartridge-door assembly installed. However, it might be easier to reinstall the front-right and right-side cover assembly if the cartridgedoor assembly is removed. See Cartridge-door assembly on page 7. Figure 2-49 Remove the front-right and right-side cover assembly (4 of 6) 6. If necessary, remove two screws (callout ), release two tabs (callout 2), and then slide the frontright cover toward the top of the right-side cover to release it. Figure 2-50 Remove the front-right and right-side cover assembly (5 of 6) 2 78 Chapter 2 Removal and replacement ENWW
 ENWW Removal and")
93 7. If necessary, separate the front-right cover from the right-side cover. Figure 2-5 Remove the front-right and right-side cover assembly (6 of 6) ENWW Removal and replacement procedures 79
94 Lower-right cover and bracket NOTE: You do not need to remove the sheet-metal bracket to remove the lower-right cover. However, you must remove the bracket and the cover when removing some of the other product components in this chapter. Use this procedure to remove the cover only, or the cover and the bracket.. Before proceeding, remove the following components: DIMM cover. See DIMM cover and DIMM on page 57. Formatter cover and Formatter PCA. See Formatter cover and formatter PCA on page 60. Top-right cover. See Top-right cover on page 73. Control panel. See Control panel on page 74. Front-right and right-side cover assembly. See Front-right and right-side cover assembly on page To remove the cover and the bracket: Remove three screws (callout ). To remove the bracket only: Remove one screw (the bottom most screw in callout ). Figure 2-52 Remove the lower-right cover ( of 4) 80 Chapter 2 Removal and replacement ENWW
 to release the sheet-metal bracket.")
95 3. To remove the bracket only:: Slide the sheet-metal bracket up to release it, and then remove the bracket. NOTE: You might need to slightly pull outward on the lower-right cover (callout ) to release the sheet-metal bracket. Reinstallation tip When you reinstall the bracket, make sure that the tab (callout 2) is engaged in the slot in the chassis. Figure 2-53 Remove the lower-right cover (2 of 4) 2 4. Raise the right side of the product, slide the lower-right cover toward the back of the product, and then rotate the cover away from the product. Figure 2-54 Remove the lower-right cover (3 of 4) ENWW Removal and replacement procedures 8
 Reinstall the lower-right cover.")
, and the three tabs (callout 2) along the bottom of the cover.")
96 5. Remove the lower-right cover. Figure 2-55 Remove the lower-right cover (4 of 4) Reinstall the lower-right cover. Carefully raise the right side of the product, find the three slots in the chassis (callout ), and the three tabs (callout 2) along the bottom of the cover. Figure 2-56 Reinstall the lower-right cover ( of 2) 2 82 Chapter 2 Removal and replacement ENWW
97 2. Rotate the cover up to engage the tabs with the slots, and then slide the cover toward the front of the product to install it. Figure 2-57 Remove the lower-right cover (2 of 2) ENWW Removal and replacement procedures 83

98 Top cover. Before proceeding, remove the following components: DIMM cover. See DIMM cover and DIMM on page 57. Formatter cover. See Formatter cover and formatter PCA on page 60. Rear-door assembly. See Rear-door assembly on page 62. Left cover. See Left cover on page 66. Top-right cover. See Top-right cover on page 73. Control panel. See Control panel on page Remove three screws (callout ). Figure 2-58 Remove the top cover ( of 2) 84 Chapter 2 Removal and replacement ENWW

99 3. Slightly raise the rear of the cover, slide the cover toward the front of the product, and then remove it. Figure 2-59 Remove the top cover (2 of 2) ENWW Removal and replacement procedures 85
 pickup roller ( of 2) 2.")
100 Main assemblies Tray (multipurpose tray) pickup roller CAUTION: Do not touch the surface of the roller. Skin oils deposited on the roller might cause printquality problems.. Press the cartridge-door release button, and then open the cartridge door. Make sure that the door is completely open. Figure 2-60 Remove the Tray (MP tray) pickup roller ( of 2) 2. Release two tabs, and then rotate the roller out and away from the product to remove it. TIP: It might be easier to release the tabs by using a small flat blade screwdriver. Figure 2-6 Remove the Tray (MP tray) pickup roller (2 of 2) 86 Chapter 2 Removal and replacement ENWW
101 Tray (multipurpose tray) separation pad CAUTION: Do not touch the surface of the pad. Skin oils deposited on the roller might cause paperhandling problems.. Press the cartridge-door release button, and then open the cartridge door. Make sure that the door is completely open. Figure 2-62 Remove the Tray (multipurpose tray) separation pad ( of 2) 2. Release two tabs (callout ), and then remove the separation pad. Figure 2-63 Remove the Tray (multipurpose tray) separation pad (2 of 2) ENWW Removal and replacement procedures 87

102 Tray 2, Tray 3, or Tray 4 pickup roller CAUTION: Do not touch the surface of the roller. Skin oils deposited on the roller might cause printquality problems. NOTE: it now. If you did not remove the Tray 2, Tray 3, or Tray 4 cassette before servicing the product, remove. Carefully place the product front-side up, so that you can see into the opening where the cassette would be installed. NOTE: Debris can scratch or damage the back of the product. Before you place the product frontside up, remove any debris from the work surface. If possible, set the product on a clean, dry cloth to prevent scratching and damage. 2. Release the roller bushing, rotate the busing up, and then slide the bushing off of the roller shaft. Figure 2-64 Remove the Tray 2, Tray 3, or Tray 4 pickup roller ( of 3) 88 Chapter 2 Removal and replacement ENWW


103 3. Carefully remove the black-plastic guard (callout ). CAUTION: The guard is partially retained by the bushing removed in the previous step. Do not lose the guard when the bushing is removed. Figure 2-65 Remove the Tray 2, Tray 3, or Tray 4 pickup roller (2 of 3) 4. Slide the roller toward the left side of the product, rotate the right end of the roller away from the product, and then remove the roller assembly. Figure 2-66 Remove the Tray 2, Tray 3, or Tray 4 pickup roller (3 of 3) ENWW Removal and replacement procedures 89
 on page 54. 2. Remove two screws (callout ), and then remove the separation pad (callout 2).")
104 Tray 2, Tray 3, or Tray 4 separation pad CAUTION: Do not touch the surface of the pad. Skin oils deposited on the roller might cause paperhandling problems.. Remove the tray cassette. See Tray cassette (Tray 2, Tray 3, or Tray 4) on page Remove two screws (callout ), and then remove the separation pad (callout 2). Figure 2-67 Remove the Tray 2, Tray 3, or Tray 4 separation pad 2 90 Chapter 2 Removal and replacement ENWW

, release one tab (callout 2), and then slide the assembly toward the outside of the")
105 Tray 2, Tray 3, or Tray 4 base-plate roller assembly. Remove the tray cassette. See Tray cassette (Tray 2, Tray 3, or Tray 4) on page Locate the base roller assembly (callout ), release one tab (callout 2), and then slide the assembly toward the outside of the product to release it. Figure 2-68 Tray 2, Tray 3, or Tray 4 base plate roller assembly ( of 2) 2 3. Remove the base roller assembly. Figure 2-69 Tray 2, Tray 3, or Tray 4 base plate roller assembly (2 of 2) ENWW Removal and replacement procedures 9

106 Transfer roller CAUTION: Do not touch the black-sponge portion of the transfer roller. Skin oils deposited on the transfer roller might cause print-quality problems.. Press the cartridge-door release button, and then open the cartridge door. Make sure that the door is completely open. NOTE: If you did not remove the print cartridge before servicing the product, remove it now. Figure 2-70 Remove the transfer roller ( of 3) 2. Release two tabs (callout ) at the left end of the roller, slightly lift the end of the roller up, and then slide the roller (callout 2) toward the left to release it. Remove the roller. Figure 2-7 Remove the transfer roller (2 of 3) 2 92 Chapter 2 Removal and replacement ENWW

107 3. If necessary, remove the gear, the bushing, and the spring, and then install them on a replacement roller. Figure 2-72 Remove the transfer roller (3 of 3) ENWW Removal and replacement procedures 93

108 USB port PCA WARNING! ESD sensitive component.. Before proceeding, remove the following components: DIMM cover. See DIMM cover and DIMM on page 57. Formatter cover. See Formatter cover and formatter PCA on page 60. Top-right cover. See Top-right cover on page 73. Control panel. See Control panel on page 74. Front-right and right-side cover assembly. See Front-right and right-side cover assembly on page Release the wire harness (callout ) from the retainers (callout 2). Figure 2-73 Remove the USB port PCA ( of 3) 2 94 Chapter 2 Removal and replacement ENWW
 4.")
 ENWW")
109 3. Remove on screw (callout ). Figure 2-74 Remove the USB port PCA (2 of 3) 4. Carefully remove the USB port PCA. Figure 2-75 Remove the USB port PCA (3 of 3) ENWW Removal and replacement procedures 95

110 Power-switch assembly WARNING! ESD sensitive component.. Before proceeding, remove the following components: DIMM cover. See DIMM cover and DIMM on page 57. Formatter cover. See Formatter cover and formatter PCA on page 60. Top-right cover. See Top-right cover on page 73. Control panel. See Control panel on page 74. Front-right and right-side cover assembly. See Front-right and right-side cover assembly on page Disconnect one connector (callout ), and then remove one screw (callout 2). Figure 2-76 Remove the power-switch assembly ( of 2) 2 96 Chapter 2 Removal and replacement ENWW
 ENWW Removal")
111 3. Remove the power-switch assembly. Figure 2-77 Remove the power-switch assembly (2 of 2) ENWW Removal and replacement procedures 97

112 Main fan, fan duct, and environmental sensor WARNING! ESD sensitive component. Use the steps in this procedure to remove only the environmental sensor, or the sensor and the main fan.. Before proceeding, remove the following components: DIMM cover. See DIMM cover and DIMM on page 57. Formatter cover. See Formatter cover and formatter PCA on page 60. Top-right cover. See Top-right cover on page 73. Control panel. See Control panel on page 74. Front-right and right-side cover assembly. See Front-right and right-side cover assembly on page To remove the main fan, fan duct, and the environmental sensor: Disconnect two connectors (callout and callout 2), and then release the wire harnesses from the retainers (callout 3). To remove the environmental sensor only: Disconnect one connector (callout ) and release the wire harness from the retainers (callout 3). Figure 2-78 Remove the main fan, fan duct, and the environmental sensor PCA ( of 3) Chapter 2 Removal and replacement ENWW
, and then remove the main fan.")

113 3. Release one tab (callout ), and then remove the environmental sensor (callout 2). Figure 2-79 Remove the main fan, fan duct, and the environmental sensor PCA (2 of 3) 2 4. To remove the main fan only: Release two tabs (callout ), and then remove the main fan. To remove the main fan and fan duct: Remove one screw (callout 2), and then remove the main fan and fan duct together. Reinstallation tip If only the main fan was removed: When the fan is reinstalled, the air must flow into the product. Make sure that the label side of the fan is toward the inside of the product when the fan is reinstalled. Figure 2-80 Remove the main fan, fan duct, and the environmental sensor PCA (3 of 3) 2 ENWW Removal and replacement procedures 99
114 Fuser. Before proceeding, remove the following components: Rear-door assembly. See Rear-door assembly on page 62. Right-rear cover. See Right-rear cover on page Duplex models only: Release two tabs (callout ) on the duplex media-feed guide, and then slide the guide toward the back of the product to remove it. Reinstallation tip media-feed guide. Make sure that both tabs snap back into place when reinstalling the duplex Figure 2-8 Remove the fuser ( of 4) 3. Disconnect three connectors (callout ), and release one wire harness from the retainer (callout 2). Figure 2-82 Remove the fuser (2 of 4) 2 00 Chapter 2 Removal and replacement ENWW


115 4. Remove four screws (callout ). Figure 2-83 Removing the fuser (3 of 4) 5. Pull the fuser out of the back of the product. CAUTION: To avoid damaging the fuser, the cartridge-door assembly must be closed before you remove the fuser. Figure 2-84 Removing the fuser (4 of 4) ENWW Removal and replacement procedures 0

 3. Open the cartridge door, and then remove four screws (callout ).")
116 Registration assembly. Before proceeding, remove the following components: Rear-door assembly. See Rear-door assembly on page 62. Left cover. See Left cover on page Unhook the clasp on the registration assembly gear (callout ), and then slide the gear off of the shaft. Figure 2-85 Remove the registration assembly ( of 3) 3. Open the cartridge door, and then remove four screws (callout ). Figure 2-86 Remove the registration assembly (2 of 3) 02 Chapter 2 Removal and replacement ENWW
 ENWW Removal and")
117 4. Lift the registration assembly out of the product, gear-end first. Figure 2-87 Removing the registration assembly (3 of 3) ENWW Removal and replacement procedures 03
 on the duplex media-feed guide, and then slide the guide toward the back of the product to remove it.")
118 Duplex media-feed assembly Duplex models only.. Before proceeding, remove the following components: Rear-door assembly. See Rear-door assembly on page 62. Right-rear cover. See Right-rear cover on page Release two tabs (callout ) on the duplex media-feed guide, and then slide the guide toward the back of the product to remove it. Reinstallation tip media-feed guide. Make sure that both tabs snap back into place when reinstalling the duplex Figure 2-88 Remove the duplex media-feed assembly ( of 5) 04 Chapter 2 Removal and replacement ENWW
 4.")

119 3. Press the green lever (callout ) to release the duplex media-feed assembly. Figure 2-89 Remove the duplex media-feed assembly (2 of 5) 4. Use a small flat blade screwdriver to carefully pry the sheet-metal tab on the assembly away from the hinge pin to release it. Figure 2-90 Remove the duplex media-feed assembly (3 of 5) ENWW Removal and replacement procedures 05
 6.")
 06 Chapter 2")
120 5. Slide the assembly away from the other hinge pin to release it. Figure 2-9 Remove the duplex media-feed assembly (4 of 5) 6. Pull the duplex media-feed assembly out of the back of the product. Figure 2-92 Remove the duplex media-feed assembly (5 of 5) 06 Chapter 2 Removal and replacement ENWW
121 Laser/scanner WARNING! ESD sensitive component.. Before proceeding, remove the following components: DIMM cover. See DIMM cover and DIMM on page 57. Formatter cover. See Formatter cover and formatter PCA on page 60. Rear-door assembly. See Rear-door assembly on page 62. Left cover. See Left cover on page 66. Top-right cover. See Top-right cover on page 73. Control panel. See Control panel on page 74. Top cover. See Top cover on page Release one tab (callout ) on the air duct, and then lift the air duct (callout 2) out of the product. Figure 2-93 Remove the laser/scanner ( of 5) 2 ENWW Removal and replacement procedures 07
122 3. Remove the antistatic sponge (callout ). Figure 2-94 Remove the laser/scanner (2 of 5) 4. Disconnect one connector (callout ) and one FFC (callout 2). Reinstallation tip Make sure that you correctly reconnect the FFC when the laser/scanner is installed. If the FFC is not correctly reconnected, a 5. ERROR will appear on the control-panel display. Figure 2-95 Remove the laser/scanner (3 of 5) 2 08 Chapter 2 Removal and replacement ENWW

123 5. Remove four screws (callout ). Figure 2-96 Remove the laser/scanner (4 of 5) 6. Lift the laser/scanner up and out of the product. Figure 2-97 Remove the laser/scanner (5 of 5) ENWW Removal and replacement procedures 09

124 Engine control unit (ECU) WARNING! ESD sensitive component.. Before proceeding, remove the following components: DIMM cover. See DIMM cover and DIMM on page 57. Formatter cover and formatter PCA. See Formatter cover and formatter PCA on page 60. Rear-door assembly. See Rear-door assembly on page 62. Left cover. See Left cover on page 66. Top-right cover. See Top-right cover on page 73. Control panel. See Control panel on page 74. Front-right and right-side cover assembly. See Front-right and right-side cover assembly on page 76. Lower-right cover and bracket. See Lower-right cover and bracket on page 80. Top cover. See Top cover on page 84. Power switch assembly. See Power-switch assembly on page 96. TIP: Removing the power-switch assembly makes it easier to disconnect the connectors at the front of the ECU. 2. Disconnect two connectors (callout ). Figure 2-98 Remove the ECU ( of 9) 0 Chapter 2 Removal and replacement ENWW

.")
125 3. Remove two screws (callout ), and then remove the fan assembly. NOTE: As you remove the fan assembly, release the USB wire harness from the retainers along the bottom of the assembly (callout 2). Figure 2-99 Removing the ECU (2 of 9) 4. Disconnect 2 connectors (callout ). Figure 2-00 Remove the ECU (3 of 9) 2 ENWW Removal and replacement procedures
 2 6.")

126 5. Release one tab (callout ) on the air duct, and then lift the air duct out of the product. Figure 2-0 Remove the ECU (4 of 9) 2 6. Disconnect three connectors (callout ), one FFC (callout 2), and then release the wire harnesses from the retainers. Figure 2-02 Remove the ECU (5 of 9) 2 2 Chapter 2 Removal and replacement ENWW

 ENWW Removal")
127 7. Remove six screws (callout ). Figure 2-03 Remove the ECU (6 of 9) 8. Slight lift the ECU up, and then rotate the top of the ECU pan away from the product. CAUTION: the ECU. The ECU is still attached to the product by a FFC. Do not try to completely remove Figure 2-04 Remove the ECU (7 of 9) ENWW Removal and replacement procedures 3

. You do not have to separate the ECU and the ECU pan.")
128 9. Disconnect one FFC (callout ). Figure 2-05 Remove the ECU (8 of 9) 0. Remove the ECU. NOTE: The ECU and the ECU pan together are a single field-replaceable unit (FRU). You do not have to separate the ECU and the ECU pan. Figure 2-06 Remove the ECU (9 of 9) 4 Chapter 2 Removal and replacement ENWW

129 Cassette pickup (Tray 2) solenoid or Tray (multipurpose tray) pickup solenoid. Before proceeding, remove the following components: DIMM cover. See DIMM cover and DIMM on page 57. Formatter cover and formatter PCA. See Formatter cover and formatter PCA on page 60. Rear-door assembly. See Rear-door assembly on page 62. Left cover. See Left cover on page 66. Top-right cover. See Top-right cover on page 73. Control panel. See Control panel on page 74. Front-right and right-side cover assembly. See Front-right and right-side cover assembly on page 76. Lower-right cover. See Lower-right cover and bracket on page 80. Top cover. See Top cover on page 84. Power switch assembly. See Power-switch assembly on page 96. TIP: Removing the power-switch assembly makes it easier to disconnect the connectors at the front of the ECU. Engine control unit (ECU). See Engine control unit (ECU) on page Release the wire harness from the guides (callout ), and then remove three screws (callout 2). CAUTION: Do not try to remove the gear cover after the screws are removed (it is still attached to the solenoid-wire harness). Figure 2-07 Cassette pickup (Tray 2) or Tray (multipurpose tray) solenoid ( of 3) 2 ENWW Removal and replacement procedures 5

 pickup solenoid: Remove one screw (callout ), and then remove the solenoid (callout 2).")
130 3. Carefully unwind the wire harness (callout ) from the retainer on the gear cover (callout 2), and then remove the cover. Reinstallation tip When you reinstall the gear cover, make sure that you wrap the solenoid-wire harness around the retainer on and on-half times in a clockwise direction. Figure 2-08 Cassette pickup (Tray 2) or Tray (multipurpose tray) solenoid (2 of 3) 2 4. For the cassette (Tray 2) pickup solenoid: Remove one screw (callout ), and then remove the solenoid (callout 2). For the Tray (multipurpose tray) pickup solenoid: Remove one screw (callout 3), and then remove the solenoid (callout 4). Figure 2-09 Cassette pickup (Tray 2) or Tray (multipurpose tray) solenoid (3 of 3) Chapter 2 Removal and replacement ENWW

131 Fuser motor WARNING! ESD sensitive component.. Before proceeding, remove the following components: DIMM cover. See DIMM cover and DIMM on page 57. Formatter cover and formatter PCA. See Formatter cover and formatter PCA on page 60. Rear-door assembly. See Rear-door assembly on page 62. Left cover. See Left cover on page 66. Top-right cover. See Top-right cover on page 73. Control panel. See Control panel on page 74. Front-right and right-side cover assembly. See Front-right and right-side cover assembly on page 76. Lower-right cover. See Lower-right cover and bracket on page 80. Top cover. See Top cover on page 84. Power switch assembly. See Power-switch assembly on page 96. TIP: Removing the power-switch assembly makes it easier to disconnect the connectors at the front of the ECU. Engine controller unit (ECU). See Engine control unit (ECU) on page Disconnect one connector (callout ), remove three screws (callout ), and then remove the fuser motor. Figure 2-0 Removing the fuser motor 2 ENWW Removal and replacement procedures 7

132 Sub fan and fan duct. Before proceeding, remove the following components: DIMM cover. See DIMM cover and DIMM on page 57. Formatter cover and formatter PCA. See Formatter cover and formatter PCA on page 60. Rear-door assembly. See Rear-door assembly on page 62. Left cover. See Left cover on page 66. Top-right cover. See Top-right cover on page 73. Control panel. See Control panel on page 74. Front-right and right-side cover assembly. See Front-right and right-side cover assembly on page 76. Lower-right cover. See Lower-right cover and bracket on page 80. Top cover. See Top cover on page 84. Power switch assembly. See Power-switch assembly on page 96. TIP: Removing the power-switch assembly makes it easier to disconnect the connectors at the front of the ECU. Engine controller unit (ECU). See Engine control unit (ECU) on page Disconnect one connector (callout ). Figure 2- Removing the sub fan and fan duct ( of 5) 8 Chapter 2 Removal and replacement ENWW
 2 4. Release the wire harness from the retainers (callout ).")
133 3. Release the wire harness from the retainers (callout ), and then feed the wire harness through the opening in the chassis (callout 2). Figure 2-2 Removing the sub fan and fan duct (2 of 5) 2 4. Release the wire harness from the retainers (callout ). Figure 2-3 Removing the sub fan and fan duct (3 of 5) ENWW Removal and replacement procedures 9
 6.")

134 5. To remove the fan and duct: Remove two screws (callout ), and then carefully remove the fan and duct. NOTE: duct. If necessary, release the metal static clip, release two tabs and separate the fan from the Figure 2-4 Remove the sub fan and fan duct (4 of 5) 6. To remove the fan only: Release the metal static clip, release two tabs (callout ), and then remove the sub fan. Reinstallation tip If you install a replacement sub fan, the air must flow into the product. Arrows embossed on the fan frame indicate air flow direction. Figure 2-5 Remove the sub fan and fan duct (5 of 5) 20 Chapter 2 Removal and replacement ENWW

135 High-voltage power supply (HVPS). Before proceeding, remove the following components: DIMM cover. See DIMM cover and DIMM on page 57. Formatter cover and formatter PCA. See Formatter cover and formatter PCA on page 60. Rear-door assembly. See Rear-door assembly on page 62. Left cover. See Left cover on page 66. Top-right cover. See Top-right cover on page 73. Control panel. See Control panel on page 74. Front-right and right-side cover assembly. See Front-right and right-side cover assembly on page 76. Lower-right cover. See Lower-right cover and bracket on page 80. Top cover. See Top cover on page 84. Power switch assembly. See Power-switch assembly on page 96. TIP: Removing the power-switch assembly makes it easier to disconnect the connectors at the front of the ECU. Duplex models only: Duplex media-feed assembly. See Duplex media-feed assembly on page 04. Engine control unit (ECU). See Engine control unit (ECU) on page 0. Sub fan and duct. See Sub fan and fan duct on page Remove one screw (callout 3). NOTE: In this figure the gear cover is shown removed for clarity. Do not remove the gear cover. The gears behind the cover are not captive and can easily be dislodged if the cover is removed. Figure 2-6 Remove the high-voltage power supply ( of ) ENWW Removal and replacement procedures 2
136 3. Remove one screw (callout ), and then remove the base plate (callout 2). Figure 2-7 Remove the high-voltage power supply (2 of ) 2 4. Remove one screw (callout ), and then remove the right-side guide (callout 2). Figure 2-8 Remove the high-voltage power supply (3 of ) 2 22 Chapter 2 Removal and replacement ENWW
 2 6.")

137 5. Remove one screw (callout ), and then remove the left-side guide (callout 2). Figure 2-9 Remove the high-voltage power supply (4 of ) 2 6. Remove one screw (callout ), release one tab (callout 2) and then slide the guide toward the front of the product to release it. Remove the guide. Figure 2-20 Remove the high-voltage power supply (5 of ) 2 ENWW Removal and replacement procedures 23
.")
.")
138 7. Disconnect one connector (callout ), and then remove two screws (callout 2). Figure 2-2 Remove the high-voltage power supply (6 of ) 2 8. Remove one screw (callout ). Figure 2-22 Remove the high-voltage power supply (7 of ) 24 Chapter 2 Removal and replacement ENWW

139 9. Place the product face-side up. Remove two screws (callout ), and then remove the positioning guide (callout 2). CAUTION: When you place the product face-side up, do not damage the rear-door link arm on the left side of the product. NOTE: The positioning guide might appear to still be fastened to the product. You might have to use slight force to separate it form the product. Figure 2-23 Remove the high-voltage power supply (8 of ) 2 0. Remove two screws (callout ), and then remove the plate (callout 2). Figure 2-24 Remove the high-voltage power supply (9 of ) 2 ENWW Removal and replacement procedures 25
 on the HPVS as you separate the it from the product. Figure 2-25 Remove the high-voltage power supply (0 of ) 3 2 2.")
140 . Remove three screws (callout ), and then remove the high-voltage power supply (callout 2). NOTE: Disconnect two connectors and one FFC (callout 3) on the HPVS as you separate the it from the product. Figure 2-25 Remove the high-voltage power supply (0 of ) After the high-voltage power supply is removed, make sure that the spring on the chassis is in place. CAUTION: This spring is not captive and can easily be lost. Figure 2-26 Remove the high-voltage power supply ( of ) 26 Chapter 2 Removal and replacement ENWW
141 3 Solve problems Solve problems checklist Menu map Troubleshooting process Tools for troubleshooting Clear jams Solve paper-handling problems Solve image-quality problems Clean the product Solve performance problems Solve connectivity problems Service mode functions Product updates ENWW 27
142 Solve problems checklist The following checklist contains basic questions that you can ask the customer to help define problems quickly. Table 3- Initial troubleshooting checklist Environment Is the product installed in a suitable environment? See Environmental specifications on page 309. Is the product installed on a solid, level surface? Is the supply voltage (from the wall receptacle) within the product's rated voltage (see Electrical specifications on page 308)? Is the power cord fully seated into both the product and the electrical receptacle in the wall? Is the product exposed to direct sunlight? Media Does the customer use only supported print media? Is the media in good condition (no curl, folds, or other flaws)? Is the media stored correctly and within environmental limits? Is the correct side of the page printed on first? Is long-grain paper being used? Input trays Is the correct amount of media loaded in the tray (not stacked above the arrows embossed in the tray)? Is the media placed in the tray correctly? The sliding media guides in the tray might be too tight to too loose. Correctly adjust the sliding media guides. Remove the tray from the product. 2. Remove the stack of paper. 3. Slide the media guides until the guide indicators align with the size of paper that you are using. NOTE: The supported paper sizes for the tray are embossed in the tray. 4. Replace the stack of paper. 5. Install the tray in the product, and resend the print job. Is the tray cassette installed correctly in the product? Print cartridge Is the print cartridge installed correctly? Fuser Is the fuser installed correctly? Covers and doors Is the cartridge door fully closed? Is the rear door (face-up delivery) fully closed? 28 Chapter 3 Solve problems ENWW
143 Table 3- Initial troubleshooting checklist (continued) Condensation Does condensation occur following a temperature change (particularly in winter following cold storage)? If so, wipe off the affected parts or leave the product on for 0 to 20 minutes and then try to resume printing. Was a print cartridge opened soon after it was moved from a cold room to a warm one? If so, allow the print cartridge and the product to acclimate to room temperature for one to two hours. Miscellaneous Are any non-hp components installed? Check for any non-hp components (print cartridge, memory modules, and EIO cards) installed in the product and remove them. Hewlett-Packard recommends the use of HP components in its products. Network models only: Remove the product from the network, and make sure that the failure is with the product before beginning troubleshooting. ENWW Solve problems checklist 29
144 Menu map The menu map can be an important troubleshooting tool. The menu map shows each control-panel menu and submenu to aid navigation through the menu system. Print the menu map from the control panel by completing the following steps.. Press the Menu button. 2. Press the down arrow button or the up arrow button to navigate to the INFORMATION menu, and then press the OK button. 3. Press the down arrow button or the up arrow button to navigate to the PRINT MENU MAP sub menu, and then press the OK button to print the pages. 30 Chapter 3 Solve problems ENWW
145 Troubleshooting process Determine the problem source When the product malfunctions or encounters an unexpected situation, the product control panel alerts you to the situation. This chapter provides steps for correcting problems. Power on 2 Control-panel messages 3 Information pages 4 Image quality 5 Interface Is the product on and does a readable message appear? Yes No Does Ready appear on the control-panel display? Yes No Open the INFORMATION menu and print the configuration pages. Are all the accessories installed? Yes No Does the print quality meet customer requirements? Yes No Can the customer print successfully from the host computer? Yes. This is the end of the basic troubleshooting process. No Follow the power-on troubleshooting checks following this table. After the control-panel display is functional, go to step 2. If an error message appears, see Interpret control-panel messages on page 97. After the errors have been corrected, go to step 3. If accessories that are installed are not listed on the configuration pages, remove the accessory and reinstall it. After evaluating the configuration pages, go to step 4. Compare images with the sample defects in Solve image-quality problems on page 247. When the print quality is acceptable, go to step 5. Verify that all I/O cables are connected correctly and that a valid IP address is listed on the Jetdirect configuration page. If error messages appear on the controlpanel display, see Interpret control-panel messages on page 97. When the customer can print from the host computer, this is the end of the basic troubleshooting process. ENWW Troubleshooting process 3
146 Power subsystem Power-on checks Turn on the power. If the control-panel display remains blank or if it displays random patterns or asterisks, perform the power-on checks to find the cause of the problem.. Verify that the product is plugged into an active electrical outlet that delivers the correct voltage. 2. Verify that the power switch is in the ON position. 3. Make sure that the main fan on the right side runs for a short time. If the control-panel display is blank, but the main fan runs after the power is turned on, print an engine test page to determine whether the problem is with the control-panel display, the formatter, or other components. See Engine diagnostics on page 34. The overcurrent/overvoltage protection circuit in the low-voltage power supply unit might be running. Turn the printer off, unplug the power cord, and turn the printer on. If the printer does not function, the fuse melts, or the power supply is malfunctioning, replace the engine controller unit. See Engine control unit (ECU) on page 0. Verify that the LEDs at the back of the product on the formatter, are functioning correctly. See LED diagnostics on page Remove any HP Jetdirect or other EIO cards, and then turn off and turn on the product. 32 Chapter 3 Solve problems ENWW


147 Tools for troubleshooting Individual component diagnostics LED diagnostics LEDs on the formatter can help identify and troubleshoot product problems. LED indicators Three LEDs on the formatter indicate that the product is functioning correctly. Figure 3- Formatter LEDs 2 HP Jetdirect LEDs 2 Heartbeat LED Formatter heartbeat LED The heartbeat LED indicates that the formatter is functioning correctly. While the product is initializing after you turn it on, the LED blinks rapidly, and then turns off. When the product has finished the initialization sequence, the heartbeat LED pulses on and off. The heartbeat LED performs the following sequences:. The LED blinks when the product power is on. 2. If the light is not blinking, check the following: Reseat the formatter connectors. Replace the memory. Replace the formatter. 3. If the control panel display does not illuminate, perform an engine test to check the engine (see Engine-test button on page 34). You must have paper loaded in Tray 2 for the engine test. ENWW Tools for troubleshooting 33

148 HP Jetdirect LEDs The embedded HP Jetdirect print server has two LEDs. The yellow LED indicates network activity, and the green LED indicates the link status. A blinking yellow LED indicates network traffic. If the green LED is off, a link has failed. For link failures, check the network cable connections. For nonlink errors, print a configuration page. The second page is the HP Jetdirect configuration page. Examine this page for any inconsistencies among the network settings. Engine diagnostics Printing test pages helps you determine whether or not the product engine and the formatter are functioning. NOTE: Information pages also can be used to solve product issues. For information about printing information pages, see the product user guide. Engine-test button To verify that the product engine is functioning, print an engine-test page. Print the engine test pages NOTE: A damaged formatter might interfere with the engine test. If the engine test page does not print, try removing the formatter and performing the engine test again. If the engine test is then successful, the problem is in the formatter, the control panel, or the cable that connects them together.. Remove the DIMM cover. See DIMM cover and DIMM on page Press the engine test-page button (callout ). Figure 3-2 Locating the engine-test-page switch The test page should have a series of horizontal lines. The test page prints from the last tray that the product used to print, unless the product has been turned off and then turned on again since the most recent print job. If the product has been turned off and then on again since the most recent print job, 34 Chapter 3 Solve problems ENWW
149 then the page will print from Tray 2. The product continuously prints test pages as long as the test-page switch is depressed. The product will not print a test page if it is in Sleep mode. Print formatter test pages If the engine test was successful with the formatter removed, reinstall the formatter and then print a configuration page to test the functionality of the formatter. Fuser test page. Press the Menu button. 2. Press the down arrow button or the up arrow button to navigate to the INFORMATION menu. 3. Press the OK button to select the menu. 4. Press the down arrow button or the up arrow button to navigate to the PRINT CONFIGURATION option. 5. Press the OK button to select the option and print the page. This test helps to determine if the fuser needs to be replaced, or if it has exceeded its expected life. A customer can complete the steps below and describe the results to the HP Customer Care representative. If the page shows no problems, the fuser does not need replacing. Replace the fuser (see Fuser on page 00) if the page shows the following problems: Fuser offset repeats in the boxes on the page Lines or streaks on the page (usually down the edges of the page) indicate fuser contamination. Press the Menu button. 2. Press the down arrow button or the up arrow button to navigate to the DIAGNOSTICS menu, and then press the OK button. 3. Press the down arrow button or the up arrow button to navigate to the PRINT FUSER TEST PAGE menu, and then press the OK button. ENWW Tools for troubleshooting 35
150 Paper-path test (and automatic sensors test) Paper-path test. Press the Menu button. 2. Press the down arrow button or the up arrow button to navigate to the DIAGNOSTICS menu, and then press the OK button. 3. Press the down arrow button or the up arrow button to navigate to the PAPER PATH TEST sub menu, and then press the OK button. 4. Select the paper path test options for the test you want to run NOTE: default. Values that have an asterisk (*) are the factory-default values. Some menu items have no Item Sub-item Values Description PAPER PATH TEST Tests the paper-handling features of the product, such as the configuration of the trays. PRINT TEST PAGE Generates a page for testing the paper-handling features. You must define the path for the test to test specific paper paths. SOURCE DUPLEX ALL TRAYS TRAY TRAY 2* TRAY 3 TRAY 4 OFF ON Specifies whether the test page is printed from all trays or from a specific tray. Determines whether the duplexer is used in the test. COPIES * 0 Determines how many pages to send from the specified source as part of the test Paper-path sensors test. Press the Menu button. 2. Press the down arrow button or the up arrow button to navigate to the DIAGNOSTICS menu, and then press the OK button. 3. Press the down arrow button or the up arrow button to navigate to the PAPER PATH SENSORS sub menu, and then press the OK button. 36 Chapter 3 Solve problems ENWW
151 4. Select the paper path test options for the test you want to run 5. Press the OK button to begin the test, and then observe the control-panel designators (see the table below). The sensors should display a status as paper passes by the sensors. Table 3-2 Paper-path sensors Sensor name Sensor number Replacement part number Description Paper-path sensor test name TOP sensor PS25 RM CN Photointerrupter A TOP sensor Fuser delivery sensor PS2 0 Volt: RM CN 220 Volt: RM CN Photointerrupter B Fuser output sensor Duplex media-feed sensor PS502 RM CN Photointerrupter C Duplex sensor Media width sensor PS225 RM CN Photointerrupter D Paper width sensor Paper feeder media-feed PS8008 CE Photointerrupter E Tray 3 feed sensor sensor - Tray 3 Paper feeder media-feed PS8008 CE Photointerrupter F Tray 4 feed sensor sensor - Tray 4 Tray 3 and Tray 4 use a PS8008 sensor. Sensor test (interactive) Performs tests to determine whether the paper-path sensors are operating correctly. Table 3-3 MANUAL SENSOR TEST (special mode test) Sensor or switch name Sensor number Replacement part number Description Paper-path sensor test name Testing of sensor TOP sensor PS25 RM CN Photointerrupter A TOP sensor Open the cartridge door, remove the print cartridge, raise the registration shutter, and then use a screwdriver to activate the sensor. Fuser delivery sensor PS2 0 Volt: RM CN 220 Volt: RM CN Photointerrupter B Fuser output sensor Open the rear door, and then use a screwdriver to activate the sensor. Duplex media-feed sensor PS502 RM CN (power supply) Photointerrupter C Duplex sensor Remove the Tray 2 cassette, push the green button to drop the duplex tray, and then raise the tray. Media width sensor PS225 RM CN PCA D Paper width sensor Open the cartridge door, remove the print cartridge, and then lift the registration flap to activate the sensor. ENWW Tools for troubleshooting 37
152 Table 3-3 MANUAL SENSOR TEST (special mode test) (continued) Sensor or switch name Sensor number Replacement part number Description Paper-path sensor test name Testing of sensor Paper feeder mediafeed PS8008 (Replace feeder sensor - Tray 3 unit) Paper feeder mediafeed PS8008 (Replace feeder sensor - Tray 4 unit) Photointerrupter E Tray 3 feed sensor Remove the Tray 2 cassette, use a small screwdriver to activate the sensor through the small slot toward the front of the product. Photointerrupter F Tray 4 feed sensor Remove the Tray 3 cassette, use a small screwdriver to activate the sensor through the small slot toward the front of the product. Face-down media tray media-full sensor PS4 Photo interruptor: WG CN Top-cover flag: RM CN Photointerrupter G FD tray full sensor Lift the face-down tray output levers to activate the sensor. Rear cover open sensor Cartridge-door switch Face-up detect sensor MP tray mediapresence sensor PS WG CN Photointerrupter H Face-up detect sensor SW50 WC CN Switch I Cartridge-door open switch PS800 WG CN Photointerrupter J Rear cover open sensor PS205 RM CN Photointerrupter K Tray paper sensor Open the rear door to about 5 degrees. Open the cartridge door. Open the rear door to about 90 degrees. Push the sensor lever to the right of the center of the tray, and hold it there for 3 seconds. Cassette mediapresence sensor PS3 Currently not replaceable Photointerrupter L Tray 2 paper sensor Remove the Tray 2 cassette, and then push the sensor lever. Tray 2 cassette presence switch SW235 RM CN (tray sensor PCA) Switch M Tray 2 detect sensor Remove the Tray 2 cassette, and then reinstall it. Tray 3 and Tray 4 use a PS8008 sensor. Table 3-4 MANUAL SENSOR TEST 2 (special mode test) Sensor or switch name Sensor number Replacement part number Description Paper-path sensor test name Testing of sensor Paper feeder Tray 3 cassette mediapresence sensor Paper feeder Tray 3 cassette presence sensor PS45 CE Photointerrupter N Tray 3 paper sensor PS46 CE Photointerrupter O Tray 3 detect sensor Remove the Tray 3 cassette, and then push the sensor lever. Remove the Tray 3 cassette, and then reinstall it. 38 Chapter 3 Solve problems ENWW
153 Table 3-4 MANUAL SENSOR TEST 2 (special mode test) (continued) Sensor or switch name Sensor number Replacement part number Description Paper-path sensor test name Testing of sensor Paper feeder Tray 4 cassette mediapresence sensor Paper feeder Tray 4 cassette presence sensor PS45 CE Photointerrupter P Tray 4 paper sensor PS46 CE Photointerrupter Q Tray 3 detect sensor Remove the Tray 4 cassette, and then push the sensor lever. Remove the Tray 4 cassette, and then reinstall it. Tray 3 and Tray 4 use PS45 and PS46 sensors. Access the MANUAL SENSOR TEST or the MANUAL SENSOR TEST 2 in the DIAGNOSTICS menu.. Press the Menu button. 2. Press the down arrow button or the up arrow button to navigate to the DIAGNOSTICS menu, and then press the OK button. 3. Press the down arrow button or the up arrow button to navigate to the MANUAL SENSOR TEST or MANUAL SENSOR TEST 2 menu, and then press the OK button. 4. Press the down arrow button or the up arrow button to highlight a test, and then press the OK button to select the test. 5. To exit the diagnostic test, press the stop button, and then select EXIT DIAGNOSTICS. NOTE: Menus are not available during a test. During a test, the OK button functions like the stop button. ENWW Tools for troubleshooting 39
154 A TOP (Top-of-Page) sensor Test the TOP sensor (PS25). Open the cartridge door, and then remove the print cartridge. 2. Raise the registration shutter. 3. Use a small screwdriver to activate the TOP sensor. Figure 3-3 Test the TOP sensor 4. Check the control-panel display for sensor response. 5. If there is no response, replace the TOP sensor. 40 Chapter 3 Solve problems ENWW

155 B Fuser output sensor Test the fuser delivery sensor (PS2). Open the rear door. 2. Slowly insert a piece of paper to activate the fuser delivery sensor. Figure 3-4 Test the fuser delivery sensor 3. Check the control-panel display for a sensor response. 4. If there is no response, replace the fuser. ENWW Tools for troubleshooting 4

156 C Duplex sensor Test the duplex media-feed sensor (PS502). Remove the Tray 2 cassette. 2. Press the green lever to release the duplex media-feed assembly (metal tray). 3. Raise the duplex media-feed assembly until it snaps into place. Figure 3-5 Test the duplex media-feed sensor 4. Check the control-panel display for sensor response. 5. If there is no response, replace the high-voltage power supply (duplex model). 42 Chapter 3 Solve problems ENWW

157 D Paper width sensor Test the media width sensor (PS225). Open the cartridge door, and then remove the print cartridge. 2. Raise and then lower the registration flap to activate the sensor. Figure 3-6 Test the media width sensor 3. Check the control-panel display for a sensor response. 4. If there is no response, replace the media width sensor PCA. ENWW Tools for troubleshooting 43
158 E Tray 3 feed sensor Test the Tray 3 media-feed sensor (PS8008). Remove the Tray 3 cassette. 2. Use a small screwdriver to activate the sensor. Figure 3-7 Test the Tray 3 media-feed sensor 3. Check the control-panel display for sensor response. 4. If there is no response, replace the optional Tray 3 assembly. 44 Chapter 3 Solve problems ENWW

159 F Tray 4 feed sensor Test the Tray 4 media-feed sensor (PS8008). Remove the Tray 4 cassette. 2. Use a small screwdriver to activate the sensor. Figure 3-8 Test the Tray 4 media-feed sensor 3. Check the control-panel display for sensor response. 4. If there is no response, replace the optional Tray 4 assembly. ENWW Tools for troubleshooting 45

160 G FD tray full sensor Test the face-down media tray media-full (PS). Raise and then lower the output-bin levers to activate the sensor. Figure 3-9 Test the face-down media tray media-full sensor 2. Check the control-panel display for sensor response. 3. If there is no response, replace the top-cover flag or the photo interrupter. 46 Chapter 3 Solve problems ENWW

161 H Face up detect sensor Test the rear cover open sensor (PS). Open the rear door until it stops to activate the sensor. Figure 3-0 Test the rear cover open sensor 2. Check the control-panel display for sensor response. 3. If there is no response, replace the rear cover open sensor. ENWW Tools for troubleshooting 47

162 I Cartridge-door open switch Test the cartridge-door open switch (SW50). Open the cartridge door to activate the sensor. Figure 3- Test the cartridge-door open switch 2. Check the control-panel display for sensor response. 3. If there is no response, make sure that the sensor-actuator tab on the door is not damaged or missing. If necessary, replace the cartridge-door switch. 48 Chapter 3 Solve problems ENWW
 on page 49 shows the location of the face-up detect sensor (PS800) behind the left cover.")
163 J Rear cover open sensor Test the face-up detect sensor (PS800). Open the rear door, and then gently pull down on the door and lower the door until it is fully open to activate the sensor. NOTE: Figure 3-3 Test the face-up detect sensor (2 of 2) on page 49 shows the location of the face-up detect sensor (PS800) behind the left cover. Figure 3-2 Test the face-up detect sensor ( of 2) Figure 3-3 Test the face-up detect sensor (2 of 2) 2. Check the control-panel display for sensor response. 3. If there is no response, make sure that the sensor-actuator tab on the door is not damaged or missing. If necessary, replace the face-up detect sensor. ENWW Tools for troubleshooting 49
 media-presence sensor 2. Check the control-panel display for sensor response. 3. If there is no response, replace the multipurpose sensor PCA.")
164 K Tray paper sensor Tray (multipurpose tray) media-presence sensor (PS205). Push the sensor lever toward the right side of the product and hold it there for 3 seconds to activate the sensor. Figure 3-4 Test the Tray (multipurpose tray) media-presence sensor 2. Check the control-panel display for sensor response. 3. If there is no response, replace the multipurpose sensor PCA. 50 Chapter 3 Solve problems ENWW
165 L Tray 2 paper sensor Tray 2 cassette media-presence sensor (PS3). Remove the Tray 2 cassette, and then push on the sensor levers to activate the sensor. Figure 3-5 Test the Tray 2 cassette media-presence sensor 2. Check the control-panel display for sensor response. 3. If there is no response, replace the unit. ENWW Tools for troubleshooting 5

166 M Tray 2 detect switch Tray 2 cassette presence switch (SW235). Remove the Tray 2 cassette, and then install it to activate the sensor. Figure 3-6 Test the Tray 2 cassette presence switch 2. Check the control-panel display for sensor response. 3. If there is no response, make sure that the sensor-actuator tab on the cassette is not damaged or missing. If necessary, replace the switch. 52 Chapter 3 Solve problems ENWW
167 N Tray 3 paper sensor Tray 3 media-presence sensor (PS45). Remove the Tray 3 cassette, and then push on the sensor levers to activate the sensor. Figure 3-7 Test the Tray 3 cassette media-presence sensor 2. Check the control-panel display for sensor response. 3. If there is no response, replace the optional 500-sheet feeder. ENWW Tools for troubleshooting 53
168 O Tray 3 detect switch Tray 3 cassette presence switch (SW46). Remove the Tray 3 cassette, and then install it to activate the sensor. Figure 3-8 Test the Tray 3 cassette presence switch 2. Check the control-panel display for sensor response. 3. If there is no response, make sure that the sensor-actuator tab on the cassette is not damaged or missing. If necessary, replace the optional 500-sheet feeder. 54 Chapter 3 Solve problems ENWW

169 P Tray 4 paper sensor Tray 4 media-presence sensor (PS45). Remove the Tray 4 cassette, and then push on the sensor levers to activate the sensor. Figure 3-9 Test the Tray 4 cassette media-presence sensor 2. Check the control-panel display for sensor response. 3. If there is no response, replace the optional 500-sheet feeder. ENWW Tools for troubleshooting 55

170 Q Tray 4 detect switch Tray 4 cassette presence switch (SW46). Remove the Tray 4 cassette, and then install it to activate the sensor. Figure 3-20 Test the Tray 4 cassette presence switch 2. Check the control-panel display for sensor response. 3. If there is no response, make sure that the sensor-actuator tab on the cassette is not damaged or missing. If necessary, replace the optional 500-sheet feeder. 56 Chapter 3 Solve problems ENWW
HP LaserJet P3010 Series Printers Service Manual. dditional product information: ww.hp.com/support/ljp3010series
 HP LaserJet P3010 Series Printers Service Manual dditional product information: ww.hp.com/support/ljp3010series Table of contents 1 Theory of operation Basic operation... 2 Major printer systems... 2 Printer
P LaserJet P3010 Series Printers ervice Manual. Additional product information:
 P LaserJet P3010 Series Printers ervice Manual Additional product information: www.hp.com/support/ljp3010series HP LaserJet P3010 Series Printers Service Manual Copyright and License 2009 Copyright Hewlett-Packard
COLOR LASERJET ENTERPRISE CP4020/CP4520
 COLOR LASERJET ENTERPRISE CP4020/CP4520 SERIES PRINTER Service Manual CP4025n CP4025dn CP4525n CP4525dn CP4525xh HP Color LaserJet Enterprise CP4020- CP4520 Series Printers Service Manual Copyright and
LASERJET PROFESSIONAL P1560 and P1600
 LASERJET PROFESSIONAL P560 and P600 SERIES PRINTER Service Manual www.hp.com/support/ljp560series www.hp.com/support/ljp600series HP LaserJet Professional P560 and P600 Series Printer Service Manual Copyright
HP LaserJet P3005 Series printers Service Manual
 HP LaserJet P3005 Series printers Service Manual HP LaserJet P3005 Series printers Service Manual Table of contents 1 Device information Chapter contents... 1 Device configurations... 2 Features... 3 Walkaround...
HP LaserJet 4200, 4250, 4300 and 4350 Series printers
 HP LaserJet 4200, 4250, 4300 and 4350 Series printers Service Manual Copyright and License 2004 Copyright Hewlett-Packard Development Company, LP Reproduction, adaptation, or translation without prior
HP LaserJet 5200/5200L Series printers Service Manual
 HP LaserJet 5200/5200L Series printers Service Manual HP LaserJet 5200 Series printers Service Manual Copyright and license 2006 Copyright Hewlett-Packard Development Company, L.P. Reproduction, adaptation,
LASERJET PRO 100 COLOR MFP M175. Service Manual
 LASERJET PRO 00 COLOR MFP M75 Service Manual HP LaserJet Pro 00 color MFP M75 Service Manual Copyright and License 202 Copyright Hewlett-Packard Development Company, L.P. Reproduction, adaptation, or
HP LaserJet M3027/M3035 MFP Service Manual
 HP LaserJet M3027/M3035 MFP Service Manual Table of contents 1 Product Information Chapter contents... 1 Device configurations... 2 Features... 3 Walkaround... 5 Device parts... 5 Interface ports... 6
HP COLOR LASERJET CP5220
 HP COLOR LASERJET CP50 SERIES PRINTER Service Manual HP Color LaserJet CP50 Series Printer Service Manual Copyright and License 009 Copyright Hewlett-Packard Development Company, L.P. Reproduction, adaptation,
LASERJET PRO 400. Troubleshooting Manual M401
 LASERJET PRO 400 Troubleshooting Manual M401 HP LaserJet Pro 400 M401 Printer Series Troubleshooting Manual Copyright and License 2012 Copyright Hewlett-Packard Development Company, L.P. Reproduction,
service hp LaserJet 1160 printer hp LaserJet 1320 series printer
 service hp LaserJet 1160 printer hp LaserJet 1320 series printer HP LaserJet 1160 printer and HP LaserJet 1320 Series printer Service Manual Table of contents 1 Product Information Chapter contents...1
HP LaserJet 3050/3052/3055 All-in-One Service Manual
 HP LaserJet 3050/3052/3055 All-in-One Service Manual HP LaserJet 3050/3052/3055 All-in-One Service Manual Copyright and License 2006 Copyright Hewlett-Packard Development Company, LP Reproduction, adaptation,
HP LaserJet 8000, 8000 N, 8000 DN and HP LaserJet Mopier 240 Printers Service Manual. English
 HP LaserJet 8000, 8000 N, 8000 DN and HP LaserJet Mopier 240 Printers Service Manual English Service Manual HP LaserJet 8000 (C4085A) HP LaserJet 8000 N (C4086A) HP LaserJet 8000 DN (C4087A) HP LaserJet
LASERJET ENTERPRISE M604, M605, M606
 LASERJET ENTERPRISE M604, M605, M606 Maintenance kit replacement manual M604n M604dn M605x M605n M605dn M606x M606dn Conventions used in this guide TIP: Tips provide helpful hints or shortcuts. NOTE: Notes
LASERJET ENTERPRISE MFP M630
 LASERJET ENTERPRISE MFP M630 Maintenance kit replacement manual M630dn M630f M630z M630h Copyright and License 2014 Copyright Hewlett-Packard Development Company, L.P. Reproduction, adaptation, or translation
service hp LaserJet 2400 series
 service hp LaserJet 2400 series Table of contents 1 Product Information Chapter contents...1 Printer configurations...2 HP LaserJet 2400 Series printer base models...2 Features...4 Specifications...8 Physical
LASERJET PRO 300 COLOR LASERJET PRO 400 COLOR. Service Manual M351 M451
 LASERJET PRO 300 COLOR LASERJET PRO 400 COLOR Service Manual M35 M45 HP LaserJet Pro 300 color M35 and HP LaserJet Pro 400 color M45 Printers Service Manual Copyright and License 0 Copyright Hewlett-Packard
HP Color LaserJet CM2320 MFP Series Service Manual
 HP Color LaserJet CM2320 MFP Series Service Manual Table of contents 1 Product basics Quick access to product information... 2 Product comparison... 3 Product features... 4 Product walkaround... 5 Front
4 Theory of operation
 4 Theory of operation This chapter presents an overview of the relationships between major components in the MFP, and includes information about the following topics: Basic operation Formatter system Engine-control
Troubleshooting. Chapter contents
 Troubleshooting To better help our customers - this Color Laserjet CP6015 series troubleshooting page is simply a guide / additional information for your convenience, as you search for assistance in repairing
6 Removal and replacement
 6 Removal and replacement This chapter contains information about the following topics: Removal and replacement strategy User-replaceable parts Covers and external components Main assemblies Motors and
5 Theory of operation
 5 Theory of operation This chapter provides information about the following topics: Basic operation Internal components Formatter system Engine control system Laser/scanner system Image formation system
5 Theory of operation
 5 Theory of operation Basic operation Engine-control system Laser/scanner system Image-formation system Pickup, feed, and delivery system Jam detection Optional paper feeder ENWW 103 Basic operation The
1 Theory of operation
 1 Theory of operation Basic operation Engine-control system Laser/scanner system Image-formation system Pickup, feed, and delivery system Jam detection Optional paper feeder ENWW 1 Basic operation The
LASERJET PRO 300 COLOR MFP LASERJET PRO 400 COLOR MFP. Service Manual M375 M475
 LASERJET PRO 300 COLOR MFP LASERJET PRO 400 COLOR MFP Service Manual M375 M475 HP LaserJet Pro 300 color MFP M375 and HP LaserJet Pro 400 color MFP M475 Printers Service Manual Copyright and License 0
5 Theory of operation
 5 Theory of operation Chapter contents Introduction............................................96 Basic operation.........................................97 Image formation........................................98
Printer Subsystems. This chapter presents a generalized functional overview of the printer and the printing processes. 5-2 Functional Information EN
 Printer Subsystems This chapter presents a generalized functional overview of the printer and the printing processes. Figure 5-1 Paper Feed Subsystem 5-2 Functional Information EN Power Supply System AC/DC
Control-panel messages
 Control-panel messages Control panel message Description Recommended action 10.32.YY UNAUTHORIZED SUPPLY Unauthorized supply in use A new, non-hp supply has been installed. This message appears until you
Troubleshooting. Chapter contents
 Troubleshooting To better help our customers - this HP Laserjet 1600 series troubleshooting page is simply a guide / additional information for your convenience, as you search for assistance in repairing
LaserJet Pro M101-M106 LaserJet Pro MFP M129-M134
 LaserJet Pro M101-M106 LaserJet Pro MFP M129-M134 Troubleshooting Manual M101-M106 M129-M134 www.hp.com/support/ljm101 www.hp.com/support/ljm129mfp For printer part removal and part number information,
HP LaserJet P1500 Series. Service Manual
 HP LaserJet P1500 Series Service Manual HP LaserJet P1500 Series Service Manual Copyright information 2007 Copyright Hewlett-Packard Development Company, L.P. Reproduction, adaptation, or translation
Chapter contents. ENWW Chapter contents 113
 5 Theory of operation Chapter contents This chapter contains the following sections. Chapter contents...113 Basic operation...114 Operation sequence...114 Power-on sequences...116 Engine control system...119
Interpret control-panel messages
 Interpret control-panel messages Control-panel message types Four types of control-panel messages can indicate the status of or problems with the product. Message type Status messages Warning messages
hp LaserJet all-in-one service
 hp LaserJet 3015 3020 3030 all-in-one service Table of contents 1 Product Information Product configurations...2 HP LaserJet 3015, 3020, and 3030 all-in-one products...2 HP LaserJet 3015 all-in-one product...3
LASERJET PRO 500 COLOR MFP
 LASERJET PRO 500 COLOR MFP Troubleshooting Manual M570 Draft Version Visit the HP LaserJet Pro 500 color MFP product support page to view or print a final copy. Go to: http://sawpro.atlanta.hp.com/km/saw/home.do
4 Theory of operation
 4 Theory of operation MFP system overview Print engine Duplexing unit 1 x 500-sheet and 3 x 500-sheet high-capacity input feeder Scanner component ADF Stapler/stacker component ENWW 103 MFP system overview
HP LaserJet 3390/3392 All-in-One Service Manual
 HP LaserJet 3390/3392 All-in-One Service Manual HP LaserJet 3390/3392 All-in-One Service Manual Copyright information 2005 Copyright Hewlett-Packard Development Company, L.P. Reproduction, adaptation,
HP LaserJet P1000 Series. Service Manual
 HP LaserJet P1000 Series Service Manual HP LaserJet P1000 Series Service Manual Copyright and license 2006 Copyright Hewlett-Packard Development Company, L.P. Reproduction, adaptation, or translation
Solving paper feed problems
 Solving paper feed problems Use the following table to solve problems related to moving paper or documents through the product. Table 13. Solving paper feed problems Problem Cause Solution Pages are coming
7 Troubleshooting. Chapter contents
 7 Troubleshooting Chapter contents Introduction.......................................... 205 Troubleshooting process................................ 206 Pre-troubleshooting checklist.........................
This chapter provides information about the following topics:
 4 Maintenance This chapter provides information about the following topics: Cleaning the printer and accessories Approximate replacement intervals for supply items Locating supplies Replacing supply items
ColorLaserJet Pro M252 ColorLaserJet Pro MFP M274 ColorLaserJet Pro MFP M277
 ColorLaserJet Pro M252 ColorLaserJet Pro MFP M274 ColorLaserJet Pro MFP M277 Troubleshooting manual M274 M277 M252n M252dw www.hp.com/support/colorljm252 www.hp.com/support/colorljm274mfp www.hp.com/support/colorljmfpm277
7 Parts and diagrams. Chapter contents. Order parts, accessories, and supplies. Part numbers. Covers. Internal components. Tray 2 pickup assembly
 7 Parts and diagrams Chapter contents Order parts, accessories, and supplies Part numbers Covers Internal components Tray 2 pickup assembly Alphabetical parts list Numerical parts list ENWW Chapter contents
7 Problem solving. Basic problem solving. Status-light patterns. Fatal error secondary messages. Accessory error secondary messages
 7 Problem solving Basic problem solving Status-light patterns Fatal error secondary messages Accessory error secondary messages Media problemsolving Printed page is different from what appeared on screen
8 Parts and diagrams. Order parts, accessories, and supplies. Part numbers. Screws. How to use the parts lists and diagrams
 8 Parts and diagrams Order parts, accessories, and supplies Part numbers Screws How to use the parts lists and diagrams External covers, panels, and doors Right door assembly Internal components Assessories
HP Scanjet Enterprise 8500 fn1 HP Digital Sender Flow 8500 fn1. Service Manual
 HP Scanjet Enterprise 8500 fn1 HP Digital Sender Flow 8500 fn1 Service Manual 8500 fn1 Service Manual Copyright and license 2013 Copyright Hewlett-Packard Development Company, L.P. Reproduction, adaptation,
LASERJET PRO 300 COLOR MFP LASERJET PRO 400 COLOR MFP. Theory of Operation M375 M475
 LASERJET PRO 300 COLOR MFP LASERJET PRO 400 COLOR MFP Theory of Operation M375 M475 HP LaserJet Pro 300/400 Color MFP Theory of Operations Copyright and License 2012 Copyright Hewlett-Packard Development
2 Parts and diagrams. Order parts by authorized service providers. Related documentation and software. Fasteners used in this product
 2 Parts and diagrams Order parts by authorized service providers Related documentation and software Fasteners used in this product How to use the parts lists and diagrams Assembly locations Covers Document
4 Theory of operation
 4 Theory of operation Basic operation Scanner and ADF functions and operation Internal components (base unit) Engine control system Laser/scanner system Pickup/feed/delivery system Image-formation system
7 Solve problems. Solve problems checklist. Menu map. Troubleshooting process. Tools for troubleshooting. Control-panel messages table
 7 Solve problems To use the information in this chapter, you should have a basic understanding of the HP LaserJet printing process. Explanations of each mechanical assembly, the printer systems, and the
LaserJet Enterprise M604, M605, M606
 LaserJet Enterprise M604, M605, M606 Troubleshooting Manual 3 M604n M605n M604dn M605dn M606dn M605x M606x www.hp.com/support/ljm604 www.hp.com/support/ljm605 www.hp.com/support/ljm606 For printer part
Understanding printer messages
 Understanding printer s Printer s that appear on the control-panel display relay the normal status of the printer (such as Processing...) or an error condition (such as CLOSE TOP COVER) that needs attention.
HP Color LaserJet 4730mfp Service Manual
 HP Color LaserJet 4730mfp Service Manual HP Color LaserJet 4730mfp series Service Manual Copyright and License 2005 Copyright Hewlett-Packard Development Company, L.P. Reproduction, adaptation, or translation
HP LaserJet M4345 MFP Service Manual
 HP LaserJet M4345 MFP Service Manual Table of contents 1 Product information Device comparison... 2 Features comparison...3 Walkaround... 6 Accessories and supplies... 7 Interface ports... 8 Locking and
ADF/scanner assembly. HP LaserJet M3027_M Figure 7-1 ADF/scanner assembly
 HP LaserJet M3027_M3035 1 ADF/scanner assembly Figure 7-1 ADF/scanner assembly 2 4 3 5 1 6 HP LaserJet M3027_M3035 2 Table 7-2 ADF/scanner assembly Ref Description Part number Qty 1 Control panel CB414-60101
6 Troubleshooting. Troubleshooting process. Control-panel messages. Jams. Image defects. Repetitive-defects troubleshooting. Interface troubleshooting
 6 Troubleshooting To use the information in this chapter, you should have a basic understanding of the HP LaserJet printing process. Explanations of each mechanical assembly, the printer systems, and the
7 Parts and diagrams ENWW 313
 7 Parts and diagrams This section describes Web resources for ordering parts, and for technical support and resources for ordering related documentation and software. ENWW 313 Parts Order replacement parts
HP LaserJet M1120 MFP Series. Service Manual
 HP LaserJet M1120 MFP Series Service Manual HP LaserJet M1120 MFP Series Service Manual Copyright and License 2008 Copyright Hewlett-Packard Development Company, L.P. Reproduction, adaptation, or translation
LaserJet Pro M501 LaserJet Enterprise MFP M527. LaserJet Enterprise M506
 LaserJet Enterprise M506 LaserJet Pro M501 LaserJet Enterprise MFP M527 Repair Manual M527dn M527f M527c M527z M501n M506n M501dn M506dn M506x www.hp.com/support/ljm501 www.hp.com/support/ljm506 www.hp.com/support/ljm527mfp
Control-panel messages table
 Control-panel messages table Table 7-13 Control-panel messages 10.32.00 UNAUTHORIZED SUPPLY IN USE 10.90.XY REPLACE CARTRIDGE 10.91.00 PRINT CARTRIDGE ERROR For help press (Help button) REPLACE
This section describes Web resources for ordering parts, and for technical support and resources for ordering related documentation and software.
 Parts and diagrams This section describes Web resources for ordering parts, and for technical support and resources for ordering related documentation and software. Order parts by authorized service providers
Image Formation System
 Image Formation System Overview Features High image quality is supported. Charge control and the parts for image formation process are optimized. High durability drum E drum is adopted. Primary charging
3 Parts and diagrams. Order parts by authorized service providers. How to use the parts lists and diagrams. Covers. Internal assemblies
 3 Parts and diagrams Order parts by authorized service providers How to use the parts lists and diagrams Covers Internal assemblies Input device(s) Alphabetical parts list Numerical parts list ENWW 177
7 Troubleshooting. Chapter contents
 7 Troubleshooting Chapter contents This chapter contains the following sections: Chapter contents...303 Introduction...306 Troubleshooting process...307 Pre-troubleshooting checklist...307 Troubleshooting
114 Chapter 6 Removal and replacement ENWW
 14. Remove three screws (callout 11) from the left side of the printer. Figure 6-31. Removing the fuser (8 of 10) 114 Chapter 6 Removal and replacement ENWW 15. At the left side of the printer, pull the
MB280 / MB290 SERVICE MANUAL
 MB280 / MB290 TABLE OF CONTENTS 1. DETAILED SECTION DESCRIPTIONS...1-1 1.1 COMPONENT LAYOUT... 1-1 1.1.1 MECHANICAL COMPONENTS... 1-1 1.2 PRINTING... 1-2 1.2.1 PRINTING PROCESSES AROUND THE DRUM... 1-2
Troubleshooting. Chapter contents
 Troubleshooting To better help our customers - this HP Laserjet 3500 3550 3700 series troubleshooting page is simply a guide / additional information for your convenience, as you search for assistance
HP P4014 P4015 P4045 CARTRIDGE REMANUFACTURING INSTRUCTIONS
 HP P4014 P4015 P4045 CARTRIDGE REMANUFACTURING INSTRUCTIONS CC364A TONER CARTRIDGE CC364X TONER CARTRIDGE 95 Orville Drive, Bohemia, New York 11716 USA Ph +1 631 590 1040 Fx +1 888 791 9188 sales@summitechnologies.com
HP ENTERPRISE FLOW MFP M630
 HP ENTERPRISE FLOW MFP M630 TONER CARTRIDGE REMANUFACTURING INSTRUCTIONS HP CF281A & CF281X TONER CARTRIDGES REMANUFACTURING THE HP ENTERPRISE FLOW MFP M630 TONER CARTRIDGES By Mike Josiah and the Technical
Illustrations and parts lists
 Illustrations and parts lists The following illustrations and parts tables list the field replaceable units (FRU) for this printer. At the end of this chapter are two tables listing all of the parts shown
Troubleshooting with the control panel
 Troubleshooting with the control panel The tables in this section explain common messages that might appear on the control-panel display. Within each table, the messages and their meanings are listed in
7 Troubleshooting. Chapter contents
 7 Troubleshooting Chapter contents Troubleshooting process....................................................... 199 Basic troubleshooting process flow............................................ 200
Spermageile Asylantinnen.wmv >>>DOWNLOAD LINK<<< Keep the alcohol and cloth away from. EN Improving print quality 49 Gray
 Spermageile Asylantinnen.wmv. 8A -55 Torre C Oficina 309 Bogota, (1) 787-7100 Fax (54) (1) 787-7213 Australia. Spermageile Asylantinnen.wmv >>>DOWNLOAD LINK
Chapter contents. ENWW Chapter contents 197
 8 Parts and diagrams Chapter contents Chapter contents...197 Ordering parts and supplies...198 Parts...198 Related documentation and software...198 Supplies...198 Consumables and accessories...199 Assembly
7 Troubleshooting. Overview. This chapter discusses the following: Troubleshooting Process Troubleshooting the Printing System Reference Diagrams
 7 Troubleshooting Overview This chapter discusses the following: Troubleshooting Process Troubleshooting the Printing System Reference Diagrams Overview 7-1 Troubleshooting Process The troubleshooting
Fuser. Figure Remove the fuser assembly (1 of 2) 184 Chapter 5 Removal and replacement ENWW
 184 Chapter 5 Removal and replacement ENWW") Fuser 1. Remove the following assemblies. Scanner assembly. For the HP LaserJet 3015, see Scanner assembly. For the LaserJet 3020 and 3030, see Scanner assembly. Left cover. See Printer side covers. Rear
Fuser 1. Remove the following assemblies. Scanner assembly. For the HP LaserJet 3015, see Scanner assembly. For the LaserJet 3020 and 3030, see Scanner assembly. Left cover. See Printer side covers. Rear
LASERJET P3015 TONER CARTRIDGE REMANUFACTURING INSTRUCTIONS LASERJET P3015 TONER CARTRIDGE
 HP LASERJET P3015 TONER CARTRIDGE REMANUFACTURING INSTRUCTIONS HP LASERJET P3015 TONER CARTRIDGE 2010 UniNet Imaging Inc. All trademark names and artwork are property of their respective owners. Product
Officejet Enterprise Color X555 Officejet Enterprise Color MFP X585
 shift caps lock A S D F G H J K L Z X C V B N M @ alt alt,. : ;? / shift enter Officejet Enterprise Color X555 Officejet Enterprise Color MFP X585 Repair Manual www.hp.com/support/ojcolorx555 www.hp.com/support/ojcolormfpx585
Troubleshooting. Chapter contents
 Troubleshooting To better help our customers - this HP Laserjet 4345 mfp series troubleshooting page is simply a guide / additional information for your convenience, as you search for assistance in repairing
Status-light patterns (HP LaserJet P2030 Series Printers only) Status-alert messages (HP LaserJet P2030 Series Printers only)
 Status-alert messages (HP LaserJet P2030 Series Printers only)") 7 Solve problems To use the information in this chapter, you should have a basic understanding of the HP LaserJet printing process. Explanations of each mechanical assembly, the product systems, and the
7 Solve problems To use the information in this chapter, you should have a basic understanding of the HP LaserJet printing process. Explanations of each mechanical assembly, the product systems, and the
Control-panel message types
 Control-panel message types Four types of control-panel messages can indicate the status of or problems with the product. Message type Status messages Warning messages Error messages Description Status
Troubleshooting Process
 Troubleshooting Process The troubleshooting process is a systematic approach that addresses the major problems first, then other problems as you identify the causes for printer malfunctions and errors.
Upgrading and Servicing Guide
 Upgrading and Servicing Guide Copyright Information The only warranties for Hewlett-Packard products and services are set forth in the express statements accompanying such products and services. Nothing
Autodata 3.37 (Please Crack). Once reloaded, page one should be oriented such as the
. Once reloaded, page one should be oriented such as the") Autodata 3.37 (Please Crack). Once reloaded, page one should be oriented such as the driver for the HP. Autodata 3.37 (Please Crack) >>>DOWNLOAD LINK
Autodata 3.37 (Please Crack). Once reloaded, page one should be oriented such as the driver for the HP. Autodata 3.37 (Please Crack) >>>DOWNLOAD LINK
6 Troubleshooting. Chapter contents
 6 Troubleshooting Chapter contents Basic troubleshooting.............................. 130 Errors.......................................... 132 Control panel light messages................... 132 Fatal
SERVICE MANUAL MODEL: MFC-8220
 SERVICE MANUAL MODEL: MFC-8220 Read this manual thoroughly before maintenance work. Keep this manual in a convenient place for quick and easy reference at all times. MFC-8220 SERVICE MANUAL PREFACE This
HP Deskjet F2100 All-in-One series. Basics Guide
 HP Deskjet F2100 All-in-One series Basics Guide Hewlett-Packard Company notices The information contained in this document is subject to change without notice. All rights reserved. Reproduction, adaptation,
CARTRIDGE REMANUFACTURING INSTRUCTIONS TONER CARTRIDGE DRUM CARTRIDGE
 XEROX PHASER 7400 CARTRIDGE REMANUFACTURING INSTRUCTIONS TONER CARTRIDGE DRUM CARTRIDGE REMANUFACTURING THE XEROX PHASER 7400 TONER & DRUM CARTRIDGES By Mike Josiah and the Technical Staff at UniNet The
7 Problem solve. Menu map. Troubleshooting process. Troubleshooting tools. Control-panel messages. Event-log messages. Paper-handling problems
 7 Problem solve To use the information in this chapter, you should have a basic understanding of the HP LaserJet printing process. Explanations of each mechanical assembly, the printer systems, and the
4.7. Image quality problems and solutions
 4.7. Image quality problems and solutions Print-quality defects can be attributed to printer components, consumables, media, internal software, external software applications and environmental conditions.
8 Parts and diagrams. www MK-Electronic de
 8 Parts and diagrams Ordering parts, supplies and getting support................... 144 Accessories......................................... 145 Consumables........................................ 145
ineline6 SERVICE MANUAL FIELD SERVICE
 ineline6 SERVICE MANUAL FIELD SERVICE magicolor 5430 DL magicolor 5440 DL magicolor 5450 2005.04 Ver. 3.0 SERVICE MANUAL FIELD SERVICE magicolor 5430 DL magicolor 5440 DL magicolor 5450 Main Unit irmanual.com
THE XEROX PHASER 7400 TONER & DRUM CARTRIDGES
 THE XEROX PHASER 7400 TONER & DRUM CARTRIDGES DOC# 0403 By Mike Josiah and the technical staff at Summit Technologies a Division of Uninet Imaging. XEROX PHASER 7400 TONER & DRUM CARTRIDGE REMANUFACTURING
8 Parts and diagrams. Chapter contents. Ordering parts and supplies. Accessories. Covers. Internal components. Tray 2 pickup assembly
 8 Parts and diagrams Chapter contents Ordering parts and supplies Accessories Covers Internal components Tray 2 pickup assembly Alphabetical parts list Numerical parts list ENWW Chapter contents 217 Ordering
hp LaserJet 2400 series use
 hp LaserJet 2400 series use HP LaserJet 2400 series printer User Guide Copyright and License 2004 Copyright Hewlett-Packard Development Company, L.P. Reproduction, adaptation, or translation without prior
HP LaserJet P3005 Series printers Service Manual
 HP LaserJet P3005 Series printers Service Manual HP LaserJet P3005 Series printers Service Manual Copyright information 2006 Copyright Hewlett-Packard Development Company, L.P. Reproduction, adaptation,
Troubleshooting. Chapter contents
 Troubleshooting To better help our customers - this HP Laserjet 1600 series troubleshooting page is simply a guide / additional information for your convenience, as you search for assistance in repairing
LaserJet Quick Reference Guide *C * *C * Manual Part No. C Copyright 1998 Hewlett-Packard Co.
 HP LaserJet 1100 Quick Reference Guide Copyright 1998 Hewlett-Packard Co. Printed in USA Manual Part No. C4224-90901 Printed on at least 50%Total Recycled Fiber with at least 10% Post-Consumer Paper *C4224-90901*
6 Problem solving. Problem-solving process. Control-panel messages. Understand accessory lights for the 3-bin mailbox and stapler/stacker
 6 Problem solving Problem-solving process Control-panel messages Understand accessory lights for the 3-bin mailbox and stapler/stacker Understand lights on the formatter Replacement parts configuration