Navigation interface for Jeep GC 5 RA2 NTV-KIT581
|
|
|
- Aubrey Hunt
- 6 years ago
- Views:
Transcription


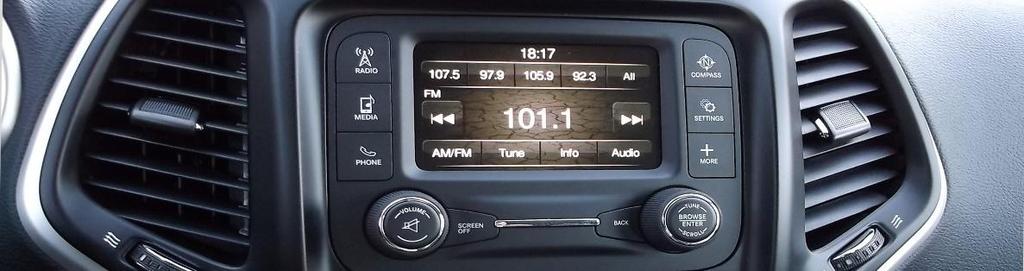


1 3950 NW 120 th Ave, Coral Springs, FL TEL FAX NNG-Jeep GC Navigation interface for Jeep GC 5 RA2 NTV-KIT581


, this kit is NOT")
2 NNG-JEEP GC Kit Content JEEP GC GPS/Interface JEEP GC internal Modification PCB Audio Switching module JEEP GC Plug & Play T-Harness TP/LCD Y-Cables Rear-LCD Harness Optional NAV/OEM switch GPS Antenna Note: This kit is only compatible with HARMAN 5" Jeep Grand Cherokee radios. If your radio does not possess heat sinks (see below), this kit is NOT compatible. COMPATIBLE NOT COMPATIBLE


3 Jeep Grand Cherokee 5 Touch Radio Removal WARRANTY DISCLAIMER NOTICE! Radio removal, disassembly, installation of Navigation Electronics, and Radio re-assembly / re-installation is the responsibility of the installer. It is recommended that you contact a professional installer that is experienced with proper work methods involving electronics and knowledgeable of specific procedures for radio disassembly, Navigation Electronics installation, and reassembly / re-installation of the Radio Head Unit in the vehicle. INSTALLATION DAMAGE TO THE VEHICLE RADIO HEAD UNIT IS EXPRESSLY NOT COVERED UNDER THE PRODUCT WARRANTY. To avoid dangerous distractions that may lead to an accident, the driver should never operate the system while the vehicle is in motion. Before installing the product, the seller should inform the end-user of proper use and compliance with the proper instructions and all states and federal laws. Before beginning your installation, familiarize yourself with the installation instructions and the Navigation system components. CAUTION: It is advisable to disconnect the negative battery cable for 3 minutes before beginning installation, to avoid unintended air bag deployment. Note and record any anti-theft radio codes prior to disconnecting. Factory Radio / Dash Pull and remove A/C bezel by hand Locate and remove 4 screws at corners 1 P a g e
 T-10")

 T-8 screws under the")
 at the top and (2) at the")

4 Jeep Grand Cherokee 5 PCB Installation Remove (2) T-10 screws from left side Remove (2) T-10 screws from right side Lift and remove the radio housing Remove (4) T-8 screws under the board Carefully pry (3) tabs, (1) at the top and (2) at the bottom, to remove the radio housing from the LCD screen plastic housing 2 P a g e
 You should see the last board with cables Locate the (2)")


5 Jeep Grand Cherokee 5 PCB Installation (cont.) You should see the last board with cables Locate the (2) ribbon cables as shown Release the touch ribbon cable by lifting the silver tab away from the cable. Release the LCD ribbon cable by lifting the black clip on top of the cable Carefully lift the circuit board as shown Place the NEW circuit board as shown. * Connect the factory touch ribbon cable to the new board. Route the factory LCD ribbon cable through the slot of the new board, then attach it to the socket. Secure the ribbons with clips and ensure the full insertion of cables as shown. 3 P a g e


6 Flip the factory circuit on top of the new board. Connect the new ribbon cables to the factory board as shown in left image. Then, connect the TP and LCD cables to the new board as shown in the right image. Pay attention to the plugs orientations, metal pins are facing upward. Route TP and LCD cables to the right side before closing the metal housing carefully. Then use the supplied bracket with cable exit cut-out. (Do not reuse the factory bracket on this side only) 4 P a g e
")


7 Jeep Grand Cherokee 5 GPS Module Installation Review the overall wire connections in the figure above Data Out / LCD Out extension connections (noted the orientation of plugs) Connect GPS Antenna to GPS Module (best GPS Antenna location is under passenger side A-pillar cover, on top of dash OR inside the center console, above the radio and under the dash cover) Test system thoroughly before re-assemble of the radio and dash ** You will have to install and use the supplied momentary switch for NAV / RADIO modes switch ** 5 P a g e


 Test driver")


8 Jeep Grand Cherokee 5 Camera Trigger Wire Inside the passenger kick panel, you will find the white plug as shown Release the clips and you will find the reverse light trigger wire (white / green). Tap the wire and connect to the orange wire from the GPS main harness for reverse signal. (Always test and confirm voltage signal before making any connection) Test driver side speaker integration function (mute and voice from navigation software) Jeep Grand Cherokee 5 Center Speaker Connection ** For vehicle with center dash speaker OR if you hear no GPS Audio due to factory external amp, please make the following connection to the center dash speaker directly. You will have to make modification to the audio box wiring harness ** Center dash speaker location Pry up the speaker/vent trim across the dash 6 P a g e
 Remove the speaker white plug Red / Gray is SP+ and Black / Gray is SP- Locate the GPS Audio Box 6-pin connector Pin")


9 Jeep Grand Cherokee 5 Center Speaker Connection (cont.) Remove the speaker white plug Red / Gray is SP+ and Black / Gray is SP- Locate the GPS Audio Box 6-pin connector Pin definition of the plug GPS Audio Box wire definitions Pink = GPS Audio + Orange = GPS Audio Purple = Radio Audio IN + White = Radio Audio IN See the diagram and instruction below for wiring modification and connections 1. Cut and extend (4) wires listed above (DO NOT CUT Yellow and Black wires). Route through dash to the center speaker location. 2. Cut center speaker connector from wires. Leave about 1 wires from plug. You will reuse the plug for speaker. 3. Cut center speaker Red / Gray SP+ wire and connect to GPS Audio + Purple wire. 4. Cut center speaker Black / Gray SP- wire and connect to GPS Audio - White wire. 5. Connect Red / Gray SP+ from plug to Pink GPS Audio + wire 6. Connect Black / Gray SP- from plug to Orange GPS Audio wire 7. Re-connect the center speaker and dash trim 7 P a g e

10 Center Dash Speaker connection diagram Jeep Grand Cherokee 5 NAV Mode Switching Press the momentary switch for activation of navigation screen ** From backup camera to NAV mode, you might see a flash image of the radio screen before NAV mode, it is a normal operation ** 8 P a g e
11 Jeep Grand Cherokee 5 Trouble Shooting Please follow all the steps in this installation manual, failure to do so might void the product warranty and damage the factory radio Power Display Sound 2014 Jeep Grand Cherokee 5 navigation should have (2) led lights on the module box for indication of power and data connections. No Display 1. There are two led lights at the GPS module to indicate data and power. If led lights are OFF and radio is ON, check the power fuse inside the black box from the main harness 2. Check all wiring connectors for any loose connection 3. Check all wiring shielding for any damage during the installation process 4. Check all wiring for any type of damage 5. Check PCB ribbon cables for loose, misalignment, or damage No Touch Response 6. Check both Radio mode and NAV mode for touch responses 7. Check led lights for power and data indications 8. Check 2in1 TP/LCD IN cable for any loose connection, or damage 9. Check PCB ribbon cables for loose, misalignment, or damage No GPS software loaded, touch screen alignment screen occurred Check map SD card at GPS module, see any sign of missing, loose, pop-out, misalignment, or damage 1. Check all cable for connections to Audio Box for loose, or damage 2. Check software volume settings, ensure volume is not muted 3. Check connections at radio for loose, damaged wires 9 P a g e
NNG Toyota 3/3s Navigation System for select Toyota NTV-KIT553/598
 3950 NW 120 th Ave, Coral Springs, FL 33065 TEL: 561-955-9770 FAX: NNG Toyota 3/3s Navigation System for select Toyota NTV-KIT553/598 NNG-Toyota 3/3s Kit Content 1 4 9 5 6 2 3 8 1. 2. 3. 4. 5. 6. 7. 8.
NNG-Toyota 6. Navigation interface for Toyota Sienna NTV-KIT625 BHM 11/02/15 NTV-DOC237
 3950 NW 120 th Ave, Coral Springs, FL 33065 TEL 561-955-9770 FAX 561-955-9760 NNG-Toyota 6 Navigation interface for 15-16 Toyota Sienna NTV-KIT625 BHM 11/02/15 NTV-DOC237 Toyota 6 navigation system application
NNG-GM2 Navigation interface for GM vehicles equipped with LVDS MYLink/CUE NTV-KIT552
 3950 NW 120 th Ave, Coral Springs, FL 33065 TEL 561-955-9770 FAX 561-955-9760 NNG-GM2 Navigation interface for GM vehicles equipped with LVDS MYLink/CUE NTV-KIT552 1. GM2 LVDS Interface/GPS combo 2. Plug
NNG-Ford V1 NTV-KIT558. Navigation interface for FORD vehicles equipped with 8.4 MyTouch NTV-DOC218
 3950 NW 120th Ave, Coral Springs, FL 33065 TEL 561-955-9770 FAX 561-955-9760 NNG-Ford V1 Navigation interface for FORD vehicles equipped with 8.4 MyTouch NTV-KIT558 NTV-DOC218 SoftTouch Navigation System
RECOMMENDED TOOLS PERSONAL & VEHICLE PROTECTION MASKING TAPE
 GUIDE PART NUMBER: 250-7616 GM SOFT TOUCH NAVIGATION SYSTEM GENERAL APPLICABILITY 2013- RAV4 KIT CONTENTS ITEM QTY DESCRIPTION 1 1 NAVIGATION INTERFACE MODULE 2 1 VEHICLE INTERFACE T-HARNESS 3 1 LCD/GPS
Parts Identification Page 1 Vehicle Preparation Page 3 Programming Switch Settings Page 3 Installation Page 4. Form #5420,
 SoftTouch Navigation System 250-7613 2012-2013 Toyota Camry Installation Instructions General Applicability: Toyota 2012-2013 Prius/Prius V, 2013 Venza, 2013 Avalon, 2013 Highlander, 2013 Tacoma For video
Jaguar F-TYPE CAM Dual Camera interface for select 14+ Jaguar vehicles NTV-KIT589
 3950 NW 120 th Ave, Coral Springs, FL 33065 TEL 561-955-9770 FAX 561-955-9760 Jaguar F-TYPE CAM Dual Camera interface for select 14+ Jaguar vehicles NTV-KIT589 BHM Overview Jaguar F-TYPE CAM interfaces
Jaguar F-TYPE CAM 16. Dual Camera interface for select 16+ Jaguar vehicles NTV-KIT746 BHM 05/31/16 NTV-DOC259
 3950 NW 120 th Ave, Coral Springs, FL 33065 TEL 561-955-9770 FAX 561-955-9760 Jaguar F-TYPE CAM 16 Dual Camera interface for select 16+ Jaguar vehicles NTV-KIT746 BHM Overview Jaguar F-TYPE CAM 16 interfaces
NTG3 / NTG3E /NTG3SLK NTV-KIT102/106/189. Overview up Mercedes GL/ML/R/E/CLS/SLK. Backup camera / AV input / RSE / Video In Motion interface
 NTG3 5.04.14 NAV-TV 3950 NW 120 Ave, Coral Srings, FL NTG3 / NTG3E /NTG3SLK NTV-KIT102/106/189 Overview 2009-up Mercedes GL/ML/R/E/CLS/SLK Backup camera / AV input / RSE / Video In Motion interface Kit
NTG3-SL NTV-KIT142. Overview Mercedes-SL. Backup camera / AV input / RSE / Video In Motion interface. Kit Contents. NTG3 Module NTV-ASY171
 NTG3 5.04.14 NAV-TV 3950 NW 120 Ave, Coral Srings, FL NTV-KIT142 Overview 2009-2011 Mercedes-SL Backup camera / AV input / RSE / Video In Motion interface Kit Contents SMB to RCA NTV-CAB007 Plug & Play
CHRY UNI-CAM v2. Chrysler/Dodge/Jeep uconnect (RA4/RA3/RA2) Dual Camera/Control in Motion Interface NTV-KIT759
 Dual Camera/Control in Motion Interface NTV-KIT759") 3950 NW 120 th Ave, Coral Springs, FL 33065 TEL 561-955-9770 FAX 561-955-9760 CHRY UNI-CAM v2 Chrysler/Dodge/Jeep uconnect (RA4/RA3/RA2) Dual Camera/Control in Motion Interface NTV-KIT759 Compatible with
3950 NW 120 th Ave, Coral Springs, FL 33065 TEL 561-955-9770 FAX 561-955-9760 CHRY UNI-CAM v2 Chrysler/Dodge/Jeep uconnect (RA4/RA3/RA2) Dual Camera/Control in Motion Interface NTV-KIT759 Compatible with
3950 NW 120 th Ave, Coral Springs, FL TEL FAX MFT F-CAM. Force Front Camera Module NTV-KIT831 BHM 07/31/18 NTV-DOC298
 3950 NW 120 th Ave, Coral Springs, FL 33065 TEL 561-955-9770 FAX 561-955-9760 MFT F-CAM Force Front Camera Module NTV-KIT831 BHM 07/31/18 Overview The MFT F-CAM module uses OEM buttons (or wire triggers)
GM-K PRG. Dual Camera interface for 15 Chevy Sonic/Spark/Trax NTV-KIT626 BHM 10/15/15 NTV-DOC235
 3950 NW 120 th Ave, Coral Springs, FL 33065 TEL 561-955-9770 FAX 561-955-9760 GM-K PRG Dual Camera interface for 15 Chevy Sonic/Spark/Trax NTV-KIT626 BHM Overview The GM-K PRG interfaces a reverse and
SIR-PCM3 955/997 SIRIUS Satellite Radio interface for Porsche PCM 3 radios NTV-KIT266/285
 3950 NW 120 th Ave, Coral Springs, FL 33065 TEL 561-955-9770 FAX 561-955-9760 SIR-PCM3 955/997 SIRIUS Satellite Radio interface for Porsche PCM 3 radios NTV-KIT266/285 BHM Overview The SIR-PCM3 adds Sirius
BMW12N-DYNAMIC KIT NTV-KIT717
 3950 NW 120 th Ave, Coral Springs, FL 33065 TEL 561-955-9770 FAX 561-955-9760 www.nav-tv.com info@nav-tv.com BMW12N-DYNAMIC KIT NTV-KIT717 Screen Connector Overview The BMW12-N kit interfaces 2 video inputs
Barracuda Video in Motion for select GM vehicles NTV-KIT211
 3950 NW 120 th Ave, Coral Springs, FL 33065 TEL 561-955-9770 FAX 561-955-9760 Barracuda Video in Motion for select 07-11 GM vehicles NTV-KIT211 BHM Overview The NAV-TV Barracuda adds Video in Motion, Navigation
AUDI-09 EXT MMi NTV-KIT187
 3950 NW 120 th Ave, Coral Springs, FL 33065 TEL 561-955-9770 FAX 561-955-9760 www.nav-tv.com info@nav-tv.com AUDI-09 EXT MMi NTV-KIT187 Overview The AUDI-09 EXT MMi Kit allows the user to add up to 3 video
CHRY MULTI-CAM. Dodge/Jeep uconnect (RA4) Interface with 6 video inputs NTV-KIT764 BHM 09/25/17 NTV-DOC266
 Interface with 6 video inputs NTV-KIT764 BHM 09/25/17 NTV-DOC266") 3950 NW 120 th Ave, Coral Springs, FL 33065 TEL 561-955-9770 FAX 561-955-9760 CHRY MULTI-CAM Dodge/Jeep uconnect (RA4) Interface with 6 video inputs NTV-KIT764 BHM Overview The UCTv2 series Interface integrates
3950 NW 120 th Ave, Coral Springs, FL 33065 TEL 561-955-9770 FAX 561-955-9760 CHRY MULTI-CAM Dodge/Jeep uconnect (RA4) Interface with 6 video inputs NTV-KIT764 BHM Overview The UCTv2 series Interface integrates
Volvo VIM NTV-KIT298
 3950 NW 120 th Ave, Coral Springs, FL 33065 TEL 561-955-9770 FAX 561-955-9760 www.nav-tv.com info@nav-tv.com Volvo VIM NTV-KIT298 Overview The Volvo VIM kit enables video in motion (VIM) and navigation
Written By: John Sutton
 Replacing the fan on your HP g7-2275 dx. Written By: John Sutton ifixit CC BY-NC-SA www.ifixit.com Page 1 of 20 INTRODUCTION Laptop cooking your lap? This guide will walk you through replacing your fan.
W205-RVC NTV-KIT580. Overview
 3950 NW 120 th Ave, Coral Springs, FL 33065 TEL 561-955-9770 FAX 561-955-9760 www.nav-tv.com info@nav-tv.com W205-RVC NTV-KIT580 Overview The W205-RVC Kit allows the user to add a backup camera input (with
BMW12-DYNAMIC KIT NTV-KIT462
 3950 NW 120 th Ave, Coral Springs, FL 33065 TEL 561-955-9770 FAX 561-955-9760 www.nav-tv.com info@nav-tv.com BMW12-DYNAMIC KIT NTV-KIT462 Overview The BMW12 kit allows the user to add up to 3 video inputs
BMW-EVO KIT NTV-KIT804
 3950 NW 120 th Ave, Coral Springs, FL 33065 TEL 561-955-9770 FAX 561-955-9760 www.nav-tv.com info@nav-tv.com BMW-EVO KIT NTV-KIT804 Screen Connector Overview The BMW-EVO kit interfaces 2 video inputs (including
REC-AV XG NTV-KIT276
 3950 NW 120 th Ave, Coral Springs, FL 33065 TEL 561-955-9770 FAX 561-955-9760 www.nav-tv.com info@nav-tv.com REC-AV XG NTV-KIT276 Overview The REC-AV XG adds video input (including rear camera) for select
AUDI DYNAMIC-EXT NTV-KIT701
 3950 NW 120 th Ave, Coral Springs, FL 33065 TEL 561-955-9770 FAX 561-955-9760 www.nav-tv.com info@nav-tv.com AUDI DYNAMIC-EXT NTV-KIT701 Overview The AUDI-DYN EXT Kit interfaces a backup camera (with dynamic
NOTICE OF INTENDED INSTALLATION AND USE
 * JBL Audio equipped vehicles will require additional part # DP-TYJBL1 audio interface. NOTICE OF INTENDED INSTALLATION AND USE THE ROSEN MULTI-MEDIA NAVIGATION SYSTEMS CONTAIN AN INTERNAL VIDEO PLAYER,
REAR-VIEW CAMERA & AV INPUT INTEGRATION INTERFACE FOR DODGE & JEEP VEHICLES 2014-UP
 DODGE 2014-2015 Durango 2014-2015 RAM* JEEP 2014-2015 Grand Cherokee APPLICATION NOTES: FOR UCONNECT 5 AND 8.4 DISPLAYS *NOTE: Not compatible with diesel powered trucks. PARTS INCLUDED (2) CH-75V CAN Interface
FDS3NAV2. For Ford Vehicles Equipped With SYNC3. Installation Instructions. Calibration and Setup Guide. Page 1 of 14
 FDS3NAV2 For Ford Vehicles Equipped With SYNC3 Installation Instructions Calibration and Setup Guide Page 1 of 14 Please read this manual thoroughly before installation. This manual illustrates a typical
NOTICE OF INTENDED INSTALLATION AND USE
 NOTICE OF INTENDED INSTALLATION AND USE THE ROSEN MULTI-MEDIA NAVIGATION SYSTEMS CONTAIN AN INTERNAL VIDEO PLAYER, WHICH IS NOT INTENDED FOR VIEWING BY THE DRIVER. THE VIDEO PLAYER IS DISABLED WHEN THE
AUDI DYNAMIC-EXT NTV-KIT701
 3950 NW 120 th Ave, Coral Springs, FL 33065 TEL 561-955-9770 FAX 561-955-9760 www.nav-tv.com info@nav-tv.com AUDI DYNAMIC-EXT NTV-KIT701 Overview The AUDI-DYN EXT Kit interfaces a backup camera (with dynamic
PRECAUTIONS: Please read before you start the installation
 Installation manual for DVI HA HDD with HA HDD harness In the box: DVI HA HDD video interface HA HDD plug and play wiring harness Installation manual IMPORTANT: Please read all precautions first. This
C.O.D-F50. Ford OEM 360 Surround-View Camera Controller NTV-KIT899 BHM 02/01/19 NTV-DOC334
 3950 NW 120 th Ave, Coral Springs, FL 33065 TEL 561-955-9770 FAX 561-955-9760 C.O.D-F50 Ford OEM 360 Surround-View Camera Controller NTV-KIT899 Overview The COD-F50 (Camera-On-Demand) kit allows Ford SuperDuty
GMNAV1 Advent Integrated Navigation
 GMNAV1 Advent Integrated Navigation This interface is designed to integrate Navigation into select Buick and Chevrolet Systems. INSTALLATION MANUAL What s in the Box The following items are supplied with
Page 1/6! ALLGIG-USB 2/11/2009 ALLGIG-USB
 Page 1/! /11/009 Overview The NAV-TV ALLGIG provides the following features when correctly installed: Enables video in motion. Enables navigation entry in motion. Enables VES display in motion. The following
BMW09N-DYNAMIC Kit NTV-KIT725 Screen Connector
 3950 NW 120 th Ave, Coral Springs, FL 33065 TEL 561-955-9770 FAX 561-955-9760 www.nav-tv.com info@nav-tv.com BMW09N-DYNAMIC Kit NTV-KIT725 Screen Connector Overview The BMW09-N kit interfaces 2 video inputs
AUDI DYNAMIC-A3 NTV-KIT702
 3950 NW 120 th Ave, Coral Springs, FL 33065 TEL 561-955-9770 FAX 561-955-9760 www.nav-tv.com info@nav-tv.com AUDI DYNAMIC-A3 NTV-KIT702 Overview The AUDI DYNAMIC-A3 Kit interfaces a backup camera input
ibook G3 14" Top Shield Replacement
 Written By: irobot ifixit CC BY-NC-SA www.ifixit.com Page 1 of 18 INTRODUCTION The metallic top shield protects the logic board from electromagnetic interference. TOOLS: Coin (1) Paper Clip (1) Phillips
ibook G4 14" 933 MHz-1.33 GHz Hard Drive
 ibook G4 14" 933 MHz-1.33 GHz Hard Drive Replacement Written By: irobot ifixit CC BY-NC-SA www.ifixit.com Page 1 of 25 INTRODUCTION You can install hard drives up to 9.5mm thick. TOOLS: Coin (1) Phillips
If technical support is required, please contact Advent Technical Support at
 Document 128-9011 Created 11/21/11 Kit Contents: Item # Qty. Component Description 1 2 Monitor Assembly 2 2 Remote Control 3 1 Cables # 3 4 1 Metal Wire Puller 5 1 Power Cord # 9 6 1 Owners Manual 7 2
PowerBook G3 Pismo I/O EMI Shield Replacement
 PowerBook G3 Pismo I/O EMI Shield Replacement Written By: irobot ifixit CC BY-NC-SA www.ifixit.com Page 1 of 23 INTRODUCTION A thin metal shield resides above the ports that protects from electromagnetic
MacBook Pro 15" Core 2 Duo Models A1226 and A1260 ExpressCard Cage Replacement
 MacBook Pro 15" Core 2 Duo Models A1226 and A1260 ExpressCard Cage Replacement Written By: Walter Galan ifixit CC BY-NC-SA www.ifixit.com Page 1 of 15 INTRODUCTION You can again use ExpressCard accessories
ibook G3 14" Hard Drive Replacement
 Written By: irobot ifixit CC BY-NC-SA www.ifixit.com Page 1 of 20 INTRODUCTION How to remove the hard drive and its bracket from your computer. TOOLS: Coin (1) Paper Clip (1) Phillips #00 Screwdriver (1)
W204-H NTV-KIT794. Overview
 3950 NW 120 th Ave, Coral Springs, FL 33065 TEL 561-955-9770 FAX 561-955-9760 www.nav-tv.com info@nav-tv.com W204-H NTV-KIT794 Overview The W204-H RVC Kit interfaces two camera inputs and optional HDMI
BMW-EVO ID6 NTV-KIT837
 3950 NW 120 th Ave, Coral Springs, FL 33065 TEL 561-955-9770 FAX 561-955-9760 www.nav-tv.com info@nav-tv.com BMW-EVO ID6 NTV-KIT837 Screen Connector Overview The BMW-EVO ID6 kit interfaces 2 video inputs
IOB-RVC NTV-KIT798. Overview
 3950 NW 120 th Ave, Coral Springs, FL 33065 TEL 561-955-9770 FAX 561-955-9760 www.nav-tv.com info@nav-tv.com IOB-RVC NTV-KIT798 Overview The IOB-RVC interfaces a single backup camera input to the factory
Dell Inspiron N5110 Service Manual
 Dell Inspiron N5110 Service Manual Regulatory model: P17F Regulatory type: P17F001 Notes, Cautions, and Warnings NOTE: A NOTE indicates important information that helps you make better use of your computer.
ADDITIONAL CAM POWER REVERSE CAM POWER BLUETOOTH MUTE AUDIO + IN AUDIO - IN 12V ACC OUTPUT 12V CONSTANT GROUND
 UNPLUG ORIGINAL RADIO CONNECTORS THEN PLUG IN HERE PLUG AND PLAY NO OTHER CONNECTIONS ARE NECESSARY USE HANDSFREE KIT MICROPHONE IPOD/IPHONE/ITOUCH/IPAD CONNECTION USB INPUT ADD YOUR BLUETOOTH HANDSFREE
W204-5 NTV-KIT198. Overview
 3950 NW 120 th Ave, Coral Springs, FL 33065 TEL 561-955-9770 FAX 561-955-9760 www.nav-tv.com info@nav-tv.com W204-5 NTV-KIT198 Overview The W204-5 Kit allows the user to add up to 3 video inputs and a
Gazer VI700A-NTG45 and VI700W-NTG45 INSTALLATION MANUAL
 Gazer VI700A-NTG45 and VI700W-NTG45 INSTALLATION MANUAL Contents List of compatible cars with preinstalled stock Mercedes Command Online NTG 4.5 and Mercedes Audio 20 NTG 4.5 multimedia interfaces... 3
NOTICE OF INTENDED INSTALLATION AND USE
 * JBL Audio equipped vehicles will require additional part # DP-TYJBL1 audio interface. NOTICE OF INTENDED INSTALLATION AND USE THE ROSEN MULTI-MEDIA NAVIGATION SYSTEMS CONTAIN AN INTERNAL VIDEO PLAYER,
MacBook Pro 15" Core 2 Duo Model A1211 Speakers Replacement
 MacBook Pro 15" Core 2 Duo Model A1211 Speakers Replacement Written By: irobot ifixit CC BY-NC-SA www.ifixit.com Page 1 of 21 INTRODUCTION Restore sound to your laptop by replacing the speakers. TOOLS:
GEN 6 LOCKPICK INSTALLATION OPTIONS COPYRIGHT 2010 COASTAL ELECTRONIC TECHNOLOGIES, INC.
 AFTERMARKET FRONT/BABY CAMERA VIDEO CONNECT HERE FRONT/BABY CAM POWER TO LOCKPICK RED W/BLACK STRIPE WIRE TO LOCKPICK BLACK GROUND WIRE UNPLUG ORIGINAL RADIO CONNECTORS THEN PLUG IN HERE PLUG AND PLAY
PowerBook G4 Aluminum 12" GHz Display Data Cable Replacement
 PowerBook G4 Aluminum 12" 1-1.5 GHz Display Data Cable Replacement Written By: Matthew Newsom ifixit CC BY-NC-SA www.ifixit.com Page 1 of 47 INTRODUCTION Replace a damaged display data cable to restore
UCTv2-W. 18 Wrangler uconnect 4.0 (CarPlay/Android Auto) Dual Camera Interface NTV-KIT851 BHM 01/19/18 NTV-DOC308
 Dual Camera Interface NTV-KIT851 BHM 01/19/18 NTV-DOC308") 3950 NW 120 th Ave, Coral Springs, FL 33065 TEL 561-955-9770 FAX 561-955-9760 UCTv2-W 18 Wrangler uconnect 4.0 (CarPlay/Android Auto) Dual Camera Interface NTV-KIT851 BHM Overview The UCTv2-W interface
3950 NW 120 th Ave, Coral Springs, FL 33065 TEL 561-955-9770 FAX 561-955-9760 UCTv2-W 18 Wrangler uconnect 4.0 (CarPlay/Android Auto) Dual Camera Interface NTV-KIT851 BHM Overview The UCTv2-W interface
IOB-RVC NTV-KIT798. Overview
 3950 NW 120 th Ave, Coral Springs, FL 33065 TEL 561-955-9770 FAX 561-955-9760 www.nav-tv.com info@nav-tv.com IOB-RVC NTV-KIT798 Overview The IOB-RVC interfaces a single backup camera input to the factory
PowerBook G4 Aluminum 12" GHz Left Clutch Hinge Replacement
 PowerBook G4 Aluminum 12" 1-1.5 GHz Left Clutch Hinge Replacement Written By: Matthew Newsom ifixit CC BY-NC-SA www.ifixit.com Page 1 of 50 INTRODUCTION Replace a broken clutch hinge to make your display
A3/GOLF 7-CAM NTV-KIT500
 3950 NW 120 th Ave, Coral Springs, FL 33065 TEL 561-955-9770 FAX 561-955-9760 www.nav-tv.com info@nav-tv.com A3/GOLF 7-CAM NTV-KIT500 Overview The A3/GOLF7-CAM Kit allows the user to add 1 video input
Nintendo DSi Wi-Fi Antenna Board
 Nintendo DSi Wi-Fi Antenna Board Replacement Replace your Nintendo DSi's Wi-Fi antenna. Written By: Andrew Bookholt ifixit CC BY-NC-SA www.ifixit.com Page 1 of 16 INTRODUCTION Use this guide to replace
Installation Instructions
 Installation Instructions Phones, Navigation These Installation Instructions supersede those dated February 2004. Page 1 of 9 March 2004 Accessory Development Changes to this revision are identified by
GM2 FIM LOCKPICK INSTALLATION OPTIONS COPYRIGHT 2012 COASTAL ELECTRONIC TECHNOLOGIES, INC.
 UNPLUG ORIGINAL RADIO CONNECTORS THEN PLUG IN HERE PLUG AND PLAY NO OTHER CONNECTIONS ARE NECESSARY FOR OVERRIDE FEATURES CONNECT USB CABLE HERE FOR FUTURE UPDATES OPTIONAL POWER OUTPUTS FOR CAMERA(S)
W205-N RVC NTV-KIT703
 3950 NW 120 th Ave, Coral Springs, FL 33065 TEL 561-955-9770 FAX 561-955-9760 www.nav-tv.com info@nav-tv.com W205-N RVC NTV-KIT703 Overview The W205-N RVC Kit interfaces a backup camera input (with active
Asus ZenFone 2 Motherboard Replacement
 Asus ZenFone 2 Motherboard Replacement If you have problems with your phone rebooting at random times, you could have a faulty motherboard in your phone. Written By: Eduardo Nodarse ifixit CC BY-NC-SA
EH50 ATTENTION: SECURITY COVERS ARE NO LONGER INCLUDED IN THE HEADREST KITS AS OF
 Toyota 4Runner 2011 - Dual Player Headrest Video Part Number: 00016-00360; Sand Beige 00016-00370; Black Accessory Code: EH50 ATTENTION: SECURITY COVERS ARE NO LONGER INCLUDED IN THE HEADREST KITS AS OF
ipad 4 - Disassemble Guide
 ipad 4 - Disassemble Guide TTT-9001 Plastic Triangle Opening Tool TTT-9002 Metal Opening Tool TTT-9007 Small Phillips Screwdriver TTT-9010 Plastic Opening Tools TTT-9013 Spudger Heat Gun / Blow Dryer This
MacBook Pro 15" Core 2 Duo Model A1211 ExpressCard Cage Replacement
 MacBook Pro 15" Core 2 Duo Model A1211 ExpressCard Cage Replacement Written By: irobot ifixit CC BY-NC-SA www.ifixit.com Page 1 of 16 INTRODUCTION You can again use ExpressCard accessories by replacing
Installation Instruction VCPRGBGM05 - rev1.5 RGB Interface Harness modification Navigation Radio
 Introduction The following instruction procedure is for the RGB interface to a GM 05 Nav Radio as part of the Webasto Product NAVCam Back-up Camera (VCP-0000220). In addition, an installer will need to
Dell Inspiron 1525 Upper Case Replacement
 Dell Inspiron 1525 Upper Case Replacement Replace the upper case on a Dell Inspiron 1525. Written By: Miroslav Djuric ifixit CC BY-NC-SA www.ifixit.com Page 1 of 13 INTRODUCTION Use this guide to help
Inspiron 22. Service Manual Series. Regulatory Model: W17B Regulatory Type: W17B001
 Inspiron 22 3000 Series Service Manual Regulatory Model: W17B Regulatory Type: W17B001 Notes, cautions, and warnings NOTE: A NOTE indicates important information that helps you make better use of your
MacBook Core 2 Duo Clutch Cover
 MacBook Core 2 Duo Clutch Cover Replacement Replace the clutch cover on your MacBook Core 2 Duo. Written By: Ben Eisenman ifixit CC BY-NC-SA www.ifixit.com Page 1 of 29 INTRODUCTION Replace the curved
Part Number: Lt. Taupe / Stone / Ivory Touring Edition Accessory Code: EH3
 Part Number: Lt. Taupe - 00016-00710 / Stone - 00016-00720 / Ivory - 00016-00730 Touring Edition - 00016-00745 Accessory Code: EH3 Kit Contents Item # Quantity Reqd. Description 1 2 Headrest Assembly 2
MY-CUE-Kit NTV-KIT457
 3950 NW 120 th Ave, Coral Springs, FL 33065 TEL 561-955-9770 FAX 561-955-9760 www.nav-tv.com info@nav-tv.com MY-CUE-Kit NTV-KIT457 Overview The MY-CUE Kit allows the user to add up to 3 audio/video inputs
Dell XPS 14z Owner s Manual
 Dell XPS 14z Owner s Manual Computer model: L412z Regulatory model: P24G series Regulatory type: P24G001 Notes, Cautions, and Warnings NOTE: A NOTE indicates important information that helps you make better
W204-N RVC NTV-KIT704
 3950 NW 120 th Ave, Coral Springs, FL 33065 TEL 561-955-9770 FAX 561-955-9760 www.nav-tv.com info@nav-tv.com W204-N RVC NTV-KIT704 Overview The W204-N RVC Kit interfaces a backup camera input (with active
Dell Inspiron System Board
 Dell Inspiron 17-5749 System Board Replacement This guide will instruct users on the procedure of removing/replacing the Dell Inspiron 17-5749 system board. Written By: Christopher Tran ifixit CC BY-NC-SA
GM IO4/IO5/IO6 M.O.S.T. 50 to RCA, SPDIF & TosLink sound processor NTV-KIT838
 3950 NW 120 th Ave, Coral Springs, FL 33065 TEL 561-955-9770 FAX 561-955-9760 GM IO4/IO5/IO6 M.O.S.T. 50 to RCA, SPDIF & TosLink sound processor NTV-KIT838 BHM rb3 WARNING: Do not connect any RCA cables
INSTALLATION INSTRUCTIONS
 INSTALLATION INSTRUCTIONS Accessory Application Publications No. CASSETTE/MP3 (EX) 2006 PILOT All 30488 Issue Date SEP 2005 Player Attachment Kit (sold separately) : P/N 08B06-S9V-100A Cassette Player
Installation Instructions ROSTRA. Select GM Vehicles with 7 Screens
 Rostra 12-Volt Accessories Reverse Camera Input Interface for General Motors Vehicles 250-8454 Installation Instructions Select GM Vehicles with 7 Screens This manual shows a typical installation. Your
TOYOTA SIENNA Dual Headrest Video
 TOYOTA SIENNA 2011- Dual Headrest Video Part Number: 00016-08130; Bisque 00016-08135; Gray 00016-08140; Dark Charcoal Code: EH5 Conflicts: Color Applicability/ Trim Level: Kit Contents: Item # Qty. Component
Dell Inspiron Screen Replacement
 Must know how to remove the battery, hard drive, and cooling fan. Learn how to remove the screen from your laptop and replace it with a new one. Written By: Austin Navarro ifixit CC BY-NC-SA www.ifixit.com
Insignia Flex 10.1 NS-P16AT10 Screen Replacement
 Insignia Flex 10.1 NS-P16AT10 Screen Replacement This guide will instruct you on how to replace the screen on the Insignia Flex 10.1 NS-P16AT10. Written By: Morgan Kidd ifixit CC BY-NC-SA www.ifixit.com
Disassembly/Repair of the Nikon Coolpix L10 Camera as originally presented on Do it Yourself Digital Camera Repair
 Disassembly/Repair of the Nikon Coolpix L10 Camera as originally presented on Do it Yourself Digital Camera Repair http://camerarepair.blogspot.com/ The following outlines the steps to dissect the Nikon
Asus Transformer T100 Motherboard
 Asus Transformer T100 Motherboard Replacement Replace the motherboard of your Asus Transformer T100. Written By: Taylor Pantiga ifixit CC BY-NC-SA www.ifixit.com Page 1 of 13 INTRODUCTION The motherboard
Coastal Electronic Technologies, Inc. GM LOCKPICK GMX-320 Installation and Operation Instructions
 Coastal Electronic Technologies, Inc. GM LOCKPICK GMX-320 Installation and Operation Instructions Thank you for your purchase of the Coastal Electronic Technologies, Inc. GM LOCKPICK GMX- 320. The GMX-320
HP TouchPad USB Connector Board Replacement
 HP TouchPad USB Connector Board Replacement Replace the USB connector board on your HP TouchPad. Written By: Andrew Bookholt ifixit CC BY-NC-SA www.ifixit.com Page 1 of 12 INTRODUCTION Use this guide to
Written By: Ben Eisenman
 iphone 3GS Rear Panel Replacement Replace a broken rear case on your iphone 3GS. Written By: Ben Eisenman ifixit CC BY-NC-SA www.ifixit.com Page 1 of 22 INTRODUCTION The plastic rear half of the iphone.
MacBook Pro 15" Core Duo Model A1150 ExpressCard Cage Replacement
 MacBook Pro 15" Core Duo Model A1150 ExpressCard Cage Replacement Written By: irobot ifixit CC BY-NC-SA www.ifixit.com Page 1 of 17 INTRODUCTION You can again use ExpressCard accessories by replacing a
Huawei Ascend P6-U06 Earpiece Speaker Replacement
 Huawei Ascend P6-U06 Earpiece Speaker Replacement Replace the Huawei Ascend P6-U06 earpiece speaker. Written By: Oren Klein ifixit CC BY-NC-SA www.ifixit.com Page 1 of 11 INTRODUCTION Replace your phone's
Inspiron Service Manual. 2-in-1. Computer Model: Inspiron Regulatory Model: P69G Regulatory Type: P69G001
 Inspiron 13 5000 2-in-1 Service Manual Computer Model: Inspiron 13-5378 Regulatory Model: P69G Regulatory Type: P69G001 Notes, cautions, and warnings NOTE: A NOTE indicates important information that helps
iphone 3G Headphone Jack Replacement Replace a broken audio port in an iphone 3G. Written By: irobot ifixit CC BY-NC-SA
 iphone 3G Headphone Jack Replacement Replace a broken audio port in an iphone 3G. Written By: irobot ifixit CC BY-NC-SA www.ifixit.com Page 1 of 18 INTRODUCTION No audio? Replace the headphone jack! TOOLS:
PCM4-CAM NTV-KIT750. Overview
 3950 NW 120 th Ave, Coral Springs, FL 33065 TEL 561-955-9770 FAX 561-955-9760 www.nav-tv.com info@nav-tv.com PCM4-CAM NTV-KIT750 Overview The PCM4-CAM Kit interfaces a backup camera input (with active
Dell XPS L702X Service Manual
 Dell XPS L702X Service Manual Regulatory model: P09E series Regulatory type: P09E002 Notes, Cautions, and Warnings NOTE: A NOTE indicates important information that helps you make better use of your computer.
MOST-AUX Fiber-optic AUX input for select MOST vehicles NTV-KIT001/002/007/008/143/151/152
 3950 NW 120 th Ave, Coral Springs, FL 33065 TEL 561-955-9770 FAX 561-955-9760 MOST-AUX Fiber-optic AUX input for select MOST vehicles NTV-KIT001/002/007/008/143/151/152 I N T E R F A C E BHM Overview The
Written By: Brittany K
 Nintendo DS Lite Motherboard Replacement Written By: Brittany K ifixit CC BY-NC-SA www.ifixit.com Page 1 of 11 INTRODUCTION This guide has been updated by ifixit staff! Read the new, official guide here.
Dell Inspiron Optical-Drive Connector
 Dell Inspiron 17-5749 Optical-Drive Connector Board Replacement This guide will instruct users on the procedure of removing/replacing the Dell Inspiron 17-5749 optical-drive connector board. Written By:
HP Pavilion dv7-6c90us Cooling fan Replacement
 HP Pavilion dv7-6c90us Cooling fan Replacement This guide will walk you through the process of replacing the cooling fan in an HP Pavilion dv7 laptop. Written By: Angelina Clayton ifixit CC BY-NC-SA www.ifixit.com
Huawei Ascend P6-U06 Screen/LCD Display Replacement
 Huawei Ascend P6-U06 Screen/LCD Display Replacement Replace the Huawei Ascend P6-U06's screen and LCD display. Written By: Zachary Rose ifixit CC BY-NC-SA www.ifixit.com Page 1 of 17 INTRODUCTION Replace
HTC Rezound - Disassemble Guide
 HTC Rezound - Disassemble Guide TTT-9007 Small Phillips Screwdriver TTT-9010 Plastic Opening Tools TTT-9013 Spudger Heat Gun / Blow Dryer This guide will show you how to disassemble the HTC Rezound mobile
Nintendo DS Lite Rear Display Bezel Replacement
 Nintendo DS Lite Rear Display Bezel Replacement Replacement of the Nintendo DS Lite rear display bezel. Written By: Matt Newsom ifixit CC BY-NC-SA www.ifixit.com Page 1 of 17 INTRODUCTION Replace the rear
Nexus 7 2nd Generation Micro USB/Daughterboard Replacement
 Nexus 7 2nd Generation Micro USB/Daughterboard Replacement Replace the Micro USB/Daughterboard on your Nexus 7 2nd Generation. Written By: Simon Krauter ifixit CC BY-NC-SA www.ifixit.com Page 1 of 11 INTRODUCTION
Motorola Droid X Camera Replacement
 Motorola Droid X Camera Replacement Written By: Gage ifixit CC BY-NC-SA www.ifixit.com Page 1 of 24 TOOLS: 64 Bit Driver Kit (1) ifixit Opening Tools (1) ifixit CC BY-NC-SA www.ifixit.com Page 2 of 24