CHAPTER 1 INTRODUCTION...11
|
|
|
- Ira Neal Higgins
- 6 years ago
- Views:
Transcription

1 1
2 2
3 Table of Contents CHAPTER 1 INTRODUCTION...11 INTRODUCTION WHAT S NEW FOR SYSTEM REQUIREMENTS OPTIONS FOR SYSTEM CONFIGURATION CHAPTER 2 SETUP...21 INTRODUCTION OFFICE SETUP PRINTER SETUP BILLING SETUP LOCAL SETUP CLIENT LETTERS LOGIN ACCOUNTS COLOR SETUP QUESTIONNAIRE SETUP RESTRICTED FORMS SETUP DATABASE SETUP COMMUNICATIONS SETUP CHAPTER 3 MULTI-OFFICE MANAGEMENT...75 INTRODUCTION THE ONLINE FEATURES SUPPORT REPORTS THE DASHBOARD CHAPTER 4 PREPARING AND FILING THE PERSONAL TAX RETURN...97 INTRODUCTION
4 CREATING A NEW PERSONAL TAX RETURN CONTINUING AN EXISTING PERSONAL TAX RETURN THE CLIENT DATA SCREEN FILING AN EXTENSION ADDING FORMS TO THE RETURN COMPLETING THE PROCESSING OF THE RETURN SCANNING AND IMPORTING DOCUMENTS TO CREATE AN ELECTRONIC FILE VERIFICATION OF THE RETURN E-FILING VIA TRANSMITTING TO CENTRAL SITE PRINTING THE RETURN AND OTHER RELATED FORMS ENCRYPTED PDF COPY OF TAX RETURN SENDING A TEXT MESSAGE BY TEXTLINK CHAPTER 5 PREPARING AND FILING THE BUSINESS TAX RETURN INTRODUCTION CREATING A NEW BUSINESS TAX RETURN CONTINUING AN EXISTING BUSINESS TAX RETURN THE CLIENT DATA SCREEN FILING AN EXTENSION THE FINANCIAL STATEMENTS IMPORT FINANCIAL DATA ADDING FORMS TO THE BUSINESS RETURN COMPLETING THE PROCESSING OF THE RETURN SCANNING AND IMPORTING DOCUMENTS TO CREATE AN ELECTRONIC FILE VERIFICATION OF THE RETURN E-FILING VIA TRANSMITTING TO CENTRAL SITE PRINTING THE RETURN AND OTHER RELATED FORMS CHAPTER 6 THE TAX RETURN TOOLS INTRODUCTION
5 THE TAX RETURN TOOLBAR THE TAX RETURN MENU THE FORM MENU THE PRINT MENU THE COMMAND MENU CHAPTER 7 ADMINISTRATIVE TOOLS WORK IN PROGRESS SUMMARY INTRODUCTION TAX RETURNS TRANSMIT QUEUE PRINTING QUEUE EXCEPTIONS/REJECTIONS OTHER ITEMS QUICK REPORTS PAYMENT BUTTON LOGIN ACCOUNT LOCK FORGOT PASSWORD LINK CHAPTER 8 UTILITY MENU INTRODUCTION RETRIEVE RETURNS TRANSFER RETURNS MASTER LOG EVENT EXPORT RECORDS UPDATES ACTIVATE CHECK RANGE PRINT BLANK FORMS QUICK REPORT LIST SYSTEM UTILITIES RESTORE BACKUP RETURN
6 USER PREFERENCES CHAPTER 9 REPORTS INTRODUCTION USING THE REPORT MENU STATUS REPORTS IRS ACKS FEE PAYMENTS ACK LETTERS MAILING LABELS CLIENT LISTS USING THE RETURN LOOKUP SCREEN TO CREATE A REPORT CHAPTER 10 HELP MENU INTRODUCTION CURRENT TOPIC ALL TOPIC HELP RETURN STATUS CODES RESOURCES TAX LIBRARY FEDERAL HELP STATE HELP ABOUT GLOSSARY 211 APPENDIX 1 IRS INFORMATION APPENDIX 2 STATES WITH E-FILING APPENDIX 3 STATUS CODES APPENDIX 4 SUPPORTED FEDERAL FORM FOR PERSONAL RETURNS APPENDIX 5 KEYBOARD SHORTCUTS APPENDIX 6 IMPORT FROM QUICKBOOKS INTRODUCTION SETUP AND REVIEW TAX LINE MAPPING IN QUICKBOOKS
7 CREATE THE EXPORT FILE IMPORT DATA INTO A BUSINESS RETURN APPENDIX 7 USER S GUIDE INTRODUCTION TO THE USER S GUIDE DAILY THINGS TO DO TYPES OF SERVICES PREPARING THE PERSONAL TAX RETURN PRESENTING THE CHECK TO THE TAXPAYER CUSTOMER RELATIONS APPENDIX 8 PREMIUM SERVICES INDEX
8 8
9 Part I Getting Started Chapter 1 Introduction Chapter 2 Program Setup Chapter 3 Multi-Office Management 9
10 10
11 Chapter 1 Introduction Introduction A well-prepared staff is essential to ensuring a successful tax season and satisfied clients who will return again next year. Please be sure to finish the Setup portion of this Manual before the tax season begins. Also, ensure that all staff members who will be using the program are familiar with the software and are prepared to support your clients. This Manual includes thorough directions to guide you through Setup and all other tasks, along with a helpful Appendices, Glossary and Taxpayer Questionnaire. You can also find helpful tutorials on your CD/DVD or within your Program Folder. What s New for 2017 The following lists reflect the changes for the new tax year. These lists are up to date as of the printing of this document, however, it is likely that more updates will occur before and after the tax season begins Program Enhancements Strong Passwords A new requirement for user passwords has been enabled. Passwords must be changed every 90 days and the previous 3 passwords cannot be reused. Passwords must meet the following minimum requirements when they are changed or created; Must be 8-20 Characters 1 Uppercase Letter 1 Lowercase Letter 1 Digit 1 Special Character Forgot Password A link has been added to the login page allowing the users to reset their password. A temporary password will be either ed or sent via text message to the user, upon verification they will then be allowed to create a new password. Login Accounts We have expanded the Login Accounts to include; Address & Cell Phone Each login account has been expanded to allow the entry of the users Address and/or Cell Phone number. One of these fields is required to use the new Forgot Password feature. 11
12 Disable Login Accounts A disabled login account feature has been added to the software, making it easier to turn on and off program access for logins. A disabled login will have no access to the program. Capture Signatures The ability to capture signatures has been expanded to include; On Screen Signature Capture The ability to use a mouse to draw signatures in the capture signature box has been added. Signature Capture A link can be sent to the Taxpayer(s) address to request a digital signature. State only RT s The program has been enhanced to allow State only RT filing. Templates We have included an template in the client letter setup. This template can be customized and used when ing clients their tax returns. Extensions Extension that are sent electronically will receive a more explicit acknowledgment or rejection response from the IRS. Office Setup Bypass all Key Tracking When this setting is enabled it will turn off the auto text on the choice list fields within a return. Mask SSN/EIN When this setting is enabled it will mask the SSN or EIN on the Return Lookup screen and only the last 4 digits will be displayed. Tax Return Audits New validations have been added for Earned Income Credit and Tax Alerts to assist in satisfying the IRS Regulatory requirements. Printing Returns Training Returns We have opened up the printing functionalities within the training returns. Training tax returns will print with a "Training Preview" watermark. 12
13 Referral Coupons The referral coupon discount amount and expiration date is now easily maintained within the print options. Client Letters The Federal and State client letters can now be printed from the print menu while inside a tax return. Send to Preparers have the option to the signed copy of the tax return upon capturing the taxpayer s signatures. Turn on EIN Masking An option has been added to mask the EINs on the 1040 forms when the return is printed. New and Updated Forms The following form updates have been made to the software: Form 1042-S This form has been added to the software to report Foreign Persons U.S. source income that is subject to withholdings. Form SSA-1042S This form is used to report Social Security Benefits for Nonresident Aliens. Form RRB-1042S This form is used to report payments made by the Railroad Retirement Board to Nonresident Aliens. Form 8228-A - Buyers and transferees use this form with Form 8288 for each foreign person that disposes of real property located in the U. S. to report withholding on the amount realized. Form This form is used to show the amount of effectively connected taxable income (ECTI) and the total tax credit allocable to the foreign partner for the partnership's tax year. Form 8867 The Paid Preparer s Due Diligence Checklist has been updated. Form 1040NR This form can now be filed electronically. Banking Updates We are partnered with several industry leading bank product providers, ensuring that you have a variety of funding choices. TPG Refund Advantage Refundo Republic 13
14 Business Program Enhancements Addition of the 1041 and 990 States Users can file 1041(Estates and Trusts) and 990 (Organization exempt from Income Tax) State business tax returns. Expanded Financial Statement Importing The importing of financial statements has been enhanced to allow tax line mapping after import. The change allows import of any.csv file with a two column (description/amount) format. Additionally we allowing the Income Statement and the Balance Sheet to be imported separately. XERO Integration To increase efficiency and process a high volume of business returns we have enhanced the import financial information into business tax returns from a XERO chart of accounts using tax line mapping. Extended Reports The ability to create extended reports in the business program has been implemented, allowing the preparers to create custom reports. System Requirements 1 GB of hard disk space 1 GB of memory in Windows Vista, Windows 7, Windows 8, Windows 10 (Scriptel Signature Pad is not supported on Windows 10) High-speed or Dial-up Internet Service HP compatible laser printer supporting a Printer Control Language of 6 or higher or a GDI compatible printer. Please note this is due to bank requirements for properly printing checks. Options for System Configuration This program can be setup in four different configurations. Please consult with your sales person to determine the best setup for your organization Single Workstation - A single computer is used by all preparers for all functions. This computer is used to print all returns, reports, and checks. This computer is also used to transmit information to and from Central Site. This computer can be enabled to use an unlimited number of Electronic Return Originators and Paid Preparers. 2. Networked, Multiple Workstations - The program is installed on only one computer that functions as a server, which is connected to other computers that function as workstations that can be used as transmitting computers via the server. Transferring of data from one computer to another is not necessary. However, it is important during installations and updates that all workstations close out of the program except one.
15 3. Non-Networked, Multiple Workstations- The program is installed on one transmitting computer and on an unlimited number of non-transmitting computers. The non-transmitting computers transfer information to and from the transmitting computer, which in turn, transfers information to and from Central Site. The transmitting computer is used for all communications to and from Central Site. While the program can be installed on an unlimited number of non-transmitting computers, the purchase of the program enables only one license for a transmitting computer (or server as above). 4. Multi-Office Organizations and Service Bureaus The program is installed on a Main Computer and one or more Remote Computers. The Main Computer transmits to Central Site. The Remote Computer(s) communicates with the Main Computer via Central Site. The Main Computer controls the degree to which the Remote Computer communicates directly with Central Site. General Directions for Software Configuration and Installation Basic Installation/Single Workstation To install the program to a single computer, follow these steps: 1. Close all applications that are running on your computer. 2. Insert the CD/DVD or Download the installation files from the Customer Portal. Windows Installer will begin loading the program automatically, and the Installation Wizard will open. (If Windows Installer has not been loaded previously, you may be prompted to restart the computer.) 3. Follow the on-screen directions of the Installation Wizard. See further directions for Software Setup below. 4. The Installation Wizard will install the program to the C:\Xlink17 folder of the hard drive by default. If the program is being installed on a network server, change the destination drive letter to that of the network server. (Example: If E is the destination of the server, change the folder to E:\Xlink When installation is complete, click on Finish to launch the program. Networked, Multiple Workstations To share the program across a network, follow these steps: 1. Follow the Basic Installation directions (above) to install the program to the computer established as the network server. 2. On the network server, share the drive and/or folder on which the program is installed. 3. Map a drive from each workstation to use the shared Xlink17folder. 15

16 4. At each individual workstation, browse to the shared Xlink17 folder and create a shortcut on the workstation s desktop using the Xlink32.exe file. On the workstation desktop, make sure that the Icon properties reflect the drive and folder that are mapped to the program. (Example: Target is E:\Xlink32.exe; Start In: E:\) Non-Networked, Multiple Workstations/Computers To use multiple computers without a network, follow these steps: 1. Follow the Basic Installation directions (above) for installing the program on all computers. The software license allows multiple installations, however, only one computer can serve as a transmitting computer. 2. Under Office Setup in the Manual, follow the directions under the Registration Tab. Multi-Office Organizations and Service Bureaus To use multiple computers in a Multi-Office Organization or Service Bureau, follow these steps: 1. Use the Office Management feature on the program website by the Main Office to enroll and setup all Remote Offices. 2. Follow the Basic Installation (above) for installing the program on all computers. During the Basic Installation, the Remote Computers will automatically communicate with Central Site, which will in turn transfer information already generated by the Main Office. 3. Enter any additional information during Setup that was not already provided by the Main Office during the automatic transfer. Please contact your technical support for assistance. Detailed Directions for Software Installation and First-Time Setup The following directions instruct how to install the software after the configuration above has been determined and the Installation Wizard has opened: 1. Start the program installation and the Welcome screen will open. 2. Click Next to continue the 2017 program installation The End User License Agreement (EULA) appears. Select the radio button I Accept the terms of the license agreement and click Next to continue.


17 4. Choose the location of where the program will be installed. By default, the program is installed in the following destination C:\Xlink17 folder. A different location may need to be selected depending on the configuration used, as described in the previous section. A different location can be selected by clicking the Change button. After the location is selected click Next to continue. 5. Click Install to install the program to the destination location that was previously selected. If changes need to be made to Installation Settings, click the Back button. 6. The program begins to install and the progress bar begins to move. When the installation is complete, the last install screen will appear automatically. The selection I would like to launch 1040 Software will be automatically checked. Click Finish to continue to the Setup Screens. The following directions instruct how to setup the software: 1. Under Prior Year Information, if the program was used the previous year, a. The Path will be detected and already entered. If this Path is incorrect, click the button and locate the correct Path. If the program was not used in the previous year, this section should be left blank. b. Enter the Prior Year Login and Password used to access the program the previous year, if applicable. 17


18 2. Enter the User ID and Password, which are provided by the Sales Representative. Click Next to continue. 3. Under Office Information, a. If the program was used in the previous year or if this is a managed site, the information on this screen will already be completed. b. If the information is not already completed, enter the required information in all fields that are denoted with an asterisk (*), then click Next to continue. 4. Under Administrator Password, enter the Admin Password that will be used for the Administrator account. Enter the Admin Password a second time to confirm the password. This password will be used to login to the program. 5. Under Enhanced Encryption, enter a unique Enhanced Encryption Password to enhance the security of the program. This step is not required. Enter the Enhanced Encryption Password a second time to confirm the password. This is not a requirement. Click Next to continue. 6. Select Transmit, Transfer, or Feeder from the dropdown list to designate how this program will communicate with Central Site. 7. Select the options to transfer data as a prior year user of the program, as follows: a. Prior year Setup b. Prior year Billing Information c. Prior year Database d. Prior year Login Accounts e. Prior year Appointments 8. Click Next to continue. 18


19 9. The following screen will open if any of the prior year transfers of data were selected in the previous step: 10. Check the box next to the previous year s Login Accounts that will be carried over to the new year s program. Alternatively, click the Select All button. 11. Enter the Default Password these Login Accounts will use to access the program. The user will be prompted to change their password the first time they log into the program. 12. Click Next to continue. 13. Click Finish to start the newly installed program. 14. Enter the Administrator Login and Password that were previously created for this account in Step 4 above. 19
20 20


21 Chapter 2 Setup Introduction When the program is opened for the first time, the screen will look as follows: The Navigational Tabs The Navigational Tabs are located at the top of the screen. These tabs allow the User to move between Individual 1040 Returns, Business Returns, and the Website swiftly by simply clicking on the appropriate Tab. The Menu Bar The Menu Bar is located right below the Navigational Tools. This Menu Bar will change as different areas of the program are accessed. To open a Menu item, click on that particular Menu item or Press [Alt] and the first underlined letter of the menu item. (Example: To open Database, click on DATABASE or Press [Alt+D].) The Toolbar The Toolbar is located directly below the Menu Bar allowing quick access to frequently used features. Like the Menu Bar, the Toolbar will change as different areas of the program are accessed. To open a Toolbar function, click on the button or press [Alt] and the underlined letter on the button. (Example: To add a new tax return, click on the ADD NEW button, or press [Alt + A].) 21

22 The Work In Progress Summary Screen The Work In Progress Summary screen allows the user to quickly view a summary of all important functions occurring in the program. Additional functions become enabled as new returns are added and interaction with Central Site begins. The user is prompted to take action when a category is blue or increases in number. It is important to complete the following directions in this Chapter for proper setup of your tax software program. This will enable you to maximize the program s potential and increase your efficiency during the busy tax season. Note: Dashboard Management Remote Office users will only need to use setup for those functions not already determined by the Main Office. Office Setup From the Opening Screen, click on SETUP in the Menu Bar, scroll down to OFFICE SETUP, and click once. The first tab in the new Application Settings screen will be REGISTRATION. This information may already appear if you used this program last year, or it may have been entered during installation. Registration Tab This information is mostly used by technical support so that they can help you when necessary. Most of this information will appear from entries made with the Installation Wizard. 1. Enter the USER ID number. This number can be found on your picking ticket with your shipment of the program. If you used this program the previous year, this ID will already appear. 2. Enter the NAME. Use the name of the company or the name of the person who will be operating the main computer in your office. 3. Enter the LOCATION. Use your own designation system. For example, if you have 5 locations in one city and identify them as C1, C2.C5, then label them accordingly. 4. Enter the PHONE NUMBER. Use the phone number of the primary contact person at your organization. 22
23 5. Enter the FAX NUMBER. Use the fax number of the office where the primary contact person of your organization will be located. 6. Enter the . Use the address of the primary person or office using the program. 7. Under TRANSMITTING COMPUTER?, make the following selections only if this computer is configured for a Non-Networked, Multiple Workstations setup or a Multi-Office Organization and Service Bureau setup. a. From the dropdown list: i. Select TRANSMIT if this computer will be transmitting directly to Central Site as a transmitting computer or a Main Computer. ii. Select TRANSFER if this is a non-transmitting computer that will be transferring data to a media that will then be transferred to a transmitting computer. iii. Select FEEDER if this is a Remote Computer that will be transmitting directly to Central Site to communicate with the Main Computer in a Multi- Office or Service Bureau configuration. b. Check the box next to TRANSFER INCOMPLETE RETURNS if you want all returns, including incomplete returns, to be transferred every time to the transmitting computer. 8. Under RECEIPT NUMBERS, a. Check the box next to REQUIRED if you want receipt numbers required for all Returns. If this box is checked, a Verify Error will occur if no receipt number is entered. b. Check the box next to AUTO ASSIGN if you want the program to automatically assign receipt numbers. c. Enter the RECEIPT RANGES according to minimum and maximum receipt numbers. This program allows you to set two separate Receipt Ranges to correspond to your own accounting system. 9. Under VERIFICATION SETTINGS, make the following selections to control the types of error messages that will appear while processing a tax return. a. Under PREVENT TRANSMIT ON, i. Mark the box FATAL ERRORS if you want printing and transmitting to be barred in the case of fatal verification errors. This is the default setting. 23
24 A fatal error is one that prevents the Return from being accepted by the IRS. ii. Mark the box ERRORS ABOVE WARNING if you want printing and transmitting to be barred in the case of verification errors above the warning level. This level of error includes errors that occur when a calculated field has been overridden by the User. iii. Mark the box ALL ERRORS/WARNINGS if you want printing and transmitting to be barred in the case of any and all verification errors. This level of error includes errors that occur when any field has been overridden, including those that are not necessarily relevant to the actual tax return calculations. b. Check the box DISPLAY WARNING-TYPE ERRORS if you want warning messages displayed during verification for any errors above the warning level. c. Check the box DISPLAY OVERRIDES AS ERRORS if you want to include overrides as part of the warning messages displayed above when the selection above has been made. d. Check the box SHRINK VERIFY LIST ON ENTER if you want the Errors on the Error List to disappear as they are remedied during the verification of a Return. 10. Click the bar APPOINTMENT ADDRESS to enter an address that will appear as the company address on calendar appointment letters. a. Enter the FIRM NAME, ADDRESS, CITY, STATE, ZIP AND PHONE. b. Click OK to save the information and close the window. 11. In the Application Settings window, click the second tab, E-FILING, to continue with Setup, or click OK to exit Setup and resume later. E-Filing Tab This information is used to auto-populate the data entry fields of Form 8879, the IRS e-file Signature Authorization and the Electronic Bank Application. 1. Enter the DEFAULT EFIN. This is the Electronic Filing Identification Number assigned to you by the IRS when you completed and filed Form 8633, Application to Participate in the e-file Program or when you applied for an EFIN online. 24

25 2. Enter the DEFAULT SBIN. This is the Service Bureau Identification Number provided by the IRS. If you do not have an SBIN, leave this field blank. 3. The IRS TELETAX NUMBER will already be entered. If this number changes throughout the tax season, you will be notified by us to change this phone number. 4. Check NO CROSS COLLECTION IN NY/ME if you will be processing returns in one of these states. Note: These states do not allow the banks to secure tax return refund money for any collections except debts owed to the government. 5. Check DISCARD ACK LETTERS to eliminate acknowledgment letters from the Work In Progress Summary. This should be selected if you do not send acknowledgement letters to your clients. 6. Check AUTO GENERATE PINS to automatically generate PIN numbers for the taxpayer and spouse on Form Check REQUIRE PREPARATION FEE if you want to receive a Verify Error and prevent the electronic filing of a RAC Return that does not include a preparation fee. This function creates a fatal error when a preparation fee is not present. See page 23 for details. 8. Check LEAVE THE TAX RETURN STATUS AT ACKNOWLEDGED FOR BANK PRODUCTS to leave the tax return status of an electronically filed return that has an associated bank product as Acknowledged until the bank product has been funded. If this box is not checked, the return status will be Completed when the final return has been printed. 9. Under PROMPT TO FILE STATE ELECTRONICALLY, use the dropdown list to choose one of the following by clicking on your particular choice: a. ALWAYS-The user will be prompted by a Verify Error when the return is transmitted if a State Electronic Filing Signature Document is missing. This will always occur regardless of whether the state return must be electronically filed. b. WHEN REQUIRED-The user will be prompted by a Verify Error when the return is transmitted if a State Electronic Filing Signature Document is missing, and the state return is required to be electronically filed with the federal return. c. NEVER-The user will not be prompted that a State Electronic Filing Signature Document is missing. 25

26 10. In the Application Settings Window, click the third tab, OVERRIDES to continue with Setup, or click OK to exit Setup and resume later. Overrides Tab (Optional) This information is optional. If provided here, this information will always appear in Forms 1040 and/or 8879 and cannot be altered. If you will be using more than one ERO (Electronic Return Originator) with different EFIN s (Electronic Filing Identification Numbers), leave this blank and enter this information in Database Setup on page Enter the first set of fields (COMPANY NAME, EIN, ADDRESS, CITY, STATE, ZIP, and SELF-EMPLOYED check box) for the information you want to have appear on every Form 1040 you prepare. 2. Enter the second set of fields (ERO S NAME, EIN, FIRM ADDRESS, CITY, STATE, ZIP, SELF-EMPLOYED check box, and SBIN) for the information you want to have appear on every Form 8879 you prepare. 3. Under SITE ID, enter a default Site ID next to DEFAULT if you want to assign one Site ID for all Returns prepared on this computer. If your system uses non-transmitting computers at different sites, you can enter a different Default ID here in each nontransmitting computer. If you have computers at different sites connected to a network, you should not enter a default site ID. 4. Check the box next to REQUIRED if you want a verify error message to appear if no Site ID is entered. This function should be used if Returns are being prepared at more than one office and Site IDs have been assigned to those different locations. 5. Under AUTO ADD STATE RETURN (Personal Returns Only), 26
27 a. As the first option, next to AUTO ADD STATE RETURN FROM, select from the first dropdown list: i. DISABLE AUTO ADD to disable this function which automatically adds a state return to a return file if there are state wages on the Form W-2. ii. CLIENT DATA SCREEN to automatically add a state return to the Return File for the state listed as the Taxpayer s resident address, or iii. ERO SPECIFIED to always add a state return to the Return File for the state listed for the ERO preparing the return. b. As a second option, select a state from the second dropdown list to automatically add a state return for that particular state to every Return File. c. Next to AUTO ADD STATE RETURN BASED ON W-2, check the box to automatically add a state return if the W-2 has state return information. 6. Next to DEFAULT TAXPAYER S PHONE NUMBER FROM, select from the dropdown list the type of phone number you would like to always use as the Taxpayer s phone number in reports. 7. In the Application Settings Window, click the fourth tab, DEFAULTS to continue with Setup, or click OK to exit Setup and resume later. Defaults Tab (Optional) Similar to the Overrides Tab, this tab allows you to set default information and is also optional. 1. Under Application Level, a. Check JUMP CURSOR PAST CITY/STATE if you want the cursor to bypass the city and state fields and go right to the zip code field. If the city and state appear in the database, the program will automatically enter the correct city and state for the zip code entered. This feature can be disabled in an individual Login account. See page 51 for details. b. Check ENABLE RETURN OWNER LOCKING so that only the Preparer of a Return or an Administrator of the program is able to access a Return. See page 51 for the setup of Administrators and other limited access Users under Login Accounts. c. Check AUTO ADD FILING OPTIONS to add the Filing Options Fee Comparison chart to the return. d. Check Enable DOUBLE ENTRY VALIDATION to enable the program to require double entry of the bank account information on the Client Data screen. 27

28 e. Check LOCK FINISHED PAPER RETURNS to lock completed paper returns, which can only be reopened under certain login accesses. See page 51 for more information on login accesses. f. Check BLIND ENTRY FOR ADD NEW RETURN to mask the Taxpayers SSN when creating a new tax return. g. Check BYPASS ALL KEY TRACKING to turn off the auto text on the choice list fields within a return. h. Next to DEFAULT STATE RAC TO Y/N, select Yes from the dropdown list to allow the addition of a State RAC to a Return File. If No is selected or if no selection is made, a State RAC will not be available. i. Check SILENTLY SAVE RETURN ON CLOSE to save any changes made to a return when it is closed without prompting. j. Check USE WINDOWS LOGIN NAME to use the same login name assigned for the Windows program on this computer. k. Check ALLOW ONLY FULL 1040 RETURNS if you want to disallow the preparation of 1040A s and 1040EZ s. l. Check SYSTEM CLOCK WITH USNO to stop the program from defaulting to this time, EST, when communication with Central Site occurs. m. Check USE WINDOWS HOTKEYS to use the default Windows shortcut keys CTRL+V, CTRL+C AND CTRL+P to cut, copy and paste. n. Check MASK SSN/EIN to only display the last 4 digits of either the SSN or EIN on the Return Lookup screen. o. Next to AUTO SAVE AFTER MINS enter the number of minutes for a desired time interval in which a Return will be automatically saved. 2. Under Year to Year, a. Check EXCLUDE FORMS W2/1099 to not have the W-2 and 1099 forms transfer from one year to the next with the taxpayer s information. 28
29 b. Check EXCLUDE DOCUMENT to not have Documents transfer from one year to the next with the taxpayer s information. c. Check INCLUDE PREPARER INFO ON 1040 to include the Preparer Information when a return is transferred from the prior year. 3. Under Return Level, a. Check REQUIRE THIRD PARTY DESIGNEE to require the user of the program to enter a third party designee to each return. b. Check REQUIRE USER STATUS if you want to require the input of a User Status Code for every Return. c. Check REFERRAL REQUIRED to require the user of the program to select a referral type on the Client Data Sheet. 4. In the Application Settings Window, click the fifth tab, GENERAL to continue with Setup, or click OK to exit Setup and resume later. General Tab (Optional) Similar to the Overrides Tab, this tab allows you to set default information and is also optional. 1. To change the FONT SET, use the drop down list to select a new font setting. The Default font setting is 1 and is based on a screen setting of 1024 x 768 pixels. Default +1 will increase the Font size by ⅛ and Default +2 will increase the default size by ¼. Default -1 will decrease the Font size by ⅛, and Default 2 will decrease the Font size by ¼. 2. Enter a default PRIOR YEAR PATH or click on BROWSE to locate the appropriate prior year path. This setting fixes the path for the transfer of data from the previous year to the current year. 3. Enter a default RETRIEVAL PATH or click on BROWSE to locate the appropriate retrieval path. The program will save transferred Returns to this location when the Retrieve Returns option of the Utility Menu is selected. See page 189 for more information on retrieving returns. 4. Enter a default TRANSFER PATH or click on BROWSE to locate the appropriate transfer path. The program will save returns to this location when the Transfer Returns option of the Utility Menu is selected or when the Transfer Returns/ option is selected from the Work In Progress Summary screen. See page 190 for more information on transferring returns. 5. Under BACKUP, 29
30 a. Check ENABLE BACKUP to enable the Backup Returns option of the Other Items list in the Work In Progress Summary screen. With this option enabled, created or modified tax returns are saved to the Backup Returns list and are available for saving externally from the program. Returns saved externally can be restored if and when that option is needed. See page 184 and 187 for more information on the backup and restoration of Returns. b. Enter the default BACKUP FILE PATH or click on BROWSE to locate the appropriate backup path. This is the path the program will use to backup data and retrieve data if and when necessary. It is best to use an external storage device such as a CD/DVD, memory stick, or Zip Drive. See page 187 for more information on a complete backup or restoration of all tax software data. 6. Under Billing, a. Next to 1040 BILLING, select a default Billing Scheme for individual Returns from the dropdown list. See page 41 for setup of the Billing Scheme. b. Next to BUSINESS BILLING, select a default Billing Scheme for business Returns from the dropdown list. See page 41 for setup of the Billing Scheme. 7. In the Application Settings Window, click the sixth tab, AUTH/AUDITS to continue with Setup, or click OK to exit Setup and resume later. Auth/Audits Tab This tab displays the proper authorization codes necessary to enable interaction with the program and other optional software packages that can be purchased. The authorization codes are automatically downloaded to transmitting computers during communications with Central Site. Additionally, this tab allows you to customize the Diagnostic system to run optional error checks for Earned Income Credit, Schedule A, and Schedule C, E, F, and Forms 4835 and These options can be very useful for ensuring the IRS Regulatory Requirements are being met. 1. Under AUTHORIZATIONS, a. For a Transmitting Computer, no action on your part under this tab is necessary. b. For a Non-Transmitting Computer, 30 iv. Copy the Authorization codes from the transmitting Computer s Authorizations tab into the same boxes in the non-transmitting computer s Authorizations tab. There may not be an Authorization code for every box.

31 2. Under TAX RETURN AUDITS (Personal Returns Only), a. Click the EARNED INCOME CREDIT button to enable the optional error checks. The Earned Income Credit Validation Checks window will open. i. Check each box and enter a minimum or maximum dollar amount for each situation for which you want an error to appear if that particular issue arises. The tax preparer will be prompted if the taxpayer is not qualified for the EIC or if the tax payer needs to provide additional details and documentation. ii. Click OK to save these settings and close the window. b. Click the HEAD OF HOUSEHOLD button to enable the optional error checks. The Head of Household Validation Check box will open. i. Check each box and enter a minimum or maximum dollar amount for each situation for which you want the tax preparer to be prompted to ask the taxpayer for details and documentation while the return is being prepared. The tax preparer will have to check a box while the return is being prepared affirming that he or she asked the appropriate question. ii. Click OK to save these settings and close the window. c. Click the SCHEDULE A button to enable the optional error checks. The Schedule A Validation Checks window will open. i. Check each box for each situation for which you want an error to appear if that particular issue arises. The percentages and amounts set in the boxes should not be changed as they reflect the limitations of the current tax laws. A verify error will appear, and the tax preparer will be prompted with the requirements to take that particular deduction. ii. Click OK to save these settings and close the window. d. Click the ADDITIONAL SCHEDULES/FORMS button to enable the optional error checks to Form W-2, Schedules C, E, F, and/or Forms 4835 and The Additional Schedules/Forms Validation Check window will open. 31

32 i. Check each box for each situation for which you want an error to appear if that particular issue arises. A verify error will appear, and the tax preparer will be prompted with the requirements for the credit or deduction. ii. Click OK to save these settings and close the window. e. Click the AMERICAN OPPORTUNITY CREDIT button to enable the optional error checks to this credit. The American Opportunity Validation Check window will open. i. Check each box for each situation for which you want the tax preparer to be prompted to ask the taxpayer for details and documentation while the return is being prepared. The tax preparer will have to check a box while the return is being prepared affirming that he or she asked the appropriate question. ii. Click OK to save these settings and close the window. f. Click the Tax Alerts button to enable the optional error checks to Form 8880, the age of a taxpayer who has received social security benefits during the year, and the Income and Info Details Checklist. i. Check each box and enter the age for each situation for which you want the tax preparer to be prompted to ask the taxpayer for details and documentation while the return is being prepared. 3. In the Application Settings Window, click the seventh tab, TEXTMSG to continue with Setup, or click OK to exit Setup and resume later. TextMsg/ Tab This tab must be setup in order to enable the TextLink or function. A free Google account must be created first. TextLink allows you to contact your clients by text messaging at no extra cost and allows you to contact and send documents to your customer directly through the program. 1. Under Mail Settings, a. Enter your Google and PASSWORD if you already have a Google account. Do not 32
33 b. Or click the REGISTER FOR A FREE GOOGLE ACCOUNT button, and follow the onscreen directions if you do not already have a Google account. Alternatively, visit to create an account. 2. Under ADVANCED-SMTP SETTINGS (OPTIONAL), enter the Server URL and Server Port only if these settings need to be changed. This is optional and should not be completed unless necessary. 3. In the Application Settings Window, click OK to save and exit OFFICE SETUP. Printer Setup From the Opening Screen, click on SETUP in the Menu Bar, drag the arrow down to PRINTER SETUP, and click once. The first tab in the new application settings screen will be PRINTER SETTINGS. Printer Settings Tab This tab allows you to change the default printer for different functions and adjust the check printing defaults. This enables you to have separate printers for creating returns, checks and reports. If changes are not made in this tab, the program automatically sets the Windows Default Printer for all functions. See page 14 for Printer Requirements. 1. Under Default Printer(s), a. Check PROMPT FOR TAX RETURN PDF if you want the program to prompt the User to create a PDF when printing Final Returns. If you check this box, you must enter a path in the PDF Printing Options tab which will be covered shortly. b. Check USE GDI PRINTER INTERFACE to enable the use of a GDI printer for printing returns only. c. Next to TAX RETURN, CHECK, and REPORT, select a default printer from the dropdown list for each of these functions. 2. Under CHECK PRINTING, a. Change the default number of 50 if you need to adjust the text on a check either up or down. A change to 51 will lower the text by one-tenth of a line. A change to 49 will raise the text by one-tenth of a line. b. Check REMOTE PRINTING BY SITE if you want to enable the ability to print checks at remote sites. To use this feature, you must have a Virtual Private Network between the transmitting computer and non-transmitting computer or between the transmitting computer and the offsite printer. See page 69 for more information and setup of the Site ID. 33

34 3. Under TAX ESTIMATOR-NUMBER OF COPIES TO PRINT, a. Under TAX ESTIMATION, EF DECLARATION/PIN AUTHORIZATION, BANK APPLICATION, and PRIVACY LETTER, enter between 1 to 4 to choose how many copies of each item you want printed when the Tax Estimator is printed. 4. Under SIGNATURE PAD SELECTION, a. Select the bullet next to USE TOPAZ PAD, if applicable. b. Select the bullet next to USE SCRIPTEL PAD, if applicable. c. Select the bullet next to USE ON-SCREEN SIGNATURES, if applicable. 5. In the Printer Settings window, click the second tab, 1040 RETURN PRINTING, or click OK to exit Setup and resume later Return Printing Tab This tab allows you to select which forms, worksheets, and reports will print when you select the printing of the final individual return. 1. Under PREPARER, a. Check the boxes of forms, worksheets, and reports, of which you need to retain a copy. b. Check SEND TO PRINTER to have the selected forms sent to the printer and/or check SEND TO ARCHIVE to have the selected forms sent to the archive file. Additionally check SEND TO to have the selected forms sent the associated address on file. 2. Under CLIENT, a. Check the boxes of forms, worksheets, and reports, of which you need to give to your client as their copy. b. Check SEND TO PRINTER to have the selected forms sent to the printer and/or check SEND TO ARCHIVE to have the selected forms sent to the archive file. 34


35 Additionally check SEND TO to have the selected forms sent the associated address on file. 3. Under E-FILED, check SEND TO PRINTER to have the Forms 8453 and 8879 sent to the printer and/or check SEND TO ARCHIVE to have these forms sent to the archive file. The large X s show documents that are always produced. 4. Under FEDERAL ONLY IF NOT E-FILED, a. Check ASSET DETAIL and WORKSHEETS if you will be completing paper federal returns to produce these documents. The large X s show documents that are always produced. b. Check SEND TO PRINTER to have the produced documents sent to the printer and/or check SEND TO ARCHIVE to have these documents sent to the archive file. Additionally check SEND TO to have the selected forms sent the associated address on file. 5. Under STATE ONLY IF NOT E-FILED, a. Check ASSET DETAIL and WORKSHEETS if you will be completing paper state returns to produce these documents. The large X s show documents that are always produced. b. Check SEND TO PRINTER to have the produced documents sent to the printer and/or check SEND TO ARCHIVE to have these documents sent to the archive file. Additionally check SEND TO to have the selected forms sent the associated address on file. 6. In the Printer Settings window, click the third tab, PRINT OPTIONS, or Click OK to exit Setup and resume later. 35

36 Print Options Tab This tab allows you to select additional printing options. 1. Under BATCH PRINTING OPTIONS, a. Next to BATCH PRINT ON CTRL-P, select from the dropdown list, i. PRINT IMMEDIATE to print the return as soon as [Ctrl+P] is pressed, or ii. BATCH PRINT to queue the jobs for batch printing when [Ctrl+P] is pressed. The queued jobs will appear on the Work in Progress Summary Screen under the Printing Queue, or b. Check BATCH PRINT ON CTRL-T to queue jobs for batch printing when [Ctrl+T] is pressed. This is the same function that transmits Returns to Central Site for transmitting computers or transfers jobs from a Non-Transmitting computer to a Transmitting computer. Checking this box adds the additional function of queuing jobs for batch printing to the Ctrl+T function. 2. Under PDF PRINTING OPTIONS, a. Click on the BROWSE button to search for the folder in which you want to save your PDF s or type in the location of the folder. b. Check USE EXTERNAL PDF READER if you want to view the PDF in Adobe Acrobat Reader when it is created. c. Check ALWAYS ENCRYPT GENERATED PDF to always create an encrypted PDF. d. Check USE SSN FOR FILE NAME to create a PDF with the Taxpayer s social security number assigned as the name of the PDF file. e. Check DOCARCHIVE ON WINDOWS XP if there are issues with viewing the PDF without this option selected. This selection is recommended if the computer is operating under the Windows XP program. 36
37 3. Under CURRENT FORM/BANK APP OPTIONS, a. Check ASSET DETAIL W/BUS ACTIVITIES if you want an automatically printed report of assets and depreciation when Business Activity Forms are printed. (Examples: Schedules C, E, F and Form 4562). This option only controls the printing of assets when a currently selected form is being printed. b. Check ALWAYS PRINT SIGNED DOCUMENTS to print all documents which have an electronic signature associated. c. Check TURN OFF ESIGNATURE FORM PRINTING to disable the SignDoc button that allows the user to print forms with an electronic signature. d. From the dropdown list in PRINT WORKSHEETS, choose NONE to print no associated worksheets when a form is printed, choose ALL to print all associated worksheets when a form is printed, or choose SELECT to be given the option to select from a list of worksheets at the time of printing. e. Check OVERFLOW DETAIL(S) if you want a report of any user defined overflow entries (also called miscellaneous entry items). f. Check PREPARER COPY FOR BANK APP to print a copy of the bank application. g. Check NO PAYMENT VOUCHER WITH 8879 to not print the payment vouchers with the Check PRINT PREPARER COPY IF VERIFIED W/ERROR if you want to prevent the printing of a client copy if the return was not verified error-free. This is a helpful feature if you would like to review a return on paper when there are verification errors, but you do not want to print a copy for the client. 5. Check PRINT PAYMENT VOUCHER W/PAPER RETURNS if you want the payment voucher automatically printed with the paper return. The payment voucher should be mailed with the taxpayer s tax payment to the proper taxing authority. 6. Check PRINT FIELD VALUES IN BOLD if you want data entered into the fields of the documents printed in bold. The dollar values will appear on the Return in bold making them easier to read. 7. Check COMPLETED ON PRINT FINAL FOR PAPER RETURNS if you want the status of paper returns to be completed after they have been printed. 8. Check PRINT TAX SUMMARY WITH BANK DOCUMENTS if you want a summary of the tax return to print when the bank documents are printed. 37
38 9. Check ADD PRINTED PREPARER S NAME TO 1040 if you want the paid preparer s name automatically printed on the Form Check PRINT 8879/8453 WITH BANK DOCUMENTS if you want the Forms 8879 and 8453 to automatically print when the bank documents are printed. 11. Check DO NOT PRINT ITEMIZED FORM BILLING if you do not want an itemized bill printed, and only want a summary of the bill printed. 12. Check DISABLE INCOME SUMMARY SIGNATURES if you want to disable the function that prints the Income and Information Details Checklist, along with Taxpayer and Preparer Signature lines, which acknowledges that all of the information is accurate and complete. 13. Check OPT-OUT COMPLETED RETURN TRANSFER if you want to disable the transfer of completed returns during a transfer from a non-transmitting computer to a transmitting computer. 14. Check PRINT INVOICE W/8879/8453 EF DOCUMENTS if you want the Forms 8879 and 8453 to automatically print when electronic filing documents are printed. 15. Check PRINT DATE ON PAGE 2 OF 1040 RETURN if you want the 1040 forms to display the date the return was printed. 16. Check PRINT PAGE NUMBERS if you want page numbers to appear on each page of the return. 17. Check PRINT SITE ID ON EACH PAGE if you want the Site ID entered on the Client Data Screen to print on the top of each page of the return. 18. Check PRINT COPY SEPARATION PAGES if you want a blank piece of paper to be included between the Preparer, Client, Federal, and State copies of the return. 19. Check NO PRINT FINAL ON INVOICE DUE if you want to prevent the printing of a final return if the invoice for the return is not yet paid in full. 20. Check EXIT TAX RETURN ON PRINT FINAL if you want a current tax return to be closed when the final printing is completed. 21. Check TURN ON SSN MASKING to enable the masking feature of the Taxpayer s social security number. If this box is checked, the Taxpayer s social security number will appear as XXX-XX-1234 on all worksheets, invoice, and any other paperwork with the exception of the actual returns. 22. Check TURN ON PTIN MASKING to enable the masking feature of the Preparer s Taxpayer s Identification Number. 38


39 23. Check TURN ON EIN MASKING to enable the masking feature of the Employer Identification number. 24. Check DO NOT PRINT PAGE 2 OF INVOICE if you do not want the second page of the invoice printed, which shows the prior year balance, total payments received, net invoice amount, and the amount to be paid by the financial institution. 25. Check 8879 LAST PRINTED VERIFY to notify the User if the Form 8879 has changed because of other changes made in the return file and therefore needs to be reprinted. 26. Check EXCLUDE PRIVACY LETTER if you do not want the Privacy Letter included with the Return. Please note that this letter may be required for certain transactions and in certain jurisdictions. 27. From the dropdown list next to SIGNATURE BLOCK, select BLANK to print the Return and other documents with the Signature Block blank, select X-OUT to print the Return with the Signature Block with an X over the signature, and select BLACK OUT to print the return with the Signature Block as blacked out. 28. In the Printer Settings window, click the fourth tab, BUS. RETURN PRINTING, or Click OK to exit Setup and resume later. Business Return Printing Tab This tab allows you to select which forms, worksheets, and reports will print when you select the printing of the final business return. 1. Under PREPARER, a. Check the boxes of forms, worksheets, and reports, of which you need to retain a copy. b. Check SEND TO PRINTER to have the selected forms sent to the printer and/or check SEND TO ARCHIVE to have the selected forms sent to the archive file. Additionally check SEND TO E- MAIL to have the selected forms sent the associated address on file. 2. Under CLIENT, a. Check the boxes of forms, 39
40 worksheets, and reports, of which you need to give to your client as their copy. b. Check SEND TO PRINTER to have the selected forms sent to the printer and/or check SEND TO ARCHIVE to have the selected forms sent to the archive file. Additionally check SEND TO to have the selected forms sent the associated address on file. 3. Under E-FILED, a. Check SEND TO PRINTER to have the Forms 8453 and 8879 sent to the printer and/or check SEND TO ARCHIVE to have these forms sent to the archive file. Additionally check SEND TO to have the selected forms sent the associated address on file. The large X s show documents that are always produced. 4. Under FEDERAL ONLY IF NOT E-FILED, a. Check ASSET DETAIL and WORKSHEETS if you will be completing paper federal returns to produce these documents. The large X s show documents that are always produced. b. Check SEND TO PRINTER to have the produced documents sent to the printer and/or check SEND TO ARCHIVE to have these documents sent to the archive file. Additionally check SEND TO to have the selected forms sent the associated address on file. 5. Under STATE ONLY IF NOT E-FILED, a. Check ASSET DETAIL and WORKSHEETS if you will be completing paper state returns to produce these documents. The large X s show documents that are always produced. b. Check SEND TO PRINTER to have the produced documents sent to the printer and/or check SEND TO ARCHIVE to have these documents sent to the archive file. Additionally check SEND TO to have the selected forms sent the associated address on file. 6. In the Application Settings Window, click OK to save and exit PRINTER SETUP. Billing Setup From the Opening Screen, click on SETUP in the Menu Bar, drag the arrow down to BILLING SETUP, and click once. The BILLING SETUP window will open. 40

41 This function enables use of the program s Client Invoicing feature allowing you to bill your clients for tax preparation fees simultaneous to preparing their Returns. Please follow these directions only through Step 1 if you do not plan on using this feature. There are two Billing Setups available: The 1040 Individual Return Billing Setup is available when you are working in the 1040 program, and the Business Return Billing Setup is available when you are working in the Business Return program. The directions below can be used for both programs. 1. If you do not intend to use the invoicing feature, check the box next to DISABLE INVOICING which can be found on the bottom right hand side of the screen under the GENERAL tab and move to the next section, LOCAL SETUP. 2. To use the invoicing feature, under BILLING SCHEME, a. Click the SAVE AS button to create a new Billing Scheme. The Billing Setup window will open. b. Enter a name for the Billing Scheme and click OK. The name for this Billing Scheme will appear on the dropdown list, and it will be assigned a Billing ID number. The directions that follow will setup this new Billing Scheme. Additional Billing Schemes can be created and selected from the dropdown list. 3. Under the GENERAL tab, a. Under OFFICE INFORMATION TO BE PRINTED ON EACH BILLING INVOICE, enter the Company Name on the first line, the Street Address on the second line, and the City, State, and Zip on the third line. Alternatively, enter your proper mailing address in this area. b. Next to STATE SALES TAX RATE, enter the proper State, County, or other Local Sales Tax Rate if this applies to you. Check your state and local laws to determine whether tax preparation is a taxable item where you are located and the appropriate tax rate. c. Enter the SELF PREPARED FLAT FEE to charge a flat fee for data entry and electronically file returns for taxpayers that self-prepared their returns. 41
42 d. Check NO PRIOR YEAR BALANCE ON INVOICE to prevent the program from transferring a balance due on the tax preparation of a return from one year to the next. e. Check DON T BILL FOR SCH A WHEN USING STD DEDUCTION to prevent the program from charging for this form when the Standard Deduction amount is being used. f. Check TURN OFF DEFAULT BANK APP DISBURSEMENT to require the preparer to select the type of bank product disbursement on the bank application. g. Check PREVENT TRANSMIT ON RETURNS WITH A BALANCE DUE to require the invoice be paid in full prior to transmitting the return. h. Enter the TAX PREPARATION DISCOUNT, if applicable, as a percentage. This amount will be subtracted from the total due on every invoice processed under this Billing Scheme. (Example: This may be a Military Discount Billing Scheme that gives members of the military a 20% discount.) An entry for an optional discount for selected returns is also available further below. i. Enter the DEFAULT HOURLY RATE you charge for preparing returns if you charge by the hour. If you instead charge by the form, do not make an entry here and use the Form Billing tab instead. j. Check COLLECT TAX ON BILLINGS to add the State, County, or other Local sales tax to the collectable amount of the Invoice. k. Check BILL FOR EF FORMS ONLY if you want to charge only for the forms that are part of the final tax return. Any forms or worksheets used in preparation of the tax return, that do not become part of the final tax return, will not be billable. 4. Under the FORM BILLING tab (for itemized billing by the form instead of an hourly rate), a. The first item in the dropdown list will be US-FEDERAL. 42


43 b. If you charge a fee for every form: i. Under PER ITEM, enter the amount you charge for each form. Leave the other columns blank. Example: You charge $25 per W-2. If a client has 1 W-2 Form, he will be charged $25. If instead the client has 3 W- 2s, he will be charged $75. If you do not charge for a specific form, leave the amount blank. c. If you charge a base price for up to so many of one type of form, i. Under BASE QTY, enter the number of forms included in the base price. ii. Under BASE PRICE, enter the amount of the fee charged if one or more of those forms is included on the return. iii. Under PER ITEM, enter the amount you charge for each additional form over the Base Quantity. Example: You charge $100 for up to the first 5 W-2s on a return. If more than 5 W-2s are added to the return, then you charge $20 each. If a client has 1 W-2, she will pay $100 for the addition of the W-2 to the return. If the client has 5 W-2s, she will pay $100 for the addition of the 5 W-2s to the return. If the client has 6 W-2s, she will pay $120, $100 for the first 5 W-2s and $20 for the last W-2. d. Return to the dropdown list and pick the first state and/or the other federal forms (i.e. AL-Alabama for Individual Returns or US Federal 1120S for Business Returns) for which you will be filing returns, if applicable. Enter the amount you charge for each state form according to the directions above. e. Continue to select all of the federal forms and/or states for which you will be filing returns, and enter how much you charge for each form. 43

44 5. Under the WORKSHEET tab, follow the directions for each worksheet in the same manner as directed above for forms. 6. Under the LINE ITEMS tab, follow the directions for each line item in the same manner as directed above for forms. 7. Under the DISCOUNTS TAB, enter a DISCOUNT NAME, and a DISCOUNT PERCENTAGE or a DISCOUNT AMOUNT that can be applied to an invoice with this Billing Scheme. This is an optional discount code that can be applied while the return is being prepared. 8. Under the CUSTOM CHARGES TAB, enter a CHARGE DESCRIPTION and an AMOUNT that can be applied to an invoice with this Billing Scheme. This is an option for customizable charges that can be applied while the return is being prepared. 9. Under the CUSTOM SETTINGS TAB, will display the premium services that you are enrolled in along with the Base Fees and the Add On/Mark Up Fee Amount associated with each premium service. a. Check AUTO ADD AUDIT PROTECTION (FINANCIALS ONLY) to automatically add this product to every individual return that has an associated bank product. b. Check AUTO ADD AUDIT PROTECTION (NON FINANCIALS ONLY) to automatically add this product to every individual return that does not have an associated bank product. c. Check AUTO ADD CADR PLUS (FINANCIALS ONLY) to automatically add this product to every individual return that has an associated bank product. 10. In the Billing Setup window, click OK to save and exit BILLING SETUP. You will be prompted to save this new Billing Scheme as a default Billing Scheme. A different Billing Scheme can be set as a default. See page 30 for more details. Alternatively, click the SAVE AS button to create an additional Billing Scheme by following the directions above. Local Setup From the Opening Screen, click on SETUP in the Menu Bar, drag the arrow down to LOCAL SETUP, and click once. The Application Settings window will open. 44


45 This function allows you to create default settings for a particular computer or workstation that is connected to other computers or workstations, which may have different Local settings. 1. For FONT SET, see page 29 for directions. 2. For PRIOR YEAR PATH, RETRIEVAL PATH, and TRANSFER PATH, see page 29 for directions. 3. For BACKUP PATH, see page 30 for directions. 4. For DEFAULT PRINTER options, see page 33 for directions. 5. In the Application Settings window, click OK to save and exit LOCAL SETUP. Client Letters From the Opening Screen, click on SETUP in the Menu Bar, drag the arrow down to CLIENT LETTERS, and click once. The CLIENT LETTERS window will open. This function allows you to customize the Client Letters already created by the program or create your own letters for both Individual and Business Returns. The letters are available in both English and Spanish when you print them for a client. Default letters have already been created, and this setup is only necessary if you wish to modify them or add your own custom letters. If you would like to leave the default letters as they are, please skip to the next step on page 48, Login Accounts. When you open Client Letters Setup, it will look as follows: Different functions in Client Letters are available from the following three areas: 45
46 Client Letters Menu Bar - Located along the top of the screen. To open a Menu item, click on that particular Menu item, scroll down to the appropriate function, and click on it once. Client Letters Toolbar - Located just below the Menu Bar allowing quick access to frequently used features. To use a Toolbar function, click on the button. Return Type Located just below the Toolbar, different tabs are available to choose a letter according to the type of Return being filed, including Individual (1040), Partnership (1065), Corporation (1120), S-Corporation (1120S), Estates and Trusts (1041), and Organization exempt from Income Tax (990) Returns. Client Letters Editor - Located below the Toolbar. To Open, View, Edit, and Save a Client Letter: 1. Select the tab of the type of Return for which you want to edit a letter. The 1040 tab has a list of letters for Individual Returns, the 1065 tab has a list of letters for Partnership Returns, the 1120 tab has a list of letters for Corporation Returns, the 1120S tab has a list of letters for S-Corporation, the 1041 tab has a list of letters for Estates and Trusts, and the 990 tab has a list of letters for Organizations Exempt from Income Tax Returns. 2. Under CLIENT LETTERS in the Client Letters editor, select the letter you would like to view and/or modify by clicking on it. Example: To open the Federal Extension letter, click on Extension under the listing of Federal. The letter you are currently viewing will be highlighted. Note: Not every section appears in every letter, so the body of the letter might be blank when you first open it. a. To view Client Letters in Spanish, i. Click on FILE in the Menu Bar, and scroll down to OPEN. The SELECT A CLIENT LETTER TO EDIT window will open. ii. Highlight SPANISH and click OPEN. The window will close and the Client Letters will now appear in Spanish. iii. Highlight ENGLISH after following the directions above to return the Client Letters to English. 3. Under SECTIONS, select the area of the chosen letter you would like to view and/or modify. The section you are viewing will be highlighted. If the section you click on is not used in the letter you have clicked on, the large screen on the right will remain blank. Once you click on a section that is used in the letter you have chosen, writing will appear in the large right hand screen. 46
47 4. To edit sections of the Client Letter, a. Modify the letter by adding, deleting, or changing the verbiage within the letter. b. CUT, COPY, AND PASTE by going to EDIT, and scrolling down to the needed function. c. To use the Keywords function, which allows you to enter variables such as First Name and Last Name, i. Place the blinking cursor in the letter where you would like to insert the Keyword. ii. Click on and the KEYWORD window will open. This function is also available from the Menu Bar under Tools. iii. Choose the Keyword you would like to use from the list by clicking on it. The Keyword will become highlighted. iv. Click INSERT. To enter another Keyword, click on it to highlight it and click Insert. v. Click CLOSE when you are finished entering Keywords. d. To check the spelling of the letter, i. Click on and the Spelling window will open only if there are any spelling errors in the letter. The misspelled words will be underlined in red. Make appropriate spelling changes as necessary. e. To make other changes, i. Click on the other buttons and use the dropdown lists on the Toolbar to change the font type, font size, font bolding, and paragraph alignment. f. Click on the next Section of the letter you want to edit. You will be prompted to save the previous section just edited. Click YES to save or NO to keep the previous version of the edited section. 5. To preview the Client Letter, a. Click on and the Preview Client Letter window will open. Additional letters can be previewed by choosing from the dropdown list at the bottom of the screen and clicking PREVIEW. Click CLOSE when you are finished previewing the letter. 47
48 6. To save the Client Letter, a. Click on to save the Client Letter to the current location, or click FILE in the Menu Bar and scroll down to SAVE AS to save to a new location. Create a file name for the Client Letter in the new location. 7. To open a Client Letter saved to a new location, a. Click to open the SELECT A CLIENT LETTER TO EDIT window. Select the new file to open. This function is also available from the Menu Bar under FILE. 8. To abandon changes made to a letter and reset the default letter, a. Click to restore the letter to the original. Please note that all edits made to this section of the Client Letter will disappear. This function is also available from the Menu Bar under EDIT. 9. Click to insert the Tax Preparer s black and white bmp file logo into Client Letters. 10. Click FILE in the Menu Bar and scroll down to EXIT to exit Client Letters. Login Accounts From the Opening Screen, click on SETUP in the Menu Bar, drag the arrow down to LOGIN ACCOUNT, and click once. The LOGIN ACCOUNTS window will open. This function allows you to create and edit user logins and passwords for enhanced security purposes. It also allows the prohibition of users into certain areas of the program by the use of Access Levels. Each user must have their own unique Login ID and Password, making this step a requirement if more than one user will be preparing returns. One Administrator login account is already created when you open the program. If a user has forgotten their password or been locked out their account see pages 187 and 188 for instructions. To set the Administrator preferences, or create Login Accounts, Passwords and Access Levels: 1. Under Login Accounts, a. Click EDIT to modify the default Administrator s Login preferences, or click ADD to add a new Login Account. The Login Preferences screen will appear. Repeat the following process until all Login Accounts have been added. 48


49 b. Under LOGIN DETAIL, i. Enter the LOGIN ID of the first user. ii. Enter the LOGIN NAME of the first user. iii. Enter the ADDRESS of the first user. The Address is required to utilize the Forgot Password tool. iv. Enter the CELL PHONE NUMBER of the first user. The Cell Phone Number is required to utilize the Forgot Password tool. v. Enter the PASSWORD of the first user. vi. CONFIRM PASSWORD by entering it a second time. vii. Select the ACCESS LEVEL for this user which is set to ADMINISTRATOR by default. See the directions below for customizing access levels. viii. Select the PREPARERS SHORTCUT ID from the dropdown list or click the NEW button to open the Paid Preparer Information window from the Database. These ID s will be set up later in the Database Setup, but the button allows a new ID to be created during the creation of Login Accounts. See page 56 for details. ix. Check DISABLE LOGIN ACCOUNT to turn off access to the program for specific logins. 49
50 x. Check TRAINING RETURNS ONLY to limit this User to preparing training returns only. xi. Check SHOW FEES IN TRANSMIT FILTER WINDOW to display the fees due (in addition to the amount of refund) for each return during transmission. xii. Check DISPLAY INVOICE SHORT FORM to display the short form instead of the longer form invoice for this Login. xiii. Check HIDE WORK IN PROGRESS COUNTS if you want to hide the counts of items in the Work In Progress Summary screen. Some preparers prefer this information to be kept private. c. Under LOGIN PREFERENCES, i. Choose the COLOR SCHEME the user of this Login prefers from the dropdown list. Color schemes can be customized. See page 52 for details. ii. Choose the CLIENT DATA SCREEN the user of this Login prefers from the dropdown list. You can experiment with the three different formats to see which one works best for you. iii. Choose the QUESTIONNAIRE the user of this Login prefers from the dropdown list. A standard English or Spanish Questionnaire can be selected, or a custom Questionnaire can be selected and setup later in the Questionnaire Setup. See page 53 for details. iv. Choose ENGLISH or SPANISH for the CLIENT LETTERS for this Login. This creates a default for the type of letter that will be created for a client when their Return is prepared by a particular User. However, this default can always be changed for an individual Client when you are working within their Return. v. Choose the LOOKUP SORT BY option from the dropdown list. Clients can be searched by social security number, last name, or in the order in which they are added to the database when using the Lookup function on the toolbar to find clients. You may not know at this time which system will work better for you-this is something you can always change later. vi. Check USE TRANSCRIPTION MODE if you want to enter pre-prepared tax returns. This function disables the Display Overrides as Errors function and allows data entry into otherwise calculated fields without a warning message. 50

51 vii. Check BYPASS CITY/ZIP KEY TRACKING if you do not want the program to automatically enter the City and State when a Zip Code is entered. See page 27 for details on how this is used. viii. Check BYPASS EIN KEY TRACKING if you do not want the program to automatically enter the EIN. This will prevent the auto population of these fields when the first couple of digits are entered. It is useful to mark this option if you are using more than one EIN for this Login ID. ix. Check IGNORE STATE ID FROM EMPLOYER DATABASE if you do not want the program to automatically add the State EIN s on Forms W-2, W-2G, and 1099-R. This will prevent the auto population of these fields when the first couple of digits are entered. It is useful to mark this option if you will be entering several State ID numbers. d. Click OK to return to the Login Accounts screen. 2. To modify the default Access Levels or create a new Access Level, a. Click on the ACCESS LEVELS button at the bottom left hand corner of the Login Accounts screen. The Access Level Configuration window will open. i. Choose one of the default levels under SELECT LEVEL TO MODIFY to modify one of the existing default levels. ii. Click ADD LEVEL to create a new level. The NEW ACCESS LEVEL window will open. Enter a Level name, and click OK. The new name will appear in the dropdown list. b. Modify the ACCESS for each LEVEL. The left screen, ACCESS TO SELECT, has a list of all the potential functions that can be added to an access level. The right screen, ACCESS INCLUDED, has a list of all the functions that are currently available to an access level and can be removed. By default, an Operator has the most 51
52 access, a Data entry person has limited access, and a Clerk has the most limited access. i. Highlight a function under ACCESS TO SELECT and click ADD to remove a level from the left screen and add it to the right screen, making that function available. ii. Highlight a function under ACCESS INCLUDED and click REMOVE to remove a level from the right screen to the left screen, making that function unavailable. The ADD ALL and REMOVE ALL buttons can be used to move the entire list at one time. c. Click RENAME to rename an ACCESS LEVEL, and the RENAME ACCESS LEVEL window will appear. i. Type in the name you prefer for that level and click OK to save the new name. d. Click DELETE to delete an access level. You will be prompted to press YES to complete the deleting process or to press NO to cancel. e. Click OK to save and close the ACCESS LEVEL CONFIGURATION window. 3. To modify a Login Account, a. Click the LOGIN ACCOUNT you wish to edit, and it will become highlighted. Click EDIT. The Login Preferences screen will appear and you can make your desired edits. Click OK when you are done. 4. To remove a Login Account, a. Click the LOGIN ACCOUNT you wish to remove, and it will become highlighted. Click REMOVE. A small screen will come up asking you if you are sure you want to remove this Login account. Click YES. The Login Accounts screen will now be missing that Login. 5. In the Login Accounts window, click OK to save and exit LOGIN ACCOUNTS. Color Setup From the Opening Screen, click on SETUP in the Menu Bar, drag the arrow down to COLOR SETUP, and click once. The COLOR SETUP window will open. This function allows you to change and customize the color scheme of certain fields. This step is optional. If you want to leave the colors as they are, please skip to the next step, Database Setup. 52

53 1. Choose a preformatted COLOR SCHEME from the dropdown list, or click SAVEAS to create a new Color Scheme. A new Color Setup screen will appear. Enter the name for your new color scheme and click OK. The name of the new color scheme will appear in the dropdown list next to NAME. 2. Next to ITEM, choose the first field for which you would like to apply a color and background for your new color scheme from the dropdown list. a. Click TEXT and the color screen will appear. Choose a color for the text and click OK. You can also use the Define Customs Colors button to choose a different color than those available in the first color screen. b. Click on BACKGROUND and the color screen will appear. Choose a color for the background and press OK. To choose no background color, choose the white block in the lower right hand corner of the basic colors. The new color scheme for the chosen item will appear as a Sample in between the BACKGROUND and TEXT buttons. 3. Continue editing ITEMS as directed above and click Save to save the Color Scheme. Click CANCEL To exit COLOR SETUP. 4. Go to page 47 to determine where to apply a Color Scheme for a particular Login Account. Questionnaire Setup From the Opening Screen, click on SETUP in the Menu Bar, drag the arrow down to QUESTIONNAIRE SETUP, and click once. The QUESTIONNAIRE SETUP window will open. A Questionnaire is automatically added to each Return file, and the lines in the Questionnaire appear in the order as they do in the Setup. As questions are answered, forms are automatically added to the Return file based on the answers to the questions. This function allows customization of the Questionnaire so that additional questions can be added to the standard Questionnaire. Select New Questionnaire under Login Preferences to use this function. To add a new line in the Questionnaire: 1. Click the ADD button to add a new line item to the Questionnaire. The Questionnaire Item window will open. 53


54 2. Next to ROW TYPE, select the type of line from the dropdown list as follows: a. QUESTION To create a question for the Questionnaire. b. QUESTION WITH NOTEBOX To create a question for the Questionnaire with a box where notes can also be entered. c. FORM HEADER To create a header for a Form. d. SECTION HEADER To create a header for a Section. e. EMPTY ROW To enter an empty row in the Questionnaire. 3. Next to ATTACH FORM, select the form that should be added to the Return file if the question is answered in the affirmative. 4. Next to QUESTION, enter the question as it should appear in the Questionnaire. 5. Click OK to save the new Questionnaire Item. 6. Click SAVE to save the Questionnaire or CLOSE to close the window. To move a line in the Questionnaire: 1. Click on the line that needs to be moved up or down, and it will become highlighted. 2. Click the MOVEUP button to move the line upwards. 3. Click the MOVEDOWN button to move the line downwards. 4. Click OK to save the new Questionnaire Item. To delete a line in the Questionnaire: 1. Click on the line that needs to be deleted, and it will become highlighted. 54

55 2. Click the DELETE button to delete the line. To save a new version of the Questionnaire: 1. Click the SAVEAS button. A new Questionnaire Setup window will open. 2. Enter the name of the new Questionnaire. The Questionnaire will now be saved under the new name assigned. 3. Click SAVE to save the Questionnaire or CLOSE to save the window. Restricted Forms Setup From the Opening Screen, click on SETUP in the Menu Bar, drag the arrow down to RESTRICTED FORMS SETUP, and click once. The RESTRICTED FORMS SETUP window will open. This function allows you to restrict certain forms from being added to tax returns or restrict the editing of certain forms. 1. Select either FEDERAL OR A SPECIFIC STATE from the dropdown list to restrict the addition or editing of a certain form. 2. Check the box under RESTRICT ADD next to any forms you do not want to have added to any tax returns. 3. Check the box under RESTRICT EDIT next to any forms you do not want to have edited in any tax returns. Click Save to save the Questionnaire or Close to save the window. 4. Click SAVE to save the new restricted settings or CLOSE to save the window. This function also allows you to restrict certain fields from being used, and the Restricted Field will appear in the Restricted Fields list. 1. Open the form in any Return and right click on the field to be restricted. 2. Select LOCK FIELD. This Field will not appear in the Restricted Fields list and can no longer be used. 55
56 3. Use the same process to unlock the field. Database Setup From the Opening Screen, click on DATABASE in the Menu Bar. The different sections of the Database will appear in a list. To choose any item on the list, scroll down to the item and click on it. This function allows you to collect information over a period of time (including year to year) and use it either automatically or on demand. Information can be added to the database in one of two ways: 1.) It can be manually entered, and 2.) It can be automatically entered as Returns are created and verified. There are two databases that may need attention during Setup: Paid Preparers and Electronic Return Originators. (The others are optional.) Paid Preparers If you will have more than one Paid Preparer, you will want to set up their information in the database. This information will appear on Form 1040s to correspond with the correct Paid Preparer. If you have only one Paid Preparer, the information should already be entered in the Overrides Tab of Office Setup as an ERO on page Click on DATABASE in the Menu Bar, scroll down to PAID PREPARERS and click once. The Paid Preparers window will open. 2. Enter a PREPARER ID to add a new Paid Preparer. This Identification can be numbers, letters, or a combination of both. It can consist of up to seven characters. 3. Click ADD. The Paid Preparer Information window will open, and the PREPARER S ID will already appear. 4. Check SELF EMPLOYED if this Paid Preparer is self-employed. 5. Enter the PREPARER S SSN. Do not use dashes in between numbers. 6. Alternatively, enter the PREPARER S PTIN. The PTIN is the Preparer s Tax Identification Number. This number is assigned by the IRS by filling out Form W-7P. It is an alternative to a social security number for tax preparers so that they do not have to use their social security number on their client s tax returns. 56

57 7. Enter the THIRD PARTY DESIGNEE PIN, if applicable. This allows the Paid Preparer to discuss the return with the IRS. 8. Enter the PAID PREPARER S NAME. 9. Enter the Preparer s PTIN. 10. Enter the FIRM S NAME of the Paid Preparer, if applicable. 11. Enter the EIN of the Firm, if applicable. The EIN is the Employer s Identification Number and is also referred to as the Federal Tax Identification Number (FTIN). 12. Enter the FIRM S ADDRESS. If there is no separate firm, enter the address of the individual Paid Preparer. 13. Enter the CITY, STATE and ZIP in the appropriate fields. 14. Select the PREPARER TYPE from the dropdown list. The taxpayer must meet one of these requirements. 15. Enter the CAF NUMBER. A CAF number is a unique nine-digit identification number and is assigned the first time the Preparer files a third party authorization with the IRS. 16. Enter the OFFICE PHONE. 17. Enter the ELECTRONIC FILING ID. This is the Electronic Filing Identification Number assigned to the Paid Preparer by the IRS. 18. Enter the CELL PHONE and CELL PHONE CARRIER in the appropriate fields. 19. Enter the Paid Preparer s address. 20. Enter the two letter code under STATE 1 for the first state the Paid Preparer will be filing returns, if applicable. Example: California-CA 21. Enter the IDENTIFICATION number of the Paid Preparer for that particular state, if applicable. This number is assigned by the particular state. 22. Enter the same information for State 2 if this Paid Preparer will be filing returns in a second state. 57


58 23. Click the CAPTURE SIGNATURE button to enable the Signature Pad to create an electronic copy of the Paid Preparer s signature. Follow the directions of the Signature Pad. This function works with a Signature Pad and allows the Paid Preparer s signature to automatically appear on all forms where necessary. The signature will appear on the screen. 24. Click REMOTESIGN to send a link to the Paid Preparers address to capture their signature remotely. 25. Click DELETE SIGNATURE to delete a signature already captured for this Paid Preparer. A new signature can be added by using the CAPTURE SIGNATURE button. 26. Click SAVE to be returned to the Paid Preparers screen. The newly added Paid Preparer will appear in the Paid Preparers screen. 27. Click on the Paid Preparer in the Paid Preparer window to edit the information, and the line will become highlighted. Click EDIT. The Paid Preparer Information screen will appear and the information can be edited. Make edits and click SAVE to save the edits or click CANCEL to close and return to the Paid Preparers screen. 28. Click on the Paid Preparer in the Paid Preparer window to delete a Paid Preparer, and the line will become highlighted. Click DELETE. You will be prompted as to whether you want to delete this record. Click YES. 29. Continue adding Paid Preparers as directed above until finished and click CLOSE to exit Paid Preparers. Electronic Return Originators If you will have more than one Electronic Return Originator (ERO), you will want to set up their information in the database. This information will appear on Form 8879 to correspond with the correct ERO. If you have only one ERO, the information should already be entered in the Overrides Tab of Office Setup on page Click on DATABASE in the Menu Bar, scroll down to EF ORIGINATORS and click once. The EF Originators screen will open. 2. Enter the ERO S EFIN number. This number is assigned to the ERO by the IRS and must be six digits. 58
59 3. Click ADD. The Electronic Return Originator screen will open, and the ERO S ELECTRONIC FILER ID will already appear. 4. Check SELF EMPLOYED if this ERO is self-employed. 5. The SPECIAL FEE PROCESS will already be checked if this ERO will be processing returns in a state that requires the ERO to charge the same fee for both financial and nonfinancial products. 6. Enter the ERO S SSN. Do not use dashes in between numbers. 7. Alternatively, enter the ERO S PTIN. The PTIN is the ERO s Tax Identification Number. This number is assigned by the IRS by filling out Form W-7P. It is an alternative to a social security number for tax preparers so that they do not have to use their social security number on their client s tax returns. 8. Enter the ERO S EIN if the ERO is a firm. The EIN is the Employer s Identification Number and is also referred to as the Federal Tax Identification Number (FTIN). 9. Enter the ERO S NAME. Use the name assigned to the ERO number, whether that be a firm name or individual name. 10. Enter the FIRM S ADDRESS. If there is no separate firm, enter the address of the individual ERO. 11. Enter the CITY, STATE, ZIP, and OFFICE PHONE in the appropriate fields. 12. Enter the CELL PHONE and CELL PHONE CARRIER in the appropriate fields. 13. The MASTER EFIN will already be entered, if applicable, from the ERO Enrollment on the web portal. 14. Enter the SERVICE BUREAU. This refers to the Service Bureau Identification number (SBIN), if applicable. 15. Enter the PIN. The PIN is the 5 digit ERO s Personal Identification Number chosen by the ERO to be used on Form The RAC Bank the ERO previously selected will automatically appear. If the name of the bank is missing and the ERO has signed up with a bank, or if the wrong bank appears, contact your technical support person for assistance. 17. Enter the two letter code under STATE 1 for the first state the Paid Preparer will be filing returns, if applicable. Example: California-CA 18. Enter the IDENTIFICATION number of the Paid Preparer for that particular state, if applicable. This number is assigned by the particular state. 59
60 19. Enter the same information for STATE 2 if this Paid Preparer will be filing returns in a second state. 20. Click the CAPTURE SIGNATURE button to enable the Signature Pad to create an electronic copy of the ERO s signature. Follow the directions of the Signature Pad. This function works with a Signature Pad and allows the ERO s signature to automatically appear on all forms where necessary. The signature will appear on the screen. 21. Click REMOTESIGN to send a link to the ERO s cell phone to capture their signature remotely. 22. Click DELETE SIGNATURE to delete a signature already captured for this ERO. A new signature can be added by using the CAPTURE SIGNATURE button. 23. Click SAVE to be returned to the EF Originators screen. The newly added ERO will appear in the EF Originators screen. 24. Click on the ERO in the EF Originator window to edit the information, and the line will become highlighted. Click EDIT. The Electronic Return Originator Information screen will appear and the information can be edited. Make edits and click SAVE to save the edits or click CANCEL to close and return to the EF Originator screen. 25. Click on the ERO in the EF Originator window to delete an ERO, and the line will become highlighted. Click DELETE. You will be prompted as to whether you want to delete this record. Click YES. 26. Continue adding ERO S as directed above until finished and click CLOSE to exit EF Originators. At this time, no other entries need to be made to the Database for Setup purposes. Continue to page 67 to complete setup, or review the following materials to add further helpful information to the Database. Cities/Zip Codes Once a City, State and Zip Code are used in a Return, they are added to the Database. The program can automatically add the current City and State listed by the United States Postal Service when a Zip Code is entered. See Page 27 for proper setup of this function. If this selection is not made, then when a City, State and Zip Code is manually entered into a Return, it will be added to the Database. City/Zip Codes can also be added to the database manually. To add a City, State, and Zip Code: 1. From the Opening Screen, click on DATABASE in the Menu Bar, scroll down to CITIES/ZIP CODES, and click once. The Cities/Zip Codes window will open. 60


61 2. Under NEW RECORD, enter the new ZIP CODE and click ADD. The City/State/ZIP Code window will open. 3. Enter the CITY and STATE and click SAVE to save the new data and close the window. If a manually entered City, State and Zip Code need to be edited: 1. From the Opening Screen, click on DATABASE in the Menu Bar, scroll down to CITIES/ZIP CODES, and click once. The Cities/Zip Codes screen will open. 2. Scroll down and click the ZIP CODE and/or CITY to be edited, and it will become highlighted. 3. Click EDIT. The City/State/ZIP Code window will open. Edit the data to reflect the appropriate information. 4. Click SAVE and the new data will be saved and the window will close. To delete a City, State and Zip Code, do as follows: 1. From the Opening Screen, click on DATABASE in the Menu Bar, scroll down to CITIES/ZIP CODES, and click once. The Cities/Zip Codes screen will open. 2. Scroll down and click the ZIP CODE and/or CITY to delete, and it will become highlighted. 3. Click DELETE. You will be prompted as to whether you want to delete this record. Click YES to delete the record or NO to keep the record and return to the previous screen. 61
 is entered into the")

62 4. Click CLOSE. Employers/Payers Once an Employer (W-2 filer) or Payer (1099 filer) is used in a Return and that Return is verified, the Employer s or Payer s information is added to the Database. After the information is in the Database, the program will automatically add the Employer s or Payer s information to new Returns when the Federal Tax Identification Number (FTN) is entered into the Return. Employers and Payers can also be added to the database manually. To add an Employer or Payer to the Database, do as follows: 1. From the Opening Screen, click on DATABASE in the Menu Bar, drag the arrow down to EMPLOYERS/PAYERS, and click once. The Employers/Payers screen will open. 2. Under NEW RECORD, enter the EMPLOYER EIN and click ADD. The EIN is also known as the Federal Tax Identification Number (FTIN). The Employer/Payer Information screen will open and the Federal EIN will already appear. 3. Enter the NAME CONTROL. The Name Control is the first 4 letters of the name of the Employer or Payer. 4. Enter the FIRM S NAME for this Employer or Payer. 5. If the Firm has a domestic address, a. Enter the CARE OF ADDRESS if applicable. b. Enter the FIRM S ADDRESS. c. Enter the CITY, STATE and ZIP CODE. 6. If the Firm has a foreign address, a. Enter the FIRM S ADDRESS. 62
63 b. Enter the CITY. c. Enter the PROVINCE, as applicable. d. Enter the POSTAL CODE. e. Enter the COUNTRY CODE. 7. Enter the two letter code under STATE 1 for the first state for which the Employer or Payer has an identification number, if applicable. 8. Enter the IDENTIFICATION number of the Employer or Payer for that particular state, if applicable. This number is assigned by the particular state. 9. Enter the same information for State 2 if the Employer or Payer has an identification number for a second state. 10. Click SAVE to return to the Employers/Payers window. The added Employer or Payer will now appear in the list. To edit an Employer s or Payer s information in the Database: 1. From the Opening Screen, click on DATABASE in the Menu Bar, scroll down to EMPLOYERS/PAYERS, and click once. The Employers/Payers window will open. 2. Scroll down and click the EMPLOYER EIN and EMPLOYER NAME to be edited, and it will become highlighted. 3. Click EDIT. The Employer/Payer Information window will open. Edit the information as needed. 4. Click SAVE. The new data will be saved and the window will close. To delete an Employer or Payer from the Database: 1. From the Opening Screen, click on DATABASE in the Menu Bar, scroll down to EMPLOYERS/PAYERS, and click once. The Employers/Payers screen will open. 2. Scroll down and click the EMPLOYER EIN and EMPLOYER NAME to delete, and it will become highlighted. 3. Click DELETE. You will be prompted as to whether you want to delete this record. Click YES to delete the record or NO to keep the record and return to the previous screen. 4. Click CLOSE to return to the previous screen. 63


64 Care Providers Once a Care Provider from federal Form 2441 is used in a Return and that Return is verified, the Care Provider s information is added to the Database. Once the information is in the Database, the program will automatically add the Care Provider s information to new Returns when the Care Provider s Social Security number or Federal Employer Identification Number is entered into the Return. Care Providers can also be added to the database manually. To add Care Provider to the Database, do as follows: 1. From the Opening Screen, click on DATABASE in the Menu Bar, scroll down to CARE PROVIDERS, and click once. The Care Providers window will open. 2. Under NEW RECORD, enter the CARE PROVIDER S ID and click ADD. If the Care Provider is an individual, this will be a social security number. If the Care Provider is a business, this will be an EIN. The EIN is also known as the Federal Tax Identification Number (FTIN). The Care Providers Information window will open and the Care Provider s ID will already appear. 3. Select if the ID TYPE is an EIN or SSN from the dropdown list. 4. Enter the PROVIDER S NAME. Enter a firm name if this is a business, or enter the individual s name if it is not. 5. Enter the PROVIDER S ADDRESS. 6. Enter THE CITY/STATE/ZIP. 7. Enter the Provider s TELEPHONE NUMBER. 8. Enter the two letter code under STATE 1 for the first state for which the Care Provider has an identification number, if applicable. 9. Enter the IDENTIFICATION number of the Care Provider for that particular state, if applicable. This number is assigned by the particular state. 10. Enter the same information for STATE 2 if the Care Provider has an identification number for a second state. 11. Click SAVE to return to the Care Providers window. The added Care Provider will now appear in the list. 64
65 To edit a Care Provider s information in the Database, do as follows: 1. From the Opening Screen, click on DATABASE in the Menu Bar, drag the arrow down to CARE PROVIDERS, and click once. The Care Providers window will open. 2. Scroll down and click the PROVIDER ID and CARE PROVIDER NAME to be edited, and it will become highlighted. 3. Click EDIT. The Care Provider information window will open. Edit the information as needed. 4. Click SAVE and the new data will be saved and the window will close. To delete a Care Provider from the Database, do as follows: 1. From the Opening Screen, click on DATABASE in the Menu Bar, scroll down to CARE PROVIDERS, and click once. The Care Providers window will open. 2. Scroll down and click the PROVIDER ID and CARE PROVIDER NAME to delete, and it will become highlighted. 3. Click DELETE. You will be prompted as to whether you want to delete this record. Click YES to delete the record or NO to keep the record and return to the previous screen. 4. Click CLOSE to return to the previous screen. Referrals Referrals are added to the Database manually. Once they are in the Database, the Preparer can select a particular Referral to associate with a client. A Report can be created that will allow you to track referrals. See Chapter 8, Reports. To add Referrals to the Database: 1. From the Opening Screen, click on DATABASE in the Menu Bar, scroll down to REFERRALS, and click once. The Referrals window will open. 2. Under NEW RECORD, enter the SEQUENCE NUMBER and click ADD. The Referrals window will open. 3. Enter the REFERRAL. 4. Click SAVE to return to the Referrals window. The added Referral will now appear in the list. Donee Once a Donee s information is used in a Return and that Return is verified, the Donee s information is added to the Database. After the information is in the Database, the User creating a return can 65


66 automatically add the Donee s information by choosing it from a dropdown menu in the Form Donee information can also be added to the Database manually. To add Donees to the Database: 1. From the Opening Screen, click on DATABASE in the Menu Bar, scroll down to DONEES, and click once. The Donees window will open. 2. Under NEW RECORD, enter the DONEE NAME and click ADD. The Donee Information window will open. 3. Enter the Donee s Name, Address, City, State and Zip. 4. Enter the Donee s Federal ID number. The Donor should provide this as a nonprofit organization collecting tax-deductible donations. 5. Click SAVE to return to the Donee window. The added Donee will now appear in the list. Bank RTN s Once a Bank s information (name and routing number) is used in a Return and that Return is verified, the Bank s information is added to the Database. After the information is in the Database, the User creating a return can automatically add the Bank s information by choosing it from a dropdown menu in the Client Data Screen. Bank information can also be added to the database manually. To add Bank RTN s to the Database: 1. From the Opening Screen, click on DATABASE in the Menu Bar, scroll down to BANK RTNS, and click once. The Bank RTNs window will open. 2. Under NEW RECORD, enter the BANK RTN (Routing Transit Number) and click ADD. The Bank/Credit Union Information window will open and the Routing Transit Number will already appear. 3. Enter the INSTITUTION S NAME. 66

67 4. Click SAVE to return to the Bank RTNs window. The added Bank will now appear in the list. To edit a Bank s information in the Database: 1. From the Opening Screen, click on DATABASE in the Menu Bar, drag the arrow down to BANK RTNS, and click once. Bank RTNs window will open. 2. Scroll down and click the BANK RTN and BANK NAME to be edited, and it will become highlighted. 3. Click EDIT. The Bank/Credit Union Information window will open. Edit the information as needed. 4. Click SAVE and the new data will be saved and the window will close. To delete a Bank from the Database: 1. From the Opening Screen, click on DATABASE in the Menu Bar, scroll down to BANK RTNS, and click once. The Bank RTNs window will open. 2. Scroll down and click the BANK RTN and BANK NAME to delete, and it will become highlighted. 3. Click DELETE. You will be prompted as to whether you want to delete this record. Click YES to delete the record or NO to keep the record and return to the previous screen. 4. Click CLOSE to return to the previous screen. Occupations This program comes with an initial Database of general occupations. New occupations to the Database must be manually entered. Occupations are not automatically added when a Return is created and verified. Once an Occupation has been entered in the Database, the User creating a return can automatically add the Occupation by choosing it from a list in the Client Data Screen. See page 103 for more information. To add an Occupation to the Database: 67

68 1. From the Opening Screen, click on DATABASE in the Menu Bar, scroll down to OCCUPATIONS, and click once. The Occupations window will open. 2. Under NEW RECORD, enter the SEQUENCE NUMBER and click ADD. The sequence number is a three-digit number you choose as a code. The occupations appear in the list according to their sequence number. The Occupations screen will open and the Sequence Number will already appear. 3. Enter the OCCUPATION. 4. Click SAVE to return to the Occupations window. The added Occupation will now appear in the list. To edit an Occupation s information in the Database: 1. From the Opening Screen, click on DATABASE in the Menu Bar, scroll down to OCCUPATIONS, and click once. The Occupations window will open. 2. Scroll down and click the ID and OCCUPATION to be edited, and it will become highlighted. 3. Click EDIT. The Occupations window will open. Edit the information as needed. 4. Click SAVE and the new data will be saved and the window will close To delete an Occupation from the Database: 1. From the Opening Screen, click on DATABASE in the Menu Bar, scroll down to OCCUPATIONS, and click once. The Occupations window will open. 2. Scroll down and click the OCCUPATION to delete, and it will become highlighted. 3. Click DELETE. You will be prompted as to whether you want to delete this record. Click YES to delete the record or NO to keep the record and return to the previous screen. 4. Click CLOSE to return to the previous screen. 68

69 Site Identifiers Site Identifiers (Site ID) must be manually entered into the Database. Once in the Database, the User creating a Return can automatically add the Site ID by choosing it from a dropdown list in the Client Data Screen. See page 102 for more details. To add a Site Identifier to the Database: 1. From the Opening Screen, click on DATABASE in the Menu Bar, scroll the arrow down to SITE IDENTIFIERS, and click once. The Site Identifiers window will open. 2. Under NEW RECORD, enter the SITE ID and click ADD. The Site ID is a one to seven-digit code you assign and can consist of numbers, letters, or both. The Site IDs appear in the order in which they are entered into the Database. The Site ID screen will open and the Site ID will already appear. 3. Enter the DESCRIPTION. This description should more fully explain where the site is located and will be listed as the Site Name. 4. Enter the REMOTE PRINTER DEVICE. Use this function if you will be remote printing your checks from a VPN, WAN or terminal service. 5. Click SAVE to return to the Site Identifiers window. The added Site ID will now appear at the end of the list. To edit a Site ID in the Database: 1. From the Opening Screen, click on DATABASE in the Menu Bar, scroll down to SITE IDENTIFIERS, and click once. The Site Identifiers window will open. 2. Scroll down and click the SITE ID and SITE NAME to be edited, and it will become highlighted. 3. Click EDIT. The Site Identifiers window will open. Edit the information as needed. 4. Click SAVE and the new data will be saved and the window will close. 69

70 To delete a Site ID from the Database: 1. From the Opening Screen, click on DATABASE in the Menu Bar, drag the arrow down to SITE IDENTIFIERS, and click once. The Site Identifiers screen will open. 2. Scroll down and click the SITE ID and SITE NAME to be deleted, and it will become highlighted. 3. Click DELETE. You will be prompted as to whether you want to delete this record. Click YES to delete the record or NO to keep the record and return to the previous screen. 4. Click CLOSE to return to the previous screen. User Status Codes User Status Codes are user created codes to classify certain Returns. For example, a User Status Code could be DOCWAIT indicating that the Preparer is waiting on more Documents from the Tax Preparer in order to finish the Return. User Status Codes must be manually entered. Once in the Database, User Status Codes can be added to a Return and will appear in the Return Lookup screen. To add a User Status Code to the Database: 1. From the Opening Screen, click on DATABASE in the Menu Bar, scroll down to USER STATUS CODES, and click once. The User Status Codes window will open. 2. Under NEW RECORD, enter the USER STATUS CODE and click ADD. The User Status Code is a one to seven-digit code you assign and can consist of either numbers, letters, or both. Also, the User Status Code is case sensitive. The User Status Codes appear in the order in which they are entered into the Database. The User Status Codes screen will open and the User Status Code will already appear. 3. Enter the DESCRIPTION. This description should fully explain the User Status Code. 70

71 4. Click SAVE to return to the User Status Codes window. The added User Status Code will now appear in the list. To edit a User Status Code in the Database: 1. From the Opening Screen, click on DATABASE in the Menu Bar, scroll down to USER STATUS CODES, and click once. The User Status Codes window will open. 2. Scroll down and click the STATUS CODE and DESCRIPTION to be edited, and it will become highlighted. 3. Click EDIT. The User Status Codes window will open. Edit the information as needed. 4. Click SAVE and the new data will be saved and the window will close. To delete a User Status Code from the Database: 1. From the Opening Screen, click on DATABASE in the Menu Bar, scroll down to USER STATUS CODES, and click once. The User Status Codes window will open. 2. Scroll down and click the STATUS CODE and DESCRIPTION to delete, and it will become highlighted. 3. Click DELETE. You will be prompted as to whether you want to delete this record. Click YES to delete the record or NO to keep the record and return to the previous screen. 4. Click CLOSE to return to the previous screen. Educational Institutions Once an Educational Institution is used in a Return and that Return is verified, the Educational Institution s information is added to the Database. After the information is in the Database, the program will automatically add the Educational Institutions information to new Returns when the Federal Tax Identification Number (FTIN) is entered into the Return. Educational Institutions can also be added to the database manually. To add an Educational Institution, do as follows: 1. From the Opening Screen, click on DATABASE in the Menu Bar, drag the arrow down to EDUCATIONAL INSTITUTIONS, and click once. The Educational Institutions screen will open. 71


72 2. Under NEW RECORD, enter the INSTITUTIONS FEIN and click ADD. The FEIN is also known as the Federal Tax Identification Number (FTIN). The Educational Institute Information screen will open and the Institution Federal EIN will already appear. 3. Enter the INSTITUTION S NAME for this Educational Institute. 4. If the Institute has a domestic address, a. Enter the INSTITUTE S ADDRESS. b. Enter the CITY, STATE and ZIP CODE. 5. If the Institute has a foreign address, a. Enter the INSTITUTE S ADDRESS. b. Enter the CITY. c. Enter the PROVINCE, as applicable. d. Enter the POSTAL CODE. e. Enter the COUNTRY CODE. 6. Click SAVE to return to the Educational Institutions window. The added Educational Institute will now appear in the list. 72

73 To edit an Educational Institutes information in the Database: 1. From the Opening Screen, click on DATABASE in the Menu Bar, scroll down to EDUCATIONAL INSTITUTIONS, and click once. The Educational Institution window will open. 2. Scroll down and click the EDUCATIONAL EIN and INSTITUTION NAME to be edited, and it will become highlighted. 3. Click EDIT. The Educational Institute Information window will open. Edit the information as needed. 4. Click SAVE. The new data will be saved and the window will close. To delete an Educational Institute from the Database: 1. From the Opening Screen, click on DATABASE in the Menu Bar, scroll down to EDUCATIONAL INSTITUTIONS, and click once. The Educational Institution window will open. 2. Scroll down and click the EDUCATIONAL EIN and INSTITUTION NAME to be edited, and it will become highlighted. 3. Click DELETE. You will be prompted as to whether you want to delete this record. Click YES to delete the record or NO to keep the record and return to the previous screen. 4. Click CLOSE to return to the previous screen. Communications Setup The final step in Setup is to establish communications with Central Site. One initial transmission must occur before Returns can be processed. 1. From the Opening Screen, click on TRANSMIT TO CENTRAL SITE in the Work In Progress Summary screen. This can be found on the right hand side of the screen under Transmit Queue. The Transmit to Central Site screen will open. 2. Click on SETUP. This can be found in the lower left hand corner of the screen. The Communication Settings screen will open, and the User # will already appear. 73

74 3. Enter the PASSWORD provided with your software. 4. Check the first three boxes under ENABLE of up to three different times to automatically engage Transmission with Central Site, and for each selection enabled, a. Check RECEIVE ONLY to only receive communications from Central Site but not send any returns or other transmissions at this time. b. Enter the TIME to receive transmissions. 5. Check the fourth box under ENABLE to setup an interval schedule, and a. Check RECEIVE ONLY to only receive communications from Central Site but not send any returns or other transmissions during these interval transmissions. b. Enter the TIME FRAME during which these interval transmissions should take place. c. Enter the INTERVAL in minutes between each transmission. Example: If the time frame is between 8am and 4pm, and the interval is set at 60, transmission will take place at the top of each hour with the first transmission being at 8am, the second transmission being at 9am, and the last transmission being at 4pm. 6. Click OK to return to the Transmit to Central Site window. 7. Click the FILTER button to open the Central Site Transmit Queue, and uncheck the boxes of any return files that are not ready to be transmitted. Click OK to return to the previous window. 8. Click TRANSMIT to initiate communications with Central Site. This may take a few minutes. You will be prompted when a successful communication has occurred. Click OK to return to the previous window. 9. Click OK to close the Transmit to Central Site window and return to the opening screen. Congratulations! You are finished setting up your 2017 tax preparation software program and are ready to begin preparing tax returns for your clients. 74
75 Chapter 3 Multi-Office Management Introduction Multi-Office Management is a feature that enables Service Bureaus and Multi-Office organizations to easily view data compiled in easy-to-read reports. Additionally, this product allows the Main Office to automatically add EROs via an online process and setup several Remote Offices online at one time. The Main Office can choose whether to control certain features within the Remote Offices software programs. The Online Features The Online features are accessed by logging in to the Support Home Page. This information will be provided to you when you purchase Multi-Office Management. The Support Home Login screen looks as follows: Tax Year 2016 This function allows the User the ability to select the tax year. Office Management This function is used by the Main Office to manage all Remote Offices. After changes are made to a Main account at this site, the Remote Office accounts will automatically be updated with the changes the next time they transmit to Central Site. To access Office Management: 1. From the Support Home, click on OFFICE MANAGEMENT in the Support Home Toolbar. The Office Management screen will open. 75

76 ERO Enrollment This function allows the Main Office to add a Remote Office ERO as a software user of the program and enroll the ERO to process bank products. To allow more efficient entering of several EROs, one ERO s data can be copied and edited to reflect a different ERO s data. Important Note: The Main Office must have the EROs completed and signed paperwork as a matter of fulfilling the duty of due diligence. To Add a new ERO: 1. Obtain from the ERO all enrollment paperwork which will be used as a reference for enrolling the ERO online. The following data entered should reflect the EROs paperwork. 2. From the Office Management Screen, click ERO ENROLLMENT. The ERO EFIN Management screen will open. 3. If this program was used in a previous year, click next to the first EFIN to complete bank enrollment for this ERO. If this program was not used in a previous year, click on the ADD EFIN button and begin by entering the Master-EFIN. The EFIN Setup screen will open. Sub-EFINs can be entered only after the Master-EFIN has been entered and registered. 4. Under EFIN INFORMATION, a. Select the USER ID from the dropdown list. The User IDs are created when the program is purchased. Please contact Technical Support for details. b. Enter the EFIN assigned by the IRS. c. Select the EFIN TYPE from the dropdown list. One Master EFIN will be assigned to the Main Computer and have control of all of the Remote Computers. A Sub- EFIN is assigned to a Remote Computer. d. Enter the SERVICE BUREAU NAME, if applicable. 76
77 e. Check the Box next to SERVICE BUREAU FEE ON ALL PRODUCTS to charge a service bureau fee on all products for this EFIN including Returns that do not have an associated bank product. 5. Under EFIN HOLDER INFORMATION, enter all of the information for the owner of this EFIN, and check the COPY TO SAVED CONTACTS button to save this EFIN s information to the contacts list. Click Save, and a new screen will open with the Fee Deposit Information. 6. Under FEE DEPOSIT INFORMATION, enter the bank information for the ERO. This is the bank where the EFIN will have tax return fees deposited. Click SAVE, and a new screen will open displaying all available banks. 7. Select the BANK from the dropdown list, and click THE CREATE BANK APPLICATION button. The Bank Application for the chosen bank will open. 8. Enter the Bank Application information or check the COPY FROM SAVED CONTACTS button to copy this EFIN s information from the contacts list, and check the box at the end certifying that you agree to the Terms and Conditions of this bank. Click SAVE AND CONTINUE, and the bank s Security Question screen will open. 9. Select the answer for all of the Security Questions from the dropdown list, or enter the information, as applicable. Click SAVE AND SUBMIT TO BANK to immediately submit this information, or click Save to submit to the bank later. The entering of this EFIN is now complete. To Edit an ERO s information: 1. From the Office Management Screen, click ERO ENROLLMENT. The ERO Enrollment screen will open. 2. Scroll down to select the ERO whose information needs editing. 3. Click to open the ERO Setup screen. 4. Edit the information as necessary according to the directions above for adding a new ERO. To Copy one ERO s information and Edit to Enroll a new ERO: 1. From the Office Management Screen, click ERO ENROLLMENT. The ERO EFIN Management screen will open. 2. Scroll down to select the ERO whose information you want to copy. 3. Click to open the ERO setup screen with the current ERO s data. 77

78 4. Edit the information to reflect the new data according to the directions above for adding a new ERO. To Delete an ERO: 1. From the Office Management Screen, click ERO ENROLLMENT. The ERO EFIN Management screen will open. 2. Scroll down to select the ERO whose information you want to delete. 3. Click to be prompted to delete this ERO. A window will open asking you to confirm that you want to delete the ERO. 4. Click YES to delete the ERO or click NO to close the window without deleting the ERO. Bank Selection This function allows the Main Office to set the bank selection for their EFINs that have been registered with multiple banks. This is also a quick way to view the Add-on and Service Bureau Fee s that have been set. To Select a Bank: 1. From the office Management screen, click Bank Selection. The Bank Selection Screen will open. 2. Scroll down to select the EFIN whose bank selection needs to be set. 3. Click Select to open the select bank screen. This screen will show the banks the EFIN has been registered with. 4. Select the Bank the EFIN will be utilizing for this Tax Season, and click Close. Manage Multi-Tier Offices This function is used to manage Multi-Tier Offices, which allows the Main Office to assign several Remote Offices to a Multi-Tier Office. 78

79 To create a Multi-Tier Office: 1. From the Office Management Screen, click MANAGE MULTI-TIER OFFICES. The Manage Multi-Tier Offices screen will open. Use the ADD NEW USER button as a shortcut to add new User IDs while also creating Multi-Tier Offices. 2. Locate the User ID of the office to designate as a Multi-Tier Office, and click the button. The Add Multi-Tier Office screen will open. 3. Enter the MULTI-TIER OFFICE NAME. 4. Enter the MULTI-TIER OFFICE SERVICE BUREAU FEE, if applicable. 5. Check the box next to SERVICE BUREAU FEE ON ALL PRODUCTS to charge a Service Bureau fee on all returns prepared, including returns that do not have an associated bank product. 6. Check the box next to SERVICE BUREAU FEE LOCKED if you do not want your franchise offices to charge a different amount. 7. Click Save to return to the Manage Multi-Tier Offices screen. 8. Click the button next to the User ID that was just added as a Multi-Tier Office. The Add Multi-Tier Office Users for Office screen, with the User ID of the Office appearing, will open. 9. Check the box next to each User ID to be added as a sub-remote Office under this Multi-Tier Office, and click Save. Only User IDs that have not been previously added to a different Multi-Tier Office will be available. Switch Office IDs The Main Office (or Master User ID) can open all of the Multi-Tier Office User ID accounts. This function is used to switch from the Master User ID account to any of the Multi-Tier Office User ID accounts. 79
. 3. Click the SWITCH button.")
80 To switch an Office ID: 1. From the Office Management Screen, click SWITCH OFFICE IDS. The Switch Office IDs screen will open. 2. Select from the dropdown list the MULTI-TIER OFFICER USER ID you would like to view (instead of the Main Office). 3. Click the SWITCH button. The selected Multi-Tier Office is now open instead of the Main Office and only the Remote Offices assigned to this Multi-Tier Office will be available. To switch back to the Main Office: 1. From the Office Management Screen, click Switch Office IDs. The Switch Office IDs screen will open. 2. Select Main Account from the top of the dropdown list. 3. Click the Switch button. The Main Office (Master User ID) is now open. Manage Master User This function allows the Main Office to assign an individual User ID to receive all correspondence including tax returns and other messages. To Create a Master User ID: 1. From the Office Management Screen, click MANAGE MASTER USER. The Manage Master User screen will open. 2. Select the USER ID to be assigned as the Master User. This function will not be available after the Master User ID is selected. Group Configuration This function is used to create Groups, which allows the Main Office to create Global Settings and assign these settings to specific offices. It also allows the Main Office to view reports by Group within the program by using the Dashboard function. This section is located under the Global Settings section. To create a Group: 1. From the Office Management Screen, click GROUP CONFIGURATION. The Group Configuration screen will open. 80


81 2. Click the CREATE A NEW GROUP button. The Group Setup screen will open. 3. Enter a GROUP NAME and click ADD. The Group Configuration screen will reopen, and the new Group will appear under the list of Group Names. 4. Click the button to add Offices to the selected Group. Click Save to accept the changes and return to the Group Summary Screen. 5. Click the button to publish this information which will become effective across the Multi-Office Organization system during the next update. Alternatively, click the PUBLISH ALL VALID GROUPS button to publish all Groups. Manage Billing This function allows the creation of a fee schedule for Personal Returns as a Global Setting. This section is located under the Global Settings section. 1. From the Office Management Screen, click MANAGE BILLING. The Fee Schedules screen will open, along with the Global Settings window on the left hand side. Other Global Settings can be accessed from this screen. 2. Click the CREATE A NEW BILLING SCHEME button. The Schedule Setup screen will open. 3. Enter a NEW SCHEDULE NAME and click ADD. The Fees Setup screen will open. 4. Click the GO TO DISCOUNTS button to enter discounts if they are available with this Fee Schedule. The Discounts for Schedule screen will open. 5. Enter the Discount Name to identify the discount. 6. Enter the Discount information as follows: 81


82 a. Enter a DISCOUNT PERCENTAGE only to allow offices to discount a fixed percentage off of the fees charged by the tax preparer. b. Enter a Discount Amount only to allow offices to discount a fixed amount off of the fees charged by the tax preparer. c. Enter a DISCOUNT PERCENTAGE and a DISCOUNT AMOUNT to allow offices to discount a certain percentage, but one not exceeding the discount amount. 7. Click the GO TO CUSTOM CHARGES button, and the Customer Charges for Schedule screen will open. 8. Enter the CHARGES DESCRIPTION to identify the custom charge, and enter the CHARGE AMOUNT. 9. Click the GO TO FEES button, and the Fees Setup for Schedule screen will open. 10. Select the set of forms for which you want to set fees from the dropdown list. The set of forms and schedules selected will open. There is one set including all federal forms, and then a separate set for each state. 11. Enter the amount to charge for each schedule and form, and 12. Click SAVE to continue entering fees for a different set of forms for this same fee schedule (the Billing Setup screen will open allowing you to choose another set of forms), and click SAVE and Exit when you are finished entering fees for this fee schedule Click the button to apply this Fees Schedule to specific Offices. Click Save to accept the changes and return to the Fee Schedule screen.

83 14. Click the button next to the new Billing Schedule created to publish this information which will become effective across the Multi-Office Organization system during the next update. Alternatively, click the PUBLISH ALL VALID BUSINESS FEE SCHEDULES button to publish all Billing Schedules. Manage Business Billing This function allows the creation of a fee schedule for Business Returns as a Global Setting. This section is located under the Global Settings section. This function works in the same manner as the Manage Billing function for Personal Returns. Please see the previous section for instructions. Manage Access Level Sets This function allows the Main Office to create different Access Level Sets and individual Access Levels as a Global Setting. This enables the Main Office to control access to the program at both an office level and an individual level. This section is located under the Global Settings section. To create an Access Level Set and Access Levels: 1. From the Office Management Screen, click MANAGE ACCESS LEVELS. The Manage Access Level Sets screen will open, along with the Global Settings window on the left hand side. Other Global Settings can be accessed from this screen. 2. Click the CREATE A NEW SET OF ACCESS LEVELS button. The Access Set Setup screen will open. 3. Enter the SET NAME and click ADD. The Manage Access Level screen will reopen, and the new set will appear under the list of Set Names. 4. Click the button to edit an already created Access Level Set or click the CREATE A NEW SET OF ACCESS LEVELS button to create a new Access Level Set. 5. Click THE ADD A NEW ACCESS LEVEL button. The Access Level Setup screen will open. 6. Enter the Level Name and click ADD. The Manage Access Levels screen will open, and the new Authorization Level Name will appear under the Access Levels. 83

84 7. Click the button next to the newly created Authorization Level Name. The Configure Access Level Detail screen will open. 8. Check the box for every access that will be granted to this access level. 9. Click SAVE AND CLOSE to save this Access Level. 10. Continue adding Access Levels and designating the level of access as instructed above. 11. Click THE BACK TO MANAGE ACCESS LEVEL SETS after all edits to the Access Levels are completed. 12. Click the button to apply this Access Level Set to specific Offices. Click Save to accept the changes and return to the Fee Schedule screen. 13. Click the button next to the Access Level Set to publish this information which will become effective across the Multi-Office Organization system during the next update. Alternatively, click the PUBLISH ALL VALID ACCESS LEVELS button to publish all Access Level Sets. Manage EROs/Offices This function allows the Main Office to set up individual preferences for each ERO/Remote Office. A Main Office can control both the access levels and the amounts charged for services performed by the ERO/Remote Offices. Important Note: This is different from ERO Enrollment which must be completed for the ERO to establish a relationship with the bank. Please note: For the following directions, the User must click SAVE AND CONTINUE to save changes. The VIEW button allows the User to view the changes but will not save them. 84


85 To Setup Preferences for an Office/ERO: 1. From the Office Management Screen, click MANAGE EROS/OFFICE SETUP. The Manage Offices screen will open. 2. The list of all Offices/EROs will appear. An office can be located by search criteria or only the offices of a specific multi-tier can be listed by selecting the multi-tier office from the drop down list. 3. Click the button next to the ERO to setup a new ERO s information, or click the button to edit a current ERO. 4. Under USER ID INFORMATION, enter all of the information for the ERO, as follows: a. The User ID will already be assigned to this ERO. b. Select the TRANSMIT TYPE for this ERO from the dropdown list. 85

86 c. Select the LOGIN - AUTHORIZATION LEVEL SET you want to assign to this ERO or click the CREATE NEW LEVEL button to create a new Authorization Level Set. d. Select the GROUP you want to assign to this ERO or click the CREATE NEW GROUP button to create a new Group. This ERO will appear in this Group when reports are created on the Management Dashboard within the program. e. Enter all other applicable information for this ERO. 5. Under BILLING/FEE INFORMATION, enter applicable information as follows: a. Select the BILLING SCHEDULE from the dropdown list or click the CREATE NEW SCHEDULE Button to create a new Billing Schedule. The Billing Schedules are created in Manage Billing as detailed above. b. Enter the OFFICE INFORMATION such as name and address that should be printed on each invoice. c. Enter the STATE SALES TAX RATE, if applicable. Check with the state where this ERO will be preparing returns to see if this tax is applicable, and if so, the rate. d. Enter the TAX PREPARATION DISCOUNT, if applicable. e. Enter the DEFAULT HOURLY RATE for this ERO. f. Check the box to DISABLE INVOICING for this ERO. g. Check the box to COLLECT TAX ON BILLINGS? to apply and collect the sales tax rate entered above on invoices. l. Check the box to PREVENT TRANSMIT ON RETURNS WITH A BALANCE DUE to require the invoice be paid in full prior to transmitting the return. h. Enter the SELF PREPARED FLAT FEE, if applicable. 86

87 i. Check the box to BILL FOR EF FORMS ONLY if you want this ERO to only charge for forms that are electronically filed. j. Check TURN OFF DEFAULT BANK APP DISBURSEMENT OPTIONS to require the preparer to select the type of bank product disbursement on the bank application. k. Check the box NO PRIOR YEAR BALANCE ON INVOICE to prevent the program from transferring a balance due on the tax preparation of a return from one year to the next for a specific User. l. Check the box DON T BILL FOR SCH A WHEN USING STD DEDUCTION to prevent the program from charging for a Schedule A when the Standard Deduction is being used. m. Enter the PROTECTION PLUS MARKUP fee, if applicable. n. Check the box to AUTO ADD AUDIT PROTECTION (Financials Only) to each return for this ERO. o. Check the box to AUTO ADD AUDIT PROTECTION (Non-Financials) to each return for this ERO. p. Check the box to AUTO ADD CADR PLUS (1040 Only) to each return for this ERO. 6. Under MESSAGE DELIVERY, make selections, as follows: a. Check the first box if the Master User will receive a copy of all Tax Returns. b. Check the second box if the Main Office will receive a copy of all Tax Returns. c. Check the third box if the Master User will receive a copy of all Documents. d. Check the fourth box if the Main Office will receive a copy of all Documents. 87

88 e. For the following four dropdown boxes, choose whether the following types of messages should be sent to the Owner of the Tax Return, Franchise, Main Office, or to all: i. FEDERAL/SYSTEM MESSAGES ii. FEDERAL REJECT MESSAGES iii. STATE MESSAGES iv. PRINTING OF CHECKS 7. Under DESKTOP INSTALLATION SETTINGS, make selections and enter the information as follows: a. Enter a SITE IDENTIFIER assigned by the Main Office for each Remote Office. This unique ID allows the Main Office to monitor the activities at different Remote Offices. b. Select Yes from the dropdown list to enable the following actions: i. TRANSFER PRIOR YEAR SETUP. ii. TRANSFER PRIOR YEAR BILLING. iii. TRANSFER PRIOR YEAR DATABASES. iv. TRANSFER PRIOR YEAR LOGIN ACCOUNTS. v. TRANSFER PRIOR YEAR APPOINTMENTS c. Enter an ADMINISTRATIVE PASSWORD for this User ID. d. Enter the ENCRYPTION KEY, if applicable. 88
89 8. The remaining screens allow entry of information for Office Setup as it is described in this Manual. See Chapter 2 for details. 9. Click the PUBLISH ERO button to publish the information entered for this ERO and close this screen. Alternatively, click the RETURN TO MANAGE OFFICES button to return to that screen, and the ERO/Office can be published at a later time by using the button next to the User ID. Manage Restricted Forms This function allows the Master User Id to restrict individual User IDs from adding or editing certain forms to Returns. This function does not apply to Global Settings. This function is available in the Manage ERO/Office section. To Restrict Forms for Certain User IDs: 1. From the Office Management Screen, click MANAGE EROS/OFFICE SETUP. The Manage EROs/Office screen will open. 2. Click or button next to the User ID to restrict forms for this User ID. The ERO Setup window will open. 3. Click VIEW RESTRICTED FORMS, and the Restricted Form Setup for User ID screen, with the User ID number selected, will open. 4. Select US-FEDERAL or the particular State from the dropdown list of the restricted form you want to edit. The Restricted Form Setup screen will open. 5. Check the RESTRICT ADD box next to each form that you want to restrict from being added to a Return for this User ID, or check the RESTRICT EDIT box next to each form that you want to restrict this User ID from editing. 6. Click SAVE to return to the Manage Restricted Forms screen. 7. Click the Publish restricted forms button to publish this information which will become effective for this User ID during their next transmission to Central Site. Manage Restricted Fields This function allows the Master User Id to restrict individual User IDs from adding or editing certain fields to Returns. This function does not apply to Global Settings. This function is also available in the Manage ERO/Office section. This function works similarly to the Manage Restricted Forms as instructed above. Manage User Logins This function allows the Main Office to assign individual Login accounts for the Remote Office, and designate the access level applicable to that particular Login account. This function does not apply to Global Settings. This function is also available in the Manage ERO/Office section. 89

90 To Create a Login: 1. From the Office Management Screen, click MANAGE EROS/OFFICE SETUP. The Manage EROs/Office screen will open. 2. Click the button next to the User ID for whom you want to create a Login. The Logins for that particular User screen will open. 3. Click the CREATE A NEW LOGIN BUTTON. The Manage User Login Detail screen will open. 4. Enter a LOGIN ID for this Login account. 5. Enter the LOGIN NAME for this Login account. This could be the name of the actual user for this Login. 6. Enter a PASSWORD for this Login account. 7. Enter the chosen PASSWORD for this Login account a second time to confirm the entry. 8. Check the box to require the user to change the password the next time they log in to the program. If this box is not checked, the Main Office will have access to the Login account s password and will have to provide this password to the user. 9. Select an ACCESS LEVEL for this Login account from the dropdown list. The availability of Access Levels will be determined by the Access Level Set chosen during ERO Setup for this particular User ID. 10. Enter the PREPARER SHORTCUT ID for this User ID. 11. Check the box to allow the user access to the training returns only. 12. Check the box to display the fees due (in addition to the amount of refund) for each return during transmission. 13. Check the box to show only a short form of the Invoice for this Login. 90

91 14. Check the box to hide the number of returns processed on the Work in Progress screen. 15. Click the SAVE AND CLOSE button to save this Login and close this screen. Manage Databases This function allows the Main Office to create a Database for EROs, Paid Preparers, Referrals, and User Status Codes which will autopopulate the Databases in the Remote Office s program. This allows a User the flexibility of working at different workstations and/or locations without having to reenter the User s ERO and/or Paid Preparer information. See Page 58 and 56 respectively, for directions on entering the information for the Paid Preparers and ERO s Databases. Support This function allows Users to get several types of support including account management, updates, reset passwords, and order marketing resources. Select the appropriate category of support for details. 1. From the Support Home, click on SUPPORT in the Support Home Toolbar. The Support Management Screen will open Manage Offices This function allows the Main Office to activate product licenses for their users, places offices on hold, select State Packages for release and select purchased premium options. To Activate Offices: 91

92 1. From the Support Management screen, click Manage Offices. The Manage Offices Screen will open. 2. The list of all Offices will appear. An office can be located by search criteria or only the offices of a specific multi-tier can be listed by selecting the multi-tier office from the drop down list. 3. Check the box(es) under each column to active the associated product for that user ID, or if all users should have the product license click the Select All Button. Alternately you can click the Select All button. Note: The Federal License must be activated before the other columns are able to be selected. 4. Click the Update Licenses button to enable the product licensing for the modified User ID. 5. Continue activating product licenses as needed. To place a User ID on hold: 1. From the Manage Offices Screen, locate the Office/User ID that needs to be placed on hold. 2. Click the toggle hold button to place the User ID on hold. If the User ID is placed on hold they will not be able to transmit until the hold is removed. 3. To verify the User ID is on hold the toggle hold button is displayed in red. To remove a User ID from Hold: 1. Click to remove the hold. The user ID will be able to transmit to central site again. 92
93 To choose State Packages for Release: 1. From the Manage Offices Screen, locate the Office/User ID that needs the State Packages. 2. Under the column Included States click the drop down a. Select Home State, to allow the user to receive just the State that they reside in. b. Select Nearby States, to allow the user to receive their home state plus their four surrounding states. c. Select All States, to allow the user to receive all states. 3. Click the Update Licenses button to enable the product licensing for the modified User ID. 4. To select Individual States Click Under the State Software column the Choose State Packages screen will open. Check the box for every state that the User needs. 5. Click Activate Packages to allow the user to receive the selected state. To Reset Serial Number: 1. From the Manage Offices Screen, locate the Office/User ID that needs their Serial Number Reset. 2. Click to reset the serial number for the selected office. 3. Click OK to confirm that you want to reset the serial number. Reports Several reports are available within the Multi-Office Management system including Administrative, Financial, and Status Reports. Many of the reports available in this online system are the same or similar to the software program, however, they give a report of the information for more than one office. See Chapter 8, Reports, for the details of the data available from individual reports. The Dashboard The Dashboard function allows the Main Office to quickly view reports concerning the productivity of the Remote Offices sorted by pre-selected Groups. The Dashboard is available from the WIP screen. To View and Sort Reports from the Dashboard: 1. From the WIP, under TAX RETURNS, click on MANAGEMENT DASHBOARD. The Dashboard Management Screen will appear. 93
94 2. Select the DASHBOARD TYPE from the dropdown list. This features allows the sorting of the list by several different methods. 3. Select the GROUP from the dropdown list. This feature allows further sorting by preselected Groups assigned during the ERO setup process. 4. Enter a START date and END date for the transactions you want to view in the Report. 5. Click the GO button, and the report will appear. After viewing the Data, click the WIP button on the Toolbar to return to the WIP. 94
95 Part II The Tax Return Chapter 4 Preparing and Filing the Personal Tax Return Chapter 5 Preparing and Filing the Business Tax Return Chapter 6 The Tax Return Tools 95
96 96


97 Chapter 4 Preparing and Filing the Personal Tax Return Introduction The Tax Return screen is where Tax Returns are created, prepared, edited, and processed. The following instructions will guide you through the entire process of tax preparation, including electronic filing of the Return. Chapter 6 will show you the different ways you can access different functions, along with introducing you to a few functions not mentioned during the Tax Preparation and Electronic Filing directions. Different areas of the Tax Return screen will be open and available depending on whether you are in the Tax Return Lookup screen or working within an actual Tax Return. When a Return is opened or a new Return is created, the Tax Return Screen opens. This screen looks as follows: Navigational Tabs The Navigational Tabs are located at the top of the screen. These tabs allow the User to move between Individual 1040 Returns, Business Returns, and the Website swiftly by simply clicking on the appropriate Tab. 97
98 Tax Return Menu Bar The Tax Return Menu is located along the top of the screen. It includes most of the functions of the normal Menu Bar, along with additional functions for preparing Tax Returns. There are three additional Menu Bar items: Return, Form, and Print. These Menus items are covered in detail in the next chapter. Tax Return Toolbar The Tax Return Toolbar is located directly underneath the Menu bar and contains all of the basic functions you will need in the preparation and filing of a tax return. Tax Return Information Bar This black bar shows the Taxpayer s Name and Social Security number, along with the date the Return was created. Note: If an asterisk (*) appears next to the taxpayer s name, a change has been made in the return, but the return has not been saved. Attached Forms Screen This screen located on the left hand side shows all of the Forms associated with the Return, including documents that are not sent as part of the Return, such as the Invoice. To open a Form from this screen, double click on the particular Form and it will open in the Form screen to the right. The Attached Forms screen is divided into either two or three separate sections: General-This screen shows general information concerning the preparation of the Tax Return. Federal-This screen shows Forms and Worksheets related to the Federal Tax Return that will be sent to the IRS and/or should be held as a record relating to the Tax Return. State-This screen shows Forms and Worksheets related to the State Tax Return if this Return has an associated state return file. Open Form Screen This screen located on the right hand side shows the Form, Worksheet, or other document currently open. When a Return is created, the first open document is the Client Data screen. When you open any document to view or edit it, this is where the document will open and where you will be working. Creating a New Personal Tax Return The first step in creating a new Tax Return is filling out the Taxpayer Questionnaire, which can be found at this end of this Manual and is also available as a PDF. This step is essential to gather all of the information necessary to accurately prepare the Tax Return. It is also of the utmost importance to review all of the Due Diligence questions with the taxpayer and spouse, if applicable, before completing the return. Alternatively, if the taxpayer and spouse are present while the Return is being prepared, the program can be setup to ask required Due Diligence Questions. See page 31 for details. Most of the data entered into the program should come from the Taxpayer Questionnaire, the Due Diligence questions, and External Sources such as W-2s and 1099s. 98

99 Follow these steps to create a Return: 1. Click on from the Toolbar. The Add New Return window will open. 2. Enter the Taxpayer s SOCIAL SECURITY NUMBER. Alternatively, you can scan the barcode of the client s W-2 form and the social security number will autopopulate. As source documents with barcodes are scanned, the appropriate forms are added to the return with all of the information entered. You can open these forms from the Attached Forms list to view them and add any additional information that may be necessary. You can move from one field to the next by pressing Enter or Tab on the keyboard. It is not necessary to enter the dashes in the social security number. (Example: can be entered ). 3. Re-enter the same social security number next to CONFIRM ENTRY, and click OK. The Client Data screen for the new Return will open. 4. Alternatively, click the W7 button if the client does not have a valid social security number. The Client Data screen for the new Return will open. Continuing an Existing Personal Tax Return This step allows you to open a Return you have already created to continue preparation of the Return. Note: This function also allows you to add a new Return by filling in the Social Security number in the Return Lookup screen and clicking ADD. To open an existing Return: 1. Click on from the Toolbar. The Return Lookup screen will appear. 2. Under Search Criteria, next to LAST NAME OR SSN, select the search criteria you want to use from the dropdown list. 3. Enter the data that corresponds to the search criteria of the Taxpayer and click GO, and only Taxpayers with that search criteria will appear. 4. Or, click GO without entering any search criteria, and a list of all Returns will appear, or to use other Search Criteria, see page


100 5. Double click on the correct Return after scrolling down to find it, and the selected return will open. The Client Data Screen The next step in preparing a Return is entering general information into the Client Data screen about the taxpayer, spouse, and dependents, if any. To move from field to field within the Client Data screen, use either the Enter or Tab key on the keyboard. To delete information, use either the Delete or Backspace key on the keyboard. It is not necessary to fill in every field in the Client Data screen, however, filling in as many fields as possible will make it less likely you will experience errors during Verification, Transmission, and IRS Acknowledgment. Please note that the following directions only assist in where to enter the proper information. Please consult professional tax guides in determining what the proper information should be. Bookmarks Bookmarks can be entered in any field in any Form as helpful notes to yourself as the Preparer about that particular field for the client. Bookmarks can act as a helpful tickler file of items that need to be addressed before the return is completed. Also, Bookmarks are automatically time stamped so that the Preparer can keep track of when the Bookmark was created. Bookmarks will appear as a Verify Error and may prevent Printing and/or Transmission depending on how you have set the Verification Settings during Office Setup. See page 23 for details. To create a Bookmark: 1. Right click the mouse while in the field of any form, and a dropdown list will appear or press the F6 function key on the keyboard. 100
101 2. Click on BOOKMARK in the menu. The Bookmark Field will open. 3. Enter comment or question and click OK to save or CANCEL to exit without saving. A new item will be added to the ATTACHED FORMS list named BOOKMARKS. To view, edit, or delete a Bookmark: 1. Double click BOOKMARKS under GENERAL in the ATTACHED FORMS list. The Return Bookmarks window will open. 2. Double click on the Bookmark you want to work with. The form where that Bookmark is located will open, and the data field for that particular Bookmark will be highlighted. At this point, changes to the field itself can be made. 3. Press the F6 key on the keyboard to open the bookmark for the highlighted field. 4. Click OK to save the Bookmark as is and return to the previous screen. 5. Edit Bookmark and click OK to save Bookmark as edited and return to previous screen. 6. Click DELETE to delete Bookmark and exit the Return Bookmarks window. Entry of the Client Data Screen There will be fields in the Client Data screen where helpful information at the bottom of the screen will be available. For example, when the Filing Status field is highlighted, the code for each filing status will appear. To move from field to field in the Client Data Screen, press Enter or Tab on the keyboard. To fill out the Client Data Screen: 1. Next to USER STATUS, enter a User Status Code if you want to. Alternatively, click at the bottom of the Client Data screen. The User Status Codes window will open. Scroll down to the User Status Code and click on it to highlight. Click OK. The User Status Code you chose will automatically appear and the next field to be highlighted will be Dependent. To assign User Status Codes in the Database, see page


102 2. Next to TRANSCRIPTION MODE, enter X only if you want to disable the calculation engine and make every field a data entry field only. If an X already appears, this Login Account has been setup for Transcript Mode by default. Delete the X to disable Transcript Mode. Transcript Mode can be established as a default setting for all returns for a specific Login Account. For details, see page Next to PREP ID, click the CHOICES button at the bottom of the screen to open the Paid Preparers window, click the Prep ID for this user, and click OK. The Prep ID will be entered into the field. To set a default Preparation Shortcut ID for this user, see page Next to SITE ID, click the CHOICES button at the bottom of the screen to open the Site ID window, click the Site ID for this location, and click OK. The Site ID will be entered into the field. A Site ID is not a required field and can be left blank. To set a default Site ID for this location, see page Next to RECEIPT #, if a receipt number does not already appear, enter the receipt number. This is not a required field and can be left blank. To set up the program to automatically assign receipt numbers, see page The OWNER field is read only, and the name of the user for this Login Account will appear. In the blank field next to the CREATED BY field, enter an X to limit the access of this return to only this Login ID and Administrators. 7. Next to EFIN, enter the EFIN of the Tax Preparer. This information will already appear if it has been setup for this Login. 8. Next to SSN, the Taxpayer s social security number will already appear. Check this number with the Taxpayer s social security number to be sure it has been entered correctly. 102

103 9. Next to DOB, enter the birthday of the Taxpayer. This field will be highlighted in white when the screen opens. When you press Enter or Tab on the keyboard after entering the DOB, the next field to be highlighted will be Name. The taxpayer s age will appear next to the DOB field. 10. Next to DOD, enter the date of death of this taxpayer, if applicable. 11. Next to NAME, enter the First Name of the Taxpayer, press Enter or Tab, enter the Middle Initial or leave blank, press Enter or Tab, enter the Last Name, press Enter or Tab, enter any other identifying information (Example: Jr.) and press Enter or Tab on the keyboard. The next field to be highlighted will be Occupation. 12. Next to OCCUPATION, a. Enter the name of the occupation of the Taxpayer and press Enter or Tab, or b. Click at the bottom of the Client Data screen. The Occupations window will open. Scroll down to the Occupation and click on it to highlight. Click OK. The Occupation you chose will automatically appear and the next field to be highlighted will be Dependent. 13. Next to DEPENDENT, mark an X in the box only if this Taxpayer is claimed as a Dependent on another person s Tax Return. Otherwise, leave blank. Press Enter or Tab. The next field to be highlighted will be Blind. 14. Next to BLIND, mark an X in the box if this Taxpayer is legally blind according to IRS regulations. The next field to be highlighted will be Disabled. 15. Next to DISABLED, mark an X in the box if this Taxpayer is disabled according to IRS regulations. The next field to be highlighted will be Home Phone. 16. Next to HOME PHONE, enter the Taxpayer s home phone number, press Enter or Tab, enter the Taxpayer s WORK phone number (if any), press Enter or Tab, enter the Taxpayer s CELL phone number (if any), press Enter or Tab, and enter the Taxpayer s address, and press Enter or Tab. The next field to be highlighted will be Text Message. Note: The Cell Phone number must be entered to use the TextLink feature. 17. Next to TEXT MESSAGE, mark an X in the box if the Taxpayer wants to receive information from you by Text Message on their cell phone. 103
104 18. Next to CELL PHONE CARRIER, a. Click on the CHOICES button at the bottom of the screen to bring up a window including all of the TextLink supported cell phone carriers. b. Click to highlight the Taxpayer s cell phone carrier. Click OK. The Choices window will close and the cell phone carrier and code will appear in the Client Data screen. 19. Next to PREFERRED CONTACT, enter C for cell phone, E for , T for text, or P for home phone, depending on the taxpayer s preferred method of contact. These choices will appear at the bottom of the Client Data screen for quick reference. 20. Next to FORM 1040 NR, enter X to prepare a Form 1040NR for this taxpayer. 21. Next to PREFERRED LANGUAGE, enter the taxpayer s preferred language for communication. 22. Next to TAXPAYER MALE/FEMALE, enter M if the taxpayer is male or F if the taxpayer is female. 23. Next to ID NUMBER, enter the Taxpayer s driver s license or state issued identification number. 24. Next to ID STATE, enter the two letter code for the State where the ID was issued. 25. Next to ID EXPIRATION DATE, enter the date the identification expires. 26. Next to ID ISSUE DATE, enter the date the identification was obtained. 27. Next to FILING STATUS, enter 1 for Single, 2 for Married Filing Jointly, 3 for Married Filing Separate, 4 for Head of Household, and 5 for Widow or Widower. These codes are provided at the bottom of the Client Data screen for quick reference. a. If you Enter 1, 4, or 5 and press Enter or Tab, the highlighted field will move to ADDRESS INFORMATION. b. If you Enter 2, and press Enter or Tab, the highlighted field will move to SPOUSE INFORMATION. Enter the Spouse s information in the same manner as you did the Taxpayer s information. Note that the Spouse s last name will autopopulate as the Taxpayer s last name as soon as you type in the first letter of the last name if it is the same as that of the Taxpayer. If the last names are the same, press Tab on the keyboard to keep the name. If the last names are different, change it accordingly. 104 c. If you Enter 3, and press Enter or Tab, the highlighted field will move to IF MFS, DID YOU LIVE TOGETHER AT ANY TIME DURING THE TAX YEAR?
105 i. Mark an X if the Taxpayer and Spouse did live together during any time in the tax year. The box below will become highlighted. ii. If you marked an X in the previous field, mark an X next to IF SO, DID YOU LIVE TOGETHER DURING THE FINAL 6 MONTHS if the Taxpayer and Spouse lived together during the last six months of the tax year. Leave the field blank if they did not live together during the last six months of the tax year. iii. Press Enter or Tab until the field under SPOUSE INFORMATION is highlighted, and enter the Spouse s information in the same manner as you did the Taxpayer s information regardless of whether an X was entered for either of the two questions. 28. Under ADDRESS INFORMATION, if the taxpayer has a domestic address, a. Enter the Taxpayer s mailing address (street address or P.O. Box) and press Enter or Tab, enter APARTMENT NUMBER, if any, and press Enter or Tab. b. Next to C/S/ZIP, the highlighted field will move either to the Zip Code or the City, depending on what you have entered during Setup. i. Enter the City if the highlighted field moves to the City field, press Enter or Tab, enter the two digit State code, press Enter or Tab, and enter the Zip Code. ii. If the highlighted field moves to the Zip Code field, enter the Zip Code. The City and State fields should be automatically filled. c. Next to APO/FPO, enter 1 if the Address is an APO, DPO or FPO address, enter 2 if this is a Stateside Military address, or enter 3 if this a foreign address. If none of these apply, leave blank. Press Enter or Tab. d. Enter the COMBAT ZONE if applicable. Otherwise, leave blank. Press Enter or Tab. Next to Date, enter the date the taxpayer went into the Combat Zone. e. Next to US CITIZEN OR RESIDENCY, select Y for yes if the taxpayer is a U.S. citizen or resident in the U.S. for the entire tax year. Otherwise, select No. 29. Under ADDRESS INFORMATION, if the taxpayer has a foreign address, move the cursor to the empty field next to FOREIGN, click in the field to mark an X, and press Enter. The Address Information will change to reflect fields for a foreign address. a. Enter the foreign address information, as applicable. 105
106 30. If the customer will be using any type of Direct Deposit, a. Next to BANK NAME, enter the Taxpayer s bank s name, or click on at the bottom of the Client Data screen. The Banks/Credit Unions window will open. Click on the Bank s Name to highlight it, and click OK. The Bank or Credit Union name will automatically be entered along with the proper Routing Number. To enter Banks or Credit Unions into the Database, see page 66. b. Next to ROUTING NUMBER, enter the Bank s Routing number unless it was already entered automatically with the bank s name. c. Next to ACCOUNT NUMBER, enter the Taxpayer s account number at that bank and press Enter or Tab. d. Next to ACCOUNT TYPE, select CHECKING or SAVINGS, to designate the type of account. 31. To track how you are growing your client base, a. Under CLIENT REFERRAL and next to REFERRAL TYPE, enter the type of referral or click at the bottom of the Client Data screen. The referral choice screen will open. Click on the type of referral to highlight it, and click OK. b. Next to DESCRIPTION, enter additional information to help you track your referrals. (Example: Name of existing client who referred new client.) The next field to be highlighted will be the First Name under Dependents. 32. Answer the five questions regarding Health Insurance coverage. Enter a Y to answer yes, and enter an N to answer no according to the Taxpayer s answers on the Taxpayer Questionnaire. 33. Under DEPENDENTS - CHILDREN AND OTHER QUALIFYING INDIVIDUALS, if the Taxpayer does not have any Dependents leave this section blank. If the Taxpayer does have Dependents, a. If you have been following along with the previous directions, the first highlighted field will be FIRST NAME. If not, click in that field to highlight it, or if you will need to fill in more than 9 dependents, click Client Data Screen for more dependent lines. near the bottom of the 106
107 b. Enter the FIRST NAME of the first dependent, press Enter or Tab, enter the LAST NAME of the dependent, press Enter or Tab, enter the BIRTHDATE of the dependent, press Enter or Tab, enter the SSN of the dependent, and press Enter or Tab. Note that the Dependent s last name will autopopulate as the Taxpayer s last name as soon as you type in the first letter of the last name if it is the same as that of the Taxpayer. If the last names are the same, press Tab on the keyboard to keep the name. If the last names are different, change it accordingly. c. Under RELATIONSHIP, click at the bottom of the Client Data screen, and highlight the correct choice, and click OK. d. Under MO, enter the number of months the dependent lived with the Taxpayer during the tax year, or enter MX for Mexico or CN for Canada if the dependent lived in one of those countries for the entire year. e. Under CODES, in the first square, click at the bottom of the Client Data screen, highlight the correct choice, and click OK, or i. Enter 1 if the dependent lived with the Taxpayer, ii. Enter 2 if the dependent did not live with the Taxpayer because of an agreement either by divorce or other agreement, iii. Enter 3 if the dependent is the Taxpayer s parent, or iv. Enter 4 if the dependent does not fit one of the above descriptions. f. Under CODES, in the second square, the program will automatically select the proper EIC status for this dependent based on the information already entered. If this status is incorrect because other circumstances are applicable, click at the bottom of the Client Data screen, highlight the correct choice, and click OK, or i. Enter E if the dependent is an Earned Income Credit (EIC) qualifying child under age 19, ii. Enter S if the dependent is a student under age 24, iii. Enter D if the dependent is permanently and totally disabled, or iv. Enter K if the dependent is an EIC qualifying child who has been kidnapped, 107
108 v. Enter N if the dependent is not eligible for the EIC. g. Under CODES, in the third square, the program will automatically select whether the dependent is eligible for the Child Tax Credit based on the information already entered. If this status is incorrect because other circumstances are applicable, enter an X if the dependent is eligible for the Child Tax Credit or remove the X if the dependent is not eligible. h. Under CODES, in the fourth square, enter an X if the Taxpayer is eligible for Dependent Care expenses on Form 2441 for this dependent because the dependent is a child, or D if the taxpayer is eligible for Dependent Care expenses because the dependent is disabled, or leave blank if the Taxpayer is not eligible for Dependent Care expenses for this dependent. i. Under ST, different codes may be available depending on the State entered for a particular return. Enter a code from the bottom of the Client Data screen if applicable. j. If there are more dependents, enter them in the same manner. If not, move to the next section. 34. Under NON-DEPENDENTS CLAIMED FOR EIC AND DISABLED PERSON S DEPENDENT CARE EXPENSES, if the Taxpayer does not have any Non-Dependents meeting these requirements, leave this section blank. If the Taxpayer does have Non-Dependents meeting this description, a. Follow the directions above for Dependents, except under CODES, i. In the first square, enter X if this is a Head of Household qualification. ii. In the second square, enter the EIC Code, 1. E for Eligible, 2. S for Student, 3. D for Disabled, or 4. N for None. iii. In the third square, enter a D to claim dependent care expenses if the person is disabled or enter a C if the person is cared for because the taxpayer or spouse is a custodian. 108
109 b. Under ST, different codes may be available depending on the State entered for a particular return. Enter a code from the bottom of the Client Data screen if applicable. 35. The Client Data screen is now finished, and you are ready to move to the next step, Adding Forms. It is not necessary to exit this screen. Filing an Extension If your client needs to file an Extension for time, rather than a Return, add Form 4868 after the Client Data screen has been completed, according to the general directions below for adding Forms. Form 4868 can be printed or electronically filed. If the Extension is being electronically filed, it is not necessary to add Form 8879, Electronic Filing Authorization, as directed below for E-filing Returns. During Verification and Transmitting, an Error will appear that Form 8879 has not been attached. This error can be ignored and you can continue the process. Adding Forms to the Return It is now time to add Forms to the Return. Begin by adding External Source Forms-these are Forms whose information is generated solely by external sources, such as W-2s and 1099s. These forms can be entered manually or by scanning a barcode as described below. Please note that source documents are entered by scanning the barcode. The data from the form is automatically added to the return. On the other hand, actual pictures of documents can be scanned and added to the Document Archive, which is described later. Any data from these documents is not added to the return automatically. Next, add Forms which are secondary to the W-2, such as Schedule A, B, C and D. These Forms will include information derived both from external sources, such as receipts, along with information from the Taxpayer, such as whether a home office was used exclusively for work purposes. If you have entered any Business Activity Forms, follow with the entry of the Depreciation Forms, which will become available upon the creation of the Business Activity Form (directions are given in detail below). Finally, review the Form 1040 and add any additional information that is needed. Note the items above do not include an exhaustive list of Forms, external sources, or other information which need to be added, but were simply given as examples. Forms can be opened, edited, and otherwise altered by using either the Form Menu or the Return Toolbar. These directions give general instructions for adding and completing all Forms, along with specific directions for a few commonly used Forms. To Add Forms to the Return and complete them: 1. Click the button from the Toolbar. The All Forms and Schedules window will open. Alternatively, open the Scan Barcode Forms window by double clicking on this 109


110 selection under the General Attached Forms. While this window is open, scan the barcode of the documents and they will appear on the list. 2. If the ADD FORM button is used, select the form you would like to add by scrolling down to the Form or by entering the SCHEDULE/FORM NUMBER in the box at the bottom and pressing Enter on the keyboard to automatically add the Form or by pressing Tab from the keyboard to highlight the Form. You can also double-click on a form in the list to add it to the return file. Enter all external source forms first, such as W-2s and 1099s. The W-2 Form is highlighted by DEFAULT. The forms are organized as follows: a. The first tab, FEDERAL, shows the forms in order by Form Letter and Number. b. The second tab, INDEX, shows the Forms in order by description and field in alphabetical order. This option allows you to find a Form by the description of the field even if you do not know which Form to use. c. The third tab, PROFORMA, shows the Forms for storing prior year data and Forms for data entry. d. The fourth tab, STATE, shows forms used to prepare State Returns. e. The fifth tab, DEPRECIATION, shows forms used to calculate Depreciation. Additional Forms will become available in this list as Business Activity Forms are added to the Return. 3. Enter data into the Form in the same manner as the Client Data screen. General rules for filling out Forms are as follows: 110 a. The field is ready to have data entered when it is highlighted.
111 b. Use the Enter or Tab keys on the keyboard to move between fields. c. Darker areas have been autopopulated from other fields in the Return. d. Other areas are calculated fields which are either already autopopulated or will autopopulate as you add information. (Example: Social Security and Medicare wages and contributions are calculated when you enter Federal Wages. If you change the automatically entered Social Security and Medicare wages, the Social Security and Medicare contributions will be recalculated to show the new figures based on those wages. ) e. A calculated field which has been overridden (the calculation has been ignored and another value has been entered) will appear in red. 4. The bottom of the screen is available for the following information and actions: a. It will give a more detailed description of what information belongs in a particular field when it is highlighted for quick reference, b. It will provide different Choices such as Codes or information from the Database when the CHOICES button is clicked. i. Click on to view and use choices. c. It will provide access to helpful or necessary Worksheets when the WORKSHEETS button is highlighted. i. Click on to view and fill out a Worksheet. d. It will provide links to other Forms when the FORM LINKS button is highlighted. i. Click on to view form links. The program will jump to the new Form and Field that is linked to the current Form and field. 5. When the Form is finished, you can continue working on the Return by adding additional Forms or moving to the next section. It is not necessary to save individual Forms as you finish them. 6. After you have entered all External Source Forms, enter all Forms and Schedules secondary to the Form Example: Schedule A, B, C, D 7. If a Business Return has been created in this program that is associated with this Personal Return, import the Schedule K-1(s). See page 158 for details. 111

112 8. Special Note on Depreciation - There are two different Asset Entry Formats available: a. Regular Non-Vehicle Assets Follow the directions below to add non vehicle assets to a Business Activity. b. Vehicle Assets Follow the Add Vehicle Asset directions to add all vehicles to Business Activities. Also add any vehicles used in conjunction with Form To add a Regular Non-Vehicle Asset for a business: 1. To open the Business Activity Asset window, a. While in the Business Activity Form (Example: Schedule C), hold down Ctrl on the keyboard and press the N key at the same time (the All Forms and Schedules window will open to the Depreciation tab), or b. Click DEPRECIATION in the Attached Forms list under the General Section, or c. Add a Form as instructed above and go to the DEPRECIATION tab, and double click the Business Activity for which you want to add an Asset. There will be a selection for every Business Activity already added to the Return file. The Business Activity Asset window for the Business Activity will open showing a list of any Assets that have already been added. 2. Click on the NEW ASSET button. The Asset Details window will open. 3. Scroll down the list to find the type of Asset, click on the type of asset so that a checkmark forms next to it, and click OK. 4. Under the GENERAL TAB, enter the information that applies to this Asset and check any boxes that apply. 112


113 5. If the Asset qualifies for the MACRS bonus depreciation because of the Date Placed in Service, the button will be enabled. If applicable, click this button, and the Special Depreciation Allowance window will open. a. Each Federal Asset that qualifies will automatically be elected for the Special Bonus Depreciation. Check the first checkbox, only if you would like to elect out of the Special Bonus Depreciation for this Asset. b. If the Taxpayer s Resident State allows the Special Bonus Depreciation and you would like to elect to take this depreciation, check the second checkbox. c. Click OK. The Special Depreciation Allowance window will close. 113


114 6. Select the DEPRECIATION TAB, and enter the information for the Federal Return, and the State Return, if applicable. 7. If adjustments to depreciation need to be made, there are now three areas where you can make adjustments, as follows: a. Basis Adjustment Located at the top of the screen, enter in an amount to adjust the starting depreciable basis. b. Adjusted Depreciation Located in the Prior Depreciation section, enter an amount to adjust prior year accumulated depreciation. c. Depreciation Override - Located in the Current Depreciation Section, enter an amount to override the calculated depreciation or check the box at the bottom to override depreciation to zero. 8. Click to close the window and enter another asset. To view the depreciation breakdown of an asset after the Business Activity Asset window has closed: 1. While in the Business Activity Form (Example: Schedule C), hold down Ctrl on the keyboard and press the N key at the same time. The All Forms and Schedules window will open to the Depreciation tab. 2. Double click the Business Activity which has the asset you want to view. The Business Activity Asset window will open. 114


115 3. Double click on the Asset you want to view. The Choose Asset Class window for this particular asset will open. 4. Click the DEPRECIATION Tab. The depreciation breakdown will appear on the screen. To remove an Asset from a Business by Sale or Casualty: 1. Follow the directions above to open and view the Choose Asset Class window for the asset you want to remove. 2. Click if the Asset has been sold (the Disposition of Asset window will open), and a. Enter the information and check the boxes in the highlighted fields as applicable. The darkened fields will become calculated and filled as you enter the highlighted fields. b. Click OK. 3. Click if the Asset has been destroyed or stolen (the Casualty/Theft Loss window will open), and a. Enter the information in the highlighted fields as applicable. The darkened fields will become calculated and filled as you enter the highlighted fields. b. Under FORM 4684 OCCURRENCE LINK, and under DESCRIPTION, c. Choose NEW OCCURRENCE from the dropdown list to create a new Form 4684 and automatically enter the information into the Form 4684, or 115

116 d. Choose an Occurrence already appearing to link the Casualty or Loss to an already created Form 4684 and automatically enter the information into the Form 4684, or e. Choose MANUAL TRANSFER OF ASSET BASIS to not link Form This Form will have to be added and the information entered manually. f. Click OK. 4. Click if the Asset has been taken out of service, but none of the other selections apply (the Date Taken Out of Service window will open, and a. Enter the Date Taken out of Service which is the date the Asset is no longer used for business purposes. b. Click Ok. To delete an Asset from a Business: 1. Follow the directions above to open and view the Choose Asset Class window for the asset you want to remove. 2. Click. The Delete Asset window will open. Note that Assets should not be deleted unless they have been mistakenly entered. 3. Click YES to delete the Asset or NO to abandon the deletion of the asset. To add Vehicle Asset for a business: 1. To access Business Activity Asset window, a. While in the Business Activity Form (Example: Schedule C), hold down Ctrl on the keyboard and press the N key at the same time (the All Forms and Schedules window will open to the Depreciation tab), or b. Add a Form as instructed above and go to the DEPRECIATION tab. c. Double click on Car/Truck to open Business Activity Asset window. 116


117 2. Click on the NEW ASSET button. The Asset Details window will open. 3. Scroll down the list to find the type of Car or Truck, click on the type of Car or Truck so that a checkmark forms next to it, and click OK. 4. Under the GENERAL TAB, enter the information that applies to this Vehicle and check any boxes that apply, and answer all Vehicle Questions. Note: If the vehicle was placed into service and depreciated in a previous year, the program will automatically use actual expenses and depreciation for the deduction. If the asset was placed into service during the current tax year, the program will use the larger deduction available (depreciation and actual expenses vs. mileage) unless the FORCE MILEAGE STANDARD RATE option is chosen. 5. If the Asset qualifies for the MACRS bonus depreciation because of the Date Placed in Service, the screen will open). will be enabled (the Special Depreciation Allowance a. Each Federal Vehicle that qualifies will automatically be elected for the Special Bonus Depreciation. Check the first checkbox, only if you would like to elect out of the Special Bonus Depreciation for this Vehicle. b. If the Taxpayer s Resident State allows the Special Bonus Depreciation and you would like to elect to take this depreciation, check the second checkbox. c. Check the third checkbox, only if the asset is not eligible for Special Bonus Depreciation. 6. Click OK. The Special Depreciation Allowance window will close. 7. Under the MILEAGE EXPENSE Tab, enter all of the information as applicable for the vehicle, as follows: a. Next to Total VEHICLE MILEAGE, enter the total mileage of the vehicle. Entering the mileage amounts creates the business use 117

118 percentage. It is also used to attach the vehicle asset to the corresponding Business Activity. b. Enter the TOTAL COMMUTE MILEAGE to subtract this mileage from the TOTAL VEHICLE MILEAGE in the final calculation, or enter the AVG DAILY COMMUTE MILES and the program will calculate the TOTAL COMMUTE MILEAGE to subtract from the TOTAL VEHICLE MILEAGE. c. To attach the asset to a Business Activity, enter the total miles driven for each Business Activity. 8. Under the DEPRECIATION TAB, enter the information for the Federal Return, and the State Return, if applicable. 9. If adjustments to depreciation need to be made, there are now three areas where you can make adjustments, as follows: a. Basis Adjustment Located at the top of the screen, enter an amount to adjust the starting depreciable basis. b. Adjusted Depreciation Located in the Prior Depreciation section, enter an amount to adjust prior year accumulated depreciation. c. Depreciation Override Located in the Current Depreciation Section, enter an amount to override the calculated depreciation or check the box at the bottom to override the depreciation to zero. 10. Next to DEPRECIATION OVERRIDE TO ZERO, check the box to override the calculated depreciation and set it to zero. 11. Click to close the window to enter another asset. Please Note if you would like to view a breakdown of All Vehicle Assets by Business Activity select the Car & Truck Form from the Attached Forms Screen. 118

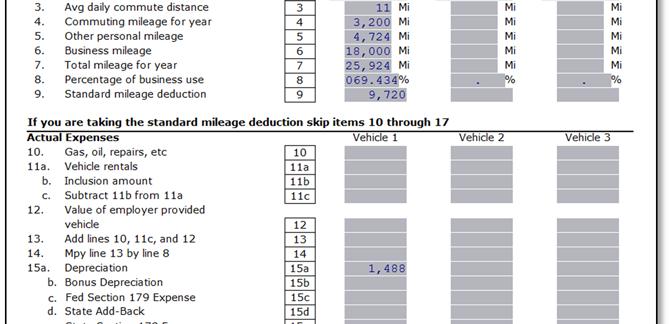

119 119


120 Completing the Processing of the Return After all of the tax data has been entered into the return, the following steps ensure the proper completion of the return. Finishing the return after all tax data has been entered: 1. After you have entered all secondary Forms, open Form 1040 by double-clicking on RET 1040-FEDERAL RETURN under FEDERAL in the Attached Forms Screen. a. Review the Form 1040 making sure all of the information is complete and fill in any additional information that must be entered on Form 1040 directly. 2. Open Form 8879 which will be automatically added to the return file under the Federal Attached Forms list. The Refund Type field will be highlighted when the form is opened. a. Next to REFUND TYPE, enter 1 for Check from IRS, 2 for Direct Deposit from IRS, 4 for Tax Payment Due, or 5 for a Refund Transfer from bank. These codes are provided next to the box and at the bottom of the screen for quick reference. i. If a 5 is entered, indicating a Bank Product, the Electronic Bank Application will be added to the Attached Forms list. See directions below for completing the Bank Application. b. The cursor will now move from the HOME PHONE and WORK PHONE number as you hit Enter or Tab on the keyboard. These numbers should be autopopulated 120
121 from the Client Data screen, but enter the phone numbers if they do not appear. c. Under Other Documents Attached, select any additional documents that need to be attached to the Return, and use the Choices section at the bottom of the screen to determine the appropriate entry. d. Under Part II, Declaration of Taxpayer, Line 6c, check the box only if the Taxpayer wants the IRS to automatically withhold funds from the Taxpayer s refund to pay federal income taxes owed by the Taxpayer. e. The cursor will now move to the TAXPAYER S PIN. If the PIN is not set up to automatically generate, enter a 5 digit number selected by the Taxpayer. It cannot contain all zeros. To set the program to automatically generate taxpayer s PINs, see page 25. f. The cursor will now move to the SPOUSE S PIN. If the PIN is not set up to automatically generate, enter a 5 digit number selected by the Spouse, if applicable, and hit the Enter or Tab key on the keyboard. It cannot contain all zeros. g. The cursor will now move to the PRIOR YEAR AGI. Enter this amount from last year s Return if the information has not autopopulated. When this field is complete, hit the Enter or Tab key on the keyboard. h. The cursor will now move to the SPOUSE S PRIOR YEAR AGI. Enter this amount from last year s Return, if applicable and the information has not autopopulated. When this field is complete, hit the Enter or Tab key on the keyboard. i. The cursor will now move to the TAXPAYER S PRIOR YEAR PIN. Enter the 5 digit number selected by the Taxpayer for last year s return. j. The cursor will now move to SPOUSE S PRIOR YEAR PIN. Enter the 5 digit number selected by the Spouse for last year s return, if applicable. k. The cursor will now move to SIGNATURE DATE. Enter the date the Taxpayer and Spouse are acknowledging and electronically signing this return. l. The cursor will move to the next section, and the PIN codes fields will be autopopulated. If the taxpayer and/or spouse manually entered their own codes, change these figures by highlighting on each code and using the Choice button at the bottom to enter the proper code. 121
122 m. The cursor will move to the ERO/Paid Preparer PIN. Enter a 5 digit number selected by the ERO or Paid Preparer. It cannot contain all zeros. n. The remainder of the information should be autopopulated. However, if it is not, continue to hit Enter or Tab and move through the rest of the Form and enter information where it is missing. 3. Other forms that may have been added to the Return File and may need attention are as follows: a. The File Options Form will be added to the Attached Forms list when data is entered into the return indicating that the taxpayer will be receiving a refund. This Form is a helpful tool allowing the Client to view all of their options concerning mailing or e-filing the Return, along with options for using Bank Products. b. If the Taxpayer is eligible for the Earned Income Credit and Form 8867, the Preparer EIC List will have been automatically added to the Attached Forms List. These questions should be answered so that the User satisfies the Due Diligence requirements of the IRS in regards to the Earned Income Credit. c. If a Bank Product was chosen in Form 8879, the Bank Application will have been automatically added to the Attached Forms list, and needs to be completed. Please Note: Different banks have different guidelines concerning their Bank Products. It will be necessary to refer to the Banking Guidelines sent to you concerning your own bank for details on how to process a Bank Application. i. Open the Bank Application by double clicking on Bank App under Federal in the Attached Forms list. ii. Enter all data on the screen-banks will not process partially completed Bank Applications. 4. The Return is now ready for the Verification Process. Verify, E-File, and Print the Return. See directions below. 5. The following documents should be printed: a. A Preparer s copy of the Bank Application will need to be printed or saved as a PDF with the Return if a financial product is being purchased. This application should be signed by the Taxpayer and kept by the Preparer in his or her office or electronically. b. A Truth in Lending Disclosure statement will be printed with the Bank Application, if applicable. This statement should be signed by the Taxpayer and kept by the Preparer in his or her office or electronically. 122

123 6. If you are adding a State Return, it is helpful to run the Verification of the Return without the State Return, then add the State Return, and run the Verification process again. The State Return may already be added to the return file by default if this selection has been made during the Overrides process. Scanning and Importing Documents to Create an Electronic File This program allows you to create an electronic file of the entire return, including all source documents and any other paperwork associated with the return. The scanner allows you to take pictures of the documents that can be viewed in the Document Archive and printed at a later date if necessary. This step helps you create a paperless office and still meet your due diligence requirements. You can also import files into the Return File and attach documents to the electronic Return that is sent to the IRS. To Add Pictures of Documents or Import Files to the Return File: 1. While the return file is open, double click on DOCUMENT ARCHIVE under General in the Attached Forms list. The Archived Documents Listing window will open. 2. Click the SCAN DOCUMENT button to add a picture of a document to the return file, and use the scanner to position the picture of the document. The Capture Document Image window will open. 3. At the bottom of the open window, select from the dropdown list, IDENTIFICATION, INCOME SOURCES, FORM W-2, FORM 1099, FORM 1098-T, or OTHER ITEMS, and enter an identifying name for this document. 123

124 4. Click the SNAP button to take a picture. 5. Click the CROP or ROTATE button at the top of the window to crop or rotate the picture, if necessary. 6. Click the SAVE button to save the picture of the document with the accompanying information. 7. Click the IMPORT DOCUMENT button to add an electronic file to the return file. The Document Import window will open. 8. Enter the FILE NAME or browse to locate the file. 9. Enter a DESCRIPTION of the file. 10. At the bottom of the open window, select from the dropdown list, IDENTIFICATION, INCOME SOURCES, FORM W-2, FORM 1099, FORM 1098-T, or OTHER ITEMS, and enter an identifying name for this document. 11. Click the OK button to save the document to the return file. 12. Additional documents can be added to the return file in the same manners (either scan or import), or click CLOSE to close the window. To View a Picture of a Document Already Scanned or a Document Imported: 1. While the return file is open, double click on DOCUMENT ARCHIVE under General in the Attached Forms list. The Archived Documents Listing window will open. 2. Click on the document you want to view to highlight it, and click OPEN. The picture of the document will appear. 3. Click CLOSE when you are finished viewing the document. To Attach Documents to the Electronic Version of the Return to be Filed with the IRS: 1. While the return file is open, double click on DOCUMENT ARCHIVE under General in the Attached Forms list. The Archived Documents Listing window will open. 124

125 2. Click on the document you want to attach to the electronic version of the return to be filed with the IRS to highlight it, and click ATTACH DOCUMENT. The Document Attachment Listing window will open. 3. Click CLOSE. Verification of the Return The next step is Verification of the Return. The program examines every field in the Return to determine whether there are errors that must be fixed before the Return is sent to the IRS. The Return should be verified even if the Return will be filed by mail. To Verify the Return: 1. While in the Return you want to Verify, click on the Toolbar. 2. If no Errors are found, the No Errors/Reject window will open. This window states that the Return has been verified successfully. a. To Transmit the successfully Verified Return, hold down the Ctrl key on the keyboard, and hit the T on the keyboard at the same time. The Return will be queued to be Transmitted on the WIP. b. To Print the successfully Verified Return, hold down the Ctrl key on the keyboard and hit the P on the keyboard at the same time. The Print Final Return window will open allowing the return to be printed immediately, a PDF of the return will be generated, or the return will be queued to be Transmitted on the WIP depending on the configuration created during Setup. c. To Transmit or Print at a later time, click OK. The Return will still be open. 3. If Errors have been found in the Return, the Return Errors and Rejects window will open. This window will open automatically on the VERIFY tab and the Verify Errors will be listed by PACKAGE, FORM, AND MESSAGE. 4. Click on an error to highlight it and correct the problem. a. To view the Details of the Error, click the button. 125
126 b. To correct the Error, double click on the Error. The Form where the Error is occurring will open, and the Field where the Error is occurring will be highlighted. Fix the Error and press Enter on the keyboard. The Return Errors and Rejects screen will appear and the next error will be highlighted. Continue correcting all of the errors until the process is finished. 5. Click the VERIFY button to run the Verification process again. Continue to fix errors and run the Verification process until all of the Errors are fixed and the No Errors/Rejects window opens. E-Filing via Transmitting to Central Site This program allows you to easily electronically file your Clients Returns. The Returns are queued to be Transmitted from within the Return after the Return has been prepared. During Transmission from the WIP Summary, the Returns are sent to Central Site, which then sends the Returns to the IRS and any applicable state agencies, for States that support e-filing and are listed in Appendix 2. Note that Form 8879 and the proper State filing Form must have been attached during Tax Preparation. Please see page 120 for further directions if this step has not been completed. If you are not e-filing a Return, skip this step and move to the next step, Printing the Return and other Related Forms. Two types of State E-filing are supported: Federal and State Electronic Filing - The Federal Return is sent to the IRS with the State Return. Once the IRS acknowledges (accepts) the Federal Return, the IRS sends the State data to the appropriate State department. State Returns must be sent with the Federal Return. Central Site will receive acknowledgements from both the IRS and the State and will send them to your program during Transmission. However, if there is an error with the State Return, the State agency will contact the Taxpayer directly. Independent filing for States - The Federal Return and State Returns are sent separately to the taxing authorities. If both a Federal Return and State Return are being filed, Central Site sends the Federal Return to the IRS and waits for an acknowledgment. Once the federal acknowledgment has been received, Central Site sends the State Return to the proper State agency. It is not necessary to send the State Return at the same time as the Federal Return, and a State Return can be filed even if the Federal Return has not been processed by this program. To Queue Returns for Transmitting to Central Site for E-filing: 1. While in the return file, click on the toolbar. The Queue Return for Transmission screen will appear and show available Packages. 2. Check the boxes under the QUEUE column for those PACKAGEs you want to queue for Transmitting at this time. 126
127 3. Check the box SUBMIT FOR DIAGNOSTICS only if the return needs to be examined by Technical Support before it is sent to the IRS and/or State agency. 4. Click QUEUE to send the Returns to the TRANSMIT QUEUE in the WIP Summary or click CLOSE to abandon the function. The action taken will depend on how you have selected the Transmission settings in Setup. The Return Lookup window will appear and the Return will be highlighted. 5. To Transmit the Returns from the WIP Summary, see page152. Printing the Return and other Related Forms The final step for preparing every Return is Printing all of the necessary copies of the Return. (This step may have already been completed as part of the Verification process.) If a paper Return has been created, it can be printed at this time. There are other options available for printing separate parts of the Return. See page 159 for further directions. To print all of the necessary copies and accompanying paperwork of the Return: 1. While in the return file and after it has been verified successfully, click the button from the Toolbar. 2. If there are additional Verify Errors in the Return, the Return Errors and Rejects screen will appear. If you still want to Print the Return, and you have allowed Printing with Errors in Setup, click NEXT. The Print Final Return window will open. If you have not allowed Printing with Errors in Setup, the Verify Errors must be corrected before Printing can occur. 3. If there are no Verify Errors in the Return, a. If you have chosen PRINT IMMEDIATE in Print Options in the Printer Setup, the Print Final Return window will open. 127

128 b. If you have chosen BATCH PRINTING in Print Options in the Printer Setup, the Return will be queued for Batch Printing in the WIP. To Print the Return from the Batch Printing option, see page 173. c. If you have chosen TRANSFER in Print Options in the Printer Setup, the Return will be queued for Transfer in the WIP and will not Print. This Return can be printed later from the Transmitting computer. 4. Once you reach the Print Final Return window, choose the Printer you want to use next to NAME from the dropdown list. The default printer created during Setup for printing Returns will automatically appear. 5. There are several choices available at this point, some of which can be combined with each other (Example: Print Preview and then Print), as follows: a. Click PRINT to Print the Return, or b. Click SIGNDOC to enter an electronic signature from a Signature Pad on the document, or c. Click the DOC checkbox first, and then click SIGNDOC to enter an electronic signature from a Signature Pad on the document and a signed/encrypted copy of the tax return to the Taxpayer. d. Click REMOTE SIGN to generate a link that will be sent to the Taxpayer or Spouse requesting their signature. To use this function a Signature Pad must have been used to previously capture the Paid Preparer Signature during the database setup, see page 56. e. Click QUEUE to queue the Return for Printing in the WIP, or f. Click FILTER to choose only certain pages of the return to print or archive, or g. Click PDF to create a PDF of the Return, or h. Check the ENCRYPT PDF box to encrypt the PDF so that it may be safely ed to the client, or i. Click PREVIEW to preview how the Return will look when Printed, or click CLOSE to close the Print Final Return window. 128


129 6. Every item chosen in RETURN PRINTING during Printer Setup will Print. To change the list of Items that will be printed, see page 34. Encrypted PDF Copy of Tax Return This function allows you to send an encrypted PDF of the tax return to the Taxpayer. This feature must be enabled under Text Messaging in Office Setup. See page 32. To an Encrypted PDF of the Tax Return: 1. While in the return, and after it has been verified successfully, click the button from the Toolbar. 2. Once you reach the Print Final Return window, select ENCRYPTED PDF COPY OF TAX RETURN. The PDF Password Window will open. 3. Select a PDF PASSWORD by one of the following two methods, a. Click OK to accept the automatically generated PDF Password. The Password consists of the last four letters of the taxpayers name and the last four digits of the taxpayers SSN, or b. Enter a new unique PDF Password and then click OK to open the window. 4. Create the by the following directions, a. Enter the SUBJECT to describe the , b. Click into the body section and enter the message you wish to convey, or use the default client letter that automatically attaches. c. Check the SEND ATTACHMENT PASSWORD box to send a second 129
 to designate whether to send the email to the Taxpayer, the Spouse or both.")
130 that contains the PDF Password created previously in step 3 and will be needed to open the PDF. d. Select the TAXPAYER and/or SPOUSE box(es) to designate whether to send the to the Taxpayer, the Spouse or both. Note: If the boxes are greyed out and cannot be checked, an address was not entered on the Client Data Screen for that individual. 5. Click OK to send the message. Sending a Text Message by TextLink TextLink allows you to send your Clients Text Messages about the status of their Returns, such as whether a Return has been acknowledged, whether a loan has been approved, or whether a check is ready for pickup. To send a Text Message: 1. Open the Return of the Client as directed above for Continuing an Existing Tax Return. 2. While in the Return, click the button on the Return Toolbar. The TextLink-Text Messaging Option window will open. 3. Type in your message up to 160 characters. 4. Click OK. The TextLink-Text Confirmation window will open. 5. Click YES to send the message. The TextLink-Success screen will open showing that your text message has been sent. 6. Click OK to close the window, or click CANCEL to close the TextLink-Text Messaging Option. 130


131 Chapter 5 Preparing and Filing the Business Tax Return Introduction The Business Tax Return screen is where Business Tax Returns are created, prepared, edited, and processed. The following instructions will guide you through the entire process of business tax preparation, including electronic filing of the Return. Chapter 6 will show you the different ways you can access different functions, along with introducing you to a few functions not mentioned during the Tax Preparation and Electronic Filing directions. Different areas of the Tax Return screen will be open and available depending on whether you are in the Tax Return Lookup screen or working within an actual Tax Return. When a Return is opened or a new Return is created, the Tax Return Screen opens. This screen looks as follows: Navigational Tabs The Navigational Tabs are located at the top of the screen. These tabs allow the User to move between Individual 1040 Returns, Business Returns, and the Website swiftly by simply clicking on the appropriate Tab. 131

132 Business Tax Return Menu Bar The Tax Return Menu is located along the top of the screen. It includes most of the functions of the normal Menu Bar, along with additional functions for preparing Tax Returns. There are three additional Menu Bar items: Return, Form, and Print. These Menus items are covered in detail in the next chapter. Business Tax Return Toolbar The Tax Return Toolbar is located directly underneath the Menu bar and contains all of the basic functions you will need in the preparation and filing of a tax return. Business Tax Return Information Bar This black bar shows the Business EIN number, along with the date the Return was created. Note: If an asterisk (*) appears next to the taxpayer s name, a change has been made in the return, but the return has not been saved. Attached Forms Screen This screen located on the left hand side shows all of the Forms associated with the Return, including documents that are not sent as part of the Return, such as the Invoice. To open a Form from this screen, double click on the particular Form and it will open in the Form screen to the right. The Attached Forms screen is divided into either two or three separate sections: General-This screen shows general information concerning the preparation of the Tax Return. Federal-This screen shows Forms and Worksheets related to the Federal Tax Return that will be sent to the IRS and/or should be held as a record relating to the Tax Return. State-This screen shows Forms and Worksheets related to the State Tax Return if this Return has an associated state return file. Open Form Screen This screen located on the right hand side shows the Form, Worksheet, or other document currently open. When a Return is created, the first open document is the Client Data screen. When you open any document to view or edit it, this is where the document will open and where you will be working. Creating a New Business Tax Return The first step in creating a new Business Tax Return is gathering all of the appropriate paperwork. This includes financial statements, receipts, asset records and any other documentation, such as Forms Misc-1099, that will be required to file the return. This step is essential to accurately prepare the Tax Return. Most of the data entered into the program should come from the financial statements. Follow these steps to create a Business Return: 132
133 1. Click the button from the Toolbar. The Add New Corporate Return window will open. 2. Enter the EMPLOYER ID NUMBER. You can move from one field to the next by pressing Enter or Tab on the keyboard. It is not necessary to enter the dashes in the employer identification number. (Example: can be entered ). This number is assigned to the business by the IRS. It may also be referred to as an FEIN. 3. Re-enter the same employer ID number next to CONFIRM ENTRY. An alert will appear if the number does not exactly match the previous entry. 4. Select the type of Business Entity from the choices as follows, and click OK. a. Select 1065 if you are preparing a federal Tax Return of Partnership Income. This form should be used if more than one individual has engaged in a business activity, and those individuals have not officially incorporated or are an LLC that has not properly requested an S-election status. If there is only one taxpayer engaged in the business activity, file Schedule C with the personal return instead. b. Select 1120S if you are preparing a federal S Corporation Tax Return. This form should be used if the business entity has incorporated or organized as an LLC, and the business entity has properly requested an S-election status. c. Select 1120 if you are preparing a federal Corporation Income Tax Return. This form should be used if the business entity has incorporated and has not properly requested an S-election status. d. Select 1041 if you are preparing a federal Tax Return for estates and trusts that earn income during the course of the year. e. Select 990 if you are preparing an annual reporting return that certain federally taxexempt organizations must file with the IRS. It provides information on the filing organization's mission, programs, and finances. Continuing an Existing Business Tax Return This step allows you to open a Business Return you have already created to continue preparation of the Business Return. Note: This function also allows you to add a new Return by filling in the Employer ID number in the Return Lookup screen and clicking ADD. To open an existing Return: 1. Click on from the Toolbar. The Return Lookup screen will appear. 2. Under Search Criteria, next to BUSINESS NAME or EIN, or select the search criteria you want to use from the dropdown list. 133


134 3. Enter the data that corresponds to the search criteria of the Business and click GO, and only Businesses with that search criteria will appear. 4. Or, click GO without entering any search criteria, and a list of all Business Returns will appear, or to use other Search Criteria, see page Double click on the correct Return after scrolling down to find it, and the selected return will open. The Client Data Screen The next step in preparing a Business Return is entering general information into the Client Data screen about the Business. To move from field to field within the Client Data screen, use either the Enter or Tab key on the keyboard. To delete information, use either the Delete or Backspace key on the keyboard. It is not necessary to fill in every field in the Client Data screen, however, filling in as many fields as possible will make it less likely you will experience errors during Verification, Transmission, and IRS Acknowledgment. Please note that the following directions only assist in where to enter the proper information. Please consult professional tax guides in determining what the proper information should be. 134


135 Entry of the Client Data Screen There will be fields in the Client Data screen where helpful information at the bottom of the screen will be available. For example, when the Filing Status field is highlighted, the code for each filing status will appear. To move from field to field in the Client Data Screen, press Enter or Tab on the keyboard. To fill out the Client Data Screen: 1. Next to TRANSCRIPTION MODE, enter X only if you want to disable the calculation engine and make every field a data entry field only. If an X already appears, this Login Account has been setup for Transcript Mode by default. Delete the X to disable Transcript Mode. Transcript Mode can be established as a default setting for all returns for a specific Login Account. For details, see page Next to PREP ID, click the CHOICES button at the bottom of the screen to open the Paid Preparers window, click the Prep ID for this user, and click OK. The Prep ID will be entered into the field. To set a default Preparation Shortcut ID for this user, see page Next to SITE ID, click the CHOICES button at the bottom of the screen to open the Site ID window, click the Site ID for this location, and click OK. The Site ID will be entered into the field. A Site ID is not a required field and can be left blank. To set a default Site ID for this location, see page Next to RECEIPT #, if a receipt number does not already appear, enter the receipt number. This is not a required field and can be left blank. To set up the program to automatically assign receipt numbers, see page The CREATED BY field is read only, and the name of the user for this Login Account will appear. In the blank field next to the CREATED BY field, enter an X to limit the access of this return to only this Login ID and Administrators. 6. Under the Client Information section the entity organization type will be selected. This information is read only and was set on the previous screen when creating the new Business Return. 135
136 7. Next to EIN, the Business s Employer Identification Number will already appear. 8. Next to BUSINESS NAME, enter the business name of this entity exactly as it appears in its application for an EIN. This field will be highlighted in white when the screen opens. When you press Enter or Tab on the keyboard after entering the Business Name, the next field to be highlighted will be the business control name and it will auto populate with the first 4 characters of the business name. 9. Next to NAME 2/DBA, enter the alternate name under which the company is doing business as, if applicable. 10. Next to OFFICE OR PARTNER, enter the First and Last Name of the Officer (S- Corp), Partner (Partnership) or Manager (LLC) who is responsible for preparing this return, who must also be authorized by the business entity to sign the return. Press Enter or Tab on the keyboard. The next field to be highlighted will be Officer/Partner Phone. 11. Next to OFFICER/PARTNER PHONE, enter the phone number of the Officer, Partner, or Manager entered. Press Enter or Tab. The next field to be highlighted is Title. 12. Next to TITLE, enter the title of the Officer, Partner, of Manager which establishes their authority to prepare this Return on behalf of the business. Examples: President, Managing Partner, Secretary, Treasurer, Director, Managing Member. Press Enter or Tab. The next field to be highlighted is Secondary phone(s). 13. Next to SECONDARY PHONE(S), enter the additional phone numbers of the Officer/Partner. Press Enter or Tab. The next filed to be highlighted is Next to , enter the Business s address that is used for official, confidential correspondence. Press Enter or Tab. The next field to be highlighted will be Text Message. 15. Next to TEXT MESSAGE, mark an X in the box if the Business wants to receive information from the User by Text Message on their cell phone. Note: The Cell Phone number must be entered to use the TextLink feature. 16. Next to CELL PHONE CARRIER, a. Click on the CHOICES button at the bottom of the screen to bring up a window including all of the TextLink supported cell phone carriers. b. Click to highlight the Taxpayer s cell phone carrier. Click OK. The Choices window will close and the cell phone carrier and code will appear in the Client Data screen. 136
137 17. Next to PREFERRED CONTACT, enter E for , T for text, or P for phone, depending on the business s preferred method of contact. These choices will appear at the bottom of the Client Data screen for quick reference. 18. Next to PREFERRED LANGUAGE, enter the business s preferred language for communication. 19. Under ADDRESS INFORMATION, if the business has a domestic address, a. Enter the Business s mailing address and press Enter or Tab. b. Next to C/S/ZIP, the highlighted field will move either to the Zip Code or the City, depending on what you have entered during Setup. i. Enter the City if the highlighted field moves to the City field, press Enter or Tab, enter the two digit State code, press Enter or Tab, and enter the Zip Code. ii. If the highlighted field moves to the Zip Code field, enter the Zip Code. The City and State fields should automatically appear. 20. Under ADDRESS INFORMATION, if the taxpayer has a foreign address, move the cursor to the empty field next to FOREIGN, click in the field to mark an X, and press Enter. The Address Information will change to reflect fields for a foreign address. a. Enter the foreign address information, as applicable. 21. Under Business Information, a. Enter the DATE ORGANIZED/INCORPORATED, if applicable, for a corporation or LLC. b. Enter the STATE OF ORGANIZATION, if applicable, for a corporation or LLC. c. Enter the NAICS CODE, or click on at the bottom of the Client Data screen. The Principal Business Activity Codes window will open. Click on the code or description to highlight it, and click OK. The NAICS will automatically be entered along with the Name of the Principal Activity. d. Enter the PRINCIPAL BUSINESS ACTIVITY unless it was already entered automatically with the NAICS code. e. Enter the PRINCIPAL PRODUCT OR SERVICE of this Business. f. Enter the FISCAL YEAR BEGINNING date if it differs from January 1st. 137
138 g. Enter the FISCAL YEAR ENDING date if it differs from December 31st. h. Enter the SERVICE CENTER where the business return will be filed if it differs from what has been automatically added. i. Select the ACCOUNTING METHOD by placing an X in the box next to Cash, Accrual or Other. Enter a description for Other, if applicable. j. Check any of the boxes designating a more specific accounting method, if applicable. k. Check the applicable boxes as follows: i. INITIAL RETURN if this is the first time this business is filing a tax return. ii. AMENDED RETURN if this is an amended return of the original return that has already been filed. iii. NAME CHANGE if the name of the Business has changed from the previous year s tax return. iv. FINAL RETURN if this is the last Return the business will be filing. v. ADDRESS CHANGE if the address listed on this Return is a different address from the one on last year s Return. l. Enter the NAME of the custodian of books and records and check the box if this is the same name as an Officer. m. Enter the ADDRESS of where the books and records are located and check the box if this is the same address of the entity. n. Under RETURN OPTIONS, i. Check to force Schedules L, M1 and M2 if the Taxpayer wants to prepare these documents even if they are not required to be filed. ii. CHECK TO LOAD ALLOCATION AND APPORTIONMENT WORKSHEET if the Business operates in more than one state. iii. CHECK TO ANSWER NO if the answer to all the questions on the Other Information section will be no. iv. CHECK TO USE TAX INFORMATION REPORTED ON ASSET WORKSHEETS to use this data to complete all of the information where this data is applicable in the return, such as the balance sheet and the income statement. 138
139 v. CHECK TO LOAD FORM 3115 if applicable to this return. vi. Check the box next to 1065/1120S FILERS ONLY to enter rental income and expenses directly on Form 8825 instead of the income statement for the individual return. 22. Enter various elections or specific information to print at the top of main federal forms. 23. If the business will be using Direct Deposit, a. Next to BANK NAME, enter the Taxpayer s bank s name, or click on at the bottom of the Client Data screen. The Banks/Credit Unions window will open. Click on the Bank s Name to highlight it, and click OK. The Bank or Credit Union name will automatically be entered along with the proper Routing Number. To enter Banks or Credit Unions into the Database, see page 66. b. Next to ROUTING NUMBER, enter the Bank s Routing number unless it was already entered automatically with the bank s name. c. Next to ACCOUNT NUMBER, enter the Business s account number at that bank and press Enter or Tab. d. Next to ACCOUNT TYPE, select CHECKING or SAVINGS, to designate the type of account. 24. Under Preparer Information, a. Next to PREPARER S NAME, enter the Preparers Name and additional required information, or click on at the bottom of the Client Data screen. The Paid Preparers window will open. Click on the Paid Preparers name to highlight it, and click Ok. The Paid Preparers name and associated information will automatically be entered. 25. To track how you are growing your client base, a. Under CLIENT REFERRAL and next to REFERRAL TYPE, enter the type of referral or click at the bottom of the Client Data screen. The referral choice screen will open. Click on the type of referral to highlight it, and click OK. b. Next to DESCRIPTION, enter additional information to help you track your referrals. (Example: Name of existing client who referred new client.) 26. Under E-FILE SECURITY, 139
140 a. Enter the Business s PHYSICAL ADDRESS, place an X in the box next to same as mailing address if applicable. b. Enter the SIGNING OFFICERS SSN. c. Enter the PRIOR YEAR TOTAL INCOME for this business, or place an X in the box next to Prior year income was zero. d. Select the filing license type of either (S)elf preparation or (P)rofessional preparation. e. Next to Number of associated W2s filed, enter the number of W2s that were generated for this business if claiming the deduction for salaries and wages. Additionally enter the NUMBER OF OFFICERS who received compensation if claiming the deduction for Officers compensation. f. Enter the PARENT COMPANY NAME and EIN if applicable. g. Place an X in the box next to each type of additional return this entity file this year. h. Use the Choices button to select the type of Payment Method for any estimated payments. Additionally enter the LAST 4 DIGITS of the account the payment was made from and enter the EFTPS CONFIRMATION NUMBER if applicable Note: only the first and last payments are viewable. 27. The Client Data screen is now finished, and you are ready to move to the next step, Adding Forms. It is not necessary to exit this screen. Filing an Extension If your client needs to file an Extension for time, rather than a Return, add Form 7004 after the Client Data screen has been completed, according to the general directions below for adding Forms. Form 7004 can be printed or electronically filed. If the Extension is being electronically filed, it is not necessary to add Form 8879, Electronic Filing Authorization, as directed below for E-filing Returns. During Verification and Transmitting, an Error will appear that Form 8879 has not been attached. This error can be ignored and you can continue the processes. 140


141 The Financial Statements The next step is the completion of the Financial Statements, a required step that is designed to improve the speed and accuracy of entering the organization s income and expenses according to the books and balance sheet data. The data can be manually entered based on the organization s financial records or by importing the data using a.csv file. See Appendix 6 for the QuickBooks Import directions. Add data to the Financial Income Statement: 1. While the Return file is open, under the Attached Forms list, General section, double click FINANCIALS INCOME STATEMENT. The Financial Statements Income Statement window will open. 2. Check the first box to elect to use the tax information reported in the Asset Manager to complete the fields pertaining to depreciation, amortization, auto expenses and sales of assets. If this box is not checked, the User will need to enter this data manually. 3. Enter all applicable information into the Revenue and Expenses sections or alternatively import the business data from QuickBooks according to the directions in Appendix 6. Add the Financial Balance Sheet: 1. While the Return file is open, under the Attached Forms list, General section, double click on Financials Balance Sheet. The Financial Statements Balance Sheet window will open. 2. Check the first box to reconcile differences in assets and liabilities in the equity accounts. If this box is not checked, this reconciliation will not occur unless the User manually enters the information. 141


142 3. Check the second box to elect to use the tax information reported in the Asset Manager to complete the fields pertaining to depreciation, amortization, auto expenses and sales of assets. If this box is not checked, the User will need to enter this data manually. 4. Enter all applicable information into the Assets, Liabilities, and Owners Equity sections or alternatively import the business data from QuickBooks according to the directions in Appendix 6. If the import has already been completed, the data will already appear. Import Financial Data This function allows the User to import financial information into a Business Tax Return from a.csv file that was exported from their accounting software. Utilizing the Tax Line Mapping built into the program ensures that the return data flows to the appropriate lines in the Business Return. To Import Financial Data: 1. While the return file is open, click on Return in the Tax Return Menu and drag your mouse to down to IMPORT FINANCIAL DATA and click once. The Import Financial Data window will open. Click Yes to continue or No to cancel. 2. Enter the File Path or click browse to locate the file. A.csv file is what can be imported. 3. Select either Balance Sheet or Income Statement. 4. Click the OK button to import the file into the tax return, or click Close to close the window. 5. The Imported Financial Data Sheet will be displayed under the Attached Forms list. 142

143 To Complete Tax Line Mapping of Financial Data: 1. After the Financial Data has been imported complete the Tax Line Mapping for the Income Statement and/or Balance Sheet. 2. While the return file is open, double click on either Imported Income Statement Information or Imported Balance Sheet under General in the Attached Forms list. The Imported financial data statements will open. 3. Locate the item description that needs to be mapped and Click into the adjacent Tax Line Mapping field. Click the Choices button at the bottom of the screen or hit F3 on the keyboard. The Tax Line Mapping window will open. 4. Scroll down the list to find the code and description that applies to the specific line item, click on the description so the line becomes highlighted, and click OK. 5. Click to carry the amounts to either the Income Statement or Balance Sheet. 6. Continue the Tax Line Mapping as needed. Adding Forms to the Business Return It is now time to add any additional, required Forms and Worksheets to the Return, with the exception of Schedule K-1s, which are addressed in the next section. See page 109 in Chapter 4 for adding Forms, which are added and completed in the same manner as a personal return. Using the K-1 Manager The K-1 Manager is used to create a Schedule K-1 for each Business Owner. A Schedule K-1 created in the K-1 Manager can be ed to each Business Owner or imported into the Taxpayer s Personal Return. See page 158 for details. To create K-1s for Business Owner: 143
144 7. While the return file is open, under the Attached Forms list, General section, double click on K-1 Manager. The K-1 Manager window will open. 8. Check the box next to DISPLAY K-1 FORMS IN THE NAVIGATION PANEL to list the newly created Schedule K-1s under the Federal section in the Attached Forms list. 9. Click the ADD button to create a new Schedule K-1. The Schedule K-1 worksheet will open. 10. Enter any applicable data into the Form Schedule K-1 worksheet in the same manner as the Client Data screen. Most of the data on the right side of the worksheet will already be calculated from the Financial Statements and other Forms and Worksheets based on the amount of percentage of ownership entered on the left side of the worksheet. General rules for filling out worksheets are as follows: a. The field is ready to have data entered when it is highlighted. b. Use the Enter or Tab keys on the keyboard to move between fields. c. Darker areas have been auto populated from other fields in the Return. d. A calculated field which has been overridden (i.e. the calculation has been ignored and another value has been entered) will appear in red. 11. When the first K-1 worksheet is finished, add and complete additional K-1s for all Business Owners. 144

145 To K-1s to Business Owners: 1. While the return file is open, under the Attached Forms list, General section, double click on K-1 Manager. The K-1 Manager window will open. 2. Click on the Owners name to highlight the K-1 that you want to . K-1 s that can be ed will have an X in the able column. 3. Click the button to a copy on the K-1 to the selected shareholder. Completing the Processing of the Return After all of the tax data has been entered into the business return, the following steps ensure the proper completion of the return. Finishing the return after all tax data has been entered: 1. After you have completed all of the forms, worksheets, and Schedule K-1s, open the Business Return by double-clicking on RET 1065, RET 1120, RET1120S, RET 1041, or RET 990 as applicable, under the Federal Section in the Attached Forms list. b. Review the Business Return making sure all of the information is complete and fill in any additional information that must be entered into the Business Return directly. 2. Open Form 8879 which will be automatically added to the return file under the Federal section of the Attached Forms list. a. The cursor will now move to the PIN section. If the PIN is not set up to automatically generate, enter a 5 digit number selected by the Business authorized representative. It cannot contain all zeros. To set the program to automatically generate business PINs, see page 25. b. The cursor will move to the Signature date which will auto fill based on when the pin was entered. c. The cursor will move to the ERO/Paid Preparer PIN. Enter a 5 digit number selected by the ERO or Paid Preparer. It cannot contain all zeros. 145
146 d. The remainder of the information should be autopopulated. However, if it is not, continue to hit Enter or Tab and move through the rest of the Form and enter information where it is missing. 3. The Return is now ready for the Verification Process. Verify, E-File, and Print the Return. See directions below. 4. If you are adding a State Return, it is helpful to run the Verification of the Return without the State Return, then add the State Return, and run the Verification process again. Scanning and Importing Documents to Create an Electronic File This program allows you to create an electronic file of the entire return, including all source documents and any other paperwork associated with the return. The scanner allows you to take pictures of the documents that can be viewed in the Document Archive and printed at a later date if necessary. This step helps you create a paperless office and still meet your due diligence requirements. You can also import files into the Return File and attach documents to the electronic Return that is sent to the IRS. This function works in the same manner as Personal Returns. See page 123 for details. Verification of the Return The next step is Verification of the Return. The program examines every field in the Return to determine whether there are errors that must be fixed before the Return is sent to the IRS. The Return should be verified even if the Return will be filed by mail. This function works in the same manner as Personal Returns. See page 125 for details. E-Filing via Transmitting to Central Site This program allows you to easily electronically file your Clients Business Returns. The Returns are queued to be Transmitted from within the Return after the Return has been prepared. Returns that are queued are shown on the 1040 WIP Summary in the Transmit Queue. During Transmission from the 1040 WIP Summary, the Returns are sent to Central Site, which then sends the Returns to the IRS and any applicable state agencies, for States that support e-filing and are listed in Appendix 2. Note that Form 8879 and the proper State filing Form must have been attached during Tax Preparation. Please see page 145 for further directions if this step has not been completed. If you are not e-filing a Return, skip this step and move to the next step, Printing the Return and other Related Forms. This function works in the same manner as Personal Returns. See page 127 for details. 146
147 Printing the Return and other Related Forms The final step for preparing every Business Return is Printing all of the necessary copies of the Return. (This step may have already been completed as part of the Verification process.) If a paper Return has been created, it can be printed at this time. There are other options available for printing separate parts of the Return. See page 159 for further directions. This function works in the same manner as Personal Returns. See page 127 for details. Every item chosen in Business Return Printing during Printer Setup will Print. To change the list of Items that will be printed, see page
148 148
149 Chapter 6 The Tax Return Tools Introduction There are five different areas in which you will find Tax Return Tools for both Personal and Business Returns: The Tax Return Toolbar The Tax Return Menu The Form Menu The Print Menu The Command Menu Some of these areas have already been mentioned in the previous Chapters on Tax Preparation and Electronic Filing. Additionally, many of the functions within these areas have already been explained in detail. This Chapter guides you through these areas individually explaining when the function is unique to a particular area or when the function can be accessed from different areas. Depending on your preference, you can choose which way works best for you. Note: some of the functions listed in this Chapter may only be available in the Personal Return. The Tax Return Toolbar While working in a Personal or Business Return, click on the function you need to use in the Toolbar. Note: some of the functions may only be available in the Personal Return. The action taken by the program will depend on your chosen function as follows: ADD FORM This function opens the All Forms and Schedules window to add Forms. This function is covered in Chapters 4 and 5. DELETE This function deletes an existing form. Note that some forms cannot be deleted. To delete an existing form: 1. Open the Form you want to delete by double clicking on it in the Attached Forms screen. 2. Click the DELETE button in the Toolbar. A window prompting you as to whether you want to delete the selected Form will appear. 3. Click OK to delete the Form or CANCEL to cancel the action. The Form will no longer exist in the Return once it is deleted. 149
150 SAVE This function saves the Return as it exists at a particular moment in time without exiting the Return. REFRESH This function refreshes the Attached Forms list to show any recent additions or deletions to the list. BACK This function scrolls up the Attached Forms list. NEXT This function scrolls down the Attached Forms list. PRINT This function prints a final copy of the Return. This function is covered in Chapters 4 and 5. VERIFY This function begins the Verification process. This function is covered in Chapters 4 and 5. QUEUE This function queues the Return for transmitting later with other Returns. NOTES This function allows you to create Preparer Notes for a particular Return. To create, view, save, and delete Preparer Notes: 1. Open the Return in which you want to use the Preparer Notes function. 2. Click the NOTES button in the Toolbar. The Preparer Notes window will open. 3. Click NEW to create a new note. The date will appear. Write your note in the empty screen at the bottom of the window and click SAVE. The new Note will now appear next to the date, and the note will be accessible from Preparer Notes under the General section of the Attached Forms screen. 4. To delete a Note, click on the Note to highlight it in blue, and click DELETE. The Note will be deleted and you will not be prompted to make sure you want to delete the note. 5. When you are finished with Preparer Notes in this Return, click CLOSE. CALC This function opens the Calculator. To Use the Calculator: 1. Use the mouse to click on the numbers and functions within the calculator, or use the numbers and functions on the keyboard to use the calculator. 2. To insert a calculated number already being used in the Tax Return, place the cursor in the field, open the calculator, Click GET and the calculated number will appear in the display field for use. 3. To insert a calculated number in a data field, place the cursor in the field, open the calculator, perform the calculation, and click Insert. The calculated number will appear in the field. 150
151 APPTS (Personal Returns Only) This function allows you to view, add, and delete appointments from the Today s Appointments function on the WIP screen. To use the Today s Appointments function from within the Return: 1. Click on APPTS while in a Return. The abbreviated Client Appointments window will open. 2. Click ADD to add an appointment. The larger Client Appointments screen will open. See page 181 for further directions on viewing appointments. 3. Click on the appointment to highlight it in blue, and click EDIT to edit an existing appointment. The larger Client Appointments screen will open. 4. Click on the appointment to highlight it in blue, and click REMOVE to delete an existing appointment. The appointment will be removed without any prompting. SEND TEXT This function allows you to send a text message to the client of the open return. This function is covered in Chapter 4. QUICK This function allows you to quickly check the status of a Return while you are working in a different Return. The Query Return Status Results window will open allowing you to quickly view information about the Return such as whether the IRS has acknowledged the Return, and if so, the current status, and whether a check for a RAC has been paid. 1. To use the Quick Return Status function, a. Click on QUICK while in a Return. The Query Return Status window will open. b. Enter the SOCIAL SECURITY NUMBER of the taxpayer or the EIN of the Business. The Query Return Status Results window will open. Click CLOSE when you are finished reviewing the information. PAYMENTS This function opens the Tax Return Payment Details window so that a payment for the tax return services can be made, or so the user can view the payment history. See Chapter 7 for details on entering a payment. CHAT This function allows you to chat with Technical Support. The chat button is available throughout the program. 1. To use the Chat function, a. Click on CHAT while in a Return. The Chat window will open. b. Enter Your Name, User ID and EFIN click the Start Chat button to initiate the chat session with technical support. 151

152 CLOSE This function closes the Return. If you have made changes to the Return, you will be prompted as to whether you want to save the changes. If you have not made changes to the Return, the Return will close without prompting. The Tax Return Menu While working in a Personal or Business Return, click on RETURN in the Menu Bar, drag the arrow down to the function you need to use, and click once. The action taken by the program will depend on your chosen function. SAVE RETURN This function saves the Return as it exists at a particular moment in time without exiting the Return. This Menu item works in the same manner as the SAVE button in the Return Toolbar. TAX ESTIMATOR (Personal Returns Only) This function jumps to the Tax Estimate-Estimator Form in the Attached Forms list and opens this Form. The Tax Estimator allows you to predetermine an approximate amount of tax that will be owed by or refunded to your client. To use the Tax Estimator: 1. Add a new Return as instructed above in Creating a New Tax Return. The Client Data screen will appear for the Taxpayer s new Return. Do not fill out the Client Data screen. 2. Click on TAX ESTIMATOR in the RETURN Menu. 3. Enter the information in the Tax Estimator in the same manner as the Client Data screen. This information will already appear in the Client Data screen when you begin preparing the actual Return. 4. The Tax Estimator will calculate the approximate tax owed or to be refunded. 5. Print the Tax Estimate using the PRINT function. VERIFY RETURN This function Verifies the Return. This Menu item works in the same manner as the VERIFY button in the Return Toolbar. QUEUE RETURN This function Queues the Return. This Menu item works in the same manner as the QUEUE button in the Return Toolbar. PRINT RETURN This function Prints the Return. This Menu item works in the same manner as the PRINT button in the Return Toolbar. 152
153 INFO/STATUS This function jumps to the Information and Status Form in the Attached Forms list and opens this Form. REJECTS/ERRORS This function jumps to the Return Errors and Rejects window so that you may quickly view any Import Errors, Verify Errors, or Rejects for the Return. SUSPEND RETURN Suspending a Return will prevent it from being sent to the IRS even if it is transmitted to Central Site. You may be instructed to use this function by Technical Support when they are trying to troubleshoot a problem with a Return. See Transmit on page 153 for directions on sending a Suspended Return to Central Site. To suspend a Return: 1. While in a Return, click on SUSPEND in the Return Menu Bar. The Manual Status Selection window will open and the Code S for Suspended from Further Processing will be selected. 2. Write COMMENTS in the bottom window as to why you are suspending this Return. 3. Click OK. The Return will now be in a Suspended status. To remove Suspended Status from a Return: 1. While in a Return, go to the INFORMATION AND STATUS Form under GENERAL in the ATTACHED FORMS list and double click to open the Form. 2. In the second line from the top, next to OVERRIDE, delete the S in the first box and the date in the second box. The Return s Suspended Status has been removed. TRANSFER RETURN This function opens the Transfer Returns window which is used to Transfer Returns either to an external storage device or a zip drive for retrieval by another computer. See page 190 for directions. DELETE RETURN This function deletes an entire Return including any attached State Returns. To delete a Return: 1. While in a Return, click on DELETE in the RETURN Menu. The Delete Return window will open. 2. Click YES to delete the Return and NO or CANCEL to abandon the deletion of the Return. Y-T-Y TRANSFER This function transfers Tax Return data from the previous year s program. This function is only necessary if the current Return is being created prior to when the Year-to-Year authorization code is entered and communications with Central Site have taken place. The data transferred during a Year- 153

154 to-year transfer is placed either in the current Return or in the ProForma forms depending on where it belongs. To transfer Return data using the Year-to-Year function: 1. While in a Return, click on Y-T-Y TRANSFER in the RETURN Menu. The Year-To-Year Data Transfer Options window will open. 2. Click RELOAD to transfer the previous year s Return (any information saved for this year s Return will be lost), or click STATE ONLY to transfer only the State Return data from the previous year s Return (any Federal Return data already entered will not be lost), or click CANCEL to cancel the action. RE-LOAD BILLING This function operates as soon as it is selected from the dropdown list. This function recalculates the invoice for the return if any changes have been made to the return or billing scheme that would affect the amount due. COPY TO TRAINING This function will create a copy of the return and place it in the training database. REVIEW BOOKMARKS This function allows you to view Bookmarks in the Return Bookmarks window. This function is covered in Chapter 4. PREPARER NOTES This function opens the Preparer Notes window. This Menu item works in the same manner as the NOTES button in the Return Toolbar. OVERFLOW DETAILS This function opens the Overflow Details Listing window to view all instances where the Open Statement function from the Form Menu was used to create an overflow list on a Form. See page 157 for directions to use the Open Statement function. To view and open overflow data: 1. While in a Return, click on OVERFLOW DETAILS. The Overflow Details Listing window will open. 2. Double click on an item from the list to view the Form. The Form with the overflow data will open. Click CLOSE when you are finished viewing the information. DELETE STATE This function is similar to the Delete function in the Return Menu, however, it only deletes the State Return. Additionally, it allows you to choose which State Return you would like to delete. 154
 This function opens the K-1 Manager in the Business Return. See page 143 for details.")
155 To delete a State Return: 1. While in a Return, click on DELETE STATE in the RETURN Menu. The Delete State window will open. 2. Click on the State Return you want to delete. 3. Click OK to delete the Return or CANCEL to abandon the deletion. K-1 MANAGER (Business Returns Only) This function opens the K-1 Manager in the Business Return. See page 143 for details. CLIENT APPOINTMENT (Personal Returns Only) This function opens the Client Appointments window. This Menu item works in the same manner as the APPT button in the Return Toolbar. DOCUMENT ARCHIVE This function opens the Archived Documents Listing window. This location stores Returns as PDF s which have been signed by a Signature Pad and documents or other images that have been scanned. Once a Return has been signed, it becomes a permanent record here, and remains even if the Return is altered and resigned at a later date. This function also provides for the scanning of additional documents. See page 123 for details. To open an Archived Document: 1. While in a Return, click on DOCUMENT ARCHIVE in the RETURN Menu. The Archived Documents Listing window will open. 2. Click on the Document you want to open and click OPEN. A PDF of the Return or document will open for viewing or printing. EVENT LOG This function opens the Event Log which shows the actions that have been taken in the program with a time and date stamp. This function also allows the user to add events. 155
156 SCAN BARCODE FORMS This function opens the Scanned Forms Listing window. This function is covered in Chapters 4 and 5. TEXTLINK PLUS (Personal Returns Only) This function opens the TextLink-Text Messaging Option window. This function is covered in Chapter 4. LOCK/UNLOCK This function Locks and Unlocks the Return. The user will be prompted when the function is activated whether the Return has been locked or locked. CHANGE OWNER This function allows the user to change the Owner/Tax Preparer of the return. The user will be prompted to choose a new owner when the function is activated. CHANGE ENTITY TYPE (Business Returns Only) This function opens the Change Entity Type window and allows the User to change a business entity from one type to another. IMPORT FINANCIAL DATA (Business Returns Only) This function allows the User to import data for either the balance sheet or income statement using a CSV file. See Appendix 6 for details. CLOSE RETURN This function closes the Return. SPLIT TAX RETURN (Personal Returns Only) This function allows the user to change a state-level Married Filing Joint Return for Registered Domestic Partners into two federal single tax returns or a federal/statelevel Married Filling Joint Return into two federal/state Married Filing Separately returns. The user will be prompted to choose a new filing status when the function is activated. To Use the Split Tax Return Feature: 1. Prepare both the federal and state returns as normal selecting Married Filing Joint Return. 2. Enter a T or an S on the Client Data Sheet next to each Dependent or Others Cared for to designate that individual to the Taxpayer or Spouse s individual return. 3. Check the bottom of all Forms and Worksheets for a note that states TAXPAYER/SPOUSE SPLIT FIELD. This note indicates that items may be allocated to the Taxpayer or Spouse. Select Ctrl + W when a split field notification appears. An Overflow Detail worksheet will open with a question mark next to items that need to be allocated. 4. Enter a T to allocate items on the worksheet to the Taxpayer and an S to allocate items on the worksheet to the Spouse. 5. File the state return only if a Married Filing Joint Return is being filed for the state Return While in the Return, click on SPLIT TAX RETURN in the RETURN Menu. The Split Tax Return window will open.

157 7. Select SINGLE to split the federal Return into two separate Single Returns of Registered Domestic Partners or select MARRIED FILING SEPARATELY to split the federal Return of a married couple. 8. Open the individual Returns from the Return List and file the Returns separately. The Form Menu While working in a Personal or Business Return, click on FORM in the Menu Bar, drag the arrow down to the function you need to use, and click once. The action taken by the program will depend on your chosen function. ADD FORM This function opens the All Forms and Schedules window to add Forms. This function is covered in Chapters 4 and 5. DELETE FORM This function deletes a Form which was previously added to the Return. This function is covered in Chapters 4 and 5. FORMS ATTACHED This function simply moves the cursor from wherever it is to the Client Data line in the Attached Forms screen. OPEN WORKSHEET This function opens a Worksheet when the field allows or requires a Worksheet entry. The WORKSHEETS button in the Return becomes activated when one of these fields are highlighted. The Open Worksheet function in the Menu Bar works in the same manner as the WORKSHEETS button at the bottom of the form. OPEN STATEMENT This function allows for Overflow data when working in a Form and there are not enough lines in the Form for all of the required data. To use the Open Statement function: 1. Highlight the field in the Form in which you need Overflow data. 2. Click on OPEN STATEMENT in the FORM Menu. The Overflow window will open. 3. Fill in the Overflow data. 4. Press the Esc key on the keyboard to return to the Form. Overflow details can be viewed from the Return Menu. See page 154 for more details. 157
158 GOTO LINE # This function allows you go directly to a specific line in a Form. To move to a specific line: 1. While in a Form, click on GOTO LINE # in the FORM Menu. The Goto Line window will open. 2. Enter Line Number and press OK. LINK FORMS This function allows you to quickly jump from one Form to another. This function is available when the FORM LINKS button at the bottom of the Return becomes activated, which occurs because the current highlighted field is linked to another Form. The Link Forms function in the Menu Bar works in the same manner as the LINK FORMS button. INPUT INDEX This function opens the INDEX Tab in the All Forms and Schedules window used when you are adding Forms. The Input Index function in the Menu Bar works in the same manner as the ADD FORM button in the Toolbar with the second tab selected. CLIENT PROFORMA (Personal Returns Only) This function opens the PROFORMA tab in the All Forms and Schedules window used when you are adding Forms. The Client ProForma function in the Menu Bar works in the same manner as the ADD FORM button in the Toolbar with the third tab selected. DEPRECIATION This function opens the DEPRECIATION Tab in the All Forms and Schedules window used when you are adding Forms. The Depreciation function in the Menu Bar works in the same manner as the ADD FORM button in the Toolbar with the fifth tab selected. STATE FORMS This function opens the STATE Tab in the All Forms and Schedules window used when you are adding Forms. The State function in the Menu Bar works in the same manner as the ADD FORM button in the Toolbar with the fourth tab selected. REVIEW NEXT FORM This function opens the next Form in the Attached Forms list. REVIEW PREV FORM This function opens the previous Form in the Attached Forms list. QUESTIONNAIRE (Personal Returns Only) This function allows the user to create a custom Questionnaire that must be completed while the Return is being prepared. This function was not fully operational at the time this Manual was printed. Please contact your Technical Support person for details. ADD OCCURRENCES This function allows the user to create multiple occurrences of the same form. IMPORT SCHEDULE K-1 (Personal Returns Only) This function allows the user to import a Schedule K-1 from a Business Return into a Personal Return. To import a Schedule K-1: 1. While in a Personal Return, click on IMPORT SCHED K1 in the FORM MENU. The Import Schedule K-1(s) window will open. 158

159 2. Check the box next to the SSN of the person whose Schedule K-1 needs to be imported. 3. Click the Import button. The Schedule K-1 from the Business Return will be automatically added to the Personal Return. The Print Menu While working in a Return, click on Print in the Menu Bar, drag the arrow down to the function you need to use, and click once. Follow the directions in Chapters 4 and 5 for printing when the Print dialog window opens. The action taken by the program will depend on your chosen function. CURRENT FORM ONLY This function prints only the Form of the Return that is currently opened in the screen. RETURN COMPONENTS This function allows the User to pick certain Forms of which one copy will be printed. To use the Return Components function: 1. While in a Return, click on RETURN COMPONENTS in the PRINT Menu. The Print Specified Components window will open. 2. Check or uncheck boxes of components of which you want one copy printed. 3. Click OK to open the Print dialog window or CANCEL to return to the Return. 4. Follow the directions for the Print Dialog window in Chapter 4. FINAL TAX RETURN This function prints the Return in the same manner as the PRINT button in the Return Toolbar. SCHEDULE K-1S (Business Returns Only) This function prints the Schedule K-1s associated with the Business Return. BANK DOCUMENTS (Personal Returns Only) This function prints the Bank Documents associated with the Return and forms required for electronic filing. DISCLOSURE/PRIVACY This function prints the consent forms and privacy statements that are required to be provided to the Taxpayer. 159
 This function prints the Form 8879 and Form 8453 electronic filing documents associated with the tax return.")
160 ORGANIZER/PROFORMA (Personal Returns Only) This function prints the Proformas for tax planning, however, they are not available until the Proforma package is sent to you following the normal tax season. 8879/8453 EF DOCUMENTS (Personal Returns Only) This function prints the Form 8879 and Form 8453 electronic filing documents associated with the tax return. ACKNOWLEDGE LETTER This function prints the Federal Acknowledgement Letter. STATE ACK LETTER This function prints the State Acknowledgment Letter. This function is not available if there is no associated State Return. CLIENT LETTER This function prints either the Federal or State Client Letter. PAYMENT VOUCHER This function prints only the Payment Voucher for the Return. EXTENSION REQUEST This function prints an Extension Request. Creating an Extension is covered in Chapters 4 and 5. REFERRAL COUPONS (Personal Returns Only) This function prints referral coupons that the Taxpayer can give to their friends. ATTACHED FORMS LIST This function prints the Attached Forms list as it appears in the Return screen. Other options are available for printing such as Landscape or Portrait layout. PREVIEW RETURN This function generates a pdf copy of the return with a watermark of Preparers Review Copy Do Not File on the return. The Command Menu The Command Menu consists of a list of Commands that are also available on the keyboard by using the Function keys. The corresponding Function key is listed. HELP TOPIC (F1) This command opens the Help Menu. WORK IN PROGRESS (F2) (Personal Returns Only) This command exits the current screen and opens the WIP Summary screen. BUSINESS SUMMARY (F2) (Business Returns Only) This command exits the current screen and opens the Business Summary screen. CHOICE LIST (F3) This command works in the same manner as the Choice button in the Return Toolbar. This command is only available when a Return is open. SELECT FOR PRINT (F4) This command allows you to customize which Forms print for a particular Return. Making changes using this command only customizes the printing for the current Return. 160
161 To use the Select for Print command: 1. While in a Return, click the F4 button on the keyboard, or click on SELECT FOR PRINT from the COMMANDS Menu. The Customize Page and Worksheet Printing window will open. The preset selections of what normally does and does not print are selected under AUTO PRINT and DON T PRINT respectively in that order. 2. Check the box FORCE PRINT to Print a Form or Worksheet whose box is checked DON T PRINT, indicating that it does not normally print with the Return. 3. Check the box DON T PRINT to prevent the printing of a Form or Worksheet whose box is checked AUTO PRINT, indicating that it does normally print with the Return. 4. Click OK when you are finished with your selections. 5. Click CLOSE to close the window. CLEAR OVERRIDE (F5) This command reruns the calculation over an overridden field. To clear an Override and recalculate the field: 1. Place the cursor in the field where you want to clear the Override. 2. Click the F5 button on the keyboard, or click CLEAR OVERRIDE from the COMMANDS Menu. The value will return to the calculated value. BOOKMARK FIELD (F6) This command opens the Bookmark Field for creating a Bookmark. This command is covered in Chapter 3. CALCULATOR (F7) This command opens the Calculator. This command works in the same manner as the CALC button in the Return Toolbar. SEARCH CRITERIA (F7) This command is not always available in the Command Menu. This command is only available when the Return Lookup screen is open. This command allows a broader search for Returns from data such as EFIN, Receipt, or Home Phone Number. PRINT WINDOW (F8) This command opens the Print Dialog window to print the current screen being viewed. The Print Dialog window will vary according to which screen is open. SORT STATEMENT (F9) This command allows a list of items in a Form, Worksheet, or Overflow column to be sorted in ascending order alphabetically. To sort a column: 1. Place the cursor somewhere in the column to be sorted. 2. Click the F9 button on the keyboard, or click Sort Statement from the Commands Menu. A prompt as to whether you want the column sorted will open. 161
162 3. Click OK. The column will be sorted. EXIT (F10) This command exits the program. This command works in the same manner as the Exit button available when the Work In Progress Summary screen is open. 162
163 Part III Work In Progress Summary Chapter 7 Administrative Tools Chapter 8 Utility Menu Chapter 9 Reports Chapter 10 Help Menu 163
164 164

165 Chapter 7 Administrative Tools Work In Progress Summary Introduction The Work In Progress Summary (WIP) screen allows the Administrator or other User to have quick access and knowledge of certain functions that should be performed regularly. The screen allows the Administrator to view a quick snapshot of how many Returns exist at different stages in the tax preparation process, along with any printing duties, important bulletins, and appointments. The Work In Progress Summary Screen looks as follows: When you are away from the WIP screen, and you want to return, click along the Toolbar. which can be found Tax Returns The Tax Returns section of the WIP Summary allows you to quickly access tax returns, view a summary of tax returns being prepared and processed, and have a quick link to the Management Dashboard. Select a Return This function is used to view or create personal returns. It is discussed fully in Chapter 4 on Personal Tax Return Preparation. Status Summary List This list allows you to view the status of all Returns prepared in the program. See Appendix 3 for a list of Status Codes and Descriptions. Also, you can create your own User Status Codes in the Database. See page 70 for details. To view the Status Summary List: 1. From the WIP, under TAX RETURNS, click on STATUS SUMMARY LIST. The Return Status Summary window will appear. 165
166 2. View the List. The CODE will appear first, a DESCRIPTION will occur second, and the number (COUNT) of Returns with this Status will appear third. 3. To view a list of the individual Returns with a particular status, double click on the line for that status. The Return Lookup window will open, and only the Returns with the chosen status will appear. Management Dashboard This function is used to manage Multi-Office Organizations. It is discussed fully in Chapter 3. For more information, see Page 93. Business Returns This function is used to view or create business returns. It is discussed fully in Chapter 5 on Business Tax Return Preparation. Training Returns This function allows the user to create Returns in a training environment. Full functionality to prepare a Return is available, however, the Returns will not be sent to Central Site for transmission. Transmit Queue The Transmit Queue serves as the communication link between your software program and Central Site or between Non-Transmitting Computers and Transmitting Computers. Central Site serves as the communication link between your software program(s) and the IRS and the banks. Whenever you transmit to Central Site, Central Site receives newly entered information from your software program and returns information received from the IRS and/or the banks that it has received on your behalf. Central Site will also send you any current updates. Whenever you Transfer Returns and Mail, the Transmitting Computer receives newly entered information from the Non-Transmitting Computer and returns information from Central Site. 166

167 Communication with Central Site is a very important function even if there are no Returns to send. Try to Transmit to Central Site at least twice a day during the busy tax season to keep the tax preparation process moving smoothly. Transmit to Central Site or Service Bureau The Transmit to Central Site function is available to Transmitting and Feeder Computers. Please note that if you are using Non-Transmitting Computers, it is important to transfer information (the next section) from the Non-Transmitting Computers to the Transmitting Computer before you Transmit to Central Site. To Transmit to Central Site: 1. From the WIP, under TRANSMIT QUEUE, click TRANSMIT TO CENTRAL SITE. Alternatively, you can hit the TRANSMIT button from the Toolbar. The Transmit to Central Site screen will appear and show the Items to send. 2. Click the FILTER button to remove any return files from the Transmit Queue that you don t want to send with this Transmission. 3. Click TRANSMIT. This button can be found in the lower right hand corner. You should have already configured the transmission settings during the Setup of Communications on page 67. If you have not already done so, please go to that page now. If you are unable to establish a connection with Central Site, please contact technical support for help. You will be prompted when a successful communication with Central Site has occurred. 4. Click OK to return to the previous screen. 167

168 5. Click CANCEL to close the Transmit to Central Site screen and return to the opening screen. The WIP screen will reflect any information transmitted or received during the communications process. Transfer Returns/Mail The Transfer Returns/Mail is only available to Non-Transmitting Computers. To Retrieve Returns from the Transmitting Computer, see page 189 under Utility Menu. To Transfer to the Transmitting Computer: 1. From the WIP, under TRANSMIT QUEUE, click TRANSFER RETURNS/MAIL. The Outqueue Contents window will appear and show the File types and Descriptions to transfer. 2. Click TRANSFER. This button can be found in the lower right hand corner. The Transfer Returns screen will open. The File Name and the location of the Transfer File should appear. The default Transfer File path is setup at page 29. The Transfer file can be saved to an external drive or an internal file for later sending by . If it does not appear, or if you want to transfer the information to a different location, click the [ ] button to browse and find the correct location The LABEL NAME will appear as the User Name. Enter a different LABEL NAME if you want to identify it differently.

169 4. Click OK. The Transfer File Contents screen will open. If an empty file has been chosen, the information has now been transferred to that file. 5. View the CONTENTS OF THE FILE with the transferred information. 6. Click APPEND if an existing File has been chosen, and you want to APPEND the new information to the end of the existing file. 7. Click REPLACE if an existing File has been chosen, and you want to replace the entire file with the new information. 8. Click CLOSE when you are finished to return to the WIP screen. Printing Queue The Printing Queue shows a list of print jobs that are currently ready, along with how many of each to print. Checks, Registers, and Activation During communications, Central Site will send a list of checks that have been authorized by your bank to be disbursed. The number next to Checks, Registers, and Activation will show how many checks are authorized and ready to be printed. To activate and begin a series of checks: 1. From the WIP, under PRINTING QUEUE, click CHECKS, REGISTERS, AND ACTIVATION. The Checks, Registers, and Activation screen will appear. 169


170 2. Click on the third Tab, CHECK INVENTORY. Two lists will appear: A STARTING CHECK NUMBER and an ENDING CHECK NUMBER. Checks must be activated by check number before the program will allow them to be used. This function further allows you to activate different series of checks for different printers and possibly different workstations and/or Site ID s. 3. Click ACTIVATE. This button can be found in the lower right hand corner. The Activate Check Range screen will open. 4. Select the RAC BANK from the dropdown list which you previously selected for processing your bank products. 5. Enter the STARTING CHECK NUMBER and the ENDING CHECK NUMBER for the set of checks you want activated at this time. If you enter check numbers that have already been activated, you will be prompted that you have overlapped check numbers. 170
171 6. Enter the SITE ID for this set of checks to differentiate between what check numbers are available to use at certain sites. 7. Enter the CHECK LAYOUT VERSION, if applicable. This is only required for certain banks, and the information is available on the outside packaging of the checks. 8. Click OK. You will be returned to the Check Inventory Tab. 9. Select a range and click EDIT or double click on the range to edit an activated set of check numbers. The Edit Check Range window will open. 10. Edit the STARTING and/or ENDING CHECK NUMBERS and click OK. The edited check numbers will appear in the Check Inventory Tab. 11. Click CLOSE to return to the WIP screen. To print Checks from the Print Queue: 1. From the WIP, under PRINTING QUEUE, click CHECKS, REGISTERS, AND ACTIVATION. The Checks, Registers, and Activation screen will appear. 2. Under the first tab CHECKS TO PRINT, under FILTER CRITERIA, from the dropdown list, choose ALL SITES or one particular Site for which you want to print checks. 3. Click TEST CHECK when you start new checks to see if they print correctly. 4. Click on the box next to each check you want to print. A checkmark will appear in the box. You can alternatively click SELECT ALL at the bottom to checkmark all the checks or click CLEAR ALL to clear the checkmarks from the checks. 5. Check the printer to be sure it is loaded properly with checks. 6. Click PRINT CHECK(S). The Print Checks window will open. 171

172 7. Enter the STARTING CHECK NUMBER in the printer and click OK. This number must correspond with a set of the numbers activated to be printed. See above section for details. The Print window will open. 8. Select the correct printer from the dropdown list. See page 33 for designating a default printer for printing checks. 9. Click PRINT. The selected check(s) will begin printing. Please see the User s Guide for details on distributing the check(s) to the Taxpayer(s). 10. Click CLOSE to return to the WIP screen. To delete Checks from the Print Queue: 1. From the WIP, under PRINTING QUEUE, click CHECKS, REGISTERS, AND ACTIVATION. The Checks, Registers, and Activation screen will appear. 2. Under the first tab CHECKS TO PRINT, under FILTER CRITERIA, from the dropdown list, choose ALL SITES or one particular Site for which you want to delete checks. 3. Click on the box next to each check you want to delete. A checkmark will appear in the box. You can alternatively click SELECT ALL at the bottom to checkmark all the checks or click CLEAR ALL to clear the checkmarks from the checks. 4. Click DELETE. The check will automatically delete without prompting and you will be returned to the Checks to Print Screen. 5. Click CLOSE to return to the WIP screen. To view the Check Register and Reprint or Reissue Checks: 1. From the WIP, under PRINTING QUEUE, click CHECKS, REGISTERS, AND ACTIVATION. The Checks, Registers, and Activation screen will appear. 2. Click on the second Tab, CHECK REGISTER. 3. To look for a specific check, under FILTER CRITERIA, enter the LAST NAME or the SSN of the person whose check you are searching. 4. Click FILTER to view the checks matching your selection. You should be able to quickly find the check you are looking for from the list. 172
173 5. Mark the box of the check you were searching with a checkmark. You can also use the SELECT ALL and CLEAR ALL buttons at the bottom to mark all the checks or unmark all of the checks. 6. Click VOID to void a check. Important: When a check is Voided, it is NOT sent to Central Site first. If a check is stolen or lost, you must call the bank to place a stop payment on the check. 7. Click REPRINT to reprint a check without reissuing it through the bank. Important: When a check is set to be Reprinted, it is NOT sent to Central Site first. The check is simply queued to be printed again. The ERO will be prompted by a warning that he or she is responsible for any losses attributed to the unauthorized reprinting of a check. This option should be used only for checks that are torn, damaged, or printed incorrectly. Write VOID clearly on the check and see your Bank Guidelines on what to do with the voided check. 8. Click CLOSE to return to the WIP screen. Tax Returns When Tax Returns are set for batch printing, the number next to Tax Returns will show how many are ready to be printed. See page 36 for directions on the setup of batch printing. To Print or Delete Tax Returns from the Printing Queue: 1. From the WIP, under PRINTING QUEUE, click TAX RETURNS. A screen similar to the Return Lookup screen will appear with a list of Returns queued to print. 173


174 2. To Print, a. One Return, click on the Return to highlight it in blue. Click PRINT from the Toolbar. b. A section of Returns (that are in a row), click the first return in the section-it will become highlighted in blue, hold down the Shift key on the keyboard (do not release), and then click the last Return in the section-all of the returns in that section will become highlighted in blue. Click PRINT from the Toolbar. c. Scattered returns throughout the list, hold down the Ctrl key on the keyboard, and then select Returns by clicking on them. The selected returns will become highlighted in blue. Click PRINT from the Toolbar. d. All Returns, click PRINT ALL from the Toolbar. The Print window will open. 3. Select the correct printer from the dropdown list. See page 33 for directions on designating a default printer for printing returns during Setup. 4. Click PDF to create a PDF which can be saved or printed from the PDF window. 5. Click PRINT to print to the selected printer. 174
175 6. To delete a Return(s), follow the same directions above, except press DELETE instead of PRINT. You will not be prompted as to whether you really want to delete the return. Proformas The Proforma option will be available when you receive your Archive CD later in the year. Federal Acknowledgement Letters Federal Acknowledgement letters are queued by Central Site during communications with Central Site. These letters provide information to the Taxpayer concerning their return, including when their return was acknowledged, how much their refund will be, how much their loan amount will be, and an approximate time as to when these funds will be available. These letters also provide information concerning any payments due to the IRS and where to send them. See page 45 to edit the contents of these letters during Setup. A Federal acknowledgement letter for an individual return can be printed from within the actual Return by using the Print Menu. See page 159 for details. To Print Federal Acknowledgement Letters: 1. From the WIP, under PRINTING QUEUE, click FEDERAL ACKNOWLEDGEMENT LETTERS. A screen similar to the Return Lookup screen will appear with a list of Letters queued to print. 2. Follow the steps above under Printing Tax Returns. The Federal Acknowledgement Letter printing function works in exactly the same manner as the Tax Return printing function. State Acknowledgement Letters State Acknowledgement letters are processed in the same manner as the Federal Acknowledgement Letters. They also contain similar information. See Federal Acknowledgement letters for directions on printing. See page 45 to edit the contents of these letters during Setup. Exceptions/Rejections After Returns have been transmitted to Central Site and processed, Central Site will return them back to your program as an Exception or Rejection, if a Return could not be processed properly. The Return will end up in this section under the appropriate field, depending on why it was sent back. Fed Rejects Federal Rejects occur for numerous reasons, but generally, it involves an error that must be fixed before the IRS will process the Return electronically. To View and Correct Federal Rejects: 175

176 1. From the WIP, under EXCEPTIONS/REJECTS, click FED REJECTS. A screen similar to the Return Lookup screen will appear with a list of Returns rejected by the IRS. 2. Double click on a Return you want to resolve. The Return will open, and the Return Errors and Rejects window will open on top of the Open Return. The Rejects Tab will be open, and it will show a list of errors that must be corrected. 3. To understand an error, click on the line of that error and it will highlight in blue. Click DETAILS. The Description area will give greater explanation as to the error. 4. Fix the listed errors in the Return. 5. Close the Return Errors and Rejects window. 6. Click TRANSMIT to queue the Return for a retransmission to Central Site. 7. Go to the next rejected Return on the list, correct the errors, and click TRANSMIT. 8. When you are finished correcting and transmitting the Returns, click the WIP button in the Toolbar to return to the opening screen. 176
177 State Refused and Rejects These Rejects can also occur for numerous reasons-some which can be fixed, and others that cannot. As a result, some of these Returns will need to be retransmitted while others will not. To view and correct State Refused and Rejects: 1. From the WIP, under EXCEPTIONS/REJECTS, click STATE REFUSED AND REJECTS. A screen similar to the Return Lookup screen will appear with a list of Returns rejected for any other reason besides a Federal Reject. 2. Follow the directions listed above for Fed Rejects. However, note that not all rejects and exceptions can be remedied. 3. After reviewing a Return, if a reject or exception cannot be remedied, from the screen listing all of the rejected or excepted Returns, click on the Return to highlight it in blue, and hit DELETE. The Return will be removed from the exception/reject list. 4. When you are finished correcting and transmitting the Returns, click the WIP button in the Toolbar to return to the opening screen. Fed/State Alerts The IRS Alert/Messaging system provides an avenue for informing the Tax Preparer that they have an issue that needs corrected. These Alerts inform the Tax Preparer, however, they are not issues so serious as to hold up the Acknowledgement of the Return. These Alerts will be available both outside and within the Return file. Fed Refused These Returns are refused by Central Site and have not yet been sent to the IRS, a bank, or a State for further processing. Information could be missing or invalid, or the Return could have been sent to Central Site with a Suspended Status. To View and Correct Refused Returns: 1. Follow the directions above for Fed Rejects. If the Return has been Suspended, please see page 153 for removing the Suspension. Verified Retrieved These Returns have been Retrieved from a Non-Transmitting Computer. They are ready to be Verified and then Transmitted. To Verify and Transmit these Returns: 1. From the WIP, under EXCEPTIONS/REJECTS, click VERIFY RETRIEVED. The Verify process will begin on the Returns in this queue. The Return Lookup window will appear showing the status or the Returns: 177

178 a. If a returns has been Verified successfully, it will be queued for Transmitting and the Status in the Return Lookup window will say Return Queued. b. If a Return has not been Verified successfully, the Return will not be queued for Transmitting, and the Status will say Retrieved. These Returns must be corrected individually and re-verified before they are ready to be transmitted. See page 125 for Verification of the Returns. 2. When you are finished reviewing the Returns, click the WIP button in the Toolbar to return to the opening screen. Bank Rejected These Returns have had a bank product rejected by the Bank and need to be corrected and resubmitted. To View Returns with Rejected Bank Products: 1. From the WIP, under Exceptions/Rejects, click Bank Rejected. 2. Double click each Return in the list to open the bank applications one by one. 3. Correct the errors reported in the bank applications. 4. Click the Resubmit Bank App button to queue the bank application for resubmittal during the next transmission to Central Site. Pending Remote Signatures These Returns are waiting to receive the remote signature from the Taxpayer(s). Remote Signatures can be requested during printing of documents that need to be signed see page 128. All electronically signed forms will be saved in the Document Archive as a permanent record of the Tax Return see page 155. To View Returns waiting for Taxpayer(s) Signatures: 1. From the WIP, under Exceptions/Rejects, click Pending Remote Signatures. 2. Double click each Return in the list to open the tax return that is waiting for the taxpayer and/or spouse to sign. 178
179 3. Under the Attached Forms, double click Remote Signature, the Remote Signature Listing Window will open. Displaying the Document, Requested Signature Date and Time and the Status. 4. Scroll down the list and click the document, it will become highlighted. a. Click to print the document without the taxpayer(s) signatures. b. Click to delete the pending signature request for a specific document. c. Click to open the document archive and view signed documents or permanent records that have been attached to the Return. See page 155 Other Items Software Updates During transmission to Central Site, software updates will be sent back to your program. You will be prompted to install the updates when Software Updates under Other Items becomes highlighted, and the number of updates will appear off to the right. It is important to install any Software Updates you receive as soon as possible to ensure your program is working at its maximum potential. To Install Software Updates: 1. Close all other programs if you are working on a network. 2. From the WIP, under OTHER ITEMS, click SOFTWARE UPDATES. The Software Updates screen will open. 3. Click PRINT if you would like a copy of the description of the update(s). 4. Click Apply All. 5. Click RESTART when installation is finished. The program will now open with the most current updates. 6. All other networked workstations can also open the program, if applicable. Secure This function allows you to create an to send to Technical Support during communication with Central Site. Technical Support will receive your and send you a response that you will receive during your next communication with Central Site that occurs after Technical Support has responded. To create or edit an to be sent to Central Site: 179

180 1. From the WIP, under OTHER ITEMS, click SECURE . The Queued window will open. 2. Click NEW. The Queue Message window will open. 3. Write your message under DETAILS. 4. Next to ATTACH SSN, enter the Taxpayer s SSN to attach files from the return. 5. Enter the DESTINATION USER ID of the technical support person with whom you are working and click OK. The window will close and return to the Queued window. The new- will appear under DESCRIPTION. 6. To edit an that has not yet been sent, click on the to highlight it, and click OPEN. Edit the and click SAVE. 7. Click CLOSE when you are finished with creating and editing s. The s will be sent to Central Site during the next communications. Bulletins Central Site will send you Bulletins regarding the most recent changes in federal and state tax laws, rules and regulations, along with important bank updates. The Bulletins will let you know what you need to do to stay in compliance, and in addition, will make you aware of any software updates that will be released to conform to the new law, rule or regulation. It is important to check the Bulletins often for any important information that may apply to you. You will be alerted when you have new Bulletins and how many. To View, Save, Print and Delete Bulletins: 1. From the WIP, under OTHER ITEMS, click BULLETINS. The Bulletins screen will open. 180

181 2. Double click on the Bulletin you want to review. The Bulletin Message window will open. 3. Read the Bulletin, and a. Click SAVE to keep the message and turn off the alert that you have a new bulletin, b. Click DELETE to discard the bulletin, c. Click PRINT to print the bulletin, and/or d. Click CLOSE to close the bulletin and keep the alert that you have a new bulletin. 4. After reading all of your new Bulletins, click the WIP button in the Toolbar to return to the main screen. Today s Appointments This function allows you to view a calendar with the current day highlighted, schedule appointments, and view those appointments in both a list fashion by day and on the calendar. From the WIP, under OTHER ITEMS, click TODAY S APPOINTMENTS. The Today s Appointments screen will open. The Today s Appointments screen looks as follows: Toolbar: The Toolbar is located along the top of the screen and allows you to work with Appointments. Calendar: Different months can be viewed by clicking on the small arrows next to the name of the current month. The current day is circled in red. Also, the current day is shown at the bottom of the calendar. Days with appointments set are in bold. 181
, along with the Preparer s Name and the Subject matter of the appointment.")
182 Appointment List: This list appears to the right of the calendar. If you highlight a certain day on the calendar, this list will show you the appointments for that day. The list includes the Date and Time (in military time), along with the Preparer s Name and the Subject matter of the appointment. If the appointment concerns a Client, the Taxpayer s Name and phone number will also be listed. Notes Area: This area will show any notes associated with a certain appointment entered by the User. To create an Appointment: 1. Click ADD from the toolbar. The Clients Appointments screen will open. If you highlight a date on the calendar before you click Add, this date will automatically appear under Date. 2. Enter the SUBJECT of the Appointment. (Example: Prepare tax return, disburse refund check) 3. Next to START TIME, select the date and time from the dropdown calendar and the time selection arrows. 4. Enter the PREPARER if it is someone different from the person currently logged in. The User ID of the person currently logged in will already appear. 5. Under OUTLOOK, a. Select the DURATION of the appointment from the dropdown list. b. Next to REMIND BEFORE, choose whether you want a reminder, and how long before the appointment you want to receive your reminder. The reminder will be sent to your Outlook account if you have that program. 6. Check INCLUDE CONTACT INFORMATION if you want to include the Client s contact information in the Outlook Reminder. 7. Click SEND TO OUTLOOK to set the appointment in the Outlook calendar. 8. Enter the NAME, ADDRESS, CITY, STATE, ZIP, PHONE, and ADDRESS of the client. 182
183 You only need to enter the information that will be necessary for this particular client. If it is a new client, you should enter all of the information. If it is a returning client, you may only need to enter their name. 9. Enter any NOTES that will be helpful to you. These notes will appear on the Today s Appointments screen when you click on the appointment in the Appointment List. 10. Click SAVE to close and return to the Today s Appointments screen. To view the details of an Appointment, 1. Find the Appointment in the calendar and click on it in the Client Appointment List to highlight it in blue. 2. Double click the Appointment. The Client Appointments screen will open. 3. View the Appointment. 4. Click the GO TO button to open the Client s Return, which will appear if the Appointment was created during the preparation of the Tax Return 5. When finished viewing the appointment, click SAVE to close and return to the Today s Appointments screen. To edit an Appointment: 1. Find the Appointment in the calendar and click on it in the Client Appointment List to highlight it in blue. 2. Click EDIT from the Toolbar or double click the appointment in the Client Appointment List. The Client Appointments screen will open. 3. Make edits to the Appointment. 4. Click SAVE to close and return to the Today s Appointments screen. To delete an Appointment: 1. Find the Appointment in the calendar and click on it in the Client Appointment List to highlight it in blue. 2. Click DELETE from the Toolbar. The appointment will delete without any prompting. 3. To view only your own Appointments, while logged in under your User Name, click SHOW MY APPOINTMENTS ONLY under the calendar. 4. When you are finished with TODAY S APPOINTMENTS, click the WIP button to close and return to the main screen. 183
184 Backup Returns Backing up your returns and other data is an essential function during the busy tax season. To enable and setup Backup, see page 30. Once the Backup Returns function is activated, all Returns (new and modified) are queued to the list of Backup Returns. If the Backup needs to be Restored, see page 187. To Backup Returns: 1. From the WIP, under OTHER ITEMS, click BACKUP RETURNS. The Backup Returns screen will open. 2. Click SELECT ALL to highlight all of the Returns, or select individual returns by checking the boxes next to them. 3. Click CLEAR ALL if you want to un-highlight all of the Returns and start the process over. 4. Click BACKUP. You will be prompted when you have successfully backed up your Returns, along with a number of how many Returns were backed up. 5. Click CLOSE to return to the main screen. To Backup All Data: 1. From the WIP, under OTHER ITEMS, click BACKUP RETURNS. The Backup Returns screen will open. 2. Click FULL BACKUP. The Full Backup screen will appear. 184


185 3. Click in the boxes to create checkmarks of all the items you want to Backup. If you want to backup all items, place a check in every box. 4. Click OK. You will be prompted when you have successfully backed up your Data, along with how many items of Data were backed up. 5. Click CLOSE to return to the main screen. TextLink Plus Inbound and TextLink Plus Outbound This is a premium package. Please contact your sales person for details on purchasing and using this feature. Quick Reports Frequently viewed reports can be located here so that you can quickly access them. See Chapter 8 for more information on reports. To add and remove Reports to and from the Quick Reports area: 1. From the Opening Screen, click on UTILITY in the Menu Bar, drag the arrow down to QUICK REPORTS LIST, and click once. The Quick Reports window will appear. 185

186 2. The screen on the left has AVAILABLE REPORTS that can be added to the Quick Reports List, and the screen on the right has the WORK IN PROGRESS-QUICK REPORTS which are those reports that have already been added to the Quick Reports List. 3. To add a Report, click on the Report from the AVAILABLE REPORTS so that it becomes highlighted. Click ADD. The Report will move to the right hand side. 4. To remove a Report, click on the Report in the WORK IN PROGRESS-QUICK REPORTS so that it becomes highlighted. Click REMOVE. The Report will move to the left hand side. 5. Click OK to close and return to the main screen with the changes, or click CLOSE to close the screen without any changes made to QUICK REPORTS. If you click OK, the Quick Reports area of the WIP will reflect the changes. 6. To view a Quick Report, from the QUICK REPORTS area on the WIP, click on the particular Report you want to view. The Report will appear. 7. When finished with the Quick Report, click the WIP button to return to the main screen. Payment Button The Payment Button allows any user of the program to process a payment and apply it to a taxpayer s invoice, even if the User does not have access to the taxpayer s return file. It also allows any User to view the payment details of previous payments made making it easier to assist clients who have questions about their payment history. To Process a Payment: 1. From the Toolbar on the Opening Screen, click the button. The Tax Return Payment Search window will open. a. Enter the Primary Taxpayer s SOCIAL SECURITY NUMBER. The Tax Return Payment Summary window will open. 2. Click NEW PAYMENT which can be found on the bottom right hand side of the window. The Tax Return Payment Details window will open. 186
187 3. Enter the DATE RECEIVED if different than the current date, from whom the payment was RECEIVED, select the PAYMENT METHOD from the dropdown list, enter the AMOUNT of the payment, and enter a REFERENCE NUMBER and/or MEMO, if applicable. The name of the User who is currently logged in will appear next to RECEIVED BY. 4. Click SAVE. The Tax Return Payment Details window will close, and the new payment will appear in the list under Payment Information in the tax Return Payment Summary window. To View the Details of a Processed Payment: 1. From the Toolbar on the Opening Screen, click the button. The Tax Return Payment Search window will open. 2. Enter the Primary Taxpayer s SOCIAL SECURITY NUMBER. The Tax Return Payment Summary window will open. 3. Click on the processed payment to view under PAYMENT INFORMATION to highlight it. 4. Click Details which can be found on the bottom right hand side of the window. The Tax Return Payment Details window will open. 5. View the Details of the Payment and click CLOSE when finished. Login Account Lock Enhanced Security Login is a new feature that gives our users and their accounts an additional later of protection from fraud. Our enhanced security precautions were implemented to make user accounts more secure. A User s account will become locked after six failed login attempts. The user can wait fifteen minutes for the lock to be removed or a User with an Administrator Access level can manually remove the lock. To Remove the Account Lock: 1. A User with Administrator Access must login to the program. 2. From the Opening Screen, click on SETUP in the Menu Bar, drag the arrow down to LOGIN ACCOUNT, and click once. The LOGIN ACCOUNTS window will open. 3. A lock icon will be displayed next to each login account that has attempted and failed to login to the program more than six times. 187


188 4. Click the LOGIN ACCOUNT you wish to unlock, and it will become highlighted. Click EDIT. The Login Preferences screen will appear and you can make your desired edits. Click OK when you are done. 5. The Lock will be removed and the user can now login to the program. Forgot Password Link The Forgot Password link has been added to the login page allowing the users to reset their password. To utilize the Forgot Password feature the login must have either an Address or Cell Phone Number entered in their login account. A temporary password will be ed or sent via text message to the user, upon verification, they will then be allowed to create a new password. Use Forgot Password: 1. From the Login Screen Click, enter the Login name and click Forgot Password? link. The Forgot Password window will open. 2. Check Send to Cell to send the temporary password to the cell phone registered with this login account. Alternatively Check Send to to send the temporary password to the address registered to this login account. Click Ok to continue or click cancel to close the window. 3. Enter the Temporary Password. 4. In the New Password field enter in the new password for this Login following the strong password guidelines. 5. Re-enter the newly created password and click OK. Communication with central site will occur and the program will open. 188
189 Chapter 8 Utility Menu Introduction The Utility Menu provides a list of different functions, some of which need to be performed daily and are also found on the WIP Summary, and others which do not need to be performed as frequently. Retrieve Returns This Utility is used by a Transmitting Computer to open files that have been transferred by a Non- Transmitting Computer. See the next section for directions on transferring Returns. To Retrieve Returns: 1. From the Opening Screen, click on UTILITY in the Menu Bar, drag the arrow down to RETRIEVE RETURNS, and click once. The Select a File to Retrieve window will open. 2. From the dropdown box, locate the Returns folder where you previously transferred the data from the Non-Transmitting Computer. The files in the folder will be listed in the open window. 3. Click on the file you want to retrieve. It will be listed as the File Name used during transfer. 4. Click OPEN. The Transfer File Contents window will open. 5. Check the boxes of the Returns you want to retrieve by clicking on them. You can also use the SELECT ALL button to check all of the Returns or click CLEAR ALL to uncheck all of the Returns. 6. Click RETRIEVE. The number of Returns retrieved will be shown. 7. If the Retrieve Return Already Exists box opens, click Y to overwrite the existing Return and replace it with the retrieved Return, or hit N to skip the existing Return, or [Esc] to abort the Retrieve process. 8. Click OK. The Return Lookup screen will open with a list of the Retrieved Returns. 9. Transmit to Central Site. See page 126 for directions on transmitting returns. Transfer Returns The Transfer Returns function is used to transfer Returns from a Non-Transmitting Computer to a Transmitting Computer. This function is available in the Utility Menu, but is more readily available in the 189
190 WIP for computers marked as Non-Transmitting/Feeder Computers during Setup. See page 23 for Setup. To Transfer Returns from the Utility Menu: 1. From the Opening Screen, click on UTILITY in the Menu Bar, drag the arrow down to TRANSFER RETURNS, and click once. The Outqueue Contents window will open. 2. Go to Step 2, on page 168 for complete directions. Master Log Event This utility allows you to create a customized report of different events that have occurred by person. To Create a Master Log: 1. From the Opening Screen, click on UTILITY in the Menu Bar, drag the arrow down to MASTER EVENT LOG, and click once. 2. Enter a number of ROWS to limit the rows of data in the report. 3. From the dropdown box, select the search criteria you want to search. 4. In the next box, enter the value of the search criteria. 5. Click Go. The report will be prepared for viewing providing all events that have occurred for a particular social security number, Login ID, User ID, or Site ID. Export Records The Export Records function allows you to export client data and Return information to an external database or spreadsheet program for the facilitation of custom sorting and reporting. The program saves the data in a comma-delimited file format, which is used by the majority of other software programs. To Export Records from this program to an outside program: 1. From the Opening Screen, click on UTILITY in the Menu Bar, drag the arrow down to EXPORT RECORDS, and click once. The Export Records window will open. 2. Select an EXPORT NAME from the dropdown list to choose the name of the data you would like to export. The Export Name represents a preset list of data fields. 3. Next to OUTPUT FILENAME, enter the path name of the location where you would like to send the data, or press the [ ] button to browse. The Save As window will open. 190
 provide a prompt for a CREATION DATE in a Month/Day format. Enter the date or leave blank. Click OK. The month and day are already entered by default.")
191 4. Search for the folder where you would like to send the data, and click on it. Next to FILE NAME, enter a name for the file. Click SAVE. The path name will appear next to Output File Name. 5. Click EXPORT. Some data sets (Export Names) provide a prompt for a CREATION DATE in a Month/Day format. Enter the date or leave blank. Click OK. The month and day are already entered by default. (Example: January 1 st is entered as 0101) A window will appear showing how many Returns have been exported. 6. Click OK. The original Export Records window will now appear in front. 7. Click CLOSE to return to the main screen. 8. To view the data, open the database or spreadsheet program and open the file where the data was exported. The program will provide directions to convert the comma-delimited file to a useful format. Updates The Updates function allows you to transfer Software Updates from a Transmitting Computer to a Non- Transmitting Computer. It is important to establish communications with Central Site via the Transmit function on page 153 before transferring updates to be sure the updates are current. To save Updates to a remote storage device (for a physical transfer) or folder (for an transfer): 1. From the Opening Screen, click on UTILITY in the Menu Bar, drag the arrow down to UPDATES, and click once. The Software Updates window will open. 191
 tab and check the boxes next to the software update packages you want to save.")
192 2. Next to PATH, click on the BROWSE button in the top right hand corner to find the location of where you want to send the updates. Click on the folder and click OK. 3. Click on the CREATE DISK(ETTE) tab and check the boxes next to the software update packages you want to save. Depending on the size of the storage device, you may not be able to save all of the update packages at once. 4. Click on the update and click DETAILS to view the details of an individual update. 5. Click CREATE. The Updates will be copied, and you will be prompted by the total number of updates. 6. Click OK to return to the initial Updates window. 7. If you have saved the Updates to a folder for ing, zip the files in the folder, and them. To Load an Update from a storage device to a Non-Transmitting Computer: 1. From the Opening Screen, click on UTILITY in the Menu Bar, drag the arrow down to UPDATES, and click once. The Updates window will open. 2. Insert the storage device into the Non-Transmitting Computer. 3. Next to PATH, click on the BROWSE button in the top right hand corner to find the location of the storage device. Click on the file and click OK. 4. The Updates will now appear as a list under LOAD UPDATE(S). 192

193 5. In the LOAD UPDATE(S) tab, check the boxes next to the software update packages you want to load from the storage device. 6. Click on an update and click DETAILS to view the details of an individual update. 7. Click the LOAD button. The Updates will be loaded, and you will be prompted by how many Updates were loaded, and whether you have storage devices to load. 8. If you have additional storage devices to load, click YES and follow the onscreen directions. Otherwise click NO. Once you click NO, the Software Updates window will open. 9. Click APPLY ALL. 10. Click RESTART after Updates are installed to restart the program with the new updates applied. To Load an Update from a zip file to a Non-Transmitting Computer: 1. Close the program if it is open. 2. Unzip the files from the to the location C:\Xlink17\WRKQUEUE. If you are loading Updates to a server via , use the Network Location, for example, E:\Xlink17\WRKQUEUE. 3. Open the program. The Software Updates will appear in the WIP Summary, and can be loaded in the same manner as they are for a Transmitting Computer. See page 179 for more information. Activate Check Range The Activate Check Range is used to limit a range of check numbers that are authorized to be printed. This function is available in the Utility Menu, but is more readily available in the WIP Summary under the Printing Queue. 193

194 To Activate and Begin a Series of Checks from the Utility Menu: 1. From the Opening Screen, click on UTILITY in the Menu Bar, drag the arrow down to ACTIVATE CHECK RANGE, and click once. The Checks, Registers, and Activation window will open. 2. Go to Step 2, page 169 for complete directions. Print Blank Forms This function allows you to print blank Tax Forms, Schedules, and Worksheets. To Print Blank Forms: 1. From the Opening Screen, click on UTILITY in the Menu Bar, drag the arrow down to PRINT BLANK FORMS, and click once. The Print Blank Forms window will open. 2. Next to PACKAGE NAME, select a particular package from the dropdown list that you would like to print. EF Package is the Federal Electronic Filing Package, PF Package is the Federal Paper Filing Package, and the other Packages are listed by the two letter state postal code. 3. Check the box next to the Forms, Schedules, or Worksheets you would like to print, or click SELECT ALL to print the entire package. 4. Click CLOSE when you are finished to return to the previous screen. Quick Report List This function allows you to add Reports to the Quick Report list so that they can be queried and viewed by a simple click on the WIP screen. See page 185 on how to add and view a Quick Report. System Utilities This function helps Technical Support troubleshoot problems you may be having. You should use these utilities only when you are in contact with Technical Support. Your Technical Support contact person will assist you in the use of these functions. 194
195 Important Note: It is best to limit this function to Users with Administrator access to prevent unauthorized changes to important program data. See page 51 for directions on limiting access to other Users. Systems Utilities is a specifically listed access that can be limited. Restore Backup Return This function allows you to restore Returns you previously stored using the Backup Returns function in the WIP Summary screen. See page 184 for details. While you should regularly use the Backup Returns function to protect data, the Restore Backup Returns function will only be needed when something has happened to your Return data. To Restore Backup Returns: 1. From the Opening Screen, click on UTILITY in the Menu Bar, drag the arrow down to RESTORE BACKUP RETURNS, and click once. The Backup File Contents window will open with a list of saved Returns, along with the Return Lookup Screen. 2. If the Returns have been saved to a different Backup Path than the one setup as a default, hit the [ ] button to browse. If you use the Browse function, click OK to enter the proper Backup Path. 3. Next to LIST RETURN, use the dropdown box and do the following: a. Click SHOW ALL to show all saved Returns (this will include copies of the same Return if the Return has been backed up more than once), b. Click SHOW MOST RECENT to show the most recently saved Returns (this will include only the most recently backed up copy of an individual Return), or c. Click SHOW RECENT OVER DIR to show the last complete list of saved Returns (this will include only copies of Returns that no longer exist in the current directory). 4. Check the box next to the Returns you want to restore, or use the SELECT ALL button to choose all of the Returns, or use the CLEAR ALL button to clear those Returns you have already checked. 195
196 5. Click RESTORE. If a Return being restored already exists in the current program data, you will be prompted whether you want the existing Return replaced. 6. Click one of the following: a. YES to overwrite the existing Return with the saved Return (note that any changes made to the Return since the last Backup will be lost), b. NO to keep the existing Return, or c. ALL to overwrite all existing Returns with the saved Returns. 7. Click OK on the window prompting you as to how many Returns were restored. The Return Lookup screen will show the restored Returns. 8. Review the restored Returns, and click WIP to return to the main screen. User Preferences This function allows the current user to quickly access the Login Preferences that are available when the Login Account is created during Setup. See page 50 for specific directions. Specifically, this function allows the user who is currently logged into the program to select different preferences and override some selections made during Setup. This function also allows the current user to change his or her password. 196

197 Chapter 9 Reports Introduction The Reports Menu provides several different preset Reports. The data for these Reports can be queried according to your needs so that a Report only reflects the information you require. Custom Reports can also be generated within the Return Lookup screen by selecting columns to be displayed and criteria to be queried. All preset Reports are opened in the same manner with differing options available for sorting and grouping within the particular Report window. As listed below, there are six categories of preset Reports each having its own subgroup of Reports. Several types of Reports are available to meet the needs of your individual business, and you will find some of them to be indispensable. To find the Report you are looking for, use the Report Menu to decide on a general option, and then scroll on that option for a particular Report that will meet your needs. Alternatively, there are several options available for creating a custom Report within the Return Lookup screen. The user selects all of the columns to be viewed in the Report and then separately selects the search criteria to be used, along with the parameters of that search criteria. Using the Report Menu General Directions for Opening and Viewing a preset Report: 1. From the Opening Screen, click on REPORTS in the Menu Bar, and drag the arrow down to the general Report category. A new menu will open to the right. Drag the arrow down to the particular Report you want to use and click once. The Report Writer window with the particular Report you chose will open. Under Results, basic information about the formation and printing of the Report will appear. 2. Mark options on how you would like to query the Report. See below for further details on individual Reports. 3. To view the Report, click QUICK VIEW. The Report will appear in the Results screen. 197

198 4. To print the Report, click PRINT. The Print window will open. 5. Select the Printer from the dropdown list. The default printer for Reports will already appear. See page 33 for setting up the default printer. 6. Click OK to print a hard copy, click PDF to create a PDF, or click Cancel. 7. Click CLOSE to close the Report window. Status Reports These Reports print a list of Returns according to their current status. This function is useful for creating a list of Returns that need a specific step to further or complete the tax preparation process. REJECTED RETURNS This Report allows you to view rejected Federal Returns as a list. You have different options for sorting and grouping the data. You can also limit the Returns on the list by a starting and ending acknowledgement date. DETAILED REJECTED RETURNS This Report allows you to view the details of rejected Federal Returns including the reject code and description of the reject. You have different options for sorting and grouping the data. You can also limit the Returns on the list by a starting and ending acknowledgement date. REFUND TRANSFERS This Report provides a list of clients who have received a refund transfer. You have several options for sorting and grouping the data. CHECK(S) READY This Report provides a list of clients whose checks are ready for printing. It allows you to sort and group the clients by different criteria and includes the client s home phone number. This Report is a useful tool to use in tandem with check distribution. STATE ACKS/REJECTS This Report provides a list of State Returns that have been acknowledged, along with their status, including whether they have been rejected by the State. The Report can be sorted by different criteria, including the State Code. 198
199 STATUS BY CREATION DATE This Report provides a list of Returns and their current status within a certain date range of being created. Other sorting criteria can also be applied to the Report. STATUS BY MODIFICATION DATE This Report provides a list of Returns and their current status within a certain date range of having been modified. Other sorting can also be applied to the Report. STATUS WITH PREP FEES This Report is similar to the Status by Creation Date Report except that it also includes the Tax Preparation fees charged. ETD STATUS REPORT This Report provides a list of Extensions that have been electronically filed and whether they have been acknowledged or rejected, or are still pending. IRS Acks These Reports print a list of Returns that have been acknowledged either by all Returns within a certain date range or by category. The Reports give a count of how many Returns have been acknowledged and allow you to sort and group the Returns by different criteria. IRS ACK COUNTS This Report provides a list of all federal Returns acknowledged within a certain date range and can be sorted and grouped by different criteria, making the Report more customized to your needs. IRS REJECTS (ALL) This Report provides a list of all federal Returns that have ever been rejected, including those that have been retransmitted and acknowledged. This report can be very helpful for quickly viewing what types of Returns are being rejected in order to identify whether a Preparer is potentially committing fraud. IRS AND STATE ACKNOWLEDGEMENTS This Report is similar to the previous Report except that it only includes Reports that required both IRS and State Acknowledgement if both Acknowledgements have been received. This Report is very helpful if you are preparing Returns for States who are slower to process and acknowledge their Returns or those States who do not acknowledge rejected Returns. IRS ACKS WITH PHONE AND ADDRESS This Report provides a list of all federal Returns acknowledged within a certain date range with the Phone Number and Address of the client. RACS WITH IRS DEPOSITS This Report provides a list of all federal Returns for which a refund deposit has been issued by the IRS. RACS WITHOUT IRS DEPOSITS This Report provides a list of all federal Returns for which a refund deposit has not been issued by the IRS. Fee Payments These Reports group Returns by whether the tax preparation fees have been paid. 199
200 FEE PAYMENTS BY PAYMENT DATE This Report provides a list of Returns for which fees have been paid by payment date. This Report also breaks down the fees paid by Return Preparation Fee, Electronic Filing Fee, and Document Preparation Fee. NO FEE PAYMENT BY ACK DATE This Report provides a list of acknowledged Returns for which the fees have not yet been paid. FEE PAYMENTS BY RECEIPT This Report provides a list of Returns for which fees have been paid by Receipt number. This Report also breaks down the fees paid by Return Preparation Fee, Electronic Filing Fee, and Document Preparation Fee. NO FEE PAYMENTS BY RECEIPT This Report provides a list of Returns for which the fees have not yet been paid by Receipt number. FEE PAYMENTS BY SITE AND DATE This Report provides a list of Returns by Site for which the fees have been paid. RAC FEES BY SITE This Report provides a list of Returns by Site showing the amount of Bank RAC fees that have been charged and whether they have been paid. OTC PAYMENTS BY PAYMENT DATE This Report provides a list of clients who have received a payment as an overage from the original amount of their tax return refund. Ack Letters This function does not print an actual Report, but instead prints Acknowledgement Letters within a certain group, and within a certain date range. IRS BALANCE DUE LETTERS This function prints all Acknowledgement Letters from the IRS for Returns you have processed that require a balance of tax paid to the IRS within a specified date range. IRS ACKNOWLEDGEMENT LETTERS This function prints all Acknowledgement Letters from the IRS within a specified date range, regardless of the contents of the letter. STATE ACKNOWLEDGEMENT LETTERS This function prints all State Acknowledgement Letters within a specific date range, regardless of the contents of the letter. CLIENT PAYMENT VOUCHERS This function prints only the Payment Voucher for Federal Acknowledgement letters. Mailing Labels There are three options for printing mailing labels: 1) Use the internal software program for formatting and printing the labels. 200
 Use the EXPORT RECORDS function within the Utilities function to export the data to any type of data processing program.")
201 2) Use the EXPORT TO WORD function within the Mailing Labels function to export the data to Microsoft Word for formatting and printing labels. 3) Use the EXPORT RECORDS function within the Utilities function to export the data to any type of data processing program. Note: The third option only provides for a full mailing list of all clients whereas this function allows a more refined sorting of clients. To print Mailing Labels using the third option, see page 190 under Utilities for further directions on Export Records. To print Mailing Labels using the first two options: 1. From the Opening Screen, click on REPORTS in the Menu Bar and drag the arrow down to MAILING LABELS. A new menu will open to the right. Drag the arrow down to the particular set of mailing labels you want to print and click once. The Report Writer window with the particular set of labels you chose will open. Under RESULTS, basic information about the formation and printing of the mailing labels will appear. 2. To view the Labels under RESULTS, click QUICK VIEW. 3. To print the labels within the program, a. Click PRINT. The Print window will open. b. To choose a different printer than the default, use the dropdown list and click on a new printer. c. Click PDF to view a PDF. d. Click PRINT to print the labels. Note: This program only prints one format of labels-they must be 1 by 4, such as Avery #
202 4. To print the labels in Microsoft Word, a. Close all Microsoft Applications. b. Click EXPORT TO WORD. Microsoft Word will open with the labels preformatted. c. Edit the labels in Word however you choose. You can change the font size and type, save the labels, and make whatever other changes you choose. You can also Export the data from Word to another data processing program at this time for further sorting of data. d. Print the labels via the print function in Microsoft Word or other program. 5. Click CLOSE to close the Report Writer and return to the main screen. Sets of Mailing Labels Available MAILING LABELS-REJECTS This functions creates mailing labels for those clients whose Returns are currently rejected by the IRS. MAILING LABELS BY SITE This function creates mailing labels for all of the clients who have their Returns prepared at a particular Site. MAILING LABELS-SELF PREPARED This function creates mailing labels for only those clients who prepare their own Returns, and then use your services for electronic filing. MAILING LABELS-PAPER RETURNS This function creates mailing labels for only those clients who do not file their Returns electronically, but instead mail them as paper Returns. MAILING LABELS-QUEUED RETURNS This function creates mailing labels for Returns that are currently queued for transmitting to Central Site. Client Lists These Reports group clients by certain criteria or by providing certain information about the clients. CLIENT BIRTHDATE LIST This Report provides a list of all of your clients and their birthdates, along with their spouses and spouses birthdates. TELEPHONE LIST BY PREPARER This Report provides a list of your clients, their telephone numbers, and the fees they have paid. The clients can be sorted by different criteria, including by Preparer and Site ID. RECEIPTS BY SITE This Report provides a list of all Returns prepared by Site, including the Preparer ID, the current Status of the Return, the Date the Return was transmitted, the amount of the Refund, and the type of Bank Product they used, if any. 202
203 RETURNS WITHOUT RECEIPTS This Report provides the same information as the RECEIPTS BY SITE Report, however, it only shows the Returns that were prepared without a Receipt number. CLIENT TELEPHONE LIST This Report provides a list of your clients and their telephone numbers. The clients can be sorted by different criteria. CLIENT REFERRAL SUMMARY This Report provides a list of your clients and how they were referred to use your business. Using the Return Lookup Screen to Create a Report To Create and View a Custom Report: 1. From the Toolbar, click on the button. The Return Lookup screen will appear. 2. From the Return Lookup Toolbar, click on the EXTENDED button. The Search Field Setup window will open. The upper left side of the screen has a list of AVAILABLE DISPLAY FIELDS and the upper right side of the screen has a list of SELECTED DISPLAY FIELDS. 3. To add a Display Field column to the report, click on the name of the field in the Available Display Fields list to highlight it, and click the ADD button. The selected Display Field will be removed from the list on the left and appear on the list on the Right under SELECTED DISPLAY FIELDS. 4. To remove a Display Field column from the report, click on the name of the field in the Selected Display Fields list to highlight it, and click the REMOVE button. The selected Display Field will be removed from the list on the right and appear on the list on the left under AVAILABLE DISPLAY FIELDS. 5. The bottom left side of the screen has a list of AVAILABLE SEARCH FIELDS. To add a Search Field to the report, click on the name of the field in the Available Search Fields list to highlight it, and click the ADD button. Depending on the search field selected, a window will open asking for the criteria of that specific field. 6. Enter the appropriate criteria for the search field in the open window by entering a number, dates, or other criteria, or by selecting from a dropdown list, and click OK. The selected Search Field will be removed from the list on the right and appear on the list on the left under SELECTED SEARCH FIELDS. 7. To remove a Search Field from the report, click on the name of the field in the Selected Search Fields list to highlight it, and click the REMOVE button. The selected Search Field will be removed from the list on the right and appear on the list on the left under AVAILABLE SEARCH FIELDS. 8. Click Save at the bottom. The Save Report window will open. 203
204 9. Enter the name of the newly created report and click OK in the Save Report window. 10. Click OK in the Search Field Setup window and the newly created report will appear for viewing. To view a previously created Custom Report: 1. From the Toolbar, click on the button. The Return Lookup screen will appear. 2. From the Return Lookup Toolbar, click on the EXTENDED button. The Search Field Setup window will open. 3. Click on the REPORTS button at the bottom of the window. The Saved Reports window will open. 4. Select the Custom Report from the dropdown list and click Load. The Search Field Setup window will open. 5. If any changes to the Custom Report are needed, make changes according to the directions above for creating a Custom Report. 6. Click Save to save the Custom Report with a new name and follow the directions above for creating a Custom Report. Otherwise, click OK to view the report. To work with a Report: 1. Create a new Custom Report or open an existing Custom Report as instructed above. 2. Click the EXPORT button in the Toolbar to export the information to an Excel spreadsheet. The Excel spreadsheet with the Custom Report will open and normal Excel functions are available for manipulating the data or saving the report in Excel format. 3. Click the SUMMARY button in the Toolbar to create a summarized version of the Custom Report. The Report Totals window will open with a list of the Field Descriptions in the report, how many returns have data applicable to that field, and the total of the field. The data will vary depending on the individual report. To delete a Custom Report: 1. From the Toolbar, click on the button. The Return Lookup screen will appear. 2. From the Return Lookup Toolbar, click on the EXTENDED button. The Search Field Setup window will open. 204

205 3. Click on the REPORTS button at the bottom of the window. The Saved Reports window will open. 4. Select the Custom Report from the dropdown list and click Delete. 205
206 206

207 Chapter 10 Help Menu Introduction The Help Menu provides information to assist you when you have a question about this program. Of course, the technical support team is also at your disposal, but this Help function has been created to answer quick questions and fix minor issues. The Help Menu is based on the information in this Manual, along with some additional helpful information, allowing you to quickly find information while you are working in the program without having to locate and flip through the Manual. Current Topic This function provides you information about the current task you are completing or about the screen you are viewing. To View Help on a Current Topic: 1. Click on HELP in the Menu Bar, drag the arrow down to CURRENT TOPIC, and click once. A screen with help information will open on the window in which you are currently working. 2. View the information. 3. Follow the directions below under All Topic Help for directions on further Help information. 4. When you are finished, click the Close button (the small red x in the upper right hand corner of the screen) to close the Help window. All Topic Help This function provides you information about any help topic by utilizing either an index of contents or by conducting a search. This search function locates search words within the titles of articles. To Use the Help Function: 1. From the Opening Screen, click on HELP in the Menu Bar, drag the arrow down to ALL TOPIC HELP, and click once. The Help window will open. 207
208 2. To use All Topic Help as an index, a. Under the first tab, CONTENTS, scroll to the subject you want to view. Example: Go to Federal Help for information on Federal forms. b. Click once on the subject to open the entire subject. You may have to scroll down through several pages to find the information you need. c. Or, click twice on the subject to open the entire subject, and also open a table of contents of that subject. Subjects with a closed book icon next to them can be opened further. Subjects with an open book icon next to them cannot be opened further. d. View the information. 3. To use All Topic Help as a search engine, a. Click on the second tab, SEARCH. b. In the first empty white box, enter the keyword(s) you would like to search. c. Click the SEARCH button. The second empty white box will fill with the search results. d. From the search results, click on the subject that interests you. e. View the information. 4. When you are finished, click the Close button (the small x in the upper right hand corner of the screen) to close the Help window. Return Status Codes This Help function gives you immediate access to the Status Summary codes used by the program when it transmits Return information back to your transmitting computer. This information is helpful for determining the status of Returns and what further steps need to be taken to process them completely. To View the Return Status Code List from Help: 1. From the Opening Screen, click on HELP in the Menu Bar, drag the arrow down to RETURN STATUS CODES, and click once. The Help window will open to the Status Summary List. 2. View the information. 3. When you are finished, click the Close button (the small x in the upper right hand corner of the screen) to close the Help window. 208
209 Resources Tax Library This function allows you quick access to this third party Tax Library at a discounted fee. Please visit their website for more details by linking through this section. Federal Help This Help function sends you immediately to the Federal Help section in the Contents of Help. To Go Directly to Federal Help: 1. From the Opening Screen, click on HELP in the Menu Bar, drag the arrow down to FEDERAL HELP, and click once. The Help Window will open to the Federal Help section. 2. Follow the directions above for further information on using Help as an index. State Help This Help function sends you to the regular help screen from where you can choose a particular State. To Use State Help: 1. From the Opening Screen, click on HELP in the Menu Bar, drag the arrow down to STATE HELP, and click once. The Help window will open. 2. Scroll down to the State for which you need help. 3. Follow the directions above for further directions in using the Help as an index. About This function shows what packages are available with your software program, and those packages you have activated. It also shows which state packages you have installed. This screen provides you with the program and print versions you are currently using. Finally, this screen provides contact information for your sales and technical support groups. To use About: 1. From the Opening Screen, click on HELP in the Menu Bar, drag the arrow down to ABOUT, and click once. The About window will open. 2. View the information. 3. Click the PRINT button to print the information. 4. Click OK to close the window when you are finished. 209
210 210
211 Glossary This Glossary provides a helpful list of definitions, some of which are unique to this program and others that are IRS-defined. Acknowledgment A message from the IRS or the State Agency that a Return has been accepted via electronic filing. Adjust Gross income (AGI) This amount is the Taxpayer s total income reduced by certain deductions, such as contributions made to an IRA, student loan interest payments and other available deductions. Adjustments to Income This amount is the Taxpayer s total deductions that are subtracted from gross income to calculate Adjusted Gross Income (AGI). These include, but are not limited to, deductions for moving expenses, alimony paid, a penalty on early withdrawal of savings, and contributions to an individual retirement arrangement (IRA). Adjustments to income can be subtracted from gross income even if itemized deductions are not available or claimed. Amount Due This is the amount the Taxpayer owes to the IRS when the total tax due for the year is greater than the total tax payments already made for the year. Asset Any item of economic value owned by an individual or corporation which must be depreciated for tax purposes. Audits These functions are used to configure the diagnostic validations. Bank This is the Bank you have chosen to process your bank products related to Tax Returns. This is independent of a Client s bank where a direct deposit might be made or the bank where you conduct normal bank business. Bank Product A loan product purchased from the Bank enabling the Taxpayer to receive their tax refund earlier than would be provided by the IRS. Basis The Basis is the amount of the taxpayer s monetary investment for tax purposes in real or personal property used for business. The Basis is normally cost, however it could be different depending on how and when the property was purchased, and if the property is used for both business and personal purposes. Basis is used to determine the amount of expense available for the current year from depreciation (regular and special) and Section 179, and to calculate a taxable gain or loss on the sale or other disposition of the property. Bulletins Messages received from Central Site during communications containing important, recently released information for all Tax Preparers. 211
212 Care Provider A person or entity who provides care for an individual and whose income can be expensed by the Taxpayer who makes the payments of income. Central Site This is the home base where all communications between the Tax Preparer and the IRS and State Agencies take place. This is also how Remote offices communicate with their Main office. Child and Dependent Care Credit This is a nonrefundable credit available to certain taxpayers to claim a credit for paying someone to care for their qualifying Dependents under the age of 13 or Spouses or dependents who are unable to care for themselves. Client The Client is the person for whom the Preparer is preparing Tax Returns. The Client is interchangeably referred to as the Taxpayer. Communications The process which occurs during Transmit/Transmission when information is sent to Central Site from the User and information is sent back to the User from Central Site. Dependent This is a person, other than the Taxpayer or Spouse, who entitles the Taxpayer to claim a dependency exemption. Depreciation This is a deduction taken for the business use of certain items which lose value over a period of time longer than one year, such as office furniture. Direct Deposit This is an electronic transfer of a Refund into a Taxpayer s financial institution account directly from the IRS. Due Diligence This is a process, which when used in the context of the Earned Income Tax Credit (EITC), refers to requirements that Preparers must follow when preparing returns that involve the EITC. DONEE A Donee is a non-profit organization that is authorized by the federal government to accept tax deductible charitable contributions. EFIN The Electronic Filing Identification Number assigned to an ERO by the IRS used for identity purposes when a Return is electronically filed. EIC The Earned Income Tax Credit or Earned Income Credit is a refundable tax credit available to some taxpayers. EIN The Employer Identification Number, also known as the Federal Employer Identification Number (FEIN) is assigned to all businesses who hire employees, pay wages, and deposit employment taxes to the IRS on behalf of those employees. Electronic Signature Pad This is an electronic device with a touch sensitive LCD screen which allows users to acquire and register a signature or any other physical signature capture device that captures and converts a signature into an electronic format. Employer/Payer A person or entity who has paid wages to an employee and deposited employment taxes to the IRS on behalf of that employee. 212
213 ERO An Electronic Return Originator is a person or entity who has been authorized by the IRS to electronically file Tax Returns and has been assigned an EFIN. Exemption This is a fixed amount a Taxpayer can claim and subtract from income for his or herself, the spouse, and any eligible Dependents. Export To move data from this program to an outside program for sorting, formatting, and printing. Feeder Site Also known as a Remote Computer that will transmit directly to Central Site to communicate with the Main Office or Service Bureau. Filing Status The Filing Status of the Taxpayer determines the rate at which taxable income is taxed. The five filing statuses are as follows: Single, Married Filing a Joint return, Married Filing a Separate return, Head of Household, and Qualifying Widow(er) with dependent child. FTIN The Federal Tax Identification Number is synonymous with the TIN, and is generic for any type of Identification number assigned by the IRS for reporting purposes. Gross Income This amount includes money, goods, services, and property a person receives that must be reported as taxable. This also includes unemployment compensation and certain scholarships. It does not include welfare benefits and nontaxable Social Security benefits. Import This function moves Returns prepared by other tax programs into this program. Investment Income This amount includes taxable and tax-exempt interest, dividends, capital gains distributions, and rental income. Main Office The office in a Multi-Office Organization or Service Bureau that is the administrator of all Remote Offices and has overall control of the operation. Master User This is the User ID of the Main Office in a Multi-Office Organization or Service Bureau. MeF This refers to Modernized e-file. Multi-Tier Office This is a Remote Office of the Main Office that can have other Remote Offices organized under it. Under this system, three tiers are available: The Main Office, Multi-Tier Offices, and Remote Offices which may be assigned to a Multi-Tier Office or the Main Office. Name Control This is the first four significant letters of a Taxpayer's last name that the IRS uses in connection with the Taxpayer SSN to identify the Taxpayer, Spouse and Dependents. Non-Transmitting Computer A computer which prepares Returns, but does not communicate with Central Site via Transmitting. Instead, the Non-Transmitting computer transfers information to the Transmitting Computer. Occupation A description of what the Taxpayer does to earn income. 213
214 Paid Preparer This is an individual who is paid to prepare Tax Returns. A Paid Preparer is not necessarily also an ERO, but instead may work for an ERO. Part-Year Resident This is a person who lived in a particular state for only part of the year, and may have to file a state income tax return for that state if he or she lived there a specific amount of time and/or made a certain amount of income from a source in that state. Personal Exemption An exemption claimed for yourself and, if married filing jointly, for your spouse. PIN A Personal Identification Number used by a Taxpayer and/or an ERO as a replacement to a signature in some cases. This number is not assigned by any agency, but rather is chosen by the person using the pin. PTIN A Preparer Tax Identification Number can be used by Preparers who are not working as a business entity, and therefore, do not have a separate FEIN, so that they do not have to share their Social Security Number with their Clients. Qualifying Widow(er) This is a filing status claimed by a Taxpayer whose Spouse has died during the tax year and entitles the Taxpayer to the tax rates and benefits of a joint return. If a widow(er) has Dependents and does not remarry, that person may be allowed to claim Qualifying Widow(er) status for 2 additional years. RAC A Refund Anticipation Check is a check issued by the Bank after funds have been received by the IRS and requires no out of pocket fees from the Client. Refund This is the amount owed to a Taxpayer when the total tax payments made for the year are greater than the total tax due for the year. Remote Computer See Feeder Site above. Remote Office An office whose registration and setup is controlled by a Main Office. The level of access granted to a Remote Office will be controlled by the Main Office. Rejection A message from the IRS or the State Agency that a Return has not been accepted via electronic filing. The Return must be corrected and retransmitted. Retrieve The process which occurs when a Transmitting Computer uploads Return data from a Non- Transmitting Computer. RTN A Routing Transit Number is a unique number to every bank and is used to identify that bank for direct deposit of a Tax Refund. SBIN The Service Bureau Identification Number is used when a Tax Preparer has many sites and many different EFIN s, and is assigned by the IRS. 214
215 Site ID This is the code for a particular Site assigned by the User so that activity at different Sites can be delineated. SSN The Social Security Number is what most Taxpayers use for identification purposes. Standard Deduction This is an amount that reduces the taxable income subject to tax and varies according to filing status, age, blindness, and dependency of the Taxpayer, Spouse and any Dependents. Submission ID This is a globally unique 20 digit number assigned to electronically filed tax returns with the following format: EFIN + ccyyddd + 7-digit alphanumeric sequence number. Status Codes These Codes indicate the status of a current Return, such as whether it has been acknowledged, accepted, or completed. Taxpayer The Taxpayer is the person for whom the Preparer is preparing Tax Returns. The Taxpayer is interchangeably referred to as the Client. TIN The Taxpayer Identification Number is a generic name for any type of Identification number that is used to represent a Taxpayer. A TIN could be assigned by a Federal Agency or a State Agency. Transfer(ring) The process which occurs when Return data is sent from a Non-Transmitting Computer to a Transmitting Computer. Transmit(ting)/Transmission The process which occurs when a Transmitting Computer sends information to and receives information from Central Site. Transmitting Computer This is a computer capable of Transmitting to and from Central Site. A Transmitting Computer does not necessarily have an associated Non-Transmitting Computer. Transmitter Add-on Fee This fee is subtracted from Tax Preparation fees and deposited into the User s account for purchase of next year s program. Updates Data received from Central Site which makes alterations to the program during the tax season in order to keep up with changes in the tax laws and regulations, or to make the program work more efficiently. User A person who is using this program. This person could be a Paid Preparer, an ERO, a Data Entry person, or any other person using the program. This person could have Administrator status allowing them access to all functions or a very limited access allowing only a few specific functions. User ID This is the identification code assigned to an office in a Multi-Office Organization or Service Bureau. Verify(ing) - The internal process which occurs within the program before Transmitting to Central Site in order to catch errors at an early stage. This process is also used for paper Returns. 215
216 216
217 Appendix 1 IRS Information IRS Service Center Phone Numbers The IRS Tele-tax number is The IRS e-help Desk phone number is The IRS number for Where s My Refund is The IRS number for General Tax Help is The IRS number for Business and Specialty Tax Help is The IRS number for people with hearing impaired is (TDD). The IRS Health Coverage Tax Credit Customer Contact number is The IRS e-file Calendar was not released as of the printing of this Manual. Please go to for updated information. 217
218 218
219 Appendix 2 States with E-Filing This program supports Electronic Filing for the following States: Alabama Kentucky North Carolina Arizona (Personal Only) Louisiana North Dakota (Personal Only) Arkansas Maine (Personal Only) Ohio (Personal Only) California Maryland Oklahoma Colorado (Personal Only) Massachusetts Oregon (Personal Only) Connecticut Michigan Pennsylvania Delaware Minnesota Rhode Island D.C. (Personal Only) Mississippi South Carolina Georgia Missouri Tennessee Hawaii (Personal Only) Montana (Personal Only) Texas (Business Only) Idaho (Personal Only) Nebraska (Personal Only) Utah Illinois New Hampshire (Personal Only) Vermont (Personal Only) Indiana New Jersey Virginia Iowa (Personal Only) New Mexico West Virginia (Personal Only) Kansas (Personal Only) New York Wisconsin 219
220 220
221 Appendix 3 Status Codes Status Codes and Descriptions Bank RejBank Reject 9 Bank Application Rejected Acked Acknowledged A IRS Acknowledgement Chk Rdy C Check Ready to Print ProformaProforma E Proforma Return EF Retun EF Return F EF Return Refused by CS G Refused at Central Site RedyExtn Ready H Extension Ready Imported I Imported Return St Rej/Excp J Rejected by State Imp ErrsImport K Error Imported with Errors PapRet N Paper Return State TransEF Qued O State EF Queued ChkPrintd P Check was Printed Queued Return Q Queued for Transfer/Transmit RejectedIRS R Rejected by the IRS service center Suspended S Suspend from further processing Transferred T Transferred from one computer to another Unknown U Return Status Unknown SuspXmit.Queued V Transmit to Central Site for Review CS W Received at Central Site Retrieved X Retrieved from another computer Return At IRS Y At IRS service center, waiting for IRS acknowledgement 221
222 Completed (Z) Completed and accepted by IRS No further Action Necessary. Extn Qued e Extension queued IRSExten@IRS I Extension at IRS Extn Refused k Extension refused at Central Site Extn Pending p Extension Pending at Central Site Extn Rejected r Extension Rejected by IRS Extn State Only Rej s State Only Rejected by IRS W7 Rtn w Tax Return with no SSN 222
223 Appendix 4 Supported Federal Form for Personal Returns Forms Description 1040, A & EZ Individual Income Tax Return 1040 ES Estimated Tax Return 1040 NR Non-Resident Returns and Attached Schedules and Forms 1040 SS Return for Resident of Puerto Rico 1040 V Payment Voucher 1040 X Amended US Tax Return W-2 Wage & Tax Statement W-2G Gambling Income Statement W-2PR Puerto Rico Withholding Statement W-7 Application for Individual Taxpayer Identification W-7 COA Certification of Accuracy of IRS ITIN 982 Reduction of Tax/Discharge of Debt 1042 RRB Railroad Retirement Benefits Statement for Nonresident Aliens 1042 S Foreign Person's US Source Income Subject to Withholding 1042 SSA Social Security Benefits Statements for Nonresident Aliens 1098 C Contributions of Motor Vehicles, Boats and Airplanes 1098 T Tuition Statement 1099 B Proceeds from Broker and Barter Exchange Transactions 1099 C Cancellation of Debt 1099 DIV Dividends and Distributions 1099 G Certain Government Payments 1099 INT Interest Income 1099 K Payment Card and Third Party Network Transactions 1009 LTC Long-Term Care and Accelerated Death Benefits 1099 MISC Miscellaneous Income Statement 1099 OID Original Issue Discount 1099 Q Payments from Qualified Education Programs 1099 R Distributions from pensions and annuities 1099 RRB Railroad Retirement Benefit Statement (Tier 1) 1099 SSA Social Security Benefits Statement 1116 Foreign Tax Credit 1127 App. for Extension of Time for Payment of Tax Due/Undue Hardship 1310 Person Claiming Refund Due to Deceased Taxpayer 2106 Employee Business Expenses 2106 EZ Employee Business Expenses 2120 Multiple Support Declaration 2210 Underpayment of Tax 2210 F Underpayment of Tax for Farmers 2350 Application to File a Federal Extension 2439 Notice to Shareholder of Undistributed Long-Term Capital Gains 2441 Child & Dependent Care 2555 Foreign Earned Income 2555 EZ Foreign Earned Income 2848 Power of Attorney and Declaration of Representative 223
224 224 Forms Description 3115 Application for Change in Accounting Method 3468 Investment Credit 3800 General Business Credit Part I & II 3800 PG3 General Business Credit Part III 3903 Moving Expense 4136 Fuel Tax Credit 4137 Social Security Tax on Tips 4255 Recapture of Investment Credit 4361 Exemption from SE Tax by Ministers, Members of Religious Orders and Christian Science Practitioners 4562 Depreciation & Amortization 4684 Casualties & Thefts 4797 Sales of Business Property 4835 Farm Rental Income & Expenses 4852 Substitute for W Automatic Extension of Time to File 4952 Investment Interest Expense 4970 Tax on Distribution of Trusts 4972 Tax on Lump Sum Distribution 5329 Taxes on Qualified Retirement Plans 5405 First-Time Homebuyer Credit 5695 Home Energy Credit 5884 Work Opportunity Credit 6198 At-Risk Limitations 6251 Alternative Minimum Tax 6252 Installment Sale Income 6478 Credit For Alcohol Fuel 6765 Credit For Research Activities 6781 Gain/Loss Sec 1256 Contracts 8283 Non-cash Charitable Contributions 8332 Release/Revocation of Release of Claim to Exemption for Child by Custodial Parent 8379 Injured Spouse Claim and Allocation 8396 Mortgage Interest Credit 8582 Passive Activity Loss Limitations 8582 CR Passive Activity Gain Limitations 8586 Low Income Housing Credit 8594 Asset Acquisition Statement Under Section Nondeductible IRA Contributions 8615 Tax for Children Under Prior Year Minimum Tax Credit 8812 Additional Child Tax Credit 8814 Report Child s Interest & Dividends 8815 Exclusion of Series EE Interest 8820 Orphan Drug Credit 8821 Tax Information Authorization 8822 Change of Address 8824 Like Kind Exchange 8826 Disabled Access Credit 8828 Recapture of Fed Mortgage Subsidy 8829 Business Use of Your Home
225 Forms Description 8834 Qualified Electric vehicle Credit 8835 Renewable Electricity Production Credit 8839 Qualified Adoption Expenses 8843 Statement of Exempt Individuals 8844 Empowerment Zone Employment Credit 8845 Indian Employment Credit 8846 Credit for FICA/Medicare Tax on Tips 8853 Medical Savings Accounts/LTC Contacts 8857 Request for Innocent Spouse Relief 8859 D.C. First Time Home Buyer Credit 8862 EIC After Disallowance 8863 Education Credits 8867 Paid Preparer s EIC Checklist 8879 IRS e-file Signature Authorization 8880 Credit for Qualified Retirement Savings Contributions 8881 Credit for Small Employer Pension Plan Startup Costs 8885 Health Coverage Tax Credit 8889 Health Savings Accounts 8891 U.S. Information Return for Beneficiaries of Certain Can. Ret. Plans 8903 Domestic Production Activities Deduction 8910 Alternative Motor Vehicle Credit 8917 Tuition and Fees Deduction *Pending 8919 Uncollected SS & Medicare Tax on Wages 8925 Report of Employer-Owned Life Insurance Contracts 8936 Qualified Plug-In Electric Drive MV Credit 8938 Statement of Foreign Financial Assets 8941 Credit for Small Employer Health Insurance Credit 8948 Preparer Explanation for Not Filing Electronically 8949 Sales and other Dispositions of Capital Assets 8958 Allocation of Tax Amounts Between Certain Individuals in Community Property States 8959 Sales and Other Dispositions of Capital Assets 8960 Net Investment Income Tax for Individuals, Estates, and Trusts 8962 Premium Tax Credit (PTC) 8965 Health Coverage Exemptions 9465 Installment Agreement Request Schedules Description A Itemized Deductions B Interest & Dividends C Profit or Loss From Business C-EZ Net Profit From Business D Capital Gains & Losses E Supplemental Income EIC Earned Income Credit F Farm Income & Expenses H Household Employment Taxes J Farm Income Averaging K Beneficiary s Share of Income K S Shareholder s Share of Income K Partner s Share of Income 225
226 R SE Worksheets Bank Application Bus Act Q Car & Truck EF-PMT FEC Record Home Sale IRS Election IRS Notes IRS Regulatory Minister NOL Other Not Paper File PIN Form Credit for the Elderly Social Security Self-Employment Tax Description Bank Application for Financial Products Business Activities Questionnaire Car and Truck Expense Worksheet Electronic Filing Debit Payment Form Foreign Employer Compensation Record Home Sale Worksheet Explanation of Election to IRS Preparer s Notes to IRS Explanation of Regulatory to IRS Statement of Clergy Income Net Operating Loss Worksheet Other Notes Statement of Taxpayer s Choice to File in Paper Format Authentication of PIN form Note: For a more detailed list of Accepted Forms/Schedules for Tax Year 2016 not included with your software program, please refer to the IRS website, 226
227 Appendix 5 Keyboard Shortcuts Key Function Key Function F1 Help Current Topic F6 Bookmark Field F2 Work In Progress Screen F7 Calculator in Return F3 Choice List F8 Print Window F4 Select for Print F9 Return Lookup/Sort Statement Row F5 Clear Override F10 Exit Program CTRL+ Function CTRL+ Function A Add Form O Open Statement B Save Return Q Query Status C Client ProForma R Rejects/Errors D Delete Form S State Forms E Tax Estimator T Transmit F Forms Attached U Reload Billing G Go To Line # V Verify Return K Input Index W Worksheet L Link Forms X Save and Exit P Print Return Y Info & Status Screen N Depreciation Z Suspend Return 227
228 ALT+ C D F H P R R S U Menu Command Menu Database Menu Forms Menu from Return Only Help Menu Print Menu from Return Reports Menu from WIP Only Return Menu from Return Only Setup Menu Utility Menu Additional Keyboard Shortcuts [Home] [End] [Page Up] [Page Down] [Ctrl]+[End] [Ctrl]+[Home] [Ctrl]+[Page Down] [Ctrl]+[Page Up] [Ctrl]+[Shift]+[A] [Ctrl]+[Shift]+[C] [Ctrl]+[Shift]+[U] [Ctrl]+[Shift]+[V] Moves the cursor to the left of a line. Moves the cursor to the right of a line. Scroll the form up on the screen. Scroll the form down on the screen. Go to the bottom of the form. Go to the top of the form. Go to the next attached form. Go to the previous form. Adds Form Occurrence Copy Locking and Unlocking Returns Paste 228


229 Appendix 6 Import from QuickBooks Introduction This function allows the User to import financial information into a Business Tax Return from a QuickBooks Chart of Accounts. Utilizing the Tax Line Mapping in QuickBooks ensures that the return data flows to the appropriate lines in the Business Return. To use the built in Tax Line Mapping see page 142. Setup and Review Tax Line Mapping in QuickBooks This first step is to review the Tax Line Mapping associated with each account in the QuickBooks Chart of Accounts for the business. Refer to the Tax Line Mapping Table at the end of these directions to determine which line in QuickBooks corresponds to the line in the Business Return. To Assign Tax-Line Mapping from the Business: 1. Open QuickBooks. 2. From the Opening Screen in QuickBooks, a. Click Company in the Menu Bar, drag the arrow down to Chart of Accounts, and click once. The Chart of Accounts window will open. b. Click the Account Name to highlight and then click the Account button. This will open the Edit Account window for this account. Select the correct tax-line mapping choice from the pulldown list according to the table at the end of these directions, and click Save and Close. c. Move to the next line in the Chart of Accounts and follow the same procedure until every line in the Chart of Accounts has been completed. 229


230 Create the Export File Once you have completed the Tax Line Mapping, the export file can be created, which will contain data that has been entered into QuickBooks and has been associated to a corresponding line in the Business Return by the Tax Line Mapping. To Create the Export File: 1. From the Opening Screen in QuickBooks, click Reports in the Menu Bar, scroll down to Accountant, scroll down to the new menu that has opened to Income Tax Summary. The Income Tax Summary Report will be produced. 2. Select the appropriate Tax Year for this Business Return from the drop down list. 3. Click the Excel button which can be found just above the date bar, and the Export Report window will open. 4. Select A common separated (.csv) file which will create a.csv file. 5. Click the Export button at the bottom of the Income Tax Summary Report window and the Create Disk File window will open. 6. Select a location for the file, enter a name for the file and click Save. The default location will be the Company File in QuickBooks. This file could be created by the Taxpayer and given to the Tax Preparer on an external storage device. 230


231 Import Data into a Business Return After an export data file of a business financial data has been created in QuickBooks, this data can be easily imported into a Business Return. Import Financial Data: 1. Create a new Business Return or open an existing Business Return according to the directions in Chapter Click Return in the Menu Bar, drag the arrow down to Import Financial Data, and click once. The Import Financial Data Window will open. 3. Click Yes to continue with the import of new data. Any financial data already entered in the Business Return will be replaced with the data from this imported file. Click No to cancel the request. 4. Locate and select the QuickBooks export file previous created, select either Balance Sheet or Income Statement and click OK to complete the Import of Financial Data. 5. The Financial Data will now appear on both the Financial Statements sheets within the Business Return based on the Tax Line Mapping. 6. Make any necessary adjustments. Please note: Adjustments may be required when the Business Return has predefined lines on the Financial Statement for ease of entry on the Tax Return, but a corresponding tax line mapping is unavailable. Example: The category Other Income on the Business Return Income Statement includes a predefined line for Income or loss received from a pass through entity, but no corresponding tax line mapping is available for QuickBooks import. Therefore, income or loss received from a pass through entity would be given the tax-line mapping of Income: Other income and would be entered in the table under line 8h of the 231
232 Income Statement when imported. The User would need to transfer the amount of income or loss received from a pass through entity to line 8e and delete the related line from the 8h table to ensure the amount flows to the appropriate line on the tax return. 7. Enter all equity/capital account information on the Balance Sheet. 232
233 Tax Line Mapping Table QuickBooks Tax-Line Mapping Business Returns to Which the Tax- Line Mapping Applies Line in the Business Return to Which Data Flows Income: Gross receipts or sales Income: Returns and allowances Income: Interest Income 1120 Income: Gross rents 1120 Income: Gross royalties 1120 Income: State tax refund 1120 Income: Other income COGS-Schedule A: Purchases COGS-Schedule A: Cost of labor COGS-Schedule A: Section 263A depreciation COGS-Schedule A: Add'l section 263A costs COGS-Schedule A: Meals and entertainment COGS-Schedule A: Other costs 1120, 1120S, , 1120S, , 1120S, , 1120S, , 1120S, , 1120S, Deductions: Comp. of Officers -Schedule E 1120 Deductions: Compensation of shareholder/officers Deductions: Shareholder medical insurance Deductions: Shareholder life insurance Deductions: Shareholder disability insurance 1120, 1120S, S 1120S 1120S 1120S 1a 1b 3a 4a 5 8h 8h 9a 9b 9c 9c 9c 9c 30a 30a
234 Deductions: Compensation of other officers Deductions: Salaries and wages 1120S Deductions: Other salaries and wages 1065 Deductions: Guaranteed payments-use of capital 1120, 1120S 1065 Deductions: Guaranteed payments-partners 1065 Deductions: Guaranteed pmts-medical insurance premiums Deductions: Repairs and Maintenance Deductions: Bad debts Deductions: Rents 1065 Deductions: State taxes , 1120S, , 1120S, , 1120S, 1065 Deductions: State franchise or inc. tax 1120S, 1065 Deductions: Local property taxes Deductions: Payroll taxes Deductions: Other miscellaneous taxes Deductions: Licenses Deductions: Interest expense Deductions: Charitable contributions 1120 Deductions: Depletion Deductions: Advertising Deductions: Retirement plans/etc , 1120S, , 1120S, , 1120S, , 1120S, , 1120S, , 1120S, , 1120S 30a 30b 30b b 32b 32d 32d 32d 24 22a 15 17b
235 Deductions: Pension/profit-sharing/etc. Deductions: Employee benefit programs 1120, 1120S 1120, 1120S, 1065 Deductions: Employee medical insurance 1120S, 1065 Deductions: Employee disability insurance 1120S, 1065 Deductions: Meals and entertainment (subj to 50% limit) Deductions: Meals and entertainment(subj to 50% limit) Deductions: Meals and entertainment (100% deductible) Deductions: Meals and entertainment(100% deductible Other Deductions: Accounting 1120S 1120, S Other Deductions: Advertising 1065 Other Deductions: Auto and truck Other Deductions: Bank charges Other Deductions: Business gifts Other Deductions: Commissions Other Deductions: Continuing/professional education Other Deductions: Credit & collection costs Other Deductions: Discounts given Other Deductions: Dues and subscriptions Other Deductions: Independent contractors Other Deductions: Insurance 1120, , 1120S, , 1120S, , 1120S, , 1120S, , 1120S, , 1120S, , 1120S, , 1120S, , 1120S, , 1120S, , 1120S, a 25a 25c 25c
236 Other Deductions: Janitorial & cleaning Other Deductions: Laundry Other Deductions: Legal & professional fees Other Deductions: Office expenses Other Deductions: Parking Other Deductions: Postage and Delivery , 1120S, , 1120S, , 1120S, , 1120S, , 1120S, 1065 Other Deductions: Postage & delivery 1120S, 1065 Other Deductions: Printing 1120S, 1065 Other Deductions: Printing & copying 1120 Other Deductions: Security Other Deductions: Supplies 1120, 1120S, , 1120S, 1065 Other Deductions: Telephone 1120S, 1065 Other Deductions: Telephone/Internet 1120 Other Deductions: Tools Other Deductions: Travel Other Deductions: Utilities Other Deductions: Other deductions Schedule K-Rentals (not Fm 8825): Incomerental Schedule K-Rentals (not Fm 8825): Expenses-rental Schedule K-Portfolio Inc (Loss): Interest income-bank, CDs, etc. 1120, 1120S, , 1120S, , 1120S, , 1120S, S, S, b 37 3b 236
237 Schedule K-Portfolio Inc (Loss): Interest income-cd's/etc. Schedule K-Portfolio Inc (Loss): Interest income-us Treasury obligation Schedule K-Portfolio Inc (Loss): Interest income-u.s. Treas Schedule K-Portfolio Inc (Loss): Dividend income Schedule K-Portfolio Inc (Loss): Royalty income Schedule K-Portfolio Inc (Loss): Other income Schedule K-Other Income (Loss): Other income Schedule K-Deductions: Charitable contributions 1120S S 1120S, S, S 1120S, 1065 Schedule K-Deductions: Other deductions 1120S, 1065 Schedule K-Inv. Interest: Int. exp. on investment debts Schedule K-Inv. Interest: Int. exp.-investment debts S Schedule K-Foreign Tax: Total foreign taxes 1120S, 1065 Schedule K-Other items: Sec. 59(e) expenses Schedule K-Other items: Section 59(e) expenses Schedule K-Other items: Tax-exempt interest income Schedule K-Other items: Other tax-exempt income Schedule K-Other items: Nondeductible expenses B/S-Assets: Cash 1120S S, S, S, , 1120S, 1065 B/S-Assets: Accts. Rec. and trade notes 1120S, 1065 B/S-Assets: Accts. Rec. and trade notes b 3c 3c 2a 5 8h 8h b 22b 32c d 8g 36c Balance Sheet, Line 1, End of Year Balance Sheet, Line 2a, End of Year Balance Sheet, Line 2a, End of Year 237
238 B/S-Assets: U.S. government obligations B/S-Assets: Tax-exempt securities B/S-Assets: Other current assets B/S-Assets: Loans to stockholders 1120 B/S-Assets: Loans to shareholders B/S-Assets: Mortgage/real estate loans B/S-Assets: Other investments B/S-Assets: Buildings/oth. depr. assets B/S-Assets: Accumulated depreciation B/S-Assets: Depletable assets B/S-Assets: Accumulated depletion B/S-Assets: Land B/S-Assets: Intangible assets B/S-Assets: Accumulated amortization B/S-Assets: Other assets 1120, 1120S, , 1120S, , 1120S, S B/S-Liabs/Cap: Accounts payable 1065 B/S-Liabs/Cap: S-T Mortgage/note/bonds pay. 1120, 1120S, , 1120S, , 1120S, , 1120S, , 1120S, , 1120S, , 1120S, , 1120S, , 1120S, , 1120S, B/S-Liabs/Cap: Other current liabilities 1065 B/S-Liabs/Cap: All nonrecourse loans 1065 B/S-Liabs/Cap: L-T Mortgage/note/bonds pay Balance Sheet, Line 4, End of Year Balance Sheet, Line 5, End of Year Balance Sheet, Line 12, End of Year Balance Sheet, Line 6, End of Year Balance Sheet, Line 6, End of Year Balance Sheet, Line 7, End of Year Balance Sheet, Line 12, End of Year Balance Sheet, Line 8a, End of Year Balance Sheet, Line 8b, End of Year Balance Sheet, Line 9a, End of Year Balance Sheet, Line 9b, End of Year Balance Sheet, Line 10, End of Year Balance Sheet, Line 11a, End of Year Balance Sheet, Line 11b, End of Year Balance Sheet, Line 12, End of Year Balance Sheet, Line 14, End of Year Balance Sheet, Line 15, End of Year Balance Sheet, Line 19, End of Year Balance Sheet, Line 16, End of Year Balance Sheet, Line 18, End of Year 238
239 B/S-Liabs/Cap: Other liabilities 1065 B/S-Liabs/Eq.: Accounts payable B/S-Liabs/Eq.: S-T Mortgage/note/bonds pay. B/S-Liabs/Eq.: Other current liabilities B/S-Liabs/Eq.: L-T Mortgage/note/bonds pay. B/S-Liabs/Eq.: Other liabilities B/S-Liabs/Eq.: Loans from stockholders 1120 B/S-Liabs/Eq.: Loans from shareholders B/S-Liabs/Eq.: Capital stock 1120, 1120S 1120, 1120S 1120, 1120S 1120, 1120S 1120, 1120S 1120S 1120S B/S-Liabs/Eq.: Capital stock - Preferred Stk B/S-Liabs/Eq.: Capital stock - Common Stk B/S-Liabs/Eq.: Paid-in or capital surplus B/S-Liabs/Eq.: Treasury stock 1120, 1120S 1120S B/S-Liabs/Eq.: Cost of Treasury stock 1120 Schedule M-1: Depreciation per books Schedule M-1: Expenses on books not on return Schedule M-1: Income on books not on return Schedule M-1: Tax-exempt interest income 1120 Fm a: Income-other rental real estate 1120, 1120S, , 1120S, , 1120S, S, 1065 Fm 8825-A: Gross rents 1120S, 1065 Balance Sheet, Line 19, End of Year Balance Sheet, Line 14, End of Year Balance Sheet, Line 15, End of Year Balance Sheet, Line 19, End of Year Balance Sheet, Line 18, End of Year Balance Sheet, Line 19, End of Year Balance Sheet, Line 17, End of Year Balance Sheet, Line 17, End of Year Balance Sheet, Line 21b, End of Year Balance Sheet, Line 21a, End of Year Balance Sheet, Line 21b, End of Year Balance Sheet, Line 22, End of Year Balance Sheet, Line 28, End of Year Balance Sheet, Line 28, End of Year h 3d 8h 8h 239
240 Fm 8825-A: Advertising 1120S, 1065 Fm 8825-A: Auto and travel 1120S, 1065 Fm 8825-A: Cleaning and maintenance 1120S, 1065 Fm 8825-A: Commissions 1120S, 1065 Fm 8825-A: Insurance 1120S, 1065 Fm 8825-A: Legal and other prof. fees 1120S, 1065 Fm 8825-A: Interest expense 1120S, 1065 Fm 8825-A: Repairs 1120S, 1065 Fm 8825-A: Taxes 1120S, 1065 Fm 8825-A: Utilities 1120S, 1065 Fm 8825-A: Wages and salaries 1120S, 1065 Fm 8825-A: Other misc. rental expenses 1065 Fm 8825-A: Other miscellaneous expenses 1120S Fm 8825-B: Gross rents 1120S, 1065 Fm 8825-B: Advertising 1120S, 1065 Fm 8825-B: Auto and travel 1120S, 1065 Fm 8825-B: Cleaning and maintenance 1120S, 1065 Fm 8825-B: Commissions 1120S, 1065 Fm 8825-B: Insurance 1120S, 1065 Fm 8825-B: Legal and other prof. fees 1120S, h
241 Fm 8825-B: Interest expense 1120S, 1065 Fm 8825-B: Repairs 1120S, 1065 Fm 8825-B: Taxes 1120S, 1065 Fm 8825-B: Utilities 1120S, 1065 Fm 8825-B: Wages and salaries 1120S, 1065 Fm 8825-B: Other misc. rental expenses 1065 Fm 8825-B: Other miscellaneous expenses 1120S Fm 8825-C: Gross rents 1120S, 1065 Fm 8825-C: Advertising 1120S, 1065 Fm 8825-C: Auto and travel 1120S, 1065 Fm 8825-C: Cleaning and maintenance 1120S, 1065 Fm 8825-C: Commissions 1120S, 1065 Fm 8825-C: Insurance 1120S, 1065 Fm 8825-C: Legal and other prof. fees 1120S, 1065 Fm 8825-C: Interest expense 1120S, 1065 Fm 8825-C: Repairs 1120S, 1065 Fm 8825-C: Taxes 1120S, 1065 Fm 8825-C: Utilities 1120S, 1065 Fm 8825-C: Wages and salaries 1120S, 1065 Fm 8825-C: Other misc. rental expenses h
242 Fm 8825-C: Other miscellaneous expenses 1120S Fm 8825-D: Gross rents 1120S, 1065 Fm 8825-D: Advertising 1120S, 1065 Fm 8825-D: Auto and travel 1120S, 1065 Fm 8825-D: Cleaning and maintenance 1120S, 1065 Fm 8825-D: Commissions 1120S, 1065 Fm 8825-D: Insurance 1120S, 1065 Fm 8825-D: Legal and other prof. fees 1120S, 1065 Fm 8825-D: Interest expense 1120S, 1065 Fm 8825-D: Repairs 1120S, 1065 Fm 8825-D: Taxes 1120S, 1065 Fm 8825-D: Utilities 1120S, 1065 Fm 8825-D: Wages and salaries 1120S, 1065 Fm 8825-D: Other misc. rental expenses 1065 Fm 8825-D: Other miscellaneous expenses 1120S Dividends: Div.--< 20% owned corps Dividends: Div.--20% or > corps Dividends: Div.--debt-financed stk Dividends: Div.--< 20% pref. stk Dividends: Div.--20% or > pref. stk h h 8h 8h 8h 8h 242
243 Dividends: Div.--< 20% foreign. corps Dividends: Div.--20% or > foreign corps Dividends: Div.-wholly owned foreign 1120 Dividends: Div.-domestic corps Dividends: Div.-affil group members 1120 Dividends: Div.-from FSC's 1120 Dividends: Other div.-foreign corps Dividends: Inc.-controlled foreign corps Dividends: Foreign dividend gross up 1120 Dividends: IC-DISC and former DISC div Dividends: Other dividends 1120 Dividends: Ded.-div. paid on pref. stk Tax/Payments: Estimated Qtrly Payment # Tax/Payments: Estimated Qtrly Payment # Tax/Payments: Estimated Qtrly Payment # h 8h 8h 8h 8h 8h 8h 8h 8h 8h 8h 37 Estimated Tax Payments Worksheet Estimated Tax Payments Worksheet Estimated Tax Payments Worksheet 243
244 244
245 Appendix 7 User s Guide Introduction to the User s Guide This User s Guide outlines the step-by-step tasks that must be taken to completely process a Tax Return with this software program. Daily Things to Do 1.) The Transmitting/Main Computer should transmit to Central Site at least twice a day, once in the morning and once in the evening. If you are operating a system with Non-Transmitting Computers, set up a regular schedule for transferring and retrieving data to and from the Non- Transmitting and Transmitting Computers. If you are operating as a Multi-Office Organization or a Service Bureau, set up a regular schedule for transmitting by the Remote Computer(s) to the Main Computer via Central Site. See Chapter 2 under Communications Setup in the Manual to enable automatic scheduling. 2.) Check the Work In Progress Summary (WIP) screen for New Items: a. Checks to be printed-the Check Ready by Site Report provides a list of all Taxpayers whose checks are ready with their phone numbers. b. IRS Rejects-Correct Return(s) and contact Taxpayer(s) if necessary. c. Software Updates-Apply all software updates to both Transmitting and Non-Transmitting Computers, and contact Technical Support immediately if you have any problems. d. Bulletins-Read Bulletins regularly in case they apply to you or your Taxpayers. Types of Services The following page gives a detailed list of the bank products offered, along with the Tax Preparation and other services for which the Taxpayer can be charged a fee. This program has been enhanced to provide several billing options. You can make copies of this page for your office staff for quick reference. For detailed instructions on setting up billing and entering fees into the program, please refer to Chapter
246 Tax Preparation A fee is normally charged for preparing the Tax Return for the Taxpayer. This fee is automatically deducted from the Taxpayer s refund, when applicable. Be sure your information is entered on page 2 of the Return, and sign and date the return if you are a Paid Preparer. If you are only assisting the Taxpayer with entering the data into the computer and not signing the return as a Paid Preparer, the Taxpayer cannot be charged a Tax Preparation fee. Electronic Filing A fee may be charged when the Taxpayer s tax return is electronically filed with both the IRS and state taxing agency. Some banks do not allow an electronic filing fee to be charged when a Taxpayer is purchasing a bank product. The Taxpayer must electronically file their return to receive a bank product. Also, electronic filing typically provides a faster refund. If the Taxpayer chooses to do a paper return, it may be several weeks before their refund will be available. Protection Plus A fee will be charged when the Taxpayer chooses to purchase Protection Plus, an audit protection product offered by an independent company made available directly through the software. See Appendix 8 for details. CADR+ A fee will be charged when the Taxpayer chooses to purchase CADR+, a health services product offered by an independent company made available directly through the software. See Appendix 8 for details. RAC (Refund Anticipation Check) The Taxpayer should receive their check from you in two to four weeks. RAC Direct Deposit The Taxpayer's refund will be sent directly to their bank account. You will NOT print a check for the Taxpayer. Direct Deposit of Refund The Taxpayer should receive a direct deposit of their refund into their bank account in two to four weeks. The customer must pay any fees due in advance of filing the return electronically. Paper Check The IRS will mail a check to the Taxpayer s home in two to four weeks. The customer must pay any fees due in advance of filing the return electronically. 246
247 Preparing the Personal Tax Return This program allows the Tax Preparer to electronically store IRS documents in accordance with IRS Rev. Proc Please refer to that document for more information regarding the storage of electronic tax returns and other documents. 1.) Fill out the Taxpayer Questionnaire and have the Taxpayer sign the form verifying everything is true and correct. This questionnaire is available at the end of this User s Guide and as a PDF in the Xlink16 directory for you to make copies. 2.) Check the Taxpayer s Photo Identification and Social Security card to verify that the information matches the information on the Taxpayer Questionnaire. 3.) Begin the Tax Return and complete the Taxpayer Data sheet, along with the applicable Due Diligence questions. This program assists the Tax Preparer in fulfilling his or her federal requirements mandated in IRS Treasury Regulation Complete any additional Due Diligence requirements of the state in which the Tax Preparer is operating or preparing returns. 4.) Print the Consent to Use and Privacy Notice forms and have the Taxpayer sign these forms. If there is a Spouse, he or she also needs to sign these forms. Alternatively, use the Signature Pad to capture the signature(s) on these forms. The electronically signed forms will be saved in the Document Archive as a permanent record of the Tax Return. 5.) Scan the Taxpayer Questionnaire, any additional Due Diligence Documentation, Photo Identification(s), Social Security card(s), and any other applicable identifications and documents to create a complete electronic copy of the return if this equipment is being utilized by your office. Otherwise, a hard copy of all of these documents should be kept as part of the Taxpayer s tax return records. 6.) Continue preparing the Federal Tax Return. 7.) When the federal portion of the Return file is completed, verify the Return file and make any necessary corrections. 8.) Add State Return(s) if applicable and complete them. The State Return may be automatically added to the return if this option was selected during Setup. See Chapter 2 of the Manual. 9.) Verify the Return file again and make any necessary corrections. 10.) Queue the Return file for Transmitting or Transferring. See the Manual for more information on transmitting and transferring returns to and from Transmitting Computers, Non-Transmitting Computers, Remote Computers, and Central Site. 11.) Print the Consent to Disclosure and Bank Application and have the Taxpayer sign these forms if the Taxpayer is purchasing a Bank Product. Alternatively, use the Signature Pad to capture the Taxpayer s Signature on these forms. The forms will then be signed and saved in the Document Archive as a permanent record of the Tax Return. 247
248 12.) Print the Form 8879 if the return is being electronically filed, and the ERO is using the Practitioner PIN method and/or auto-generating the Taxpayer s PIN and have the Taxpayer sign this form. Alternatively, use the Signature Pad to capture the Taxpayer s Signature and Tax Preparer s signature on this form. This form will be signed and saved in the Document Archive as a permanent record of the Tax Return. Either a hard copy or an electronic copy of the signed Form 8879 must be kept as part of the Tax Preparer s records. 13.) Print all applicable forms as follows: a. Taxpayer copy of the Federal and State Return b. Preparer copy of the Federal and State Return (if you keep hard copies) c. IRS copy of the return if the Federal Return is being mailed d. State copy of the return if State Return is being mailed e. Taxpayer copy of all applicable bank documents f. Preparer copy of all applicable bank documents (if you keep hard copies) g. Taxpayer copy of all other applicable product applications h. Payment voucher, if applicable 14.) If this is an electronically filed Return, a. If the Federal Return includes attachments that cannot be electronically filed, but instead must be mailed to the IRS, these attachments, along with a copy of Form 8879, will be printed with the Taxpayer s return along with mailing directions. b. Do not mail the IRS any documents, including Form 8879, except under the conditions listed above. 15.) If this is a paper Return being mailed to the IRS and/or State, a. Have the Taxpayer sign the appropriate Return. b. Sign the appropriate Return if you are a Paid Preparer. c. Mail the appropriate Return along with any other required documents. 16.) On a regularly scheduled basis, from the Work In Progress Summary screen, click Transmit to send the electronically filed Return(s) from a Transmitting Computer and/or Remote Computer to Central Site and/or Main Office, or click Transfer from a Non-Transmitting Computer to send to an external storage device for Retrieving by a Transmitting Computer. 17.) Give the Taxpayer the following documents for his or her Records: 248
249 a. A copy of the Federal Return, and any copies of State Returns, as applicable b. A signed Form 8879 if the Return has been filed electronically if requested c. A signed copy of the Bank Application, as applicable d. The Taxpayer s (and Spouse s) copy(ies) of their W-2s e. Any other documentation the Taxpayer brought with them for preparing the Tax Return 18.) As the Preparer, keep for your Records (as a hard copy or as an electronic copy): a. A copy of the Federal Tax Return, and any copies of State Returns, as applicable b. A signed Form 8879, if applicable, which must be kept for at least 3 years from the due date of the Federal Return or the filing date of the Return, whichever is later c. The top copy of the Bank Application d. The signed Taxpayer Questionnaire e. Any documents related to the Due Diligence Requirements f. The photocopies of all Social Security cards and Picture Identifications g. Signed Consent to Use, Consent to Disclosure, and Privacy Notice forms h. Copies of all W-2 s used to prepare the Tax Return Presenting the Check to the Taxpayer 1.) The Taxpayer must present their Photo Identification to pick up the check. This is the case even if you saw the ID before, and you remember the Taxpayer. DO NOT GIVE A CHECK TO ANYONE EXCEPT THE TAXPAYER, OR THE TAXPAYER S SPOUSE IF THEY FILED A JOINT RETURN. 2.) If a Bank Product has been requested, write the Check Number on the bottom of the Bank Application and have the Taxpayer date and sign that he or she received the check. 3.) This is your last opportunity to get the Taxpayer s Signature on every required form. Check one more time to be sure this is completed. Note: If a Taxpayer does not receive their entire expected Refund, he or she needs to call the Treasury Department at if a letter has been received by the Taxpayer from the IRS indicating the shortage is for a repayment of debt to a government agency. If the Taxpayer did not receive a letter, the Taxpayer needs to contact the bank to determine why the entire Refund was not paid. 249
250 Customer Relations It is very important to explain this carefully to your Taxpayers: The IRS does not guarantee Refunds on any date or time. Additionally, the Banks do not guarantee they will give a loan to any or all of your Taxpayers. The following responses have been created for you to use as talking points when and if a Taxpayer is questioning when they will receive a form of payment: Electronic Filing We are submitting your tax return to the IRS electronically. If the IRS identifies any errors, you will not receive a refund. If the IRS accepts your return, they will pay your refund in two to four weeks. RAC (Refund Anticipation Check) In addition to electronic filing, we are submitting a request to the bank to receive your refund from the IRS and to allow us to print a check for your refund less fees. The check for your refund will become available as soon as the IRS pays your refund (in two to four weeks). RAC DD (RAC Direct Deposit) In addition to electronic filing, we are submitting a request to the bank to receive your refund from the IRS, and to deposit your refund less fees directly into your bank account. The direct deposit of your refund will become available as soon as the IRS pays your refund (in two to four weeks). You will need to contact your bank to determine if the Bank made the deposit. 250

251 Appendix 8 Premium Services We have integrated with our software the services of two industry leading service providers, Call A Doctor Plus and Protection Plus. Call A Doctor Plus CADRPlus allows you to provide professional tax preparers with a best-in-class health care service that is 100% integrated with our software that can generate year-round revenue, and increase profits during the tax season. Protection Plus Protection Plus offers you and your clients the chance to rest easy with audit assistance. Including benefits for both the tax professional and the taxpayer, Protection Plus offers comprehensive and reliable aid in the event of an audit. Protection Plus is fully integrated with our software you can seamlessly incorporate the service into your current tax preparation process. Enrollment The first step to be able to provide these premium services is to enroll with the companies and agree to their terms and conditions. Enroll for Premium Services: 1. Login to the Portal as the Master User, Main Office, or Service Bureau. 2. From the Support Home, click on SUPPORT in the Support Home Toolbar. The Support Center screen will open. 3. Click MANAGE ACCOUNT to open and view the Manage Account Information Screen. 4. Under PART IV PROTECTION PLUS AGREEMENT, a. Select YES from the dropdown list if you want to enable the Protection Plus s audit assistance service. b. After you have read the terms and conditions, check the box to agree to the terms and conditions of the Protection Plus User Agreement. 5. Under PART V CADRPLUS AGREEMENT, a. Select YES from the dropdown list if you want to enable the Call A Doctor Plus resource service to your customers. 251
252 b. After you have read the terms and conditions, check the box to agree to the terms and conditions of the Call A Doctor user Agreement. 6. Click SAVE to save your changes and return to Office Management screen. Additional Options for Protection Plus The Master User or Main Office can also enable Protection Plus to be auto added to each return and charge a fee for the processing of this premium service. To Edit Protection Plus Preferences for an Office/ERO from the Web Portal: 1. From the Office Management Screen, click MANAGE EROS/OFFICE SETUP. The Manage Offices screen will open. The list of all Offices/EROs will appear. An Office can be located by search criteria or only the offices of a specific multi-tier can be listed by selecting the multi-tier office from the drop down list. 2. Click the button next to the ERO to setup a new ERO s information, or click the button to edit a current ERO. 3. Under BILLING/FEE INFORMATION, enter applicable information as follows: a. Select the BILLING SCHEDULE from the dropdown list or click the CREATE NEW SCHEDULE Button to create a new Billing Schedule. The Billing Schedules are created in Manage Billing as detailed above. b. Enter the OFFICE INFORMATION such as name and address that should be printed on each invoice. c. Enter the PROTECTION PLUS MARKUP fee, if applicable. d. Check the box next to AUTO ADD AUDIT PROTECTION to each return for this ERO. 4. Click Save and Continue to save your changes. 5. Click the PUBLISH ERO button to publish the information entered for this ERO and close this screen. Alternatively, click the RETURN TO MANAGE OFFICES button to return to that screen, and the ERO/Office can be published at a later time by using the button next to the User ID. To Edit Protection Plus Preferences for an Office/ERO from the Tax Program: 1. Login to your Tax Software Program as the Administrator From the Opening Screen, click on SETUP in the Menu Bar, drag the arrow down to BILLING SETUP, and click once. The BILLING SETUP window will open.

253 3. Under the CUSTOM SETTINGS TAB, a. Next to AUDIT PROTECTION CHECK AUTO ADD FINANCIALS to automatically add this product to every bank product individual return. Otherwise, Protection Plus will need to be manually included by adding a form to Returns on an individual basis. Important Note: You must have a contract and be enrolled with Audit Protection to add these fees. b. Next to AUDIT PROTECTION CHECK AUTO ADD NON -FINANCIALS to automatically add this product to every non-bank product individual return. Otherwise, Protection Plus will need to be manually included by adding a form to Returns on an individual basis. 4. In the Billing Setup window, click OK to save and exit BILLING SETUP. Utilizing the Premium Services Protection Plus can be added to the Return by using the auto-add function described above or by using the Add Form function that is used for adding any type of Form or Worksheet to the Return. CADRPlus can be added to the Return by following the directions below. Adding CADRPlus to a Return: 1. Complete the Client Data Sheet, and enter Y for the question Would you like to purchase a one year subscription to CADRPlus for you and your family for $199.95? 2. Enter all Source Documents and any Forms which are secondary to the W-2, such as Schedule A, B, C and D. 3. Complete Form 8879 and the Bank Application. The Tax Return must have a refund, and the Return must be marked as a RAC/RT to offer CADRPlus. 4. Under the Attached Forms Screen, all of the Forms associated with the Return, including the CADRPlus and Protection Plus forms, will appear. If one or both these forms do not appear, and the Taxpayer is requesting the service(s), complete the following steps: a. Click the button from the Toolbar. The All Forms and Schedules window will open. 253
1040 Quick Start Guide
 1040 Quick Start Guide Tax Year 2018 1 P a g e Introduction This Quick Start Guide describes the installation process for the 1040 Software. It contains information about communication, updating, as well
Drake Zero User s Manual
 .. Drake Zero User s Manual Tax Year 2017 Support.DrakeSoftware.com (828) 524-8020 Tax Year 2017 i Copyright The 2017 Drake Zero User s Manual, Drake Tax Software, and any other related materials are copyrighted
Professional Editions Setup Guide
 Professional Editions Setup Guide FOR TAX YEAR 2017 V 1 1 Table of Contents Click on any title to navigate directly to that section. Download and Install Download Installation File from Practice Manager
AUTOMATIC UPDATES You can set up your program to automatically install updates.
 TaxReturnProduction 2 STARTING YOUR DAY Updating Your Software It is important to update your software as soon as an update becomes available for download. The Update Manager is used to obtain and install
Welcome to your Lacerte products! We appreciate your business.
 Welcome to your Lacerte products! We appreciate your business. Please follow steps 1 through 4 in this guide: Step 1: Install the Final 2014 Program Step 2: Install the 2015 Program Step 3: Transfer Your
Web1040 User s Manual Tax Year 2017
 .. Web1040 User s Manual Tax Year 2017 Support.DrakeSoftware.com (828) 524-8020 Web 1040 User Manual Copyright The 2017 Web1040 User s Manual, Drake Tax Software, and any other related materials are copyrighted
SUGGESTED DEFAULT TEMPLATES FOR TWO 2009 January 10, 2010
 For the latest defaults, check the AARP Tax-Aide Extranet at www.aarp.org/tavolunteers This document contains many suggestions; local practices should prevail. There are actually very few have to settings.
Electronic Signature & Storage. Rollout Guide
 Electronic Signature & Storage Rollout Guide Tax Season 2013 2012-2013 Jackson Hewitt Tax Service Inc. All rights reserved. Page 1 of 45 Table of Contents Electronic Signature & Storage Overview... 3 Client
CIT Enterprise Edition Setup Guide FOR TAX YEAR 2016
 CIT Enterprise Edition Setup Guide FOR TAX YEAR 2016 Thank you for choosing TaxAct CIT Enterprise Edition. We look forward to helping make this your best tax season ever! Remember, TaxAct s dedicated Professional
Preparer s Editions Setup Guide
 Preparer s Editions Setup Guide FOR TAX YEAR 205 V 2.5 Thank you for choosing TaxAct Preparer s Editions. We look forward to helping make this your best tax season ever! Remember, TaxAct s dedicated Professional
TaxWise Changes Document
 TaxWise 2009 Changes Document Purpose: Distribute the changes that have been made to TaxWise 2009. The following will be described in this document: Changes What s New Benefits Instructions for using a
Paperless Tax Office Automation
 _ Topics in this Quick Start Guide Key steps for using GruntWorx in your tax practice How to submit jobs How to Populate UltraTax CS client tax files with GruntWorx How to purchase GruntWorx credits and
ALL MEMBERS AND PAYEES
 Table of Contents Click a link to walk through a specific procedure. ALL MEMBERS AND PAYEES 1 GETTING STARTED How do I register? How do I log on? How do I update security questions? How do I retrieve/reset
QUICKBOOKS PRO 2008 AN INTRODUCTION TO QUICKBOOKS PRO
 QUICKBOOKS PRO 2008 AN INTRODUCTION TO QUICKBOOKS PRO Opening a Company Database 1. To change the open company in QuickBooks, click File on the main menu and select Open or Restore Company. When the next
Walkthrough ULTRATAX/1065. Tax Year 2016
 ULTRATAX/1065 Walkthrough Tax Year 2016 This walkthrough is for 2016 UltraTax/1065, although the general concepts also apply to 2017 UltraTax/1065. We will release an updated version of this walkthrough
Paperless Tax Office Automation
 _ Topics in this Quick Start Guide Key steps for using GruntWorx in your tax practice How to submit jobs How to Populate ProSystem fx client tax files with GruntWorx How to purchase credits and run usage
Accounts Payable MODULE USER S GUIDE
 Accounts Payable MODULE USER S GUIDE INTEGRATED SOFTWARE SERIES Accounts Payable MODULE USER S GUIDE Version 3.1 Copyright 2005 2009, Interactive Financial Solutions, Inc. All Rights Reserved. Integrated
TOOLBOX CS. Getting Started. version 17.x.x
 TOOLBOX CS Getting Started version 17.x.x TL31429 (11/20/17) Copyright Information Text copyright 2005-2017 by Thomson Reuters. All rights reserved. Video display images copyright 2005-2017 by Thomson
VITA/TCE Training. Installing TaxSlayer Pro Desktop TaxSlayer, LLC
 VITA/TCE Training Installing TaxSlayer Pro Desktop 2016 TaxSlayer, LLC Installation and Network Configuration... 4 Installation... 4 Login... 9 Network Configuration... 10 Transmitting Computer... 10 Workstations...
Paperless Tax Office Automation
 _ Topics in this Quick Start Guide Key steps for using GruntWorx in your tax practice How to submit jobs How to Populate UltraTax CS client tax files with GruntWorx How to purchase GruntWorx credits and
CJA evoucher. Attorney User Manual Release 5.2 October 2018
 CJA evoucher Attorney User Manual Release 5. October 08 CJA evoucher for Attorneys i Contents Nota Bene: Edit before using!... Introduction... Panel Management... Voucher & Authorization Request Submission...
2017 Quick Start Manual
 2017 Quick Start Manual Table of Contents 2017 Filing Season Security Requirements... 1 Technical and Customer Support Options... 3 System Requirements... 5 Installing TaxSlayer Pro... 6 Initial Configuration...
WELCOME TO WEBLINK Accessing WebLink...6. Registration Process...6. Log In Process After Registration On-Line Help...
 WebLink User Guide Table of Contents WELCOME TO WEBLINK... 1 Internet Explorer Browser Settings...3 WebLink Features... 5 Accessing WebLink...6 Registration Process...6 Log In Process After Registration...
Professional Editions Setup Guide
 Professional Editions Setup Guide FOR TAX YEAR 2016 V 2 Thank you for choosing TaxAct Professional Editions. We look forward to helping make this your best tax season ever! Remember, TaxAct s dedicated
Paperless Tax Office Automation
 Topics in this Quick Start Guide GruntWorx Popullate for UlltraTax CS Key steps for using GruntWorx in your tax practice How to submit jobs How to Populate UltraTax CS client tax files with GruntWorx How
Paperless Tax Office Automation
 _ Topics in this Quick Start Guide Key steps for using GruntWorx in your tax practice How to submit jobs How to Populate ProSystem fx client tax files with GruntWorx How to purchase credits and run usage
SUGGESTED DEFAULT TEMPLATES FOR TWO 2011 November 27, 2011
 SUMMARY: This document describes the procedures to create State- and Site-Level Templates (tax form defaults) and provides a set of defaults that can be used with TaxWise Online for 2011. It replaces the
First Data Global Gateway SM Virtual Terminal User Manual
 First Data Global Gateway SM Virtual Terminal User Manual Version 1.0 2015 First Data Corporation. All Rights Reserved. All trademarks, service marks, and trade names referenced in this material are the
ATX Document Manager. User Guide
 ATX Document Manager User Guide ATX DOCUMENT MANAGER User Guide 2008 CCH Small Firm Services. All rights reserved. 6 Mathis Drive NW Rome, GA 30165 No part of this manuscript may be copied, photocopied,
GoSystem Tax RS. Using GruntWorx to Populate. Paperless Tax Office Automation. Topics in this Quick Start Guide. Key steps to configuring GruntWorx
 Paperless Tax Office Automation Topics in this Quick Start Guide Key steps to configuring GruntWorx ow to submit jobs ow client tax files are populated with GruntWorx ow to purchase credits and run usage
Business ebanking User Guide
 Business ebanking User Guide If you have any questions, please contact Business ebanking Support at 1-800-593-4345 Contents About Business Online Banking... 3 System Requirements/Considerations... 4 Password
Calendar & Buttons Dashboard Menu Features My Profile My Favorites Watch List Adding a New Request...
 remitview User Guide 1 TABLE OF CONTENTS INTRODUCTION... 3 Calendar & Buttons... 3 GETTING STARTED.... 5 Dashboard.... 7 Menu Features... 8 PROFILE.... 10 My Profile... 10 My Favorites... 12 Watch List...
Wholesale Lockbox User Guide
 Wholesale Lockbox User Guide August 2017 Copyright 2017 City National Bank City National Bank Member FDIC For Client Use Only Table of Contents Introduction... 3 Getting Started... 4 System Requirements...
User s Guide. (Virtual Terminal Edition)
") User s Guide (Virtual Terminal Edition) Table of Contents Home Page... 4 Receivables Summary... 4 Past 30 Day Payment Summary... 4 Last 10 Customer Transactions... 4 View Payment Information... 4 Customers
User s Guide (Virtual Terminal Edition) Table of Contents Home Page... 4 Receivables Summary... 4 Past 30 Day Payment Summary... 4 Last 10 Customer Transactions... 4 View Payment Information... 4 Customers
2 New Company Setup OBJECTIVES:
 2 New Company Setup In Chapter 2 of Accounting Fundamentals with QuickBooks Online Essentials Edition, you will learn how to use the software to set up your business. New Company Setup includes selecting
TPG Bank ERO Enrollment Instructions
 TPG Bank ERO Enrollment Instructions To access and complete the ERO Bank Enrollment Application for your EFINs you must be logged into your Customer Portal site. Click on Bank Enrollment. If this is a
L E S S O N 1 Lesson objectives
 L E S S O N 1 Lesson objectives To gain an overview of the course and the topics to be covered To know how QuickBooks works and how you can get around in QuickBooks To learn common business terms used
Eclipse Forms. Release 8.7.2
 Eclipse Forms Release 8.7.2 Legal Notices 2011 Epicor Software Corporation. All rights reserved. Unauthorized reproduction is a violation of applicable laws. Epicor and the Epicor logo are registered trademarks
Automation of Industry eforms
 Automation of Industry eforms EFORMS 4473 DEPARTMENT OF JUSTICE: BUREAU OF ALCOHOL, TOBACCO, FIREARMS AND EXPLOSIVES INFORMATION SERVICES DIVISION DATE PREPARED: May 3, 2017 Table of Contents OVERVIEW...
Setting up TWO. Logging on to TWO the first time
 Setting up TWO To set up TaxWise Online as a Favorite in Internet Explorer, use the following steps: 1. Open Internet Explorer or Google Chrome. 2. Type https://twonline.taxwise.com in the address line.
TRACS Enterprise Manual
 TRACS Enterprise Manual Table of Contents Welcome to NAPA TRACS... 1 What's New in NAPA TRACS... 1 Registering your NAPA TRACS Application... 2 Backing Up NAPA TRACS... 2 Online Updates... 2 Chapter 1
Remote Deposit. User Guide. Copyright 2008 v3.2 The remote capture software is powered by Wausau Financial Systems, Inc.
 Remote Deposit User Guide Copyright 2008 v3.2 The remote capture software is powered by Wausau Financial Systems, Inc. Table of Contents Remote Deposit User Guide The Remote Deposit Application...2 Using
Quick Start Manual. Technical Support TaxSlayer Pro Quick Start Manual.
 2013 Quick Start Manual Technical Support 706.868.0985 w w w. t a x s l a y e r p r o. c o m 1 2 TaxSlayer Pro Professional Tax Preparation Software 2013 QUICK START MANUAL Table of Contents IRS Preparer
WalkThrough ULTRATAX/1041. Tax Year 2013
 ULTRATAX/1041 WalkThrough Tax Year 2013 Invest a few hours of your time to experience the power of UltraTax/1041 the tax preparation application that puts you in complete control of processing your tax
1. ECI Hosted Clients Installing Release 6.3 for the First Time (ECI Hosted) Upgrading to Release 6.3SP2 (ECI Hosted)
 Upgrading to Release 6.3SP2 (ECI Hosted)") 1. ECI Hosted Clients........................................................................................... 2 1.1 Installing Release 6.3 for the First Time (ECI Hosted)...........................................................
1. ECI Hosted Clients........................................................................................... 2 1.1 Installing Release 6.3 for the First Time (ECI Hosted)...........................................................
PLANNER CS. Getting Started. version
 PLANNER CS Getting Started version 2017.1.0 TL31518 (11/20/17) Copyright Information Text copyright 1998-2018 by Thomson Reuters. All rights reserved. Video display images copyright 1998-2018 by Thomson
DSS User Guide. End User Guide. - i -
 DSS User Guide End User Guide - i - DSS User Guide Table of Contents End User Guide... 1 Table of Contents... 2 Part 1: Getting Started... 1 How to Log in to the Web Portal... 1 How to Manage Account Settings...
Sync User Guide. Powered by Axient Anchor
 Sync Powered by Axient Anchor TABLE OF CONTENTS End... Error! Bookmark not defined. Last Revised: Wednesday, October 10, 2018... Error! Bookmark not defined. Table of Contents... 2 Getting Started... 7
GoSystem Tax RS. Using GruntWorx to Populate. Paperless Tax Office Automation. Topics in this Quick Start Guide NEED HELP?
 Paperless Tax Office Automation Topics in this Quick Start Guide Key steps to configuring GruntWorx ow to submit jobs ow client tax files are populated with GruntWorx ow to purchase credits and run usage
efiletexas.gov Review Queue User Guide Release
 efiletexas.gov Review Queue User Guide Release 2017.1 EFS-TF-200-4075 v.1 October 2017 Copyright and Confidentiality Copyright 2017 Tyler Technologies, Inc. All rights reserved Use of these materials is
E-FORM GETTING STARTED GUIDE THE COMPLETE ELECTRONIC TAX FORM DVD
 E-FORM GETTING STARTED GUIDE THE COMPLETE ELECTRONIC TAX FORM DVD Updated November 2014 Copyright 2014-2015 Thomson Reuters. All Rights Reserved. Thomson Reuters disclaims any and all liability arising
ACA-1095 Reporting Help Pro-Ware, LLC
 ACA-1095 Reporting Help Contents 3 Table of Contents Foreword 0 Part I Introduction 6 1 Overview 6 2 Welcome Screen 6 3 What's New 6 4 Home Screen 7 Toolbar... 7 File Manager... (Multi-Client Only) 8
GoSystem Tax RS. Using GruntWorx to Populate. Paperless Tax Office Automation. Topics in this Quick Start Guide NEED HELP?
 Paperless Tax Office Automation Topics in this Quick Start Guide Key steps to configuring GruntWorx ow to submit jobs ow client tax files are populated with GruntWorx ow to purchase credits and run usage
Creating Interactive PDF Forms
 Creating Interactive PDF Forms Using Adobe Acrobat X Pro for the Mac University Information Technology Services Training, Outreach, Learning Technologies and Video Production Copyright 2012 KSU Department
Quick Start Guide for Windows
 for Windows The Eudora 5.1 User Manual for Windows is on the Eudora CD included in the product box. If you prefer a printed and bound copy, you can purchase one from www.eudora.com or call 1-800-2-EUDORA
Wealth Management Online. User Guide
 Wealth Management Online User Guide Version 3.0 Welcome to Cambridge Trust Company s Wealth Management Online internet access site. Wealth Management Online provides access to your investment portfolio
Enterprise Payment Solutions. Remote Deposit Capture. Remote Deposit Capture User Manual
 Enterprise Payment Solutions Remote Deposit Capture 1999-2014 Jack Henry & Associates, Inc. All rights reserved. Information in this document is subject to change without notice. Printed in the United
ivisions Employee Guide Portal Employee User Guide Town of Needham Terry Wolfson Created: 1/27/2014 Updated: 10/5/2016
 ivisions Employee Guide Portal Employee User Guide Town of Needham Terry Wolfson Created: 1/27/2014 Updated: 10/5/2016 Contents What is ivisions?... 2 Registering to ivisions Portal... 3 Logging into the
Table of Contents. Chapter 1: Installation Hardware Requirements... 1 Special Setup for Windows Vista... 1
 Table of Contents Chapter 1: Installation Hardware Requirements... 1 Special Setup for Windows Vista... 1 Chapter 2: Moving around in the program Menu... 4 Toolbar... 6 Chapter 3: Setup Setting up a Company...
Startup Guide. Version 1.7
 Startup Guide 1 INTRODUCTION 3 COMPANIES & USERS 4 Companies & Users Licensee Offices 4 Companies & Users Insurers 6 Companies & Users Distributors 7 Companies & Users Users 8 Reset Password 10 Companies
2013 Product Catalog. Quality, affordable tax preparation solutions for professionals Preparer s 1040 Bundle... $579
 2013 Product Catalog Quality, affordable tax preparation solutions for professionals 2013 Preparer s 1040 Bundle... $579 Includes all of the following: Preparer s 1040 Edition Preparer s 1040 All-States
PROPRIETARY MATERIALS
 PROPRIETARY MATERIALS No use of these proprietary materials is permitted without the express written consent of or license from Thomson Reuters. Altering, copying, distributing or reproducing any of these
W-2 Printing & E-Filing
 Vision Municipal Solutions W-2 Printing & E-Filing How-To Guide P a g e 2 Contents Introduction... 4 What is the goal of this walkthrough?... 4 Substitute W-2 Copy A... 5 Create a new W-2 Run... 5 Modifying
CCH Axcess Tax Electronic Filing User Guide
 CCH Axcess Tax Electronic Filing User Guide December 2014 2000-2014, CCH INCORPORATED, a part of Wolters Kluwer. All rights reserved. Material in this publication may not be reproduced or transmitted,
Computerized Payroll Accounting User s Guide
 Computerized Payroll Accounting User s Guide COMPUTERIZED PAYROLL ACCOUNTING After studying this appendix, you will be able to: 1 2 3 4 5 6 7 8 Identify the components and procedures of a computerized
CCH esign. Introduction. ProSystem fx Tax
 ProSystem fx Tax CCH esign Introduction allows you to send documents to your clients, employees, and other third parties to obtain their electronic signatures securely. We teamed up with AssureSign to
Concept Toolkit 12 Calculate Plan Educate
 Concept Toolkit 12 Calculate Plan Educate About Concept Toolkit Concept Toolkit Version 12. Copyright 1997-2017 Ativa Interactive Corporation System Requirements Windows 2000 / XP / Vista / NT / 7 / 10
ProSystem fx Practice Management
 ProSystem fx Practice Management Version 2 0 12.1 2.02 October 2012 Welcome to ProSystem fx Practice Management! This bulletin provides important information relating to ProSystem fx Practice Management
jraven Quick Start Guide
 jraven Quick Start Guide Version 1.0 9/15/2010 Overview, Install, Starting the Application and Setup... 3 Overview:... 3 INSTALL / SETUP... 3 How to install jraven... 4 Migrating Data - jraven MIGRATION
Wells Fargo Merchant Services. Wells Fargo Mobile Merchant User Guide for Apple ipad Version 3.2
 Wells Fargo Merchant Services Wells Fargo Mobile Merchant User Guide for Apple ipad Version 3.2 Table of Contents Overview...3 Key Features...3 Download Wells Fargo...4 Mobile Merchant...4 Demo Mode...4
Microsoft Dynamics GP. System User s Guide
 Microsoft Dynamics GP System User s Guide Copyright Copyright 2010 Microsoft. All rights reserved. Limitation of liability This document is provided as-is. Information and views expressed in this document,
NorthStar Club Management System
 NorthStar Club Management System The Version 3.2.0 GL- 03252008 March 25, 2008 CONTENTS OVERVIEW OF THE GL (GENERAL LEDGER) MODULE... 5 ACCESSING THE GL MODULE... 6 GL INTRODUCTION:... 8 Inquiry... 8 Admin...
Anchor User Guide. Presented by: Last Revised: August 07, 2017
 Anchor User Guide Presented by: Last Revised: August 07, 2017 TABLE OF CONTENTS GETTING STARTED... 1 How to Log In to the Web Portal... 1 How to Manage Account Settings... 2 How to Configure Two-Step Authentication...
Includes all of the following a value of over $695:
 2011 Product Catalog Quality, affordable tax preparation solutions for professionals save over $136 2011 Preparer s 1040 Bundle... $559 Includes all of the following a value of over $695: Preparer s 1040
Paperless Tax Office Automation
 Paperless Tax Office Automation Topics in this Quick Start Guide Key steps to configuring GruntWorx How to submit jobs How client tax files are populated with GruntWorx How to purchase tokens and run usage
PROPRIETARY MATERIALS
 PROPRIETARY MATERIALS No use of these proprietary materials is permitted without the express written consent of or license from Thomson Reuters. Altering, copying, distributing or reproducing any of these
GRS Enterprise Synchronization Tool
 GRS Enterprise Synchronization Tool Last Revised: Thursday, April 05, 2018 Page i TABLE OF CONTENTS Anchor End User Guide... Error! Bookmark not defined. Last Revised: Monday, March 12, 2018... 1 Table
DT MAX T1 DT MAX T1 - USER GUIDE
 DT MAX T1 DT MAX T1 - USER GUIDE TABLE OF CONTENTS DT Max T1 - User Guide 1 About this document 4 DT Max Basics 5 Splash screen 5 Client List 8 Personalizing the Client List 9 Sorting the Client List 10
Financial Management 1099 Processing Year-End Update Guide
 Financial Management 1099 Processing - 2016 Year-End Update Guide December 20, 2016 2016 Tyler Technologies. All Rights Reserved. All rights reserved. Information within this document is the sole property
Receivables Edge SM User Guide
 TREASURY SERVICES Receivables Edge SM User Guide Receivables Edge SM is an internet-based management application and account reconciliation solution. Receivables Edge combines advanced image and data capture
Expedient User Manual Getting Started
 Volume 1 Expedient User Manual Getting Started Gavin Millman & Associates Pty Ltd 281 Buckley Street Essendon VIC 3040 Phone 03 9331 3944 Web www.expedientsoftware.com.au Table of Contents Logging In...
System Management. User Guide
 System Management User Guide The information in this document is subject to change without notice and does not represent a commitment on the part of Horizon. The software described in this document is
i-power DMS - Document Management System Last Revised: 8/25/17 Version: 1.0
 i-power DMS - Document Management System Last Revised: 8/25/17 Version: 1.0 EPL, Inc. 22 Inverness Parkway Suite 400 Birmingham, Alabama 35242 (205) 408-5300 / 1-800-243-4EPL (4375) www.eplinc.com Property
User Bulletin 2881: Electronic Filing 1040 Processing 2007 UltraTax/1040-US Version January 11, 2008
 User Bulletin 2881: Electronic Filing 1040 Processing 2007 UltraTax/1040-US Version 07.3.1 January 11, 2008 PURPOSE This user bulletin provides UltraTax/1040-US users with an overview of the processing
2012 W2 Guide KB
 2012 W2 Guide KB 499302 In order to provide greater functionality and more value to our customers SAGE 100 FUND ACCOUNTING has partnered with Aatrix to handle all W2 processing and filing. You now have
Administrator s Guide
 Administrator s Guide 1995 2011 Open Systems Holdings Corp. All rights reserved. No part of this manual may be reproduced by any means without the written permission of Open Systems, Inc. OPEN SYSTEMS
WELCOME TO WEBLINK..1. Internet Explorer Browser Settings...3. WebLink Features...5. Accessing WebLink Registration Process...
 WebLink User Guide Table of Contents WELCOME TO WEBLINK..1 Internet Explorer Browser Settings......3 WebLink Features.....5 Accessing WebLink..... 6 Registration Process..... 6 Log In Process After Registration.......15
Getting Started with Commercial Services
 Getting Started with Commercial Services USER GUIDE For informational purposes only, not considered an advertisement. WELCOME TO M&T BANK S COMMERCIAL SERVICES M&T Bank s Commercial Services system provides
User Guide For Version 4.0
 User Guide For Version 4.0 Easy-to-use, Complete Cyber Cafe Management Software by icafe Manager User Guide Contents Chapter 1: Introduction 7 1.1 About the Manual 7 1.2 Intended Audience 7 1.3 Conventions
 www.insightsoftware.com for JD Edwards World and EnterpriseOne Version: 2.1 Last Updated: August 31, 2011 Contents 1. Introduction... 4 Welcome... 4 Using this Guide... 4 2. The Console Interface... 5
TaxWise Online User Guide
 When you have to be right Tax & Accounting TaxWise Online User Guide T A X W I S E O N L I N E UserGuide 2016 Universal Tax Systems, Inc. and its affiliates and/or licensors. All rights reserved. 225 Chastain
CopyRight Notice TRADEMARKS
 2003 DRAKE SOFTWARE CopyRight Notice The 2003, Drake Tax Software and any other related materials are Copyrighted Material. All rights are reserved by Drake Enterprises, LTD., including all ownership rights.
INBUSINESS BANKING SYSTEM
 Introducing your new INBUSINESS BANKING SYSTEM Companion Guide to Business Banking Video Tutorials Updated 0.09.8 WELCOME TO THE INBUSINESS SYSTEM The InBusiness System will help you efficiently and securely
PARTNER PORTAL TOOLKIT
 Revised 7/26/2018 PARTNER PORTAL TOOLKIT Financial Advisors WWW.PAYLOCITY.COM TABLE OF CONTENTS Partner Portal Toolkit... 3 User Accounts... 4 Partner Portal... 5 Select Company or Set... 6 Recent Hires...
CCH ProSystem fx Practice Management
 CCH ProSystem fx Practice Management For first-time installations of Practice Management, this guide details the installation instructions and setup information. Please refer to the Table of Contents to
Moving graphic examples are included on some pages. To view them you need the Flash plugin on your
 Print: Introduction Introduction Understanding the basic components of the Millennium circulation environment and how each function works is key to efficiently using Millennium Circulation. Because there
Release Notes. Contents. About this release. MYOB AccountRight Standard 2011 Beta MYOB AccountRight Plus 2011 Beta
 Release Notes MYOB AccountRight Standard 2011 Beta MYOB AccountRight Plus 2011 Beta Contents Section See About this release below Getting started page 2 New features page 6 Features unavailable in this
Test Information and Distribution Engine
 SC-Alt Test Information and Distribution Engine User Guide 2018 2019 Published January 14, 2019 Prepared by the American Institutes for Research Descriptions of the operation of the Test Information Distribution
CLIQ Web Manager. User Manual. The global leader in door opening solutions V 6.1
 CLIQ Web Manager User Manual V 6.1 The global leader in door opening solutions Program version: 6.1 Document number: ST-003478 Date published: 2016-03-31 Language: en-gb Table of contents 1 Overview...9
Welcome. Welcome to ExpensAble. Features of ExpensAble
 User Guide 0 Insperity Expense Management 2211 Michelson Suite 520 Irvine California 92612 T: 888.536.6200 www.insperity.com/products/expense-management Welcome This chapter provides an introduction to