TCOSoft Remote Director. Remote Management User s Guide for WBTs
|
|
|
- Grace Oliver
- 5 years ago
- Views:
Transcription
1 TCOSoft Remote Director Remote Management User s Guide for WBTs
2 DISCLAIMER While all attempts have been made to ensure the accuracy of the data in this manual, no warranty is made or implied as to its accuracy. Specifications are subject to change without notice. COPYRIGHT No part of this manual may be copied in any form without the express written permission of TCOSoft Corporation. Copyright 2002 TCOSoft Corporation. All Rights Reserved Worldwide. TRADEMARKS TCOSoft, Remote Director is a Registered Trademarks of TCOSoft Corporation. Windows is a Trademark of Microsoft Corporation. 2
3 Contents 1.0 Remote Director Overview 1.1 Introduction 1.2 Software Description 1.3 How to use this Manual 1.4 Attention 2.0 Installing Remote Director 2.1 System Requirements 2.2 Uninstall the Old Remote Director 2.3 Uninstall the Old Address Book 2.4 Deleting Remote Director Folders 2.5 Installing the Address Book 2.6 Setting up the Service Password 2.7 Installing the Remote Director 2.8 Configuring the Address Book Server 2.9 Connecting the Address Book Server 3.0 Managing Your WBTs 3.1 Organizing Your WBTs Creating a Device List under the Address Book Server Creating a Sub Device List under the Local System Grouping your WBTs 3.2 Creating a Master Profile Upload a Profile Changing the Master Profile Settings Download the Master Profile 4.0 Firmware Upgrades Downloads 4.1 Overview 4.2 Firmware Upgrade by Flashing Obtaining your Upgrade Files Firmware Upgrade 4.3 Firmware Upgrade by Scheduling Uploading Firmware Files Firmware Upgrade 5.0 Administration 5.1 Windows: Control Panel Updates Starting/Stopping the Address Book Service Changing the Broadcast Mechanism Changing the Service Password Changing the Profile Password Password Summary 5.2 Viewing the Address Book Log 5.3 Set the Time Out 5.4 Update a Device Status 5.5 Deleting a Device 5.6 Deleting a Device List 6.0 WBT Properties and Miscellaneous Features 6.1 Viewing WBT Properties 6.2 Editing Device Properties 6.3 Connection Manager Add/Edit a RDP Connection Add/Edit an ICA Connection Add/Edit a PowerTerm Connection 6.4 Upload Profile Appendix A
4 1.0 Remote Director Overview 1.1 Introduction Thank you for your interest in TCOSoft s Remote Director management software. You have taken an important step towards improving the management of your Windows Based Terminals (WBTs) in your company. This has become the focus of many companies in the global market that rely on their information infrastructure to support their workforce. IT Administrators have the opportunity to work beyond their geographic location and assist their business colleagues outside the walls of their company. Remote Director can manage and control infinite WBTs through a single computer. Remote Director can be implemented in your system in less than an hour through an easy and quick installation process. With the help from Remote Director, Administrators have a multitude of possibilities when it comes to interacting with their WBTs: organizing devices by name, department, or even by room number. Additional tools such as flashing and scheduling enables Administrators to update device software and settings at any time of the day. We hope you enjoy using Remote Director and we are looking forward to addressing any of your questions and comments if any should arise. Sincerely, TCOSoft Management info@tcosoft.com
5 1.2 Software Description Server Side Software Remote Director TCOSoft s Remote Director allows the Network Administrator to flash image and registry files across the network to the devices using either Push or Pull technology. This allows dynamic update of the device s environment. The functionality Remote Director provides is given below: An easy to use user interface where a user can add new device lists or new devices to the existing ones under the local system. To allow deleting a device list on the local system with right authentication To allow the device lists to be downloaded from and uploaded to the TCO Address Book Service. To allow retrieving of Device Properties of multiple devices with a spreadsheet interface. To provide the functionality of retrieving and updating the Device Properties on each device. To allow configuration of devices by providing the same user interface running on the devices. To allow the manager to change the management password of the devices. Address Book Service The TCO Address Book Service runs continuously on a WinNT server and obtains information related to devices and keeps track of them. The TCO Address Book Service also provides information regarding the devices to the TCO Remote Director as and when requested. The TCO Address Book Service maintains the following information for device lists that are created by the TCO Remote Director: profile files that can be used by devices to dynamically configure themselves at boot time image files that can be used to update devices via a scheduling mechanism invoked by the TCO Remote Director The TCO Address Book Service thus acts as a central repository of device information and allows devices to work in a seamless and plug-and-play fashion. It provides broadcasting mechanism through IP Broadcast and IP Multicast that are enabled by default. Note: To view detail description of Client side software, see Appendix A 5
6 1.3 How to use this Manual The first the first three sections explain how to implement Remote Director Manger into your network. We recommend both first time and continued users of our software to follow the proceeding steps, some of the processes have changed. These signs require special attention! Stop Yield Note Remote Director Glossary of Icons: Server Shortcut to setting up New Device List (See section 3.1.1for further instruction) New Device Attention Remote Director to a new device on network (See section 5.4 for further instruction) Refresh Refresh the user interface Address Book Server Configure and modify the Address Book Server(s) (see section 2.8 for further instruction) Flash Flash down file to Device or Device List Properties View Device properties Password Create password for a device 6
7 1.4 Attention All previous versions of Remote Director have to be completely uninstalled before installing Remote Manger 3.0. One address book server per subnet is recommended If you are using DHCP to assign IP addresses for your devices: - It is recommended that the Address Book Server be kept powered on at all times - It is possible using DHCP a new IP address would be assigned to your CE Device after the device is turned on/off. All addresses for this device will be displayed as active or inactive To make the organization of your CE Device more efficient, we recommend giving each device a name and location before distributing to employees 7
8 2.0 Installing Remote Director 8

9 Must have Administrator Rights All previous versions of Remote Director have to be uninstalled before installing the new one. Check for the current version of the Address Book before uninstalling the old Address Book (see section 2.3). If the versions are the same, you can keep the current version. 2.1 System Requirements Remote Director: Windows 98, Windows NT, Windows 2000, Windows XP Address Book Server: Windows NT, Windows 2000, Windows XP 9
10 2.2 Uninstall the Old Remote Director To uninstall Remote Director: Click: My Computer Click: Control Panel Click: Add/Remove Programs Follow screen dialog instructions to uninstall the TCO Remote Director Figure Uninstall the Old Address Book To check for the current Address Book Version: Click: My Computer Click: Control Panel Click: TCO Address Book Click: About to view and compare Version Numbers To uninstall the Address Book: Click: My Computer Click: Control Panel Click: Add/Remove Programs Follow screen dialog instructions to uninstall the Address Book Continue with deleting the deleting the Remote Director Folders to complete uninstalling the old version 10
11 2.4 Deleting the Remote Management Folders To delete Remote Director and the Address Book file folders: Click: My Computer Click: C: Click: Program Files Click TCOSoft Delete: Remote Director Folder & Address Book Folder 11

12 2.5 Installing the Address Book To install the Address Book: Insert the CD Click: My Computer Click: Control Panel Click: Add/Remove Programs Follow Screen Dialog Instructions Open Folder: Setup.exe Click: Setup.exe Figure 2.2 The Welcome Dialog will be displayed Follow instructions of the Installation Wizard Figure
13 2.6 Setting up the Service Password The Password is automatically set to default (= no password) unless changed You do not have to setup a service password while installing The Password is setup in the TCOSoft Control Panel. 2.7 Installing the Remote Director To install the Remote Director: Click: My Computer Click: Control Panel Click: Add/Remove Programs Follow screen dialog instructions to add the new TCO Remote Director Open Folder: Setup.exe Click: Setup.exe Follow the Instructions of the Installation Wizard 2.8 Configuring the Address Book Server To configure the Address Book Server IP Address: Open: TCO Remote Director Click: Server Icon Select: Configure (or press hotkey: Ctrl/a) Figure


14 The following Dialog Screen will appear to add, remove, modify, or auto-discover the Address Book Servers IP Addresses Click: Auto-Discover to display Address Book Server IP Address Click: Add Figure 2.5 The following Screen will be displayed Click: OK If the IP Address of the ABS was not detected, the appropriate IP Address has to be entered manually Figure 2.6 To enter the Address Book Server IP Address manually: Click: Add 14 Figure 2.7
.")


15 The following screen will be displayed Enter: IP Address Enter: Service Password Figure 2.8 Leave Password blank if you have not setup the Service Password yet. (see page.. for setup instructions). 2.9 Connecting the Address Book Server Every time the Devices are turned on they identify the Address Book Server using a simple broadcasting mechanism. The broadcast mechanism will identify the server IP address and connect to the Address Book Service. To Connect the Address Book Server: Click: Server Select: Connect (or click: Address Book Icon Figure 2.9 A Message will be displayed to confirm that the Address Book Server has been connected. 15
16 To view all WBTs connected to your Network: Click: Unassigned Figure
17 3.0 Managing your WBTs Organizing your CE Devices Creating a Master Profile Creating a Device List A) Address Book Service B) Local System Uploading a Master profile Creating a Sub Device List Changing the Master Profile Settings Grouping your CE Devices Download the Master Profile Scheduling a profile download If the IP Address of a WBT does not show up under the Unassigned List, you have to register the Device IP in the Local System. To make the Grouping of your WBTs easier, we recommend entering a Name and Location on each device individually, before issuing them within the company (see section 3.2 for details). 17


18 3.1 Organizing your WBTs The following sections explain how to create Device Lists and Sub Lists in order to group your WBTs in the Address Book Server and/or the Local System. The Local System: Can be used as a Backup Tool in case the ABS does not work. Cannot be used to Schedule Profiles or Firmware Downloads. If your system includes different CE Device Types we recommend organizing them in different Sub Lists. Different CE Devices can be remotely managed in one Device List, but cannot receive joint Firmware Upgrades Creating a Device List under the Address Book Service Open: Remote Director Right Click: Address Book Server IP Select: New Device List (or Click: Device List Icon) Figure 3.1 The following dialog box will be displayed Enter Device List Name: (Ex: Accounting_John) Enter: Device List Password 18 Figure 3.2


19 3.1.2 Creating a Device List under the Local System If the Local System is not displayed in the ABS and Device List Column, you have to enable the Local System. To enable Local System: Start from the Remote Director Main menu Click: Tools Select: Settings Click: Box for Local System to enable Figure 3.3 To create a device list under the local system Right Click: Local System Select: New Device List Enter: Device List Name Enter: Device List Password Figure


20 3.1.3 Grouping your WBTs In order to organize and move your WBTs from the Unassigned List: Drag: Device IP Address to the desired Device List If a Device IP Address does not show up under the Unassigned List, the Device IP has to be entered manually. Figure 3.5a To enter a Device IP manually: Right Click: on Device List Click: New Device Enter in IP Address and press Get Info Or Select the Device List to add Device Click on the: New Device icon Enter in IP Address and press Get Info Figure 3.5b 20
21 The following dialog box will be displayed Enter: Password if needed You will get information from the device you selected. It includes UUID, platform ID, Terminal type, Build version, Location, Remarks and Time. Figure
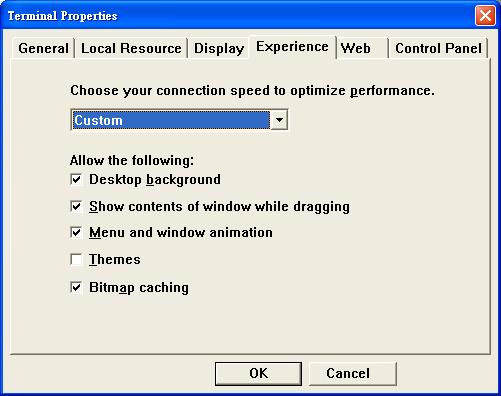
22 3.2 Creating a Master Profile A Master Profile can be created for different CE Device Types or Users of CE Devices. You have to upload one Device Profile to work off of to create a Master Profile Upload a Device Profile Go into terminal properties of the WBT by pressing F2 Click the Profile Upload tab The screen similar to the below display will appear. Figure 3.7 Enter: Device Name and Location Click: Upload Profile A Message will be displayed to confirm that the Profile Upload was successful. 22


23 3.2.2 Changing the Master Profile Settings Start from the Remote Director menu: Click: Server Select: Device Profiles Figure 3.8 Manage Profiles on the Address Book Server will be displayed. Click: Create Profile Figure


24 The Master Profile Names that were uploaded from the Device will be displayed: Highlight: Selected Profile Name Click: OK It is recommended to delete profiles no longer in use. Figure 3.10 A tree-like properties menu for the profile uploaded in Section will be displayed: To change Terminal Properties Mark/Unmark: Selected Properties To edit Terminal Properties Right Click: Selected Properties Click: Edit Click: OK to finalize changes Figure


25 The Profile Information screen will be displayed Select: Icon to identify the New Profile Enter: New Profile Name Enter: Profile Description Click: OK Figure 3.12 The following screen will be displayed Confirm the new profile is displayed Close: All dialog screens Figure


26 3.2.3 Downloading the Master Profile A Master Profile can be downloaded to a Device List/ Device Sub List. The Device List/ Device Sub List can be a set of devices group or an individual device. Download a Master Profile to a Device List/Sub List Start from the Main Menu Right Click: Selected Device List/Sub List Select: Profiles The Device List Properties screen will be displayed (refer to Figure 3.14) Highlight: Device Type Click: Attach Profile Select: Profile from the list Click: OK Figure 3.14a The following screen will be displayed Figure 3.14b 26

27 The following screen will be displayed Figure 3.15 Select: Time and Date to Reboot by adjusting the Bar Type: Message to notify the User of Reboot You will not be able to download the Profile if the Device is turned off. If the Reboot Time was not specified, the Device will reboot immediately. The Scheduled Status Screen will be displayed Confirm: Successful Profile Download (Scheduled = Successful Download) Click: Retry if Download was not successful Figure
28 4.0 Firmware Upgrades/ Downloads You can only flash or schedule firmware downloads to a device list or sub list if all those devices are the same device type. Only TCO files can be used to upgrade firmware on CE Devices using Remote Director. Firmware Upgrades are available on TCOSoft s or device manufacturer s web site. 28
29 4.1 Overview The following steps define how to upgrade the Device Firmware Software using Remote Director. The Firmware software reference in this document is the machine code the device specific firmware. Occasions may arise where the software to be updated for enhancement in features, fixes, and the like. Review the following before starting the firmware upgrade: Important: A firmware upgrade requires planning. Review what features are being upgraded for the WBT. Plan the firmware upgrade as follows: The device receiving the firmware upgrade must be the only device type on the Device List or Sub List. This is required as each device type has unique components. 29
, and then save them to the same directory in your local server with a known path. The \"xxxx.")
30 4.2 Firmware Upgrade by Flashing Obtaining your Upgrade Files You can obtain later version firmware, includes "xxxx.bin", "xxxx.tco" and "xxxx.rgs", from your distributor/manufacturer (through their web site, FTP site or ), and then save them to the same directory in your local server with a known path. The "xxxx.bin" contains the firmware image which you want to upgrade. It is same as the.bin file upgraded from FTP server. The "xxxx.tco" converts the.bin format to.tco format. The "xxxx.rgs" contains register information of firmware upgrading need Firmware Upgrade The following steps define how to flash the manufacturer supplied firmware upgrade file (.tco) to all the Devices on a Device List or Sub List. Important: Stop and confirm the following: Confirm all xxx.tco and firmware files are on the Address Book server Flash each xxx.tco file to a selected Device List or Sub List, one at a time as follows: Start from the Remote Director main menu Highlight: Device List/Sub List Click: Flash Icon Or Click: Device Flash File (main menu) Figure 4.1 The following screen will be displayed to locate the xxx.tco file from the folder where it was saved. This also displays the current Firmware on the Device. 30


31 Figure 4.2 Click: Browse and locate or highlight the xxx.tco file Click: Open Click: Flash Agent Status will display status until the following is displayed: Flashing Completed. The Firmware Image will be flashed to all the Devices on the Device List or Sub List and they will reboot immediately, once or twice depending on upgrade. A dialog screen will display: Flash Finished, see Status Click OK Close all dialog screens Figure 4.3 Important: Repeat the above steps for more than one device on different Device Lists or Sub Lists, as needed per your system. After all xxx.tco files have been flashed and the Devices have rebooted successfully, the upgrade is finished. End of steps. 31
 on to the Remote Director server, so the Firmware upgrade can be Scheduled to all the Devices on a Device List or Sub List. Important: Stop and confirm the following: Confirm all *.")

32 4.3 Firmware Upgrade by Scheduling Uploading Firmware Files The following steps define how to Upload the Firmware Images (*.tco files) on to the Remote Director server, so the Firmware upgrade can be Scheduled to all the Devices on a Device List or Sub List. Important: Stop and confirm the following: Confirm all *.tco and firmware files are on the Address Book Server Important: Upload and Schedule each firmware *.tco file to a selected Device List or Sub List, one at a time as follows: e.g. Upload and Schedule the WBT Accounting Device List the 1st evening at 7:00 pm. Upload and Schedule the WBT Sales Device List on the following evening at 7:00 pm Start from the Remote Director main menu From the menu bar select Server Firmware Image Figure 4.4 The following dialog screen will be displayed to allow you to locate the *.tco file. Click: Create Firmware Image button Click the down-arrow and locate the *.tco file to be uploaded. Click: Open Note: The Remote Director can find the (*.tco) files from any server in the network. Note: The Properties button can be selected to display the firmware image properties, as follows: Highlight Device Type and click Properties Figure 4.5 The firmware file is now ready to be scheduled. 32

33 4.3.2 Firmware Upgrade After the Firmware (*.tco) file has been uploaded, the following steps define how to schedule the firmware upgrade to all the Devices on a Device List or Sub List. Start from the main menu Highlight: Device List or Sub List From the menu bar select Device Schedule Firmware Image Download Figure 4.6 Very Important: Select only the Device List or Sub List with the Devices that are to receive the upgrade. Device Status must be Active The initial screen displays the Device current Build Version n.n. (refer to Figure 4.7) Click: Next Figure

 Figure 4.")
34 Connection type selection is provided to balance the load on the server between the Address Book server and the device. Change: connection default, if needed. High-Speed LAN = 5 seconds (default) Figure 4.8 Figure
35 5.0 Administration 35
36 5.1 Windows Control Panel Updates Starting or Stopping the Address Book Service Start from the Windows Desktop Start Button Select: Settings Click: Control Panel Click: TCO Address Book Figure 5.1 The TCO Address Book Server screen will be displayed: Click: ABS IP Broadcast tab Click: Start/Stop Service Figure
37 5.1.2 Changing the Broadcast Mechanism Start from the Windows Desktop Start Button Select: Settings Click: Control Panel Click: TCO Address Book Figure 5.3 The TCO Address Book Server screen will be displayed Click: ABS IP Broadcast Tab Confirm: Both IP Multicasting & IP Broadcasting are enabled Figure
38 5.1.3 Changing the Service Password You have to change the Service Password both in the Control panel and in the Remote Director Server Configuration or the Address Book Service Start from the Windows desktop Start button Select: Settings Click: Control Panel Figure 5.5 The following screen will be displayed Click: Security Tab Select: Change Service Password Figure

39 The following screen will be displayed Enter: New Password Confirm: New Password Figure 5.7 To change the Password in the Remote Director Server Configuration: Start in the Remote Director Main Menu Click: Server Click: Modify Enter: Password Confirm: New Password Click: OK Figure
40 5.1.4 Changing the Profile Password The Profile Password set in the Control Panel must match the Profile Password entered when uploading a Profile from a CE Device Start from the Windows Start Button Click: Start Select: Settings Click: Control Panel Click: TCO Address Book The following screen will be displayed Click: Security Tab Select: Change Profile Password Enter: New password Confirm: New Password Figure
41 5.1.5 Password Summary Password Initial Password Setup Changing the Password Device List A Device List can only be accessed by this password See Creating a Device List Start from Remote Director Main Menu Right Click: Device List Select: Properties Click: Change Password Enter: New Password Confirm: New Password Device Devices (terminal) can only be accessed by this password See Grouping your WBTs Start from the Remote Director Main Menu Click: Device Select: Management Password ( or Click: Key Icon) Enter: Password Confirm: New Password 41

42 5.2 Viewing the Address Book Log To view the status of different operations in the Address Book Server Log: Start from the Remote Director Main Menu Figure 5.12 Right Click: Address Book Server Icon Figure 5.10 The Address Book Server Log will be displayed Figure

43 5.3 Set Time Out A Time Out will occur when Remote Director had difficulties connecting to the CE Device on the Network. The Time Out set for the Flashing, Registry, the Profile Agent, and the Address Book Server should not be set too low to prevent too many timeouts. To set the Time Out for the Remote Director Agents: Start from the Remote Director Main Menu Click: Tools Select: Options Select: Time Out Figure 5.13 Slide: Bar to adjust the Time Out for the RM Agents. Figure

44 5.4 Updating a Device Status To view or update a Device Status: Start from the Remote Director main menu Select: Device IP address Press: F5 Button on your Keyboard or Right Click: Selected Device IP Select: Device Information Figure 5.15 The Update Device Status Screen will be displayed Click: OK Figure


45 5.5 Deleting a Device To delete a Device from a Device List: Start from the Remote Director Main Menu Right Click: Selected Device IP Select: Delete Click: Yes/ NO Figure Deleting a Device List To delete a Device List: Start from the Remote Director Main Menu Right Click: Selected Device List Select: Delete Figure


46 6.0 WBT Properties and Miscellaneous Features 6.1 Viewing WBT properties To View WBT properties: Start from the Main Menu From the menu bar select Device Device Properties Or Right click on the WBT IP Address and click Device Properties Figure 6.01 Device properties window will appear: Figure


47 6.2 Editing Device Properties Double click on the Terminal Property icon on Figure 5.20 to reach the Terminal Properties. There are six major Terminal Properties Sheets as follows. Using these properties sheets, administrator can remotely change client's setting from server. All of the style and functionalities of the Properties Sheet are almost same as the terminal. For more detail information, please refer to "Configure Terminal Properties" session of Terminal User s guide. Figure 6.03 Figure

48 Figure 6.05 Figure


49 Figure 6.07 Figure

. Select \"Microsoft Remote Desktop Client\" from the connection list. (Figure 5.28) Fill all of the fields on below two setting sheets to complete the RDP setting.")
50 6.3 Connection Manager Double click on the Connection Manager icon to reach the Connections Settings. Using the setting sheets, administrator can remotely add, edit and delete client's setting from server. All of the style and functionalities of the Dialog Sheet are almost same as the terminal. For more detail information, please refer to "Creating a new connection" and "Editing a connection" sessions on the Terminal User s Guide. Figure Add/Edit a RDP Connection Add a RDP connection Click "Add" button to reach "new connection" dialog box (Figure 5.27). Select "Microsoft Remote Desktop Client" from the connection list. (Figure 5.28) Fill all of the fields on below two setting sheets to complete the RDP setting. (Figure 5.29~30) Edit a RDP connection Click "Edit" button in stead of "Add" button. Do the same procedure as Add connection. 50 Figure 6.10


51 Figure 6.11 Figure Add/Edit an ICA Connection Add an ICA connection Click "Add" button to reach "new connection" dialog box (Figure 5.27). Select "Citrix ICA Client" from the connection list. (Figure 5.28) Fill all of the fields on below two setting sheets to complete the ICA setting. (Figure 5.31~32) Edit an ICA connection Click "Edit" button in stead of "Add" button. Do the same procedure as Add connection. Figure 6.13 Figure
 Fill all of the fields on the Powerterm Connection. (Figure 5.33) Click OK to complete the emulation setting. (Figure 5.33) Edit a PowerTerm connection Click \"Edit\" button in stead of \"Add\" button.")

52 6.3.3 Add/Edit a PowerTerm Connection Add a PowerTerm connection Click "Add" button to reach "new connection" dialog box (Figure 5.27). Select "Terminal emulation" from the connection list. (Figure 5.28) Fill all of the fields on the Powerterm Connection. (Figure 5.33) Click OK to complete the emulation setting. (Figure 5.33) Edit a PowerTerm connection Click "Edit" button in stead of "Add" button. Do the same procedure as Add connection. Figure Upload Profile Double click on the Upload Profile icon to reach the TCO Profile Upload dialog sheet. Using the setting sheets, administrator can remotely upload client's settings from server. Type the profile name and Password which you want to save on the Address Book Server. Click "OK" to complete the profile upload. 52 Figure 6.16
53 Appendix A An easy to use user interface where a user can add new Device Lists and then drag or add Device IP addresses to these lists under the Local System. Allows Device Lists to be downloaded from and uploaded to the Address Book Server. Provides the functionality of retrieving and updating the Terminal Properties of one or multiple CE devices. Creates a device profile from the client side profiles that are on the Address Book Server. Provides the flexibility to create device properties as a Device Profile that can be attached to a Device List on the Address Book Server. Note: The devices on boot-up, will download this Device Profile. Allows the manager to schedule Devices for firmware image updating. Allows the manager to change the management password of the devices. Allows deleting a Device List on the Local System with right authentication. Allows editing the device properties of the device from the client-side profile interface. 53
54 Address Book Service The Address Book Service should run continuously on a Windows XP/2000/NT machine, authenticating Windows CE devices connecting to the server, and keeping track of them. The Address Book Service thus enables Windows CE device to be configured and added to a network in a plug-and-play manner. Devices identify the Address Book Service either using a simple broadcasting mechanism (restricted to a single sub-net) or via IP multicasting (requiring a router). Note: The type of broadcasting can be configured via the Address Book Service Control Panel. The Address Book Service also provides information regarding the Window CE devices to the Remote Director when requested. The Address Book Service maintains the following information for Device Lists: Profile files that can be used by the Windows CE devices to dynamically configure themselves at boot time. Firmware Image files that can be used to upgrade Windows CE devices via a scheduling mechanism invoked by the Remote Director. Address Book Service Recommendations Note: The Remote Director and Address Book Service can be installed on the same server. The Address Book Service should run continuously on a Windows XP/2000/NT machine, authenticating Windows CE devices connecting to the server, and keeping track of them. The Address Book Service thus enables Windows CE devices to be configured and added to a network in a plug-and-play manner. Devices identify the Address Book Service either using a simple broadcasting mechanism (restricted to a single sub-net) or via IP multicasting (requiring a router). The type of broadcasting can be configured via the Address Book Service Control Panel. Broadcasting option should be enabled when a device has to be connected to an Address Book Service when both the device and the Address Book Service are in a single subnet. Multicasting Option should be enabled when a device has to be connected to an Address Book service when the terminal and the Address Book service are across different subnets. A Device can be connected to the Address Book Service using either the Broadcasting and or Multicasting options. In either case the user should select the respective options on both the Address Book Service and the Windows CE device. 54
55 On the Address Book Service side the user can select the options using the Address Book service control panel. On the device side the user can select the options in the Profile Upload Tab in device settings. Note: default = both Enable Multicast and Enable Broadcast are selected, as shown If the Device is not able to connect to the Address Book Service using both these options then the device will use the static Address Book Service IP Address specified by the user in the TCOSoft Remote Management window of the device control panel to connect. Note: Whenever the settings for Broadcasting or Multicasting are changed, the Address Book Service needs to be stopped and restarted for the changes to take effect This is done by selecting the Services option in the Control Panel. 55
WinClient Remote Manager USER S MANUAL. Revision: WRM /10/22
 WinClient Remote Manager USER S MANUAL Revision: WRM 2.1 2002/10/22 Copyright This manual and any accompanying software and firmware are copyrighted. No parts of this publication may be reproduced, stored
PROCESS AUTOMATION. MANUAL VisuNet Control Center Version 4.1
 PROCESS AUTOMATION MANUAL VisuNet Control Center Version 4.1 With regard to the supply of products, the current issue of the following document is applicable: The General Terms of Delivery for Products
IP Device Search and Configuration Tool Operation Manual
 IP Device Search and Configuration Tool Operation Manual Note Copyright Statement This manual may not be reproduced in any form or by any means used to create any derivative such as translation, transformation,
Device Manager. Managing Devices CHAPTER
 2 CHAPTER This chapter describes how to perform routine device management tasks using the Administrator Console. It provides information on managing the devices within your Cisco VXC Manager environment.
NCD ThinSTAR User s Guide
 NCD ThinSTAR User s Guide Copyright Copyright 2000 by Network Computing Devices, Inc. (NCD).The information contained in this document is subject to change without notice. Network Computing Devices, Inc.
Print Server. User s Manual. Rev. 01 (April, 2004) Made In Taiwan
 Made In Taiwan") Print Server User s Manual Rev. 01 (April, 2004) Made In Taiwan TABLE OF CONTENTS ABOUT THIS GUIDE... 4 INTRODUCTION... 5 PACKAGE CONTENTS... 6 SYSTEM REQUIREMENTS... 6 GENERAL FEATURES... 7 PRODUCT VIEW...
Print Server User s Manual Rev. 01 (April, 2004) Made In Taiwan TABLE OF CONTENTS ABOUT THIS GUIDE... 4 INTRODUCTION... 5 PACKAGE CONTENTS... 6 SYSTEM REQUIREMENTS... 6 GENERAL FEATURES... 7 PRODUCT VIEW...
Sharp Advanced Presentation Software OPERATION MANUAL. Professional Edition Version 1.5. Transferring Images. Troubleshooting
 Installing/ Uninstalling Basic Operations Adjusting and Controlling Transferring Images Saving a Custom Image Troubleshooting Glossary/ Services Sharp Advanced Presentation Software Professional Edition
Configuration Manager
 CHAPTER 7 This chapter describes how to perform routine Cisco VXC Manager configuration management tasks using the Administrator Console. It provides information on managing the configuration settings
Smart Control Center. User Guide. 350 East Plumeria Drive San Jose, CA USA. November v1.0
 Smart Control Center User Guide 350 East Plumeria Drive San Jose, CA 95134 USA November 2010 202-10685-01 v1.0 Table of Contents Chapter 1 Getting Started Smart Control Center Installation.................................6
Procomm Plus Installation Guide. Prophet 21 FASPAC 4.1
 Procomm Plus Installation Guide Prophet 21 FASPAC 4.1 The documentation in this publication is provided pursuant to a Sales and Licensing Contract for the Prophet 21 System entered into by and between
KYOCERA Net Admin User Guide
 KYOCERA Net Admin User Guide Legal Notes Unauthorized reproduction of all or part of this guide is prohibited. The information in this guide is subject to change without notice. We cannot be held liable
Help Contents - December 4, 2012
 1 of 70 12/4/2012 12:18 PM Help Contents - December 4, 2012 1-10ZiG Manager 1.1 - Configuring and Managing the Server 1.1.1 - Server Settings 1.1.2 - Network Settings 1.1.3 - Ports Used 1.1.4 - Discovery
Evaluation Kit Manual
 Xcalibur Global 1.2 Evaluation Kit Manual Management Software Written By: Chip PC Training Dep. December 2007 www.chippc.com 1 2 Contents 1 General 4 2 DVD Content 5 3 Installation Prerequisites 5 4 Xcalibur
Avalanche Remote Control User Guide. Version 4.1
 Avalanche Remote Control User Guide Version 4.1 ii Copyright 2012 by Wavelink Corporation. All rights reserved. Wavelink Corporation 10808 South River Front Parkway, Suite 200 South Jordan, Utah 84095
HP Device Manager 4.x User Manual
 HP Device Manager 4.x User Manual Copyright 2009 Hewlett-Packard Development Company, L.P. The information contained herein is subject to change without notice. Microsoft and Windows are trademarks of
DI-704P Ethernet Broadband Router. Ethernet (Straight Through) Cable. 5V DC Power Adapter
 Cable. 5V DC Power Adapter") 1 This product can be set up using any current Web browser, i.e., Internet Explorer or Netscape Navigator. DI-704P Ethernet Broadband Router and Print Server Before You Begin 1. If you purchased this router
1 This product can be set up using any current Web browser, i.e., Internet Explorer or Netscape Navigator. DI-704P Ethernet Broadband Router and Print Server Before You Begin 1. If you purchased this router
Windows 2000 Safe Mode
 LAB PROCEDURE 29 Windows 2000 Safe Mode OBJECTIVES 1. Restart and try various startup options. RESOURCES Troubleshooting 1. Marcraft 8000 Trainer with Windows 2000 installed 2. A PS2 mouse 3. A LAN connection
Bridge Cable User s Guide
 Bridge Cable User s Guide Table of Contents Overview -------------------------------------------------------------------- 2 Driver Installation --------------------------------------------------------
Network USB over IP Server With 1-USB2.0 Port. User Manual V1.0
 Network USB over IP Server With 1-USB2.0 Port User Manual V1.0 1 2 TABLE OF CONTENTS COPYRIGHT...4 1. INTRODUCTION...5 PRODUCT OVERVIEW...5 COMPONENTS AND FEATURES...5 HARDWARE INSTALLATION...5 2. THE
YEStation LE Windows Based Terminal Model 2505 User's Guide Version 1.00.b
 YEStation LE Windows Based Terminal Model 2505 User's Guide Version 1.00.b Copyright 2002 Affirmative Computer Products November 2002 YEStation Limited Warranty General Terms and Conditions Limited Product
Administrators Guide. Wyse Device Manager Release Issue: PN: Rev. L
 Administrators Guide Wyse Device Manager Release 4.8.5 Issue: 042511 PN: 883885-01 Rev. L Copyright Notices 2011, Wyse Technology Inc. All rights reserved. This manual and the software and firmware described
Wireless-G. User Guide. PrintServer for USB 2.0. GHz g WPS54GU2. A Division of Cisco Systems, Inc. WIRELESS. Model No.
 A Division of Cisco Systems, Inc. GHz 2.4 802.11g WIRELESS Wireless-G PrintServer for USB 2.0 User Guide Model No. WPS54GU2 Copyright and Trademarks Specifications are subject to change without notice.
PROMISE ARRAY MANAGEMENT ( PAM) FOR FastTrak S150 TX2plus, S150 TX4 and TX4000. User Manual. Version 1.3
 FOR FastTrak S150 TX2plus, S150 TX4 and TX4000. User Manual. Version 1.3") PROMISE ARRAY MANAGEMENT ( PAM) FOR FastTrak S150 TX2plus, S150 TX4 and TX4000 User Manual Version 1.3 Promise Array Management Copyright 2003 Promise Technology, Inc. All Rights Reserved. Copyright by
PROMISE ARRAY MANAGEMENT ( PAM) FOR FastTrak S150 TX2plus, S150 TX4 and TX4000 User Manual Version 1.3 Promise Array Management Copyright 2003 Promise Technology, Inc. All Rights Reserved. Copyright by
Network Management Utility
 4343-7705-02 Network Management Utility Foreword Welcome Network Management Utility is utility software that provides central control over printers, copiers, and other devices on a network. With Network
N30 Supervisory Controller Quick Start
 Issue Date June 30, 2004 TECHNICAL BULLETIN N30 Supervisory Controller Quick Start N30 Supervisory Controller Quick Start...2 Introduction... 2 Key Concepts... 3 Using This Document... 3 Related Information...
User Guide. Illustra Connect Version C0
 User Guide Illustra Connect Version.0 8200-114-01 C0 Notice The information in this manual was current when published. The manufacturer reserves the right to revise and improve its products. All specifications
SC-T35/SC-T45/SC-T46/SC-T47 ViewSonic Device Manager User Guide
 SC-T35/SC-T45/SC-T46/SC-T47 ViewSonic Device Manager User Guide Copyright and Trademark Statements 2014 ViewSonic Computer Corp. All rights reserved. This document contains proprietary information that
ATX Document Manager. User Guide
 ATX Document Manager User Guide ATX DOCUMENT MANAGER User Guide 2008 CCH Small Firm Services. All rights reserved. 6 Mathis Drive NW Rome, GA 30165 No part of this manuscript may be copied, photocopied,
Veritas System Recovery 18 Management Solution Administrator's Guide
 Veritas System Recovery 18 Management Solution Administrator's Guide Documentation version: 18 Legal Notice Copyright 2018 Veritas Technologies LLC. All rights reserved. Veritas and the Veritas Logo are
NET Control & NET User. User Manual. Rogev computers
 NET Control & NET User User Manual Rogev computers http://www.rogev.co.il Content 1. System Requirement... 3 1-1 Magic card... 3 1-2 Windows operating system... 3 1-3 Client computers... 3 1-4 Master computer...
HDMI A/V over Gigabit Ethernet Adapter. User s Manual
 HDMI A/V over Gigabit Ethernet Adapter User s Manual HDMI A/V over Gigabit Ethernet Adapter User s Manual ABOUT THIS MANUAL This manual is designed for use with the HDMI A/V over Gigabit Ethernet Adapter.
Thin Client Administrator
 Thin Client Administrator Reference Manual Revision: 2.13.3 Maple Computer Corp. 886 2 27714596 by fax www.maple.com.tw Preface The Maple Thin Client Manager is designed to provide remote management and
Network Setup 2.0
 Network Setup 2.0 4343-7709-01 Foreword Welcome Thank you for using Network Setup. Network Setup is utility software which allows simple network setup of devices such as printers. It allows setup of devices
Recent Operating System Class notes 04 Managing Users on Windows XP March 22, 2004
 Recent Operating System Class notes 04 Managing Users on Windows XP March 22, 2004 You log into a system to notify the system who you are. When you log off, any files you have opened are cleaned up, and
KYOCERA Net Admin Installation Guide
 KYOCERA Net Admin Guide Legal Notes Unauthorized reproduction of all or part of this guide is prohibited. The information in this guide is subject to change without notice. We cannot be held liable for
BSQUARE Corporation. Remote Device Administrator for use with the IBM NetVista N2200w. User s Manual. Version 1.0
 BSQUARE Corporation Remote Device Administrator for use with the IBM NetVista N2200w User s Manual Version 1.0 2000 BSQUARE Corporation BSQUARE is a registered trademark of BSQUARE Corporation and other
Administrators Guide. Wyse Device Manager Release 4.9. Issue: PN: Rev. M
 Administrators Guide Wyse Device Manager Release 4.9 Issue: 021512 PN: 883885-01 Rev. M Copyright Notices 2012, Wyse Technology Inc. All rights reserved. This manual and the software and firmware described
FlashMaxII Operation Guide
 FlashMaxII Operation Guide 2015-07-09 Version 1.0 EE Tools, Inc. 4620 Fortran Drive Suite 102 San Jose, CA 95134, USA www.eetools.com sales@eetools.com Tel : (408)263-2221 Fax : (408)263-2230 1 Table of
10ZiG Technology. Thin Desktop Quick Start Guide
 10ZiG Technology Thin Desktop Quick Start Guide 2010 05 20 Introduction This document is intended as a quick start guide for installing Thin Desktop. After reading this document, you will know how to:
Wireless Bluetooth USB Dongle User s Guide
 Wireless Bluetooth USB Dongle User s Guide 1 Table of Content CHAPTER 1 INTRODUCTION... 5 INTRODUCTION TO BLUETOOTH... 5 INTRODUCTION TO THE WIRELESS BLUETOOTH USB DONGLE... 5 CHAPTER 2 CONTENTS OF PACKAGE...
CorpSystem Workpaper Manager
 CorpSystem Workpaper Manager Networking Best Practices Guide Version 6.5 Summer 2010 Copyright: 2010, CCH, a Wolters Kluwer business. All rights reserved. Material in this publication may not be reproduced
For ClassPad 300. ClassPad Manager. (ProgramLink) Limited Version. User s Guide. RJA
 Limited Version. User s Guide. RJA") For ClassPad 300 E ClassPad Manager (ProgramLink) Limited Version User s Guide RJA510188-4 http://world.casio.com/edu_e/ Note Display examples shown in this User s Guide are intended for illustrative purposes
For ClassPad 300 E ClassPad Manager (ProgramLink) Limited Version User s Guide RJA510188-4 http://world.casio.com/edu_e/ Note Display examples shown in this User s Guide are intended for illustrative purposes
Axon HD Content Management Application (CMA)
") [ ] Axon HD Content Management Application (CMA) A Content Management Application (CMA) running on an Axon HD media server or a computer connected through an Ethernet network gives you remote control of
[ ] Axon HD Content Management Application (CMA) A Content Management Application (CMA) running on an Axon HD media server or a computer connected through an Ethernet network gives you remote control of
DPoE Element Manager. Release Notes
 DPoE Element Manager Release Notes Copyright 2008 PANDUIT Corp. All rights reserved. No part of this book shall be reproduced, stored in a retrieval system, or transmitted by any means, electronic, mechanical,
Beijer Electronics Data Collector. Manual. English MAEN826B,
 MAEN826B, 2009-10 Beijer Electronics Data Collector Manual English Foreword Beijer Electronics Data Collector Manual Foreword Beijer Electronics Data Collector is used to save trend and alarm data logged
Configuring and Managing WAAS Print Services
 13 CHAPTER This chapter describes how to configure and manage the WAAS print services feature that allows Edge WAEs to function as print servers in your branch offices. Note Throughout this chapter, the
Content Management Application (CMA)
") Chapter 13: CHAPTER 13 A running on an Axon HD media server or a computer connected through an Ethernet network gives you remote control of content, software and configuration management functions. The
Chapter 13: CHAPTER 13 A running on an Axon HD media server or a computer connected through an Ethernet network gives you remote control of content, software and configuration management functions. The
Atlona Manuals Software AMS
 AMS Atlona Manuals Software Version Information Version Release Date Notes 1 03/18 Initial release AMS 2 Welcome to Atlona! Thank you for purchasing this Atlona product. We hope you enjoy it and will take
PROMISE ARRAY MANAGEMENT ( PAM) USER MANUAL
 USER MANUAL") PROMISE ARRAY MANAGEMENT ( PAM) USER MANUAL Copyright 2002, Promise Technology, Inc. Copyright by Promise Technology, Inc. (Promise Technology). No part of this manual may be reproduced or transmitted
PROMISE ARRAY MANAGEMENT ( PAM) USER MANUAL Copyright 2002, Promise Technology, Inc. Copyright by Promise Technology, Inc. (Promise Technology). No part of this manual may be reproduced or transmitted
Bose ControlSpace Designer Software. User Guide
 Bose ControlSpace Designer Software User Guide 2005 Bose Corporation. No part of this work may be reproduced, modified, distributed or otherwise used without prior written permission. Contents Introduction
Frequently Asked Questions and other helpful information
 Frequently Asked Questions and other helpful information FAQ How do I chart? To create a chart, left click on the Chart toolbar button in the upper left corner of your CQG screen. A chart appears. In the
DBT-120 Bluetooth USB Adapter
 DBT-120 Bluetooth USB Adapter Rev.2.1 (09/25/2002) 2 Contents Introduction... 5 Package Contents... 6 Installing Bluetooth Software... 6 Hardware Installation... 8 Introduction to Bluetooth Software...
Legal Notes. Regarding Trademarks KYOCERA MITA Corporation
 Legal Notes Unauthorized reproduction of all or part of this guide is prohibited. The information in this guide is subject to change without notice. We cannot be held liable for any problems arising from
Epson Device Admin User s Guide NPD EN
 Epson Device Admin User s Guide NPD5817-00 EN About this Manual About this Manual Marks and Symbols! Caution: Instructions that must be followed carefully to avoid bodily injury. c Important: Instructions
Galileo Print Manager Installation Guide
 Galileo Print Manager Installation Guide 24 November 2003 Copyright 2003 Galileo International. All rights reserved. Information in this document is subject to change without notice. The software described
HP Management Integration Framework 1.7
 HP Management Integration Framework 1.7 Administrator Guide Abstract This document describes the use of HP Management Integration Framework interfaces and is intended for administrators involved in the
Xcalibur Global Version 1.2 Quick Configuration Guide Document Version 3.0
 Xcalibur Global Version 1.2 Quick Configuration Guide Document Version 3.0 December 2010 COPYRIGHT NOTICE TRADEMARKS 2010 Chip PC Inc., Chip PC (Israel) Ltd., Chip PC (UK) Ltd., Chip PC GmbH All rights
Intel Server RAID Controller U2-1 Integration Guide For Microsoft* Windows NT* 4.0
 Intel Server RAID Controller U2-1 Integration Guide For Microsoft* Windows NT* 4.0 Revision 1.0 February 2000 Revision History Revision Revision History Date 1.0 Initial Release 02/10/00 Intel Corporation
Installing the Operating System or Hypervisor
 If you purchased E-Series Server or NCE Option 1 (E-Series Server or NCE without a preinstalled operating system or hypervisor), you must install an operating system or hypervisor. This chapter includes
IP Protocol Support. Personal Server. Instruction Manual. No Page 1
 IP Protocol Support Personal Server Instruction Manual www.lindy.com No. 32454 Page 1 Contents What s in the box?... 3 Product Information... 4 IP Protocol Setup... 5 Configuring TCP/IP settings (Windows
Legal Notes. Regarding Trademarks KYOCERA MITA Corporation
 Legal Notes Unauthorized reproduction of all or part of this guide is prohibited. The information in this guide is subject to change without notice. We cannot be held liable for any problems arising from
SMG-1100/6100 User s Manual
 User s Manual First Edition, January 2011 www.moxa.com/product 2011 Moxa Inc. All rights reserved. Reproduction without permission is prohibited. User s Manual The software described in this manual is
**Please contact your local agent to get a legal license to upgrade: W-8031/8331/8731 to W- 8037/8337/8737 or W-8039/8339/8739 to W-8036/8336/8736 **
 Upgrading Your WinCON s ISaGRAF Driver This manual outlines the steps to install & upgrade your WinCON s drivers. (8037/8337/8737 & W-8036/8336/8736) **Please contact your local agent to get a legal license
Dell Flexible Computing Solutions: Deploying On-Demand Desktop Streaming
 Dell Flexible Computing Solutions: Deploying On-Demand Desktop Streaming Product Group November 2007 Dell White Paper November 2007 Contents Introduction... 3 Overview... 4 Planning the Deployment... 5
Configuring and Managing WAAS Legacy Print Services
 13 CHAPTER Configuring and Managing WAAS Legacy Print Services This chapter describes how to configure and manage the WAAS legacy print services feature that allows WAEs to function as print servers in
Nortel Media Application Server 5.1. Installation NN
 NN44450-300 Document status: Standard Document issue: 01.03 Document date: 15 October 2008 Product release: Release 5.1 Job function: and Commissioning Type: Technical document Language type: English All
Business Insights Dashboard
 Business Insights Dashboard Sage 500 ERP 2000-2013 Sage Software, Inc. All rights reserved. Sage, the Sage logos, and the Sage product and service names mentioned herein are registered trademarks or trademarks
Connectivity options configuration
 Global Connection Settings dialog box, page 1 Connectivity options access, page 5 Advanced details about ICA and RDP connections, page 18 Global Connection Settings dialog box While it is not recommended
A Division of Cisco Systems, Inc. PrintServer for USB. with 4-Port Switch. User Guide WIRED PSUS4. Model No.
 A Division of Cisco Systems, Inc. WIRED PrintServer for USB with 4-Port Switch User Guide Model No. PSUS4 Copyright and Trademarks Specifications are subject to change without notice. Linksys is a registered
ADS/ADX Turnkey User's Guide Code No. LIT Software Release 6.0 Issued June 17, 2013 Supersedes May 10, 2013
 Code No. LIT-12011177 Software Release 6.0 Issued June 17, 2013 Supersedes May 10, 2013 Refer to the QuickLIT Web site for the most up-to-date version of this document. Introduction...3 Naming Conventions...3
Configuring the network clients
 3 Configuring the network clients Accessing the wireless router Setting an IP address for wired or wireless clients To access the ASUS Wireless Router, you must have the correct TCP/IP settings on your
USER MANUAL for USB2.0 to Data Link. USB2.0 Data Link Cable
 Introduction USER MANUAL for USB2.0 to Data Link USB2.0 Data Link Cable Congratulations on your purchase of PCLinq2 Hi-Speed USB Bridge Cable! PCLinq2 is your Hi-Speed USB 2.0 solution to peer-to-peer
Sagem MEMS 7.3 Quick Installation Guide
 Sagem MEMS 7.3 Quick Installation Guide This document is an installation supplement to the MorphoAccess Enrollment Management System (MEMS) Installation Guide and User Guide. To ensure the most effective
Migrating from Citrix XenApp (IMA / FMA) to Parallels Remote Application Server
 to Parallels Remote Application Server") Parallels Remote Application Server Migrating from Citrix XenApp (IMA / FMA) to Parallels Remote Application Server Contents 1. Introduction a. Why Should You Migrate from Citrix to Parallels RAS b. Overview
Parallels Remote Application Server Migrating from Citrix XenApp (IMA / FMA) to Parallels Remote Application Server Contents 1. Introduction a. Why Should You Migrate from Citrix to Parallels RAS b. Overview
4 Enter an IP address and sub-net mask for the ftp server and. 5 Go to the [System and Maintenance] > [Administrative Tools]
![4 Enter an IP address and sub-net mask for the ftp server and. 5 Go to the [System and Maintenance] > [Administrative Tools]](/thumbs/87/97409897.jpg "4 Enter an IP address and sub-net mask for the ftp server and. 5 Go to the [System and Maintenance] > [Administrative Tools]") $00_WT-4_En.book Page 115 Friday, August 10, 2007 2:02 PM 4 Enter an IP address and sub-net mask for the ftp server and click [OK]. 5 Go to the [System and Maintenance] > [Administrative Tools] control
$00_WT-4_En.book Page 115 Friday, August 10, 2007 2:02 PM 4 Enter an IP address and sub-net mask for the ftp server and click [OK]. 5 Go to the [System and Maintenance] > [Administrative Tools] control
WinDSX New Installations
 WinDSX New Installations Use these instructions for new Installations. a) Make sure that the Comm Server PC has the.net Framework 4.0 or higher installed. b) Make sure you have Administrative Privileges
Configuring the WT-4 for ftp (Ad-hoc Mode)
") En Configuring the WT-4 for ftp (Ad-hoc Mode) Windows XP Introduction This document provides basic instructions on configuring the WT-4 wireless transmitter and a Windows XP Professional SP2 ftp server
En Configuring the WT-4 for ftp (Ad-hoc Mode) Windows XP Introduction This document provides basic instructions on configuring the WT-4 wireless transmitter and a Windows XP Professional SP2 ftp server
DSL-G624T. Wireless ADSL Router. If any of the above items is missing, please contact your reseller. This product can be set up using any
 This product can be set up using any current web browser, i.e., Internet Explorer 6x or Netscape Navigator 7x. DSL-G624T Wireless ADSL Router Before You Begin 1. If you purchased this Router to share your
Laser Beam Printer. Network Guide. IMPORTANT: Read this manual carefully before using your printer. Save this manual for future reference.
 Laser Beam Printer Network Guide IMPORTANT: Read this manual carefully before using your printer. Save this manual for future reference. ENG Network Guide How This Manual Is Organized Chapter 1 Before
9.4 Authentication Server
 9 Useful Utilities 9.4 Authentication Server The Authentication Server is a password and account management system for multiple GV-VMS. Through the Authentication Server, the administrator can create the
Channel 4. User Manual. Version 2.0
 Channel 4 User Manual Version 2.0 Table Of Contents Introduction... 1 System Requirements... 2 Installation... 3 Creating a Program... 7 Uploading a Program... 8 Support... 8 Introduction Evsl s Channel
Phocos CX-I. Installation Guide
 Phocos CX-I Installation Guide Table of Content 1. Introduction...3 2. Installing the Phocos CX-I Device...4 2.1. Windows 98 and Windows ME...4 2.2. Windows 2000...10 2.3. Windows XP...17 3. Uninstalling
Configuring the WT-4 for ftp (Infrastructure Mode)
") En Configuring the WT-4 for ftp (Infrastructure Mode) Mac OS X Introduction This document provides basic instructions on configuring the WT-4 wireless transmitter and a Mac OS X (10.5.2) ftp server for
En Configuring the WT-4 for ftp (Infrastructure Mode) Mac OS X Introduction This document provides basic instructions on configuring the WT-4 wireless transmitter and a Mac OS X (10.5.2) ftp server for
Sage Residential Management Versions 9.5 through Installation Guide
 Sage Residential Management Versions 9.5 through 14.1 Installation Guide This is a publication of Sage Software, Inc. Copyright 2014. Sage Software, Inc. All rights reserved. Sage, the Sage logos, and
Part No. P May 4, Business Communications Manager. BCM Imaging Tool User Guide
 Part No. P0609711 01.01 May 4, 2004 Business Communications Manager BCM Imaging Tool User Guide 2 Copyright 2004 Nortel Networks All rights reserved. May 4, 2004. The information in this document is subject
Log & Event Manager UPGRADE GUIDE. Version Last Updated: Thursday, May 25, 2017
 UPGRADE GUIDE Log & Event Manager Version 6.3.1 Last Updated: Thursday, May 25, 2017 Retrieve the latest version from: https://support.solarwinds.com/success_center/log_event_manager_(lem)/lem_documentation
Farstone TotalDeploy User Guide
 Farstone TotalDeploy User Guide 1 Introduction to TotalDeploy...3 1.1 Overview...3 1.1.1 What is TotalDeploy...3 1.1.2 Who needs TotalDeploy?...3 1.1.3 TotalDeploy infrastructure...3 1.2 What you can do
Wireless LAN USB Stick AWL400. User Manual. Version 1.1 June BENQ Corporation
 Wireless LAN USB Stick AWL400 User Manual Version 1.1 June 2002 Notice I Copyright Statement This manual cannot be reproduced in any form or by any means or used to make any derivative such as translation,
ebox-wbt Users Guide Version: 1.22 Written by: Anthony Lu Documentation number EX030819
 ebox-wbt Users Guide Version: 1.22 Written by: Anthony Lu Documentation number EX030819 http://www.compactpc.com.tw Page 1 of 24 Table of Contents Introduction...3 ebox Software...5 Additional ebox Benefits...6
XLmanage Version 2.4. Installation Guide. ClearCube Technology, Inc.
 XLmanage Version 2.4 Installation Guide ClearCube Technology, Inc. www.clearcube.com Copyright and Trademark Notices Copyright 2009 ClearCube Technology, Inc. All Rights Reserved. Information in this document
Network Management Software ALLNET Zone Controller
 Network Management Software ALLNET Zone Controller For ALL0558N / ALL02850N / ALL02860ND / ALL02880ND User Manual v1.0 Table of Contents 1. Installation & Un-installation... 4 1.1. Install NMS Suite...
SAP Workforce Performance Builder 9.5
 Upgrade Guide Workforce Performance Builder Document Version: 1.0 2016-10-15 2016 SAP SE or an SAP affiliate company. All rights reserved. CUSTOMER Table of Contents 1 Introduction... 3 2 Migrating a Workarea...
NETWORK ATTACHED STORAGE
 NETWORK ATTACHED STORAGE Dual Bay Pro Enclosure Users Manual BOSSNAS122 Includes Features Description Quick Install Detailed Setup Guide Tools Guide Administrator Factory Default Settings User Name and
USB Server User Manual
 1 Copyright Notice Copyright Incorporated 2009. All rights reserved. Disclaimer Incorporated shall not be liable for technical or editorial errors or omissions contained herein; nor for incidental or consequential
WEBSEWSS SINGLE SERVER INSTALLATION INSTRUCTIONS
 2300 East 14th Street Tulsa, Oklahoma 74104 USA Phone: (918) 749-1119 Fax: (918) 749-2217 e-mail: info@statsoft.com WEB: http://www.statsoft.com Notes: WEBSEWSS SINGLE SERVER INSTALLATION INSTRUCTIONS
KYOCERA Net Viewer 5.3 User Guide
 KYOCERA Net Viewer. User Guide Legal Notes Unauthorized reproduction of all or part of this guide is prohibited. The information in this guide is subject to change without notice. We cannot be held liable
Setup and Configuration
 Setup and Configuration OmniStream TM Solution Guide OmniStream Atlona Setup Guide Version Information Version Release Date Notes 1 02/19 Initial release 2 03/19 Audio added 3 03/19 USB added OmniStream
LevelOne. User's Guide. Broadband Router FBR-1402TX FBR-1403TX
 LevelOne Broadband Router FBR-1402TX FBR-1403TX User's Guide Table of Contents CHAPTER 1 INTRODUCTION... 1 LevelOne Broadband Router Features... 1 Package Contents... 3 Physical Details...4 CHAPTER 2 INSTALLATION...
FileZilla FTP Instructions. FileZilla FTP Instructions
 FileZilla FTP Instructions 1 EMS FileZilla FTP Instructions 1, FileZilla Installation 2, Opening FileZilla 3, FileZilla Settings 4, Downloading Your Website 5, Uploading Your Website 6, More Help EMS Internet
STATISTICA VERSION 10 STATISTICA MONITORING AND ALERTING SERVER (MAS) INSTALLATION INSTRUCTIONS
 INSTALLATION INSTRUCTIONS") Pre-requisites: STATISTICA VERSION 10 STATISTICA MONITORING AND ALERTING SERVER (MAS) INSTALLATION INSTRUCTIONS 1. The installation of the STATISTICA Monitoring And Alerting Server (MAS) network version
Pre-requisites: STATISTICA VERSION 10 STATISTICA MONITORING AND ALERTING SERVER (MAS) INSTALLATION INSTRUCTIONS 1. The installation of the STATISTICA Monitoring And Alerting Server (MAS) network version