SURE TO HAVE YOUR PROOF OF PURCHASE. RETURN REQUESTS CAN NOT BE PROCESSED WITHOUT PROOF OF PURCHASE.
|
|
|
- Marcus Bond
- 6 years ago
- Views:
Transcription
1
2 FCC Warning This equipment has been tested and found to comply with the limits for a Class B digital device, pursuant to subpart J of Part 15 of the FCC Rules. These limits are designed to provide reasonable protection against harmful interference when the equipment is operated in a commercial environment. This equipment generates, uses, and can radiate radio frequency energy and, if not installed and used in accordance with the instruction manual, may cause harmful interference to radio communications. Operation of this equipment in a residential area is likely to cause harmful interference in which the user will be required to correct the interference at their own expense. CE Mark Warning This is a Class B product. In a domestic environment, this product may cause radio interference, in which case the user may be required to take adequate measures. VCCI Mark Warning LIMITED WARRANTY Hawking Technology guarantees that every HPS1P 10/100M Parallel Print Server is free from physical defects in material and workmanship under normal use for two (2) years from the date of purchase. If the product proves defective during this two-year warranty period, call Hawking Customer Service in order to obtain a Return Authorization number. Warranty is for repair or replacement only. Hawking Technology does not issue any refunds. BE SURE TO HAVE YOUR PROOF OF PURCHASE. RETURN REQUESTS CAN NOT BE PROCESSED WITHOUT PROOF OF PURCHASE. When returning a product, mark the Return Authorization number clearly on the outside of the package and include your original proof of purchase. IN NO EVEN SHALL HAWKING TECHNOLOGY S LIABILTY EXCEED THE PRICE PAID FOR THE PRODUCT FROM DIRECT, INDIRECT, SPECIAL, INCIDENTAL OR CONSEQUENTIAL DAMAGES RESULTING FROM THE USE OF THE PRODUCT, ITS ACCOMPANYING SOFTWARE OR ITS DOCUMENTATION. Hawking Technology makes no warranty or representation, expressed, implied or statutory, with respect to its products or the contents or use of this documentation and all accompanying software, and specifically disclaims its quality, performance, merchantability, or fitness for any particular purpose. Hawking Technology reserves the right to revise or updates its products, software, or documentation without obligation to notify any individual or entity. Please direct all inquiries to:techsupport@hawkingtech.com Trademarks NetWare is a registered trademark of Novell Inc. and Windows 95/98/Me and Windows NT/2000/XP are registered trademarks of Microsoft Corp. All other brands and product names are trademarks of their respective companies. Copyright No part of this publication may be reproduced in any form or by any means or used to make any derivative (such as translation, transformation or adaptation) without the express written consent of the manufacturer as stipulated by the United States Copyright Act of 1976.
3 Table of Contents 1.1 Product Introduction Product Features Product Package Print Server Network Functions Network Printing Functions for a Network Server Network Printing Environment Contents of the User s Manual Firmware & Printing Function HARDWARE INSTALLATION WINDOWS PEER-TO-PEER NETWORK System Architecture Administrator Installation and Setup Administrator Utilities Client Installation and Setup Client Utilities Network Ports Quick Setup Remote Ports (Utility) WINDOWS NT/2000 NETWORK System Architecture Windows NT/2000 Server Installation and Setup User Installation and Setup NETWARE NETWORK System Architecture NetWare 3.x Installation & Setup Quick Installation Using the Install program Installation Using PSETUP NetWare 4.x/5.x Installation & Setup Quick Installation Using Install program... 64
4 5.3.2 NetWare 4.x/5.x Installation Using PSETUP UNIX SYSTEM NETWORK Introduction Enable Print Server s TCP/IP Support Setup the HPS1P s IP Address ARP & Ping Assignment DHCP BOOTP RARP Verify the HPS1P s IP Address Configure Remote lpd Printing on the Host Print a Test Page CONFIGURATION UTILITY Introduction General - General Information for the HPS1U Printer Status - Attached Printer Status IP Cfg - IP Address Configuration NW PS Cfg - NetWare Print Server Configuration NW RP Cfg - NetWare Remote Printer Configuration NW Information - NetWare Printing Summary Print Server Cfg Print Server Network Ability Setting Restore Default - Restore to Default Upgrade - Firmware Upgrade / Update DHCP Cfg - DHCP Server Configure DHCP Information - DHCP Information Mail Print Configuration - Printing Setting SMB Cfg SMB Printing Setting
5 7.16 SNMP Cfg - SNMP Parameter Setting AppleTalk Cfg AppleTalk Configuration WEB MANAGEMENT Introduction Web Manager Utility Installation and Execution Starting The Web Manager Utility Web Management of the HPS1P Print Server Using Your Browser Obtaining Print Server Information Obtaining Printer Status Obtaining NetWare Information Obtaining DHCP Status Changing the Device Configuration Setting IP Address Configuring DHCP Parameters Configuring Printing Configuring SNMP Parameters System Utilities PRINTING Introduction System Requirements Print Server Side Client Side System Setup Print Server Side Client User Side IPP PRINTING Introduction Print Server Side Client Side
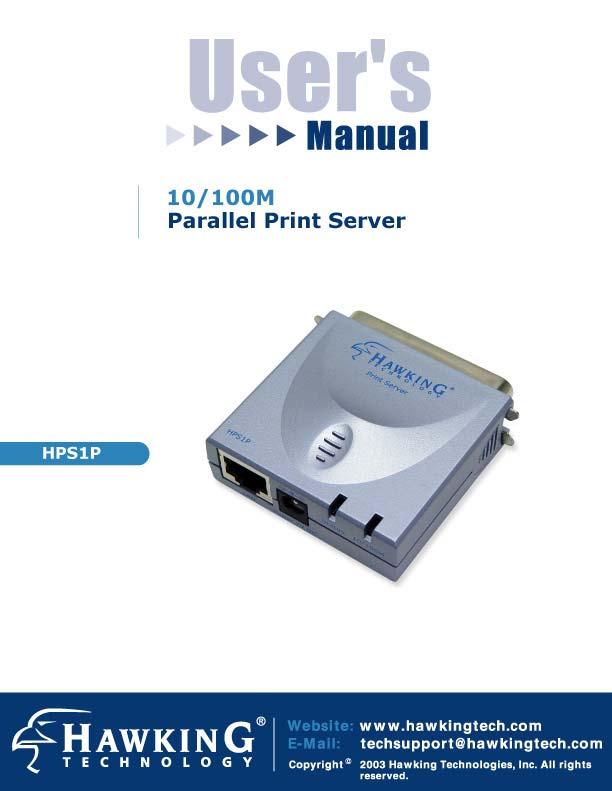
6 1.1 Product Introduction Congratulations on purchasing Hawking s HPS1P 1-Port Parallel 10/100M Internet Print Server. The Hawking HPS1P is a powerful and convenient network printing solution that will connect your parallel printer to a network. The HPS1P has a 10/100Mbps autosensing port, allowing you to attach it to a 10Base-T or 100Base- TX network without the need for a dedicated PC print server. The HPS1P also supports multiple servers and multiple protocols, providing you with the capability to print from anywhere, from any computer and from any application. The HPS1P print server supports IPX, TCP/IP, AppleTalk, and NetBEUI protocols. It also supports the most common network operating systems and protocols including Windows 95/98/Me, Peer-to-Peer Printing, Windows NT/2000/XP, NetWare, Unix/Linux, MAC OS, etc. With the HPS1P Installation Wizard for Windows, you can easily and instantly adjust the HPS1P s settings for your printing environment, and start enjoying the fantastic features provided by this print server. In the following chapters, we will introduce in detail the printing features, installation methods, and system configuration for different network environments. If you would like to set up and install print server quickly, please refer to the Quick Installation Guide that comes along with this print server.
7 1.2 Product Features Provides one 10/100Mbps auto-sensing port that complies with IEEE 802. and 802.3u standards Provides one printer port that can attach directly to a printer's parallel port Supports TCP/IP, IPX/SPX, NetBEUI network protocols Supports LPR, Printing, Raw Printing, Unix Logical Printer Supports Peer-to-Peer Printing (TCP/IP/IPX/NetBEUI) Supports Server-based printing (Novell NetWare and Windows) Compatible with all major operating systems (Windows 95/98/Me/NT/2000/XP, NetWare (3.x above) and Unix/Linux) Supports DHCP (both client and server) protocol Efficient print job transfer using DMA (Direct Memory Access) Supports bi-directional capability; able to get information from printers Supports Web-based management, Windows Configuration Utility, SNMP Protocol Provides easy-to-use installation, setup and diagnostic programs Provides flash memory for convenient software upgrades Supports a Fault-Tolerant Upgrade capability
8 1.3 Product Package Package Contents The following items are packaged with your HPS1P 10/100M Internet print server: HPS1P Print Server One CD-ROM Quick Installation Guide One power adapter
9 1.4 Network Printing Architecture This section illustrates how a print server functions over a network environment. Before you install and use the HPS1P print server, it is strongly suggested that you read this section completely and select only the chapters that pertain to your specific operating system. Below is a diagram of a typical network with a print server installed. There is a main server, several client computers, print server, along with an optional network server. Print Server Client User Network Server (optional) Network Printing Environment Client User Print Server Network Server Unix Print Server Windows NT Server NetWare Server Windows NT Windows 2000 Workstation Windows 98
10 1.4.1 Print Server Network Functions Print Server Unix Print Server Windows NT Server NetWare Server Windows NT Windows 2000 Windows 98 Workstation Because the HPS1P print server supports IPX, TCP/IP, AppleTalk and NetBEUI network protocols, any networked computer can print directly through the print server from any of the installed protocols. * TCP/IP * IPX * NetBEUI Unix TCP/IP IPX Windows NT Server NetWare Server TCP/IP TCP/IP IPX NetBEUI Windows NT Workstation Windows 2000 Windows 98
11 1.4.2 Network Printing Functions for Clients Client User Unix Print Server NetWare Server Windows NT Server Windows NT Windows 2000 Windows 98 Workstation Windows 95/98/Me/NT/2000/XP The HPS1P provides a PTPP (Peer-to-Peer Printing) driver and utilities for Windows 95/98/NT/2000/XP users. PTPP (Peer-to- Peer Printing) supports IPX, TCP/IP, and NetBEUI protocols. While printing after installation, PTPP will automatically select the proper transport protocol to connect to the print server depending on the protocols installed in each computer (the client computer may only have IPX or TCP/IP installed). Application PTPP IPX TCP/IP NetBEUI * TCP/IP * IPX * NetBEUI Windows 98 PTPP NetBEUI Application PTPP TCP/IP PTPP Windows 2000 IPX TCP/IP NetBEUI
 search for an available print port through Windows.")
12 In the client installation procedure, after the PTPP (Peer-to-Peer Printing Driver) is installed into Windows, the client or administrator system will automatically (manual configuration is also allowed) search for an available print port through Windows. (see diagram below) PTPP Windows 98 P1 Print Server MIS-2 P1 P2 P3 Print Server MIS-1 UNIX / Linux UNIX (includes HP/UX, SCO Unix, SunOS, Solaris, Unixware DECUnix, IBM AIX and others) and Linux use the systemstandard LPR to print to your HPS1P. MAC OS The MAC OS can use the system-standard AppleTalk network to print through your HPS1P.
13 1.4.3 Network Printing Functions for a Network Server Network Server Unix Print Server Windows NT Server NetWare Server Windows NT Windows 2000 Windows 98 Workstation Common network servers use the following operating systems: Windows NT/2000 The HPS1P provides a PTPP (Peer-to-Peer Printing) driver with utilities for Windows NT and Windows After PTPP is installed, the server can directly print to the HPS1P print server. Adding this printing function into Windows NT/2000 Server allows for print queuing, user authority management, and many other advanced features. NetWare 3.x/4.x/5.x In a NetWare environment, the HPS1P offers various printing modes including print queue, remote printer, etc.
14 1.5 Network Printing Environment Common network printing environments use the following: Windows Peer-to-Peer Network Since both the HPS1P and client s PTPP drivers fully support IPX, TCP/IP, and NetBEUI protocols, the PTPP driver will automatically search and match up the proper printing protocol for both client and print server when a print request is issued. Unix TCP/IP * TCP/IP * IPX * NetBEUI IPX NetWare ServerWindows NT Server PTPP TCP/IP PTPP NetBEUI PTPP IPX PTPP TCP/IP Windows NT Workstation Windows 2000 Windows 98 Windows NT/2000 Network
15 The network printing function will become available after the PTPP driver is installed into Windows NT/2000. Adding this printing function for your Windows NT/2000 Server enable print queuing, user authority management, and many other advanced features. Print Queue Windows 98 TCP/IP Windows NT Server PTPP TCP/IP * TCP/IP * IPX * NetBEUI IPX Windows 2000 NetWare Network (see below)
16 Print Queue Windows 98 IPX / IP NetWare 3.x/4.x/5.x IPX * TCP/IP * IPX * NetBEUI IPX Windows 2000
17 1.6 Contents of the User s Manual Chapter 2 explains print server s hardware installation and configuration. The following chapters 3, 4, 5, and 6 introduce configuration features for each of the following operating system networks: Chapter 3. Windows Peer-to-Peer Network Chapter 4. Windows NT/2000 Server-Based Network Chapter 5. NetWare Network Chapter 6. UNIX System Network You may select the appropriate chapters and sections to read depending on your networks printing requirements. Chapter 7 and chapter 8 introduce the HPS1U s management and configuration utilities for Windows and your Web Browser s environment. You may select the appropriate management utility according to your computer s platform. Chapter 9 introduces the HPS1P s Print Server Printing function and setup procedure. Printing provides a new way to print documents across the Internet by through the use of an IP accessible account. Chapter 10 introduces the HPS1P s IPP Printing functions and setup procedure. IPP Printing provides a convenient way to print documents across the Internet through the use of Windows NT/2000/and XP native IPP protocol.
18 1.7 Firmware & Printing Function In order to provide a complete network printing solution, this HPS1P s supports Multiple Feature Function Sets for users to select the appropriate Printing Feature Set to use depending on individual s printing requirement. Currently, the system provides two Feature Sets for users to choose from: Standard Feature Set PTPP (Peer-to-Peer-Printing) TCP/IP (LPR) NetBEUI IPX Printing IPP Printing (Only some models, see 1.2) NetWare Bindary Printing NetWare Enhancement Feature Set TCP/IP Printing (LPR) NetWare Bindary Printing NetWare NDS Printing (Only some models, see 1.2) NetWare Remote Printer (Only some models, see 1.2) All feature sets are included on the HPS1P s CD-ROM. <CD Driver>\FLASHROM\<Model Name>\PSxxROM.BIN
19 Please refer to section 7.11 for instructions on how to select and setup the Feature Set. If you need to use NetWare NDS Printing, then you must change the system s default Standard Feature Set to the NetWare Enhancement Feature Set. In the meantime, the print server will support NetWare NDS / Remote Printer and other printing functions, however, it will not support NetBEUI, Printing and the other Standard Feature Set s special functions.
20 2. Hardware Installation 1. Unpack the HPS1P s packaging and check all the items listed in section Connect the print server to the printer you want to share on your network For direct attach models, plug the print server directly to the printer s centronics (parallel) port. For palmtop/desktop models, connect the printer to print server through the standard printer cable. 3. Connect the power adapter to the print server. 4. The print server will perform the Power-On-Self-Test (POST) after it is powered on. The Status LED will flash for up to one minute to indicate that the print server is ready. NOTE1 : You MUST use the power adapter shipped with the print server, do NOT use any other power adapter from any other sources. NOTE2: To prevent any compatibility problems between the HPS1P and other printers, it is recommend that you power on the print server before the printer.
21 3. Windows Peer-to-Peer Network
22 3.1 System Architecture The HPS1P supports Windows Peer-to-Peer network printing mode, which is suitable for most medium and small network environments. Through the quick and simple installation procedure, users can immediately enjoy the convenience of network printing. * TCP/IP * IPX * NetBEUI PTPP TCP/IP Windows NT Server PTPP NetBEUI PTPP IPX PTPP TCP/IP Windows NT Workstation Windows 2000 Windows 98 The installation procedure is separated into the following two parts: 1. Administrator Installation and Setup (refer to section 2 for more detailed information). System administrators must : Install the administrator s utilities into his/her computer.
23 Configure the print server from the administrator s configuration utility. 2. Client Installation and Configuration (refer to section 3 for more detailed information). Client users must install the Windows PTPP driver (Peer-to-Peer Printing) for network printing. In addition, after PTPP is installed, the system will automatically search for all print servers on the network, and add all printing ports (P1/P2/P3) of the print server into Windows printing port (refer to Network Printing Architecture in section 1.4 for more detailed information).
24 3.2 Administrator Installation and Setup WINDOWS 95/98/Me/NT/2000/XP 1) POWER ON: After you have correctly connected your print server to your PC and router, please power on all units. 2) Before the installation, please verify that your network protocols are installed on your PC (TCP/IP, IPX and/or NetBEUI). If they are not installed, please consult your operating systems manual for instructions on how to do so. 3) INSTALL the Administrator Installation Program: To install your Print Server administration software, please follow the directions listed below. 1. Insert the Windows 95/98/Me/NT/2000/XP Setup CD into your CD- ROM. (Windows should execute the Autorun.exe program automatically. If not, run Autorun.exe manually from your CD-ROM drive s root directory). 2. The Hawking Installation windows manager will pop up on your screen as follows:
25 3. Click on Admin Installation and the Utilities Setup window will be displayed. 1. Click Next, and specify the destination folder where the HPS1P utility files will be installed. 2. Click Next, and select the components you want to install. It is highly recommended to install all provided components. 3. Click Next, and specify the program folder where the program icons will be added.

26 4. Click Next to start the utility file installation. 5. The Print Server Utilities program will finish installing. After this installation is complete, the next step will involve configuring your HPS1P. Click Next, and the Choose Print Server dialog box will be displayed as follows.
27 6. Click Next and a dialog box will prompt you to name your print server. (Please make sure to write down the name you assign to your print server for future use). 7. Click Next to configure your print server s network communication protocol. As a system default setting, IPX and NetBEUI protocols are enabled and do not need to be configured. With the TCP/IP protocol, you can either (1) assign a dedicated IP address for your print server or (2) configure it later through the configuration utility software. (If you choose Do not change IP configure later, there is no effect on your network settings. It is suitable for both Non-IP and IP-enabled networks). 8. Click Next and the configuration summary will be displayed in the setup window. You have completed the Print Server Setup process and are ready to setup your print server to work with your printer. Please
 Now that you have completed the administrator s setup, you can perform the Client Installation procedure on all client")
28 click Next and your system will add the HPS1P s network port to your PC. 9. The Installation complete window will be displayed to indicate that the Administrator Installation procedure is finished. (Please restart your computer for your setup to complete its installation) Now that you have completed the administrator s setup, you can perform the Client Installation procedure on all client computers in your network. To set up printing from this administrator s PC to the print server, please follow the standard Add Printer procedure as described in the steps below. Please choose your appropriate operating system and follow the directions to add your printer through your OS.


29 WINDOWS 98/NT/Me/2000 Step1. Click the Start button, choose Setting Printers Step2. Step3. Double click on Add Printer Select Local printer click Next. Step4. Select your printer manufacturer and model, and then click Next.

30 Step5. Choose the Print Server s Network Port, which was created by the administrator or client installation process, and click Next. Step6. Complete the rest of the questions to finish the network printer setup.


31 WINDOWS XP Setup Step1. Click the Start button; choose Control Panel Printers and Faxes Step2. Click on Add a Printer Step3. The Add Printer Wizard will appear Press Next. Step4. Select Local printer attached to this computer Press Next.


32 Step5. In the Select a Printer Port window select Use the following port and drag the selection bar down to your newly created print server entry Press Next. Step6. Select a suitable printer manufacturer and model, and then click Next. Step7. Please continue through the next couple of installation steps by pressing Next until your new printer is added to your computer. Press the finish button to finalize your configuration.
33 3.3 Administrator Utilities After the Administrator Installation is completed, there will be six utilities in print server s Program folder. Network Ports Quick Setup Local printer port management tool (see section 3.5). Remote Ports Remote printer port management tool (see section 3.5). NetWare Quick Setup NetWare quick installation software (see chapter 5). Print Server Configuration HPS1P management tool (see chapter 7 Print Server Configuration). Uninstall Web Manager Administrator Web based management tool (see chapter 8 Web Manager Configuration).


34 3.4 Client Installation and Setup 1. Insert the CD shipped along with the HPS1P into your CD-ROM drive. The Autorun.exe program will execute automatically. If it does not start automatically, run Autorun.exe manually from your CD-ROM drive s root directory. 2. The "Installation Manager" will be displayed on the screen as follows. 3. Click Client Installation and the Utilities Setup window will be displayed. 4. Click Next and specify the destination folder where the utilities will be installed.

35 5. Click Next and specify the program folder where the program icons will be added. 6. Click Next to start the installation.

36 7. You have completed the software installation process. Click Continue and the HPS1P s network port will be detected on the network and will be added to your PC. 8. The Installation complete window will be displayed to indicate that the Client Installation procedure is finished. You must then perform the Windows standard Add Printer procedure, as described below, to add a network printer to your PC. Step1. Click the Start button, choose Setting Printers Step2. click Next. Double click the Add New Printer select Local printer
37 Step3. Next. Select a suitable printer manufacturer and model, and then click Step4. Choose the HPS1P s Network Port that was created in the client installation process and click Next. Step5. Complete the rest of the questions by hitting Next to finish the network printer setup.
 Network Ports Quick Setup 2) Remote Ports 3) Uninstall Network Driver The Uninstall Network Driver tool will assist you in removing all installed client software.")
38 3.5 Client Utilities After Client Installation is completed, there will be three tools located in the print server s Program folder. 1) Network Ports Quick Setup 2) Remote Ports 3) Uninstall Network Driver The Uninstall Network Driver tool will assist you in removing all installed client software. The other two tools are described as follows: Network Ports Quick Setup The Network Ports Quick Setup Utility offers a very simple method to add or remove your print server s printer port from the client s computer. During the client s installation procedure, the system will automatically search for all print servers on the network and add them into the printer ports of the client s computer. (see below)

39 If you have just installed another new print server on your network, you must run this program first. This program will search for new print servers and allow you to add the new network printer port into the client s computer. Perform the standard Add Printer procedure, and you will be able to print directly to the printer through the newly installed print server port. Chosen
 print servers. 3.5.")
40 Chosen Please be aware that Network Ports Quick Setup Utility can only detect and configure all print servers on the same network; it cannot search and configure print servers on other subnets across network segments. You must use the Remote Ports Utility described in the next section to manage remote (across network segments) print servers Remote Ports (Utility) The Remote Ports Utility is a convenient tool for you to manage and add printer ports of a remote print server. From the utility assistant panel, you can print to other print servers outside of your subnet and across your network segments. Please note that this function only supports the TCP/IP network protocol. Please follow the procedures described below: Step1. Run the Remote Ports Utility


41 Step2. Press Add, then enter the HPS1P s name, IP address, and port number. Step3. Press OK to add the remote printer port into your computer s printer ports. In order to use the remote printing function, you will have to proceed with the normal Add Printer procedure and select your printer port as the newly added remote printer port.
42 4. Windows NT/2000 Network
43 4.1 System Architecture Peer-to-Peer network printing and Server-Based Printing is available for machines using the Windows NT/2000 server. Only one Windows NT/2000 is required to have the Windows PTPP (Peer-to-Peer Printing) driver installed to share the printing service on the network. Other network users can simply connect to the server and access the shared printer. (See below). Print Queue Windows 98 TCP/IP Windows NT Server PTPP TCP/IP * TCP/IP * IPX * NetBEUI IPX Windows 2000
44 4.2 Windows NT/2000 Server Installation and Setup Please follow the procedures described below for installation of a peer-to-peer connection (PTPP) between a Windows NT/2000 Server and the HPS1P. Print Queue Windows 98 TCP/IP Windows NT Server PTPP TCP/IP * TCP/IP * IPX * NetBEUI IPX Windows 2000 Step1. If this is your first time installing the print server, please install the administrator software on your Windows NT/2000 server first. Refer to section 3.2 for installation instructions. If your network has already an installed working print server and your Windows NT/2000 server has not yet installed the PTPP driver, please install the client software. Refer to section 3.4 and 3.5 for installation instructions. Step2. Please add/configure Peer-to-Peer Printing on your Windows NT/2000 network printer and verify that you can print from Windows NT/2000 to the print server through the installed PTPP driver. Step3.
45 Share the above server s printer to the network by performing the standard Windows printer sharing process.
46 4.3 User Installation and Setup Print Queue Windows 98 TCP/IP Windows NT Server PTPP NetBEUI * TCP/IP * IPX * NetBEUI IPX Windows 2000 After the server side installation is completed, the client side will be able to find the server s shared printer in your Network Neighborhood. You will then need to perform Window s standard Add New Printer procedure. Select Network Printer as shown in the screen below, and complete the configurations to access the shared printer.
47 5. NetWare Network
48 5.1 System Architecture We implemented the NetWare printer sharing functionality into the HPS1P, to allow one or more printers attached to the print server to be connected to your network. The HPS1P can support both the NetWare print server and remote printer functions: The embedded print server, which emulates the queue management functionality of the NetWare print server, is the PSERVER program running on the NetWare server. A user first prints a job at a workstation, the job is routed to a NetWare server. The NetWare server then stores the job in a print queue and the print server gets the print job from the queue to the printer on your network. Print Queue Windows 98 Netware Server Print Server Windows 2000 The embedded remote printer allows a printer to function identically to a DOS workstation running NPRINTER.EXE program without the DOS workstation. A user first prints a job at a workstation; the job is routed to a NetWare server; then the NetWare server stores the job in a print queue and the print server moves the print job from the queue to the remote printer and then to the printer.
49 Print Server Function Print Queue Windows 98 Netware Server Remote Printer Windows 2000 The advantages of embedding the NetWare network printing functionality in the print server include: Quick and easy installation. Easy network management. Enhanced printing performance. Relief of NetWare s file server burden. The HPS1P can operate either in print server mode or in a remote printer mode. Each print server should log into a NetWare server before servicing the print jobs. Each print server will occupy a user account with which it can log into the NetWare server. A remote printer will not log into a NetWare server; it will connect to a NetWare print server and get the print jobs from the print server. A remote printer does not occupy any user account. A NetWare print server can control many remote printers; thus a print server account can be shared to many remote printers. The printing performance of a remote printer will be slower than a print server s performance, because a remote printer does not get a print job directly from the print queue. The remote printer gets its print job from the print server. The Advantages of a Print Server
50 - Easy configuration. - Better printing performance. The Advantage of a Remote Printer - Save user licenses.
51 5.2 NetWare 3.x Installation & Setup Once your print server is connected to your Ethernet network, you can set it up for use with your networking software. There are two methods you can use to do this easily: Please note that, you need install the IPX protocol before continuing to install the print server. 1. In a DOS environment or DOS Windows, use the INSTALL quick-installation program found on the <CD-ROM Drive>\DOSUTIL of CD-ROM included with the print server. 2. In a DOS environment or DOS Windows box, use the PSETUP configuration program found on the included <CD- ROM Drive>\DOSUTIL; configure the print server to use a particular file server. Then, use NetWare s PCONSOLE program to create a NetWare print server and print queue with the appropriate names Quick Installation Using the Install program The INSTALL program included on the CD-ROM can be used to quickly set up the HPS1P for use with the NetWare environment. It can only be used to set up the print server in Printer Server mode; it cannot be used to configure the print server in Remote Printer mode. The HPS1P handles changing the print server s internal settings, the creation of the NetWare print server and print queue objects on the file server as well as the assignment of the print server to the queue. Unless you need to configure the NetWare settings to conform to special requirements for your network, you can use the quick installation method. To use this method, 1. Log into your NetWare server as SUPERVISOR.


52 2. Insert the CD-ROM included with the print server, and change to the appropriate drive and directory. Ex. e:\dosutil\ 3. Run the INSTALL program. 4. Select your new print server from the displayed list and press Enter. The name listed will be the same as the Device Name printed on the back label of your print server. 5. A list of defaults will be displayed. If you need to change any of these items, use the arrow keys to choose the item you need to change, then press Enter to display a list of choices. When all of the values are correct, select the Continue Installation item and press Enter.
53 6. The quick installation program will not only set up the print server, but also create and setup all required objects on the file server. When setup is complete, it will display an execution command that you can run after logging into the file server to redirect print commands to the new print server. capture /S=III /Q=PRINTSERVER_Q1 /nt /nff /nb /l=1 /ti=10 This command redirects the LPT1 port (/l=1) to the print queue PRINTSERVER_Q1 on the file server named III. No banner page will be printed (/nb); no form feed will be added to the end of the job (/nff); and tabs will not be expanded into spaces (/nt). If the program does not explicitly signal end-of-job, the capture facility will wait 10 seconds (/ti=10) before assuming that the print job is complete. 7. Reset the print server to have the changes take effect. Before printing, you may want to verify that the setup was complete. Using the Print Server Status option of the PSETUP command (as described in the following section), you can verify that the print server is connected to the right file server and is using the correct network frame type. You may also want to use the NetWare PCONSOLE program to verify that: A NetWare print server and one, two, or three print queue(s) have been created on the file server. The number of print queues created is equal to the number of printer ports on your print server. Printer 0 (or Printer 1, Printer 2) on the print server is serving the new print queue(s). The print queue(s) and print server have the right permissions and notification settings.

54 For more detailed information, consult your NetWare manual Installation Using PSETUP Configuring in Print Server Mode For more complex setup needs, you can use the PSETUP program in conjunction with the NetWare PCONSOLE program. The installation procedure is as follows: 1. From a workstation, log in to your NetWare server as SUPERVISOR. 2. Run the PSETUP program included on the CD-ROM. ( Ex. e:\dosutil\psetup.exe ) 3. Select your new print server from the list provided. 4. Choose NetWare Configuration from the menu.

55 5. Select the Print server in the Printing mode field. 6. Change the Alias of the print server if you wish. 7. Set the Primary File Server to be the file server where the print server s queue will be located. 8. Press Escape to exit the Print Server Configuration screen, confirm that the changes should be saved, and exit PSETUP. At this point the print server setup is complete. You can now begin setting up the NetWare print server and print queue objects: 9. Run the NetWare PCONSOLE program. 10. Change the current file server, if necessary, using the Change Current File Server menu selection. 11. Choose the Print Queue Information menu selection. 12. Press the Insert key to add a new print queue. 13. Type in a print queue name, such as PQ or Q1.


56 14. You have now successfully created the print queue that your print server will serve. Press the Escape key until the Available Options main menu is displayed. 15. Select Print Server Information. 16. Press the Insert key to add a new NetWare print server object. The print server name can be identical to the PSxxxxxx name printed on the label of the print server, or you can use an alias name you have assigned using PSETUP. 17. Press Enter to select the newly created print server. 18. Select Print Server Configuration.
, and press Enter, then select Parallel LPT1 (or LPT2, LPT3) in the Type field.")
 and press Enter. 23.")
57 19. Select Printer Configuration. 20. Select Printer 0 (or Printer 1, Printer 2), and press Enter, then select Parallel LPT1 (or LPT2, LPT3) in the Type field. If your print server has only one port, you do not need to configure this Type field. 21. Press Escape, and answer Yes to the Save Changes question. 22. Select Queues Serviced by Printer, then select Printer 0 (or Printer 1, Printer 2) and press Enter. 23. Press Insert and add your newly created print queue to the list of queues serviced by the printer. Enter a priority number for the queue service, or press Enter to accept the default.
58 24. Repeatedly press Escape to exit the PCONSOLE program. 25. Reset the print server to have the changes take effect. NOTE: If the print server you have is with multiple printer connectors, you may create multiple print queues and printer objects. Your print server should now be ready to use. You should be able to redirect printing to your print server using a CAPTURE command like the one shown in the previous section Configuring as a Remote Printer Mode The remote printer feature is not available for some print server models. Make sure that you have created the NetWare print server with Type Remote using PCONSOLE utility before you configure the print server. For more detailed information about PCONSOLE, please refer to NetWare s manual. You can set up the NetWare print server and print queue objects by following the steps below: 1. Run the NetWare PCONSOLE program. 2. Change the current file server, if necessary, using the Change Current File Server menu selection. 3. Choose the Print Queue Information menu selection. 4. Press the Insert key to add a new print queue. 5. Type in a print queue name, like PQ or Q1. 6. You have now successfully created the print queue that your NetWare print server will serve. Press the Escape key until the Available Options main menu is displayed. 7. Select Print Server Information.
, press Enter, and then select Remote Parallel in the Type field. 13. Press Escape, and answer Yes to the Save Changes question. 14.")
59 8. Press the Insert key to add a new NetWare print server. 9. Press Enter to select the newly created print server. 10. Select Print Server Configuration. 11. Select Printer Configuration. 12. Select Printer 0 (or Printer 1, Printer 2), press Enter, and then select Remote Parallel in the Type field. 13. Press Escape, and answer Yes to the Save Changes question. 14. Select Queues Serviced by Printer, then select Printer 0 and press Enter. 15. Press Insert and add your newly created print queue to the list of queues serviced by the printer. Enter a priority number for the queue service, or press Enter to accept the default.

60 16. Repeatedly press Escape to exit the PCONSOLE program. 17. You must now load the NetWare print server on the NetWare file server so that the print server configured as a remote printer can connect to that print server and service the print jobs. To load the NetWare print server, type LOAD PSERVER.NLM PrintServer at the system console of the NetWare file server where the PrintServer is the print server name newly created by the PCONSOLE program. To configure the print server as a NetWare remote printer, perform the following steps: 1. From a workstation, log in to your NetWare server as SUPERVISOR. 2. Run the PSETUP program included on the CD-ROM. (ex. e:\dosutil\psetup.exe) 3. Select your new print server from the list provided.


61 4. Choose NetWare Configuration from the menu. 5. Select Remote Printer in the Printing mode field. 6. Type the print server s name in the Print server field. The print server that is being configured as a remote printer now will service the print server. 7. Type the printer number assigned in PCONSOLE in the Printer Number field. 8. Press Escape to exit the NetWare Configuration screen, confirm that the changes should be saved, and exit PSETUP. 9. At this point the print server setup is complete.
62 10. Reset the print server to let the changes take effect.
63 5.3 NetWare 4.x/5.x Installation & Setup This chapter explains how to configure your print server for operation with NetWare 4.x/5.x file servers and clients using NDS (NetWare Directory Services). If you need to install NetWare 4.x/5.x bindery mode network printing, please refer to the previous chapter. The installation procedure is the same as NetWare 3.x. How NetWare 4.x/5.x is Different Novell NetWare version 3.x uses a database called bindery for storing information such as user and group information, server configuration, and information about network services. Each NetWare 3.x file server has its own bindery, which is administrated separately from other file servers using commands such as SYSCON, PCONSOLE, and so on. NetWare version 4.x/5.x improved on the bindery concept by introducing NDS, NetWare Directory Services. NDS is a treestructured directory that is shared by a group of file servers on a network, allowing centralized administration and easy coordination of users, permissions, and resources between servers. To make it possible for NetWare 4.x/5.x servers to coexist with NetWare 3.x servers, NetWare 4.x/5.x supports bindery emulation, which makes parts of the NDS directory visible to NetWare 3.x clients, just as if the information were stored in a NetWare 3.x bindery. This allows clients to access NetWare 4.x/5.x servers without being upgraded to the NetWare 4.x/5.x software, and for 3.x and 4.x/5.x servers to be mixed on a network. Your print server can operate either in bindery mode or NDS mode. Bindery mode works with NetWare 3.x servers and with NetWare 4.x/5.x servers using bindery emulation. NDS mode works with NetWare 4.x/5.x servers.

64 NOTE: Though the print server supports both bindery mode and NDS mode, it cannot support both modes at the same time. If you are using both NetWare 3.x and 4.x/5.x servers, you need to set up the print server to use bindery mode. If you need to install NetWare 4.x/5.x bindery mode network printing, please refer to the previous chapter. The installation procedure is the same as NetWare 3.x Quick Installation Using Install program The INSTALL program included on the CD-ROM can be used to quickly set up the print server for use. It can only be used to set up the print server in Server mode; it cannot be used to configure the print server in Remote Printer mode. To use this method, 1. Log in to your NetWare server as ADMIN. 2. Insert the CD-ROM and change to the appropriate drive and directory. Ex. e:\dosutil\ 3. Run the INSTALL program with the NDS option. E :\dosutil\install /NDS 4. Choose your new print server from the displayed list and press Enter. The name listed will be the same as the Device Name printed on a label of your print server.

65 5. A list of defaults will be displayed. If you need to change any of these items, use the arrow keys to choose the item you need to change, then press Enter to display a list of choices. When all of the values are correct, select the Continue Installation item and press Enter. The Current Tree and Current Context settings cannot be changed within the INSTALL program. If you need to change the tree or context where the print server will be installed, use the CX command to change them before starting the INSTALL program. 6. The quick installation program will not only set up the print server but also create and setup all required objects on the network. When the setup is complete, it will also display an execution command that you can run after logging in to the file server to redirect print commands to the new print server. 7. Reset the print server to have the changes take effect. NOTE: The print server may require up to a minute after power-up to log into a NetWare Directory Services context because of the large number of the calculations NDS security requires.
66 5.3.2 NetWare 4.x/5.x Installation Using PSETUP Configuring in Print Server Mode For more complex setup requirements, you can use the PSETUP program in conjunction with the NetWare PCONSOLE program. To install the print server using NetWare Directory Services (NDS) mode: 1. Log into your NetWare server as ADMIN. 2. Run the PSETUP program included on the print server CD- ROM. (ex. e:\dosutil\psetup.exe) 3. Select your new print server from the list provided. 4. Choose NetWare Configuration from the menu. 5. Select Print server in the Printing mode field. 6. Change Alias name if you want. 7. Set the NDS tree and NDS context where the print server will be located. Do NOT set a Primary file server, as that would force the use of bindery mode. 8. Press Escape to exit the Print Server Configuration screen, confirm that the changes should be saved, and exit PSETUP. 9. Run the NetWare PCONSOLE program.
 in the Print server field. 13. Assign printer and print queue names. 14.")
67 10. Change the current context, if necessary, using the Change Context menu selection. 11. Choose Quick Setup from the menu. 12. Enter the print server name (either the PSxxxxxx name or an alias name you have assigned) in the Print server field. 13. Assign printer and print queue names. 14. Set the Banner type to PostScript if you are using a PostScript printer, and to Text otherwise. 15. Press F10 to save the new configuration.
68 16. Reset the print server to have the changes take effect. NOTE: The print server may require up to a minute after power-up to log into a NetWare Directory Services context because of the large number of calculations NDS security requires. Your print server should now be ready for use by workstation users. You should be able to redirect printing to your print server using a CAPTURE command Configuring in Remote Printer Mode This remote printer feature is not available for our 10/100Mbps 3- port models. Make sure that you have created the NetWare print server with Type Remote using the PCONSOLE utility before you configure the print server. For more detailed information about PCONSOLE, please refer to NetWare s manual. You can set up the NetWare print server, print queue and printer objects by following the steps below: 1. Run the NetWare PCONSOLE program. 2. Change the current context, if necessary, using the Change Context menu selection. 3. Choose Quick Setup from the menu.

69 4. Enter the print server name in the Print server field. 5. Assign printer and print queue names. 6. Set the Banner type to PostScript if you are using a PostScript printer, and to Text otherwise. 7. Set the Location to Manual Load. 8. Press F10 to save the new configuration and return to the main menu. 9. Choose the Printers menu. 10. Select your newly created Printer from the Printers list. 11. You can view or edit the Printer number from 0 to Save the new configuration and exit PCONSOLE.

70 You must load the NetWare print server on the NetWare file server so that the print server configured as a remote printer can connect to the print server and service the print jobs. To load the NetWare print server, type LOAD PSERVER.NLM PrintServer in the system console of the NetWare file server; PrintServer is the print server name newly created by the PCONSOLE program. To configure the print server as a NetWare remote printer, perform the following steps: 1. Log in to your NetWare server as ADMIN. 2. Run the PSETUP program included on the CD-ROM. ex: e:\dosutil\psetup.exe 3. Select your new print server from the list provided. 4. Choose NetWare Configuration from the menu. 5. Select Remote Printer in the Printing mode field. 6. Type the print server s name in the Print server field. The print server that is being configured as a remote printer now will service the printer. 7. Type the printer number assigned in PCONSOLE in the Printer Number field.
71 8. Press Escape to exit the NetWare Configuration screen, confirm that the changes should be saved, and exit PSETUP. 9. Reset the HPS1P to have the changes take effect.
72 6. UNIX System Network
73 6.1 Introduction The print server is available for TCP/IP printing through the Unix lpd (Line Printer Daemon) protocol. The lpd protocol originated with Unix release is based on the BSD version of Unix and supported under most versions of Unix. This chapter explains how to configure the print server for TCP/IP operation, and how to modify configuration files on your Unix system to allow printing to the print server. The configuration examples in this manual follow the syntax for BSD based Unix systems. Please refer to the related system documentation for the correct syntax of your systems. To configure the print server for lpd printing, perform the following procedures below: 1. Enable the HPS1P s TCP/IP Support. 2. Set the HPS1P s IP address. 3. Verify the HPS1P s IP Address. 4. Configure remote lpd printing on the host. 5. Print a test page. In the next section, we will describe these five procedures in depth.
74 6.2 Enable Print Server s TCP/IP Support The default configuration of the HPS1P has TCP/IP support enabled. You can configure the HPS1P to enable TCP/IP support using the configuration program or PSETUP program on the CD- ROM included with the HPS1P.
75 6.3 Setup the HPS1P s IP Address The print server must have a unique IP address in order to be recognized by the network. You can set up the IP address on various Unix systems using any one of the following methods: 1. ARP & Ping Assignment (Recommand for Unix) 2. DHCP (Dynamic Host Configuration Protocol) 3. BOOTP (Bootstrap Protocol) 4. RARP (Reverse Address Resolution Protocol) The print server will use the last three methods to obtain its IP address automatically if its IP address is configured as Auto ( ) ARP & Ping Assignment You can use ARP and Ping commands with a web browser to complete print server s IP address setting. Parameters for the commands are as follows: arp s <IP Address> <Ethernet ID> ping <IP Address> For example, a print server with the following configuration: Node ID: 0000B (the Node ID is printed on the rear side of the print server) Assign IP address:
76 arp s B ping In the meantime, your HPS1P IP will temporarily be set to (will restore after reboot). Therefore, you need to run your web browser to set a permanent IP address (refer to section for detailed IP configuration) DHCP There are many Unix systems that support the DHCP protocol nd the procedures to configure the DHCP server database are different. This manual does not describe the DHCP server configuration on Unix systems. It is highly recommended that the DHCP server should be located on the same network as the HPS1P BOOTP If you have the BOOTP daemon, bootpd, running on your UNIX system which is accessible to the print server, you can use the BOOTP protocol to set up the IP address of the print server. We recommend that the BOOTP server should be located on the same subnet as the print server. If you use Network Information Services (NIS) in your system, you may need to rebuild the NIS map with the BOOTP services before doing the following BOOTP configuration. To rebuild the NIS map, please refer to your system documentation. To configure the IP address data for the BOOTP server, you will need to log in as the host of the BOOTP server with superuser (root) admin rights. Perform the following steps to add address entries: 1. Optionally, assign a name corresponding to the print server s IP address. You can add this address to the /etc/hosts file, by adding the following line: pserver
77 2. Add an entry to the host s /etc/bootptab file, similar to the following: hostname:\ :ht=1:\ :ha=print_server_ethernet_address:\ :ip=print_server_ip_address: Lines should be indented with tabs. Where hostname is the device name of the HPS1P; the ht=1 tag specifies that the hardware type is Ethernet. The ha= tag specifies that the Ethernet address of the HPS1P is the Node ID located on the print server. The ha tag must be preceded by the ht tag. The ip= tag should correspond to the IP address you want to assign to the print server. For example, below is an example of a print server with the following configuration: Node ID: 0000B (this implies Ethernet address is 0000B ), IP address: The entry for this print server in the /etc/bootptab file should be: PS010101:\ :ht=1:\ :ha=0000b :\ :ip= :
78 6.3.4 RARP The procedure below enables the RARP daemon running on your system to respond to a RARP request from the print server and assign an IP address to the print server. 1. Log in the host of RARP server as the superuser (root). 2. Assign a name corresponding to the print server s IP address. You can add this address to the /etc/hosts file, by adding a line such as: pserver 3. Add the Ethernet address and the host name for the print server to the /etc/ethers file, by adding a line like: 00:00:B4:01:01:01 pserver The Ethernet address of the print server is the Node ID located on the print server. 4. If your system uses Network Information Services (NIS), you will need to make changes to the NIS host and its databases. 5. Check if the RARP daemon is running using the ps and grep commands. If the RARP daemon is not running on your host, type rarpd -a to run the RARP server.
79 6.4 Verify the HPS1P s IP Address To verify that your print server is responding to the newly assigned IP address, use a PING command to check the HPS1P s response: ping ip-address
80 6.5 Configure Remote lpd Printing on the Host You can use this procedure to configure your Unix host(s) to allow printing to your network. The procedure below can be used for Unix variants that are related to BSD Unix, like SunOS or Linux. For other versions of Unix, consult your system documentation, keeping in mind that: 1. The print server should be treated as a BSD networked print server host. 2. The host name should be the name (or IP address) that you have assigned to the print server. 3. The printer name (or queue name) on the remote host should be lpt1, lpt2 or lpt3, the name of the parallel port on the print server. You will need to perform the tasks below, logged in as the superuser (root). To configure your Unix host for printing, 1. Optionally, assign a name corresponding to the print server s IP address. You can add this address to the /etc/hosts file, by adding the following line: pserver 2. Create a spool directory for the printer in the same directory where spool directories are normally kept on the machine, such as /var/spool or /var/spool/lpd: mkdir /var/spool/lpd/pserverd chown daemon /var/spool/lpd/pserverd chgrp daemon /var/spool/lpd/pserverd chmod 775 /var/spool/lpd/pserverd
81 3. Add an entry to the host s /etc/printcap file, similar to the following: printer-name:\ :lp=:\ :rm= :\ :rp=lpt1:\ :lf=/var/spool/lpd/pserverd.log:\ :sd=/var/spool/lpd/pserverd:\ :mx#0: Lines should be indented with tabs. More than one printer name can be used, with variants separated by vertical bars (name1 name2). The rm= entry should correspond to the IP address you have assigned to the print server. You can also use a host name if you have one assigned in the /etc/hosts file. The sd= entry should correspond to the spool directory you created in the previous step. The rp= entry should correspond to the port name of the remote printer. The values should be one of lpt1, lpt2 or lpt3 depending on the which printer port your printer is attached to (for multiple port print servers). The print server should now be available for printing from your Unix host.
82 6.6 Print a Test Page To print to the print server, you can use the lpr command: lpr -Pprinter-name file... or, you can use the lp command on SCO Open Server: lp d printer-name file... Where printer-name is one of the names for the printer in the /etc/printcap file, which you created in the previous step. Consult your system documentation for more information about printer configuration and administration and about lpr and other printing commands.m
83 7. Configuration Utility
84 7.1 Introduction This chapter introduces the HPS1P s system configuration utility in a Windows environment. This utility is automatically installed during the Windows Administrator Utility installation procedure - refer to section 3.2 and 3.3. This utility provides complete management and configuration functions for the print server. This utility only provides configuration functions for the HPS1P itself; it does not include configuration functions for client side or other file server or NetWare server in the network environment. The Configuration Utility provides the following configuration and management functions: General: General Information of print server PrintServer Status: PrintServer Network Status Printer Status: Attached Printer Status IP Cfg: IP Address Configuration NW PS Cfg: NetWare Print Server Configuration NW RP Cfg: NetWare Remote Printer Configuration NW Information: NetWare Printing Summary Print Server Cfg: Print Server Network Ability Setting Restore Default: Restore to the Default Value Upgrade: Firmware Upgrade / Update DHCP Cfg: DHCP Server Configuration
85 DHCP Information: DHCP Information Mail Print Cfg: Printing Setting SMB Cfg: SMB Printing Setting SNMP Cfg: SNMP Parameter Setting AppleTalk Cfg: AppleTalk Protocol Setting The following section will explain in detail each specific function.

86 7.2 General - General Information for the HPS1U Each time you run the HPS1U s configuration utility, the system will initially delay for several seconds because the utility is using system s available network protocols to search for all print servers on the network. Therefore, you must first select the print server you would like to configure from the Print Server Name s field under the General tag. The system will, at the same time, display the selected print server s model number and firmware version. You may select any available printer port in the Printer Port s field at the bottom of that page, and then press the TestPrint button to test print. By pressing the Refresh button, you may manually search again for print servers on the network. 7.3 Print Server Status

87 The Print Server Status page displays the network ability and status of the HPS1P in detail.
88 7.4 Printer Status - Attached Printer Status The Printer Status page displays the printer status for each port.

89 7.5 IP Cfg - IP Address Configuration The IP Cfg page allows you to configure the HPS1P s IP address. The print server will obtain its IP address automatically if you configure the IP address as Auto. Click the Write button to save the configuration to the print server and Click the Reset button to reset the print server and have the changes take effect.
. The operation mode, which determines how the print server logs into the network between Bindery mode and NDS mode.")
90 7.6 NW PS Cfg - NetWare Print Server Configuration The NW PS Cfg page allows you to set: The Alias name, a nickname by which the print server can be called (in addition to the PSxxxxxx name printed on the label). The operation mode, which determines how the print server logs into the network between Bindery mode and NDS mode. The primary file server where the NetWare print server object is located, or the print server s NDS tree and context. The remote printer, which determines if the print server works in remote printer mode. The polling interval, which determines how often the print server checks the print queues. The Write button: save the configuration to the print server. The Reset button: reset the print server to let the changes take effect.
91
92 7.7 NW RP Cfg - NetWare Remote Printer Configuration Only some print server models provide Remote Printer function. The NW RP Cfg page allows you to set: The Print Server, which will be serviced by the print server configured as a remote printer. The Printer Number, which is assigned in PCONSOLE. The remote printer, which determines if the print server works at remote printer mode. The Write button: save the configuration to the print server. The Reset button: reset the print server to let the changes take effect.
93 7.8 NW Information - NetWare Printing Summary The NW Information page displays the print server connection information for NetWare.

94 7.9 Print Server Cfg Print Server Network Ability Setting The Print Server Cfg page allows you to set: The Diagnostic Printout, which determines whether or not a diagnostic printout should be printed on the printer to which the print server is connected. The TCP/IP Support button, determines whether or not the TCP/IP network printing protocol is supported The NetWare Support button, determines whether or not the NetWare network printing protocol is supported The NetBEUI Support button, determines whether or not the NetBEUI network printing protocol is supported The Write button: saves the configuration to the print server. The Reset button: resets the print server to let the changes take effect.

95 7.10 Restore Default - Restore to Default The Restore Default page allows you to erase all of the HPS1U s settings and restore them to the default factory settings. The Restore button: saves the default configuration displayed in this page to the print server. The Reset button: resets the print server to let the changes take effect.
 file is stored on your computer. Choose the updated firmware in the File Name field.")
96 7.11 Upgrade - Firmware Upgrade / Update The HPS1P stores its internal program in flash memory, which can be upgraded when a new version of the print server s software becomes available. To perform an upgrade: Make sure the updated PxxxM_xP.BIN (depending on your model) file is stored on your computer. Choose the updated firmware in the File Name field. Click the Upgrade button to upgrade the HPS1P s flash memory. The yellow Status LED on the print server will be lit continuously.

97 7.12 DHCP Cfg - DHCP Server Configure The HPS1P can be configured with DHCP settings to provide a dynamic IP addresses assignment. The DHCP Cfg page allows you to set: The DHCP startup determines if the print server will act as DHCP server. If this item is set to Auto, the HPS1P will detect if there a DHCP server on the network when it boots up. If there is no DHCP server on the network, then the print server will configure itself as a DHCP server; otherwise it will disable this function. DHCP setup is used to configure TCP/IP parameters that will be assigned to a DHCP client. If this item is set to Auto, the print server will determine all TCP/IP parameters automatically; otherwise you will have tio configure the following parameters: IP Address: specifies the IP address of print server itself. Starting IP: specifies the starting IP address for assigning to DHCP clients. IP range: specifies how many IP addresses are available to DHCP clients.
98 Gateway IP: gives the IP address of the default gateway. Netmask: gives the network mask. DNS server: gives the IP address of the domain name server. The Write button: save the configuration to the print server. The Reset button: reset the print server to let the changes take effect.

99 7.13 DHCP Information - DHCP Information The DHCP Information page can be used to display the DHCP server information when the HPS1P is in DHCP mode. The status: displays if the print server acts as a DHCP server. Starting IP: displays the starting IP address available for assignment to DHCP clients. Next available IP: displays the next available IP address that can be assigned to a DHCP client. Gateway IP: displays the configured IP address of the default gateway. Netmask: displays the configured network mask. DNS server: displays the configured IP address of the domain name server.
.")
100 7.14 Mail Print Configuration - Printing Setting Using the HPS1P s printing function, the client user on the Internet can the printing file to a dedicated mailbox and the HPS1P will automatically get the from that mailbox and print it. The tab will allow you to configure the following: Mail Polling Time - default value is zero (1 minute). This function sets the time delay for checking if there is new in your assigned print server box. Mail Server This function sets the mail server IP address of the mailbox you wish to configure for mail polling. Mail Account This is the login account of the mailbox being polled. Mail Password This is your box password. You will be asked to confirm your password after setting the initial password.
101 Print Mail Header This determines whether or not the printing job will print out the mail header from your s.

102 7.15 SMB Cfg SMB Printing Setting The SMB Cfg page allows you to configure the SMB parameters of this print server. This will allow your PC to print to the HPS1P through the SMB protocol. The page allows you to set: Alias Name - the SMB alias name of this print server. Group Name - the name of the SMB group that this print server joins to. Abort JOB when print error - if you check this item, the print server will abort the printing job when any printing error occurs.

103 7.16 SNMP Cfg - SNMP Parameter Setting The SNMP Cfg page allows you to configure the SNMP parameters of the HPS1P. This information can be viewed by the SNMP MIB browser. The page allows you to set: System contact - the system Administrator information for the HPS1P. System location - the System location of the HPS1P print server.

104 7.17 AppleTalk Cfg AppleTalk Configuration The AppleTalk Cfg page allows you to configure the AppleTalk network parameters of the HPS1P. AppleTalk is a data communication protocol often used by Macintosh computers. The HPS1P can use these parameters to join in an AppleTalk network and share the printer with other AppleTalk workstations. Only the printer attached to the P1 printer port can be shared with other AppleTalk network workstations (for multi-port models). The page allows you to set the following: Printer Type - the type of printer attached to the P1 printer port. You can get the printer type from the manufacturer of your printer. Zone - the Zone name that the print server will join. Only workstations in the same zone can share the printer. If you want to share the printer with all workstations in every zone, you should enter only an * in this field.
105 8. Web Management
106 8.1 Introduction The HPS1P can be configured and managed via the Web. Through the Local Area Network, or even the Internet, an administrator can easily configure and manage the HPS1P s functions through a web browser. Simply enter the print server s IP address into your browser s URL field to manage the HPS1P through the print server s built-in Web Server. In order to increase the convenience of management, the HPS1P print server provides a Web Manager Utility to assist you in browsing other print servers and managing print server s printing environment on your Local Area Network systematically. Please refer to next section for the instructions of Web Manager Utility.

107 8.2 Web Manager Utility Web Manager Utility is implemented through WWW Plug-in technology. After the installation of this utility on Windows, you don t need to memorize the print server s IP address or the number of print servers installed on the same network. After executing the Web Manager Utility, all print servers on the Local Area Network will be detected by the system automatically and listed in the browser. Simply click on the print server you want to configure to access its built-in web pages Installation and Execution Since the Web Manager Utility is a part of the Administrator Utility it is installed when the Windows Administrator Utility was installed. Execute the Web Manager Administrator in the program folder Print Server Utilities Starting The Web Manager Utility When you execute the Web Manager Utility, your system will take approximately 5 seconds to display the HPS1P s Web Console Page. In the mean time, your system will be searching for all print servers on the same subnet. After the search is completed, the screen will switch to the following screen:
108 The Window will be split into two parts: 1) Print Server List on the left half of your screen will list all similar print servers found on the same network. 2) The web interface for the selected print server will be displayed on the right portion of your screen displaying print server configuration information. In the left frame, click on the print server that you want to manage and configure, the print server s Web configuration screen will be displayed in the right frame. If you wish to access the print server s web interface without executing the Web Manager Utility, you may also enter the print server s IP address into the URL field of any browser to display its Web management screen.
109 8.3 Web Management of the HPS1P Print Server Using Your Browser You may use any Web Browser to review the status or configure the settings of the HPS1P. The Print Server s management screen contains three frames: Control Panel: On the top, which contains several HyperText links that links to an information or configuration page respectively. Status Line: On the bottom of the page, which is used to display warning or error messages. Configuration Pages: In the middle of the page, which contain several informational pages about the print server and its attached printer(s), as well as several configuration pages used to set up print server. The browser will group the configuration items into the following topics:
110 Print Server Info: General Information of print server. Printer Status: Current status of the attached printers. NetWare Status: Print Server connection information for NetWare applications. DHCP status: Current DHCP server status and information. Device Cfg: Device configuration IP Cfg: IP configuration DHCP Cfg: DHCP parameter configuration Mail Print Cfg: printing configuration SNMP Cfg: SNMP Information configuration Utilities: Utilities for the print server In order to protect your print server you will be able to access the status information at any time but you cannot save the configuration pages unless you pass the password verification process. You will be asked to check your username and password when you want to save or modify configuration settings. Please ignore the username and enter a password at that moment, then reload the configuration pages again to initiate the password protection. The configuration pages will now be displayed again in your browser window Obtaining Print Server Information Each time you open your browser to connect to a print server, you will get this print server information page initially. The print server information page displays some general information of print server.
 for each")

111 8.3.3 Obtaining Printer Status The Printer status page can be used to display the status of the attached printer(s) for each port Obtaining NetWare Information The NetWare status page displays the NetWare connection information of the print server.

112 8.3.5 Obtaining DHCP Status The DHCP status page can be used to display the DHCP information when the print server s client DHCP function is enabled.
113 8.3.6 Changing the Device Configuration The Device Cfg page allows you to set the following: Alias name - an alternate name by which the print server can be named (in addition to the PSxxxxxx name printed on the label). NetWare Protocol Support - determines whether or not the print server supports the NetWare printing function. NetBEUI Protocol Support - determines whether or not the print server supports the NetBEUI network protocol. POST diagnostic printout - determines whether or not a diagnostic printout should be printed to the attached printer. Save to Print Server button - saves the configuration to the print server. Type new password - changes to a new password. Re-type new password - confirms the new password. Change password button - saves the new password to the print server.
114 The print server will verify your password (it will ignore the User Name item) when you save your configuration. Make sure to reset the print server (described in section System Utilities) to let the changes take effect Setting IP Address The IP Cfg page allows you to configure the IP address of the HPS1P. The print server will obtain its IP address automatically through the following protocols: DHCP, BOOTP, RARP as long as you configure the IP address with the auto option enabled. Click on Save to write the configuration information to the HPS1P print server. The HPS1P will verify your password (it will ignore the User Name item) when you save the configuration. Make sure to reset the print server (described in section System Utilities ) to apply the changes Configuring DHCP Parameters The HPS1P can be configured as a DHCP server to provide dynamic IP addresses assignments. The DHCP Cfg page allows you to set the following:

115 The DHCP server startup - This determines if the print server will act as a DHCP server. If this item is set to Auto, the print server will detect if there is any other DHCP server on the network when it boots up. If there is no DHCP server on the network, then the print server will configure itself as DHCP server; otherwise it will disable this function. DHCP settings are used to configure TCP/IP parameters that will be assigned to a DHCP client. If this item is set to Auto, the print server will determine all TCP/IP parameters automatically; otherwise you will configure the following parameters: Starting IP - specifies the starting IP address for assigning an IP string to DHCP clients. IP range - specifies how many IP addresses are available to DHCP clients. Net mask provides the system with your current network mask settings. Gateway IP - the IP address of the default gateway. DNS server - the IP address of the domain name server on your system.
116 The Save to Print Server button - saves the configuration settings to the HPS1P. Make sure to reset the print server (described in section ) to have the changes take effect Configuring Printing Using print server s printing function, the client user on the Internet can the printing file to a dedicated mailbox The print server will automatically get the from that mailbox and print it to the attached printer. The detailed function descriptions are described in the Printing Chapter. The page allows you to set the following: Mail Polling Time - default value is zero (1 minute). It allows you to set the time interval between system polling times for getting the from mail server. Mail Server Specifies where the mail server IP address of the mailbox is. Mail Account - the account login of the mailbox in the mail server. Mail Password - the password of the mailbox account.
117 Print Mail Header - Specifies whether or not to print out the mail header Configuring SNMP Parameters The SNMP Cfg page allows you to configure SNMP parameters for the HPS1U print server. This information can be accessed through the SNMP MIB browser. The page allows you to set the following: System Contact - the system Administrator information for the HPS1U print server. System Location - the System location of the HPS1U print server System Utilities You can perform several tasks from the Utilities page which are described below:
118 Software reset - Specifies whether or not to reset the print server. Restore to factory default - Specifies whether or not to erase all of the print server s settings and restores the default print server configuration to factory settings. Print diagnostic page - Specifies whether or not to print a diagnostic page to an attached printer connected at either LPT1, LPT2 or LPT3 of the print server. This feature can be used to test the print server to make sure it is operating properly, or to isolate any installation problems. Do it button Saves and performs the actions requested in the utilities menu.
119 9. Printing
120 9.1 Introduction Printing provides a new way of printing over the Internet. You may set up an POP account to take raw s and have the HPS1P print any raw s that arrive in that POP account mailbox. The HPS1P will periodically retrieve s in the mailbox account specified during installation and print it to the attached specified printer.
121 9.2 System Requirements Print Server Side The HPS1P must be connected to an server with a free account for the print server to poll. The server must be permanently connected to the Internet in order to receive printing requests Client Side The client side can be any operating systems with a mailing tool. The client side must be able to connect to an SMTP server to send . The client side must install and setup the TCP/IP protocol for an active Internet connection. If you use the printing service described in the next section, please install the Printing Driver for Printing provided on the CD-ROM.
122 9.3 System Setup Print Server Side Step1.Execute the Print Server Configuration Utility. Step2.In the IP Cfg page, configure the IP address. Step3.In the Mail Print Cfg page configure Mail polling time and MailBox parameters. Mail Polling Time: Default is 1 minute; Intervals for print server to check s in the MailBox. Mail Server - Mail Account and Password are the Mailbox s server's IP address, account, and password respectively. Step4. Press the "Write" button then the "Reset" button to finalize Client User Side At first, please confirm that the client computer has installed and setup the TCP/IP protocol correctly Send an directly to the account serviced by the print server. You can send a text document directly to the print server mailbox and have it print out. Please note that the recipient should be the address serviced by the Print Server. The Print Server will automatically retrieve the from the box and print it to the attached printer. Please note that attached s will not print out correctly.
123 10. IPP Printing
124 10.1 Introduction The IPP (Internet Printing Protocol) provides you with a convenient method for remote printing jobs via the TCP/IP protocol. The HPS1P 10/100M Parallel Print Server can support IPP printing capabilities. It is not necessary to modify any of the print server s internal settings to use the IPP printing features. Windows 2000 and Windows XP computers can use IPP printing functions through the operating system s internal IPP functionality. IPP printing will let you share your network printer with any PC that can access the HPS1P print server by IP. You can even share your printer with users over the Internet who know your printer model, printer port, and IP address of your HPS1P.10.2 System Setup Print Server Side It is not necessary to modify your IPP settings on the print server side. Make sure you know your print server s IPP settings and make sure they are correctly set to your network s IP settings. Contact your system administrator if you are unfamiliar with your network s routed IP settings. If you would like to share your printer with Internet users outside of your internal network structure, you will have to set an outside IP address that can access the print server. You also have to make sure that any gateway, router or firewall does not block the IPP protocol if you have those devices installed. Please contact your system administrator or consult your router s manual for DMZ or port mapping configuration settings.

125 Client Side You will need to perform Window s standard Add New Printer procedure. To do this, select the Network Printer setting as shown in the screen below and click Next. Select Connect to a printer on the Internet or on a home or office network and enter the URL of your HPS1P print server. The URL format will be The IP portion of the URL will be the print server s IP address. LPT_PORT is the port name of your print server that your printer is connected to. For one port print servers, the port name will be lpt1. For
Print Server. User s Manual
 Print Server User s Manual 1. INTRODUCTION...5 1.1 Product Introduction... 6 1.2 Product Models... 7 1.3 Product Package... 9 1.4 Network Printing Architecture... 11 1.4.1 Print Server Network Functions...
Print Server. User s Manual
 Print Server User s Manual 1. INTRODUCTION...5 1.1 Product Introduction... 6 1.2 Product Package... 7 1.3 Network Printing Architecture... 9 1.3.1 Print Server Network Functions... 10 1.3.2 Network Printing
Print Server. User s Manual. Version: 1.0 (July, 2005)
") Print Server User s Manual Version: 1.0 (July, 2005) COPYRIGHT Copyright 2005/2006 by this company. All rights reserved. No part of this publication may be reproduced, transmitted, transcribed, stored
Print Server User s Manual Version: 1.0 (July, 2005) COPYRIGHT Copyright 2005/2006 by this company. All rights reserved. No part of this publication may be reproduced, transmitted, transcribed, stored
Print Server User s Manual Version: 2.0 (January, 2006)
") Print Server User s Manual Version: 2.0 (January, 2006) COPYRIGHT Copyright 2006/2007 by this company. All rights reserved. No part of this publication may be reproduced, transmitted, transcribed, stored
Print Server User s Manual Version: 2.0 (January, 2006) COPYRIGHT Copyright 2006/2007 by this company. All rights reserved. No part of this publication may be reproduced, transmitted, transcribed, stored
LevelOne FPS-9021/FPS User Manual. Mini Printer Server w/parallel (USB2.0) Port V
 Port V") LevelOne FPS-9021/FPS-9022 Mini Printer Server w/parallel (USB2.0) Port User Manual V1.0.0-0601 CONTENTS 1. INTRODUCTION...1 1.1 Product Introduction... 2 1.2 Product Package... 3 1.3 Network Printing
LevelOne FPS-9021/FPS-9022 Mini Printer Server w/parallel (USB2.0) Port User Manual V1.0.0-0601 CONTENTS 1. INTRODUCTION...1 1.1 Product Introduction... 2 1.2 Product Package... 3 1.3 Network Printing
Print Server. User s Manual. Version: 3.0 (July, 2007)
") Print Server User s Manual Version: 3.0 (July, 2007) COPYRIGHT Copyright 2006/2007 by this company. All rights reserved. No part of this publication may be reproduced, transmitted, transcribed, stored
Print Server User s Manual Version: 3.0 (July, 2007) COPYRIGHT Copyright 2006/2007 by this company. All rights reserved. No part of this publication may be reproduced, transmitted, transcribed, stored
Print Server. User s Manual
 Print Server User s Manual 1 Contents 1. INTRODUCTION...1 1.1 Product Introduction... 2 1.2 Product Package... 3 1.3 Network Printing Architecture... 4 1.3.1 Print Server Network Functions... 5 1.3.2 Network
USB 2.0 Print Server FPS User s Manual
 USB 2.0 Print Server FPS-1010 User s Manual Copyright (C) 2005 PLANET Technology Corp. All rights reserved. The products and programs described in this User s Manual are licensed products of PLANET Technology,
P-201/ P-201U Wired Printer Server
 P-201/ P-201U Wired Printer Server User s Manual COPYRIGHT Copyright 2006/2007 by this company. All rights reserved. No part of this publication may be reproduced, transmitted, transcribed, stored in a
LevelOne FPS-9023/WPS User Manual. Wired/Wireless Printer Server w/multi - Port V
 LevelOne FPS-9023/WPS-9123 Wired/Wireless Printer Server w/multi - Port User Manual V1.0.0-0606 CONTENTS 1. INTRODUCTION... 1 1.1 PRODUCT INTRODUCTION... 2 1.2 PRODUCT PACKAGE... 3 1.3 NETWORK PRINTING
Ethernet Print Server Single Port 10Mbps Print Server
 Ethernet Print Server Single Port 10Mbps Print Server Installation Manual PM1000IPNDS 1 Overview Save precious time and space with the compact StarTech.com 1 Port 10 Mbps Print Server. No need for a printer-dedicated
Please take the time now to check the contents of your package: HPS12U Print Server One CD-ROM Quick Installation Guide One power adapter
 Congratulations on purchasing Hawking s HPS12U 1-Port Parallel + 2 USB Ports 10/100M Internet Print Server. The Hawking HPS12U is a powerful and convenient network printing solution that will connect your
USB-PRINTER WIRELESS LAN PRINTSERVER (DN ) Manual
 Manual") USB-PRINTER WIRELESS LAN PRINTSERVER (DN-13014-2) Manual COPYRIGHT Copyright 2007/2008 by this company. All rights reserved. No part of this publication may be reproduced, transmitted, transcribed, stored
USB-PRINTER WIRELESS LAN PRINTSERVER (DN-13014-2) Manual COPYRIGHT Copyright 2007/2008 by this company. All rights reserved. No part of this publication may be reproduced, transmitted, transcribed, stored
Congratulations on purchasing Hawking s HWPS12UG 1-Port Parallel + 2 USB Ports Wireless G Print Server. The Hawking HWPS12UG is a powerful and
 Congratulations on purchasing Hawking s HWPS12UG 1-Port Parallel + 2 USB Ports Wireless G Print Server. The Hawking HWPS12UG is a powerful and convenient network printing solution that will connect your
Wireless Print Server. User s Manual. Version: 1.0(July, 2005)
") Wireless Print Server User s Manual Version: 1.0(July, 2005) COPYRIGHT Copyright 2005/2006 by Edimax Technology. All rights reserved. No part of this publication may be reproduced, transmitted, transcribed,
Wireless Print Server User s Manual Version: 1.0(July, 2005) COPYRIGHT Copyright 2005/2006 by Edimax Technology. All rights reserved. No part of this publication may be reproduced, transmitted, transcribed,
Conceptronic C54PSERVU Wireless Print Server
 Conceptronic C54PSERVU Wireless Print Server User s Manual Version: 1.0 COPYRIGHT Copyright 2005/2006 by Conceptronic. All rights reserved. No part of this publication may be reproduced, transmitted, transcribed,
Direct Attached Fast Ethernet Print Server
 Direct Attached Fast Ethernet Print Server FPS-1001 User s Manual Copyright (C) 2004 PLANET Technology Corp. All rights reserved. The products and programs described in this User s Manual are licensed
Congratulations on purchasing Hawking s HPS1P 1-Port Parallel 10/100M Print Server. The HPS1P is a powerful and convenient network printing solution
 Congratulations on purchasing Hawking s HPS1P 1-Port Parallel 10/100M Print Server. The HPS1P is a powerful and convenient network printing solution that will connect your printer to your network. The
Print Server. Quick Configuration Guide. Network Connectivity for Printers
 Print Server Quick Configuration Guide Network Connectivity for Printers 1 Features The DPO NIC enables printers to communicate over an Ethernet network with many different network operating systems, including
USB 2.0 Print Server. User s Manual. Rev. 01 (Jan, 2004) Made In Taiwan
 Made In Taiwan") USB 2.0 Print Server User s Manual Rev. 01 (Jan, 2004) Made In Taiwan TABLE OF CONTENTS ABOUT THIS GUIDE... 4 INTRODUCTION... 5 PACKAGE CONTENTS... 6 SYSTEM REQUIREMENTS... 6 GENERAL FEATURES... 7 PRODUCT
USB 2.0 Print Server User s Manual Rev. 01 (Jan, 2004) Made In Taiwan TABLE OF CONTENTS ABOUT THIS GUIDE... 4 INTRODUCTION... 5 PACKAGE CONTENTS... 6 SYSTEM REQUIREMENTS... 6 GENERAL FEATURES... 7 PRODUCT
H-UC232S USB Serial Converter
 H-UC232S USB Serial Converter FCC Warning This equipment has been tested and found to comply with the regulations for a Class B digital device, pursuant to Part 15 of the FCC Rules. These limits are designed
TABLE OF CONTENTS COPYRIGHT INTRODUCTION...4 PRODUCT OVERVIEW...4 COMPONENTS AND FEATURES...4 HARDWARE INSTALLATION
 TABLE OF CONTENTS COPYRIGHT...3 1. INTRODUCTION...4 PRODUCT OVERVIEW...4 COMPONENTS AND FEATURES...4 HARDWARE INSTALLATION...5 2. PRINT SERVER INSTALLATION...6 PREPARATION...6 CONFIGURATION SOLUTION TABLE...6
Trademarks Copyright FCC Warning
 Trademarks NetWare is a registered trademark of Novell Inc and Windows 95/98/Me and Windows NT/2000/XP are registered trademarks of Microsoft Corp. All other brands and product names are trademarks of
Fast Ethernet Print Server 1 Parallel, 2 USB
 Fast Ethernet Print Server 1 Parallel, 2 USB User s Manual Rev. 01 (Nov, 2005) Made In Taiwan TABLE OF CONTENTS ABOUT THIS GUIDE... 4 INTRODUCTION... 5 PACKAGE CONTENTS... 6 SYSTEM REQUIREMENTS... 6 GENERAL
TOSHIBA TEC Label Printer. B-SV4D Series. LAN Adapter Users Manual
 TOSHIBA TEC Label Printer B-SV4D Series LAN Adapter Users Manual First Edition: February 16, 2004 Trademarks NetWare is a registered trademark of Novell Inc and Windows 95/98/Me and Windows NT/2000/XP
Trademarks Copyright FCC Warning
 Trademarks NetWare is a registered trademark of Novell Inc and Windows 95/98/Me and Windows NT/2000/XP are registered trademarks of Microsoft Corp. All other brands and product names are trademarks of
TABLE OF CONTENTS COPYRIGHT INTRODUCTION...3 PRODUCT OVERVIEW...3 COMPONENTS AND FEATURES...3 HARDWARE INSTALLATION
 TABLE OF CONTENTS COPYRIGHT...2 1. INTRODUCTION...3 PRODUCT OVERVIEW...3 COMPONENTS AND FEATURES...3 HARDWARE INSTALLATION...3 2. MFP SERVER INSTALLATION...5 PREPARATION...5 CONFIGURATION SOLUTION TABLE...5
Longshine Technologie Europe GmbH
 Longshine Technologie Europe GmbH www.longshine.de TABLE OF CONTENTS COPYRIGHT...2 1. INTRODUCTION...3 PRODUCT OVERVIEW...3 COMPONENTS AND FEATURES...3 HARDWARE INSTALLATION...3 2. MFP SERVER INSTALLATION...5
FPS User Manual. Print Server w/ 1 Parallel Port. Ver
 FPS-1031 Print Server w/ 1 Parallel Port User Manual Ver. 1.00-0803 The LevelOne Support Team can not support questions or compatibility issues with the following operating systems: Windows NT/95/98/98se/Me
Longshine Technologie Europe GmbH LCS-MFP101-2 Multifunction Printserver
 Longshine Technologie Europe GmbH LCS-MFP101-2 Multifunction Printserver www.longshine.de TABLE OF CONTENTS COPYRIGHT...2 1. INTRODUCTION...3 PRODUCT OVERVIEW...3 COMPONENTS AND FEATURES...3 HARDWARE INSTALLATION...3
HP JetDirect Print Servers. HP JetAdmin. Setup Guide
 R HP JetDirect Print Servers HP JetAdmin Setup Guide Setup Guide HP JetAdmin Copyright Hewlett-Packard Company 2000 All rights reserved. Reproduction, adaptation, or translation without prior written
PREPARATION OVERVIEW... 63
 TABLE OF CONTENTS COPYRIGHT... 3 1. INTRODUCTION... 4 PRODUCT OVERVIEW... 4 COMPONENTS AND FEATURES... 4 HARDWARE INSTALLATION... 5 NETWORK ENVIRONMENT... 6 WIRED NETWORK WITH PRINT SERVER:... 6 2. PRINT
This device complies with Part 15 of the FCC Rules. Operation is subject to the following two conditions:
 1 FCC Statement This device complies with Part 15 of the FCC Rules. Operation is subject to the following two conditions: (1) This device may not cause harmful interference. (2) This device must accept
PARALLEL PRINTER FAST ETHERNET PRINT SERVER
 PARALLEL PRINTER FAST ETHERNET PRINT SERVER User Manual DN-13001-1 TABLE OF CONTENTS COPYRIGHT... 2 1. INTRODUCTION... 3 PRODUCT OVERVIEW... 3 COMPONENTS AND FEATURES... 3 HARDWARE INSTALLATION... 4 NETWORK
User Manual. Network Interface Card (NC-6)
") User Manual Network Interface Card (NC-6) Contents 1 Welcome 1.1 Trademark Acknowledgements...1-2 1.2 About PageScope Light...1-2 2 Getting Ready 2.1 Selecting the Network Print Method...2-2 For Windows
User Manual Network Interface Card (NC-6) Contents 1 Welcome 1.1 Trademark Acknowledgements...1-2 1.2 About PageScope Light...1-2 2 Getting Ready 2.1 Selecting the Network Print Method...2-2 For Windows
Print Server Administration User s Guide
 Print Server Administration User s Guide ii About This Guide Table of Contents ABOUT THIS GUIDE... 1 What s Not Covered in This User s Guide... 1 Contents of the User s Guide... 2 INTRODUCTION... 3 Background
LevelOne User Manual
 LevelOne User Manual FPS-1031 Parallel Print Server Ver. 1.1 The LevelOne Support Team can not support questions or compatibility issues with the following operating systems: Windows NT/95/98/98se/Me 2
Network Guide. IMPORTANT: Read this manual carefully before using your printer. Save this manual for future reference. ENG
 Network Guide IMPORTANT: Read this manual carefully before using your printer. Save this manual for future reference. ENG Network Guide How This Manual Is Organized Chapter 1 Before You Start Chapter 2
USB PRINTER WIRELESS LAN PRINT SERVER (DN-13014) PARALLEL PRINTER WIRELESS LAN PRINT SERVER (DN-13016) Quick Installation Guide
 PARALLEL PRINTER WIRELESS LAN PRINT SERVER (DN-13016) Quick Installation Guide") USB PRINTER WIRELESS LAN PRINT SERVER (DN-13014) PARALLEL PRINTER WIRELESS LAN PRINT SERVER (DN-13016) Quick Installation Guide 1 1.1 Product Introduction Thank you for purchasing and using our print server.
USB PRINTER WIRELESS LAN PRINT SERVER (DN-13014) PARALLEL PRINTER WIRELESS LAN PRINT SERVER (DN-13016) Quick Installation Guide 1 1.1 Product Introduction Thank you for purchasing and using our print server.
Océ Copier/Printer. Connectivity Manual
 Océ 9600 Copier/Printer Connectivity Manual Océ-Technologies B.V. This manual contains a description of how the Océ 9600 Copier/Printer is connected to the network using various connection types and how
Network Quick Install Cards Document Centre 490/480/470/460 ST
 Network Quick Install Cards Document Centre 490/480/470/460 ST This package contains Quick Install Cards that will help you connect the Document Centre to your network and install E-mail. Please read and
2. PRINT SERVER INSTALLATION...
 TABLE OF CONTENTS COPYRIGHT...2 1. INTRODUCTION...3 PRODUCT OVERVIEW...3 COMPONENTS AND FEATURES...3 HARDWARE INSTALLATION...4 NETWORK ENVIRONMENT...5 2. PRINT SERVER INSTALLATION...6 PREPARATION...6 CONFIGURATION
Print Server. User s Manual. Rev. 01 (April, 2004) Made In Taiwan
 Made In Taiwan") Print Server User s Manual Rev. 01 (April, 2004) Made In Taiwan TABLE OF CONTENTS ABOUT THIS GUIDE... 4 INTRODUCTION... 5 PACKAGE CONTENTS... 6 SYSTEM REQUIREMENTS... 6 GENERAL FEATURES... 7 PRODUCT VIEW...
Print Server User s Manual Rev. 01 (April, 2004) Made In Taiwan TABLE OF CONTENTS ABOUT THIS GUIDE... 4 INTRODUCTION... 5 PACKAGE CONTENTS... 6 SYSTEM REQUIREMENTS... 6 GENERAL FEATURES... 7 PRODUCT VIEW...
Network USB over IP Server With 1-USB2.0 Port. User Manual V1.0
 Network USB over IP Server With 1-USB2.0 Port User Manual V1.0 1 2 TABLE OF CONTENTS COPYRIGHT...4 1. INTRODUCTION...5 PRODUCT OVERVIEW...5 COMPONENTS AND FEATURES...5 HARDWARE INSTALLATION...5 2. THE
TABLE OF CONTENTS ABOUT THIS GUIDE... 4
 TABLE OF CONTENTS ABOUT THIS GUIDE... 4 INTRODUCTION... 5 PACKAGE CONTENTS... 6 SYSTEM REQUIREMENTS... 6 GENERAL FEATURES... 7 PRODUCT VIEW... 8 HARDWARE INSTALLATION... 10 NETWORKING APPLICATION... 10
PS Admin program User s Guide
 PS Admin program User s Guide Rev. 02 (February, 2003) Copyright Statement Copyright 1997 No part of this publication may be reproduced in any form or by any means or used to make any derivative such as
EPSON Type B Ethernet Interface Card
 EPSON Type B Ethernet Interface Card C82362* (10Base2/10BaseT) C82363*/C82364* (10BaseT/100BaseTX) All rights reserved. No part of this publication may be reproduced, stored in a retrieval system, or transmitted
Contents. Introduction... 3
 Contents Introduction... 3 Step 1 - Connecting your Mini Print Server... 4 Diagnostic Push Button... 5 LED Indicators... 5 Step 2 - Configuring your Mini Print Server... 6 Overview... 6 Configuration Methods...
USER'S MANUAL. 10/100Mbps 2Port USB2.0/1Port Parallel Print Server. Mini-300PU
 USER'S MANUAL 10/100Mbps 2Port USB2.0/1Port Parallel Print Server Mini-300PU Contents 1 INTRODUCTION... PRODUCT OVERVIEW... NETWORK MANAGEMENT... NETWORK CONFIGURATION... HARDWARE INSTALLATION... 2 PRINT
Preface. About Axis. Network CD- ROM Servers
 Preface Preface Thank you for purchasing the Axis NPS 550 Network Print Server. Our goal in developing this product is to enable you to connect your printers anywhere in your network, allowing all network
Printed on recycled paper with at least 10% post-consumer content. Setup Guide
 Printed on recycled paper with at least 10% post-consumer content Setup Guide All rights reserved. No part of this publication may be reproduced, stored in a retrieval system, or transmitted in any form
USER S MANUAL Multi-LinQ USB2.0
 USER S MANUAL Multi-LinQ USB2.0 CONTENT 1. Introduction----------------------------------------------------------------------------------2 2. Package Content--------------------------------------------------------------------------2
CE MARK WARNING LIMITED WARRANTY
 CE MARK WARNING This is a Class B product. In a domestic environment, this product may cause radio interference, in which case the user may be required to take adequate measures. LIMITED WARRANTY Hawking
User Manual. Unpacking and Setup
 User Manual USB Print Server LPV2-USB-TX1 Unpacking and Setup This section provides unpacking and setup information for the USB Print Server. Unpacking Open the shipping carton of the Switch and carefully
DocuPrint C55/C55mp Quick Network Install Guide
 DocuPrint C55/C55mp Quick Network Install Guide Windows for Workgroups / Windows 95 Peer-to-Peer Network Windows NT 3.5X Network Windows NT 4.X Network Macintosh EtherTalk/TokenTalk Network Novell NetWare
7. Server Configuration Introduction Search for All Available MFP Server Status of MFP Server
 Copyright by Edimax Technology Co, LTD. all rights reserved. No part of this publication may be reproduced, transmitted, transcribed, stored in a retrieval system, or translated into any language or computer
Multi-Port Fast Ethernet Print Server FPS-3300
 Multi-Port Fast Ethernet Print Server FPS-3300 User s Manual 1 Copyright (C) 2006 PLANET Technology Corp. All rights reserved. The products and programs described in this User s Manual are licensed products
D-Link DP-311P. Manual. Wireless Print Server. Building Networks for People
 D-Link DP-311P Wireless Print Server Manual Building Networks for People Contents Package Contents...3 Introduction...4 Getting to know the DP-311P...5 Getting Started...6 Using the Web Configuration...7
FPS-3001TXU FPS-3002USB FPS-2112
 Level One Print Servers FPS-3001TXU FPS-3002USB FPS-2112 User Guide Copyright 2004. ALL RIGHTS RESERVED. Document Version: 1.2 (April, 2004) P/N: 9560MF00A0 All trademark and trade names are the properties
Network Quick Install Cards Overview
 Network Quick Install Cards Overview Page 1 1. Configure the Document Centre for Token Ring or Dynamic TCP/IP addressing (If applicable) For 100MBps Ethernet or Token Ring Networks Dynamic TCP/IP addressing
Network Setup 2.0
 Network Setup 2.0 4343-7709-01 Foreword Welcome Thank you for using Network Setup. Network Setup is utility software which allows simple network setup of devices such as printers. It allows setup of devices
Initial Novell NetWare Setup for NetWare 4.1 Setting up the printer as a print server
 Initial Novell NetWare Setup for NetWare 4.1 Setting up the printer as a print server NetWare 4.1 introduces the concept of a hierarchical tree database, called NetWare Directory Services (NDS). NDS is
LevelOne User Manual
 LevelOne User Manual WPS-1133 3-Port USB/Parallel Wireless Printer Server Ver. 1.1 The LevelOne Support Team can not support questions or compatibility issues with the following operating systems: Windows
AXIS 1440 Network Print Server for EPSON Printers. Technical Specifications. Supported Protocols. Supported Printers. Mechanical.
 printer connector Supported Protocols NetWare: IPX, SAP, RIP, SPX, NCP (extended with NDS) and LIP. Windows/OS/2 : NetBIOS/NetBEUI, TCP/IP, WINS/ NBT. Ethernet 10BaseT connector test button network indicator
LabelWriter. Print Server. User Guide
 LabelWriter Print Server User Guide Copyright 2011 Sanford, L.P. All rights reserved. 04/11 No part of this document or the software may be reproduced or transmitted in any form or by any means or translated
TABLE OF CONTENTS COPYRIGHT INTRODUCTION...4 PRODUCT OVERVIEW...4 WIRELESS SPECIFICATIONS...4 COMPONENTS AND FEATURES...
 TABLE OF CONTENTS COPYRIGHT...3 1.INTRODUCTION...4 PRODUCT OVERVIEW...4 WIRELESS SPECIFICATIONS...4 COMPONENTS AND FEATURES...5 HARDWARE INSTALLATION...6 WIRELESS NETWORK ENVIRONMENT...7 2. PRINT SERVER
Novell NetWare 3.x/4.x/5.x Network
 Phaser 7300 Color Printer Novell NetWare 3.x/4.x/5.x Network This section provides installation and troubleshooting steps for Novell NetWare (3.x/4.x/5.x): Quick setup see page 35. Advanced setup see page
2500C/C+/CM. Professional Series Color Printer NETWORK GUIDE
 HP 2500C/C+/CM Professional Series Color Printer NETWORK GUIDE Acknowledgments HP ColorSmart II, HP PhotoREt II and HP ZoomSmart Scaling Technology are trademarks of Hewlett-Packard Company. Microsoft
ABOUT THIS GUIDE... 4
 TABLE OF CONTENTS ABOUT THIS GUIDE... 4 INTRODUCTION... 6 PACKAGE CONTENTS... 7 SYSTEM REQUIREMENTS... 7 GENERAL FEATURES... 8 PRODUCT VIEW... 9 HARDWARE INSTALLATION... 11 NETWORKING APPLICATION... 11
D-Link DPR-1020 USB 2.0 MFP Server. Manual. Rev. 01 (November, 2008)
") D-Link DPR-1020 USB 2.0 MFP Server Manual Rev. 01 (November, 2008) Table of Contents Table of Contents Package Contents...1 Contents of Package:...1 System Requirements:...2 Introduction...3 External Features...6
D-Link DPR-1020 USB 2.0 MFP Server Manual Rev. 01 (November, 2008) Table of Contents Table of Contents Package Contents...1 Contents of Package:...1 System Requirements:...2 Introduction...3 External Features...6
Downloaded from manuals search engine
 TABLE OF CONTENTS ABOUT THIS GUIDE... 5 INTRODUCTION... 6 PACKAGE CONTENTS... 7 SYSTEM REQUIREMENTS... 7 GENERAL FEATURES... 8 PRODUCT VIEW... 9 HARDWARE INSTALLATION... 11 NETWORKING APPLICATION... 11
SUPERSCRIPT 1800 NETWORK USER S GUIDE. July, A
 SUPERSCRIPT 1800 NETWORK USER S GUIDE July, 1999 808-878291-011A Proprietary Notice and Liability Disclaimer The information disclosed in this document, including all designs and related materials, is
TL-PS110U Single USB2.0 Port Fast Ethernet Print Server
 Single USB2.0 Port Fast Ethernet Print Server Rev: 3.0.0 1910012229 COPYRIGHT & TRADEMARKS Specifications are subject to change without notice. is a registered trademark of TP-LINK TECHNOLOGIES CO., LTD.
LPR for Windows 95/98/Me/2000 TCP/IP Printing User s Guide
 LPR for Windows 95/98/Me/2000 TCP/IP Printing User s Guide Rev. 02 (August, 2001) Copyright Statement Trademarks Copyright 1997 No part of this publication may be reproduced in any form or by any means
TABLE OF CONTENTS ABOUT THIS GUIDE... 4
 TABLE OF CONTENTS ABOUT THIS GUIDE... 4 INTRODUCTION... 5 PACKAGE CONTENTS... 5 SYSTEM REQUIREMENTS... 6 GENERAL FEATURES... 7 PRODUCT VIEW... 8 HARDWARE INSTALLATION... 10 NETWORKING APPLICATION... 10
COMPUPRINT SP40. Ethernet 10/100Base-T Connection Installation Guide
 COMPUPRINT SP40 Ethernet 10/100Base-T Connection Visit th e web site http://www.compuprint.com for th e lates t information,drivers and firmware. 2 A78410014-004 Table of Contents Important - READ ME First...
Quick Installation Guide
 Wireless / Fast Ethernet Print Server Series Quick Installation Guide Version 1.1 January. 2006 Insert the CD shipped along with the print server into your CD- ROM drive. The Autorun.exe program should
Axis NPS 630/632 Quick Installation Guide
 English Axis NPS 630/632 Quick Installation Guide Token Ring Print Server for NetWare Windows OS/2 Unix Quick Installation Guide This guide covers the installation and basic configuration procedures for
USER S MANUAL. QS2 USB2.0 QS2 USB2.0/eSATA Combo and QS2 USB2.0/eSATA/Firewire Combo Models
 USER S MANUAL QS2 USB2.0 QS2 USB2.0/eSATA Combo and QS2 USB2.0/eSATA/Firewire Combo Models FCC COMPLIANCE STATEMENTS This equipment has been tested and found to comply with the limits for a Class B digital
User Manual 1-port USB 2.0 Print Server
 User Manual 1-port USB 2.0 Print Server GPSU21W6 PART NO. M1210-b 1 www.iogear.com 2 Welcome Thank you for purchasing this 1-port USB 2.0 Print Server that allows any networked computer to share a USB
Axis NPS 550 Quick Installation Guide
 English Axis NPS 550 Quick Installation Guide Ethernet Print Server for NetWare Windows OS/2 Unix Macintosh Quick Installation Guide This guide covers the installation and basic configuration procedures
Wireless-G. User Guide. PrintServer for USB 2.0. GHz g WPS54GU2. A Division of Cisco Systems, Inc. WIRELESS. Model No.
 A Division of Cisco Systems, Inc. GHz 2.4 802.11g WIRELESS Wireless-G PrintServer for USB 2.0 User Guide Model No. WPS54GU2 Copyright and Trademarks Specifications are subject to change without notice.
1. INTRODUCTION 1.1 Product Introduction 1.2 Product Modes 1.3 Product Package 1.4 Network Printing Architecture 1.5 Network Printing Environment 1.6
 Links for mode 504058 (1-Port UTP/BNC Parae Pocket Print Server): Downoads & inks http://www.inteinet-network.com/htm/d-pserver.htm This manua http://inteinet-network.com/mk2/manuas/502993_manua.zip Instructions
PRINT SERVER INSTALLATION...
 TABLE OF CONTENTS COPYRIGHT... 3 1. INTRODUCTION... 4 PRODUCT OVERVIEW... 4 WIRELESS SPECIFICATIONS... 4 COMPONENTS AND FEATURES... 5 HARDWARE INSTALLATION... 5 NETWORK ENVIRONMENT... 7 WIRED NETWORK WITH
USB 2.0 WIRELESS LAN PRINT SERVER
 USB 2.0 WIRELESS LAN PRINT SERVER User Manual DN-13014-3 1 TABLE OF CONTENTS COPYRIGHT... 4 1. INTRODUCTION... 5 PRODUCT OVERVIEW... 5 WIRELESS SPECIFICATIONS... 5 COMPONENTS AND FEATURES... 6 HARDWARE
Enabling and Using EtherTalk for Mac OS 9.x. If you use EtherTalk, Macintosh computers do not require IP addresses.
 Macintosh This topic includes: "Requirements" on page 3-29 "Quick CD-ROM Install Steps" on page 3-29 "Enabling and Using EtherTalk for Mac OS 9.x" on page 3-29 "Enabling and Using TCP/IP for Mac OS 9.x"
Axis NPS 530/532 Quick Installation Guide
 English Axis NPS 530/532 Quick Installation Guide Ethernet Print Server for NetWare Windows OS/2 Unix Macintosh Quick Installation Guide This guide covers the installation and basic configuration procedures
Two kinds of size notation are employed in this manual. With this machine refer to the metric version.
 Network Guide 1 2 3 4 5 6 7 Functions Available over a Network Connecting the Network Cable to the Network Setting Up the Machine on a Network Windows Configuration Using the Printer Function Configuring
Wired / Wireless USB2.0 MFP Print Server FPS-1010M / FPS-1010MG. User s Manual. Version: 2.0 (January, 2008)
") Wired / Wireless USB2.0 MFP Print Server FPS-1010M / FPS-1010MG User s Manual Version: 2.0 (January, 2008) Copyright Copyright 2008 by PLANET Technology Corp. All rights reserved. No part of this publication
Wired / Wireless USB2.0 MFP Print Server FPS-1010M / FPS-1010MG User s Manual Version: 2.0 (January, 2008) Copyright Copyright 2008 by PLANET Technology Corp. All rights reserved. No part of this publication
A Division of Cisco Systems, Inc. PrintServer for USB. with 4-Port Switch. User Guide WIRED PSUS4. Model No.
 A Division of Cisco Systems, Inc. WIRED PrintServer for USB with 4-Port Switch User Guide Model No. PSUS4 Copyright and Trademarks Specifications are subject to change without notice. Linksys is a registered
TABLE OF CONTENTS ABOUT THIS GUIDE... 4
 TABLE OF CONTENTS ABOUT THIS GUIDE... 4 INTRODUCTION... 5 PACKAGE CONTENTS... 6 SYSTEM REQUIREMENTS... 6 GENERAL FEATURES... 7 PRODUCT VIEW... 8 HARDWARE INSTALLATION... 10 NETWORKING APPLICATION... 10
USER S MANUAL. For 2.5 and 3.5 Models
 USER S MANUAL For 2.5 and 3.5 Models FCC COMPLIANCE STATEMENTS This equipment has been tested and found to comply with the limits for a Class B digital device, pursuant to Part 15 of the FCC Rules. These
Fiery Network Controller for DocuColor 5065 SERVER & CONTROLLER SOLUTIONS. Printing from Windows
 Fiery Network Controller for DocuColor 5065 SERVER & CONTROLLER SOLUTIONS Printing from Windows 2005 Electronics for Imaging, Inc. The information in this publication is covered under Legal Notices for
Addonics T E C H N O L O G I E S
 Addonics T E C H N O L O G I E S Zebra Drive Enclosure For Following Models: ZESACS ZUSCSU ZUSCSF User Guide FCC Warning Statement This equipment has been tested and found to comply with the limits for
User s Manual. Net-LinQ : USB Network Bridge Cable
 User s Manual Net-LinQ : USB Network Bridge Cable 1. Introduction Congratulations on your purchase of the Net-LinQ: an USB-USB Network Bridge cable. This Net-LinQ USB Network Bridge cable provides a quick
Laser Beam Printer. Network Guide. IMPORTANT: Read this manual carefully before using your printer. Save this manual for future reference.
 Laser Beam Printer Network Guide IMPORTANT: Read this manual carefully before using your printer. Save this manual for future reference. ENG Network Guide How This Manual Is Organized Chapter 1 Before
Table of Contents. Page i
 Table of Contents Chapter 1 Introduction 1 Features... 1 Safety Instructions... 2 Packaging Contents... 2 Physical Details... 2 LED Indicators... 5 Reset Button... 6 Chapter 2 LAN Installation 7 Procedure...
SURE TO HAVE YOUR PROOF OF PURCHASE. RETURN REQUESTS CAN NOT BE PROCESSED WITHOUT PROOF OF PURCHASE.
 LIMITED WARRANTY Hawking Technology guarantees that every HSB2 WiFi Signal Booster is free from physical defects in material and workmanship under normal use for two (2) years from the date of purchase.
Note For more information, go to to view Document # 2562.
 Macintosh This topic includes: "Requirements" on page 3-32 "Enabling and Using EtherTalk" on page 3-32 "Enabling and Using TCP/IP" on page 3-33 "Quick Install Steps for Mac OS 9.x" on page 3-33 "Quick