Make viewing and managing your Cuddeback images easy with Trophy Room Cuddeback s free PC program
|
|
|
- Esmond Cox
- 5 years ago
- Views:
Transcription
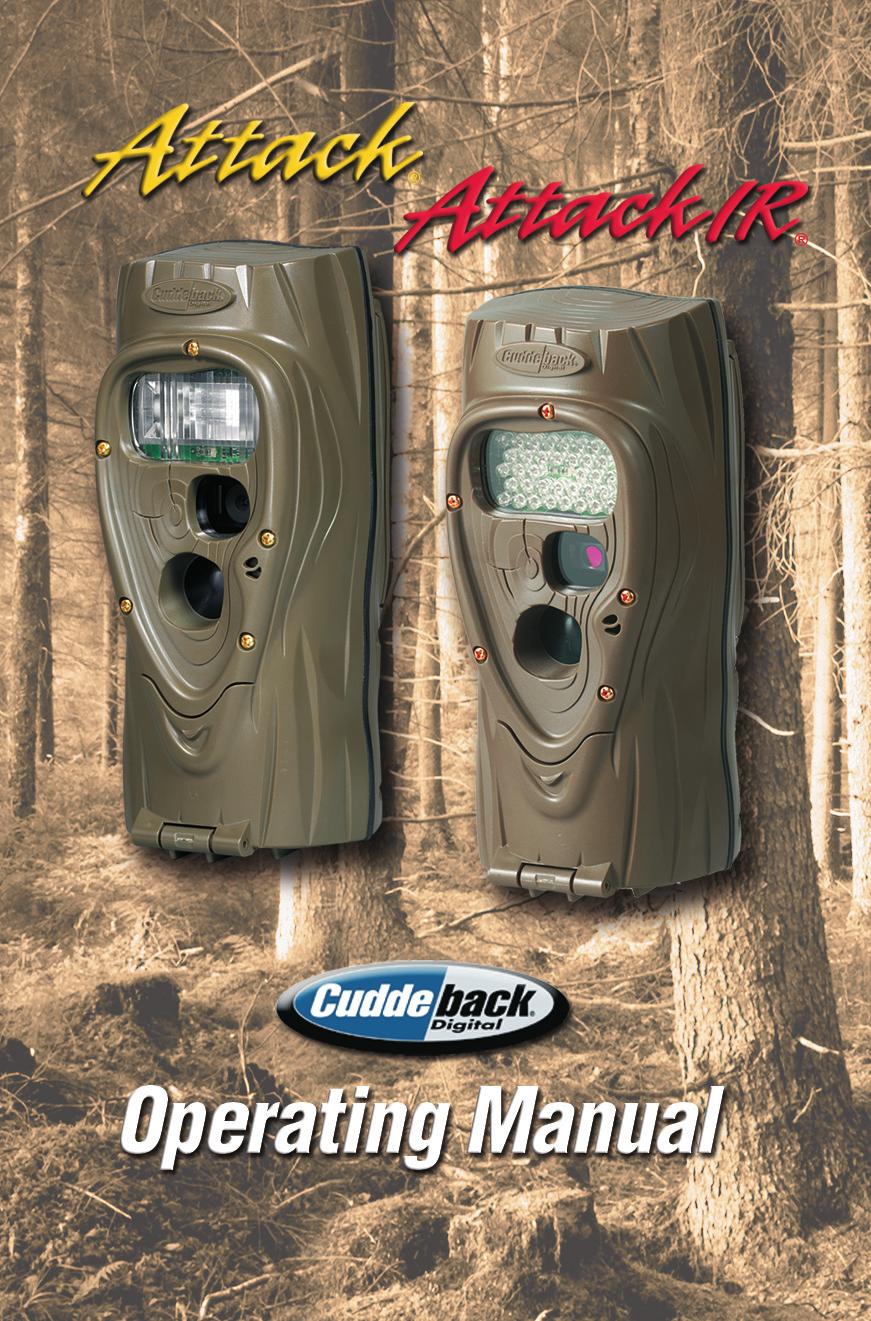
1

2 Make viewing and managing your Cuddeback images easy with Trophy Room Cuddeback s free PC program
 NEW includes camera troubleshooting and support tools 2) NEW - hunting and scouting tips; articles from our pro staff 3) Plus: 1-click image copy from SD card to your PC.")
3 Trophy Room manages your images, and now your Cuddeback camera, too! 1) NEW includes camera troubleshooting and support tools 2) NEW - hunting and scouting tips; articles from our pro staff 3) Plus: 1-click image copy from SD card to your PC. Fast Guard Duty image viewing. Image organization, enhancement, and classification. Complete moon & sun data for each image. Trophy Room data screen example Free download at See page 20 for more details
; accepts a padlock")
4 CuddeSafe Protects your Cuddeback Attack & Attack IR from bears, thieves and the elements! Fits Cuddeback Attack series scouting cameras Heavy-duty, bear-proof metal design Easy to install (lag-bolts to tree); accepts a padlock Makes for easier card checking/battery replacement
5 STOP Need Help? Don t contact your dealer. Use one of these support options: Download Trophy Room and use its support tools Visit for support, help and troubleshooting options us at support@cuddeback.com Call us at (920) The store you purchased this product from does not carry parts nor are they able to service your camera. Call us at the phone number above and our customer service staff will be happy to help you.
6 FREE Extended Warranty with online registration! Extend the warranty on your Attack/Attack IR to 18 months by registering your purchase at Click Support then Product Registration. You must register your Attack within 10 days of purchase to be eligible.


7 Care and treatment A. Don t abuse your camera. Treat it like the sophisticated piece of electronics that it is. I. Treat it gently do not abuse or drop II. Keep SD card dry and never insert wet SD cards into the camera III. Avoid letting water enter the camera IV. Remove batteries at the end of the season 1
. 2) Four D cell batteries (we recommend Rayovac or Duracell brand batteries). 3) When Attack is working it displays an electronic worm on the LCD.")
8 Attack / Attack IR Operating Instructions NOTE: Unless otherwise noted, all references in this manual to Attack also apply to the Attack IR. What You Need 1) One or more Secure Digital (SD) cards. (See Appendix A for recommendations). 2) Four D cell batteries (we recommend Rayovac or Duracell brand batteries). 3) When Attack is working it displays an electronic worm on the LCD. This worm scrolls around the LCD to indicate that you must not remove the SD card, must not turn the rotary knob, or must not press any button. Please be patient and wait for the worm to go away before removing the SD card. worm 2
 Flash (Attack) Back Test LED Camera Lens User Interface Door Motion- Heat Sensor Battery Door Back USB Connector SD Card Socket Back Mount Bracket LCD Screen A/B")
9 Step 1 Familiarize yourself with Attack Take a moment to familiarize yourself with Attack s parts. Front Infrared LEDs (Attack IR) Flash (Attack) Back Test LED Camera Lens User Interface Door Motion- Heat Sensor Battery Door Back USB Connector SD Card Socket Back Mount Bracket LCD Screen A/B Buttons Manufacturing Test Point User Interface LED Rotary Knob Video Switch Strap & Slots NOTE: After the bracket has been mounted to a tree, slide Attack s two thumb screws down into the bracket. 3

 Wait until the LCD display goes blank and the green and red LEDs are off. 5) Install your SD card.")
10 Step 2 Installing Batteries and SD Card 1) Turn the rotary knob to the OFF position. 2) Loosen the battery thumb screw and open the battery compartment door. Install four brand new alkaline D cell batteries. Make sure to observe correct polarity. Close the door and tighten the thumb screw completely. 3) A series of numbers displayed. These are Attack s hardware and software version numbers. 4) Wait until the LCD display goes blank and the green and red LEDs are off. 5) Install your SD card. Be sure to observe the correct polarity with clipped corner on the card to the right. Battery Install SD Card Install Bottom View 4
11 Step 3 Setting up the Attack 1) Turn the rotary knob to Time position, press A and B to set. Time is AM/PM format. 2) Turn the rotary knob to Date position, press A and B to set. 3) Turn the rotary knob to Year position, press A and B to set. 4) Later you will read Step 8 More Features for information on the USB and MENU positions. Step 4 Attaching Attack to a Tree 1) We recommend you first try your Attack at home. 2) For optimum detection of deer-sized animals we recommend mounting Attack about 30 to 36 inches off the ground (this is about waist high to slightly higher). 3) For best image quality, install Attack about 10 to 15 feet from where animals are expected. Attack will detect animals at distances from directly in front of the camera to about 50 feet. Note that detection distance varies greatly with air temperature, animal size, and the speed the animal is moving. 5
 Once the tree bracket is attached to the tree, make sure both thumb screws on the back of Attack are tightened completely. Then slide Attack onto the bracket.")
12 4) Attack features our Genius Mounting System. This system allows you to attach the bracket to a tree and then slide Attack on and off the bracket as needed. 5) Once the tree bracket is attached to the tree, make sure both thumb screws on the back of Attack are tightened completely. Then slide Attack onto the bracket. 6) It is best to remove any vegetation and obstructions from Attack s field-of-view that may interfere with Attack s sensor or camera. 7) Aim/align Attack to make sure it is pointed where you expect the animals to be. Aim Attack level with the ground to maximize detection range and performance. You can use Attack s test feature (explained next) to help you determine the detection area. 8) Cuddeback has optional mounting methods available, such as tilt-brackets, bear-resistant boxes, and mounting posts. See your retailer or for details. 6
13 Step 5 Checking Attack s Detection Zone 1) Turn the rotary knob to the Test position. Close the cover and tighten the thumb screw. Put Attack back onto the tree bracket. (Note: there is a more convenient method to enable test mode, see Step 7 - Checking your Attack for details). 2) Walk back and forth in front of Attack. The red LED will illuminate when Attack s sensor has detected you. Using this method you can accurately position your Attack as desired. Step 6 Arming the Attack Turn the rotary knob to one of the Armed delay settings. These settings represent the amount of time Attack will wait before it will take another image. This dwell time prevents multiple images of the same animal. Here is our recommendation for the various Armed settings: a. Under 30 seconds game trails b. 1 and 3 minutes scrapes c 5 to 30 minutes food plots or feeders When first armed, Attack will display the indicated delay for 5 seconds and then begin counting down from 45 to 0. When the counter reaches 0, Attack will arm and be ready to record images. When Attack detects a subject and takes a picture a worm will be displayed and the LED will flash red and green do not remove the SD card until the LED is OFF. 7
14 After the image is saved to the SD card the LCD will display the delay setting and begin counting down. Once the counter reaches 0, Attack is ready to record the next image. Step 7 Checking Attack When you check Attack it is not necessary to turn the rotary knob. Instead, press the A or B button to temporarily suspend Armed mode and view pertinent information, such as the number of images on the SD card and battery level. Each time you press the A or B button new information will be displayed. Here is the sequence of information that is displayed each time the A or B button is pressed. 1) Images on SD card. Note the ARMED, DWELL, and IMAGES icons are displayed. 2) Free Space on SD card in MB. Note that ARMED and DWELL icons are displayed. 3) Battery Level as a percentage. For example, bt:99 means there is 99% battery power left. 4) Time 5) Date 6) Year 7) Test indicates Attack is in Test mode and will illuminate the red Test LED when activity is sensed. 8) Pressing A or B again will Arm the camera and the current delay setting will be displayed. 8
15 You can leave Attack in any of the states 1 thru 7 and Attack will automatically re-arm in about 5 minutes. This allows you to close the cover and leave the area without triggering an image. Step 8 More Features Video Mode Attack can be set to record video. Attack records video day only. Attack IR records video day and night. Video recording is enabled by moving the Video Switch to ON. To disable video recording move the switch to OFF. Attack will take an image before it begins recording the video, thus you do not give up images to get video. Note video length can be set to 10, 20, or 30 seconds. See page 12 for details. Menu Position Turn the rotary knob to the MENU position to perform various activities. Press A to advance to the next menu item, press B to activate the displayed menu action. 1) Battery Level the battery level is displayed in the format bt:99, which is a percentage of remaining battery power. Press the A button to advance to the next menu item. 2) CLr (Clear SD card) This menu allows you to clear all images and content on the SD card. Press and hold B to clear the card. The worm will appear and the LEDs will flash RED. When finished, the LCD will display the amount of space on the SD card in MBs. Press A to advance to the next menu item. 3) Pic Lets you take a test picture. Press B to take a picture. Press A to advance to the next menu item. 9
16 4) Attack: FLSH This menu allows you to test Attack s flash. Press B to charge the flash circuit. The LCD will begin counting down from 30. After the 30 second count down the LED will flash green to indicate that the flash is charged. Press B again to fire the flash (CAUTION light output from the flash is very bright!). Attack IR: LEd (IR LEDs) This menu allows you to test Attack IR s IR LEDs and measure the battery strength. Press B to test Attack IR s infrared LEDs. The LEDs will be driven from 33% maximum power to 99% maximum power. The test will stop when the batteries do not have sufficient power to drive the LEDs or at 99%. If the batteries are depleted, FAIL will be displayed. If the reading is below 99% you may want to change the batteries to maximize the illumination range. 5) PO:O (Parameter Programming) This setting allows you to change the setting for the camera. See the next section for details. 6) StAt (Statistical Data) Press B to display Activation Date, Armed Days, and Image Counter. Activation Date is the first day you used the camera. Armed Days is now many days that camera has been used. Image Counter is the total number of images taken with the camera. 7) LOAd Lets you to install new firmware. We may update the Attack firmware to improve its performance. If a firmware update is required you will need to download a firmware file from our website. Instructions will be provided with the firmware. 10
17 Please see for details. We recommend you check our website for updates at the beginning of your scouting season. 8) Firmware Version 4 numbers will be displayed, such as This is the firmware version. Turn the rotary knob to a new setting or press A to return to the battery level display. Setting Attack Parameters Some Attack features can be changed by the user. Attack can also be programmed to become a time lapse camera. (Note - In the text that follows the underlined items are default settings. For most users these settings are not required and you can leave PO set to 0). Step 0: Enable or disable parameters OR select Time Lapse Operation First you must enable parameters. This is done by: 1. Rotate knob to MENU 2. Press A until P0:0 is displayed. P0 indicates Parameter Zero, which is the parameter on/off control. 3. When P0:0 is displayed, press the B key to select from these 3 options: P0:0 = parameters are OFF and set to defaults (recommended for most users) P0:1 = parameters are ON and can be changed as desired P0:tL = time lapse mode. Attack is put into time lapse mode as explained later. Step 1: Press the A key to display P1 (strobe flash power) P1 controls the Attack flash power. (This setting is ignored on the Attack IR and will be displayed as P1:--) 11
18 The available settings are selected by pressing the B key: P1:1 = 10 foot flash range (best setting for indoor use) P1:2 = 20 foot flash range P1:3 = 30 foot flash range (best setting for general use) P1:4 = 40+ foot flash range (best setting for fields) Step 2: Press the A key to display P2 (video length) P2 controls the Attack video length. The available settings are selected by pressing the B key: P2:1 = 10 second video P2:2 = 20 second video P2:3 = 30 second video Step 3: Press the A key to display P3 (video operating time) P3 controls the Attack IR video operating time (This setting is ignored on the Attack and will be displayed as P3:--) The available settings are selected by pressing the B key: P3:1 = record videos only at night P3:2 = record videos only during the day P3:3 = record videos during day & night Step 4: Press the A key to display P4 (operating time) P4 controls the time Attack will take pictures. The available settings are selected by pressing the B key: P4:1 = operate only at night P4:2 = operate only during the day P4:3 = operate during day & night Step 5: Press the A key to display P5 (quality) P5 controls the Attack image and video quality. The available settings are selected by pressing the B key: P5:1 = standard resolution 5MP (small file) images/video P5:2 = high quality 5MP (large file) images/video 12
19 Note image quality is improved by optimizing the JPG and VIDEO compression algorithm. Images will be clearer when zooming, but file size is significantly increased. Most users will not benefit from this feature, which is mainly intended for research professionals that require the best image quality possible. Time Lapse Mode (PO:=tL) Time Lapse Mode is enabled when Parameter 0 is set to tl. In Time Lapse Mode pictures are taken at a preset interval. For example, if you set the time lapse interval to 3 hours, the camera will take a picture every 3 hours. By default the time lapse images are taken day and night. You can use P4 to control day/night operation. Once P0 is set to tl you use the Rotary Knob to select the desired time lapse interval. Time lapse is started by rotating the knob to one of the ARMed settings. When armed, the LCD will display LPSE and the interval to indicate that the camera is operating in Time Lapse Mode. The available settings are selected with the rotary knob: 05 sec 1 minute interval 15 sec 15 minute interval 30 sec 30 minute interval 1 min 1 hour interval 3 min 3 hour interval 5 min 6 hour interval 10 min 12 hour interval 30 min 24 hour interval 13
20 When Time Lapse Mode is enabled the Attack will NOT function as a motion sensor camera. User can adjust P1 (strobe power), P4 (operating time), and P5 (image quality). Videos are NOT recorded. To disable Time Lapse Mode set P0 to P0:0 or P0:1. USB Position Attack can copy images from the SD card to a USB flash drive. This allows you to quickly retrieve your images and take them home with you. NOTE: If the LCD display EC:30 the USB device is either not plugged in correctly or is not compatible with Attack. We recommend using the USB drive available at Follow these steps to copy images from SD card to USB device: 1) Turn the rotary knob to the USB position. USB will be displayed on the LCD. 2) Install a compatible USB flash drive (see appendix A). 3) Press A to display COPY. 4) Press B to begin the transfer of images from the SD card to the USB device. The percentage of files copied will be displayed during the copy process. Please wait while the images are copied. 5) Once the copy process is complete all images on the SD card will automatically be erased, and done will be displayed. 6) If you need to interrupt and cancel this operation, press and HOLD B for 3 seconds. The operation will be cancelled and the images on the SD card and USB device will remain. 14
21 Follow these steps to erase all content on the USB device: 1) Turn the rotary knob to the USB position. USB will be displayed on the LCD. 2) Install a compatible USB flash drive (see appendix A). 3) Press A twice to display CLr. 4) Press and hold B to clear the USB device. CAUTION - Once the device is cleared it cannot be restored. Guard Duty Attack features an innovative time lapse photography mode we call Guard Duty. When Guard Duty is enabled Attack will take a picture every 12 seconds and save the images onto the SD card. Guard Duty allows you to continuously monitor a field or hunting location and then view everything that happened. In practice, Guard Duty can compress an entire day of activity into a ten minute viewing experience. To enable Guard Duty turn the rotary knob to the Guard Duty position. Guard Duty will automatically arm after a 45 second countdown. Guard Duty will only take images during daylight; it will not record images at night. At night, Guard Duty mode is disabled, but Attack will still take pictures of animals detected with its motion heat sensor. Guard Duty images are 1.3 MP and are saved in the folder DCIM\200CUDDY. Images from each day will be saved in a separate folder. 15
22 Guard Duty will record 3600 images every 10 hours. In a week Guard Duty can record over 10,000 images. This requires a large SD card. We recommend an 8GB card or larger. To check Attack when in Guard Duty mode press A. The check process is similar to checking Attack when in Armed mode. Cuddeback s Trophy Room software program can view a day s worth of Guard Duty images in a few minutes. Visit cuddeback.com to download a free version of Trophy Room. Guard Duty images can typically be viewed in less than 10 minutes on your PC. Due to the high number of images saved we do not recommend using a field viewer to view Guard Duty images. You will need to use a PC to view Guard Duty images. Battery life while in Guard Duty mode will be less than in other operating modes. No Card Mode - Using Attack Without an SD Card When Attack is used without an SD card, images are stored in Attack s internal image memory. Attack features an internal memory of about 120 MB. This will allow storage of up to 120 images. Images can be transferred from internal memory to an SD card or USB flash device. 16
23 Transfer to SD card: If you use Attack without an SD card, follow these steps to transfer the images from the internal memory to an SD card. 1) If Attack is not armed, turn the rotary knob to any of the Armed positions. 2) If Attack is armed, press A to display the number of images in internal memory. 3) Insert your SD card into Attack. 4) Press A. The amount of free space on the SD card will be displayed. 5) Press A to initiate the transfer. Images saved in internal memory will be copied to the SD card. As they are being copied the worm will appear and the number of images remaining to be transferred will be displayed on the LCD. 6) When the count reaches 0 the transfer is complete and all images on the internal memory are erased. 7) To stop the transfer before it has finished, press and hold B. Transfer to USB flash device: If you use Attack without an SD card, follow these steps to transfer the images from the internal memory to a USB flash device. 1) If Attack is armed, press A to display the number of images in internal memory. 2) Insert your USB device into the USB connector. 3) Turn the rotary knob to the USB position. USB will be displayed. 17
24 4) Press B to initiate the transfer. Images saved in internal memory will be copied to the USB device. As they are being copied the worm will appear and the number of images remaining will be displayed on the LCD. 5) When the count reaches 0 the transfer is complete and all images on the internal memory are erased. 6) To stop the transfer before it has finished, press and hold B. Battery Life and Battery Low Warning Battery life in Attack will vary depending upon battery quality, ambient temperature, the number of images taken, how long Attack has been operating, and other factors. Battery life you get may be more or less than these numbers depending on the circumstances. Attack 10,000 images or 12 months, depending on usage. Attack IR 50,000 images or 12 months, depending on usage. Note - using video mode greatly reduces battery life. Guard Duty Mode 80,000 images or about 1 month of use. Replace Attack batteries when: 1) The BLOW icon appears on the LCD. 2) When the displayed battery level is bt:10 or bt:00. 3) When Attack does not appear to operate correctly. In some cases the batteries may be too low to turn on the LCD or BLOW icon. 18
25 Viewing Images You will need an external viewing device or computer to view images. First, remove the SD card from the camera. Make sure to only remove the SD card when the worm is not visible. Here is a list of some viewing options. 1) You can view the images with an optional viewer or a point-and-shoot camera that is able to read Attack images (Note: not all SD based cameras can view Attack images, please test any camera before purchasing). 2) Replace the SD card with a fresh SD card and take the original SD card with you to view on your PC or other device. 3) Cuddeback s CuddeView viewer will allow you to view the images, copy the images to a second SD card and erase the images from the SD card. You can then put the original SD card back into Attack. CuddeView allows you to transfer images from multiple cameras to a single SD card. Go to for more information on CuddeView. (Note: CuddeView may not be able to copy all the images taken in Guard Duty mode. If you are using Guard Duty we recommend you view the images on a computer.) Use Windows PC to Manage Cuddeback Images with Trophy Room Trophy Room software makes it easy to manage your Cuddeback images. 19
26 Trophy Room 1) Automatically copies images from your SD card to your PC and organizes them by year and date. 2) Allows you to rename each folder making it easy to find your images. 3) Displays sun and moon data for each image, including moon phase, moon rise and set, sunrise and set, and moon and sun position in the sky at the time the image was taken. Trophy Room data screen example 20 4) Categorizes images as buck, doe, fawn, bear, etc. There are 28 categories to select from. For whitetail deer you can enter point count and give deer a name to allow easy monitoring of trophy animals. 5) Automatically calculates the buck/doe/fawn ratios based upon your images. 6) Includes CuddeCharts with which you can analyze your images to determine peak movement patterns based upon sun and moon phase and position.
27 7) Includes Crystal Ball with which you can use the data you ve collected and analyzed with CuddeCharts to predict future activity. Think of this as the traditional moon tables, only tailored to you. 8) Allows you to rapidly view Cuddeback images taken in Guard Duty mode. 9) Is FREE and works with all Cuddeback cameras. You can download it at Appendix A SD Card Requirements SD cards are sized in GB (Gigabytes); the bigger the number the more images that can be saved on the card. Attack will work with card sizes from 1 GB to 32 GB. See table on page 22. We have extensively tested Attack with most major brands of SD cards, however, low quality cards are available that may not operate in Attack. We recommend you use SanDisk brand cards which are readily available at stores that sell cameras. You can also order cards directly from Cuddeback. See for information. USB Devices Attack will only function with small form factor USB Flash Devices. Compatible USB Flash Drives are available direct from Cuddeback. For more information go to 21
28 This table shows approximately how many images and videos fit on a SD card: Card & Video Mode Attack (flash) Attack IR Attack & Attack IR Card Size Video Images Videos* Images Videos** Guard Duty Mode On 2 GB Off days 2 GB On n/a 4 GB Off days 4 GB On n/a 8 GB Off days 8 GB On n/a 16 GB Off days 16 GB On n/a *Assumes that 75% of images are at night when the videos are not recorded. **With the Attack IR every image will also record a video. For this chart we assume each JPG is 1MB and each video is 4MB. Your actual JPG and video file sizes will be different. Assumes a 12 hour day with 3600 images taken per day. Video mode is always disabled in Guard Duty mode. For this chart we assume each Guard Duty image is 100KB. 22

29 Put your Cuddeback virtually anywhere! No tree needed! Set-up is simple as I, 2, Insert Post Mount into firm ground. Insert 2 thumb screws into bracket Adjust camera angle and tighten


30 Aim your camera in virtually any direction up, down or all around! Pan & tilt Insert 2 thumb screws into bracket Lockable cable lock to tree


31 Kit includes: Tilt Mount Brackets Lock Clip Theft Deterrant Mounting Tool Mounting Screws Slide on/off Tilt adjust Lockable Put a Genius Tilt Mount bracket in all your favorite hunting spots!

32 Non Typical, Inc., P.O. Box 10447, Green Bay, WI
worm Attack /Attack IR Operating Instructions Step 1 Familiarize yourself with Attack/Attack IR
 Attack /Attack IR Operating Instructions The latest, full size version of this manual is available for download at www.cuddeback.com/support. We recommend that you download the manual as we periodically
Full Color Digital Scouting Camera. User s Manual Scouting Camera SG860C-HD
 Full Color Digital Scouting Camera User s Manual Scouting Camera SG860C-HD Content 1 Instruction...1 1.1 General Description...1 1.2 Application... 2 1.3 Camera Interface... 2 1.4 Saving Images or Videos...
Infrared Digital Scouting Camera User s Manual Scouting Camera SG560K-8mHD
 Infrared Digital Scouting Camera User s Manual Scouting Camera SG560K-8mHD Content 1 Instruction... 1 1.1 General Description... 1 1.2 Application... 1 1.3 Camera Interface... 2 1.4 Saving Images or Videos...
Instructions for D-55IRXT GameSpy Digital Camera
 Instructions for D-55IRXT GameSpy Digital Camera THANK YOU for your purchase of the D-55IRXT GameSpy Digital Camera. Please read this booklet before using the unit. If you should have any questions about
Instructions for I40XT GameSpy Digital Camera
 Instructions for I40XT GameSpy Digital Camera THANK YOU for your purchase of the Model. Please read this booklet before using the unit. If you should have any questions about this product or any other
Full Color Digital Scouting Camera. User s Manual HCO ScoutGuard SG560C
 Full Color Digital Scouting Camera User s Manual HCO ScoutGuard SG560C Content 1 Instruction... 1 1.1 General Description... 1 1.2 Application... 1 1.3 Camera Interface... 2 1.4 Saving Images or Videos...
Infrared Digital Scouting Camera. User s Manual Scouting Camera SG560P-8M
 Infrared Digital Scouting Camera User s Manual Scouting Camera SG560P-8M Content 1 Instruction...1 1.1 General Description...1 1.2 Application...1 1.3 Camera Interface... 2 1.4 Saving Images or Videos...
Infrared Digital Scouting Camera. User s Manual
 Infrared Digital Scouting Camera User s Manual Quick Start 1. Load the fully charged AA batteries, 12(recommended), 8 or 4(emergency); or connect 6 V external power supply; 2. Insert the SD card (32GB
Xenon Flash Digital Scouting Camera. User Manual SG565F-14mHD
 Xenon Flash Digital Scouting Camera User Manual SG565F-14mHD Content 1 Instruction... 1 1.1 Camera Body Interfaces... 1 1.2 General Description... 2 1.3 Application... 2 1.4 Shooting Information Display...
Infrared Digital Scouting Camera. User s Manual Covert Deuce
 Infrared Digital Scouting Camera User s Manual Covert Deuce Content 1 Instruction... 1 1.1 General Description... 1 1.2 Application... 1 1.3 Camera Interface... 1 1.4 Saving Images or Videos... 3 2 Cautions...
Silver & Blue Series Troubleshooter. Cuddeback Troubleshooting Steps for Silver & Blue Series. Test 1. Camera Power
 Cuddeback Troubleshooting Steps for Silver & Blue Series Use the following steps to determine if your Cuddeback Silver & Blue Series camera is working correctly. Before requesting service, follow these
Digital Surveillance Camera
 Digital Surveillance Camera FL-A model User s manual www.spy-point.com Thank you for purchasing SPYPOINT FL-A product. You can now enjoy the many benefits of a full feature and easy to use digital surveillance
User s Guide for PRIMOS Mug Shot Trail Camera
 User s Guide for PRIMOS Mug Shot Trail Camera Model# 65063 Thanks for purchasing this Primos Mug Shot Trail Camera. Please read this user s guide carefully before your first use. Product overview Fig.1
Trail Camera TC2201NA User Manual
 Trail Camera TC2201NA User Manual Index 1. Introduction... 3 2. Digital Trail Scout Specifications... 4 3. Parts Identification... 5 4. Packing Contents... 6 5. Battery and SD Card Installation... 6 6.
DIGITAL GAME CAMERA. Model DC-6SS
 DIGITAL GAME CAMERA Model DC-6SS CONTENTS: WELCOME... 2 GETTING STARTED... 3 MOTION DETECTOR... 4-8 CAMERA MENUS... 9-10 CONNECTING TO A COMPUTER... 11 TROUBLESHOOTING... 12 WARRANTY... 13 Leaf River Outdoor
REQUIRED FOR STARTUP:
 MODEL MTC200 ITEMS REQUIRED FOR STARTUP... 2 FEATURES & SPECS... 3 CAMERA DIAGRAMS... 4-5 BATTERY INSTALLATION... 6 MEMORY CARD INSTALLATION... 8 QUICK-START... 9 INCLUDES: ADVANCED SETTINGS...10 MOUNTING
ProStalk PC2000. Nature Camera User Manual
 ProStalk PC2000 Nature Camera User Manual Index 1. Introduction... 3 2. Camera Specifications... 4 3. Parts Identification... 5 4. Packing Contents... 6 5. Battery and SD Card Installation... 6 6. Setup
Infrared Digital Scouting Camera User s Manual Scouting Camera SG560K-8M
 Infrared Digital Scouting Camera User s Manual Scouting Camera SG560K-8M For model: SG560K-8M Content 1 Instruction...1 1.1 General Description...1 1.2 Application...1 1.3 Camera Interface...1 1.4 Saving
Instructions for M100 GameSpy Digital Camera
 Instructions for M100 GameSpy Digital Camera THANK YOU for your purchase of the. Please read this booklet before using the unit. If you should have any questions about this product or any other Moultrie
Digital Surveillance Camera INT SPYP. IR-B model. User s manual.
 TM Digital Surveillance Camera SPYP IR-B model INT User s manual www.spy-point.com Thank you for purchasing SPYPOINT IR-B product. You can now enjoy the many benefits of a full feature and easy to use
Rapid deployment surveillance system
 Rapid deployment surveillance system Table of contents Camera Kit Contents... 2 System Requirements and Compatibility... 3 General Information... 3 Battery Life... 3 Quick Start Guide... 4 Camera Overview...
RANGER. 5MP Security Digital Trail Camera Instructions for use Model BN058 / BN059 / BN060
 RANGER 5MP Security Digital Trail Camera Instructions for use Model BN058 / BN059 / BN060 In d e x 1 Introduction...3 2 Specifications...4,5 3 Parts identification...6 4 Package contents...7 5 Battery
RANGER. Digital Trail Camera Instructions for use: Model BN057
 RANGER Digital Trail Camera Instructions for use: Model BN057 In d e x 1. Introduction... 3 2. Specifications... 3 3. Parts identification... 5 4. Package contents... 6 5. Battery and SD card installation...
Scouting Camera Ltl 5210A(12MP)
") Scouting Camera Ltl 5210A(12MP) USER S MANUAL TABLE OF CONTENTS General Information...2 1.1 Introduction... 2 1.2 Application...3 1.3 Illustration...3 Quick Start... 5 2.1 Load Batteries...5 2.2 Insert
Scouting Camera Ltl 5210A(12MP) USER S MANUAL TABLE OF CONTENTS General Information...2 1.1 Introduction... 2 1.2 Application...3 1.3 Illustration...3 Quick Start... 5 2.1 Load Batteries...5 2.2 Insert
PRADCO Outdoor Brands 3280 Highway 31, Ste B Calera, AL 35040
 FCC Statements Moultrie Products MCG-13181 Moultrie Products MCG-13182 Instructions for M-Series Digital Game Cameras M-40 M-40i Note: changes and modifications not expressly approved by the party responsible
Infrared Digital Scouting Camera. User s Manual Scouting Camera SG560K-12mHD
 Infrared Digital Scouting Camera User s Manual Scouting Camera Content 1 Instruction...1 1.1 Camera Body Interfaces...1 1.2 General Description... 2 1.3 Application... 2 1.4 Shooting Information Display...
LTL ACORN Scouting Camera Ltl 5210(5MP)& Ltl 5210A(12MP)
& Ltl 5210A(12MP)") LTL ACORN Scouting Camera Ltl 5210(5MP)& Ltl 5210A(12MP) USER S MANUAL TABLE OF CONTENTS General Information...2 1.1 Introduction...2 1.2 Application...3 1.3 Illustration...3 Quick Start...5 2.1 Load Batteries...5
LTL ACORN Scouting Camera Ltl 5210(5MP)& Ltl 5210A(12MP) USER S MANUAL TABLE OF CONTENTS General Information...2 1.1 Introduction...2 1.2 Application...3 1.3 Illustration...3 Quick Start...5 2.1 Load Batteries...5
User Manual HC-500A ENG-1
 User Manual HC-500A ENG-1 Contents 1. Instructions... 3 1.1 General Description... 3 1.2 Camera Body Interface... 3 1.3 Camera components and features... 3 1.4 Remote Control... 4 5.1 Shooting Information
Digital Scouting Camera. User s Manual SG565FV
 Digital Scouting Camera User s Manual SG565FV Content 1 Instruction... 1 1.1 General Description... 1 1.2 Camera Body Interfaces... 1 1.3 Shooting Information Display... 3 1.4 Supported Format... 3 2 Cautions...
PRADCO Outdoor Brands 3280 Highway 31, Ste B Calera, AL 35040
 FCC Statements S-50i Moultrie Products MCG-13183 Note: changes and modifications not expressly approved by the party responsible could void the user s authority to operate this device. Instructions for
USER MANUAL MINI WILDLIFE CAMERA
 USER MANUAL MINI WILDLIFE CAMERA INTRODUCTION Thank you for purchasing our mini wildlife camera. This device is a special camera designed specifically for recording and observing wildlife. These easy to
USER S MANUAL Scouting Trail Camera
 USER S MANUAL Scouting Trail Camera Contents 1. Whole View and Details of Camera...- 1 - Figure 1: Front View of Camera...- 1 - Camera Screen Display (Test Mode Main Interface)...- 2-2. Camera Menu List
Digital Game & Trail Hunting Camera
 Digital Game & Trail Hunting Camera User Manual ATC-801 Version 1.1.3 Table of Contents 1. Instructions... 1 1.1 General Description... 1 1.2 Camera Body Interface... 1 1.3 Camera components and features...
Crenova Trail Hunting Camera
 Crenova Trail Hunting Camera Quick User s Manual Congratulations on your purchase of this high quality Crenova Trail Hunting Camera! It has been designed to provide you with the best capturing technology
Wildlife Digital Infrared Trail Camera User s Manual HT A
 Wildlife Digital Infrared Trail Camera User s Manual HT-200 002A Table of Contents 1 Instructions...1 1.1 General Description...1 1.2 Camera Body Interfaces...1 1.3 Camera Components and Features...1 1.4
SG520 Series. Infrared Digital Scouting Camera User Manual. Page 1
 1 Instruction Infrared Digital Scouting Camera User Manual SG520 Series Page 1 1 Instruction Content 1 Instruction... 3 1.1 Camera Body Interface... 3 1.2 General Description...4 1.3 Shooting Information
Infrared Digital Scouting Camera
 Infrared Digital Scouting Camera User s Manual Model # W6E Includes USB Cable 2 - Bungee Cords User Manual Player Software Camera Unit NOTE: Player Software is optional. files can be played by using most
STC-TGL2M / STC-TGL5M User s Manual. Toll Free Customer Support Version /15
 STC-TGL2M / STC-TGL5M User s Manual Toll Free Customer Support 1-888-304-6125 www.wildviewcam.com Version 6.0 09/15 For Customer Service or Warranty Information Call Toll Free 888-304-6125 WILDVIEW P.O.
RANGER. 8MP Digital Trail Camera Instructions for use Model BN061 / BN062
 RANGER 8MP Digital Trail Camera Instructions for use Model BN061 / BN062 1 Introduction... 3 2 Specifications... 3 3 Parts identification... 5 4 Package contents... 6 5 Battery and SD card installation...
User Manual. 5MP Outdoor Camera. with PIR
 User Manual 5MP Outdoor Camera with PIR TABLE OF CONTENTS Camera Kit Contents 3 Camera Overview 4 General Information 8 Definitions 9 Quick Start Guide 13 Battery and Memory Installation 14 Camera Setup
PRADCO Outdoor Brands 3280 Highway 31, Ste B Calera, AL 35040
 FCC Statements Moultrie Products MCG-13036 Moultrie Products MCG-13269 Instructions for P-Series Digital Game Camera Panoramic 180i Panoramic 120i Note: changes and modifications not expressly approved
PRADCO Outdoor Brands 3280 Highway 31, Ste B Calera, AL 35040
 FCC Statements Moultrie Products MCG-13036 Moultrie Products MCG-13269 Instructions for P-Series Digital Game Camera Panoramic 180i Panoramic 120i Note: changes and modifications not expressly approved
Wildlife Digital Infrared Trail Camera User s Manual HC-300
 Wildlife Digital Infrared Trail Camera User s Manual HC-300 Table of Contents 1 Instructions...1 1.1 General Description...1 1.2 Camera Body Interfaces...1 1.3 Camera Components and Features...1 1.4 Remote
Infrared Digital Scouting Camera
 Infrared Digital Scouting Camera User s Manual Model # I6 Includes USB Cable 2 - Bungee Cords User Manual Player Software Camera Unit NOTE: Player Software is optional. files can be played by using most
Applicable models:hunting B
 Highly Recommended by Outdoor Explorers - Hunting Wildlife Scouting Cam Cams Instruction Book This Hunting cam is the best-selling scouting camera which is designed for activity and is resistant against
Invisible Infrared Digital Scouting Camera
 Invisible Infrared Digital Scouting Camera User s Manual Model # R12B20-7 Includes T T-Post Support Adjustable Strap User Manual Flextime Player Software Camera Unit NOTE: Flextime Player Software is optional.
Infrared Scouting Camera UV595 HD Instruction Manual
 Infrared Scouting Camera UV595 HD Instruction Manual (For UV595 HD Model) Content 1 General Description... 1 2 Camera button info diagram... 2 3 Installing the batteries... 3 4 Customizing the camera settings...
Stealth Cam. STC-I550 User s Manual. Toll Free Customer Support Version /08
 Stealth Cam STC-I550 User s Manual Toll Free Customer Support 1-877-269-8490 www.stealthcam.net Version 1.0 03/08 For Customer Service or Warranty Information Call Toll Free 877-269-8490 Stealth Cam, LLC
STC-TGL1 User s Manual. Toll Free Customer Support Version /07
 User s Manual Toll Free Customer Support 1-888-304-6125 www.wildviewcam.com Version 1.7 07/07 For Customer Service or Warranty Information Call Toll Free 888-304-6125 WILDVIEW P.O. Box 535189 Grand Prairie,
STC-TGLX35IR User s Manual Toll Free Customer Support
 User s Manual Toll Free Customer Support 1-888-304-6125 www.wildviewcam.com Version 3.0 07/10 For Customer Service or Warranty Information Call Toll Free 888-304-6125 WILDVIEW P.O. Box 535189 Grand Prairie,
Instructions for PREMISE PRO Digital Surveillance Camera
 Important Battery lnformation - Only use Alkaline or Lithium batteries. We recommend the use of Energizer batteries. - Do not mix old and new batteries. Always replace ALL the batteries at the same time.
Infrared Digital Scouting Camera
 Infrared Digital Scouting Camera User s Manual Model # M16i20-7 Includes Adjustable Strap User Manual Camera Unit page 1 Features RESOLUTION MAX: 16 MP FLASH 36 High Intensity IR LED s FLASH RANGE up to
High Intensity Invisible IR Digital Scouting Camera
 High Intensity Invisible IR Digital Scouting Camera User s Manual Model # KP10B8-7 Includes Camera Unit 2 - Bungee Cords User Manual page 1 Features RESOLUTION MAX: 10 MP FLASH FLASH RANGE SENSOR SENSOR
Superb Full HD Trail Camera Uovision UV785 12MP Instruction Manual
 Superb Full HD Trail Camera Uovision UV785 12MP Instruction Manual UV785 Model Content Page 1 General Description 1 2 Camera button info diagram 1 3 Installing the batteries 2 4 Inserting SD card 2 5 Customizing
Thanks! TABLE OF CONTENTS
 EXODUS Trek Thanks! First and foremost If you re reading this, you bought the Trek, which means that you ve supported us in our mission to build a better hunting industry company! We want to give you an
Instructions for P-150/P-150i Digital Game Camera
 Important Battery lnformation - Only use alkaline batteries. We recommend the use of Duracell or Energizer batteries. - Do not mix old and new batteries. Always replace ALL the batteries at the same time.
Version: Ltl- 5610A- 01 TABLE OF CONTENTS General Information Features Application Illustration... 2 Getting Started
 Infrared Digital Scouting Camera Ltl- 5610 Series GPS Coordinate Input 1920 1080 Video USER S MANUAL Version: Ltl- 5610A- 01 TABLE OF CONTENTS General Information... 1 1.1 Features... 1 1.2 Application...
Invisible IR Digital Scouting Camera
 Invisible IR Digital Scouting Camera User s Manual Model # p16b20 Includes USB Cable Adjustable Strap User Manual Flextime Player Software Camera Unit NOTE: Flextime Player Software is optional. Flextime
Digital Trail Camera
 Digital Trail Camera Thank you for purchasing our product. You can now enjoy the true benefits of a second generation all digital trail This 12.0 MP camera was developed by our team of highly qualified
Superb HD Scouting Camera UV785-HD Instruction Manual
 Superb HD Scouting Camera UV785-HD Instruction Manual (For UV785-HD Model) Content 1 General Description... 1 2 Camera button info diagram... 2 3 Installing the batteries... 3 4 Inserting SD card... 4
Invisible IR Digital Scouting Camera
 Invisible IR Digital Scouting Camera User s Manual Model # t6b20 Includes USB Cable 2 - Bungee Cords User Manual Flextime Player Software Camera Unit NOTE: Flextime Player Software is optional. Flextime
impact INSTRUCTIONS LiteTrek 4.0 Monolight lighting equipment and accessories
 impact lighting equipment and accessories LiteTrek 4.0 Monolight INSTRUCTIONS Congratulations on your purchase of the Impact LiteTrek 4.0 Portable Monolight. Enjoy the many benefits of a portable strobe
Table of contents Introduction Getting Started Taking still images or videos
 User Manual Table of contents Introduction Features............................................1 Package contents.....................................2 Camera overview.....................................2
Trail Camera User s Manual
 Trail Camera User s Manual (for S100/S108/S120/S128/S158) V1.1 PLEASE READ CAREFULLY BEFORE USING CAMERA Package Contents Mounting Strap 1 Trail Camera 1 Antenna(wireless camera only) 1 USB Cable 1 User
Trail Camera User s Manual (for S378) V1.0
 V1.0") Trail Camera User s Manual (for S378) V1.0 PLEASE READ CAREFULLY BEFORE USING CAMERA Package Contents Mounting Strap 1 Trail Camera 1 Antenna(wireless camera only) 1 USB Cable 1 User s Manual 1 Camera
Trail Camera User s Manual (for S378) V1.0 PLEASE READ CAREFULLY BEFORE USING CAMERA Package Contents Mounting Strap 1 Trail Camera 1 Antenna(wireless camera only) 1 USB Cable 1 User s Manual 1 Camera
Infrared Digital Scouting Camera
 Infrared Digital Scouting Camera User s Manual Model # t5i20 Includes Camera Unit 2 - Bungee Cords User Manual page 1 Features RESOLUTION FLASH FLASH RANGE SENSOR SENSOR RANGE IMAGE FORMAT MEMORY IMAGE
615HD Digital Video Camera
 615HD Digital Video Camera User Manual 2009-2011 Sakar International, Inc. All rights reserved. Windows and the Windows logo are registered trademarks of Microsoft Corporation. All other trademarks are
hp photosmart 315 digital camera user s guide English 1
 hp photosmart 315 digital camera user s guide English www.hp.com/photosmart 1 Contents Chapter 1: Getting Started... 7 Introduction...7 Camera parts...8 Quick setup...9 Turning the camera on and off...13
UOVISION UM MP Wireless Digital Scouting Camera User s Manual
 www.uovisioneurope.com UOVISION UM565 8.0MP Wireless Digital Scouting Camera User s Manual www.uovisioneurope.com Quick Start 1. Load 12pcs of new AA batteries and/or connect 6 V external power supply.
Heat-sensing Bullet CCTV Camera
 ADD-ON CAMERA FOR HOMEGUARD 4400 SERIES DVRS HGPRO838-2M-070818 2018 HOMEGUARD Heat-sensing Bullet CCTV Camera Instruction Manual - HGPRO838 / EN BE PROTECTED & HIGH-ACCURACY MOTION ALERT IP66 EDIY A S
DVR 528 Digital Video Camera
 DVR 528 Digital Video Camera User Manual 2010 Sakar International, Inc. All rights reserved. Windows and the Windows logo are registered trademarks of Microsoft Corporation. All other trademarks are the
DV5-2. SC-DV5_Main.jpg. SC-DV5_Main.jpg. SC-DV5_Main.jpg
 DV5-2 SC-DV5_Main.jpg SC-DV5_Main.jpg SC-DV5_Main.jpg Overview Camera: Overview -screen Display: The DV5-2 body camera is an advanced recording system with many options and features available. Please review
Ice Cam Covert Scouting Camera Instruction Manual
 Ice Cam Covert Scouting Camera Instruction Manual Page1 Page2 Table of Contents Camera button info diagram:..4 Installing the batteries & SD card:...5 Understanding the main screen info:....6 Accessing
Invisible IR Digital Scouting Camera
 Invisible IR Digital Scouting Camera User s Manual Model # V12b7-7 Includes Adjustable Strap User Manual Camera Unit page 1 RESOLUTION MAX: 12 MP FLASH FLASH RANGE SENSOR SENSOR RANGE IMAGE FORMAT MEMORY
Instruction Manual (Ref. 853S-1; rev )
") Instruction Manual (Ref. 853S-1; rev. 20150130) WildSpy Solar Cam Outdoor Products Solar Powered IR Time Lapse Scouting Camera Model No: AC-853S This unit has been designed to support the WildSolar system
Instruction Manual (Ref. 853S-1; rev. 20150130) WildSpy Solar Cam Outdoor Products Solar Powered IR Time Lapse Scouting Camera Model No: AC-853S This unit has been designed to support the WildSolar system
High Intensity Invisible IR Digital Scouting Camera
 High Intensity Invisible IR Digital Scouting Camera User s Manual Model # TR8B1-7 Includes Camera Unit 2 - Bungee Cords User Manual page 1 Features RESOLUTION MAX: 8 MP FLASH FLASH RANGE SENSOR SENSOR
SMOKE DETECTOR SD HIDDEN CAMERA WITH NIGHTVISION
 SMOKE DETECTOR SD HIDDEN CAMERA WITH NIGHTVISION SKU: HCSmokeConeSD THANK YOU FOR PURCHASING THE SMOKE DETECTOR SD Please read this manual before operating the Smoke Detector SD and keep it handy. Fewer
Technaxx Wild Cam TX 44. User Manual
 EN Technaxx Wild Cam TX 44 User Manual The Declaration of Conformity for this device is under the Internet link: www.technaxx.de/ (in bottom bar Konformitätserklärung ). Before using the device the first
Invisible Infra Red Flash Booster
 Invisible Infra Red Flash Booster Model: QC-8044 Part No: IRX-22BW (VER.20140908) Wireless Booster Model: QC-8044 / IRX-22BW Main Features: *Upgrade any visible scouting camera to be totally invisible.
PHOTO MODES. Photo. Video Mode Records Audio INSTRUCTION MANUAL HD VIDEO HD TIME LAPSE. All Day Time Lapse + Photos
 PHOTO MODES Photo INSTRUCTION MANUAL Video Mode Records Audio HD VIDEO HD TIME LAPSE All Day Time Lapse + Photos CLEANING CAMERA: Do not use window or any chemical cleaner to clean any part of the camera.
IP116 Plus HD WiFi Camera
 IP116 Plus HD WiFi Camera Instruction Manual 1 Introduction Thank you for choosing the IP116 Plus HD WiFi Camera. We understand that whenever we purchase something new, we want to enjoy it as soon as possible.
2011 Copyright, Stealth Cam, LLC
 2012 2011 Copyright, Stealth Cam, LLC TRIAD 3 cameras in one Hi-Res still images: The basis upon which scouting cameras were designed, today s Stealth Cam s shoot high-resolution still images (day & night)
28056 Digital Camera
 28056 Digital Camera User Manual HASBRO and its logo and NERF are trademarks of Hasbro and are used with permission. 2012 Hasbro. All rights reserved. Windows and the Windows logo are registered trademarks
Trail Camera RANGER Mini Instruction Manual
 Trail Camera RANGER Mini Instruction Manual Content 1: Camera Overview... 1 2: Quick Start Guide... 2 2.1: Installing the Batteries... 2 2.2: Installing the SD Card... 2 2.4: Power Switch and Buttons...
Digital Trail Camera. Instruction Manual Model#: C LIT #: /03-10
 Digital Trail Camera Instruction Manual Model#: 119203C LIT #: 98-1164/03-10 Congratulations on your purchase of the Tasco Digital Trail Camera! This weatherproof, rugged trail camera is designed to record
Black Maverick Covert Scouting Camera Instruction Manual
 Black Maverick Covert Scouting Camera Instruction Manual Page1 Table of Contents Camera button info diagram: (Fig. 1)...4 Installing the batteries..5 Installing the SD card....5 Understand the main screen
SD-595 Covert Surveillance Camera
 1 Brite Star http://www.starweb.com.au/index.html SD-595 Covert Surveillance Camera 12 Mega Pixel + Hi Definition Video with Audio 2016 - User s Manual 2 CONTENTS Page 1 About the Covert Trail Camera 1.1
LINK-DARK LINK-DARK-V QUICK START GUIDE (US ONLY) v.1.1
 v.1.1") LINK-DARK (US ONLY) LINK-DARK-V QUICK START GUIDE v.1.1 In the box 1x Camera 1x Mounting bracket 1x Installation strap 1x Quick start guide 1x Micro SIM card is preactivated and inserted in the camera
LINK-DARK (US ONLY) LINK-DARK-V QUICK START GUIDE v.1.1 In the box 1x Camera 1x Mounting bracket 1x Installation strap 1x Quick start guide 1x Micro SIM card is preactivated and inserted in the camera
Infrared Digital Scouting Camera User s Manual for SG560 Series
 Infrared Digital Scouting Camera User s Manual for SG560 Series For model: SG560/ SG560V/ SG560B/ SG560VB Content 1 Instruction...1 1.1 General Description...1 1.2 Application...1 1.3 Parts...1 1.4 Saving
HOBO Occupancy/Light Data Logger (UX90-005x/-006x) Manual
 Manual") HOBO Occupancy/Light Data Logger (UX90-005x/x) Manual UX90-005x The HOBO Occupancy/Light data logger monitors room occupancy up to 5 or 12 meters away (depending on the model) as well as indoor light changes
HOBO Occupancy/Light Data Logger (UX90-005x/x) Manual UX90-005x The HOBO Occupancy/Light data logger monitors room occupancy up to 5 or 12 meters away (depending on the model) as well as indoor light changes
DVR 514 Digital Video Recorder
 DVR 514 Digital Video Recorder User Manual 2010 Sakar International, Inc. All rights reserved. Windows and the Windows logo are registered trademarks of Microsoft Corporation. All other trademarks are
STC-I530IR User s Manual Toll Free Customer Support
 User s Manual Toll Free Customer Support 1-877-269-8490 www.stealthcam.net Version 6.0 09/15 For Customer Service or Warranty Information Call Toll Free 877-269-8490 Stealth Cam, LLC P.O. Box 539504 Grand
DVR 710HDv2 Digital Video Recorder
 DVR 710HDv2 Digital Video Recorder User Manual 2009-2011 Sakar International, Inc. All rights reserved. Windows and the Windows logo are registered trademarks of Microsoft Corporation. All other trademarks
Wild Camera DENVER WCT-8010 Instruction Manual
 Wild Camera DENVER WCT-8010 Instruction Manual WWW.DENVER-ELECTRONICS.COM ENG-1 Table of Contents 1. Instructions...3 1.1 General Description...3 1.2 Camera Body Interface...3 1.3 Camera components and
Prepare your EPIC for action.
 TM Call Toll Free for Customer Service 877-269-8490 Prepare your EPIC for action. Register your EPIC V 1.0 05/08 Go to to register your new camera. By doing this you will be kept up to date of all the
Vigilant Hunter Instruction Manual Model: VH200HD
 Vigilant Hunter Instruction Manual Model: VH200HD PLEASE READ CAREFULLY BEFORE USING CAMERA Thank you for Purchasing your UWAY Camera The UWAY Vigilant Hunter is a high quality digital surveillance camera.
Ctdigi.com. Instruction manual. Production by S & W Technology Labs
 Ctdigi.com Instruction manual Production by S & W Technology Labs I. Install app II. Guard camera Guard camera Introduction Accessory Sensor Scenario Guard 360 Introduction - Catalog - Install app Scenario
Important Tips. The working voltage of the camera is 6 V. You can either use 4 or 8 AA batteries, or use an
 Content General Information... 1 1.1 Features... 1 1.2 Application... 1 1.3 Standard Components... 1 1.4 Memory... 3 Quick Start... 4 2.1 Loading Batteries... 4 2.2 Connecting External Power... 5 2.3 Inserting
VIV-CV-1225V v2 Digital Camera Binoculars. Instruction Manual
 VIV-CV-1225V v2 Digital Camera Binoculars Instruction Manual 2009-2019 Sakar International, Inc. All rights reserved Windows and the Windows logo are registered trademarks of Microsoft Corporation. All
VIGILANCE 1-8X16 DIGITAL NIGHT VISION MONOCULAR USER MANUAL FF18000
 VIGILANCE 1-8X16 DIGITAL NIGHT VISION MONOCULAR USER MANUAL FF18000 The Firefield brand has recently launched with products designed to maximize every intense moment. Originally designed for consumers