All Rights Reserved. Rev , November 2003
|
|
|
- Job Wilson
- 5 years ago
- Views:
Transcription
1
2 All Rights Reserved The use, disclosure, modification, transfer or transmittal of this work for any purpose, in any form, or by any means, without the written permission from Net2Phone is strictly forbidden. Rev , November 2003 Disclaimer The content of this manual is subject to change without notice and should not be construed as a commitment by the distributor or Net2Phone. This manual is furnished for informational use only and Net2Phone assumes no responsibility or liability for any errors or inaccuracies that may appear herein. Any Net2Phone services provided through this Equipment are not intended to replace or be a substitute for primary line voice services or Plain Old Telephone Service ("POTS") and are not meant to provide guaranteed Automatic Number Identification or Automatic Location Information capabilities associated with 911 or E911 services or to permit access to 411 directory assistance services. Net2Phone will not be liable for any damages, expenses, liabilities, risks, or harms arising out of or related to the Net2Phone services provided through this Equipment.
3 Table of Contents Welcome... 1 Overview... 1 Requirements... 1 Support... 1 Setting Up Your ATA Configuring an IP Address... 2 DHCP Configuration... 2 Static IP Configuration... 3 Configuring Account and Network Settings... 6 Automatic Configuration via IVR... 6 Entering Parameters...6 Configuring Port Configuring Port Verifying the Success of the Automatic Configuration via IVR Automatic Configuration via Web Configuration Page...11 Configuring Account Settings Verifying the Success of the Automatic Configuration via the Web Configuration Page Manual Configuration via Web Configuration Page...13 Entering Parameters Configuring Local Dialing...15 Configuring the Account/PIN Prompter...16 Supported Languages and Currency Languages Currency Making a Telephone Call Calling Regular Telephones...19 Calling Other Cisco ATA 186 Devices...20 Page i
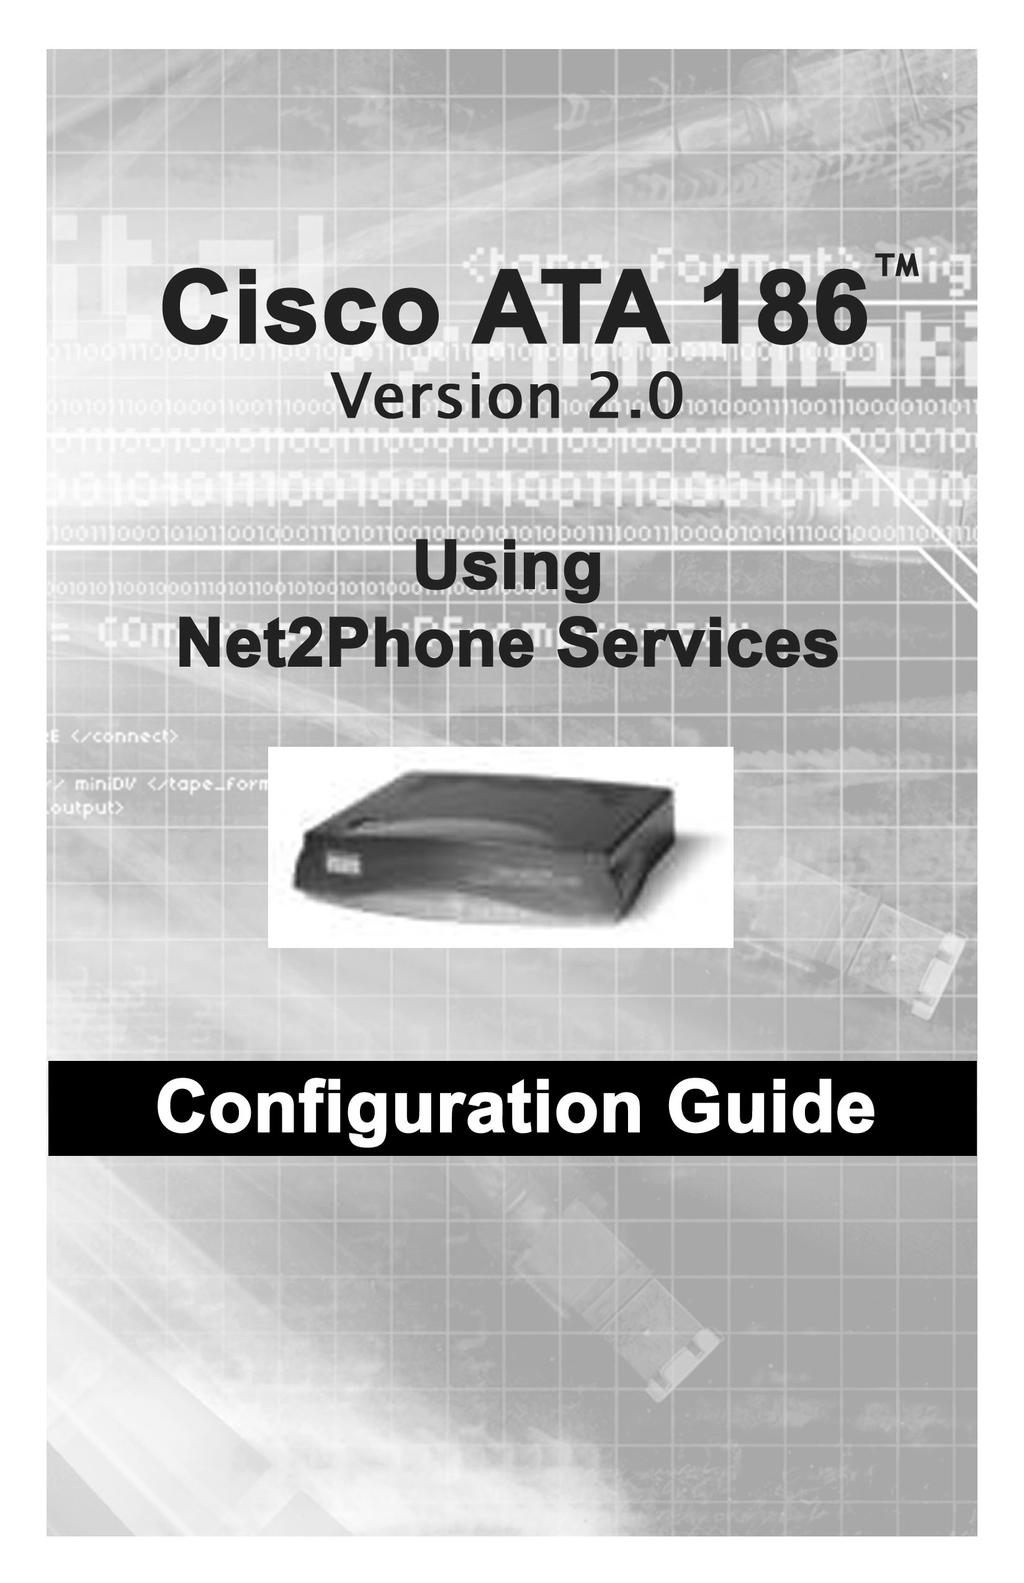
4 Welcome Overview This document contains information that will help you configure the Cisco ATA 186 Analog Telephone Adaptor to place calls on the Net2Phone network. IMPORTANT: The firmware on your device must be version 2.15 or higher. If you have an older version, you must upgrade through Cisco before proceeding. To find out the firmware version on your device, access the Web Configuration page. The firmware version is displayed in the bottom lefthand corner. For additional information on installing and configuring the ATA 186, please refer to the User s Guide located on the following Web site: Requirements Access to a Broadband Internet Service Provider (ISP) or Local Area Network A Net2Phone account number and PIN for each phone port (Contact your local distributor for an account and PIN if you do not have one.) Any conventional analog telephone A telephone line wall jack Support For all technical issues regarding the use of the ATA 186 on the Net2Phone network, please resellersupport@net2phone.com and place ATA 186 in the subject line. Setting Up Your ATA 186 If your ATA 186 is not currently set up, please follow the steps below. 1. Connect the ATA 186 to your Ethernet port. Plug one end of an Ethernet cable (RJ-45) into the Ethernet port on the back of the device. Plug the other end into a broadband router or LAN port. 2. Connect your telephone into the ATA 186. Plug the RJ-11 cable from your telephone into the Phone 1 port on the back of the device. Page 1
5 If you want to attach another telephone, then plug the RJ-11 cable from the second phone into the Phone 2 port. 3. Power up the ATA 186. Plug the power supply into an AC outlet and plug its power cable into the power supply port on the rear of the device. The device powers up immediately, and the button on the top of the device will blink. Configuring an IP Address Before configuring Net2Phone account and network settings, your ATA 186 must have an IP address. You can configure your ATA 186 with a dynamic (DHCP) or static IP address. This section outlines the steps for both configuration methods. DHCP Configuration If your network utilizes a DHCP server to assign IP addresses to network devices, or if you are connecting the ATA 186 to a home router such as a Linksys router, follow the steps below: 1. Pick up the telephone handset, and press the button on top of the ATA 186. You will hear a voice prompt that says, Configuration Menu. Enter menu number followed by the # key 2. Access the DHCP menu by pressing 20# on the telephone keypad. You will hear a voice prompt that says, Enter value. 3. Enable DHCP by pressing 1#. You will hear a voice prompt that says, You entered 1. To change, press 1; to review, press 2; to save, press 3; to review your saved value, press 4; or press the pound key (#) to exit. 4. Save the setting by pressing 3 on the telephone keypad. 5. Hang up the phone. The red light at the top of the device will flash for a second. NOTE: If, after two minutes, the ATA 186 continues to have a flashing red light, you are not behind a DHCP server and will need to configure a static IP address. (See Static IP Configuration below.) 6. To find out the IP address assigned to the device, pick up the telephone handset, and press the button on top of the ATA 186. You will hear a voice prompt that says, Configuration Menu. Enter menu number followed by the # key Page 2
6 7. Obtain the IP address by pressing 80# on the telephone keypad. The system will immediately announce the IP address of your ATA 186. Please write it down. TIP: After announcing the IP address, the system will return to the configuration menu, so if you missed all or part of the address, press 80# again and listen for the IP address. NOTE: If the IP address you hear is , then either your network does not have a DHCP server (in which case you should proceed to the Static IP Configuration below) or your DHCP server is not assigning an IP address to the ATA 186 (in which case you should contact your network administrator for assistance). 8. Hang up the telephone handset, and proceed to the Configuring Account and Network Settings section to configure your ATA 186 for use with the Net2Phone network. Static IP Configuration If you want or need to assign a static IP address to the ATA 186, please follow the steps below: 1. Obtain the following information from your Internet Service Provider (ISP) or IT Administrator: IP Address Default Gateway Subnet Mask Primary DNS Server Secondary DNS Server (optional) 2. Pick up the telephone handset, and press the button on top of the ATA 186. You will hear a voice prompt that says, Configuration Menu. Enter menu number followed by the # key 3. Access the DHCP menu by pressing 20# on the telephone keypad. You will hear a voice prompt that says, Enter value. 4. Disable DHCP by pressing 0# on the telephone keypad. You will hear a voice prompt that says, You entered 0. To change, press 1; to review, press 2; to save, press 3; to review your saved value, press 4; or press the pound key (#) to exit. 5. Save the setting by pressing 3. Page 3
7 6. Access the IP address menu by pressing 1# on the telephone keypad. You will hear a voice prompt that says, Enter value. 7. Enter the IP address on the telephone keypad using the * key in place of the. (e.g., enter 123*456*7*89 to represent the IP address ) and then press the # key. For example, to enter the IP address , you would press 123*456*7*89. You will hear a voice prompt that says, You entered xxx.xxx.xx.xxx (where xxx.xxx.xx.xxx is your IP address). To change, press 1; to review, press 2; to save, press 3; to review your saved value, press 4; or press the pound key (#) to exit. 8. Save the setting by pressing 3 on the telephone keypad. 9. Access the Default Gateway menu by pressing 2# on the telephone keypad. You will hear a voice prompt that says, Enter value. 10. Enter the default gateway on the telephone keypad using the * key in place of the., and then press the pound (#) key. For example, to enter the default gateway , you would press 123*456*7*89. You will hear a voice prompt that says, You entered xxx.xxx.xx.xxx (where xxx.xxx.xx.xxx is your default gateway). To change, press 1; to review, press 2; to save, press 3; to review your saved value, press 4; or press the pound key (#) to exit. 11. Save the setting by pressing 3 on the telephone keypad. 12. Access the Subnet Mask menu by pressing 10# on the telephone keypad. You will hear a voice prompt that says, Enter value. 13. Enter your subnet mask on the telephone keypad using the * key in place of the., and then press the pound key (#). For example, to enter the subnet mask , you would press 123*456*7*89. You will hear a voice prompt that says, You entered xxx.xxx.xx.xxx (where xxx.xxx.xx.xxx is your subnet mask). To change, press 1; to review, press 2; to save, press 3; to review your saved value, press 4; or press the pound key (#) to exit. 14. Save the setting by pressing 3 on the telephone keypad. 15. Access the primary DNS server menu by pressing 916# on the telephone keypad. You will hear a voice prompt that says, Enter value. Page 4
8 16. Enter your primary DNS server on the telephone keypad using the * key in place of the., and then press the pound (#) key. For example, to enter the primary DNS server address , you would press 123*456*7*89. You will hear a voice prompt that says, You entered xxx.xxx.xx.xxx (where xxx.xxx.xx.xxx is your primary DNS server address). To change, press 1; to review, press 2; to save, press 3; to review your saved value, press 4; or press the pound key (#) to exit. 17. Save the setting by pressing 3 on the telephone keypad. 18. If your network makes use of a secondary DNS server, access the secondary DNS server menu by pressing 917# on the telephone keypad. You will hear a voice prompt that says, Enter value. 19. Repeat steps 15 and 16 above to enter the DNS server address and save the setting. 20. Save the setting by pressing 3 on the telephone keypad. 21. Hang up the telephone. Page 5
9 Configuring Account and Network Settings In order for your ATA 186 to gain access and place outgoing calls on the Net2Phone network, you must first configure the device. There are three options for configuring the Cisco ATA 186. Two are automatic methods, and one is manual. They are: 1. Automatic Configuration via Interactive Voice Response (IVR), below 2. Automatic Configuration via Web Configuration page, on page Manual Configuration via Web Configuration page, on page 12 In the automatic configuration methods, the ATA 186 connects to Net2Phone's configuration server, then downloads and installs: a configuration file that contains all the necessary settings to work with Net2Phone EXCEPT the account and PIN, and the latest firmware for the ATA 186. The manual method requires that you: a. Upgrade your ATA 186 to the latest firmware; you can obtain an upgrade either from Cisco or from the place from which you obtained the ATA 186. b. Enter the appropriate values in the configuration fields. Select the method you would like to use to configure your ATA 186 and refer to the corresponding directions below. Automatic Configuration via IVR This automatic method relies on the telephone keypad for configuring the parameters on the ATA 186. If you prefer to enter the values via the Web interface, please refer to the Automatic Configuration via Web Configuration Page section on page 11. ENTERING PARAMETERS To enter parameters via the IVR: 1. Pick up the telephone handset, and press the button on top of the ATA 186. You will hear a voice prompt that says, Configuration Menu. Enter menu number followed by the # key 2. Access the TFTP URL menu by pressing 905# on the telephone keypad. You will hear a voice prompt that says, Enter alphanumeric value. 3. Enter ata.net2phone.com by pressing the corresponding telephone keys. For example, to enter the a, press the 2 key twice, followed by the pound (#) key. Page 6
10 NOTE: Each time you press a key, the voice announces the character corresponding with the amount of times you pressed the key. The character is not entered until you press the pound (#) key; if you hear the wrong character, keep pressing the key until the correct character is announced. Go slowly, listen to make sure you are entering the correct character, and press pound (#) after each character to enter the value. To enter the t, press the 8 key twice, followed by the pound (#) key. To enter the a, press the 2 key twice, followed by the pound (#) key. To enter the dot, press the 1 key twice, followed by the pound (#) key. To enter the n, press the 6 key three times, followed by the pound (#) key. To enter the e, press the 3 key three times, followed by the pound (#) key. To enter the t, press the 8 key twice, followed by the pound (#) key. To enter the 2, press the 2 key once, followed by the pound (#) key. To enter the p, press the 7 key twice, followed by the pound (#) key. To enter the h, press the 4 key three times, followed by the pound (#) key. To enter the o, press the 6 key four times, followed by the pound (#) key. To enter the n, press the 6 key three times, followed by the pound (#) key. To enter the e, press the 3 key three times, followed by the pound (#) key. To enter the dot, press the 1 key twice, followed by the pound (#) key. To enter the c, press the 2 key four times, followed by the pound (#) key. To enter the o, press the 6 key four times, followed by the pound (#) key. To enter the m, press the 6 key twice, followed by the pound (#) key. Page 7
11 Press # to signal the end of the entry. You will hear a voice prompt that says, You entered ata.net2phone.com. To change, press 1; to review, press 2; to save, press 3; to review your saved value, press 4; or press the pound key (#) to exit. 4. Save the setting by pressing 3 on the telephone keypad. 5. Access the USE TFTP menu by pressing 305# on the telephone keypad. You will hear a voice prompt that says, Enter value. 6. Enable USE TFTP by pressing 1# on the telephone keypad. You will hear a voice prompt that says, You entered 1. To change, press 1; to review, press 2; to save, press 3; to review your saved value, press 4; or press the pound key (#) to exit. 7. Save the setting by pressing 3 on the telephone keypad. 8. Access the TO CONFIG menu by pressing 80001# on the telephone keypad. You will hear a voice prompt that says, Enter value. 9. Enable TO CONFIG by pressing 1# on the telephone keypad. You will hear a voice prompt that says, You entered 1. To change, press 1; to review, press 2; to save, press 3; to review your saved value, press 4; or press the pound key (#) to exit. 10. Save the setting by pressing 3 on the telephone keypad. 11. Press # to exit and then hang up the telephone. The red light on the top of the device should blink while the device connects to the configuration server and downloads the files. 12. When the red light stops blinking, press the button at the top of the device. IMPORTANT: Before you upgrade to the SIP firmware with Net2Phone settings, please note that if you have the MGCP firmware installed on the ATA 186, you must make sure that the EPID0orSID0 field contains a period (.). If it does not, the automatic configuration will not work correctly. NOTE: Some older ATA 186 firmware will not accept a DNS address for the configuration server when entered via the IVR. If you are using older ATA 186 firmware and it does not accept DNS, use a PC to ping ata.net2phone.com and enter the IP address that is pinged in the place of ata.net2phone.com. Page 8
12 CONFIGURING PORT 1 The account numbers used on ports 1 and 2 must be different from each other. You cannot enter the same account number for both ports. To configure the account for port 1: 1. Pick up the telephone handset, and press the button on top of the ATA 186. You will hear a voice prompt that says, Configuration Menu. Enter menu number followed by the # key 2. Access the PORT 1 ACCOUNT NUMBER menu by pressing 46# on the telephone keypad. You will hear a voice prompt that says, Enter alphanumeric value. 3. Enter the account number one digit at a time, followed by the # key after each digit. When you enter the final digit, press the # key twice. For example, to enter the account number 12345, you would press 1#2#3#4#5##. You will hear a voice prompt that says, You entered xxxxx (where xxxxx is the account number). To change, press 1; to review, press 2; to save, press 3; to review your saved value, press 4; or press the pound key (#) to exit. 4. Save the setting by pressing 3 on the telephone keypad. Without hanging up the telephone, continue with the following steps to configure the PIN for port 1. To configure the PIN for port 1: 1. Access the PORT 1 PIN MENU by pressing 4# on the telephone keypad. You will hear a voice prompt that says, Enter alphanumeric value. 2. Enter the PIN one digit at a time, followed by the # key after each digit. When you enter the final digit, press the # key twice. For example, to enter the PIN 9876, you would press 9#8#7#6##. You will hear a voice prompt that says, You entered xxxx (where xxxx is the PIN). To change, press 1; to review, press 2; to save, press 3; to review your saved value, press 4; or press the pound key (#) to exit. 3. Save the setting by pressing 3 on the telephone keypad. If you have an account for port 2, you will need to configure it, as well. Page 9
13 CONFIGURING PORT 2 IMPORTANT: The Net2Phone account number that you enter for port 2 should be different from the account entered for port 1. To configure the account for port 2: 1. Pick up the telephone handset, and press the button on top of the ATA 186. You will hear a voice prompt that says, Configuration Menu. Enter menu number followed by the # key 2. Access the PORT 2 ACCOUNT NUMBER menu by pressing 47# on the telephone keypad. You will hear a voice prompt that says, Enter alphanumeric value. 3. Enter the account number one digit at a time, followed by the # key after each digit. For the final digit, press the # key a second time. For example, to enter the account number 12345, you would press 1#2#3#4#5##. You will hear a voice prompt that says, You entered xxxxx (where xxxxx is the account number). To change, press 1; to review, press 2; to save, press 3; to review your saved value, press 4; or press the pound key (#) to exit. 4. Save the setting by pressing 3 on the telephone keypad. Without hanging up the telephone, continue with the following steps to configure the PIN for port 2. To configure the PIN for port 2: 1. Access the PORT 2 PIN MENU by pressing 14# on the telephone keypad. You will hear a voice prompt that says, Enter alphanumeric value. 2. Enter the PIN one digit at a time, followed by the # key after each digit. When you enter the final digit, press the # key twice. For example, to enter the PIN 9876, you would press 9#8#7#6##. You will hear a voice prompt that says, You entered xxxx (where xxxx is the PIN). To change, press 1; to review, press 2; to save, press 3; to review your saved value, press 4; or press the pound key (#) to exit. 3. Save the setting by pressing 3 on the telephone keypad. 4. Hang up the phone. The red light at the top of the device will flash for a second. It may take a few seconds for the changes to take effect. Page 10
14 VERIFYING THE SUCCESS OF THE AUTOMATIC CONFIGURATION VIA IVR Before you configure the local dialing feature, it is a good idea to make sure that the configuration was successful. To verify that the automatic configuration was successful: 1. Access the Web Configuration page by opening a Web browser and entering the following address: ( xxx.xxx.xxx.xxx represents the IP address of your ATA 186). 2. Check the lower left-hand corner of the Web Configuration page and make sure it displays version Check the GkOrProxy field on the Web Configuration page and make sure it reads sip.net2phone.com. If those values are not present, repeat the automatic configuration via IVR procedure or use the manual configuration method on page 13. You can now set up the ATA 186 to allow you to place calls as you usually do in your country (without having to dial as if you were in the US). To configure this feature, proceed to the Configuring Local Dialing section on page 15 in this Guide. IMPORTANT: In order to make changes to the ATA186 after using the automatic configuration method (either IVR or Web), you must change three fields to the following values: UseTFTP: 0 TftpURL: ToConfig: 1 Click the Apply button to save the settings. You can now make any other changes to the device, including the local dialing configuration. Automatic Configuration via Web Configuration Page Using this automatic method, you can configure the device via a Web interface: the Web Configuration page. This method automatically sets the device to use Net2Phone and downloads the correct firmware. CONFIGURING ACCOUNT SETTINGS The account numbers used on ports 1 and 2 must be different from each other. You cannot enter the same account number for both ports. To configure the account for port 1: 1. Access the Web Configuration page by opening a Web browser and entering the following address: ( xxx.xxx.xxx.xxx represents the IP address of your ATA 186). The Cisco ATA 186 Web Configuration page displays (see below). 2. In the TftpURL field, enter ata.net2phone.com. 3. In the ToConfig field, enter 1. Page 11
15 4. In the UseTftp field, enter In the LoginID0 field, enter the account number for port In the PWD0 field, enter the PIN for port If you have an account for port 2, enter the account number in the LoginID1 field. IMPORTANT: The Net2Phone account number that you enter for port 2 should be different from the account entered for port Enter the PIN in the PWD01 field. 9. Click the Apply button at the bottom of the Web page to save the changes. The red light on the top of the device should blink while the device connects to the configuration server and downloads the files. It may take a few seconds for the changes to take effect. Continue with the next section, Verifying the Success of the Automatic Configuration via the Web Configuration Page. VERIFYING THE SUCCESS OF THE AUTOMATIC CONFIGURATION VIA THE WEB CONFIGURATION PAGE To verify that the automatic configuration was successful: 1. Access the Web Configuration page by opening a Web browser and entering the following address: ( xxx.xxx.xxx.xxx represents the IP address of your ATA 186). 2. Check the lower left-hand corner of the Web Configuration page and make sure it displays version Check the GkOrProxy field on the Web Configuration page and make sure it reads sip.net2phone.com. If the configuration was unsuccessful, power off the ATA 186 and then power it back on again. If this is still unsuccessful, repeat the automatic configuration via Web Configuration page procedure or use the manual configuration method on page 12. You can now set up the ATA 186 to allow you to place calls as you usually do in your country (without having to dial as if you were in the US). To configure this feature, proceed to the Configuring Local Dialing section on page 15 later in this chapter. Page 12
16 IMPORTANT: In order to make changes to the ATA186 after using the automatic configuration method (either IVR or Web), you must change three fields to the following values: UseTFTP: 0 TftpURL: ToConfig: 1 Click the Apply button to save the settings. You can now make any other changes to the device, including the local dialing configuration. Manual Configuration via Web Configuration Page In the manual configuration, you must manually enter the appropriate values into each field. The firmware version of the ATA 186 you will be using must be or higher. If you have a previous version, contact Cisco or the party from whom you obtained the device for an upgrade. ENTERING PARAMETERS To enter parameters via the Web Configuration page: 1. Open a Web browser and enter the following address: ( xxx.xxx.xxx.xxx represents the IP address of your ATA 186). 2. Enter the appropriate values for the configuration fields (see the Cisco ATA 186 Configuration Page table on the following page) and then click the Apply button when finished. The ATA 186 will restart (reboot). NOTE: The bold items in the table indicate which fields are required. Page 13
17 CISCO ATA 186 WEB CONFIGURATION PAGE UIPassword ToConfig 0 UseTftp 0 TftpURL 0 CfgInterval 3600 EncryptKey 0 Dhcp 1 StaticIP StaticRoute StaticNetMask UID0 NODID PWD0 PIN for Net2Phone account number for line 1. UID1 NODID1 PWD1 PIN for Net2Phone account number for line 2. If only using line 1, leave blank (0). GkOrProxy sip.net2phone.com Gateway 0 GateWay UseLoginID 1 LoginID0 Net2Phone account number LoginID1 AltGk 0 AltGkTimeOut 0 GkTimeToLive 300 GkId. UseSIP 1 SIPRegInterval 300 MaxRedirect 5 SIPRegOn 1 NATIP SIPPort 5060 MediaPort OutBoundProxy 0 NatServer 0 NatTimer 0x LBRCodec 0 AudioMode 0x RxCodec 0 TxCodec 0 NumTxFrames 1 CallFeatures 0xffffffff PaidFeatures 0x CallerIdMethod 0x00019e60 CallWaitCallerId 0x003c33d0 Polarity 0x ConnectMode 0x AutMethod 0x TimeZone 17 NTPIP AltNTPIP DNS1IP DNS2IP UDPTOS 0x000000a0 SigTimer: 0x OpFlags 0x Nprintf TraceFlags 0x RingOnOffTime 2,4,25 IPDialPlan 1 DialPlan *72St7>#.r9t1 **St4- #St >#t8.r9t2-0>#t811.rat4- ^1t4>#.- BusyTone 2,30467,28959,1191,1513,0,4000,4000,0 RingBackTone 2,30831,30467,1943,2111,0,16000,32000,0 AlertTone 1,30467,0,5970,0,0,480,480,1920 Net2Phone account number. NOTE: A separate account number must be used for the second line. If only using Line 1, leave blank (0). DialTone 2,31538,30831,3100,3885,1,0,0,1000 ReorderTone 2,30467,28959,1191,1513,0,2 000,2000,0 CallWaitTone 1,30831,0,5493,0,0,2400,240 0,4800 CallCmd Af;AH;BS;NA;CS;NA;Df;EB;Ff; EP;Kf;EFh;HQ;Jf;AFh;HQ;I*67 ;ga*82;fa#90v#;oi;h#72v#; ba#74v#;ca#75v#;da#73;ea *67;gA*82;fA*70;iA*69;DA*9 9;xA;Uh;GQ; Page 14
18 IMPORTANT: In order to work properly with the Net2Phone service, the ATA 186 must be using the G.723 CODEC. To verify the codec being used, access the Web Configuration page (see below) and make sure the following fields are populated with zero (0): LBRCodec RxCodec TxCodec 3. To refresh the Web page with the new settings, click the [Click here to reload] link at the top of the page. You should now be able to place outgoing calls and receive incoming calls. Configuring Local Dialing If you are using the ATA 186 outside the US, you can configure the ATA 186 to dial as you normally do in your country (without international access codes, country codes, etc. for local calls). NOTE: If you are using the ATA 186 in the US, you do not need to configure the local dialing feature. You can skip this section and just dial as usual. To configure the local dialing feature if you are outside the US: 1. Connect to the Web Configuration page (see Configuring Account Settings in the Automatic Configuration via Web Configuration Page section on page 11 in this Guide). 2. In the DialPlan field, click in the text box to insert the cursor before the default characters, but DO NOT erase the contents of the field. 3. Insert the following characters BEFORE the default characters: Pn011xxx (where xxx is the local country code of the country in which you are using the device). For example, if the default characters of the DialPlan field were abcdefghijklmno and your local country code was 555, the field should look like this: Pn abcdefghijklmno. For example, the image below displays the Cisco ATA 186 Web interface for a device that is configured for use in China (country code 86). Page 15
 key to enter the character. 4. Click the Apply button to save the setting. You can now dial as you would on a regular telephone.")
19 Local Dialing Configuration TIP: The is the secondary character on the backslash (\) key (above the Enter key). Press and hold the Shift key and then press the backslash (\) key to enter the character. 4. Click the Apply button to save the setting. You can now dial as you would on a regular telephone. NOTE: Note that the entry is case sensitive and the after the entry is necessary. The hash mark character ( ) is usually found as the secondary character on the backslash key above the Enter key on the keyboard. Configuring the Account/PIN Prompter When the Account/PIN prompter feature is enabled and the phone connected to the Cisco ATA 186 goes off-hook, the device will prompt users for their preferred language, Net2Phone account and PIN, and the number they wish to call. NOTE: The local dialing feature cannot be used together with the account/pin prompter. Page 16
. 2.")
20 To configure the account/pin prompter feature: 1. Connect to the Web Configuration page (see Configuring Account Settings in the Automatic Configuration via Web Configuration Page section on page 11 in this Guide). 2. If the DialPlan field is configured for local dialing, delete the Pn011xxx text from the field, but do not delete any other text in the field. The account/pin prompter will not function if the local dialing text remains in the DialPlan field. 3. In the DialPlan field, click in the text box to insert the cursor before the default characters, but DO NOT erase the contents of the field. 4. Insert the following characters BEFORE the default characters: H NOTE: This entry is case sensitive, so be sure to enter a capital H. For example, if the default characters of the DialPlan field were abcdefghijklmno, the field should look like this: H09999 abcdefghijklmno. For example, the image below displays the Cisco ATA 186 Web interface for a device that is configured to use the account/pin prompter. Account/PIN Prompter Configuration SUPPORTED LANGUAGES AND CURRENCY The account/pin prompter feature supports the languages and currencies displayed below. LANGUAGES English Spanish Chinese (Mandarin) Arabic Portuguese Russian Polish Czech Vietnamese Page 17
21 CURRENCY United States Dollar ($) Brazilian Real Canadian Dollar ($) Chinese Renminbi Euro Hong Kong Dollars Indian Rupees Indonesian Rupiahs Philippine Pesos Malaysian Ringgit Mongolian Tugrics Russian Rubles South Korean Won Polish Zilotys Thailand Bhat Vietnamese Dong Page 18
22 Making a Telephone Call Currently, the Cisco ATA 186 can only place calls to regular telephones or to other ATA devices. In the future, it will be able to call other Net2Phone devices. Calling Regular Telephones To place a call to a regular telephone: 1. Pick up your telephone handset, and listen for a dial tone. 2. Using your telephone keypad, dial the number of the person you want to call. Local Dialing Disabled: For all domestic calls within the US, dial 1 + area code + 7- digit telephone number. For international calls placed from the US, dial country code + city code + telephone number. If you are calling from outside the US to the US, dial 1 + area code + 7-digit telephone number. If you are calling from outside the US, dial country code + city code + telephone number. Local Dialing Enabled: For all domestic calls within the US, dial 00 + area code + 7- digit telephone number. For international calls placed from the US, dial 00 + country code + city code + telephone number. For local calls, dial: 7-digit telephone number OR area code + 7-digit telephone number The call will be placed. TIP: If you press # after entering the telephone number, the call will be sent more quickly. 3. When you have finished with your call, simply hang up your telephone handset. 4. To place another call, pick up your telephone handset, and repeat the steps above. Page 19
23 Calling Other Cisco ATA 186 Devices Currently, the Cisco ATA 186 can only place calls to regular telephones or to other ATA devices. In the future, it will be able to call other Net2Phone devices. To place a call to another Cisco ATA 186 device: 1. Pick up your telephone handset, and listen for a dial tone. 2. Using your telephone keypad, dial *72, followed by the account number of the person you want to call. For example, if the call recipient s account number is , you would dial * The call will be placed. TIP: If you press # after entering the telephone number, the call will be sent more quickly. 3. When you have finished with your call, simply hang up your telephone handset. 4. To place another call, pick up your telephone handset, and repeat the steps above. Page 20
Yap Jack Plus Quick Start Guide. <insert image>
 0 Welcome The Yap Jack Plus is a voice over IP device that allows you to make inexpensive calls over the Internet using your own telephone. To use the device, all you need is a dial-up account
Parameters and Defaults
 APPENDIX B This Appendix provides information on the parameters and defaults that you can use to provision your Cisco ATA 186. Provisioning files must begin with #txt for the formating tool, cfgfmt.exe,
DEVICE CONFIGURATION GUIDE
 DEVICE CONFIGURATION GUIDE Using the CallSpeak Service with the Linksys PAP2 Phone Adapter DocVersion: CallSpeak-PAP2-DCG-080205 All Rights Reserved Copyright 2005 The use, disclosure, modification, transfer,
Reference List of Parameters
 APPENDIX A In general, configuring the Cisco Unified IP Phones 7905G and 7912G can be accomplished through Cisco Unified CallManager and through the network configuration options on a phone. These processes
All Rights Reserved. February 2005 Version 1.1
 All Rights Reserved The use, disclosure, modification, transfer or transmittal of this work for any purpose, in any form, or by any means, without the written permission from Net2Phone is strictly forbidden.
Configuring the Cisco ATA for SCCP
 CHAPTER 3 This section describes how to configure the Cisco ATA to operate with the Skinny Client Control Protocol (SCCP) signaling image and how the Cisco ATA obtains the latest signaling image. You can
Cisco ATA 186 FAQ and Common Issues
 Cisco ATA 186 FAQ and Common Issues Document ID: 19302 Contents Introduction Software Selection, Load, and Upgrade Hardware Install, Power Up Faults, and ATA Configuration Features IP Addressing (DHCP)
VoiceLine Getting Started Guide InnoMedia MTA R
 VoiceLine Getting Started Guide InnoMedia MTA 3328-2R June 2005 IMPORTANT NOTICE CONCERNING EMERGENCY 911 SERVICES Your service provider, not the manufacturer of the equipment, is responsible for the provision
All Rights Reserved. Copyright 2005
 Page i All Rights Reserved Copyright 2005 The use, disclosure, modification, transfer, or transmittal of this work for any purpose, in any form, or by any means, without the written permission of the copyright
Configuring the Cisco ATA for SIP
 CHAPTER 3 This section describes how to configure the Cisco ATA to operate with the Session Initiation Protocol (SIP) signaling image and how the Cisco ATA obtains the latest signaling image. You can configure
IMPORTANT NOTICE CONCERNING EMERGENCY 911 SERVICES
 IMPORTANT NOTICE CONCERNING EMERGENCY 911 SERVICES Your service provider, not the manufacturer of the equipment, is responsible for the provision of phone services through this equipment. Any services
All Rights Reserved. Rev. 1.0, 2003
 All Rights Reserved The use, disclosure, modification, transfer or transmittal of this work for any purpose, in any form, or by any means, without the written permission from Net2Phone is strictly forbidden.
Steady green On hook. Slow flashing green Off hook. Off Port not ready. Off No link. Fast flashing green Upgrading firmware.
 Product Features Product Features Top Panel Feature Description Steady green On hook. Phone Phone 2 Slow flashing green Off hook. Off Port not ready. Flashing green Transmitting or receiving data through
Quick Start Guide. Cisco SPA232D Mobility Enhanced ATA
 Quick Start Guide Cisco SPA232D Mobility Enhanced ATA Package Contents Analog Telephone Adapter Ethernet Cable Phone Cable Power Adapter Quick Start Guide Product CD-ROM Welcome Thank you for choosing
ANSEL FXS / 1 PSTN. VoIP Telephone Adaptor. User Manual V1.10
 ANSEL 5518 1 FXS / 1 PSTN VoIP Telephone Adaptor User Manual V1.10 Quick Guide Step 1: Broadband (ADSL/Cable Modem) Connections for ANSEL 5518 A. Connect ANSEL 5518 WAN port to ADSL NAT Router as the following
2757 VoIP Phone Users Guide
 2757 VoIP Phone Users Guide Rev. 1.0 Table of Contents 1 Introduction... 5 1.1 Package Contents... 5 1.2 Features... 5 1.3 Basic Setup... 6 2 Network Setup... 8 2.1 Static IP Address... 8 2-2 PPPoE...11
VoiceLine Calling Features
 VoiceLine Calling Features For a complete list of features and codes, refer to the VoiceLine User s Guide. VOICELINE CALLING FEATURES Feature Call Waiting Caller ID 3-Way Calling Description Once you hear
All Rights Reserved. XJ100 Wireless Handset Version W1.00.0B. August 2004
 All Rights Reserved The use, disclosure, modification, transfer or transmittal of this work for any purpose, in any form, or by any means, without the written permission from Net2Phone is strictly forbidden.
All Rights Reserved. XJ200 Wireless Handset Version WT April 2005
 All Rights Reserved The use, disclosure, modification, transfer or transmittal of this work for any purpose, in any form, or by any means, without the written permission from Net2Phone is strictly forbidden.
Quick Start Guide. Cisco SPA100 Series Analog Telephone Adapters. SPA112 Two Port Phone Adapter SPA122 ATA with Router
 Quick Start Guide Cisco SPA100 Series Analog Telephone Adapters SPA112 Two Port Phone Adapter SPA122 ATA with Router Package Contents Analog Telephone Adapter Ethernet Cable Power Adapter Quick Start Guide
Table of Contents. CRA-200 Analog Telephone Adapter 2 x Ethernet Port + 2 x VoIP Line. Quick Installation Guide. CRA-200 Quick Installation Guide
 CRA-200 Analog Telephone Adapter 2 x Ethernet Port + 2 x VoIP Line Quick Installation Guide Table of Contents VoIP ATA Package Contents... 2 Checklist... 2 IMPORTANT SAFETY INSTRUCTIONS... 3 Connecting
AC1200M/MS. User Manual
 AC1200M/MS User Manual Table of Contents User Manual... 1 1 Preface... 1 2 LED Indicators and Connectors... 1 2.1 LED Indicators... 1 2.2 Hardware Installation... 2 3 Voice Prompt (AC1200MS)... 2 4 User
Cisco Analog Telephone Adaptor Overview
 CHAPTER 1 This section describes the hardware and software features of the Cisco Analog Telephone Adaptor (Cisco ATA) and includes a brief overview of the Skinny Client Control Protocol (SCCP). The Cisco
Analog Telephone Adapter Setup for Q-SYS Softphone
 Analog Telephone Adapter Setup for Q-SYS Softphone This document applies to this Cisco device: SPA232D Introduction This document covers the use of the SPA232D in the role of analog telephone adapter (ATA)
MAX 410 TM MAX 420 TM MAX 430 TM
 MAX 410 TM MAX 420 TM MAX 430 TM VoIP Gateway User Guide Version 1.0 The specifications and information regarding the products in this manual are subject to change without notice. All statements, information,
BESTip ATA Combo Quick Start Manual (Ver.1.53G)
") BESTip ATA Combo Quick Start Manual (Ver.1.53G) Requirements: Before making any Internet call from your BESTip ATA Combo, you need the following items: 1. An Touch-tone phone set. 2. An 110/220V AC electrical
BESTip ATA Combo Quick Start Manual (Ver.1.53G) Requirements: Before making any Internet call from your BESTip ATA Combo, you need the following items: 1. An Touch-tone phone set. 2. An 110/220V AC electrical
babytel Self Install Guide
 babytel Self Install Guide Last updated April 5, 2005 Contents Contents --------------------------------------------------------------------------------------------------------------------2 Welcome --------------------------------------------------------------------------------------------------------------------3
interference to radio or television communications at your own expense.
 Max 410/420/430 The specifications and information regarding the products in this manual are subject to change without notice. All statements, information, and recommendations in this manual are believed
The VWRT510&WRT500 High Speed Router User s Guide
 The VWRT510&WRT500 High Speed Router User s Guide The page 1 of 53 Table of Contents 1 Preface... 4 2 LED Indicators and Connectors... 5 2.1 LED Indicators... 6 2.2 Hardware Installation... 7 3 Voice Prompt...
SVG300S+ 2 FXS SIP/IAX ATA USER MANUAL
 SVG300S+ 2 FXS SIP/IAX ATA USER MANUAL STEPHEN TECHNOLOGIES CO.,LIMITED ALL RIGHTS RESERVED Contents Preface... 3 About this Manual... 3 Audience... 3 Related Documentation... 3 Document Conventions...
Welltech WellGate User Manual
 Welltech WellGate 2626 An Easy to Use PBX Gateway User Manual Copyright 2009 Welltech Computer Co., Ltd. All right reserved Table of Contents Introduction...2 WellGate 2626 - An Easy to Use PBX Gateway...2
InterPBX Quick Installation Guide
 InterPBX Quick Installation Guide Prepare Your Telephone Numbering Plan InterPBX Communication System supports flexible numbering plan with maximum 5 digits of extension number. You need to prepare the
GXV-3000 IP Video Phone Quick Installation Guide
 1 GXV-3000 IP Video Phone Quick Installation Guide WARNING: Please DO NOT power cycle the GXV when LED lights are flashing during system boot up or firmware upgrade. You may corrupt firmware images and
Cisco SPA112 Configuration Guide Using AccessLine SIP Trunks
 Cisco SPA112 Configuration Guide Using AccessLine SIP Trunks Version 1.0 1 April 2013 Configuration Guide for the Cisco SPA112 with AccessLine Before you begin you will need to have active SIP Trunks from
VoiceAccess Users Guide
 Users Guide Table of Contents GETTING STARTED...1 Device Configuration...1 Connecting to a PBX...2 Plus Features...2 VoiceMail...2 Call Forwarding...2 Caller ID...3 MANAGING CALLING FEATURES FROM THE PHONE...4
VS Port FXS SIP. VoIP Telephone Adaptor. User Manual. V2.1h
 VS200 2-Port FXS SIP VoIP Telephone Adaptor User Manual V2.1h Quick Guide Step 1: Broadband (ADSL/Cable Modem) Connections for VS200 A. Connect VS200 LAN port to ADSL NAT Router as the following connection.
IPS-2101h. Quick Installation Guide V1.0
 IPS-2101h Quick Installation Guide V1.0 ArtDio IPS-2101h VoIP Gateway Package content: One IPS-2101h VoIP Gateway One Power Adaptor One RJ 45 Ethernet Cable One RJ-11 Telephone Cable Quick Installation
Analogue Telephony Adaptor User Manual
 Analogue Telephony Adaptor User Manual Issue 2 20/10/2006 The Flexor 151 is compliant with the following standards: EN 60950-1:2001 EN 55022:1998 EN 55024:1998 EN 61000-3-2:2000 EN 61000-3-3:1995 See chapter
ATCOM Series IP Phone LAN Configuration Guide
 ATCOM Series IP Phone LAN Configuration Guide This guide supplies a step-by-step operation on how to install and configure ATCOM Series IP Phone in LAN. 1 Install the IP Phone (Take PA168B/C/E IP phone
EIP 7012 Essence VoIP Phone Administration Guide Version 1.0B
 Essence Technology EIP 7012 Essence VoIP Phone Administration Guide Version 1.0B Table of Contents 1 Introduction... 1 1.1 Hardware Overview... 1 1.2 Software Overview... 1 2 Keypad interface for IP Phone
SoundStation IP Com. Administrators Guide NBX ADMINISTRATORS GUIDE
 Administrators Guide SoundStation IP 3000-3Com NBX ADMINISTRATORS GUIDE Table of Contents Introduction... 1 Overview... 1 Typical Deployment... 1 Features... 2 Communication Protocol Options... 2 Preparing
VG-422R. User s Guide
 VG-422R User s Guide Trademarks Contents are subject to revise without prior notice. All trademarks belong to their respective owners. FCC Warning This equipment has been tested and found to comply with
Phone Adapter with Router
 Voice User Guide Model No. SPA2102 Copyright and Trademarks Specifications are subject to change without notice. Linksys is a registered trademark or trademark of Cisco Systems, Inc. and/or its affiliates
Contents. 2 V85 Desktop VoIP Phone User Guide YML772 Rev1
 Contents Chaper 1: Introduction... 4 About VoIP... 4 Chapter 2: Getting to know your V85... 6 Before you begin...... 6 Package Contents... 7 Rear of the V85... 8 Chapter 3: Getting your V85 Up and Running...
Quick start guide. CL4939 Big button big display telephone/answering system with caller ID/ call waiting
 Quick start guide CL4939 Big button big display telephone/answering system with caller ID/ call waiting Introduction This quick start guide provides you basic installation and use instructions. A limited
Voice Communication for Free High Performance Embedded VoIP Gateway
 Voice Communication for Free High Performance Embedded VoIP Gateway 07I12CM.ENC Copyright Notice Copyright (c) 2007 DSG Technology Inc. All rights reserved. This guide, the software and the hardware described
KTA1010 INSTALL GUIDE
 KTA1010 INSTALL GUIDE Table of Contents 1 Check for Required Items... 2 2 Installation... 2 2.1 Installation View... 2 2.2 Connection Chart to determine cable types... 3 3 Ready to use... 3 3.1 Network
SPA400 Internet Telephony Gateway with 4 FXO Ports
 SPA400 Internet Telephony Gateway with 4 FXO Ports Administration and Configuration Guide v1.0 Using the SPA400 The SPA400 features the ability to connect up to four (4) standard analog telephones lines
Netphone KE1020A/KE1021A User s Manual
 Netphone KE1020A/KE1021A User s Manual 1. Introduction... 3 2. Package Contents... 3 3. Component Illustration... 3 4. Character Strings... 4 5. Installation and Settings... 4 5.1 Installation... 4 5.2
Ultra-elegant Gigabit IP Phone
 Ultra-elegant Gigabit IP Phone SIP-T42G Quick Start Guide(V73.40) www.yealink.com Applies to firmware version 29.73.0.40 or later. EHS36 Packaging Contents The following items are included in your package.
GIGABIT COLOR IP PHONE
 GIGABIT COLOR IP PHONE USER GUIDE UC842 Version:1.0.3.59 Nanjing Hanlong Technology Co., Ltd 86-25-84608050 support@hanlongtek.com Notices Information Notices Information Copyright Copyright 2005-2013
Caller dialled digit during recording. Fax routing Config? Yes. Route to Fax Extensions
 Auto Attendant Menu Caller dialled digit during recording Digits 0-7 Fax tone detected selection is made 2nd digit present Single Digit Config Fax routing Config? Ignore Fax Route to Extensions Route to
VoIP Analog Telephone Adapter VIP-158 User s manual Version 1.00
 VoIP Analog Telephone Adapter VIP-158 User s manual Version 1.00-1 - Copyright Copyright (C) 2007 PLANET Technology Corp. All rights reserved. The products and programs described in this User s Manual
Avaya one-x Quick Edition System Setup Instructions
 Avaya one-x Quick Edition System Setup Instructions 16-602329 Issue 1, May 2007 This document outlines the preferred order for connecting and configuring your Quick Edition devices. Initial System Setup
DIGITAL PHONE USER GUIDE
 DIGITAL PHONE USER GUIDE 1.800.952.1001 (NH/ME) 1.800.633.8578 (PA) 1.877.959.4862 (MD) 1.877.952.4863 (VA) Atlanticbb.com All Rights Reserved The use, disclosure, modification, transfer or transmittal
Polycom KIRK IP Interface Card - User Guide
 Polycom KIRK IP Interface Card - User Guide 1. Introduction This guide helps you setting up the KIRK Wireless Server 1500 with IP Interface Card on a Cisco CallManager. Please refer to your CallManager
Installation & Configuration Guide
 Installation & Configuration Guide Rel. 2.0 Service Pack 1 Rel. 2.0 Service Pack 1 Vertical Communications, Inc. reserves the right to revise this publication and to make changes in content without notice.
VoIP ATA series (ATA171plus, ATA172plus, ATA-171, ATA-172, ATA-171M, ATA-171P)
") ATA Web User Guide VoIP ATA series (ATA171plus, ATA172plus, ATA-171, ATA-172, ATA-171M, ATA-171P) User Guide Released Date : January-2015 Firmware Version : V.303 1. Introduction... 4 2. Hardware Overview...
ATA Web User Guide VoIP ATA series (ATA171plus, ATA172plus, ATA-171, ATA-172, ATA-171M, ATA-171P) User Guide Released Date : January-2015 Firmware Version : V.303 1. Introduction... 4 2. Hardware Overview...
A Division of Cisco Systems, Inc. Wireless-G. IP Phone. User Guide. Voice WIP330. Model No.
 A Division of Cisco Systems, Inc. Voice Wireless-G IP Phone User Guide Model No. WIP330 Copyright and Trademarks Specifications are subject to change without notice. Linksys is a registered trademark
Upgrading Using the Boot Helper
 Upgrading Using the Boot Helper Last Updated: December 21, 2006 This chapter describes the procedures for installing a new release of Cisco Unity Express software using the boot helper. Note The boot helper
Broadband Router. with 2 Phone Ports WIRED. Installation and Troubleshooting Guide RT31P2. A Division of Cisco Systems, Inc. Model No.
 A Division of Cisco Systems, Inc. Broadband Router with 2 Phone Ports WIRED Installation and Troubleshooting Guide Model No. RT31P2 Copyright and Trademarks Specifications are subject to change without
Ultra-elegant Gigabit IP Phone
 Ultra-elegant Gigabit IP Phone SIP VP-T49G Quick Start Guide (V80100) wwwyealinkcom Applies to firmware version 5180075 or later Packaging Contents The following items are included in your package If you
Sipura SPA 3000 How To. (c) Bicom Systems
 Bicom Systems") Sipura SPA 3000 How To Sipura SPA 3000 How To All rights reserved. No parts of this work may be reproduced in any form or by any means - graphic, electronic, or mechanical, including photocopying, recording,
Sipura SPA 3000 How To Sipura SPA 3000 How To All rights reserved. No parts of this work may be reproduced in any form or by any means - graphic, electronic, or mechanical, including photocopying, recording,
Ultra-elegant Gigabit IP Phone SIP-T48S
 Ultra-elegant Gigabit IP Phone SIP-T48S Quick Start Guide (V8120) wwwyealinkcom Applies to firmware version 6681015 or later Packaging Contents The following items are included in your package If you find
Hotel Phone - H3 & H5 Quick Installation Guide
 Hotel Phone - H3 & H5 Quick Installation Guide Connection methods Please connect power adapter, network, PC, and handset to the corresponding ports as described in below picture. 2 / 6 1 Introduction to
Ultra-elegant Gigabit IP Phone SIP-T48S
 Ultra-elegant Gigabit IP Phone SIP-T48S Quick Start Guide (V8220) wwwyealinkcom Applies to firmware version 6682010 or later Packaging Contents The following items are included in your package If you find
Voice Cable Modem User Manual
 User Manual Model CM500V September 2017 202-11792-01 350 E. Plumeria Drive San Jose, CA 95134 USA Support Thank you for purchasing this NETGEAR product. You can visit www.netgear.com/support to register
Quick Installation Guide of Acer WLAN 11b Broadband Router
 Preparation 1 At lease one PC with IEEE802.11b WLAN client installed. 2 One straight-through Category 5 Ethernet cable, used to link WAN interface to xdsl or CM for Internet connection. 3 Acer WLAN 11b
Ultra-elegant Gigabit IP Phone
 Ultra-elegant Gigabit IP Phone SIP-T48G Quick Start Guide (V8060) wwwyealinkcom Applies to firmware version 3580060 or later Packaging Contents The following items are included in your package If you find
Reinstalling a Cisco Unity Express Image Using the Boothelper
 Reinstalling a Cisco Unity Express Image Using the Boothelper Last Updated: October 5, 2011 This chapter describes the procedures for installing Cisco Unity Express software using the boothelper. Use the
Ultra-elegant Gigabit IP Phone
 Ultra-elegant Gigabit IP Phone SIP-T48G Quick Start Guide(V80.95) www.usaphone.com 856.761.1000 Applies to firmware version 35.80.0.80 or later. Packaging Contents The following items are included in your
CHAPTER 3 CONFIGURING THE SIP-PHONE THROUGH WEB PAGES STEP 1. BROWSE THE IP ADDRESS PREDEFINED VIA KEYPAD... 36
 WellPhone-305 SIP CHAPTER 1 OVERVIEW OF THE SIP-PHONE... 3 1. HARDWARE OVERVIEW... 4 1.Front View and Keypad function... 4 2.Back View...11 3.Specification of connector...11 2. SOFTWARE FEATURES AND SPECIFICATION...
KIDAtalk talk all you want. KIDAtalk Hardware and Software Documentation. For subscription, CONTACT us at:
 KIDAtalk talk all you want Sign up now and call the world For subscription, CONTACT us at: 158 Victoria Parade. Suva. P.o. Box 59, Suva, Fiji Islands. Phone: 679-331 5511 Fax: 679-331 2239 Email: info@kidanet.com.fj
ATCOM IPPBX IP01 Product Guide Version: VoIPon Tel: +44 (0) Fax: +44 (0)
 Fax: +44 (0)") Figure: ATCOM IPPBX IP01 ATCOM IPPBX IP01 Product Guide Version: 1.0 2010-05-10 Content CONTACT ATCOM... 3 CHAPTER 1 THE INTRODUCTION OF IP01... 4 CHAPTER 2 ACCESS TO THE IP01... 6 2.1 WEB PAGE ACCESS
Figure: ATCOM IPPBX IP01 ATCOM IPPBX IP01 Product Guide Version: 1.0 2010-05-10 Content CONTACT ATCOM... 3 CHAPTER 1 THE INTRODUCTION OF IP01... 4 CHAPTER 2 ACCESS TO THE IP01... 6 2.1 WEB PAGE ACCESS
Print Server. User s Manual. Rev. 01 (April, 2004) Made In Taiwan
 Made In Taiwan") Print Server User s Manual Rev. 01 (April, 2004) Made In Taiwan TABLE OF CONTENTS ABOUT THIS GUIDE... 4 INTRODUCTION... 5 PACKAGE CONTENTS... 6 SYSTEM REQUIREMENTS... 6 GENERAL FEATURES... 7 PRODUCT VIEW...
Print Server User s Manual Rev. 01 (April, 2004) Made In Taiwan TABLE OF CONTENTS ABOUT THIS GUIDE... 4 INTRODUCTION... 5 PACKAGE CONTENTS... 6 SYSTEM REQUIREMENTS... 6 GENERAL FEATURES... 7 PRODUCT VIEW...
Ultra-elegant Gigabit IP Phone
 Ultra-elegant Gigabit IP Phone SIP VP-T49G Quick Start Guide (V8011) wwwyealinkcom Applies to firmware version 5180010 or later Packaging Contents The following items are included in your package If you
TIPS FOR YOUR COMFORT AND SAFETY 4 SUPPORTING DOCUMENTATION 4 ABOUT YOUR PHONE 5 CUSTOMIZING YOUR PHONE 7 CALL HANDLING FEATURES 7
 USER GUIDE NOTICE The information contained in this document is believed to be accurate in all respects but is not warranted by Mitel Networks Corporation (MITEL ). The information is subject to change
Ultra-elegant Gigabit IP Phone SIP-T46S
 Ultra-elegant Gigabit IP Phone SIP-T46S Quick Start Guide(V81.20) www.yealink.com Applies to firmware version 66.81.0.15 or later. Packaging Contents The following items are included in your package. If
Ultra-elegant Gigabit IP Phone
 Ultra-elegant Gigabit IP Phone SIP VP-T49G Quick Start Guide (V225) wwwyealinkcom Applies to firmware version 512205 or later Packaging Contents The following items are included in your package If you
Cisco Model SPA 303 Quick Start Guide
 Cisco Model SPA 303 Quick Start Guide Welcome Thank you for choosing the Cisco Small Business IP phone. This guide describes how to install your phone and how to perform some basic tasks. 1 Installing
Broadband High-Speed DSL Modem User Manual
 Broadband High-Speed DSL Modem User Manual Model DM200 September 2017 202-11621-03 350 E. Plumeria Drive San Jose, CA 95134 USA Support Thank you for purchasing this NETGEAR product. You can visit www.netgear.com/support
Enterprise IP Phone SIP-T19 E2 & T19P E2
 Enterprise IP Phone SIP-T19 E2 & T19P E2 Quick Start Guide(V80.10) www.yealink.com Applies to firmware version 53.80.0.10 or later. Packaging Contents The following items are included in your package.
Grandstream IP Phone Configuration Guides
 Grandstream IP Phone Configuration Guides Version 1.0 Yeastar Information Technology Co. Ltd. Table of Contents FOR GRANDSTREAM GXP SERIES... 3 Register with MyPBX... 3 Provisioning for MyPBX... 5 Phone
Sipura SPA 2002 How To. (c) Bicom Systems
 Bicom Systems") Sipura SPA 2002 How To Sipura SPA 2002 How To All rights reserved. No parts of this work may be reproduced in any form or by any means - graphic, electronic, or mechanical, including photocopying, recording,
Sipura SPA 2002 How To Sipura SPA 2002 How To All rights reserved. No parts of this work may be reproduced in any form or by any means - graphic, electronic, or mechanical, including photocopying, recording,
Nortel IP Phone 1120E/1140E User Guide (CICM).
.") Nortel IP Phone 1120E/1140E User Guide (CICM). Overview Nortel IP Phone 1120E/1140E brings voice and data to the desktop by connecting directly to a Local Area Network (LAN) through an Ethernet connection.
Nortel IP Phone 1120E/1140E User Guide (CICM). Overview Nortel IP Phone 1120E/1140E brings voice and data to the desktop by connecting directly to a Local Area Network (LAN) through an Ethernet connection.
VoIP Phone SFT-1200 /SFT-1100 SFT-9200 / SFT-9100 QIG V 1.00
 VoIP Phone SFT-1200 /SFT-1100 SFT-9200 / SFT-9100 QIG V 1.00 1 Over view This phone is a full-feature telephone that provides voice communication. Read this QIG carefully to learn how to operate this product
Installation & Configuration Guide
 Installation & Configuration Guide Release 2.0 Release 2.0 Vertical Communications, Inc. reserves the right to revise this publication and to make changes in content without notice. 2010 by Vertical Communications,
VoiceCo Networks, Inc. Phone Feature Guide
 VoiceCo Networks, Inc. Phone Feature Guide Copyright Disclaimer Trademarks and patents Copyright 2009-2018, VoiceCo Networks All rights reserved. This document may not be copied or otherwise reproduced,
IPF-2000 User Manual. ArtDio Company Inc. Ver.1.0.
 Ver.1.0 www.artdioinc.com ArtDio Company Inc. Safety Instructions 1. Do not attempt to service the product yourself. Any servicing of this product should be referred to qualified service personal. 2. To
Reinstalling a Cisco Unity Express Image Using the Boothelper
 Reinstalling a Cisco Unity Express Image Using the Boothelper Last Updated: December 10, 2010 This chapter describes the procedures for installing Cisco Unity Express software using the boothelper. Note
TABLE OF CONTENTS COPYRIGHT INTRODUCTION...3 PRODUCT OVERVIEW...3 COMPONENTS AND FEATURES...3 HARDWARE INSTALLATION
 TABLE OF CONTENTS COPYRIGHT...2 1. INTRODUCTION...3 PRODUCT OVERVIEW...3 COMPONENTS AND FEATURES...3 HARDWARE INSTALLATION...3 2. MFP SERVER INSTALLATION...5 PREPARATION...5 CONFIGURATION SOLUTION TABLE...5
Reinstalling a Cisco Unity Express Image Using the Boothelper
 Reinstalling a Cisco Unity Express Image Using the Boothelper Last Updated: December 10, 2010 This chapter describes the procedures for installing Cisco Unity Express software using the boothelper. Note
Allworx User s Guide (Release x)
") Allworx User s Guide (Release 6.8.1.x) -PAGE INTENTIONALLY LEFT BLANK- Table of Contents 1 VOICEMAIL...1 1.1 ACCESSING YOUR MESSAGE CENTER INBOX...1 1.2 LISTENING TO YOUR VOICEMAIL...2 1.3 SENDING VOICEMAIL
Allworx User s Guide (Release 6.8.1.x) -PAGE INTENTIONALLY LEFT BLANK- Table of Contents 1 VOICEMAIL...1 1.1 ACCESSING YOUR MESSAGE CENTER INBOX...1 1.2 LISTENING TO YOUR VOICEMAIL...2 1.3 SENDING VOICEMAIL
Wireless-G. User Guide. IP Phone WIP330. A Division of Cisco Systems, Inc. Model No. Voice
 A Division of Cisco Systems, Inc. Voice Wireless-G IP Phone User Guide Model No. WIP330 Copyright and Trademarks Specifications are subject to change without notice. Linksys is a registered trademark
Getting Started 3. Using this Guide 3 Connecting Your Phone 4
 Table of Contents Getting Started 3 Using this Guide 3 Connecting Your Phone 4 Adjusting the Footstand / Handset Rest 5 Signing In to Your Phone 5 Choosing the Proper Headset 5 An Overview of Your Phone
HandyTone-701 User Manual (Automatic Provisioning Version)
") HandyTone-701 User Manual (Automatic Provisioning Version) Ver1.0.1 2017/08/22 created Copyright 2017 cloudippbx.com Thank you for purchasing Grandstream HT-701. Make sure and acknowledge that you have
HandyTone-701 User Manual (Automatic Provisioning Version) Ver1.0.1 2017/08/22 created Copyright 2017 cloudippbx.com Thank you for purchasing Grandstream HT-701. Make sure and acknowledge that you have
Configuring the Grandstream UCM6202 for use with TopView Voice Notification Updated August 2018
 Configuring the Grandstream UCM6202 for use with TopView Voice Notification Updated August 2018 Contents Introduction... 2 Voice Notification in TopView... 2 Options for using VOIP in TopView... 2 How
IP Telephony Troubleshooting
 IP Telephony Troubleshooting by Ronald Trunk Page IP Telephony Troubleshooting By Ron Trunk Now that IP telephony systems are becoming commonplace, network engineers need to be familiar with IP telephony
Call Back supports Suspend/Resume CallBack notification for both intracluster and intercluster QSIG
 Overview, page 1 Prerequisites, page 1 Configuration Task Flow, page 2 Interactions and Restrictions, page 8 Troubleshooting, page 9 Overview The CallBack feature allows you to receive notification when
Manual PBX IP Version: 1.0
 Manual PBX IP 2008 Version: 1.0 Content CONTACT ATCOM... 3 CHAPTER 1 THE INTRODUCTION OF PBX-IP 2008... 4 CHAPTER 2 ACCESS TO THE PBX-IP 2008... 7 2.1 WEB PAGE ACCESS BY BROWSER... 7 2.2 SSH ACCESS BY