1. The complete picture after assembly. Assembly
|
|
|
- Francis Woods
- 6 years ago
- Views:
Transcription


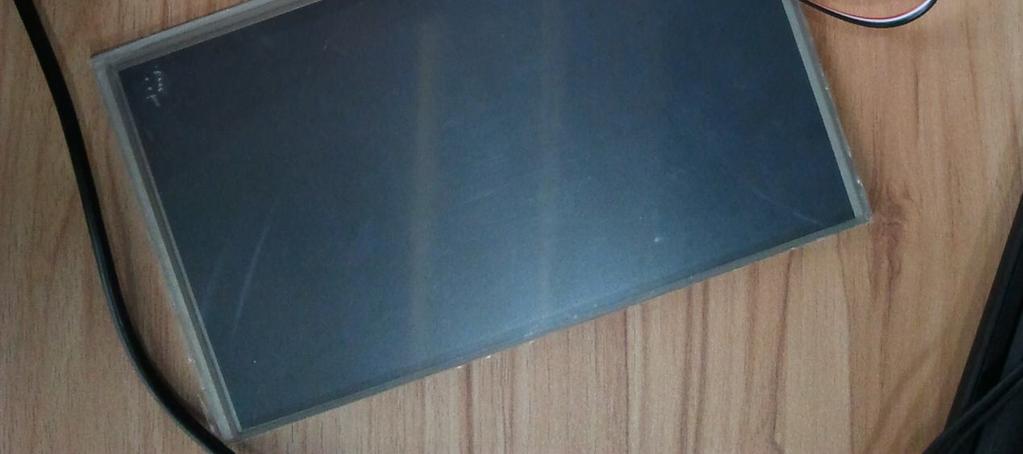
1 1. The complete picture after assembly Assembly


2


3 2. Get the product in hand, assembly steps are as follows:first, face up flat the main screen, and connect the screen data cable to the small adapter board, be sure to insert the black clip card of two ends of the slot into inside. IF the card is not tight enough, it may cause abnormal display. In the tutorials, all have clips apply the same settings.


4


5


6 3. Connect the other end of the adapter plate to a small boost driver board.


7 4.Connect the screen menu control button board to the boost driver board. Please do not anti-plug. 5.Connect the power supply line of the screen to the boost driver board. Please do not anti-plug.


8 5.Connecting the touch USB cable, Please do not plug it in the opposite direction. The easy way to check is to straighten the touch screen control cable flat and the flexible flat cable with silk printing should face up. The order of 4-pin plug wire is black, green, white, and red, as below shown.


9 Then, connect the other end of the 4-pin USB cable with the control board. Please do not anti-plug.


10 Connect the other end of the USB control board to the a standard USB interface


11 Connect 12V DC power supply and HDMI VGA plug to the boost driver board. Reminder: before power supply to the boost driver board, take away all conductors, under the boost drive board, which may cause a short circuit, such as electronic components, metal plates, and other electronic boards. In this case, the 2 welding foot under the boost driver board power supply terminal have nothing to be protected, and positive and negative legs are very close, so it is easy to incur power pin short circuit of power pin, as well as will burn the entire display device.
 raspberry pcduino (here HDMI cable needs connected before powered) or VGA cable into the corresponding boost driver board interface tightly. 2.")
12 At this point, the connection assembly of the whole equipment has completed. Tutorials 1. Plug the HDMI of the signal source pc (windows ubuntu) raspberry pcduino (here HDMI cable needs connected before powered) or VGA cable into the corresponding boost driver board interface tightly. 2. Plug the USB touch drive line into the source device 3. power supply the boost driver board with DC 12V 4. device source to power On How to use screen control panel buttons 1. Power ON / OFF, press boot, press again shutdown, cycling 2.MENU / confirmation, control the language, brightness, contrast and other parameters set of the screen, set and press confirmation again then return to previous menu 3. - PAGE DOWN 4. + PAGE UP 5. Select the video source


13 Windows System Connect PC / laptop's video output cable to the boost driver board, and connect the USB cable of touch screen driver to the PC / laptop, and then install XP-win7-win8 driver.rar. You can calibrate the screen after the installation is completed. LINUX Similarly, connecting with linux kernel system, connect the video output devices to the boost driver board, and connect the USB cable of touch screen drive to the device. Then follow the tutorials of linux.rar to install the driver. How to 32/64Touchkit drive:

14 1. Press ctrl + shift + t, open a terminal window, enter sudo uname --m, press enter 2. 2 If shows i686, means it installed the 32-bit operating system If shows i686, means it installed the 64-bit operating system After install the driver, calibrate the touch screen, then it can be used normally. Mobile linux(take Raspberry for example) The touch-screen calibration of mobile LINUX system is more complicated, so we here provide a well configured xinput_calibrator (touch screen calibration procedure) raspbeery pi system firmware. Customers just need to burn the firmware, and then below steps. operating steps:
15 1. Please compile the system image ( Recommend to use 8G card to Import mirror, the 4G card may be not enough ) on latest debain version. Network location : reen.zip 2. refresh system and Start the raspberries pie,using lsusb command to check if the touch screen is recognized or not : pi@raspberrypi ~ $ lsusb Bus 001 Device 002: ID 0424:9512 Standard Microsystems Corp. Bus 001 Device 001: ID 1d6b:0002 Linux Foundation 2.0 root hub Bus 001 Device 003: ID 0424:ec00 Standard Microsystems Corp. Bus 001 Device 004: ID 1c4f:0002 SiGma Micro Keyboard TRACER Gamma Ivory Bus 001 Device 005: ID 0eef:0001 D-WAV Scientific Co., Ltd egalax TouchScreen If you see A egalax, it means that you had found the touch screen,if you do not find the touch screen, would you please check if the USB interface contacted well,confirm the touch screen chip is egalax. 3. Login raspberries pie, enter into the graphical interface,run xinput_calibrator Program software, Calibration the screen(mirror had installed the software) pi@raspberrypi ~ $ xinput_calibrator
16 The screen will have a notice and mention you to click the Small fork diagonally,after you clicking, the screen will prompt a adjustment of information,as following: Calibrating EVDEV driver for egalax Inc. USB TouchController id=8 current calibration values (from XInput): min_x=1938, max_x=114 and min_y=1745, max_y=341 Doing dynamic recalibration: Setting new calibration data: 121, 1917, 317, 1741 > Making the calibration permanent < copy the snippet below into /etc/x11/xorg.conf.d/99-calibration.conf Section InputClass Identifier calibration MatchProduct egalax Inc. USB TouchController Option Calibration Option SwapAxes 1 EndSection 4.Coping the following content according to the notice Section InputClass Identifier calibration MatchProduct egalax Inc. USB TouchController Option Calibration Option SwapAxes 1 EndSection 5. open File /usr/share/x11/xorg.conf.d/01-input.conf, delete the data in the file already exists,then put the content you copped to the file,then saving.
17 ~ $sudo nano /usr/share/x11/xorg.conf.d/01-input.conf 6. Restart the raspberries pie, then you can enjoy your touch screen well.
5inch HDMI LCD (B) User Manual
 User Manual") 5inch HDMI LCD (B) User Manual Description 5 inch Resistive Touch Screen LCD, HDMI interface, supports various systems Features 800 480 high resolution, touch control Supports Raspberry Pi, and driver
5inch HDMI LCD (B) User Manual Description 5 inch Resistive Touch Screen LCD, HDMI interface, supports various systems Features 800 480 high resolution, touch control Supports Raspberry Pi, and driver
3.2 / 3.5 Touch-Display
 Ausgabe 13.10.2017 Copyright by Joy-IT 1 Index 1. Connection 2. Installing the software 3. Using the buttons on the 3.2 TFT 4. Calibrating the touchscreen 5. Simultaneously using the LCD and the HDMI output
7inch HDMI LCD (H) User Manual
 User Manual") (H) User Manual 7inch HDMI LCD (H) 7inch HDMI LCD (H) (with case) CONTENT Introduction... 3 Features... 3 Differences betteen two versions... 4 How to Use... 5 Working with PC... 5 Tablet PC Settings...
(H) User Manual 7inch HDMI LCD (H) 7inch HDMI LCD (H) (with case) CONTENT Introduction... 3 Features... 3 Differences betteen two versions... 4 How to Use... 5 Working with PC... 5 Tablet PC Settings...
10.1inch HDMI LCD (B) User Manual
 User Manual") 10.1inch HDMI LCD (B) User Manual CONTENT Introductin... 3 The LCD and Control Board... 3 How to Use... 4 Holder Assembly... 4 Working with PC... 4 Hardware Connection... 4 Tablet PC Settings... 5 Workign
10.1inch HDMI LCD (B) User Manual CONTENT Introductin... 3 The LCD and Control Board... 3 How to Use... 4 Holder Assembly... 4 Working with PC... 4 Hardware Connection... 4 Tablet PC Settings... 5 Workign
Raspberry Pi Setup. 5 HDMI NightScout Display Notes: Instructions to switch to chromium-browser highlighted in yellow.
 Raspberry Pi Setup 5 HDMI NightScout Display 2017-09-30 Notes: Instructions to switch to chromium-browser highlighted in yellow. Items Needed: Raspberry Pi with Debian Jessie loaded and configured. See
7inch HDMI Display-B. User Manual. product description
 7inch HDMI Display-B User Manual product description 7 standard display, 800 480 Hardware resolution, Up to 1920x1080 software configuration resolution. capacitive touch screen, maximum support 5 point
5 inch HDMI Display-B
 5 inch HDMI Display-B User Manual 1 / 5 product description 5 standard display, 800x480 resolution,maximum HDMI resolution 1920X1080 is supported Capacitive touch screen, support 5 point touch maximum
All rights reserved by Waveshare Electronics Co., Ltd. Not allow to modify, distribute, or copy without permission.
 DVK512 User Manual Copyright All rights reserved by Electronics Co., Ltd. Not allow to modify, distribute, or copy without permission. Revision History Revision Date Description V1.0 Aug. 18, 2014 Initial
5.5" HDMI OLED-Display with Capacitive Touchscreen V1.0 SKU:DFR0524
 5.5" HDMI OLED-Display with Capacitive Touchscreen V1.0 SKU:DFR0524 This is a 5.5" HDMI OLED-Display with Capacitive Touchscreen. It has 1920 1080 HDMI highdefinition output and comes with a capacitive
3.5 Inch TFT Display
 3.5 Inch TFT Display Resistive&Capacity Touch Screen Website: www.inno-maker.com Contact: sales@inno-maker.com, support@inno-maker.com 1 Website: www.inno-maker.com Contact: sales@inno-maker.com, support@inno-maker.com
DATASHEET. 4DPi Primary Display for the Raspberry Pi REVISION 2.0 HARDARE. Document Date: 28 th September 2015 Document Revision: 2.
 DATASHEET 4DPi-32 3.2 Primary Display for the Raspberry Pi REVISION 2.0 HARDARE Document Date: 28 th September 2015 Document Revision: 2.0 Uncontrolled Copy when printed or downloaded. Please refer to
DATASHEET. 4DPi-24-HAT. 2.4 Primary Display for the Raspberry Pi. In partnership with. Compatible with A+, B+ and Pi2
 DATASHEET In partnership with 4DPi-24-HAT 2.4 Primary Display for the Raspberry Pi Compatible with A+, B+ and Pi2 Document Date: 17 th July 2015 Document Revision: 1.1 Uncontrolled Copy when printed or
Zero2Go. User Manual (revision 1.03) Wide Input Range Power Supply for Your Raspberry Pi. Copyright 2017 UUGear s.r.o. All rights reserved.
 Wide Input Range Power Supply for Your Raspberry Pi. Copyright 2017 UUGear s.r.o. All rights reserved.") Zero2Go Wide Input Range Power Supply for Your Raspberry Pi User Manual (revision 1.03) Copyright 2017 UUGear s.r.o. All rights reserved. Table of Content Product Overview... 1 Product Details... 3 Package
Zero2Go Wide Input Range Power Supply for Your Raspberry Pi User Manual (revision 1.03) Copyright 2017 UUGear s.r.o. All rights reserved. Table of Content Product Overview... 1 Product Details... 3 Package
Parts List: Assembly Instructions:
 My Ride SERVICE MANUAl MyRide ASSEMBLY GUIDE 1.1 ASSEMBLY INSTRUCTIONS ASSEMBLING THE MYRIDE Parts List: Heavy Plate Stabilizer Fin - Right Stabilizer Fin - Left Stabilizer Fin - Large Middle Power Cord
XLink Kai Raspberry Pi Beginners Tutorial
 XLink-Kai-Raspberry-Pi-Beginners-Tutorial.md XLink Kai Raspberry Pi Beginners Tutorial Hi! This tutorial will guide you through setting up XLink Kai on a Raspberry Pi to play multiplayer system link Xbox
Spring 2017 Gabriel Kuri
 Lab 2 ECE 431L Spring 2017 Gabriel Kuri This lab is made up of two parts. Part 1 will consist of familiarizing yourself with the Raspberry Pi (RPi). It includes running Unix/Linux commands to become somewhat
DATASHEET. 4DPi Primary Display for the Raspberry Pi. Document Date: 9 th September 2014 Document Revision: 1.2
 DATASHEET 4DPi-35 3.5 Primary Display for the Raspberry Pi Document Date: 9 th September 2014 Document Revision: 1.2 Uncontrolled Copy when printed or downloaded. Please refer to the 4D Systems website
MOBILE SAFETY DVR1543K. CLIP ON REARVIEW MIRROR KIT with 4.3-INCH LCD MONITOR FRONT & REAR CAR CAMCORDER with DUAL MOUNTING REVERSING CAMERA
 MOBILE SAFETY DVR1543K REARVIEW MIRROR CAR DRIVING RECORDER KIT CLIP ON REARVIEW MIRROR KIT with 4.3-INCH LCD MONITOR FRONT & REAR CAR CAMCORDER with DUAL MOUNTING REVERSING CAMERA 3.0 MEGA PIXEL CAMERA
Lab2 - Bootloader. Conventions. Department of Computer Science and Information Engineering National Taiwan University
 Lab2 - Bootloader 1 / 20 Cross-compile U-Boot. Connect to Raspberry Pi via an USB-TTL cable. Boot Raspberry Pi via U-Boot. 2 / 20 Host Machine OS: Windows Target Machine Raspberry Pi (2 or 3) Build Machine
700TSU INSTALLATION MANUAL
 M 700TSU INSTALLATION MANUAL 2 Table of Contents Features...03 Specifications...04 Quick-Start...05 Remote Control...07 Hardware Installation...10 Software Installation...14 Touch Screen Driver Installation
1029 INSTALLATION MANUAL
 1029 INSTALLATION MANUAL 2 Table of Contents Features 03 Specifications 04 Quick Start..05 Remote Control.07 Capacitive Touch..10 Hardware Installation 11 1029CNH / 1029CNV / 1029TNH / 1029TNV Models Additional
pcduino V3B XC4350 User Manual
 pcduino V3B XC4350 User Manual 1 User Manual Contents Board Overview...2 System Features...3 Single-Board Computer Configuration......3 Pin Assignments...4 Single-Board Computer Setup...6 Required Hardware...6
BeagleBone Black USB Expansion RS232 Module Cape Coolgear, Inc. Version 1.1 September 2017 Model Number:
 BeagleBone Black USB Expansion RS232 Module Cape Product Manual Coolgear, Inc. Version 1.1 September 2017 Model Number: USB-2COM-BB 2 USB-2COM-BB Product Manual Revision History Revision Date Author Comments
AcuTouch. Rugged Touch Screen. Preface. Copyright. Warranty. Trademark Recognition. AWARD is a registered trademark of AWARD International Inc.
 Preface AcuTouch Rugged Touch Screen Copyright The material in this document is the intellectual property of Acura Embedded Systems Inc. This publication, including all photographs, illustrations and software,
5inch HDMI Display User Manual
 5inch HDMI Display User Manual product description 5 standard display, 800 480 resolution With resistive touch screen, support touch control support backlight control alone, the backlight can be turned
Raspberry Pi Setup Tutorial
 Raspberry Pi Setup Tutorial The Raspberry Pi is basically a miniature linux- based computer. It has an ARM processor on it, specifically the ARM1176JZF- S 700 MHz processor. This is the main reason why
How to Make a Raspberry Pi Web Server
 2 Ways to Make a Raspberry Pi Web Server - wikihow http://www.wikihow.com/make-a-raspberry-pi-web-server of 5 08/5/203 :3 AM How to Make a Raspberry Pi Web Server If you are looking for a way to make a
10. In the world of computers, the term refers to the computer s physical components, such as the monitor, keyboard, motherboard, and hard drive.
 Computer Maintenance 2016 Fall Final Review True/False Indicate whether the statement is true or false. 1. A motherboard can have more than one bus, each using a different protocol, speed, data path size,
5inch HDMI Display. User Manual. product description
 User Manual product description 5 standard display, 800 480 resolution With resistive touch screen, support touch control support backlight control alone, the backlight can be turned off to save power
700/702 INSTALLATION MANUAL
 700/702 INSTALLATION MANUAL 2 Table of Contents Features 03 Specifications 04 Quick Start..05 Remote Control.07 Capacitive Touch..10 Hardware Installation 11 700CSH / 702CSH / 700TSH / 702TSH / 700YH /
PENDRIVE TO PENDRIVE SELECTIVE DATA TRANSFER Akshay Ravindra Bhasarkar 1, Mrs. R. N. Mandavgane 2
 PENDRIVE TO PENDRIVE SELECTIVE DATA TRANSFER Akshay Ravindra Bhasarkar 1, Mrs. R. N. Mandavgane 2 1 Student M.tech(VLSI), Department of Electronics & Telecommunication Engineering, BDCOE, Sevagram, Maharashtra,
LinkSprite Technologies,.Inc. pcduino V2
 1 2 Contents Board Overview...3 System Features...4 Single-Board Computer Configuration...5 Pin Assignments...7 Single-Board Computer Setup...9 Required Hardware...9 Optional Hardware...9 Adjusting Screen
2-PORT USB, VGA AND AUDIO POCKET DATA LINK KVM USER MANUAL (DS-11404)
") 2-PORT USB, VGA AND AUDIO POCKET DATA LINK KVM USER MANUAL (DS-11404) Table of Contents Introduction...3 Specifications...4 Hardware Installation..5 AP Installation of Pocket Data Link KVM......6 The Icon
2-PORT USB, VGA AND AUDIO POCKET DATA LINK KVM USER MANUAL (DS-11404) Table of Contents Introduction...3 Specifications...4 Hardware Installation..5 AP Installation of Pocket Data Link KVM......6 The Icon
AcuTouch. Rugged Touch Screen. Preface. Copyright. Warranty. Trademark Recognition. AWARD is a registered trademark of AWARD International Inc.
 Preface AcuTouch Rugged Touch Screen Copyright The material in this document is the intellectual property of Acura Embedded Systems Inc. This publication, including all photographs, illustrations and software,
A64-OLinuXino 64-bit open source embedded computer
 A64-OLinuXino 64-bit open source embedded computer QUICK START GUIDE Document revision B, October 2017 Designed and manufactured by OLIMEX Ltd, 2017 All boards manufactured by OLIMEX LTD are RoHS compliant
参考資料. LinkSprite.com. pcduino V2
 pcduino V2 1 Contents Board Overview...3 System Features...4 Single-Board Computer Configuration......5 Pin Assignments...7 Single-Board Computer Setup......9 Required Hardware......9 Optional Hardware......9
10.1 HDMI LCD. Index. Published: Copyright by Joy-IT 2
 Index 1. Introduction 2. Bracket Mounting 3. Usage with a PC 3.1 Device Connection 4. Usage with a Raspberry Pi 4.1 Installation 4.1.1 Basic installation 4.1.2 Rotating the display with touch function
Installation guide. Step1. Install the OS for Raspberry Pi 3. Go to to download Raspbian to the PC.
 Installation guide Step1. Install the OS for Raspberry Pi 3 Go to https://www.raspberrypi.org/downloads/ to download Raspbian to the PC. Unzip 2017-01-11-raspbian-jessie.zip and you will get a disc image
USB-2COM-BB USER S MANUAL
 USB-2COM-BB USER S MANUAL 2017 May Edition Titan Electronics Inc. Web: www.titan.tw The computer programs provided with the hardware are supplied under a license. The software provided should be used only
Manual of ET-LCD SW HAT
 ET- LCD SW HAT ET-LCD SW HAT is Board I/O that is specifically designed for connection with Board Raspberry Pi through Connector 40-PIN; this board includes LCD 16x2, SW, Buzzer, RTC DS3231 with Connector
How to use Arduino Uno
 1 How to use Arduino Uno Typical Application Xoscillo, an open-source oscilloscope Arduinome, a MIDI controller device that mimics the Monome OBDuino, a trip computer that uses the on-board diagnostics
Lab 0: Intro to running Jupyter Notebook on a Raspberry Pi
 Lab 0: Intro to running Jupyter Notebook on a Raspberry Pi Nick Antipa, Li-Hao Yeh, based on labs by Jon Tamir and Frank Ong January 24, 2018 This lab will walk you through setting up your Raspberry Pi
RoboPeak Mini USB Display User Manual
 2014-3-18 Rev. 1.4 Team Contents: 1. Introduction... 2 Features... 2 2. Typical Use Case... 3 As Human Interactive Interface for Mini PC... 3 As an additional screen for PC... 4 3. Basic Usage... 5 Connect
Spreedbox Getting Started Guide
 Spreedbox Getting Started Guide Last Updated: September 2017 CONTENTS 1. Introduction... 3 2. Prerequisites... 4 3. Opening the box... 5 4. USB Manual, Quick Start Guide & MAC Sticker... 6 5. International
Bluetooth Keyboard Setup Instructions
 Bluetooth Keyboard Setup Instructions Setup Using GUI (NOOBS/Raspbian) 1. Insert your micro SD card into the micro SD card slot on the Raspberry Pi. 2. Connect an HDMI cable from your Raspberry Pi to your
[Note: Power adapter is not included in the kits. Users need to prepare a 9 12 V ( >300mA capacity ) DC power supply]
![[Note: Power adapter is not included in the kits. Users need to prepare a 9 12 V ( >300mA capacity ) DC power supply]](/thumbs/76/74094055.jpg "[Note: Power adapter is not included in the kits. Users need to prepare a 9 12 V ( >300mA capacity ) DC power supply]") 062 LCD Oscilloscope Assembly Notes Applicable Models: 06203KP, 06204KP DN062-18v02 Important Notes 1. Some components shown in the schematic and PCB layout are for options or adjustments. They do not
062 LCD Oscilloscope Assembly Notes Applicable Models: 06203KP, 06204KP DN062-18v02 Important Notes 1. Some components shown in the schematic and PCB layout are for options or adjustments. They do not
Rs-Pi USB- 4 Hub & I2C RS232 User Manual
 Rs-Pi USB- 4 Hub & I2C RS232 User Manual 1. U5 MCP23008 8 GPIO output J2 (GP0 ~ GP7 ) OUTPUT & GP0,GP1,GP2,GP3,GP,GP5,GP6,GP7 (8 LED OUTPUT ) R20,R21,R22 (A0,A1,A2) address select JP9 Disable Jumper 2.
1. USB to Serial cable driver installation instructions 2. Instructions for use with Raspberry Pi 3. Instructions for use with WRT54g and similar
 TechnoFix This document contains three sections: 1. USB to Serial cable driver installation instructions 2. Instructions for use with Raspberry Pi 3. Instructions for use with WRT54g and similar Please
Thanks for purchasing one of the most cutting edge mini computing devices available today,
 Welcome! Thanks for purchasing one of the most cutting edge mini computing devices available today, the MK802IV LE. The MK802IV LE is a powerful quad core Linux mini computer which runs a version of Ubuntu
AerMonitor AM Aer Monitor User's Manual. Version-0.1
 AerMonitor AM-1015 Aer Monitor User's Manual Version-0.1 AerMonitor AM-1015 Copyright Notice This document is copyrighted, 2013. All rights are reserved. Firich Enterprise Co., Ltd reserves the right to
OMNI Expandable HMI Panel Computer with Intel Celeron J1900/ N2807 Processor
 17 OMNI-2155 15.6 Expandable HMI Panel Computer with Intel Celeron J1900/ N2807 Processor Expandable HMI Panel PC Solution OMNI Slot 9-30 V Power Connector RS-232/422/485 VGA Remote Power Connector USB
Quick Start Guide EX-9686U/A-L(A9) Copyright TOPSCCC Technology CO., LTD. All rights reserved
 Copyright TOPSCCC Technology CO., LTD. All rights reserved") Quick Start Guide Copyright 2000 2014 TOPSCCC Technology CO., LTD. All rights reserved Release Notes Version Release Date Notes 1.0 June 2013 Initial release 2.0 October 2013 Correct some typo errors 3.1
Quick Start Guide Copyright 2000 2014 TOPSCCC Technology CO., LTD. All rights reserved Release Notes Version Release Date Notes 1.0 June 2013 Initial release 2.0 October 2013 Correct some typo errors 3.1
Energy Meter and. Current Transducer. Assembly Manual
 Energy Meter and Current Transducer Assembly Manual 2017 1 The energy meter assembly is made of two separate boxes and associated accessories, as follows: Energy Meter (EM) Box, with two cables feeding
Installation of RedHawk 6.5-r24.2 on the Jetson TX1 Development Board Release Notes. September 19 th, 2017
 Installation of RedHawk 6.5-r24.2 on the Jetson TX1 Development Board Release Notes September 19 th, 2017 This page intentionally left blank 1. Introduction This document describes the process of installing
KTX PC User Manual. KumoTeck 06/25/2010. Tech Support. Masahiro Ishida
 KTX PC User Manual KumoTeck 06/25/2010 Tech Support Masahiro Ishida 1 Introduction Thank you for purchasing KTX-PC from us. This Manual explains how we treat this robot and its accessories. Please read
PU-160ETH. Ethernet and USB to HDMI Converter. Operation Manual PU-160ETH
 PU-160ETH Ethernet and USB to HDMI Converter Operation Manual PU-160ETH Trademark Acknowledgments All products or service names mentioned in this document may be trademarks of the companies with which
UPS PIco. for use with. Raspberry Pi B+, A+, B, and A. HAT Compliant. Raspberry Pi is a trademark of the Raspberry Pi Foundation
 UPS PIco Uninterruptible Power Supply with Peripherals and I 2 C control Interface for use with Raspberry Pi B+, A+, B, and A HAT Compliant Raspberry Pi is a trademark of the Raspberry Pi Foundation Gold
This is a tutorial about sensing the environment using a Raspberry Pi. measure a digital input (from a button) output a digital signal (to an LED)
 output a digital signal (to an LED)") Practical 2 - Overview This is a tutorial about sensing the environment using a Raspberry Pi and a GrovePi+. You will learn: digital input and output measure a digital input (from a button) output a digital
Practical 2 - Overview This is a tutorial about sensing the environment using a Raspberry Pi and a GrovePi+. You will learn: digital input and output measure a digital input (from a button) output a digital
Instruction How To Use Laptop As Monitor For Desktop Windows 7
 Instruction How To Use Laptop As Monitor For Desktop Windows 7 In this article, I'll show you the process in Windows XP and Windows 7, the to split programs on the second monitor using Windows XP or Windows
Home Automation, Inc. Model 53A00-1. OmniTouch 5.7 Touchscreen with Video
 Home Automation, Inc. Model 53A00-1 OmniTouch 5.7 Touchscreen with Video Installation Manual Document Number 53I00-1 Rev A June, 2007 FCC NOTICE This device complies with FCC Rules Part 15. Operation is
Adafruit 5" and 7" 800x480 TFT HDMI Backpack
 Adafruit 5" and 7" 800x480 TFT HDMI Backpack Created by lady ada Last updated on 2017-10-22 09:01:29 PM UTC Guide Contents Overview Pinouts EDID EEPROM Port Backlight Control Power Output Raspberry Pi
UPDATING THE FIRMWARE IN FRAME BASED MODULES...
 7700/7800 MultiFrame Manual TABLE OF CONTENTS 1. OVERVIEW... 1 1.1. REQUIREMENTS... 1 1.1.1. Requirements Serial Port Upgrade Method... 1 1.1.2. Requirements FTP Upgrade Method (For VistaLINK Capable Modules
Diamond Systems Hercules II Single Board Computer FastStart Guide
 Diamond Systems Hercules II Single Board Computer FastStart Guide DSC Document #7460001 Rev A Diamond Systems Corp. (650) 810-2500 www.diamondsystems.com This document describes a series of quick steps
4-port USB to RS232 Adapter FTDI Cable. Product Manual. Coolgear, Inc. Version 1.1 September 2017 Model Number: CG-4X232FTDI.
 4-port USB to RS232 Adapter FTDI Cable Product Manual Coolgear, Inc. Version 1.1 September 2017 Model Number: CG-4X232FTDI 2 CG-4X232FTDI Product Manual Revision History Revision Date Author Comments 1.0
Quick Start Guide SBC21/NSD21/EC 21 SBC21 / EC21 / NSD21. Quick Start Guide. Copyright IC Nexus Corporation. All rights reserved
 SBC21 / EC21 / NSD21 Quick Start Guide Copyright 2000 2013 IC Nexus Corporation. All rights reserved Release Notes Version Release Date Notes 1.0 June 2013 Initial release 2.0 October 2013 Correct some
705 INSTALLATION MANUAL
 705 INSTALLATION MANUAL 2 Table of Contents Features...03 Specifications...04 Quick - Start...05 Remote Control...07 Hardware Installation...10 705 Models Additional Info...14 Owner s Record...15 3 Features
Catalogue. Assembling... 1 Unpack Charge the Battery Install the Memory Card Product Basics Buttons and Connections...
 Catalogue Assembling... 1 Unpack... 1 Charge the Battery... 1 Install the Memory Card... 1 1 Product Basics... 2 1.1 Buttons and Connections... 2 1.2 Start Up and Shut Down... 2 2 Introduction of Google
Orange Pi User Manual. <Version: V1.0 >
 Orange PI User Manual What s Orange Pi? It s an open-source single-board computer. It can run Android 4.4, Ubuntu, Debian, Rasberry Pi Image, Cubieboard Image, as well as the banana pi
Can't use USB 3.0 connection with Ubuntu 12.04
 Can't use USB 3.0 connection with Ubuntu 12.04 Can't use USB 3.0 connection with Ubuntu 12.04 Background Recently my 1.0TB external hard drive--my backup drive--failed, and I replaced it with a 2.0TB external
Raspberry Pi. Quick-Start Guide. Rev 1.0, Mar 2017
 Raspberry Pi Quick-Start Guide Rev 1.0, Mar 2017 Table of Contents 1. Raspberry Pi Start Kits... 2 A. Generation Introduction:... 2 B. Package including:... 2 2. Assembly... 3 A.16GB Micro SDPre-Loaded
Dell Streak Unlock Software
 Release March 2011 Dell Streak Unlock Software A Step-By-Step Tutorial For Unlocking Dell Streak 5 To Work With Any Compatible Network And SIM Card. UnlockStreak.com 1 Introduction www.unlockstreak.com
1020 / 1022 INSTALLATION MANUAL
 1020 / 1022 INSTALLATION MANUAL 2 Table of Contents Features...03 Specifications...04 Quick - Start...05 Remote Control...07 Hardware Installation...10 1020TSV, 1022TSV, 1020YV, 1022YV, 1020TSH, 1022TSH
1. Proceed to Step #2, it should be properly installed and ready to use. If you plan on using the supplied USB-to-RS-232 Cable for Windows
 Installation Step #1 Configuring your PC for RS-232 Control If you have a built-in RS-232 connector 1. Proceed to Step #2, it should be properly installed and ready to use. If you plan on using the supplied
GNSS Logger Unit with RTKLIB. Tiphat Areeyapinun Shizuoka University
 GNSS Logger Unit with RTKLIB Tiphat Areeyapinun Shizuoka University 1 GNSS Logger Unit with RTKLIB 2 Objective To record GNSS RAW data directly from a receiver module for post processing Small footprint
ENGLISH. Matrox Parhelia. Matrox Millennium P750. User Guide
 Matrox Millennium P650 User Guide 10818-301-0210 2005.02.28 ENGLISH Matrox Parhelia Matrox Millennium P750 Hardware installation This section describes how to install your Matrox card. If your Matrox graphics
Micro USB Lamp Kit ESSENTIAL INFORMATION. Version 2.0 DESIGN A STYLISH LAMP WITH THIS
 ESSENTIAL INFORMATION BUILD INSTRUCTIONS CHECKING YOUR PCB & FAULT-FINDING MECHANICAL DETAILS HOW THE KIT WORKS DESIGN A STYLISH LAMP WITH THIS Micro USB Lamp Kit Version 2.0 Build Instructions Before
ROGER S HALL 2ND FLOOR CRESTRON USER GUIDE
 SUPPORT 1(646)-997-3934 ROGER S HALL 2ND FLOOR CRESTRON USER GUIDE PAGE 1 TABLE OF CONTENTS START UP...1 INPUT SOURCE LAPTOP CONNECTION...2 AIR MEDIA...3 LECTERN PC...4 BLU-RAY PLAYER...5 PROJECTOR...6
Matrix. Get Started Guide V2.0
 Matrix Get Started Guide V2.0 Overview Matrix is a single board mini computer based on ARM with a wide range of interface, equipped with a powerful i.mx6 Freescale processor, it can run Android, Linux,
CDL-160ETH. Ethernet and USB to HDMI Converter. Operation Manual CDL-160ETH
 CDL-160ETH Ethernet and USB to HDMI Converter Operation Manual CDL-160ETH Disclaimers The information in this manual has been carefully checked and is believed to be accurate. Cypress Technology assumes
Quality-Management. Digital microscope with display for visual inspection, etc. Microscope cwhpro 302
 Quality-Management Digital microscope with display for visual inspection, etc. Microscope 302 Page 1 of 13 Microscope 302 Microscope 302 Page 2 of 13 Microscope 302 for visual inspections of / and / or
Updating the Firmware in the BAM-1020 Particulate Monitor
 Met One Service Bulletin Revised: February 12, 2009 Met One Instruments, Inc. 1600 N.W. Washington Blvd. Grants Pass, OR 97526 (541) 471-7111 www.metone.com Updating the Firmware in the BAM-1020 Particulate
8 / 16 port combo KVM Switch 1+1 Console 8 / 16 port combo KVM Switch User Manual
 8 / 16 port combo KVM Switch 1+1 Console 8 / 16 port combo KVM Switch User Manual V2.0 2007.4.25 C o n t e n t s 1. Introduction... 16H4 1.1 Back Panel... 4 1.2 Main Features... 17H5 1.3 Package Contents...
TUTORIAL Describe the circumstances that would prompt you to use a microprocessorbased design solution instead of a hard-wired IC logic design.
 TUTORIAL 1 1. Make a list of 10 products containing microprocessors that we use everyday. Personal computer Television Calculator Elevator Mobile phones MP3 players Microwave ovens DVD players Engine Control
Experiments 1 How to set up Raspberry Pi B+ The little computer you can cook into DIY tech projects
 Experiments 1 How to set up Raspberry Pi B+ The little computer you can cook into DIY tech projects The Raspberry Pi is a computer about the size of a credit card. The darling of the do-it-yourself electronics
EXP GDC. Laptop External Graphics Adapter DOCK INDEX INDEX History Overview Notice EXP GDC versions Features...
 EXP GDC Laptop External Graphics Adapter DOCK INDEX INDEX... 1 History... 2 Overview... 3 Notice... 3 EXP GDC versions... 4 Features... 4 Upgrade Features... 5 Hardware requirements... 5 Packing List...
Internet Of Things You Search. IOTCape User manual IOTYS SARL All rights reserved IOTCape - User manual Page 1 of 17
 Internet Of Things You Search IOTCape User manual 2015 IOTYS SARL All rights reserved IOTCape - User manual Page 1 of 17 TABLE OF CONTENT 1 Introduction... 5 1.1 Scope... 5 1.2 Product description... 5
CDL-160ETH. Ethernet and USB to HDMI Converter. Operation Manual CDL-160ETH
 CDL-160ETH Ethernet and USB to HDMI Converter Operation Manual CDL-160ETH Disclaimers The information in this manual has been carefully checked and is believed to be accurate. Cypress Technology assumes
Installation Instructions. Ecast Mojo B75B Motherboard Upgrade Kit Kit #
 Installation Instructions Ecast Mojo B75B Motherboard Upgrade Kit Kit #26684501 This kit contains the parts and instruction to install the B75B Motherboard into your Ecast Mojo jukebox. Tools Required
Vidifox Document Camera GV 400 USER GUIDE. Please read this manual carefully before operating the camera and keep it for your reference.
 Vidifox Document Camera GV 400 USER GUIDE Please read this manual carefully before operating the camera and keep it for your reference. PLEASE READ CAREFULLY BEFORE USE n n n n n n n Please be aware of
User Manual. DVK512 Expansion Board For Raspberry Pi
 DVK512 Expansion Board For Raspberry Pi User Manual DVK512 is an expansion board designed for Raspberry Pi Model B+, integrates various components and interfaces for connecting external accessory boards.
DVI Desktop 4-Port Audio-Combo-KVM Switch
 DVI Desktop 4-Port Audio-Combo-KVM Switch User s Manual (DS-12800) Index 1 INTRODUCTION... 2 1.1 FEATURES... 2 1.2 PHYSICAL DIAGRAM... 3 1.3 PACKAGE CONTENTS... 3 2 SPECIFICATIONS... 4 2.1 GENERAL... 4
Davide Cavaliere 18 th February 2017
 Davide Cavaliere www.monocilindro.com dadez87@gmail.com 18 th February 2017 This guide explains how to set in read mode your Raspberry Pi 3, running the latest Raspbian Jessie (January 2017). This feature
A113X1 Development Kit
 A113X1 Development Kit User Guide Revision: 4.0 Release Date: 2018-02-06 Amlogic, Ltd. COPYRIGHT 2017 Amlogic, Ltd. All rights reserved. No part of this document may be reproduced. Transmitted, transcribed,
5x86 Third Serial Port Installation
 Introduction This document explains how to add a third serial port to P3, P4, P5, or P7 PowerStations that have a 5x86 CPU card. It includes instructions for opening the PowerStation, reconfiguring the
Compute Module IO Board Plus User Manual
 Compute Module IO Board Plus User Manual OVERVIEWS This is an Expansion board of Compute Module 3 and Compute Module 3 Lite. It is compatible with Compute Module IO Board V3 from Raspberry Pi Foundation,
Touch Calibration / Marco Key / OSD introduction
 Touch Calibration / Marco Key / OSD introduction Touch Screen Introduction & Calibration Penmount 9000 (RS-232) Penmount 5000 (USB) Touchscreen Calibration Penmount Control Board The PenMount Touch Screen
Rs-Pi 7 USB- Hub & I2C 1-Wire User Manual
 Rs-Pi 7 USB- Hub & I2C 1-Wire User Manual 1. U8 RTC DS1307 with CR2032 Battery 2. U7 TMP102 Temperature Sensor 3. U9 24C32 32Kbit EEPROM JP10 Disable Jumper 4. U6 MCP4725 12bit Digital-to-Analog Converter,
ZA-H8N9 Motherboard. User Manual. Intel Corei7/Corei5/Corei3 Pentium Processor
 ZA-H8N9 Motherboard User Manual Intel Corei7/Corei5/Corei3 Pentium Processor Version:1.0 Issue Date:08/2016 ZA-H8N9 Motherboard Configuration Diagram 1 ZA-H8N9 Motherboard Diagram 2 Catalog ZA-H8N9 Motherboard
QUICK START GUIDE. Android or Windows Tablet. 1 Tower PC. Mount the RazorGage to your Own Table. Assembling the RazorGage ST with RazorGage Table
 QUICK START GUIDE Android or Windows Tablet If you have a Tablet Style Interface (PC or Android) then skip this step. 1 Mount monitor and attach legs to control tower using hardware provided and place
Cabinet features. Display features. Picade X HAT features
 Picade PIM305 The ultimate desktop retro arcade machine! Picade is a Raspberry Pi-powered mini arcade that you build yourself, with authentic arcade controls, a high resolution 4:3 display that's ideal