PROVAR QUICKSTART GUIDE
|
|
|
- Bridget Crawford
- 5 years ago
- Views:
Transcription

1 PROVAR QUICKSTART GUIDE A simple, practical guide for getting started with Provar info@provartesting.com
2 Introduction 4 How to use this guide 4 SECTION 1: Setup 5 What is Provar? 5 Prerequisites 5 Installing Provar 6 SECTION 2: Your first project 10 Introduction to Test Projects 10 Importing a Test Project 10 Checking your Salesforce connection 12 SECTION 3: Creating tests 15 About this section 15 Lesson 1: Mapping simple values 16 Introduction to Test Cases 16 Introduction to the Test Builder 16 Creating a Test Case 17 Adding Test Steps with the Test Builder 19 Viewing and Adjusting Test Cases 27 Lesson 2: Running and reporting 30 Running Test Cases with Test Builder 30 Introduction to Run modes 31 Introduction to Test Runner 32 Exporting a report 33 Exercise 1 and 2: Create Account Test Case 36 Lesson 3: Mapping advanced inputs 38 Inputting a dynamic date with SF Today 38 Mapping a lookup field 40 Asserting values 46 Testing a validation rule 49 Renaming Test Steps 53 Exercise 3: Create Case Test Case 56 Lesson 4: Functions and variables 57 Introduction to Functions 57 Copying Test Cases 57 Adding Date functions 59 Adding Breakpoints 64 Capturing Variables 66 Exercise 4: Create Case2 Test Case 70 Lesson 5: Lists and Tables 71 Introduction to Tables 71 Finding data in a List View 71
3 Setting a value in a Variable 76 Logging a Call via the Quick Action 79 Using Variables in Test Steps 81 Finding data in a Related List 84 Exercise 5: Create Account and Contact Test Case 90 Lesson 6: Testing in Consoles 92 Introduction to Console Testing 92 Navigating a Console 93 Attaching a File to a Case 101 Refreshing the UI 104 Locating information on Related Lists 107 Using a Variable as a Row Locator 112 Closing a Case 118 Exercise 6: Manage Opportunity 125 Lesson 7: Visualforce Testing 126 Introduction to Visualforce 126 Using Group Steps 126 Mapping Visualforce fields with Page Objects 131 Checking Page Objects in Provar Desktop 140 Mapping a Visualforce Table 143 Exercise 7: Test WebToCase Test Case 157 Lesson 8: Testing with the API 159 Creating object records with the API 159 Adding UI Test Steps after API Test Steps 170 Updating object records with the API 173 Reading/Asserting values with the API 175 Querying values with the API 178 Introduction to Callable tests 179 Creating a Callable Test Case 180 Exercise 8: API Create Account Test Case 192 Version History 193 3
4 Introduction Welcome to the Provar quickstart guide. This guide is intended to help you through the basics of setting up and using Provar. It covers tool setup and describes how to use many of Provar s popular features. This quickstart guide is a lighter version of our standard Help and Training. As such, it does not provide comprehensive information about all of Provar s features. If you want to know about features not covered in this guide, or if you have any questions about the topics covered here, please contact us at info@provartesting.com. How to use this guide This guide starts with essential setup activities (Sections 1 and 2) and then moves into scenario-based lessons to introduce Provar s key features (Section 3). For best results we recommend reading the guide from start to finish, since later lessons assume knowledge that earlier lessons have provided. Please note: the current version of this guide uses screenshots taken with Provar version on Mac OS X. The appearance of Provar on your own machine may vary slightly from those in the guide. 4
5 SECTION 1: Setup What is Provar? Provar is a test automation solution designed for Salesforce. Provar works by accessing the metadata in your Salesforce org. This helps you to build maintainable tests, because it avoids using elements that can change in different Salesforce environments, such as field IDs. Metadata integration also makes Provar an expert in testing areas of Salesforce that have been tricky to automate in the past, such as Visualforce, Console and Lightning. Provar comes as software that you install on a PC or Mac, with a Chrome application that lets you build Test Cases in the browser. These are known respectively as Provar desktop and Provar Test Builder. Provar is designed to be usable by developers and non-developers alike. It creates humanly readable test cases that can be understood by your whole QA team and its stakeholders. Take a look at to learn more about Provar and its features. Prerequisites Before you install Provar, check that your machine has the following: A minimum system configuration of 8GB RAM and dual-core processor or better. You should also have 500MB of free disk space and Java 7 runtime installed. A strong network connection to help Provar run effectively. The Google Chrome browser. This browser is strongly recommended for use with Provar since it gives you access to the Test Builder, a chrome application, which lets you build tests quickly from within Salesforce. If you don t have Google Chrome installed, you can still use Provar, but this plugin will not be available. We assume in this guide that you will be using Google Chrome. To use your Provar quickstart, you will also need the following: A Provar license key. You should have received this by as part of your quickstart setup. A Provar installer program. You should have received this in the same as your license key as part of your quickstart setup. Please follow the instructions in that to download your Provar installer. EITHER: A Provar sample test project file. You should have received this by as part of your quickstart setup. Please download the file onto your machine. OR: Login details to your chosen Salesforce environment, including a username, password and security token. The login user must have system administrator permissions with Modify All Data and API Enabled ticked on their profile. This is needed so that Provar can access the environment s metadata. 5

6 If you have not received information regarding your license key or Provar installer, please contact us. Installing Provar Complete the following steps to install Provar. 1. Run the Provar installer you have previously downloaded. Follow the on-screen instructions to complete the installation, then launch Provar. 2. Select a workspace folder. This is where all your Test Project data will be saved on your computer. You may want to switch your workspace in future so that you can have more than one Test Project, so also make sure that you leave unticked the option Use this as the default and do not ask again. Click OK to continue. 3. Activate your license by following the steps below. 6

7 When you open Provar for the first time, the Welcome Window will appear with the License Manager on top of it. If the License Manager does not appear, go to Help > License Manager to open it. From the License Manager, click the Add button. 7


8 Select your License Type: Fixed Seat licenses allow the use of Provar on a single physical computer in your network Floating licenses allow the use of Provar on multiple physical or virtual computers in your network Trial licenses are temporary licenses to allow organizations to assess Provar Enter a License Name or accept the default name provided. Enter your License Key in the box provided. Fixed Seat or Floating licenses have a 25-character key. Trial licenses have a significantly longer key which will extend beyond the box provided. Once you have entered these details, click the Test button. If your validation is unsuccessful, check that you have entered the details correctly and try again. If the problem persists, contact us at info@provartesting.com. If your test is successful, click the OK button. 8
9 To activate your license, click the Activate button. The status of your license should go to Activated and the bulb next to the License Name should light up ( ). Click the OK button to proceed. 9
10 SECTION 2: Your first project Introduction to Test Projects A Test Project is a collection of all your test-related data. It groups together all the Test Cases you will be creating during this quickstart. In future you can create different Test Projects to group together different sets of test cases. A Test Project also stores your Salesforce connection details. This Salesforce connection defines the Salesforce environment in which your Test Cases will be built and run. It also allows Provar to access the metadata of your Salesforce environment, and gives you access to all of Provar s Salesforce-related features. When you import a Test Project, a Salesforce connection will be provided within the Test Project. If you create a Test Project from scratch, you will need to set up a Salesforce connection manually. Importing a Test Project For the purposes of this quickstart, we will start by importing an existing Test Project. From the Welcome Window, click the Import an existing Test Project link. Select the option Select archive file and find the location of the zipped sample project file provided to you. For more information on this file please refer to section Prerequisites. 10

11 Leave other options defaulted, and click the Finish button. After you have imported a new Test Project, you will see its folder appear in the Navigator on the left side of the screen. 11

12 Clicking the triangle next to the project folder will expand it to show the files within. Test Cases are stored in the /tests folder. Checking your Salesforce connection After you have imported a new Test Project, Provar will begin accessing the metadata of the environment s metadata via the Salesforce connection provided. Then it will validate your Test Cases. You can monitor the progress of both of these from the Org Browser window in the bottom-right of the screen, and in the status area immediately below it. 12

13 Once Provar has successfully downloaded your environment s metadata, you will see in the Org Browser a navigable copy of your environment s metadata. This Org Browser is one of many windows, known as views, which are visible within Provar desktop. You can change your views by manually resizing, dragging to a different location on the screen, or maximizing and minimizing. If you ever want to return your arrangement to the default, click the View button at the top-right and select Reset Views. 13


14 Clicking on an Object name will open a secondary panel showing rows of data from that object. There may be a short delay while Provar retrieves the data requested. The Org Browser is a useful way of quickly viewing test data, especially when fields are not visible on page layouts. You can also click on any Id cell to navigate to that record within the connected Salesforce environment. Logging in is handled automatically. 14
15 SECTION 3: Creating tests About this section In Sections 1 and 2, you installed Provar and imported a Test Project with some sample Test Cases. In this section, you will create some of your own Test Cases and also review some of the samples provided. There are 8 lessons in this section. These are designed to get you comfortable with using Provar and familiar with key concepts. We recommend that you complete all the lessons yourself by following along with the printscreens and click-paths provided. Lessons are followed by exercises where you can test your understanding of the lesson. We recommend completing all of these exercises. If you get stuck, or want to skip an exercise, you can use the video link provided in the exercise to see the exercise completed click by click. You can also refer to the solutions provided for you in the Test Project you have imported. In this Test Project, you will find all the Test Cases which we cover in the lessons and exercises below. 15
16 Lesson 1: Mapping simple values In this first lesson you will learn how to create a simple Test Case. In this lesson we will cover: How to create Test Cases How to use the Test Builder How to map buttons How to set input values How to capture printscreens How to check Test Cases in Provar desktop Introduction to Test Cases Now that you have imported a Test Project with a working Salesforce connection, you can start building Test Cases. A Test Case is a single use case which contains a number of Test Steps, run sequentially. After you create and save a Test Case, it will be stored as a.testcase file on your machine, and can be found in the tests folder of your Test Project. These files can then be shared with other members of your team. For more information on how to do this, please refer to the help articles in our full training course, found under Tool Features > Version Control. Introduction to the Test Builder The fastest way to create Test Cases in Provar is using the Test Builder. The Test Builder is a Chrome extension that allows you to build Test Cases interactively from within Salesforce. It allows you to add Test Steps quickly and can automatically capture fields and input values. 16
17 We will launch the Test Builder automatically after creating our first Test Case. Creating a Test Case To create a new Test Case, click the New Test button in the top-left corner. From the New Provar Test Case window, give your Test Case the name Create Lead. 17

18 You will note that various defaults have been suggested, such as Normal Test Case and Launch Test Builder Session being ticked. We will use these defaults for now, but let s amend Salesforce Application to Sales. The Salesforce Application dropdown allows you to set the app that you want Salesforce to launch in, e.g. Sales. If left at default, it will use the application last used by that user. In general, it s best to select a specific Application to make sure that the behavior is consistent with what you are expecting. Then click the Finish button. The Test Builder will now launch automatically and make the connection to Salesforce. 18

.")
19 You will note that the Test Builder displays the Test Case which was just created, Create Lead. It has automatically added the first Test Step, Salesforce Connect. Now Provar will launch a separate Chrome session which will log into Salesforce automatically. This may take a few moments. Adding Test Steps with the Test Builder After Provar has logged into Salesforce, you will have a split-screen view of Salesforce on the left and the Test Builder on the right. Once this login has been completed, you should also see in the Test Builder that the Test Step for Salesforce Connect has a green tick icon next to it ( ). From your Salesforce session, navigate to the Leads tab. 19


20 Right-click on the New button and select Add to Test Case. After you click this, the Test Builder will detect your click and offer to add it as a new Test Step. The Add New Test Step window will open in the Test Builder. 20

21 You will note that the page has been detected automatically as Salesforce Lead Home. The button has also been detected as the New button. Note that we did not have to include any Test Step to navigate to the Leads tab. Provar does this navigation automatically to save time. However, this only applies to the first screen of a Test Case: navigations to subsequent screens are assumed to be driven through the Test Steps, unless you specify otherwise. To add this Test Step to the Test Case, click the Add & Do button. This will add the Test Step and execute it so that you can add more steps. You will then be navigated automatically to the New Lead screen. 21

22 * Next enter the following information into the New Lead screen: First Name: Tom Last Name: Parker Company: Playton PLC Lead Source: Phone Inquiry We will now map these inputs into the Test Case. On the First Name field, right-click and select Add to Test Case. 22


23 If you have clicked accurately, you will note that the Test Builder has automatically detected the First Name field for input. * The Test Builder screen should look like this: * 23
24 You will note that the page has again been detected automatically, this time as Salesforce Lead New screen. The field has been detected as the First Name field, and the Interaction Type as Set to a Value of Tom. Although the Test Builder detects this information automatically, you can always amend the information manually if needed. For example, you can change the Field Name to be a different field, or you can correct the Value entered. If in doubt, you can also click the Cancel button and try re-adding the Test Step. Click Add & Do. Then repeat these steps to map Last Name, Company and Lead Source. Once you have mapped these fields, your Test Builder should look like this: 24


25 We will now add a final Test Step for clicking the Save button. We will also add printscreens of the lead before and after the Save button is clicked. Right-click the Save button and select Add to test case. The Test Builder should detect the Save button automatically. * 25

26 This time, under Options, tick Screenshot Before and Screenshot After. This will take a screenshot of the Salesforce page before and after the Save button is clicked Then click the Add & Do button. Congratulations! You have finished creating your first Test Case. * 26


27 Viewing and Adjusting Test Cases Finally, let s review the Test Case in Provar desktop. In the center of the screen you will see your Test Case open with the Test Steps ordered sequentially as they were in the Test Builder. You can also resize the Test Case window to see it better. You can also drag-and-drop Test Steps to re-order them in the Test Case. Try moving the Lead Source Test Step up so that it is the first field to be set on the New screen. 27

 to save")
28 When you see an asterisk (*) in front of the Test Case name, this means that you have unsaved changes. Click the Save button ( ) to save your change. 28
29 Well done! You have completed Lesson 1. 29

30 Lesson 2: Running and reporting In this lesson you will learn how to run a Test Case and export a report of the run. In this lesson we will cover: How to run a Test Case When to use each of Provar s 3 Run modes How to use the Test Runner How to export a report How to interpret the report Running Test Cases with Test Builder In the last lesson you created your first Test Case, Create Lead. This has been saved as a.testcase file inside the /tests folder of your Test Project. * There may be other folders inside your /tests folder, as in the screenshot above. These sub-folders are used to group Test Cases together. Click on your Create Lead Test Case, then click the Test Builder button at the top of the screen. If you have any unsaved changes, you will be prompted to save them at this point. After clicking the Test Builder button, Provar will launch a new Test Builder session and execute the full Test Case step-by-step. 30
 at the top of the Test Builder.")

31 After running through the Test Steps, Provar will pause at the end of the Test Case so that more Test Steps can be added. Since we re not adding any more Test Steps right now, you can complete the run by clicking the Resume icon ( ) at the top of the Test Builder. Click it twice to vacate the session. Introduction to Run modes You will have noted that there are three different run modes available in Provar. You have just used Test Builder mode to build and run Test Cases with the Test Builder alongside. This mode lets you pause execution and step forwards and backwards through the Test Case. It also supports breakpoints and variable capture, which we will cover in Lesson 4. This is 31

32 Provar s most commonly used mode. You should always use this mode when you are actively working on a Test Case. Run mode is the standard mode for when a Test Case is complete. It will not launch the Test Builder and does not support breakpoints or variable capture. You should choose this mode when you just want to run a Test Case and do not anticipate a need for the Test Builder. Debug sits in between the other two modes as it does not launch the Test Builder but it does support breakpoints and variable capture. You can use this mode if you want to troubleshoot a Test Case in Provar desktop, without use of the Test Builder. Introduction to Test Runner After running a Test Case, you can refer get more information about the success of the run in the Test Runner. This is the bottom-left window in Provar desktop. In the Test Runner you can see the Test Case that has just been run and see log information for each Test Step by clicking on it. 32


33 You can also see any screenshots captured during the run. Double-click into the Before Screenshot to see the inputs specified in the Test Case. Exporting a report You can also export test run results into a PDF or CSV. To export a report, click the Export button ( ) in the top-right corner of the Test Runner. 33

34 In this window you can specify PDF or CSV output and specify additional details to be included. For now, just accept the default options and click Finish to launch a PDF report. 34

35 Well done! You have completed Lesson 2. 35
36 Exercise 1 and 2: Create Account Test Case Now that you have completed Lessons 1 and 2, we re going to test your knowledge of what s been covered so far. In this exercise you will use Provar to create a simple Test Case and set some values in the Test Builder. Please complete the following: Create a new Test Case named Create Account Use the Test Builder to create an Account and input the following information Account Name = Barton Media Active = Yes Approved = TRUE Number of Locations = 15 Website = SLA Expiration Date = 01/01/2020 SLA = Gold SLA Serial Number = Add a screenshot before and after clicking Save Export a CSV report of the new Create Account Test Case All of these tasks are covered in depth in Lessons 1 and 2, so refer back to these Lessons if you are unsure of what steps to take. This Test Case includes inputting some data types not covered in Lesson 1, such as a date field, a number field and a URL. However, the method of inputting these data types is just the same as you have already used on a picklist and a text string. The only exception to this is the Approved field which is a checkbox. To add this input, right-click on the field and click Add to Test Case. An Interaction Type of Check should be suggested automatically instead of the normal Set. All you need to do is then click Add & Do as usual. The screenshot below shows how this looks. 36

37 After you have completed this exercise, compare your Test Case to the Create Account Test Case solution provided in your Test Project. Want to check your work? Watch the exercise solution video: 37

38 Lesson 3: Mapping advanced inputs In this lesson you will learn how to handle more advanced input values into a Test Case and use the assert feature to check various outcomes. In this lesson we will cover: How to input dynamic dates How to input lookup fields How to assert values based on other inputs How to test validation rules How to rename Test Steps Inputting a dynamic date with SF Today Start by creating a new Test Case. Name the Test Case Create Opportunity and launch Test Builder. When Test Builder has opened, navigate to the Opportunity tab. Map the New button as your first Test Step. These tasks are covered in detail in Lesson 1, so refer back to this Lesson if you are not sure how to complete them. Your Test Builder should now look like this: First add a Test Step for setting the Opportunity Name to Opportunity 1. Then right-click into Close Date and click Add to Test Case. This time, instead of using the Interaction Type of Set, click the dropdown and select SF Today. 38
39 SF Today is a special function available for date fields. This function will automatically input today s date into a field (based on when the Test Case is executed). This is equivalent to clicking the date hyperlink that sits next to a date field on a standard edit page. Click Add & Do to see this in action. Your Opportunity screen should now look like this: 39

40 Provar has a large library of useful functions. These will be covered in more detail in Lesson 4. Mapping a lookup field Next, you will map the lookup field Account Name. Mapping lookup fields is more complex than mapping other fields because you generally need to map the lookup dialog box. This ensures that a unique record is chosen, as duplicate results can cause your test to fail. While it is also possible to map a lookup field as if it were a text field, this is not recommended unless the value you are inputting will be unique (e.g. a Case Autonumber). If in doubt, map the lookup dialog box. To start, right-click on the Lookup icon next to the Account Name field ( Case. Make sure that you click directly on the Lookup icon, not the field. ) and click Add to Test Your Test Builder should now look like this: 40


41 Click Add & Do. You will be navigated automatically to the Lookup dialog box with a Search box at the top. 41


42 Enter Barton Media into the Search box, then right-click and select Add to Test Case. Click Add & Do. Then map the Go! button next to the Search box using the same method. Then click Add & Do. Your Test Builder should now look like this: 42


43 Additionally, the Search dialog should also have located a Barton Media account which was created during Exercise 1. If you did not complete Exercise 1, and your search for Barton Media did not find a match, just create an Account record with the name Barton Media now. Don t map this in your Test Case! The fastest way to do this is to click the New button right next to the Go! button which was just mapped: 43

44 Then click the Save button and retrace your steps to the Search dialog. Map a row from your Search Results by right-clicking on a given Account Name and selecting Add to Test Case. Your Test Builder should look like this: 44

45 Click Add & Do. The lookup dialog box should now be closed automatically, and the value input into the Account Name field on the new Opportunity screen. 45

46 Asserting values Now you will check that when a certain field input is provided, another value is set automatically. We will do this using an Assert. In this example you will set the Stage field to Perception Analysis and check that the Probability is updated to match. First, select the Perception Analysis option from the Stage field. Map this value into the Test Case then click Add & Do. Mapping fields is covered in detail in Lesson 1, so refer back to this Lesson if you are not sure how to do this. 46
47 You will note that the Probability field has been updated automatically to 70% after you selected Perception Analysis. Now map this Probability input into the Test Case. This time, in the Test Builder, change the Interaction Type from Set to Read/Assert. 47

48 Under Interaction Type, tick the Assert Value checkbox. This will automatically tick the Extract Value checkbox as well. Then make sure that the Expected Value is set to 70. These Extract options instruct Provar to store the value in the Variables view of Provar desktop, which can be useful for troubleshooting. You can read about this in more detail in Lesson 4, Capturing Variables. Your Test Builder should look like this: 48

49 Now click Add & Do. Testing a validation rule Finally, you are going to use an Assert to test a validation rule. In this example you will set the Amount field to a value exceeding 1 million dollars, and check that this triggers a validation rule. First, set the Amount field to 2m and map this value into your Test Case. 2m is a shorthand for 2 million. This is one of a few shortcuts commonly used by Salesforce users to make sure that the right number of 0 s is entered into number and currency fields. Other common shortcuts are k, b and h. Provar supports use of any of these. Now map the Save button, then click Add & Do. Your screen should now look like this: 49

50 Note that your Amount value has triggered a validation on the Opportunity with an error message: Error: Amount cannot exceed $1M. To add this to the Test Case, right-click on either the Amount field or the error message itself, and click Add to Test Case. In Test Builder, change the Interaction Type from Set to Read/Assert. 50

51 Once selected, tick the checkbox for Assert Message. This will automatically tick the checkbox for Extract Message. Next, copy and paste the validation rule error message from Salesforce into the Expected Message box. Make sure that you copy the full message, including the Error: at the front. Your Test Builder should look like this: 51

52 Tick the Screenshot After checkbox as well to get a screenshot of the error occurring. Finally, click Add & Do. To allow the opportunity to be saved, make a final edit to amend the Amount value to below 1 million. Map this as a Test Step, and then map the Save button. Your Test Builder should now look like this: 52


53 Now close down your Test Builder and navigate back to Provar desktop to review your Test Case. Renaming Test Steps Have a look at the Test Case you just built in Provar desktop. 53

54 You will note in your Test Case that names are automatically assigned to all your Test Steps to make them easy to understand. However it is also possible to rename Test Steps if you want to improve clarity or adhere to a specific naming convention. One good example of this is when you have added Assert steps, as the Test Step name is just a generic UI Assert. In this example we will rename our UI Assert Test Steps to clarify what action is being taken. To start, click on the first UI Assert Test Step in your Test Case. In the right-hand window showing the Test Step details, check that the Test Step you have selected is the Assert which checks that the Probability field value is 70. It should look like this: Next, right-click on the Test Step and select Rename Test Step. In the dialog box that opens, write out a more detailed name for the Test Step, for example, UI Assert: Check Probability is 70%. 54


55 Then click OK. Do the same to rename the second UI Assert Test Step. Click the OK button, and save your changes. Congratulations! You have completed Lesson 3. 55
56 Exercise 3: Create Case Test Case Now that you have completed Lesson 3, it s time to test your knowledge of what was covered. In this exercise you will use Provar to create a Test Case that creates a Case, relates it to an Account and asserts some information. Please complete the following: Create a new Test Case named Create Case Use the Test Builder to create a Case and input the following information Account Name = Barton Media Priority = High Case Origin = Phone Add Asserts to test that, when Priority = High, values are required for both Potential Liability and Engineering Req Number Take screenshots of the error messages asserted Address the validation rule errors by entering the following information: Potential Liability = Yes Engineering Req Number = 2342IKL11 Save the Case All of these tasks are covered in depth in Lesson 3, so refer back to this lesson if you are unsure of what steps to take. Remember that your assertions must be an exact match of the error messages presented on the page. To get these exact values, first trigger the validation rules in Test Builder, and then copy and paste the error messages presented. Don t forget to include Error: at the front. After you have completed this exercise, compare your Test Case to the Create Case Test Case solution provided in your Test Project. Want to check your work? Watch the exercise solution video: 56
57 Lesson 4: Functions and variables In this lesson you will learn more about Functions and Variables. In this lesson we will cover: How to copy Test Cases How to use Functions How to add breakpoints to Test Steps How to check Variables using the Variables View Introduction to Functions Often when building Test Cases it s useful to enter values which are tailored to their context. In Provar this is done using Functions. Provar has many Functions: some for date manipulation, including date formats; some for strings, to remove spaces; some for numbers, to change locale format or the number of decimal places. Until now you have been working mostly in the Test Builder. This lesson instead will be based in Provar desktop, which is where Functions become available. To learn more about Functions, refer to the Function articles in our full Help guide, found under Application Testing > Functions. In this exercise, we ll return to the Create Opportunity Test Case you created in the previous lesson and look at how we can use functions to input more intelligent values. But first, we ll create a copy of the Create Opportunity Test Case to use in this lesson, so that you don t overwrite your work from Lesson 3. Copying Test Cases To make a copy of a Test Case, go to the Navigator in Provar desktop and open up your /tests folder. Your Navigator should look something like this: 57

58 On your Create Opportunity Test Case, right-click and select Copy, then right-click and select Paste. (You can also use your standard copy-and-paste keyboard shortcuts, such as Ctrl + v and Ctrl + v, or Cmd + c and Cmd + v.) A dialog box should appear asking for a name for the new Test Case: Accept the name Create Opportunity2, then click OK. 58

59 You should see that the new Test Case has been created in the Navigator. Double-click to open the new Test Case. Adding Date functions Now that you have a copy of the Test Case from Lesson 3, look for the Test Step which populates the Close Date, and click on it. 59

60 In this Test Step you used the special option SF Today which you input via the Test Builder. Let s overwrite this with a function. Under the Interaction panel, change the Action selection from Today link to Set. The Interaction panel should refresh to show options for the Set action. It should look like this: Since this the Close Date is a date field, the standard Date Editor ( you choose a static date value as an input. ) has been presented. This lets Instead of entering a static value, click the Date Editor icon ( ) and swap to the Expression Editor ( ). It should look like this: 60
 will input a date which is x number of days after another given date. This is typically used alongside TODAY, which will input today s date.")

61 This Expression Editor is where you can use functions. For date fields, two commonly used functions are DateAdd() and TODAY. DateAdd() will input a date which is x number of days after another given date. This is typically used alongside TODAY, which will input today s date. TODAY is equivalent to the SF TODAY special function that you used in Lesson 3. In this example, you will use these functions together to input a Close Date which is 30 days in the future. In the Value box, right-click and select Content Assist. (Or you use Ctrl + Spacebar.) It s a good idea to always use Content Assist when entering functions, because it will help you avoid syntax errors. Select the DateAdd() function by double-clicking or pressing Return. 61


62 Within the brackets, type TODAY,30. It should look like this: So that we can check the function s output, add a screenshot after the Opportunity record is saved. To do this, click into the final Test Step of the Test Case. 62

63 In the Screenshot After dropdown, change the selection No Screenshot to Capture the Entire Page. What s the difference between Capture the Visible Area and Capture the Entire page? Visible area gives a literal screenshot, equivalent to what you would see in a browser. Entire page instead gives a capture of the full length of the webpage. This is useful for long pages where it s important to see the entire view. Finally, click Save. If you want to, you can now run this Test Case and watch as the inputs are put in. Click the Test Builder or Run button to do so. Can t remember what the different Run modes do? Refer back to the Introduction to Run modes section in Lesson 2 to refresh your memory. 63

64 Adding Breakpoints When you are responsible for building and maintaining Provar tests it can be helpful to use breakpoints. Breakpoints are planned pauses in your Test Case where the execution of the Test Case will halt until you indicate that it should continue. As you may remember from Lesson 2, breakpoints are respected in Test Builder and Debug run modes, but will not interfere with the standard Run mode. This makes them a useful tool for troubleshooting. In this example, let s add a breakpoint after the Close Date function you just entered. This will allow us to check the formula before resuming the test. In Provar desktop, find the Test Step where the Close Date is set, and right-click on it. Select the option Toggle Breakpoint. You will note that the Test Step icon has changed to indicate that it has a breakpoint ( ). Now run the Test Case in Test Builder mode. You will note that the Test Case pauses automatically at the breakpoint: 64

65 Before clicking Resume, let s add another breakpoint, this time on the Test Step that asserts the Probability value of 70%. Breakpoints can be added via the Test Builder as well. In Test Builder, right-click on the Test Step and select Toggle Breakpoint. 65


66 Now click Resume ( ). You should see the test run to the next breakpoint and pause. Finally, click Resume to run the Test Case through to the end. Click Resume one last time to vacate it from the Test Builder: Capturing Variables Another useful feature for troubleshooting is the Variables view. This is where you can review information relating to the working of each Test Step, including asserted values and messages. This will become helpful as you start to build more complex Test Cases, especially those that involve API testing or testing with . Let s take a look at the Variables view using the Test Case you just ran. 66


67 First, open up the Variables view by clicking on the Views button at the top-right corner of Provar desktop. Select Show Variables from the dropdown. By default, the Variables View should open in the same window as your Org Browser. You can now see Variables for any Test Step by clicking on that Test Step in the Test Runner. Note that the view of Variables will change depending on the Test Step you have selected. Let s check the Probability value assert that you set up earlier. In the Test Runner, click on the Test Step that performs the UI Assert against the Probability field. 67
 and Variables (after).")

 is the right place to look for information extracted during asserts.")
68 After clicking on the Test Step, have a look at the Variables view. You will note that the Variables view has three sections: Parameters, Variables (before) and Variables (after). Parameters displays the value of parameters passed into the Test Step. This topic will be covered later in this guide. Variables (Before) and Variables (After) displays the state of each variable before and after the Test Step is executed. Variables (After) is the right place to look for information extracted during asserts. Open up the Variables (after) section and then open Values > Fields > Probability. Among the information stored for Probability, note the value field showing a value of

69 Now that you know where to look for information extracted during asserts, see if you can find the error message extracted on the second UI Assert step, where you tested the $1 million validation rule. Start by clicking on the relevant Test Step in Test Runner. Once found, it should look like this: Note that both the message and the value have been stored. This is because you ticked both Extract Message and Extract Value when you added this Test Step. Well done! You have finished Lesson 4. 69

70 Exercise 4: Create Case2 Test Case Let s check your knowledge of Lesson 4. In this exercise you will use Provar to update the Test Case that you created in Exercise 3. Please complete the following: Make a copy of your Create Case Test Case to use in this exercise Add a new Test Step that updates the Case Subject with the Case ID Add a breakpoint after the Test Step which triggers Case validation rules, and test it Use the Variables view to locate the validation error messages presented when the case was Priority = High and Potential Liability and Engineering Req Number were blank All of these tasks are covered in depth in Lesson 4, so refer back to this Lesson if you are unsure of what steps to take. To get a Case ID, use the caseid function. Remember that a Case ID will not be generated until after the Case record is created, so consider where in the Test Case you should add this Test Step. A final tip: if you find yourself on the Case Feed page and you need to switch tabs to the Case Details page, you don t need to map this as a Test Step. Just click on the Case Details tab yourself and then carry on adding Test Steps. Provar will handle the navigation automatically. After you have completed this exercise, compare your Test Case to the Create Case2 Test Case solution provided in your Test Project. Want to check your work? Watch the exercise solution video: 70
71 Lesson 5: Lists and Tables In this lesson you will learn how to handle data in lists and tables. In this lesson we will cover: How to manage records in List Views and Related Lists How to set values in a Variable How to use Variables in a Test Step Introduction to Tables Two commonly used Salesforce elements are the List View and the Related List. Both of these elements display a specific set of Salesforce object records organized into columns and rows, filtered and sorted by specific criteria. Because the data in these lists will change dynamically based on the data in the system, we need to make sure that our tests are flexible enough to deal with these changing results. To do this we need to approach these elements as a table with separate rows of data. For all standard Salesforce elements, such as List Views and Related Lists, Provar will automatically recognize the element as a table and will map it accordingly. Once mapped, Provar provides two methods of locating information in tables. The first is a WHERE option, which lets you search for a specific record based on defined criteria (e.g. a Case where Case Number = ). The second is a ROW NUMBER option, which lets you select a record based on its row position in the table (e.g. a Case which is result number 1, the first row in a list). In this next section we ll look at how to handle table mappings in Provar. We ll start by looking at a standard Case List View. Finding data in a List View Start by creating a new Test Case named Log a Call. 71

72 Make sure that you select a non-console Salesforce Application, instead of accepting the default. Click Finish. Once your Test Builder session has launched, navigate to the Case tab in Salesforce. Open up the list view All Open Cases. You can do this either by clicking Go!, if the List View is already visible when you arrive on the Case tab, or you can select All Open Cases from the dropdown and it will load automatically. You do not need to map these steps. Once your List View has loaded its results, you should see something like this: 72

73 Note that your column headers and row details may differ from the screenshot above. Now let s select a Case from the list of results. Right-click on the Case Number of the first Case in the list, and select Add to Test Case. 73


74 When the Test Builder loads this Test Step it will look something like this: 74

75 You will note that the page has been detected automatically as Salesforce Case List (All Open Cases). As mentioned above, you do not need to add Test Steps to navigate to this List View. Provar will navigate there automatically, in the same way that it can navigate to Tabs. By default, however, this auto-navigation only applies to the first screen of a Test Case. Navigations to later screens are assumed to be driven through the Test Steps, unless you specify otherwise. You ll practise doing this later. In here you can see one of the two types of row location: this first option is the WHERE option, where you can locate a case based on defined criteria. In this example the WHERE has been populated for you based on the row you just mapped. Instead of using the WHERE option, let s use ROW NUMBER. Click the Where option to toggle it to Row Number. 75

76 After selecting Row Number, you will note that the Row Locator has been reduced to a single option, and 1 has been prefilled for you. This means that the first Case in the List View, Row Number 1, will be selected. Click Add & Do to accept this option. Setting a value in a Variable Now let s test the Quick Action of Log a Call on the Case Feed. We re going to create a Call Activity and verify that it gets added to the Activity History Related List on the Case. Since a Related List can contain many records, we need to be able to identify the newly created Activity from the list. To do this, we ll stamp the new Activity with a Unique ID. Once we get to the Related List, we can use that Unique ID to search for the exact Activity record that we just created. To make this Unique ID value accessible across the Test Case, we ll set the value in a Variable. Later on in the Test Case, we will reference the Variable to search the list. We introduced Variables in Lesson 4, Capturing Variables. Refer back to this lesson if you need to refresh your memory. To set a value in a Variable, navigate to Provar Desktop. 76

 In the Test Step parameters, set a Value Name of ActivitySubject.")
77 Open the Test APIs view. By default this will be in the top-left of Provar Desktop. Next, find the Set Values Test API and drag this into the Test Case. (It doesn t matter where in the Test Case you drag it to, as we ll tidy this up later.) In the Test Step parameters, set a Value Name of ActivitySubject. This will be used to identify the Variable when it is used. 77


78 In the Value box, type Call and a space after. Then add the UniqueId function, and restrict it to 4 characters. INFOBOX: Remember that you should add functions using Content Assist, which you can access with a right-click in the Value box or with Ctrl + spacebar. Refer back to Lesson 4, Adding Date functions, if you need to refresh your memory on adding functions. Your input should look like this: The UniqueId function defaults to 12 characters, which gives a strong probability of uniqueness, but this can be shortened if preferred. In this scenario it has been reduced to 4 characters to make it easier to read. After you have set these options, drag the Set Values Test Step up to the very top of your Test Case. 78

79 As a best practice we recommend storing Set Values Test Steps at the top of each Test Case. This makes it easy to see the Variables which are in use in the test. This will become especially useful as your Test Cases get longer and more complex. Finally, click Save. Logging a Call via the Quick Action Now that you have a Variable ready to stamp a Unique ID onto the Activity, navigate back to your Test Builder. (Or, if you do not still have the Test Case open, launch it from Provar Desktop.) From the Case Feed page, click the Log a Call action. You don t need to map this click, since it s a part of standard Salesforce navigation which Provar will recognize automatically. 79


80 Next, right-click on Subject and click Add to Test Case. Accept the default input of Call, and click Add on the Test Step - not the usual Add & Do! 80

81 We are not using the Add & Do option because we re not going to execute this Test Step yet. First, let s revert to Provar Desktop to add our Variable in place of the static Call value. You can also close the Test Builder at this point, since we will need to re-run the Test Case in order to set the Variable value. Using Variables in Test Steps Navigate to Provar Desktop, and click on the Test Step you just created. 81


82 In the Test Step parameters pane, find the Interactions section and the Value box within it. Click into the Value box and delete the static Call value. Still in the Value box, load Content Assist with a right-click or Ctrl + spacebar. 82

83 Scroll down until you find the ActivitySubject Variable. Double-click to insert. You will note that the method for adding Variables to a test is just the same as the method for adding Functions. You can generally find Variables below Functions in the Content Assist list. It should look like this: Note the curly braces, which denote that this is a Variable or a Function. Click Save. Now re-run the Test Case via Test Builder. Once this completes, you should see the Subject populated as follows: 83


84 Finally, map the Log a Call button and click Add & Do to create the Activity record. Finding data in a Related List Now that the Activity has been logged, let s locate it on the Case s Activity History Related List. Provar s approach to Related Lists is much the same as its approach to List Views. First click the Details tab at the top of the Case Feed. (Note that this step does not have to be mapped.) 84

85 Scroll down to the Activity History Related List. Right-click on the Subject of the Activity in the top row, and click Add to Test Case. 85
.")
86 You will note that the Test Builder has prefilled the WHERE instruction with a search on the Activity Subject. This is fine, but we will overwrite the search term provided with the value we have stored in the ActivitySubject Variable. Click Add in the Test Builder to save the Test Step. (Don t click Add & Do). Then navigate back to Provar Desktop. In the Test Case view, click into the penultimate row which begins With. (This is known as a With Row.) 86
, including the")

87 In the Test Step parameters pane, Click into the Row Locator box. Delete everything enclosed in quote marks ( ), including the quote marks themselves. Open Content Assist, and scroll down the list until you find the ActivitySubject Variable, then insert it. 87

88 You might notice that, this time, your Variable has been added with a $ sign at the front. This is added automatically by Provar when a Variable is used on a With Row, since the Variable is being used as a search term. It s best practice to always use Content Assist when entering Variables, to make sure you can get the syntax right for the Test Step type. Click Save to the complete the Test Case. Finally, navigate back to Test Builder, and click Resume ( ) to play the final Test Step. If you have added the Variable successfully, the Test Step will navigate you to the record detail page of the Activity you just created. 88

89 Well done! To review your work, navigate back to Provar Desktop and re-run the Test Case to see it working step by step. If your Test Step did not successfully navigate to an Activity record, you might not have entered the ActivitySubject Variable correctly. Double-check your With Row and make sure that your input matches the instructions above. Then Try re-running your Test Case. Congratulations! You have finished Lesson 5. 89

90 Exercise 5: Create Account and Contact Test Case Now that you ve completed Lesson 5, let s test your knowledge. In this exercise you will use Provar to create an Account, find that Account in a List View and add a Contact to it via the Related List. Please complete the following: Create a new Create Account and Contact Test Case Within the Test Case: Create Account Strider Bank with a unique 6-character reference in the Account Name, e.g. Strider Bank (ref: H632SF) If there are other required fields on the Account page, fill them out too From the All Accounts List View, locate the newly created Account via its unique ID From the Contacts related list on the newly created Account, create a new Contact, Lucinda Jeffries Take a printscreen of the new Contact record All of these tasks are covered in depth in Lesson 5, so refer back to this Lesson if you are unsure of what steps to take. Auto-Navigate: Since this exercise requires you to navigate to a List View half-way through a Test, you will need to override Provar s default behavior, which is to autonavigate only at the start of a test. When you get to the Test Step of navigating to the All Accounts list view, go into Provar Desktop, find the Test Step parameters for that step and make sure that, under Navigate, you have selected Always navigate. The printscreen is provided below with the rest of the test greyed out. 90

91 Auto Paginate: When searching a List View for a record, you may want to use Provar s Auto Paginate option. Auto Paginate instructs Provar to search through all the results in a List View, paging through until it finds the record. This is very useful when your record might be on the second page or later. You will find Auto Paginate on your With Row Test Step, under Test Step parameters. After you have completed this exercise, compare your Test Case to the Create Account and Contact Test Case provided in the folder in your Test Project. Want to check your work? Watch the exercise solution video: 91

92 Lesson 6: Testing in Consoles In this lesson you will learn how to test Console Applications. In this lesson we will cover: How to navigate the Console and manage tabs How to test processes in a Console Application How to use UI Navigate to perform a refresh How to use Step-To to jump to a given Test Step Introduction to Console Testing Consoles can be tricky applications to handle in Salesforce because of their particular behavior. One characteristic of Consoles is that their behavior is sticky, that is, when you start a session in the Console, it will re-open any tabs you had open in your previous session. Provar will automatically close any existing tabs when a new Test Case starts, so that they do not interfere with the new run. You will see this in action when you launch a Test Case. This Auto-close feature is enabled by default, but you can disable it on a specific Test Case if needed. To change the setting, open your Test Case and click on the Salesforce Connect Test Step. Under Test Step parameters, untick the option Close all console tabs. 92

93 A second characteristic of Consoles is that they involve multiple layers of tabs. In general, Provar can map these tab layers automatically, but there will be times that you will want to adjust the navigation yourself. Before we build our first Test Case, let s clarify some terminology. Above is a screenshot of an open Console session. On this screenshot you can see the follow tab types: 1) Home Tab: This is equivalent to the Tab menu on a standard (non-console) application. It shows the Object type. It s currently set to Accounts. 2) Primary Tab: These are the Tabs on the top row of the Console. On this screenshot there is just one open, for the Account Barton Media. 3) Secondary Tab: These are the Tabs on the second row of the Console. On this screenshot there are three open. We will be using this terminology throughout this lesson, so refer back to this section if you need a reminder. Now let s move into Provar Desktop to start testing in the Console. Navigating a Console The following Test Case will cover the creation of a Case and some standard Case actions, such as attaching a file and closing a Case. Let s start by creating a new Test Case, Manage Case. 93

94 Make sure that you select Console Application in the Salesforce Application dropdown. Click Finish. Once your session has launched, select the Home Tab Accounts and then open the All Accounts List View. 94


95 Now let s map a Test Step to locate the Account Barton Media from the list. Right-click on the first Account in the list, and select Add to Test Case. 95

96 Once the Test Step is loaded, you should see the following at the top of the Test Builder: You will note that Home Tab has been selected. This shows that Home Tab is the Active Tab and the location for performing this Test Step. This Active Tab concept is very important because Console Applications can have multiple Tabs open. If the Active Tab changes, Provar needs to know so that it can execute the Test Step in the right location. Note that the Test Step above looks different when it is in a Console application. If you mapped the same Test Step in a non-console Application, it would look like this: Click Add on this Test Step (not Add & Do ). Then navigate to Provar Desktop to set the Account Name as Barton Media and to tick Auto Paginate on the With Row. These steps were covered in detail in Lesson 5, so refer back to this lesson if you need to refresh your memory. Save these Test Steps, and then click Resume in the Test Builder to run the updated Test Steps. 96


97 This should navigate you to the Barton Media Account. (If you have any trouble when resuming the test, just re-launch the Test Builder to run the Test Case cleanly from the beginning.) Once you are navigated to the Barton Media Account, note that this has opened in a new Primary Tab: This Primary Tab opened up automatically and is now the new Active Tab. So now there are two Tabs open: the Home Tab and the Primary Tab. (You can navigate between them by clicking on Accounts and Barton Media respectively.) Scroll down to the Cases Related List and add the New button as a Test Step. 97


98 When this Test Step loads, you should see this in the Test Builder: 98

99 You will note that the Page Scaffold now displays Current Tab. This means that Provar will expect to find this New Case button on the Tab which is currently active, without having to navigate to any other Tab. If we were to return to the Account List View and add a Test Step to click on a second Account in that list, the Page Scaffold would revert to Home Tab for that Test Step. This tells Provar to change the Active Tab back to the Home Tab before performing the next Test Step. Click Add & Do on this Test Step to get to the following screen: Now we can see one Primary Tab, Barton Media, and two Secondary Tabs, Details and New Case. On the New Case page, map a Test Step that sets the Case Origin to Phone. 99

100 Once again, the Page Scaffold is set to Current Tab. This is correct because the Active Tab does not need to change in order to perform this Test Step. Click Add & Do. Finally, map the Save button and then click Add & Do again. 100
101 Attaching a File to a Case Now let s test the process of attaching a file to a Case via the Attachments Related List. On your newly created Case, switch over to the Case Details view by clicking the button highlighted below. 101

102 Scroll down to the Attachments Related List and map the Attach File button. Click Add & Do. Map the Choose File button, and click Add instead of Add & Do. Then move into Provar Desktop. Click into the Choose File Test Step and look into the Test Step parameters. In the Interaction section, set Action to Choose File. 102


103 Under File Name/Location, click the File icon ( ). Then select the file DeliveryStatusReport.xlsx located in the templates folder of your Quickstart Test Project. (If you re not using the Test Project provided, you can create your own DeliveryStatusReport.xlsx file and add it to your templates folder. It does not need any special content.) Save your work in Provar Desktop, and navigate back to the Test Builder. Back on the Attach File page, re-select the file manually by clicking the Choose File button. Don t map this Test Step since you already did this in Provar Desktop. (We re just replicating it here in the browser so that we produce and map all the expected behavior.) Then map the Attach File button and click Add & Do. You should see the following confirmation message: Finally, map the Done button and click Add & Do. This Tab will close automatically. Once you ve been redirected back to the Case page and it s been refreshed, you should see the File under the Attachments Related List. 103
. Scroll down to the Notes & Attachments Related List. Can you see the Attachment you added to the Case?")
104 Refreshing the UI Now that you ve attached this file to the Case, let s verify that the Attachment is also visible from the related Account. Navigate back to the Barton Media Account by clicking on the Details Secondary Tab (see below). Scroll down to the Notes & Attachments Related List. Can you see the Attachment you added to the Case? It s quite likely that the Attachment won t be visible until the page is refreshed. Let s add a Refresh step into the Test Case to make sure this happens. Navigate into Provar Desktop and open the Test APIs view. Find the UI Navigate option in the UI Testing section. 104

105 Click and drag UI Navigate into your Test Case. 105


106 You will note that this has defaulted to Refresh, which is the type of navigation we want. Apart from refreshing the page, UI Navigate can also be used to Navigate Forwards or Navigate Backwards in the browser. This is equivalent to clicking the forward and back buttons in a browser. You can see these options under Navigate in the Test Step parameters. Click Save on this Test Step and return to the Test Builder. Click Resume to execute the step. 106

107 Locating information on Related Lists Back on the Account Details page, you should now be able to see the Attachment in the list. Right-click on the Title of this Attachment and click Add to Test Case. When the Test Builder loads, you should see the following: 107

108 Do you see anything wrong with this Test Step? If we accept Current Tab as the Page Scaffold, the Test Case will fail when we run it again. Provar won t be able to find the Notes & Attachments list because it will be looking for it on the Case page, where the last Test Step finished. Let s adjust the navigation so that Provar can find the right Tab. Click on Current Tab and instead select Existing Tab from the dropdown. 108

109 Existing Tab means we want to navigate to a different Tab which is already open. Two new options will open up for Primary Tab and Secondary Tab. In general, Provar will populate these automatically, as it has done here. However the rule for adding these manually is very simple: the names just have to match the names you see on the Console. 109

110 In this example, we can see that the Primary Tab is labelled Barton Media and the Secondary Tab labelled Details, so this is a match for what we see in the Test Builder. You can change these labels directly in the Test Builder if you want to change the selection. If you want to navigate to a Primary Tab which doesn t have a Secondary Tab, just leave the Secondary Tab option blank. If a Test Step fails in a Console test and you need to troubleshoot it, checking these Tabs is a good place to start. Now that the Page Scaffold is correct, let s address the rest of the Test Step. We want to make sure that the right Attachment is located in the list. 110

111 Instead of locating the row by searching on Type, change the selection so that it locates by Title and Related To. 111

112 Ticking both options will ensure that only a record matching both criteria will be selected. There s just one problem left with this Test Step: at the moment the Related To is referring to a specific Case Number. We will need to update this so that it will choose the right Case Number each time the Test Case is run. To do this, click Add on the Test Step and navigate into Provar Desktop. Using a Variable as a Row Locator Let s update the Row Locator so that it uses a Variable to find the right Case Number. Click on the With Row Test Step you just added and look at the Row Locator in Test Step parameters. 112
113 We need to change this hardcoded Case Number into a variable, so that the right Case Number will be selected each time this Test Case runs. Let s do this using a Read/Assert Test Step. You covered Read/Assert Test Steps in Lessons 3 and 4, when we asserted a Probability value and tested some validation rules before checking the results in the Variables View. Refer back to these two lessons if you need a reminder. Navigate back into Test Builder. Find the Test Step which is labelled On SF Case View Screen. Right-click on it and select Step-To. 113


114 Step-To allows you to jump backwards or forwards to a Test Step without executing the Test Steps in between. This is perfect for us in this situation because we want to add a Read/Assert Test Step in an earlier part of our Test Case. After you ve clicked Step-To, your Test Builder should look like this: If we were to click Resume now, the Test Case would re-run from the red-highlighted step. 114


115 But first, let s add a Read/Assert Test Step. Change Secondary Tabs so that you can see the Case detail page, then map the Case Number field value into the Test Case. In Test Builder, change the Interaction Type to Read/Assert. We only need the default option Extract Value to be ticked. 115

116 Click Add & Do. Once this Test Step has executed, navigate back to Provar Desktop and find the value in the Variables View. Now that we have this value in a variable, let s return to the With Row Test Step and override the hardcoded value. Click on the With Row Test Step and find the Row Locator again. Delete the Case Number and the quote marks which enclose it. Open Content Assist and scroll down until you find $Values. Double-click to add it in. 116


117 Finally, type the path of the CaseNumber value from the Variables View. You can type this out yourself or copy and paste the following: $Values.fields.CaseNumber.value. Once finished, your Row Locator should look like this: Click Save, then navigate back to the Test Builder. Use Step-To to get to the On SF Account View Screen Test Step (i.e. skipping the File Attachment Test Steps). Your Test Builder should look like this: If you have any trouble with this navigation, you can close down your Test Builder session and re-run it cleanly from the beginning. Step-to is just to save time. 117

118 Finally, click Resume. Did you get to the Attached File page? If not, go back and check that you added the variable correctly, and then try re-running the Test Case from the beginning. Closing a Case Now let s close the Case and verify that it shows as closed on the Account as well. Navigate to the Case detail page by clicking on its Secondary Tab: Now map the Close Case button. 118


119 When the Test Builder loads this Test Step, you will need to change the Page Scaffold so that it points back to this Secondary Tab. Change the selection from Current Tab to Existing Tab. 119


120 You should find that the correct Primary and Secondary Tab values have been populated automatically. However, once again the Case Number is hardcoded and will need to be adjusted. Click Add & Do nonetheless, then navigate to Provar Desktop. Find the On Case View Screen Test Step and click on it to view the Test Step parameters. On the Secondary Tab Name option, delete the hardcoded Case Number and replace it using the same method as above. Remember to use Content Assist to get the right syntax, and then type out the rest of the path. It should look like this: Save your work in Provar Desktop and navigate back to Test Builder. We ll test this variable when we rerun the Test Case at the end of this lesson. 120

121 On the Close Case screen, map the Status to Closed and the Case Reason to Installation. Then map the Save button. Finally, let s navigate back to the Account detail page to verify that the Case Status shows as Closed on the Related List. Swap your Secondary Tab back to Account Details and scroll down to the Cases Related List. This time, let s Assert the information we want without clicking into the Case details. In the Related List, locate the Case that you just closed. Find the cell where you can see its Closed Status. 121

122 Right-click on this cell and select Add to Test Case. Your Test Builder should look like this: 122
 Then change your Interaction Type from Set to Read/Assert.")
123 First change the Page Scaffold to Existing Tab. This time, the Primary Tab should be set to Barton Media and the Secondary Tab should be Details. Next, check that your Row Locator has been selected as Case Number. (We will update this shortly so that it isn t a hardcoded value.) Then change your Interaction Type from Set to Read/Assert. Choose the Assert Value option with an Expected Value of Closed. Click Add. Finally, navigate into Provar desktop and update your With Row so that it points to the CaseNumber variable, using the same method as above. 123
124 It should look like this: Save your work in Provar Desktop, then click Resume in Test Builder to check this Final Step. Finally, re-run the Test Case from the beginning to check that your variable is being set and referenced correctly across the test. Well done! You ve finished Lesson
125 Exercise 6: Manage Opportunity Let s test your knowledge of Lesson 6. In this exercise you will use Provar to create a Contact, create an Opportunity against that Contact and verify that it has been added correctly. Please complete the following: Create a new Manage Opportunity Test Case, launched in the Console Application Within the Test Case, please complete the following: Create a new Contact, Gary Barton, where Account Name = Barton Media From the Opportunities Related List on the new Contact record, create a new Opportunity record where Stage = Qualification and Name includes a Unique ID (e.g. Opportunity Ref xxxxxx ) Use an Assert on the Opportunity to verify that Gary Barton is set as the Primary Contact Role From the Contact record, verify that the Opportunity is visible on the Opportunities Related List by searching for an Opportunity record with a matching Name and Stage. Take a screenshot of the Opportunity record found If you have any trouble with this navigation, you can close down your Test Builder session and re-run it cleanly from the beginning. Step-to is just to save time. After you have completed this exercise, compare your Test Case to the Manage Opportunity Test Case provided in the folder in your Test Project. Want to check your work? Watch the exercise solution video: 125
126 Lesson 7: Visualforce Testing In this lesson you will learn how to test Visualforce pages and external website pages. In this lesson we will cover: How to use Group Steps How to manage Page Objects How to test Visualforce fields and tables How to test non-salesforce website pages Introduction to Visualforce Until now in this guide we have looked at testing standard Salesforce elements. Visualforce testing is a little different. While standard Salesforce page layouts are available out of the box and have a rigidly defined format and behavior, Visualforce instead is written from scratch by a developer. This gives it a greater flexibility and means that its appearance and behavior is not possible to predict ahead of time. Fortunately, this unknown quantity is not a problem for Provar, since Provar has evolved to test all sorts of elements. However, our approach to testing these pages needs to be a little different from our approach to standard page layouts, and we need to be aware of the new elements in play. In this lesson we ll explore some new concepts relating to Visualforce pages, such as Visualforce field locators and Page Objects. We ll also see how these concepts extend to testing other types of pages, like external website pages. Using Group Steps We ll start by creating a new Test Case for use in this lesson. Navigate into Provar Desktop. To save time, let s make a copy of the Create Opportunity Test Case from Lesson 3. In the Navigator, find the Create Opportunity Test Case and Copy and Paste it. Name the new Test Case Manage Opportunity Products and click OK. 126

127 Then open it up so that you can see the Test Steps. Since this Test Case is getting long, let s organize it with some Group Steps before we add anything else to it. Group Steps are a way of sectioning up a Test Case so that you can see at a glance what each part of the Test Case is doing. This is helpful as your Test Cases get longer and more complex. Open the Test APIs view and find the Group Steps option. Click and drag it Group Steps into the top of the Test Case, above the Salesforce Connect row and below the.testcase row. 127


128 Give your Group Step a Description, Opportunity Creation. To add a Test Step into this Group Step, just click on the Test Step and drag it onto the Group Step. Try doing this with your Salesforce Connect Test Step. Once added, it should look like this: 128


129 Now add all your remaining Test Steps into the Group Step as well. To add multiple Test Steps, first collapse your parent Test Steps to make your test smaller. Next, click on the first Test Step you want to add, then hold down SHIFT and click on the last Test Step. This will select any Test Steps in between. Once you have your selection, click on it and drag it all into the Group Step. Make sure that your Salesforce Connect Test Step is at the top! 129
 next to the Group Step to check that all the Test")

130 Click the Collapse button ( correctly. ) next to the Group Step to check that all the Test Steps have been added Great! Add a second Group Step named Product Selection. This is where we will start adding new Test Steps. 130

131 Then, launch the Test Builder. Mapping Visualforce fields with Page Objects Once your Test Case has run to the end, you should be on a newly created Opportunity record and your Test Builder should look like this: On your Opportunity screen, find the Product Selector button and map it into your Test Case. 131


132 Click Add & Do. You should be navigated to the following screen: Welcome to your first Visualforce page! This is a custom Product Selector page. It gives the user a single page where they can edit key Opportunity information and add up to three Products. 132

133 Let s start by testing the top half of the page, the Opportunity fields. Right-click on the Opportunity Name field and select Add to Test Case. You should see the following in the Test Builder: 133

134 Note that this Test Step looks a little different from when a field is mapped on a standard page layout. There are two important differences. The first important difference is in the Page Structure. 134
135 In Page Structure, you can see that the page has been recognized as a Visualforce page. Since Provar hasn t encountered the page before, it s going to create a new Page Object called ProductSelector. It will refer back to this Page Object any time that we test this page in future. Page Objects are a popular design pattern in test automation. You may already be familiar with them if you have used a Selenium framework for test automation. A Page Object stores information about a page: how it looks, what fields it contains and how those fields can be located and interacted with. The Page Object is a centralized container for this page-related information. This means that, if changes happen to the page in future and this information needs to be updated, you will only need to update the one Page Object, instead of every place that the page is referenced in your Test Cases. This helps to keep your maintenance effort to a minimum. Provar creates Page Objects for all non-standard Salesforce pages in your tests. They are also used when you test external website pages, such as a web-to-case form. You can read more about the Page Object design pattern in Selenium s documentation: For now we will accept the default Page Structure options. The second important difference is in the Field Details. In this section, as you can see above, a new Field Locator option has appeared. This Field Locator is the method we use to find and interact with a field on a Visualforce page. 135

136 When we test standard Salesforce pages, locators are not needed because Provar can access the field directly. When testing custom pages, however, there is more than one way to locate a field in the code. On custom pages, therefore, the locator is presented to you so that you can see what element has been located and the method used, and update this if needed. Provar has its own algorithm for creating and maintaining Visualforce Field Locators. These locators are designed to be resistant to cosmetic changes as well as usable across different environments. Visualforce locators are suggested automatically wherever possible. On the Test Builder screen above, you can see that a Visualforce Field Locator has been provided automatically. It looks like this: We recommend using this option when it is available. When this method is not available, there are other methods to choose from. Click the Visualforce dropdown in your Test Builder to see the options available. Apart from Visualforce, there are three other field locator options available. 136
137 By Label is another efficient way of locating a field. This is a good option for when a Visualforce locator is not available. To use this one, just check that the Label entered is a match for the label that you see on the Visualforce page. By Name and By XPath are also available as alternatives. In general, you should choose whichever locator method you believe will be the most robust and reliable in the context of a given page. This will reduce the need for any future maintenance. For now, let s accept the suggested default and use the Visualforce locator. In your Test Step, just amend the Value to Opportunity 2. Then click Add & Do. Now map the Stage field underneath Opportunity Name. You should see this in the Test Builder: 137

138 Note the table of Stage picklist values that has appeared under Value Type. Provar automatically maps this and stores the list in the Page Object. For now, move back to your Salesforce window and change the Stage dropdown to Qualification. You should see this update the Value in the Test Builder. 138

139 Click Add & Do. Also map Close Date. Change the Interaction Type to SF Today by clicking the Set dropdown. Click Add & Do. Finally, map the Save button and click Add & Do again. This should redirect you back to your Opportunity detail page. Well done! To verify that the edits made on the Visualforce page have been registered, add a quick Assert to check the Opportunity Stage is Qualification. (We ll skip the others in the interests of time.) 139

140 If you can t remember how to add an Assert, refer back to Lesson 3, Asserting Values, which covered this in detail. Now move into Provar Desktop to review what s been created so far. Checking Page Objects in Provar Desktop Back in Provar Desktop, let s tidy up the Test Case a little. First, label your UI Assert Test Step with a name that describes what the step is doing. If you don t remember how to relabel a Test Step, refer back to Lesson 3, Renaming Test Steps.) Next, move your newly created Test Steps into the Product Selection Group Step. (Again, it s a good idea to collapse the parent Test Steps first.) Now let s take a look at the Page Object just created. In Navigator, open /src and then /pageobjects. 140


141 Double-click the ProductSelector.java file so that it opens in the main window. Note that all our referenced fields are contained in the file, as well as the Save button. This list will grow as we reference more elements in our test. Now click on the Stage field. 141


142 Note the Visualforce Field section which contains the Visualforce Field Locator. Scrolling down, you can also see the Stage picklist values and titles in the Editor Type. Note that you can also change tabs to look at the Java Source code. 142

 Map the Product Selector button to get back onto the Visualforce page.")
143 Click on the Java Source tab. On the Java Source tab, scroll down to see the ProductSelector class. Here you can see the locators and other information stored per element. You won t generally need to access to this source code, but it s useful to know where it is in case you ever need to refer to it. Let s navigate back into Test Builder to carry on building out this test. Mapping a Visualforce Table Switch back to your open Test Builder session. (Or, if you closed it, click the Test Builder button in Provar Desktop to re-run the Test Case.) Map the Product Selector button to get back onto the Visualforce page. Click Add & Do. Now let s add Products to the Opportunity. 143

144 In the Product table, in the first cell of the first row, select GenWatt Diesel 10kW. Now let s map this information into the Test Case. Right-click on the first cell, GenWatt Diesel 10kW, and select Add to Test Case. Your screen should now look like this: 144

145 Note that all three Product rows have been outlined in red by the Test Builder. This shows that Provar has recognized this as a table and wants to map this as such. Now look at the Test Builder: 145

146 Since this is the first time that Provar has encountered this table, it s suggesting that a new table be created in the Page Object with the name lineitems. This name has been scraped from the Visualforce page code. Much like Visualforce Field Locators, Visualforce Tables will be mapped and stored in the Page Object when they are first encountered. Let s change the name of this table to be more descriptive. Click into the New Table box in Test Builder and enter OpportunityLineItems. 146


147 Then click Add & Do. Now enter 2000 into the Amount field in the same row and map it. The Test Step should look like this: Note that, again, the table is highlighted in red. The Test Builder should show the following: 147

148 Note that the table has been detected as an existing table and the name prefilled to OpportunityLineItems. Provar prefills these options wherever possible, but you can always manually override these selections. For example, you can click on Existing Table and change it to New Table, or vice versa. You may need to do this sometimes when you are testing complex pages. Click Add & Do on this Test Step. Now map a second Product row using the same method. In Salesforce, on the second row of the table, select the Product SLA: Gold and map this as a Test Step. Then click Add & Do. 148


149 Do the same for an Amount of 500. Once you are finished, your Test Builder should look like this: There is a small issue here that we need to correct. Do you see what it is? Take a look at your Salesforce screen for a clue: Do you see the duplicate rows? What has happened here is that the Test Builder is using Row 1 of the table to input all of the Product information. This means it has overwritten the first Product entry with the second Product entry, instead of entering this on Row

150 We need to amend this in Provar Desktop so that Row 2 is used for the second Product. Navigate into Provar Desktop and open your Test Case. We re going to Copy and Paste the With Row Test Step and update it so that it points to Row 2 of our table. To do this, right-click on the With Row Test Step and select Copy. (You can also use your standard copy-and-paste keyboard shortcuts, such as Ctrl + c or Cmd + c.) 150
 You should see that a new With Row Test Step has been created at the bottom of your test.")
151 Then right-click on the row above, On SF ProductSelector page, and select Paste. (Alternatively, leftclick on this row and use your keyboard shortcut.) You should see that a new With Row Test Step has been created at the bottom of your test. It should be on the same indentation level as your existing With Row Test Step. 151

152 Take care when copy and pasting Test Steps to make sure that they appear on the right indentation level. If you d pasted this new With Row Test Step inside the existing With Row, Provar would struggle to locate the row. Amend the new Test Step so that the Row Locator shows 2 instead of 1. Then expand the new With Row and delete the Test Steps relating to Product 1, as so: 152


153 Do the same on the original With Row to remove the Test Steps relating to Product 2: Click Save and return to the Test Builder. Navigate back to where the ProductSelector inputs begin by right-clicking on the On SF ProductSelector page Test Step and selecting Step-To. 153

154 The Test Builder should look like this: Also refresh your Salesforce browser session to empty the table: Then click Resume on the Test Builder to see the Product information being entered. 154


155 Great work! (If you hit any issues with the Step-To or Resume, close down the Test Builder and re-run the Test Case from the beginning.) Finally, map the Save button and click Add & Do. On Visualforce pages, the top-page and bottom-page Save button are two separate elements. This means that you could have one or two Save button elements in your Page Object, depending on which buttons you have used. 155
156 Congratulations! You have finished Lesson

157 Exercise 7: Test WebToCase Test Case Now that you ve completed Lesson 7, let s test your knowledge of what was covered. In this exercise you will use Provar to test a web-to-case form that sits outside Salesforce. The process for this is very similar to testing a Visualforce page. Please complete the following: Create a new WebToCase Test Case to test the webform at Create a new Page Object for the form named WebToCase In the Test Case, enter the following information into the webform: Contact Name: Mark Roberts markroberts@provaruserguide.com Phone: Priority: High Subject: Item not delivered Map the Submit button and name it Submitbutton Take a screenshot after the Submit button is it s clicked Back in Provar Desktop, review the newly created Page Object and its Java Source code All of these tasks are covered in depth in Lesson 7, so refer back to this Lesson if you are unsure of what steps to take. To test a webpage outside Salesforce, you ll need to choose slightly different settings when you create the new Test Case. Instead of Use an existing connection, choose the option Create a UI Testing connection. Click Next then enter the following information: Name: WebToCase Base URL: 157

158 Then click Finish to launch the Test Builder session. After you have completed this exercise, compare your Test Case to the Test WebToCase Test Case provided in the folder in your Test Project. Want to check your work? Watch the exercise solution video: 158
159 Lesson 8: Testing with the API Until now in this guide we have looked at testing Salesforce via the User Interface (UI). However there will be time when you will want to manipulate data directly using Salesforce s APIs. This can be useful for managing your test data, as well as emulating integration processes. In this lesson you will learn about testing with Salesforce s APIs and how to use Callable tests. In this lesson we will cover: How to manipulate, assert and query data using API Test Steps How to create Callable and Calling Test Cases Creating object records with the API Let s start by creating a new Test Case. In this Test Case we ll create an Account record and perform various actions on it via the API. Navigate into Provar Desktop and create a new Test Case called Manage Account. Don t click Finish yet. Since we re going to start our work in Provar Desktop, we need to make some changes to the default settings on the wizard screen. Select No connection required and untick Launch Test Builder Session. 159

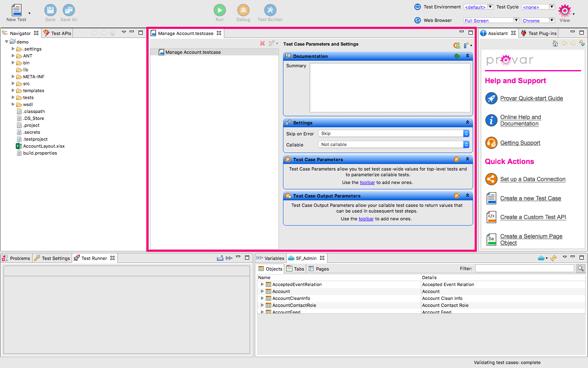
160 Click Finish. 160
161 Note that no Salesforce Connect Test Step has been created. This isn t a problem since it will be added automatically when we add the first Test Step. Let s create an Account record via the API. In the Org Browser, click on the Account object. Wait for the secondary panel to load with rows of Account data. There may be a short delay while this data is retrieved. Once loaded, it should look like this: Note that your data may look different from the data in the screenshot above. Once your data is loaded, click on a row of Account data (any row is fine). Drag this data row into the Test Case window. 161

162 Once you let go of the row, the following menu will appear: This menu shows the available Salesforce API Test Steps. Select Add an Object create step. This will create a new Account record based on the Account row that you chose above. 162
 shows the fields which are to be populated.")
163 On the next screen, you will be asked to select the fields to populate on the new Account record. Note the two columns at the far right, Required and P ( ). Required shows the fields which are set to required in Salesforce. All required fields must be populated in this insert, else the insert will fail. P ( ) shows the fields which are to be populated. Note that P ( ) already has some rows ticked: 163
 In addition, Provar automatically includes any fields which were populated on the Account which you chose when creating this Test Step. (This is why BillingStreet is ticked in the screenshot above.")
164 As a rule, Provar includes all required fields automatically to help reduce failures. These are indicated by an X. (You can see this in the Name row in the screenshot above.) In addition, Provar automatically includes any fields which were populated on the Account which you chose when creating this Test Step. (This is why BillingStreet is ticked in the screenshot above. Your own results may vary.) Let s adjust the included fields so that we have consistent results. Start by clicking unselect all at the bottom right of the window. This will untick all non-required fields. 164
165 Now tick Approved, SLA, SLA Expiration Date and SLA Serial Number. To make finding fields easier, you can click on any column header to sort the list by that column. You can also use the search box at the bottom. Once you have ticked those fields, click OK to create the Test Step. Test Case should now look like this: 165


166 Note that two Test Steps have been added, the Salesforce Connect Test Step and the Create Object Test Step. As a rule, Provar will always create a Salesforce Connect Test Step after you add a Salesforce API Test Step, if one doesn t already exist. Click into your Create Object Test Step to see the parameters. 166

167 Within these parameters, note particularly the two sections for Field and Result: Within Field you can see the fields which will be populated and add or amend values. Within Result you can see that a variable will be created containing the new Account ID, once this Test Step is executed. This variable is currently named AccountId. We will refer back to it in a minute. Now let s update the Fields section. Set up the following data in the Fields section: Name = New Account Approved c = TRUE SLA c = Platinum SLASerialNumber c = a unique 10-digit ID SLAExpirationDate c = 60 days after today s date INFOBOX: Remember to use the Expression Editor to access the functions you need for SLASerialNumber c and SLAExpirationDate c. If you can t remember how to add a unique ID, refer back to Lesson 5, Setting a value in a Variable. If you can t remember how to add a dynamic date, refer back to Lesson 4, Adding Date functions. When finished, your Fields section should look like this: 167


168 Note that, if you need to add or remove fields, you can use the parameters to return to the fields selection window. icon at the top of the Test Step You re almost ready to run this Test Case, but let s change the Salesforce Application that the Test Case will run in. You can do this by clicking on the Salesforce Connect Test Step and finding the Salesforce Application option within the UI Testing section. Set Salesforce Application to Sales, and then save the Test Case. Now run your Test Case with Test Builder. After your Test Case has completed, you ll note that you are still on the setup home page. 168


169 This is just because the Test Case is running its steps via the API, not the UI. However, we can still use the UI to verify the creation of the Account and perform some actions on it. Let s start check by checking that the Account record has been inserted as expected. Navigate back into Provar Desktop. Where would you look to find the ID of the newly created Account record? Remember that your Create Object Test Step created a Variable, AccountId, which would contain the new Account ID. Use the Variables view to find this ID, then copy it to the clipboard. 169
170 INFOBOX: If you need a refresher on using the Variables view, refer back to Lesson 4, Capturing Variables. Navigate back to your Test Builder session. In the URL, paste your ID into the string after.com/ so that it looks like this: (Note that your prefix may differ from ap2, since this is defined by the Salesforce server.) Press Return on this URL to navigate to the new Account record. Note that the fields have been populated as you defined in the Create Object Test Step. Adding UI Test Steps after API Test Steps Now let s make a few updates via the UI. From this Account detail page, right-click the Edit button and select Add to Test Case. Then click Add & Do. 170


171 Set Active to Yes, and add this as a Test Step. Then set Account Number to a 10-digit number, and add this as a Test Step. Once this Test Step is saved, use Provar Desktop to replace the value with the UniqueId function, so that a different number is generated each time. Finally, map the Save button and tick the Screenshot After. Then click Add & Do. Your Account should now look like this: Now let s add an update via the API. But first, we need to make 2 small updates to futureproof the UI Test Steps you just created. 171

172 Navigate back into Provar Desktop. If you click into your Test Steps On SF Account View screen or On SF Account Edit screen, you will find a hardcoded ID in the Object Id box. This is fine for the first run, since it matches the Account ID you are currently working with, but it won t work for later runs. In the On SF Account View screen Test Step, delete this ID and add the Variable instead. 172

173 On the On SF Account Edit screen Test Step, delete the ID and just leave it blank. We could add the Variable here as well, but it s not needed since the navigation will be driven through the previous Test Steps. Updating object records with the API Now let s update this record using another API Test Step. Click and drag another row of Account data into the Test Case. (Again, it doesn t matter which row you use.) 173

174 This time, when the menu appears, choose Add an Object update step. On the next screen select the fields Name, Type and CustomerPriority c. For this Update action, note that no fields are pre-selected, not not even required ones. Then click OK. Once your Update Object Test Step has appeared, remove the hardcoded ID in the Object Id box and replace it with your AccountId Variable. Then, in the Fields section, set CustomerPriority c to High and Type to Customer - Direct. Use Content Assist to set Name to be the AccountId Variable. Save the Test Case and navigate back to Test Builder. Run the new Test Step, and then refresh the Account page to check the result. 174

175 Note the updated values in Customer Priority, Type and Name. Reading/Asserting values with the API Now let s do a Read/Assert using the API. Let s verify that the Customer Priority was set correctly in the previous Test Step. Click and drag another row of Account data into the Test Case. This time, select Add an Object read/assert step. 175


176 In the next window, locate Customer Priority. Note the two columns on the right-hand side. The P ( ) column indicates fields to be Read and stored as Parameters. The rightmost ( ) column indicates fields to be Asserted. Tick both boxes, then click OK. 176


177 Your Test Step parameters should look something like this: Note that, if your data row has a value set for Customer Priority, this will be prefilled in the Assert statement. If your data row has no value, the second part of the statement will be blank. Amend the parameters so that Object Id points back to your AccountId Variable and so that your Assert statement shows Customer Priority = High. Save the Test Case. Then click the Run button to try out the Test Case with the Assert. Once completed you should see the following in the Test Runner: 177


178 Querying values with the API Finally, let s query the Account to access the Account Number defined earlier. Click and drag another row of Account data into the Test Case. Select Add a SOQL Query step, then select Account Number from the fields list. Click OK. You should see the following in the new Test Step s parameters: Let s update the SOQL Query so that it only retrieves the Account Number of the Account just created. Update the SOQL Query box so that it reads as follows: Select AccountNumber from Account where Id = Within the, open Content Assist and add the AccountId Variable. 178


179 It should look like this: Note that the Result List Name is AccountRows. This is where the Account Number Variable will be stored. Run the Test Case in Debug mode, then look for the queried Account Number in the Variables view. Introduction to Callable tests Now that we ve covered the main API Test Steps, let s look at making tests callable. Using callable tests is good practice because it allows functionality to be encapsulated and reused across multiple Test Cases. It also helps to reduce maintenance effort when system functionality changes and tests need to be updated. In Provar, the recommended approach to create your Callable Test Case first and then connect it to your Calling Test Case. In this example, we ll use our current Test Case as the Calling Test Case. We ll create a new Callable Test Case which creates a simple Opportunity with some basic data from the Calling Test Case. Let s look at this in Provar Desktop. 179

180 Creating a Callable Test Case Start by creating a new Test Cast called Callable Create Opportunity. As before, select No connection required and untick Launch Test Builder Session. Click Finish. A new Test Case will be created. 180


181 In the parameters of this first Test Step, note the Callable box which is generally defaulted to Not callable. Change this setting to Callable. Note that, in the Navigator, the icon for this Test Case now has a red arrow ( Callable. ) to indicate that it is Note also the two sections below the Callable box in the parameters for this Test Case: These two sections are used to define the values which will be received into the Test Case before execution, and returned out of the Test Case after execution. We ll return to these sections shortly. Firstly, let s set up an API Test Step to Create an Opportunity record. Select and drag a row of Opportunity data into your Test Case, and select Add an Object create step. 181


182 Add only the Required fields and the AccountId field into your Test. (As before, start by clicking unselect all at the bottom right of the window to untick all non-required fields.) Click OK. Find the Fields section within the Test Step parameters of the new Test Step. You will note that the Fields section contains some pre-existing data. This is because the Required fields would naturally be populated in the original data row. 182

183 We ll leave these as they are for now. Navigate back up the test to your first Test Step. Now we ll add some Parameters. This will allow us to populate values on the new Opportunity based on information received from the Calling Test Case. Let s Parameterize Name and AccountId. To add a new Parameter, Click on the icon in the Test Case Parameters section. The following window will appear: 183

184 In this window you have the option to create a Parameter from an existing Test Step or to define your own from scratch. Since we have already created the Test Step with the Parameters we want to use, we ll use the defaulted option, From an existing Test Step Parameter. If you want to create Parameters first and then create the Test Step, you can use the Define your own option to do this. 184

185 Click the triangle next to the Create Object Test Step to access the Parameters available in this Test Step. Select Name from the list. You can also specify a Default Value here. Enter Opp Test 123. Setting a Default Value is good practice because it gives an indication of what kind of value to expect in the field, especially if the field label is not very descriptive. It can also be useful for required fields, to avoid failures, or scenarios when a value might or might not be passed from the Calling Test Case. Click OK. You will note that you have been navigated to the Create Object Test Step. 185

186 Note that the Name field has been parameterized automatically. If you navigate back up to the top-level Test Step, you will find a corresponding entry for Name in the Test Case Parameters section. Add another Parameter for AccountId. 186


187 Leave Default Value blank this time. Click OK. Your Create Object Test Step should now have two parameterized fields: Finally, amend CloseDate so that it takes a today s date value by adding {TODAY}. (Remember that you ll need to change to the Expression Editor to do this.) The Fields section should now look like this: 187


188 As TODAY, which gives today s date, you can also use NOW, which gives the current date and time. This is useful for populating Salesforce date/time fields. Now Save this Test Case and re-open your original Test Case, Manage Account. From the Navigator, select your Callable Test Case and drag it into the Test Case window. You should see the following Call Step appear: 188

189 Note the two Parameters which we defined on the Callable Test Case. The AccountId field we can leave as is, since we already have an AccountId parameter defined in both Test Cases. Let s just change the value in the Name field to include the Account Number from this Test Case. Delete the default value in Name and use Content Assist to add the AccountRows Variable. Once this is added, add a fullstop at the end of the AccountRows Variable. This will autocomplete the entry to include AccountNumber. (If the autocomplete does not occur for any reason, you can manually type this in. Take care to preserve the syntax as it appears below.) Great work! These two Parameters together mean that the Callable Test Case will generate an Opportunity record containing the Account Number and the AccountId of the Account record which was generated in this Test Case. Note that these Parameter settings only apply to when the Manage Account Test Case is the Calling Test Case. When there is another Calling Test Case, the Name and AccountId can be set according to values from that Test Case. Alternatively, when values are not specified, the Callable Test Case will use its own default values (such as Name: Opp Test 123 ). Save the Manage Account Test Case, then run it in Debug mode. You can watch the Test Case s progress in the Test Runner. Once the Test Case is complete, scroll down in Test Runner to see the final few steps: 189


190 Click on the Opportunity hyperlink to see the created Opportunity. It should look something like this: Note that Opportunity Name and Account Name have been populated by the Parameters passed to the Callable Test. Navigate back to Provar Desktop to find these same Parameters in the Variables window. 190

191 You ll need to click on the Calling Test Step in Test Runner: Well done! You have completed Lesson
TESTING WITH DIFFERENT PROFILES
 TESTING WITH DIFFERENT PROFILES Another simple, practical guide for getting started with Provar www.provartesting.com info@provartesting.com Introduction 3 Testing with Different Profiles 3 Introduction
Lightning Knowledge Guide
 Lightning Knowledge Guide Salesforce, Spring 18 @salesforcedocs Last updated: April 13, 2018 Copyright 2000 2018 salesforce.com, inc. All rights reserved. Salesforce is a registered trademark of salesforce.com,
Visual Workflow Implementation Guide
 Version 30.0: Spring 14 Visual Workflow Implementation Guide Note: Any unreleased services or features referenced in this or other press releases or public statements are not currently available and may
EDITING AN EXISTING REPORT
 Report Writing in NMU Cognos Administrative Reporting 1 This guide assumes that you have had basic report writing training for Cognos. It is simple guide for the new upgrade. Basic usage of report running
Useful Google Apps for Teaching and Learning
 Useful Google Apps for Teaching and Learning Centre for Development of Teaching and Learning (CDTL) National University of Singapore email: edtech@groups.nus.edu.sg Table of Contents About the Workshop...
Switching to Sheets from Microsoft Excel Learning Center gsuite.google.com/learning-center
 Switching to Sheets from Microsoft Excel 2010 Learning Center gsuite.google.com/learning-center Welcome to Sheets Now that you've switched from Microsoft Excel to G Suite, learn how to use Google Sheets
Imagine. Create. Discover. User Manual. TopLine Results Corporation
 Imagine. Create. Discover. User Manual TopLine Results Corporation 2008-2009 Created: Tuesday, March 17, 2009 Table of Contents 1 Welcome 1 Features 2 2 Installation 4 System Requirements 5 Obtaining Installation
[ Getting Started with Analyzer, Interactive Reports, and Dashboards ] ]
![[ Getting Started with Analyzer, Interactive Reports, and Dashboards ] ]](/thumbs/88/117545107.jpg "[ Getting Started with Analyzer, Interactive Reports, and Dashboards ] ]") Version 5.3 [ Getting Started with Analyzer, Interactive Reports, and Dashboards ] ] https://help.pentaho.com/draft_content/version_5.3 1/30 Copyright Page This document supports Pentaho Business Analytics
Version 5.3 [ Getting Started with Analyzer, Interactive Reports, and Dashboards ] ] https://help.pentaho.com/draft_content/version_5.3 1/30 Copyright Page This document supports Pentaho Business Analytics
Table of Contents COURSE OVERVIEW... 5
 Table of Contents COURSE OVERVIEW... 5 DISCUSSION... 5 THE NEW DATABASE FORMAT... 5 COURSE TOPICS... 6 CONVENTIONS USED IN THIS MANUAL... 7 Tip Open a File... 7 LESSON 1: THE NEW INTERFACE... 8 LESSON
VERSION JANUARY 19, 2015 TEST STUDIO QUICK-START GUIDE STANDALONE & VISUAL STUDIO PLUG-IN TELERIK A PROGRESS COMPANY
 VERSION 2015.1 JANUARY 19, 2015 TEST STUDIO QUICK-START GUIDE STANDALONE & VISUAL STUDIO PLUG-IN TELERIK A PROGRESS COMPANY TEST STUDIO QUICK-START GUIDE CONTENTS Create your First Test.2 Standalone Web
HeroBase Administrator Training Guide 101
 HeroBase Administrator Training Guide 101 Contents Introduction... 3 Preconditions... 3 What is a campaign?... 3 What is a Project?... 3 How does Campaign Templates relate to Campaigns?... 4 What is Lead
IBM Atlas Policy Distribution Administrators Guide: IER Connector. for IBM Atlas Suite v6
 IBM Atlas Policy Distribution Administrators Guide: IER Connector for IBM Atlas Suite v6 IBM Atlas Policy Distribution: IER Connector This edition applies to version 6.0 of IBM Atlas Suite (product numbers
Adobe Document Cloud esign Services. for Salesforce Version 17 Installation and Customization Guide
 Adobe Document Cloud esign Services for Salesforce Version 17 Installation and Customization Guide 2015 Adobe Systems Incorporated. All rights reserved. Last Updated: August 28, 2015 Table of Contents
SecureTransport Version May Web Client User Guide
 SecureTransport Version 5.3.6 9 May 2018 Web Client User Guide Copyright 2018 Axway All rights reserved. This documentation describes the following Axway software: Axway SecureTransport 5.3.6 No part of
How to Edit Your Website
 How to Edit Your Website A guide to using your Content Management System Overview 2 Accessing the CMS 2 Choosing Your Language 2 Resetting Your Password 3 Sites 4 Favorites 4 Pages 5 Creating Pages 5 Managing
User Documentation. Administrator Manual.
 User Documentation Administrator Manual Proposal Software 1140 US Highway 287, Suite 400-102 Broomfield, CO 80020 USA Tel: 203.604.6597 www.proposalsoftware.com Table of Contents Open the WebPro Viewer...
Salesforce Classic Mobile Guide for iphone
 Salesforce Classic Mobile Guide for iphone Version 41.0, Winter 18 @salesforcedocs Last updated: November 30, 2017 Copyright 2000 2017 salesforce.com, inc. All rights reserved. Salesforce is a registered
Administration Essentials for New Admins (Managing Data) Exercise Guide
 Exercise Guide") Administration Essentials for New Admins (Managing Data) Exercise Guide Table of Contents 6-1: Prepare the Import File... 1 6-2: Import Leads Using Wizard... 3 6-3: Export Using Data Loader... 4 6-4:
Administration Essentials for New Admins (Managing Data) Exercise Guide Table of Contents 6-1: Prepare the Import File... 1 6-2: Import Leads Using Wizard... 3 6-3: Export Using Data Loader... 4 6-4:
Salesforce Classic Guide for iphone
 Salesforce Classic Guide for iphone Version 35.0, Winter 16 @salesforcedocs Last updated: October 27, 2015 Copyright 2000 2015 salesforce.com, inc. All rights reserved. Salesforce is a registered trademark
Introduction to Moodle
 Introduction to Moodle Preparing for a Moodle Staff Development Session... 2 Logging in to Moodle... 2 Adding an image to your profile... 4 Navigate to and within a course... 6 Content of the basic template
Salesforce Console Implementation Guide for Salesforce Classic
 Salesforce Console Implementation Guide for Salesforce Salesforce, Winter 18 @salesforcedocs Last updated: November 30, 2017 Copyright 2000 2017 salesforce.com, inc. All rights reserved. Salesforce is
User Guide. Issued July DocAve Backup for Salesforce User Guide
 DocAve Backup for Salesforce User Guide Issued July 2017 1 Table of Contents What s New in this Guide...4 About DocAve Backup for Salesforce...5 Supported Browsers...6 Submitting Documentation Feedback
Easy Worklog for JIRA. User Manual
 User Manual Supported versions: 3.1.2 Date: 14.09.2017 1. User Manual..................................................................................... 3 1.1 Overview...................................................................................
Solution Composer. User's Guide
 Solution Composer User's Guide January 2014 www.lexmark.com Contents 2 Contents Overview...4 Understanding the basics...4 System recommendations...5 Building custom solutions...6 Getting started...6 Step
Document revision 1.0
 Document revision 1.0 Contents Installing the Application... 3 Basic Setup... 4 Lightning New/Edit Page Configuration... 6 Lightning App Page Configuration... 8 Standardization Options... 12 Enabling and
Author : Gayle Clark, Business Solutions Analyst, Spescom Software Ltd. Approved by : Ewen Roberts, Software Developer Spescom Software Inc.
 SPESCOM SOFTWARE User Guide eb Layout Editor User Guide Document Number : SAN03810 Rev 0.2 Release Date : 15 December 2006 Document Status : Not Approved Author : Gayle Clark, Business Solutions Analyst,
Welcome to Selector2GO Help
 Welcome to Selector2GO Help World Headquarters 445 Hamilton Avenue, 7th floor, White Plains, New York 10601 United States of America Support: +1 914 259 4900 support@rcsworks.com 2004-2018. All Rights
Start Here. Accessing Cisco Show and Share. Prerequisites CHAPTER
 CHAPTER 1 Revised: May 31, 2011 Accessing Cisco Show and Share, page 1-1 Cisco Show and Share Quick Start, page 1-4 Sign In to Cisco Show and Share, page 1-20 Set Your Personal Preferences, page 1-22 Accessing
Perceptive Nolij Web. Administrator Guide. Version: 6.8.x
 Perceptive Nolij Web Administrator Guide Version: 6.8.x Written by: Product Knowledge, R&D Date: June 2018 Copyright 2014-2018 Hyland Software, Inc. and its affiliates.. Table of Contents Introduction...
Getting Started With the Cisco PAM Desktop Software
 CHAPTER 3 Getting Started With the Cisco PAM Desktop Software This chapter describes how to install the Cisco PAM desktop client software, log on to Cisco PAM, and begin configuring access control features
Xton Access Manager GETTING STARTED GUIDE
 Xton Access Manager GETTING STARTED GUIDE XTON TECHNOLOGIES, LLC PHILADELPHIA Copyright 2017. Xton Technologies LLC. Contents Introduction... 2 Technical Support... 2 What is Xton Access Manager?... 3
Chatter Answers Implementation Guide
 Chatter Answers Implementation Guide Salesforce, Summer 18 @salesforcedocs Last updated: July 26, 2018 Copyright 2000 2018 salesforce.com, inc. All rights reserved. Salesforce is a registered trademark
Contents. Signing In... 3 Answering Your Personal Security Question... 4 Forgetting Your Password... 4 Exploring the Learning Center Interface...
 User Guide Contents Logging On... Signing In... Answering Your Personal Security Question... 4 Forgetting Your Password... 4 Exploring the Learning Center Interface... 5 Understanding Icons... 5 Understanding
Multi-NVR Manager. Quick Start Configuration Usage
 Multi-NVR Manager Quick Start Configuration Usage 2014. All rights are reserved. No portion of this document may be reproduced without permission. All trademarks and brand names mentioned in this publication
The Python Mini-Degree Development Environment Guide
 The Python Mini-Degree Development Environment Guide By Zenva Welcome! We are happy to welcome you to the premiere Python development program available on the web The Python Mini-Degree by Zenva. This
Salesforce Console Implementation Guide
 Salesforce Console Implementation Guide Salesforce, Summer 16 @salesforcedocs Last updated: August 12, 2016 Copyright 2000 2016 salesforce.com, inc. All rights reserved. Salesforce is a registered trademark
RingCentral for Salesforce. Administrator Guide
 RingCentral for Salesforce Administrator Guide 1 RingCentral for Salesforce Administrator Guide Introduction Contents Introduction...3 About RingCentral for Salesforce..................................................
Installation & Configuration Guide Enterprise/Unlimited Edition
 Installation & Configuration Guide Enterprise/Unlimited Edition Version 2.3 Updated January 2014 Table of Contents Getting Started... 3 Introduction... 3 Requirements... 3 Support... 4 Recommended Browsers...
BLOOMBERG VAULT FOR FILES. Administrator s Guide
 BLOOMBERG VAULT FOR FILES Administrator s Guide INTRODUCTION 01 Introduction 02 Package Installation 02 Pre-Installation Requirement 02 Installation Steps 06 Initial (One-Time) Configuration 06 Bloomberg
Desktop & Laptop Edition
 Desktop & Laptop Edition USER MANUAL For Mac OS X Copyright Notice & Proprietary Information Redstor Limited, 2016. All rights reserved. Trademarks - Mac, Leopard, Snow Leopard, Lion and Mountain Lion
Set Up and Configure Salesforce Advisor Link
 Set Up and Configure Salesforce Advisor Link Examples and illustrations throughout this document are for illustrative purposes only and not to be considered guidance on proper or required configurations.
SOU Banner 9 Navigation Guide
 SOU Banner 9 Navigation Guide Draft 11.29.2018 Contents Introduction.... 2 Application Navigator.... 2 Basic Navigation.... 3 Page Header.... 4 Key Block... 4 Sections... 5 Bottom Section Navigation...
FORMSTACK ONLINE FORMS
 FORMSTACK ONLINE FORMS Introduction The online application forms are built through a product called Formstack. With Formstack you can build intelligent and professional looking forms and map them into
In the first class, you'll learn how to create a simple single-view app, following a 3-step process:
 Class 1 In the first class, you'll learn how to create a simple single-view app, following a 3-step process: 1. Design the app's user interface (UI) in Xcode's storyboard. 2. Open the assistant editor,
MANAGEMENT AND CONFIGURATION MANUAL
 MANAGEMENT AND CONFIGURATION MANUAL Table of Contents Overview... 3 SYSTEM REQUIREMENTS... 3 The Administration Console... 3 CHAT DASHBOARD... 4 COMPANY CONFIGS... 4 MANAGE LEARNING... 7 MANAGE TABS...
InSite Prepress Portal Quick Start Guide IPP 9.0
 InSite Prepress Portal Quick Start Guide IPP 9.0 Exported on 07/26/2018 Table of Contents 1 What is InSite Prepress Portal?... 4 1.1 Getting familiar with InSite Prepress Portal 9.0...4 1.2 Use a single
How to Edit Your Website
 How to Edit Your Website A guide to using your Content Management System Overview 2 Accessing the CMS 2 Choosing Your Language 2 Resetting Your Password 3 Sites 4 Favorites 4 Pages 5 Creating Pages 5 Managing
HTML/CSS Lesson Plans
 HTML/CSS Lesson Plans Course Outline 8 lessons x 1 hour Class size: 15-25 students Age: 10-12 years Requirements Computer for each student (or pair) and a classroom projector Pencil and paper Internet
CCRS Quick Start Guide for Program Administrators. September Bank Handlowy w Warszawie S.A.
 CCRS Quick Start Guide for Program Administrators September 2017 www.citihandlowy.pl Bank Handlowy w Warszawie S.A. CitiManager Quick Start Guide for Program Administrators Table of Contents Table of Contents
Practice Labs User Guide
 Practice Labs User Guide This page is intentionally blank Contents Introduction... 3 Overview... 3 Accessing Practice Labs... 3 The Practice Labs Interface... 4 Minimum Browser Requirements... 5 The Content
Introduction to Cognos
 Introduction to Cognos User Handbook 7800 E Orchard Road, Suite 280 Greenwood Village, CO 80111 Table of Contents... 3 Logging In To the Portal... 3 Understanding IBM Cognos Connection... 4 The IBM Cognos
User Guide. FTR Manager For more information visit
 FTR Manager 5.7.1 TABLE OF CONTENTS INTRODUCTION... 4 Overview... 4 About This Document... 4 GETTING STARTED... 5 Installation... 5 Starting FTR Manager... 5 To start Manager in Windows 7 or Windows 10
Dynamics CRM Integration for Gmail. User Manual. Akvelon, Inc. 2017, All rights reserved
 User Manual Akvelon, Inc. 2017, All rights reserved Contents Overview... 3 Installation of Dynamics CRM Integration for Gmail 2.0... 3 Buying app subscription... 4 Remove the extension from Chrome... 5
HOTDOCS DOCUMENT SERVICES
 HotDocs Document Services ~ February 2012 Page 1 HOTDOCS DOCUMENT SERVICES Getting Started in the Cloud AT A GLANCE Sign up for HotDocs Document Services Receive contract order confirmation email Install
2 Getting Started. Getting Started (v1.8.6) 3/5/2007
 3/5/2007") 2 Getting Started Java will be used in the examples in this section; however, the information applies to all supported languages for which you have installed a compiler (e.g., Ada, C, C++, Java) unless
2 Getting Started Java will be used in the examples in this section; however, the information applies to all supported languages for which you have installed a compiler (e.g., Ada, C, C++, Java) unless
CLIQ Web Manager. User Manual. The global leader in door opening solutions V 6.1
 CLIQ Web Manager User Manual V 6.1 The global leader in door opening solutions Program version: 6.1 Document number: ST-003478 Date published: 2016-03-31 Language: en-gb Table of contents 1 Overview...9
Guide to User Interface 4.3
 Datatel Colleague Guide to User Interface 4.3 Release 18 June 24, 2011 For corrections and clarifications to this manual, see AnswerNet page 1926.37. Guide to User Interface 4.3 All Rights Reserved The
POOSL IDE Installation Manual
 Embedded Systems Innovation by TNO POOSL IDE Installation Manual Tool version 4.1.0 7 th November 2017 1 POOSL IDE Installation Manual 1 Installation... 4 1.1 Minimal system requirements... 4 1.2 Installing
COPYRIGHTED MATERIAL. Using Adobe Bridge. Lesson 1
 Lesson Using Adobe Bridge What you ll learn in this lesson: Navigating Adobe Bridge Using folders in Bridge Making a Favorite Creating metadata Using automated tools Adobe Bridge is the command center
Multi-Sponsor Environment. SAS Clinical Trial Data Transparency User Guide
 Multi-Sponsor Environment SAS Clinical Trial Data Transparency User Guide Version 6.0 01 December 2017 Contents Contents 1 Overview...1 2 Setting up Your Account...3 2.1 Completing the Initial Email and
Warewolf User Guide 1: Introduction and Basic Concepts
 Warewolf User Guide 1: Introduction and Basic Concepts Contents: An Introduction to Warewolf Preparation for the Course Welcome to Warewolf Studio Create your first Microservice Exercise 1 Using the Explorer
AudaEnterprise Gold User Guide
 Table of Contents 1. Introduction 3 2. Getting Started with Assessments 3 2.1 Creating an assessment 3 2.2 Copying an assessment 4 2.3 Opening an assessment 5 3. The Assessment Job Log 5 4. Working on
S-Drive User Guide v1.27
 S-Drive User Guide v1.27 Important Note This user guide contains detailed information about S-Drive usage. Refer to the S-Drive Installation Guide and S-Drive Advanced Configuration Guide for more information
Using Sitecore 5.3.1
 Using Sitecore 5.3.1 An End-User s Guide to Using and Administrating Sitecore Author: Sitecore Corporation Date: December 12, 2007 Release: Rev. 1.0 Language: English Sitecore is a registered trademark.
MarkLogic Server. Query Console User Guide. MarkLogic 9 May, Copyright 2018 MarkLogic Corporation. All rights reserved.
 Query Console User Guide 1 MarkLogic 9 May, 2017 Last Revised: 9.0-7, September 2018 Copyright 2018 MarkLogic Corporation. All rights reserved. Table of Contents Table of Contents Query Console User Guide
CME E-quotes Wireless Application for Android Welcome
 CME E-quotes Wireless Application for Android Welcome This guide will familiarize you with the application, a powerful trading tool developed for your Android. Table of Contents What is this application?
PTC Navigate Trial Instructions
 PTC Navigate Trial Instructions Welcome to the PTC Navigate Trial! Product data is your organization s most valuable asset. Decisions made with this information can greatly impact your business, especially
Training Manual and Help File
 Training Manual and Help File 30.06.2011 Update Manage Grow Welcome to your new Juniper Website Management System with CMS Introduction The Juniper Website Management System with CMS (Website Content Management
Style Report Enterprise Edition
 INTRODUCTION Style Report Enterprise Edition Welcome to Style Report Enterprise Edition! Style Report is a report design and interactive analysis package that allows you to explore, analyze, monitor, report,
SharePoint: Fundamentals
 SharePoint: Fundamentals This class will introduce you to SharePoint and cover components available to end users in a typical SharePoint site. To access SharePoint, you will need to log into Office 365.
Working with Mailbox Manager
 Working with Mailbox Manager A user guide for Mailbox Manager supporting the Message Storage Server component of the Avaya S3400 Message Server Mailbox Manager Version 5.0 February 2003 Copyright 2003
Electronic Sales Platform User s Manual
 Electronic Sales Platform User s Manual Version 1.1 2018 St. Petersburg 2 CONTENTS Preface... 3 1 Introduction... 4 1.1 Workstation Requirements and Settings... 4 1.2 Starting application... 5 2 Summary
UAccess ANALYTICS Next Steps: Working with Bins, Groups, and Calculated Items: Combining Data Your Way
 UAccess ANALYTICS Next Steps: Working with Bins, Groups, and Calculated Items: Arizona Board of Regents, 2014 THE UNIVERSITY OF ARIZONA created 02.07.2014 v.1.00 For information and permission to use our
CSE 101 Introduction to Computers Development / Tutorial / Lab Environment Setup
 CSE 101 Introduction to Computers Development / Tutorial / Lab Environment Setup Purpose: The purpose of this lab is to setup software that you will be using throughout the term for learning about Python
Reporter Tutorial: Intermediate
 Reporter Tutorial: Intermediate Refer to the following sections for guidance on using these features of the Reporter: Lesson 1 Data Relationships in Reports Lesson 2 Create Tutorial Training Report Lesson
PowerTeacher Administrator User Guide. PowerTeacher Gradebook
 PowerTeacher Gradebook Released June 2011 Document Owner: Documentation Services This edition applies to Release 2.3 of the PowerTeacher Gradebook software and to all subsequent releases and modifications
IMPLEMENTING DATA.COM CLEAN FOR ACCOUNTS, CONTACTS, AND LEADS
 IMPLEMENTING DATA.COM CLEAN FOR ACCOUNTS, CONTACTS, AND LEADS Data.com Clean Overview In addition to finding and adding new accounts, contacts, and leads, Data.com cleans your existing Salesforce data
Salesforce ID of the Feature record is stored in the Product Option record to maintain the relationship.
 01 INTRODUCTION Welcome to the first edition of Manual Migration Training. In this video we ll take a high-level look at the steps necessary to perform a successful migration of SteelBrick content. In
Introduction to Microsoft Access 2016
 Introduction to Microsoft Access 2016 A database is a collection of information that is related. Access allows you to manage your information in one database file. Within Access there are four major objects:
Snapshot Best Practices: Continuous Integration
 Snapshot Best Practices: Continuous Integration Snapshot provides sophisticated and flexible tools for continuously keeping Salesforce accounts, developer projects, and content repositories synchronized.
suitedxt Instructions for Use NeoSoft, LLC NS Rev. 2 Copyright 2014 NeoSoft, LLC All rights reserved
 suitedxt Instructions for Use NeoSoft, LLC NS 03 009 0001 Rev. 2 Copyright 2014 NeoSoft, LLC All rights reserved Revision History Document Revision Date of Issue Description 1 14 July 2014 Initial Release
DOWNLOADING AND LICENSING STEALTHWATCH PRODUCTS
 DOWNLOADING AND LICENSING STEALTHWATCH PRODUCTS Beginning with StealthWatch System v6.3.0, you must license all StealthWatch products. For some products, such as virtual appliances and software updates,
Work Smart: Windows 7 New Features
 About Windows 7 New Features The Windows 7 operating system offers several new features to help you work faster and more efficiently, and enable you to access the files, folders, programs, and applications
NurseSim Help Files. Before you start
 NurseSim Help Files. Before you start Before starting NurseSim you will need to check your PC specifications. NurseSim needs a minimum of 4GB RAM (memory) and a Core i3, i5, i7 or A6/A8 processor. To check
Wholesale Lockbox User Guide
 Wholesale Lockbox User Guide August 2017 Copyright 2017 City National Bank City National Bank Member FDIC For Client Use Only Table of Contents Introduction... 3 Getting Started... 4 System Requirements...
Importing source database objects from a database
 Importing source database objects from a database We are now at the point where we can finally import our source database objects, source database objects. We ll walk through the process of importing from
ILM Assessment Portal. Customer Guide
 ILM Assessment Portal Customer Guide 1 ILM Assessment Portal Customer Guide V1.1 This is a reference guide for the ILM Assessment Portal ( Portal ), ILM s online tool for Centre customers who use the ILM
SharePoint General Instructions
 SharePoint General Instructions Table of Content What is GC Drive?... 2 Access GC Drive... 2 Navigate GC Drive... 2 View and Edit My Profile... 3 OneDrive for Business... 3 What is OneDrive for Business...
RingCentral for Salesforce Classic. UK Administrator Guide
 RingCentral for Salesforce Classic UK Administrator Guide 1 RingCentral for Salesforce Classic UK Administrator Guide Introduction Contents Introduction... 3 About RingCentral for Salesforce.................................................
Parish . User Manual
 Parish Email User Manual Table of Contents LOGGING IN TO PARISH EMAIL... 3 GETTING STARTED... 3 GENERAL OVERVIEW OF THE USER INTERFACE... 3 TERMINATE THE SESSION... 4 EMAIL... 4 MESSAGES LIST... 4 Open
Griffin Training Manual
 Griffin Training Manual Grif-WebI Orientation Class For View Only Users Alumni Relations and Development The University of Chicago Table of Contents Chapter 1: Defining & Accessing Web Intelligence...
End User Manual. December 2014 V1.0
 End User Manual December 2014 V1.0 Contents Getting Started... 4 How to Log into the Web Portal... 5 How to Manage Account Settings... 6 The Web Portal... 8 How to Upload Files in the Web Portal... 9 How
SharePoint 2010 Site Owner s Manual by Yvonne M. Harryman
 SharePoint 2010 Site Owner s Manual by Yvonne M. Harryman Chapter 9 Copyright 2012 Manning Publications Brief contents PART 1 GETTING STARTED WITH SHAREPOINT 1 1 Leveraging the power of SharePoint 3 2
1. Understanding efinanceplus Basics
 1. Understanding efinanceplus Basics To understand the procedures described later in this guide, you will first need some background on the efinanceplus environment. Whether adding, searching for, viewing,
Salesforce Lead Management Implementation Guide
 Salesforce Lead Management Implementation Guide Salesforce, Winter 16 @salesforcedocs Last updated: October 1, 2015 Copyright 2000 2015 salesforce.com, inc. All rights reserved. Salesforce is a registered
Semester 2, 2018: Lab 1
 Semester 2, 2018: Lab 1 S2 2018 Lab 1 This lab has two parts. Part A is intended to help you familiarise yourself with the computing environment found on the CSIT lab computers which you will be using
My Sysco Reporting Job Aid for CMU Customers. My Sysco Reporting. For CMU Customers (Serviced by Program Sales)
") My Sysco Reporting For CMU Customers (Serviced by Program Sales) 1 Accessing My Sysco Reporting... 2 Logging In... 2 The Reporting Dashboard... 3 My Sysco Reporting Process... 6 Generating a Report...
My Sysco Reporting For CMU Customers (Serviced by Program Sales) 1 Accessing My Sysco Reporting... 2 Logging In... 2 The Reporting Dashboard... 3 My Sysco Reporting Process... 6 Generating a Report...
Install Guide WINTER '15 REVISION C. C o p y r i g h t C l o u d A p p s L t d
 Install Guide WINTER '15 REVISION C C o p y r i g h t 2 0 1 4 C l o u d A p p s L t d 1 Table of Contents Introduction... 3 Version History... 4 Requirements... 5 Salesforce Organisation Types... 5 Salesforce
CLOUD EXPLORER DATALOADER USER S GUIDE UC INNOVATION, INC. April 07, 2017
 CLOUD EXPLORER DATALOADER USER S GUIDE April 07, 2017 UC INNOVATION, INC. 230 Commerce, Suite 110 Irvine, CA 92602 Phone: 949-415-8246 Fax: 866-890-7874 Email: info@ucinnovation.com http://www.ucinnovation.com
Module 3: Working with C/C++
 Module 3: Working with C/C++ Objective Learn basic Eclipse concepts: Perspectives, Views, Learn how to use Eclipse to manage a remote project Learn how to use Eclipse to develop C programs Learn how to