Attendance Management System. User Manual. (Last Revise: 12 th April 2013) - 1 -
|
|
|
- Philip Warner
- 6 years ago
- Views:
Transcription
1 Attendance Management System User Manual (Last Revise: 12 th April 2013) - 1 -
2 Table of Contents Introduction... 3 Software Installation... 3 Login... 7 Interface Preview... 7 Main Window... 7 Child Window... 8 Department Management Staff Management Device Management Device Communication Holiday Management Holiday Allotment Shift Management Shift Pattern Management Staff Shift Schedule Add New Schedule Modify/Delete A Shift Schedule Attendance Analysis Analysis Configuration Analysis Generate Reports Raw Swipe Record Report Attendance Detail Report Temp Shift Management On Leave Management Manual Adjustment Raw Swipe Record System Log System Tool Path Setting Database Location Database Backup Rebuild Database Index Compact Database Remove Antique Record Export Attendance Record Trouble-shooting
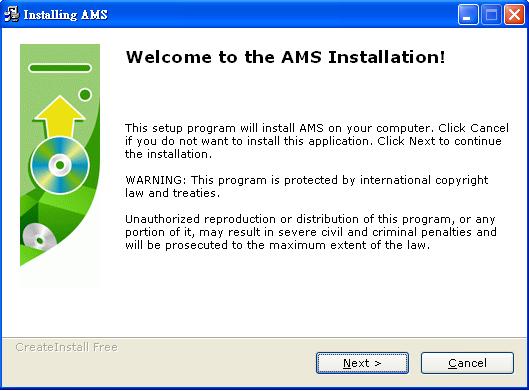
3 Introduction This manual is to teach you how to install and use the Attendance Management system (AMS). The system is for attendance management and communication with fingerprint or proximity card device. It will teach you how to install the software and show you step by step how to input critical data into the software. Lastly, it will show you some troubleshooting techniques in solving problems for the software. AMS system is a multi-lingual interface system. User can choose the interface language in login screen. The software can be run in Windows 98, Windows 2000, Windows XP, Windows Vista, Windows 7 and Windows 8. But, it cannot be used in Linux or Unix platform. Software Installation Put the Installation CD into CD-ROM drive. Browse the CD, and double click on file setup.exe which is located in a date code directory such as The installation wizard will start, click Next to proceed
4 - 4 -


5 Select installation path and then click Next. The system will begin to install the program

6 Click Finish to complete the installation
. Interface Preview The software is window based.")

7 Login Run the shortcut Attendance Management System on the desktop The default login account is system, and the password is blank (no password). Interface Preview The software is window based. The interface between the software and user is through each window. After authentication, it will show you the main window. For each item, it will show the child window. The child window must locate inside the main window. Main Window The main window consists of the title bar, top pulled-down menu, hot menu, the - 7 -

8 content area and the status bar. The title bar shows the software name. The top pulled-down menu covers all the items in the software. The hot menu provides the quickest way for accessing the critical item. Finally, the status bar shows the status of the system such as the current date and time. Title bar Top pulled-down menu Hot menu Status bar Child Window The child window is invoked when you select a menu item. Each child window has its layout. Some are similar and some are different. Most of child windows have the icon bar located at the top for choosing different actions

9 - 9 - Icon Bar

10 Department Management Department management is to maintain the department used in the system. User can add/modify/delete department here. There should be at least ONE department in the system, as department must be assigned during the adding of new staff record. Add New Department To add a department, click the icon bar add. Input Department Number and Department Name. Click Save to save and exit


11 New Department will be shown. Adding Subsidiary Department You can add a sub department under another department. It creates a hierarchy between departments. For example, Administration section consists of Account Department and Shipping Department. Or, you can setup multi-organization. Each organization has its own departments. For example, you can setup 2 organizations. One is ABC Company Ltd. and the other is DEF Company Ltd. Each company has its own sales department and account department. To form the hierarchy, you need to input an upper department during the adding of department

12 The new department (Account Department) will be added under ABC Company Ltd. To modify a department, we use mouse to point to the department and click the icon Modify. Then, we can change the content. To delete a department, we use mouse to point to the department and then click the icon Delete to delete the department. In the other staff selection screen, you may need to show Subsidiary Department staff. You need to tick the check box Show Subsidiary

13 Department if you want to do so. No staff will be listed if there is no staff belongs to selected department. Once Show Sub-Department is selected, all staffs in subsidiary department will be listed. Staff Management Staff Management handles all staff settings, including adding/deleting/ modifying staff information. User can also handle staff resignation here. One of the attributes in staff management is User ID. It is the identifier used in fingerprint device or proximity card device. For example, staff number is MIS001 and its user ID is 7. It means the fingerprint or card information in device belong to user id 7 will be match to staff MIS001. To invoke the staff management item, just click the Staff in hot menu. When you see the Staff window, click the icon Add to add a staff to the system

14 In the input screen, you can input the related information for each staff. Some fields are necessary to input while others are optional. The fields Name, Staff Number, Dept and User ID are necessary for input whenever you add a staff record. The other fields are optional


15 In the input screen, you can see there are 3 pages. They are base info, other info and remark. In each page, you can input the related information of each staff. You can click the page title to let the system showing the page content. The page other info consist of the less important information of each staff. You are free to choose to input or not. The third page Remark allow you to input the remark of the staff and also to see the number of fingerprint template, the password information and the proximity card number if it has

16 If the user has enrolled 2 fingerprints in the device, the fingerprint field will display 1,2 which means that first and second fingerprint has been enrolled. The sequence in here is not the same as the fingerprint sequence in user s hand. The field Admin shows you whether the user is supervisor in the fingerprint or proximity card device. If it is supervisor, you will see true or you will see false. The field password shows the password in the fingerprint or proximity card device. It will not display the exact content of the password. Instead, it will show a number of star * to represent the password. Finally, the card field will show the card number in hexidecimal in the device. When you have input all the necessary information of the staff, you can click the icon button Save to save the staff information into the software database. If you do not click Save, the input data will be lost


17 To modify a staff s information, you can use mouse to select the staff and click the icon Modify. After that, edit the same thing in the input screen and save it afterwards. To delete a staff s information, you can use mouse to select the staff and click the icon Delete. When you choose to delete a staff, you are asked to confirm your action. Click confirm to proceed or cancel to abort the action. Please be noted that the process is NOT RECOVERABLE


18 Normally, we will set the staff to the resigned state rather than deleting the staff directly. The resigned staff will be not shown in the staff listing, unless user enables Show Resigned Staff option. The resigned staffs will also be excluded in reports unless specified. However, all records of resigned staff are still preserved in the system. To set the staff to the resigned state, select the staff and click the icon Modify. Then, tick the check box resign and Save. After that, you are asked to confirm the action


19 Select Confirm to confirm staff resignation or Cancel to abort the action. When you confirm the setting of resignation, you can see more fields displayed for input of resignation date, type and reason. Except the resign date and type, you are free to choose whether to input the reason of resignation. The resigned staff will not be listed in other selection windows unless the check box Show Resigned Staff is selected. In the staff management, you can see a button of Quick setup


20 The staff quick setup is to maintain the annual leave entitled for each staff. You can either input the entitled annual leave days for each staff or use auto calculate to find out the annual leave days automatically. If you intend to use the auto calculate function, you need to input each staff s join date and grade. The auto calculate work out the annual leave days of each staff based on these data. Besides, it will check the annual leave template for the number of annual leave days entitled


21 In the template, there are 3 default grade. They are General, Clerk and Manager. You can add more grade to the system For each grade, we can set the entitled annual leave days according to the number of working years. In the quick setup, we can post the remaining days of annual leave of current year to the next year. The posted annual leave days will be display in the last year of next year period


22 Device Management Device management is to keep record of each device in an environment. You can add/modify/delete a device in this module. To invoke this module, click the icon device management. To add a new device, press add. Each device has a device number which identifies the device. Select an unique device number and input the device name. Normally, we will give a meaningful device name for easy remembering. For each device, we need to select a model belonging to the device


23 The model will affect the communication between computer and the device. So, please check the device model before input this item. Finally, you need to input the communication mode for successful communication. Tick the check box networked if you decide to communicate with the device by TCP/IP. If the communication mode is by COM port or USB port, please uncheck the networked check box. For TCP/IP connection, you need to input the IP address, port number and communication password. The IP address should be equal to the one stored in the device. The port number also needs to be the same. The default port number is If you have changed the one in device, you need to change the item in here for successful communication. Finally, the communication password should also be the same with that of the device. The default communication password is 0. If you change the communication password in the device, you also need to change the item in this


24 input screen. The communication password is to protect the device from communicating from other unauthorized software. For COM / USB connection, uncheck the check box Networked?. Then, input the com port number and the communication baud rate. When you plug the RS232 cable to the computer, the OS will assign a com port number for the communication. You can check the com port number from the OS. For Windows XP, right click my computer and select computer management. Then, select device management and find com or lpt. Use mouse to click the left + sign to see the available com port for the computer. After knowing the com port, you can input back to the software for communication by COM port. If the device has USB communication, you just uncheck the check box networked and input any com port or baud rate. The software will judge the communication is by COM port or USB port automatically. Once you have input correct all fields, click the button save to save the device into the software

25 The saved new device will be shown in the device list in the lower part of the device window. Device Communication Device communication is a list of items for communication with the fingerprint or proximity card device. To invoke it, click the icon Download. The download window will be shown after invoking. In the left side, you can see a tree list of devices that you input in Device Management. Each item has a square box in left hand side. Click the square box means you want to communicate with the device
26 The root of the tree is a tip showing Select Device. Check it means you want to select all devices. Uncheck it means all devices will be unchecked. In this window, you can select multi-devices for communication. In this window, you can see the top menu has been changed to that belonging to data communication. In the middle part, you can see a list of items in a toolbar for reading and setting time, reading and setting name, USB import, clearing and setting admin. The common button is located in right middle part. They are used much more frequently by user. They are mainly for download/upload/delete transaction data and download/upload/delete fingerprint or password or card template

27 To download transaction data, just click the button Download Record. Transaction data means the in out records punched by user. This Download record is by marker. That is, when you download the data from the device, you cannot download again using this button. The marker has already been moved to the end. If your computer has done reinstallation and you want to download back the previous record, you can choose Download all record. This button is to download all the records in the device flash memory. Unless you do the action of delete record, you can always click the download all record to get back the previous data. Be careful in clicking the delete record as the deleted records are UNRECOVERABLE. When you click the button, the system will ask your confirmation before deleting. We may have more than one device in a network. In such case, we used to download fingerprint template or password or card information from one device to the computer and upload back to the other devices. The button download template will download all fingerprint template to the software database. Besides, if the user has enrolled proximity card or password, they will also be downloaded into the software. But, you can see the card number but you cannot see the exact content of
28 password. The system will show star (*) to represent the content of the password. The button delete template will delete the fingerprint template, card and password in the device. But, it only delete those user ID found in the software. It will not affect those fingerprint by the other user ID. We then come to the buttons in the toolbar. In this toolbar, we use the button to do less frequent job. The first two buttons are Read Time and Set Time. Read Time is to read the clock time of the device selected. Set time is to set the time of selected device. When you download data from device, the system will set the device time automatically for the first time of download in entry to the window. Read Name is to read the user name from the device. When you install the device the first time, it will not have name. It only has user ID. So, you need to do the set name once for a device. USB Import is to import the in out transaction through the USB disk. Some customers do not use TCP/IP nor COM port to do the communication due the difficulty in cabling. They will then choose the use of USB disk. The button clear admin is used to clear any supervisor in the device. When the supervisor in the device has left, user may not get into the menu again. They can use this button to clear any supervisor in the device so that they can access the device menu again. Finally, the button set admin will do the opposite of clear admin. It will get the selected user and change this user id from normal user to supervisor

29 Just select the user that you want to raise it to supervisor and click button write. At last, we come to the rarely used top menu. Normally, user seldom use it but it is very useful. The top menu is in format of pulled-down menu. When you click the item, a pop-up menu will be displayed such as the 1. Download online. In Data Item, you can see a item in pop-up menu. It is Download online. It is to monitor all selected device and download the in out transaction immediately when user punch its finger. When you select this item, it will ask you the time interval in seconds. It is the time between each monitoring. The default interval is one second. The check box display is an option for choosing whether to show the connection message in the message area. The default is to display. When you confirm the interval, you can click the button start to download data in online mode

30 The system will check all selected device by the input time interval in seconds. When any user punches its fingerprint, the data will be collected immediately. Should you want to stop the download online, you can click the icon stop to stop the process. The next menu item is setup. It is a pop-up menu for setting the device


31 The first item is delete all enroll data. It is to delete all enroll data in the device no matter whether the user ID is found in the software. It is different from delete template. delete template will only delete template of those users that is found in the software. So, this item is suitable for clearing device. The second item in the menu is bell. It is to set the time of the bell to sound. In the setting of bell time, you can input the hour and minute for the bell of the device to sound. When you start to input the hour, the enable check box will be checked automatically

32 When you finish the input, you can press the button write to set the time to the device. Also, you can click the button read to read back the current bell time of the device. The third popup menu is for timezone management. Timezone management is to control the time that staff can punch fingerprint or card or password

33 In the pop-up menu, you can see 4 items. They are Timezone, Time group, User vs Timezone and Time Match. Timezone is the allowed time per day of week. Time group is the group that have maximum of 3 timezones. User vs Timezone is to allocate timezone and group to a user. Finally, Time Match is to allow a combination of group for opening door. Time zone When you select the timezone, you will see a timezone window. In the window, you can see the device number. If you have selected more than one device, you can swap to different device. The timezone number is the number of timezone for setting. It allows maximum of 50 timezones to be set. For each timezone, you can set the range of access time from Sunday to Saturday

34 For example, you can set the access time on Sunday from 08:00 to 23:59. It means that user can only do the punch within this range of time, inclusive. If the user punch at 07:01 on Sunday, he will fail to do so. When you have changed the setting, you need to write the data back to the device. The buttons Write Current Timezone and Write All Timezone will write back the data into the device. The first one will write only the current screen timezone number. The last one will write all 50 timezones back to the device. In the contrary, you can read back the device setting by the 2 buttons of Read current timezone and Read all timezone. Time group When we finish the setting of time zone, we can also set time group to include different time zones. You can have a maximum of 5 time groups. Each Time Group can have a maximum of 3 time zones. The system will generate 5 time groups for you automatically and will assign a default group name. The group name is the English of the number. You can change the group name by clicking the button Set group name

35 To add a time zone into the highlight group, highlight an available time zone and click the left arrow icon. In the contrary, if you want to remove a time zone from a group, you can click the icon of right arrow

36 Finally, you need to write the data back to the device for effectiveness. Click the button Write device will do the job. Besides, you can check the setting of the device by clicking the button Read Device. User vs Time zone When we have time zone and time group, we need to assign them to each staff. Each staff can be assigned 1 time group and 3 time zones. If a staff has been assigned for time zone 1 and time zone 2, it can open door at any time of the two time zones. Their relation is "or". Another example, if a user has been assigned to group 2 and time zone 3, 4 and 5, she can open door in any time under time zone of group 2 and time zones 3, 4 and

37 The blue down arrow is used for assigning group to the staff while the green down arrow is used for assigning time zone. The icon of computer with cross is to remove any thing from the staff. Basically, you need to tick the staff first before doing assignment or removal. The system allows you to have multi selection. Any assignment or removal will be effective for selected staff. When you tick the tree root Employee, you can select or unselect all staff. Similarly, you need to write the change back to the device. Click the button Write device or the above diagram can do the job


38 If you want to check the configuration of the device, you can click the button Read Device or the above picture. The configuration data will be shown in the message area. Time Match Totally, you can set 10 time matches. Each Time match can have a maximum of 3 Time groups. When a time match has 2 time groups, it means that any one member from each group must punch together for access. If a time match has 3 time groups, it means that 3 staff from the 3 time groups must punch for access. Each Match can open door based on the time zone under each user. Again, use the left arrow icon to insert group while using the right arrow to remove group for the match. Similarly, you can click the button Write Device to write the change to the device and click the button Read Device to read the current setting in the device
 time (sun to sat, 09:00 to 12:00) User 3 3 Group 3 time zone (3) time (sun to sat, 13:00 to 23:59) Then, we set the time match of Group 2 and")
39 For the time match to work, we must note the open door time of each member. For example, we take the example of user 2 and user 3. User Group Group Time zone User 2 2 Group 2 time zone (2) time (sun to sat, 09:00 to 12:00) User 3 3 Group 3 time zone (3) time (sun to sat, 13:00 to 23:59) Then, we set the time match of Group 2 and 3. For the time from 09:00 to 12:00, user 2 can access independently. User 3 needs to have user 2 punches for access. For the time of 13:00 to 23:59, the opposite happens. User 3 can access independently but user 2 need the presence of user 3. For the time of 12:30, none of them can access even they punch together. Normally, we will use the time match to combine the administrator and the normal user. User 2 can only access in normal office time. User Time zone Administrator All time User 2 Mon Fri 07:00 to 22:00 In this case, user 2 can only access in Monday to Friday, from 07:00 to 22:00. Out of this time, he can only access with the presence of administrator while the administrator can access all the time


40 For the model of FP50U, you will not find the group 4 for selection. It is the design of the device. Time status Time status is to set the device time verification and time log. Time verification identifies the verification mode. For example, we can set 08:00 to 18:00 having only the fingerprint verification. Or, we can set 18:01 to 22:00 having verification of fingerprint plus the password. Time Log is to set the status of the punching. The fingerprint machine has 8 time status. They are in, out, duty on, duty off, overtime on, overtime off. You can set different time zone to different status

41 When you invoke the time status, you can see a new popup window of time status. In this window, you can select either verify or log. When you select verify, all actions belong to time verification. When you select log, all actions belong to time log. You can input the time zone by clicking the button Edit. Under the selection of verification, you can input the time zone and then the verification method. Any means any one of fingerprint, card or password. Under the selection of Log, you can input the time zone and then the mode


42 Currently, the software will only identify the in and out. Duty on and overtime on will also be interpreted as in. Duty off and overtime off will be interpreted as out. When you have finished the input of data, remember to click the button save to store the data into the database. This action only stores the setting into the database. You also need to burn the setting into the fingerprint device. You do this by clicking the button write. Besides, you can view the setting in the fingerprint device by clicking the button read. In the device communication, we can connect different fingerprint or card machine. For card controller AC100, we need special handling. If this software is used to connect to AC100, we need to set the device to AC100 in system tool


43 Then, when we do the device communication, the program will be different. In this screen, we have 1 more top menu. It is the Device Control


44 Under device control, we have Argument and Inquiry. In device argument, we can change the setting of AC100 in area of door, verification and security. For example, we can change the delay time of door relay. It is the time interval between card passing verification and the opening of door. In verification control, we can switch on or off the verification of user id + password. Some users have special privileges that they do not need to bring proximity card. So, they will just choose pressing user ID and password only. The procedure is by pressing user ID, button <Esc>, input of password and then button <Ent>

45 Besides, we can activate the card and password together for verification. User can choose always, prohibit or by time zone. In selection of time zone, user can set maximum of 4 time zones for requiring user to use card and password together. Normally, the out of office time requires user to use both. Finally, we can choose whether the first reader is for in mode. Normally, the first

46 reader will be installed outside the door so that its record belong to in mode. Sometimes, the installation make different so that the first reader is installed inside the door. So, we can change it to out mode in the system. The third page of device argument is security password. Once you change the communication and keyboard password, other persons cannot connect with the device by the same software as they do not know the password. If you reinstall your computer without remembering the password, you can reset the AC100 machine by jumper so that the password will be reset to zero again. In device inquiry, we can check whether the device has presence of a specified user or card number. Normally, when a staff resigns, we will use back the old card. If we


47 want to use it again, we need to delete the card from the device first. For the model of AC100, the time zone and User vs Time zone are quite different. In Time zone, we can either use week group or work day group for controlling the passing. There are 16 week groups for use. Each week group has 6 time zones per day of week. It means that you can control the user to open door at maximum of 6 time zones per day

48 Each week group has 6 time zones per day of week. It means that you can control the user to open door at maximum of 6 time zones per day. If you want much more simplifier case, you can choose work day and non-work day for controlling the passing. You can select the input of 4 work days and 1 non-work day. Each day has 4 time zones for input. You can assign any work day to a user so that she can have maximum of 4 time zones for opening door. Besides, we have 4 time zones for 1 nonwork day. All holidays belong to non-working day. We can burn holiday to the card device by either ticking one or two day of week or input of a special day


49 Holiday Management Holiday is to identify the date for public holiday. In public holiday, staff need not be on duty. To invoke the holiday management, just click the icon Holiday Management. To add a holiday calendar per year, click the button Add Holiday. Input Year and Category Name. Click OK to proceed


50 After the input of holiday calendar, you can add detail date for the public holiday. Then, you will see an input window for the date range and the holiday name. Input the Begin Date, End Date and Holiday Name. Click OK to confirm. New holiday will be added. Repeat the adding till public holidays have been added

51 When you find some error in adding, you are free to choose to modify or delete the public holiday. There is a quick setup that you can set up all Sunday as public holidays. So, you do not need to set them one by one. To do so, click the button Quick setup. You will see an input window with several check boxes

52 Check the check box all Sunday to assign all Sundays as public holiday. Besides, you can select Customize to define a customized day off. Click Alternate Weekend for alternate long week and short week

53 Click OK to proceed. The system will generate a new holiday category with selected day in whole year

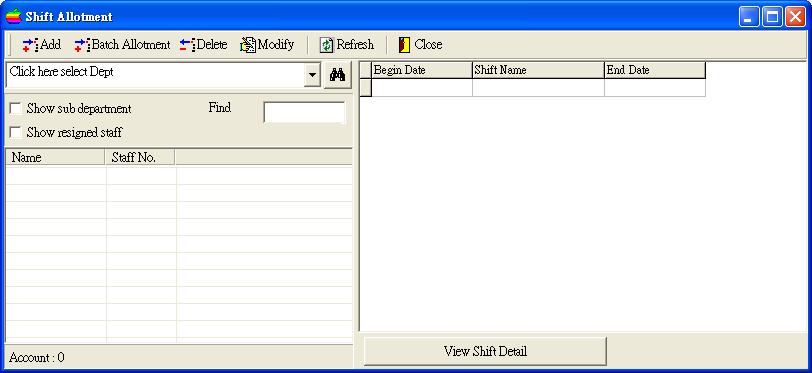
54 Holiday Allotment After defining Public Holidays, the holiday must be allotted to staff before they are taking effect. To invoke the Holiday Allotment, click the icon Holiday Allotment. In the holiday allotment window, you can allot holiday calendar to one department or a list of departments or single staff

55 Choose the department and select the appropriate holiday. Click button Add. The Holiday will be allotted to selected department. Continue the above process till all allotment has been done

56 You can choose the holiday and click Delete to remove the selected holiday. Shift Management Shift refers to the preset in and out time in a date. For example, you can input the in and out time as 09:00 and 18:00 correspondingly in a day. Or, you can input 09:00 and 13:00 for a shift to represent half day in Saturday. It consists of header and detail (time zones). You need to input both the header and detail to finish the setup of shift management. To invoke the shift management module, click the icon Shift Management. Click the top button New Shift to add a new header


57 You will see an edit window for input of Shift header. The first field is order number. It is to control the arrangement of the shift. Input Shift No. and provide a Name for the new shift. If it is the default shift, click the check box default shift. If a staff does not have any shift arrangement, the system will get the default shift automatically. Lastly, input any remark that you may want the system to keep. Finally, click OK to save the shift header

58 To add a detail information (time zone) for a shift, select the new shift and then click Add Detail

59 Then, you will see a popup edit window. In this window, you need to input the in time and out time. Need Swipe The in time and out time can be chosen for swiping or not. If the check box need swipe is not checked, it means that staff does not need to punch. The system will assign the time for the staff automatically and disregard any swipe time. For example, if the in time is 08:00, the system will assign the in time to the attendance record. Earliest In For in time, you need to input also the earliest in time as a limit. The system will start to count the in time from the earliest in time onwards. Time before this time will be ignored. For example, the time is set to be 07:00. That means for staff swiping card on/after 07:00, the swipe records will be considered as a valid clock in record. If staff swipe at 6:59 or before, the system will ignore those records, and they will be taking into account during attendance analysis. However, those times will also be seen in raw swipe record
60 Latest Out The possible latest clock out time. The idea is same as the Earliest In, but this is for clock out time. Similarly, the system will ignore the time after latest out time. (For Earliest In and Latest Out to take effect, a analysis parameter must be set, refer to Section 14.1 for details) Count Late Arrival This check box is to select whether to count late arrival. If you choose not to count late arrival, you will not get any figure about the late in time. For example, the preset in time is 09:00. If the actual in time is 09:17, the system will show the actual time as usual but the late in column will be blank. Count Early Out This check box is to select whether to count early out. If you choose not to check this, the system will not calculate the early out time. You will see the column blank in attendance report

61 Allow Late In A buffering time zone for late arrival. In this example, the setting is 00:15, which means 15 minutes buffering time is provided. For staff arriving at 09:15 or before, the system will not count the staff as late arrival. However, if staff arrives at 09:16, then the staff is late, and the late time will be 16 minutes, instead of 1 minute. Allow Early Out A buffering time zone for early off. The concept is same as Allow Late In. Early In = Overtime Count the work time before In Time as overtime. The default cut off time is in time less one minute. But, you can choose to change the cut off time. For example, you can change the cutoff time to 08:29. If the staff arrives at 08:10, the overtime calculated is 20 minutes instead of 50 minutes. Late Out = Overtime Count the work time after Out Time as overtime. Get Earliest If there are several times in the in time range, the default choice is to get the one just before the in time. If this check box is ticked, the system will get the earliest time within the in time range. Get Latest If there are several times in the out time range, the default choice is to get the one just after the out time. If this check box is ticked, the system will get the latest time within the out time range
62 OT Shift It defines whether the shift is an Overtime Shift. If it is overtime shift, the working time will be counted in the overtime column. Mid Time Mid Time is the middle time between in and out for finding the lunch time automatically in the attendance intelligent report. The report will find out the lunch out and in time by looking for the time near the mid time, left and right. The default mid time is the middle time between in and out. You can change it to the time that you want. Work Time Work time is the calculated working time by the difference of out and in time. Some customers need to less the work time from the lunch time. Then, you can input the break time to have the actual work time. The actual work time is the calculated work time less the break time. Attendance report will show the actual work time rather than the calculated work time. Flexible Flexible means the in time for the time zone is not care. We just concern the period between in and out. When you tick this, we assume staff only has chance of early out. Example in time = 09:00 out time = 22:00 work time = 6 hours User can come in at any time. We just count whether she has stayed for 6 hours. If she stays 5 hours, she will get an early out of 1 hour. One case is that we cannot count early out and can only count late in. The case is that the period is less than the standard period while the out time is near the out time. Example in time = 08:00 out time = 22:00 work time = 5 hours Staff comes in on 19:00 and leave on 21:30. The working time is 2 and half hour

63 The remaining period has only 30 minutes between actual out time and the standard out time. If we treat it as early out of 30 minutes, the period will be 2 and half hour + half hour which only reaches 3 hours. But the standard working period is 5 hours. So, we will treat it as late in of 2 and half hours instead. Then, the total time will be 5 hours. Working time : 2.5 hours Late in Total : 2.5 hours : 5 hours. Break time Some users do not want to set 2 time zones for attendance in order to lessen the number of verification by staff. In this case, they can input the break time to lessen the total working time. Then, just one time zone will be used for the attendance. In the attendance calculation, the total working time will lessen the break time for the purpose of accuracy. The standard working time of the attendance detail report have lessen the break time automatically

64 If staff makes half day leave, the remaining working hour will also lessen the break time. Example in time = 09:00 Out time = 18:00 Break time = 13:00 14:00 Half day on leave = 09:00 13:00 Remain working = 13:00 18:00 The remain working time will be 4 hours, not 5 hours as 1 hour of break time has been deducted. Shift Pattern Management After setting the Shifts, user has to define the shift pattern. Shift pattern describes work hour in each day on a yearly/monthly/weekly, customize and auto base. Add Weekly-based Shift Pattern To invoke the shift pattern module, click the icon Shift Pattern. Select Weekly and then click New Pattern


65 Input Name for new shift pattern. Select the new shift pattern and then click Add. Select Begin Date. Select Shift Name to assign to specified day, and then click


66 Click OK to proceed. Shift will be assigned to selected day. Repeat Step to until all work days have been assigned with a shift. (Notes: If shift in next work day is same as the one in previous day, no shift assignment is required, as the system will automatically use the shift in previous for days without shift assignment.) In the following example, the shift pattern will be:


67 Mon Fri: Shift Sat: Shift Sun: Ignored as it is set to be public holiday (Refer to Section 7 for details) Click Close to exit. In customize mode, you can input the number of days for repeating the cycle. In auto mode, you can input several shifts for the system to select automatically

68 The system will select the suitable shift based on the minimum difference between the shift and the actual punching time. Some customers do not want to arrange dedicated shift for staff as they are changing frequently. Staff Shift Schedule After setting shift pattern, user has to assign the shift pattern to staffs. For staffs without any assigned shift, no attendance records will be shown in attendance reports. Add New Schedule Go to Shift Allotment. Click Batch Allotment. Click Select staff

69 Click Click here to select Dept., and then select the target department. Put a tick in the box for all target staff. Or, right-click on the blank area, click Select All on the popup menu to select all listed staffs. Click OK to proceed


70 Select shift pattern in Assign Shift, and then set the Begin Date and End Date. The system default setting is no end date. Un-tick the No Ending Date if there is a specify end date for the assigned shift pattern. Click OK to proceed
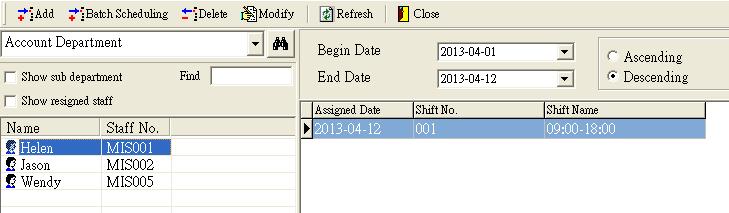
71 The selected shift pattern will then be assigned to the staffs in the specified period. Click Cancel to close the Batch Scheduling Window. Modify/Delete A Shift Schedule Go to Shift Allotment. Click on Click here to select Dept. and then select the department

72 Click on Click here to select Dept. and then select the department. Select particular staff, corresponding shift schedule will be shown. Select the shift schedule which required being deleted/modified. Click Delete / Modify to delete/modify a shift schedules
73 Attendance Analysis Analysis Configuration Go to Analysis. Click Analysis Parameter to configure the analysis rules
: Minimum step unit of absent time. Treat invalid Swipes as Absence: If either clock-in or clock-out record is missing, the system will treat it as absence.")
74 In/Out Attendance Rule: The default setting is Ignore In/Out. This one should not be changed. Work Time Unit (min): Minimum step unit of work time. Absent Time Unit (min): Minimum step unit of absent time. Treat invalid Swipes as Absence: If either clock-in or clock-out record is missing, the system will treat it as absence. Match I/O record according to Shift def.: Once this option is enabled, system will search for valid attendance records according to the Earliest In and Latest Out settings (Refer to Section for details) Click Save to save and exit


75 Analysis Go to Analysis. Click By Dept. and then select departments for analysis. Or, click By Staff and then Select Staff


76 Specify the Begin Date and End Date, and then click Analyze to start the analysis. Wait until the progress bar reach 100%. Click Close to exit


77 Generate Reports Raw Swipe Record Report Show all swipe record for selected staffs. Go to Report and then Raw Swipe Record. Click Select Dept. or Select Staff to select department or staff. Specify the Begin Time and End Time and then click Search
 Attendance Detail Report Go to Report and then Attendance Detail")
78 Raw swipe records will be listed. Click Preview to preview print layout; click Print to print the report; click Excel to export the report to excel file. (Notes: To export the report to excel file, Microsoft Excel must be installed on the computer) Attendance Detail Report Go to Report and then Attendance Detail Report


79 Click Select Dept. or Select Staff to select department or staff. Specify the Begin Date and End Date. Click Preview to preview print layout; click Print to print the report; click Excel to export the report to excel file. (Notes: To export the report to excel file, Microsoft Excel must be installed on the computer)

80 Temp Shift Management Instead of assigning shift to staff by shift pattern, user can assign the shift directly to staff on particular dates, which is called Temp Shift. Temp Shift has highest priority in the system. Once temp shift is assigned on particular date, it will override all Holiday or Shift Schedule settings. Add Temp Shift Go to Attendance Management and then Temp Shift Management. Click on Click here to select Dept. and then select the department

81 Select staff and then click Add. Select Shift Name. Specify the Begin Date and End Date, and then click OK to save. The assigned Temp Shift will be displayed
82 - 82 -


83 On Leave Management On Leave Management handles all absence records of staffs. The records might be annual leave, sick leave, etc. User can also add special records such as Meeting with customer, Business trip, etc. Define Absence Reason Go to Attendance Management and then On_Leave Management. Click On Leave Reason
84 Click New to add new on leave reason. Input all the absence reasons and then click Save. Click Close to exit


85 Add Single Absence/Leave Record Go to Attendance Management and then On Leave Management. Click on Click here to select Dept. and then select the department. Select staff and then click Add

86 Select On Leave Reason, and then specify the Begin Date, Begin Time, End Date and End Time. If staff is absence for half-day or a couple hours, user has to specify whether the staff still need to swipe card or not. If no swiping card are required, the system regard the Begin Time and End Time as clock-in time and clock out time accordingly. Clock-in Required: Staff has to swipe card during on duty. Clock-out Required: Staff has to swipe card during off duty

87 Specify the number of Days that the leave/absence taken. User can input 0.1, 0.5 or 1, etc. Click OK to save. The new on leave record will be shown. Batch Absence/Leave Record Registration Go to Attendance Management and then On_Leave Management. Click Batch Allotment


88 Click Select staff. Click Click here to select Dept., and then select the target department


89 Put a tick in the box for all target staff. Or, right-click on the blank area, click Select All on the popup menu to select all listed staffs. Click OK to proceed. After selecting staffs, input all necessary information. Click OK to save and then click Cancel to exit


90 Manual Adjustment If staff does not have either clock-in or clock-out record, the system will not able to generate an accurate attendance report. User must add the record manually. Add Swipe Record Before adding swipe record, Adjustment Reason has to be defined first. Go to Staff Management and then Basic Information. Select Manual Adjustment Reason


91 Click Add to add new reason and then click Save. Click Close to exit. Go to Attendance Management and then Manual Adjustment


92 Click on Click here to select Dept. and then select the department. Select staff and then click Add New. Specify Adjustment Date, Adjustment Time and select Adjustment Reason. Click OK to add new record


93 Raw Swipe Record Go to Attendance Management and then Raw Swipe Record Click on Click here to select Dept. and then select the department. Select target staff and the then specify Begin Date and End Date. All swipe records in the specified time period will be listed


94 System Log System log is to check the login and logout status. System Tool System tool is mainly for doing housekeeping job of the system


95 Besides, it allows you to set the system company name. And, you can select the default interface language in this window. When you have input of the company name, remember to click the button Save Company to save the name. Then, the company name will be shown in all reports of the system. Similarly, when you have selected the interface language, you need to click the button Save Setting to save the selection
96 Path Setting It is for setting the location of different items such as database location, backup location and photo location. Photo location is to put the file of image for each staff. Backup location is the path for storing backup data. Database location is the path for storing the access database (imsds.mdb) and the corresponding system database (system.mdw). Database Location You are free to choose the database type in this area. You can select either using access database or mysql. For access database, you need to specify the location of the mdb file. For mysql, you need to set up an ODBC account to connect to the mysql database. The ODBC account has a source name. Then, you can input the data source name into the software for connection. Besides, when you install the mysql database, you need to set up user and password. The default user is root. The password is free to set. The database name is readonly. It must be imsdb. The software will create this database with all relevant tables automatically. After input of the parameters, click the button save to save all the settings. The software will try to connect the mysql database. If connection fails, you cannot do the saving. If connection succeeds, the software will quit. When you enter the software again, the database connected will be mysql database. For the administration of the mysql database, please refer to the corresponding menu


97 Database Backup It is to backup the whole database into other area. Then, you may copy the backup to other removable media for off-site backup


98 The default backup file name will be displayed. If you accept the name, you just click the button Start or you can change it. The default path is the backup location stored in the system. Once you finish the backup process, you can copy the backup file to other removable media for off-site backup. To restore the database, you do not need the system interface. You just copy the imsdb_yyyymmdd.mdb back to the database directory and rename to imsdb.mdb. Please be reminded that the authentication database system.mdw must be present in the same directory as that of imsdb.mdb. Otherwise, you cannot access to the database. Rebuild Database Index Database use index to search records so that you can get a list of records quickly. Without index, the searching will take more time. Rebuild database index is to reorganize the index structure so that the speed of searching will be increased


99 Compact Database Database operation will cause the fragmentation in the blocks of the database. Block is the basic component of database. Compact database will do the de-fragmentation of these blocks which will increase the speed of performance of operation. Remove Antique Record Day by day, the records in the system will be accumulated and the database size will be very large. This item can be used to remove the old records so that the database size will be cut down. When you invoke the item, a window will be displayed for asking the Due Date. (Notes: the Due Date CANNOT be the date within the nearest 120 days.)

100 Click the button Clear Record to remove all attendance record before the Due Date. Click Yes to confirm the removal. Click Close to exit


101 Export Attendance Record This item is to export the raw swipe record out to text file or database file. This is for other system to get the data and do processing. For example, you may have a payroll system which can import the raw swipe record from text file. Then, you can use this item to do the job. You are asked to select all records or input a data range for output. And, you need to choose the target is text file or database file. Once you confirm the input, you can click the button Start to start the process. Then you need to choose the output path and filename for storing the data


102 Import Staff This item is for importing staff information from an excel file. Many customers have a legacy system or an excel sheet to keep the staff information. They then can use this item to import the staff information instead of retyping them one by one

103 In the input window, you can see the format of the excel file by clicking the button Template. After you prepare the excel file, you can input the path and file name in the file name box and click the button Import to proceed

104 Trouble-shooting 1. Cannot see new department after adding the department. Click the Refresh button in the Department List. After clicking the button, new department will be shown. 2. Cannot execute download module If you click the download icon with error message of class not registered, the device API may be disconnected from windows. You can register back the API. If your program is installed in c:\ams, you will see api_* directories in the path. Just go the three directories and execute the batch file reg.bat to restore the registration of API. --- The End
Software Manual. For Fingerprint Attendance System
 Software Manual For Fingerprint Attendance System Content: 1 PRECAUTION... 4 2 GETTING STARTED...4 2.1. HOW TO COMMUNICATE THE SYSTEM WITH THE READER TERMINAL... 4 3 HOW TO USE FINGERPRINT T & A MANAGEMENT
T9 Fingerprint Machine Hardware User Manual. Date: Version: 1.1
 T9 Fingerprint Machine Hardware User Manual Date: 2010.07.27 Version: 1.1 (c)2010 Copyright Pegasus Equipments Ltd. All Rights Reserved. 1 Table of Content Introduction... 3 Installation... 3 Menu Structure...
Preface. Thanks for choosing products of this company. T5, with world cutting edge
 Preface Honorable customers, Thanks for choosing products of this company. T5, with world cutting edge technologies fingerprint recognition, computer communication, as well as microelectronics, is considered
INSTALLATION AND SET UP CONNECTING AND ACTIVATING TERMINALS IN SOFTWARE
 Software USER GUIDE Chapter 1 INSTALLATION AND ACTIVATION 3-12 INSTALLATION AND SET UP CONNECTING AND ACTIVATING TERMINALS IN SOFTWARE By Using TCP/IP, RS232 or RS485 Connection Connection by USB Flash
If there is an update are subject to change without notice
 mark for special model function Specific function subject to actual attendance If there is an update are subject to change without notice 1 Preface Honorable customers, Thanks for choosing products of
Attendance Management Software User Manual
 Attendance Management Software User Manual About this Manual: This manual provides software operation instruction, for example install and uninstall program, collect data, assign shift and output report,
USER GUIDE. Biometric Attendance Software.
 USER GUIDE Product AXES Time Biometric Attendance Software E-mail : Web site: sales@axestime.com Care@axestime.com www.axestime.com Overview Axes Time is an industry leader in terms of both innovation
Smart Access Control System Software. User Manual. Version 1.0
 Smart Access Control System Software User Manual Version 1.0 Copyright MaCaPS International Ltd. 2002 This manual was produced by MaCaPS International Ltd. MaCaPS International Ltd. http://www.macaps.com.hk
Preface. Thanks for choosing products of our company. The product with world cutting edge technologies-fingerprint recognition, computer
 Preface Honorable customers, Thanks for choosing products of our company. The product with world cutting edge technologies-fingerprint recognition, computer communication, as well as microelectronics,
Access Control & Time Attendance Management System. User Manual
 Access Control & Time Attendance Management System User Manual Contents Software Installation Wizard 5 Chapter One System Functional Properties 6 Chapter Two System Requirements 7 2.1 Hardware Requirements
Preface. Honorable customers,
 Preface Honorable customers, Thanks for choosing products of this company. OA200, with world cutting edge technologies fingerprint recognition, computer communication, as well as microelectronics, is considered
RosslareBio 8000 Biometric Recognition Management Software Software Manual
 RosslareBio 8000 Biometric Recognition Management Software Software Manual Copyright 2018 by Rosslare. All rights reserved. This manual and the information contained herein are proprietary to ROSSLARE
ABRIDGED User Guide. (For Flexi Schedule Users) A Central Solution for Time Attendance and Access Control
 A Central Solution for Time Attendance and Access Control") ABRIDGED User Guide (For Flexi Schedule Users) A Central Solution for Time Attendance and Access Control COPYRIGHT NOTICE All rights reserved. No part of this book may be reproduced or transmitted in any
ABRIDGED User Guide (For Flexi Schedule Users) A Central Solution for Time Attendance and Access Control COPYRIGHT NOTICE All rights reserved. No part of this book may be reproduced or transmitted in any
Table of Contents.
 Table of Contents http://www.advancedactuators.com 1. Items Included with the ThumbLock PCMU:... 2 2. IMPORTANT NOTE:... 2 3. Supported Operating Systems:... 2 Section 1 Installing the ThumbLock PCMU Software...
AKCess Pro Server Access Control User Manual
 www.akcp.com AKCess Pro Server Access Control User Manual Help Version updated till version 118 Copyright 2012, AKCess Pro Co., Ltd.. 1) Introduction A) What is the AKCess Pro Server / Access Control?
Access Control Software User Manual
 Access Control Software User Manual Version: 2.4.3.1038 Date: November 2010 Table of Contents Table of Contents 1. Install and Uninstall Software...1 1.1 Install Software...1 1.2 Uninstall Software...4
Access Control Software User Manual
 Access Control Software User Manual Version: 2.4.4.1040 Date: Dec. 2011 Table of Contents Table of Contents 1. Install and Uninstall Software...1 1.1 Install Software...1 1.2 Uninstall Software...4 2.
Time Reorder Utility User Manual
 Time Reorder Utility User Manual Revisions...3 Introduction...4 Getting Started...5 Running Modes...7 Tray icon menu...7 Enter Password...8 Connections...8 Define Connections...8 Verify Connections...9
USER MANUAL ZKTime.Net 3.0-Android. Version: 1.0 Date: April, 2015
 USER MANUAL ZKTime.Net 3.0-Android Version: 1.0 Date: April, 2015 About This Manual This document introduces the installation and uninstallation of the ZKTime.Net 3.0 - Android, and describes the user
MorphoManager User Manual. Table of Contents
 User Manual Table of Contents Introduction... 4 Support... 4 Overview... 5 What is a client?... 5 What is a server?... 5 What is a fingerprint enrollment device?... 5 What is a MorphoAccess?... 6 What
Easy Time Control Training Manual
 Easy Time Control Training Manual Copyright 2008, Trinity Enterprise Solutions Inc Easy Time Control Training Manual Table of Contents Preface...iii Module 1...5 Getting Started...5 1.1. Opening the System...6
Smart Access Control System Software User Manual (Client Version)
") Disclaimer Information in this document is subject to change without notice. Companies, names, and data used in examples herein are fictitious unless otherwise noted. No part of this document may be reproduced
Disclaimer Information in this document is subject to change without notice. Companies, names, and data used in examples herein are fictitious unless otherwise noted. No part of this document may be reproduced
ACCESS CONTROL SOFTWARE V3.1 REFERENCE MANUAL
 ACCESS CONTROL SOFTWARE V3.1 REFERENCE MANUAL 01/2004 Centaur is a registered trademark of Position Technology INC. Pro-Report, Tracker, FrontGuard and FrontView are trademarks of Position Technology Inc.
Compumatic CompuTime101
 1. Getting Started Entering upgrade codes Defining global rules Adding clocks Adding departments Adding Shifts Adding employees Compumatic CompuTime101 Quick Reference Guide v3.2 2. Downloading Punches
ID
 User Manual 1. Usage Guidelines.... 1 1.1 The recommended procedure... 1 1.2 Button description.... 2 1.3 The initial interface and main menu... 2 1.4 Authentication methods... 3 2. Department set....
Table of Contents.
 Table of Contents http://www.bioaxxis.com 1. Items Included with the BioAxxis ThumbLock PCMU:...2 2. IMPORTANT NOTE:...2 3. Supported Operating Systems:...2 Section 1 Installing the BioAxxis ThumbLock
1. Technical Specification Introduction Basic Concepts User Enrollment User Verification...
 delivert 1. Technical Specification.... 1 2. Introduction.... 1 2.1 Basic Concepts.... 2 2.1.1 User Enrollment... 2 2.1.2 User Verification... 2 2.1.3 User ID Numbers.... 2 2.1.3 Authority (status) Levels....
Kronos Instructions for Employees. Table of Contents. Recording Your Time.10. Viewing Your Timecard.2-3 Totals & Schedule Definitions.
 Kronos Instructions for Employees Table of Contents Logging on to Kronos.2 Recording Your Time.10 Viewing Your Timecard.2-3 Totals & Schedule Definitions.4-5 Approving Your Timecard..5 Accruals...6 Requesting
Axxis Biometrics LLC. BioAxxis L113 Fingerprint Door Lock Programming Kit
 Axxis Biometrics LLC BioAxxis L113 Fingerprint Door Lock Programming Kit Revision 0.14 Dec 2005 Table of Contents 1. Introduction... 2 Product Overview... 2 Main Features... 2 Packing Lists... 3 2. Operation
User Manual (V1.4) Models: D100/D200/Aseries/EPseries/ TC550/OC500/T60/VF30/VP Anviz Global Inc.
 Models: D100/D200/Aseries/EPseries/ TC550/OC500/T60/VF30/VP Anviz Global Inc.") (V1.4) Models: D100/D200/Aseries/EPseries/ TC550/OC500/T60/VF30/VP30 2001-2013 Anviz Global Inc. PREFACE User Manual Honorable customers: Thanks for choosing products of our company. The product with world
(V1.4) Models: D100/D200/Aseries/EPseries/ TC550/OC500/T60/VF30/VP30 2001-2013 Anviz Global Inc. PREFACE User Manual Honorable customers: Thanks for choosing products of our company. The product with world
Midpoint Security,
 User Manual Revision: 6, Date: October 4, 009 Midpoint Security, UAB, Kaunas, Lithuania www..emssa.net TABLE OF CONTENTS Copyright notice... Liability waiver... Introduction... 4 Overview... Settings tab...
uface800 Time Clock User Manual uface800
 Innovative Time and Attendance Solutions uface800 Time Clock User Manual Version 3.6.3 uface800 Visit: MidexTimeAndAttendance.com Call: 1-888-544-7878 Email: info@midexsoftware.com /TimeAndAttendanceSoftware
Self-Service Attendance Terminal User Manual
 Version: 4.0 Date: Sep. 2013 Scope: SSR self-service attendance terminal with a firmware version later than V3.0, 2.8 inch network attendance machine About This Manual This document describes the GUIs
User Manual. BioTime Web
 BioTime Web Version: 1.0 Date: December 2016 BioTime Web Index 1. Quick Start... 2 1.1. Overview... 2 1.2. Finger Placement... 3 1.3. How to use touch screen... 3 1.4. Recommended Operation Steps... 4
Timetec Computing Sdn Bhd
 User Guide Copyright Notice All rights reserved. No part of this book may be reproduced or transmitted in any form or by any means, electronic or mechanical, including photocopying, recording, or by any
PRODUCT USER GUIDE
 TO PLACE AN ORDER CALL: 866-487-4751 OR VISIT: WWW.TIMECLOCKEXPERTS.COM PRODUCT USER GUIDE www.icontime.com 1.800.847.2232 Table of Contents CONTENTS Introduction... 2 Home Page... 3 PART I: Setting up
T50 user manual(v1.2)
") T50 user manual(v1.2) Subject to change without notice Preface Honorable customers, Thanks for choosing products of our company. The product with world cutting edge technologies fingerprint/card recognition,
T50 user manual(v1.2) Subject to change without notice Preface Honorable customers, Thanks for choosing products of our company. The product with world cutting edge technologies fingerprint/card recognition,
Help Contents Manual
 Help Contents Manual TimeClick 18 018 Last Updated: February 18 1 Table of Contents WHAT TO EXPECT WITH THIS MANUAL... 4 Resources Found on Website and Blog... 4 Contact Customer Support Team... 4 PREFERENCES...
Access Control Software Operation Guide
 Access Control Software Operation Guide Mar. 25, 2014 CONTENTS Part 1 Installation and Unload of Software... 5 1.1 Basic Steps of Installation... 5 1.2 Basic requirements for hardware of Installation...
Access Control Software Operation Guide
 Access Control Software Operation Guide September 1, 2012 CONTENTS Part 1 Installation and unload of Software... 5 1.1 Basic Steps of Installation... 5 1.2 Basic requirements for hardware of Installation...
Finger Scanner Manual Book
 Finger Keep er S er ies Finger Scanner Manual Book Page 1 F inger Keep er S eries Contents Chapter I Introduction of the Basic Operation of Finger Keeper..4 1. Interface Description of Finger Keeper....4
BIOMETRIC FINGERPRINT TECHNOLOGY
 BIOMETRIC FINGERPRINT TECHNOLOGY Installation Guide timeqplus Biometric TM Installation Guide Thank you for purchasing the timeqplus Biometric Time and Attendance System. This installation guide will
SAFESCAN TA-Software / TA + -Software TIME ATTENDANCE SOFTWARE MANUAL ENGLISH NEDERLANDS DEUTSCH FRANÇAIS ESPAÑOL ITALIANO PORTUGUÊS
 SAFESCAN TA-Software / TA + -Software TIME ATTENDANCE SOFTWARE MANUAL ENGLISH NEDERLANDS DEUTSCH FRANÇAIS ESPAÑOL ITALIANO PORTUGUÊS TABLE OF CONTENTS INTRODUCTION AND DIRECTIONS FOR USE 1. THE BASICS
Configuration Manual. Version 5.5
 Configuration Manual Version 5.5 Table of Contents Bulk Import of Employees... 4 Bulk Employee Import File Requirements and Sample... 4 Bulk Import of Initial Flexi Time Balance... 4 Initial Flexi Balance
USER GUIDE Time and Attendance User Administration Human Capital Management Suite
 USER GUIDE Time and Attendance User Administration Human Capital Management Suite Ormed Information Systems Ltd. Version 1.2 (January 2015) What s Inside What s Inside...1 Introduction...2 Procedures...3
UltraTime Enterprise WebTime User Guide
 UltraTime Enterprise WebTime User Guide This guide will explain how to use the WebTime view of UltraTime Enterprise. Sample screens have been provided for guidance. The WebTime time entry screen is the
First Access Express OPERATOR GUIDE
 First Access Express OPERATOR GUIDE October 2016 Cutting edge simplicity Table of Contents Introduction... 4 PC Requirements... 5 Step 1. Software Installation... 5 Complete Installation Server and Client...
WEB TIME SUPERVISOR GUIDE
 Revised 02/23/2018 WEB TIME SUPERVISOR GUIDE CLIENT RESOURCE PAYLOCITY.COM TABLE OF CONTENTS Web Time... 3 Home... 15 Employees... 28 Reports... 130 Web Kiosk Setup... 132 Glossary... 156 Index... 158
Finger Authentication Server
 Futronic Technology Company Ltd. Finger Authentication Server User's Guide Version 5.7 Copyright 2003-2010 Futronic Technology Company Ltd. Copyright 2003-2010 Futronic Technology Company Ltd. All rights
Facial & Fingerprint Recognition Product
 Facial & Fingerprint Recognition Product Series User Manual Version: 1.1.7 Date: January 2010 About This Manual This document introduces the user interface and menu operations of the Facial & Fingerprint
4 ATTENDANCE SHEET VIEWING DATA 62 CONTENTS
 4 ATTENDANCE SHEET Ignore this chapter if you are not using the software for time attendance function. Attendance Sheet displays all attendance data as In time, Out time, Work time, Overtime, Leave taken,
Website:
 Website: www.mantratec.com Application We Provide. PayTime (Desktop based Attendance & Payroll) PayTime ESS (Employee Self Service) PayTime SMS (SMS on Event) Web based Time Attendance Web based Payroll
New version. Access Control Software Operation Guide
 BeSeen New version Access Control Software Operation Guide May,21,2012 CONTENTS Part 1 Installation and unload of Software... 4 1.1 Basic Steps of Installation... 4 1.2 Basic requirements for hardware
Self-Service Attendance Terminal User Manual
 Self-Service Attendance Terminal User Manual Version: 4.1 Date: May. 2014 Scope: SSR self-service attendance terminal with a firmware version later than V3.0, 2.8 inch network attendance machine About
Version: 1.1 Software Version: For Access 4.5.8/5.0.8 and above Version Date: July, 2011
 User Manual Version: 1.1 Software Version: For Access 4.5.8/5.0.8 and above Version Date: July, 2011 About This Manual This document introduces the main function, the user interface and operations of the
TestAnyTime User Manual (Imaging) English Version
 English Version") TestAnyTime User Manual (Imaging) English Version 1 User Manual Notes & Notices Thank you for choosing TestAnyTime. This quick start guide will teach you the basics and have you up & running in a few minutes.
TestAnyTime User Manual (Imaging) English Version 1 User Manual Notes & Notices Thank you for choosing TestAnyTime. This quick start guide will teach you the basics and have you up & running in a few minutes.
FINGERPRINT TERMINAL HARDWARE USER'S MANUAL
 http://www.epordo.com 1 FINGERPRINT TERMINAL HARDWARE USER'S MANUAL or email us at info@securiticn.com 1 1. INTRODUCTION 1.1 SUPPLIED PART LIST 1.2 ABOUT 1.3 HARDWARE SPECIFICATION 2. PRODUCT OVERVIEW
MYOB Exo PC Clock. User Guide
 MYOB Exo PC Clock User Guide 2018.01 Table of Contents Introduction to MYOB Exo PC Clock... 1 Installation & Setup... 2 Server-based... 2 Standalone... 3 Using Exo PC Clock... 4 Clocking Times... 5 Updating
ScaleLink Pro USER GUIDE
 ScaleLink Pro USER GUIDE For Version 3.24 January 2005 ISHIDA CO., LTD Copyright 2001-2004 Ishida Co. Ltd., Japan No part of this manual may be reproduced or transmitted in any form or by any means, electronic
C2 Pro User Manual Anviz Technology Co., Ltd.
 C2 Pro User Manual (V1.0) 2001-2015 Anviz Technology Co., Ltd. PREFACE Honorable customers: Thank you for choosing products from Anviz Technology Co.,Ltd. Our products contain world cutting edge technologies
How to install the software of ZNS8022
 How to install the software of ZNS8022 1. Please connect ZNS8022 to your PC after finished assembly. 2. Insert Installation CD to your CD-ROM drive and initiate the auto-run program. The wizard will run
IS2000. Administrative Operator s Guide
 IS2000 Administrative Operator s Guide Table of Contents Logging Off... 7 Event Manager... 7 HARDWARE MANAGER... 8 Maneuvering the Hardware Tree... 8 Unlocking the Module... 8 Viewing the Hardware Tree...
Table of Contents Overview of Fingerprint Technology...3 Introduction...3 System Requirements...4 Installation Guide...5
 Table of Contents Overview of Fingerprint Technology...3 Introduction...3 System Requirements...4 Installation Guide...5 Connecting the AccuTime Scanner...5 Installing the software...5 Initial startup
TimeClock Plus Web Edition 3.0
 TimeClock Plus Web Edition 3.0 Web Edition 3.0 Quick Reference WELCOME TO TIMECLOCK PLUS WEB EDITION 3.0 To access the bookmarks go to View > Navigation Panels > Bookmarks. The Quick Reference Guide was
T-7 FINGERPRINT TERMINAL. HARDWARE USER'S MANUAL Rev 1.1
 T-7 FINGERPRINT TERMINAL HARDWARE USER'S MANUAL Rev 1.1 1 Table of Contents 1. INTRODUCTION 1.1 SUPPLIED PART LIST 1.2 ABOUT PEGASUS T-7 1.3 HARDWARE SPECIFICATION 2. PRODUCT OVERVIEW 2.1 COMMUNICATION
LockState RL 4000 User Guide
 LockState RL 4000 User Guide www.resortlock.com Table of Contents Section 1: General Overview 1. Foreword... 3 2. Important Information.. 3 3. Software Installation.. 4 Section 2: Initial Lock Setup Manual
File Management Tutorial
 Just a reminder... Files: any individual item on your computer that contains data. E.g. document, photo, spreadsheet, email, PowerPoint, etc. File Management Tutorial Folders: containers for your files
ECO TA500 User Manual
 About this manual ECO TA500 User Manual Version: 1.0 Date: FEBRUARY 2017 About This Manual This document describes the GUIs and menu operations of the ECO TA500. About this manual Not all the devices have
Koheen E-Attendance User Guide (First-timer)
") Koheen E-Attendance 4.3.3 User Guide (First-timer) Manage Time sheets just as you wish This document is for the first time user of Koheen E-Attendance Software. The document is just 7 page long with screenshots.
Koheen E-Attendance 4.3.3 User Guide (First-timer) Manage Time sheets just as you wish This document is for the first time user of Koheen E-Attendance Software. The document is just 7 page long with screenshots.
Grandstream Networks, Inc. GDS Manager User Manual
 Grandstream Networks, Inc. GDS Manager User Manual Table of Contents DOCUMENT PURPOSE... 6 CHANGE LOG... 7 Software... 7 Software Version 1.0.0.98... 7 Software Version 1.0.0.75... 7 WELCOME... 8 GETTING
IS2000. Administrative Operator s Guide. AOG-101 (07/2005) Software Version 7.45
 Software Version 7.45") IS2000 Administrative Operator s Guide www.imron.com AOG-101 (07/2005) Software Version 7.45 Table of Contents INTRODUCTION...6 Overview...6 GENERAL INFORMATION...6 Logging On...7 Logging Off...9 Event
IS2000 Administrative Operator s Guide www.imron.com AOG-101 (07/2005) Software Version 7.45 Table of Contents INTRODUCTION...6 Overview...6 GENERAL INFORMATION...6 Logging On...7 Logging Off...9 Event
TOTALPASS PROXIMITY USER GUIDE
 TOTALPASS PROXIMITY USER GUIDE TotalPass Small Business Premium Icon Time Systems, Inc. sales@icontime.com www.icontime.com Copyright 2015 Icon Time Systems, Inc. All rights reserved. Reproduction of this
USER MANUAL. Disclaimer
 USER MANUAL Disclaimer The instructions in this document have been carefully checked for accuracy and are presumed to be reliable. Smart I Electronics Systems Pvt. Ltd. and its writers assume no responsibility
Quick Start Guide 4/8/16-Ch DVR
 Quick Start Guide 4/8/16-Ch DVR 1 1. Install Hard Drive &DVD Writer 1.1Install Hard Drive Notice: 1. Support two SATA hard drives. Please use the hard drive the manufacturers recommend specially for security
Guard Tour Management Software. User s Manual
 Guard Tour Management Software User s Manual 5005 5005 Installation Guide 1. Preparation a. Make a sketch of the sites and name all the check points where the RFID cards will be installed e.g. front door,
Please ignore the disk delivered to you, recently we upgraded our software, please download all from:
 Fingerprint Time Attendance Terminal Please ignore the disk delivered to you, recently we upgraded our software, please download all from: http://dj107.com/xiaocaiping.html Content Chapter 0: How to punch
Ministry of Civil Service and Administrative Reforms. Electronic Attendance System USER MANUAL
 Ministry of Civil Service and Administrative Reforms Electronic Attendance System USER MANUAL January 2011 INDEX CHAPTERS PAGE NO. INTRODUCTION.. 3 SELECTION OF MENU OPTION & NAVIGATION... 3 MENU & SUBMENU...
ATX Document Manager. User Guide
 ATX Document Manager User Guide ATX DOCUMENT MANAGER User Guide 2008 CCH Small Firm Services. All rights reserved. 6 Mathis Drive NW Rome, GA 30165 No part of this manuscript may be copied, photocopied,
Application Software for TIMY Time Reporting Terminal
 Application Software for TIMY Time Reporting Terminal User Manual Manual P/N 08984-90003 Revision 03/2013 to level v1.55 Copyright 2005 2013 T Data Ltd. All rights reserved. Time Attendance Systems T Data
Marketing tools for Check-Inn Setup Guide & Manual. Rev. 1/22/16
 Marketing tools for Check-Inn Setup Guide & Manual Rev. 1/22/16 2015 Innsoft, Inc. Contents License & warranty... 5 Customer support... 6 Acknowledgement... 6 Introduction... 7 Getting Started... 8 Installation...
The DATA-MAXX PCMAXX data collection system manages data collection in remote and stationary environments.
 Welcome to the DATA-MAXX family of customers. With this manual and our available technical staff, you will learn how to fully implement your DATA-MAXX PCMAXX system. If you need additional technical support
ETS-TA Time and Attendance Module
 PENTAGON 2000 SOFTWARE Pentagon 2000 Software 15 West 34 th Street 5 th Floor New York, NY 10001 Phone 212.629.7521 Fax 212.629.7513 TITLE: Time and Attendance PART: General System MODULE: BUILD 9.0.0.27
Quick Simple Reliable. Universal Time Clock TM Product User Guide RTC P a g e
 Quick Simple Reliable Universal Time Clock TM Product User Guide RTC-1000 2.5 2014-01-22 1 P a g e Copyright 2014 Icon Time Systems, Inc. All rights reserved. Reproduction of this document in whole or
ViewPower. User s Manual. Management Software for Uninterruptible Power Supply Systems
 ViewPower User s Manual Management Software for Uninterruptible Power Supply Systems Table of Contents 1. ViewPower Overview...2 1.1. Introduction...2 1.2. Structure...2 1.3. Applications...2 1.4. Features...3
Fingerprint Machine Hardware User Manual. Date: Version: 1.0
 Fingerprint Machine Hardware User Manual Date: 2010.01.26 Version: 1.0 1 Table of Content Introduction... 3 Installation... 3 Menu Structure... 6 Enrollment... 6 1. User Enroll... 6 2. Manager Enroll...
K Series Economic Models User Manual
 About this manual K Series Economic Models User Manual Version: 1.0 Date: July 2014 About This Manual This document describes the GUIs and menu operations of the K series economic models. I About this
DOORKING SYSTEMS. PROGRAMMING OVERVIEW Programming from System Keypad Programming through Software Communication from PC to Controller
 DOORKING SYSTEMS ACCESS CONTROL SOLUTIONS DKS SOFTWARE AND SYSTEM CONNECTIVITY WORKSHOP PROGRAMMING OVERVIEW Programming from System Keypad Programming through Software Communication from PC to Controller
A-1300 Biometric Access Control System USER'S MANUAL
 A-1300 Biometric Access Control System USER'S MANUAL Table of Contents 1. General Information... 1 1.0 Notification... 2 1.1 System Overview... 2 1.2 Main Features... 2 1.3 Equipment... 3 2. Basic Concepts...
V-CUBE Sales & Support. User Manual
 V-CUBE Sales & Support User Manual V-cube, Inc. 2013/12/20 This document is the user manual for V-CUBE Sales & Support. 2013 V-cube, Inc. All Rights Reserved. Revision history Revision date Details 2013/12/20
Table of Contents.
 Table of Contents 1. Items Included with the BioAxxis ThumbLock Audit Trail Software: 2 2. IMPORTANT NOTE:... 2 3. Supported Operating Systems:... 3 Section 1 Installing the BioAxxis ThumbLock AT Software...
ivms-4200 Access Control Client User Manual UD00895N
 ivms-4200 Access Control Client User Manual UD00895N User Manual About this Manual This Manual is applicable to ivms-4200 Access Control Client. The Manual includes instructions for using and managing
NVMS7000 Client Software User Manual
 NVMS7000 Client Software User Manual i User Manual About this Manual This Manual is applicable to NVMS7000 Client Software. The Manual includes instructions for using and managing the product. Pictures,
User Guide. ZKTime Lite. Time & Attendance and Access Control software. Version 1.0
 User Guide ZKTime Lite Time & Attendance and Access Control software Version 1.0 ZKTime Lite ZKTime Lite User guide Important Notice Thanks for choosing this product. Without the written permission of
PROXIMITY Encoding System
 PROXIMITY Encoding System ins-206 Date code: 251103 Contents 2 Contents Setting up the system...4 Introduction...4 What s in the box...5 Installing the system...5 Initialising the program...6 Initialising
3.2 No records found though staff have clocked in/out The machine cannot connect with PC Clock s time works fine, but FP scanner
 1 2 Contents 1 Product Introduction... 2 1.1 Introduction... 2 1.1.1 Product Feature... 2 2 Operation Guide... 5 2.1 Keypad Introduction... 5 2.2 Time attendance status... 5 2.3 User... 5 2.3.1 User enroll...
Quick Start Guide 4/8/16-Ch DVR
 Quick Start Guide 4/8/16-Ch DVR 1 1. Install Hard Drive &DVD Writer 1.1Install Hard Drive Notice: 1.This series support one SATA hard drive. Please use the hard drive the manufacturers recommend specially
SSR 3 inch Color Screen Series User Manual
 SSR 3 inch Color Screen Series User Manual Version: 1.0 Date: September 2010 About This Manual This manual introduces the interface and menu operations of the SSR 3 inch color screen series fingerprint
MCDOUGAL LITTELL EASYPLANNER USER S GUIDE
 MCDOUGAL LITTELL EASYPLANNER USER S GUIDE 1 Introduction The McDougal Littell EasyPlanner allows you to quickly and easily access Resource materials such as tests, quizzes, books, and other supporting
IMPORTANT. Registration Settings: SERIAL NUMBER: COMPUTER ID: REGISTRATION NUMBER:
 IMPORTANT Registration Settings: SERIAL NUMBER: COMPUTER ID: REGISTRATION NUMBER: Once you have your TALITY software functioning properly copy your phone system settings onto this page and save it for
Understanding Door Configuration
 CHAPTER 5 This chapter describes the concepts used to configure doors and templates. A door configuration is a collection of devices, such as locks and readers, connected to a Cisco Physical Access Gateway