FOREWORD REVIEW COPY 2005 Infiniti QX56 Navigation System OM USA_English
|
|
|
- Mitchell Porter
- 5 years ago
- Views:
Transcription
1 FOREWORD Thank you for purchasing an INFINITI automobile. This user s manual is for the navigation system only. Please read this manual carefully to ensure safe operation of the navigation system. This manual contains operating instructions for the INFINITI Navigation System offered in your INFINITI vehicle Please read your vehicle s owner s manual first. Do not remove this manual from the vehicle when selling this vehicle. The next user of this navigation system may need the manual. Because of possible specification changes, sections of this manual may not apply to your vehicle. All information, specifications and illustrations in this manual are those in effect at the time of printing. INFINITI reserves the right to change specifications or design at any time without notice.
2
3 Table of Contents Introduction How does the Infiniti navigation system work? What features are available on the Infiniti navigation system? How do I operate the Infiniti navigation system? How do I program a destination? How do I use the Point of Interest (POI) feature? How do I use the address book feature? How do I use the avoid area feature? How do I use the automatic rerouting feature? How do I use the voice guidance feature? How do I adjust the display? Information on map data discs Troubleshooting guide Index
4
5 1 Introduction How to use this manual For safe operation Reference symbols Safety note Laser product...1-3
6 HOW TO USE THIS MANUAL SAFETY NOTE This manual uses special words and icons, organized by function. Please refer to the following items and familiarize yourself with these symbols. FOR SAFE OPERATION WARNING This is used to indicate the presence of a hazard that could cause death or serious personal injury. To avoid or reduce the risk, the procedures must be followed precisely. CAUTION This is used to indicate the presence of a hazard that could cause minor or moderate personal injury or damage to your vehicle. To avoid or reduce the risk, the procedures must be followed carefully. NOTE: This indicates an item to help you understand the maximum performance of your vehicle. If ignored, it may lead to a malfunction or poor performance. REFERENCE SYMBOLS This indicates information necessary for efficient use of your vehicle or accessories. DEST button This is a button on the control panel. View key This is a select key on the screen. By selecting this key you can proceed to the next function. This system is primarily designed to help you reach your destination, and also performs other functions as outlined in this manual. However, you, the driver, must use the system safely and properly. Information concerning road conditions, traffic signs and the availability of services may not always be up-to-date. The system is not a substitute for safe, proper, and legal driving. Before using the navigation system, please read the following safety information. Always use the system as outlined in this manual. WARNING When the driver operates the navigation system or uses the joystick (screen function), first park the vehicle in a safe place and set the parking brake. Using the system while driving can distract the driver and may result in a serious accident. Destinations cannot be set while the vehicle is in motion. Do not rely on voice guidance alone. Always be sure that all driving maneuvers may be made legally and safely to avoid an accident. 1-2 Introduction
7 Do not disassemble or modify this system. If you do, it may result in accidents, fire, or electrical shock. Do not use this system if you notice any malfunction such as a frozen screen or lack of sound. Continued use of the system may result in accident, fire, or electrical shock. If you notice any foreign object in the system hardware or spilled liquid, or notice smoke or a smell coming from it, stop using the system immediately and contact your nearest INFINITI dealer. Ignoring such conditions may lead to accidents, fire, or electrical shock. WARNING Do not disassemble or modify this system. There are no user serviceable parts in this navigation system. If maintenance, adjustments and operations other than those specified in this manual are attempted, injury due to laser radiation and exposure could occur. NOTE: Some states/provinces may have laws limiting the use of video screens while driving. Use this system only where legal. LASER PRODUCT This navigation system is certified as a Class 1 laser product. The navigation system complies with DHHS Laser-Radiation Standards, 21 CFR Chapter 1, subchapter J. Introduction 1-3
8 MEMO 1-4 Introduction
9 2 How does the Infiniti navigation system work? What is a navigation system? About the navigation system What is GPS (Global Positioning System)? Accuracy of positioning Positioning adjustment Receiving signals from GPS satellites Display of GPS information Detailed map coverage areas (MCA) for the navigation system When a gray road or dark green road is displayed on the map...2-4
10 WHAT IS A NAVIGATION SYSTEM? WHAT IS GPS (Global Positioning System)? ABOUT THE NAVIGATION SYSTEM This navigation system combines the data obtained from the vehicle (by gyro sensor) and from GPS (Global Positioning System) satellites to calculate the current location of the vehicle. This position is then displayed on the screen, allowing route guidance to a destination. 2-2 How does the Infiniti navigation system work? GPS is a system developed and operated by the U.S. Government, covering the entire planet. This navigation system receives three or more different radio signals from NAVSTAR (GPS satellites), orbiting the earth 13,049 miles (21,000 km) above ground. The data from different sets of signals are trigonometrically calculated to obtain the position of the vehicle. The tracking center in the U.S. controls signals transmitted from GPS satellites. This control sometimes results in reduced accuracy or no signal received at all, in accordance with government requirements. Consequently, areas such as military bases may not accurately appear on the navigation screen. ACCURACY OF POSITIONING INV1191 The color of the GPS Indicator on the upper left corner of the screen indicates positioning as follows: Green: positioning is possible and accurate Yellow: positioning is possible but accuracy is minimal Gray: positioning is not possible For approximately 3 or 4 minutes after system startup, the GPS indicator remains gray, even if accurate positioning is possible.
11 POSITIONING ADJUSTMENT When the system judges that the vehicle position information is not accurate based on vehicle speed and gyro sensor data calculations, the system will adjust the vehicle position information using GPS signals. RECEIVING SIGNALS FROM GPS SATELLITES Sometimes, satellite reception is weak. The following are places where signals tend to be weak: Inside tunnels and parking lots in buildings Areas with numerous tall buildings Under multi-layered highways In a dense forest Near military bases and certain government facilities Vehicles in these areas may not receive GPS signals (Indicator color: gray). The antenna for GPS is located behind the instrument panel inside the vehicle. Do not place any objects, especially mobile phones or transceivers, on the instrument panel. Because the strength of the GPS signals are approximately one billionth of that of TV waves; phones and transceivers will decrease the strength or may totally disrupt the signals. DISPLAY OF GPS INFORMATION This system displays GPS information. Please refer to GPS information display on page DETAILED MAP COVERAGE AREAS (MCA) FOR THE NAVIGATION SYS- TEM This system is designed to help you reach your destination, and also performs other functions as outlined in this manual. However, you, the driver, must use the system safely and properly. Information concerning road conditions, traffic signs and the availability of services may not always be up-to-date. The system is not a substitute for safe, proper, and legal driving. Map data covers select metropolitan areas in the United States. Map data is available on map DVD-ROM. For information about map DVD-ROMs, contact an INFINITI dealer or call the INFINITI Navigation System help desk at Map data includes 2 types of areas: Detailed coverage areas providing all detailed road data and other areas showing Main roads only. NOTE: Detailed map data is not available in many areas and is generally limited to select major metropolitan areas. For information on which metropolitan areas are in detailed coverage areas, please refer to the INFINITI Navigation System Software Booklet (included). When you purchase an updated map DVD-ROM, a new software booklet will be provided. How does the Infiniti navigation system work? 2-3
12 WHEN A GRAY ROAD OR DARK GREEN ROAD IS DISPLAYED ON THE MAP When you are driving on a gray road after the vehicle has deviated from the suggested route during route guidance, automatic rerouting may not start immediately. The navigation system does not provide route guidance for dark green roads. Therefore, if the destination is set on a dark green road, the enlarged map display will return to the ordinary map screen at a point on a suggested road that is near the destination. Also, the voice guidance will stop at a point on a suggested road that is near the destination. Refer to About route guidance on page4-18 for details. POI information and street names near gray roads may not be contained in the map data. 2-4 How does the Infiniti navigation system work?
13 3 What features are available on the Infiniti navigation system? Route guidance Point of interest (POI) directory Address book Avoid area Automatic reroute Detour Birdview Voice guidance Short menus...3-4
14 ROUTE GUIDANCE The main feature of the INFINITI Navigation System is Visual and Audio Route Guidance in selected detailed map coverage areas. Utilizing a network of GPS (Global Positioning System) satellites, the INFINITI Navigation System tracks your location on the map and directs you where you want to go. Once you program a destination covered by a detailed map, The INFINITI Navigation System will determine a route from your current location to your destination. The moving map display and turn-by-turn voice commands help the driver determine upcoming turns. This feature can be especially helpful in finding unfamiliar locations or businesses. The system may be unable to set a destination and/or calculate distance when a destination is outside a detailed map coverage area. Additionally, audio route guidance may not be available if the destination is outside a detailed map coverage area. For more information on how to program a destination, please refer to section 5. POINT OF INTEREST (POI) DIREC- TORY The INFINITI Navigation System offers an extensive Point of Interest (POI) directory in detailed map coverage areas for your convenience. This directory includes a wide variety of destinations ranging from gas stations, ATMs, and restaurants to casinos, ski resorts, shopping centers and businesses. By accessing the Point of Interest directory, you can search for addresses and phone numbers for a destination, and with a press of a button, the INFINITI Navigation System will calculate a route to the destination. The Point of Interest directory offers many uses. For example, the directory can be sorted by the various types of restaurants near your current location. If you need an ATM or gas station, the INFINITI Navigation System can point you to the closest one or the closest one of your favorite brand. For more information on how to use the Point of Interest directory, please refer to section 6. ADDRESS BOOK Using the Address Book feature, you will have the ability to store up to 50 locations in detailed map coverage areas into a personal directory. This is especially useful for frequently visited locations, such as your clients, relatives, or friends. The Address Book feature will provide you with easy access to frequently visited locations when setting them as your destination. For more information on how to use your Address Book, please refer to section What features are available on the Infiniti navigation system?
15 AVOID AREA AUTOMATIC REROUTE DETOUR By using the Avoid Area feature, you can identify areas or freeways that you would like the IN- FINITI Navigation System to avoid when plotting routes. For example, if you know of a freeway or area that is always congested with traffic, you can program the INFINITI Navigation System to plot routes that go around that particular freeway or area. For more information on the Avoid Area feature, please refer to section 8. If you miss a turn while using the Route Guidance feature, the INFINITI Navigation System will automatically recalculate a new route to your destination. For more information on the Automatic Reroute feature, please refer to section 9. If you hear about a traffic accident on the radio that is 4 miles (6 km) ahead of you and traffic is backing up fast, you can use the Detour function to calculate an alternative route that will help you avoid the gridlock caused by the traffic accident. The INFINITI Navigation System has the ability to find an alternative route using secondary roads that will return you to primary roads after a specified number of miles. For more information on the Detour feature, please refer to section 9. What features are available on the Infiniti navigation system? 3-3
16 Birdview VOICE GUIDANCE SHORT MENUS The INFINITI Navigation System gives you a choice of two map viewing styles, a normal 2-dimensional Plan View map and the 3-dimensional Birdview map. The 3-D Birdview map depicts a geographic area as seen from an elevated perspective, so you will get a better feel for the route ahead. For more information on the Birdview feature, please refer to section 11. INV1192 INV1193 INV1764 Route guidance is executed using voice and screen instruction. When the vehicle approaches an intersection where you need to turn, the voice guidance tells you the direction to take. The system also has the following useful features: Enlarged display of intersections. Automatic rerouting when a vehicle is off the course (when map is displayed). For more information on the Voice Guidance feature, please refer to section 10. To make the INFINITI Navigation System easier to use, there is a short menu function in which the most commonly used items are listed. When the indicator is illuminated, the short menus (Easy Mode) are displayed. When the indicator is turned off, the default navigation systems menus (Expert Mode) are displayed. [Easy Mode] is the default setting on the initial screen at the delivery of your new vehicle. 3-4 What features are available on the Infiniti navigation system?
17 Term [Expert Mode] is used in this manual when the Short Menus key indicator is turned off. When the amber indicator is highlighted, the system is set to [Easy Mode]. When the SETTING, DEST or ROUTE button is pressed in the [Easy Mode] screen, the Help key is displayed. For more information on the Short Menu feature, please refer to section 4. What features are available on the Infiniti navigation system? 3-5
18 MEMO 3-6 What features are available on the Infiniti navigation system?
19 4 How do I operate the Infiniti navigation system? Control panel button functions Names of the components How to use the joystick and the ENTER button How to use the PREV button How to use the SETTING button How to use the DEST button How to use the ROUTE button How to eject/insert the disc Setting up the start-up screen Confirmation of destination or waypoint Clearing the memory Setting the average speed About route guidance Notes on route guidance About the display error
20 CONTROL PANEL BUTTON FUNC- TIONS LHA How do I operate the Infiniti navigation system?
21 NAMES OF THE COMPONENTS 1. ( DAY/NIGHT ) button; refer to vehicle s Owner s Manual. Changes display brightness. 2. PREV button; refer to page 4-4. Returns to the previous screen during setup. Finishes the setup after it is completed. 3. JOYSTICK and ENTER button; refer to the next section. Scrolls the map, selects and sets each setting item. 4. SETTING button; refer to page 4-4. Performs various adjustments and settings to help you use the navigation system more effectively. LNV TRIP button; refer to vehicle s Owner s Manual. Displays warning messages (if there are any) and displays TRIP 1 TRIP 2 FUEL ECONOMY MAINTENANCE each time you press the button. 6. DEST button; refer to page 4-7. Displays the Set a Destination menu. 7. ROUTE button; refer to page 4-8. Displays the setting menu screen at the time of route calculation. 8. MAP button; refer to page Toggles between the intersection and the map during route guidance. Returns to the map screen from the settings screen. 9. GUIDE VOICE button; refer to page Provides voice guidance from the current location. 10. ( ZOOM OUT ) button; refer to page Alters the scale of the map display. 11. ( ZOOM IN ) button; refer to page Alters the scale of the map display. 12. ( EJECT ) button; refer to page Ejects the DVD. HOW TO USE THE JOYSTICK AND THE ENTER BUTTON The navigation system is operated by selecting keys on the screen with the joystick and pressing the joystick in to ENTER your selection. Be sure to understand the operation of the joystick before using the navigation system. Selecting the keys on the screen Use the joystick to select keys on the screen. The joystick can be tilted in eight directions. The selected key will be highlighted in yellow. Use the joystick to scroll the map. How do I operate the Infiniti navigation system? 4-3
22 Selecting the function of the highlighted key Press the ENTER button. The display shows the screen used to carry out the function of the selected key (highlighted in yellow). HOW TO USE THE PREV BUTTON This button has two functions. To return to the previous screen: When this button is pressed during setup, setup will be canceled, and the screen will return to the previous screen. To finish the set-up: When this button is pressed after set-up is completed, the settings will be renewed as directed, and the screen will return to the map. When the PREV button must be pressed, (for example, after the set-up is finished) instructions are given in the operation procedure of each section in this manual. If the PREV button is pressed when not finished with the set-up, the setting will be canceled, and the screen will return to the previous screen. INV1765 HOW TO USE THE SETTING BUT- TON When the SETTING button is pressed, the [SETTINGS] screen is displayed. WARNING For safety, some of the functions on the menu will be disabled while the vehicle is moving. To use the temporarily disabled functions, park the vehicle in a safe place, shift to P or N, and set the parking brake. To use the navigation system more effectively, various adjustments and settings can be performed. Display key: The key also adjusts the display Brightness/Contrast/Map Background. Please refer to page Vehicle Electronic Systems key: No settings available for the navigation system. Please refer to vehicle s Owner s Manual. System Settings key: Please refer to vehicle s Owner s Manual. Navigation key: Changes various settings of the navigation system. Please refer to page 4-5. Short Menus key: This key changes between [Expert Mode] and [Easy Mode]. Please refer to How do I operate the Infiniti navigation system?
23 Guidance Volume key: Adjusts or turns off volume of the voice guidance. Please refer to Adjusting the guide volume on page Help key: Available only in easy mode (Short menus). You can see the explanation of navigational functions. INV1766 When the Navigation key is selected The following display will appear when selecting the Navigation key and pressing the ENTER button. View key: This will let you choose between Birdview display and Plan View display. Please refer to Switching between Birdview and Plan View displays on page Heading key: You can set the map either to show the vehicle s current forward direction as up, or to show North as up. Please refer to Changing the display direction (in Plan View display) on page Nearby Display Icons key: Displays five types of points of interest around the current location. Please refer to Setting the nearby display icons on page Save Current Location key: Stores the current vehicle location in the address book. Please refer to Storing current vehicle position on page 7-4. Adjust Current Location key: Corrects the location and direction of the vehicle icon. Please refer to Updating the current vehicle location and the direction on page How do I operate the Infiniti navigation system? 4-5
24 Auto Reroute On/Off key: GPS Information key: A new route to the desired destination will automatically be calculated again from the location when the vehicle deviates from the suggested route during route guidance. Please refer to Automatic rerouting on page 9-2. Avoid Area Setting key: Defines areas to avoid when calculating a route. GPS information will be displayed. Please refer to GPS information display on page Quick Stop Customer Setting key: Sets the user-defined [Quick Stop] POI (Point Of Interest). Please refer to Quick stop on page Please refer to Setting avoid areas on page 8-2. Clear Memory key: Clears all the stored memory (Address Book, Avoid Area, Previous Dest.). Please refer to Clearing the memory on page Edit Address Book key: Changes the names and positions of the registered locations. Set Average Speed for Estimated Journey Time key: Please refer to Setting the average speed on page Tracking On/Off key: You can choose whether to display the path from the start to the current position. Please refer to Displaying the track on page Easy mode when the Short Menus key is selected View key: Same as in Expert Mode. Heading key: Same as in Expert Mode. INV1767 Please refer to Setting up and editing the address book on page How do I operate the Infiniti navigation system?
25 INV2315 HOW TO USE THE DEST BUTTON Sets destinations (final destination and waypoints) to search for a route. This will activate various navigational functions. WARNING For safety, some of the functions on the menu will be disabled while the vehicle is moving. To use the temporarily disabled functions, park the vehicle in a safe place, shift to P or N, and set the parking brake. Address Book key: Please refer to Setting with the Use this category item if you want to go to Point of Interest (POI) key on page places stored in the address book Please refer to Setting with the City key: Address Book key on page 5-3. Sets the destination (waypoint) on the map Previous Dest. key: screen of the area around the input city. Please refer to Setting with the You can choose destinations from the last 10 destinations set. City key on page For details, please refer to Setting with the Phone Number key: Previous Dest key on page 5-5. Use this category item when the destination Street Address key: phone number is known. Please refer to Setting with the Use this category item if you know the city name, street name and house number of the Phone Number key on page destination (waypoints). Map Please refer to Setting with the key: Street Address key on page 5-7. Use this category item if you want to choose the place directly on the map display. Intersection key: Please refer to Setting with the Sets a destination using the intersection of Map key on page streets. Country Please refer to Setting with the key: Intersection key on page This key is used to retrieve a location in another country when it is set as the destination Point of Interest (POI) key: (waypoint). Please refer to Setting with the Use this category item if you want to go to a restaurant, hotel, gas station or other facility. Country key on page How do I operate the Infiniti navigation system? 4-7
26 Please refer to Setting with the Home key on page Street Address key: Same as in Expert Mode. Point of Interest (POI) key: Same as in Expert Mode. Country key: Same as in Expert Mode. Easy Mode when the Short Menus key is selected INV2316 Help key: You can see the explanation of the navigational functions. Home key: When you set your home in the address book, a route home will be calculated by selecting this key. If the home is not set beforehand, the setting mode will appear to input the home address. 4-8 How do I operate the Infiniti navigation system? INV1770 HOW TO USE THE ROUTE BUT- TON When the ROUTE button is pressed while the current location is displayed on the screen, the display shows the following keys. When no operations are executed after a few seconds, the keys will disappear automatically. Quick Stop key: Selects the destination (waypoints) from a list of 5 commonly used POI (Points of Interest). Please refer to Quick stop on page 5-41.
27 Where am I? key: Displays the street where the vehicle is currently located, the previous street, and the upcoming street. Please refer to Where am I on page Cancel Guidance key: Cancels the route guidance. Please refer to Cancel guidance on page Route Info key: Displays the route to the destination. There are three types of display methods. Complete Route key: Displays the entire route from the current location to the destination. Please refer to Displaying the complete route to the destination on page Turn List key: Displays a list of the guidance points for the entire route to the destination on a simple map. Please refer to Displaying turn list on page Route Simulation key: Performs a simulation drive on the map screen by moving a vehicle icon on all the routes from the current location to the destination. Please refer to Requesting the simulation drive to the destination on page Edit Route key: Resets the set destination (waypoint). Please refer to Making the system guide the route with detailed options on page Easy Mode when the Short Menus key is selected INV1771 Help key: You can see the explanation of the navigation functions. Quick Stop key: Same as in Expert Mode. Where am I? key: Same as in Expert Mode. How do I operate the Infiniti navigation system? 4-9
28 HOW TO EJECT/INSERT THE DISC Cancel Guidance key: Same as in Expert Mode. Keys that appear when the map is scrolled with the joystick You can scroll the map display and get information about the area near your vehicle and the destination using the joystick. This function can be used when the original map disc is inserted. You can operate this with the map display on. This function cannot be used when the system is calculating the route or drawing the screen. INV1772 Store Place key: You can store the location with the cross pointer. Please refer to Storing current vehicle position on page 7-4. Destination # key: You can set the position as a destination, using the cross pointer. The maximum number of destinations is six, and the last one stored will be the final destination. (# will appear on the map to denote the selected locations from 1 to 6.) Please refer to Making the system guide the route with detailed options on page The navigation system is installed under the front passenger seat. This system is provided with the map DVD-ROM. NOTE: Please take great care in handling the disc How do I operate the Infiniti navigation system?
29 CAUTION The included map DVD-ROM is designed specifically for your navigation system. Do not use it in another system as it could cause a malfunction. Do not allow the system to get wet. Excessive moisture such as spilled liquids may cause the system to malfunction. LHA Slide the front passenger seat back for easier access to the navigation system. The map DVD-ROM is mounted under the front passenger seat with the slot facing the front of the vehicle. LHA To insert a disc: Place the disc in the slot. It will be drawn in automatically. You do not have to push it in all the way. 3. To eject the disc: Press the button, and remove the disc. How do I operate the Infiniti navigation system? 4-11
30 SETTING UP THE START-UP SCREEN CONFIRMATION OF DESTINATION OR WAYPOINT When the engine is turned off during route calculation and then turned on, the [CONFIRMA- TION OF DEST./WAYPOINT] screen will be displayed after the [START-UP] screen. INV2317 When you turn the ignition key to ACC, the above warning is displayed on the screen. Read the warning and select the I AGREE (English) or ENTER (Francais) key. If you do not press the ENTER button within one minute, the display will black out. Pressing either the MAP, ROUTE or DEST button will bring back the start-up screen. INV1774 In the [CONFIRMATION OF DEST./ WAY- POINT] screen, the following four keys are displayed. To All Destinations From Next Waypoint Cancel Guidance Change (only in Expert Mode) When the PREV or MAP button is pressed in this screen, the [Turn by turn] screen will be displayed How do I operate the Infiniti navigation system?
31 When the To All Destinations key is selected Route guidance will start to all destinations/waypoints from the current location. INV1775 When the From Next Waypoint key is selected Select the From Next Waypoint key when you want to start route guidance to the next waypoint/destination. 1. Select the From Next Waypoint key. INV When the Yes key is selected, route guidance to the current waypoint is deleted and route calculation to the next destination will start. If you do not want to delete the route guidance, select the No key and the screen will return to the map. This key can be selected only when a waypoint is set. When the PREV button is pressed, the previous screen will be displayed. How do I operate the Infiniti navigation system? 4-13
32 When the Change key is selected It is possible to edit the route guidance to the destination. This key is displayed only in [Expert Mode]. INV1777 When the Cancel Guidance key is selected The route guidance is cancelled. 1. Select the Cancel Guidance key. INV When the Yes key is selected, route guidance is canceled. If you do not want to delete the route guidance, select the No key and the screen will return to the map. Press the GUIDE VOICE button to activate the route guidance again. When the PREV button is pressed, the previous screen will be displayed How do I operate the Infiniti navigation system?
33 CLEARING THE MEMORY All the stored data (Address Book, Avoid Area, Previous Dest) can be cleared. 1. Press the SETTING button. INV1779 INV Select the Change key. 2. The [EDIT ROUTE] screen will be displayed. Please refer to Setting with Country key on page How do I operate the Infiniti navigation system? 4-15
34 2. Select the Navigation key on the [SET- TINGS] screen. INV1781 INV1782 INV Select the Clear Memory key. 4. Select the Yes key How do I operate the Infiniti navigation system?
35 SETTING THE AVERAGE SPEED INV When the Yes key is selected, the stored data will be cleared, and the [NAVIGATION SETTINGS] screen will appear. This navigation system can calculate and display the expected arrival time to the destination. To do this, set average vehicle speeds when driving on freeways, main roads and ordinary roads. The following settings are available. Freeway Default: 55 MPH (90 km/h) Max: 70 MPH (115 km/h) Min: 40 MPH (65 km/h) Main Roads Default: 25 MPH (40 km/h) Max: 50 MPH (80 km/h) Min: 10 MPH (20 km/h) Ordinary Roads Default: 15 MPH (25 km/h) Max: 35 MPH (55 km/h) Min: 5 MPH (10 km/h) 1. Press the SETTING button. INV Select the Navigation key on the [SET- TING] screen. How do I operate the Infiniti navigation system? 4-17
36 ABOUT ROUTE GUIDANCE 3. Select the INV1785 Set Average Speed for Estimated Journey Time key on the [NAVIGATION SETTINGS] screen. INV Move the joystick upward or downward to select an item you want to change. 5. Move the joystick left or right and set an average vehicle speed. It is possible to set the item illuminated in yellow. When the Return All Settings to Default key is selected, all settings return to default. The INFINITI Navigation System may not calculate a route if the current vehicle location is too far away from the destination. In this case, please divide your trip by selecting one or two intermediate destinations. NOTE: There may be cases that carpool lanes are included on a suggested road when the automatic rerouting function is activated and even if the Use Time Restricted Roads is turned off. Refer to Setting the priorities for route calculation on 5-33 for details. The navigation system does not provide route guidance for dark green roads. Therefore, if the destination is set on a dark green road, the enlarged map display will return to the ordinary map screen at a point on a suggested road that is near the destination, and the distance and direction to the end point of the suggested road will be displayed on upper right corner of the screen. Also, at this time, the voice will say, En route to your destination, some roads contain incomplete map data. Turn guidance will not be provided in this area How do I operate the Infiniti navigation system?
37 When approaching the end point of the suggested road, the voice will say, Entering the road with incomplete map data. Please use the direction arrow and distance information to proceed to your destination. To reach your destination, refer to the map screen, always follow actual roads and regulations and drive safely. NOTES ON ROUTE GUIDANCE The route selected by the system may not be the shortest, nor are other circumstances such as traffic jams considered. Because of the inevitable difference in road conditions and circumstances between the time you use this system and the time the information was produced from the DVD, there may be discrepancies in roads and regulations. In such cases, follow the actual information available. During route calculation, the map will not scroll, however the vehicle icon will move with the actual vehicle s movement. During route calculation, buttons such as MAP, DEST, ( ZOOM OUT ) and ( ZOOM IN ) and the joystick will be disabled. In some cases, after the calculation is complete, it may take some time to get the calculated route on the display. Waypoints that have been passed will not be covered by the re-routing calculation. If you scroll the map while the suggested route is being drawn, it may take more time to finish drawing. If waypoints are set, the system is calculating multiple routes between waypoints simultaneously, and the following may result: If one section (or more) of the routes between the waypoints is not found, none of the route will be displayed. The route may not connect completely at some waypoints. The route may require a U-turn close to some waypoints. Route calculation may not be completed in the following cases: If there is no main road within 3.1 miles (5 km) from the vehicle, a message saying so will appear on the screen. Try requesting route calculation when the vehicle is closer to the main road. If there is no main road within 3.1 miles (5 km) from the destination or waypoint, a message saying so will appear on the screen. Try setting the location closer to the main road. If the vehicle is too close to the destination or if there are no branches of the roads to the destination. A message saying so will appear on the screen. If it is deemed impossible to reach the destination or waypoints because of traffic regulations, etc. If the only route to reach the destination or waypoints is extremely complicated. If the destination, current vehicle position or waypoint is within the avoid area. If the setting of avoid areas covers the routes to the destination, route calculation may not be possible. The following may occur when the route is being displayed: If you are requesting a calculation from the main road, the origin of the route may not exactly match the current vehicle position. If you are requesting a calculation to a destination on the main road, the end of the route may not exactly match the destination. How do I operate the Infiniti navigation system? 4-19
38 If you are requesting a calculation from the main road, the system may show a route from another main road. This may be because the icon to show the current vehicle position (vehicle icon) is not set accurately. In that case, park the car in a safe place and reset the vehicle icon, or continue driving to see if the vehicle icon appears on the main road before requesting route calculation again. There are cases in which the system shows a detoured route to reach the destination or waypoints, if you set them from memory or facility information. In order to correct this, you will have to be careful about the traffic direction, especially when the lanes with different travel directions are shown separately. Such places are interchanges and service areas. This system makes no distinction between limited traffic control and total control (blockage). It may show a detoured route even if the road is usable. Even if the freeway preference is set to OFF, the route may be set on them. To avoid this, set a waypoint on another road type and request calculation How do I operate the Infiniti navigation system? Even if the preference is set as OFF for a ferry line, the route may be set on it. To avoid this, set a waypoint on a road and request calculation. Ferry lines, except those which accept only pedestrians, bicycles and motorcycles, are stored in this system. When using them, take into consideration the travel time required and operational condition to decide whether to use them or not. ABOUT THE DISPLAY ERROR The following cases may affect the display accuracy of the vehicle s position or travel direction. The accuracy will return to normal if the driving conditions return to normal: When there is a similar road nearby. When the vehicle is traveling on a long stretch of straight road or series of curves with a large radius. When the vehicle is traveling in an area with a checkerboard road system. When the vehicle is making consecutive S curves. When the vehicle is at a large Y-shaped junction. When the vehicle is on a loop bridge. When the vehicle is on a snow-covered or unpaved road. When the vehicle has made several consecutive turns or zigzags. When the vehicle is rotated on a parking lot turntable while the ignition switch is OFF. Immediately after the vehicle is driven out of a parking garage or underground parking lot. When the vehicle has different sizes of tires or tire chains. When the vehicle is moved immediately after the engine is started.
39 5 How do I program a destination? Various ways to set the destination (or waypoint) Expert mode categories Easy mode categories Setting with the Address Book key Setting with the Previous Dest. key Setting with the Street Address key Setting with the Intersection key Setting with the key Setting with the City key Setting with the Phone Number key Setting with the Map key Setting with the Country key Setting with the Home key (in easy mode) Having the system guide you to the destinations Making the system guide the route with detailed options Adjusting and deleting the pre-set destination (waypoints) To delete a destination All clear Quick stop Quick stop customer setting Where am I? Cancel guidance When the All Destinations key is selected When the Waypoint 1 key is selected When the Do not Cancel key is selected
40 VARIOUS WAYS TO SET THE DESTI- NATION (or waypoint) WARNING To operate the navigation system or to use the screen functions, first park the vehicle in a safe place and set the parking brake. Using the system while driving can distract the driver and may result in a serious accident. Phone Number Map 5-2 How do I program a destination? INV2315 EXPERT MODE CATEGORIES To set the destination and waypoints, you can choose from the eight categories described below. Use these options to choose the best way to find the route to the destinations and waypoints. Address Book Previous Dest Street Address Intersection Point of Interest (POI) City
41 EASY MODE CATEGORIES INV2316 When the Expert Mode is canceled, the following three categories will be displayed as Easy Mode. Home Street Address Point of Interest (POI) Use the Street Address key and the key in the same way as in Expert Mode. Please refer to Setting with the Street Address key on page 5-3 and Setting with the key on page 6-2. If the Short Menus key is highlighted in amber in the [SETTING] screen, the screen is in Easy Mode. In this case, the keys displayed are different from the screen in Expert Mode. If you set a destination or waypoints, they will be displayed with icons. If you want to go to places close to the stored locations or facilities, use categories such as facility, nearby facility or memory for easier setting. When using either the Point of Interest (POI) or nearby Points of Interest categories, the names called up can be set as the destination if you do not scroll the screen. If you want to choose a different place on the screen from the one called up, you will have to scroll the screen. SETTING WITH THE Address Book KEY The Address Book will allow you to store locations in the memory. This is especially useful for locations that you visit frequently. Please refer to Setting up and editing the address book on page 7-2. INV Press the DEST button. 2. Select the Address Book key on the [DEST. SETTING] screen. The [DEST. SETTING (Address Book)] screen will be displayed. How do I program a destination? 5-3
42 3. Select the item key of your destination (waypoints) on the [DEST. SETTING (Address Book)] screen. INV1787 INV1788 INV To set the destination (waypoints), refer to Making the system guide the route with detailed options on page To slightly alter the destination. Select the Map key to display the map screen of the area around the specified destination (waypoints). 5-4 How do I program a destination?
43 Please refer to Changing the listing order on page 7-7. SETTING WITH THE Previous Dest. KEY This system memorizes the last 10 destinations previously chosen, allowing you to set new destinations or waypoints from them. INV If necessary, operate the joystick to adjust the location of the destination (waypoint). Press the ENTER button. Select the Destination key to confirm. The [DEST. SETTING] screen will be displayed. To set the destination (waypoint), refer to Making the system guide the route with detailed options on page To change the listing order, select the Sort key on the [DEST. SETTING (Address Book)] screen and tilt the joystick to the right or left, or press the ENTER button. INV Press the DEST button. 2. Select the Previous Dest. key on the [DEST. SETTING] screen. A total of 10 destinations and locations previously set can be stored and displayed. How do I program a destination? 5-5
44 3. Select the item key of your destination (waypoints) on the [DEST. SETTING (Previous Dest.)] screen. INV1792 INV1793 INV To set the destination (waypoints), refer to Making the system guide the route with detailed options on page To fine tune the destination. Select the Map key to display the map screen of the area around the specified destination (waypoints). 5-6 How do I program a destination?
45 SETTING WITH THE Street Address KEY Sets the destination (waypoints) from the street names and addresses that you enter. There are two search methods; direct search by the street names, and search by the street names after the state and/or the city are defined. INV If necessary, operate the joystick to adjust the location of the destination (waypoints). Press the ENTER button. Select the Destination key to confirm. The [DEST. SETTING] screen will be displayed. To set the destination (waypoints), refer to Making the system guide the route with detailed options on page First press the DEST button. 2. Select the Street Address key. INV2319 How do I program a destination? 5-7
46 Setting with the List key The List key is used when you know the names of the destination and waypoints. 1. A keyboard will be displayed on the [DEST. SETTING (Street Address)] screen. Enter the street name you want to set. It is not possible to enter names if they are not stored in the DVD-ROM. INV2320 INV2321 INV Enter the street name of your destination. For example, enter T, then U. 3. Enter U, then select the List key. The list screen of street names which begin with TU will appear. If less than 5 suggested streets remain, they will be displayed automatically without selecting the List key. The city names and street names will be displayed. Use the joystick to scroll the display if more than 5 suggested street names appear. When the Next Search key is selected, it is possible to narrow down cities. To use this function, refer to Setting with the City key on page How do I program a destination?
47 When the PREV button is pressed, the screen to input street names will be displayed. 4. Select one street of your destination. 5. Enter the house number. Select the OK key. INV2324 It may not be possible to specify a location after selecting the OK key. In that case, a list of locations which correspond to the entered house number will be displayed. INV To set the destination (waypoints), refer to Making the system guide the route with detailed options on page NOTE: If a house number is entered and it is not a direct hit for house numbers already stored in the database, then only a map to the general vicinity will be displayed. How do I program a destination? 5-9
48 7. To slightly alter the destination. Select the Map key to display the map screen of the area around the specified destination (waypoints). An approximate location corresponding to the entered house number is displayed. If necessary, correct the location using the joystick. The location displayed by the calculation using the house number may differ from the actual location. In that case, correct the location using the joystick How do I program a destination? INV2323 INV1803 INV If necessary, operate the joystick to adjust the location of the destination (waypoint). Press the ENTER button. Select the Destination key to confirm. The [DEST. SETTINGS (Street Address)] screen will be displayed. To set the destination (waypoint), refer to Making the system guide the route with detailed options on page Setting with the State key The State key is used when you select a state/province to set the destination. 1. Select the State key.
49 2. The display shows the screen to select states. Input a state/province name. INV2327 INV2328 INV2329 When the Last 5 States key is selected, the history of the previous five settings will be listed. 3. The display shows the state list. Select a state/province name. How do I program a destination? 5-11
50 4. The screen returns to the [DEST. SETTING (Street Address)] screen. When the state/province is set, the display shows the selected state/province next to the State key. Input the street name. Please refer to Setting with the List key on page 5-8. INV2330 INV2331 INV2332 Setting with the City key The City key is used when you select a city to set the destination. 1. Select the City key. The display shows the screen to retrieve cities. 2. Input a city name How do I program a destination?
51 When the Last 5 Cities key is selected, the history of the previous five settings will be listed. It is not possible to select cities if they are not in the state/province you set. INV2333 INV2334 INV The display shows the city list. Select a city of your choice. 4. The screen returns to the [DEST. SETTING (Street Address)] screen. When the city is set, the display shows the selected city next to the City key. Input the street name of your choice. Proceed to Setting with the List key on page 5-8. How do I program a destination? 5-13
52 SETTING WITH THE Intersection KEY This will allow you to set an intersection as a destination (waypoints). 1. Press the DEST button. 2. Select the Intersection key. A keyboard will be displayed. INV2336 INV1815 Setting with the List key The List key is used when you know the names of the destinations and waypoints. 1. Enter the first street name where the destination (waypoints) is located using the keyboard, then select the List key How do I program a destination?
53 When entering a street name, enter a minor street name as the first street and the calculation will be easier and quicker. INV Select the first street name using the same procedures as Setting with the Street Address key. When the Next Search key is selected, it is possible to narrow down states and cities. To use this function, refer to Setting with the City key on page INV Enter the 2nd (intersecting) street name, then select the List key. If there are less than 5 streets which intersect the first street, they will be displayed automatically without selecting the List key. For a road where lanes with different traffic directions are shown separately, the list shows first street name, second street name,... How do I program a destination? 5-15
54 4. Select the name of the second street. The [DEST. SETTING (Intersection)] screen will appear. INV1818 INV1819 INV To set the destination (waypoints), refer to Making the system guide the route with detailed options on page To slightly alter the destination. Select the Map key to display the map screen of the area around the specified destination (waypoints) How do I program a destination?
55 NOTE: When the corresponding data does not exist under the following conditions, the street name list may not be displayed: A street name is being input after the City key has been selected. List is being displayed by selection of the List key. INV If necessary, operate the joystick to adjust the location of the destination (waypoint). Press the ENTER button. Select the Destination key to confirm. The [DEST. SETTINGS (Intersection)] screen will be displayed. To set the destination (waypoint), refer to Making the system guide the route with detailed options on page Setting with the State key INV1822 The State key is used when you select a state/province to set the destination. 1. Select the State key. How do I program a destination? 5-17
56 2. The display shows the screen to select states. Input a state/province name. INV1823 INV1824 INV1825 It is not possible to select cities if they are not in the state/province you set. When the Last 5 States key is selected, the history of the previous five settings will be listed. 3. The display shows the state/province list. Select a state/province name How do I program a destination?
57 4. The screen returns to the [DEST. SETTING (Intersection)] screen. When the state/province is set, the display shows the selected state/province next to the State key. Input the street name. Please refer to Setting with the List key on page INV1826 INV1827 INV0973 Setting with the City key The City key is used to retrieve an intersection from the specified city to set the destination. 1. Select the City key. The display shows the screen to retrieve cities. 2. Input a city name. How do I program a destination? 5-19
58 When the Last 5 Cities key is selected, the history of the previous five settings will be listed. It is not possible to select cities if they are not in the state/province you set. INV1829 INV1830 INV The display shows the city list. Select a city of your choice. 4. The screen returns to the [DEST. SETTING (Intersection)] screen. When the city is set, the display shows the selected city next to the City key. Input the street name of your choice. Proceed to Setting with the List key on page How do I program a destination?
59 SETTING WITH THE City KEY Sets the destination (waypoints) on the map screen of the area in and around the input city. 1. Press the DEST button. INV2337 SETTING WITH THE KEY The INFINITI Navigation System includes a database of Point of Interest (POI) locations such as restaurants, hotels, and gas stations. (refer to section 6.) By using this feature, you can set a Point of Interest location as a destination. For details on how to use the POI feature, please refer to section 6. INV Select the City key on the [DEST. SET- TING] screen. How do I program a destination? 5-21
60 If less than 5 suggested cities remain, they will be displayed automatically without selecting the List key. Setting with the List key INV1834 The List key is used when you know the names of the destination and waypoints. 1. Enter the characters of the city name which you wish to set as a destination (waypoints) using the keyboard on the [DEST. SETTING (City)] screen, then select the List key. INV Select the city name of your destination (waypoints) on the [DEST. SETTING (City)] screen. When the List key is selected, the data of the currently-listed cities will be displayed How do I program a destination?
61 3. To set the destination (waypoints), refer to Making the system guide the route with detailed options on page INV1836 INV1837 INV To slightly alter the destination. Select the Map key to display the map screen of the area around the specified destination (waypoints). 5. If necessary, operate the joystick to adjust the location of the destination (waypoints). Press the ENTER button. Select the Destination key to confirm. The [DEST. SETTING (City)] screen will be displayed. To set the destination (waypoints), refer to Making the system guide the route with detailed options on page List is being displayed by selection of the List key. How do I program a destination? 5-23
62 Setting with the State key The State key is used when you select a state/province to set the destination. 1. Select the State key. INV1839 INV1840 INV The display shows the screen to select states/provinces. Input a state/province name. When the Last 5 States key is selected, the history of the previous five settings will be listed How do I program a destination?
63 SETTING WITH THE Phone Number KEY NOTE: This option only works when the destination is listed in the POI directory. Sets the destination (waypoints) on the map screen of the area and around the input phone number. 1. Press the DEST button. INV The display shows the state/province list. Select a state/province name. INV The screen returns to the [DEST. SETTING (City)] screen. When the state/province is set, the display shows the selected state/province next to the State key. Input the city name. Please refer to Setting with the List key on the previous section. How do I program a destination? 5-25
64 2. Select the Phone Number key on the [DEST. SETTING] screen. INV2339 INV1845 INV Enter the ten digit phone number of the destination (waypoints) using the keyboard on the [DEST. SETTING (Phone Number)] screen. 4. If you select the OK key, the [DEST. SET- TING (Phone Number)] screen will be displayed. 5. To set the destination (waypoints), refer to Making the system guide the route with detailed options on page How do I program a destination?
65 6. To slightly alter the destination. Select the Map key to display the map screen of the area around the specified destination (waypoints). INV1847 INV1848 INV If necessary, operate the joystick to adjust the location of the destination (waypoints). Press the ENTER button. Select the Destination key to confirm. To set the destination (waypoints), refer to Making the system guide the route with detailed options on page When a hospital is set as a destination, a telephone number of the destination will be displayed, if available. SETTING WITH THE Map KEY This will enable you to zoom into the map for detail and set the desired location. This works best when you know the location geographically, or want to check the geographical surroundings on the map before setting the destinations. How do I program a destination? 5-27
66 1. Press the DEST button. 2. Select the Map key. The map of the entire area will be displayed. INV2340 INV1851 INV Operate the joystick to choose the destination (waypoints). 4. Adjust the location using the joystick, and press the ENTER button. 5. Select the Destination key. The [DEST. SETTING] screen will appear How do I program a destination?
67 SETTING WITH THE Country KEY When the Street Address, Intersection, City, or Point of Interest (POI) key is used to set the destination (waypoints) in other countries, they are retrieved from the areas in the country which have been set in the country category. When setting the destination (waypoints) in other countries, select a country first. INV Please refer to Making the system guide the route with detailed options on page When the OK key is selected in the [DEST. SETTING] screen, route calculation starts. If you want to add waypoints, select the Waypoint key. INV Press the DEST button. The [DEST. SETTINGS] screen will be displayed. Select the Country key. How do I program a destination? 5-29
68 SETTING WITH THE Home KEY (in easy mode) Sets the home as a destination. In the Expert Mode, this key will not be displayed. Turn on the highlighted amber Short Menus key in the [SETTING] screen. INV Select the Country key. Each time the EN- TER button is pressed, the country selection toggles between USA and Canada. 3. Then, the selected country will be displayed at the right of the Country key. 1. Press the DEST button. 2. Select the Home key. INV How do I program a destination?
69 HAVING THE SYSTEM GUIDE YOU TO THE DESTINATIONS WARNING To operate the navigation system or to use the screen functions, first park the vehicle in a safe place and set the parking brake. Using the system while driving can distract the driver and may result in a serious accident. INV The [DEST. SETTING] screen will be displayed. Set the OK key. To set the destination (waypoints), refer to Making the system guide the route with detailed options on page If the home is not registered in the Address Book, the [STREET ADDRESS] screen will be displayed. Please refer to Setting with the Street Address key on page 5-7. INV1191 MAKING THE SYSTEM GUIDE THE ROUTE WITH DETAILED OPTIONS By choosing the destination from the menu, you can choose detailed options such as waypoints and calculation conditions and have the system guide you from the current position to the destination. How do I program a destination? 5-31
70 Setting the destination First, you will have to set the destination. 1. Select a destination using one of the methods described earlier in this chapter: Address Book Previous Destination Street Address Intersection Point of Interest (POI) City Phone Number Map Home 2. Set the route priorities and select the Route Calc. key to calculate the route. Refer to Route calculation and guidance on page How do I program a destination? INV1857 If you select the OK key at this point, route calculation will start without any waypoints. Press the PREV button to display the [EDIT ROUTE] screen. INV1858 Setting the waypoints After you set a destination, you can set waypoints. When the ROUTE button is pressed on the map and the Edit Route key is selected, the [EDIT ROUTE] screen will be displayed. The maximum number of destinations and waypoints that can be set is six (6). Please refer to Expert mode categories on page Select the key or key on the [EDIT ROUTE] screen.
71 It is also possible to set a waypoint by selecting the Waypoint key in the [DEST. SET- TING] screen. Setting the priorities for route calculation After the setting of destinations and waypoints is completed, set the calculation conditions such as route type with high priorities. INV2343 The [EDIT ROUTE] screen will be displayed. 2. Select a waypoint destination using one of the destination selection procedures outlined earlier in the chapter. INV1857 Select the conditions with high priorities. If you want to get to your destination in the shortest time, select the Shortest Time key. Selecting the key will turn the indicator light in the key ON; selecting it again will turn it OFF. When you select the OK key at this point, route calculation will start without any additional waypoints. Press the PREV button to display the [EDIT ROUTE] screen. How do I program a destination? 5-33
72 Shortest Distance key: The route to the destination is calculated so that it is the shortest distance. NOTE: It may not be the shortest distance in all cases. Minimize Toll Road key: INV Select the Priorities key. The screen for setting calculation conditions will appear. The conditions with the indicator light ON will have high priority. When the ROUTE button is pressed on the map and the Edit Route key is selected, the [EDIT ROUTE] screen will be displayed How do I program a destination? INV Select the conditions with high priorities. Select each key on the screen to turn its respective indicator light ON or OFF. Shortest Time key: The route to the destination is calculated so that you can reach the destination in the shortest time. In some cases, a freeway or toll road with detours may be recommended. NOTE: It may not be the shortest time in all cases. The route to the destination is calculated with minimum use of toll roads. Minimize FWY key: The route to the destination is calculated with minimum use of freeways. Use Time Restricted Roads key: The route using time restricted roads is calculated. NOTE: If the Use Time Restricted Roads is not selected, the navigation system calculates a route without including carpool lanes. The auto reroute function is activated and recalculates a route including carpool lanes if both of the following conditions are met: the auto reroute function is turned ON.
73 you deviate from suggested road and drive on a carpool lane. With this auto reroute calculation, a suggested route including carpool lanes will be displayed, and the message The route has changed to include time restricted roads. Please be sure to obey traffic regulations. will be displayed on the screen. Because the suggested route provided at this time is calculated without taking regulations and limitations of time restricted roads into consideration at all, please drive safely and follow the actual roads and regulations when driving. NOTE: When driving on a time restricted road, be sure to obey traffic regulations. INV1862 When this key is selected and the OK key is pressed, a confirmation screen will be displayed. When the Yes key is pressed, route calculation will start. The system considers time restricted roads as whole-day restricted. When the key is set to OFF, time restricted roads will not be included in route calculation. WARNING When the route is calculated with this key ON, be sure to obey traffic regulations. Use Ferry Route key: Select this key if you prefer routes with ferry lines. How do I program a destination? 5-35
74 Route calculation and guidance After setting all the items required, you may proceed to route calculation for guidance. After the route calculation is completed, the guidance will start automatically. When the ROUTE button is pressed on the map and the Edit Route key is selected, the [EDIT ROUTE] screen will be displayed. Select the Route calc. key How do I program a destination? INV1863 INV1864 INV1302 Route calculation screen will be displayed. The suggested route will be displayed with a thick blue line. If you enter this route, the voice guide will start. If you want to cancel the route calculation, press the ENTER button. If you set a place which is not suitable as a destination, the suggested route will not be displayed. In such a case, the OK key will be displayed on the screen. Select the OK key. Reset a correct destination. If route calculation is not possible with all the set preferences, the system may look up a route that does not exactly correspond to the preferences. When deleting the settings of destinations or waypoints, press the ROUTE button. Enlarged intersection display When the vehicle approaches a guide point such as an intersection, the enlarged map of the point will be displayed.
75 NOTE: When the guide point is close to the guidance start point, the enlarged map may not be displayed. The guide point name may not be displayed. The position of the vehicle icon on the enlarged map may differ from the position on the current display. 1. Press the MAP or PREV button. The map screen will appear. INV1303 When no operation is executed with the enlarged map displayed, the map stays displayed. If route numbers are included in the map data, route numbers will be displayed on the left side of the screen. If street names are displayed in two lines, route numbers will not be displayed. INV1304 To display the enlarged map, press the MAP button or PREV button. 2. When the vehicle arrives at the neighborhood of the destination, the route guidance will end automatically. To alternate between the map and the enlarged screen, press the MAP button or PREV button. In the map screen, the distance to the next guide point and the turning direction will be displayed on the right side of the screen. How do I program a destination? 5-37
76 ADJUSTING AND DELETING THE PRE- SET DESTINATION (waypoints) Using the joystick, you can adjust the destination (waypoints). 1. Press the ROUTE button. INV1868 INV Select the Edit Route key. 3. Choose the destination (waypoints) you want to adjust on the [EDIT ROUTE] screen How do I program a destination?
77 4. The map screen will be displayed for adjusting. Use the joystick to adjust the location. When you move the joystick, the Adjust key will be displayed. INV1870 INV1871 INV Select the Adjust key. The new destination (waypoints) will be set. TO DELETE A DESTINATION 1. To delete the destination (waypoint), choose the destination (waypoint) in step 3 and select the Delete key. How do I program a destination? 5-39
78 ALL CLEAR 2. Select the Yes key. The preset destination (waypoints) will be deleted. INV1873 INV1874 INV Press the Map button to return to the map screen. To set a new destination (waypoints), refer to Expert mode categories or Easy mode categories on page 5-2. If you reset the new destination (waypoints), the older destination (waypoints) will be deleted. If you have requested a route calculation, the previous suggested route will be deleted from memory. The destination and waypoint can be deleted at one time. 1. Press the ROUTE button. Several keys will be displayed on the right of the screen. Select the Edit Route key How do I program a destination?
79 QUICK STOP 2. The [EDIT ROUTE] screen will be displayed. Select the All Clear key. INV1875 INV1876 INV Select the Yes key. The system will display pre-defined POI s (Points of Interest) in the current vicinity of the vehicle and the distances to them. These POI s can be gas stations, hotels, restaurants, ATM s or customer-programmed facilities. This function will operate while the vehicle is moving. 1. Press the ROUTE button. The display shows several keys on the right of the screen. Select the Quick Stop key. How do I program a destination? 5-41
80 2. The display shows the [QUICK STOP] screen. Select the category of your choice. Five categories are displayed on the screen. The last one can be customized. When you use a POI category frequently, it is convenient to use the quick stop function. Please refer to Quick stop customer setting on page INV1878 INV1879 INV The cuisine selection screen is displayed only when the RESTAURANT key is selected. Select the All key or Fast Food key. 4. The display shows the direction and distance from the current vehicle position to the selected facility. Select the facility name you want to set as a destination (waypoints) How do I program a destination?
81 5. Set route priorities, then select the OK key. Route calculation to the destination will be started. If quick stop is set after the destination was set, the system starts the route calculation to the location as the waypoint. Five waypoints can be registered at the same time. INV1881 INV1781 INV1882 QUICK STOP CUSTOMER SETTING 1. Press the SETTING button. 2. Select the Navigation key on the [SET- TINGS] screen. 3. Select the Quick Stop Customer Setting key on the [NAVIGATION SETTINGS] screen. How do I program a destination? 5-43
82 4. Select a facility you frequently visit. For example, select the INFINITI DEALER key. When it is set, the screen returns to the previous screen. Press the MAP button to return to the map. INV1032 INV1033 INV Press the ROUTE button. Then, select the Quick Stop key, and press the ENTER button. The display shows the selected facility in the last row. When a hospital is set as a destination, a telephone number of the destination will be displayed, if available How do I program a destination?
83 WHERE AM I? CANCEL GUIDANCE This key is used to find the name of the street on which the vehicle is currently located. 1. Press the ROUTE button. Several keys appear on the right of the screen. Select the Where am I? key. INV1887 INV1888 INV The display shows the [WHERE AM I?] screen, which includes the next, current, and previous streets. Each one shows the streets which the vehicle is approaching, currently traveling on, and those streets the vehicle was previously traveling on. Press the MAP or PREV button to return to the map. 1. Press the ROUTE button. 2. Several keys appear on the right of the screen. Select the Cancel Guidance key. How do I program a destination? 5-45
84 WHEN THE Waypoint 1 KEY IS SE- LECTED This key can be selected only when a waypoint is set. Route guidance to the next waypoint is deleted. INV1890 The [CONFIRMATION] screen is displayed with the following three keys. All Destinations Waypoint 1 or Waypoint Do not Cancel WHEN THE All Destinations KEY IS SELECTED The route guidance is turned off temporarily. INV Select the All Destinations key. 2. When the Yes key is selected, the route guidance is turned off. When the No key is selected, the map will be displayed. When the PREV button is pressed, the previous screen will be displayed. To restart the route guidance, press the GUIDE VOICE button How do I program a destination?
85 WHEN THE Do not Cancel KEY IS SELECTED The [CONFIRMATION] screen will return to the map screen. 1. Select the Waypoint 1 key. INV When the Yes key is selected, the waypoint is deleted and route calculation will start. When the No key is selected, the map will be displayed. When the PREV button is pressed, the previous screen will be displayed. How do I program a destination? 5-47
86 MEMO 5-48 How do I program a destination?
87 6 How do I use the Point of Interest (POI) feature? Setting with the key Setting with the List key Setting with the Category key Setting with the State key Setting with the City key Setting with the Nearby key POI categories Setting the nearby display icons
88 SETTING WITH THE KEY The keys in Point of Interest (POI) are: List Category State/Province City Nearby INV First press the DEST button. 2. Select the key on the [DEST. SETTING] screen. SETTING WITH THE List KEY INV1893 The List key is used when you know the exact names of the destinations and waypoints. 1. Input the facility name for your destination. NOTE: For a quicker search, input the state/province, city and category before searching for your desired destination. If the system detects that the number of corresponding facilities or cities is five or less, the display shows the list screen automatically. 6-2 How do I use the Point of Interest (POI) feature?
89 2. The display shows the screen to select a facility or Info key. INV1894 INV1895 INV1896 When the Next Search key is selected, it is possible to narrow down categories, states/provinces and cities. To use this function, refer to Setting with the Category key, Setting with the State key and Setting with the City key on pages 6-5, 6-7 and When a facility name is selected, the display shows the [DEST. SETTING (POI)] screen to set the destination. To set priorities, select the OK key. Then, the route calculation will be started. When you alter the destination or set waypoints, select the Waypoint key. Please refer to Making the system guide the route with detailed options on page How do I use the Point of Interest (POI) feature? 6-3
90 When the Info key next to the facility name of your choice is selected in step 2, the display shows the detailed [Address] and [Telephone number] of the selected facility, and the Map and Enter keys. INV1897 INV1896 INV When setting the facility as the destination, select the OK key. The display shows the [DEST. SETTING (POI)] screen to set the destination. Set priorities and select the Route Calc. key. Then, the route calculation will be started. When you alter the destination or set waypoints, select the Waypoint key. Please refer to Making the system guide the route with detailed options on page When the Map key is selected, the display shows the map. When the ENTER button is pressed, the display shows the Destination key. 6-4 How do I use the Point of Interest (POI) feature?
91 SETTING WITH THE Category KEY The Category key is used when you select a facility category to set the destination. 1. Select the Category key. INV1898 INV1899 INV The display shows the screen to select categories. Input a category name. See listing of categories on page When the Last 5 Categories key is selected in step 2, the history of the previous five settings will be listed. How do I use the Point of Interest (POI) feature? 6-5
92 3. The display shows the category list. Select a category name. When the RESTAURANT key is selected, the screen to input the cuisine type will be displayed. 6-6 How do I use the Point of Interest (POI) feature? INV1901 INV1902 INV The screen returns to the [DEST. SETTING (POI)] screen. When the category is set, the display shows the selected category beside the Category key. Input the facility name. If you do not know the facility name you want to go to, select the List key so that the facility names in the category will be listed in alphabetical order. It may take some time to show the list, depending on categories. 5. When a facility name is input, the system retrieves the facility name according to the selected category and the input letters. Then, the display shows the screen to select a facility and Info key. Please refer to Setting with the List key on page 6-2.
93 When the Next Search key is selected, it is possible to narrow down states/provinces and cities within the selected category. To use this function, refer to Setting with the State key and Setting with the City key on pages 6-7 and 6-9. INV1904 INV1905 INV1906 SETTING WITH THE State KEY The State key is used when you select a state/province to set the destination. 1. Select the State key. 2. The display shows the screen to select states. Input a state/province name. How do I use the Point of Interest (POI) feature? 6-7
94 When the Last 5 States key is selected, the history of the previous five settings will be listed. INV1907 INV1908 INV The display shows the state list. Select a state/province name. 4. The screen returns to the [DEST. SETTING (POI)] screen. When the state/province is set, the display shows the selected state/province next to the State key. Input the state/province name. If you do not know the facility name you want to go to, select the List key so that the facility names will be listed in alphabetical order. 6-8 How do I use the Point of Interest (POI) feature?
95 5. When a facility name is input, the system retrieves the facility name according to the input letters. Please refer to Setting with the List key on page 6-2. INV1910 INV1911 INV1912 When the Next Search key is selected, it is possible to narrow down categories and cities within the selected state. To use this function, refer to Setting with the Category key and Setting with the City key on pages 6-5 and 6-9. SETTING WITH THE City KEY The City key is used to retrieve a facility from the specified city to set the destination. 1. Select the City key. How do I use the Point of Interest (POI) feature? 6-9
96 2. The display shows the screen to select cities. Input a city name. INV1058 INV1914 INV1915 When the Last 5 Cities key is selected in step 2, the history of the previous five settings will be listed. 3. The display shows the city list. Select a city of your choice How do I use the Point of Interest (POI) feature?
97 It may take some time to show the list, depending on categories. INV The screen returns to the [DEST. SETTING (POI)] screen. When the city is set, the display shows the selected city beside the City key. Input the facility name of your choice. If you do not know the facility name, select the Category key to retrieve a facility. When the facility is set from the Category key, the display shows the selected facility beside the Category key. INV When the facility name is input, the system retrieves the facility name according to the selected city and the input letters. Then, the display shows the screen to select a facility and Info key. Please refer to Setting with the List key on page 6-2. How do I use the Point of Interest (POI) feature? 6-11
98 The Nearby key is available only when a category is set. Set a category first. INV1918 SETTING WITH THE Nearby KEY The Nearby key is used to retrieve a facility within 30 miles (50 km) from the current vehicle location. 1. Select the Point of Interest (POI) key on the [DEST. SETTING (POI)] screen. 2. Set category according to page Select the Nearby key. INV1919 When there are any nearby facilities based on the selected category, the display shows the list of facility names, directions and distance from the current vehicle location, and Info keys. Please refer to Setting with the List key on page 6-2. Facilities in the selected category will be listed from the nearest to the farthest How do I use the Point of Interest (POI) feature?
99 INV1923 When a hospital is set as a destination, a telephone number of the destination will be displayed, if available. How do I use the Point of Interest (POI) feature? 6-13
100 POI CATEGORIES AIRPORT FERRY TERMINAL PARKING GARAGE AMUSEMENT PARK GAS STATION PARKING LOT ATM GOLF COURSE PERFORMING ARTS AUTO SERVICE & MAINTENANCE GROCERY STORE POLICE STATION AUTOMOBILE CLUB HISTORICAL MONUMENT RENTAL CAR AGENCY BANK HOSPITAL REST AREA BORDER CROSSING HOTEL RESTAURANT BOWLING CENTER ICE SKATING RINK SCHOOL BUS STATION INFINITI DEALER SHOPPING BUSINESS FACILITY LIBRARY SKI RESORT CASINO MARINA SPORTS CENTER CITY CENTER MOVIE THEATER SPORTS COMPLEX CITY HALL MUSEUM TOURIST ATTRACTION COLLEGE AND UNIVERSITY NIGHTLIFE TOURIST INFORMATION COMMUNITY CENTER NISSAN DEALER TRAIN STATION COMMUTER RAIL STATION OTHERS WINERY CONVENTION/EXHIBITION CENTER PARK & RIDE COURT HOUSE PARK/RECREATION AREA 6-14 How do I use the Point of Interest (POI) feature?
101 SETTING THE NEARBY DISPLAY ICONS Five types of facilities can be displayed on the map using respective icons, including: ATMs Gas stations Hotels Restaurants Rest areas 1. Press the SETTING button on the control panel. INV Select the Navigation key on the [SET- TINGS] screen. INV Select the Nearby Display Icons key on the [NAVIGATION SETTINGS] screen. The [NEARBY DISPLAY ICONS] screen will be displayed. How do I use the Point of Interest (POI) feature? 6-15
102 INV Select the facility you wish to display, and press the ENTER button. Every time the ENTER button is pressed, the indicator lights of the items are turned ON and OFF alternately. ON: To display nearby icons. OFF: To stop displaying nearby icons. INV1355 The icons of the selected facilities will be displayed. When the MAP button is pressed, the current location will be displayed. When the PREV button is pressed, the previous screen will reappear How do I use the Point of Interest (POI) feature?
103 7 How do I use the address book feature? Setting up and editing the address book Setting up the address book Using various categories to store locations Storing current vehicle position Storing locations of your choice Confirming the stored locations Changing the listing order Editing the address book Changing stored names Changing the icons Adjusting the stored address book entries Deleting stored locations
104 SETTING UP AND EDITING THE AD- DRESS BOOK You can store locations in the address book for quicker access, or name the location and set a special icon on the map. SETTING UP THE ADDRESS BOOK You can store your favorite places or the places you frequently visit. By storing them, you can recall them quickly on the display, enabling easier setting of these destinations. USING VARIOUS CATEGORIES TO STORE LOCATIONS You can choose various categories in the menu to store the locations. The categories are: Street Address, Points of Interest (POI), Phone Number, Map, Intersection, City and Previous Dest. 1. Press the SETTING button. INV Select the Navigation key. The [NAVIGATION SETTINGS] screen will be displayed. 7-2 How do I use the address book feature?
105 3. Select the Edit Address Book key. The [EDIT ADDRESS BOOK] screen will be displayed. INV1924 INV1925 INV Choose an unused number location on the address book list. 5. Store location. Set a location to be stored in the same way as when setting a destination (waypoints). Please refer to Expert Mode Categories on page 5-2. Press the MAP button to go back to get the current vehicle display. The maximum number of the stored locations is 50, including your home and office. How do I use the address book feature? 7-3
106 If you want to store places close to POI, it is quicker to use the Points of Interest (POI) key. STORING CURRENT VEHICLE PO- SITION 1. Press the SETTING button. 2. Select the Navigation key. INV1781 INV Select the Save Current Location key. The [NAVIGATION SETTINGS] screen will be displayed. The current location of the vehicle will be stored in the next available address book location, and be displayed on the vehicle icon screen. 7-4 How do I use the address book feature?
107 If the number of the stored locations exceeds 50, a message will appear Memory is full. Delete old one to store new one. If you store more than one location at the same place, the location stored in the database with the largest identification number will be displayed. If you store the location by the location store function, the stored name may differ, depending on the scale used in the display. The unused and smallest identification number will be assigned to the newly set location. INV1928 INV1929 INV1930 STORING LOCATIONS OF YOUR CHOICE You can use the joystick to store desired locations. 1. Scroll the map to the desired location with the joystick, then press the ENTER button. The display shows several keys on the right of the screen. 2. Select the Store Place key. The registered number will be displayed at that location on the map. Press the MAP button once or the PREV button twice to go back to the current vehicle display. CONFIRMING THE STORED LOCA- TIONS To confirm that the locations have been stored: 1. Press the SETTING button. How do I use the address book feature? 7-5
108 2. Select the Navigation key. The [NAVIGATION SETTINGS] screen will be displayed. INV1781 INV1924 INV Select the Edit Address Book key. 4. Choose the Map key next to the location that you want to confirm. 7-6 How do I use the address book feature?
109 The stored location will be displayed on the map. If you want to confirm several stored locations, press the PREV button. To go back to the map display, press the MAP button. INV1932 INV1933 INV1934 CHANGING THE LISTING ORDER 1. Select the Sort key on the [EDIT AD- DRESS BOOK] screen. 2. To change the listing order, tilt the joystick to the right or left, or press the ENTER button. When the left indicator on the Sort key is highlighted: list in the order of numbers When the center indicator on the Sort key is highlighted: list in the order of icons When the right indicator on the Sort key is highlighted: list in alphabetical order How do I use the address book feature? 7-7
110 EDITING THE ADDRESS BOOK You can alter the names or the icons of the stored locations. CHANGING STORED NAMES 1. Press the SETTING button. INV Select the Navigation key. 3. Select the Edit Address Book key. INV How do I use the address book feature?
111 4. Choose the stored location you want to change the name of. INV1935 INV1936 INV Select the Rename key. The change name screen will be displayed. 6. Select the Set key after entering the new name. To go back to the map display, press the MAP button. CHANGING THE ICONS 1. You can display the icon at a stored location. Press the SETTING button. How do I use the address book feature? 7-9
112 2. Select the Navigation key. The [NAVIGATION SETTINGS] screen will be displayed. INV1781 INV1924 INV Select the Edit Address Book key. 4. Choose a stored location where you want to set the icon How do I use the address book feature?
113 INV1939 INV1940 INV Select the Landmark Icon key. 6. Choose an icon. (See the illustration on the next page for a legend of icons which can be set for stored locations.) The picture displayed on the left [icon] is a planview icon and the picture displayed on the right [icon] is a Birdview icon. The icon of the stored location will be set. To go back to the screen displaying the current vehicle position, press the MAP button. If you press the PREV button, the screen will go back to the screen displayed in step 5. If you alter the icon of the stored location, the icon on the map will also change. How do I use the address book feature? 7-11
114 7-12 How do I use the address book feature? INV1755
115 ADJUSTING THE STORED AD- DRESS BOOK ENTRIES You can easily adjust the point of the stored location with the joystick. 1. Press the SETTING button. 2. Select the Navigation key. INV Select the Edit Address Book key. INV1924 The [NAVIGATION SETTINGS] screen will be displayed. How do I use the address book feature? 7-13
116 4. Choose the Map key next to the stored location you want to adjust. INV1942 INV1943 INV Use the joystick to set the new location. 6. Select the Adjust key. The location is updated after the update message is shown. The screen goes back to the screen displayed in step 4. To go back to the screen displaying the current vehicle position, press the MAP button How do I use the address book feature?
117 DELETING STORED LOCATIONS You can delete the stored locations you no longer need from the system memory. 1. Press the SETTING button. 2. Select the Navigation key. INV Select the Edit Address Book key. INV1924 The [NAVIGATION SETTINGS] screen will be displayed. How do I use the address book feature? 7-15
118 INV1945 INV1946 INV Select the location you want to delete. 5. Select the Delete key. 6. The system will ask for a confirmation. If correct, select the Yes key. The location will be deleted. After the deletion message is shown, the screen goes back to the screen displayed in step 4. To go back to the screen displaying the current vehicle position, press the MAP button How do I use the address book feature?
119 8 How do I use the avoid area feature? Setting avoid areas Setting with the selected location key Renaming the avoid areas Deleting the avoid areas Setting with the Map key...8-8
120 SETTING AVOID AREAS Setting avoid areas will give you a route away from areas you wish to avoid. If the vehicle icon is in the avoid area, route calculation cannot be completed. 1. Press the SETTING button. 2. Select the Navigation key. INV Select the Avoid Area Setting key. INV1948 The display shows the [NAVIGATION SETTING] screen. The display shows the [AVOID AREA SETTING] screen. 8-2 How do I use the avoid area feature?
121 4. Select a key which is not set as an avoid area. It is possible to set up to 10 areas to avoid. INV1949 INV2345 INV The display shows categories which can be used to set an avoid area. For example, use the Map key to set an avoid area. Select the Map key. For setting with other categories, please refer to Expert mode categories on page The display shows the map which centers the area to be set as an avoid area. Use the ( ZOOM IN ) or ( ZOOM OUT ) button to adjust the map reduction scale. How do I use the avoid area feature? 8-3
122 7. Use the joystick to adjust the location. Area size: Max. 5 x 5miles (8 x8km) INV1952 INV1953 INV The display shows the keys on the right of the screen. Select the Set key. If you want to avoid the freeway in that area, select the Avoid Freeway key to turn on the green indicator on the key. (Indicator ON: avoid, OFF: do not avoid) When altering the size of the avoid area, select the Area key. The area size is increased or decreased by three scales. 9. The avoid area is set, and the grid will be displayed on the screen. The grid color will be displayed in green or blue. (Avoid Freeway ON: green, OFF: blue) If the route guidance is set, the display shows the [AVOID AREA SETTING] screen. 8-4 How do I use the avoid area feature?
123 SETTING WITH THE SELECTED LO- CATION KEY When the stored avoid area is selected, it can be renamed or deleted. RENAMING THE AVOID AREAS 1. Press the SETTING button. INV Please refer to Making the system guide the route with detailed options on page If the route guidance is not set, the display shows the current vehicle location. INV Select the Navigation key. The display shows the [NAVIGATION SET- TINGS] screen. How do I use the avoid area feature? 8-5
124 3. Select the Avoid Area Setting key. The display shows the [AVOID AREA SETTING] screen. INV1948 INV1956 INV Select a key which is set as an avoid area. 5. Select the Rename key. 8-6 How do I use the avoid area feature?
125 6. The display shows the keyboard. Enter the area name using the keyboard. When the Set key is selected, the avoid area is renamed, and the screen returns to the previous screen. When the Back Space key is selected, the cursor moves back to the previous letter. When the Space key is selected, the cursor proceeds to make one space. INV1958 INV1959 INV1960 DELETING THE AVOID AREAS 1. Select the Delete key on the screen in step 5 under Renaming the avoid areas. 2. Select the Yes key. The avoid area is deleted. If the route guidance is set, the display shows the [AVOID AREA SETTING] screen. When the No key is selected, the avoid area will not be deleted, and the screen returns to the previous screen. How do I use the avoid area feature? 8-7
126 3. Please refer to Making the system guide the route with detailed options on page If the route guidance is not set, the display shows the current vehicle location. INV1955 INV1781 INV1948 SETTING WITH THE Map KEY When the stored avoid area is selected, it can be adjusted or deleted. Press the SETTING button. Adjusting the stored avoid areas 1. Select the Navigation key. The display shows the [NAVIGATION SET- TINGS] screen. 2. Select the Avoid Area Setting key. The display shows the [AVOID AREA SETTING] screen. 8-8 How do I use the avoid area feature?
127 3. Select the Map key of stored avoid areas. INV1961 INV1962 INV Use the joystick to adjust the location. 5. Press the ENTER button. The display shows the keys on the right of the screen. Select the Set key. If you want to avoid the freeway in that area, select the Avoid Freeway key to turn on the green indicator on the key. (Indicator ON: avoid, OFF: do not avoid) When altering the size of avoid area, select the Area key. The area size is increased or decreased by three scales. How do I use the avoid area feature? 8-9
128 6. The avoid area is set, and the grid is displayed on the screen. If the route guidance is set, the display shows the [AVOID AREA SETTING] screen. INV1964 INV1955 INV Please refer to Making the system guide the route with detailed options on page If the route guidance is not set, the display shows the current vehicle location. Deleting the stored avoid areas 1. Select the Delete key on the screen shown in step 5 under Adjusting the stored avoid areas How do I use the avoid area feature?
129 INV Select the Yes key when asked if you are sure you want to delete the avoid area. The avoid area is deleted. If the route guidance is set, the display shows the [AVOID AREA SETTING] screen. When the No key is selected, the avoid area will not be deleted, and the screen returns to the previous one. INV Please refer to Making the system guide the route with detailed options on page If the route guidance is not set, the display shows the current vehicle location. How do I use the avoid area feature? 8-11
130 MEMO 8-12 How do I use the avoid area feature?
131 9 How do I use the automatic rerouting feature? Rerouting when the vehicle is off the suggested route Automatic rerouting Detouring from the route temporarily...9-3
132 REROUTING WHEN THE VEHICLE IS OFF THE SUGGESTED ROUTE When you have strayed from the suggested route during the route guidance, you can request a reroute from the current location using the automatic rerouting function. AUTOMATIC REROUTING This setting will reroute the vehicle automatically when the driver deviates from the suggested road. You will have to set the system for automatic rerouting to enable this function. 1. Press the SETTING button. 2. Select the Navigation key. INV Select the Auto Reroute On/Off key. INV2007 The display shows the [NAVIGATION SET- TINGS] screen. 9-2 How do I use the automatic rerouting feature?
133 DETOURING FROM THE ROUTE TEM- PORARILY activated, route re-calculation will be attempted so that the vehicle returns to the original route. However, if the vehicle stays off the route, the system will calculate a new route. If you encounter a traffic jam, you can ask the system to calculate a detour with the pre-set distance. NOTE: The detour feature is only available when a destination has been set. 1. Press the ROUTE button. INV When turning on/off the auto reroute, select the On or Off key. When the ENTER button is pressed, the selected key will be illuminated. 5. Press the MAP button. The map screen will reappear, and the system will start route calculation automatically. When optional routes are not found, the original route will be displayed. When the vehicle runs off the suggested route with the automatic rerouting function How do I use the automatic rerouting feature? 9-3
134 INV1968 INV1969 INV Select the Edit Route key. 3. Select the Detour key. 4. Set distance for detour calculation. The system will look for a detour according to the distance set from the current location. 9-4 How do I use the automatic rerouting feature? When the Avoid the Current Street key is selected, a detour route to approximately 20 miles (30 km) will be calculated if the distance to the next guide point intersection exceeds 20 miles (30 km). If an alternative route cannot be found, the previous route before calculation will be displayed. If the vehicle is traveling at high speed, the suggested detour may start from a point the vehicle has already passed.
135 10 How do I use the voice guidance feature? About voice guidance Basics of voice guidance Adjusting the guide volume Directions given and the distance to the road points Notification of an intersection on an ordinary road Notification of consecutive intersections on an ordinary road Notification of an entrance to a freeway Notification of a freeway junction Notification of an exit from a freeway Requesting current voice information Notes on the voice guidance
136 ABOUT VOICE GUIDANCE WARNING To operate the navigation system or to use the screen functions, first park the vehicle in a safe place and set the parking brake. Using the system while driving can distract the driver and may result in a serious accident. BASICS OF VOICE GUIDANCE The voice guidance will verbally tell you which direction to turn when the vehicle approaches the intersection in which you have to make a turn to reach your destination. NOTE: There may be some cases in which the voice guidance and the actual road conditions do not correspond. This may occur because of discrepancies between the actual road and the information on the DVD or due to the vehicle s speed. In case the content of the voice guidance does not match the actual road conditions, follow the information obtained from traffic signs or notices on the road. ADJUSTING THE GUIDE VOLUME 1. Press the SETTING button on the control panel. INV Select the Guidance Volume key, then push the ENTER button. When the Guidance Volume key is illuminated with amber indicator, it is activated. When turning up/down the voice guidance, touch the Louder or Softer key. The voice will become louder/softer How do I use the voice guidance feature?
137 REQUESTING CURRENT VOICE IN- FORMATION DIRECTIONS GIVEN AND THE DIS- TANCE TO THE ROAD POINTS Directions will differ depending on road type. Distances may vary depending on vehicle speed. NOTIFICATION OF AN INTERSEC- TION ON AN ORDINARY ROAD In a quarter mile (400 meters), right (left) turn. Right (left) turn ahead. NOTIFICATION OF CONSECUTIVE INTERSECTIONS ON AN ORDINARY ROAD In a quarter mile (400 meters), right (left) turn, then left (right) turn. Right (left) turn ahead, then left (right) turn. NOTIFICATION OF AN ENTRANCE TO A FREEWAY In a quarter mile (400 meters) freeway entrance on your right onto (road number and direction). Freeway entrance on your right onto (road number and direction). NOTIFICATION OF A FREEWAY JUNCTION In about one mile (1.6 kilometers), keep to the right (left) onto (road number and direction), then in a quarter mile keep to the left (right). Keep to the right (left) onto (road number and direction), then in a quarter mile (400 meters) keep to the left (right) onto (road number and direction). Keep to the left (right) onto (road number and direction). NOTIFICATION OF AN EXIT FROM A FREEWAY In about one mile (1.6 kilometers), exit on your right. Take the second exit on your right. INV1405 This is available during route guidance, from the time after the route calculation is completed until the vehicle arrives at the destination. Press the GUIDE VOICE button. The current condition will be announced. If you press the GUIDE VOICE button when you are off the suggested route and when the automatic reroute function is off, the voice will announce: Proceed to the highlighted route. If you press the GUIDE VOICE button when you are going in the wrong direction, the voice will announce: Please make a legal U- turn if possible. How do I use the voice guidance feature? 10-3
138 NOTES ON THE VOICE GUIDANCE The voice guidance in this system should be regarded as a supplementary function. When driving your vehicle, check the route on the map display and follow the actual road and all traffic regulations. The voice guidance is activated only for junctions with certain conditions. In some cases you may need to turn, even if there is no voice guidance. The content of the voice guidance may vary, depending on the direction of the turn and the type of junction with other roads. The route guidance will be activated at various times depending on the situation. When the vehicle is off the suggested route, route guidance is not available. The system will not inform you of this; please refer to the map display and request rerouting. At freeway junctions, the road numbers and directions may not accurately correspond with the voice guidance. At freeway exits, the street names may not accurately correspond with the voice guidance. The displayed street names may sometimes differ from the actual names or UNKNOWN STREET NAME may be displayed. Please refer to Automatic re-routing on How do I use the voice guidance feature? When the amber indicator on the Guide Volume key is not illuminated, the voice guidance is not available. The voice guidance will start when the vehicle enters the suggested route. Before entering the route, refer to the map display for the direction. When the vehicle approaches a waypoint, the voice will say, You have arrived at waypoint 1 (2, 3, 4...). The guidance will switch to the next route section. While the voice guidance is not available, please refer to the map display for the direction. In some cases, the voice guidance ends before arrival at the destination. In such cases, drive the vehicle by referring to the destination icon displayed on the map screen. When the system can judge on which side the destination (waypoint) is located, the voice guidance will say on the right (left) after announcing the arrival at the destination. Voice guidance may not operate as specified or may not operate at all due to the angle of roads at intersection entrances and exits.
139 11 How do I adjust the display? Screen information Plan View display Screen information Birdview display Switching between Birdview and Plan View displays Zooming in and out of the map Changing the display direction (in Plan View display) Scrolling the map Displaying the complete route to the destination Displaying turn list Requesting the simulation drive to the destination Cancel simulation Displaying the track GPS information display Updating the current vehicle location and the direction Setting the display mode Adjusting the display brightness Adjusting the display contrast Switching the display color How to handle the display Characteristics of liquid crystal display Maintenance of the display
140 SCREEN INFORMATION PLAN VIEW DISPLAY SCREEN INFORMATION Birdview DISPLAY Direction key: This indicates and sets the direction of the map on the display. Please refer to Changing the display direction (in Plan View display) on page Map scale: This display indicates the scale on the current map. Vehicle icon: This icon indicates your vehicle and the direction of travel How do I adjust the display? INV1405 GPS indicator: This will tell you the strength of the GPS signal received. Please refer to Accuracy of positioning on page 2-2. : This will indicate the approximate distance of route and traveling time to the destination. This indicator will appear when you set the destination with the route guidance ON. : Press the MAP or PREV button to show the enlarged intersection display. INV1407 Map scale: This display indicates the scale on the current map. By using the ( ZOOM IN ) / ( ZOOM OUT ) buttons, you can change the scale of the map. Height and distance on Birdview display is shown in the following table. Height of view 512,000 feet (160,000 m) Distance between grids 160 miles (256 km) Depth of distance approx. 2,240 miles (approx. 1,792 km)
141 Height of view Distance between grids Depth of distance 128,000 feet (40,000 m) 40 miles (64 km) approx. 560 miles (approx. 896 km) 64,000 feet (20,000 m) 20 miles (32 km) approx. 280 miles (approx. 448 km) 32,000 feet (10,000 m) 10 miles (16 km) approx. 140 miles (approx. 224 km) 16,000 feet (4,800 m) 8,000 feet (2,400 m) 4,000 feet (1,200 m) 2,000 feet (600 m) 1,000 feet (300 m) 4.0 miles (8 km) approx. 70 miles (approx. 112 km) 2.0 miles (4 km) approx. 35 miles (approx. 56 km) 1.0 mile (2 km) approx. 17-1/2 miles (approx. 28 km) 1/2 mile (1 km) approx. 8-3/4 miles (approx. 14 km) 1/4 mile (500 m) approx. 4-3/8 miles (approx. 7 km) INV1408 Height of view: 1,000 feet (300 m) SWITCHING BETWEEN Birdview AND PLAN VIEW DISPLAYS Birdview mode displays the view from above, looking down toward the direction the vehicle is traveling. This combines the detailed display close to the vehicle and the long distance view in one screen. INV1409 Height of view: 16,000 feet (4,800 m) How do I adjust the display? 11-3
142 INV1410 INV1411 INI0036 To change between the Birdview and Plan View, proceed as follows: 1. Press the SETTING button How do I adjust the display?
143 2. Select the Navigation key. INV1781 INV1766 INV Select the View key. 4. Select the Birdview or Plan View key. The display shows the [NAVIGATION SET- TINGS] screen. Some locations or buildings may be labeled differently in Plan View display and Birdview display. About Birdview display The destination (waypoints) cannot be set in Birdview display using the map method. Set them in Plan View display. It always appears with the current forward direction up. How do I adjust the display? 11-5
144 ZOOMING IN AND OUT OF THE MAP When the system is re-drawing the display in Birdview display, the distance the vehicle travels becomes longer, and/or the degree the vehicle turns becomes larger than in the Planview display in order to complete re-drawing. The names of the roads and locations may differ, depending on where the names appear on the screen. In order to avoid having too much detail on the map, all road names are not always shown on the screen. When the display re-draws the map, a road name which is shown on the previous screen may not appear on the new screen How do I adjust the display? Use the ( ZOOM IN ) / ( ZOOM OUT ) buttons to change the scale of the display and height view. Nine map scales are available from the most detailed (1 : 10,000) to the widest view (1 : million). Each time the ( ZOOM IN ) button is pressed, the map scale will change one level to display a more detailed map. Each time the ( ZOOM OUT ) button is pressed, the map scale will change one level to display a map that shows a wider area. The chosen map scale will be displayed on the left side of the screen. By pressing the button repeatedly, you can skip the levels to reach the map of desired scale. Scale level on the Plan View display Map scale Actual distance 1 : million 160 miles (256 km) 1 : 5.12 million 40 miles (64 km) 1 : 1.28 million 10 miles (16 km) 1 : 320, miles (4 km) 1 : 160,000 1 mile (2 km) 1 : 80,000 1/2 mile (1 km) Map scale Actual distance 1 : 40,000 1/4 mile (500 m) 1 : 20,000 1/8 mile (200 m) 1 : 10,000 1/16 mile (100 m) Scales on the Birdview are listed on page 11-2.
145 CHANGING THE DISPLAY DIRECTION (in Plan View display) INV1413 Most detailed level (1: 10,000) INV1414 The widest level (1: million) INV Press the SETTING button. 2. Select the Navigation key on the [SET- TINGS] screen. How do I adjust the display? 11-7
146 INV Select the Heading key on the [NAVIGA- TION SETTINGS] screen. The [HEADING] screen will be displayed. INV Select the Heading Up key or the North Up key. The map is displayed as follows: Display with North up INV1417 Heading Up : The map shows the current forward direction up. North Up : The map shows North up How do I adjust the display?
147 SCROLLING THE MAP You can manually scroll the map to check the location of your choice. INV1418 Display with the forward direction up When the key is selected, the amber indicator light will light up. When the MAP button is pressed after the display setting, the [CURRENT LOCATION] screen will appear. When the PREV button is pressed, the previous screen will reappear. INV Operating the joystick. The map scrolls in the same direction as the joystick movement. While the vehicle is traveling, a single operation will move within the displayed area of the screen. 2. Press the MAP button to go back and show the current vehicle position. You can also select the PREV button to go back. How do I adjust the display? 11-9
148 DISPLAYING THE COMPLETE ROUTE TO THE DESTINATION You can request to display the complete suggested route to the destination. 1. Press the ROUTE button. Keys will be displayed on the screen. INV Select the Route Info key. INV How do I adjust the display?
149 DISPLAYING TURN LIST You can display the list of guide points to the destination during or after route calculation. 1. Press the ROUTE button. INV1988 INV Select the Complete Route key. The complete suggested route to the destination will be displayed. How do I adjust the display? 11-11
150 INV1987 INV1990 INV Select the Route Info key. 3. Select the Turn List key. A list of destinations, waypoints and guide points will be displayed. Guidance will be made at each guide point which direction to turn. The distance between the guide points and the travel time will also be displayed. It may take time to prepare the turn list. In such cases, the Turn List key will be highlighted and you cannot select it until calculation is completed. In the turn list, turning points more than 60 miles (100 km) away from the current vehicle location will not be displayed How do I adjust the display?
151 REQUESTING THE SIMULATION DRIVE TO THE DESTINATION When calculated routes include a freeway, information about freeway entrances and exits will also be displayed. You can simulate driving the entire suggested route to the destination on the screen. 1. Press the ROUTE button. Keys will be displayed on the screen. 2. Select the Route Info key. INV1987 How do I adjust the display? 11-13
152 the suggested route to the destination in the route simulation. CANCEL SIMULATION 1. Press the ROUTE button during simulation. INV1992 INV Select the Route Simulation key. The screen will display a simulated drive with voice guidance on the suggested route to the destination. 4. When the DEST button is pressed, or the vehicle starts to run, the route simulation will be canceled. Route simulation is not available for dark green roads on your route. Therefore, if the start point is on a dark green road, the vehicle icon will jump from the start point to the suggested road when starting the route simulation. Also, if the destination is on a dark green road, the vehicle icon will jump from the end point of How do I adjust the display?
153 DISPLAYING THE TRACK You can have the system track the road you have taken, and display it with tracking marks (O). 1. Press the SETTING button. INV1994 INV1995 Select the Route Info key. 2. The [ROUTE INFO.] screen will be displayed. Select the Cancel Simulation key. When the DEST button is pressed, or the vehicle starts to run, the route simulation will be canceled. If you select the Pause key, simulation is paused. If you select the key again, the simulation will restart. How do I adjust the display? 11-15
154 2. Select the Navigation key on the [SET- TINGS] screen. INV1781 INV1996 INV Select the Tracking On/Off key. 4. Select the On key How do I adjust the display?
155 GPS INFORMATION DISPLAY The following GPS information will be displayed on the screen: latitude, longitude, altitude, signal reception, and satellite locations. 1. Press the SETTING button. INV Press the MAP button. The location of the vehicle will be displayed. INV Select the Navigation key on the [SET- TINGS] screen. You can select the On key to display the tracking marks (O), and the Off key to get rid of them. The tracking marks (O) may be spaced differently, according to the scale of the map. If you reset the current vehicle location, the tracking marks (O) will be cleared. How do I adjust the display? 11-17
156 UPDATING THE CURRENT VEHICLE LOCATION AND THE DIRECTION If the vehicle icon does not indicate the correct location or the direction does not match the actual road, you can adjust them on the map screen. 1. Press the SETTING button. 3. Select the GPS Information key. GPS information will be displayed. INV1999 INV1721 The satellite with the stronger signal will be indicated in green. The display will read, [3-dimensional positioning], [2-dimensional positioning], or [positioning not possible], depending on the signal strength. (Elevation will not be displayed in 2-dimensional positioning.) When the MAP button is pressed, the [CURRENT LOCATION] screen will appear. When the PREV button is pressed, the [NAVIGATION SETTINGS] screen will appear How do I adjust the display?
157 2. Select the Navigation key on the [SET- TINGS] screen. INV1781 INV2000 INV Select the Adjust Current Location key on the [NAVIGATION SETTINGS] screen. 4. Align the correct location to the cross point on the map using the joystick, and select the Set key. The current location will be corrected, and the direction adjustment screen will appear. How do I adjust the display? 11-19
158 SETTING THE DISPLAY MODE You can alter the display mode. ADJUSTING THE DISPLAY BRIGHT- NESS You can choose the best brightness for the display. 1. Press the SETTING button. 5. Adjust the direction using the INV2002 and keys. The arrow on the display shows the direction of the vehicle icon. 6. Select the Set key How do I adjust the display? INV1437 It is not possible to update the vehicle location when the vehicle is moving. Depending on the driving conditions, the vehicle icon may not exactly correspond to the actual location of the vehicle. To verify position, refer to map books or check actual landmarks. If you notice that the system is displaying a different road from the one the vehicle is actually traveling, and the vehicle icon does not go back to the right road after traveling approximately 6-1/4 miles (10 km), update the vehicle location.
159 2. Select the Display key. The [DISPLAY SETTINGS] screen will be displayed. INV2009 INV2010 INV Select the Brightness/Contrast/Map Background key. 4. Select the Brightness key. When the joystick is tilted to the right, the screen will brighten, and darken when tilted to the left. The screen displayed before pressing the SETTING button will be displayed as a sample screen on the [DISPLAY SETTINGS] screen. How do I adjust the display? 11-21
160 ADJUSTING THE DISPLAY CON- TRAST You can choose the best contrast for the display. 1. Press the SETTING button. INV Select the Display key. The [DISPLAY SETTINGS] screen will be displayed. 3. Select the INV2010 Brightness/Contrast/Map Background key How do I adjust the display?
161 4. Select the Contrast key. When the joystick is tilted to the right, contrast of the screen will be higher, and will be lower when tilted to the left. SWITCHING THE DISPLAY COLOR 1. Press the SETTING button. INV2012 INV2009 INV Select the Display key. The [DISPLAY SETTINGS] screen will be displayed. 3. Select the Brightness/Contrast/Map Background key. How do I adjust the display? 11-23
162 HOW TO HANDLE THE DISPLAY INV Select the Map Background key. The display brightness will be altered. The display uses liquid crystal and should be handled with care. WARNING Never disassemble the display. It has some areas with extreme high voltage. Touching it may result in serious personal injury. CHARACTERISTICS OF LIQUID CRYSTAL DISPLAY If the temperature inside the vehicle is especially low, the display will stay relatively dim or the movement of the images may be slow. These conditions are normal; when the temperature rises, the display will function normally. You may notice darker or brighter dots in parts of the display; this is inherent in monitor displays and is not a malfunction. You may also notice a remnant of the previous display image on the screen. This afterimage is inherent in displays and is not abnormal. The screen may become distorted by strong magnetic fields. MAINTENANCE OF THE DISPLAY CAUTION To clean the display, never use a rough cloth, alcohol, benzine, thinner, any kind of solvent, or paper towel with chemical cleaning agent. They will scratch or deteriorate the panel. Do not splash any liquid such as water or car fragrance on the display. Contact with liquid will cause the system to malfunction. If you need to clean the display screen, use a dry soft cloth. If additional cleaning is necessary, use a small amount of neutral detergent with a soft cloth. Never soak the exterior with water or detergent How do I adjust the display?
163 12 Information on map data discs How to order map data DVD-ROM updates How to handle the DVD-ROM About the navigation map DVD-ROM Icons Abbreviations definition list
164 HOW TO ORDER MAP DATA DVD- ROM UPDATES To order updated mapping DVD-ROMs or additional DVD-ROMs, please contact the INFINITI Navigation System help desk at: ADDRESS: P.O. Box 2082, Burlingame, CA WEB SITE: PHONE: HOURS: 6:00 AM to 5:00 PM (Pacific Time) HOW TO HANDLE THE DVD-ROM SIH0082 CAUTION Handle a DVD-ROM by its edges. Never touch the surface of the disc. To clean a disc, wipe the surface from the center to the outer edge using a clean, soft cloth. Do not wipe the disc using a circular motion. Do not use a conventional record cleaner, benzine, thinner or alcohol intended for industrial use. A new disc may be rough on its inner and outer edges. Remove the rough edges using the side of a pen or pencil as illustrated. Never attempt to use a DVD-ROM that has been cracked, deformed, or repaired using adhesive. Doing so may cause damage to the equipment. Handle the DVD-ROM carefully to avoid contamination or flaws. Otherwise, signals may not be read properly. Do not write, draw or attach anything on any side of the DVD-ROM. Do not store the DVD-ROM in locations exposed to direct sunlight or in high temperatures or humidity. Always place the discs in the storage case when they are not being used. Do not put on any sticker or write anything on either surface of the DVD-ROM Information on map data discs
165 ABOUT THE NAVIGATION MAP DVD-ROM 1. This navigation map DVD-ROM has been prepared by ZENRIN CO., LTD. under license from Navigation Technologies Corporation. ZENRIN CO., LTD. has added, processed and digitized data based on the digital road map data of Navigation Technologies Corporation. Due to the production timing of the map data, some new roads may not be included in this map data or some of the names or roads may be different from those at the time you use this DVD-ROM. 2. Traffic control and regulation data used in this DVD-ROM may be different from those at the time you use this DVD-ROM due to the data production timing. When driving your vehicle, follow the actual traffic control signs and notices on the roads. 3. Reproducing or copying this map software is strictly prohibited by law. Published by NISSAN North America, Inc Navigation Technologies. All rights reserved. Certain business data provided by infousa.com, Inc. Copyright 2002, All rights reserved. ICONS Icon legend follows: Information on map data discs 12-3
166 12-4 Information on map data discs INI0094
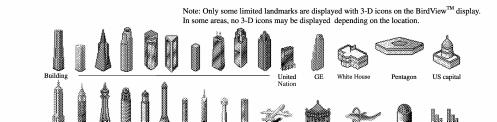
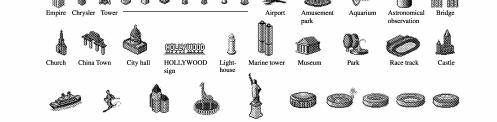
167 INV1183 Information on map data discs 12-5
FOREWORD REVIEW COPY 2004 Quest Navigation System OM USA_English
 FOREWORD Thank you for purchasing a NISSAN automobile. This user s manual is for the navigation system only. Please read this manual carefully to ensure safe operation of the navigation system. This manual
Thank you for purchasing an INFINITI automobile. This user s manual is for the navigation system only. This manual contains operating instructions
 Thank you for purchasing an INFINITI automobile. This user s manual is for the navigation system only. This manual contains operating instructions for the INFINITI Navigation System offered in the INFINITI
FOREWORD. Thank you for purchasing an INFINITI automobile.
 FOREWORD Thank you for purchasing an INFINITI automobile. This user s manual is for the navigation system only. This manual contains operating instructions for the INFINITI Navigation System offered in
Thank you for purchasing an INFINITI automobile. This user s manual is for the navigation system only. This manual contains operating instructions
 Thank you for purchasing an INFINITI automobile. This user s manual is for the navigation system only. This manual contains operating instructions for the INFINITI Navigation System offered in the INFINITI
Table of. Contents Getting started 2. Introduction 1. Map settings 3. Setting a destination 4. Route guidance 5. Storing a location/route 6
 FOREWORD Thank you for purchasing a NISSAN vehicle. This user s manual is for the navigation system only. This manual contains operating instructions for the NISSAN Navigation System offered in your NISSAN
Table of. Introduction 1. Map settings 3. Setting a destination 4. Route guidance 5. Storing a location/route 6. Viewing technical information 7
 Table of Introduction 1 Contents Getting started 2 Map settings 3 Setting a destination 4 Route guidance 5 Storing a location/route 6 Viewing technical information 7 Other settings 8 Voice recognition
INFINITI CONSUMER AFFAIRS DE- PARTMENT
 INFINITI NAVIGATION SYSTEM HELPDESK CONTACT INFORMATION For assistance or inquiries about the INFINITI Navigation System contact the INFINITI NAVIGATION SYSTEM HELPDESK at:. ADDRESS: P.O. Box 1588 Orem,
3 Map settings. 4 Setting destination. Destination screen Delete destination Route guidance
 INFINITI NAVIGATION SYSTEM HELPDESK CONTACT INFORMATION For assistance or inquiries about the INFINITI Navigation System, or to order updated map data, contact the INFINITI NAVIGATION SYSTEM HELPDESK at:.
2005 Buick Rendezvous Navigation System M
 2005 Buick Rendezvous Navigation System M Overview... 1-1 Overview... 1-2 Features and Controls... 2-1 Features and Controls... 2-2 Navigation Audio System... 3-1 Navigation Audio System... 3-2 Index...1
NISSAN CONSUMER AFFAIRS DE- PARTMENT
 NISSAN NAVIGATION SYSTEM HELP- DESK CONTACT INFORMATION For assistance or inquiries about the NISSAN Navigation System, or to order updated mapping DVD-ROMs or additional DVD-ROMs, contact the NISSAN NAVIGATION
2015 NAVIGATION SYSTEM OWNER S MANUAL. For your safety, read carefully and keep in this vehicle.
 2015 NAVIGATION SYSTEM OWNER S MANUAL For your safety, read carefully and keep in this vehicle. NISSAN NAVIGATION SYSTEM HELP- DESK CONTACT INFORMATION For assistance or inquiries about the NISSAN Navigation
Navigation System... 1 Radio Frequently Asked Questions Troubleshooting MAIN TABLE OF CONTENTS
 Navigation System... 1 Radio... 41 Frequently Asked Questions... 53 Troubleshooting... 56 MAIN TABLE OF CONTENTS i NAVIGATION SYSTEM TABLE OF CONTENTS Safety Guidelines... 1 System Introduction... 3 System
Precautions Very important information. Please read this section carefully before using this product.
 Precautions Very important information. Please read this section carefully before using this product. This product is intended to provide turn-by-turn instructions to safely guide you to your desired destination.
Odyssey Quick Start Guide. Version:
 Odyssey Quick Start Guide Version: 2009.3 2 Odyssey Quick Start Guide Copyright About Version: 2009.3 Doc. Date: 20 February 2009 Copyright Copyright 2006-2009. All rights reserved. No part of this publication
Before Using the Navigation System
 Before Using the Navigation System WARNING Read this manual first Read this manual carefully before using the navigation system. We are not liable for accidents or other problems resulting from failure
2006 HUMMER H3 Navigation System M
 2006 HUMMER H3 Navigation System M Overview... 1-1 Overview... 1-2 Features and Controls... 2-1 Features and Controls... 2-2 Navigation Audio System... 3-1 Navigation Audio System... 3-2 Index... 1 GENERAL
2007 HUMMER H3 Navigation System M
 2007 HUMMER H3 Navigation System M Overview... 3 Overview... 4 Features and Controls... 15 Features and Controls... 16 Navigation Audio System... 57 Navigation Audio System... 58 Index... 69 1 GENERAL
TomTom Navigation app for iphone/ipad Reference Guide
 TomTom Navigation app for iphone/ipad Reference Guide Contents Getting Started 6 Start TomTom Navigation app for iphone/ipad... 6 Updating your TomTom Navigation app for iphone/ipad... 6 GPS reception...
User guide. DRIVE 10s Sygic, a.s. All rights reserved.
 User guide DRIVE 10s 2014 Sygic, a.s. All rights reserved. ... 1 I. Getting Started... 1 The Navigation Screen... 1 Entering an Address... 2 Turn by Turn Navigation... 6 Acquiring GPS Position... 7 II.
Navigation Overview ! WARNING: SAFETY INFORMATION
 Navigation Overview Navigation System SAFETY INFORMATION Do not use the system until you have familiarised yourself with its operation. The requirements of the Road Traffic Regulations (RTR) apply. Observation
Odyssey Mobile User's Guides. Version: 3.0
 Odyssey Mobile User's Guides Version: 3.0 Last Update: 22-June-2006 2 Odyssey Mobile User s Guide Copyright About Odyssey Mobile Version: 3.0 Documentation Date: 22-June-2006 Copyright Copyright 2005-2006.
AVIC-F220. English. Operation Manual HIDE-AWAY NAVIGATION SYSTEM
 Operation Manual HIDE-AWAY NAVIGATION SYSTEM AVIC-F220 Be sure to read Important Information for the User first! Important Information for the User includes the important information that you must understand
User Manual JRV9000. Navigation software for the JRV9000. English April 2016, ver. 1.0
 User Manual JRV9000 Navigation software for the JRV9000 English April 2016, ver. 1.0 Table of contents 1 Getting started... 5 1.1 Initial set-up... 5 1.2 Screen controls... 6 1.2.1 Using the buttons and
NVX226 Navigation System. User s Manual
 NVX226 Navigation System User s Manual 1287693 Contents Getting started-------------------------------------------------------------------------------------- 1 Charging the battery -------------------------------------------------------------------------------
Warnings and Safety information
 Thank you for choosing the GPS Navigation Software. This software uses GPS satellites for route navigation and creation. The user guide for In-car navigation should be read thoroughly and kept as reference
Owner s manual NX405. English. Clarion NX405 English 1
 Owner s manual NX405 English Clarion NX405 English 1 Thank you for choosing the Clarion NX405 as your navigator. Start using Clarion NX405 right away. This document is the detailed description of the navigation
2009 Navigation System
 Customer Experience Center 1-800-331-4331 009 Navigation System Quick Reference Guide MN 00505-NAV09-COR Printed in USA 1/07 TABLE OF CONTENTS LIMITATIONS OF THIS QUICK REFERENCE GUIDE 1 BASIC OPERATION
Getting started. Mounting your navigation device. 1. Push the EasyPort Mount on your TomTom START against the windshield in your car.
 TomTom START 1. Getting started Getting started Mounting your navigation device 1. Push the EasyPort Mount on your TomTom START against the windshield in your car. 1 2. Adjust the angle of your device.
2007 Chevrolet Equinox and Pontiac Torrent Navigation System M
 2007 Chevrolet Equinox and Pontiac Torrent Navigation System M Overview... 3 Overview... 4 Features and Controls... 15 Features and Controls... 16 Navigation Audio System... 55 Navigation Audio System...
Navigation Software User Guide
 Navigation Software User Guide 1 Contents INSTALLATION... 3 IN-VEHICLE INSTALLATION... 3 FITTING THE DEVICE MOUNT... 3 SELECTING A NAVIGATION MODE... 4 Easy Navigation Mode. 5 FULL NAVIGATION MODE... 9
Version 9 User Guide for. Developed for Omnitracs
 Version 9 User Guide for Developed for Omnitracs Table of Contents Welcome to CoPilot Truck 4 Driving Screen 4 Driving Menu 5 GO TO MENU: Single Destination Navigation 6 Address 6 My Places 7 Points of
2005 Mid-Size Truck Navigation System M
 2005 Mid-Size Truck Navigation System M Overview... 1-1 Overview... 1-2 Features and Controls... 2-1 Features and Controls... 2-2 Navigation Audio System... 3-1 Navigation Audio System... 3-2 Index...
2007 GMC Acadia Navigation System M
 2007 GMC Acadia Navigation System M Overview... 3 Overview... 4 Features and Controls... 15 Features and Controls... 16 Navigation Audio System... 57 Navigation Audio System... 58 Voice Recognition...
User Manual Alpine Navigation
 User Manual Alpine Navigation Navigation software for the Alpine INE-W960/INE-W960S/INE-NAV-60 US English January 2015, ver. 1.0 Thank you for choosing the Alpine unit as your navigator. Start using your
2015 Mazda Motor Corporation Apr (Print1)
") 2015 Mazda Motor Corporation Apr. 2015 (Print1) Table of contents 1 Warnings and Safety information...4 2 Getting started...6 2.1 Before using the navigation system... 6 2.2 Navigation menu... 8 2.3 Buttons
2015 Mazda Motor Corporation Apr. 2015 (Print1) Table of contents 1 Warnings and Safety information...4 2 Getting started...6 2.1 Before using the navigation system... 6 2.2 Navigation menu... 8 2.3 Buttons
SUBARU STARLINK. Quick Reference Guide. your subaru connected. Love. It s what makes a Subaru, a Subaru.
 SUBARU STARLINK your subaru connected Quick Reference Guide 2017 Love. It s what makes a Subaru, a Subaru. Table of Contents 2 Controls 3 Bluetooth Basics 4 8 Hands-free Calling SUBARU STARLINK 6.2" Multimedia
2005 GMC Yukon/Yukon XL, Yukon Denali/Yukon Denali XL Navigation System M
 2005 GMC Yukon/Yukon XL, Yukon Denali/Yukon Denali XL Navigation System M Overview... 1-1 Overview... 1-2 Features and Controls... 2-1 Features and Controls... 2-2 Navigation Audio System... 3-1 Navigation
2014 Tribeca Navigation System. Owner s Manual
 2014 Tribeca Navigation System Owner s Manual This supplement contains a detailed description of the Navigation System and instructions for proper operation. Please read this supplement carefully before
v Sygic, a.s. All rights reserverd. User guide
 v3 2011 Sygic, a.s. All rights reserverd. User guide I. Getting Started... 1 The Navigation Screen... 1 Entering an Address... 2 Turn by Turn Navigation... 5 Acquiring GPS Position... 6 II. Navigation
1. Select your preferred language, then tap to confirm your selection. Later you can change it in Regional settings.
 Initial set-up 1. Select your preferred language, then tap to confirm your selection. Later you can change it in Regional settings. 2. Read the End User Licence Agreement, and tap if you agree with the
User Manual Clarion Mobile Map Navigation software for Clarion NP509 (System Mode) NP509
 NP509") User Manual Clarion Mobile Map Navigation software for Clarion NP509 (System Mode) NP509 Copyright note The product and the information contained herein is subject to change without prior notification.
User Manual Clarion Mobile Map Navigation software for Clarion NP509 (System Mode) NP509 Copyright note The product and the information contained herein is subject to change without prior notification.
2007 Buick Rendezvous Navigation System M
 2007 Buick Rendezvous Navigation System M Overview... 3 Overview... 4 Features and Controls... 15 Features and Controls... 16 Navigation Audio System... 59 Navigation Audio System... 60 Index... 73 1 GENERAL
PRIME/ESSENTIAL NAVIGATION QUICK START GUIDE
 PRIME/ESSENTIAL NAVIGATION QUICK START GUIDE EN Initial set-up 1. Select your preferred language, then tap to confirm your selection. Later you can change it in Regional settings. 2. Read the End User
NAVIGATION USER MANUAL
 NAVIGATION USER MANUAL POWERED by Welcome Dear Customer, Thank you for selecting NDrive as your navigation software. This guide is created so that you can find quick and simple answers to your questions,
Quick Start Guide Ford Mustang
 Multimedia Navigation System Quick Start Guide Ford Mustang *FOR MODELS WITH FORD SYNC ONLY Navigation Bluetooth Hands-Free (For use with Sync) ipod and MP3 compatible (For use with Sync) Back-up camera
2016 Mazda Motor Corporation Jan (Print5)
") 2016 Mazda Motor Corporation Jan. 2018 (Print5) Table of contents 1 Warnings and Safety information...4 2 Getting started...6 2.1 Before using the navigation system... 6 2.2 Navigation menu... 8 2.3 Buttons
2016 Mazda Motor Corporation Jan. 2018 (Print5) Table of contents 1 Warnings and Safety information...4 2 Getting started...6 2.1 Before using the navigation system... 6 2.2 Navigation menu... 8 2.3 Buttons
GPS NAVIGATION SYSTEM DNX7540BT
 GPS NAVIGATION SYSTEM DNX7540BT GPS NAVIGATION INSTRUCTION MANUAL ІНСТРУКЦІЯ З КОРИСТУВАННЯ GPS-НАВІГАТОРОМ РУКОВОДСТВО ПО ЭКСПЛУАТАЦИИ НАВИГАЦИОННОЙ СИСТЕМЫ GPS B64-4525-00 Contents Safety Precautions
Table of contents. 1 Warnings and Safety information...4
 Table of contents 1 Warnings and Safety information...4 2 Getting started...5 2.1 Before using the navigation system... 5 2.2 Navigation menu... 7 2.3 Buttons and other controls on the screen... 9 2.3.1
Honda Toyota Accord Venza Quick Start Guide
 Multimedia Navigation System Honda Pilot Quick Start Guide In-Dash Multi-Media / Navigation System Honda Toyota Accord Venza Quick Start Guide G System Features: Navigation Bluetooth Hands-Free ipod and
agellan RoadMate User Manual
 agellan RoadMate User Manual www.carid.com Magellan RoadMate GPS Receiver The Magellan RoadMate receiver is a vehicle navigation product that utilizes GPS signals from satellites to calculate your precise
SatGuide Symbian User Manual. SatGuide Symbian OS USER MANUAL
 SatGuide Symbian User Manual SatGuide Symbian OS USER MANUAL CONTENTS 1 - INTRODUCTION...1 WHAT IS SATGUIDE?...1 SATGUIDE FEATURES...1 2 - SMART PRACTICES WHILE DRIVING...2 DRIVE SAFE, CALL SMART SM...2
2006 Mid-Size Truck Navigation System M
 2006 Mid-Size Truck Navigation System M Overview... 1-1 Overview... 1-2 Features and Controls... 2-1 Features and Controls... 2-2 Navigation Audio System... 3-1 Navigation Audio System... 3-2 Index...
Tap this button on your iphone to start the TomTom app.
 TomTom app 1. Getting started Getting started Tap this button on your iphone to start the TomTom app. The language used for buttons and menus in the TomTom app is the same as the language you selected
2009 Mid-Size Truck Navigation System M
 2009 Mid-Size Truck Navigation System M Overview... 1-1 Overview... 1-2 Features and Controls... 2-1 Features and Controls... 2-2 Navigation Audio System... 3-1 Navigation Audio System... 3-2 Index...
2007 Cadillac SRX Navigation System M
 2007 Cadillac SRX Navigation System M Overview... 3 Overview... 4 Features and Controls... 15 Features and Controls... 16 Navigation Audio System... 57 Navigation Audio System... 58 Voice Recognition...
Learn how to enter a destination and operate the navigation system.
 NAVIGATION Learn how to enter a destination and operate the navigation system. Basic Navigation Operation A real-time navigation system uses GPS and a map database to show your current location and help
Foreword. *: indicates the equipment that differs depending on the model, the grade or the options.
 MMC_MMCS.book Page 1 Wednesday, December 26, 2007 2:01 PM Foreword Thank you for selecting a MITSUBISHI MOTORS product. This owner s manual will add to your understanding and full enjoyment of the many
TomTom Nav Compatible with Sony XAV/XNV-KIT Reference Guide
 TomTom Nav Compatible with Sony XAV/XNV-KIT Reference Guide Contents Getting started 4 Start TomTom Nav Compatible with Sony XAV/XNV-KIT... 4 GPS reception... 4 Planning a route 5 Planning a route... 5
Owner s manual NZ503
 Owner s manual NZ503 US English Thank you for choosing the Clarion NZ503 as your navigator. Start using Clarion NZ503 right away. This document is the detailed description of the navigation software. You
User Manual. Alpine Navigation System. Navigation software for the Alpine Navigation System. English March 2015, ver. 1.0
 User Manual Alpine Navigation System Navigation software for the Alpine Navigation System English March 2015, ver. 1.0 Table of contents 1 Warnings and safety information... 5 2 Getting started... 6 2.1
1. Preface. Safety Precautions. English CAUTION. Warnings
 Owner s manual (Navigation) Mode d emploi (Navigation) Benutzerhandbuch (Navigation) Manuale dell utente (Navigazione) Gebruikershandleiding (Navigatie) Guía de usuario (Navegación) Ägarhandbok (Navigation)
Magellan RoadMate 9250T-LMB. User Manual.
 Magellan RoadMate 9250T-LMB User Manual www.carid.com Magellan RoadMate GPS Receiver The Magellan RoadMate receiver is a vehicle navigation product that utilizes GPS signals from satellites to calculate
2007 Chevrolet Avalanche, Tahoe, Suburban and GMC Yukon, Yukon XL, Yukon Denali, Yukon XL Denali Navigation Manual M
 2007 Chevrolet Avalanche, Tahoe, Suburban and GMC Yukon, Yukon XL, Yukon Denali, Yukon XL Denali Navigation Manual M Overview... 3 Overview... 4 Features and Controls... 15 Features and Controls... 16
Turn-by-Turn Mapping GPS and MP3 Player Quick Start Guide
 Pub. 988-0148-532 Turn-by-Turn Mapping GPS and MP3 Player Quick Start Guide Copyright 2005 Lowrance Electronics, Inc. All rights reserved. No part of this manual may be copied, reproduced, republished,
2009 Chevrolet Corvette Navigation System M
 2009 Chevrolet Corvette Navigation System M Overview... 1-1 Overview... 1-2 Features and Controls... 2-1 Features and Controls... 2-2 Navigation Audio System... 3-1 Navigation Audio System... 3-2 Voice
2007 Chevrolet Silverado and GMC Sierra and Sierra Denali Navigation System M
 2007 Chevrolet Silverado and GMC Sierra and Sierra Denali Navigation System M Overview... 3 Overview... 4 Features and Controls... 15 Features and Controls... 16 Navigation Audio System... 57 Navigation
User s Guide. Your Navigator Deluxe v2.0. BlackBerry platform for mobile phones. GPS Navigation Suite for U.S. Cellular
 Your Navigator Deluxe v2.0 GPS Navigation Suite for U.S. Cellular BlackBerry platform for mobile phones To see whether your device is supposed, visit: http://www.telenav.com/products/tn/devices/uscc.html
USER MANUAL. icn 700. series. with SmartS English - Australia/Canada/United States
 USER MANUAL NavPix Navigate to pictures icn 700 series with SmartS 2006 en English - Australia/Canada/United States icn 700 series User Manual English Australia / Canada / United States 2006 Brunswick
User Guide. SmartTruckRoute Android Navigation App for Truck Drivers. Introduction: Installation - Activation
 User Guide SmartTruckRoute Android Navigation App for Truck Drivers Introduction: Installation - Activation Download SmartTruckRoute from Google Play. Use the app free of charge from 1-2 PM and 1-2 AM
User Manual Xite Navigation and Xite LV (Large Vehicle) Navigation
 Navigation") User Manual Xite Navigation and Xite LV (Large Vehicle) Navigation Navigation Software for the XSG2NA Infotainment System US English This manual contains detailed instruction on the operation of the new
User Manual Xite Navigation and Xite LV (Large Vehicle) Navigation Navigation Software for the XSG2NA Infotainment System US English This manual contains detailed instruction on the operation of the new
Navigation system basics
 2014 Navigation system basics Paul Pearson Bowling Green Revision 3.0 Index Contents 1. Introduction...3 2. Overview...4 3. Navigation overview...4 4. Destination Entry....6 5. Points of Interest (POI
Welcome! Presented by Paul Pearson National Corvette Museum, August 28, 2014
 Welcome! Presented by Paul Pearson National Corvette Museum, August 28, 2014 Linking IP to Driver Mode Selector If your car IP gauges don t change when you turn the driver mode selector, you just need
Table of contents. Main Map Screen... 2 Basic Commands... 5 Exploring menu screens... 5 Using keyboards... 5 Performing a search...
 Table of contents Welcome!... 2 Main Map Screen... 2 Basic Commands... 5 Exploring menu screens... 5 Using keyboards... 5 Performing a search... 7 Go screen... 7 How to Navigate... 8 Navigate to an address...
Learn how to enter a destination and operate the navigation system.
 NAVIGATION* Learn how to enter a destination and operate the navigation system. Basic Navigation Operation A real-time navigation system uses GPS and a map database to show your current location and help
A Charging LED B Touchscreen C On/Off button D Speaker E External antenna connector F USB connector G RDS-TMC connector H Memory card slot
 TomTom ONE XL 1. What s in the box What s in the box a Your TomTom ONE XL A B C D E F G H A Charging LED B Touchscreen C On/Off button D Speaker E External antenna connector F USB connector G RDS-TMC connector
R300. Quick Start Guide 15G06A E3403
 R300 E3403 Quick Start Guide 15G06A348000 Layout Features 1 2 6 5 3 4 7 8 9 10 11 12 1 External Antenna port Connects to an external antenna for better signal performance (the external antenna is optional)
PRIME/ESSENTIAL NAVIGATION USER MANUAL
 PRIME/ESSENTIAL NAVIGATION USER MANUAL EN Table of contents 1 Warnings and safety information... 5 2 Getting started... 6 2.1 Initial set-up... 6 2.2 Screen controls... 7 2.2.1 Using the buttons and other
Learn how to enter a destination and operate the navigation system. Steering Wheel Controls Use the steering wheel controls to give voice commands.
 NAVIGATION* Learn how to enter a destination and operate the navigation system. Basic Navigation Operation A real-time navigation system uses GPS and a map database to show your current location and help
ENGLISH QUICK START GUIDE NAVIGATION CAMPER & TRUCK EDITION
 V1.1 NAVIGATION QUICK START GUIDE ENGLISH CAMPER & TRUCK EDITION Getting started When using the navigation software for the first time, an initial setup process starts automatically. Do as follows: Select
NAVIGATION* WARNING. Basic Navigation Operation. Learn how to enter a destination and operate the navigation system.
 NAVIGATION* Learn how to enter a destination and operate the navigation system. Basic Navigation Operation A real-time navigation system uses GPS and a map database to show your current location and help
User Manual. XSG2 Infotainment Center. Navigation Software XSG2. English. May 2010, ver G2NAVIMN01
 User Manual XSG2 Infotainment Center Navigation Software XSG2 English May 2010 ver. 1.2 125G2NAVIMN01 1 Copyright note The product and the information contained herein is subject to change without prior
INSTRUCTION MANUAL GPS NAVIGATION SYSTEM KNA-G430 B
 GPS NAVIGATION SYSTEM KNA-G430 INSTRUCTION MANUAL B64-3680-08 WARNING Read this manual carefully before starting to operate the Kenwood Car Navigation System and follow the manual s instructions. Kenwood
Navigation system basics
 2014 Navigation system basics Paul Pearson Bowling Green Index Contents 1. Introduction... 3 2. Overview... 4 3. Navigation overview... 4 4. Destination Entry.... 6 5. Points of Interest (POI s).... 9
1 Warnings and Safety information Getting started with igo Using keyboards Using the map... 12
 GPS Guide Table of contents 1 Warnings and Safety information... 7 2 Getting started with igo8... 8 2.1 Simple and Advanced modes... 10 2.2 Buttons and other controls on the screen... 11 2.2.1 Using keyboards...12
Owner s Manual NALB Form No. NALB-EA-13F ( C-14NAV)
") Owner s Manual 2013 Mazda Motor Corporation Printed in Japan Sep. 2013 (Print2) Table of contents 1 Warnings and Safety information... 6 2 Getting started... 7 2.1 Navigation menu...7 2.2 Buttons and
Owner s Manual 2013 Mazda Motor Corporation Printed in Japan Sep. 2013 (Print2) Table of contents 1 Warnings and Safety information... 6 2 Getting started... 7 2.1 Navigation menu...7 2.2 Buttons and
Sygic Fleet 2D Navigation Manual 1 Last update: 2015/01/20 Sygic
 Sygic Fleet 2D Navigation Manual 1 Last update: 2015/01/20 Sygic Table of Contents Prologue... 1 Getting started... 2 Compatibility... 2 Navigation Screen... 3 Entering an Address... 4 Turn by Turn Navigation...
USER MANUAL. icn 700. series. with SmartS English - Europe/New Zealand
 USER MANUAL NavPix Navigate to pictures icn 700 series with SmartS 2006 en English - Europe/New Zealand icn 700 series User Manual English - Europe / New Zealand 2006 Brunswick New Technologies Asia Pte
Please be aware that all current vehicle navigation systems have certain limitations that may affect their ability to perform properly.
 Introduction Thank you for your purchase of the Navigation System. Please read this manual carefully to ensure proper use. Keep this manual in your vehicle at all times. The Navigation System is one of
Magellan RoadMate. Reference Manual. Instructions for Operating the Magellan RoadMate 300
 Magellan RoadMate Reference Manual Instructions for Operating the Magellan RoadMate 300 *** IMPORTANT SAFETY WARNINGS *** The Magellan RoadMate 300 is a vehicle-navigation aid designed to assist you in
What's in the box 6. What's in the box...6. Read me first 7. Safety 10. Positioning the mount...10 Safety settings Planning a route 11
 TomTom VIA Contents What's in the box 6 What's in the box...6 Read me first 7 Installing in your car...7 Switching on and off...7 Setting up...7 GPS reception...7 About MyTomTom...8 Setting up MyTomTom...8
Owner's manual NX604. Navigation
 Owner's manual NX604 Navigation Thank you for choosing the Clarion NX604 as your navigator. Start using Clarion NX604 right away. This document is the detailed description of the navigation software. You
Play DVDs, Audio CDs, MP3 Discs. Supports steering wheel controls. Customizable backgrounds. Bluetooth Phonebook and favorites
 Multimedia Navigation System Quick Start Guide GM Series Navigation Bluetooth Hands-Free ipod and MP3 compatible Back-up camera ready Play DVDs, Audio CDs, MP3 Discs Supports steering wheel controls Customizable
User s Guide. AT&T Navigator V2.0. GPS Navigation Suite for AT&T : BlackBerry Devices Touch Screen
 AT&T Navigator V2.0 GPS Navigation Suite for AT&T : BlackBerry Devices Touch Screen To see whether your device is supported, visit http://www.wireless.att.com/lbs User s Guide Copyright 2003-2010 TeleNav,
2007 Cadillac STS/STS-V Navigation System M
 2007 Cadillac STS/STS-V Navigation System M Overview... 3 Overview... 4 Features and Controls... 15 Features and Controls... 16 Navigation Audio System... 91 Navigation Audio System... 92 Voice Recognition...
TABLE OF CONTENTS 1 QUICK GUIDE 9 2 BASIC FUNCTION 25 3 NAVIGATION SYSTEM 57 4 PHONE AUDIO/VIDEO SYSTEM VOICE COMMAND SYSTEM 273
 TABLE OF CONTENTS 1 QUICK GUIDE 9 2 BASIC FUNCTION 25 3 NAVIGATION SYSTEM 57 4 PHONE 131 5 AUDIO/VIDEO SYSTEM 193 6 VOICE COMMAND SYSTEM 273 7 INFORMATION 287 8 APPS 309 9 PERIPHERAL MONITORING SYSTEM
Quick Guide Crosstrek Impreza Legacy Outback. Love. It s what makes a Subaru, a Subaru.
 Quick Guide Crosstrek Impreza Legacy Outback 2018 Love. It s what makes a Subaru, a Subaru. Table of Contents 2 Controls 3 Bluetooth Basics 4 7 Hands-free Calling SUBARU STARLINK Pairing Your Cell Phone
Weldon User Manual Weldon Navigation
 Weldon User Manual Weldon Navigation Navigation software version 1.0 March 2013 Thank you for choosing Weldon and V-MUX as your GPS solution. You can start using your Weldon Navigation right away. This
Learn how to enter a destination and operate the navigation system. Steering Wheel Controls Use the steering wheel controls to control the system.
 * Learn how to enter a destination and operate the navigation system. Basic Navigation Operation A real-time navigation system uses GPS and a map database to show your current location and help guide you
2014 Accord Plug-in Hybrid Navigation Online Reference Manual
 Navigation Online Reference Manual The information and specifications included in this publication were in effect at the time of approval for printing. Honda Motor Co., Ltd., reserves the right, however,