CarNavi-Tech AUDI09. Specification & Installation. Vehicles coming with 3G/3G+ MMI
|
|
|
- Alfred Hunter
- 5 years ago
- Views:
Transcription


1 release date : model : QVI-AUD09-V6 / product code : AUD AUDI09 Specification & Installation Vehicles coming with 3G/3G+ MMI SUNE TECHNOLOGY ELECTRONIC CO., LTD No.9, Land 606,Anping Rd., Tainan City Taiwan Tel: Fax: Website Shop Skype : hsin_han99 or sune_tech Your best partner for better driving
2 Contents 1. Before installation 1.1 Main specification 1.2 Features 1.3 System diagram 1.4 Components 1.5 Exterior 2. SETUP 2.1 DIP switch 2.2 Remote control 2.3 Original buttons in car 2.4 OSD implementation 2.5 OSD (on screen display) 2.6 FACTORY mode 2.7 Rear view parking guide line 2.8 Touch calibration 2.9 Remote control button 2.10 DVD, CMMB model selection 3. Installation 3.1 Installation diagram 3.2 Cautions on installation 3.3 Installation 3.4 Using original navigation button 3.5 Connecting CAN cable 4. Troubleshooting
3 1.1 Main specification 1. Input Spec. (MULTI VIDEO INTERFACE) - 1 x Analog R, G, B, C sync - 1 x CVBS(REAR CAMERA) Input. (Rear camera source) - 3 x A/V (NTST & PAL) Input. - 1 x LCD Input (Car system Input) 2. Output Spec. - 2 X CVBS OUTPUT (Video Out for installing Headrest monitor) - 1 x Audio OUTPUT - 1 X LCD OUTPUT(LCD Operation) 3. Power Spec. - Input Power : 10VDC ~ 16VDC - Consumption Power : 6WATT (in maximum level) 4. Mode change - Input Video skip : able to skip each input source via adjusting DIP switch - Control by using the remote control - Able to change a mode to another mode by using the mode switch - Able to change modes and control DVD, DTV via touching the screen - Able to change modes via using the original buttons(navigation) 3
4 1.2 Features DVD, DTV and navigation control via touching screen DVD, DTV control via registering values of the buttons on the remote control (only for models including remote control) Installation from the direction of the command DVD, DTV, navigation control via MMI controller Plug & Play (the LVDS cable offered) Control of position of the DVD, navigation image Screen Display improvement (user convenience-intended interface) Remote control offered Mode change via mode switch Control of rear camera power 4
5 1.3 System diagram NVI Touch Input Navigation Input A/V1 A/V2 CVBS (Rear Camera) DVD DMB A/V3 Remote Control VIDEO CIRCUIT POWER CIRCUIT Power Input (+10VDC~+16VDC) MCU Switch for source toggle DIP S/W LCD In/Out VIDEO MUX TOUCH NAVI A/V OUT MMI Controller HEADREST MONITOR 5

")
")
")
")
")
")
")
 * 1ea")


")
")
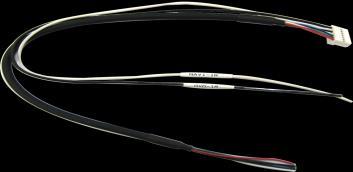
6 1.4 Components IR cable * 1ea (HIRCAB0002) MODE cable * 1ea (HARETC0001) RGB cable * 1ea (HNAVIC0004) TOUCH OUT cable * 1ea (HTOUCH0004) LVDS cable * 1ea (HLVDSC0014) TOUCH IN cable * 1ea (HTOUCH0007) LCD cable * 1ea (HLCDCA0015) POWER cable (24P) * 1ea REAR CAMERA POWER cable * 1ea AV cable * 1ea Remote control * 1ea (HPOWER0011) (HARETC0002) (HAVCAB0002) (REMOTE0001) 6


 5 LVDS OUT 6")


7 1.5 Exterior Dimension Horizontal length 146mm Vertical length 88mm Height 25mm 1 LED 2 POWER/CAN/RGB 3 Rear camera 4 AV(IN/OUT) 5 LVDS OUT 6 TOUCH OUT TO NAVI 7 DIP S/W - SUB BOARD - (47*38*22) 8 8 TO I/F 11 9 TO TOUCH 10 TO MONITOR 11 TO SYS
8 2.1 DIP switch #PIN function DIP S/W selection 1 RGB INPUT skip 2 A/V 1 skip 3 A/V 2 skip 4 A/V 3 skip 5 Monitor Size ON : Skipping RGB Mode OFF : RGB Display ON : Skipping A/V 1 OFF : A/V1 Display ON : Skipping A/V 2 OFF : A/V2 Display ON : Skipping A/V 3 OFF : A/V3 Display 6 N.C 7 Rear Mode 8 ON : 7inch LCD with 800*480 Resolution OFF : 6.5inch LCD with 400*240 Resolution ON : External Rear Camera OFF : OEM Rear Camera ON : DOWN, OFF : UP DIP S/W usage [AUDI ] - Input mode to intend to use : A/V3(DVD), Navigation (RGB) - Rear view camera : installation on CVBS4 - When the original navigation is NOT installed DIP S/W : 1 OFF DIP S/W : 2,3 ON (input mode skip) DIP S/W : 4 OFF (A/V3 available) DIP S/W : 5 OFF DIP S/W : 7 ON (CVBS4 available) 8

9 2.2 Remote control Key POWER & PIP MENU OK Not for use OSD implementation Making a selection Move upward Move downward Function Move leftward, press 2 seconds long-factory mode implementation Move rightward, press 2 seconds long-factory Mode implementation-factory mode Reset 9


10 2.3 Original buttons in car NAVIGATION implementation unavailable so far 1 move upward 2 move downward 3 magnification 4 reduction 5 confirm; press 2seconds long-menu implementation 6 return; press 2seconds long 7 setup for destination; press long 2seconds- driving in night mode 8 mode change 9 move leftward 10 move rightward DVD, CMMB implementation 5 confirm 9 move counterclockwise 10 move clockwise If you press any button among the three buttons, DVD/CMMB OSD menu will appear on the screen. mode change If there is the MODE handle button in car and CAN wire is connected, driver can change modes with the MODE button. Press long : return to main image Press short : mode change 10

 Here is a picture of the mode change menu.")
11 2.4 OSD implementation OSD implementation - DVD To implement DVD OSD menu, installer must install DVD system on AV1 and connect DVD IR cable among navigation cables with remote sensor cable of DVD. OSD implementation - CMMB, NAVI >>> > First of all, if you touch the screen on mode AV1, you can see the menu as shown left. And then if you do NOT touch anything on the screen 5 seconds or more long; or if you touch the screen except the menu, the menu will disappear. At that time, if you choose INPUT, you can get o ut of the menu and see the mode change men u.(left picture) Here is a picture of the mode change menu. If you select the channel which you want, then the channel will be changed to that.(right picture) DVD, DTV, navigation menu is available in English or Chinese. After implementing OSD menu with pushing MENU button on remote control, choose the language that you want to use. As shown above, if you touch the screen on mode AV2, you can see the menu as shown left. And then if you do NOT touch anything on the screen 5 seconds or more long; or if you touch the screen except the menu, the menu will disappear.(left picture) Here is a picture of the mode change menu. If you select the channel which you want, then the channel will be changed to that.(right picture) 11


12 2.5 OSD (on screen display) OSD menu: Press MENU button on the remote control. Analog RGB Video IMAGE - BRIGHTNESS - CONTRAST - SATURATION - HUE - SHARPNESS - USER IMAGE : To choose a option among 4 prepared color shade. Analog RGB Video OSD - LANGUAGE : To change the language displaying on navigation, DVD, CMMB OSD menu (select 1 among English or Chinese) - TRANS : Transparency control of the OSD background - H_POSITION : Horizontal movement of the OSD window - V_POSITION : Vertical movement of the OSD window Analog RGB Video UTIL - FACTORY RESET : To reset all the values about navigation, DVD screen to factory default. (NOT available for reset of the position value of images, only for functions inside OSD menu) 12
, MD7000(WVGA),MYVI(WVGA),PAPAGO(WVGA) -")
13 2.6 Factory mode Factory mode: press button 2 seconds long. IMAGE - H-POSITION : Control over horizontal movement of screen - V-POSITION : Control over vertical movement of the screen - NAVI MODEL : DEFAULT, KD900(WVGA), MD7000(WVGA),MYVI(WVGA),PAPAGO(WVGA) - CAR MODEL : DEFAULT, 2011 A7,8-NEW - AVOUT SELECT : DEFAULT, AV1, AV2, AV3 PARK - PARK ENABLE : Setup of rear view parking guide line - PARK SETUP : Control over position of rear view parking guide line (Refer to page14.) - REAR SELECT : CAN, LAMP - SAFE ENABLE : To select whether to use SAFE function(not to allow watch video while driving) or not UTIL - CALIBRATION : Touch calibration (Refer to page15.) - IR MEMORY : To register value of buttons on the remote controller (Refer to page16~17.) - DVD TYPE : Setup for the type of DVD (Refer to page18.) - CMMB TYPE : Setup for the type of DMB (Refer to page18.) - MMI CONTROL : To enable control DVD and CMMB via UI on screen - FACTORY RESET : To reset all the value in factory mode 13


14 2.7 Rear view parking guide line Factory mode: press button 2 seconds long. 1 Register the value needed on the PARK ENABLE as ON in the PARK section as shown left. (default ON) 2 If you get rear gear after setup, parking guide line will appear on screen as shown left. Now that you push OK button, you can see H-POS on the left of screen. Then adjust horizontal position of the guide line. 3 After adjusting horizontal position, press OK on the remote controller. Then you can see V-POS on the left of screen. At that time you can adjust vertical position of the guide line. 14

15 2.8 Touch calibration 1 First of all, press button on remote controller 2 seconds long. Then you can access to the FACTORY mode. 2 Register YES when the CALIBRATION option is selected as shown above. >>> 3 Then you can see touch calibration on screen about 2 seconds long as shown above. After the word touch calibration disappear, touch calibration function will implement. (Just touch shape on screen.) If you succeed, you can see success. If not, you will see failure. 15
 with other models besides already registered option-sanyo and NECVOX, you can register value of DTV and DTV s remote control")

16 2.9.1 Remote control button Registering value of remote control buttons? When you want to control DVD and DTV via touch screen (using OSD menu) with other models besides already registered option-sanyo and NECVOX, you can register value of DTV and DTV s remote control which you have. Then you can control DVD and DTV via touch screen. 1 First of all, press button on remote controller 2 seconds long. Then you can access to the FACTORY mode. And go to IR MEMORY, UTIL. There are two options in IR MEMORY as shown above; DTV and DVD. Then you select AV source that you want to set among them. >>> 2 This is a window for register of DVD s remote control button value. At the moment just select a menu that you want to save. (Select DTV in options of IR MEMORY if you want to save values of DTV s remote control. And follow the instruction below.) Instruction> a. Select POWER in OSD menu, then press OK on remote control. (as shown above) b. If the marked area flickers as shown above, press POWER button on the remote control of DVD that you want to use. (continued in the next page) 16


17 2.9.2 Remote control button Instruction> continued c. The values that you registered will appear as green text in the marked area on pressing the button. And the values will be saved automatically. d. Register remain buttons value in OSD menu like the above-mentioned. >>> 3 After register, select INPUT in OSD menu and press OK. Then you can see confirmation window as shown above. At the moment, if you choose YES, all the values that you entered will be saved. If you select NO, the values won t be saved. (If data is saved, DVD TYPE and DTV TYPE will be changed to USER automatically.) If you see SUCCESS on screen, the data is saved clearly and you can control DVD via touch screen. BUT, you MUST change the option in DVD(DTV)/UTIL/FACTORY to USER. (Refer to page18.) 17
 DVD TYPE UTIL DVD/DTV TYPE If DVD/DTV type that you want to use is not NECVOX or SANYO, you have to register values of the remote control that you want to use in the IR MEMORY")
18 2.10 DVD, DTV model selection Factory Default : DVD TYPE NECVOX/SANYO (For Chinese DVD) CMMB TYPE? (For Chinese DTV) DVD TYPE UTIL DVD/DTV TYPE If DVD/DTV type that you want to use is not NECVOX or SANYO, you have to register values of the remote control that you want to use in the IR MEMORY section and set the DVD TYPE / CMMB TYPE to USER. Unless you do this process after saving the data, you can NOT control DVD/CMMB via touch screen. DVD TYPE : NEC/SANYO, DV-108, SANYO-1, SANYO-2, USER CMMB TYPE : PIONEER/PANASONIC, USER If you enter data in IR MEMORY section in FACTORY mode, DVD TYPE / DTV TYPE will automatically be saved to USER. CMMB TYPE 18
19 3.1 Installation diagram navigation AUX-ON (N.C) RGB CAN-L CAN-H IR-AV3 (DTV) IR-AV2 (DVD) IR-AV1 (NAVI) PARKING (SAFE) Touch cable DIP S/W LED X+ Y+ X- Y- TOUCH OUT TO NAVI VIDEO INTERFACE LVDS OUT POWER/CAN/RGB R-CAM A/V(IN/OUT) REAR OPT2 (N.C) MODE : Toggle S/W IR PB12 (N.C) GPIO-ZO : MMI GND ACC Audio R Audio L AV/OUT Video AV AV 3 AV 2 1 REAR C Control Box Offered LCD cable LVDS cable GND REAR (12V OUT) Monitor Original LCD cable TO SYS TO I/F SUB BOARD TO MONITOR TO TOUCH Touch screen Offered Touch In cable 19
20 3.2 Cautions on installation Ignition key should be taken off before starting installation, interface power connection must be the last step in installation. Power cable should be separated when connecting interface. Should be no any electronic devices or magnetic pole around installation place. All steps of installation should be done by well-trained specialist. Dismantling without manufacturer s permission can not be guaranteed, (No permission to break attached label on the board.) Kindly check all parts are in the box, when receiving the product, if anything missing, inform to the supplier or manufacturer. According to our sales policy, any problems caused by user s mistake, careless can not be guaranteed. 20


21 3.3 Installation Separating monitor, connecting LVDS-IN cable and LCD cable Rear view of monitor Rear view of command 1 Here are pictures of the rear view of the disassembled monitor and command. You can see that original LCD cable of monitor is connected to the command in the picture above. 2 Connect the original LCD cable to TO MONITOR of the sub-board after disconnecting it from the command. And connect the LCD cable enclosed in our package to TO SYS of the sub-board. Then connect the opposite end of the cable to the spot that the original LCD cable is connected of command 21


22 3.3 Installation Connecting touch screen cable and navigation touch cable navigation 2 Connect the TOUCH OUT cable enclosed in our package to TOUCH OUT TO NAVI of the interface. Then connect the opposite end of it to the touch cable of navigation system. Plug & Play type for TOUCH OUT cable 1 Connect the TOUCH IN cable enclosed in our package to the connector of touch screen. And connect the opposite end of it to TO TOUCH of the sub-board. 22


23 3.4 Using original navigation button When you use the mode change function via original navigation button, you have to connect 16pin as shown below. - Case of A8 - Find a bunch of cables connecting DVD box from the passenger seat. And connect the white one among the cables with MMI cable of POWER cable enclosed in our package. ** If you handle A8 vehicle, connect the white/blue cable to the orange cable in our power cable as shown top right. 23
, CAN(L) enclosed in our package to the original CAN cable respectively.")
24 3.5 Connecting CAN cable If you connect the CAN cable in models including MODE handle button, you can change modes via MODE button. Find the red connector from the passenger seat. After disassembling it, connect the CAN(H), CAN(L) enclosed in our package to the original CAN cable respectively. PIN No.15 : CAN High PIN No. 5: CAN Low 24
25 4. Troubleshooting Q. I can not switch A/V sources. A. Check IR or Ground cable connection. Check LED lamps in the interface, if it is not on, check power cable. Q. All I got on the screen is black. A. Check second LED lamp of the interface is on, if not, check A/V sources connected are working well. (Second lamp indicates AV sources connected works well.) Check interface connection has been done well. Q. Displayed image color is not proper. (too dim or not suitable color) A. Try to select INITIAL in OSD menu, if it does not work, inform the manufacturer.) Q. Rear camera image does NOT appear. A. Set DIP switch #7 in ON Q. Unwanted A/V mode is displayed. (A/V source switching order : OEM->RGB->AV1->AV2->AV3) A. Check DIP Switch Setting. Q. OEM image is not displayed. A. Check interface s LCD In/Out cable connection. If the status keeps on, inform the manufacturer. Q. Screen only displays white like left picture. A. Check LCD out cable is connected well, if this status keeps, inform the manufacturer. 25
CarNavi-Tech. Your best partner for better driving
 Your best partner for better driving SUNE TECHNOLOGY CO.,LTD No.9,Lane 606,Anping Rd,Tainan City 70849,TAIWAN TEL:+88662292246 FAX:+88662288104 Http://www.sune-tech.com Shop http://www.carnavi-tech.com
CarNavi-Tech BM12 V2.3. Specification & Installation
 BM12 V2.3 Specification & Installation Last updated : 2013.11.22 Model : QVI-BM12-Main-V2.3 IF / Product code : QVI-BM12-1207-003 SUNE TECHNOLOGY ELECTRONIC CO., LTD No.9, Land 606,Anping Rd., Tainan City
Car-solutions.com. Video Interface for BMW (V.1.1) Specification & Installation
 Specification & Installation") Last updated : 2013.01.29 Model : QVI-BM12-Main-V1.0 IF / Product code : QVI-BM12-1112-002 Video Interface for BMW (V.1.1) Specification & Installation Contents 1. Before installation 1.1 Main specification
Last updated : 2013.01.29 Model : QVI-BM12-Main-V1.0 IF / Product code : QVI-BM12-1112-002 Video Interface for BMW (V.1.1) Specification & Installation Contents 1. Before installation 1.1 Main specification
Video Interface for Nissan Juke. Car Solutions. User Manual
 Video Interface for Nissan Juke User Manual 1. Before installation 1.1 Specification 3 1.2 Features 4 1.3 System diagram 5 1.4 Components 6 1.5 Exterior 7 2. User interface 2.1 Dip switch 8 2.2 Keypad
erald Int ons BMW09 Specification & Installation Model: PIP-BM09-N3-V2
 BMW09 erald Int ons Model: PIP-BM09-N3-V2 Specification & Installation -PIP BMW 09 Feature -Clear quality view -NTSC, PAL Auto detection -AV source switching thru genuine button in vehicle. -Convenient
Multimedia interface Input/output spec Input : HDMI*2, Analog RGB*1, A/V*1, CVBS(Rear Camera)*1 CVBS(Front Camera)*1 Output : To LCD*1.
*1 CVBS(Front Camera)*1 Output : To LCD*1.") SUNE TECHNOLOGY CO.,LTD No.9,Lane 606,Anping Rd,Tainan City 70849,TAIWAN TEL:+88662292246 FAX:+88662288104 Http://www.sune-tech.com Shop http://www.carnavi-tech.com SKYPE:sune_tech or hsin_han99 Specification
SUNE TECHNOLOGY CO.,LTD No.9,Lane 606,Anping Rd,Tainan City 70849,TAIWAN TEL:+88662292246 FAX:+88662288104 Http://www.sune-tech.com Shop http://www.carnavi-tech.com SKYPE:sune_tech or hsin_han99 Specification
Car-Solutions.com
 Warning / Caution Warning Caution When installing the main unit, do not remove or alter existing vehicle fasteners, including nuts, bolts, screw, clips, and fittings. Never detach, move or alter existing
Car-Solutions.com
 Specification Car Compatibility : New S-Class(W222), New C-Class(W205) New CLA Class, New GLE Class Components : Interface* 1ea, Sub-board*1ea Multimedia interface Input/output spec Input : HDMI*2, Analog
Car-Solutions.com
 Specification Car Compatibility : 2017 Infinity Q30 Components : Interface* 1ea, Sub-board*1ea Multimedia interface Input/output spec Input : HDMI*2, Analog RGB*1, A/V*1, CVBS(Rear view Camera)*1, CVBS(Front
RGB High-End CONVERTER SPECIFICATION -. MODEL: PIP-RGB-HE-STD-V5 -. PRODUCT CODE : PIP-RG
 RGB High-End CONVERTER SPECIFICATION -. MODEL: PIP-RGB-HE-STD-V5 -. PRODUCT CODE : PIP-RG-0810-861 INDEX -. Precaution..3 -. RGB High-End Feature.. 4 -. Main Spec.... 5 -. System Composition.. 6 -. Outline
Car-Solutions.com
 Specification Compatibility : 2016 Ford Sync3 System FORD EXPLORER, MUSTANG, F150, KUGA, FOCUS Components : Interface* 1pcs, Subboard* 1pcs Interface Input/Output specification Input : Analog RGB*1, A/V*1,
GVIF MODULE SPECIFICATION (Land Rover, Prius, Lexus etc.) -. MODEL: GVIF07 Rev.2 -. P/N :
 -. MODEL: GVIF07 Rev.2 -. P/N :") GVIF MODULE SPECIFICATION (Land Rover, Prius, Lexus etc.) -. MODEL: GVIF07 Rev.2 -. P/N : Index -. Upgraded points on Rev.2 - How to save remote key value - Parking Guide line -. Pre-Caution -. Main Specification
GVIF MODULE SPECIFICATION (Land Rover, Prius, Lexus etc.) -. MODEL: GVIF07 Rev.2 -. P/N : Index -. Upgraded points on Rev.2 - How to save remote key value - Parking Guide line -. Pre-Caution -. Main Specification
Instruction Manual. BMW APIX PAS for BMW
 Instruction Manual BMW APIX PAS for BMW 1 INDEX Specifications 1. Main Spec./Feature--------------------------- 2. Diagram---------------------------------------- 3. Components-----------------------------------
Instruction Manual. MASERATI LEVANTE THC2 for LEVANTE 2017, QUATTROPORTE 2017, GHIBLI 2017
 Instruction Manual MASERATI LEVANTE THC2 for LEVANTE 2017, QUATTROPORTE 2017, GHIBLI 2017 INDEX Specifications 1. Main Spec ------------------------------------3 2. Diagram --------------------------------------4
Instruction Manual. Audi 4G HDMI for AUDI, PORCSHE, Volkswagen
 Instruction Manual Audi 4G HDMI for AUDI, PORCSHE, Volkswagen INDEX Specifications 1. Main Spec. ------------------------------------ 2. Diagram --------------------------------------- 3. Components ----------------------------------
MASERATI PAS-T (VIDEO
 MASERATI PAS-T (VIDEO Interface) (Quattroporte 2009~2013 / GranTurismo 2009~ ) MODEL DATE 2017.03.06 MASERATI PAS-T-161209 Main Spec. 1. Input Spec. (MULTI VIDEO INTERFACE) - 2 x A/V Input (External video
Instruction Manual. PCM4.1_PAS_TD for Porsche panamera
 Instruction Manual PCM4.1_PAS_TD for Porsche panamera 1 INDEX Specifications 1. Main Spec. ---------------------------------- 2. Diagram ------------------------------------- 3. Components --------------------------------
CM PAS-T (VIDEO Interface)
") CM PAS-T (VIDEO Interface) MODEL CM PAS-T 160125 DATE 2016.03.28 Main Spec. 1. Input Spec. (MULTI VIDEO INTERFACE) - 2 x A/V Input (External video source). - 1 x CVBS(REAR CAMERA) Input. (Rear camera source)
CM PAS-T (VIDEO Interface) MODEL CM PAS-T 160125 DATE 2016.03.28 Main Spec. 1. Input Spec. (MULTI VIDEO INTERFACE) - 2 x A/V Input (External video source). - 1 x CVBS(REAR CAMERA) Input. (Rear camera source)
AUDI-09 EXT MMi NTV-KIT187
 3950 NW 120 th Ave, Coral Springs, FL 33065 TEL 561-955-9770 FAX 561-955-9760 www.nav-tv.com info@nav-tv.com AUDI-09 EXT MMi NTV-KIT187 Overview The AUDI-09 EXT MMi Kit allows the user to add up to 3 video
Car-solutions.com
 Warning / Precautions! Do not modify, dismantle or unintended operation this system outside Q-roi After Sales. Damage occurred by unintended operation may Warning cause Q-roi After Sales service void.
BMW APIX PAS (Rear Camera Interface)
") BMW APIX PAS (Rear Camera Interface) MODEL BM-PAS-160525 DATE 2016.07.30 Main Spec. 1. Input Spec. (MULTI VIDEO INTERFACE) - 1 x CVBS(REAR CAMERA) Input. (Rear camera source) - 1 x CVBS(FRONT CAMERA) Input.
BMW APIX PAS (Rear Camera Interface) MODEL BM-PAS-160525 DATE 2016.07.30 Main Spec. 1. Input Spec. (MULTI VIDEO INTERFACE) - 1 x CVBS(REAR CAMERA) Input. (Rear camera source) - 1 x CVBS(FRONT CAMERA) Input.
Car-Solutions.com Instruction Manual BENZ TAC2 for Mercedes Benz
 Instruction Manual BENZ TAC2 for Mercedes Benz 1 INDEX 3 4 5 6 7 9 10 12 13 15 23 25 26 27 2 Specification 1. Main spec. 3 Specification 3. Diagram DIGITAL RGB RGB+Syn REAR CAMERA CAR COMMAND SYSTEM CAN
- Compatible with 8 and 10.2 monitor.
 - Rear-view camera input. - Front-view camera input. - Front-view camera and AV Inputs can still be used even if vehicle is equipped with an OEM rear view camera. - Provides an HMDI Input for Navigation
Video Interface for Audi with MMI 3G System. User Manual. Car-Solutions.com
 Video Interface for Audi with MMI 3G System User Manual Car-Solutions.com 2 Contents 3 Welcome - What' in the box? 4 About Interface - Dimension 5 - External Appearance 6 Connector Pin Assignment 7 8 9
W204-5 NTV-KIT198. Overview
 3950 NW 120 th Ave, Coral Springs, FL 33065 TEL 561-955-9770 FAX 561-955-9760 www.nav-tv.com info@nav-tv.com W204-5 NTV-KIT198 Overview The W204-5 Kit allows the user to add up to 3 video inputs and a
Instruction Manual High-Definition Link for EVO ID5,ID6 With OEM Touch IW-EVO6-N23
 Release Date: 09 0-07 Instruction Manual High-Definition Link for EVO ID5,ID6 With OEM Touch Model Name Latest Firmware Date 09-0 - 3 Manual Version Rev..8 Language English Contents Precautions Car Compatibility
BMW12-DYNAMIC KIT NTV-KIT462
 3950 NW 120 th Ave, Coral Springs, FL 33065 TEL 561-955-9770 FAX 561-955-9760 www.nav-tv.com info@nav-tv.com BMW12-DYNAMIC KIT NTV-KIT462 Overview The BMW12 kit allows the user to add up to 3 video inputs
W DYNAMIC Kit NTV-KIT461
 3950 NW 120 th Ave, Coral Springs, FL 33065 TEL 561-955-9770 FAX 561-955-9760 www.nav-tv.com info@nav-tv.com W204-12 DYNAMIC Kit NTV-KIT461 Overview The W204-12 DYNAMIC kit allows the user to add up to
Instruction Manual High-Definition Link for Volkswagen IW04VW-T
 Instruction Manual High-Definition Link for Volkswagen Model Name IW04VW-T IW04VW-T Latest Firmware Date 2015-12 - 21 Manual Version Rev. 1.1 Language English Release Date: 2016-06 28 Contents Cautions
AUDI DYNAMIC-A3 NTV-KIT702
 3950 NW 120 th Ave, Coral Springs, FL 33065 TEL 561-955-9770 FAX 561-955-9760 www.nav-tv.com info@nav-tv.com AUDI DYNAMIC-A3 NTV-KIT702 Overview The AUDI DYNAMIC-A3 Kit interfaces a backup camera input
Instruction Manual High-Definition Link for EVO ID5,ID6 Without OEM Touch IW-EVO5-N23
 Release Date: 2018 12-12 Instruction Manual High-Definition Link for EVO ID5,ID6 Without OEM Touch IW-EVO5-N23 Model Name IW-EVO5-N23 Latest Firmware Date 2018-12 - 12 Manual Version Rev. 1.6 Language
Instruction Manual High-Definition Link for MIB2 IW-MIB2-N23
 Instruction Manual High-Definition Link for MIB Model Name Latest Firmware Date 08 - - 6 Manual Version Rev.. Language English Release Date: 08-6 Contents Precautions Car Compatibility Chart AUDI Car Compatibility
Instruction Manual High-Definition Link for MIB2 IW-MIB2-N23
 Release Date: 08-6 Instruction Manual High-Definition Link for MIB IW-MIB-N3 Model Name IW-MIB-N3 Latest Firmware Date 08 - - 6 Manual Version Rev.. Language English Contents Precautions Car Compatibility
Instruction Manual High-Definition Link for 2015 Audi A6 FACELIFT IW04A-4G
 Instruction Manual High-Definition Link for 2015 Audi A6 FACELIFT Model Name IW04A-4G IW04A-4G Latest Firmware Date 2016-07 - 26 Manual Version Rev. 1.4 Language English Release Date: 2016-08 - 01 Contents
BMW09N-DYNAMIC Kit NTV-KIT725 Screen Connector
 3950 NW 120 th Ave, Coral Springs, FL 33065 TEL 561-955-9770 FAX 561-955-9760 www.nav-tv.com info@nav-tv.com BMW09N-DYNAMIC Kit NTV-KIT725 Screen Connector Overview The BMW09-N kit interfaces 2 video inputs
BMW / Mini. X SERIES Up X1 Sports Vehicle X5 Sports Activity Vehicle X6 Sports Activity Coupe
 BMW / Mini 1 SERIES 2007-2011 1 Series 3-door hatchback 2007-2013 1 Series 2-door Coupe (1M) 2004-2012 1 Series (5-door) 2008 - Up 1 Series Convertible 3 SERIES 2005-2011 3 Series Sedan 2005-2011 3 Series
Instruction Manual High-Definition Link for VOLVO IW03V-N23
 Instruction Manual High-Definition Link for VOLVO Model Name IW03V-N23 IW03V-N23 Latest Firmware Date 2016-03 - 22 Manual Version Rev. 1.3 Release Date: 2016-06 - 27 Language English Contents Cautions
AUDI DYNAMIC-EXT NTV-KIT701
 3950 NW 120 th Ave, Coral Springs, FL 33065 TEL 561-955-9770 FAX 561-955-9760 www.nav-tv.com info@nav-tv.com AUDI DYNAMIC-EXT NTV-KIT701 Overview The AUDI-DYN EXT Kit interfaces a backup camera (with dynamic
BMW-EVO KIT NTV-KIT804
 3950 NW 120 th Ave, Coral Springs, FL 33065 TEL 561-955-9770 FAX 561-955-9760 www.nav-tv.com info@nav-tv.com BMW-EVO KIT NTV-KIT804 Screen Connector Overview The BMW-EVO kit interfaces 2 video inputs (including
AUDI DYNAMIC-EXT NTV-KIT701
 3950 NW 120 th Ave, Coral Springs, FL 33065 TEL 561-955-9770 FAX 561-955-9760 www.nav-tv.com info@nav-tv.com AUDI DYNAMIC-EXT NTV-KIT701 Overview The AUDI-DYN EXT Kit interfaces a backup camera (with dynamic
Instruction Manual High-Definition Link for Mercedes-Benz IW04M
 Instruction Manual High-Definition Link for Mercedes-Benz Model Name IW04M IW04M-HNRAA Latest Firmware Date 2014-12 - 02 Manual Version Rev. 3.1 Release Date: 2015-05 - 12 Language English Contents Cautions
MY-CUE-Kit NTV-KIT457
 3950 NW 120 th Ave, Coral Springs, FL 33065 TEL 561-955-9770 FAX 561-955-9760 www.nav-tv.com info@nav-tv.com MY-CUE-Kit NTV-KIT457 Overview The MY-CUE Kit allows the user to add up to 3 audio/video inputs
BMW-EVO ID6 NTV-KIT837
 3950 NW 120 th Ave, Coral Springs, FL 33065 TEL 561-955-9770 FAX 561-955-9760 www.nav-tv.com info@nav-tv.com BMW-EVO ID6 NTV-KIT837 Screen Connector Overview The BMW-EVO ID6 kit interfaces 2 video inputs
v.logic Intelligent Solution Interface V4-CCC
 v.logic Intelligent Solution Interface For the E-series BMW and Mini with navigation system or radio and 6.5 or 8.8 monitor with 10pin BMW LVDS connector Product features Plug and play media-controller
BMW12N-DYNAMIC KIT NTV-KIT717
 3950 NW 120 th Ave, Coral Springs, FL 33065 TEL 561-955-9770 FAX 561-955-9760 www.nav-tv.com info@nav-tv.com BMW12N-DYNAMIC KIT NTV-KIT717 Screen Connector Overview The BMW12-N kit interfaces 2 video inputs
Instruction Manual. High-Definition Link for Mercedes-Benz IW-NTG55-N23 LVDS IN/OUT IR IN/OUT DIP SWITCH. Latest Firmware Date
 Instruction Manual High-Definition Link for Mercedes-Benz AV IN/OUT HDMI IN Model Name IW-NTG55-N23 LVDS IN/OUT IR IN/OUT 5V USB POWER DIP SWITCH IW-NTG55-N23 Latest Firmware Date 2018 03 28 Manual Version
Instruction Manual High-Definition Link for BMW IW06B-N23. iw06b-n23. digi t al mu l ti inter. f or bmw. Latest Firmware Date
 Instruction Manual High-Definition Link for BMW Model Name IW06B-N23 iw06b-n23 digi t al mu l ti inter f or bmw face IW06B-N23 Latest Firmware Date 2015-10- 13 Manual Version Rev. 1.3 Release Date: 2015-11-17
Car-solutions.com
 Warning Warning Warning Do not modify, dismantle or unintended operation this system outside Qnavi After Sales. Damage occurred by unintended operation may cause Qnavi After Sales service void. During
Gazer VI700A-NTG45 and VI700W-NTG45 INSTALLATION MANUAL
 Gazer VI700A-NTG45 and VI700W-NTG45 INSTALLATION MANUAL Contents List of compatible cars with preinstalled stock Mercedes Command Online NTG 4.5 and Mercedes Audio 20 NTG 4.5 multimedia interfaces... 3
W204-H NTV-KIT794. Overview
 3950 NW 120 th Ave, Coral Springs, FL 33065 TEL 561-955-9770 FAX 561-955-9760 www.nav-tv.com info@nav-tv.com W204-H NTV-KIT794 Overview The W204-H RVC Kit interfaces two camera inputs and optional HDMI
VL2-CONCERT. for Audi with 6,5 monitor, Symphony or Concert radio
 v.link Video-inserter for Audi with 6,5 monitor, Symphony or Concert radio Video-inserter with 2 video + RGB + rear-view camera input Product features Video-inserter for factory-infotainment monitors 2
VL2-C5. for Citroen C5 and Peugeot 508 with navigation with colour display and 10pin LVDS monitor connector
 v.link Video-inserter for Citroen C5 and Peugeot 508 with navigation with colour display and 10pin LVDS monitor connector Video-inserter with 2 video + RGB + rear-view camera input and CAN control Product
PCM4-CAM NTV-KIT750. Overview
 3950 NW 120 th Ave, Coral Springs, FL 33065 TEL 561-955-9770 FAX 561-955-9760 www.nav-tv.com info@nav-tv.com PCM4-CAM NTV-KIT750 Overview The PCM4-CAM Kit interfaces a backup camera input (with active
FN-MAZDA3 Installation Manual
 Manual Version: V20150401 FN-MAZDA3 Installation Manual Product Name: FN-Mazda3 Product Type: Interface with build in navigation Application: All Mazda 2014/2015 cars with new Mazda Connect systems What's
QUICK START GUIDE MERCEDES-BENZ (NTG4.5/NTG5)
") Multimedia interface for original entertainment system QUICK START GUIDE MERCEDES-BENZ (NTG4.5/NTG5) Installation 1. Operation 1.1 Features---------------------------------------------------------------3
Multimedia interface for original entertainment system QUICK START GUIDE MERCEDES-BENZ (NTG4.5/NTG5) Installation 1. Operation 1.1 Features---------------------------------------------------------------3
Instruction Manual. High-Definition Link for VOLVO. A-LINK For V-sensus SD SLOT HDMI IN POWER RESET DIP SWITCH USB 1 USB 2 5V USB.
 Release Date: 2018 07-15 Instruction Manual High-Definition Link for VOLVO A-LINK For V-sensus 5V USB SD SLOT HDMI IN POWER RESET DIP SWITCH USB 1 USB 2 FOR V-sensus POWER/CAN DEBUG KEYPAD LVDS OUT LVDS
IOB-RVC NTV-KIT798. Overview
 3950 NW 120 th Ave, Coral Springs, FL 33065 TEL 561-955-9770 FAX 561-955-9760 www.nav-tv.com info@nav-tv.com IOB-RVC NTV-KIT798 Overview The IOB-RVC interfaces a single backup camera input to the factory
W205-N RVC NTV-KIT703
 3950 NW 120 th Ave, Coral Springs, FL 33065 TEL 561-955-9770 FAX 561-955-9760 www.nav-tv.com info@nav-tv.com W205-N RVC NTV-KIT703 Overview The W205-N RVC Kit interfaces a backup camera input (with active
IOB-RVC NTV-KIT798. Overview
 3950 NW 120 th Ave, Coral Springs, FL 33065 TEL 561-955-9770 FAX 561-955-9760 www.nav-tv.com info@nav-tv.com IOB-RVC NTV-KIT798 Overview The IOB-RVC interfaces a single backup camera input to the factory
FV Rover_Jaguar_2014 installation manual_ v This interface can insert High definition RGB
 FV Rover_Jaguar_2014 installation manual_ v140214 This interface can insert High definition RGB navigation video, AV and reverse camera video onto Rover, Jaguar car screens[from 2011 and later] This version
Instruction Manual High-Definition Link for Lexus IW03LX
 Instruction Manual High-Definition Link for Lexus Model Name IW03LX IW03LX Latest Firmware Date 2016-09 - 06 Manual Version Rev. 3.9 Release Date: 2016-12 - 30 Language English Contents Cautions 3 Dimension
RL2-MMI3G-Q3 RL2-MMI3G-GW. For Audi MMI3G basic/high, MMI3G+ basic/high and VW RNS850 navigation systems with 4pin HSD LVDS connector
 r.link Video-inserter RL2-MMI3G-Q3 RL2-MMI3G-GW For Audi MMI3G basic/high, MMI3G+ basic/high and VW RNS850 navigation systems with 4pin HSD LVDS connector Video-inserter for front- and rear-view camera
v.logic Intelligent Solution Interface CI-V4-NTG45
 v.logic Intelligent Solution Interface Compatible with Mercedes Benz vehicles with COMAND Online NTG4.5 navigation and Audio20 NTG45 system with 4pin HSD LVDS connector Page Product features Plug and play
Compatible with GM CUE, MyLink and IntelliLink Infotainment Systems with 8 and 10.2 screens. NAVGM-80R MODULE CAN BOX AND HARNESS GPS ANTENNA
 Plug and Play connectors make installation simple and easy. Utilizes the latest Navigation mapping version of igo Primo. Adds 2 AV inputs. Utilizes Cortex A6 high speed processor. Maintains the OEM touch
INSTALLATION MANUAL. v.logic Intelligent Solution Interface V5-NBT-PNP
 INSTALLATION MANUAL v.logic Intelligent Solution Interface For the F-series BMW with navigation system or radio and 6.5, 7, 8.8 or 10.25 monitor with 4+2pin HSD2 LVDS connector Product features Own on-screen
VL2-NG4. for Citroen and Peugeot with navigation NG4 with colour display and 10pin LVDS monitor connector
 v.link Video-inserter for Citroen and Peugeot with navigation NG4 with colour display and 10pin LVDS monitor connector Video-inserter with 2 video + RGB + rear-view camera input and CAN control Product
RL2-MMI3G-Q3 RL2-MMI3G-GW. Compatible with Audi MMI3G basic/high, MMI3G+ basic/high and VW RNS850 navigation systems with 4pin HSD LVDS connector
 r.link Video-inserter RL2-MMI3G-Q3 RL2-MMI3G-GW Compatible with Audi MMI3G basic/high, MMI3G+ basic/high and VW RNS850 navigation systems with 4pin HSD LVDS connector Video-inserter for front- and rear-view
A3/GOLF 7-CAM NTV-KIT500
 3950 NW 120 th Ave, Coral Springs, FL 33065 TEL 561-955-9770 FAX 561-955-9760 www.nav-tv.com info@nav-tv.com A3/GOLF 7-CAM NTV-KIT500 Overview The A3/GOLF7-CAM Kit allows the user to add 1 video input
DODGE Challenger Charger Journey. 6-Pin Video Input Cable 6-Pin Audio In/Out Cable GPS Magnetic Antenna
 CHRYSLER 2011-2014 300c DODGE 2011-2014 Challenger 2011-2014 Charger 2011-2014 Journey FIAT 2011-2014 Freemont Plug and Play connectors make installation simple and easy. Utilizes the latest mapping version
Instruction Manual High-Definition Link for Chevrolet(GM) IW03GF
 IW03GF") Release Date: 06-06 - 7 Instruction Manual High-Definition Link for Chevrolet(GM) IW03GF Model Name IW03GF-HNRAA Latest Firmware Date 05-06 - 7 Manual Version Rev. 3.6 Language English Contents Cautions
Release Date: 06-06 - 7 Instruction Manual High-Definition Link for Chevrolet(GM) IW03GF Model Name IW03GF-HNRAA Latest Firmware Date 05-06 - 7 Manual Version Rev. 3.6 Language English Contents Cautions
705 INSTALLATION MANUAL
 705 INSTALLATION MANUAL 2 Table of Contents Features...03 Specifications...04 Quick - Start...05 Remote Control...07 Hardware Installation...10 705 Models Additional Info...14 Owner s Record...15 3 Features
IC-9039: Multimedia Interface.- NEW PEUGEOT 407 / 607
 IC-9039: Multimedia Interface.- NEW PEUGEOT 407 / 607 This interface is to be used in cars with 12V negative ground only. Depending on the type of installation to be performed in your Peugeot 407/607,
Vehicle Applications. Features. Radio Compatibility. Note. Parts Included. Wiring Diagram
 Vehicle Applications BMW 1 SERIES 2011 - Up 1 Series (5 Door) 2012 - Up 1 Series (3 Door) Features 3 SERIES 2012 - Up 3 Series Sedan 2012 - Up 3 Series Wagon 4 SERIES 2013 - Up 4 Series Coupe 2013 4 Series
W204-N RVC NTV-KIT704
 3950 NW 120 th Ave, Coral Springs, FL 33065 TEL 561-955-9770 FAX 561-955-9760 www.nav-tv.com info@nav-tv.com W204-N RVC NTV-KIT704 Overview The W204-N RVC Kit interfaces a backup camera input (with active
HD-MB NTG 5.5 HDMI INTERFACE DATE.
 Instruction Manual HD-MB NTG 5.5 HDMI INTERFACE DATE. 2018.07.25 Korea Auto Parts www.kaptrade.com COMPONENTS MB NTG 5.5 Quad Lock Cable AV Cable LVDS In/Out Cable FAKRA Connector U-PAD USB A-A Cable UART
C2-MMI2G-x. Compatible with Audi MMI 2G navigation systems
 c.logic Interface C2-MMI2G-x Compatible with Audi MMI 2G navigation systems Product features Full plug and play multimedia interface 2 AV-inputs with separate IR-control-channels Integrated into vehicle
CI-VL2-MIB-2. for VAG Fahrzeuge with MIB High/Standard infotainment systems with 7 /8 or 5.8 monitors
 v.link Video-inserter for VAG Fahrzeuge with MIB High/Standard infotainment systems with 7 /8 or 5.8 monitors Video-inserter with 2 video + RGB + rear-view camera input and CAN control Product features
INSTALLATION INSTRUCTIONS
 GM MyLink Dual Video Input Interface for Factory Display Radios (Kit # 9002-2785v2) Please read thoroughly before starting installation and check that kit contents are complete. Items Included in the Kit:
GMNAV1 Advent Integrated Navigation
 GMNAV1 Advent Integrated Navigation This interface is designed to integrate Navigation into select Buick and Chevrolet Systems. INSTALLATION MANUAL What s in the Box The following items are supplied with
Compatible with Cadillac CUE, GM MyLink (io3, io5 & io6) Infotainment Systems with 4.3 and 8 screens. ACPGM-80V MODULE CAN BOX CUE Harness
 Infotainment Systems with 4.3 and 8 screens. ACPGM-80V MODULE CAN BOX CUE Harness") The ACPGM-80V has a built in Dual-Link module that allows connection of Android and other devices with two-way mirroring control. Adds a reverse camera input with active parking guidelines. Adds 2 Audio/Video
The ACPGM-80V has a built in Dual-Link module that allows connection of Android and other devices with two-way mirroring control. Adds a reverse camera input with active parking guidelines. Adds 2 Audio/Video
CI-VL2-MBN45. for Mercedes Benz vehicles generation NTG with Comand Online, Audio50 APS or Audio 20 with 4pin HSD LVDS connector on the monitor
 v.link Video-inserter CI-VL2-MBN45 for Mercedes Benz vehicles generation NTG4.5-204 with Comand Online, Audio50 APS or Audio 20 with 4pin HSD LVDS connector on the monitor Video-inserter with 2 video +
Jaguar F-TYPE CAM Dual Camera interface for select 14+ Jaguar vehicles NTV-KIT589
 3950 NW 120 th Ave, Coral Springs, FL 33065 TEL 561-955-9770 FAX 561-955-9760 Jaguar F-TYPE CAM Dual Camera interface for select 14+ Jaguar vehicles NTV-KIT589 BHM Overview Jaguar F-TYPE CAM interfaces
VL2-MBN4.
 v.link Video-inserter for Mercedes Benz vehicles generations NTG3, NTG4 with Comand APS, Audio50 APS or Audio 20 with 10pin HSD LVDS connector on the monitor Video-inserter with 2 video + RGB + rear-view
v.logic Intelligent Solution Interface V5-CIC-E-PNP
 v.logic Intelligent Solution Interface Compatible with the E-series BMW and Mini with navigation system or radio and 6.5 or 8.8 monitor with 4pin HSD LVDS connector Product features Own on-screen display
Mazda Connect Infotainment System
 - The ACPMZ-72Z has a built in Dual-Link module that allows connection of Android and other devices with two-way mirroring control. - Adds a reverse camera input with active parking guidelines. - Adds
VL2-LR06. for Land Rover and Jaguar with touch-screen navigation version 1 and 1.1
 v.link Video-inserter for Land Rover and Jaguar with touch-screen navigation version 1 and 1.1 Video-inserter with 2 video + RGB + rear-view camera input Product features Video-inserter for factory-infotainment
v.logic Intelligent Solution Interface V5-CCC-PNP
 v.logic Intelligent Solution Interface Compatible with E-series BMW and Mini with navigation system or radio and 6.5 or 8.8 monitor with 10pin BMW LVDS connector Product features Own on-screen display
FV Benz 172 installation manual_ver
 FV Benz 172 installation manual_ver.1107020 This interface can insert RGB navigation or CVBS video signals onto Benz A172 car screens. And it has these features: Original Knob to switch the inputs, and
5.6" Multi-function Monitor
 5.6" Multi-function Monitor User s Manual Please read this Manual carefully before use of this product, and keep it handy for future reference. I. Packing List.. 2 II. Product Appearance... 3-5 III. Product
W205-RVC NTV-KIT580. Overview
 3950 NW 120 th Ave, Coral Springs, FL 33065 TEL 561-955-9770 FAX 561-955-9760 www.nav-tv.com info@nav-tv.com W205-RVC NTV-KIT580 Overview The W205-RVC Kit allows the user to add a backup camera input (with
AX-AM-AU91. Audi HDMI and Camera Interface 2013-up* *Visit AxxessInterfaces.com for up-to-date vehicle specific applications.
 AX-AM-AU91 INSTALLATION INSTRUCTIONS INTERFACE COMPONENTS AX-AM-AU91 interface AX-AM-AU91 harness 10-pin harness with RCA jacks 6-pin to 4-pin LVDS (video) cable Audi HDMI and Camera Interface 2013-up*
NNG-GM2 Navigation interface for GM vehicles equipped with LVDS MYLink/CUE NTV-KIT552
 3950 NW 120 th Ave, Coral Springs, FL 33065 TEL 561-955-9770 FAX 561-955-9760 NNG-GM2 Navigation interface for GM vehicles equipped with LVDS MYLink/CUE NTV-KIT552 1. GM2 LVDS Interface/GPS combo 2. Plug
1020 / 1022 INSTALLATION MANUAL
 1020 / 1022 INSTALLATION MANUAL 2 Table of Contents Features...03 Specifications...04 Quick - Start...05 Remote Control...07 Hardware Installation...10 1020TSV, 1022TSV, 1020YV, 1022YV, 1020TSH, 1022TSH
C1-MFD2-R1. Compatible with navigation systems Volkswagen MFD2/RNS2 Skoda Nexus
 c.logic lite-interface C1-MFD2-R1 Compatible with navigation systems Volkswagen MFD2/RNS2 Skoda Nexus Only for vehicles WITH factory rear-view camera Product features full plug and play multimedia interface
 FV VW2013 Interface Installation Manual ver:20130226: FV_VW2013_NAVI,[with internal navigation module] FV_VW2013, [without internal navigation] This interface can insert video into 2013 volkswagen monitors.[the
INSTALLATION INSTRUCTIONS
 GM camera interface for vehicles with a factory Rear Entertainment System (RES) (Kit # 9002-2764) Please read thoroughly before starting installation and check that kit contents are complete. Items Included
FN_Volvo2014 interface + NAVI installation manual_v
 FN_Volvo2014 interface + NAVI installation manual_v20140130 2014 Volvo, the Blue connector behind CD is used for video insertion This interface with internal navigation module can insert High definition
Precautions. Please read carefully before using this product.
 Thank you for purchasing this BEWITH Mirror Media MM-1. It is designed to give you many years of enjoyment. Please read all instructions in this manual before attempting operation and keep it handy for
E06PO28001 Installation Manual_v
 E06PO28001 Installation Manual_v20150926 This interface can insert video into Porsche PCM40 car screens, The OEM touch can be used to control the installed device.[navigation, Android module, Reverse video,
ANDROID INTERFACE DATE.
 Instruction Manual ROiK-VV ANDROID INTERFACE DATE. 208.08.27 Korea Auto Parts www.kaptrade.com COMPONENTS ROIK-VV Power/ CAN Cable Universal Cable LVDS Cable AV Cable WiFi/BT Antenna GPS Antenna (5M) Speaker