Chapter 1 Getting Started
|
|
|
- Virginia Adams
- 6 years ago
- Views:
Transcription
1
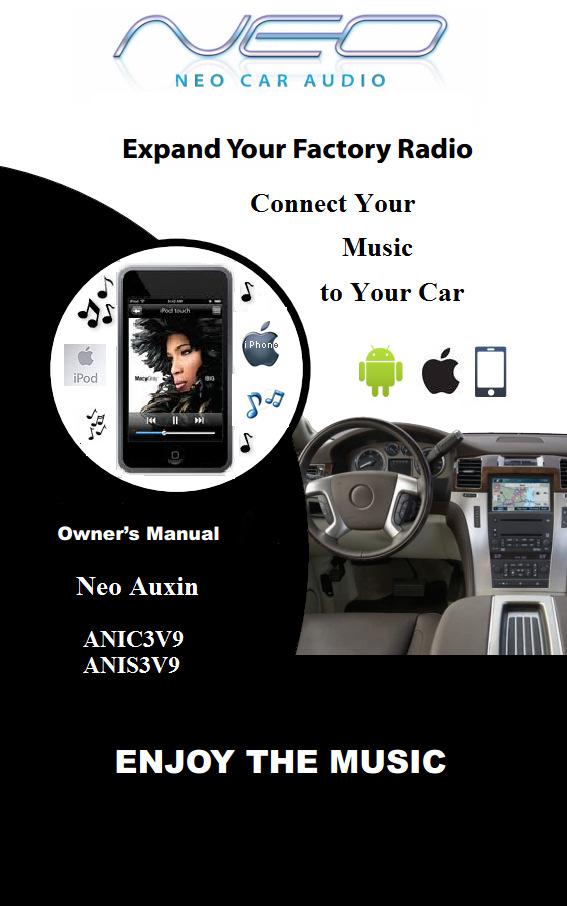
2 Chapter 1 Getting Started Installation Instructions 1.1 Subject The NEO AUX adapter an integration between an MP3 player and a factory installed car stereo. Equipped with the specific vehicle harness and standard 3.5mm jack the NEO- AUX interface will allow you to connect your MP3/DVD/XM player or ipod / iphone to the car stereo system easily. 1.2 Introduction Thank you for purchasing the NEO-AUX adapter, which has been designed to provide endless hours of listening pleasure through most vehicles factory radios. To insure that your AUX interface performs correctly in your vehicle, we recommend that you read this entire manual before attempting installation. 1.3 Precautions Proper mounting location Securely install the interface in a location that is free from heat, humidity, moving parts, or direct sunlight. Beware of hot airflow from your vehicle s climate control system. We recommend securing the interface to a suitable location, free of sharp metal edges, using double-sided tape, Velcro, or wire ties. 1.4 Disclaimer This product is not affiliated with any of the OEM manufactures. Modifying the radio may void any outstanding warranty. The purchase of this product carries with it no warranties, either expressed or implied. While every care has been taken to provide a quality product, we cannot guarantee that the Neo Aux adapter will function correctly if installation is not done according to the instructions provided in this guide. We also cannot guarantee that the NEO AUX adapter will function correctly with an MP3 player if the MP3 player is broken or damaged or not supported. Keep your eyes on the road while driving! We are not liable for the misuse of this product. Misuse includes improper installation, damage to the board or radio while trying to install it, and the illegal use of the radio. 1.5 Completeness and connection of set a) NEO AUX adapter set consists of the following (see figure 1).
3 b) Basic wiring diagram of NEO AUX adapter (see Figure 2): 1.6 Important Compatibility Notes If your vehicle is equipped with an external factory CD changer, you must disconnect it in order to be able to install the interface. You will lose the use of the external CD changer to gain the use of your ipod or MP3 player. Any built-in CD changer will remain working. Chapter 2 General Installation 2.1 Installation location: Most installations will require you to remove the factory radio in order to plug in the vehicle specific harness. For some vehicles, you will also have the option to connect the interface to the factory pre-run CD changer cable located in the trunk or glove box. 2.2 Tools needed: In many cases, there are no special tools required in order to remove the stereo. Radio removal tools are available for some stereos to aide in the removal of the radio. Please
4 consult your local car audio shop or your vehicle s dealership for instructions or assistance if necessary. If you are unsure how to install the interface properly, we recommend contacting your local car stereo shop for the assistance. 2.3 Preparation and adapter installation 1. Turn off car engine and remove key from ignition. 2. If your radio uses a Security Code, make sure that you have the code before unplugging the radio. 3. Un-mount your radio from the dash in order to get access to the back side of the radio. Some vehicles require special tools to remove the radio. Please consult your vehicle s dealership or a local car audio professional if necessary. 4. Attach the car harness connector to the back of the stereo to the CD changer port. Be sure to make a firm connection but do not force it. Connect the other end to the module. 5. WV/AUDI/SEAT/SKODA - there is a black single cable on the vehicle specific harness (3). You will need to attach it to the back bolt of the car stereo or to the stereo chassis. Remove the PVC from the end of the black wire (2) (a) Connect the end of the black wire (2) to the metal part of the car stereo chassis. You can connect it under the bolt (3) if present. (b) Make sure that the solid contact is maintained between the striped black wire and the metal part of the car stereo body. The failure to attach the black cable to the chassis of the stereo will mean that the NEO adapter will not work! All VW / AUDI / Seat / Skoda vehicles require this black cable to be attached. 6. For AUDI vehicles only: For some AUDI head units an additional part or harness modification is required in order to gain the access to the CD changer port. The 8-pin CD changer port on such stereos is occupied by a solid 20-pin connector. Please contact Neo Car Audio tech support for further information
5 7. For BMW vehicles only: Please refer to the installation insert for the special guidelines for BMW installation. 8. For Toyota vehicles only: In some Toyota / Lexus / Scion vehicles the CD changer port is occupied with a factory harness (such as NAV or audio harness). The NEO package for Toyota includes a Y shaped vehicle cable. In order to connect interface properly please follow to the scheme below. Figure 4. Connection scheme for Toyota/Lexus/Scion If the car does not have NAV or XM leave the female end of the Toyota harness open. 9. For Honda / Acura 03 and never (HON1 adapter) and Chrysler/Dodge/Jeep with navigation or XM installed you may need HON1-Y Y cable or CHR-Y cable in order to gain the access to the car stereo port occupied with the factory connector. 10. Once the interface is connected to the radio, you will need to test the operation of the interface before re-assembling the dash. 11. Turn your car stereo on and switch it over to the CD Changer mode using the Disk / Mode / CD / AUX (depending on the stereo type) buttons on your car stereo until it shows Disk 1, Track 01 on a the display. 12. Connect the AUX cable to the MP3 player or the ipod. Turn on the MP3 player or the ipod and play some tunes. You should now hear the sound coming from the car stereo speakers. 13. Once the operation of the interface is confirmed, you may continue with the installation. If you experience difficulties with the installation, please see our troubleshooting section. 14. Find a place where you can place the NEO AUX adapter. We recommend placing the module in a place that is easily accessible. Note: Make sure you mount the NEO AUX adapter in a place with enough room so that, when you re-mount the car stereo, you do not break the adapter. 15. You may use the glove box or other spaces inside the dash to direct Audio cables to a convenient location. 16. Re-mount your car stereo, making sure its clips or strews are secure.
6 Adapter mounting in the trunk (for select VW and BMW only). 1. Locate the trunk mounting cable in your car (usually located along the left side of the car in the back). 2. Disconnect the existing CD changer, if present. 3. Attach the matching cables. 4. For BMW trunk installation: Some BMW s are factory wired for a cellular phone. Except for wire location, the factory cellular phone connector looks identical to the factory 3-pin connector used for the CD changer. The CORRECT 3-pin connector for the CD changer has a BROWN wire (ground) in the #1 pin position. Please make certain you use this connector. The INCORRECT factory cellular phone connector has a BROWN wire in the center position DO NOT USE THIS CONNECTOR. Congratulations! You have installed the NEO AUX adapter. You may now use it with your MP3 player or ipod / iphone. 2.5 When the car ignition is OFF NEO-AUX adapter does not control the MP3 player or the ipod. When you turn your car ignition or car stereo off, the MP3 player or the ipod will remain playing. You will need to turn the ipod or the MP3 player off manually if you do not want it to continue playing. 2.6 Upgrade to full ipod/iphone integration You can upgrade your NEO-AUX package to the ipod/iphone integration with full control and charging by purchasing an additional cable. Please contact Neo Car Audio for more information If your MP3/XM/DVD player has different size plug You can easily convert 3.5mm phone jack to the 2.5mm or RCA connectors with the small plug converters. Call Neo Car Audio for more information.
 red power wire may also be yellow 1. Turn off the car engine and remove the key from the ignition.")
7 Chapter 3. - Nissan and Infiniti using NIS2 vehicle harness Tools needed 1. Panel trim removal tool (optional) 2. Philips screwdriver Preparation Picture 1: NIS2 vehicle specific harness (5) red power wire may also be yellow 1. Turn off the car engine and remove the key from the ignition. It is recommended to disconnect the car battery before performing the installation. 2. Carefully remove the radio from the dash. Installation 3. Locate the vehicle specific cable (NIS2) and blue colored Posi-Tap clip that came with your adapter (picture 1) 4. Connect NIS2 harness to the port at the back of the radio (see picture 2). Use the connector (3) on the picture 1. Note: If the port is occupied with a different factory harness disconnect this harness; insert connector (3) to the slot at the back of the stereo, reconnect the disconnected factory harness back to the stereo using the female end of the NIS2 harness (4). If the port on the back of the stereo is empty let the female end of the NIS2 harness (4) hang free do not connect it to anything.
 (5) on the NIS2 harness to the radio 12V")

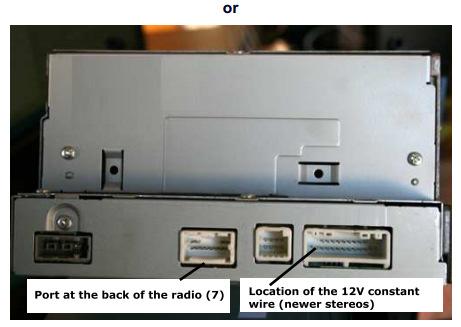
8 Picture 2 Back of the Nissan Radio 5. Connect the RED power wire (can also be yellow) (5) on the NIS2 harness to the radio 12V constant wire. You will need to use the blue Posi-Tap clip (6) provided with your package. 6. Locate the radio 12V constant wire. Refer to the diagram below; there could be 2 scenarios, depending on whether you have the older or the newer Nissan stereo:
9
 that comes from your stereo is the HOT wire referring to the scheme 1.")
10 7. Connect the 12V constant wire and red power wire (can also be yellow) (5) on NIS02 harness using the Posi-Tap. Please refer to the scheme below for the proper connection (scheme 1). Scheme 1. How to connect the wires using Posi-taps. The wire (the 12V constant wire) that comes from your stereo is the HOT wire referring to the scheme 1. Attention: Don t forget to strip the red power wire on your vehicle specific harness NIS02. WARNING! NEVER CUT ANY WIRES THAT COME FROM YOUR STEREO! 8. If you have any problems with using posi-taps please see the installation contact Neo Car Audio tech support at Route the harness to the bottom compartment or glove box and connect the module to the vehicle specific harness (NIS2). 10. Find a safe accessible place to secure the module. 11. Test the unit operation BEFORE mounting the stereo back into the dashboard. Cycle the ignition and put the stereo into the SAT mode. It should show XM 001 on a display. If it is not - see Troubleshooting section below. 12. If the correct operation of the unit is confirmed mount the stereo back to the dash. If not please see the troubleshooting section of this manual. 13. Congratulations! You have installed your Neo AUX adapter and you may use it right now with your portable player.

11 Chapter 4. - Support Troubleshooting We recommend seeking the help of the professional car stereo installer if you are not sure in your abilities to perform the installation. For technical support please contact Neo Car Audio
GROM-IPOD V2 Adapter (GROM-IPD2) Installation and operation instructions
 Installation and operation instructions") Chapter 1 Getting Started GROM-IPOD V2 Adapter (GROM-IPD2) Installation and operation instructions 1.1 Subject The GROM ipod V2 adapter an integration between an ipod (or iphone) and a car stereo. Featuring
Chapter 1 Getting Started GROM-IPOD V2 Adapter (GROM-IPD2) Installation and operation instructions 1.1 Subject The GROM ipod V2 adapter an integration between an ipod (or iphone) and a car stereo. Featuring
Add Auxiliary Audio to Your Factory Radio. Owner s Manual PXAUX
 Add Auxiliary Audio to Your Factory Radio Owner s Manual PXAUX PXAUX & Optional Add-ons Factory Radio (not included) Vehicle Specific Harness (actual harness may vary) PXAUX Interface RCA Input RCA Input
Owner s Manual PXAUX. Add Auxiliary Audio to Your Factory Radio
 Add Auxiliary Audio to Your Factory Radio Owner s Manual PXAUX isimple A Division of AAMP of America 13190 56th Court Clearwater, FL 33760 Ph. 866-788-4237 support@isimplesolutions.com 2012 AAMP of Florida,
Installation Table of Contents
 1 Installation Table of Contents Pages 1. Introduction 4 2. Precautions 4 3. Compatibility 5 4. Dipswitch Settings 5 5. Installation 6-7 6. Operation 8-16 2 Neo Gateway 2.0 & Optional Add-ons Neo Gateway
ipod Interface for BMW
 ipod Interface for BMW ISBM71 Instruction Manual PROFESSIONAL INSTALLATION STRONGLY ADVISED IMPORTANT NOTE ipod Firmware MUST be updated BEFORE any other step is taken. Otherwise, the ipod will not operate
Interface Module. for selected Toyota/Lexus/Scion vehicles. Installation & Operation
 for selected Toyota/Lexus/Scion vehicles Installation & Operation Serial Number: Date of Purchase: Contents Introduction and Precautions... 2 Supported ipod Models... 3 Vehicle Identification and Pre-System
Interface Module for radio Auxiliary Input. Installation & Operation
 Interface Module for radio Auxiliary Input Installation & Operation Serial Number: Date of Purchase: Contents Introduction and Precautions... 2 Supported ipod Models... 3 Installation...3-4 Operation...
GM3x-HF Installation Guide for GM Class II Radios with XM Tuner
 Courtesy of:discountcarstereo.com Driving without distraction is a necessity for a safer driving experience GM3x-HF Installation Guide for GM Class II Radios with XM Tuner Created July 19, 2016 Revised:
PA15-HON2. ipod to HONDA and ACURA Car Stereo Interface. Owner's Manual. (Preliminary Version)
") PA15-HON2 ipod to HONDA and ACURA Car Stereo Interface Owner's Manual (Preliminary Version) 2008.10.20 9AM to 5PM (Pacific Time) Tech Support Hot Lines 626-3363836 626-8906410 Quick Guide. If the radio
PA15-HON2 ipod to HONDA and ACURA Car Stereo Interface Owner's Manual (Preliminary Version) 2008.10.20 9AM to 5PM (Pacific Time) Tech Support Hot Lines 626-3363836 626-8906410 Quick Guide. If the radio
PA15-HON3. PA15-HON3 ipod to HONDA / ACURA car stereo interface with song title display PRELIMINARY OWNER'S MANUAL
 PA15-HON3 ipod to HONDA / ACURA car stereo interface with song title display PA15-HON3 ipod to HONDA / ACURA car stereo interface with song title display KEY FEATURES This adaptor connects an ipod, iphone,
*000IPODIG* ipod Installation Guide. Tools Needed: (depending upon vehicle) 000IPODIG IMPORTANT
 000IPODIG IMPORTANT") Revision 3/15/05 ipod Installation Guide IMPORTANT Before starting, compare items on your invoice with items received. Carefully check through packaging material. If any item is missing, please call: Crutchfield
Revision 3/15/05 ipod Installation Guide IMPORTANT Before starting, compare items on your invoice with items received. Carefully check through packaging material. If any item is missing, please call: Crutchfield
FDS3NAV2. For Ford Vehicles Equipped With SYNC3. Installation Instructions. Calibration and Setup Guide. Page 1 of 14
 FDS3NAV2 For Ford Vehicles Equipped With SYNC3 Installation Instructions Calibration and Setup Guide Page 1 of 14 Please read this manual thoroughly before installation. This manual illustrates a typical
Courtesy of:discountcarstereo.com MB-HF. Hands-Free & Streaming Audio Install Guide for Mercedes
 Courtesy of:discountcarstereo.com MB-HF Hands-Free & Streaming Audio Install Guide for 1994-98 Mercedes Created September 3, 2016 Revised: March 23, 2019 Introduction: Safety comes first when you re on
Expand Your Factory Radio. add. ipod PXAMG. Owner s Manual. Neo Gateway ENJOY THE MUSIC
 Expand Your Factory Radio add ipod PXAMG GM Owner s Manual Neo Gateway ENJOY THE MUSIC Table of Contents Pages 1. Introduction 2 2. Precautions 2 3. Compatibility 3 4. Dipswitch Settings 3 5. Installation
Interface Module. for selected BMW/Mini Cooper vehicles. Installation & Operation
 Interface Module for selected BMW/Mini Cooper vehicles Installation & Operation Serial Number: Date of Purchase: Contents Introduction and Precautions... 2 Supported ipod Models... 3 Pre-System Setup...
PRECAUTIONS: Please read before you start the installation
 Installation manual for DVI HA HDD with HA HDD harness In the box: DVI HA HDD video interface HA HDD plug and play wiring harness Installation manual IMPORTANT: Please read all precautions first. This
Courtesy of:discountcarstereo.com USB-CDR30. ation Guide for Porsche CDR30/31. Radios Revised: January 10, 2018
 Courtesy of:discountcarstereo.com USB-CDR30 Quick Start Installation ation Guide for Porsche CDR30/31 Radios Revised: January 10, 2018 Introduction: Portable audio products are everywhere, reflecting demand
Coastal Electronic Technologies, Inc. GM LOCKPICK GMX-320 Installation and Operation Instructions
 Coastal Electronic Technologies, Inc. GM LOCKPICK GMX-320 Installation and Operation Instructions Thank you for your purchase of the Coastal Electronic Technologies, Inc. GM LOCKPICK GMX- 320. The GMX-320
Courtesy of:discountcarstereo.com. For illustration purposes only BKRCD-HF
 Courtesy of:discountcarstereo.com For illustration purposes only BKRCD-HF Hands-Free, Audio Streaming Installation Guide for Becker Radios with CD Changer Created June 30, 2016 Revised: December 26, 2017
ipod Owner s Manual Expand Your Factory Radio VOLKSWAGEN Media Gateway PXAMG PGHVW2 Media Gateway add PXAMG
 R Expand Your Factory Radio add ipod VOLKSWAGEN Owner s Manual Owner s Manual Media Gateway PXAMG Media Gateway PGHVW2 PXAMG Peripheral Electronics, a division of AAMP of America 13160 56th Court Clearwater,
Digital Music Changer
 Digital Music Changer YT-M06 User Manual English I Product Introduction Yatour Digital Music Changer is a revolutionary replacement of CD Changer. It can be easily installed and used. It delivers CD quality
Your ipod through ACURA / HONDA Car Stereo System!
 Your ipod through ACURA / HONDA Car Stereo System! KEY FEATURES This adaptor connects an ipod, iphone, or itouch to your ACURA / HONDA audio system with the following benefits: Connects ipod s audio output
Courtesy of:discountcarstereo.com. This radio is for illustration purposes only BLU-BKR235. Quick Installation Guide for Becker AUX.
 Courtesy of:discountcarstereo.com This radio is for illustration purposes only BLU-BKR235 Quick Installation Guide for Becker AUX Ready Radios Created June 19, 2015 Revised: January 15, 2018 Introduction:
ipod Expand Your Factory Radio NISSAN/INFINITI add
 Expand Your Factory Radio Harness Connection add ipod Dip Switches Port 1 Port 2 (See Manual) USB NISSAN/INFINITI 370z Cube Pathfinder Armada Sentra Maxima Altima Rouge Versa G35 M35/45 QX56 Murano Owner
ipod Expand Your Factory Radio PGHGM1 Owner s Manual Media Gateway add PXAMG
 Expand Your Factory Radio Harness Connection add ipod Dip Switches Port 1 Port 2 (See Manual) USB GM Owner s Manual Media Gateway PXAMG PGHGM1 isimple A Division of AAMP of America 13190 56th Court Clearwater,
Courtesy of:discountcarstereo.com C5CD-HF. Quick Start Bluetooth Installation Guide for select Corvette with 12-Disc CD Changer
 Courtesy of:discountcarstereo.com C5CD-HF Quick Start Bluetooth Installation Guide for select 1997-04 Corvette with 12-Disc CD Changer Created January 16, 2013 Revised March 12, 2019 Introduction: If your
Digital Media Changer
 Digital Media Changer YT-M07 User Manual English CDC MP3 1- Product Introduction 1.1 Introduction Yatour Digital Media Changer is a revolutionary replacement of CD Changer. It can be easily installed and
ipod Owner s Manual Expand Your Factory Radio FORD Media Gateway PXAMG ISFD73 Media Gateway add PXAMG
 Expand Your Factory Radio add ipod FORD Owner s Manual Owner s Manual Media Gateway PXAMG Media Gateway ISFD73 PXAMG Peripheral Electronics, a division of AAMP of America 13160 56th Court Clearwater, Florida
ADDITIONAL CAM POWER REVERSE CAM POWER BLUETOOTH MUTE AUDIO + IN AUDIO - IN 12V ACC OUTPUT 12V CONSTANT GROUND
 UNPLUG ORIGINAL RADIO CONNECTORS THEN PLUG IN HERE PLUG AND PLAY NO OTHER CONNECTIONS ARE NECESSARY USE HANDSFREE KIT MICROPHONE IPOD/IPHONE/ITOUCH/IPAD CONNECTION USB INPUT ADD YOUR BLUETOOTH HANDSFREE
TM LOCKPICK C8 INSTALLATION OPTIONS COPYRIGHT 2011 COASTAL ELECTRONIC TECHNOLOGIES, INC. UNPLUG ORIGINAL RADIO CONNECTORS THEN PLUG IN HERE
 TM LOCKPICK C8 INSTALLATION OPTIONS COPYRIGHT 2011 COASTAL ELECTRONIC TECHNOLOGIES, INC. FACTORY CONNECTORS INCLUDED UNPLUG ORIGINAL RADIO CONNECTORS THEN PLUG IN HERE PLUG AND PLAY NO OTHER CONNECTIONS
GMNAV1 Advent Integrated Navigation
 GMNAV1 Advent Integrated Navigation This interface is designed to integrate Navigation into select Buick and Chevrolet Systems. INSTALLATION MANUAL What s in the Box The following items are supplied with
Gazer VI700A-NTG45 and VI700W-NTG45 INSTALLATION MANUAL
 Gazer VI700A-NTG45 and VI700W-NTG45 INSTALLATION MANUAL Contents List of compatible cars with preinstalled stock Mercedes Command Online NTG 4.5 and Mercedes Audio 20 NTG 4.5 multimedia interfaces... 3
MBCD-HF. Quick Start Bluetooth Installation Guide for Select Mercedes with Changer. Courtesy of:discountcarstereo.com
 Courtesy of:discountcarstereo.com MBCD-HF Quick Start Bluetooth Installation Guide for Select 1994-98 Mercedes with Changer Created September 3, 2016 Revised: March 24, 2019 Introduction: Safety comes
Courtesy of:discountcarstereo.com. il-jag. Apple Lightning Adapter Installation Guide for Jaguar with CD Changer. (not for 2000-Up Premium System)
") Courtesy of:discountcarstereo.com il-jag Apple Lightning Adapter Installation Guide for Jaguar with CD Changer 1998-03 x308 & 1998-06 x100 Standard Audio (not for 2000-Up Premium System) Created May 3,
Courtesy of:discountcarstereo.com il-jag Apple Lightning Adapter Installation Guide for Jaguar with CD Changer 1998-03 x308 & 1998-06 x100 Standard Audio (not for 2000-Up Premium System) Created May 3,
Neo ProLink vsat IPOD CONNECTION KIT INSTRUCTION MANUAL. Use for both 20VSAT & 24VSAT
 Neo ProLink vsat I P O D T O F O R D P O D F R D 2 0 2 4 V S A T IPOD CONNECTION KIT INSTRUCTION MANUAL Use for both 20VSAT & 24VSAT NEO PROLINK Ford With the Neo ProLink for FORD radios equipped with
BMW12-DYNAMIC KIT NTV-KIT462
 3950 NW 120 th Ave, Coral Springs, FL 33065 TEL 561-955-9770 FAX 561-955-9760 www.nav-tv.com info@nav-tv.com BMW12-DYNAMIC KIT NTV-KIT462 Overview The BMW12 kit allows the user to add up to 3 video inputs
Courtesy of:discountcarstereo.com JAG-HF
 Courtesy of:discountcarstereo.com JAG-HF Quick Start Bluetooth Installation Guide for select Jaguar xj & xk with CD Changer 1998-03 x308 and 1998-06 x100 Created May 15, 2016 Revised: April 2, 2018 Introduction:
HANDS-FREE BLUETOOTH INTERFACE FOR SELECT 2005-UP SELECT TOYOTA, SCION, LEXUS VEHICLES
 BFTAK HANDS-FREE BLUETOOTH INTERFACE FOR SELECT 2005-UP SELECT TOYOTA, SCION, LEXUS VEHICLES Scosche s BFTAK Bluetooth Interface will allow you to wirelessly communicate with your Bluetooth enabled celular
AUDI DYNAMIC-EXT NTV-KIT701
 3950 NW 120 th Ave, Coral Springs, FL 33065 TEL 561-955-9770 FAX 561-955-9760 www.nav-tv.com info@nav-tv.com AUDI DYNAMIC-EXT NTV-KIT701 Overview The AUDI-DYN EXT Kit interfaces a backup camera (with dynamic
GM2 FIM LOCKPICK INSTALLATION OPTIONS COPYRIGHT 2012 COASTAL ELECTRONIC TECHNOLOGIES, INC.
 UNPLUG ORIGINAL RADIO CONNECTORS THEN PLUG IN HERE PLUG AND PLAY NO OTHER CONNECTIONS ARE NECESSARY FOR OVERRIDE FEATURES CONNECT USB CABLE HERE FOR FUTURE UPDATES OPTIONAL POWER OUTPUTS FOR CAMERA(S)
AUDI DYNAMIC-EXT NTV-KIT701
 3950 NW 120 th Ave, Coral Springs, FL 33065 TEL 561-955-9770 FAX 561-955-9760 www.nav-tv.com info@nav-tv.com AUDI DYNAMIC-EXT NTV-KIT701 Overview The AUDI-DYN EXT Kit interfaces a backup camera (with dynamic
GEN 6 LOCKPICK INSTALLATION OPTIONS COPYRIGHT 2010 COASTAL ELECTRONIC TECHNOLOGIES, INC.
 AFTERMARKET FRONT/BABY CAMERA VIDEO CONNECT HERE FRONT/BABY CAM POWER TO LOCKPICK RED W/BLACK STRIPE WIRE TO LOCKPICK BLACK GROUND WIRE UNPLUG ORIGINAL RADIO CONNECTORS THEN PLUG IN HERE PLUG AND PLAY
NTG3 / NTG3E /NTG3SLK NTV-KIT102/106/189. Overview up Mercedes GL/ML/R/E/CLS/SLK. Backup camera / AV input / RSE / Video In Motion interface
 NTG3 5.04.14 NAV-TV 3950 NW 120 Ave, Coral Srings, FL NTG3 / NTG3E /NTG3SLK NTV-KIT102/106/189 Overview 2009-up Mercedes GL/ML/R/E/CLS/SLK Backup camera / AV input / RSE / Video In Motion interface Kit
NTG3-SL NTV-KIT142. Overview Mercedes-SL. Backup camera / AV input / RSE / Video In Motion interface. Kit Contents. NTG3 Module NTV-ASY171
 NTG3 5.04.14 NAV-TV 3950 NW 120 Ave, Coral Srings, FL NTV-KIT142 Overview 2009-2011 Mercedes-SL Backup camera / AV input / RSE / Video In Motion interface Kit Contents SMB to RCA NTV-CAB007 Plug & Play
FORD LOCKPICK INSTALLATION OPTIONS COPYRIGHT COASTAL ELECTRONIC TECHNOLOGIES, INC.
 RADIO RIBBON CABLE FACTORY CONNECTORS IPOD/IPHONE/ITOUCH/IPAD CONNECTION (INCLUDED) REMOTE CONTROL RECEIVER REVERSE CAM 12V POWER AUX A/V INPUT FRONT CAM 12V POWER REVERSE TAILLIGHT INPUT A/V HEADREST
FEATURES. - COMPATIBLE WITH ALL ipod / MP3 PLAYERS / SATELLITE RADIOS. - SMALL IN OR UNDER DASH CONTROL HEAD WITH 3.5mm HEADPHONE INPUT
 R Thank you for purchasing the Maxxsonics ipod / MP3 interface module. This model allows you to connect your ipod / MP3 music source directly into your aftermarket amplifier with out having to use a radio
r-... 5v 0 Instruction Manual ipod Interfaces USB Interfaces Bluetooth Module ipod Interface USB Interface
 ... connecting to the aftermarket ipod Interface USB Interface Instruction Manual ipod Interfaces USB Interfaces Bluetooth Module r-... 5v 0 Bluetooth Module www.connects2.com www.connects2.com Introduction
TM C8 LOCKPICK PRO STEERING WHEEL CONTROLS * OPERATIONS WHILE MENUS ARE DISPLAYED ON INSTRUMENT CLUSTER CONTROLS ON BACK OF STEERING WHEEL BACK
 TM C8 LOCKPICK PRO STEERG WHEEL CONTROLS SCROLL UP MENUS SELECT DESIRED FEATURE * OPERATIONS WHILE MENUS ARE DISPLAYED ON STRUMENT CLUSTER CONTROLS ON BACK OF STEERG WHEEL SCROLL DOWN MENUS TOGGLE TO REAR
REAR-VIEW CAMERA & AV INPUT INTEGRATION INTERFACE FOR DODGE & JEEP VEHICLES 2014-UP
 DODGE 2014-2015 Durango 2014-2015 RAM* JEEP 2014-2015 Grand Cherokee APPLICATION NOTES: FOR UCONNECT 5 AND 8.4 DISPLAYS *NOTE: Not compatible with diesel powered trucks. PARTS INCLUDED (2) CH-75V CAN Interface
GM-PRO UNLOCK INSTALLATION OPTIONS 3 VIDEOS SOURCES - 3 AUDIO SOURCES
 GM-PRO UNLOCK INSTALLATION OPTIONS 3 VIDEOS SOURCES - 3 AUDIO SOURCES USE HANDSFREE KIT MICROPHONE ** INCLUDED CONNECTION FOR AFTERMARKET REAR VIEW CAMERA VIDEO 3 INPUT OR USE RCA TO 1/8" ADAPTER FOR AUDIO
AUDI DYNAMIC-A3 NTV-KIT702
 3950 NW 120 th Ave, Coral Springs, FL 33065 TEL 561-955-9770 FAX 561-955-9760 www.nav-tv.com info@nav-tv.com AUDI DYNAMIC-A3 NTV-KIT702 Overview The AUDI DYNAMIC-A3 Kit interfaces a backup camera input
Register your product and get support at CEM2000. Quick Start Guide
 Register your product and get support at CEM2000 EN Quick Start Guide 1 a b c d e f g 2 3 4 5 B a b c d a a a b c d b b A e f c c g h d d 6 5mm 5mm Overview of parts 1 These are the supplied parts needed
Courtesy of:discountcarstereo.com JAGCD-HF. Bluetooth Installation Guide CD Changer. Created May 15, 2016 Revised: February 18, 2018
 Courtesy of:discountcarstereo.com JAGCD-HF Bluetooth Installation Guide for select Jaguar xj & xk with CD Changer Works in 1998-03 x308 and 1998-06 x100 Created May 15, 2016 Revised: February 18, 2018
Coastal Electronic Technologies, Inc. Chrysler/Dodge/Jeep FREEDOM IN MOTION MYGIG LOCKPICK Installation and Operation Instructions
 Coastal Electronic Technologies, Inc. Chrysler/Dodge/Jeep FREEDOM IN MOTION MYGIG LOCKPICK Installation and Operation Instructions Thank you for your purchase of the Coastal Electronic Technologies, Inc.
Please read thoroughly before starting installation and check that kit contents are complete.
 Chrysler/Dodge/Jeep Remote Add-On CD player for RA1, RA2, RA3, or RA4 radios (Kit # 5000-8750) 2013-current RAM truck and Viper; 2015-current Charger, Challenger, and 300; 2017 Pacifica Please read thoroughly
INSTALLATION INSTRUCTIONS
 INSTALLATION INSTRUCTIONS Accessory Application Publications No. MP3 ATTACHMENT KIT 2006 RIDGELINE AII 28615 Issue Date FEB 2005 PARTS LIST Attachment Kit: P/N 08B06-SJC-100 MP3 Player Kit (sold separately):
As always, refer to the latest documents and versions on our website under Support at
 Reproduction in whole or in part is governed by laws and contractual terms existing between mobridge and the authorized party. As always, refer to the latest documents and versions on our website under
Jippo Play - Installation Manual Page 1 INSTALLATION MANUAL. Intro Camera Operation Installation - Wrangler JK... 2
 Jippo Play - Installation Manual Page 1 INSTALLATION MANUAL CONTENTS Intro... 1 Camera Operation... 2 Installation - Wrangler JK... 2 Jippo Play Configuration... 6 VES Installation... 7 Camera Installation...
VeNICE 2002 VeNICE 2002-PRO Range Rover L Bluetooth Audio Input Module
 VeNICE 2002 VeNICE 2002-PRO Range Rover L322 2002-2005 Bluetooth Audio Input Module Thank you and congratulations for the purchase of the L322 VeNICE Bluetooth module! We are urged to remind you that any
NOTICE OF INTENDED INSTALLATION AND USE
 * JBL Audio equipped vehicles will require additional part # DP-TYJBL1 audio interface. NOTICE OF INTENDED INSTALLATION AND USE THE ROSEN MULTI-MEDIA NAVIGATION SYSTEMS CONTAIN AN INTERNAL VIDEO PLAYER,
3 4 & 4 & 5 & AUX 13 USB Q & A...
 Table of Contents BT45-ACU Package Content... 2 Introduction & Notice... 2 Compatibility Information Vehicle Compatibility & XM Tuner Location... 3 Bluetooth Device Compatibility... 4 Radio & Device Compatibility
Courtesy of:discountcarstereo.com USB-JAG. Quick install Guide for Jaguar X100 and X308 with Changer
 Courtesy of:discountcarstereo.com USB-JAG Quick install Guide for Jaguar X100 and X308 with Changer Created: September 10, 2016 Revised: May 31, 2018 Introduction: Just because you drive an older car does
A2D-JAG98 Quick Start Guide for Jaguar x308 & x100 with CD Changer
 Courtesy of:discountcarstereo.com A2D-JAG98 Quick Start Guide for Jaguar x308 & x100 with CD Changer 1997-06 Standard or Premium Audio Systems Created August 3, 2016 Revised: January 14, 2019 Introduction:
INSTALLATION AND USER MANUAL FOR GATEWAY PRO BT
 INSTALLATION AND USER MANUAL FOR GATEWAY PRO BT 1. INTRODUCTION The Dension Gateway Pro BT lets you connect your ipod or USB storage (stick, hard drive or mass storage capable mp3 player) to your original
Courtesy of:discountcarstereo.com JAG-CDR. x308 with CD Changer. Created May 3, 2016 Revised: July 4, 2017
 Courtesy of:discountcarstereo.com JAG-CDR Quick Start Installation Guide for Jaguar x100 & x308 with CD Changer 2000-03 03 x308 and 2000-06 06 x100 Premium Systems Created May 3, 2016 Revised: July 4,
INSTALLATION AND USER MANUAL FOR GATEWAY PRO BT
 INSTALLATION AND USER MANUAL FOR GATEWAY PRO BT 1. INTRODUCTION The Dension Gateway Pro BT lets you connect your ipod or USB storage (stick, hard drive or mass storage capable mp3 player) to your original
Courtesy of:discountcarstereo.com IP-JAG98
 Courtesy of:discountcarstereo.com IP-JAG98 Quick Installation Guide for Jaguar x308 & x100 with CD Changer Select 1997-06 Standard and Premium Systems Created May 3, 016 Revised: December 10, 018 Introduction:
PXDXFB Auxiliary input Adapter Installation Guide for Focus with Blaupunkt Radio
 Courtesy of:discountcarstereo.com PXDXFB Auxiliary input Adapter Installation Guide for 2000-04 Focus with Blaupunkt Radio Revised February 3, 2017 Introduction: Many Ford Focus Owners with the Blaupunkt
Jaguar F-TYPE CAM 16. Dual Camera interface for select 16+ Jaguar vehicles NTV-KIT746 BHM 05/31/16 NTV-DOC259
 3950 NW 120 th Ave, Coral Springs, FL 33065 TEL 561-955-9770 FAX 561-955-9760 Jaguar F-TYPE CAM 16 Dual Camera interface for select 16+ Jaguar vehicles NTV-KIT746 BHM Overview Jaguar F-TYPE CAM 16 interfaces
SIR-PCM3 955/997 SIRIUS Satellite Radio interface for Porsche PCM 3 radios NTV-KIT266/285
 3950 NW 120 th Ave, Coral Springs, FL 33065 TEL 561-955-9770 FAX 561-955-9760 SIR-PCM3 955/997 SIRIUS Satellite Radio interface for Porsche PCM 3 radios NTV-KIT266/285 BHM Overview The SIR-PCM3 adds Sirius
PCM4-CAM NTV-KIT750. Overview
 3950 NW 120 th Ave, Coral Springs, FL 33065 TEL 561-955-9770 FAX 561-955-9760 www.nav-tv.com info@nav-tv.com PCM4-CAM NTV-KIT750 Overview The PCM4-CAM Kit interfaces a backup camera input (with active
PRECISION INTERFACE ELECTRONICS, INC.
 OEM NAVIGATION & VIDEO INTERFACE PRODUCT CATALOG 2009 PRECISION INTERFACE ELECTRONICS, INC. FACTORY NAVIGATION INTERFACES ACU/NAV-EYE1 ACURA CL 1999-2003 MDX 2001-2002 RL 1999-2003 TL 1999-2002 ACU/NAV-EYE2
HANDS-FREE BLUETOOTH INTERFACE FOR SELECT 2005-UP SELECT TOYOTA, SCION, LEXUS VEHICLES
 BFTAK HANDS-FREE BLUETOOTH INTERFACE FOR SELECT 2005-UP SELECT TOYOTA, SCION, LEXUS VEHICLES Scosche s BFTAK Bluetooth Interface will allow you to wirelessly communicate with your Bluetooth enabled celular
BMW-EVO ID6 NTV-KIT837
 3950 NW 120 th Ave, Coral Springs, FL 33065 TEL 561-955-9770 FAX 561-955-9760 www.nav-tv.com info@nav-tv.com BMW-EVO ID6 NTV-KIT837 Screen Connector Overview The BMW-EVO ID6 kit interfaces 2 video inputs
ARC-CDJPLAYER INSTALLATION MANUAL Full plug and play kit, universal fit for use in Chrysler vehicles with RA1, RA2, RA3, or RA4 radios.
 Required for Install: ARC-CDJPLAYER INSTALLATION MANUAL Full plug and play kit, universal fit for use in Chrysler vehicles with RA1, RA2, RA3, or RA4 radios. 1. Chrysler/Dodge/Jeep vehicle with Uconnect
TOYOTA YARIS HATCHBACK Preparation
 Preparation Part Number: PT546-52120 (Base Grade) Kit Contents 1 1 Receiver Assembly, Radio Unit 2 1 Owner s Manual 3 1 Hardware Bag NOTE: Part number of this accessory may not be the same as the part
PLAY, CONTROL, CHARGE
 PLAY, CONTROL, CHARGE Your ipod and ipod mini through Car Stereo! Thank you for purchasing this product. This manual describes the functions and operation of ipod to vehicle audio system interface. Please
Jaguar F-TYPE CAM Dual Camera interface for select 14+ Jaguar vehicles NTV-KIT589
 3950 NW 120 th Ave, Coral Springs, FL 33065 TEL 561-955-9770 FAX 561-955-9760 Jaguar F-TYPE CAM Dual Camera interface for select 14+ Jaguar vehicles NTV-KIT589 BHM Overview Jaguar F-TYPE CAM interfaces
Part Number: Lt. Taupe / Stone Accessory Code: EH3
 Part Number: Lt. Taupe - 00016-00710 / Stone- 00016-00720 Accessory Code: EH3 Kit Contents Item # Quantity Reqd. Description 1 2 Headrest Assembly 2 2 Remote Control 3 2 Cables 3 4 1 Power Cord #9 5 1
INSTALLATION AND USER MANUAL FOR GATEWAY PRO BT
 INSTALLATION AND USER MANUAL FOR GATEWAY PRO BT 1. INTRODUCTION The Dension Gateway Pro BT lets you connect your ipod or USB storage (stick, hard drive or mass storage capable mp3 player) to your original
NNG-Ford V1 NTV-KIT558. Navigation interface for FORD vehicles equipped with 8.4 MyTouch NTV-DOC218
 3950 NW 120th Ave, Coral Springs, FL 33065 TEL 561-955-9770 FAX 561-955-9760 NNG-Ford V1 Navigation interface for FORD vehicles equipped with 8.4 MyTouch NTV-KIT558 NTV-DOC218 SoftTouch Navigation System
AXi-RGB3 INSTALLATION MANUAL
 Rev. 4.0 081915 AXi-RGB3 INSTALLATION MANUAL PLEASE REVIEW THIS INSTALLATION MANUAL CAREFULLY BEFORE BEGINNING ANY WORK COMPATIBLE PLUG & PLAY WIRING HARNESSES AXi-BMW18-R AXi-CRVT-R AXi-FL24-R AXi-GM1-R
Vehicle Applications. Features. Radio Compatibility. Note. Parts Included. Wiring Diagram
 Vehicle Applications BMW 1 SERIES 2011 - Up 1 Series (5 Door) 2012 - Up 1 Series (3 Door) Features 3 SERIES 2012 - Up 3 Series Sedan 2012 - Up 3 Series Wagon 4 SERIES 2013 - Up 4 Series Coupe 2013 4 Series
Courtesy of:discountcarstereo.com USB-C5. Quick Start Installation Guide for Select Corvette
 Courtesy of:discountcarstereo.com USB-C5 Quick Start Installation Guide for Select 1997-04 Corvette Created January 16, 2013 Revised October 24, 2018 Introduction: Just because you drive an older car does
Part Number: Lt. Taupe / Stone / Ivory Touring Edition Accessory Code: EH3
 Part Number: Lt. Taupe - 00016-00710 / Stone - 00016-00720 / Ivory - 00016-00730 Touring Edition - 00016-00745 Accessory Code: EH3 Kit Contents Item # Quantity Reqd. Description 1 2 Headrest Assembly 2
Introduction & Features. Important Notes. Installation Steps
 Navigation Unlock & Reverse Camera Input Interface for Chrysler/Dodge/Jeep/Ram Vehicles Rev. 051915 ***Only applicable to revision 1.1.2 firmware on BCI-CH21*** Class 2 J1850 VPW Arbitration J1850 Class
SiriusXM Satellite Radio interface
 www.vaistech.com Owner s Manual SiriusXM Satellite Radio interface (SXV300 SiriusXM Tuner required) UNIVERSAL Copyright 2003-2018 VAIS Technology Published Jan 10, 2018 VAIS Technology, 8811 American Way,
GROM-MST3 PLUS MP3 USB Android car stereo adapter kit for fiber-optic stereos
 GROM-MST3 PLUS MP3 USB Android car stereo adapter kit for fiber-optic stereos Optional Bluetooth, AUX-in and ipod/iphone extensions INSTALL MANUAL www.gromaudio.com Copyright GROM Audio, 2013 TABLE OF
RSNAV.com CarPlay interface for 3G MMI (B8)
") Version 1.0 Warning: Professional installation recommended. Mask the working trim surfaces properly, otherwise, it will be scratched easily while installing! 1. Installation 2. Using, VW radio removal
Version 1.0 Warning: Professional installation recommended. Mask the working trim surfaces properly, otherwise, it will be scratched easily while installing! 1. Installation 2. Using, VW radio removal
W204-H NTV-KIT794. Overview
 3950 NW 120 th Ave, Coral Springs, FL 33065 TEL 561-955-9770 FAX 561-955-9760 www.nav-tv.com info@nav-tv.com W204-H NTV-KIT794 Overview The W204-H RVC Kit interfaces two camera inputs and optional HDMI
Installation Instructions
 Installation Instructions Phones, Navigation These Installation Instructions supersede those dated February 2004. Page 1 of 9 March 2004 Accessory Development Changes to this revision are identified by
EH50 ATTENTION: SECURITY COVERS ARE NO LONGER INCLUDED IN THE HEADREST KITS AS OF
 Toyota 4Runner 2011 - Dual Player Headrest Video Part Number: 00016-00360; Sand Beige 00016-00370; Black Accessory Code: EH50 ATTENTION: SECURITY COVERS ARE NO LONGER INCLUDED IN THE HEADREST KITS AS OF
Parts Identification Page 1 Vehicle Preparation Page 3 Programming Switch Settings Page 3 Installation Page 4. Form #5420,
 SoftTouch Navigation System 250-7613 2012-2013 Toyota Camry Installation Instructions General Applicability: Toyota 2012-2013 Prius/Prius V, 2013 Venza, 2013 Avalon, 2013 Highlander, 2013 Tacoma For video
Bluetooth Car Adapter(YT-BTA)
") Bluetooth Car Adapter(YT-BTA) 1 Product Introduction 1.1 Description Nowadays, using mobile phone during driving is widely considered dangerous,and hands free car kit ensures driving safety. As the using
Bluetooth Car Adapter(YT-BTA) 1 Product Introduction 1.1 Description Nowadays, using mobile phone during driving is widely considered dangerous,and hands free car kit ensures driving safety. As the using
OPERATION MANUAL GROM-MST3 PLUS AUDI MMI 2G. Connect the cables to the appropriate slots available on GROM-MST3 (see above illustration).
.") OPERATION MANUAL GROM-MST3 PLUS AUDI MMI 2G 1. EXT1-EXT2 PORTS - Accessories Cables Connection Connect the cables to the appropriate slots available on GROM-MST3 (see above illustration). EXT1- connect
OPERATION MANUAL GROM-MST3 PLUS AUDI MMI 2G 1. EXT1-EXT2 PORTS - Accessories Cables Connection Connect the cables to the appropriate slots available on GROM-MST3 (see above illustration). EXT1- connect
WIRELESS BLUETOOTH AUDIO TO ANY CAR RADIO MAKE THE CONNECTION
 ISFM23 WIRELESS BLUETOOTH AUDIO TO ANY CAR RADIO MAKE THE CONNECTION Smartphones and Bluetooth media devices TranzItTM BLU 98.2 98.3 98.4 Perfect for ANDROID 1. Introduction Thank you for choosing the
INSTALLATION INSTRUCTIONS
 INSTALLATION INSTRUCTIONS Accessory Application Publications No. CASSETTE/MP3 (EX) 2006 PILOT All 30488 Issue Date SEP 2005 Player Attachment Kit (sold separately) : P/N 08B06-S9V-100A Cassette Player
NISSAN HARNESS USED WITH XIA-I01 XIAH-NS1. Installation Instructions APPLICATIONS * READ IMPORTANT WARNING BEFORE ATTEMPTING ANY INSTALLATION
 NISSAN HARNESS USED WITH XIA-I01 XIAH-NS1 Installation Instructions NISSAN 350Z 2003-2005 Altima 1998-2006 Armada 2005-2007 Frontier 1998-2007 Maxima 1998-2005 Murano 2003-2006 Pathfinder 1998-2005 Quest
INSTALLATION AND USER MANUAL FOR GATEWAY PRO BT
 INSTALLATION AND USER MANUAL FOR GATEWAY PRO BT 1. INTRODUCTION The Dension Gateway Pro BT lets you connect your ipod or USB storage (stick, hard drive or mass storage capable mp3 player) to your original
Disconnect the battery to ensure there will be no shorted wires during the installation procedure.
 The round-style headunit receiver radio features Bluetooth technology allowing music to wirelessly stream from your compatible Bluetooth-enabled device. Control the audio from a distance -- all from your