CAS Configuration Manager
|
|
|
- Winifred Black
- 5 years ago
- Views:
Transcription

1 CAS Configuration Manager NursingCAS Help Guide 2017 Liaison International. All Rights Reserved.
2 Table of Contents Introduction... 3 What is the CAS Configuration Manager?...3 Before you Get Started... 4 Review the Application...4 Review Transcript and Coursework Verification Options...4 Be Aware of Cycle Rollovers...4 Save Often...4 Accessing your Programs... 5 Add a New Program...6 Copy an Existing Program...6 Edit Program Data...6 Branding your Program Page... 7 Select a Branding Image (Required)...7 Branding Image Guidelines... 7 Upload your Branding Image (Required)... 7 Create Introductory and Instructional Text (Required)...8 Content Formatting Tips... 8 Set Up your Program Home Page Introduction (Required)... 9 Configuring Your Program Settings Configure Transcript and Coursework Entry (Required) College Transcripts Verification Requirements Application Statuses Configure Evaluations (Optional) Configure Questions (Optional) Add Question Sets Add Questions Configure Prerequisites (Optional) Configure Documents (Optional) Preview your Programs Submit Program for CAS Approval Monitor your Program Status... 24

3 Introduction What is the CAS Configuration Manager? The CAS Configuration Manager is where you ll configure your program s requirements, settings, and branding for the CAS application. The application is divided into four sections: 1. Personal Information 2. Academic History 3. Supporting Information 4. Program Materials The first three sections contain the data elements and questions that are common across all participating programs, such as biographic information, standardized test scores, etc. Using the CAS Configuration Manager, you can configure the fourth section to provide information about your program and school, as well as collect additional information from applicants. Information you collect in the Program Materials section is then available in the Applicant s Profile in WebAdMIT and can be included in Lists, Reports, and Exports. This information is only available to your program. Please review this guide carefully before configuring your programs. For a detailed step-by step walkthrough of the process, refer to the WebAdMIT Configuration Portal Training elearning course available here: Application dashboard showing the primary 4 sections: ` 3
4 Before you Get Started Review the Application Before you configure your programs, it s important to review the sections of the application that are common across all programs. This will help you determine which questions are already included in the application by default and what program-specific questions you may need to add. To review the application sections, navigate to Review Transcript and Coursework Verification Options Before configuring your transcript and coursework entry requirements, review Transcript and Coursework Verification so you can make informed decisions. Be Aware of Cycle Rollovers All program pages from the current cycle in an approved or closed status will be automatically rolled over to the new cycle and available for editing. You can jump to the Edit Program Data section for information on editing the rolled-over pages; however, we recommend reviewing the entire guide to help you determine what edits to make. Save Often Save your information at least every fifteen minutes to prevent the system from timing out on you. 4
 with your username and password. 2. Click CAS Configuration Portal under Management in the left menu. 3.")

5 Accessing your Programs To access your programs and their configuration settings: 1. Log into WebAdMIT ( with your username and password. 2. Click CAS Configuration Portal under Management in the left menu. 3. The Configuration Manager launches in a new window. Select NURSINGCAS on the left. 4. Select the current application cycle. 5. Select your organization or school. From here, you can add new programs, copy existing programs, or edit program data. 5
 or just their program data (name, deadline date, degree type, graduate track, etc.). This will save you time in setting up the program.")

6 Add a New Program Before adding a new program, review your existing programs to see if any are similar enough that you can copy their entire configuration (program data, branding, custom questions, documents, etc.) or just their program data (name, deadline date, degree type, graduate track, etc.). This will save you time in setting up the program. If you need to create a new program, follow the steps below. 1. Click + Program at the bottom of the page. 2. Then, click + Add. 3. Enter the program data and click Save. Helpful Tip: Use the WebAdMIT Name field to create a nickname for your program that is only visible within WebAdMIT. This is useful if you have many programs with similar names. Note: All program pages from the current cycle will be automatically rolled over to the new cycle and available to edit. There is no need to create new program pages; you may simply edit the page that has been rolled over. See the Edit Program Data section below for more information. Copy an Existing Program Copying existing programs can save you time, particularly if an existing program has the same or similar data to the program you want to create. 1. Click + Program at the bottom of the page. 2. Click Copy. 3. Select the program you want to copy. 4. To copy all the program configurations into your new program (branding, custom questions, documents, etc.), click the Copy All Program Settings checkbox. If you only want to copy the program data (name, deadline date, graduate track, etc.), leave this unselected. 5. Click Copy. Your new program is created with the same name as the original and -copy-1 is appended. Be sure to edit the new program to update the name, data, etc. Edit Program Data It s important to review a program s data for accuracy. To edit a program, hover your mouse over it and click Details to view the Program Details page. Then, click Edit at the bottom of the page. 6


7 Branding your Program Page The home page is the first page applicants see when they view your program in the Program Materials section. From here, applicants can jump to the other parts of the Program Materials section you enabled, like Questions, Prerequisites, etc. Select a Branding Image (Required) Your branding image appears on the top of your home page. We recommend using an image that is consistent with your program or school s branding. This is the only section where applicants will see your specific program s branding, so make it count! Branding Image Guidelines Images must be in.jpeg,.tiff, or.png format and no larger than 250kb. File names cannot contain spaces or special characters. Your overall image size should be 900 px by 270 px, but consider the following: o A banner with your program information will cover a bottom portion of your image. o You can choose to display your school s name in the headline text if it is not already part of your image. Once you have at least one program, you can configure your branding. Upload your Branding Image (Required) 1. From the Program Details page, click the Palette icon. 7
8 2. Click Edit Header. 3. Click Browse and select your image. To review the branding guidelines, click the link at the bottom of the page. 4. Select whether you want to show your program s name in the headline text. If this is already part of your image, select No. 5. If you choose to show headline text, select a contrasting text color below. 6. Click Save. Create Introductory and Instructional Text (Required) The text you include on the home page will be applicants first look at your program and school-specific information in the application. You should include an introduction, instructions on how to be a successful applicant, and important details about your program and school. You can also include information on your specific requirements. Some examples include: Previously-earned degrees GPA Test scores, such as GRE Needed experience State restrictions Deadline requirements Supplemental applications or fees, if applicable Any optional information from the Supporting Information section that applicants should complete to apply to your program You can include a link on your program s page to your school s website, but make sure that all pertinent information included on your website is also included in the home page text. This makes it easier for applicants to find the information they need in one place. The home page is a required section in both the Configuration Manager and the CAS application. Applicants will view your program home page before submitting their application, even if you disable the optional sections. Content Formatting Tips There is no limit to the length of text, but 1,500 characters or less is recommended for the best visual display. Use the bold, italic, and underline options to format your text, as needed. Use the bulleted list, numbered list, and indent options to structure your text. Use the link icon to add links to websites or addresses. Links open in a new browser window. 8
 1. Click the Palette icon to open the Branding section. 2. Click Edit Instructions.")
9 If copying and pasting content from a website, first copy the content to Microsoft Word (or another text editing program, like Notepad) and format it to your liking. Then, copy it from the notepad and paste it into the editor. Set Up your Program Home Page Introduction (Required) 1. Click the Palette icon to open the Branding section. 2. Click Edit Instructions. 3. Use the HTML editor to create your content. 4. Click Save. Example of branded homepage: 9


10 Configuring Your Program Settings You can customize your program with Transcripts, Evaluations, Questions, Prerequisites, and Documents pages. From the Program Details page, click the Program Settings icon to configure these pages. Next, on the Program Editor page, click the checkboxes next to each page you want to use. Then, click each link to customize the pages. 10
11 Configure Transcript and Coursework Entry (Required) In this section, you can indicate both the types of transcripts required for your program and the required coursework entry. College Transcripts 1. Click the Program Settings icon. 2. Click the College Transcripts link on the left. 3. Choose the type of transcripts you would like NursingCAS to collect for your program. 4. Select the type of coursework you would like applicants to enter. The options available to you vary based on your program transcripts selection. If you are accepting Official transcripts, you can subsequently accept All Coursework (all coursework is required to be entered), Prerequisites Only (only prerequisite courses are required to be entered), or None. If you are accepting Unofficial transcripts, you can subsequently accept Prerequisites Only or None. 5. Click Save. Verification Requirements The transcript and coursework entry selections you make determine the level of verification performed by NursingCAS staff. Verification options include: Official Transcripts and Full Coursework Entry with FULL Verification 11
12 Official Transcripts and Prerequisite Coursework Entry Only with LIGHT Verification Official Transcripts and No Coursework Entry with LIGHT Verification Unofficial Transcripts and Prerequisite Coursework Entry Only with NO Verification Unofficial Transcripts and No Coursework Entry with NO Verification No Transcripts and No Coursework Entry with NO Verification The following information provides additional context: Official Transcripts: Applicants are required to have their official transcripts mailed directly to NursingCAS by the issuing institution s registrar s office. Once received, NursingCAS s operations team validates each transcript for authenticity. Transcripts are provided to designated school users in WebAdMIT as a high-resolution PDF. Note that these transcripts are considered official by AACRAO; please read this statement for additional details. Additionally, NursingCAS now accepts e-transcripts from Parchment and Credential Solutions. Unofficial Transcripts: Applicants can upload a copy of their unofficial transcript(s) directly in the Academic History section the application. These transcripts are provided to designated school users in WebAdMIT as a high-resolution PDF. Note that unofficial transcript(s) are not verified. No Transcripts: Applicants are not required to have transcripts sent directly to NursingCAS (instead, you can process transcripts directly at your institution), and will not be available in WebAdMIT. Full Coursework Entry with FULL Verification: Applicants will enter all the coursework they have completed at any college or university attended in order to submit their application. NursingCAS will verify this data for accuracy and calculate several GPAs which will be available in WebAdMIT, including GPA by year, GPA by subject, GPA by school, nursing GPA (if applicable), and cumulative GPA. Pre-requisite Coursework Entry with LIGHT Verification: Applicants will only enter specific courses they have completed to match your pre-requisite course requirements. These courses are available in a read-only format in WebAdMIT and are not verified. Additionally, only Per Transcript and Overall GPAs are provided to you in WebAdMIT. Note that if any data point is missing from the transcript, then GPAs may not be available. No Coursework Entry with LIGHT Verification: Applicants will not enter any coursework data and only Per Transcript GPAs and an Overall GPA are provided to you in WebAdMIT. Note that if any data point is missing from the transcript, then GPAs may not be available. No Coursework Entry with No Verification: Applicants will not enter any coursework data and no GPAs are provided to you in WebAdMIT. The following applications statuses correspond to the verification options listed above (see below for full descriptions of NursingCAS Application Statuses). 12
13 Transcripts and Coursework Settings Official Transcripts + Full Coursework Official Transcripts + Prerequisites Only Official Transcripts + No Coursework Unofficial Transcripts + Prerequisites Only Unofficial Transcripts + No Coursework No Transcripts + No Coursework Type of GPA Provided All GPAs (Course subject, By School, etc.) Light Verification (Per Transcript and Overall GPA only) Light Verification (Per Transcript and Overall GPA only) No GPAs provided No GPAs provided No GPAs provided Applicants Final WebAdMIT Status Verified (full verification) Verified (light verification) Verified (light verification) Complete (no verification) Complete (no verification) Complete (no verification) * Light verification means only limited GPA calculations will show and if any data point from the transcript is missing, GPAs may not be available. Note: When selecting Official Transcripts and Full Coursework Entry with FULL Verification, users can generate program-specific local and prerequisite GPA calculations in addition to the provided GPAs. Click here for more information. 13


14 Example of GPA calculations provided with FULL verification: Example of GPA calculations provided with LIGHT verification: 14
15 Application Statuses Application Status Definition Notes In Progress The applicant has selected one of your programs but has not yet submitted their application WebAdMIT Users can see contact information and any other data entered by applicants. Received The applicant has submitted their application to one of your programs. WebAdMIT Users can see all applicant data; however, transcripts may be missing. Complete The applicant has submitted their application and all transcripts for Colleges Attended have been received and scanned. WebAdMIT users can see all applicant data, including transcripts (if required). This is the final status for programs that require unofficial or no transcripts. Verified The applicant has submitted their application and all transcripts for Colleges Attended have been received and scanned. Additionally, all coursework and degrees have been verified by the operations team, and all schoolspecific and cumulative GPAs have been entered by the operations team. This is the final status for programs that require official transcripts and full coursework. All coursework has been verified and GPAs have been calculated. This is the final status for programs that require official transcripts and prerequisites or official transcripts and no coursework (once the GPAs are entered by the operations team during light verification ). On Hold The applicant has submitted their application, but it has been placed on hold by operations team. WebAdMIT users can only see partial information; the operations team uses this status for administrative holds. Undelivered The applicant has submitted their application, but it has been undelivered by the operations team WebAdMIT users can see full information about applicants. Undelivered applicants have an opportunity to update their application to correct errors found during verification. 15
16 Configure Evaluations (Optional) In this section, you can ask applicants to add evaluations to their application (also known as Letters of Reference). When applicants add an evaluation, they identify an evaluator and send them a request to complete an electronic evaluation. 1. Click the Program Settings icon. 2. Click the Evaluations checkbox on the left, then click the Evaluations link. 3. Add any relevant instructions in the Applicant Instructions field. 4. Specify the minimum number of evaluations required (1-10), as well as the maximum number of evaluations accepted (1-10). If you do not require evaluations, set the minimum required to Indicate if the minimum required must be completed for the application to be submitted for review. If you select yes, applications will not become complete and will not be verified by our staff until the minimum number of evaluations are received by applicants evaluators. If you select no, applications will become complete once all transcripts and payments are received, regardless of whether the evaluations are complete. 16
17 Configure Questions (Optional) In this section, you can add custom questions that are not included in the common sections of the application or that are specific to your school or program. These questions can be either required or optional for applicants. Common question examples include: Have you previously applied to our program? Why are you interested in this profession? Why are you interested in this program? You can also use these questions as reminders to ensure applicants fulfill your requirements. For example: We require that you provide your SSN. Have you entered that in the Supporting Information section of the application? Before adding your custom questions, review your application to determine what questions you need to add. We also recommend reviewing any supplemental applications your school or program may use as these custom questions may eliminate the need for supplemental applications. Click here to view examples of custom questions. Add Question Sets Question Sets can be used to group questions together in a specific category (e.g. Research Interests, Graduate Assistantship Questions, etc.). You must create at least one Question Set to use the custom question functionality. 1. Click the Program Settings icon. 2. Click the Questions checkbox on the left, then click the Questions link. 3. Add instructions about the questions in the Applicant Instructions field. This text will appear at the top of the page. 4. Click + Add Question Set. 5. Add header text. This appears as a title above your question(s) (e.g. Research Interests, Graduate Assistantship Questions, etc.) and can be used to summarize the questions you are asking or provide other relevant details. 6. Add an optional description. 7. Click + Add. 17
18 Add Questions Once you create a Question Set, you can add questions to it. There are several question types you can choose from, depending on the format in which you expect applicants to answer each question: Multiple Choice: Questions can be single or multiple answer. o Single answer questions can appear with radio buttons or drop-down menus for applicants to select. Applicants can choose only one response. o Multiple answer questions appear with checkboxes for applicants to select. Applicants can choose one or more responses. Essay: Questions appear with a text box where applicants can type their response. You can set the maximum number of characters that applicants can enter. If you want the question to appear as a short, one-line answer, set the character limit to 50 characters. If you want applicants to enter a longer answer, set the character limit to 250 characters or more. Either/Or: Questions appear with radio buttons where applicants can choose from two responses. These are typically questions that require a Yes or No answer. Section Text Box: A block of instructional text that you can insert to provide applicants with additional information. This is not an actual question so applicants will not be able to enter any responses. We recommend only using this option if you have a very specific use case. Date: Questions appear with a text box where applicants must enter their response in date format via a calendar picker. Numeric: Questions appear with a text box where applicants must enter a number. You can set whether decimal points are allowed, the maximum number of characters (not including any decimal points, if applicable), and to automatically format numbers over 999 with proper commas. 1. Click + Add Question. 2. Select whether the question is required or not. 3. Enter a Question Description. 4. Select a Question Type from the drop-down. 5. Configure additional options, depending on the Question Type selected. 6. Click Add. 7. Add more questions and question sets as needed and click Save. 18
19 Configure Prerequisites (Optional) In this section, you can list the prerequisite courses, credits, and grades required for entry to your program. Applicants will then self-identify which courses they feel meet your prerequisite coursework requirements. Additionally, a GPA will be calculated (but it can t be edited). You can add instructions that help guide applicants through selecting their prerequisites. You can also add descriptions for each prerequisite, explaining how you expect applicants to match the prerequisite. This field can contain a maximum of 250 characters, so you may need to shorten descriptions if cutting and pasting from another resource. You should identify prerequisites by subject types, not university course numbers (i.e. Introductory Biology instead of BIOL 101 ) as students from different institutions may not be familiar with your course numbering system. Prerequisite course collection is optional for each program. You can add up to 50 prerequisite courses for each program. 1. Click the Program Settings icon. 2. Click the Prerequisites checkbox on the left, then click the Prerequisites link. 3. Enter any custom instructions you want to provide in the Applicant Instructions HTML editor. 4. Click + Prerequisite. 5. Enter the following details for each course. Title: Enter a descriptive title (e.g. Chemistry Lab not CHEM 101L). Description: Enter a description that is 250 characters or less (e.g. Chemistry Lab courses much be for science majors and taken within the last 5 years to fulfill our requirements. ). Minimum Grade: Enter a number from 0-4, including 2 digits after the decimal point (e.g. 2.50). Minimum Credits: Enter a number from 0-4 without decimals (e.g. 3). 6. Click + Prerequisites to continue adding courses as needed. 7. Click Save. 19
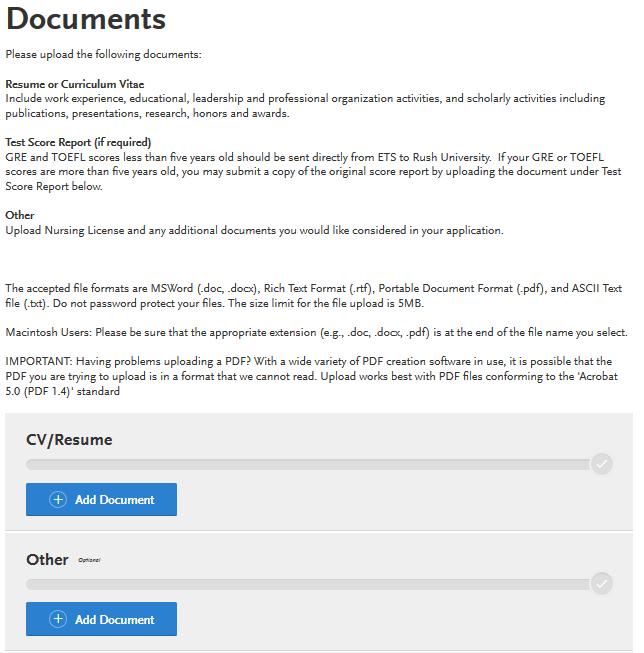
20 Configure Documents (Optional) In this section, you can ask applicants to upload supplemental documentation, including: Certification Course Catalog Description CV/Resume Health Records High School Transcript License Military Papers Personal Statement Research/Publication Shadowing/Healthcare Experience Test Score Report Writing Sample Other If you choose to require any documents, be sure to provide specific instructions. For example, if you require a form to be completed, you can use the instructions section to link to the document on your school s website and instruct applicants to download, complete, and upload the form as an Other document type. 1. Click the Program Settings icon. 2. Click the Documents checkbox on the left, then click the Documents link. 3. In the Applicant Instructions field, add text that prompts applicants to upload the document type, along with relevant instructions (note that file format and size restriction information is automatically included in the application). 4. Use the Request toggle next to the document type in the Program Documents section to define whether the document is requested. This setting must be enabled (indicated by a green checkmark) for applicants to see it listed on the Documents page. 5. Use the Require toggle to define whether the document is required. If this setting is enabled (indicated by a green checkmark), applicants cannot submit to your program unless they upload the document. If you want this question to be optional, leave the setting disabled (indicated by a gray x). 6. Specify the maximum number of documents that applicants can upload. If you set the document to required, this will be the number of documents applicants must upload to apply to your program. If the document is not required, this will be the number of documents applicants have the option of uploading, but can still apply without doing so. You cannot collect more than 5 documents for an individual document type regardless of whether it is required or optional. 7. Click Save. 20

21 Preview your Programs Once you re done configuring your home page, branding, and additional sections, you can preview how your program page will appear to applicants in the application. 1. From the Program Details page, click the Home icon. 2. Scroll down to the Program Settings section and confirm that the sections you want to include are enabled. Sections that are not enabled will not be visible in the application. 3. Click the eye icon to preview each section. 4. Carefully review each page to confirm that the formatting and requirements are correct and make any necessary edits before submitting your program for approval. If you need to make any changes, click Edit at the bottom of the page. Note that when previewing, you can only view how the page looks for applicants; you cannot interact with any of the elements (i.e. drop-down menus, text fields, etc.). 21

22 Examples of the Questions, Prerequisites, Documents, and References views for applicants: 22

23 23
24 Submit Program for CAS Approval Once you configured and reviewed your program pages, you must submit your program to NursingCAS for review and approval. Your program will not be live in the application until it receives approval. If errors are found, your program will revert to Draft status for you to edit. If your program is approved, you will receive an from NursingCAS. 1. Click the home icon. 2. Scroll down to the Program Settings section and click Submit for Review. Once your program is approved, you can only edit the deadline date, home page, and branding. You cannot edit any other sections of the program, such as Questions, Documents, Prerequisites, etc.. Monitor your Program Status Your program can be in different statuses: Draft means that this is a new program that you can fully edit. It has not been sent to the CAS administrator for approval and is not available to applicants (even if the open date has passed). Ready for Review means that you submitted the program for review and approval by the CAS administrator. It is currently locked and you cannot make changes. Approved means that the program was submitted to the CAS administrator and was approved. Active programs are either live in the application or will become live on the program start date. If the program has not yet opened, applicants can view it as a future program on the Program Selection page in the application. Only the program deadline date, home page, and branding can be edited in this status. Closed means that the program was live on the application, but is no longer available to applicants because the deadline date has passed. The program deadline date, home page, and branding cannot be edited by admissions users. If you have any questions about setting up your program, contact Ann Donnelly at (617) or adonnelly@liaisonedu.com. 24
25 Checklist: CAS Configuration Review the Application Review the current application to get a sense of the questions that are already included and what you may want to add. Start to pull together any details about your program and school that you want to share with applicants in the application. Be Aware of Cycle Rollovers Keep in mind that all pages from the current cycle in an approved or closed status will be rolled over to the new cycle. Brand your Program Page Work with your Marketing or PR department to choose a branding image that meets the size and format specifications. Pull together your program s introductory text and instructions, as well as any requirements information, including supplemental items/fees if you use a two-part application process. Configure Transcript and Coursework Entry Indicate the transcripts and coursework entry you require. Configure Evaluations Determine how many evaluations, if any, you want to request. Configure Questions Review current school and supplemental applications to help you determine which questions you need to ask. Configure Prerequisites Pull together information on prerequisites, including any instructions. Configure Documents Ensure you have specific instructions for any documents you are requesting. Preview and Submit your Program Monitor your program s status. 25
Configuration Manager Help Guide
 Configuration Manager Help Guide The Configuration Manager Help Guide is designed to help you navigate through the CAS Configuration Portal, which is the tool you will use to set up your programs on your
RF-PTCAS CONFIGURATION MANAGER HELP GUIDE
 RF-PTCAS CONFIGURATION MANAGER HELP GUIDE The Configuration Manager Help Guide is designed to help you navigate through the RF-PTCAS Configuration Portal, which is the tool you will use to set up your
CAMPUS PORTAL QUICK REFERENCE GUIDE: STUDENT PORTAL
 CAMPUS PORTAL QUICK REFERENCE GUIDE: STUDENT PORTAL 1 CONTENTS How to Set Up Your Portal Web Account... 3 How to Personalize Your Homepage... 4 How to View Holds Applied to Your Portal Account... 4 How
Parent Student Portal User Guide. Version 3.1,
 Parent Student Portal User Guide Version 3.1, 3.21.14 Version 3.1, 3.21.14 Table of Contents 4 The Login Page Students Authorized Users Password Reset 5 The PSP Display Icons Header Side Navigation Panel
Discipline Page My Home Access Center Account Fees Page Using Home Access Center Interim Progress Report Page Attendance Month View Page
 My Home Access Center Account Obtaining a HAC Account What are challenge questions? Create challenge questions Change your challenge questions Change your password Forgot your user name or password Frequently
Home Access Center User Assistance
 User Assistance Using Home Access Center Home Access Center Menu View another student Attendance Month View Page Change months View attendance details Subscribe to attendance email alerts Calendar Page
Using Home Access Center. Attendance Month View Page. Calendar Page. Career Plan Page. Classwork Page. Course Requests Page.
 Using Home Access Center Home Access Center Menu View another student Attendance Month View Page Change months View attendance details Subscribe to attendance email alerts Calendar Page Customize calendar
Using Home Access Center
 Page 1 of 27 Using Home Access Center Home Access Center (HAC) is a browser-based student information system that allows you to view student registration, report card, attendance, discipline, transcript,
Using Home Access Center
 Using Home Access Center Home Access Center (HAC) is a browser-based student information system that allows you to view student registration, report card, attendance, discipline, transcript, next year
Test Information and Distribution Engine
 SC-Alt Test Information and Distribution Engine User Guide 2018 2019 Published January 14, 2019 Prepared by the American Institutes for Research Descriptions of the operation of the Test Information Distribution
Uploading Documents to an Application
 The following steps will explain how Graduate Program Administrators upload any supporting documents to the students file (references, transcripts and supporting documents). Prospective students and referees
Self Service Student Guide
 Self Service Student Guide (as of 05/24/2018 ) Alamance Community College Student Success Division PO Box 8000 1247 Jimmie Kerr Rd Graham, NC 27253 (336) 506 4270 www.alamancecc.edu Alamance Community
Home Access Center User Assistance
 User Assistance Using Home Access Center Home Access Center Menu View another student Attendance Month View Page Change months View attendance details Calendar Page Customize calendar information Change
AGING STUDIES ADMISSIONS APPLICATION
 AGING STUDIES ADMISSIONS APPLICATION MASTER OF SCIENCE DEGREE IN GERONTOLOGY This application must be typed or printed legibly in black ink. If not legible, your application will be disqualified. TODAY'S
MiraCosta CurricUNET User Manual
 MiraCosta CurricUNET User Manual Building the Worldwide Curriculum Network Page 1 Contents Log In... 5 Courses... 6 Programs... 9 Create Proposal... 10 Deactivate Credit Course... 11 Deactivate Noncredit
WebAdMIT User Manual Liaison International. All Right Reserved.
 WebAdMIT User Manual 2017 Liaison International. All Right Reserved. Table of Contents Section 1: Introduction... 6 What is WebAdMIT?...6 About Liaison International... 6 About This Help Manual... 6 System
Symplicity Career Services Manager Student User Reference Guide
 Symplicity Career Services Manager Student User Reference Guide WELCOME TO SYMPLICITY! Wayne State University Law School Career Services Office Symplicity is the new web-based career management system
Use the following link to access the application: University of Utah Graduate Application. Step 1: Create an Account - Click Create Account.
 Graduate Program Application Instructions Please reference these instructions as you complete the graduate application process. These instructions will answer many frequently asked questions. NOTE: The
Wake Forest University Transcript Request Parchment User Guide
 Wake Forest University Transcript Request Parchment User Guide Revised February 2016 Table of Contents Introduction.... 3 Content Intentions...... 3 What is a Transcript?..... 3 College, Graduate School
PowerSchool Parent Portal User Guide. PowerSchool 7.x Student Information System
 PowerSchool 7.x Student Information System Released December 2012 Document Owner: Documentation Services This edition applies to Release 7.6 of the PowerSchool software and to all subsequent releases and
Using Home Access Center
 Page 1 of 16 Using Home Access Center Home Access Center (HAC) is a browser-based student information system that allows you to view student registration, report card, attendance, discipline, transcript,
Table of Contents COURSE OBJECTIVES... 2 LESSON 1: ADVISING SELF SERVICE... 4 NOTE: NOTIFY BUTTON LESSON 2: STUDENT ADVISOR...
 Table of Contents COURSE OBJECTIVES... 2 LESSON 1: ADVISING SELF SERVICE... 4 DISCUSSION... 4 INTRODUCTION TO THE ADVISING SELF SERVICE... 5 STUDENT CENTER TAB... 8 GENERAL INFO TAB... 19 TRANSFER CREDIT
PowerSchool Student and Parent Portal User Guide. PowerSchool Student Information System
 PowerSchool Student and Parent Portal User Guide PowerSchool Student Information System Released December 2016 Document Owner: Documentation Services This edition applies to Release 10.1 of the PowerSchool
Student Portal Training
 Student Portal Training From the FSC homepage (www.flsouthern.edu), scroll to the bottom of the page and click for Current Students Then click Portal (Or go directly to https://portal.flsouthern.edu/ics/.)
Student Guide INTRODUCTION TO ONLINE RESOURCES
 Student Guide INTRODUCTION TO ONLINE RESOURCES Date: 12. March. 2018 By: Technical Support Team Table of Contents 1) Introduction 3 2) Student Panel (SIS) 3 2.1) Student Panel (SIS) Login 3 2.1.1) Definitions
AP Onestop Request Official Transcript
 AP Onestop Request Official Transcript USERNAME: Refer to AP Self Service for user name PASSWORD: The first time only will be ApA and the 8 digit A# or Birth date twodigit month, day and year. Then click
eproject Submission tutorial for IQP/MQP students
 eproject Submission tutorial for IQP/MQP students You will learn the phases of the eproject submission process up to the Approve stage. The tutorial takes approximately 8 minutes. Before beginning the
PowerSchool. GPA/Class Rank Transcripts. (Revised 05/19/14)
") PowerSchool GPA/Class Rank Transcripts (Revised 05/19/14) GPA Calculation: There is no GPA calculation in PowerSchool. GPA is dynamic - the system automatically recalculates a student s GPA when a grade
PowerSchool GPA/Class Rank Transcripts (Revised 05/19/14) GPA Calculation: There is no GPA calculation in PowerSchool. GPA is dynamic - the system automatically recalculates a student s GPA when a grade
Click on view my advisement report
 How-To Guide For Obtaining Pharmacy Transcripts and GPA for PhorCAS Pharmacy Residency Applications Last updated: 11/6/17 by Julie Mandel, PharmD Candidate 2018 Step 1: Calculating your PharmD GPA You
Parchment Send K-12 User Guide
 Parchment Send K-12 User Guide 2 Contents INTRODUCTION 5 DASHBOARD 6 TRANSCRIPT REQUESTS 7 Approve current requests 8 Approve a request that was waiting for the next grading period to end 9 Approve a request
esd Portal: Parent View User Guide v
 esd Portal: Parent View User Guide v. 3.7.0 Copyright 2002-2013 eschooldata, LLC All rights reserved. TABLE OF CONTENTS Overview... 3 Account Registration... 3 Logging In... 5 Getting Help... 7 Navigating
Faculty Portal. Logging In:
 Faculty Portal Logging In: Access the portal via the web address provided by your institution. If your institution is using Active Directory to authenticate, you may not be required to log in at this page.
esd Portal: Parent View User Guide v
 esd Portal: Parent View User Guide v. 5.9.0 Copyright 2002-2018 eschooldata, LLC All rights reserved. TABLE OF CONTENTS Overview... 3 Parent Portal Login Page... 3 Online Registration...4 Parent Portal
College of Lake County. Student Administration System 9.0 Advisement Process - 19 th /41 st Hour Information Guide
 College of Lake County Student Administration System 9.0 Advisement Process - 19 th /41 st Hour Information Guide September, 2008 STUDENT ADMINISTRATIVE SYSTEM ADVISEMENT PROCESS at19 TH & 41 ST HOUR INFORMATION
My Team And Manager Reports Rev 2
 My Team And Manager Reports 20141210 Rev 2 1 Contents My Team Overview... 3 My Team Search... 7 Action Items... 8 Tasks Overview... 8 Assign Training... 11 Profile Overview... 13 Transcript... 15 Calendar
User Manual. perfectionlearning.com/technical-support
 User Manual perfectionlearning.com/technical-support 1 User Manual Accessing Math X... 3 Login... 3 Forgotten Password... 3 Navigation Menu... 4 Logout... 4 Admin... 5 Creating Classes and Students...
User Manual. Home Access Center User Assistance
 User Assistance User Manual Using Menu View another student Attendance Month View Page Change months View attendance details Calendar Page Customize calendar information Change calendar views Classwork
My Lakeland Student Guide
 My Lakeland Student Guide My Lakeland is your connection to your class schedule, your grades, your student account and your personal contact information. Known in technical terms as a student self-service
PowerSchool Student and Parent Portal User Guide. https://powerschool.gpcsd.ca/public
 PowerSchool Student and Parent Portal User Guide https://powerschool.gpcsd.ca/public Released June 2017 Document Owner: Documentation Services This edition applies to Release 11.x of the PowerSchool software
WHAT IS MY WAY? Metropolitan Community College 1 07/18/16
 WHAT IS MY WAY? MCC My Way is the web portal at MCC. The portal provides single sign-on access by automatically logging into My Services, Microsoft Outlook Calendar, Student Planning, Office 365, and Blackboard
DRX Platform Manager DRX Platform Manager
 DRX Platform Manager 1 P a g e Table of Contents DRX Platform Manager... 1 Introduction to the DRX Platform Manager... 4 Getting Started... 4 Login... 4 Platform Manager... 4 DRX Application Configuration
Canvas: Interface & Modules
 Canvas: Interface & Modules Contents View Dashboard... 2 Course Navigation Menu... 3 The Syllabus Tool... 4 View Syllabus Table... 5 Editing/Uploading the Syllabus... 6 Editing an Event or Assignment in
CurricUNET User Manual
 CurricUNET User Manual Page 1 Contents Log In... 5 Changing Your Password... 6 Viewing Courses... 8 Viewing Programs... 11 Create Proposal... 12 Course Proposals... 15 Cover or Main page... 15 Proposal
Records and Enrollment Participants Guide
 IBM Cognos Analytics Welcome to Cognos Records and Enrollment Training! Today s objectives include: Gain a Basic Understanding of Cognos Understand University policies on data security including FERPA
PowerSchool 7.x Student Information System
 PowerSchool 7.x Student Information System Released May 2012 Document Owner: Documentation Services This edition applies to Release 7.2 of the PowerSchool software and to all subsequent releases and modifications
MSW Online Application Steps (walk-through)
") MSW Online Application Steps (walk-through) Click here to visit the MSW Application page of the School of Social Work Website. October 1, 2018 January 5, 2019 9/28/18 1 Application Process Step 1: Apply
MSW Online Application Steps (walk-through) Click here to visit the MSW Application page of the School of Social Work Website. October 1, 2018 January 5, 2019 9/28/18 1 Application Process Step 1: Apply
Campus Solutions Advisement Quick Reference Guide
 Campus Solutions Advisement Table of Contents Introduction to Step Sheets... 1 About Your Advisee... 2 View List of Advisees... 3 Send Notifications to Advisees... 4 View Advisee Student Center... 7 View
MN Studio Website - User Guide
 MN Studio Website - User Guide Version 1.1 MN Studio Website Program 1. Introduction Welcome to the new website program! The MN Studio Website program allows you to create your own website with customized
SPECIFICATIONS Insert Client Name
 ESSENTIAL LMS BRANDING SPECIFICATIONS Insert Client Name Creation Date: June 23, 2011 Last Updated: July 11, 2017 Version: 16.5 Page 1 Contents Branding Elements... 3 Theme Management... 3 Header Images...
S NISWEB tm For Lancaster Theological Seminary
 Welcome to the new features of SONISWEB for Lancaster Theological Seminary. On the following pages, you will be guided to the features available to you for the purpose of reviewing your academic and financial
Palisades School District PowerSchool Parent Portal Guide
 Palisades School District PowerSchool Parent Portal Guide Get Started To get started, you must create a parent account in the PowerSchool Parent Portal. Create a Parent Account Use this procedure to create
Schedule User Guide PowerSchool Student Information System
 PowerSchool Student Information System Document Properties Schedule User Guide Copyright Owner 2004 Apple Computer, Inc. All rights reserved. This document is the property of Apple Computer, Inc. and is
MyDegreePath Student Manual
 MyDegreePath Student Manual Last Revised: March 16, 2017 Table of Contents Audits How do I run an audit?... 1 How do I run a what-if audit?... 1 How do I run a what-if audit with a minor?... 3 How do I
Student Forms Table of Contents
 Student Forms Updated Summer 2012 Student Forms Table of Contents Student Forms Form Categories... 1 Creating a Form... 2 Publishing a Form and making it Active... 2 General Tab... 2 Form Editor Tab...
STUDENT USER GUIDE FOR
 STUDENT USER GUIDE FOR Contents Registering on Handshake... p. 2 Adjusting Public/Private settings...p. 3 Setting Notification Preferences p. 4 Uploading Documents. p. 4 Editing Documents... p. 5 Searching
Public Health Graduate Program Application Instructions
 Public Health Graduate Program Application Instructions Please use these directions as a reference as you complete the ApplyYourself application process. These instructions will facilitate the process
Administrator Quick Guide
 1 Administrator Quick Guide Login Screen The first page employees will see when visiting their training site is the login screen. This is where employees must enter their username and password to access
PARENT PORTAL VIEW LEARNING GUIDE
 PARENT PORTAL VIEW LEARNING GUIDE Central Susquehanna Intermediate Unit, USA TABLE OF CONTENTS Overview... 3 Account Registration... 3 Logging In... 5 Getting Help... 7 Navigating the Portal... 8 Messages...
A Learning Management System for Professionals Who Protect the Public s Health. User QuickGuide
 A Learning Management System for Professionals Who Protect the Public s Health User QuickGuide How to login to MRC-TRAIN 1. Type https://www.mrc.train.org into the address field of your browser. 2. Enter
PowerSchool Student and Parent Portal User Guide. PowerSchool 8.x Student Information System
 PowerSchool 8.x Student Information System Released July 2014 Document Owner: Documentation Services This edition applies to Release 8.0.1 of the PowerSchool software and to all subsequent releases and
esd Portal: Parent View User Guide v
 esd Portal: Parent View User Guide v. 5.0.0 Copyright 2002-2016 eschooldata, LLC All rights reserved. TABLE OF CONTENTS Overview... 3 Parent Portal Registration... 3 Logging In... 5 Getting Help... 7 Navigating
UC ELC Extract Procedures April 21, 2016
 April 21, 2016 1. Overview ** 2. Configure the Create UC Data Files Form** Entering Additional Required Data ** Specific Fields for the ELC Extract Specific Fields for the TES Extract** Specific Fields
In the fourth unit you will learn how to upload and add images and PDF files.
 Introduction Here at SUNY New Paltz, we use the Terminal Four (T4) web content management system (CMS). This puts the power of editing content on our college s webpage in the hands of our authorized users.
An Overview of the OSCAR Application Process
 An Overview of the OSCAR Application Process Although applying for positions in OSCAR may seem complex at first, it is a straightforward process that can be broken down into four basic steps: Upload Documents
How To: This document covers how to perform several common tasks in eservices from the Student Center. eservices Self Service Help for Students
 This document covers how to perform several common tasks in eservices from the Student Center. How To: Find User ID/Username Forgot My Password Browse Schedule or Course Catalog Enroll Add Classes Enroll
TEACHER PAGES USER MANUAL CHAPTER 6 SHARPSCHOOL. For more information, please visit: Chapter 6 Teacher Pages
 SHARPSCHOOL USER MANUAL CHAPTER 6 TEACHER PAGES For more information, please visit: www.customernet.sharpschool.com 0 TABLE OF CONTENTS 1. 2. 3. 4. 5. 6. 7. 8. 9. 10. 11. INTRODUCTION... 1 I. TEACHER PAGE
esd Portal: Parent View User Guide v
 esd Portal: Parent View User Guide v. 3.9.0 Copyright 2002-2014 eschooldata, LLC All rights reserved. TABLE OF CONTENTS Overview... 3 Account Registration... 3 Logging In... 5 Getting Help... 7 Navigating
CourseWorks Quick Start
 Introduction CourseWorks Quick Start CourseWorks (aka Sakai ) is the university's new course management system, which allows instructors to develop and maintain course Web sites. With CourseWorks, instructors
Admissions & Intro to Report Editing Participants Guide
 IBM Cognos Analytics Admissions & Intro to Report Editing Participants Guide Welcome to Cognos - Admissions and Introduction to Report Editing! Today s objectives include: Gain a Basic Understanding of
TES The Transfer Evaluation System. Functional Users Manual rev
 Functional Users Manual rev. 7.14.14 TES The Transfer Evaluation System Research Courses. Track Evaluations. Empower Transfer. This manual is designed to help you understand this powerful tool in a step
Student Guide INTRODUCTION TO ONLINE RESOURCES
 Student Guide INTRODUCTION TO ONLINE RESOURCES Date: 08. June. 2017 By: Technical Support Team STUDENT GUIDE southwales.unicaf.org 1)Introduction...4 2)Student Panel (SIS)...4 2.1)Student Panel (SIS) Login...4
Contra Costa CurricUNET User Manual
 1000 River Walk Drive, Suite 350 Idaho Falls, ID 83402 Tel: 208.522.1225 Fax: 208.522.2896 Contra Costa CurricUNET User Manual Building the Worldwide Curriculum Network Table of Contents Log In... 4 Viewing
PlusPortals Manager User Guide. Get Started Managing Your School's Portals. Integrated School Management Software
 PlusPortals Manager User Guide Get Started Managing Your School's Portals Integrated School Management Software Copyright 2018 Rediker Software. All rights reserved. Information in this document is subject
PUBLIC HEALTH GRADUATE PROGRAM APPLICATION INSTRUCTIONS
 PUBLIC HEALTH GRADUATE PROGRAM APPLICATION INSTRUCTIONS DIVISION OF PUBLIC HEALTH APPLICATION INSTRUCTIONS Please use these directions as a reference as you complete the ApplyYourself application process.
UC ELC Extract Procedures March 22, 2008
 UC ELC Extract Procedures March 22, 2008 The UC ELC Transcript Extract program allows a School to extract data from Aeries that includes student history and test data. This information is then sent as
User Guide. Chapter 6. Teacher Pages
 User Guide Chapter 6 s Table of Contents Introduction... 5 Tips for s... 6 Pitfalls... 7 Key Information... 8 I. How to add a... 8 II. How to Edit... 10 SharpSchool s WYSIWYG Editor... 11 Publish a...
Loyola Marymount University School of Education
 Loyola Marymount University School of Education The California Teaching Performance Assessment (CalTPA) Frequently Asked Questions The information presented in this guide is meant to serve as introductory
User Manual Contents
 User Manual Contents Accessing MyPortfolio... 2 New Users - Creating an Account... 3 Returning Users - Logging in to Your Account... 5 Resetting Your Password... 6 Updating Your Account/Profile Information...
SLATE APPLICATION HOW TO GUIDES
 SLATE APPLICATION HOW TO GUIDES Accessing and Navigating Slate How to log into Slate How to find an application in Slate How to view an applicant s PDF Slate Record Overview The Dashboard Tab Slate Record
Grade Reporting for Secondary Schools Conference 2017
 Conference 2017 Session Description: Explanation of timelines and procedures of the grade reporting cycle; available grade reporting options, grade input, and generating report cards and other reports.
SUBMITTING NON-SUBSTANTIVE GRADUATE AND PROFESSIONAL STUDIES CATALOG EDITS
 SUBMITTING NON-SUBSTANTIVE GRADUATE AND PROFESSIONAL STUDIES CATALOG EDITS Final Catalog Editing Process & Timeline Content Owner Submits Non- Substantive Edits determined by college Graduate Asso. Deans
How to use the transcription tool STATE LIBRARY GUIDE
 How to use the transcription tool STATE LIBRARY GUIDE Transcription website https://transcripts.sl.nsw.gov.au/ Overview of the transcription process The Library loads the digitised image of the document
ACTIVE CAMPUS PORTAL ADVANCED (SHAREPOINT BASICS)
") ACTIVE CAMPUS PORTAL ADVANCED (SHAREPOINT BASICS) Training for Points of Contacts How SharePoint fits into Active Campus Portal Introduction to SharePoint Services Working with Lists Working with Libraries
ACTIVE CAMPUS PORTAL ADVANCED (SHAREPOINT BASICS) Training for Points of Contacts How SharePoint fits into Active Campus Portal Introduction to SharePoint Services Working with Lists Working with Libraries
SLATE APPLICATION HOW TO GUIDES
 SLATE APPLICATION HOW TO GUIDES Accessing and Navigating Slate How to log into Slate How to find an application in Slate How to view an applicant s PDF Slate Record Overview The Dashboard Tab Slate Record
TAS User Guide. 12 January Version 1.0
 TAS User Guide 12 January 2012 Version 1.0 Disclaimer This user guide is for information purposes and might not exactly match the functionality and display of the TAS Registration system and the TLD Application
Student Records. Course Instructions. SLCM_AD_310 Student Records 1. Click Attachments (upper right corner) Print the pdf
 Print the pdf") Student Records SLCM_AD_310 1 of 106 Course Instructions Click Attachments (upper right corner) Click QRC Course Navigation pdf Print the pdf Use the pdf to navigate the course and take the Assessments
Student Records SLCM_AD_310 1 of 106 Course Instructions Click Attachments (upper right corner) Click QRC Course Navigation pdf Print the pdf Use the pdf to navigate the course and take the Assessments
Peralta Community College District CurricUNET User Manual
 Peralta Community College District CurricUNET User Manual Page 1 Contents Log in... 8 Changing Your Password... 9 Viewing Courses... 11 Viewing programs... 14 Create Proposal... 15 New Course Proposal...
Logging into and using MyBC
 Logging into and using MyBC MyBC is Bellin College s Student Information System. This is where you go to register for classes, view your student documents, check your billing, and view your financial aid.
My Courses: Displays courses the user has self-enrolled in as well as courses that have been assigned to the user when available.
 LOGGING IN To log in go to https://gbateam.redvector.com and enter your Login /Username and Password. If you have forgotten your password, click on the Forgot your password link. 1. Enter the primary email
Focus University Training Document
 Focus University Training Document FOCUS Training: Nurses/Health Training Agenda Basic Navigation of SIS Searching for Students More Search Options Student Record and Sub menus o General Demographics o
ACADEMIC TECHNOLOGY SUPPORT
 ACADEMIC TECHNOLOGY SUPPORT D2L : Introduction A Guide for Instructors ats@etsu.edu 439-8611 www.etsu.edu/ats Table of Contents Introduction...1 Objectives... 1 Logging In to D2L...1 My Home... 2 The Minibar...
Instructor User Guide for BioPortal Molecular Biology
 Instructor User Guide for BioPortal Molecular Biology Cox, Doudna, and O Donnel Getting Started with BioPortal for Cox, Doudna, and O Donnel, Molecular Biology Table of Contents Overview... 1 Online Help...
HOME ACCESS CENTER USER GUIDE
 USING HOME ACCESS CENTER Home Access Center (HAC) is an online portal that allows parents/guardians to log in and view information pertaining to their student(s) attendance, classes, grades, and registration
Campus Solutions Self Service: Student Quick Reference Guide
 Campus Solutions Self Service: Student Table of Contents Introduction to Step Sheets... 4 Getting Started in CUNYfirst... 5 Managing Mozilla Firefox Pop Up Blockers for CUNYfirst... 6 Managing Microsoft
Instructor User Guide for EconPortal Macroeconomics, Third Edition
 Instructor User Guide for EconPortal Macroeconomics, Third Edition Krugman/Wells Getting Started with EconPortal for Krugman/Wells Macroeconomics, 3e Table of Contents Overview... 1 Online Help... 1 System
Blackbaud StudentInformationSystem. Mail Guide
 Blackbaud StudentInformationSystem Mail Guide 102411 2011 Blackbaud, Inc. This publication, or any part thereof, may not be reproduced or transmitted in any form or by any means, electronic, or mechanical,
Academic Advising Basics
 Arizona Board of Regents, 2011 updated 07.11.2010 v.3.0 For information and permission to use our PDF manuals, please contact uitsworkshopteam@listserv.com PDFs available at www.uits.arizona.edu/workshops
eservices Self Service Help for Students
 eservices Self Service Help for Students This document covers how to perform several common tasks in eservices from the Student Center. How To: Find User ID/Username Forgot My Password Text/Email Notification
LAUSD: Naviance edocs Workbook and Technical Job Aide
 LAUSD: Naviance edocs Workbook and Technical Job Aide 1 2 Table of Contents TABLE OF CONTENTS 2 LESSON 1: NAVIACE EDOCS OVERVIEW 3 COURSE OVERVIEW 3 WHAT IS NAVIANCE EDOCS? 3 COLLEGE APPLICATION PROCESS
WHY EFFECTIVE WEB WRITING MATTERS Web users read differently on the web. They rarely read entire pages, word for word.
 Web Writing 101 WHY EFFECTIVE WEB WRITING MATTERS Web users read differently on the web. They rarely read entire pages, word for word. Instead, users: Scan pages Pick out key words and phrases Read in