Migrating SharePoint From 2007 to 2010
|
|
|
- Eustacia Dickerson
- 6 years ago
- Views:
Transcription
 221 8821 Advanced Legal Systems, Inc. CREATING TECHNOLOGICAL CALM www.")
1 Migrating SharePoint From 2007 to 2010 Presented By Scott Randall (888) Advanced Legal Systems, Inc. CREATING TECHNOLOGICAL CALM
2 Table of Contents Section 1: Getting Started... 1 Lesson 1.1: Overview of SharePoint... 1 What is SharePoint Server 2007?... 1 Opening a SharePoint Site... 2 Navigating a SharePoint Site... 3 Overview of Document Libraries and Lists... 6 Lesson 1.2: Introduction to Meeting and Document Workspaces... 7 Types of Workspaces... 7 Creating Workspaces... 8 Accessing Workspaces Publishing to a Workspace Lesson 1.3: Document Management Using Check-in/Check-out Using Version History Using Content Approval Lesson 1.4: Folders Creating a Folder Viewing a Folder s Contents Section 2: Parts of your SharePoint Space Lesson 2.1: Discussion Boards What is a Discussion Board? Setting Up a Discussion Board Using a Discussion Board Lesson 2.2: The Recycle Bin Deleting an Item Accessing the Recycle Bin Recovering an Item Lesson 2.3: Adding Alerts to Outlook What is an Alert? Creating an Alert in SharePoint Adding Alerts to Outlook Lesson 2.4: Basic Office Tasks Opening the Document Pane Overview of the Pane Publishing a File to a Workspace Where to Find Common SharePoint Tasks Lesson 2.5: Using InfoPath and SharePoint Prerequisites Creating InfoPath Form Library Publishing an InfoPath Form to a SharePoint Services Site Creating and Filling Out a Form on SharePoint Using SharePoint Views Using SharePoint Lists in InfoPath Submitting Forms to a SharePoint Site Advanced Legal Systems, Inc.
3 Lesson 2.6: Using InfoPath Forms with SharePoint Workflows Forms and Workflows Publishing the Form Adding a Workflow Adding a Data Connection to Receive Workflow Information Creating a New Form View for the Workflow Changing the Form in Response to Workflow Status Lesson 2.7: Creating Lists and Libraries Libraries Communications Tracking Custom Lists Web Pages Lesson 2.8: Creating and Managing Sites and Web Pages Overview of Sites and Site Templates About Site Collections Creating Sites and Workspaces Creating Web Pages Deleting Sites and Workspaces Lesson 2.9: Site Customization Adding, Moving, and Customizing Web Parts Navigational Settings Modifying the Site Theme, Title, and Description Section 3: Upgrading SharePoint 2007 to SharePoint Lesson 3.1: Install Prerequisites Run Pre-Upgrade Checker Tool Backup SharePoint Environment Prior to Upgrade Ensure that all hardware and software requirements are met Run the Prerequisite Installer Lesson 3.2: Run Setup on All Servers Lesson 3.3: Run the SharePoint Products Configuration Wizard Launching the SharePoint Products Configuration Wizard Advanced Legal Systems, Inc.
4 Section 1: Getting Started Lesson 1.1: Overview of SharePoint What is SharePoint Server 2007? Microsoft Office SharePoint Server was designed to be a centralized meeting place and data repository for members of an organization and succeeds SharePoint Portal The advantage of using SharePoint is that it provides an interface that is common to Web sites (offering recognizable, familiar navigation), provides high integration with Office 2003 and 2007 programs, and is easier to connect to because a user only has to use a web browser. You can manage content on the site and use a wide variety of tools to track the progress of a document, sale, or idea. Searching for a document or name searches the ENTIRE site, as well as all documents, lists of past and present clients, etc. Each member of your organization can have their own personal site, complete with public and private areas. Groups can be organized and create their own sub home page, share their own documents, and more. There are a lot more options that SharePoint uses and has access to, so let s get started and see what SharePoint can offer you.

5 Opening a SharePoint Site You should see the home page for your organization: 2 Advanced Legal Systems, Inc.
.")

6 Navigating a SharePoint Site 1. Page Identification You will always know exactly where you are by looking in the upper left hand corner. If you have navigated a few pages into the SharePoint site, a navigation flow will be displayed under the Navigation tabs (3). This is called a breadcrumb trail: Use the Back button in Internet Explorer to step backwards through your navigation flow or click any position in the navigation flow to jump to that area. 2. Search / Customization / In the upper right hand corner, you can see your login name, customization links, the Help tool, and an area you can use to search the site: 3 Advanced Legal Systems, Inc.
7 Help links 3. Navigation tabs The vast majority of Web sites have a list of links at the top of the page that let you jump to a certain section. SharePoint is no different! Click a tab to be directed to that area: Notice how the News item has a pull down arrow beside it? This means that there are extra options for this heading. After installation of the default SharePoint server, there is a link to a sample news item as well as the news archive: Webmasters of the SharePoint server and regular users alike can both post news topics. The archive feature lets you make sure you didn t miss anything that might have come down the line. We will discuss news items later in this manual. 4 Advanced Legal Systems, Inc.


8 4. Site Actions menu This menu appears on nearly every page you can access on a SharePoint server. You can compare this menu to the File menu of a program. It is mainly used to perform maintenance on a specific page, so the commands in this menu will change. As you can see, there are a number of things you can do on the main home page: 5. Quick Links / Table of Contents Like the Navigation tabs, the Quick Links bar is an ever present feature on your screen. If you look closely, the bar contains the same commands, but with a few twists: First of all, there is a link to View All Site Content at the top. Click this and you will see every document, all lists, picture libraries, discussion 5 Advanced Legal Systems, Inc.

9 boards, surveys, individual sites and workspaces, and the Recycle Bin. There is a counter to tell you how many of each item in each header there is, as well as the date when something was created and/or last modified. We will explore these object types later in this manual. 6. Working Area The center of the window will display lists, details, properties, and data contained in the current page. Overview of Document Libraries and Lists When you first log in, you will see the home page for your organization. If you click the Document Center tab, you will see all documents that have been uploaded for the organization members to use: A document library will probably be the most common item you will use when working with SharePoint because it has the ability to hold files and make them easily accessible. Inside a document library you will see a listing of all files it contains: 6 Advanced Legal Systems, Inc.
10 Each item in a document library or list is a link to download/view the file. However, there are other options you can use as well. If you hover your mouse over an item listing, you will see a pull down arrow appear on the right. Click this arrow for more document options. As we learn more in this manual, you will see how to create your own libraries and lists. You can also create document libraries and lists for your own use in your personal site, and the process for creating document libraries and lists is the same for either location. Lesson 1.2: Introduction to Meeting and Document Workspaces As we learned in the previous lesson, document libraries can hold data for you to view and share. In this lesson we will talk about some more specialized places to meet and work: meeting and document workspaces. Workspaces are like separate pages within the main site. You can use a workspace that is accessible to a team of workers who are doing a project together. Having all of your files and resources in one place makes working that much easier. Types of Workspaces Meeting and document workspaces come in many flavors; let s quickly explore the multitude of options you can choose from. Collaboration Team Site A site for teams to quickly organize, author, and share information. It provides a document library and lists for managing announcements, calendar items, tasks, and discussions. Blank Site Document Workspace Wiki Site Blog A blank site for you to customize based on your requirements. A site for colleagues to work together on a document. It provides a document library for storing the primary document and supporting files, a tasks list for assigning to do items, and a links list for resources related to the document. Site for a community to brainstorm and share ideas. It provides Web pages that can be quickly edited to record information and then linked together through keywords. A site for a person or team to post ideas, 7 Advanced Legal Systems, Inc.
11 observations, and expertise that site visitors can comment on. Meetings Basic Meeting Workspace Blank Meeting Workspace Decision Meeting Workspace Social Meeting Workspace Multipage Meeting Workspace A site to plan, organize, and capture the results of a meeting. It provides lists for managing the agenda, meeting attendees, and documents. A blank meeting site for you to customize based on your requirements. A site for meetings that track status or make decisions. It provides lists for creating tasks, storing documents, and recording decisions. A site to plan social occasions. It provides lists for tracking attendees, providing directions, and storing pictures of the event. A site to plan, organize, and capture the results of a meeting. It provides lists for managing the agenda and meeting attendees, plus two blank pages for you to customize based on your requirements. Creating Workspaces You can create custom workspaces in the organization home page or in your personal site. In this example, we will create a new basic meeting workspace in the Document Center of the home page. To begin, click the Document Center tab to view the page. Next, click Site Actions Create: 8 Advanced Legal Systems, Inc.


12 This will bring you to the Create page, which you will use quite a bit when setting up the SharePoint site for your organization: Under the Web Pages heading (far right), click Sites and Workspaces. This will open the New SharePoint Site window: 9 Advanced Legal Systems, Inc.


13 Let s step through and create a basic site. Give the site a title and description: Give the page a unique URL: Next, select the template. The Basic Meeting Workspace is found in the Meetings tab: The next step is to assign permissions for the site. Permissions are used to keep unwanted visitors out of the site. The default setting makes the new page inherit the parent site permissions; that is, the new site is limited to access to the parent page. In this case the parent page was the Home document library, which is accessible to everyone. However, if you want to create specific permissions for this page, click Use unique permissions: 10 Advanced Legal Systems, Inc.


14 The next section asks if you want to keep the same set of navigation tabs as the parent: Finally, you will specify how SharePoint will catalogue this new Web site. Check off the boxes that apply to the purpose of this page. It is recommended that you click the top checkbox, but this is not required; it just lets others find the site easily. If you do not check this box, you will have to provide other users with the URL you created: Click the Create button at the bottom of the page to make the new site. 11 Advanced Legal Systems, Inc.

15 After a moment, you will see the new page appear: From here, you are free to add whatever content you want to by click the appropriate links in each section. Accessing Workspaces Once a page is created, you can locate it in one of two ways, depending on how the site was initially set up. If you recall the Site Categories section of the page setup, you had the option to list the new site in the site directory. If you checked this option, then you can view the site in the Quick Launch bar wherever you created the site. Keeping with our previous example, we can view the Sample Meeting Workspace in the Document Center: 12 Advanced Legal Systems, Inc.
16 Click the link to visit the page. Note that if you click the + icon you can view any workspaces or libraries that are associated with that page: Publishing to a Workspace Publishing documents and information to workspaces is pretty straightforward. When viewing the page where you want to add content (it doesn t necessarily have to be a workspace), click the appropriate link, which will be named Click here to update, Add new item, Add new document, or something similar. Let s add a text document to the Document Library of the Sample Meeting Workspace. Click Add new document: 13 Advanced Legal Systems, Inc.
17 14 Advanced Legal Systems, Inc.

18 You will be taken to the Upload Document page. Click the Browse button to look for a file to add: Click OK to upload the file. By default, the Overwrite existing files checkbox is selected. This means that if a file with the same name already exists, it will overwrite without any warning. If you don t have this checked off and you try to save a file with the same name, you will receive an error message. Be careful when uploading files! It is a good idea to uncheck the checkbox just to be safe unless you are sure you are uploading a file for the first time. Lesson 1.3: Document Management Using Check in/check out Document check in/check out is similar in nature to signing books in and out of a library but not quite (we ll explain in a moment). Files that are checked in are considered approved for use and viewable by all. Check in and check out happen when you are using the default Documents folder in the Home Document Center. Let s add a text file to the Documents folder to show how this works. Later, we will see how to check in or check out a document that has already been uploaded. 15 Advanced Legal Systems, Inc.


19 First, navigate to the folder, making sure you click its name in the Quick Launch bar: Click the Upload command and select a document to upload: Click OK to upload the file. After a moment, you will see a screen telling you that the file has been checked out to you: 16 Advanced Legal Systems, Inc.
20 If you are the owner of a checked out file, that means that the file does indeed exist in the folder where you uploaded it, but it is flagged as checked out to a user. If you want to check in a file so it is available for others to use, enter a title for the file (if you like) and then click Check In: The file will be listed like any others: Now, if you didn t upload the file but want to use one that is free, simply hover your mouse over the file name, click the pull down arrow, and click Check Out: 17 Advanced Legal Systems, Inc.
.")
21 The file will be marked as checked out, which enables you to make changes to the file. While the file is checked out, others can still view the file, but it will be the original version (the way it was before you checked it out). When you are finished working on the file, hover your mouse over the file name again, click the pull down arrow, and click Check In. You now have the opportunity to describe the changes you have made using the Check in page: The biggest part of this page is the ability to change the version number, which we will discuss later in this lesson. 18 Advanced Legal Systems, Inc.

22 If you don t want to keep the changes you made to the file, click the file and select Discard Check Out. You will be warned that this will abandon changes: Using Version History All documents in SharePoint start as version 0.1. Minor changes here and there, such as a spell check, small formatting change, or editing of properties, result in small number changes: 0.2, 0.3, etc. Major changes warrant a major version change, from 0.x to 1.x, 2.x, etc. This sounds like just another thing to keep track of, but SharePoint does a good job of remembering this for you and making version number changes a piece of cake. 19 Advanced Legal Systems, Inc.


23 When you check in a document, you are provided with a list of options: With the last option, you can simply overwrite the old version if you want. However, this is only recommended if you have made very minor changes. Finally, you have the option to keep the file checked out after you submit a new version. Click OK to confirm your upgrade option to the version number. Using Content Approval When everyone uses the features of a well set up SharePoint server, you can keep very tight control over common mistakes. As you have seen, the check in/check out system works well to make sure no one changed anything they weren t supposed to! Managers and administrators of a SharePoint site can opt to have any files that are uploaded or checked back in be approved. To do this, open the document library or list you want to use with Content Approval. Click Settings Document Library Settings: 20 Advanced Legal Systems, Inc.

24 When the Customize <folder/list name> page appears, click Versioning settings under the General Settings heading: When the Versioning Settings page appears, click the Yes radio button in the Content Approval section: What this does is marks any changed file as pending until it is approved or rejected by someone who has the authority to do so, such as an administrator or supervisor. If approved, it is listed back in the list or library and viewable to everyone. If rejected, it remains as pending and is visible to those who can view drafts. Once the necessary changes are made, the file can be reviewed again and hopefully approved. 21 Advanced Legal Systems, Inc.


25 Lesson 1.4: Folders In this lesson we will explore the concept of folders in more detail. We have already seen some folder operations when we explored check in and check out procedures. In this lesson, we will explore the process of creating folders, moving items around inside folders, and removing folders. Creating a Folder When using a SharePoint site, there are two general ways to organize information. There are different types of libraries that hold information groups of like information. Each library is tailored to fit the different types of data there are to store. We have already seen how to create a library, but let s go over it once more in case you forgot. First, select the destination for the new library and then click Site Actions Create: When the Create page appears, choose an option from the Libraries list: For the most part, you will likely use the Document Library type. However, you can further categorize items in a library by adding folders, just like you can on your computer. 22 Advanced Legal Systems, Inc.


26 Create a folder by first opening a document library or list, and then clicking New Folder: Enter a name for the folder when the New Folder page appears: Click OK to create the folder. You will see the folder listed: 23 Advanced Legal Systems, Inc.


27 Click on the pull down to the right of the new document folder and select Approve/reject to approve the new folder: Select Approved and then click OK: 24 Advanced Legal Systems, Inc.

28 Viewing a Folder s Contents Opening a folder is a snap just click the folder name and you will be directed inside to see the contents. Note that the breadcrumb trail is updated as well: 25 Advanced Legal Systems, Inc.

29 Section 2: Parts of your SharePoint Space Lesson 2.1: Discussion Boards What is a Discussion Board? A discussion board is a place where you can leave messages on a topic and others can reply to those messages. If you are familiar with the concept of a Web site forum, this concept is the same. You can see how many people have posted replies and when they last posted. These discussion boards are useful when members of a team are spread out over a geographical area and want to throw around some ideas. SharePoint keeps everything neatly organized for you so all you have to do is click a topic and join in. Setting Up a Discussion Board Creating a discussion board is easy to do. From your main SharePoint page, click Site Actions Create. Under the Communications heading, click Discussion Board: 26 Advanced Legal Systems, Inc.


30 You can now give the board a name and a description. Note as well the option to display this particular board in your Quick Launch bar. If you do, it will be on the left of your personal site whenever you need it. If you don t, you will have to click the View All Site Content link and then browse for the board: The new board will appear and is ready to use. Using a Discussion Board Discussion boards work by someone posting a topic and others adding their input. A discussion board can more accurately be thought of as a discussion room, because there can be several conversations happening at once. These conversations are commonly referred to as threads. 27 Advanced Legal Systems, Inc.


31 To start a new thread, click New Discussion. The New Item page will appear. Enter a subject and then type your message: Note that the Body section of the item has different formatting commands, just like a word processor. You can add font effects, change the alignment, add pictures and hyperlinks, change the text color, and more. When you have completed your message, click OK. The message will be posted: 28 Advanced Legal Systems, Inc.

32 Click any topic in the board to view it: If there are any attachments included with the file, you can view them by clicking View Properties and then selecting the name of the file. If you want to reply to a thread, click the Reply link in the upper right hand corner of the message. The New Item window will appear again and show you the original message. You can add your own contribution to the message. Lesson 2.2: The Recycle Bin We ve all done it: deleted something by accident and then frantically tried to get it back. This is harder to do on a SharePoint site, but nevertheless, it can be done from time to time. In this lesson we will explore the Recycle Bin on a SharePoint server. Deleting an Item When you want to erase a document, list, or entire document library, open the folder or library that contains the file you want to remove. In this case, let s remove ILTA Social Networking January 2010 from the ILTA University Documents folder. Click the file s pull down arrow and click Delete: 29 Advanced Legal Systems, Inc.


33 Accessing the Recycle Bin The Recycle Bin is found at the bottom of your Quick Launch bar. This is also true if you are viewing the home page for your organization. Click the link to open the folder: All items that have been deleted from the source page will be stored here. That is, if you delete something from your SharePoint site, it will be found in your Recycle Bin, not the main Recycle Bin that is also found on your organization s home page. 30 Advanced Legal Systems, Inc.
34 To permanently delete an item or several items, select the check box beside each file and then click Delete Selection. To restore the item to its original location, select the check box beside each file and then click Restore Selection. To select all items, click the checkbox directly underneath the Restore Selection button. Recovering an Item If you moved something to the Recycle Bin by accident, you can move it back to its original location. This is done in the same way you delete something: select the file(s) you want to restore and then click Restore Selection. You will be prompted to confirm your choice. Lesson 2.3: Adding Alerts to Outlook 2007 An organization can only effectively work together when the proper people have the proper information. SharePoint is designed to have all the information available to the users, but in order to find something, the user would have to go looking for it. Alerts let a user place a flag on a particular file or list item. Whenever something happens to that file, the user who placed an alert will be notified of changes. This lesson will discuss how to add alerts to Outlook What is an Alert? As described in the introduction, an alert is a special notification that is added to a file or list item. Whenever something happens to the file, an alert can be sent via e mail to you (and others) giving the details of what has happened. This is useful when several people in a team are working on the same file. If one person checks out a file in order to do the work they need to, the check in procedure will cause an alert to be sent to all people who have signed up. This eliminates the hassle of trying to contact the next person who needs to work on the file in person. The automated alert takes care of this for you. And since e mail is pretty much an integral part of the business world today, excuses for missing a file are harder to pass off! 31 Advanced Legal Systems, Inc.
35 Creating an Alert in SharePoint In this section of the lesson, I m going to create an alert on a file in the Document Center of the organization home page. To place an alert, you can either do this by clicking the Properties icon in the Document Center and then clicking Alert Me. You can also click the pull down arrow on a file and click Alert Me: Either method will bring you to the New Alert page. Here is where you will fill out the details of the alert. Alert Title Send Alerts To SharePoint automatically inserts a default title for the alert in the form of <source folder>:<file name>, but you can change this to be whatever you want. By default, the person who has made the alert will be the only one who receives notification. You can add other people to the recipient list by clicking the address book icon ( ). This will open a new window where you can search for specific people in your organization. Enter their name and click the search button to locate and select different names. 32 Advanced Legal Systems, Inc.


36 Send Alerts for These Changes Send an alert under the following circumstances: When to Send Alerts To avoid a potential flood of notification e mails, you can choose how frequently you want to receive notification of a document change: Click OK to apply the alert settings. Adding Alerts to Outlook 2007 To add an alert to Outlook, open Outlook and click Tools Rules and Alerts: 33 Advanced Legal Systems, Inc.


37 This will open the Rules and Alerts dialogue box. Click the Manage Alerts tab: Click the New Alert button to open the New Alert dialogue box. Inside, there are two possible sources of information: sources sending you alerts and sources you have visited in the past. Click the + sign beside each option to see the available choices: Highlight one of the sources or enter your own URL in the Web site Address box and click Open. Any alerts you have subscribed to with Outlook will appear in your Inbox folder as an e mail message. 34 Advanced Legal Systems, Inc.
38 Lesson 2.4: Basic Office Tasks In order to work on documents stored on the SharePoint server, you will need to open them in a program that has been installed on your own computer. In this lesson, we will examine the things you can do with files that were created using the Microsoft Office package, such as Word and Excel documents. We will also learn about the Document Management pane that helps Office 2007 users interact with the SharePoint server from inside the individual Office programs. Opening the Document Pane If you want to work on a specific document that has been stored on the SharePoint server, such as one of the Word documents below, just click on the document and it will be downloaded from the server and opened in the appropriate program. Note that you will most likely have to provide your SharePoint password to download the file: In this case, the document will open in Word and the Document Management pane will appear on the right hand side of the screen: If this pane does not appear on its own, you can open it by clicking Office Menu Server Document Management Information: 35 Advanced Legal Systems, Inc.

39 Overview of the Pane The Document Management pane provides lots of useful information about this particular file and other statistics about the SharePoint site. Let s go over the different parts of this pane. At the top of the pane there is a menu stating the original location of the document you have opened. Click the pull down arrow for options about the document s source location: You have the option to open the original location in Internet Explorer, as well as change the title or settings of the particular site. Also shown are options to disconnect from a workspace and delete the source workspace. These items are grayed out for the moment because in our example, the document was opened from the Document Center in the Home page of the organization. If this file was opened from an actual workspace inside another user s profile, these options would be available to you with proper credentials. Underneath this menu are five different options that provide statistics about the source location of the document: From left to right, the buttons are: Status This is the default view of the Document Management pane. Currently, the document I have opened has been checked out to me. Once I have 36 Advanced Legal Systems, Inc.
40 finished working on the document, I can check it back in using the provided link: Members/Groups This option provides a roll call for all users of the SharePoint server. It displays all online and offline users as well as current groups on the SharePoint server. You can hover your mouse over any name to see a pull down arrow; click this arrow for more options. You have the ability to schedule a meeting with the group via Outlook, view the group site, send mail, edit permissions and user information if you have the credentials, add the group members to your Outlook contacts, and view Outlook properties for the group. At the bottom of the pane is the option to add new members to a group if you have the credentials, and a link to send a mass e mail to all SharePoint members: Tasks Locations on the SharePoint server have the ability to list tasks. In this case, the Document Center can have a maintenance list of tasks applied to it: Click the pull down arrow beside the task name to view management options: You can also add a task, receive alerts on a task s progress, and view any workflow tasks. Choose from the bottom of the pane: 37 Advanced Legal Systems, Inc.
41 Documents This option lists the documents currently saved in the source location: Click the pull down arrow beside a file for management options: Finally, you can add new documents and folders as well as receive alerts about a document at the bottom of the pane: Links The Links option displays any links that have been added to a link list in the source location. This option is not available in all locations. It is only available in custom document workspaces and can contain links to other documents or Internet resources that a group might need to complete a task. At the bottom of the pane is the option to add links to the list or receive alerts about a particular list. Publishing a File to a Workspace Publishing a file to an external location is as easy as using the Save As command. The only difference is that the file will not be saved on your local computer, but to a network location. Therefore, in order to save a file to a place like this, you will likely have to provide a username and password. There are two different ways to publish a file: one will be to a workspace that exists, and one that does not. Let s explore publishing to a workspace that doesn t exist first. 38 Advanced Legal Systems, Inc.

42 Let s save a new document to a new workspace on a SharePoint server. Keep in mind you can save the updates to the file locally until you are actually ready to publish; that is, you only need to publish the file when it is complete. Until then, you can save it like a regular document. Click Office Menu Publish Create Document Workspace: 39 Advanced Legal Systems, Inc.
. Next, pick a location.")

43 The Document Management pane will open again, but will show content different from what we have seen previously in this lesson: Enter the name of the document workspace in the space provided (the file name will be used by default if you don t add one). Next, pick a location. If you have previously used Word with SharePoint like I have, then you will see the different links listed in the combo box: My Site (my Administrator s page), the Document Center for Home, and the Home page itself. There is also the option to save under a new URL. Check with your system administrator first before picking this option so they can confirm that the URL on the SharePoint server is available for use. For this example, let s pick My Site. After selecting that option, click the Create button (it s hiding under the combo box in the previous diagram). You will see the save progress: 40 Advanced Legal Systems, Inc.

 exists as labeled under the Members/Groups tab. Now, let s explore how to save a document to an existing workspace.")
44 and depending on the save location, you may be prompted for credentials. Since we re saving the file to My Site, I have to enter my password again: Once the workspace has been created, you will see the Document Management pane appear again listing details about this current workspace that was just created: Without going through each of the tabs, we can see that the document is up to date according to the Status tab and that only one user (me) exists as labeled under the Members/Groups tab. Now, let s explore how to save a document to an existing workspace. Click Office Menu Save As and then choose My SharePoint Sites from the list of places on the left: 41 Advanced Legal Systems, Inc.
45 If you double click an item listed in this location, you can pick from a sub location right inside the Save As dialogue box. Just pick a location and click save. Where to Find Common SharePoint Tasks We have seen that you can perform most of the basic SharePoint commands by using the Document Management pane. You can add files, folders, users, schedule meetings, and add contact information all from this one place. The Office Menu also provides other tasks under the Server sub menu: 42 Advanced Legal Systems, Inc.

46 We know that you need to check out a document from the server in order to use or make changes. This menu gives you the option to check the document back in, which saves changes and lets other people use it. You can discard your current check out and work on the document later, too. Click View Version History to see a list of changes that the document has undergone since it was first created: 43 Advanced Legal Systems, Inc.
47 If you have been assigned to a group and part of your job involves working on a particular document, click View Workflow Tasks. This will show you who has been assigned to do what on the document. Finally, the Document Management Information option will toggle the Document Management pane on or off. Lesson 2.5: Using InfoPath and SharePoint In this lesson you will learn how to publish an InfoPath form to a SharePoint Services site, how to fill out a form from a SharePoint site, and how to use and create SharePoint views. In addition, you will also learn how to submit InfoPath forms to a SharePoint library, and how to get data for a form from a SharePoint list. Prerequisites In order to use InfoPath 2007 forms with SharePoint Services, you must have access to a server that is running SharePoint Services (InfoPath is compatible with both SharePoint Services 3.0 and SharePoint Server 2007.) SharePoint Services must be up and running on a machine that is accessible to you (on your office network or over the Internet) and you must have authorization (a username and password) to access the server. If you are the form designer you should be using InfoPath (preferably InfoPath 2007) to create and publish your forms to the SharePoint site. In addition, you should also have permissions on the SharePoint site that allow you to create document libraries. If you are filling out forms from a SharePoint site, you should also be using InfoPath to complete the forms and you should be using Internet Explorer (version 6.0 or higher) as your Web browser. (You can use other Web browsers to view promoted fields in an InfoPath document library, but you will need Internet Explorer to have a form from a SharePoint site automatically open in InfoPath.) 44 Advanced Legal Systems, Inc.


48 Creating InfoPath Form Library 45 Advanced Legal Systems, Inc.

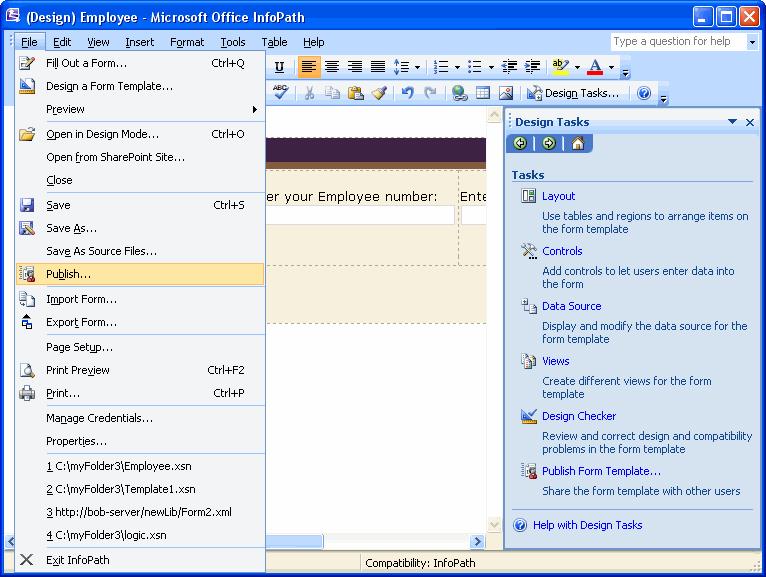
49 Once you have completed and tested your form design, you are ready to publish the form to a SharePoint site. To do this, make sure that the form is open in design mode, and then click the File menu followed by the Publish Option. Publishing an InfoPath Form to a SharePoint Services Site Once you have completed and tested your form design, you are ready to publish the form to a SharePoint site. To do this, make sure that the form is open in design mode, and then click the File menu followed by the Publish Option. 46 Advanced Legal Systems, Inc.


50 When you click this option, the Publishing Wizard will open on your screen. When it does, make sure that the To a SharePoint Server with or without InfoPath Forms Services radio button is selected. Once you are ready, click the Next button in the wizard. When the next stage of the wizard appears, enter the address of the SharePoint site you are using into the field provided. Then, click Next. If you enter these items correctly, the next stage of the Publish wizard will appear. In this stage of the wizard, select the top radio button (Document Library), and then click the Next button. In the next stage of the wizard, you should once again select the top radio button (Create a new document library). 47 Advanced Legal Systems, Inc.

51 When you are ready to continue, click the Next button. At this point, you will be presented with fields that you can use to enter a name and a description for the form library you are creating. When you click the Next button, you will have the opportunity to specify fields from your forms for promotion. 48 Advanced Legal Systems, Inc.

52 When you specify fields for promotion, the specified fields can be listed in columns in the SharePoint library that you created. Because InfoPath forms are based on XML, the form data stored in the XML can easily be extracted and listed in the SharePoint library. To specify a field for promotion, click the Add button in the upper right of the Publishing wizard. When you click this button, a Select Field or Group dialogue will appear. 49 Advanced Legal Systems, Inc.

53 In the Select a Field or Group dialogue, click on a field that you want to promote and then click the OK button to add it to the list of promoted fields in the wizard. Once you have promoted the necessary fields, click the Next button in the Publishing Wizard to continue. In the next stage of the wizard, (shown below), you should verify the server and Web site information presented, and then click the Publish button to publish the form. 50 Advanced Legal Systems, Inc.


54 If the form has been published correctly, you will see a message in the Publishing Wizard indicating this. Once the Form has been published, click the Close button. Now, if you use your Web browser to open the SharePoint Web site that you published to, you should see that the new library that you created is available to users. Creating and Filling Out a Form on SharePoint To create a form on SharePoint from a published template, you can open your Web browser and navigate to the SharePoint site that contains the form. 51 Advanced Legal Systems, Inc.

 When the form library opens in the browser, you can click the New button to open up")
55 When the SharePoint site opens, you should open the document library that was created for the form. (You can click the link provided in the quick launch bar to open the library.) When the form library opens in the browser, you can click the New button to open up a new blank form based on the one that was published. 52 Advanced Legal Systems, Inc.

56 If you enter this information correctly, the form will automatically open up in InfoPath (on your computer). At this point, you can fill out the form in InfoPath. Once the form has been completed, you can save the results by clicking the Save button on the Standard toolbar. 53 Advanced Legal Systems, Inc.

57 Using either of these options will display a Save As dialogue showing the SharePoint library that the form results will be saved in. To save the form, you should enter a name in the File Name field and then click the Save button. Once the form has been saved, the data fields that the form designer specified for promotion will be visible in the library. (Here, the promoted fields are shown in the red rectangle.) 54 Advanced Legal Systems, Inc.
58 If a user or the form designer clicks on an icon for the form (under the New column in the library) they will see a message that looks something like this. At this point, clicking the Open button will open up the form in InfoPath, where the form data can be viewed or edited. This is quite different from creating a new item in the document library as discussed in the preceding pages. In this case, when the form is opened, any data that has already been entered into it will be visible. This allows the form designer to view the data as it appears in the completed form, and it allows the user to change the data that they previously entered. In addition, multiple users can open this same copy of the form and enter data as required. In this way, a single copy of the form can be filled out by multiple users. When you click the Save button on the Standard toolbar, the form will automatically be saved under the same name in the same place in the document library; no new form will be created. 55 Advanced Legal Systems, Inc.

59 Using SharePoint Views In the following image, you can see a SharePoint form library that contains three completed forms. The red box shows the data from the fields that were promoted in the published template. If you click on the small arrow by the column heading for this data, you will see options for sorting the data in ascending or descending order based on the column heading. 56 Advanced Legal Systems, Inc.
.")

60 When you display the option list for a promoted field column, you can also see options for filtering the items in the library (shown below in the red box). The filter options that appear will depend on the column (promoted field) that you are selecting. In the following image, the form library has been filtered to show only forms where the department field has been specified as Head Office. 57 Advanced Legal Systems, Inc.


61 SharePoint will also allow you to create views of the library items by clicking the Settings menu, and then clicking the Create View option in the SharePoint Web page. When you click the Create a View option, a new Web page will open in your browser window. 58 Advanced Legal Systems, Inc.

62 From this page, you can click to choose from a set of available view types. For this example, we will choose the Standard View option (shown in the red box). The next Web page that appears provides you with an array of options for customizing your view. Here, you can enter a name for your view, specify if the view is to be public or for you only, and you can select what columns will be displayed in the view. 59 Advanced Legal Systems, Inc.
 for customizing your view.")
63 If you scroll down in the page, you can find even more options for sorting and filtering your view. Further scrolling will reveal more customization options for the view (like grouping options or totals) for customizing your view. Once you have customized the SharePoint view as you require, click the OK button at the bottom of the Web page to create your view. 60 Advanced Legal Systems, Inc.

64 In your original form library view, you will see a view option at the far right of the menu bar. If you click on this option, you will see a menu of preset SharePoint views that you can choose from. You can select a view from this menu by clicking the corresponding option, or you can click the Modify This View option near the bottom of the menu to modify your current view. You should also notice a Create View option near the bottom of the SharePoint View menu. You can use this option to create a new view as described in the preceding pages. 61 Advanced Legal Systems, Inc.
 local system.")
65 As an example of one of the preset views, the following image shows a typical SharePoint Web page that is displayed in a browser when the Explorer View is selected. If a user or a form designer clicks on one of the form icons in this Explorer view, the form will open up in InfoPath on the users (or designers) local system. Using SharePoint Lists in InfoPath There are many methods you can use to populate InfoPath forms with data. You can use a resource file, you can auto populate fields (and controls) with data by providing default values, and you can set up rule based data values. In the following pages, we ll learn how to use a SharePoint List to provide data to our form by specifying the list as a secondary data source. To create this secondary data source, we ll have to create a data connection to the list. 62 Advanced Legal Systems, Inc.


66 To begin, open the form that you want to use in InfoPath s design mode. Once you have the form open, click the Tools menu followed by the Data Connections option. When you follow these options, a Data Connection dialogue will appear on your screen. In this dialogue, you should click the Add button to create a new data connection. Then, the Data Connection wizard will start. In the first stage of the Data Connection wizard, select the Receive Data radio button. 63 Advanced Legal Systems, Inc.

67 Once you are ready, click the Next button to move to the next stage of the wizard. In this next stage of the wizard, select the SharePoint Library or List option, and click Next. In the Next stage of the Wizard, enter the address of the SharePoint site that contains the list that you want to use. Once you are ready, click the Next button to continue. 64 Advanced Legal Systems, Inc.

68 In the next stage of the wizard, you will be presented with a view of the SharePoint lists that are available at the Web site. At this point, you can select a list from among those that are available, and then click the Next button to continue. 65 Advanced Legal Systems, Inc.


69 In the next stage, you can select the field or fields that you want to use from the list by marking the corresponding checkboxes. Once you have selected the fields that you want to use, you can click the Next button to proceed. In the next stage of the wizard, you can choose to store a copy of the current list data with the form template. (A connection to the site will be required if you want to refresh or update the data from the SharePoint list.) Once again, click the Next button when you are ready to move on. 66 Advanced Legal Systems, Inc.

70 In the final stage of the wizard, you can enter a name for the data connection and use the check box provided to specify if the SharePoint list data is automatically retrieved when the form is opened. When you click the Finish button, you will be returned to the original Data Connections dialogue that you first started from. 67 Advanced Legal Systems, Inc.


71 In this dialogue, you should be able to see the new connection that you created. At this point, you can click the Close button to remove the dialogue from your screen. Now, if you display the Data Source task pane, you should be able select and view the SharePoint List data as a secondary data source. 68 Advanced Legal Systems, Inc.

72 To assign the data to a control, you can double click a given control (a list box for example) to display the Properties dialogue. In the Properties dialogue for the control, select the Look up Values from an External Data Source radio button, and then choose the name of the data connection to the SharePoint list in the Data Source field. In the case of a list box, these options would be under the List Box Entries heading in the dialogue. 69 Advanced Legal Systems, Inc.


73 Now we will click the button just to the right of the Entries field in the dialogue to specify exactly which entries from the list we will use. This will display a Select Field or Group dialogue that we can use to specify the column from the SharePoint list that will be displayed in the control. Once we select the item that we want from the SharePoint list (data connection), we can click the OK button to finish. 70 Advanced Legal Systems, Inc.

74 Once the form is published and a user opens it to fill it out, they may see a message box that looks something like the following. If the user clicks the Yes button, the data from the SharePoint list will be refreshed in the form. (At this point, the user may also have to enter their username and password for the SharePoint server.) If the user clicks the No button, the data will not be retrieved from the SharePoint list. The following image shows the SharePoint list as it appears in the SharePoint Web site. The next image shows the same list data populating a list box control in a form. 71 Advanced Legal Systems, Inc.
75 72 Advanced Legal Systems, Inc.

76 Submitting Forms to a SharePoint Site You have already seen how to publish a form to a SharePoint site and how the users who fill out the published form can save their form results to a SharePoint site. In the pages that follow, we ll explore how to set up a form template so that users can submit their form data to a SharePoint server. To begin, open up the form in question in InfoPath Once the form is open in design mode, click the Tools menu, followed by the Submit Options menu item. 73 Advanced Legal Systems, Inc.


77 Now, the Submit Options dialogue box will appear on your screen. In the Submit dialogue, put a checkmark in the Allow Users to Submit This Form checkbox. Next, make sure the Send form data to a single destination radio button is selected, and then choose the SharePoint Document Library option from the drop list provided. Also, make sure the Show the Submit menu and the Submit toolbar button check box is checked. If you click the Advanced button at the bottom of the dialogue, you will see options for specifying custom messages for a successful or failed submission, and for specifying the form behavior after the data has been submitted. 74 Advanced Legal Systems, Inc.

78 When you re ready, click the Add button to begin the process of adding a new data connection. When you click the Add button in the dialogue, a Data Connection Wizard will open, allowing you to specify the library that you will submit to and the name for the submitted form. 75 Advanced Legal Systems, Inc.

79 (To prevent each submitted copy of the form from having the same name, you can click the formula button at the far right of the File Name field. When you click this button, you will be able to choose a field from the form to enter as the file name. If you do this, each time the form is submitted, the value from the specified field in the submitted form will be used as the name for the submitted form.) Once you have entered the SharePoint library name that you will submit to, as well as the file name that the form will be submitted with, click the Next button in the wizard to continue. In the next stage of the wizard, you can enter a name for the submit data connection that you are creating. 76 Advanced Legal Systems, Inc.

80 At this point, you can click the Finish button to be returned to the Submit Options dialogue. Now you can click the OK button in the dialogue to implement your settings. 77 Advanced Legal Systems, Inc.


81 When the form is published and a user then opens the form to fill it out, they will see a Submit button on the Standard toolbar. After the user enters data into the form fields, they can click the Submit button to submit the form to the SharePoint library. The following image shows a SharePoint document library after the form shown above has been submitted to it. 78 Advanced Legal Systems, Inc.


82 If you wish, you can add your own Submit button to the form in design mode. To do this, just click the button control in the Controls task pane to create a button at the position of the cursor. Next, double click on the button to display the Button Properties dialogue. When the Properties dialogue appears, enter a caption for the button in the Label field provided, and then click the Rules button in the dialogue to set up a submit rule. 79 Advanced Legal Systems, Inc.


83 In the Rules dialogue, click the Add button to display the Rule dialogue. Once the Rule dialogue is displayed, do not click the Set Condition button since you will want this rule to apply at all times. Instead, click the Add Action button right away to display the Action dialogue. Here, you will select the Submit using a data connection option from the drop list provided. Make sure that the correct data connection (to the correct SharePoint library) is selected in the Data connection field of the Action dialogue box, and then click the OK button in all of the open dialogues to close them (starting with the Action dialogue). 80 Advanced Legal Systems, Inc.
.")
84 Once you have added the Submit button, the users who open the published form to complete it will see the button included in the form. If the user enters data and clicks the button in the form, the submission process will begin in the usual way (username, password, and so on). Note: If you are trying to publish to a SharePoint server, or if you are trying to access a form in a SharePoint Library, you may see the following message box. 81 Advanced Legal Systems, Inc.
85 If you see this message, open up the Internet Explorer browser, click the File menu, and click the Work Offline option to clear the checkmark from it. With the checkmark cleared, the menu should look like this. At this point, you should be able to go ahead and work with SharePoint and InfoPath. 82 Advanced Legal Systems, Inc.
86 Lesson 2.6: Using InfoPath Forms with SharePoint Workflows In the previous lesson, we learned how to publish forms to a SharePoint document library and how to fill out forms that are located in a SharePoint library. Now it is time find out how to use InfoPath 2007 to design forms that can be used in conjunction with SharePoint workflows. In this lesson, you will learn what a SharePoint workflow is and how InfoPath forms can be designed to respond to different stages in a workflow. You will also learn how to create a data connection to the workflow, and how to make an InfoPath form respond to the ongoing status of a workflow by changing the form view. Forms and Workflows In a general sense, a workflow can be described as a structured progression of tasks that is used to guide and track a project or document along its path to completion. With SharePoint workflows, the final objective of the workflow is often a completed document of some kind. Using a workflow, it is possible to track documents (such as Word documents or Excel workbooks) through the stages of a given business process until the document is completed. (Of course, SharePoint workflows can be used for many other purposes in addition to document tracking.) In the context of this lesson, the question becomes: How can we combine workflows and workflow data with InfoPath form functionality? As you know, InfoPath forms can be published to a SharePoint Services document library. In addition, you also know that a data connection can be created to receive data from a SharePoint list or library. If one were to base a SharePoint workflow on a form published to a SharePoint site, you could track the progress of the form by checking the status of the workflow. Furthermore, a connection could be created in the form that can receive data from the list or form library associated with the workflow. This would allow the form designer to create conditional logic rules in the form that is based on workflow data. In other words, the InfoPath form could be designed so that its functionality responds to the current state of the workflow. 83 Advanced Legal Systems, Inc.

87 Publishing the Form The example that we follow through this lesson will be started by publishing a form to a SharePoint site. The form used in this example is based on the Meeting Agenda sample template that is provided with InfoPath In this example, we will publish the InfoPath form to a SharePoint document library, and then apply a Three state Workflow to the library. This will allow us to track the current state of the form and to customize the form behavior based on the workflow status. 84 Advanced Legal Systems, Inc.

88 To publish the form template to the SharePoint site, you should first save a local copy of the form, and then click the File menu followed by the Publish option. When you perform this action, the Publish Wizard will appear on your screen. In this situation, the procedure for publishing the form to a SharePoint library is the same as discussed in the previous lesson. In the first stage of the Publishing Wizard, select the To a SharePoint server with or without InfoPath Forms Services radio button and click the Next button. In the next stage of the wizard, you should enter the address of the SharePoint site that you are publishing to. Once you have entered the address, click the Next button. At this point, you will be prompted for a username and password to access the server. 85 Advanced Legal Systems, Inc.

89 If you enter this information correctly, the next stage of the Publishing Wizard will appear. In this stage of the wizard, select the Document Library radio button and click the Next button. In the next stage of the wizard, select the radio button to create a new document library. Once you are ready, click the Next button to continue. 86 Advanced Legal Systems, Inc.
 add a description. Once again, click the Next button when you are ready.")
90 In the next stage of the wizard, enter a name for the new document library that you are publishing to and (optionally) add a description. Once again, click the Next button when you are ready. 87 Advanced Legal Systems, Inc.

91 In the next stage of the wizard, you can choose the fields that will be promoted (displayed) in the SharePoint document library columns. You can add additional fields by clicking the Add button, or you can remove fields from the list by selecting them and then clicking the Remove button. Once you are satisfied with the fields that you have specified for promotion, click the Next button to continue. In the next stage of the wizard, verify the information for the new document library and, once you are ready, click the Publish button. In the final stage of the wizard, check the message to find out if your template was published correctly, and then click the Close button. Your template should now be published to a new document library. 88 Advanced Legal Systems, Inc.

92 The following image shows the new SharePoint library created for the published template. Adding a Workflow Once we have the InfoPath form published to the new document library, we can apply a workflow to it. For this example, we will apply the Three state Workflow that comes with SharePoint Server At this point, there is one issue that we must take care of before we can proceed. Before you can apply the Three state Workflow to a list or document library, a choice column must be added to the list or library. (Note: Other SharePoint workflows may not require this column. Remember, you can apply any suitable workflow that you want to the document library if you have multiple workflows available.) 89 Advanced Legal Systems, Inc.

93 To add a choice column, open the Internet Explorer web browser and go to the SharePoint site that you are publishing to. Once the SharePoint site opens, navigate to the new library that your form was published in. To add a choice column to the document library, click the Settings menu followed by the Form Library Settings option. 90 Advanced Legal Systems, Inc.

94 When the Customize page opens in your web browser, scroll down until you see the Create Column link. When you find the link, click on it. 91 Advanced Legal Systems, Inc.

95 In the Create Column page, select the Choice radio button, and then enter a name, a description, and menu options for the choice column. Once you are ready, click the OK button at the very bottom of the page to add your column to the library that you published you template in. 92 Advanced Legal Systems, Inc.

96 Now you should see this new column when you view your document library. Now that this column has been added, we can go ahead and implement the Three state Workflow. (Remember, if you have other workflows available in your SharePoint site, you could choose one of those instead). 93 Advanced Legal Systems, Inc.


97 To apply the workflow, click the Settings menu followed by the Form Library Settings option. In the Customize web page that appears in your browser, click the Workflow Settings option under the Permissions and Management heading. 94 Advanced Legal Systems, Inc.

98 In the next page that opens in your browser, you will be able to select a workflow to apply to the form library you created. In this example, the Three state Workflow has been selected from the large Workflow field near the top. In this page, you should also enter a name for the workflow in the field provided and specify any other options as necessary. (For the most part, the default options were accepted for this example.) You may notice near the bottom of the page that we have specified (with a checkbox) that this workflow will be started when a new item is created. This specification is also optional. Once you are ready, click the Next button at the bottom of the page to proceed. 95 Advanced Legal Systems, Inc.

99 In the next page that opens up in the browser, you can specify settings for the workflow states, as well as what information will appear (and where it will appear) when a workflow is started. You can also use this page to specify e mails that are sent out when the task is started, or when it changes to a middle state. For the most part, the default settings on this page were used for this example. If you scroll down to the bottom of the page, you will see an OK button. Click the OK button to implement this workflow in the library that you published your form in. 96 Advanced Legal Systems, Inc.

100 Now you should be able to open the library in question and use the New menu to create a new form based on the template. When you click this New button, a form will open up in InfoPath in Fill out a Form Mode on your computer. Rather than fill out the form at this point, you should just save it. 97 Advanced Legal Systems, Inc.


101 When you save this form, make sure that you save it to the document library that you opened it from. You may recall from the preceding pages that we specified that the workflow should be started when a new item is created. Once you have saved the form to the document library, the creation of this form item will start the workflow. (A workflow could also be started manually if required.) Now, if you view the document library, you should see the new form listed there. 98 Advanced Legal Systems, Inc.

102 Because the workflow has been started, you should be able to scroll over to the right and see the name of the workflow as a heading in the library. Underneath this heading, you should see the current status of the form in the workflow. In the example image above, you can see that the Agenda WorkFlow is In Progress for the current form. 99 Advanced Legal Systems, Inc.

103 If you click on the words In Progress, a workflow status page will open in the browser. In the Workflow Status page, you will see options to terminate the workflow, to view workflow history, and more. In the image above, under the Tasks heading, you can see a Workflow Initiated message, followed by the form title (shown in the red box). 100 Advanced Legal Systems, Inc.

104 If you click on this form title, a page with more options will open in your browser. If you click the Edit Item option on this page, you will see a new page appear with an option that allows you to modify the state of the workflow. This means that a user can open the form from the document library (by clicking on the form s icon in the library), fill it out to the extent that they are required to, and then update the status of the workflow accordingly. Adding a Data Connection to Receive Workflow Information You have already seen how to get data from a SharePoint list into an InfoPath form. Now, we will continue this workflow example by creating a data connection in the original form template that will receive workflow information. 101 Advanced Legal Systems, Inc.


105 First, as the form designer, you should open up a copy of the form template on their local computer. Once the form template is open in design view, you can click the Tools menu followed by the Data Connections option. When the Data Connections dialogue box opens, click the Add button to start the Data Connection wizard. In the first stage of the wizard, click the Receive Data radio button and click Next. 102 Advanced Legal Systems, Inc.

106 In the next stage of the wizard, select the SharePoint Library or List radio button. Once again, click the Next button when you are ready. 103 Advanced Legal Systems, Inc.
107 In the next stage of the wizard, enter the address of the SharePoint site that contains the list or library that you want to receive information from. Once you have entered the address, click the Next button in the wizard, and enter your username and password for the server as required. After you enter the login information correctly, you will see a list of available libraries and lists appear in the wizard. Select the library that is implementing the SharePoint workflow for the form template, and then click the Next button. 104 Advanced Legal Systems, Inc.
 is checked.")
108 In the next stage of the Data Connection Wizard, you can check off items that represent data fields that you want to receive. Since for this example you will want to receive workflow status, you should make sure that the checkbox corresponding to the name of your workflow (as it appears in the document library) is checked. In the image above, you can see that the (the name of the workflow that was applied to the form library) has been checked. Once you specify the data fields that you want to receive, click the Next button to continue. In the next stage of the wizard, you can put a check mark in the Store a copy of the data in the form template checkbox if you wish. Once you are ready, click the Next button to continue. In the final stage of the wizard, enter a name for the data connection, and then put a checkmark in the Automatically retrieve data when form is opened checkbox. Once you are ready, click the Finish button in the wizard and then close the Data Connections dialogue box. Once you complete these steps, you will have created a data connection that receives workflow information. 105 Advanced Legal Systems, Inc.

109 Creating a New Form View for the Workflow Now that you have a data connection that receives workflow information, you can create conditional logic rules that change the form in response to workflow status. In this example, a new view will be created for the form. Eventually, conditional logic rules will be put in place so that the new view will be displayed (or not) depending on the status of the workflow. With the local copy of the form still open in design view, click the Views option in the Design Tasks task pane to begin creating the new view. 106 Advanced Legal Systems, Inc.

110 When the Views task pane appears, click the Add a New View option to create a new view of the form. In the Add View dialogue, you can enter a name for the new form view and click the OK button to continue. 107 Advanced Legal Systems, Inc.
, select and copy the controls that you want, and then switch back to your new view and paste them there.")
111 In this example, the view has been named Completed. When the OK button is clicked, the new view will appear on the InfoPath screen. At this point, you can switch to the default view (by clicking on it in the Views task pane), select and copy the controls that you want, and then switch back to your new view and paste them there. (More information on views is available in the Advanced manual.) 108 Advanced Legal Systems, Inc.
 contain summary information for the Agenda form.")
112 In this example, the new view has been created by copying and pasting controls from the default view. The controls in the new view (shown below) contain summary information for the Agenda form. 109 Advanced Legal Systems, Inc.

113 By clicking the View Properties button in the Views pane, you can access the Properties dialogue for the new view. If you look carefully, you will see that the Read Only checkbox has been checked. This will help prevent the users who see this view from editing the data in the view. Changing the Form in Response to Workflow Status Now that we have a new data connection that receives workflow information and a new form view, we can go ahead and apply conditional logic rules in response to the workflow information. Our goal here is to display the new view of the form based on when the workflow indicates that the form has been completed. This will allow interested parties to view important information about the form by opening it in the SharePoint library, without seeing (or being able to easily edit) the details of the form that are visible in the default view. 110 Advanced Legal Systems, Inc.

114 To set up a rule for displaying the new view, click the Tools menu followed by the Form Options menu item. 111 Advanced Legal Systems, Inc.


115 When the Form Options dialogue opens up on your screen, you can click the Open and Save category from the list on the left, and then click the Rules button. When you follow these options, the Rules for Opening Forms dialogue will appear on the screen. To set up a rule for how the form should open, click the Add button. 112 Advanced Legal Systems, Inc.


116 In the Rule dialogue that appears, click the Set Condition button to display the Condition dialogue as shown below. In the first box of the Condition dialogue, choose the Select Field or Group option to display the Select Field or Group dialogue. In the Select a Field Or Group dialogue, you can choose the secondary data source from the Data Source drop list at the top, and then expand the folders to search for the field that corresponds to the name of your workflow. (Remember, the secondary data source was created as a result of establishing a connection to receive the workflow data.) In the Image above, the workflow field () has been selected. Of course, the name of the particular workflow field can vary from situation to situation depending upon what name the original workflow is set up with on the SharePoint Web site. Once you have selected the correct workflow field, click the OK button to return to the Condition dialogue. 113 Advanced Legal Systems, Inc.
117 In the next box in the Condition dialogue, select the is equal to criterion, and then, in the last box select the Type a Number Option and enter the number five. For this example, the resulting condition dialogue looks like this. The reason the number five is used is because each workflow status has a number associated with it. (These numbers can vary depending on what type of workflow is being used.) For the Three state Workflow (used in this example), the number five corresponds to a workflow status of completed. Once you are ready, click OK button in the Condition dialogue, and then click the Add Action button in the Rule dialogue. 114 Advanced Legal Systems, Inc.


118 When the Action dialogue appears on the screen, select the Switch Views option. Then, in the View field that appears, make sure the name of your new view is selected. (In this ongoing example, the new view is named Completed. ) Once you are ready, click the OK button in the Action dialogue, in the Rule dialogue, and in any other dialogues that are open on the screen. Since you have been working with a copy of the published form template on your local machine, we must now save the changes made to your computer, and then republish it to the SharePoint form library where it was originally published (that is, the library with the workflow). 115 Advanced Legal Systems, Inc.

119 To re publish the template to the SharePoint library, click the File menu followed by the Publish option. In the Publishing Wizard, follow the same process as before when the original template was published. 116 Advanced Legal Systems, Inc.

120 When you reach the stage of the Publishing Wizard that provides you options to create a new library or select an existing one, choose the Update the Form Template in an Existing Document Library radio button. At this point, make sure that the correct document library is selected, and then click the Next button. Follow through the remaining stages of the wizard just as before, until the modified form template is published. Once you receive the message that your form was published successfully, close the Publishing Wizard by clicking the Close button. Now, if everything has gone smoothly, the updated form should respond to the status of the workflow (that is, show the Completed view when the workflow status is at Completed ). 117 Advanced Legal Systems, Inc.

121 Here is how it works. A user opens up the SharePoint web site in his or her web browser and navigates to the document library containing the form. The user clicks on the form in the document library and the following dialogue appears. Once the user clicks the Open button, the form will open up on the user s computer in InfoPath (At this point, the user may be prompted for username and password information.) 118 Advanced Legal Systems, Inc.

122 Once the form opens, the user can enter the information that is required of them and then click the Save button on the standard toolbar to automatically save their data to the form in the SharePoint Library. 119 Advanced Legal Systems, Inc.

123 The data from this user will be saved in the form located in the document library. The user can then use the SharePoint library options to update the status of the workflow if necessary. The image above shows that the status of the workflow is still In Progress. 120 Advanced Legal Systems, Inc.


124 Now, suppose another user opens up the document library in their browser. At this point, the user will see the form data that has been promoted in the Document library. If they look at the workflow status, they will see that it is still In Progress. 121 Advanced Legal Systems, Inc.
.")
125 This user can also open the form up in InfoPath just like the previous user. This user can then fill out the form fields that apply to them. (In this particular example, the different users can enter data using the same controls by expanding the repeating tables). When the user clicks the Save button, their data will be saved in the form that is stored in the document library. 122 Advanced Legal Systems, Inc.

126 If the user wishes, they can also update the status of the workflow by using the options available in the SharePoint library menus. To end this example, let s say that eventually a user opens the form, enters and saves their data, and then sets the workflow status to Completed. 123 Advanced Legal Systems, Inc.

127 At this point, if another user opens the form by clicking on it in the document library, they will see the alternate view that was specified to appear when the workflow is completed. There are a many different ways that you could design a form to respond to a work flow status or workflow list items. Remember; the way that you implement a workflow with an InfoPath form will depend on what workflow you use, on how the form itself is designed, and of course, on what you want to do. 124 Advanced Legal Systems, Inc.
128 Lesson 2.7: Creating Lists and Libraries Up until this point, we have seen a few examples of how to create lists and libraries of information on a SharePoint site. In this lesson, we ll take a bit of a break from the technical aspect of SharePoint and introduce you to the rest of the items you can create. Libraries Document Library Form Library Wiki Page Library This is the most basic and commonly used type of list. It lets you upload documents of any type. Any documents created with Microsoft Office will open in their appropriate program if Office has been installed on your computer. A form is a method of filling in information about a certain topic or procedure. Form data can then be stored in the form, stored on a server, or e mailed to some other source. The term wiki basically means the simplest form of an online database. Wikis have been popularized by Wikipedia, a massive online encyclopedia about science, art, pop culture, technology, and everything in between. SharePoint features its own wiki capability with the Wiki Page Library. This will create an interconnected collection of pages. These pages will store a library of data, support pictures, tables, and hyperlinks about the topics you choose. Translation Management Library Report Library If documents on your SharePoint site are being translated to help clients in other parts of the world, this library will keep track of which documents have been translated into which language, and the progress of current translations. If site usage data, alerts, and other statistical features have been enabled, a report library can be used to store and organize this information. 125 Advanced Legal Systems, Inc.
129 Data Connection Library Slide Library A data connection library makes it easier to store and share files that rely on an external data connection. When using PowerPoint 2007, you can export some or all slides of a presentation to a slide library on your computer or on a network computer. This allows other members of your organization to use the same slides over again, keeping content and formatting consistent. SharePoint takes this one step further by allowing you to publish PowerPoint slides to the SharePoint site. Communications Announcements Contacts Discussion Board Create an online bulletin board and post short notes, notices, or other information you want to share with others. Use a Contacts list as a mutual address book for everyone in your organization. Manage information about people in teams, groups, and organizations. You can also share information between a contacts list and any SharePoint compatible contact program. Create a discussion board to allow members of your organization to share information in newsgroup style discussion. One user will post a topic, and others can either reply to a post or create their own post. Administrators have access to management tools which ensure only proper content is posted on a discussion board. Tracking Links Calendar Tasks Create lists of hyperlinks, URLs, and other resources for members in your organization to use. Use this handy calendar based view to schedule upcoming meetings, deadlines, events, and so on. The calendar view allows for point and click interaction and is very useful for team sites and workspaces. Information can be shared between your calendar list and SharePoint compatible event programs (such as Microsoft Office Outlook.) Create a to do list for yourself or others and list the items that need completing. 126 Advanced Legal Systems, Inc.
130 Project Tasks Issue Tracking Survey This list is an expansion of the Tasks list. It uses a graphical view (Gantt chart) to display a list of items that need completing. This chart can be shared with SharePoint compatible organizational software (such as Microsoft Project). Also building off the Tasks list, a list of issues lets you outline problems that need attention in order to finish a task. Issues can be assigned to others, prioritized, and tracked from problem to resolution. Quickly create a poll to get information and opinions from other Web site users. Included with a survey are tools to easily create different types of questions and let users answer in a number of ways. Basic statistical analysis tools are also available to track results. Custom Lists Custom List Custom List in Datasheet View Import Spreadsheet If none of the previous list types suit your needs, this option lets you create your own columns of information. The list opens as a Web page and allows you to add or edit columns one at a time so you can set it up exactly the way you want. This takes the custom list one step further by opening an editable chart in a spreadsheet environment (like Microsoft Excel) for easy and faster data entry and editing. This type of list requires a SharePoint compatible list datasheet control (typically installed while the SharePoint server was installed) and ActiveX control support (Internet Explorer 6.0 or later). If you already have a spreadsheet containing columns and data set up the way you want, SharePoint prevents you from doing the work twice. Use this option to import a spreadsheet s columns, layout, and data to a SharePoint list. (Note to Microsoft Access users: Remember you can import database data from Access to Excel, and then import the Excel spreadsheet. This method may be easier and more practical than trying to configure an external data source connection.) 127 Advanced Legal Systems, Inc.
131 Key Performance Indicator List A KPI list is a way for managers to evaluate progress against measurable goals. There are four necessary steps that must be done before you can fully use KPIs: Create a KPI list Add a KPI attribute to a list of data with some measurable attribute Add a Web part to the Web page containing the list Link the KPI list to the Web part In a way, KPI lists are like Gantt charts, but they let you insert deadlines and provide extra measuring tools for your goals. Most of the time, a Gantt chart will suffice and provide organizations with the information they need. Therefore, KPI lists are very rare in small to medium businesses. However, KPI lists are necessary for larger, distributed organizations when more information about performance is needed. Web Pages Basic Page Web Part Page Sites and Workspaces A basic page lets users add text, pictures, and tables to a page without knowing anything about coding in HTML. This is useful if you have a specific task in mind for the page. A Web Part page is a basic page that is designed to hold Web Parts. You can think of this page as a basic page with a table already built in. You can then put a Web Part into each table cell. A Web part can consist of almost all of the items we have talked about in this lesson. A site is designed to be a separate entity from the organization home page because it contains a unique directory URL. Your personal home page is an example of a site. A workspace is usually contained within a site, and each provides users with a place to collaborate and store mutual content. 128 Advanced Legal Systems, Inc.

132 Lesson 2.8: Creating and Managing Sites and Web Pages In this lesson we will explore one of the best features of SharePoint by exploring how easy it is to create entire functional Web pages without knowing HTML. Like a bucket full of plastic building blocks, you can use SharePoint s parts to customize and assemble your site to look like you want it to. We ll discuss different sites and site templates, site collections, how to create different sites and workspaces, create Web pages and Web part pages, and finally how to delete a page you no longer need. Overview of Sites and Site Templates You should be comfortable with using some of the features in your own SharePoint space and might have even had the chance to browse through some of the others in your organization. The home page for your organization and each member s site all have the same sort of features: navigation and search functionality along the top, a list of locations in the Quick Launch bar down the side, and so on. In the Quick Launch bar on your own site, you should notice a Sites link, right above the Recycle Bin: By default, there will be no customized sites or site templates; this list should be empty: You will find the link to add sites (via a site template) by clicking the Create link. As we move through this lesson, you will see how to add content. 129 Advanced Legal Systems, Inc.

133 About Site Collections If you have previous SharePoint experience, site collections have been implemented in a different way when using SharePoint With SharePoint Portal Server 2003, whenever you clicked the Create Site link under the Actions menu, you were creating a site collection. Each site collection was a top level item and contained the data you needed. Each site collection had its own unique hierarchy and was basically independent from other site collections. SharePoint 2007 was designed to be a little bit different. When you click the Sites link in the Quick Launch bar and then click Create, you will instead create a site that is a member of the site collection that is contained within your portal. In a nutshell, this means that site collections can only be created by system administrators when the SharePoint portal (the Web interface that contains everything SharePoint related) itself is being initially set up. Microsoft designed it this way for a couple of reasons. Instead of having a default portal layer and then a large number of individual site collections, everything exists in one site collection. This is useful for most organizations because the odds are good that all members will likely interact at some point. Searching for documents will likely yield better results because most documents will be viewable to the members. All members have access to the same content, templates, and navigational elements. User management is easier as well because all members are under one roof. However, there may come a time where different collections may be required. Let s explore this a bit more with an example. Imagine a company that sells two distinct products, like lawn mowers and pool supplies. These two product groups don t have anything in common, but are both managed by the same company. The likelihood that they would share documents would be small, so therefore the administrators could create two different site collections when the portal itself is being designed. Creating Sites and Workspaces After clicking the Sites link in your own page, click the Create button at the top of the page: 130 Advanced Legal Systems, Inc.

134 When the Create page appears, click Sites and Workspaces under the Web Pages heading: The New SharePoint Site page will open, which should look somewhat familiar to you by this point: Enter a title for the page and a description. Next, enter a unique URL to use so other members can locate your page easily. The section titled Template Selection contains the real substance of this page. Let s go over the different template types that are available for you. Under the Collaboration tab you will see these options: 131 Advanced Legal Systems, Inc.
135 Team Site Blank Site Document Workspace Wiki Site Blog A site for teams to quickly organize, author, and share information. It provides a document library, and lists for managing announcements, calendar items, tasks, and discussions. A blank site for you to customize based on your requirements. A site for colleagues to work together on a document. It provides a document library for storing the primary document and supporting files, a tasks list for assigning to do items, and a links list for resources related to the document. A site for a community to brainstorm and share ideas. It provides Web pages that can be quickly edited to record information and then linked together through keywords. A site for a person or team to post ideas, observations, and expertise that site visitors can comment on. The Meetings tab offers five options: Basic Meeting Workspace Blank Meeting Workspace Decision Meeting Workspace Social Meeting Workspace A site to plan, organize, and capture the results of a meeting. It provides lists for managing the agenda, meeting attendees, and documents. A blank meeting site for you to customize based on your requirements. A site for meetings that track status or make decisions. It provides lists for creating tasks, storing documents, and recording decisions. A site to plan social occasions. It provides lists for tracking attendees, providing directions, and storing pictures of the event. 132 Advanced Legal Systems, Inc.
136 Multipage Meeting Workspace A site to plan, organize, and capture the results of a meeting. It provides lists for managing the agenda and meeting attendees, plus two blank pages for you to customize based on your requirements. The Enterprise tab also offers five options: Records Center Personalization Site Site Directory Search Center with Tabs Search Center This template creates a site designed for records management. Records managers can configure the routing table to direct incoming files to specific locations. The site prevents records from being modified after they are added to the repository. A site for delivering personalized views, data, and navigation from this site collection into My Site. It includes personalization specific Web Parts and navigation that is optimized for My Site sites. A site for listing and categorizing important sites in your organization. It includes different views for categorized sites, top sites, and a site map. A site for delivering the search experience. The welcome page includes a search box with two tabs: one for general searches, and another for searches for information about people. You can add and customize tabs to focus on other search scopes or result types. A site for delivering the search experience. The site includes pages for search results and advanced searches. Finally, the Publishing tab contains a single option, a News Site. This site lets you publish news articles and links to news articles. It includes a sample news page and an archive for storing older news items. After choosing the template you want to use, continue with the creation options for the page. The Permissions section lets you choose which users will have access to the site. You can choose to have the same permissions as the parent site or specify exactly who can access this site or workspace. 133 Advanced Legal Systems, Inc.

137 The Navigation section lets you add the new site to the Quick Launch bar, as we have seen before. You also have the option to place a link to this new site on the link bar of the parent site. This helps avoid having to remember yet another URL for a site: Finally, the Navigation Inheritance option lets you use the same link bar as the parent site: Click Create at the bottom of this current page to make the site. Creating Web Pages You can create Web pages inside SharePoint using the Site Actions menu.. Click Site Actions Create. Under the Web Pages section, click either Basic Page or Web Page Part: Clicking Basic Page will let you enter a name for the page and let you choose a save location: 134 Advanced Legal Systems, Inc.

. Adding text to a page is all well and good, but it will be a bit boring and will not likely suit all your organizational needs.")
138 Note the Save Location option. If you plan to make the page available to others, save it in your Shared Documents. If you want to make the page for yourself, save it in your Personal Documents. Creating a Basic Site will do just that: make a plain site for you to customize. As soon as the page loads for the first time, a small word processing application will open and let you add content to the new page: If you need to modify the text on the page, click the Edit Content link (under the Site Actions button on the right). Adding text to a page is all well and good, but it will be a bit boring and will not likely suit all your organizational needs. In this case, you can add Web Part Pages that have more of an organized structure. Click Site Actions Create and click Web Part Page under the Web Pages heading. 135 Advanced Legal Systems, Inc.


139 This will open the New Web Part Page. Enter a name for the part page and choose a layout. On the left side of the screen, you will see a basic preview of how your page will be constructed: Underneath the Layout section, you can choose where to save the web part page. Click Create to make the page. Consider the Header, Footer, 3 Columns page (from the above diagram): 136 Advanced Legal Systems, Inc.
 you want to include in your chosen space and click Create. 137 Advanced Legal Systems, Inc.")
140 Note the different parts that make up the page. Since each part is empty, it has a link where you can add a web part. This will open a new dialogue that lists a variety of different web parts. You can even add site content you have already created, as indicated by the arrow: Select the part(s) you want to include in your chosen space and click Create. 137 Advanced Legal Systems, Inc.


141 Deleting Sites and Workspaces Imagine you were working as a team leader and set up a team site for everyone to work on. You completed the project and now you want to remove the site as it is no longer needed. To do this, visit the home page for your particular site and click Site Actions Site Settings. This will open the Site Settings page that contains all of the administrative actions for a site. Under the Site Administration heading, click Delete this site: You will be directed to a Delete page that warns you all content and user information will also be deleted when this site is gone. Click Delete to confirm your choice: You will be prompted one final time to confirm site deletion. Then, you will receive the following confirmation: 138 Advanced Legal Systems, Inc.


142 Lesson 2.9: Site Customization Up until this lesson it has been all business, learning how to use SharePoint to maximize productivity and collaboration. As we near the end of the manual, let s take a bit of a break and learn how to customize the look and feel of sites. Adding, Moving, and Customizing Web Parts We briefly explored Web parts in the last lesson when we learned more about sites. In this section, we will use a sample Team Site as our base: As you can see, this sample site is nearly identical to the organization home page. It has its own default elements, including its own Recycle Bin, which are listed in the Quick Launch bar. Let s create a Web Part page. Click Site Actions Create Web Part Page. We ll use the Header, Footer, 2 Columns, 4 Rows layout: 139 Advanced Legal Systems, Inc.
143 The Web part will be called sample_part and will be saved in the Shared Documents portion of this site (which incidentally is the only place it can be saved!). After the Web part is created, you will see all of the various sections that are available to accept content. Let s add something to the left column. Click the appropriate Add a Web Part link: This will open the Add Web Parts dialogue. There are a number of different options in this dialogue that can be added to the desired location: Lists and Libraries Content Rollup Default Miscellaneous Outlook Web Access Includes all the default lists and libraries that were created with the site, and the lists/libraries from the user who created the site. Add items like a colleagues list, a Getting Started link, a list of your own links, recent blog posts, SharePoint documents, etc. Choose from a to do list, an RSS viewer, and This Week in Pictures, which allows you to set up a slide show to show team members and outsiders the progress you have been making. Add contact details for yourself or others. These Web parts require the installation and setup of a Microsoft Exchange Server (2003 or later). Display your calendar, contacts, inbox, and tasks using Outlook Web Access. 140 Advanced Legal Systems, Inc.
 you want to add from the list and click Insert.")
144 Search Site Directory This section lets you choose from a number of automated and basic search commands to look for people, actions, best bet searches based on your keywords, and even search statistics. Display site directory categories, the sites within the categories, and the top sites from the Site Directory. Pick the Web Part(s) you want to add from the list and click Insert. At the bottom of the Web Parts dialogue is a link named Advanced Web Part gallery and options. This will close the Web Parts dialogue and open a task pane to the right of your Web Parts page: Here you can choose from the same options that were available in the dialogue, only you can see first hand the Web Parts page and the parts list at the same time. Note also the commands 141 Advanced Legal Systems, Inc.


145 to add different parts from the Closed Web Parts (set up by an administrator) and the Server Galleries. There is also a Filter command, which when clicked, displays a Show combo box. Choose a gallery of Web parts to show only those parts: At the bottom of this pane is a combo box where you can select which area of the Parts page to add the component: Let s add the I need to option (which was in the Default section of the Add Web Parts dialogue) and select the Left Column from the Add to dialogue box. Click Add to insert the part. After a moment, you will see the part appear in the chosen location: The error message that appears here is nothing to worry about; it basically means that there is no data in the list yet. 142 Advanced Legal Systems, Inc.


146 You can easily move an item from one location to another. Move your mouse over the title of the part you inserted. Your mouse will change to a four headed arrow: Now you can click and drag to move your part to a new location: When you have finished adding parts to a page, click the Exit Edit Mode link, directly underneath the Site Actions menu. To enter back into Edit Mode, click Site Actions Edit Page. Navigational Settings You can modify the different ways in which users can navigate your site. Click Site Actions Site Settings. Under the Look and Feel heading, there are two options you can use: Top link bar and Quick Launch: 143 Advanced Legal Systems, Inc.


147 Click the Top link bar option to stop (or start) inheriting links from the parent site: The Quick Launch option lets you customize the Quick Launch bar: As you can see, each of the different items in the Quick Launch bar is customizable. Click any of the properties icons ( ) to view details about that particular item. There are links at the top to add a new link, a new overall heading for the Quick Launch bar, and the option to change the order of any of the items (except the Recycle Bin; that remains permanently at the bottom of the list). 144 Advanced Legal Systems, Inc.
148 Modifying the Site Theme, Title, and Description When you are editing a Web Parts page, you may have noticed a link in the upper right hand corner: Click this link to modify the site title, add a caption, a page description, and the URL for a company logo or picture: 145 Advanced Legal Systems, Inc.


149 These options are also available by clicking Site Actions Site Settings Title, description, and icon (found under the Look and Feel section. Also in the Look and Feel section is an option to modify the site theme: If you ve ever worked with any recent Microsoft product, you should be familiar with themes. Themes are basically color and style scheme packages that can be applied to change the look of a Web site. Clicking this link will open the Site Theme page and display the default theme we have seen thus far: Select any theme from the list to see a preview and click Apply to add the theme to this site. 146 Advanced Legal Systems, Inc.

150 Section 3: Upgrading SharePoint 2007 to SharePoint 2010 Lesson 3.1: Install Prerequisites Run Pre Upgrade Checker Tool Open a Command Prompt window on the SharePoint Server and navigate to: C:\Program Files\Common Files\Microsoft Shared\Web Server Extensions\12\BIN stsadm o preupgradecheck 147 Advanced Legal Systems, Inc.


151 When complete, the Pre Upgrade Check Report will appear: 148 Advanced Legal Systems, Inc.

152 Backup SharePoint Environment Prior to Upgrade Using Built In Tools. Confirm SQL Server Volume Shadow Copy Service (VSS) is set to Automatic startup. Start / Administrative Tools / Services SQL Server VSS Writer Open a Command Prompt and navigate to: C:\Program Files\Common Files\Microsoft Shared\Web Server Extensions\12\BIN Execute the following command: stsadm o backup directory c:\backup backupmethod full 149 Advanced Legal Systems, Inc.

153 Status update messages will scroll as in progress: 150 Advanced Legal Systems, Inc.


154 When the backup has completed, navigate to the backup folder and confirm presence of backup files: Ensure that all hardware and software requirements are met Windows Server bit or Windows Server 2008 R2 64 bit SQL Server bit Ensure that the account running SharePoint Products Configuration Wizard is a member of the db_owner fixed database role on the SQL Server where SharePoint database is located. 151 Advanced Legal Systems, Inc.

155 Run the Prerequisite Installer Open Windows Explorer and navigate to: C:\ILTAU\Microsoft SharePoint Server 2010 Run PrerequisiteInstaller.exe 152 Advanced Legal Systems, Inc.


156 Click Next: Select I accept the terms of the License Agreement(s) checkbox and click Next: 153 Advanced Legal Systems, Inc.


157 The tool will run, installing and configuring the required prerequisite software: On the Installation Completion screen, verify that each prerequisite was successfully installed. Then click Finish: 154 Advanced Legal Systems, Inc.

158 Lesson 3.2: Run Setup on All Servers Open Windows Explorer and navigate to: C:\ILTAU\Microsoft SharePoint Server 2010 Run Setup.exe: 155 Advanced Legal Systems, Inc.


159 On the Enter Your Product Key page, type your product key, and then click Continue. On the License Terms page, select the I accept the terms of this agreement checkbox and then click Continue: 156 Advanced Legal Systems, Inc.


160 On the Upgrade Earlier Versions page, click Install Now : Setup will run and upgrade the existing SharePoint Server 2007 environment to SharePoint Server When complete, clear the Run the SharePoint Products Configuration Wizard Now checkbox and then click Close: 157 Advanced Legal Systems, Inc.
161 158 Advanced Legal Systems, Inc.

162 Lesson 3.3: Run the SharePoint Products Configuration Wizard Launching the SharePoint Products Configuration Wizard Start / All Programs / Microsoft SharePoint 2010 Products / SharePoint 2010 Products Configuration Wizard: 159 Advanced Legal Systems, Inc.

163 On the Welcome to SharePoint Products window, click Next: On the Services Restart window, click Yes: 160 Advanced Legal Systems, Inc.


164 The installation will proceed: On the Configuration Successful, Upgrade In Progress page click Finish: 161 Advanced Legal Systems, Inc.
SharePoint 2010 Tutorial
 SharePoint 2010 Tutorial TABLE OF CONTENTS Introduction... 1 Basic Navigation... 2 Navigation Buttons & Bars... 3 Ribbon... 4 Library Ribbon... 6 Recycle Bin... 7 Permission Levels & Groups... 8 Create
Microsoft Windows SharePoint Services
 Microsoft Windows SharePoint Services SITE ADMIN USER TRAINING 1 Introduction What is Microsoft Windows SharePoint Services? Windows SharePoint Services (referred to generically as SharePoint) is a tool
SharePoint 2013 Site Owner
 SharePoint 2013 Site Owner Effective Content and Document Collaboration with Axalta Teams 9 May 2014 Instructor: Jason Christie Site Owner Course Topics to be Covered Content Management Creating and configuring
ACTIVE CAMPUS PORTAL ADVANCED (SHAREPOINT BASICS)
") ACTIVE CAMPUS PORTAL ADVANCED (SHAREPOINT BASICS) Training for Points of Contacts How SharePoint fits into Active Campus Portal Introduction to SharePoint Services Working with Lists Working with Libraries
ACTIVE CAMPUS PORTAL ADVANCED (SHAREPOINT BASICS) Training for Points of Contacts How SharePoint fits into Active Campus Portal Introduction to SharePoint Services Working with Lists Working with Libraries
BE Share. Microsoft Office SharePoint Server 2010 Basic Training Guide
 BE Share Microsoft Office SharePoint Server 2010 Basic Training Guide Site Contributor Table of Contents Table of Contents Connecting From Home... 2 Introduction to BE Share Sites... 3 Navigating SharePoint
My Site. Introduction
 My Site Introduction My Site is a component of the portal that is available to all NB educators. It is a personalized site that provides all users with the following features: A place to save and share
SharePoint 2010 Instructions for Users
 SharePoint 2010 Instructions for Users 1. Access your SharePoint Web site...2 2. Work with folders and documents in a Shared Documents Library...3 2.1 Edit a document...3 2.2 Create a New Document...3
Index A Access data formats, 215 exporting data from, to SharePoint, forms and reports changing table used by form, 213 creating, cont
 Index A Access data formats, 215 exporting data from, to SharePoint, 215 217 forms and reports changing table used by form, 213 creating, 237 245 controlling availability of, 252 259 data connection to,
Explorer View document libraries, 165 form library, 183
 Index A Actions section Add Listing link, 18 Add News link, 29 Add Person link, 20 Advanced Search Link, 41 Change Location link, 19 Change Settings link, 13 Create Subarea link, 13 Edit Page link, 21
KENDLE CLINICAL TRIALS PORTAL USER GUIDE
 KENDLE CLINICAL TRIALS PORTAL USER GUIDE Notes to Users Copyright Copyright by Kendle International Inc., 2010. All rights reserved. No part of this document may be downloaded, reproduced, transmitted,
One of the fundamental kinds of websites that SharePoint 2010 allows
 Chapter 1 Getting to Know Your Team Site In This Chapter Requesting a new team site and opening it in the browser Participating in a team site Changing your team site s home page One of the fundamental
SharePoint. Team Site End User Guide. Table of Contents
 Table of Contents Introduction... 1 Logging in for the First Time:... 1 Areas of the team site:... 2 Navigating the team site:... 3 Adding Content to the team site:... 3 The Ribbon:... 3 Adding a Link:...
SharePoint User Manual
 SharePoint User Manual Developed By The CCAP SharePoint Team Revision: 10/2009 TABLE OF CONTENTS SECTION 1... 5 ABOUT SHAREPOINT... 5 1. WHAT IS MICROSOFT OFFICE SHAREPOINT SERVER (MOSS OR SHAREPOINT)?...
Confluence User Training Guide
 Confluence User Training Guide Below is a short overview of wikis and Confluence and a basic user training guide for completing common tasks in Confluence. This document outlines the basic features that
Microsoft Office SharePoint Reference Guide for Site Owners
 Microsoft Office SharePoint Reference Guide for Site Owners Table of Contents INTRODUCTION...3 REQUESTING A NEW SITE...3 FOLLOWING A SITE...4 NAVIGATION...5 LISTS AND LIBRARIES...6 ADDING PEOPLE TO A SITE...6
Office 365: . Accessing and Logging In. Mail
 Office 365: Email This class will introduce you to Office 365 and cover the email components found in Outlook on the Web. For more information about the Microsoft Outlook desktop client, register for a
Microsoft Office SharePoint. Reference Guide for Contributors
 Microsoft Office SharePoint Reference Guide for Contributors SharePoint: Reference Guide for Contributors Table of Contents INTRODUCTION... 3 FOLLOWING A SITE... 3 NAVIGATION... 4 LISTS AND LIBRARIES...
AN INTRODUCTION TO OUTLOOK WEB ACCESS (OWA)
") INFORMATION TECHNOLOGY SERVICES AN INTRODUCTION TO OUTLOOK WEB ACCESS (OWA) The Prince William County School Division does not discriminate in employment or in its educational programs and activities against
INFORMATION TECHNOLOGY SERVICES AN INTRODUCTION TO OUTLOOK WEB ACCESS (OWA) The Prince William County School Division does not discriminate in employment or in its educational programs and activities against
SharePoint: Fundamentals
 SharePoint: Fundamentals This class will introduce you to SharePoint and cover components available to end users in a typical SharePoint site. To access SharePoint, you will need to log into Office 365.
2013 edition (version 1.1)
") 2013 edition (version 1.1) Contents 1 Introduction... 3 2 Signing in to your Office 365 account... 3 2.1 Acceptable Use Policy and Terms of Use... 4 3 Setting your profile and options... 4 3.1 Settings:
2013 edition (version 1.1) Contents 1 Introduction... 3 2 Signing in to your Office 365 account... 3 2.1 Acceptable Use Policy and Terms of Use... 4 3 Setting your profile and options... 4 3.1 Settings:
BrainStorm Quick Start Card for Microsoft OneDrive for Business
 BrainStorm Quick Start Card for Microsoft OneDrive for Business mso.harvard.edu Changing the Way the World Works Clear the path for your productivity goals! Using Microsoft OneDrive for Business, you have
Contents. Common Site Operations. Home actions. Using SharePoint
 This is a companion document to About Share-Point. That document describes the features of a SharePoint website in as much detail as possible with an emphasis on the relationships between features. This
ForumPass Familiarization Participant Workbook June 2018
 ForumPass Familiarization Participant Workbook June 2018 1 F O R U M P A S S DOCUMENT OBJECTIVES... 3 FORUMPASS PRODUCT SUMMARY... 3 MICROSOFT SHAREPOINT PLATFORM... 3 FORUMPASS EXCLUSIVE FEATURES... 4
Microsoft SharePoint 2010
 BrainStorm Quick Start Card for Microsoft SharePoint 2010 Getting Started Microsoft SharePoint 2010 brings together your organization s people, documents, information, and ideas in a customizable space
EVERY NATION OUTLOOK WEB ACCESS (OWA) USER S GUIDE
 USER S GUIDE") EVERY NATION OUTLOOK WEB ACCESS (OWA) USER S GUIDE Exchange 2003 Version Revised September 2005 TABLE OF CONTENTS WHAT S NEW IN OWA 2003?...2 General...2 Inbox and Message Composition...2 Tasks...2 INTRODUCTION
EVERY NATION OUTLOOK WEB ACCESS (OWA) USER S GUIDE Exchange 2003 Version Revised September 2005 TABLE OF CONTENTS WHAT S NEW IN OWA 2003?...2 General...2 Inbox and Message Composition...2 Tasks...2 INTRODUCTION
Contents Office 365 Groups in Outlook 2016 on the web... 3 What are groups?... 3 Tips for getting the most out of Office 365 Groups...
 Contents Office 365 Groups in Outlook 2016 on the web... 3 What are groups?... 3 Tips for getting the most out of Office 365 Groups... 3 Create a Group in Web Outlook... 4 Group limits... 6 Group privacy...
SharePoint Online for Site Administrators
 SharePoint Online for Site Administrators Contents SharePoint Online for Site Administrators... 1 Access Your Office 365 SharePoint Website... 2 Make a New Subsite... 4 Permissions... 5 Edit the members
SharePoint General Instructions
 SharePoint General Instructions Table of Content What is GC Drive?... 2 Access GC Drive... 2 Navigate GC Drive... 2 View and Edit My Profile... 3 OneDrive for Business... 3 What is OneDrive for Business...
De La Salle University Information Technology Center. Microsoft Windows SharePoint Services and SharePoint Portal Server 2003
 De La Salle University Information Technology Center Microsoft Windows SharePoint Services and SharePoint Portal Server 2003 WEB DESIGNER / ADMINISTRATOR User s Guide 2 Table Of Contents I. What is Microsoft
Alfresco Alfresco Explorer QuickStart
 Alfresco 4.2.0 Contents... 3 Important notes...3 Starting with Explorer... 3 Toolbar... 4 Sidebar... 4 Working area...4 Logging in... 5 Adding new users...5 Creating spaces and content... 7 Creating a
IT Training Services. SharePoint 2013 Getting Started. Version: 2015/2016 V1
 IT Training Services SharePoint 2013 Getting Started Version: 2015/2016 V1 Table of Contents ACCESSING SHAREPOINT SITE 1 IT Intranet SharePoint Site... 1 Create a SubSite... 1 DOCUMENT LIBRARIES 2 Create
Office 365 Features. Click the links below for an online overview:
 Office 365 Features http://www.jeffersonstate.edu/resources-for-instructors-de/ The Microsoft Office 365 Outlook Web App (OWA) allows users to access their mailbox using a web browser from any computer
OUTLOOK WEB ACCESS (OWA) USER S GUIDE. Exchange 2003 Version - OWA Guide
 USER S GUIDE. Exchange 2003 Version - OWA Guide") OUTLOOK WEB ACCESS (OWA) USER S GUIDE Exchange 2003 Version - OWA Guide TABLE OF CONTENTS WHAT S NEW IN OWA 2003?...2 General...2 Inbox and Message Composition...2 Tasks...2 INTRODUCTION TO OWA...3 Web-Based
OUTLOOK WEB ACCESS (OWA) USER S GUIDE Exchange 2003 Version - OWA Guide TABLE OF CONTENTS WHAT S NEW IN OWA 2003?...2 General...2 Inbox and Message Composition...2 Tasks...2 INTRODUCTION TO OWA...3 Web-Based
Microsoft SharePoint is provided by Information Services for staff in Aberystwyth University.
 USING SHAREPOINT E-Services and Communications, Information Services, Aberystwyth University OBJECTIVES By the end of this training course you will be able to: Access SharePoint Customise a document library
Uploading Files. Creating Files
 Desktop/Laptop File management with Microsoft Teams (which uses a SharePoint document library) provides new options for working collaboratively. Some options will require assistance from ICT Desktop Support
Microsoft. SharePoint Your Organization s Name Here
 Microsoft SharePoint 2013 Your Organization s Name Here Table of Contents Table of Contents... 2 Introducing CustomGuide Training Manuals... 7 How it Works... 8 The Fundamentals... 9 Introduction to SharePoint...
SharePoint: Fundamentals
 SharePoint: Fundamentals This class will introduce you to SharePoint and cover components available to end users in a typical SharePoint site. To access SharePoint, you will need to log into Office 365.
SureClose Product Line
 SureClose Product Line Release Notes 3.7 June 21, 2013 SureClose 3.7 Release Notes June 2013 1 Table of Contents Overview... 4 Post-Installation Considerations... 4 Features and Functionality... 6 New
Office 365 Beginners Guide
 Office 365 Beginners Guide Revision History Date Version Author Comments 03/01/2016 1.00 Paul Leake Initial Draft 08/04/2016 1.10 Paul Leake Amended sign in instructions and changed screenshots to reflect
State Association Website User Manual. (For Website Administrators)
") State Association Website User Manual (For Website Administrators) BASICS There have been some basic changes to the layout of the new NAMSS website. Three major changes have occurred: 1. Login Process
State Association Website User Manual (For Website Administrators) BASICS There have been some basic changes to the layout of the new NAMSS website. Three major changes have occurred: 1. Login Process
Introduction to 9.0. Introduction to 9.0. Getting Started Guide. Powering collaborative online communities.
 Introduction to 9.0 Introduction to 9.0 Getting Started Guide Powering collaborative online communities. TABLE OF CONTENTS About FirstClass...3 Connecting to your FirstClass server...3 FirstClass window
COMMUNITIES USER MANUAL. Satori Team
 COMMUNITIES USER MANUAL Satori Team Table of Contents Communities... 2 1. Introduction... 4 2. Roles and privileges.... 5 3. Process flow.... 6 4. Description... 8 a) Community page.... 9 b) Creating community
User Guide. BlackBerry Workspaces for Windows. Version 5.5
 User Guide BlackBerry Workspaces for Windows Version 5.5 Published: 2017-03-30 SWD-20170330110027321 Contents Introducing BlackBerry Workspaces for Windows... 6 Getting Started... 7 Setting up and installing
Salesforce App Help. Salesforce, Winter
 Salesforce App Help Salesforce, Winter 18 @salesforcedocs Last updated: November 22, 2017 Copyright 2000 2017 salesforce.com, inc. All rights reserved. Salesforce is a registered trademark of salesforce.com,
How to Upgrade Your Site to the New User Interface
 How to Upgrade Your Site to the New User Interface Site Administrators can preview their existing site in the new user interface. We recommend that you do this first to make sure that all of the elements
How-to: SharePoint Web Forms
 How-to: SharePoint Web Forms Contents Overview:... 3 Create Web Form Site... 3 Web Form Components:... 4 Web Form page... 4 Confirmation page... 5 Responses list:... 6 Views:... 6 Form design... 7 Web
Parent Student Portal User Guide. Version 3.1,
 Parent Student Portal User Guide Version 3.1, 3.21.14 Version 3.1, 3.21.14 Table of Contents 4 The Login Page Students Authorized Users Password Reset 5 The PSP Display Icons Header Side Navigation Panel
SharePoint 2010 Site Owner s Manual by Yvonne M. Harryman
 SharePoint 2010 Site Owner s Manual by Yvonne M. Harryman Chapter 9 Copyright 2012 Manning Publications Brief contents PART 1 GETTING STARTED WITH SHAREPOINT 1 1 Leveraging the power of SharePoint 3 2
About SharePoint Server 2007 My Sites
 SharePoint How To s / My Sites of 6 About SharePoint Server 007 My Sites Use your My Site to store files and collaborate with your co-workers online. My Sites have public and private pages. Use your public
SITE DESIGN & ADVANCED WEB PART FEATURES...
 Overview OVERVIEW... 2 SITE DESIGN & ADVANCED WEB PART FEATURES... 4 SITE HIERARCHY... 4 Planning Your Site Hierarchy & Content... 4 Content Building Tools... 5 Pages vs Sites... 6 Creating Pages... 6
ES CONTENT MANAGEMENT - EVER TEAM
 ES CONTENT MANAGEMENT - EVER TEAM USER GUIDE Document Title Author ES Content Management - User Guide EVER TEAM Date 20/09/2010 Validated by EVER TEAM Date 20/09/2010 Version 9.4.0.0 Status Final TABLE
Table of Contents. 1. SharePoint 2013 Introduction...1 EVALUATION COPY
 Table of Contents Table of Contents 1. SharePoint 2013 Introduction...1 SharePoint Versions...1 Team Site Layout and Navigation...1 Layout...1 Navigation...2 Customize Quick Launch...11 Exercise 1: Team
SharePoint Online. An Introduction. IT Unit July 7, 2017 Dustin Moore V. 1.0
 SharePoint Online An Introduction IT Unit July 7, 2017 Dustin Moore V. 1.0 Contents Creating a Document Library... 1 Creating Custom Columns... 3 Editing Metadata... 3 Filtering... 5 Views... 7 Creating
Content Publisher User Guide
 Content Publisher User Guide Overview 1 Overview of the Content Management System 1 Table of Contents What's New in the Content Management System? 2 Anatomy of a Portal Page 3 Toggling Edit Controls 5
Contents Using Team Site Calendars... 2
 SharePoint 2013 End User Training Tutorial Contents Using Team Site Calendars... 2 Adding & Editing Announcements... 4 Using Custom Lists... 6 Creating Alerts to Stay Updated... 9 Communicating Through
USER GUIDE FOR SUPPLIER PORTAL SHARED APPLICATION SERVICES INFORMATION TECHNOLOGY GLOBAL PHARMACEUTICAL OPERATIONS
 Abbott Laboratories (GPO IT) - User Guide Document Version 1.0 USER GUIDE FOR SUPPLIER PORTAL SHARED APPLICATION SERVICES INFORMATION TECHNOLOGY GLOBAL PHARMACEUTICAL OPERATIONS Page 1 of 217 Abbott Laboratories
DOCUMENTUM D2. User Guide
 DOCUMENTUM D2 User Guide Contents 1. Groups... 6 2. Introduction to D2... 7 Access D2... 7 Recommended browsers... 7 Login... 7 First-time login... 7 Installing the Content Transfer Extension... 8 Logout...
Colligo Engage Outlook App 7.1. Connected Mode - User Guide
 7.1 Connected Mode - User Guide Contents Colligo Engage Outlook App 1 Benefits 1 Key Features 1 Platforms Supported 1 Installing and Activating Colligo Engage Outlook App 2 Checking for Updates 3 Updating
BASIC NAVIGATION & VIEWS...
 Content Overview VISUAL TOUR... 5 NEW FEATURES IN OUTLOOK 2010... 6 BASIC NAVIGATION & VIEWS... 7 SETTING PREFERENCES... 7 Creating an Outlook Shortcut... 7 Choosing a Startup View... 7 CUSTOMIZING INBOX
Webmail 7.0 is an online client which runs in your web browser. Webmail 7.0 allows you to access your , contact list, and calendar from
 Webmail 7.0 is an online email client which runs in your web browser. Webmail 7.0 allows you to access your email, contact list, and calendar from any computer with an internet connection and a web browser.
Colligo Engage Outlook App 7.1. Offline Mode - User Guide
 Colligo Engage Outlook App 7.1 Offline Mode - User Guide Contents Colligo Engage Outlook App 1 Benefits 1 Key Features 1 Platforms Supported 1 Installing and Activating Colligo Engage Outlook App 3 Checking
ReggieNet: Communication Workshop
 ReggieNet: Communication Workshop Facilitators: Mayuko Nakamura (mnakamu), Charles Bristow (cebrist), Linda Summer (lsummer) & Steve Travers (sttrave) Forums Before you start FORUM: A Forum is a collection
Microsoft Outlook Basics
 Microsoft Outlook 2010 Basics 2 Microsoft Outlook 2010 Microsoft Outlook 2010 3 Table of Contents Getting Started with Microsoft Outlook 2010... 7 Starting Microsoft Outlook... 7 Outlook 2010 Interface...
Oracle Cloud. Content and Experience Cloud Android Mobile Help E
 Oracle Cloud Content and Experience Cloud Android Mobile Help E82091-01 Februrary 2017 Oracle Cloud Content and Experience Cloud Android Mobile Help, E82091-01 Copyright 2017, Oracle and/or its affiliates.
Student Guide INTRODUCTION TO ONLINE RESOURCES
 Student Guide INTRODUCTION TO ONLINE RESOURCES Date: 08. June. 2017 By: Technical Support Team STUDENT GUIDE southwales.unicaf.org 1)Introduction...4 2)Student Panel (SIS)...4 2.1)Student Panel (SIS) Login...4
Cisco Unified Personal Communicator Release 8.5
 Frequently Asked Questions Cisco Unified Personal Communicator Release 8.5 FAQs 2 Basics 2 Setup 3 Availability 5 Contacts 8 Chat 10 Calls 18 Conference Calls 25 Voicemail 26 Web Meetings 27 Troubleshooting
Hands-On Introduction to Queens College Web Sites
 Hands-On Introduction to Queens College Web Sites This handout accompanies training workshops for Queens College Content Editors who will manage and maintain the web content in their areas. Overview of
Configuring SharePoint 2007
 26636.book Page 77 Thursday, February 14, 2008 4:38 PM Chapter 3 Configuring SharePoint 2007 MICROSOFT EXAM OBJECTIVES COVERED IN THIS CHAPTER: Manage Administration Manage Central Admin UI Manage the
Rutgers. A How-To Guide for Instructors
 Moodle @ Rutgers A How-To Guide for Instructors 7/30/2012 Prepared by the Department of Instructional Technology & elearning Solutions (ITeS) CA/NJDS, Room B725 Page 2 Table of Contents Required Software...
DSS User Guide. End User Guide. - i -
 DSS User Guide End User Guide - i - DSS User Guide Table of Contents End User Guide... 1 Table of Contents... 2 Part 1: Getting Started... 1 How to Log in to the Web Portal... 1 How to Manage Account Settings...
Introduction. User Privileges. PEPFAR SharePoint: Poweruser Guide
 PEPFAR SharePoint: Poweruser Guide Introduction Welcome to your role as a Poweruser of a PEPFAR SharePoint site! This guide will give you an overview of your roles and responsibilities in maintaining the
User Guide. Chapter 6. Teacher Pages
 User Guide Chapter 6 s Table of Contents Introduction... 5 Tips for s... 6 Pitfalls... 7 Key Information... 8 I. How to add a... 8 II. How to Edit... 10 SharpSchool s WYSIWYG Editor... 11 Publish a...
The Quick Access Toolbar can be either just below the Title Bar or, as in this case, just above the ruler.
 Table of Contents Ribbon... 3 Customizing the Ribbon and Quick Access Toolbars... 3 File Tab... 5 Print and Print Preview... 7 Working in Protected Mode... 8 Accessibility Checker... 9 Compatibility Changes
EDITING AN EXISTING REPORT
 Report Writing in NMU Cognos Administrative Reporting 1 This guide assumes that you have had basic report writing training for Cognos. It is simple guide for the new upgrade. Basic usage of report running
Student Guide. By UNICAF University
 vnhgfj Student Guide By UNICAF University 1 2 Table of Contents 1) Introduction... 5 2) Student Panel (SIS)... 5 2.1) Student Panel (SIS) Login... 5 2.1.1) Definitions... 5 2.1.2) Registration Email...
SCHULICH MEDICINE & DENTISTRY Website Updates August 30, Administrative Web Editor Guide v6
 SCHULICH MEDICINE & DENTISTRY Website Updates August 30, 2012 Administrative Web Editor Guide v6 Table of Contents Chapter 1 Web Anatomy... 1 1.1 What You Need To Know First... 1 1.2 Anatomy of a Home
Introduction to the Learning Environment 8.3 to 8.4.x
 Introduction to the Learning Environment 8.3 to 8.4.x User Guide Second edition, November 30, 2009 Contents My Home Accessing your courses Searching for courses Navigating inside a course Lists Actions
HGC SUPERHUB HOSTED EXCHANGE
 HGC SUPERHUB HOSTED EXCHANGE EMAIL OUTLOOK WEB APP (OWA) 2010 USER GUIDE V2013.6 HGC Superhub Hosted Email OWA User Guide @ 2014 HGC. All right reserved. Table of Contents 1. Get Started... 4 1.1 Log into
Colligo Manager 5.4 SP3. User Guide
 5.4 SP3 User Guide Contents Enterprise Email Management for SharePoint 2010 1 Benefits 1 Key Features 1 Platforms Supported 1 Installing and Activating Colligo Email Manager 2 Checking for Updates 4 Updating
GOOGLE APPS. If you have difficulty using this program, please contact IT Personnel by phone at
 : GOOGLE APPS Application: Usage: Program Link: Contact: is an electronic collaboration tool. As needed by any staff member http://www.google.com or http://drive.google.com If you have difficulty using
Outlook Web Access (OWA) Tutorial
 Tutorial") Outlook Web Access (OWA) Tutorial Outlook Web Access 2010 allows you to gain access to your email messages, calendars, contact, tasks and public folders from any computer with internet access. How to access
Outlook Web Access (OWA) Tutorial Outlook Web Access 2010 allows you to gain access to your email messages, calendars, contact, tasks and public folders from any computer with internet access. How to access
SharePoint Documents. C&IT Services User Guide
 SharePoint 2007 Documents C&IT Services User Guide SHAREPOINT 2007 DOCUMENTS........................................ Copyright 2010 Melbourne by Watsonia Software Pty Ltd (ABN 64 060 335 748) Published
Outlook: Web Access. Outlook: Web Access AIS Vienna
 Outlook: Web Access AIS Vienna Table of Contents Introduction to OWA...1 Log On... 1 OWA Workspace... 2 Hiding/Displaying the Reading Pane... 3 Collapsing/Expanding the Outlook Bar... 4 Log Off... 5 Sending
Getting Started The Outlook Web Access Window
 QUICK Source Microsoft Outlook Web Access in Exchange Server 2003 Getting Started The Outlook Web Access Window ❶ ❷ ❸ ❹ ❺ ❻ ❼ ❽ Using the Reading Pane The Reading Pane allows you to view your e-mail messages
Student Guide INTRODUCTION TO ONLINE RESOURCES
 Student Guide INTRODUCTION TO ONLINE RESOURCES Date: 12. March. 2018 By: Technical Support Team Table of Contents 1) Introduction 3 2) Student Panel (SIS) 3 2.1) Student Panel (SIS) Login 3 2.1.1) Definitions
SharePoint SITE OWNER TRAINING
 SharePoint SITE OWNER TRAINING Contents Customizing Your Site... 3 Editing Links...4 Give the site a new look...5 Changing Title, Description, or Logo...6 Remove the Getting Started Icons...6 Adding Apps
Monash University Policy Management. User Guide
 Monash University Policy Management User Guide 1 Table of Contents 1. GENERAL NAVIGATION... 4 1.1. Logging In to Compliance 360 - Single Sign On... 4 1.2. Help... 4 1.2.1. The University Policy Bank...
Transitioning Teacher Websites
 Transitioning Teacher Websites Google sites is an online web building tool that can be accessed and updated from anywhere there is an internet connection. Here is a brief video introduction of Google sites.
Useful Google Apps for Teaching and Learning
 Useful Google Apps for Teaching and Learning Centre for Development of Teaching and Learning (CDTL) National University of Singapore email: edtech@groups.nus.edu.sg Table of Contents About the Workshop...
BrightWork Team Member Training Guide
 BrightWork Team Member Training Guide Contents 1 Training Introduction... 5 1.1 Who is this Guide For?... 5 1.2 Training Introduction... 5 1.3 Prerequisites... 5 1.4 Suggested Exercises... 6 1.5 System
Zimbra Connector for Microsoft Outlook User Guide. Zimbra Collaboration
 Zimbra Connector for Microsoft Outlook User Guide Zimbra Collaboration 8.8.11 Table of Contents Legal Notices............................................................................... 1 1. Introduction..............................................................................
Frequently Asked Questions
 Frequently Asked Questions Frequently Asked Questions for Cisco Unified Personal Communicator 8.6 and Voice and Video Firmware 8.6 for Cisco Virtualization Experience Client 6215 FAQs 2 Basics 3 Setup
Custom SharePoint Workflows
 Custom SharePoint Workflows Using SharePoint Designer 2013 SharePoint Workflows Microsoft SharePoint, as a collaboration platform, contains a huge amount of business data - documents, contacts, meetings,
CONTENTS. What is Moodle? Logging in to Moodle Introducing the Workspace Customising the Workspace... 8
 Moodle Training March 2012 Material produced by the VLE Group (Monash University) and elearning Services (Faculty of Medicine, Nursing and Health Sciences, Monash University) vle.monash.edu/supporttraining/learnbytech/moodle/
Outlook 2016 Guide. A Complete Overview for Connect Users
 Outlook 2016 Guide A Complete Overview for Connect Users Chapter 1: Introduction...8 Chapter 2: Getting Around Outlook...8 Quick Access Toolbar... 8 The Ribbon... 8 Backstage View... 9 Dialog Box Launcher...
S-Drive Lightning User Guide v2.1
 S-Drive Lightning User Guide v2.1 Important Note This user guide contains detailed information about S-Drive for Salesforce Lightning usage. Refer to the S-Drive User Guide for more information about S-Drive
Administrative Training Mura CMS Version 5.6
 Administrative Training Mura CMS Version 5.6 Published: March 9, 2012 Table of Contents Mura CMS Overview! 6 Dashboard!... 6 Site Manager!... 6 Drafts!... 6 Components!... 6 Categories!... 6 Content Collections:
Office 365. Contents. Features, screen shots, and instructions are subject to change at any time Page 1
 Office 365 Contents Office 365..1 Accessing Your Email...3 First Time Set-Up...4 Changing Your Password. 6 The Email Environment...8 Reading Pane View...9 Reading Your Emails.10 Reading Attachments...11
OUTLOOK HOW DO I? 2013
 OUTLOOK HOW DO I? Click on a Link to take you to that Section OUTLOOK - GENERAL... 2 GENERAL How Do I Navigate the 2010 Outlook Screen?... 2 GENERAL: How Do I Change the Reading Pane View?... 7 GENERAL:
Managing Your Website with Convert Community. My MU Health and My MU Health Nursing
 Managing Your Website with Convert Community My MU Health and My MU Health Nursing Managing Your Website with Convert Community LOGGING IN... 4 LOG IN TO CONVERT COMMUNITY... 4 LOG OFF CORRECTLY... 4 GETTING