ATT 2000 User Manual. All specifications, information contained herein, hardware and software of the unit are subject to change without prior notice.
|
|
|
- Vernon Reed
- 5 years ago
- Views:
Transcription
1
2 ATT 2000 User Manual All specifications, information contained herein, hardware and software of the unit are subject to change without prior notice. CAUTION: Please read this manual thoroughly before operating the unit and retain it for future reference. To prevent fire or shock hazard, do not expose this unit to rain or moisture. To avoid electrical shock refer installation, servicing of this product to the distributor/dealer from whom the purchase was made No user serviceable parts inside. Static Discharge Warning: The discharge of electrostatic energy that accumulates on the surface of human body or other surfaces can disrupt the working of ATT 2000 or damage the electronic components used. Observe static safe procedures while handling / installing/ maintaining the ATT On Static Discharge it is observed that the ATT 2000 may experience loss of function which may require a manual reset to start functioning normally i.e the unit may have to be powered OFF and restarted to resume proper functioning. Safety: This product has been tested to comply with the international safety standards as per IEC and the relevant Australian/New Zealand standard.
3 General Features 4 Connection Diagram 5 Installation 6 Functional Check 7 Operating Basics 8 Programming the Unit 10 General Programming Rules 11 User Programs 12 Audiotex menus 31 Installer Programs 39 Default Prompts 54 Specifications 55 Statutory information 56 3Table of Contents
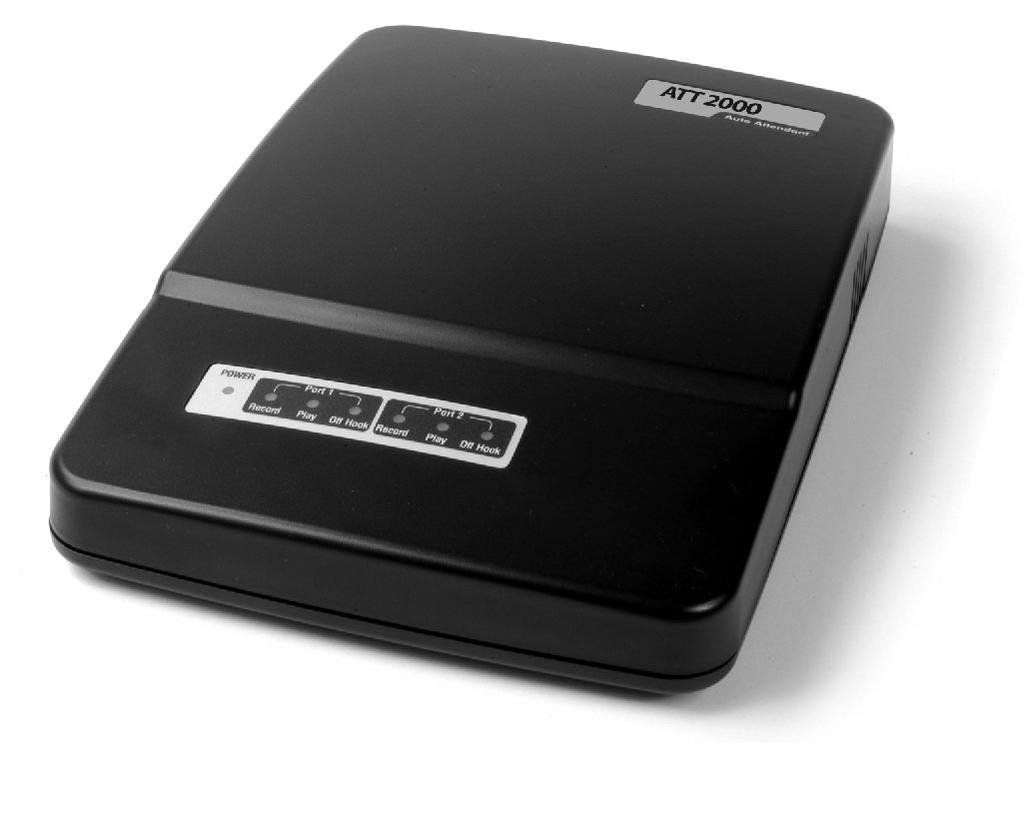
4 General Features 4 General Features Welcome to your new ATT 2000, a two port Auto Attendant. ATT 2000 answers your customer's phone call with a professional greeting and lets him or her reach the desired extension or a department that they want to reach. It also routes an incoming fax to any of the fax extensions. The ATT 2000 works 24-hours a day, 7 days a week! The ATT 2000 comes with 200 seconds (3 minutes & 20 Seconds) of voice recording space available to the user and 40 seconds of default messages on each port. The optional Audiotex enabled model has the same 40 seconds of default messages and 200 seconds of greeting space but has an additional 480 seconds (8 minutes) of voice recording space available to the user for Audiotex messages. The ATT 2000 has a Real Time Clock based automatic DAY/NIGHT and HOLIDAY mode of operation and auto-fax detection. Multiple voice menus are available in the Audiotex enabled model, where. The two models are identical in all respects and functions, except for the Audiotex function. The ATT 2000 also has a music input. While recording the DAY / NIGHT / HOLIDAY greeting, a music source may be connected through this input, to have background music while the greeting is played to the callers. Status lamps on the top panel show the current operating status of the unit. When the ATT 2000 is powered ON, the green colored POWER lamp blinks a few times rapidly, glows steady for 1 second and then flashes on-off, indicating normal operation. The OFF HOOK lamp starts glowing as soon as an incoming call is answered and remains on as long as that port is offhook. The PLAY and RECORD lamps glow while the port is playing back or recording a voice message, respectively. A standard RJ11 phone jack is used to connect the ATT 2000 to the PBX as an extension. The ATT 2000 may be wall mounted or kept on the tabletop. The unit has wall-mounting eyelets on the bottom of the unit, which is spaced 3 inches apart. The ATT 2000 has a volume control on the rear panel of the unit for adjusting the output level of the voice message being played back to the caller. This control is common for both ports in the 2-port version. The ATT 2000 does not need any batteries to retain its VOICE MESSAGES or the Program Parameters, since both are stored in Non-volatile memory. The ATT 2000 is a Plug-n-play product, which can be put to use with a minimum of programming. It comes with default parameters and default voice messages programmed in the unit, which are adequate for most installations. At some places, the hook flash and other timings may need to be programmed to get the unit to work properly in such cases please contact your dealer for assistance. The ATT 2000 is completely remote programmable.


5 Connection Diagram PBX Connection Diagram Wall Adaptor Connect ATT 2000 to Analog extensions Route all incoming calls to ATT 2000 ATT 2000 Music In Volume Control Analog Line in Power Supply Overflow 12 V AC (optional) 5
6 Installation Installation Unpack the unit from its shipping carton. Your ATT 2000 shipping carton must contain the following: The ATT 2000 Unit User Manual Phone Line Cords Wall Adaptor Select a suitable location for the ATT 2000 to be placed - it may be wall mounted or kept on the tabletop. The suitable location should have 1 or 2 analog phone extension sockets, a power socket close by and should be easily accessible for any service or maintenance work. If you plan to mount the unit on the wall please follow the wall mounting instructions given below: Use the paper template, provided with the unit, and secure two wood screws (Size 5 or 6) into the wall where you want to mount the unit. The distance between the center points of the mounting screws should be 3 inches. The wall on which the unit is to be mounted should be strong enough to support the weight of the unit. Also make sure that the screws are driven securely into the wall. Then, hang the unit onto the screws. Precautions: Do not install this unit where it would be subjected to : Direct sunlight, moisture or rain Heat sources, Radiators, Air Ducts etc. Draft from an air conditioner Excessive dust or corrosive fumes Mechanical shock or vibration Plug in the Adaptor into the power socket and switch on the power to the unit. The power lamp on the unit flashes rapidly for about 2 seconds, remains steady for a second and then continues to flash once a second, indicating normal operation. Insert the phone line cord in the phone socket on the unit and insert the other end into the wall extension socket for both the ports. Sometimes, when the power is first applied or when the phone cord is inserted, the Power lamp may glow steadily for about 5 seconds before returning to the slow On-Off flashing state. This is normal and need not cause any concern. You are now ready to do a Functional Check of the unit. 6
7 Functional Check After the Installation has been completed satisfactorily, you should carry out a few preliminary checks, before putting the unit into operation. If you are looking at the ATT 2000 while you are running the functional check, it is very easy to solve any problems that may be encountered as well as understand the programming methods. You will need another extension with a phone from which you can call into the ATT 2000 to go through the functional check. Ascertain the extension number of the ATT 2000 and call into it from the phone. The unit should pick up the call after the second ring and start playing the Main greeting. If the ATT 2000 does not pick up the call by the second ring - observe whether the Power lamp on the unit is steady or flashing. If it is still flashing, it means that the unit is not getting any RING signal. Check the extension into which the ATT 2000 is plugged in - may be the extension is faulty or you may be calling some other extension number. If the Power lamp is steady, wait for at least 16 rings - if the unit picks up the call before 16 rings, it may be, because, the default parameters have got changed. If the unit does not pick up the call even after 16 rings, most likely, the ringing signal received from the PBX is faulty. Once the unit picks up and answers the call, listen to the voice message and adjust the volume if necessary. The Volume control is located on the rear panel of the unit. As long as the unit remains off hook, the OFF HOOK lamp glows steadily. Whenever the unit is playing a voice message, the PLAY lamp on the unit will also be glowing. Now call into the ATT 2000 and dial an extension number while the unit is playing the DAY or NIGHT / HOLIDAY greeting. Confirm that the unit transfers the call to the extension that you had dialed. Set the Real Time Clock to the correct time and then program the Day and Night timings. Call into the unit and listen to both the Day and Night greetings by changing the Day and Night timings. If a fax call is routed to the unit, it transfers the call to the fax extension. If no digits are dialed, it transfers the call to the operator extension programmed in the unit. If these basic functions work properly, go into programming mode and set all the other parameters to suit your site. Most of the common problems along with the possible causes and remedies are listed on our website. If you faced any problem during the basic functional check, look through the Trouble-shooting guide on our website or call for Tech support. Note: The POWER lamp blinks roughly two times in a second when the unit is in the NIGHT and HOLIDAY MODE and roughly at about once a second in the DAY MODE. 7Functional Check
8 Operating Basics 8 Operating Basics The ATT 2000 has several built-in features. To make the best use of these features, it is necessary to understand the working of the unit as well as some features of your PBX and the site where it is being installed. The default parameters have been designed to work straight away for most of the installations. However, some sites may require additional programming. Please note that the ATT 2000 comes with factory recorded default prompts and Day, Night, & Holiday Greetings. These greetings once recorded over cannot be retrieved. The default Day, Night, Holiday greetings and default Prompts (and also the Audiotex messages) may be recorded over in any order and as many times as desired. The Hook Flash duration and the Delay after Hook flash are two parameters, which need to be programmed properly before the unit can function correctly. The Extension Length may be fixed or variable. If the variable length option is programmed, any mix of extension lengths say for example: 23, 304, 4155, etc. are all valid and calls are transferred to these types of extensions without any problem. However, if all the extensions are of a fixed length, it is recommended to program the Extension Length accordingly. The unit accepts any digits that are dialed while the DAY/NIGHT/HOLIDAY greeting is being played. If no digits are dialed till the greeting is over, the unit transfers the call to the Day or Night operator depending on the current mode of operation. When a caller encounters a BUSY or INVALID or NO-ANSWER from an extension, they have the option of trying another extension. However, if the call is not answered on the second try also, they have the option of reaching the operator only or hanging up the call. However, if all the operator extensions are busy, a caller may try the Operator extension a maximum of 6 times. On the seventh attempt, the unit responds with Please try your call again later.. and disconnects the call. It is suggested that the users familiarize themselves with the programming of the unit and then change the default password so that unauthorized changes of the parameters are avoided. The Audiotex model uses the digit 9 extensively in its Audiotex function. Hence, extension numbers beginning with the number 9 are not recommended. If any such extensions do exist, the unit transfers calls to these extensions from within the main greeting only and not from within an Audiotex menu message. Day / Night / Holiday mode The unit may be operated in the DAY or NIGHT / HOLIDAY mode the changeover is automatic depending on the Real time clock of the unit and the Day/Night/Holiday timings programmed in the unit. If it is desired to operate
9 the unit in the DAY mode only, then the Day and Night timings should both be set to 0000 hours. The unit plays the greeting depending on the DAY or the NIGHT or the HOLIDAY mode. A separate Night Operator extension may be programmed in the ATT If a caller dials the operator digit OR if the caller encounters a Busy or Invalid extension, the call is transferred to the DAY operator if the DAY mode is in operation or the NIGHT operator if it is the NIGHT /HOLIDAY mode. If you desire that the callers are able to reach the Security Department or your answering machine during the night time or during a Holiday, the Night / Holiday greeting should be recorded accordingly. The callers should be asked to dial the extension number of the Security Department or the extension to which the answering machine is connected. Alternatively, the extension of the Security Department itself could be programmed as the Night Operator extension. However, the single digit-dialing plan is not available during the NIGHT mode and HOLIDAY mode. Recording space The unit has 4 minutes of recording space available totally on each port for the Default prompts, the DAY, NIGHT and HOLIDAY greetings for each language. The default prompts in English occupy about 50 seconds of space. Hence, in a single language environment, the balance space of 190 seconds is available for the Day, Night and Holiday greetings. Each of these greetings may be of any length as long as the total duration is within 190 seconds. In a Multilingual environment, the default prompts of the second language use up 50 to 60 seconds out of these 190 seconds. The Day, Night and Holiday greetings of both the languages as well as the Pilot greeting must be made to fit into the balance of 130 to 140 seconds. Note : a) The DAY, NIGHT and HOLIDAY greetings may be recorded in any sequence at any time and may be of any duration subject to the total maximum space available. b) Each greeting may be recorded separately without having to record the other greetings at the same time. c) Once a new greeting is recorded, restoring the factory default settings cannot retrieve the default greeting. 9
10 Programming the Unit Programming the Unit The ATT 2000 Auto Attendant is shipped from the factory with default settings, which should be good enough to work in most installations. However, some site-specific parameters may need to be programmed, before the unit is put into operation. The following pages list the available programs along with the valid input parameters and the defaults already programmed in the unit. The unit has a built in set of voice prompts, which are used to guide the user during programming and also to ascertain the currently programmed values in the system. The unit is fully remote programmable. The user can program and check all of the values as well as record the DAY / NIGHT / HOLIDAY greeting, from any remote location, by calling into the unit from a standard touch-tone phone instrument. To enter the Programming Mode: Call in to the ATT 2000 by dialing the extension to which it is connected. The unit picks up the call and starts playing the DAY / NIGHT / HOLIDAY greeting. At any time while the greeting is being played, press the `star' key ( ) to enter the Programming mode. As soon as is pressed, the DAY / NIGHT / HOLIDAY greeting stops playing. Now press another, then the 4 digit password followed by the # key. The default User password is Note: The user password provides access to USER PROGRAMS only, whereas the Installer Password provides access to ALL PROGRAMS. If the password is valid, the unit prompts you with the message Enter Program Number. If the password is invalid, you will hear the message This entry is invalid and the unit returns to the DAY / NIGHT / HOLIDAY greeting. Press 6789 # to enter programming mode. Press ### to exit programming mode. Note: In the example given above, the are the password access digits, 6789 is the password itself and # is the entry terminator. If the caller presses 6789, it is treated as a transfer to an extension. 10
11 General Programming Rules All the digits for the program number and the values for that program should be entered one after the other. Where multiple extensions are being entered, a is used to append and # to end that particular program. If the unit responds with the message This entry is invalid it means that either you entered a program number which does not exist or that the parameters for that program are invalid or out of range. If a digit is input while the unit is playing a voice prompt, the voice prompt stops playing and the unit waits for further inputs. Hence, until the user is familiar with the programming methodology, it is recommended that the user wait for the voice prompts to finish playing fully before proceeding with the next program inputs. Some programs require a variable number of digits to be entered, while the rest of the programs require a fixed number of digits to be entered. Where a variable length entry is permitted, if less than the maximum number of digits permitted for that program is entered, the # key should be used to terminate the entry sequence. For the fixed length entry programs, the unit starts processing the entered digits as soon as all the digits are entered. The # key is not to be used for terminating the entry sequence for these programs. All 1xx and 3xx program numbers are for programming values and 2xx and 4xx program numbers are used to playback the programmed values. This helps in ascertaining the programmed values. If no digits are entered for 40 seconds, the unit times-out and exits from the programming mode. While the password is being entered, if no digits are entered, the unit times out within 5 seconds and returns to the main greeting. On successful completion of a program, the old values are overwritten with the new values in the unit's non-volatile memory and will come into effect after exiting from the programming mode. The unit may take about 1 second to write the values in the non-volatile memory. If more than 1 digit is entered during this period, it may lead to an error or unexpected operation. The values that are currently programmed in the system may also be ascertained by `listening' to the values prompted by the system. The # key is not prompted since it is used to terminate an entry. After the programming is over and the user exits the programming mode by pressing ###, the unit starts playing the DAY / NIGHT / HOLIDAY greeting and the user may now dial another extension or test the parameters that were just programmed. General Programming Rules 11
12 List of Available Programs List of available programs User Programs ( ) Program No. Name of the Program 101/201 No Of Rings To Pickup 102/202 Transfer Type 103/203 Single Digit Dialing Plan 104/204 Operator Ext. 105/205 Fax Extensions 106/206 Invalid Leading Digits 107/207 Valid Extension List 108 Delete Valid Extension 109/209 Invalid Extension List 110 Delete Invalid Extension 111/211 No. of Rings For No Answer 112/212 Reroute-on-busy extension 113/213 Night Operator Extension 114/214 Set Real Time 115/215 Set Office hours / Day hours 116/216 Prompt Extension while Transferring 117/217 Record / Listen to Main Greeting 118/218 Record / Listen to Night Greeting 119/219 Change User Password 120/220 Primary Language Number 121/221 Pilot Greeting Enable/Disable 122/222 Record / Listen to Pilot Greeting 123/223 Program Holiday dates 124/224 Delete Holiday dates 125/225 Record / Listen to Holiday greeting 126/226 Ghost Call check Record Submenu Messages Listen To Submenu Messages 199 Load Default User Parameters 399 Delete All Submenu Messages 12
13 Default User Parameter Table Prog. No. Default Value Name of the Program 101 : 1 No. of Rings for Pick up 102 : 1 Transfer type 103 : - Single Digit plan 104 : 0 Operator Extension 105 : - Fax Extension 106 : Invalid Leading Digits 107 : - Valid Extension List 108 : - Delete Valid Extension 109 : - Invalid Extension List 110 : - Delete Invalid Extension 111 : 5 No. of rings for No Answer 112 : - Reroute on Busy Extension 113 : - Night / Holiday Operator Extension 114 : - Real Time 115 : Day / Night hours 116 : 0 Prompt Extension Number Disabled 117 : - Record DAY greeting 118 : - Record NIGHT greeting 119 : 6789 User password 120 : 1 Language Number 121 : 0 Pilot Greeting Disabled 122 : - Record Pilot Greeting 123 : - Program Holiday dates 124 : - Delete Holiday dates 125 : - Record Holiday greeting 126 : 0 Ghost Call Check Disabled 13
14 Program # 101: Number of rings to pick up When the PBX routes an incoming call to the unit, it may be programmed to answer the call on either the first ring or anywhere up to the ninth ring. Enter 101 n where n = 0 to 9 rings If is entered, the unit prompts the message This entry is invalid. Default value = 1 Length of entry = fixed 1 digit Note: If 0-rings-for-pick-up has been programmed, the incoming call is picked up immediately as soon as the port receives the first ring pulse without waiting for the first ring to complete. Program # 201: To listen to the currently programmed value for the Number of rings to pick up - You will hear: Two Zero One (0.6 sec silence) One Program # 102: Transfer Type To select the TRANSFER TYPE ATT 2000 Supports 3 types of transferring an incoming call. Type 0 - Semi supervised Type 1 - Fully supervised Type 2 - Blind mode Semi supervised: In this mode, the unit transfers the call to an extension, if it returns a ring signal. If that extension is busy or invalid, the appropriate message is played back to the caller. Fully supervised: In this mode, the unit waits for the extension to answer before transferring the incoming call. If there is no answer from the extension, the unit plays back the message I am sorry, there is no answer from that extension and then allows the caller to dial 0 for the operator or dial another extension or hang up. The number of rings that the unit waits before deciding there is no answer from the called extension depends on the value programmed under program # 111. When a call is transferred to an extension, the ATT 2000 intelligently analyses two consecutive call progress cycles to decide whether the called extension is busy or invalid or if there is no answer. If the called party answers, the call is patched through immediately. Some PBXs return a BUSY signal when an Invalid extension is dialed. In such cases, the unit plays back the message I am sorry, that extension is 14
15 busy for invalid extension transfers. If it is very important to distinguish between a BUSY and INVALID extension, all invalid extensions must be programmed in the unit (Invalid leading digits and list of invalid extensions) Blind mode: In this mode, the unit does not check for ring no answer, busy', and re-order signals from the PBX and the call is transferred as long as it is not part of the invalid extension list. The unit dials out the extension and hangs up. This mode is normally used where the PBX is used in the Integrated mode of call transfer, where the call transfer occurs much faster than in the Semi supervised or Fully supervised mode of operation. Enter 102 n where n = 0, 1 or 2 If any other value is entered, the unit prompts the message This entry is invalid. Default value = 1 Length of entry = fixed 1 digit Program # 202: To listen to the currently programmed value for the Transfer type - You will hear: Two zero Two (0.6 sec silence) One Program # 103: Single Digit Dialing Plan (See the Audiotex section also) The user has the option of allowing access to a group of extensions by dialing a single digit. For example, the DAY greeting may be... dial 1 for Sales, 2 for Accounts and 3 for Reservations. And when the caller dials 1 you can make the unit transfer the call to say 127 or 1255, if 2 is dialed - transfer to 3291 or 416 and if 3 is dialed - transfer to 201 or 4720 and so on. In the above example, a single digit plan for 1, 2, and 3 has been enabled. The dialing plan may be enabled for the digits 1 to 8. For each digit, two extensions may be programmed and the extensions may be 2 to 5 digits in length. The dialing plans for the digits 0 and 9 are not allowed. The programming sequence for the above example is as follows: # Enter program number # Enter program number # Enter program number The dialing plan for each digit must be programmed separately. To enter only one extension for a digit, enter #. To delete both extensions entered earlier, enter #. 15
16 To delete only one of the two extensions entered earlier, first delete both extensions and then re-enter the required extension. The mode of transfer to these extensions depends on the `transfer mode' selected under program #102. The dialing plan for 0 and 9 are not allowed, since they are reserved for the Operator extensions. It is also not necessary to enable the plan for digits in a sequence. For example, the dialing plan may be enabled for digits 1, 4 and 8 only. The Operator digit, (if other than 0 or 9) should not be part of the single digit plan. All the extensions that are entered here are treated as Valid extensions and are not subject to the Invalid leading digit check or the Invalid extension list check. The extension numbers may also be repeated between the plans for different single digit plans. Default: None All single digit plans are disabled by default. Program # 203: This program prompts the Single digit plan for all digits that have been programmed. You will hear (for the example on previous page) - Two Zero Three (0.6 sec silence) One (0.6 sec silence) One Two Seven Star One Two Five Five (0.6 sec silence), Two (0.6 sec silence) Three Two Nine One (0.6 sec silence) Four One Six (0.6 sec silence) Three (0.6 sec silence) Two Zero One Star Four seven Two Zero Program # 104: Operator Extension The user may program multiple extensions as DAY Operator extensions. These extensions may be of different lengths. For example, you may enter #. In the above example, one Single digit, one 3 digit and one 4 digit extension has been programmed, Press to separate two extensions. Press # to terminate the entry. At least 1 digit must be programmed. For example, the entry # is a valid entry. However, the extensions programmed here must be valid extensions for the PBX. When a caller requests a transfer to the Operator extension, ATT 2000 dials the first extension in the above list. If the unit encounters a busy / no answer signal from the first extension, it tries the second and if even that is busy / no answer, it tries the third extension in the list. If a blind mode of transfer has been selected, the unit dials the first 16
17 extension and hangs up. The unit performs a no answer check on the operator extensions if a Fully supervised mode has been selected. The actual mode of transfer must be set by your Installer at the time of installation separately for the Operator extensions. Default value = # Length of entry = maximum of 16 digits, including the # key The # key is used to terminate the entry sequence. If a is entered as the first digit or if two consecutive s are entered anywhere else in the string, the system treats it as an invalid entry. If 16 digits are entered and then the # key is pressed, the unit checks for validity of the 16 digits and then stores them if valid. But the # key is processed as the first digit of the next program number - which will make the unit exit the programming mode. Hence, the # key must be used only if the total number of digits entered is less than 16. Program # 204: To listen to the currently programmed value for the Operator extensions - You will hear: Two zero four (0.6 sec silence) Zero The #at the end is not prompted as it is an indicator of the end of the string. Program # 105: Fax Extensions The user may program multiple extensions as Fax extensions. These extensions may be of different lengths. For example, you may enter #. To disable the fax detection, enter # as the first character. Press to separate two extensions. Press # to terminate the entry. For example, the entry # is valid. When a call is routed to the ATT 2000, it goes off hook and starts playing the DAY / NIGHT / HOLIDAY greeting normally. As soon as the Fax tone is detected, it stops playing the greeting and transfers to the Fax extension. This feature allows the caller to listen to the greeting (to confirm that he has called the correct number) and then press the START button on his fax machine. The automatic transfer to the fax extension takes place as long as the fax tone is detected before the greeting finishes playing. If the unit encounters a Busy or No-answer signal from the first extension, it tries the second and if even that is Busy / No-answer, it tries the third extension in the list. If all the extensions are Busy / No-answer, the call is transferred to the Operator, so that the fax call may be attended to manually, if possible. 17
18 If a blind mode of transfer has been selected, the unit dials the first extension and hangs up. Default value = 105 # The fax detection is disabled by default. Length of entry = maximum of 16 digits, including the # key The # key is used to terminate the entry sequence. If a is entered as the first digit or if two consecutive s are entered anywhere else in the string, the system treats it as an invalid entry. If 16 digits are entered and then the # key is pressed, the unit checks for validity of the 16 digits and then stores them if valid. But the # key is processed as the first digit of the next program number - which will make the unit exit the programming mode. Hence, the # key must be used only if the total number of digits entered is less than 16. Program # 205: To listen to the currently programmed value for the Fax extensions - You will hear: Two Zero Five The # at the end is not prompted as it is an indicator of the end of the string. Program #106: Invalid Leading digits All extensions with these leading digits are treated as invalid extensions, except if that specific extension is listed as a Valid extension OR if that leading digit is part of the Single digit dialing plan. For example # makes all extensions whose first digit is 3 or 4 or 5 or 6 or 7 or 8 or 9 as Invalid. So, if the caller dials 501, he will hear the message This entry is invalid unless the extension 501 is programmed in the VALID LIST of extensions Enter all digits one after other and press # to terminate the entry. Default value: # Length of entry = maximum of 9 digits, including the # key The # key must be used to terminate the entry, only if the total number of digits entered is less than 9. If a is entered, the unit prompts This entry is invalid and ignores the entire string of digits that were entered. Program # 206: To listen to the currently programmed Invalid Leading digits - You will hear: 18
19 Two zero Six (0.6 sec silence) Five Six Seven Eight Nine The # at the end is not prompted as it is an indicator of the end of the string. Program # 107: Valid Extension List To enter the list of Valid Extensions - Under this program, the extensions are entered one by one. After entering the program number, enter the first extension to be placed in the list-ofvalid-extensions. The extensions may be of any length from 2 to 5 digits. The unit checks for validity and stores the extension in the memory. If the entry is invalid or if it is a duplicate entry, the unit does not store that value. An all-0 extension is invalid. Press to enter the next extension. The entire list of extensions may be entered one after the other without waiting for any response from the unit. Press # to terminate the programming. Length of entry = Total of 256 digits (inclusive of the between 2 extensions) The maximum numbers of valid extensions that may be stored are: 84 extensions of 2 digits or 63 extensions of 3 digits or 50 extensions of 4 digits or 42 extensions of 5 digits. After all the available space for the valid extensions is used up, if another extension is entered, the unit prompts This entry is invalid and returns to the Enter Program number prompt. Default value: 107 # There are no default entries for this program. Program # 207: To listen to the currently programmed list of valid extensions - You will hear: Two Zero Seven (0.6 sec silence) The # at the end is not prompted as it is an indicator of the end of the string. Note: An entry in the list of valid extensions overrides the Invalid leading digit entries and the list of Invalid extensions. For example, if 5 is an invalid leading digit but extension 534 is entered in the list of valid extensions, it is treated as a valid extension. Program # 108: Delete Valid Extension To delete one or all of the Valid extensions - Enter the extension to be deleted after the program number. For example will delete extension 245 from the list of Valid extensions. 19
20 If that extension is not present in the list of Valid Extensions, you will hear the message This entry is invalid and the unit returns to the Enter Program number prompt. To delete all Valid extensions - Enter (5 zeros must be entered) Program # 208: This program also prompts the Valid list of extensions. (Same as program # 207) Program # 109: Invalid Extension List To enter the list of Invalid Extensions - Under this program, the extensions are entered one by one. After entering the program number, enter the first extension to be placed in the list-ofinvalid-extensions. The extensions may be of any length from 2 to 5 digits. The unit checks for validity and stores the extension in the memory. If the entry is invalid or if it is a duplicate entry, the unit does not store that value. An all-0 extension is invalid. Press to enter the next extension. The entire list of extensions may be entered one after the other without waiting for any response from the unit. Press # to terminate the programming. Length of entry = Total of 256 digits (inclusive of the between 2 extensions) The maximum numbers of invalid extensions that may be stored are: 84 extensions of 2 digits or 63 extensions of 3 digits or 50 extensions of 4 digits or 42 extensions of 5 digits. After all the available space for the invalid extensions is used up, if another extension is entered, the unit prompts This entry is invalid and returns to the Enter Program number prompt. Default value: 109 # There are no default entries for this program. Note: An entry in the list of valid extensions overrides the entry in the list of Invalid extensions. Program # 209: To listen to the currently programmed list of invalid extensions - You will hear: Two Zero Nine (0.6 sec silence) The # at the end is not prompted as it is an indicator of the end of the string. 20
21 Program # 110: Delete Invalid Extension To delete one or all of the Invalid extensions - Enter the extension to be deleted after the program number. For example deletes extension 245 from the list of Invalid extensions. If that extension is not present in the list of Invalid Extensions, you will hear the message This entry is invalid and the unit returns to the Enter Program number prompt. To delete all Invalid extensions - Enter (Five zeros must be entered) Program # 210: This program also prompts the Invalid list of extensions. (Same as program # 209) Program # 111: Rings for No Answer Number of rings to wait before deciding there is NO ANSWER from that extension: When an incoming call is transferred to an extension in the fully supervised mode, the unit waits to see if that extension is answered or not. If the extension returns a ring signal, the unit waits for the programmed number of rings before deciding that there is no answer at that extension. The ring signal has a very specific cadence and any response not matching the ringing sequence of that PBX are taken as answered and the caller is connected to that extension. Enter 111 n where n = 3 to 9 For all other digits, the unit prompts the message This entry is invalid. Default value = 5 Length of entry = fixed 1 digit The unit counts the number of rings returned by the called extension and if this exceeds the programmed value, the unit retrieves the call and plays the prompt I am sorry, there is no answer from that extension. The call is treated as answered if the call progress cadence returned by the called extension does not match the programmed Ring cadence. Program # 211: To listen to the value for the Number of rings for No Answer You will hear: Two One One (0.6 sec silence) Five Program # 112: Re-route on Busy Extension If an extension to which a caller requests a transfer returns a busy signal, the caller hears the prompt I am sorry, that extension is busy. Please dial 0 for an Operator or try your call later. Now if the caller dials 0, the call is 21
22 transferred to this alternate Reroute-on-busy extension. Default value: 112 # One extension of any length (max. 5 digits) may be programmed as a Reroute-on-busy extension. If this is not programmed, the call is routed to the normal Operator extension. The mode of transfer depends on the value programmed by your Installer for the Operator transfer mode. However, if the Re-route on Busy extension returns a Busy signal on the first attempt, the call is transferred to the regular Operator extension on the next attempt. Program # 212: To listen to the currently programmed value for the Re-route on busy extension - You will hear: Two One Two (0.6 sec silence) The # at the end is not prompted as it is an indicator of the end of the string. Program # 113: Night Operator Extensions The ATT 2000 transfers the caller to the extension programmed under this program number when the Night / Holiday mode is enabled and the unit is put into the Night / Holiday mode of operation and a caller needs to reach the operator (either because he got a busy extension or he dialed an invalid extension). Typically, this is the extension of the Security Department or could even be for the common answering machine for the organization or the Night desk clerk of a Hotel. Length of entry = maximum of 16 digits, including the # key The # key is used to terminate the entry sequence. If a is entered as the first digit or if two consecutive s are entered anywhere else in the string, the system treats it as an invalid entry. If 16 digits are entered and then the # key is pressed, the unit checks for validity of the 16 digits and then stores them if valid. But the # key is processed as the first digit of the next program number - which will make the unit exit the programming mode. Hence, the # key must be used only if the total number of digits entered is less than 16. Default value : None Program # 213: To listen to the currently programmed value for the Night Operator extension - 22
23 You will hear: Two One Three (0.6 sec silence) Program # 114: Set Real Time Clock The unit has a battery backed Real Time Clock. Proper setting of the Real Time is essential for the unit to switch correctly between the DAY, NIGHT and Holiday modes. To set the time, enter 114 YY MM DD WW HH MM (where YY is the Year in two digit format, MM is the Month from 01 to 12, DD is the day from 01 to 31, WW is the day of the week (Monday=01, Saturday=06, Sunday=07), HH is the hours in 24 hour format 00 to 23 and MM is minutes 00 to 59) If an Invalid value is entered, the unit prompts the message This entry is invalid. Program # 214: Listen to current Date and Time. For example, if the time is 7:45 am on Monday August 17th, 2003, the unit prompts Two One Four (0.6 sec silence) Zero Three Zero Eight One Seven Zero One Zero Seven Four Five Program # 115: Program DAY / NIGHT hours The unit may be programmed for a different mode of operation depending on the time of the day. During the DAY mode of operation, the Single Digit dialing plans are in use and the operator is the DAY Operator as programmed under Day Operator Extensions program. During the NIGHT / HOLIDAY mode of operation, the Single Digit dialing plans are NOT available for use and the operator is the NIGHT Operator as programmed under Night Operator Extensions program. To set the DAY HOURS, for example, enter to have the DAY mode from 8 AM to 5 PM. The unit expects an 8-digit HHMM1 HHMM2 string to follow the program number and automatically validates and stores the value if valid or else prompts This entry is invalid if an invalid time string is entered. The DAY mode is from HHMM1 to HHMM2 and the NIGHT mode is from HHMM2 to HHMM1. In the above example, the NIGHT mode is from 5 PM to 8 AM. If the NIGHT mode of operation is not required, enter HHMM1=HHMM2 and the unit treats the entire 24 hour duration as the DAY mode. For example effectively disables the NIGHT mode of operation. 23
24 Program # 215: Listen to the currently programmed DAY / NIGHT hours setting. In the above example, the unit will prompt Two One five (0.6 sec silence) Zero Eight Zero Zero One Seven Zero Zero. Program # 116: Prompt Extension Number Enable / Disable Prompt extension number while transferring call. ATT 2000 has a feature by which the extension number may be prompted to the caller while transferring the call. For example, if a caller dialed 319 to transfer to extension 319, the unit prompts Please hold while your call is transferred when this feature is disabled whereas it prompts Please hold while your call is transferred to extension Three One Nine if this feature is enabled. To Disable the feature, enter and to Enable, enter Default value = 0 Program # 216: Listen to the currently programmed value. The unit prompts Two One Six (0.6 sec silence) Zero. Program # 117: Day Greeting To record the DAY greeting - ATT 2000 has a default DAY greeting already recorded in it. To record your message over this default greeting, do as follows: Enter 117. Listen to the long tone and begin speaking after the tone. To terminate the recording, finish speaking, wait for 2 seconds and then press #. Note: Refer to the Recording Space section for details on the available recording time in the unit. Program # 217: To listen to DAY greeting; Enter 217. After the DAY greeting is played back, the unit prompts with Enter program number indicating that it is ready to accept the next input. If a digit is input while the DAY greeting is playing, the unit will terminate the greeting playback and accept the dialed digit as the first digit of the next program number. 24
25 Program # 118: Night Greeting To record the NIGHT greeting - ATT 2000 has a default NIGHT greeting already recorded in it. To record your message over this default greeting, do as follows: Enter 118. Listen to the long tone and begin speaking after the tone. To terminate the recording, finish speaking, wait for 2 seconds and then press #. Note: Refer to the Recording Space section for details on the available recording time in the unit. The NIGHT greeting may be recorded separately without having to record the DAY or the HOLIDAY greeting at the same time. Program # 218: To listen to NIGHT greeting Enter 218. After the NIGHT greeting is played back, the unit prompts with Enter program number indicating that it is ready to accept the next input. If a digit is input while the NIGHT greeting is playing, the unit terminates the greeting playback and accepts the dialed digit as the first digit of the next program number. Program # 119: User Password To program a new 4 digit password. Enter 119 nnnn. nnnn is the new password that you want to set. The password may include but not # as a digit. Length of entry = fixed 4 digits Default password = 6789 The which precedes the password (while going into the programming mode from the main greeting) are not treated as part of the password. Program # 219: To listen to the currently programmed password You will hear: Two One Nine (0.6 sec silence) Six Seven Eight Nine 25
26 Program # 120: Language Number Select Primary Language: The ATT 2000 may be used in a multilingual environment as it supports 2 Languages. The Main Greetings and the Default prompts may be recorded in 2 different languages. However the total recording space for all these greetings and prompts is 4 minutes. Hence, when this option is desired to be put to use, it is necessary to record the DAY / NIGHT / HOLIDAY greetings and all the Default prompts in the other language. The MULTILINGUAL feature may be used in two different modes as follows (a) SIMULTANEOUS Mode: In this mode, the prompts are recorded in the 2 languages and an additional short Pilot prompt containing the Multilingual prompt is played as soon as the call is answered by the unit. This Pilot prompt is described in the next Program #121 and must be recorded and enabled. Here, the Pilot prompt would be, for example To continue in English, press 1, Pour continuer en français veuillez composer le numéro Deux. Depending on the digit pressed by the caller, the Main greeting and the default prompts in the corresponding Language are played. If the caller does not press any digit, the main greeting of the Primary Language is played. (b) PRIMARY Mode: In this mode, you may record the Greetings and the prompts in the 2 languages but select either of them as the active language. The Pilot greeting must be disabled. For example, you have recorded the Greetings and the prompts in English (Language #1) and French (Language #2) but you would like to have only the French prompts enabled. In such a case, under this program, set the Primary Language = 2. If it is desired to change the Primary Language at a later date, program the language number accordingly. This feature allows you to have 2 languages without having to record the prompts every time you want to change the language. In this Primary Language mode of operation, the short Pilot greeting is not applicable. Enabling the Pilot greeting would automatically select the Simultaneous mode of multilingual operation. To select the Language of choice, enter 120 n where n is the Language number and may be = 1 or 2 only. Note : The total duration of the Pilot prompt and all the Multilingual prompts must not exceed 4 minutes. The Language Number is also used to change the DAY / NIGHT / HOLIDAY greeting of the second language in the Multilingual mode of operation. When the Multilingual mode has been enabled, the programs 26
27 for recording the Day or the Night / Holiday greeting would change the greeting of the Language selected under the language Number. For example, if you have recorded French prompts as Language 2 and you wish to change the French NIGHT greeting only, do as follows : Program Language number = 2, go into Program # 118 and record French NIGHT greeting, Change the Language number back to its original value. Program # 220: To listen to the current Primary Language number You will hear: Two Two Zero (0.6 sec silence) One Program # 121: Pilot Greeting Enable / Disable Pilot Greeting. Disable = 0, Enable = 1. (Default = 0) The Pilot greeting is a short greeting played before the Main greeting in the Multilingual mode of operation. The Pilot greeting gives the option to the caller to select the Language of choice (as described in Program #120). This Pilot program may also be enabled in a single Language environment - if you want new callers to be transferred to the Operator with the shortest possible delay when they do not know the extension number. This feature is also useful in transferring callers from rotary phones to the Operator as quickly as possible. For example, the Pilot greeting could be Thank you for calling ABC Company. Press 1 for further options or stay on the line for assistance. Those callers who know the extension may dial the extension immediately while the Pilot greeting is playing or if they wish to listen to further options may press 1 and then use the single digit plan or dial the extension after listening to the main greeting. Program # 221: To listen to the current value You will hear: Two Two One (0.6 sec silence) Zero Program # 122: Record Pilot greeting To record your message, do as follows: Enter 122 Listen to the long tone and begin speaking after the tone. To terminate the recording, finish speaking, wait for 2 seconds and then press #. 27
28 Program # 222: Listen to the current Pilot greeting. After the greeting is played back, the unit prompts with Enter program number indicating that it is ready to accept the next input. If a digit is input while the greeting is playing, the unit terminates the greeting playback and accepts the dialed digit as the first digit of the next program number. Program # 123: Program Holiday dates. To enter the list of Holidays - Under this program, all the Holidays, including Sundays and Weekends up to a maximum of 16 holidays - are entered one after the other in MMDD format with a separating two successive entries. The unit checks for validity and stores the dates in the memory. If the entry is Invalid or if it is a duplicate entry, the unit does not store that value. To program the Weekly Holiday for example Sunday you should enter 0007, where MM=00 signifies that it is common throughout the year and the DD=07 signifies the day of the week (where Monday=01, Saturday=06, Sunday=07). Similarly, to program Saturday as the Weekend Holiday, you should enter 0006 where the DD=06 signifies Saturday. For example, to program all Sundays, Saturdays, January 20, February 17, May 26, July 4, September 1, October 13, November 11, November 27 and December 25 as Holidays, you should enter # Length of entry = Total of 80 digits (inclusive of the between 2 Holidays). Maximum number of Holidays = 16. New entries are appended to the existing list of Holidays and the Holidays may be entered in any order. After all the available space for the Holidays is used up, if another date is entered, the unit prompts This entry is invalid and return to the Enter Program number prompt. Default value: 123 # There are no default entries for this program. Program # 223: To listen to the currently programmed list of Holidays - You will hear: Two Two Three (0.6 sec silence) The # at the end is not prompted as it is an indicator of the end of the string. 28
EZ1060, EZ2180, EZA1240, EZA2240
 USER MANUAL EZ Answer Models EZ1060, EZ2180, EZA1240, EZA2240 EZ Director 1 PORT / 2 PORT AUTO ATTENDANT Model EZD2480 EZ ADVANTAGE CORP., 221, Broad Street MILFORD, CT-06460 U.S.A. Document Rev. No: 03
EAR Installation and Programming Manual
 EAR 5000 Installation and Programming Manual Version 6.0 Release 2.0 June 2002 NOTICE This publication refers to the EAR 5000 Auto Attendant System, Release 2 Additional copies of this manual may be obtained
Voice Response System (VRS)
") UNIVERGE SV8100 Issue 8.01 Voice Response System (VRS) Enhancements With Version 3000 or higher system software, if an outside caller dials an invalid extension number when connected to the VRS Automated
UNIVERGE SV8100 Issue 8.01 Voice Response System (VRS) Enhancements With Version 3000 or higher system software, if an outside caller dials an invalid extension number when connected to the VRS Automated
TABLE OF CONTENTS Introduction: Default Operation and Remote Programming Programming Receptionist Extensions Installing CallExtend
 TABLE OF CONTENTS Introduction: Default Operation and Remote Programming... 1 CallExtend s Default Settings... 1 Resetting CallExtend to the Default Settings... 3 Remote Programming... 4 Installing CallExtend...
Four-Line Intercom/ Speakerphone 954
 1 USER S MANUAL Part 2 Four-Line Intercom/ Speakerphone 954 Please also read Part 1 Important Product Information AT&T and the globe symbol are registered trademarks of AT&T Corp. licensed to Advanced
Delta 40. This user guide will ensure you obtain the best use of your answer machine. USER GUIDE
 Delta 40 Thank you for choosing a Delta 40 Answer Machine. You have selected a carefully designed answer machine that incorporates the latest technology giving 40 minutes total recording time, a unique
Contents. Section 1 Overview 1. Section 2 Setting up your System 13
 Contents Section 1 Overview 1 Introduction 1 Installing Your System 2 Bizfon Customer Care 2 Voice Vault Card Option 2 Arranging for Telephone Company Services 3 Overview of Initial Bizfon Settings 4 Bizfon
1738 Digital Answering System USER S MANUAL. Visit us at Part 2
 1738_Panels 120904 12/9/04 8:25 AM Page 1 Visit us at www.telephones.att.com 2004 Advanced American Telephones. All Rights Reserved. AT&T and the Globe Design are trademarks of AT&T Corp., licensed to
EAR 1000 / ADRA 1000 / Installation and Programming Manual
 EAR 1000 / 2 000 ADRA 1000 / 2000 Installation and Programming Manual EAR 1000/2000 and ADRA 1000/2000 Installation and Programming Manual Release 3 Version 3 February 2004 NOTICE This publication refers
Delta 40. This user guide will ensure you obtain the best use of your answer machine. USER GUIDE
 Delta 40 Thank you for choosing a Delta 40 Answer Machine. You have selected a carefully designed answer machine that incorporates the latest technology giving 40 minutes total recording time, a unique
Model PBX816ex. Programming & User Guide
 Model PBX816ex Programming & User Guide 1 Introduction... 5 Installation hints... 5 Expanding Your System 5 System programming... 6 System password... 6 Changing the password... 6 Exchange line set up...
EAR K. Installation and Programming. Manual
 EAR 2000 4K Installation and Programming Manual EAR 2000 4K Installation and Programming Manual Release 1 Version 3 June 2011 NOTICE This publication refers to the EAR 2000, Release 3. Additional copies
Atlas AVM JR. Installation and Programming Manual
 Atlas AVM JR. Installation and Programming Manual Introduction Legal Notice Key System US provides this document "as is," with no representations or warranties, either explicit or implied, including but
Model SP416 (4 lines x 16 extensions) Automated Telephone System
 Automated Telephone System") Model SP416 (4 lines x 16 extensions) Automated Telephone System SOHO-PBX is your ideal small or home office receptionist. The SP416 is features packed and very easy to use. For more information please
Model SP416 (4 lines x 16 extensions) Automated Telephone System SOHO-PBX is your ideal small or home office receptionist. The SP416 is features packed and very easy to use. For more information please
Enterprise Call Manager
 Enterprise Call Manager Installation & Operation Manual Please leave this manual with the unit after installation Enterprise Call Manager Rev 1.7 Draft Rev. 10/11/2001 INTRODUCTION SYSTEM DESCRIPTION The
EAR 1000 / ADRA 1000 / Installation and Programming Manual
 EAR 1000 / 2 000 ADRA 1000 / 2000 Installation and Programming Manual EAR 1000/2000 and ADRA 1000/2000 Installation and Programming Manual Release 2 May 2002 NOTICE This publication refers to the EAR
REVISED 5/1/01. AT&T and the globe symbol are registered trademarks of AT&T Corp. licensed to Advanced American Telephones.
 REVISED 5/1/01 1 USER S MANUAL Part 2 1818 Digital Answering System Speakerphone Fold open this manual for information about this product s installation and operation. Please also read Part 1 Important
Model PBX 207. Programming & User Guide
 Model PBX 207 Programming & User Guide 1 Index Page Introduction 4 Installation 4 Wall Mounting 4 System Programming 4 System Password 4 Changing the Password 5 Exchange Line Set up 5 One or Two Lines?
PBX System. USER S MANUAL v2.1. for TELX PABX Models 3x8
 PBX System USER S MANUAL v2.1 for TELX PABX Models 3x8 Before Operation What Kind of Telephones You Can Use With Our PBX Can use any brand Single Line Telephone Set to program and work with it Attention
Desktop Reference Guide
 Desktop Reference Guide IP550 Telephone Using Your Telephone Your new telephone is a state of the art IP Telephone instrument. It is manufactured by IPitomy for use with the IPitomy IP PBX System. The
Two-Line Speakerphone with Caller ID/Call Waiting 992
 0992_CIB_1ATT_FINAL_022105 2/22/04 4:46 PM Page II User's Manual Part 2 Two-Line Speakerphone with Caller ID/Call Waiting 992 In case of difficulty, visit our Service Center at www.telephones.att.com or
Voice Messaging Instructions Contents
 Voice Messaging Instructions Contents Welcome to Voice Messaging 2 Using Voice Mail for the First Time 2 Recording External and Temporary Greetings 3 Personal Verification 4 Password Change 4 Playing Messages
User s manual. ML17929 Two-line corded telephone with caller ID/call waiting
 User s manual ML17929 Two-line corded telephone with caller ID/call waiting Congratulations on purchasing your new AT&T product. Before using this AT&T product, please read Important safety information
Installing And Programming The Digital Voice Announce Equipment On The DXP, DXP Plus, And FX Series Systems
 R Installing And Programming The Digital Voice Announce Equipment On The DXP, DXP Plus, And FX Series Systems Digital Voice Announce Equipment The digital voice announce device (DVA) is an optional line-powered
Caller dialled digit during recording. Fax routing Config? Yes. Route to Fax Extensions
 Auto Attendant Menu Caller dialled digit during recording Digits 0-7 Fax tone detected selection is made 2nd digit present Single Digit Config Fax routing Config? Ignore Fax Route to Extensions Route to
DX-80 TM Hard Drive Voice Mail Installation and Supervisor Guide
 DX-80 TM Hard Drive Voice Mail Installation and Supervisor Guide Every effort has been made to assure the accuracy of the information in this document. The manufacturer assumes no responsibility, express
TC-308, TC-616 TC-308-VM, TC-616-VM TC-616-NHR, TC-616-NHR-VM
 TeleCraft Hybrid Key Telephone Communication System User s Manual Version 6.02 Models: TC-308, TC-616 TC-308-VM, TC-616-VM TC-616-NHR, TC-616-NHR-VM About This Manual We wrote this manual with you, the
ASAP 104. Installation and Reference Guide. Register Online at
 ASAP 104 Installation and Reference Guide Customer Service U.S.: 1-800-288-6794 E-mail: techsupport@commandcommunications.com Register Online at www.commandcommunications.com Table of Contents Introduction
Nortel Networks Integrated Call Director
 Title page Nortel Networks Communication Server 1000 Release 4.0 Nortel Networks Integrated Call Director User Guide Revision history Revision history July 2004 Standard 1.00. This document is issued
AT&T. PARTNER Communications System Remote Administration Unit. Installation and Use
 AT&T PARTNER Communications System Remote Administration Unit Installation and Use Copyright 1994 AT&T All Rights Reserved Printed U.S.A. AT&T 518-455-050 Issue 1 April 1994 Notice Every effort was made
Avaya Unified Messenger Telephone User Interface Online Guide
 Avaya Unified Messenger Select from the following Introduction Sending voice messages Getting started Recording prompts and greetings Reviewing messages Personalizing your mailbox Replying to messages
REVISED 1/15/01. AT&T and the globe symbol are registered trademarks of AT&T Corp. licensed to Advanced American Telephones.
 REVISED 1/15/01 1 USER S MANUAL Part 2 1718 Digital Answering System Fold open this manual for information about this product s installation and operation. Please also read Part 1 Important Product Information.
Voice Processing System S G UBSCRIBER'S UIDE. Please read before using. TVP200 VOICE PROCESSING SYSTEM KX-TVP200 MODEL KX-TVP200E.
 Voice Processing System S G UBSCRIBER'S UIDE Please read before using. TVP00 VOICE PROCESSING SYSTEM KX-TVP00 MODEL KX-TVP00E Panasonic Introduction The Panasonic Voice Processing System (VPS) provides
Visit us at AT&T and the Globe Design are trademarks of AT&T Corp. licensed to Advanced American Telephones.
 Visit us at www.telephones.att.com 2002 Advanced American Telephones. All rights reserved. AT&T and the Globe Design are trademarks of AT&T Corp. licensed to Advanced American Telephones. Printed in China.
SIMADO GFX11/GFX11E Quick Start
 SIMADO GFX11/GFX11E Quick Start SIMADO GFX11 GSM/3G Fixed Cellular Terminal for Voice Applications SIMADO GFX11E GSM/3G Fixed Cellular Terminal for Emergency Applications Quick Start Documentation Disclaimer
AT&T. PARTNER Plus COMMUNICATIONS SYSTEM. PARTNER Plus Attendant Installation and Use
 AT&T PARTNER Plus COMMUNICATIONS SYSTEM PARTNER Plus Attendant Installation and Use Copyright 1991 AT&T All Rights Reserved Printed in U.S.A. AT&T 518-455-710 Issue 1 April 1991 Notice Every effort was
Automated Attendant and Voice Mail System
 LX Automated Attendant and Voice Mail System User s Guide Nothing contained in this guide shall be deemed to be, and this guide does not constitute, a warranty of, or representation with respect to, any
FX INSTRUCTION MANUAL
 FX - 1 INSTRUCTION MANUAL FX - 1 Feature Telephone Exchange System KCE Technology Corporation Contents Information To User... 1 Installation... System Connection... Wall Mounting... System Conventions...
Voice Mail and Automated Attendant User s Guide
 Voice Mail and Automated Attendant User s Guide The document page numbers and the page numbers in this file are offset by one. To manually jump to document page 3, for example, select View -> Go to Page
changing the way you share your world Call Management Services User Guide
 changing the way you share your world Call Management Services User Guide 1 800 360-8555 www.northerntel.ca Quick reference NorthernTel Call Management Services - Important Codes Service Activation Cancellation
Vocal / Vocal Jr. Auto Attendant & Voice Mail System Installation and Programming Manual. Version 7. Version 7.1 April 2005 Proprietary
 Vocal / Vocal Jr. Auto Attendant & Voice Mail System Installation and Programming Manual Version 7.1 April 2005 Proprietary Version 7 NOTICE This publication refers to the VOCAL and VOCAL jr. Voice Mail
Classic Mail Design Package 1.6
 Merlin 206,410,820 & Plus Classic Mail Design Package 1.6 Site Survey Record Merlin System Data Record Merlin system information on the Site Survey forms. Requirements: Merlin 206, 410, 820 Merlin Plus
2.4 GHz Cordless Telephone Answering System 2325/2365 with Caller ID/Call Waiting
 USER S MANUAL Part 2 2.4 GHz Cordless Telephone Answering System 2325/2365 with Caller ID/Call Waiting Please also read Part 1 Important Product Information 2002 Advanced American Telephones. All Rights
CL210A TELEPHONE & ANSWERING MACHINE
 CL210A TELEPHONE & ANSWERING MACHINE CONTENTS CONTENTS CONTENTS 1 INTRODUCTION 3 Unpacking the Telephone 4 DESCRIPTION 5 General Description 5 INSTALLATION 7 Setting Up 7 Wall Mounting 7 SETTINGS 8 Ringer
Allworx User s Guide (Release x)
") Allworx User s Guide (Release 6.8.1.x) -PAGE INTENTIONALLY LEFT BLANK- Table of Contents 1 VOICEMAIL...1 1.1 ACCESSING YOUR MESSAGE CENTER INBOX...1 1.2 LISTENING TO YOUR VOICEMAIL...2 1.3 SENDING VOICEMAIL
Allworx User s Guide (Release 6.8.1.x) -PAGE INTENTIONALLY LEFT BLANK- Table of Contents 1 VOICEMAIL...1 1.1 ACCESSING YOUR MESSAGE CENTER INBOX...1 1.2 LISTENING TO YOUR VOICEMAIL...2 1.3 SENDING VOICEMAIL
900 MHz Digital Two-Line Cordless Speakerphone with Answering System 9452 with Caller ID/Call Waiting
 USER S MANUAL Part 2 900 MHz Digital Two-Line Cordless Speakerphone with Answering System 9452 with Caller ID/Call Waiting Please also read Part 1 Important Product Information AT&T and the globe symbol
203 Digital User Guide
 Telephone Quick Reference Automatic Call-back Cancel Call Diversion All Calls Cancel No Answer Cancel Busy Cancel Follow me Extension Cancel Call Pick-up Group Directed Extension number Call Waiting Send
121000TP227S USER'S MANUAL
 121000TP227S USER'S MANUAL TABLE OF CONTENTS FEATURE LIST SAFETY INSTRUCTIONS INTRODUCTION LOCATION OF CONTROLS FUNCTION BUTTONS MENU SETTINGS CALLER ID INFORMATION DISPLAY MESSAGES CALLER ID SYSTEM OPERATION
Electra Elite and InfoSet are registered trademarks of NEC America, Inc.
 reserves the right to change the specifications, functions, or features, at any time, without notice. has prepared this document for the use by its employees and customers. The information contained herein
Voic . Glossary of Terms. Click here to access your voic online.
 Voicemail Click here to access your voicemail online. Voicemail from Arvig will enhance the way you communicate! Our voicemail allows you to play, send, answer and forward voice messages from any touch-tone
900 MHz Cordless Answering System with Caller ID/Call Waiting 9357 DRAFT 7/6/01
 9357_book/wc_1ATT 7/6/01 4:10 PM Page ii USER S MANUAL Part 2 900 MHz Cordless Answering System with Caller ID/Call Waiting 9357 DRAFT 7/6/01 Please also read Part 1 Important Product Information AT&T
CORDLESS ANSWERING SYSTEM TELEPHONE 7620
 CORDLESS ANSWERING SYSTEM TELEPHONE 7620 Installation Telephone Operation Memory Answering System Operation Installation Table Installation 1. Choose a spot near an electrical outlet and a telephone jack.
Model KS308/416 System Administration Guide
 Model KS308/416 System Administration Guide Introduction 3 Installation Hints 4 System Programming 5 IMPORTANT Exchange Lines 6 Assign Incoming calls to ring Nominated Extensions 7 Cascade Ringing Of Extensions
AT&T and the globe symbol are registered trademarks of AT&T Corp. licensed to Advanced American Telephones.
 1 USER S MANUAL Part 2 Tapeless Digital Answering System Telephone with Time/Day 1817 Fold open this manual for information about this telephone s installation and operation. Please also read Part 1 Important
Telephone-Instructions
 Telephone-Instructions Fort Leavenworth Telephone Operator/Information (ADAS) Automated Directory Attendant System (ADAS) is a computer system that p rovides the caller with a pre-recorded set of options.
Voice Mail Front desk reference
 Voice Mail Front desk reference 1841 Bourbon Road Cross Plains, Wisconsin 1-800-424-6757 www.innovationtw.com 2007 Innovation Technologies Worldwide, Inc. All rights reserved. The INNLINE EXPRESS Voice
Classic Mail Design Package
 Merlin 1030/3070 Classic Mail Design Package For Release 1.6 Site Survey Record Merlin System Data Procedure: Record Merlin system information on the Site Survey forms. Requirements: Merlin 1030 Feature
User s manual. 993 Two-line speakerphone with caller ID/call waiting
 User s manual 993 Two-line speakerphone with caller ID/call waiting Congratulations on purchasing your new AT&T product Before using this AT&T product, please read the Important product information on
InMail Feature Manual
 InMail Feature Manual GVT-010797-301-00 NA ISSUE 1.0 Copyright NEC Corporation reserves the right to change the specifications, functions, or features at any time without notice. NEC Corporation has prepared
Staff Reference. INNLINE 2020 Voice Mail
 Staff Reference INNLINE 2020 Voice Mail Notice The Innovation voice mail system (also referred to as the System ) is made available (under the terms of the Innovation Technologies Worldwide, Inc. License
M6310 Featurephone. User Guide
 M6310 Featurephone User Guide Introduction The M6310 Featurephone is a practical and convenient way to use a wide range of business telephone features, including Call Forward, Conference Calling, and
Allworx User s Guide. (Release 7.3)
") Allworx User s Guide (Release 7.3) No part of this publication may be reproduced, stored in a retrieval system, or transmitted, in any form or by any means, electronic, mechanical, photocopy, recording,
Allworx User s Guide (Release 7.3) No part of this publication may be reproduced, stored in a retrieval system, or transmitted, in any form or by any means, electronic, mechanical, photocopy, recording,
Voic Plus User Guide
 Voicemail Plus User Guide Version: 2.0_CA Revised: 25 September 2007 Notices Copyright 2007 Vonage. All rights reserved. No part of this documentation may be reproduced in any form or by any means or used
TABLE OF CONTENTS PAGE
 AT&T Consumer Services VoiceMail Manager 100 User s Guide Provided exclusively for AT&T VoiceMail 1 TABLE OF CONTENTS PAGE # Introduction... 1 What's Included... 2 Quick Start Your VoiceMail Manager 100...
THIS SYMBOL IS INTENDED TO ALERT THE USER OF THE PRESENCE OF IMPORTANT OPERATING AND MAINTENANCE (SERVICING) INSTRUCTIONS IN THE OWNER'S MANUAL.
 INSTRUCTIONS IN THE OWNER'S MANUAL.") IMPORTANT SERVICE INFORMATION Read this manual before attempting to setup or use this instrument. It contains important information regarding safe installation and use. Keep this manual for future reference.
IMPORTANT SERVICE INFORMATION Read this manual before attempting to setup or use this instrument. It contains important information regarding safe installation and use. Keep this manual for future reference.
Subscriber s Manual KX-TVA50 KX-TVA200. Voice Processing System. Model
 Voice Processing System Subscriber s Manual Model KX-TVA50 KX-TVA200 Thank you for purchasing a Panasonic Voice Processing System. Please read this manual carefully before using this product and save this
Converse 2-line Telephone. User Guide
 Converse 2-line Telephone User Guide Please open this page for a further at a glance guide to your Converse 2-Line. Please open this page for an at a glance guide to your Converse 2-Line. At a glance Handset
Thank you for purchasing our product which adopts excellent workmanship and exceptional reliability.
 INTRODUCTION Thank you for purchasing our product which adopts excellent workmanship and exceptional reliability. Your telephone is designed to give you flexibility in use and high quality performance.
ONO-7 USER MANUAL CALL-A-MATIC ONO-7. Call Accounting System. Synectix LLC. 291-A, Pepes Farm Road, Milford, CT
 USER MANUAL CALL-A-MATIC Call Accounting System Synectix LLC. 291-A, Pepes Farm Road, Milford, CT-06460 www.synectix.net 1 Callamatic User Manual Edition February 2016 All specifications, information contained
Interchange Supervisor s User Guide
 Interchange Supervisor s User Guide Interchange Supervisor s User Guide Copyright 2003 Comdial Corporation All rights reserved. Unauthorized use of this document is prohibited. Comdial Corporation 106
1. Press the TRAN button on the phone. The call is placed on hold and you are returned to dial tone
 NewTel Systems Training Worksheet Please write your name and initial after each section of training. Please hand your training sheet to your trainer so that we can make a copy. Once you have initialed
Panasonic KX-TVS120, KXTVS120, TVS120, KX-TVS220, KXTVS220, TVS220, KX-TVS320, KXTVS320, TVS320
 3DQDVRQLF 7HOHSKRQH 6\VWHPV KX-TVS0 KX-TVS0 KX-TVS30 www.voicesonic.com Phone: 877-89-89 Voice Processing System Subscriber's Guide Panaso nic Panasonic KX-TVS0, KXTVS0, TVS0, KX-TVS0, KXTVS0, TVS0, KX-TVS30,
The SL2100 Quick Install Guide: InACD V1.1 April 2018
 The SL2100 Quick Install Guide: InACD V1.1 April 2018 www.nec-enterprise.com This guide explains the installation, configuration and operation of the SL2100 InACD Feature. Regulatory Notice. Refer to the
HN1000/HN2000 Product Manual
 HN1000/HN2000 Product Manual TABLE OF CONTENTS 1.0 Introduction...1 2.0 Mounting the HN1000/HN2000... 2 3.0 Setting Up Your Optional upunch Account... 4 3.1 Creating Your Account...4 3.2 Adding Departments
Perfect Voice User Guide
 User Guide Contents What is?...1 Logging into your mailbox...2 Quick Setup...4 Main Menu Overview...6 Main Menu Options...7 Message Management...8 Message Management...9 Forward Menu (t from Message Management)...10
Tapeless Digital Answering System with Time/Day Part 2
 2 Tapeless Digital Answering System with Time/Day 1715 Fold open this manual for information about this telephone's installation and operation. Please read Part 1 Important Product Information, included
Call Pilot Auto-Attendant
 BCM Rls 6.0 Call Pilot Auto-Attendant Task Based Guide Copyright 2010 Avaya Inc. All Rights Reserved. Notices While reasonable efforts have been made to ensure that the information in this document is
INTEGRATED COMMUNICATIONS SERVER SYSTEM ADMINISTRATOR'S MANUAL SOFTWARE RELEASE 1.15
 April 2001, Issue 2 VOICEGATE ICS FOR WINDOWS NT INTEGRATED COMMUNICATIONS SERVER SYSTEM ADMINISTRATOR'S MANUAL MANUFACTURED BY: VoiceGate Corporation 550 Alden Road, Unit 112 Markham, Ontario Canada L3R
InMail Feature Manual
 InMail Feature Manual A50-031762-003 NA ISSUE 5.0 Copyright NEC Corporation reserves the right to change the specifications, functions, or features at any time without notice. NEC Corporation has prepared
9417CW Installation and User Guide
 9417CW Installation and User Guide 9417CW Telephone Important Tips Wait for at least two rings to allow the phone to identify a caller and display the caller s name and/or number. You will have to subscribe
Intercom User Manual. It is necessary to get familiar with the various "tones" of your Intercom System.
 Intercom User Manual Monitoring Tones It is necessary to get familiar with the various "tones" of your Intercom System. 1) Exchange Dial Tone : The dial tone is a continuous sound, which lasts for 6 seconds
Temperature Guard Models VM500-3 & VM500-3HT. Home Guard Model VM Operating Manual and Installation Instructions
 Temperature Guard Models VM500-3 & VM500-3HT Home Guard Model VM500-2 Operating Manual and Installation Instructions Index Temperature Guard model VM500-3 Description 3 Programming Overview 3 Programming
Innovator. Smart Communications Solutions. User s Guide
 Innovator Smart Communications Solutions User s Guide INNOVATOR TM Table of Contents Introduction... Voice Mail Main Menu... Voice Mail Setup... Setting Up Your Greetings...4 Setting Up Your Greetings...5
Caller ID Telephone 962
 1 USER S MANUAL Part 2 Caller ID Telephone 962 Please also read Part 1 Important Product Information AT&T and the globe symbol are registered trademarks of AT&T Corp. licensed to Advanced American Telephones.
Glossary KX-TVA50 KX-TVA200. Voice Processing System. Model No.
 Voice Processing System Model No. KX-TVA50 KX-TVA200 Thank you for purchasing a Panasonic Voice Processing System. Please read this manual carefully before using this product and save this manual for future
INNLINE IP Voice Mail
 INNLINE IP Voice Mail STAFF REFERENCE MITEL CONNECTED GUESTS Table of Contents NOTICE The information contained in this document is believed to be accurate in all respects but is not warranted by Mitel
Quick Resource for Crexendo Home Office Suite
 Crexendo Business Solutions Inc. Quick Resource for Crexendo Home Office Suite Crexendo QuickStart Guide 1 Crexendo QuickStart Guide Crexendo Business Solutions Inc. Getting Started Adaptor Installation
AT&T Issue 1 January DEFINITY Communications System Generic 3 Hospitality Services
 AT&T 555-230-021 Issue 1 January 1992 DEFINITY Communications System Generic 3 Hospitality Services Copyright 1995 AT&T All Rights Reserved Printed in U.S.A. Notice While reasonable efforts were made to
900 MHz Cordless Telephone/Answering System with Caller ID/Call Waiting 9371 DRAFT 8/14/01
 9371_book_1ATT 8/14/01 10:00 AM Page ii USER S MANUAL Part 2 900 MHz Cordless Telephone/Answering System with Caller ID/Call Waiting 9371 DRAFT 8/14/01 Please also read Part 1 Important Product Information
User Guide Issue 1b - September 2002 PN: IN252-00
 User Guide Issue 1b - September 2002 PN: IN252-00 Issue Release Date Changes 1 4-97 Initial Release 1a 4-98 Statements have been added for clarification purposes. 1b 9-02 The While Listening mailbox operation
A Guide to Voice Edge s Most Popular Features
 A Guide to Voice Edge s Most Popular Features Page 1 10/31/2017 Table of Contents GETTING STARTED... 4 WELCOME LETTERS... 4 VOICEMAIL... 4 SETTING UP VOICEMAIL... 4 RECORDING THE GREETING... 5 CHECKING
Sprint Digital Voice Models DVP 203 & DVP 403. System Administrator s Guide. Item Number
 Sprint Digital Voice Models DVP 203 & DVP 403 System Administrator s Guide Item Number 699345 Nothing contained in this guide shall be deemed to be, and this guide does not constitute, a warranty of, or
Quick start guide. CL4939 Big button big display telephone/answering system with caller ID/ call waiting
 Quick start guide CL4939 Big button big display telephone/answering system with caller ID/ call waiting Introduction This quick start guide provides you basic installation and use instructions. A limited
NEC SL1100 Telephone System IP4WW-12/24 Series Desktop Digital Terminals with Voic . Quick Reference Guide
 IP4WW-12/24 Series Desktop Digital Terminals with Voicemail IP4WW-12/24TXH Telephone 1 Menu Key Operation (Used to set ringing, display options and features) 2 Auto Attendant Greetings (All recordings
NuPoint Agent Reference and Configuration Manual B1
 NuPoint Agent Reference and Configuration Manual 2700-1416-B1 Contents Copyright 2002, Mitel Networks Corporation Distributed Courtesy of 8777 E. Via De Ventura Suite #340 Scottsdale, Arizona 85258 http://www.legacyvoicemail.com
Pocket User Guide 480i Phone. for Sphericall
 Pocket User Guide 480i Phone for Sphericall 480i for Sphericall User Guide Revised: May 12, 2004 Sayson Technologies Ltd. will not accept liability for any damages and/or long distance charges, which result
CISCO IP PHONE MODEL 7970 & UNITY VOIC INCLUDES IPMA FOR MANAGERS & CONFERENCE CONNECTION. Getting Started Manual
 CISCO IP PHONE MODEL 7970 & UNITY VOICEMAIL INCLUDES IPMA FOR MANAGERS & CONFERENCE CONNECTION Getting Started Manual Getting Started... 3 Using LCD Icons... 3 Using the IP Phone Configuration Utility...
Area of Rescue Command Unit Installation Instructions Model AOR-8 / Model AOR-16
 THIS PRODUCT MUST BE INSTALLED IN ACCORDANCE WITH THE APPLICABLE INSTALLATION CODE BY A PERSON FAMILIAR WITH THE CONSTRUCTION AND OPERATION OF THE PRODUCT AND THE HAZARDS INVOLVED CE PRODUIT DOIT ÊTRE
200 Receptionist s Guide
 Business Central 200 Receptionist s Guide This guide is intended for receptionists and anybody else who answers your company s incoming phone calls. It is important to use this guide to ensure that your
TABLE OF CONTENTS TELEPHONE OPERATION INITIAL SETUP INSTALLATION INITIAL PROGRAMMING PROGRAMMING OPTIONS
 TABLE OF CONTENTS INITIAL SETUP TELEPHONE OPERATION Introduction... 3 Packing List... 3 Terms... 3 420C Key Features... 4 420C Display... 6 Installing the Battery... 6 INSTALLATION Desk/Wall Mounting Bracket...