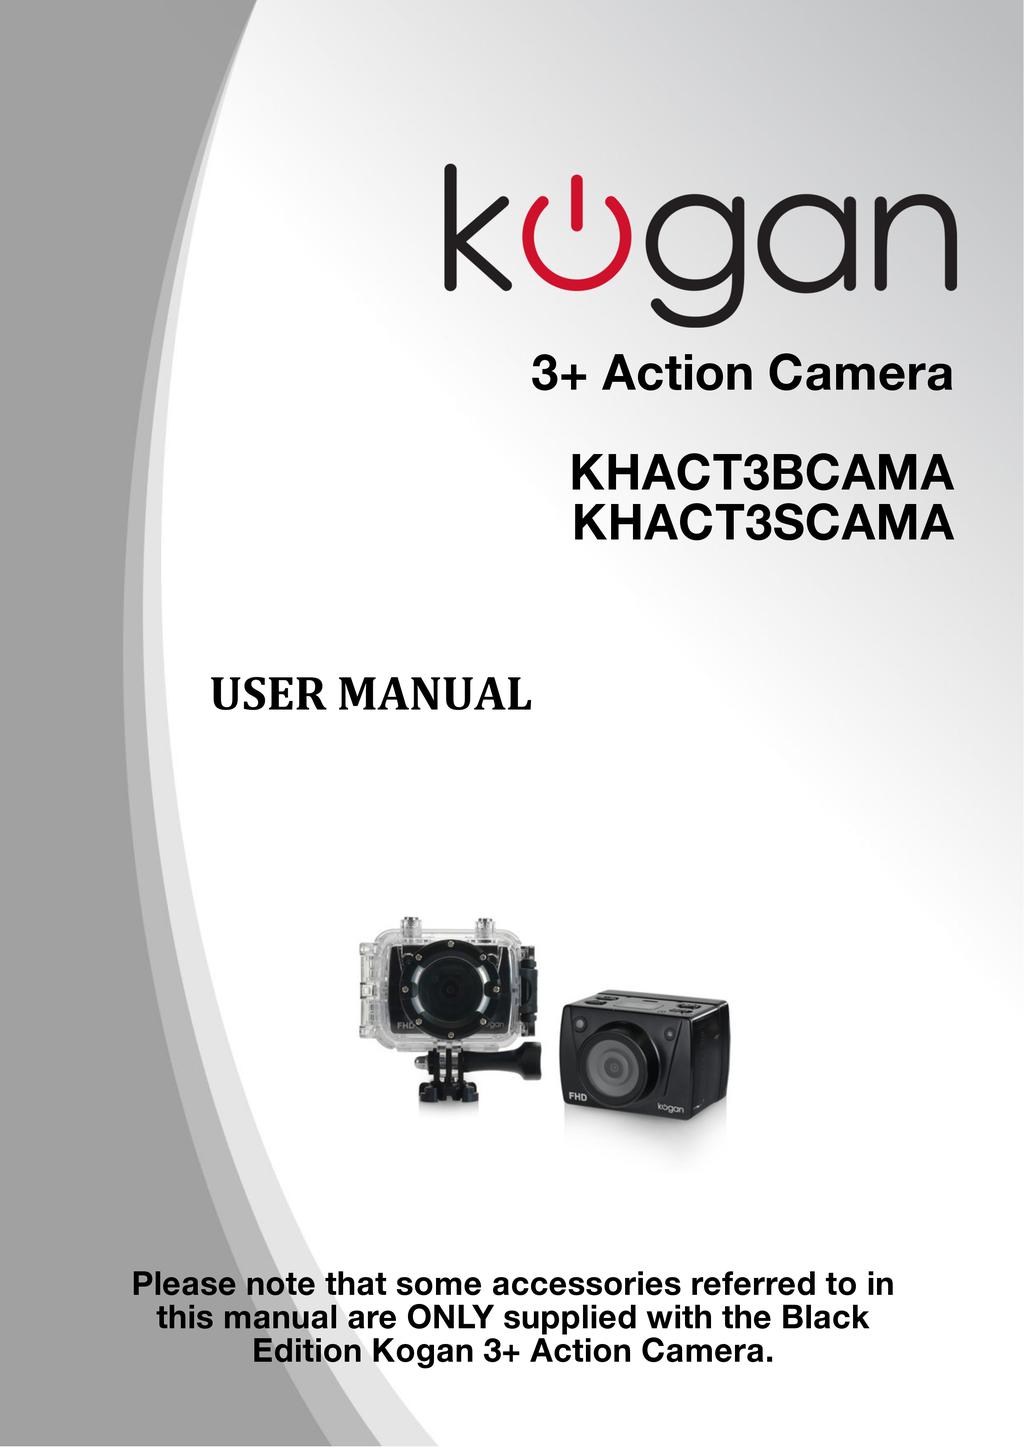
Usage Warnings. Product Introduction
|
|
|
- Christopher Small
- 6 years ago
- Views:
Transcription
1
2 Table of Contents Usage Warnings... 2 Product Introduction... 2 Product Features... 3 Product Layout... 4 Usage and Installation... 4 Setting up the camera... 4 Preparation... 5 Parameter Settings... 6 Set Video Camera Parameters... 6 Set Camera Parameters... 7 Set System Parameters... 8 Operations... 9 Taking a Picture Recording an Audio File Playing Back a File File Controls Deleting a File Protecting a File Automatically Playing a File Starting the Camera in Standby Mode Connections Connecting the AV Output Connecting the HDMI Output Connecting the Kogan 3+ Action Camera in USB Mode...13 Camera Behaviour Prompt Tones upon Operations...13 Laser Indicators Turning the TFT Screen ON/OFF...14 Storage and Playing of Files Connecting a USB Data Cable Connecting a HDMI or AV Cable Installation/Use of Backup Battery Installing a Battery Checking the Battery Power Recharging the Battery Technical Specifications Product Warnings Waterproof Housing M Dual-side Sponge Rubber Additional Notes FCC Notices
3 Usage Warnings Do not drop, knock or shake the video camera. Do not put the video camera close to an object that generates strong magnetic field, such as a magnet or a motor. Do not put the video camera close to an object that emits powerful radio waves, for example, an antenna. Strong magnetic field may cause faults on the video camera or damage the image/voice data. Do not expose the video camera to high temperature or direct sunshine. Do not put the memory card close to an object that generates strong magnetic field, such as a television set, a speaker, or a magnet. Do not put the memory card in a place where static electricity is easily generated. Disconnect the power supply to stop recharging the battery immediately when over heat, smoke, or peculiar smell occurs during recharging. Keep the video camera out of reach of children during recharging, because the power cable may be a choking or electrical shock hazard to children. Store the video camera in a cool, dry, and dust-free place. Product Introduction Thank you for purchasing the Kogan 3+ Action Camera, which has the following characteristics: Ultra small size User-friendly interface Easy operations Hand-free shooting to facilitate shooting of real scenarios at any time and place Superior recording performance thanks to dynamic HD shooting technology, providing you with an exciting video shooting experience This manual describes how to install and use the Kogan 3+ Action Camera. It also provides information about usage, operations, installation precautions and technical specifications of the Kogan 3+ Action Camera. Before using the Kogan 3+ Action Camera, read and understand this manual carefully and keep a copy handy for future use. The Kogan 3+ Action Camera is a compact, high-end HD digital camera intended for professional applications. It provides the following functions: Performs industry-leading HD digital shooting Stores voice data Displays images in real time Performs video recording Takes pictures Displays time Provides laser indication Performs 10X digital zooming Connects to an external special-purpose microphone Performs USB 2.0 high-speed data transmission Recharges the battery in USB mode 2
4 Product Features The Kogan 3+ Action Camera has the following features: A 170 ultra-wide-angle f/2.8 lens Special-purpose HD lens, which supports 1080P, 1080i, 960P, and 720P HD video recording Takes 8M pixels pictures in 3200x2400 resolution 10X digital zooming Shooting in multiple modes, such as single-key capturing, consecutive three-picture burst capturing, and automatically continuous capturing Independent voice recording function for long-time voice recording Built-in vehicle black box for real-time video recording during driving 180 photo rollover function Connects to an external TFT screen to view the video recording and playback Provides better video effects in multiple video output modes (NTSC system): 1080P (1920x1080P) 30 frames / second 1080i (1920x1080i) 60 frames / second 960P (1280x960P) 30 frames / second 720P (1280x720P) 60 frames / second 720P (1280x720P) 30 frames / second WVGA (848x480P) 120 frames / second WVGA (848x480P) 60 frames / second Detects power level of the battery and free capacity of the memory card Supports external SD cards for storage, up to 64 GB capacity Dynamic high-speed video recording, with light and shade environment transient response Detects light in three modes to meet exposure requirements in different scenarios Night shooting mode with contrast and ISO enhancements, improving the clarity and sharpness of night-time scenarios Compact and fashionable design HDMI and AV output interfaces for easy connecting to HD monitors or TV sets to view recorded files. Records video programs in MOV format to facilitate playback on a PC and uploading to video-sharing websites High colour fidelity to present more clear and natural video pictures Supports local playback, deleting files and other operations Supports 1/4X, 1/2X, 2X, 4X, 8X, and 16X fast forward, rewind and playback Supports RTC time settings and time overlapping Supports USB 2.0 Built-in microphone for high-quality recording Supports connecting to an external microphone (special-purpose microphone only) 1/4-inch general-purpose interface to facilitate extension of accessories Multiple sport accessory support for sport recording Shockproof features to withstand mild drops or knocks IP68 waterproof housing, withstanding a diving depth of 100 meters, and two-types of rear-cover deigns Automatic standby for power saving, and supports automatic saving of audio and video data. 3
 16. Power switch 17. Microphone 18. Operating/charging indicator (red) 19. LCD segment screen 20. Shutter key 21. Stop key 22. Lens 23.")

5 Product Layout 1. TFT screen 2. Menu key 3. UP key 4. LEFT key 5. DOWN key 6. Playback key 7. OK key 8. TFT screen lock knob 9. Wrist strap hole 10. Buzzer 11. SD card slot 12. RIGHT key 13. AV out/audio in 14. Record key 15. Video/Audio indicator (green) 16. Power switch 17. Microphone 18. Operating/charging indicator (red) 19. LCD segment screen 20. Shutter key 21. Stop key 22. Lens 23. Video/photo indicator (green) 24. Laser indicator 25. HDMI output 26. USB output interface 27. Threaded tripod mount interface Usage and Installation The Kogan 3+ Action Camera can be hand-held or used with hands-free accessories. It can be installed in your required location, or after being equipped with a waterproof housing, placed in water for the shooting of underwater scenarios. Setting up the camera Assembling the TFT screen onto the camera Putting the camera into the waterproof housing TFT screen Video Camera Assemble the TFT screen onto the camera Video Camera Waterproof housing Put the video camera into the waterproof housing. NOTE: to remove the TFT screen, press the PUSH snap button, then remove it. 4
6 Preparation Before using the Kogan 3+ Action Camera, complete the following preparations: 1. Power on the Kogan 3+ Action Camera and check the power level a) Turn the power switch to the ON position to initiate the system. After the red indicator is on, the corresponding symbols on the LCD screen turns on and then the system enters the preview state. On the LCD segment screen, you can find the following information: b) Recording mode: The current recording mode is displayed on the LCD segment screen. The icon indicates video mode, whereas the icon indicates audio mode. c) Photo mode: The (shooting) icon is displayed on the screen. d) Power symbol: The (power supply) icon is displayed in the upper-right corner. When the system is working, this icon is constantly on. If this icon disappears, it indicates the Kogan 3+ Action Camera is in powered-off or standby state. e) Video recording duration: In the medium row of the LCD segment screen displays the duration of the current recording video, for example, 005:20. In the preview state, press the Video key once to display the duration of the video recording, and press the Stop key once to hide the duration. Note: The duration for video recording on the LCD segment screen is synchronously displayed with that on the TFT screen. f) Battery capacity indication: The (battery capacity) icon is displayed in the bottom-left corner. This icon indicates the battery level when the video camera is powered on. The more bars the power indicator has, the more power the battery has. Note: When the video camera is in the standby or power-off state, the power icon is not displayed. g) USB connection mode: The (USB mode) icon indicates that the video camera has been connected to a computer. When the video camera is powered on and connected to a computer, this icon is lit with the green indicator on the left side blinking slowly. When the video camera is not connected to a computer, this icon is not displayed. h) Memory card capacity indication: The (memory card capacity) icon is displayed in the bottom-right corner, indicating the available space of the SD card. The more bars the power indicator has, the more free space you have. If the SD card is full, the green indicator on the left side is constantly on. At this time, on the TFT screen, you can find the following information: i) Working mode: The (Video recording) symbol is displayed in the upper-left corner, indicating that the video camera is ready for video recording. j) Battery capacity: The (battery power) symbol is displayed in the upper-left corner, indicating the battery level. k) Video resolution: The resolution icon in the bottom-left corner indicates the current video recording resolution. l) Available storage capacity: If a memory card is available upon power-on of the video camera, the (free space of the memory card) icon is displayed in the bottomright corner. m) There is no response for < and > keys in the preview state. n) When using the supplied power supply or USB cable to recharge the battery in power off, the "Working/recharging red indicator" on the top of the video camera blinks slowly. The red indicator will be constantly on upon full recharging. The recharging time lasts for about 3.5 hours. Note: Before using the video camera, check whether the battery has sufficient power. If the power level is low, use the power adapter supplied with the video camera or USB cable to recharge the battery. The "Working/recharging red indicator" blinks slowly during the recharging. Upon full recharging, the red indicator is constantly on, and the (battery power) symbol is displayed on the TFT screen. 5


7 2. Formatting the Micro SD card The Micro SD card must be a high-speed card. Before video/audio recording and shooting pictures, format the Micro SD card using the Kogan 3+ Action Camera. If a Micro SD card has been used on other devices, it should also be formatted using the Kogan 3+ Action Camera for normal use. Note: Before formatting, make sure the files in the Micro SD card are not needed. Even locked or write-protected files on the video camera can be removed during formatting. 3. Setting the data and time To set the date and time, perform the following operations: In the preview mode under power-on state, press the M key to display the menu interface. Press > to enter the system setup interface. Press + or to display the Date / Time menu. Press OK to display the Date / Time interface shown as shown: The digits under the cursor will turn blue and be adjustable. Press + or to adjust the date or time. Press OK after adjusting the date or time. Press the M key to exit the interface. Parameter Settings To set parameters, perform the following operations: In the preview mode under power-on state, press the M key to display the menu interface. Press the < or > key to choose a left or right option from the menu interface. Press the + or key to choose an upper or lower option from the menu interface. After selecting an option, press OK to save settings. Press the M key again to save the setting and exit the interface. Note: After power-on, the video camera adopts all the preset settings, except for audio recording mode. You can change settings as you desire. Set Video Camera Parameters a. Exe.: Select (the default mode) for video recording and for audio only. b. Resolution for video recording: Select the desired resolution for video recording. You can set this parameter to the 1080P, 1080i, 960P, 720P, or WVGA resolution. PAL System 1920x1080P 16:9 25f NTSC System 1920x1080P 16:9 30f 1920x1080i 16:9 50f 1920x1080i 16:9 60f 1280x960P 4:3 25f 1280x960P 4:3 30f 1280x720P 16:9 50f 1280x720P 16:9 60f 1280x720P 16:9 25f 1280x720P 16:9 30f 848x480P 16:9 100f 848x480P 16:9 120f 848x480P 16:9 50f 848x480P 16:9 60f c. This parameter involves three types of view: broad view ( ), medium view ( ) and narrow view ( ). The following shots show the same picture in the different views. Broad View Medium View Narrow View The preceding views apply only to the 1080P and 1080i HD video recording and photo modes. You can select a viewing angle as desired. 6
8 d. Bit rate: This parameter can be set to High bit rate ( ) or Normal ( ). If this parameter is set to high, pictures are clearer but the file size increases. e. Laser SYNC video: Select to enable the laser indicator, or select (the default option) to disable the laser indicator. f. Time lapse: In the preview state, press the "M" key to enter the video recording setup interface, choose "Time lapse" and set the desired interval settings. The available options are OFF (the default option), 0.1s, 0.5s, 1s, 2s, 5s, 10s, 30s. g. Pre-video: In the preview state, press the M key to enter the video recording setup interface, choose Pre-video to enable the pre-video recording function. In this mode, press the Video key to enable the pre-recording function, that is the video recording starts without saving the data; press the Video key again, the last a few seconds of the pre-recorded video will be saved as the starting part of the video recording file. h. Auto video: In the preview state, press the M key to enter the video recording setup interface, choose Auto video, and set the count-down time before the automatic video recording. The available options are OFF, 5s, 10s, or 20s. i. 180 photo rollover: In the preview state, press the M key to enter the video recording setup interface, and choose 180 Photo Rollover. This function allows you to shoot photos from any angle. The 180 photo rollover function is unavailable for video recording in WVGA/100fps and WVGA/120fps modes. j. Display time: In the preview state, press the M key to enter the video recording setup interface, choose DISPLAY TIME. If you set this parameter to ON, the video camera automatically records the date and time during video recording and displays them in the bottom-right corner of the screen. If you set this parameter to OFF, the video camera does not display the date and time during video recording. (The display time function is unavailable for video recording in 1080i, WVGA/100fps, and WVGA/120fps modes.) Note: In audio recording mode, press the Video key once to start audio recording. The audio recording duration is displayed in the upper-right corner of the TFT screen, and the green indicator blinks slowly. Press the Stop key to stop and store the currently recorded audio file. In such a situation, the green indicator is off, and the red indicator is constantly on (the operation prompt is displayed on the LCD segment screen), and the video camera restores to the state for audio recording. During audio recording, the video camera responds only to the Stop, Power off keys. When the laser SYNC video function is enabled, the laser icon is displayed in the upperleft corner of the preview screen, indicating that the video camera is in such a shooting mode. The laser will be turned when starting video recording, and turned off when stopping video recording. When the pre-video and auto video functions are both enabled, press the Video key to automatically record the time in reverse counting mode; press the Video key again, the last a few seconds of the pre-recorded video will be saved as the starting part of the video recording file. Zooming is not required in WVGA/100fps, and WVGA/120fps video recording mode. Set Camera Parameters a. Resolution: Select the required resolution for shooting. You can set this parameter to 3.0M, 5.0M, or 8.0M. b. Single shot : When the camera is set to the single-key shooting mode, one picture is captured when the Photo key is pressed once. c. Continuous capture (three): When the Photo key is pressed once, three pictures are continuously captured, and three click tones are also continuously generated. d. Auto cont. capture: Pictures is captured at intervals of 1s, 2s, 3s, 5s, 10s, 20s,30s or 60s until the Stop key is released, the memory card is full, or the battery power is low. e. Timed shooting: Select the reverse-counting time for auto-shooting (This parameter can be set to OFF, 3s, 5s, or 10s), and choose Timed Shooting and press the M key to 7
9 return to the preview state. Then press the Photo key to start reverse counting timer. When the preset time is reached, the auto-shooting indicator blinks, and the camera takes a picture. To restore to other shooting modes, set Timed Shooting to OFF. Otherwise, the camera maintains in timed shooting mode. f. Display time: In the preview state, press the M key. On the setup interface, choose Display Time. If you set this parameter to ON in advance, the camera automatically records the date and time during shooting and displays them in the bottom-lower corner of the photo. If you set this parameter to OFF in advance, the camera does not display the date and time during shooting. (The display time function is unavailable for photo shooting in 1080i, WVGA/100fps, and WVGA/120fps modes). Note: The timed shooting function and other shooting functions cannot be simultaneously enabled. Set Timed shooting to OFF to restore to the other shooting modes. Otherwise, the camera is defaulted in timed shooting mode. In single shot mode, the Auto cont. capture parameter is automatically set to OFF. If the Auto cont capture parameter is set to 1s, the time display function is unavailable. Set System Parameters a. Prompt tone: Set this parameter to ON to enable the tick tone or OFF to mute the tick tone. Note: This parameter cannot be set to mute the prompt tones for shooting and video recording. Instead, this parameter can only be set to mute the tone generated upon pressing a key on the TFT screen and no-operation prompt tones. b. Status indicator: After choosing the required menu, set this parameter to ON (turning on the status indicator) or OFF (turning off the status indicator). By default, set this parameter to ON. c. Video content loop: When this parameter is set to ON, a recorded video file is automatically saved once by segment every 15 minutes. When this parameter is set to OFF, a recorded video file is automatically saved once by segment every 30 minutes. d. Auto to standby: Set this parameter to OFF, 2 mins, 5 mins, or 10 mins. You can select the time for automatic standby. After presetting the time, the system starts counting time when there is no task or operation. When the preset time is reached, the SD21 video camera disables the input/output and enters standby mode. During time counting, the system restarts counting time if any tasks or operations are carried out. During the standby period, the Kogan 3+ Action Camera starts working if the Video, Photo, or Stop key is pressed. In factory setting, this parameter is set to OFF. e. TV output system: Set this parameter to NTSC or PAL. You can set the video system for output on a TV set. A black screen appears for two seconds during switchover between the NTSC and PAL systems, and this situation is normal. Note: Before using the video camera, select NTSC or PAL depending on your region. After the video system is selected, the light source frequency also changes to avoid image blinking during video recording. f. G-Sensor: If this parameter is set to ON, the video camera starts video recording when the video camera is shaken or when the vehicle starts. If the video camera does not shake or when the vehicle stops, the video camera stops video recording in about three minutes. By default, this parameter is set to OFF. g. Contrast: Set this parameter to Standard by default. To improve the image effect during night shooting, set this parameter to Enhanced. h. ISO sensitivity: This parameter is set to Auto by default. To improve the image effect during night shooting, set this parameter to Low lux. i. Metering: Set this parameter to Average by default to ensure the general exposure effect. If the central area is dark but the surrounding area is bright, set this parameter to Central Area to improve the imaging effect in the central dark area. If the central area is bright but the surrounding area is dark, set this parameter to Central Spot to improve the imaging effect for the surrounding dark area. j. Language: Press the < or > key to choose your desired language. k. Date/time: You can adjust the date and time, which are overlapped in the bottom-right 8
10 corner of a video or shooting file during video recording or shooting. l. Format: Select Format to remove all the files. Note: If a memory card is inserted, the video camera formats the memory card. m. Recover factory setting: This parameter restores all parameter settings to the factory settings. After you set this parameter, the system displays all the menu options in English. Press the M key to display menu options. Press the < or > key to display the System Setup menu. Press the key, and choose Language. Then set the system in your desired language. After resetting to the factory setting, the system displays 01/01/ :00 for the time. n. Ver: This parameter only shows the version number of the software used on the video camera. Note: When selecting a state from a submenu, press the M key for a backward operation, and press OK for confirmation. Operations 1. Insert a Micro SD card into the Kogan 3+ Action Camera. Note: Use a branded Micro SD card, for example, Transcend Class 10 memory card. 2. Powering on the Kogan 3+ Action Camera Turn the power switch to the ON position to power on the Kogan 3+ Action Camera. At this time, the red indicator is on, and the Kogan 3+ Action Camera changes to the preview state. Note: If the battery power is low, the symbol is displayed on the TFT screen together with a prompt. If no Micro SD card is inserted, no symbol is displayed in the bottom-right corner of the TFT screen. 3. Recording a Video In the preview state, press the Video key to start video recording. The video recording duration is displayed in the upper-right part of the TFT screen. The "Video/Audio indicator (green)" and the "Video/Photo indicator (green)" on the top of the video camera blink slowly. The recording duration is correctly displayed on the LCD segment screen. During video recording, the video camera responds only to operations for the zoom in (+) and zoom out ( ) keys. Press the Stop key once to stop and save the currently recorded video file, and the video indicator (green) on the front side is off. The video camera restores to the preview state. The recording duration disappears on the LCD segment screen. Note: During video recording, turn the power switch to the OFF position to power off the video camera after saving the currently recorded file. During video recording, if the battery power runs low, the system saves the currently recorded file and enters standby mode, displaying a prompt of Low battery on the TFT screen, until the video camera is powered off. During video recording, if the Micro SD card is full, the system saves the currently recorded file. The system also displays a message Card full on the TFT screen, indicating that the Micro SD card is full. In addition, the duration for video recording stops on the LCD segment screen, and the system restores to the preview state. In cyclic recording mode, the system automatically saves a file every 15 minutes. (The cyclic recording function and the pre-video function cannot be simultaneously enabled.) In WVGA/100 and WVGA/120 modes, the video camera does not support the time display, zooming, and 180 photo rollover functions. In 1080i/50 and 1080i/60 modes, the video camera does not support the time display function. In audio recording mode, the volume cannot be adjusted by pressing the + or key. In playback, however, the volume can adjusted by pressing the + or key. If the video camera provides a TFT screen and is in the preview state, after using a HDMI patch cord to connect the video camera to a HD display device, you can perform basic operations for the video camera on the HD display device (These basic operations, however, cannot be performed if no TFT screen is available on the video camera). 9
11 Taking a Picture Before taking a picture, perform the following operations to set the image resolution. Press the M key to display the setup interface. Press the > key to display the camera setup interface ( ). Press the + or key and choose Image Resolution. Press OK to display the resolution setup menu. You can set the resolution to any of the following three modes: 3M, with an image resolution of 2048 x M, with an image resolution of 2592 x M, with an image resolution of 3200 x Four photo shooting modes are available for the video camera. 1. Single shot (default mode): In the preview state, press the Photo key once to take a picture while the system generates a click tone. The green indicator on the front side of the video camera also blinks once (the shooting icon on the LCD segment screen blinks once), and the video camera restores to the preview state. 2. Continuous capture (three): On the camera setup interface, press the + or key and choose Single Photo. Press OK to display the interface. Press the > key, and choose Continuous capture (three). Press OK again to exit the interface. Press the M key to exit the camera setup interface. After setting is complete, the Kogan 3+ Action Camera continuously takes three pictures when you press the Photo key once. 3. Auto cont capture: On the camera setup interface, press the key and choose Auto Cont Capture. Press OK to set the time interval for continuous shooting to OFF, 1s, 2s, 3s, 5s, 10s, 20s,30s or 60s. After press the > key to set the time interval. Press OK again to exit the interface. Press the M key to exit the setup interface. At this time, if you press the Photo key, the Kogan 3+ Action Camera takes a picture at each interval until you press the Stop key to cancel shooting. 4. Timed shooting: On the camera setup interface, press the + key and choose Timed Shooting. Press OK to set the time in auto-shooting mode to OFF, 3 s, 5 s, or 10 s. Press the > key, and choose Timed Shooting. Press OK again to save and exit the interface. Press the M key to exit the camera setup interface. After setting is complete, the Kogan 3+ Action Camera starts reverse-counting timer when you press the Photo key once. When the preset time is reached, the Kogan 3+ Action Camera takes a picture. Recording an Audio File To record an audio file, perform the following operations: 1. Press the M key on the video camera setup interface, choose Exe., and then press OK to display the video and audio options. 2. Press the < or > key, and choose for audio only, and press OK again. The system gets ready for audio recording. 3. Press the Video key to start recording an audio file. At this time, the green indicator blinks slowly. The video camera also displays the audio recording symbol on the TFT screen and starts counting time. In addition, the recording duration is correctly displayed on the LCD segment screen. 4. Press the Stop key to save and stop the currently recorded audio file. At this time, the green indicator on the front side is off. The video camera restores to the preview state for audio recording. The recording duration also disappears on the LCD segment screen. 5. After audio recording is complete, press the M key. On the system setup interface, choose Exe.., and press OK to display the Audio option. Press OK to display the video and audio options, and choose Video. Press OK again to exit the setup interface. The video camera restores to the preview state for video recording. Note: Power on the video camera again to restore to the video recording mode. After audio recording is complete, you can also press the key twice to restore to the video recording mode. 10
12 Press and hold the Stop key for two seconds to directly change the video camera to the ready state for audio only. Playing Back a File You can view the recorded audio/video and photo files on the Kogan 3+ Action Camera. To view a file, perform the following operations: Press the key to display the playback interface. Press the key again to exit the playback interface. Select (the video files interface) to view a recorded video file. Select (the photo files interface) to view a photo file. Select (the mixed file interface) to view all the video, audio, and photo files. If there are many files, it takes a few seconds time for the video camera to display the preview interface. 1) Playing a Video File To play a video file, perform the following operations: On the video file interface ( ), press the +,, > or < key to display all the files displayed in thumbnails. Select the required file, and press OK to play it. When playing a video file, you can use the following keys: Key Description Key Description + Turns the sound volume up. - Turns the sound volume down. < Plays a file in slow rewind mode when you hold this key down. Plays a file in fast rewind when you press this key normally. Resets and plays a file from the beginning when you press this key. Returns to the playback interface when you press this key again. > Plays a file in slow motion when you hold this key down. Plays a file in fast forward when you press this key normally. OK Starts or suspends playing a video file when you press this key. Note: You can set the fast forward and rewind functions to a 2-, 4-, 8-, or 16-X speed. You can also set the slow forward and rewind functions to a 1/2- or 1/4-X speed. During the slow or fast play, you can press OK to resume normal playing. 2) Viewing a Photo File To view a photo file, perform the following operations: On the photo file interface ( ), press the +,, > or < key to display all the files displayed in thumbnails. Select the required file, and press OK to view it. When viewing a photo file, you can use the following keys: Key Description Key Description + Zooms in to picture. In zoom-in mode, locks a picture and moves it downwards when you press OK. - Zooms out from picture. In zoom-in mode, locks a picture and moves it upwards when you press OK. < Moves a picture right. > Move a picture left. Resets and plays a file from the beginning when you press this key. Returns to the playback interface when you press this key again. OK In zoom-in mode, switches between the + and - keys. 3) Playing an Audio File To play an audio file, perform the following operations: On the mixed file interface ( ), press the > or < key to display all the audio files in mode. Select the required file, and press OK to play it. When playing an audio file, you can use the following keys: 11
13 Key Description Key Description + Turns up sound volume. - Turns down sound volume. < No function. > No function. Resets and plays a file from the beginning when you press this key. Returns to the playback interface when you press this key again. OK Starts or suspends the playing of an audio file when you press this key. Note: The fast forward and rewind functions are not provided for playing an audio file. File Controls In playback mode, you can press the M key to delete, protect, and automatically play a file. Deleting a File On the video, photo, or mixed file interface, you can delete a video file, a photo file, or all the files. To delete a file, perform the following operations: Select a file to be deleted. Press the M key to display the operation interface. The following options are displayed on the operation interface. Delete single: deletes a picture. Press OK to display the options for deletion. Select or based on the displayed message. An option marked with will be deleted. Delete all: deletes all the unprotected pictures. Protecting a File On the video, photo, or mixed file interface, you can protect a video file, a photo file, or all the files. To protect a file, perform the following operations: Select a file to be protected. Press the M key to display the operation interface. The following options are displayed on the operation interface: Protect single: protects a file. Press OK to display the options for protection. After you select a file to be protected and press OK, the system automatically returns to the playback interface. Protect all: protects all the files. Press OK to display the options for protection. After you select all the options to be protected, the system automatically returns to the playback interface. Unlock single: unlocks a protected file. Press OK to display the options for protection. After you select a file to be unlocked and press OK, the system automatically returns to the playback interface. Unlock all: unlocks all the protected files. Press OK to display the options for protection. After you select all the files to be unlocked and press OK, the system automatically returns to the playback interface. Note: For a protected file, the icon in grey is displayed in the bottom-left corner of the preview interface. After being unlocked, a file is unprotected, and the icon in blue is displayed in the bottom-left corner of the preview interface. A protected file cannot be deleted, but can be deleted by a formatting operation. Automatically Playing a File In the photo file interface, the Kogan 3+ Action Camera can automatically play photos in sequence every five seconds. To automatically play a file, perform the following operations: Enable the playback function, and press OK. 12
14 Starting the Camera in Standby Mode The Kogan 3+ Action Camera enters preview mode after power-on. If no task or operation is carried out within the preset standby time, the system automatically enters the standby mode to save power. To wake up the camera from standby state, you can press the Video, Photo or Stop key. Note: In standby, the system does not start when you press any key on the TFT screen. In standby, no information is displayed on the LCD segment screen. Connections Connecting the AV Output In the preview state, connect the Kogan 3+ Action Camera to a display device using an AV cable. After being connected to a display device, the Kogan 3+ Action Camera can still implement all its functions. Connecting the HDMI Output In the preview state, connect the Kogan 3+ Action Camera to an HD display device using an HDMI patch cord. After being connected to the HD display device, the Kogan 3+ Action Camera can implement all its functions. Note: Incorrect removal of the HDMI patch cord may result in exceptions on the Kogan 3+ Action Camera. After being restarted, the Kogan 3+ Action Camera will restore to the normal state. Connecting the Kogan 3+ Action Camera in USB Mode 1. To connect the Kogan 3+ Action Camera in USB mode, perform the following operations: If no battery is provided for the Kogan 3+ Action Camera before delivery, connect the Kogan 3+ Action Camera using a USB power adapter to implement all the functions. The corresponding messages are displayed for operations on the LCD segment screen and the TFT screen. 2. In the power-on state, connect the Kogan 3+ Action Camera to a computer for accessing the data stored in the Micro SD card. The USB connection state icon is displayed on the LCD segment screen, and the green indicator also blinks slowly. 3. Incorrect removal of the USB power adapter may result in exceptions on the Kogan 3+ Action Camera. After being restarted, the Kogan 3+ Action Camera can restore to the normal state. Camera Behaviour Prompt Tones upon Operations The Kogan 3+ Action Camera can generate various prompt tones upon operations. 1. In normal cases, the Kogan 3+ Action Camera generates a tick tone, indicating that the operation is valid when you press the Video or Photo key once. 2. b Upon stopping video recording, the Kogan 3+ Action Camera generates a tick tone twice, indicating that the video recording operation stops. 3. If code pairing is successful upon a power-on operation, the Kogan 3+ Action Camera generates a tick tone twice, indicating that the code pairing operation is successful. 4. During video recording, the Kogan 3+ Action Camera does not generate a tick tone when you press the Photo key. 13

15 5. When any operations are performed on the TFT screen, you can enable or disable the function for generating a tone. Specifically, press the M key when the Kogan 3+ Action Camera is in the preview state. Then press the < or > key to display the Setup menu. Press the + or key, and select Prompt tone. 6. During video recording, the Kogan 3+ Action Camera generates a tick tone twice, indicating that the video recording operation stops when you press the Stop key. 7. During video recording, no prompt tone is generated by the Kogan 3+ Action Camera or by the speaker on the TFT screen when you press the Photo key. 8. In the standby state, the Kogan 3+ Action Camera generates a tick tone twice, indicating that the main system starts when you press a key. Laser Indicators The Kogan 3+ Action Camera provides laser indicators for warning operations. 1. After the Kogan 3+ Action Camera is powered on, the laser indicator is turned on when you press and hold the Video key for three seconds regardless of the working state. 2. If the laser indicator is on, it will be turned off when you press and hold the Video key for three seconds. 3. In the standby state, you can also turn on or off the laser indicator. Note: Pressing the Video key for three seconds to turn on or off the laser indicator does not affect the setting of the Laser SYNC video parameter in "Parameter Settings." Turning the TFT Screen ON/OFF After the Kogan 3+ Action Camera is powered on, you can press and hold the Photo key for three seconds to turn on or off the TFT screen. Storage and Playing of Files Connecting a USB Data Cable After video recording is complete, you can copy the recorded images to a computer for play by using a USB data cable. You can also remove the Micro SD card from the Kogan 3+ Action Camera and access the image data by using a sensor. The Media Player software is preferred for playing a file. Camera USB interface USB data cable Computer USB interface Note: Before removing the USB data cable, power off the Kogan 3+ Action Camera. When the power switch is in the OFF position, you can recharge the battery on the Kogan 3+ Action Camera. At this time, the red indicator blinks slowly. When the power switch is in the ON position, you can copy the recorded files from the Kogan 3+ Action Camera to the computer. 14


16 Connecting a HDMI or AV Cable Connecting with an HDMI Cable or an AV Cable,You can play recorded files on a TV set or a monitor that has a HD port, using an HDMI cable to connect the Kogan 3+ Action Camera to the TV set or monitor. Note: After connecting to a monitor by HDMI cable, select the proper input source for the Kogan 3+ Action Camera to play files. When using an AV cable, connect the terminals of the AV data cable to the ports in the same color on the TV set or monitor. Ensure that the TV set or monitor is properly grounded. Adjust the parameter settings of the monitor to achieve the optimal display effect. Installation/Use of Backup Battery Installing a Battery You can install the D23 battery onto the Kogan 3+ Action Camera without setting any parameters for power supply, as shown in the following figure: Checking the Battery Power You can gently press the Power key to check the power of the backup battery. The LED indicator on the battery blinks for three seconds in different colours to show the current power. Recharging the Battery You can connect the standard power unit of the Kogan 3+ Action Camera to the USB recharging interface of the D23 battery or connect a computer to the USB recharging interface of the D23 battery by using a USB data cable for recharging, as shown in the following figure. This backup battery has automatic protection against overcharging and short circuit. The red indicator light keeps flashing when charging the battery and the green indicator light is on when the battery is fully charged. (The battery can be charged for 500 times.) Note: Do not remove the backup battery randomly. If the Kogan 3+ Action Camera is not used for a long time, recharge the battery every six months to extend the battery life. 15
17 Technical Specifications Option Specifications Option Specifications View angle 170 Number of pixels Battery Power consumption 8 million CMOS sensor (3200x2400) 1000mAh lithium battery 1100mAh backup battery V (Max) Format for video recording (in NTSC system) 1080P (1920x1080P) 30 frames / second 1080i (1920x1080I) 60 frames / second 960P (1280x960P) 30 frames / second 720P (1280x720P) 60 frames / second 720P (1280x720P) 30 frames / second WVGA (848x480P) 120 frames / second WVGA (848x480P) 60 frames / second Continuous duration for video recording 80 Minutes (Standard battery) Video recording Recording video files in MOV format Standby duration 100 hours (Max.) Audio recording Recording audio files in WAV format Recharging duration Approximately 3.5 hours Shooting 3M, 5M, 8M JPEG images available for shooting resolution MicroSD Card capacity 64GB (Max.) USB interface 2.0 Operating humidity 15% 85% RH Operating system Windows 7+ or Mac OS Storage temperature Operating temperature -20 C ~ +60 C -10 C ~ +50 C Weight 80 g (without the screen) 105 g (with the screen) File storage 30 minutes per segment in normal cases 15 minutes per segment in cyclic recording mode Dimensions (W x H x D) 60 mm x 51 mm x 42 mm Product Warnings Waterproof Housing The waterproof housing is a precision component. When using the waterproof housing, adhere to the following precautions: 1. Do not randomly remove or change the O-ring, key, and lens cover. Otherwise, the waterproof performance deteriorates. 2. Do not put the waterproof housing in a place where corrosive gases are easily generated due to strong acid or alkali. Do not make the waterproof housing in contact with chemical or corrosive objects, such as strong acid or alkali. 3. Do not put the waterproof housing in a place where temperature is high (50 C) or low (-10 C) for a long time to avoid deformation. 4. Do not expose the Kogan 3+ Action Camera to sunshine for a long time to avoid deterioration of the waterproof performance. 5. Before use, ensure that the O-ring is intact, the seal is litter-free, the housing is fully sealed, and the buckle is tight. 6. After using the housing in sea water, wash it using fresh water, clean it, and dry it in a cool place. 3M Dual-side Sponge Rubber When using the 3M dual-side sponge rubber, adhere to the following precautions: 1. Before fixing the 3M dual-side sponge rubber, select a curved or flat surface to ensure proper contact between the sponge rubber and the curved or flat surface. 2. Before using the 3M dual-side sponge rubber, clean the surface where the sponge rubber is attached. 3. Before attaching the 3M dual-side sponge rubber, heat the surface of the sponge rubber using an electric blower, especially in a place where temperature is lower than -20 C. 16
18 Additional Notes When using the Kogan 3+ Action Camera, pay attention to the following notice information: 1. During continuous use, the body temperature of the Kogan 3+ Action Camera increases. This situation is normal. 2. If the Kogan 3+ Action Camera is not used for a long time, remove and maintain the battery properly, and recharge the battery every six months to ensure the battery performance. 3. During recording, enabling the digital zooming function may affect the image quality. 4. Shooting view angles are slightly different in different working modes of the video camera. 5. If a video file is large, a computer or a special-purpose player is preferred for smooth play. 6. Cyclic recording and frequent recording/deleting operations may leave data fragments in the SD card, causing failure to record or save files. To solve this problem, just backup the data to an external storage and format the SD card. FCC Notices 1. The manufacturer is not responsible for any radio or TV interference caused by unauthorized modifications to this equipment. Such modifications could void the user's authority to operate the equipment. 2. This device complies with Part 15 of the FCC Rules. (1) This device may not cause harmful interference, and (2) this device must accept any interference received, including interference that may cause undesired operation. NOTE: This equipment has been tested and found to comply with the limits for a Class B digital device, pursuant to part 15 of the FCC Rules. These limits are designed to provide reasonable protection against harmful interference in a residential installation. This equipment generates uses and can radiate radio frequency energy and, if not installed and used in accordance with the instructions, may cause harmful interference to radio communications. However, there is no guarantee that interference will not occur in a particular installation. If this equipment does cause harmful interference to radio or television reception, which can be determined by turning the equipment off and on, the user is encouraged to try to correct the interference by one or more of the following measures: --Reorient or relocate the receiving antenna. --Increase the separation between the equipment and receiver. --Connect the equipment into an outlet on a circuit different from that to which the receiver is connected. --Consult the dealer or an experienced radio/tv technician for help. 17
User manual HD10. kitvision.co.uk. JB Kitvision Christchurch, Dorset. BH23 4FL
 User manual A C T I O N C A M E R A HD10 kitvision.co.uk JB. 2957 Kitvision 2013. Christchurch, Dorset. BH23 4FL 1 1 With a wide range of cameras and accessories, Kitvision is here to help you record your
aee.com Contents EN DE ES PT IT EL FR NL PL CS DA HU SV FI NO RU
 Contents Precautions...2 Preface...2 Warranty...2 Main Functions and Features...3 List of Accessories...4 Component Guideline...5 Preparations Before Use...8 Video Modes...10 Photo Modes...13 Settings...14
LYFE SILVER USER MANUAL ENGLISH
 LYFE SILVER USER MANUAL ENGLISH Table of Contents Box Content...1 Camera Basics...3 Indicator Light Statuses...4 Getting Started Battery Installation...5 microsd Card Insertion...5 Charging the Battery...6
SLIMLINE DASH CAM Audio & Video Recorder
 SLIMLINE DASH CAM Audio & Video Recorder 1 EK142CAM INSTRUCTION MANUAL PLEASE READ ALL INSTRUCTIONS CAREFULLY AND RETAIN FOR FUTURE USE Getting Started Remove the Car Digital Video Recorder from the box.
f200 English User Manual Contents
 f200 English User Manual Contents About this Guide...3 FCC Statement...3 WEEE Notice...3 CE Regulatory Notice...4 Notes on Installation...4 Caution...4 1 Introduction...5 1.1 Features...5 1.2 Package Contents...5
USER MANUAL.
 USER MANUAL www.activeon.com Table Of Contents 1. Name of each part 2. Operation & button description 3. Start the camera 4. LCD screen shot 5. Graphical icon description 6. Video recording 7. Photo shoot
MINOX ACX 200 WiFi. Action Cam. Quick Reference Manual
 MINOX ACX 200 WiFi Action Cam Quick Reference Manual 1 Content Scope of delivery 2 Preface 3 Safety precautions 3 Components 4 LED Indicators 6 Main functions and features 7 LCD display symbols 8 Preparing
Contents Precautions Preface Product Certification Product Overview Product Structure (outline drawing)...
...") Contents Precautions... 2 Preface... 2 Product Certification... 2 Product Overview... 2 Product Structure (outline drawing)... 3 Operating Instructions... 7 Parameter Settings... 9 Operations... 11 File
Contents Precautions... 2 Preface... 2 Product Certification... 2 Product Overview... 2 Product Structure (outline drawing)... 3 Operating Instructions... 7 Parameter Settings... 9 Operations... 11 File
HD Ca mcorder. User s Manual
 HD Ca mcorder User s Manual 1 Introducing the Camcorder Read this section to learn about the features and functions of the camcorder. This chapter also covers system requirements, package contents, and
615HD Digital Video Camera
 615HD Digital Video Camera User Manual 2009-2011 Sakar International, Inc. All rights reserved. Windows and the Windows logo are registered trademarks of Microsoft Corporation. All other trademarks are
Main Functions and features...1. List of accessories...3. Component guideline...5. Front view...5 Rear view:...6 Description of indicators...
 S50 Contents Main Functions and features...1 List of accessories...3 Component guideline...5 Front view...5 Rear view:...6 Description of indicators...7 Preparations before use...8 Charging...8 Remove
Knox KN-DC20MP Instruction Manual
 Knox KN-DC20MP Instruction Manual Camera Interface, Inputs, and Outputs 1) Shutter - Press this button to take photographs or to start /stop recording a video clip, or to confirm changes in menu mode 2)
USER MANUAL
 www.activeon.com USER MANUAL Table Of Contents Names of each part 1 Operation & button description 2 Start the camera 3 LCD screen shot 4 Graphical icon description 5 Video recording 8 Photo shoot 8 Quick
DVR 528 Digital Video Camera
 DVR 528 Digital Video Camera User Manual 2010 Sakar International, Inc. All rights reserved. Windows and the Windows logo are registered trademarks of Microsoft Corporation. All other trademarks are the
D11VR. USER MANUAL DVR Camera
 D11VR USER MANUAL DVR Camera WHAT S INCLUDED D11VR WINDSHIELD BRACKET DC POWER CORD USB CABLE OWNER S MANUAL Welcome Thank you for choosing a Whistler product. We are dedicated to providing products that
DVR101 HD DASH CAM & 12MP CAMERA
 DVR101 HD DASH CAM & 12MP CAMERA GENERAL - Display: 3 HD LCD - Chipset: Novatek 96223 - Image Sensor: SC1143, 1.0M CMOS - Outputs: USB - PC Interface: USB - Power Supply: 12/24V Cig. Lead Charger - Input
HD Action Camera INSTRUCTION MANUAL WARNING: 1080p Camera & Waterproof Case. CHOKING HAZARD Small parts. Not for children under 3 years.
 6+ AGES INSTRUCTION MANUAL Waterproof Case to 30m 1920 x 1080 Last up to 70 Minutes WARNING: CHOKING HAZARD Small parts. Not for children under 3 years. HD Action Camera 1080p Camera & Waterproof Case
User s Manual BeamPod User Manual
 User s Manual BeamPod General Safety Information 1. Keep the device and packaging materials out of reach of infants and children. 2. Keep the power adapter and other contacts from water, Dry your hands
Contents. About this Guide FCC Statement WEEE Notice CE Regulatory Notice Notes on Installation Caution...
 Contents About this Guide... 4 FCC Statement... 4 WEEE Notice... 4 CE Regulatory Notice... 5 Notes on Installation... 5 Caution... 5 1 Introduction...... 6 1.1 Features... 6 1.2 Package Contents... 6 1.3
User Manual. Product Name: 360 Panoramic Camera Brand: VIVITAR Model:DVR978HD, PDV3632. Manufacture:SHUOYING DIGITAL SCIENCE&TECHNOLOGY(CHINA)Co.
Co.") User Manual Product Name: 360 Panoramic Camera Brand: VIVITAR Model:DVR978HD, PDV3632 Manufacture:SHUOYING DIGITAL SCIENCE&TECHNOLOGY(CHINA)Co.,Ltd 0 Overview Thank you for purchasing this product! PANOVIEW
User Manual Product Name: 360 Panoramic Camera Brand: VIVITAR Model:DVR978HD, PDV3632 Manufacture:SHUOYING DIGITAL SCIENCE&TECHNOLOGY(CHINA)Co.,Ltd 0 Overview Thank you for purchasing this product! PANOVIEW
ACTION CAMERA INSTRUCTION MANUAL MODEL: DV6000AF. Li-ion
 ACTION CAMERA Li-ion INSTRUCTION MANUAL MODEL: DV6000AF INTRODUCTION Congratulations on the purchase of this product. This device is perfect for capturing all those important moments in stunning 4k using
Photo Shooting Playback Upload (Audio/Video/Photo) Files to PC. 34 View Video/Photo On HDTV Wi-Fi Parameter Settings...
 Files to PC. 34 View Video/Photo On HDTV Wi-Fi Parameter Settings...") Contents Precautions...6 Preface... 7 Warranty... 8 Overview...8 Main Functions and Features... 8 List of Accessories...11 Component Guideline... 13 Description of Indicators... 14 LCD Segment Display...
Contents Precautions...6 Preface... 7 Warranty... 8 Overview...8 Main Functions and Features... 8 List of Accessories...11 Component Guideline... 13 Description of Indicators... 14 LCD Segment Display...
User Guide. Video Borescope. Models BR200 and BR250
 User Guide Video Borescope Models BR200 and BR250 Introduction Congratulations on your purchase of this Extech BR200 (17mm camera head) or BR250 (9mm camera head) Video Borescope. This instrument was designed
Manufacture:Shenzhen Roverstar Technology Co.,Ltd Dash camera/dvr D28RS
 1 USER MANUAL Introduction Dear Customer! Thank you for purchasing this NAVITEL product. NAVITEL R1000 is a multifunctional high-definition DVR with many functions and features that are described in this
Use Specification of Pixie Princess
 User Manual ----------------------------------------------------------------------------1/14----------------------------------------------------------------------------- Preface Thank you for purchasing
Contents Using the 4SK909 Twister
 Contents About this manual... 1 Notices for use... 1 Know the product... 2 Using the 4SK909 Twister... 3 Charging... 3 Inserting the TF memory card... 4 Powering ON/OFF the Dash Cam... 4 Installing in-vehicle
I. User Guide. 1. Structure. HD Lens. Speaker USB/TV port. 360 rotating clip Video/Confirm. Photo. OK/Menu. Audio. Reset. Up/Infrared HD 2 LCD.
 Body-Cam User Manual PPBCM9 Warning: 1. Be careful not to use this product in strong magnetic fields, which may cause image interference or cause product fault. 2. Be careful not to direct sunlight for
HD3000. User manual. kitvision.co.uk. 1 JB Kitvision Christchurch, Dorset. BH23 4FL. Li-PO
 User manual kitvision.co.uk A c t i o n C a m e r a HD3000 Li-PO Do not dispose of Lithium Polymer batteries with general waste. Please return it to battery recycling collection point 1 JB. 2832 Kitvision
DVR 710HDv2 Digital Video Recorder
 DVR 710HDv2 Digital Video Recorder User Manual 2009-2011 Sakar International, Inc. All rights reserved. Windows and the Windows logo are registered trademarks of Microsoft Corporation. All other trademarks
Neo Adventure Camera Manual
 Neo Adventure Camera Manual TABLE OF CONTENTS 1. Camera Care 2. Camera Accessories 3. Camera Structure 4. Camera Features 5. Two Way Remote Control 6. Overview 7. Basic Operations 8. Photo and Video Settings
DVR 514 Digital Video Recorder
 DVR 514 Digital Video Recorder User Manual 2010 Sakar International, Inc. All rights reserved. Windows and the Windows logo are registered trademarks of Microsoft Corporation. All other trademarks are
FCC Compliance Statement This device complies with Part 15 of the FCC Rules. Operation is subjected to the following two conditions: (1) this device
 this device") 1 FCC Compliance Statement This device complies with Part 15 of the FCC Rules. Operation is subjected to the following two conditions: (1) this device may not cause harmful interference, and (2) this device
1 FCC Compliance Statement This device complies with Part 15 of the FCC Rules. Operation is subjected to the following two conditions: (1) this device may not cause harmful interference, and (2) this device
quick guide follow us facebook.com/driftinnovation vimeo.com/driftinnovation instagram.com/drift_innovation twitter.com/driftinnovation
 follow us facebook.com/driftinnovation vimeo.com/driftinnovation quick guide instagram.com/drift_innovation twitter.com/driftinnovation DRIFTINNOVATION.COM contents Thank you for purchasing the Drift Stealth
CGX 1.0 Wi-Fi User Manual
 = CGX 1.0 Wi-Fi User Manual Throw it. Drop it. Submerse it. Attach it to anything. Capture everything. Record Life Congratulations on your purchase of your Cyclops Gear CGX1 Wi-Fi sports action camera.
Operation Manual Defender Car Vision 2020 HD Car DVR
 Operation Manual Defender Car Vision 2020 HD Car DVR 1 Thank you for buying Defender Car Vision 2020 HD car DVR. Before using the device read carefully this manual. mini-usb connector HDMI connector Function
PRADCO Outdoor Brands 3280 Highway 31, Ste B Calera, AL 35040
 FCC Statements S-50i Moultrie Products MCG-13183 Note: changes and modifications not expressly approved by the party responsible could void the user s authority to operate this device. Instructions for
User's Guide. Video Borescope. Models BR200 and BR250
 User's Guide Video Borescope Models BR200 and BR250 Introduction Congratulations on your purchase of this Extech BR200 (17mm camera head) or BR250 (9mm camera head) Video Borescope. This instrument was
IN-CAR HD Digital Video Recorder
 IN-CAR HD Digital Video Recorder USER MANUAL KPT-200 In order to ensure better use of each function of your Kapture In-Car HD DVR, it is recommended that you read these product instructions carefully before
UJS 4000 Action Camera Manual
 UJS 4000 Action Camera Manual Warning 1. It is a high-precision product, do not fall or crash. 2. Do not expose the unit to strong magnetic objects, such as magnet and electrical motor. Avoid strong radio
Welcome 1. Camera Precaution
 0 Table of Contents 1. Camera Precautions 4 2. Preparation... 7 Standard Accessories... 7 Parts Names... 8 Charging the Battery...... 9 Loading the SD card.. 11 Attaching the Strap.... 12 3. Quick Start.
User's Guide. Video Borescope Inspection Camera. Model BR70
 User's Guide Video Borescope Inspection Camera Model BR70 Introduction Congratulations on your purchase of this Extech BR70 Video Borescope. This instrument was designed for use as a remote inspection
Xtreme Imaging. Table of Contents:
 Xtreme Imaging Table of Contents: Preface 1 Main features...1 Computer operating system requirements.....1 Prestart Guide...3 Basic installation.3 Video mode...6 Settings 13 Photo mode......17 Settings
PRADCO Outdoor Brands 3280 Highway 31, Ste B Calera, AL 35040
 FCC Statements Moultrie Products MCG-13181 Moultrie Products MCG-13182 Instructions for M-Series Digital Game Cameras M-40 M-40i Note: changes and modifications not expressly approved by the party responsible
INSTRUCTION MANUAL. OutbackCam
 INSTRUCTION MANUAL EN OutbackCam 1 Overview Please take a moment to familiarize yourself with your new Swann OutbackCam. Front Light sensor for night detection Status light 19 Infrared LEDs Lens Passive
DVR 960HD Digital Video Recorder
 DVR 960HD Digital Video Recorder User Manual 2010 Sakar International, Inc. All rights reserved. Windows and the Windows logo are registered trademarks of Microsoft Corporation. All other trademarks are
Contents FCC COMPLIANCE STATEMENT PRECAUTIONS GETTING READY
 USER MANUAL Contents FCC COMPLIANCE STATEMENT PRECAUTIONS GETTING READY Package Contents Knowing the device BASIC OPERATIONS OF THE PROJECTOR Turning On/Off the Projector Adjusting Focus Resizing the Projection
DV 5470 User Manual Package Contents:
 DV 5470 User Manual Package Contents: Manual Camera Pouch Installation CD Earbuds AV Cable CONTENTS 1. NOTICE...2 2. SETUP...3 2.1 BATTERY INSTALLATION...3 2.2 MEMORY CARD...4 2.3 CONFIGURATION & INSTALLATION...4
User Manual V K Camera with an Integrated 3-axis Gimbal
 User Manual V 1.1 4K Camera with an Integrated 3-axis Gimbal Table of Contents Introduction 3 At a Glance 3 Charging the Battery 4 Status Battery LED Indicator Description 4 Check the Battery Level 5 Insert
User's Manual. Car DVR Prestigio Roadrunner 520 with display
 (044)361-05-06 (067)469-02-12 (099)048-99-03 (093)672-77-76 ICQ:495-089-192 ICQ:613-211-859 User's Manual Car DVR Roadrunner 520 with display In the online store you also can buy car DVR Roadrunner 520.
AK-C6A In Car Dash Camera. Instruction Manual Model Ref: MM347
 AK-C6A 20032017 In Car Dash Camera Instruction Manual Model Ref: MM347 Introduction Thank you for choosing this In Car Dash Camera. This product is manufactured to the highest standards of performance
DVR 548HD Digital Video Recorder
 DVR 548HD Digital Video Recorder User Manual 2009-2011 Sakar International, Inc. All rights reserved. Windows and the Windows logo are registered trademarks of Microsoft Corporation. All other trademarks
1, Key features. Preface. Notes
 Car DVR User Manual Preface Thank you for purchasing this DVR, this device has a unique ultra-portable design; it can be used in various fields, to bring you convenient, safe, colorful daily life. Please
DVR 426HDv3. Digital Camcorder
 DVR 426HDv3 Digital Camcorder User Manual 2009-2012 Sakar International, Inc. All rights reserved. Windows and the Windows logo are registered trademarks of Microsoft Corporation. All other trademarks
PTSGOB8W. Quick Start Guide
 PTSGOB8W Quick Start Guide Introduction Thank you for your choosing the new Tablet PC. This guide serves to enable users to get to know and familiar with our product as soon as possible. Here we have made
Operation Manual Defender Car vision 5018FullHD Car DVR
 Operation Manual Defender Car vision 5018FullHD Car DVR 1 Thank you for buying Defender Car Vision 5018FullHD car DVR. Before using the device, read attentively this manual and keep it for the whole period
Tablet PC. Android 5.1 User Manual
 Tablet PC Android 5.1 User Manual Tablet of Contents Specifications. What s inside the box Tablet Parts Getting started... How to use TF card How to connect to PC Connection to Internet.. Camera. Trouble
Body Cam Pro PFBCPRO
 Body Cam Pro PFBCPRO 1 Important: 1. To avoid a loss of data stored in the camera, we recommend transferring the data to your computer's hard drive. 2. Immediately charge the camera when the battery is
f150 Wireless Mini Camcorder User Manual
 f150 Wireless Mini Camcorder User Manual Preface About this Manual This manual is designed to demonstrate the features of your HP Wireless Mini Camcorder f150. All information presented is as accurate
Car DVR User Manual. 1, Key features. Preface. Notes
 Car DVR User Manual Preface Thank you for purchasing this DVR, this device has a unique ultra-portable design; it can be used in various fields, to bring you convenient, safe, colorful daily life. Please
3D Virtual Reality Camera
 3D Virtual Reality Camera Contents EN Name of Parts 1 Specification Parameters 3 Package Contents 4 Using the Camera 5 Operate with Remote 7 Name of Parts Introduction to camera parts Hot/Cold-Shoe Mount
I. Getting Started. 1.1 Structure
 I. Getting Started 1.1 Structure 1 8 2 9 19 14 10 11 12 13 3 4 5 6 7 16 17 18 15 1. Laser light 2. Infrared Night Vision 3. PTT 4. Video Recording 5. Power 6. Voice Recording 7. Taking Camera/White Light
2014 All Rights Reserved. Windows and the Windows logo are registered trademarks of Microsoft Corporation. All other trademarks are the property of
 2014 All Rights Reserved. Windows and the Windows logo are registered trademarks of Microsoft Corporation. All other trademarks are the property of their respective companies. 1 2 Thank you for purchasing
Item No.: 4SK108. User Manual. Thank you for choosing The Original Dash Cam. This manual offers detailed information on how to operate TODC (The
 Item No.: 4SK108 User Manual Thank you for choosing The Original Dash Cam This manual offers detailed information on how to operate TODC (The Original Dash Cam) WEE including: how to operate the device,
USER MANUAL CW14Q1P. CW14Q1P MANUAL-EN 70g 书纸,135x102mm
 CW14Q1P MANUAL-EN 70g 书纸,135x102mm USER MANUAL CW14Q1P Thank you for your choosing the new device This guide serves to enable users to get to know and familiar with our product as soon as possible. Here
Instructions for PREMISE PRO Digital Surveillance Camera
 Important Battery lnformation - Only use Alkaline or Lithium batteries. We recommend the use of Energizer batteries. - Do not mix old and new batteries. Always replace ALL the batteries at the same time.
User Guide Version 1. Primary ICT Ltd Tel: Fax:
 Please Read All Instructions Carefully Before Using User Guide Version 1 Please retain these instructions for future reference Tuff-Cam 2 contains a non-replaceable, rechargeable battery Do not attempt
Welcome 1. Precaution
 0 Table of Contents 1. Precautions. 2 2. Preparation.. 2 Standard Accessories.. 5 Parts Names.. 6 Charging the Battery Pack..... 7 3. Recording Mode 9 Loading SD card 9 Connect External Camera.. 9 Powering
Polaris G50 Dash cam incident recorder.
 Polaris G50 Dash cam incident recorder. Operation manual Quick Guide Thank you for purchasing the Polaris G50 DVR. The Polaris G50 DVR is a great product for capturing adventures and incidents both on
PREFACE. For B-PRO5 User Guide in english, please download at
 WARNING This is a hight tech product, please don t drop or hit it. Do not expose this product to any magnetized items. Avoid area that has strong radio or magnetic waves, This waves can cause damage, failure
Action-Sports Camera User Manual. Please read through the complete User Manual before using your JAKD
 Action-Sports Camera 9903 User Manual Please read through the complete User Manual before using your JAKD Action-Sports Camera, and hold onto the manual for future use. Please operate the camera on basis
USER GUIDE. R30 CAR DVR Capture your journey
 USER GUIDE R30 CAR DVR Capture your journey Languages 4 Community /kaiserbaas Register this product for 12 month warranty: www.kaiserbaas.com/register Get product updates: www.kaiserbaas.com/updates Tech
USER MANUAL QC 8020 HD Sports Camera
 USER MANUAL QC 8020 HD Sports Camera Box Contents 1x Camera 1x manual 1x Remote 1x waterproof case Also comes with 1x Surfboard mounts, 1x Handle bar/ Pole Mount, 1x Suction mount, 1x Strap, 1x Safety
Thank you for choosing the Kogan Dual Camera Car DVR with GPS!
 Thank you for choosing the Kogan Dual Camera Car DVR with GPS! Besides the general functionality of the recorder, this unit has three new features: 1. Double lens can be used to take two images at the
Important About Camera
 1 Thank you for purchasing the GoXtreme Full Dome 360. This 360 camera allows you to capture, view and share amazing full panoramic 360º videos and photos. When viewed using the companion app or desktop
Table of contents Introduction Getting Started Taking still images or videos
 User Manual Table of contents Introduction Features............................................1 Package contents.....................................2 Camera overview.....................................2
I. PRODUCT DESCRIPTION
 EP662 CAR DASH CAM INSTRUCTION MANUAL PLEASE READ THE MANUAL BEFORE YOUR FIRST USE. KEEP THIS MANUAL SAFE FOR FUTURE REFERENCE! GERMAN IS THE MENU LANGUAGE BY DEFAULT. TO FACILITATE THE SETTING FUNCTIONS,
Please review this guide fully before use. For any questions not answered in this guide, please contact WARNING Battery warning
 Please review this guide fully before use. For any questions not answered in this guide, please contact Support@Komando.com WARNING THIS DEVICE SHOULD NOT BE ADJUSTED BY THE DRIVER WHILE DRIVING. Battery
G3 Duo. Table of Contents. User Manual. GitUp Ltd. Getting Started. Camera Overview. Powering Camera On and Off. Touch Display Overview
 Table of Contents Getting Started 3 Opening the Case About Camera Case Charging the Battery Action Camera G3 Duo Inserting Removing Memory Cards Camera Overview 5 Status LEDs User Manual Slave Camera Connecting
HD Ghost Spec Sheet PROFESSIONAL ACTION CAMERAS 2012 / 2013
 HD Ghost Spec Sheet PROFESSIONAL ACTION CAMERAS 2012 / 2013 contents specifications 1 package contents 2 mode selection & settings 3 two-way remote control 4 playback & camera settings 5 new features
Hawkeye FIREFLY Micro Action CAM
 Hawkeye FIREFLY Micro Action CAM Only 14g 1080/720P 30FPS Ver 2.0 1 Contents Safety Guidelines:... 3 Features :...4 Performance and Specifications:... 5 Buttons:... 5 Record videos:... 5 Battery Charging:...5
DVR 808HD Digital Camcorder
 DVR 808HD Digital Camcorder User Manual 2009-2016 Sakar International, Inc. All rights reserved. Windows and the Windows logo are registered trademarks of Microsoft Corporation. All other trademarks are
DR-115 Portable DVR System
 DR-115 Portable DVR System User Manual The DR-115 is a compact high definition DVR system and is part of our RecordCam series of Mobile DVR systems. It is designed to be mounted to the windshield of the
DVR 508NHD Digital Camcorder
 DVR 508NHD Digital Camcorder User Manual 2009-2012 Sakar International, Inc. All rights reserved. Windows and the Windows logo are registered trademarks of Microsoft Corporation. All other trademarks are
TABLET PC. Quick Start Guide. Model: TVE100 I
 TABLET PC Quick Start Guide Model: TVE100 I Safety Precautions 1. This production is suitable for use in non-tropic areas below 2,000 meters, and the mark in the nameplate indicates the product is suitable
Preface. Product Features
 Warning 1 It is a high-precision product, do not fall or crash. 2. Do not expose the unit to strong magnetic objects, such as magnet and electrical motor. Avoid strong radio waves. Strong magnetic fields
Wireless Inspection Camera with recording LCD monitor. Product code: SRCAMV6 CAMERA NUMBER:
 User Manual Super Cam V6 SRCAMV6 Wireless Inspection Camera with recording LCD monitor. Product code: SRCAMV6 CAMERA NUMBER: Please read this user manual carefully before using this product. CONTENTS Welcome...
4K 16M K Wi-Fi 4 Fi K
 4K 16M Wi-Fi 4K 1.This is a high-precision product, please do not let it fall or strike. 2.Please do not let the camera close to the objects with strong-magnetic, such as magnet and power-driven machine.
Complete User Guide. X Limited Edition Action Camera
 1 Complete User Guide X Limited Edition Action Camera X DISCOVER: ADVENTURE Contents Share your footage with us on social media @KaiserBaas #KBdiscover To view the entire Kaiser Baas product range visit:
WATERPROOF HIGH DEFINITION VIDEO CAMCORDER
 WATERPROOF HIGH DEFINITION VIDEO CAMCORDER USER S GUIDE ENGLISH VERSION 1.0 LSC004 www.lorextechnology.com Welcome! Thank you for purchasing this Lorex Active sports camcorder. This manual covers the
PRADCO Outdoor Brands 3280 Highway 31, Ste B Calera, AL 35040
 FCC Statements Moultrie Products MCG-13036 Moultrie Products MCG-13269 Instructions for P-Series Digital Game Camera Panoramic 180i Panoramic 120i Note: changes and modifications not expressly approved
PRADCO Outdoor Brands 3280 Highway 31, Ste B Calera, AL 35040
 FCC Statements Moultrie Products MCG-13036 Moultrie Products MCG-13269 Instructions for P-Series Digital Game Camera Panoramic 180i Panoramic 120i Note: changes and modifications not expressly approved
MOBILE SAFETY DVR1543K. CLIP ON REARVIEW MIRROR KIT with 4.3-INCH LCD MONITOR FRONT & REAR CAR CAMCORDER with DUAL MOUNTING REVERSING CAMERA
 MOBILE SAFETY DVR1543K REARVIEW MIRROR CAR DRIVING RECORDER KIT CLIP ON REARVIEW MIRROR KIT with 4.3-INCH LCD MONITOR FRONT & REAR CAR CAMCORDER with DUAL MOUNTING REVERSING CAMERA 3.0 MEGA PIXEL CAMERA
Integrated Remote Commander
 3-267-590-11(1) Integrated Remote Commander Operating Instructions RM-AV2500 2004 Sony Corporation WARNING To prevent fire or shock hazard, do not expose the unit to rain or moisture. To avoid electrical
DVR-100. User Manual
 DVR-100 User Manual 1 Product structure 2 1.Power button 2.OK button 3.Mode 4.Up button 5.Down button 6.Parking monitoring button 7.Lock button 8.Len 9.Night lights 10.USB 11.AV-OUT 12.HDMI OUT 13.Mic
User Manual of Entertainment Tablet series MID
 User Manual of Entertainment Tablet series MID Thank you for purchasing MID products. This user manual introduces every function of the MID briefly, which let you have an easy control in it and enjoy its
CONTENTS I Getting to know your camera..1 II Software & Download 15 III Maintenance. 23 IV Specification and system requirement...
 CONTENTS I Getting to know your camera..1 1. Configuration & installation...1 2. Monitor screen display...2 3. Preparation before capture..2 4. Shooting 3 5. Video& Audio recording. 7 6. Audio input /output..8
Warrior G1SA. Warrior camera is a Professional, High Quality Digital Video Recorder that records in Full HD video by using a simple button operation.
 Quick Start Guide Warrior G1SA Thank you for purchasing the Full HD Warrior sports action camera. The Warrior camera can be mounted with the Bike & Helmet Kit or the Board Kit for the ultimate adventure
MIUFLY Body Camera User Guide
 MIUFLY Body Camera User Guide 1 1. Introduction Product Overview Box contents 2. Technical Specifications 3. Features TABLE OF CONTENTS 4. Main Manu Optional Detail 5. Operation 6. Troubleshooting 2 1.
DVR 985HD Digital Video Camera
 DVR 985HD Digital Video Camera User Manual 2009-2012 Sakar International, Inc. All rights reserved. Windows and the Windows logo are registered trademarks of Microsoft Corporation. All other trademarks
INSTRUCTION MANUAL DVR1 FLIP DOWN HD DVR SPECIFICATIONS
 DVR1 FLIP DOWN HD DVR SPECIFICATIONS GENERAL - Display: 2 LCD TFT - Rotates 180 - Image Sensor: 5MP, 1/3 Colour CMOS - Resolutions: HD 720p with 1080p Upscaling - Viewing Angle: 120 - Camera Adjustment: