Product Profile Basic Fuctions And Charging Remote Controller Remote Controller Profile... 9
|
|
|
- Wesley Booth
- 5 years ago
- Views:
Transcription
1
2 Content Product Profile... 3 Introduction... 3 Main Features... 3 Aircraft... 4 Aircraft Profile... 4 Aircraft Diagram... 4 Parameters... 5 Auoto-return Home... 5 Flight Data... 6 Flight Mode... 6 Propellers... 7 Battery... 7 Introduction... 8 Parameters... 8 Basic Fuctions And Charging... 8 Remote Controller... 9 Remote Controller Profile... 9 Remote Controller And Real Time FPV Using The Remote Controller Charging The Remote Controller Operating Aircraft Smart Return Home Button Camera Camera Profile Camera SD Card Interface Gimbal Gimbal Profile UPAIR APP Main Screen Connecting To A Mobile Device Camera Interface
3 Basic Setting Camera Interface Setting Flight Route Planning Follow Me Mode Calibrating The Compass Point Of Interest Smart Battery Information Precautions Fly Safe Pre-flight Checklist Flying Reminder Basic Flight Frequently Asked Question(FAQ) A Thank-you Letter
4 Product Profile This part is introduce the main features of the UPAIR 2 4k/3D Drone, the method for assembling the Aircraft and lists of components of the Aircraft and the Remote Control. Introduction The UPAIR 2 4K/3D Drone consists of the Aircraft, Remote Control, Gimbal Camera,Light stream,and a matching UPAIR APP. The flight control system is integrated within the aircraft's fuselage, and the visual positioning module/light stream and the removable gimbal are placed at the lower part of the fuselage. You can control the camera's pitch by using the UPAIR App on the mobile device, and the low-latency HD digital images transmission component is designed to transmit long-distance real-time images. Main Features The 4k/3D is equipped with a 3-axis stabilization gimbal, a 7 Bohr 110-degree micro-distortion camera, a MN34120 main image sensor, a 16-megapixel camera capable of capturing 25-frame 4k HD video, and two 3D cameras for capturing images with 3D effects. Insert a memory card with 3D images into the VR glasses to experience the stereoscopic picture. The model has applied the newly-developed flight control system, and added the new optical flow module and ultrasound module, which can make the aircraft precisely hover indoor and bring you much more flight experience. 3km Wi-Fi image transmission and 3km Remote control distance,real-time high-definition image and uplink and downlink data can be displayed on the UPAIR2 APP device. The UPAIR 2 4k/3D Drone is installed with the high-capacity lithium battery. Combined with the high efficiency power system, its maximum duration of flight can achieve 24 minutes. 3

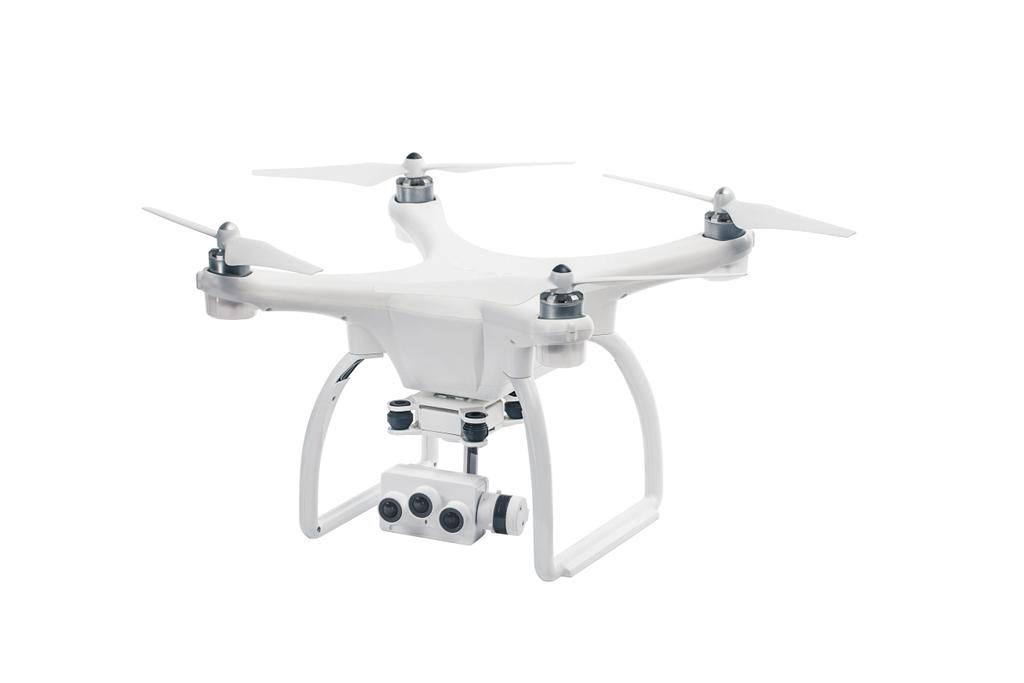
 [4]Landing Gear [5]Damping Ball [6]Gimbal [7]Camera [8]Green LED Indicator (Rear of the")
5 Aircraft This chapter will describe the composition of the aircraft,as well as features. Aircraft Profile The main components of the UPAIR 4k/3D Drone are the flight controller,the image transmission system, the positioning and navigation system, the visual positioning system, the power system, and the battery. The aircraft's main functions will be introduced in details as follows. Aircraft Diagram [1]Propellers [2]Motors [3]Red LED Indicator (head of the aircraft) [4]Landing Gear [5]Damping Ball [6]Gimbal [7]Camera [8]Green LED Indicator (Rear of the Aircraft) [9]Battery Power Button [10]Antennas(Built-in) [11]Battery Power Level Indicator [12]Image Transmission Antenna(Built in) 4
6 * Aircraft indicators: The red indicators indicate the front of the aircraft. The green indicators indicate the tail of the aircraft. Parameters Weight(including the 1350g Max. Ascending 3.5m/s Battery, Gimbal, Velocity Camera) Max. Descending 2.2m/s Max. Tilt Angle 28 Velocity Flight Time 24 Min. Max. Horizontal 8m/s Velocity Propellers 9450 Operating Temperature 0 ~ 40 Motors 2212 GPS Module GPS/GLONASS Auto Return Home(RTH) The UPAIR 4K/3D aircraft features the Auto Return Home (RTH) function.when the controller loses communication with the aircraft or the aircraft is at low power, the aircraft will automatically initiate the Auto Return Home (RTH) function and fly back to its home point with automatic landing. There are three available ways of returning: One-key RTH, Low-voltage RTH, Unsafe RTH. GPS Description Home more Before the takeoff, when the GPS signal reaches more than 11 stars for the Point than 11 first time, it will be recorded as the return point of the aircraft's current Stars voyage. * The RTH system does not support obstacles recognition, and you try the best to operate the aircraft in an open field. * There is a time difference in searching GPS signals according to user's location. The cold boot will cost 2 minutes or so, and the warm boot 30 seconds. * During an auto-flight, like auto-return, auto-landing, or follow-up mode, etc., you can activate the flight mode by using the flight mode joggle switch on the left of the remote control to avoid bad situation like crashing into barriers, or falling into a river, etc. One-Key RTH 5

7 By pushing the one-key RTH joggle switch on the controller backwards or starting it manually through the UPAIR APP to trigger the one-key return, the aircraft will go back to you. If you want to regain control during RTH, they can do so by just switching the mode. Description of RTH Mechanism: When the aircraft's current flight height is lower than 15m, it will firstly ascend to the height of 15m, and then horizontally return to the home point, and descend; When the aircraft's current height is higher than 15m, it will directly and horizontally return to the home point and descend. Smart low-battery RTH: UPAIR 2 adapts smart battery,when battery power is too low,it will return to the home point. Losing communication RTH When the GPS signal is normal, and the aircraft has automatically recorded the home point, if the radio signal (the remote control's signal) is interrupted for more than 3 seconds, the flight control system will take control over the aircraft and make it return to the home point. If the radio signal recovers during the RTH process, the aircraft will stop and hover. Then, you can take control over the aircraft again by using the remote control. Flight Data 4K/3DDrone is equipped with the Black Box, and all relevant flight data will be recorded in the SD card within the flight control system. Flight Mode Position Hold: Use the GPS module or the Optical Flow Module to drive the aircraft's precise hovering. Altitude Hold: When the GPS is invalid, or the signal is lost, the altitude hold mode can be enabled to make the aircraft fly at a fixed altitude. Headless Mode: The aircraft will record the 6

8 direction of its head when it takes off, and after it enters this mode, no matter where the head points at, the front direction is still the direction of the head when it takes off. Propellers 4K/3D aircraft use 9450 propeller,the propellers feature black or silver-colored caps, each representing a different direction of rotation. 1. Attaching the Propellers: Find the motors that have a hole, attaching the propellers with black cap onto them and rotating tightly counter- clockwise. Attach the propellers with silver cap onto motors without a hole and rotate them tightly clockwise. 2. Detaching the Propellers: Please hold the motor on one hand, then rotate the propeller in the unlock direction to loosen it. * Make sure that the black and silver propellers are installed on the right motors; otherwise, the aircraft cannot take off normally. Please manually tighten the propellers, and tighten them firmly; otherwise, an accident may happen. Since the blade is thin, be careful not to get hurt * Please use the original UPAIR propellers, the propellers must correspond to the exact aircraft model. * Propellers are easily consumed, if necessary, please purchase one additionally. * Ensure the propellers are in good shape, tightly attached before flight. Deformed or broken propellers should be replaced. * Maintain a safe distance once the motors and the propellers start spinning in order to avoid any injury. Battery [1]Charging Interface [2]Box Clip [3]Power Switch [4]Battery Level Indicator 7
9 Introduction The UPAIR2 smart battery is upgraded to a capacity of 5100mAh, a large capacity battery with a voltage of 15.2V, and has a memory function. The battery uses a new high-voltage board battery cell and uses a power core management system to provide abundant power for the aircraft. The smart battery must be charged by UPAIR official charger. Parameters Type Lithium Batter Charging Time 2.5~3 Hours Capacity 5100mAh Charging Environment Temperature Nominal Voltage 15.2 Discharging Environment Temperature 0 ~ ~ 40 Basic Features And Charging Turn on battery: When battery is off, first press the power button for once, then press and hold the power button for more than 2 seconds to turn on the battery. When the battery is turned on, the battery indicator (green) shows the current battery level. Turn off battery: When battery is on, short press the power button for once, then press and hold the power button for more than 2 seconds to close the battery. When the battery is turned off, the battery indicator is off. Check the battery level: In the battery off state, short press the battery switch once to view the current battery power. Charging The Battery: 8
10 1. The battery charger must be connected to the AC power supply ( V, 50/60Hz) first. If necessary, please use the power adapter. after that. 2. When the battery is turned off, connect the battery to the UPAIR charger. 3. The battery level indicators will show the level status as the battery is charging. 4. When fully charged, the battery level indicators will go off, remove the battery from the charger 5. The battery will become hot after flight, do not charge it immediately, wait until it cools down before charging it. 6. The optimal charging temperature range of the battery is from 0 to 40. If it is beyond the temperature range, please do not charge the battery. 7. The intelligent aircraft's battery and the remote control's battery can be charged simultaneously, but their charging times are different. Tips: * Before you attach the battery or detach it from the aircraft, please make sure the battery is turned off. Please do not attach and detach the battery when the battery is turned on. * Charge the Intelligent aircraft's battery only with the original UPAIR charger, other chargers may cause damage to the UPAIR Drone, such damage will not be covered by the UPAIR after-sale service. Remote Controller This section describes the remote controller and how to operate it. Remote Controller Profile The 4K/3D controller consist of Digital Command Transmission and Image Transmission.The digital transmission part works in the 2.4Ghz and realizes full-band random frequency hopping communication with strong anti-interference.. And integrated camera function and Gimbal operation function button, the controller and aircraft built-in 2.4G controller receiver have been successfully matched. The graphic transmission part works in the 5.8Ghz frequency band to receive image signals from the aircraft and output to the terminal display device. 9
11 Compliance version: 4K/3D controller meets FCC standards at the same time. Control mode: The controller defaults to the US hand according to the control habits (see the Manipulating the aircraft section below). Remote Controller And Real-Time FPV Battery Voltage 11.1V Controller operating frequency Image Transmission frequency Controller Antenna 2.4GHZ Controller communication distance Frequency 5.8GHZ Battery Capacity 1500mAh Image Transmission Communication Distance 2.4GHZ 5.8GHZ About 1km About 1km Using The Remote Controller 1.The Remote Control's Components: 10

12 2. Function Buttons (1) Power on/off: By pressing it, you will hear a voice prompt. Operations Power-on Operation Power-off Operation Detailed Steps Press the button once to display the remaining battery power level, and it will go off after 2 seconds; if you press it again and hold for 3 seconds before the LED indicator goes off, it will be powered on, and all LED indicators will be on. Press the button once to turn on all LED indicators. After 2s, the battery power level display will recover. If you press it again and hold for 3 seconds before the LED indicator goes off, it will be powered off, and all LED indicators will be off. (2) One-key RTH: By pressing it, you will hear a voice prompt. Operations Activate RTH Mode One-key Detailed Steps Press the One-key RTH button once and all LED indicators will be on; release it and press it again within 2s to activate One-key RTH Mode. Upon activation, all indicators will flicker, and you will hear a voice prompt. Cancel One-key RTH During the RTH process, press the RTH button again, all indicators will be off and the RTH process ends. (3) One-key Take-off: By pressing it, you will hear a voice prompt. Operations Operate One-key Take-off Mode Aircraft is during a flight Detailed Steps Press it and hold for 3s, and all indicators will be on during this process with the accelerated pace.when you hear a long voice prompt, the One-key Take-off mode will be triggered. By pressing it, you will hear the same voice prompt without triggering the one-key take-off mode. (4) Photo Button: By press it, the voice prompt will sound. Press it once to take a photo. (5) Recording: By pressing it, you will hear a voice prompt. 11
13 Operations Detailed Steps Start Press Recording once to start the recording process. End Press Recording once to stop the recording process. (6) Gimbal Pitch Control Roller: The absolution position-type potentiometer control shall be applied, and the impeller shall be rotated to adjust the Gimbal's pitch angle. (7) Contrast switching wheel: Rotary camera control with rotary encoder control (8) Flight Mode 3-Gear Switch: Adjust the switch to change the Flight Mode.Available Flight Modes include: 1. Altitude Hold 2. Position Hold 3. Headless Mode (9) Emergency Stop: 1. During the normal flight, press down three buttons (RTH Button, POWER Button, and Take-off Button) on the control panel simultaneously to trigger an Emergency Stop with corresponding voice prompts (one long sound and two short sounds). 2. Canceling the Emergency Stop: After Emergency Stop is triggered, press down Photo and Recording simultaneously to cancel Emergency Stop, and the voice prompt will disappear. Charging The Remote Controller Use only the original UPAIR charger. The charger with dual heads is available for charging the aircraft's battery and the RC battery. Charge the RC battery by connecting the RC battery with the charger in the corresponding plug. The charger can be used to charge the aircraft's battery and the Remote Controller Battery at the same time, but their charging times are different. It will take about 2.5 ~ 3 hours to fully charge the aircraft's battery, and 1.5 hours for the Remote Controller battery. If you use it to charge the aircraft's battery and the Remote Controller battery. at the same time, the charging time will be longer. Operating The Remote Controller The default factory setting follows the American standards. The present manual takes example from the American best practices of explaining how to operate an aircraft by using the controller: Remote Control(American Standard) Aircraft/Switch Altitude Hold/Position Hold/IOC Mode 12


14 Push up the stick on the left to make the aircraft ascend. Push down the stick on the left to make the aircraft descend. Push the stick on the left leftward to make the aircraft rotate counter-clockwise.push the stick on the left rightward to make the aircraft rotate clockwise. The aircraft has a maximum rotating angular velocity of 200 /s. Push up the stick on the right to make the aircraft fly forward. Push down the stick on the right to make the aircraft fly backward. Push the stick on the right leftward to make the aircraft fly leftward.push the stick on the right rightward to make the aircraft fly rightward. The aircraft has a maximum tilt angle of 30. Smart Return Home Button Press the RTH button and then hold for above 2s, the RTH indicator will flicker with the voice prompt, and activate One-key RTH Mode. Upon activated, the Aircraft will return to the nearest home point recorded. When the aircraft can only return, you cannot control the aircraft by using the remote control. However, by changing the position of three deflector rods on the left, you can gain control over the aircraft again. 1. When the aircraft's current flight height is lower than 15m, it will firstly ascend to the height of 15m, and then horizontally return to the home point and descend; 2. When the aircraft's current height is higher than 15m, it will directly and horizontally return to the home point and descend. 13
15 Camera Camera Profile The UPAIR 2 4K/3D Camera has a 1/2.3 CMOS Panasonic Image Sensor and can capture 16-megapixel images at most. Equipped with the low-distortion lens and the BLF, it can effectively promote the picture quality. The UPAIR 2 4K/3D Camera can record up to 4K,2K,2.7K videos at 30 frames per second, and 1080p HD videos at 60 frames per second,and you can set the Camera's resolution through UPAIR APP. Please refer to UPAIR APP Camera Setting Diagram for details. Camera Features: It can record up to 4K videos. Please refer to the "UPAIR APP" camera diagram for details. Camera features: It can realize high-quality picture shooting and recording of true 4K, and can also switch to 3D image shooting mode to take photos and images of specific 3D effects. Function Items Parameters Function Items Parameters 4k Video Resolution Video Resolution under 3D model 4K:3840*2160 Picture Resolution 2.7K:2704*1524 2K:1920* *1080 Picture Resolution under 3D model 16M(4640*3480); 12M(4000*3000); 8M(3264*2448) 3840*1080 Compatible Storage Micro SD Card (64G at Camera features Can switch between Card most), and C10 Card are 4K recording and 3D recommended. recording Supply Voltage USB 5V Operating Temperature -20~+80 Video Format MP4 Operating Humidity 30%~80% Picture Format JPG Storage Temperature -40~+150 Image Shooting Mode Single-picture Mode Lens 7 Bohr 110Degree Micro Distortion Main Image Sensor MN34120, 16-megapixel 1/2.3 Digital signal processor Hisilicon Camera SD Interface The UPAIR 2 4K/3D Drone supports Micro SD Card (64G at most). As the Camera is required to quickly 14

16 read and write HD video data. Please use the Micro SD Card above Class10 or UHS-1 to guarantee the normal video recording. Gimbal Gimbal Profile 4K/3D gimbal is powered by the Aircraft's Battery,as a 3-axis high-precision gimbal that provides a steady platform for the 4K/3D Camera,and during a flight you can use the gimbal dial on the controller to tilt the camera within -90 ~10 (pitch). Angle control precision of the gimbal is ±0.1,user can shoot stable videos and photos by using the Shooting Recording buttons on the remote controller. Angle control precision ±0.1 Rotational Range Pitching -90 ~10 [1]Damping Ball [2]Gimbal Motor [3]Camera *Please do not insert or pull our the SD card while the aircraft battery is still on.and please make sure the battery is open when you want to copy the data. *Please do not insert or pull out the gimbal while the battery is still on,otherwise,the gimbal or the flight controller will be damaged. UPAIR APP Main Screen This part introduces the UPAIR APP which is specially designed for UPAIR Drone Camera. You can control the 4K gimbal and camera by clicking the APP, including controlling the Picture and Video Shooting and Setting the flight parameters. In order to support the HD images transmission, you are 15

17 suggested to install the APP on a tablet device or a large-screen mobile phone in order to achieve the best visual experience. Connecting To A Mobile Device IOS System: Your mobile phone is connected with the remote control by with an USB cable. A Prompt Box will pop up in your phone, you shall click TRUST (otherwise, the connection fails) and then enter Phone Settings -> Personal Hot-spot Activate Hot-spot (Personal Hot-spot Connection on the top of your phone's screen). In this case, your mobile phone will be successfully connected with the aircraft. * Enter Camera Button in gray means the inactive status. * When your mobile phone is successfully connected with the aircraft, Enter Camera Button will turn blue, and you can click to activate the button. Android System: 1. Turn on the remote control.2. Connect your mobile phone with the remote control via the USB interface by using the USB Cable.3. Enter the Phone Settings interface and check to enable the USB Network Sharing.4. After the network sharing is successfully enabled, you can then enter the APP. Camera Interface Via the camera screen, you can set various parameters related to the camera and the viewing of 4K real-time HD videos and pictures. In the Camera interface, the full screen video will display by default, and the real-time mapping window will display on the lower left corner. By sliding the blank space on the screen upward and downward, you can enter the full screen display mode, and only the mapping can be displayed as follows: 16
18 [1] Connection status [2] H:N/A (1) When GPS is not positioned, it will display the altitude; (2) When GPS is positioned, it will display the distance from the home point. [3] D:N/A Distance from Home Distance from Mobile Phone. [4] GPS Signal Icon:shows the current strength of the GPS signal. [5] Battery Level Indicator: The battery level indicator provides a dynamic display of the battery level. [6] Press Camera Icon to shoot a photo, following the single photo shooting pattern. [7] Recording: Tap once to start recording video. [8] General Settings [9] Return Button: Press it to go back to the Home page. [10] Follow-me Mode: When the aircraft has taken off, click it, then the Follow-me Mode starts. [11] Flight Route Planning: When the current status of the aircraft is unlocked, the function can be used, refer to the detailed introduction. [12] Map Thumbnail [13] One-key RTH Mode: Click to return to the recorded home point. [14] One-key Take-off Mode: When the aircraft takes off, the Take-off Button will serve as a Landing Button. When the aircraft is flying indoors, only the unlocking function can be enabled; if it is flying outdoor, the aircraft will automatically hover at the height of 3m. (Take-off Button, Landing Button) 17
19 [15] H.S: Horizontal Velocity [16] V.S: Vertical Velocity [17] V.C: Remote Control Voltage Basic Setting Click to enter the Setting interface; Basic Settings, Camera Settings and Remote Control Settings on the left side, and detailed parameters settings on the right side. Item Default Limits Height Limit 30m m Distance Limit 30m m 18
 12M(4000 3000) 8M (3264 2448) Flight Route Planning On the Camera Screen, click Position Hold button to activate the Flight Route Planning.")
20 Camera Interface Setting Item Default Limit Video Settings 4K/30fps 4k/30fps 2.7k/30fps 2k/30fps Photo Settings 8M 16M( ) 12M( ) 8M ( ) Flight Route Planning On the Camera Screen, click Position Hold button to activate the Flight Route Planning. Enter the page, zoom in the map, the first task point is the default location of the aircraft. The sequence number is 1, task is take-off. Click any point of the map, it shows the image below: 19


21 When you make enough task points, you can click the Settings button at the bottom of the list to set the corresponding task point. In the middle of the screen, a Settings menu will show with the following items: 1. No. of task point, 2. Stay time after reaching the task point, 3. Action after reaching the task point, 4. flight altitude after reaching the task point. You can click the left/right arrow on the top of the screen to switch among different items. Please refer to the below image: Default Parameters Item Parameters Scope Default Task points time s 30s Task point expected Height m 30m Tasks 1 Departure point Hover 2 Landing point 3 Hover 4 Start Recording 5 Stop Recording 6 Shooting images Notes: 1. This function can only be entered when the aircraft is unlocked. 2. The first mission point is the current location of the aircraft, and the locked event is take-off. 20


22 3. When the map is scaled, the coordinates of the latitude and longitude of the point of the mission will not change. 4. After starting the flight route planning, the Execute button will change into a Stop button. Upon confirmation, remove all points on the map and the line, exit this function and go back to the camera screen. 5. Click real time video to get back to camera. Follow-Me Mode You can start the Follow-me function through clicking the "Follow me" button on the APP. After starting up successfully, the aircraft will fly up to 10 meters above the ground. Then, Follow the flyer and keep a certain distance for follow-up flight. Precautions: *The Follow-me function can only be activated after the aircraft takes off; *Ensure that the aircraft power is sufficient and start flying more than 3 meters above the ground; * This function only can be used after turning on the GPS is and GPS is positioned successfully; * The aircraft has no obstacle avoidance function, please pay special attention to the flight environments. Ensure that there is no obstacle around the aircraft, and be always ready to control the aircraft manually in case of emergency; * When using the Follow-me Mode, you are required to comply with local laws and regulations; * After exiting the Follow-me Mode, the aircraft will hover in place and you can continue operating the aircraft. Calibrating The Compass The compass calibration function can be enabled to calibrate the aircraft's flight stability. During the calibration process, please place the aircraft as shown below. When the arrow icon turns blue, rotate the aircraft counter-clockwise. After this direction is successfully calibrated, the APP will automatically skip to the next direction. Please repeat such operations and thoroughly complete the calibration process. 21

. Smart Battery Information C1, C2, C3, and C4 represent the battery voltage of each battery.")
23 Notes: *It is recommended to use the compass calibration as less as possible if the aircraft work properly. *When calibrating halfway, it would be better not to exit too soon.*failure in calibrating will cause drone to become locked, think twice before doing it. Point Of Interest The Upgrade of Flight Route Planning: During a flight task, the head of the aircraft will always point at the set Point of Interest. represents the point of interest. Press the icon for a while and then move to change the point of interest (prior to the execution of a task). Smart Battery Information C1, C2, C3, and C4 represent the battery voltage of each battery. Remaining Battery The remaining battery power represents the percentage of smart battery's remaining battery power, and the progress bar represents the battery's remaining battery life. 22
24 Precautions This part introduces the Flight Environment Requirements, Pre-flight Checklist and Flying Reminder. Before use, please read this manual carefully and operate the drone in accordance with the following instructions. Fly Safe 1 Fly in open area,avoid the controller being affected by base stations Subway station, High-way station, airport, high voltage line,and so on, to avoid crashing; 2 When ready to flight,please ensure that no one is within 10 meters radius of the takeoff-landing area and keep away from other unsafe factors.(such as obstacles crowds high voltage power lines trees bodies of water); 3 Do not exceed 20 minutes in continuous flight time,to avoid overheating of the motor and burning of components, resulting in crashes. Pre-flight Checklist 1. Before the flight, make sure all drone parts work properly. Do not take off the drone if the drone parts are missing or defective. 2. Mount the propellers according to the manual, make sure all propellers are firmly installed, avoid damages if the propellers falling off the drone during the flight. 3. Check if the remote-control battery and the flight-intelligent battery are fully charged, make sure the propellers, batteries, camera have been firmly installed, check if Micro-SD card or TF card has been inserted. 4. During take-off the drone, please power on the remote control, then start the aircraft. 23
25 Flying Reminder The UAV flight is restricted by many countries, before take-off, please understand and comply with the relevant laws and regulations.please make sure the drone lands smoothly. When close to the ground, ensure that the aircraft hovers, ensure the ground level, let the aircraft descend to the ground slowly. 1. Please do not operate the aircraft in restricted areas or no-fly zones under relevant laws or regulations, etc. 2. Please do not operate the aircraft when you are in poor mental state (such as intoxication). 3. Please keep the aircraft, accessories, and components out of reach of children.in case a child swallows any accessories or components, take the child to a doctor immediately. 4. If the aircraft is to be left idle for a long period, please remove the battery, place the aircraft in an environment free from dampness, moisture, mold, avoid exposing to strong sunlight, and out of electron magnetic interference.7.do not knock down, disassemble or repair the aircraft yourself. GTEN is not responsible for any damage resulting from such actions. Basic Flight 1 Choose an open space that meet flying conditions, place the aircraft on a flat surface, and face the user in the tail direction. 2 Install the blade in the correct way as described above,install smart battery. 3 Turn on the controller switch and turn on the aircraft's smart battery (note that the order is normal, reverse order, affecting signal reception). 4 Start the motor: When the aircraft is turned on, perform a high-level self-test. After the self-test is completed, the outer octagonal or inner octagonal mast can be operated to start the motor. 5 Official flight, slowly push the throttle rocker, let the aircraft take off steadily.at the end the flight, pull the left throttle stick to the lowest position and wait for the motor to turn off before releasing the rocker. 6 After turning off the motor, first turn off the aircraft power switch, then turn off the controller switch. 24
26 Frequently Asked Question (FAQ) This part offers the basic solutions of problems that may occur during the normal use of the aircraft. 1. Why does the remote control emit beeping sounds? It means the remote control is out of power, please fully charge the remote-control battery before use. 2.How long do the flight battery and the RC Battery need to be charged?normally, the charging time for the aircraft 3.Why does the FPV screen show black, while there is flying data shown on the FPV screen?make sure the flight battery is turned on. Please try to remove 4 Damping Ball of the gimbal,check if the gimbal camera and the aircraft connection plugs are loose, you can unplug them, then reconnect, and remount the gimbal. 4.Why the flying time does not meet the description? As the common rules in drones' industry field, the flight time test is under hover status. The flying time in theory would not be the same as the actual flying time.*in case of any questions or concerns, please feel free to contact us: contact@gl0dr.com; Tel.:
27 A Thank-you Letter Thank you very much for your order of the UPAIR 2 4K drone. Please follow the manual to use this product properly.this product and The Intellectual Property Right of the Manual Belong to UPAIR, without the authorization from UPAIR, no organization or individual is permitted to reprint, copy or distribute any contents of this manual in any forms.if you have any questions or problems when using this product, please contact UPAIR authorized distributors or the UPAIR customer service.* This manual might be updated.you can download the newest version at: 26
28
INSPIRE 1 Quick Start Guide V1.0
 INSPIRE Quick Start Guide V.0 The Inspire is a professional aerial filmmaking and photography platform that is ready to fly right out of the box. Featuring an onboard camera equipped with a 0mm lens and
Dragonfly Pro USER MANUAL
 New vision of the world Shenzhen Simtoo Intelligent Technology Co., Ltd. West Industry Building A5, Park Road, Bao An District, Shenzhen, China 518000 TEL: +86 755 2373 2452 Web: www.simtoo.com Email:
INSPIRE 1 Release Notes
 2017.07.10 1. All-in-One firmware version updated to v01.11.01.50. 2. Remote Controller firmware version updated to v1.7.80. 3. DJI GO app ios version updated to v3.1.13. 4. DJI GO app Android version
INSPIRE 1 Release Notes
 2016.12.15 1. All-in-One firmware version updated to v1.10.1.40. 2. DJI GO app ios version updated to v3.1.1. 3. DJI GO app Android version updated to v3.1.1. What s New: 1. Optimized Flight Restriction
DJI Inspire 1 V 2. 0 User Manual
 DJI Inspire 1 V 2. 0 User Manual Compliance Information KCC Warning Message 해당무선설비는운용중전파혼신가능성이있으므로인명안전과관련된서비스는할수없습니다. 해당무선설비는운용중전파혼신가능성이있음 In the Box Check that all of the following items have been included
PHANTOM 3. Quick Start Guide ADVANCED V1.2
 PHANTOM 3 ADVANCED Quick Start Guide V.2 Phantom 3 Advanced It s time to meet your Phantom. The Phantom 3 Advanced s camera records video at up to 080p/60fps and captures 2 megapixel photos. Review the
Inspire 2 Release Notes
 Date: 2018.04.18 Remote Controller Firmware: DJI GO 4 app: V01.02.0100 V01.01.0010 ios V 4.2.12 or above, Android V 4.2.12 or above Added support for adjusting the maximum velocity of aircraft s real-time
MAVIC PRO. Quick Start Guide V1.4
 MAVIC PRO Quick Start Guide V1.4 Aircraft The DJITM MAVICTM Pro is DJI's smallest flying camera, featuring a fully stabilized camera, Intelligent Flight Modes and Obstacle Avoidance inside a revolutionary
Epic Made Easy The Redesigned 350 QX3
 Available November 2014 350 QX3 AP Combo BLH8160 (APC) Epic Made Easy The Redesigned 350 QX3 Capturing spectacular aerial video and stills is even easier with the new Blade 350 QX3. Its simplified controls,
The mobile device holder can be tilted at different positions and angles. DO NOT force an overlarge mobile device into the mobile device holder.
 Remote Controller Profile The Phantom 3 Standard remote controller features a 2.4 GHz WiFi Video Downlink, 5.8 GHz aircraft transmission system, and a built-in battery. It is capable of transmitting signals
Inspire 2 Release Notes
 Date: 2017.12.13 Remote Controller Firmware: DJI GO 4 app: V01.01.0300 V01.01.0002 ios V 4.1.18 or above, Android V 4.1.18 or above Optimized Zenmuse X7 lens connection stability to fix an issue where
Inspire 2 Release Notes
 Date: 2018.11.16 DJI GO 4 app: v01.02.0300 v01.01.0050 ios v4.3.0 or above, Android v4.3.0 or above Fixed a rare issue where compass interference altered the orientation of the aircraft. Fixed a rare issue
Inspire 2 Release Notes
 Date: 2017.11.13 Remote Controller Firmware: DJI GO 4 app: V01.01.0200 V01.01.0002 ios V 4.1.14 or above, Android V 4.1.14 or above Added support for the Zenmuse X7 gimbal and camera. CineCore 2.1 now
7.58 lbs (3440 g, including two batteries, without gimbal and camera)
") Appendix Specifications Aircraft Weight Max Takeoff Weight GPS Hovering Accuracy Max Angular Velocity Max Tilt Angle Max Ascent Speed Max Descent Speed Max Takeoff Sea Level Max Wind Speed Resistance T650
Appendix Specifications Aircraft Weight Max Takeoff Weight GPS Hovering Accuracy Max Angular Velocity Max Tilt Angle Max Ascent Speed Max Descent Speed Max Takeoff Sea Level Max Wind Speed Resistance T650
Quick Start Guide V
 Quick Start Guide V1.5 2016.8 1. Get to Know Your DOBBY DOBBY is ZEROTECH s compact, portable, multi-axis aircraft that has been tailor-made for selfie-lovers. It comes with a high definition camera that
DJI GS PRO. User Manual V
 DJI GS PRO User Manual V1.4 2017.03 Video Tutorials Virtual Fence Mission 3D Map Area Mission Waypoint Flight Mission 2 2017 DJI All Rights Reserved. Contents Video Tutorials 2 Disclaimer 4 Warning 4 Introduction
Mi Smartphone Gimbal Manual Please read the manual carefully before using the product.
 Mi Smartphone Gimbal Manual Please read the manual carefully before using the product. 1. Product Introduction Product accessories list USB charging cable x1 Mi Smartphone Gimbal Manual Please read the
The Modern Archetype of Drones. Symmetrical facet design radiates a brilliance in the sky
 The Modern Archetype of Drones Symmetrical facet design radiates a brilliance in the sky INSTANT FLYING The Xiro Xplorer is ready to fly right out of the box. Attach the propellers, install the battery
Mavic Pro Release Notes
 Date : 2017.08.22 v01.03.1000 v4.1.7 v4.1.5 Fixed an occasional issue where DNG files couldn t be opened. Fixed an occasional issue where the camera would restart automatically during recording. Fixed
SPARK. Quick Start Guide V1.6
 SPARK Quick Start Guide V1.6 SPARK The DJI SPARK is DJI's smallest flying camera featuring a stabilized camera, Intelligent Flight Modes, and Obstacle Avoidance inside a light, portable body. Equipped
Hornet S. Remote Controller. Operation Manual. RD12
 Hornet S Remote Controller RD12 Operation Manual www.jyu.com PART DESCRIPTIONS Hornet S Communication Indicator red: disconnected green: connected remote battery capacity indicator red: low capacity green:
X-Hubsan App. The Battery. Aircraft Component Breakdown
 E N X-Hubsan App Download the X-Hubsan application for free by scanning the code on the right or by finding it on the App Store (ios) and Google Play (Android). X-Hubsan The Battery Wall Adapter Balance
ipad Navigation Map and FPV live video can be displayed with P-in-P (above) or Side-by-Side (below) layout. Custom Telemetry can be shown in either
 or Side-by-Side (below) layout. Custom Telemetry can be shown in either") Camera Overview FPV Camera brings a complete new FPV flying experience for DJI Phantom 3 Pro/Adv and Inspire 1 with innovative Navigation Map to let experienced pilots flying safer and more enjoyable.
Camera Overview FPV Camera brings a complete new FPV flying experience for DJI Phantom 3 Pro/Adv and Inspire 1 with innovative Navigation Map to let experienced pilots flying safer and more enjoyable.
5.6" Multi-function Monitor
 5.6" Multi-function Monitor User s Manual Please read this Manual carefully before use of this product, and keep it handy for future reference. I. Packing List.. 2 II. Product Appearance... 3-5 III. Product
Attach the propeller, install the battery and you enter the fascinating world of photography and aerial video.
 XPLORER V - XIRO - HD XPLORER V Platform 3-axis stabilized HD Camera 1080 Manufacturer:XIRODRONE Reference:AXR-16001 Loyalty points offered:291 Price:699.00 XPLORER V - XIRO - HD EVERYTHING YOU NEED IN
Mavic Pro Release Notes
 Date : 2017.09.19 v01.04.0000 v4.1.10 v4.1.10 Added QuickShot feature (requires DJI GO 4 app v4.1.10 or higher). Added Dynamic Home Point for ActiveTrack mode (requires DJI GO 4 app v4.1.10 or higher).
INSPIRE 1 PRO User Manual
 INSPIRE 1 PRO User Manual 2017.12 V1.4 Searching for Keywords Search for keywords such as battery and install to find a topic. If you are using Adobe Acrobat Reader to read this document, press Ctrl+F
3-Axis Stabilized Handheld Gimbal for Smartphone. Instructions. Guilin Feiyu Technology Incorporated Company. User Manual EN V1.0
 -Axis Stabilized Handheld Gimbal for Smartphone Instructions Guilin Feiyu Technology Incorporated Company User Manual EN V.0 Catalogue. SPG Overview. Quick Start Guide. Charging 5 4. Function operation
Phantom 2 Reference Guide
 Phantom 2 Reference Guide Contents Section 1: Operation and Preparing for Flight. 2 Transmitter introduction 2 Controlling the Drone 2 Turning on the Transmitter 3 Range Extender 3 Basic Drone Parts 4
User Manual V
 INSPIRE User Manual RAW V1.0 2016.03 Searching for Keywords Search for keywords such as battery and install to find a topic. If you are using Adobe Acrobat Reader to read this document, press Ctrl+F on
Technical @Makeblock D1.2.11_
 Technical support: tec-support@makeblock.com www.makeblock.com @Makeblock @Makeblock @Makeblock D1.2.11_7.40.4600 The Modular & Programmable Drone USER MANUAL Table of Contents P02 Downloading the Software
DJI MATRICE 600 PRO Release Notes
 Date : 2017.10.24 Aircraft Firmware : V 1.0.1.65 DJI GO App : ios V 3.1.18, Android V 3.1.11 DJI Assistant 2 : V 1.1.6 Aircraft Firmware: Increased flight safety. Fixed issue of output error when F channel
BEAT 2.0 USER MANUAL
 BEAT 2.0 USER MANUAL FCC ID: 2ADLJBEAT20 The device complies with part 15 of the FCC Rules. Operation is subject to the following two conditions: (1) This device may not cause harmful interference, and
3-Axis Stabilizing Gimbal For Smartphone
 3-Axis Stabilizing Gimbal For Smartphone Hohem Technology Co.,Ltd Safety instructions>> Read the operating instructions carefully and especially observe the safety information. If you do not follow the
Mavic Pro Release Notes
 Date : 2017.04.11 v01.03.0600 v4.0.7 v4.0.6 Added Fixed-Wing mode. For details about Fixed-Wing mode, please refer to the Intelligent Flight Mode section in user manual v1.6. Added an option to turn off
Aspera R7. User Manual
 1 Aspera R7 User Manual Contents Safety Information... 3 Appearance and Key Function... 5 Introduction... 6 Call Functions... 7 Notifications Bar... 8 Contacts... 9 Messaging... 9 Bluetooth and Wi-Fi...
RTK. Quick Start Guide. v1.2
 RTK Quick Start Guide v1.2 Phantom 4 RTK The PHANTOM TM 4 RTK is a smart mapping and imaging drone capable of highly accurate mapping functions. The aircraft has a built-in DJI TM Onboard D-RTK*, which
Thanks for choosing 70mai dash cam. Product overview. Power key
 Thanks for choosing 70mai dash cam Equipped with a camera chip and image sensor which allows to record high-quality videos, 70mai dash cam becomes a perfect travel companion. Read this manual carefully
DJI Phantom 3 - Standard Edition + Softshell Backpack
 DJI Phantom 3 - Standard Edition + Softshell Backpack SAVE21% Drone Capabilities Included 2.7K / 12 Megapixel Camera Integrated 3-Axis Stabilization Gimbal Easy to Fly, Intelligent Flight System Live HD
Spark Release Notes. What s New? Notes:
 Date: 2017.12.13 Aircraft Firmware: V 01.00.0800 Remote Controller Firmware: V 01.00.0400 DJI GO 4 App ios: V 4.1.22 DJI GO 4 App Android: V 4.1.22 Added support for DJI Goggles RE (with firmware v01.00.00.02
DJI MATRICE 600 Release Notes
 Date : 2018.04.17 Aircraft Firmware : V 1.0.1.66 DJI GO App : ios V 3.1.31, Android V 3.1.30 DJI Assistant 2 : V 1.1.7 Aircraft Firmware: Improved altitude measuring precision by lowering barometer drift
Specifications. Inspire 2. Aircraft (Model: T650) 7.25 lbs (3290 g, including two batteries, without gimbal and camera)
 7.25 lbs (3290 g, including two batteries, without gimbal and camera)") Specifications Inspire 2 Aircraft (Model: T650) Diagonal Distance(propeller excluded) Max Takeoff 8.82 lbs (4000 g) 7.25 lbs (3290 g, including two batteries, without gimbal and camera) 18 inch (605 mm,
Specifications Inspire 2 Aircraft (Model: T650) Diagonal Distance(propeller excluded) Max Takeoff 8.82 lbs (4000 g) 7.25 lbs (3290 g, including two batteries, without gimbal and camera) 18 inch (605 mm,
PHANTOM 4 PRO SPECS AIRCRAFT VISION SYSTEM. HomeProductsPhantom 4 ProSpecs. Weight (Battery & Propellers Included) 1388 g
 1388 g") PHANTOM 4 PRO SPECS HomeProductsPhantom 4 ProSpecs AIRCRAFT Weight (Battery & Propellers Included) Diagonal Size (Propellers Excluded) Max Ascent Speed Max Descent Speed Max Speed 1388 g 350 mm S-mode:
PHANTOM 4 PRO SPECS HomeProductsPhantom 4 ProSpecs AIRCRAFT Weight (Battery & Propellers Included) Diagonal Size (Propellers Excluded) Max Ascent Speed Max Descent Speed Max Speed 1388 g 350 mm S-mode:
3-Axis Stabilized Handheld Gimbal for Camera. Instructions. Guilin Feiyu Technology Incorporated Company
 3-Axis Stabilized Handheld Gimbal for Camera Instructions Guilin Feiyu Technology Incorporated Company User Manual E N V2.0 Catalogue 1.Product Overview 1 2.Installation 2.1Battery Charging 2.2Battery
User Manual V K Camera with an Integrated 3-axis Gimbal
 User Manual V 1.1 4K Camera with an Integrated 3-axis Gimbal Table of Contents Introduction 3 At a Glance 3 Charging the Battery 4 Status Battery LED Indicator Description 4 Check the Battery Level 5 Insert
3-Axis Stabilized Handheld Gimbal for Camera. Instructions. Guilin Feiyu Technology Incorporated Company
 3-Axis Stabilized Handheld Gimbal for Camera Instructions Guilin Feiyu Technology Incorporated Company User Manual E N V. 0 Catalogue. G6 Plus Overview 2. Quick Start Guide 3 3. Balance the Gimbal 4 Balance
Aspera R25t User Manual
 Aspera R25t User Manual 1 Contents Safety Information... 3 Product Appearance, Buttons and Key Description... 6 Battery... 7 Power on and off... 8 Unlocking the Phone... 9 File Manager... 9 Phonebook and
ACTION CAMERA INSTRUCTION MANUAL MODEL: DV6000AF. Li-ion
 ACTION CAMERA Li-ion INSTRUCTION MANUAL MODEL: DV6000AF INTRODUCTION Congratulations on the purchase of this product. This device is perfect for capturing all those important moments in stunning 4k using
1. Notes. 2. Accessories. 3. Main Functions
 Contents 1. Notes... 2 2. Accessories... 2 3. Main Functions... 2 4. Appearance And Buttons... 3 5. MID Hardware Parameters... 4 6. MID Use And Preparation... 4 7. Keys Functions... 4 8. Start-up And Shutdown...
User Manual. Product Name: 360 Panoramic Camera Brand: VIVITAR Model:DVR978HD, PDV3632. Manufacture:SHUOYING DIGITAL SCIENCE&TECHNOLOGY(CHINA)Co.
Co.") User Manual Product Name: 360 Panoramic Camera Brand: VIVITAR Model:DVR978HD, PDV3632 Manufacture:SHUOYING DIGITAL SCIENCE&TECHNOLOGY(CHINA)Co.,Ltd 0 Overview Thank you for purchasing this product! PANOVIEW
User Manual Product Name: 360 Panoramic Camera Brand: VIVITAR Model:DVR978HD, PDV3632 Manufacture:SHUOYING DIGITAL SCIENCE&TECHNOLOGY(CHINA)Co.,Ltd 0 Overview Thank you for purchasing this product! PANOVIEW
Quick Start Guide.
 Quick Start Guide www.c-me.de Specifications: Size: 130 x65x24mm folded Weight: 150g WiFi: 2.4 GHz Image Sensor: 1/2.3 CMOS Video: 1080P 30 fps* Photo: 8MP* Format: JPG/MP4 (MPEG-4 AVC/H.264) Battery:
TG VR Gimbal User Manual V Accsoon. All Rights Reserved.
 TG20 360 VR Gimbal User Manual V1.0 20161209 www.accsoon.com E-mail: salse@accsoon.com 0 Disclaimers and Warnings Congratulations on purchasing you new VR Gimbal. Please read this manual and disclaimer
FHD Driving Recorder E272S/S272W. Quick Start Guide
 FHD Driving Recorder E272S/S272W Quick Start Guide 400-8401-030 www.polaroidcarcam.com 1 Introduction 1.1 Package Contents The package contains the following items. In case there is any missing or damaged
3-Axis Stabilized Handheld Gimbal
 3-Axis Stabilized Handheld Gimbal Guilin Feiyu Technology Incorporated Company User Manual EN V1.3 1. Product Overview * The showing sports camera is not included in the package Accessories Thumb Screw
Aspera Jazz. User Manual
 Aspera Jazz User Manual 1 Contents About Aspera Jazz... 3 General Information... 3 Profile... 3 Safety Information... 3 Safety warning and Attentions... 3 Switch off in aircraft... 3 Switch off before
LYFE SILVER USER MANUAL ENGLISH
 LYFE SILVER USER MANUAL ENGLISH Table of Contents Box Content...1 Camera Basics...3 Indicator Light Statuses...4 Getting Started Battery Installation...5 microsd Card Insertion...5 Charging the Battery...6
ALL-IN-ONE DRONE SOLUTION FOR 3D MODELING
 ALL-IN-ONE DRONE SOLUTION FOR 3D MODELING Powered by PHOTO & VIDEO FULL HD 1080P - 14MPX 3-AXIS STABILIZATION AUGMENTED POWER 30MIN FLIGHT TIME 32GB INTERNAL MEMORY INCLUDES 3D MODELING SOFTWARE SAFE VIEW
PHANTOM 4 Release Notes
 2017.09.12 Overview Remote Controller Firmware: v1.9.3.0 DJI GO 4 App ios: v4.1.10 DJI GO 4 App Android: v4.1.10 What s New Added support for Head Tracking function when connected with the DJI Goggles.
OSMO. Quick Start Guide V1.0
 OSMO Quick Start Guide V1.0 Overview The Osmo is a professional handheld gimbal that combines mobility and stability in one device. Its camera shoots sharp 12MP still photos and stable video at up to 4K.
Quick Start Guide. Your SOLOSHOT3. Tag. Base & Camera. Congratulations on scoring your SOLOSHOT3!
 Quick Start Guide FOR OUTDOOR TRACKING ONLY unless used in conjunction with an Indoor Tracking Accessory. Your SOLOSHOT Congratulations on scoring your SOLOSHOT! Tag Our category-creating line of personal
1, Key features. Preface. Notes
 Car DVR User Manual Preface Thank you for purchasing this DVR, this device has a unique ultra-portable design; it can be used in various fields, to bring you convenient, safe, colorful daily life. Please
Quick Start Guide V1.0
 Quick Start Guide V1.0 Overview The OSMO TM + is a professional handheld gimbal camera that combines mobility and stability in one device. Its camera features an optical zoom lens providing 3.5x optical
User Guide. Model: ELT0702
 User Guide Model: ELT0702 Welcome! Thank you for purchasing your new Epik Learning Tab Jr. This User Guide will provide step-by-step instructions to help you learn to use your new device. After opening
DJI GS PRO. User Manual V
 DJI GS PRO User Manual V1.8 2017.08 Video Tutorials Virtual Fence Mission 3D Map Area Mission 3D Map POI Mission Waypoint Flight Mission 2 2017 DJI All Rights Reserved. Contents Video Tutorials 2 Disclaimer
User s Manual BeamPod User Manual
 User s Manual BeamPod General Safety Information 1. Keep the device and packaging materials out of reach of infants and children. 2. Keep the power adapter and other contacts from water, Dry your hands
I. User Guide. 1. Structure. HD Lens. Speaker USB/TV port. 360 rotating clip Video/Confirm. Photo. OK/Menu. Audio. Reset. Up/Infrared HD 2 LCD.
 Body-Cam User Manual PPBCM9 Warning: 1. Be careful not to use this product in strong magnetic fields, which may cause image interference or cause product fault. 2. Be careful not to direct sunlight for
DAT AL I N K 3. Quick Start Guide V1.0
 DAT AL I N K 3 Quick Start Guide V1.0 Disclaimer Congratulations on purchasing your new DJI product. The information in this document affects your safety and your legal rights and responsibilities. Read
iosd (On Screen Display)
") iosd (On Screen Display) User Manual V2.2 For iosd Firmware Version V3.3 & iosd Assistant V4.1* July, 216 * iosd Firmware V3.3 compatible with iosd Assistant V4.1. www.dji.com 216 DJI All Rights Reserved.
iosd (On Screen Display) User Manual V2.2 For iosd Firmware Version V3.3 & iosd Assistant V4.1* July, 216 * iosd Firmware V3.3 compatible with iosd Assistant V4.1. www.dji.com 216 DJI All Rights Reserved.
Contents. Packing List. VILTA Mobile. Overview. Portable Bag. Quick Start. Charging Cable. Start Up. Lanyard. Specifications.
 www.freevisiontech.com Feel free to share your photos and videos with us and we might put them on our website. User Manual Facebook.com/FreevisionVILTA Twitter.com/FreeVisionVILTA instagram.com/freevision_vilta
Android GPS Navigation HD Car Recorder. User Manual
 Android GPS Navigation HD Car Recorder User Manual Dear Customer, To Customer Thanks for buying our car camera, it is our honor and pleasure to serve you to using our product. Before using this product,
User Manual V
 User Manual V1.6 2016.10 Contents Legend... 1 Symbols... 1 Reading Suggestions... 1 Downloading the App... 1 Product Profile... 2 Introduction... 2 Features Highlights... 2 Aircraft Diagram... 3 Aircraft...
Quick Start. Mounting Pad Reset Button. Micro USB Power Port. LED Indicator. Micro SD Card Slot. Lens. Adjustable Angle. Button
 Smart Dash Cam Quick Start Mounting Pad Reset Button Micro USB Power Port LED Indicator Constant White: Normal Recording Flashing White: Emergency Recording Breathing Blue: Wi-Fi Hotspot Activated Video
Contents Using the 4SK909 Twister
 Contents About this manual... 1 Notices for use... 1 Know the product... 2 Using the 4SK909 Twister... 3 Charging... 3 Inserting the TF memory card... 4 Powering ON/OFF the Dash Cam... 4 Installing in-vehicle
P/N: FLIR Aerial Commercial Building Inspector Kit (30 Hz) Other output formats Social media
 Other output formats Social media") Page 1 of 7 Other output formats Social media Click here to refresh the page Rev. 35005 Last modified 2016-04-15 Additional supporting documents: Mechanical drawings P/N: 75604-0404 FLIR Aerial Commercial
Page 1 of 7 Other output formats Social media Click here to refresh the page Rev. 35005 Last modified 2016-04-15 Additional supporting documents: Mechanical drawings P/N: 75604-0404 FLIR Aerial Commercial
Zenmuse Z15-A7. User Manual
 Zenmuse Z15-A7 User Manual V1.0 2015.4 Warning & Disclaimer The Z15-A7 gimbal has been calibrated specifically for the designated camera and lens before it leaves the factory. Please mount only the designated
OSMO MOBILE 2. User Manual. v
 OSMO MOBILE 2 User Manual v1.0 2018.02 Searching for Keywords Search for keywords such as battery and install to find a topic. If you are using Adobe Acrobat Reader to read this document, press Ctrl+F
OSMO MOBILE. User Manual V
 OSMO MOBILE User Manual V1.2 2017.03 Searching for Keywords Search for keywords such as battery and install to find a topic. If you are using Adobe Acrobat Reader to read this document, press Ctrl+F on
OUTDOOR SECURITY CAMERA WITH LED FLOODLIGHT
 OUTDOOR SECURITY CAMERA WITH LED FLOODLIGHT Wifi Security Camera With LED Floodlight Features 20W with 1600 Lumens Indoor and Outdoor Wifi IP Camera with LED flood light Passive IR and Motion sensor Support
Lily NEXT-GEN Camera. Drone. Reinvented Owner s Manual V1.0.1
 Lily NEXT-GEN Camera. Drone. Reinvented Owner s Manual V1.0.1 For updates please visit www.lily.camera CONTENTS Legend...1 Reading Suggestions...1 Downloading the App...1 Overview...2 Introduction...2
DJI GS PRO. User Manual V
 DJI GS PRO User Manual V2.0 2017.11 Video Tutorials Virtual Fence Mission 3D Map Area Mission 3D Map POI Mission Waypoint Flight Mission 2 2017 DJI All Rights Reserved. Contents Video Tutorials 2 Disclaimer
Height Changes Your Aesthetic View
 USER MANUAL VERSION1.0 Height Changes Your Aesthetic View INTRODUCTION Support & Service Thank you for purchasing Wingsland Minivet, you hereby agree with and accept the terms of this disclaimer and is
TABLET PC. Quick Start Guide. Model: TVE100 I
 TABLET PC Quick Start Guide Model: TVE100 I Safety Precautions 1. This production is suitable for use in non-tropic areas below 2,000 meters, and the mark in the nameplate indicates the product is suitable
3-Axis Stabilized Handheld Gimbal for Smartphone
 3-Axis Stabilized Handheld Gimbal for Smartphone Guilin Feiyu Technology Incorporated Company User Manual EN V 1.1 Product overview 1. Structure Smartphone shown in illustrations is for reference only
TALK 5H USER S MANUAL
 TALK 5H USER S MANUAL 2 INTRODUCTION... 5 GETTING STARTED... 5 Important Safety Precautions... 5 Cleaning the Panel... 6 Cleaning the Phone... 6 Features... 6 Buttons overview... 7 What s int he Box...
I. PRODUCT DESCRIPTION
 EP662 CAR DASH CAM INSTRUCTION MANUAL PLEASE READ THE MANUAL BEFORE YOUR FIRST USE. KEEP THIS MANUAL SAFE FOR FUTURE REFERENCE! GERMAN IS THE MENU LANGUAGE BY DEFAULT. TO FACILITATE THE SETTING FUNCTIONS,
Preface. Product Features
 Warning 1 It is a high-precision product, do not fall or crash. 2. Do not expose the unit to strong magnetic objects, such as magnet and electrical motor. Avoid strong radio waves. Strong magnetic fields
Innovative Personal Driving Recorder DVR GPS. The DVR recorder may not record all events, incidents or accidents. It is not guaranteed.
 Innovative Personal Driving Recorder DVR GPS GPS Driving Recorder User s Manual Warranty and Responsibilities The DVR recorder may not record all events, incidents or accidents. It is not guaranteed. Any
Quick Start Guide. Panoramic Camera. 360 Pro
 360 Pro Quick Start Guide Panoramic Camera To assure the product to work in best status please read the guide carefully before operation and keep it well for future use Laptop with Touch - 360 Rotation
3-Axis Gimbal for Mirrorless and DSLR Cameras. Guilin Feiyu Technology Incorporated Company
 3-Axis Gimbal for Mirrorless and DSLR Cameras Guilin Feiyu Technology Incorporated Company User Manual EN V 2.1 1. Product Overview [5] [4] [3] [12] [7] [6] [9] [8] [2] [13] [14] [1] [15] [16] [17] [10]
Ctdigi.com. Instruction manual. Production by S & W Technology Labs
 Ctdigi.com Instruction manual Production by S & W Technology Labs I. Install app II. Guard camera Guard camera Introduction Accessory Sensor Scenario Guard 360 Introduction - Catalog - Install app Scenario
Turn your smartphone into a smart laser measurer. The only app-driven device on the market USER S MANUAL
 Turn your smartphone into a smart laser measurer The only app-driven device on the market USER S MANUAL Safety Regulations Please read these safety regulations and operation guide carefully before operating.
3-Axis Stabilized Handheld Camera
 User Manual V.0 Publish in May 206 3-Axis Stabilized Handheld Camera GuiLin FeiYu Technology Incorporated Company CONTENTS I Product Overview II EN 2. Function introduction of buttons and ports 2 2. Camera
X-CAM A10-3H 3 Axis Gimbal for GOPRO. User Manual ( V2.00 )
") X-CAM A10-3H 3 Axis Gimbal for GOPRO User Manual ( V2.00 ) The X-CAM A10-3H 3 Axis Gimbal has been setup and calibrated for use with GOPRO cameras, it is ready to use straight from the box. Specifications:
X-CAM A10-3H 3 Axis Gimbal for GOPRO User Manual ( V2.00 ) The X-CAM A10-3H 3 Axis Gimbal has been setup and calibrated for use with GOPRO cameras, it is ready to use straight from the box. Specifications:
MOBILE SAFETY DVR1543K. CLIP ON REARVIEW MIRROR KIT with 4.3-INCH LCD MONITOR FRONT & REAR CAR CAMCORDER with DUAL MOUNTING REVERSING CAMERA
 MOBILE SAFETY DVR1543K REARVIEW MIRROR CAR DRIVING RECORDER KIT CLIP ON REARVIEW MIRROR KIT with 4.3-INCH LCD MONITOR FRONT & REAR CAR CAMCORDER with DUAL MOUNTING REVERSING CAMERA 3.0 MEGA PIXEL CAMERA
CAR BLACK BOX. Beyond Security. User Manual
 CAR BLACK BOX Beyond Security User Manual Camera can be rotated 180 degrees only to the direction of driver's seat. This user manual can be modified for the function enhancement of product without prior
Datalink 3 User Manual
 Datalink 3 User Manual 2017.07 V1.0 Searching for Keywords Search for keywords such as battery and install to find a topic. If you are using Adobe Acrobat Reader to read this document, press Ctrl+F on
USER GUIDE. R30 CAR DVR Capture your journey
 USER GUIDE R30 CAR DVR Capture your journey Languages 4 Community /kaiserbaas Register this product for 12 month warranty: www.kaiserbaas.com/register Get product updates: www.kaiserbaas.com/updates Tech
USER MANUAL PRUVEEO All Rights Reserved.
 PRUVEEO USER MANUAL 1 Warm Prompt We recommend that you carefully read this manual before using the dash cam, then read it again with the dash cam in your hands as this will help you to familiarize yourself
NANOMIND 110 USER MANUAL
 NANOMIND 110 USER MANUAL Highlights - MindRacer in nano size frame, running MindPX & PX4 flight stack - heavy lifter, maximum take-off weight up to 80 g - 5~7 minutes flight time - full modularized, stackable,
RONIN 2 Diagram. 1. Grip 2. Gimbal Connector 3. HD-SDI Output 4. Power Button V Accessory Power Port
 RONIN 2 Diagram 1. Grip 2. Gimbal Connector 3. HD-SDI Output 4. Power Button 5. 14.4V Accessory Power Port 6. Pan Motor 7. Camera Upper Mounting Plate 8. GPS 9. HD-SDI Input 10. Focus Mounting Plate 11.