Federal Communication Commission Interference Statement
|
|
|
- Lilian McCarthy
- 5 years ago
- Views:
Transcription
1
2 Copyright Copyright 2016 by PLANET Technology Corp. All rights reserved. No part of this publication may be reproduced, transmitted, transcribed, stored in a retrieval system, or translated into any language or computer language, in any form or by any means, electronic, mechanical, magnetic, optical, chemical, manual or otherwise, without the prior written permission of PLANET. PLANET makes no representations or warranties, either expressed or implied, with respect to the contents hereof and specifically disclaims any warranties, merchantability or fitness for any particular purpose. Any software described in this manual is sold or licensed "as is". Should the programs prove defective following their purchase, the buyer (and not this company, its distributor, or its dealer) assumes the entire cost of all necessary servicing, repair, and any incidental or consequential damages resulting from any defect in the software. Further, this company reserves the right to revise this publication and to make changes from time to time in the contents hereof without obligation to notify any person of such revision or changes. All brand and product names mentioned in this manual are trademarks and/or registered trademarks of their respective holders. Federal Communication Commission Interference Statement This equipment has been tested and found to comply with the limits for a Class B digital device, pursuant to Part 15 of FCC Rules. These limits are designed to provide reasonable protection against harmful interference in a residential installation. This equipment generates, uses, and can radiate radio frequency energy and, if not installed and used in accordance with the instructions, may cause harmful interference to radio communications. However, there is no guarantee that interference will not occur in a particular installation. If this equipment does cause harmful interference to radio or television reception, which can be determined by turning the equipment off and on, the user is encouraged to try to correct the interference by one or more of the following measures: Reorient or relocate the receiving antenna. Increase the separation between the equipment and receiver. 3. Plug the equipment into an outlet on a circuit different from that to which the receiver is connected. 4. Consult the dealer or an experienced radio technician for help. FCC Caution: To assure continued compliance, for example, use only shielded interface cables when connecting to computer or peripheral devices. Any changes or modifications not expressly approved by the party responsible for compliance could void the user s authority to operate the equipment. This device complies with Part 15 of the FCC Rules. Operation is subject to the following two conditions: (1) This device may not cause harmful interference. (2) This device must accept any interference received, including interference that may cause undesired operation. II
3 Federal Communication Commission (FCC) Radiation Exposure Statement This equipment complies with FCC radiation exposure set forth for an uncontrolled environment. In order to avoid the possibility of exceeding the FCC radio frequency exposure limits, human proximity to the antenna shall not be less than 20 cm (8 inches) during normal operation. R&TTE Compliance Statement This equipment complies with all the requirements of DIRECTIVE 1999/5/CE OF THE EUROPEAN PARLIAMENT AND THE COUNCIL OF 9 March 1999 on radio equipment and telecommunication terminal equipment and the mutual recognition of their conformity (R&TTE). The R&TTE Directive repeals and replaces in the directive 98/13/EEC (Telecommunications Terminal Equipment and Satellite Earth Station Equipment) as of April 8, Safety This equipment is designed with the utmost care for the safety of those who install and use it. However, special attention must be paid to the dangers of electric shock and static electricity when working with electrical equipment. All guidelines of this and of the computer manufacture must therefore be allowed at all times to ensure the safe use of the equipment. National Restrictions This device is intended for home and office use in all EU countries (and other countries following the EU directive 1999/5/EC) without any limitation except for the countries mentioned below: Country Restriction Reason/Remarks Bulgaria None Outdoor use limited to 10 France mw e.i.r.p. within the band MHz Italy None Luxembourg None Norway Implemented Russian Federation None Only for indoor applications General authorization required for outdoor use and public service. Military Radio location use. Refarming of the 2.4 GHz band has been ongoing in recent years to allow the current relaxed regulation. Full implementation was planned in If used outside of own premises, general authorization is required. General authorization is required for network and service supply (not for spectrum). This subsection does not apply for the geographical area within a radius of 20 km from the centre of Ny-Ålesund. WEEE Regulations To avoid the potential effects on the environment and human health as a result of the presence of hazardous substances in electrical and electronic equipment, end users of electrical and electronic equipment should understand the meaning of the crossed-out wheeled bin symbol. Do not dispose of WEEE as unsorted municipal waste; WEEE should be collected separately. III
4 The antenna(s) used for this transmitter must not be co-located or operating in conjunction with any other antenna or transmitter. For operation within 5.15~5.25GHz frequency range, it is restricted to indoor environment. Revision User s Manual of 1200Mbps ac Dual Band Wall Plug Wi-Fi Range Extender Model: WRE-1200 Rev: 1.0 (January, 2016) Part No. EM-WRE-1200 IV
5 CONTENTS Chapter 1. Product Introduction Package Contents Product Description Product Features Product Specifications...7 Chapter 2. Hardware Introduction Product Outlook Front Panel and LED Status Bottom and DIP Switch description...12 Chapter 3. Operation Mode Introduction Repeater Mode AP Mode Client Mode...16 Chapter 4. Hardware Installation Before Getting Started Operation Range System Requirements Configuring the Network Properties...20 Chapter 5. Repeater Mode Repeater Mode Configuration Method A - Press the WPS Push button for automatic Connection Method B - Manual Connection by Web Browser Repeater Mode Advanced Settings Setting Up Repeater Manually...31 Chapter 6. AP Mode Information System Information Wireless Clients Log Networking Settings LAN-side IP Address Wireless Settings GHz 11bgn Basic Settings Advanced Security...44 V
6 GHz 11ac 11an Basic Settings Advanced Security WPS RADIUS Settings MAC Filter Management Admin Date and Time Advanced LED Settings Updating Firmware Saving/Restoring Settings Factory Default Reboot...62 Chapter 7. Client Mode Client Mode Configuration Client Mode Advanced Settings Scanning Wireless Signal...64 Appendix A: Planet Smart Discovery Utility VI
7 Figures FIGURE 2-1 WRE-1200 WITH EU TYPE POWER PLUG...10 FIGURE 2-2 WRE-1200 PANEL LAYOUT FIGURE 2-3 WRE-1200 RJ45 LAN PORT AND DIP SWITCH...12 FIGURE 3-1 WRE-1200 REPEATER MODE...14 FIGURE 3-2 WRE-1200 AP MODE...15 FIGURE 3-3 WRE-1200 CLIENT MODE...16 FIGURE 4-1 SELECTING LOCAL AREA CONNECTION...20 FIGURE 4-2 NETWORK CONNECTION PROPERTIES...20 FIGURE 4-3 TCP/IP SETTING...21 FIGURE 4-4 OBTAIN AN IP ADDRESS AUTOMATICALLY...21 FIGURE 4-5 SUCCESSFUL RESULT OF PING COMMAND...22 FIGURE 4-6 FAILED RESULT OF PING COMMAND...22 FIGURE 5-1 WRE-1200 DEFAULT MODE...24 FIGURE 5-2 ONE-TOUCH WI-FI RANGE EXTENSION...24 FIGURE 5-3 SSID OF WRE FIGURE 5-4 LOGIN BY DEFAULT IP ADDRESS...26 FIGURE 5-5 LOGIN WINDOW...27 FIGURE 5-6 QUICK SETUP WEB PAGE...28 FIGURE 5-7 SCAN THE WIRELESS SIGNAL...28 FIGURE 5-8 SELECTING SSID...29 FIGURE 5-9 ENTERING PRE-SHARED KEY...29 FIGURE 5-10 CONNECTION SUCCESSFUL...30 FIGURE 5-11 SAVING SETTINGS...30 FIGURE 5-12 AP CONNECTED...30 FIGURE 5-13 QUICK SETUP SETUP REPEATER MANUALLY...31 FIGURE 5-14 ENTERING THE SETTINGS MANUALLY...31 FIGURE 5-15 CONNECTION SUCCESSFUL...32 FIGURE 5-16 SAVING SETTINGS...32 FIGURE 5-17 AP CONNECTED...33 FIGURE 6-1 AP MODE...35 FIGURE 6-2 INFORMATION -- WIRELESS CLIENTS...37 FIGURE 6-3 INFORMATION -- LOG...38 FIGURE 6-4 NETWORK SETTINGS -- LAN-SIDE IP ADDRESS...39 FIGURE GHZ WIRELESS SETTINGS...41 FIGURE GHZ WIRELESS SETTINGS -- ADVANCED...43 FIGURE GHZ WIRELESS SETTINGS -- SECURITY...44 FIGURE GHZ WIRELESS SETTINGS -- WEP...45 FIGURE GHZ WIRELESS SETTINGS -- WPA-PSK...46 FIGURE GHZ WIRELESS SETTINGS...47 FIGURE GHZ WIRELESS SETTINGS -- ADVANCED...48 FIGURE GHZ WIRELESS SETTINGS -- SECURITY...50 FIGURE GHZ WIRELESS SETTINGS -- WEP...51 FIGURE GHZ WIRELESS SETTINGS - WPA-PSK...52 VII
8 FIGURE 6-15 WPS...53 FIGURE 6-16 RADIUS SETTINGS...54 FIGURE 6-17 MAC FILTER...55 FIGURE 6-18 ADMIN...57 FIGURE 6-19 TIME AND DATE...58 FIGURE 6-20 LED SETTINGS...59 FIGURE 6-21 UPDATING FIRMWARE...60 FIGURE 6-22 SAVING/RESTORING SETTINGS...61 FIGURE 6-23 FACTORY DEFAULT...62 FIGURE 6-24 REBOOT...62 FIGURE 7-1 QUICK SETUP...64 FIGURE 7-2 SELECTING SSID...65 FIGURE 7-3 ENTERING PRE-SHARED KEY...65 FIGURE 7-4 SAVING SETTINGS...65 FIGURE 7-5 AP CONNECTED...66 VIII


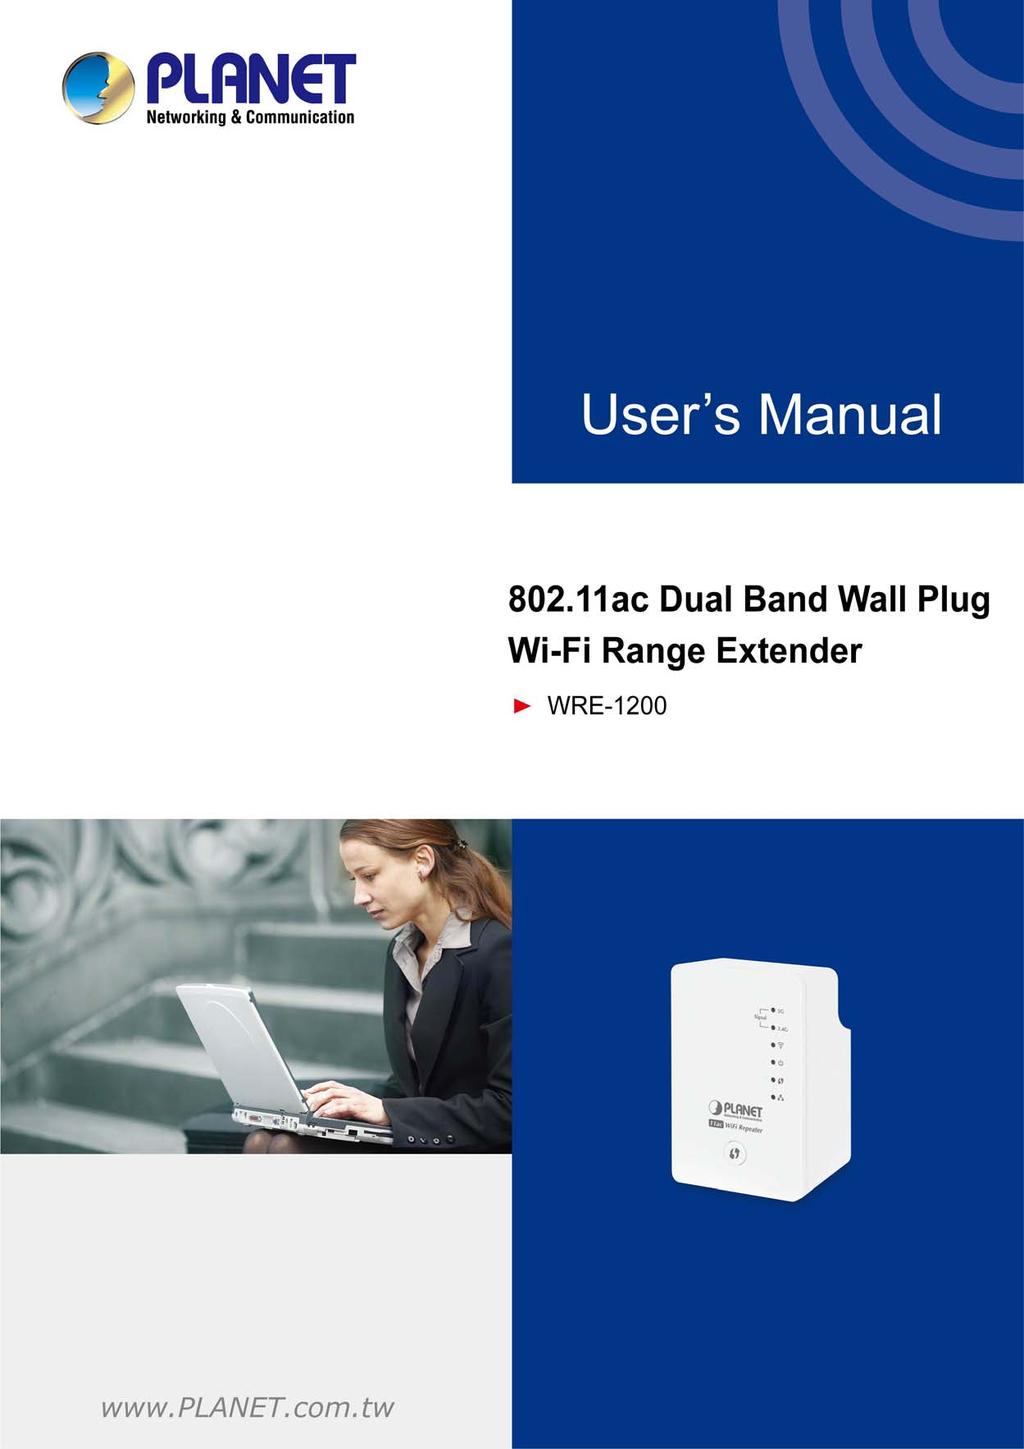
9 Chapter 1. Product Introduction 1.1 Package Contents Thank you for choosing PLANET WRE Before installing the AP, please verify the contents inside the package box. WRE-1200 Quick Guide If there is any item missing or damaged, please contact the seller immediately. 1


10 1.2 Product Description Concurrent Dual Band and 11AC Wireless Range Extension PLANET WRE-1200, an 11ac Dual-band Wi-Fi Range Extender with universal wall plug design, is case-shaped, thus making it easy to install and connect to your router wirelessly. The WRE-1200 supports Gigabit Ethernet connectivity and conforms to IEEE a/b/g/n/ac dual band standard technology; therefore, it can provide a wireless speed of up to Mbps which is 16x faster than the 11a access point at 5GHz frequency and 5.5x faster than the 11g access point at 2.4GHz frequency. With the concurrent dual-band Wi-Fi transmission capability, the WRE-1200 is more flexible than the traditional repeater that only utilizes single band for range extension in that it can quickly and easily extend high-speed 11ac 5GHz and 11n 2.4GHz wireless networks simultaneously. Eliminating Dead Zones and Doubling Wi-Fi Coverage With the WRE-1200, Wi-Fi coverage can be doubled to the point where dead zones can be eliminated. Plug the WRE-1200 directly into an electrical outlet and double the signal coverage of your Wi-Fi network for better Wi-Fi quality across different rooms or multiple floors in your home. 2

11 More Flexibility and Mobility The WRE-1200 can operate in various applications with the hardware mode DIP switch including AP, Repeater or Client, which helps to immediately set up a wireless network without software configuration. With various operation modes, it can be quickly deployed in any place without good wireless signal. Furthermore, it can extend the existing wireless network coverage by utilizing the dual frequency bands, which not only strengthen the Wi-Fi signal but also increase the efficiency of 11ac high speed at farther distance, thus providing better actual user experience. One-touch Secure Wi-Fi Extension In order to simplify security settings for home and SOHO network, the WRE-1200 supports Wi-Fi Protected Setup (WPS). Just push the WPS button and the secure connection between the WRE-1200 and the existing wireless router can be built immediately, offering users a convenient and fast method to construct a secure wireless network. Easy to Set Up with Compact Wall-Plug Design Designed in the shape of a wall plug, the WRE-1200 is easily plugged into a wall outlet for wireless access in any place. With its brick-sized, integral male plug (Type of power pin required), the WRE-1200 takes the modern form factor that makes it easy to blend into any interior design. 3

12 Smart Signal-Strength Indicator By observing the smart signal indicator, user can check the current signal strength and optimize the wireless performance with the WRE-1200, thus making your home entertainment devices wirelessly operational with ease. Wireless Range Extender for Homes The WRE-1200 is the characterization of wall-plug design and advanced 2T2R MIMO technology which reduces the effect of dead spot, so that it can get better coverage of the existing wireless network. The Repeater modes supported by the WRE-1200 help to minimize the effort of installation and cabling cost. 4


13 5 User Manual of WRE-1200
14 1.3 Product Features IEEE Compliant Wireless LAN & Wired LAN Compliant with IEEE a/b/g/n/ac dual-band (2.4G & 5G) wireless technology capable of having a data rate of up to Mbps Equipped with 10/100/1000Mbps RJ45 port for LAN, auto MDI/MDI-X supported Wireless Network Range Extender Multiple Wireless Modes: AP, Client and Universal Repeater Supports concurrent dual band range extension Supports WMM (Wi-Fi Multimedia), wireless QoS Supports wireless roaming that enables clients seamlessly handover between APs. Secure Network Connection Supports Wi-Fi Protected Setup (WPS) Advanced security: 64-/128-bit WEP, WPA/WPA2 and WPA-PSK/WPA2-PSK (TKIP/AES encryption) Supports MAC address filtering Easy Installation & Management Web-based UI and Quick Setup Wizard for easy configuration System status monitoring includes DHCP Client and System Log Flexible Usage & Compact Design Portable and wall-plug design Hardware switchable operation modes: AP, Repeater, Client Easy sync by one-touch Wi-Fi Protected Setup (WPS) 6
15 1.4 Product Specifications Product WRE Mbps ac Dual Band Wall Plug Wi-Fi Range Extender Hardware Specifications Interface LAN/WAN: 1 x 10/100/1000 Mbps auto MDI/MDI-X RJ45 port Antenna Gain: 2.4GHz: 2 x 2dBi internal antenna 5GHz: 2 x 4dBi internal antenna Mode Selection Switch (AP/Repeater/Client) Button/Switch WPS/Reset Button *Press for about 3~10 seconds for WPS settings and over 30 seconds to reset to factory default settings LED Indicators PWR, LAN, WPS, Wi-Fi signal, WLAN Material Plastic Dimensions(WxDxH) 59 x 40 x 91mm (power plug is excluded) Weight 116g Power Requirements Input power: V AC, 50/60Hz Wireless Interface Specifications IEEE ac (Draft 2.0) 5GHz Standard IEEE a/n 5GHz IEEE b/g/n 2.4GHz Frequency Band Simultaneous 2.4 GHz and 5 GHz b: DSSS (DBPSK/DQPSK/CCK) Data Modulation a/g/n: OFDM (BPSK/QPSK/16QAM/64QAM) ac: OFDM (BPSK/QPSK/16QAM/64QAM/256QAM) a: 6/9/12/24/36/48/54Mbps b: 1/2/5.5/11Mbps Data Rates g: 6/9/12/24/36/48/54Mbps n (20MHz): MCS0-15, up to 144Mbps n (40MHz): MCS0-15, up to 300Mbps ac (80MHz): Nss2-MCS9, up to 867Mbps Frequency Range 2.4GHz: 5GHz: 2.4GHz: America -- FCC: 2.412~2.462GHz Europe -- ETSI: 2.412~2.484GHz America -- FCC: 5.180~5.240GHz, 5.725~5.850GHz Europe -- ETSI: 5.180~5.240GHz America -- FCC: 1~11 Europe -- ETSI: 1~13 America -- FCC: Operating Channels 5GHz: 36, 40, 44, 48, 149, 153, 157, 161, 165 Europe -- ETSI: 36, 40, 44, 48 5GHz channel list will vary in different countries according to their regulations. 7
16 Channel Width RF Power/EIRP Receive Sensitivity n: 20/ 40MHz ac: 20/ 40/ 80MHz 2.4GHz: 5GHz: 11b: 17±1.5dBm 11a: 14±1.5dBm 11g: 15±1.5dBm 11n: 14±1.5dBm 11n: 14±1.5dBm 11ac: 12±1.5dBm 2.4GHz 5GHz 11b (11Mbps): -86±2dBm 11a: -73±2dBm 11g (54Mbps): -72±2dBm 11n (20M) mode: -71±2dBm 11n (20M) mode: -71±2dBm 11n (40M) mode: -68±2dBm 11n (40M) mode: -69±2dBm 11ac(80M) mode: -58±2dBm Software Features Wireless Modes Encryption Security Wireless Security Max. Supported Clients LAN System Management IEEE Standards Other Protocols and Standards OS Compatibility AP Client Universal Repeater WEP (64-/128-bit) WPA/WPA2 WPA-PSK/WPA2-PSK encryption Wireless MAC address filtering Support WPS (WI-FI Protected Setup ) 2.4GHz Wireless: 32 5GHz Wireless: 32 Built-in DHCP server supporting static IP address distribution Web-based (HTTP) management interface System Log IEEE ac IEEE n IEEE a IEEE g IEEE b IEEE i IEEE BASE-T IEEE 802.3u 100BASE-TX IEEE 802.3ab 1000BASE-T CSMA/CA, CSMA/CD, TCP/IP, DHCP, ICMP, SNTP Windows 10 Windows 8 Windows 7 Windows Vista Windows XP Mac OS X 10.4 and higher 8
17 Standards Conformance Temperature Humidity Regulatory Operating: 0 ~ 40 degrees C Storage: -20 ~ 60 degrees C Operating: 10 ~ 90% (non-condensing) Storage: 5 ~ 95% (non-condensing) FCC, CE, RoHS, WEEE 9
18 Chapter 2. Hardware Introduction Please follow the instructions below to connect the WRE-1200 to the existing network devices and your computers. 2.1 Product Outlook Dimensions: (W x H x D) 59 x 91 x 40 mm Weight: 116g Drawing: Figure 2-1 WRE-1200 with EU type power plug 10

 Signal Status (5G) Quick Blinking Poor signal reception ( <25%) Off Out of signal or disconnected. Steady ON Good signal reception (100%~50%).")
19 2.2 Front Panel and LED Status There are 6 LED indicators on the front panel. By observing their status, you can check whether the device runs normally. Figure 2-2 shows the hardware interface of the WRE LED description Figure 2-2 WRE-1200 Panel Layout LED definition The following table describes the status of LED indicators on the front panel. LED LED Status Description Steady ON Good signal reception (100%~50%). Slow Blinking Normal signal reception (50%~25%) Signal Status (5G) Quick Blinking Poor signal reception ( <25%) Off Out of signal or disconnected. Steady ON Good signal reception (100%~50%). Slow Blinking Normal signal reception (50%~25%) Signal Status (2.4G) Quick Blinking Poor signal reception ( <25%) Off Out of signal or disconnected. Blinking Connect to wireless Router or AP, wireless function is active. WLAN Off Wireless network is switched off. 11
 is in progress of waiting another WPS WPS device s connection, blinking for 2 minutes. Quick blinking WPS error. Off No WPS is in progress.")
20 Steady ON Power is turned on. Power Slow Blinking Ready for Reset to factory default ; power LED is blinking. Off Power is turned off. Blinking WPS (Wi-Fi Protected Setup) is in progress of waiting another WPS WPS device s connection, blinking for 2 minutes. Quick blinking WPS error. Off No WPS is in progress. Steady ON LAN port is connected. Blinking LAN port is active. LAN Off LAN port is not connected. WPS Button Press 3 to 10 seconds to trigger WPS. Press 20 to 30 seconds to disable all LEDs. Press over 30 seconds to reset to factory default. 2.3 Bottom and DIP Switch description The following graphic describes interfaces and DIP switch on the bottom panel. Figure 2-3 WRE-1200 RJ45 LAN Port and DIP switch 12

21 Chapter 3. Operation Mode Introduction The WRE-1200 can operate in various applications with the hardware mode DIP switch including AP, Repeater or Client, which helps to immediately set up a wireless network without software configuration. With various operation modes, it can be quickly deployed in any place without good wireless signal. 13


22 3.1 Repeater Mode In the repeater mode, the WRE-1200 can extend your wireless signal and coverage, and help you to solve wireless dead zone problem. Operation Mode Switch - Repeater Mode Typical Application For the first-time setup and easy installation, you can move this device close to the Wireless Broadband Router or Access Point you wish to connect to. After the installation is done and wireless connection is built, you can move this repeater device to the place you wish to use. Figure 3-1 WRE-1200 Repeater Mode 14
 function and DHCP server are both disabled, and all wireless clients obtain the IP address from")
23 3.2 AP Mode In the AP (Access Point) mode, the WRE-1200 works as a wireless router to achieve wireless connection for the wired LAN. Operation Mode Switch AP Mode Typical Application In the AP mode, the NAT (Network Address Translation) function and DHCP server are both disabled, and all wireless clients obtain the IP address from the network device connected with LAN port of the WRE They can certainly assign the IP address to themselves as well in the Control Panel of Windows. The WRE-1200 is supposed to bridge to the Ethernet directly via UTP cable. Figure 3-2 WRE-1200 AP Mode 15

24 3.3 Client Mode In the client mode, the WRE-1200 provides Internet access for a set-top box or a computer with a network adapter. Operation Mode Switch Client Mode Typical Application In the client mode, the WRE-1200 can let your networking device have wireless capability; it will become your networking device s wireless network card. You can connect this device to Ethernet port of your existing internet TV or DVD player or game console device via Ethernet cable. Figure 3-3 WRE-1200 Client Mode 16


25 Chapter 4. Hardware Installation This chapter will show you how to install your Range Extender within minutes. 4.1 Before Getting Started Find an optimal power outlet between your existing wireless router and your wireless dead zone. You may utilize the smartphone or tablet to detect the Wi-Fi signal strength. For the first-time setup, you can move the WRE-1200 closer to the access point you wish to connect to. After the connection is established, you can move the WRE-1200 to the place you wish to use. 17

 4.")
26 After this installation is done and wireless connection is built, WRE-1200's "Signal" LED will be enabled. You can check signal LED on the device to understand signal reception level. Steady light: Excellent Flash: Good Fast flash: poor Off: out of signal You can use this signal LED to find the best location of repeater(for example: a better place may be the center of your access point and the farthest client PC) 4.2 Operation Range The operation range of the wireless repeater depends on the actual environment. The path and effect of signal transmission vary with the deployment in a house or an office. 18
27 4.3 System Requirements Before installing the device, please ensure that the following items are ready. Operation mode Repeater mode (WPS) Repeater mode (Manual setting) AP mode Client mode System requirement Wireless Connection Wired Connection One wireless router with WPS N/A button One wireless router One wireless router PC or Laptop running Windows XP, PC or Laptop running Windows XP, Vista, Windows 7/8/10, MAC OS Vista, Windows 7/8/10, MAC OS X, Linux, Fedora, Ubuntu with X, Linux, Fedora, Ubuntu with Web browser installed Web browser installed The above PC or Laptop is The above PC or Laptop is installed with Wireless network installed with Ethernet NIC card which is compatible with (Network Interface Card) a/b/g/n and ac One Ethernet RJ45 UTP cable wireless network standard (10BASE-TX/1000BASE-T) 19


28 4.4 Configuring the Network Properties Configuring PC in Windows 7 and Windows Go to Start, Control Panel, Network and Internet, and Network and Sharing Center. Click Change adapter settings on the left banner. 2. Double-click Local Area Connection. Figure 4-1 Selecting Local Area Connection 3. In the Local Area Connection Status window, click Properties. Figure 4-2 Network Connection Properties 4. Select Internet Protocol Version 4 (TCP/IPv4) and click Properties. 20


29 Figure 4-3 TCP/IP Setting 5. Select the Obtain an IP address automatically and the Obtain DNS server address automatically button. 6. Click OK to finish the configuration. Figure 4-4 Obtain an IP address automatically 21

30 If the result displayed is similar to Figure 4-9, it means the connection between your PC and the AP has been established well. Figure 4-5 Successful Result of Ping Command If the result displayed is similar to Figure 4-10, it means the connection between your PC and the AP has failed. Figure 4-6 Failed Result of Ping Command If the address is , check your adapter installation, security settings, and the settings on your Range Extender. Some firewall software programs may block a DHCP request on newly installed adapters. 22
, follow the Method A - Press the WPS Push Button to connect to the WRE-1200.")
31 Chapter 5. Repeater Mode This chapter will show you how to quickly install this device by using quick setup and show you each detailed setting on the web UI page under repeater mode. 5.1 Repeater Mode Configuration There are two ways you can quickly setup the Wi-Fi Range Extender Using the WPS button Using web browser. If your existing wireless router supports WPS(Wi-Fi Protected Setup), follow the Method A - Press the WPS Push Button to connect to the WRE If your existing wireless router does not support WPS, follow the Method B - Manual Connection by Web browser to connect to the WRE-1200 and run the Setup Wizard. 23

32 5.1.1 Method A - Press the WPS Push button for automatic Connection Step 1. Make sure the operation mode by hardware switch is Repeater Mode (Default Setting). Figure 5-1 WRE-1200 default mode Step 2. Plug the WRE-1200 into the wall outlet, and wait for the WRE-1200 to boot up. Step 3. How to establish connection with AP: (1) On the front panel of the WRE-1200, press the WPS Button for more than 2 seconds until the WPS LED blinks slowly. (2) On the Wireless Router or AP, press the WPS Button for 2 seconds. (3) Wait for the connection to be established. Figure 5-2 One-touch Wi-Fi Range Extension 24
33 For the first-time setup, you can move the WRE-1200 closer to the access point you wish to connect to. After the connection is established, you can move the WRE-1200 to the place you wish to use. After this installation is done and wireless connection is built, repeater's "Signal" LED will be enabled. You can check signal LED on the device to understand signal reception level. Steady light: Excellent Flash: Good Fast flash: poor Off: out of signal You can use this signal LED to find the best location of repeater(for example: a better place may be the center of your access point and the farthest client PC) 25


34 5.1.2 Method B - Manual Connection by Web Browser It is easy to configure and manage the Range Extender with the web browser. Step 1. Plug the WRE-1200 into the wall outlet, then please use your laptop or PC to site-survey the wireless signal of the WRE-1200, and connect your PC with it wirelessly. Default SSID (2.4GHz): PLANET_2.4G_XXXX Default SSID (5GHz): PLANET_5G_XXXX ( X means the last 4 digits of the MAC address) Figure 5-3 SSID of WRE-1200 Step 2. To access the configuration utility, open a web browser and enter the address or default IP address in the web address field of the browser. Figure 5-4 Login by default IP address 26

35 After a moment, a login window will appear. Enter admin for the User Name and Password, both in lower case letters. Then click the OK button or press the Enter key. Figure 5-5 Login Window Default IP Address: or Default User name: admin Default Password: admin If the above screen does not pop up, it may mean that your web browser has been set to a proxy. Go to the Tools menu>internet Options>Connections>LAN Settings on the screen that appears, cancel the Using Proxy checkbox, and click OK to finish it. Step 3. When you have successfully logged in, you will be able to enter the Quick Setup. 27

36 Figure 5-6 Quick Setup web page Step 4. Press Scan and it will display all available 2.4GHz and 5GHz Wi-Fi networks. Figure 5-7 Scan the Wireless Signal 28

37 Step 5. All wireless access points nearby will be displayed on the list. The WRE-1200 will use the uplink router/ap SSID. Select the SSID you want to continue. Figure 5-8 Selecting SSID Step 6. You ll be prompted to input uplink wireless router s/ap s wireless security key in the Pre-shared Key field and click Save to continue Figure 5-9 Entering Pre-shared Key Step 7. The connection will be established if the key is correct. You can click Yes to set up the other band or click No to finish the setting. 29
38 Figure 5-10 Connection successful Step 8. You can enter the SSID which you want and press Apply to make the changes take effect. Figure 5-11 Saving settings The connection is established successfully. You can press Home to enter Web UI of the WRE You can refer to Chapter 6 for more information about the web settings. Figure 5-12 AP connected 30


39 5.2 Repeater Mode Advanced Settings Setting Up Repeater Manually In the Quick Setup web page, if your existed wireless access point is using hidden SSID, you can press Next to set up the network manually. Figure 5-13 Quick Setup Setup repeater manually Enter the SSID, channel and encryption type manually. Figure 5-14 Entering the settings manually 31
40 The connection will be established if the key is correct. You can click Yes to set up the other band or click No to finish the setting. Figure 5-15 Connection successful You can enter the SSID which you want and press Apply to make the changes take effect. Figure 5-16 Saving settings The connection is established successfully. You can press Home to enter Web UI of the WRE You can refer to Chapter 6 for more information about the web settings. 32
41 Figure 5-17 AP connected 33
 function and DHCP server are both disabled, and all wireless clients obtain the IP address from the network device connected with LAN port of the")
42 Chapter 6. AP Mode This chapter will show you how to quickly install this device by using quick setup and show you each detailed setting on the web UI page under AP mode. In the AP mode, the NAT (Network Address Translation) function and DHCP server are both disabled, and all wireless clients obtain the IP address from the network device connected with LAN port of the WRE They can certainly assign the IP address to themselves as well in the Control Panel of Windows. The WRE-1200 is supposed to bridge to the Ethernet directly via UTP cable. Operation Mode Switch AP Mode Please refer to the Chapter 4 Hardware installation for the settings. And make sure the hardware switch is Client Mode. 34

43 6.1 Information System Information Figure 6-1 AP mode The page includes the following information: Object Model Product Name Uptime Boot From Firmware Version MAC Address Description Displays the model number of the range extender. Displays the product name for reference, which consists of AP plus the MAC address. Displays the total time since the device was turned on. Displays information for the booted hardware, booted from internal memory. Displays the firmware version. Displays the access point s MAC address. 35
44 IP Address Displays the IP address of this device. Click Refresh to update this value. Default Gateway Displays the IP address of the default gateway. DNS IP address of DNS (Domain Name Server) DHCP Server IP address of DHCP Server. Wired LAN Port Displays LAN Port 1. Status Displays the status of the LAN port (connected or disconnected). Connection Status Source SSID Extended SSID Authentication Method Encryption Type MAC Address Channel Transmit Power Refresh Displays the status of the 2.4GHz and 5GHz wireless (connected or no connection). Display the SSID of source AP. Display the SSID of this range extender. Displays the authentication method for the specified SSID. Displays the encryption type for the specified SSID. Displays the range extender s MAC address. Displays the channel number the specified wireless frequency is using for broadcast. Displays the wireless radio transmit power level as a percentage bar. Click to refresh all information. 36
 Connected Time Idle Time Description")
45 6.1.2 Wireless Clients The Wireless Clients page displays information about all wireless clients connected to the range extender on the 2.4GHz or 5GHz frequency. Figure 6-2 Information -- Wireless Clients The page includes the following information: Object Auto Refresh Time Manual Refresh SSID MAC Address Tx Rx Signal (%) Connected Time Idle Time Description Select a time interval for the client table list to automatically refresh. Click refresh to manually refresh the client table. Displays the SSID which the client is connected to. Displays the MAC address of the client. Displays the total data packets transmitted by the specified client. Displays the total data packets received by the specified client. Displays the wireless signal strength for the specified client. Displays the total time the wireless client has been connected to the range extender. Client idle time is the time for which the client has not transmitted any data packets i.e. idle. 37

46 6.1.3 Log The system log displays system operation information such as uptime and connection processes. This information is useful for network administrators. Figure 6-3 Information -- Log The page includes the following fields: Object Save Clear Refresh Description Click to save the log as a file on your local computer. Clear all log entries. Refresh the current log. 38

47 6.2 Networking Settings LAN-side IP Address The LAN-side IP Address page allows you to configure your range extender on your Local Area Network (LAN). You can enable the range extender to dynamically receive an IP address from your router s DHCP server or you can specify a static IP address for your access point, as well as configure DNS servers. Figure 6-4 Network Settings -- LAN-side IP Address The page includes the following fields: Object IP Address Assignment IP Address Subnet Mask Default Gateway Description Select DHCP Client for your access point to be assigned a dynamic IP address from your router s DHCP server. Select Static IP to manually specify a static/fixed IP address for your range extender (below). Specify the IP address here. This IP address will be assigned to your range extender and will replace the default IP address. Specify a subnet mask. The default value is For DHCP users, select From DHCP to get default gateway from your DHCP server or User-Defined to enter a gateway manually. For static IP users, the default value is blank. DHCP users can select to get DNS servers IP address from DHCP or manually enter a value. For static IP users, 39
48 the default value is blank. Object Primary Address Secondary Address Description DHCP users can select From DHCP to get primary DNS server s IP address from DHCP or User-Defined to manually enter a value. For static IP users, the default value is blank. DHCP users can select From DHCP to get secondary DNS server s IP address from DHCP or User-Defined to manually enter a value. For static IP users, the default value is blank. 40
49 6.3 Wireless Settings GHz 11bgn Basic Settings The 2.4GHz 11bgn menu allows you to view and configure information for your range extender s 2.4GHz wireless network across three categories: Basic, Advanced and Security. Figure GHz Wireless Settings The page includes the following fields: Object Wireless Band Enable SSID Number SSID1 Auto Channel Description Enable or disable the access point s 2.4GHz wireless radio. When disabled, no 2.4GHz SSIDs will be active. Select the wireless standard used for the range extender. Combinations of b, g and n can be selected. Select the 2.4GHz frequency from the drop-down menu. Enter the SSID name for the specified SSID. The SSID can consist of any combination of up to 32 alphanumeric characters. Enable/disable auto channel selection. 41
50 Auto Channel Range Auto Channel Interval Channel Bandwidth BSS Rate Set Auto channel selection will automatically set the wireless channel for the access point s 2.4GHz frequency based on availability and potential interference. When disabled, select a channel manually as shown in the next table. Select a range from which the auto channel setting (above) will choose a channel. Specify a frequency for how often the auto channel setting will check/reassign the wireless channel. Check/uncheck the Change channel even if clients are connected box according to your preference. Set the channel bandwidth: 20MHz (lower performance but less interference) 40MHz (higher performance but potentially higher interference) Auto (automatically select based on interference level). Set a Basic Service Set (BSS) rate: This is the transmission rate for controlling communication frames for wireless clients. When auto channel is disabled, select a wireless channel manually: Object Description Channel Interval Select a wireless channel from Channel Bandwidth BSS Rate Set Set the channel bandwidth: 20MHz (lower performance but less interference), 40MHz (higher performance but potentially higher interference) Auto (automatically select based on interference level). Set a Basic Service Set (BSS) rate: This is the transmission rate for controlling communication frames for wireless clients. The Wireless Settings can only be configured in the AP mode, not in the Repeater mode or the Client mode. 42
51 6.3.2 Advanced These settings are for experienced users only. Please do not change any of the values on this page unless you are already familiar with these functions. Figure GHz Wireless Settings -- Advanced The page includes the following fields: Object Description Contention Slot Select Short or Long this value is used for contention windows in WMM. Preamble Type Set the wireless radio preamble type. The default value is Long. Guard Interval Set the guard interval g Protection Enable/disable g protection, which increases reliability but reduces bandwidth (Clients will send Request to Send (RTS) to access point, and access point will broadcast Clear to Send (CTS), before a packet is sent from client.) n Protection Enable/disable n protection, which increases reliability but reduces bandwidth (Clients will send Request to Send (RTS) to access point, and access point will broadcast Clear to Send (CTS), before a packet is sent from client.). DTIM Period Set the DTIM (delivery traffic indication message) period value of the wireless radio. The default value is 1. 43
52 RTS Threshold Set the RTS threshold of the wireless radio. The default value is Fragment Set the fragment threshold of the wireless radio. Threshold The default value is Multicast Rate Set the transfer rate for multicast packets or use the Auto setting. Tx Power Set the power output of the wireless radio. You may not require 100% output power. Setting a lower power output can enhance security since potentially malicious/unknown users in distant areas will not be able to access your signal. Beacon Interval Set the beacon interval of the wireless radio. The default value is 100. Station Idle Set the time for access point to which the client has not transmitted Timeout any data packets. Changing these settings can adversely affect the performance of your range extender Security The range extender provides various security options (wireless data encryption). When data is encrypted, information transmitted wirelessly cannot be read by anyone who does not know the correct encryption key. Figure GHz Wireless Settings -- Security The page includes the following fields: SSID Object Broadcast SSID Description It shows the SSID to configure security settings. Enable or disable SSID broadcast. When enabled, the SSID will be visible to clients as an available Wi-Fi network. 44
53 Wireless Client Isolation Authentication Method Additional Authentication When disabled, the SSID will not be visible as an available Wi-Fi network to clients clients must manually enter the SSID in order to connect. A hidden (disabled) SSID is typically more secure than a visible (enabled) SSID. Enable or disable wireless client isolation. Wireless client isolation prevents clients connected to the range extender from communicating with each other and improves security. Typically, this function is useful for corporate environments or public hot spots and can prevent brute force attacks on clients usernames and passwords. Select an authentication method from the drop-down menu and refer to the information below appropriate for your method. Select an additional authentication method from the drop-down menu. No Authentication Authentication is disabled and no password/key is required to connect to the access point. Disabling wireless authentication is NOT recommended. When disabled, anybody within range can connect to your device s SSID. WEP WEP (Wired Equivalent Privacy) is a basic encryption type. For a higher level of security consider using WPA encryption. Figure GHz Wireless Settings -- WEP 45
 or Hex (any characters from 0-9, a-f and A-F). Select which encryption key (1 4 below) is the default key.")
54 The page includes the following fields: Object Key Length Key Type Default Key Encryption Key 1 4 Description Select 64-bit or 128-bit. 128-bit is more secure than 64-bit and is recommended. Choose from ASCII (any alphanumerical character 0-9, a-z and A-Z) or Hex (any characters from 0-9, a-f and A-F). Select which encryption key (1 4 below) is the default key. For security purposes, you can set up to four keys (below) and change which is the default key. Enter your encryption key/password according to the format you selected above. WPA-PSK Figure GHz Wireless Settings -- WPA-PSK The page includes the following fields: Object WPA Type Encryption Key Renewal Interval Pre-shared Key Type Pre-shared Key Description Select from WPA/WPA2 Mixed Mode-PSK, WPA2 or WPA only. WPA2 is safer than WPA only, but not supported by all wireless clients. Please make sure your wireless client supports your selection. Select TKIP/AES Mixed Mode or AES encryption type. Specify a frequency for key renewal in minutes. Choose from Passphrase (8 63 alphanumeric characters) or Hex (up to 64 characters from 0-9, a-f and A-F). Please enter a security key/password according to the format you selected above. 46
.")
55 GHz 11ac 11an Basic Settings The 5GHz 11ac 11an menu allows you to view and configure information for your range extender s 5GHz wireless network across four categories: Basic, Advanced and Security. The Basic screen displays basic settings for your range extender s 5GHz Wi-Fi network(s). Figure GHz Wireless Settings The page includes the following fields: Object Wireless Band Enable SSID Number Auto Channel Auto Channel Range Auto Channel Interval Description Enable or disable the range extender s 5GHz wireless radio. When disabled, no 5GHz SSIDs will be active. Select the wireless standard used for the access point. Combinations of a, n and ac can be selected. It shows the SSID to enable for the 5GHz frequency. Enable/disable auto channel selection. Auto channel selection will automatically set the wireless channel for the access point s 5GHz frequency based on availability and potential interference. When disabled, select a channel manually as shown in the next table. Select a range from which the auto channel setting (above) will choose a channel. Specify a frequency for how often the auto channel setting will check/reassign the wireless channel. Check/uncheck the Change channel even if clients are connected box according to your preference. 47
56 Channel Bandwidth BSS Rate Set Set the channel bandwidth: 20MHz (lower performance but less interference) Auto 40/20MHz Auto 80/40/20MHz (automatically select based on interference level). Set a Basic Service Set (BSS) rate: This is the transmission rate for controlling communication frames for wireless clients. When auto channel is disabled, select a wireless channel manually: Object Channel Interval Channel Bandwidth BSS Rate Set Description Select a wireless channel. Set the channel bandwidth: 20MHz (lower performance but less interference) Auto 40/20MHz Auto 80/40/20MHz (automatically select based on interference level). Set a Basic Service Set (BSS) rate: This is the transmission rate for controlling communication frames for wireless clients Advanced These settings are for experienced users only. Please do not change any of the values on this page unless you are already familiar with these functions. Figure GHz Wireless Settings -- Advanced 48
57 The page includes the following fields: Object Guard Interval Set the guard interval. Description n Protection Enable/disable n protection, which increases reliability but reduces bandwidth (clients will send Request to Send (RTS) to range extender, and range extender will broadcast Clear to Send (CTS), before a packet is sent from client.) DTIM Period Set the DTIM (delivery traffic indication message) period value of the wireless radio. The default value is 1. RTS Threshold Set the RTS threshold of the wireless radio. The default value is Fragment Set the fragment threshold of the wireless radio. Threshold The default value is Multicast Rate Set the transfer rate for multicast packets or use the Auto setting. Tx Power Set the power output of the wireless radio. You may not require 100% output power. Setting a lower power output can enhance security since potentially malicious/unknown users in distant areas will not be able to access your signal. Beacon Interval Set the beacon interval of the wireless radio. The default value is 100. Station Idle Set the time for range extender to which the client has not transmitted any Timeout data packets Changing these settings can adversely affect the performance of your access point. 49

58 6.3.6 Security The range extender provides various security options (wireless data encryption). When data is encrypted, information transmitted wirelessly cannot be read by anyone who does not know the correct encryption key. Figure GHz Wireless Settings -- Security The page includes the following fields: Object SSID Broadcast SSID Wireless Client Isolation Authentication Method Additional Authentication Description It shows the SSID to configure security settings. Enable or Disable SSID broadcast. When enabled, the SSID will be visible to clients as an available Wi-Fi network. When disabled, the SSID will not be visible as an available Wi-Fi network to clients clients must manually enter the SSID in order to connect. A hidden (disabled) SSID is typically more secure than a visible (enabled) SSID. Enable or Disable wireless client isolation. Wireless client isolation prevents clients connected to the range extender from communicating with each other and improves security. Typically, this function is useful for corporate environments or public hot spots and can prevent brute force attacks on clients usernames and passwords. Select an authentication method from the drop-down menu and refer to the information below appropriate for your method. Select an additional authentication method from the drop-down menu. 50
59 No Authentication Authentication is disabled and no password/key is required to connect to the access point. Disabling wireless authentication is NOT recommended. When disabled, anybody within range can connect to your device s SSID. WEP WEP (Wired Equivalent Privacy) is a basic encryption type. For a higher level of security consider using WPA encryption. Figure GHz Wireless Settings -- WEP The page includes the following fields: Object Key Length Key Type Default Key Encryption Key 1 4 Description Select 64-bit or 128-bit. 128-bit is more secure than 64-bit and is recommended. Choose from ASCII (any alphanumerical character 0-9, a-z and A-Z) or Hex (any characters from 0-9, a-f and A-F). Select which encryption key (1 4 below) is the default key. For security purposes, you can set up to four keys (below) and change which is the default key. Enter your encryption key/password according to the format you selected above. 51

60 WPA-PSK Figure GHz Wireless Settings - WPA-PSK The page includes the following fields: Object WPA Type Encryption Key Renewal Interval Pre-Shared Key Type Pre-Shared Key Description Select from WPA/WPA2 Mixed Mode-PSK, WPA2 or WPA only. WPA2 is safer than WPA only, but not supported by all wireless clients. Please make sure your wireless client supports your selection. Select TKIP/AES Mixed Mode or AES encryption type. Specify a frequency for key renewal in minutes. Choose from Passphrase (8 63 alphanumeric characters) or Hex (up to 64 characters from 0-9, a-f and A-F). Please enter a security key/password according to the format you selected above. 52
.")
61 6.3.7 WPS Wi-Fi Protected Setup (WPS) is a simple way to establish connections between WPS compatible devices. WPS can be activated on compatible devices by pushing a WPS button on the device or from within the device s firmware/configuration interface (known as PBC or Push Button Configuration ). When WPS is activated in the correct manner and at the correct time for two compatible devices, they will automatically connect. PIN code WPS is a variation of PBC which includes the additional use of a PIN code between the two devices for verification. The page includes the following fields: Figure 6-15 WPS Object WPS Product PIN Push-button WPS WPS by PIN WPS Status Description Check/uncheck this box to enable/disable WPS functionality. WPS must be disabled when using WEP authentication Displays the WPS PIN code of the device, used for PIN code WPS. You will be required to enter this PIN code into another WPS device for PIN code WPS. Click Generate PIN to generate a new WPS PIN code. Click Start to activate WPS on the range extender for approximately 2 minutes. This has the same effect as physically pushing the range extender s WPS button. Enter the PIN code of another WPS device and click Start to attempt to establish a WPS connection for approximately 2 minutes. WPS security status is displayed here. Click Release to clear the existing status. 53

62 6.3.8 RADIUS Settings The RADIUS sub menu allows you to configure the range extender s RADIUS server settings, categorized into three submenus: RADIUS settings. A RADIUS server provides user-based authentication to improve security and offer wireless client control users can be authenticated before gaining access to a network. The range extender can utilize both a primary and secondary (backup) RADIUS server for each of its wireless frequencies (2.4GHz & 5GHz). Figure 6-16 RADIUS Settings The page includes the following fields: Object Description RADIUS Server Enter the RADIUS server host IP address. Authentication Port Set the UDP port used in the authentication protocol of the RADIUS server. Value must be between 1 and Shared Secret Enter a shared secret/password between 1 and 99 characters in length. Session Timeout Set duration of session timeout in seconds between 0 and
63 6.3.9 MAC Filter Mac filtering is a security feature that can help to prevent unauthorized users from connecting to your range extender. This function allows you to define a list of network devices permitted to connect to the access point. Devices are each identified by their unique MAC address. If a device which is not on the list of permitted MAC addresses attempts to connect to the access point, it will be denied. Figure 6-17 MAC Filter The page includes the following fields: Object Add MAC Address Add Reset Description Enter a MAC Address of computer or network device manually without dashes or colons, e.g., for MAC Address aa-bb-cc-dd-ee-ff enter aabbccddeeff. Click Add to add the MAC Address to the MAC Address filtering table. Clear all fields. 55
64 MAC address entries will be listed in the MAC Address Filtering Table. Select an entry using the Select checkbox. Object Select MAC Address Delete Selected Delete All Export Description Delete selected or all entries from the table. The MAC Address is listed here. Delete the selected MAC Address from the list. Delete all entries from the MAC Address filtering table. Click Export to save a copy of the MAC filtering table. A new window will pop up for you to select a location to save the file. 56

65 6.4 Management Admin You can change the password used to login to the browser-based configuration interface here. It is advised to do so for security purposes. Figure 6-18 Admin The page includes the following fields: Object Administrator Name Administrator Password Product Name Management Protocol Description Set the access point s administrator name. This is used to log in to the browser based configuration interface. Set the access point s administrator password. This is used to log in to the browser based configuration interface. Edit the product name according to your preference. This name is used for reference purposes. This range extender can be managed by HTTP interface. HTTP: Internet browser HTTP protocol management interface 57

66 6.4.2 Date and Time You can configure the time zone settings of your range extender here. The date and time of the device can be configured manually or can be synchronized with a time server. Figure 6-19 Time and Date The page includes the following fields: Object Local Time Acquire Current Time from your PC Use NTP Server Name Update Interval Time Zone Description Set the access point s date and time manually using the drop-down menus. Click Acquire Current Time from Your PC to enter the required values automatically according to your computer s current time and date. The range extender also supports NTP (Network Time Protocol) for automatic time and date setup. Enter the host name or IP address of the time server if you wish. Specify a frequency (in hours) for the range extender to update/synchronize with the NTP server. Select the time zone of your country/ region. If your country/region is not listed, please select another country/region whose time zone is the same as yours. 58

67 6.5 Advanced LED Settings The range extender s LEDs can be manually enabled or disabled according to your preference. Figure 6-20 LED Settings The page includes the following fields: Object Description Power LED Select on or off. Wired LED Select on or off. Wireless LED Select on or off. 2.4GHz Signal Strength Select on or off. LED 5GHz Signal Strength Select on or off. LED WPS LED Select on or off. 59

68 6.5.2 Updating Firmware The Firmware page allows you to update the system firmware to a more recent version. Updated firmware versions often offer increased performance and security, as well as bug fixes. You can download the latest firmware from the PLANET website. Figure 6-21 Updating Firmware The page includes the following fields: Object Update Firmware From Firmware Update File Update Description Select to upload firmware from your local computer. Click Browse to open a new window to locate and select the firmware file in your computer. Click Update to upload the specified firmware file to your access point. 60

69 6.5.3 Saving/Restoring Settings The range extender s Save/Restore Settings page enables you to save/backup the range extender s current settings as a file to your local computer and restore the range extender to previously saved settings. Figure 6-22 Saving/Restoring Settings The page includes the following fields: Object Using Device Save Settings Restore Settings Description Select to save the range extender s settings to your local computer. Click Save to save settings and a new window will open to specify a location to save the settings file. If saving settings to your computer, you can also check the Encrypt the configuration file with a password box and enter a password to protect the file in the field underneath, if you wish. Click the Browse button to find a previously saved settings file and then click Restore to replace your current settings. If your settings file is encrypted with a password, check the Open file with password box and enter the password in the field underneath. 61
70 6.5.4 Factory Default If the range extender malfunctions or is not responding, then it is recommended that you reboot the device or reset the device back to its factory default settings. You can reset the range extender back to its default settings using this feature if the location of the range extender is not convenient to access the reset button. The page includes the following fields: Figure 6-23 Factory Default Object Factory Default Description Click Factory Default to restore settings to the factory default. A pop-up window will appear and ask you to confirm. After resetting to factory defaults, please wait for the range extender to reset and restart Reboot If the range extender malfunctions or is not responding, then it is recommended that you reboot the device or reset the access point back to its factory default settings. You can reboot the range extender remotely using this feature. Figure 6-24 Reboot The page includes the following fields: Object Reboot Description Click Reboot to reboot the device. A countdown will indicate the progress of the reboot. 62

71 Chapter 7. Client Mode This chapter will show you how to quickly install this device by using quick setup and show you each detailed setting on web UI page under client mode. In the client mode, the WRE-1200 can let your networking device have wireless capability; it will become your networking device s wireless network card. You can connect this device to Ethernet port of your existing internet TV or DVD player or game console device via Ethernet cable. 7.1 Client Mode Configuration Please refer to the Chapter 4 Hardware installation for the settings. And make sure the hardware switch is Client Mode. 63
72 7.2 Client Mode Advanced Settings After logging in to the WRE-1200 by browser, you could see the configuration below. Figure 7-1 Quick Setup Scanning Wireless Signal Press Scan and it will display all available 2.4GHz and 5GHz Wi-Fi networks. Select the SSID you want to connect to. 64


73 Figure 7-2 Selecting SSID To select the SSID, you might need to enter the encryption of root AP. Press Save after entering the key. Figure 7-3 Entering Pre-shared Key The connection will be established if the key is correct. You can click Apply to finish the setting. Figure 7-4 Saving settings 65

74 The connection is established successfully. You can press Home to enter Web UI of the WRE You can refer to the Chapter 6 for more information about the web settings. Figure 7-5 AP connected 66

75 Appendix A: Planet Smart Discovery Utility To easily list the WRE-1200 in your Ethernet environment, the Planet Smart Discovery Utility can be downloaded from the PLANET website below. The following installation instructions guide you to running the Planet Smart Discovery Utility. Step 1: Place the Planet Smart Discovery Utility in administrator PC. Step 2: Run this utility and the following screen appears. Step 3: Press the Refresh button for the currently connected devices in the discovery list as shown in the following screen: Step 3: Press the Connect to Device button and then the Web login screen appears. The fields in white background can be modified directly and then you can apply the new setting by clicking the Update Device button. 67
Wireless Dongle. Networking. Wireless N + USB Adapter AU-4512S. User Manual
 Wireless Dongle Wireless N + USB Adapter AU-4512S Networking User Manual FCC Statement Federal Communication Commission Interference Statement This equipment has been tested and found to comply with the
Security SSID Selection: Broadcast SSID:
 69 Security SSID Selection: Broadcast SSID: WMM: Encryption: Select the SSID that the security settings will apply to. If Disabled, then the device will not be broadcasting the SSID. Therefore it will
Z-Wave 4-in-1 Multi Sensor HZS-300E/HZS-300A
 Copyright Z-Wave 4-in-1 Multi Sensor Copyright 2015 by PLANET Technology Corp. All rights reserved. No part of this publication may be reproduced, transmitted, transcribed, stored in a retrieval system,
Wireless 11n Smart Repeater AP (1T1R)
") (1T1R) 2014 Table of Contents 1. Introduction...3 1.1 Package contents... 3 1.2 Product Features... 3 1.3 Front Panel Description... 4 1.4 Rear Panel Description... 5 2. Installation...6 2.1 Hardware Installation...
(1T1R) 2014 Table of Contents 1. Introduction...3 1.1 Package contents... 3 1.2 Product Features... 3 1.3 Front Panel Description... 4 1.4 Rear Panel Description... 5 2. Installation...6 2.1 Hardware Installation...
Z-Wave Ceiling-mount Smoke Detector HZS-200E/HZS-200A
 Z-Wave Ceiling-mount Smoke Detector Copyright Z-Wave Ceiling-mount Smoke Detector Copyright 2015 by PLANET Technology Corp. All rights reserved. No part of this publication may be reproduced, transmitted,
Wireless Presentation Gateway WPG-120. User s Manual
 Wireless Presentation Gateway WPG-120 User s Manual Copyright Copyright 2009 by PLANET Technology Corp. All rights reserved. No part of this publication may be reproduced, transmitted, transcribed, stored
LevelOne User Manual WNC-0600USB N_One Wireless USB Adapter
 LevelOne User Manual WNC-0600USB N_One Wireless USB Adapter V2.0.0-0712 i Safety FCC WARNING This equipment has been tested and found to comply with the limits for a Class B digital device, pursuant to
Touchstone WECB460 Wi-Fi MoCA Bridge
 Touchstone WECB460 Wi-Fi MoCA Bridge Installation Guide ARRIS Enterprises, Inc. 2014 All rights reserved. No part of this publication may be reproduced in any form or by any means or used to make any derivative
IEEE n Wireless PCI Adapter. User s Manual
 IEEE 802.11n Wireless PCI Adapter User s Manual October, 2008 FCC Warning This equipment has been tested and found to comply with the limits for a Class C digital device, pursuant to part 15 of the FCC
CAP1750. User Manual / v1.1
 CAP1750 User Manual 12-2015 / v1.1 CONTENTS I. Product Information...2 I-1. Package Contents... 2 I-2. System Requirements... 3 I-3. Hardware Overview... 3 I-4. LED Status... 4 I-5. Reset... 4 I-6. Safety
All brand and product names mentioned in this manual are trademarks and/or registered trademarks of their respective holders.
 Copyright Copyright 2011 by PLANET Technology Corp. All rights reserved. No part of this publication may be reproduced, transmitted, transcribed, stored in a retrieval system, or translated into any language
802.11b/g Access Point WL-8000AP
 802.11b/g Access Point WL-8000AP User s Guide - FCC Certifications This equipment has been tested and found to comply with the limits for a Class B digital device, pursuant to Part 15 of the FCC Rules.
11N Wireless PCI Adapter User Guide -6-
 -6- Copyright Statement is the registered trademark of Shenzhen Tenda Technology Co., Ltd. All the products and product names mentioned herein are the trademarks or registered trademarks of their respective
Wireless-N PCI Adapter User Manual
 Wireless-N PCI Adapter User Manual V1.0 2010-06-28 FCC Certifications Federal Communication Commission Interference Statement This equipment has been tested and found to comply with the limits for a Class
High Power Wireless N USB Adapter User s Manual
 High Power Wireless N USB Adapter User s Manual 2 Table of Contents 1. Introduction... 4 1.1 Package Contents... 4 1.2 Features... 4 2. Installation... 5 3. Configuring the Adapter... 11 4. Wireless Utility...
WL556E Portable Wireless-N Repeater
 WL556E Portable Wireless-N Repeater Table of Contents About the Device...3 Minimum System Requirements...4 Package Contents...4 Device Overview...5 Front Panel...5 Bottom Panel...6 Configuring the Device...
Touchstone WR2100 Wireless Repeater
 Touchstone WR2100 Wireless Repeater Quick Installation Guide i Package Contents The following items should be included: If any of these items are damaged or missing, please contact your service provider
OAP1750. User Manual / v1.1
 OAP1750 User Manual 11-2015 / v1.1 CONTENTS I. Product Information... 2 I-1. Package Contents... 2 I-2. System Requirements... 3 I-3. Hardware Overview... 3 I-4. LED Status... 4 I-5. Reset... 4 I-6. Safety
WL-5420AP. User s Guide
 WL-5420AP User s Guide Table of contents INTRODUCTION... 1 About the Operation Modes...2 LED Indicators...5 Solid...5 Ports on the Rear Panel...7 GETTING CONNECTED... 8 WPA AP -CONFIGURATION VIA WEB...
802.11a g Dual Band Wireless Access Point. User s Manual
 802.11a+802.11g Dual Band Wireless Access Point User s Manual 0 Chapter 1 Introduction 1.1 Feature Fully interoperable with IEEE 802.11b compliant products. High-Speed data transfer rate up to 11Mbps.
Wireless N Band Adapter RWND-N1501UB / RWND-N1502UBE. User Manual
 Wireless N Band Adapter RWND-N1501UB / RWND-N1502UBE FCC STATEMENT This equipment has been tested and found to comply with the limits for a Class B digital device, pursuant to part 15 of the FCC Rules.
IEEE g Wireless PC Card. User s Guide
 IEEE 802.11g Wireless PC Card User s Guide FCC Certifications Federal Communication Commission Interference Statement This equipment has been tested and found to comply with the limits for a Class B digital
b/g/n 1T1R Wireless USB Adapter. User s Manual
 802.11 b/g/n 1T1R Wireless USB Adapter User s Manual Federal Communication Commission Interference Statement This equipment has been tested and found to comply with the limits for a Class B digital device,
Light Mesh AP. User s Guide. 2009/2/20 v1.0 draft
 Light Mesh AP User s Guide 2009/2/20 v1.0 draft i FCC Certifications This equipment has been tested and found to comply with the limits for a Class B digital device, pursuant to Part 15 of the FCC Rules.
Figure 35: Active Directory Screen 6. Select the Group Policy tab, choose Default Domain Policy then click Edit.
 PC and Server Configuration Figure 35: Active Directory Screen 6. Select the Group Policy tab, choose Default Domain Policy then click Edit. Figure 36: Group Policy Tab 7. Select Computer Configuration
N300 Mini WiFi Repeater A301. User Guide Q1.
 N300 Mini WiFi Repeater A301 1 User Guide Q1. Copyright Statement 2018 Shenzhen Tenda Technology Co., Ltd. All rights reserved. is a registered trademark legally held by Shenzhen Tenda Technology Co.,
wireless N 4-port router quick
 wireless N ADSl2+ 4-port router quick install guide Models 524360 (annex A) & 524377 (annex b) INT-524360/524377-QIG-1208-01 Thank you for purchasing the INTELLINET NETWORK SOLUTIONS Wireless N ADSL2+
H560N. Quick Start Guide
 H560N Quick Start Guide Wireless Router Package Contents: ZXHN H560N Wireless Router, Power Adapter, Quick Start Guide, Warranty Card This product is a low Low-power product mainly used to extend the Wi-Fi
EnGenius EAP N Multi-Function AP/Repeater
 EnGenius EAP9550 11N Multi-Function AP/Repeater Table of Content 1. Introduction...4 1.1. Features and Benefits...4 1.2. Package Contents...5 1.3. System Requirement...5 2. Understanding the Hardware...6
Federal Communication Commission Interference Statement
 Copyright Copyright 2012 by PLANET Technology Corp. All rights reserved. No part of this publication may be reproduced, transmitted, transcribed, stored in a retrieval system, or translated into any language
AC1200M/MS. User Manual
 AC1200M/MS User Manual Table of Contents User Manual... 1 1 Preface... 1 2 LED Indicators and Connectors... 1 2.1 LED Indicators... 1 2.2 Hardware Installation... 2 3 Voice Prompt (AC1200MS)... 2 4 User
APC-100. IEEE g Wireless USB Adapter. User s Guide v1.0
 APC-100 IEEE 802.11g Wireless USB Adapter User s Guide v1.0 FCC Certifications Federal Communication Commission Interference Statement This equipment has been tested and found to comply with the limits
802.11g PC Card/USB Wireless Adapter
 802.11g PC Card/USB Wireless Adapter User Guide Regulatory Approvals FCC Statement This equipment has been tested and found to comply with the limits for a Class B digital device, pursuant to Part 15 of
BCM94309MP Mini-PCI Card. User's Manual
 Quanta Computer Inc. BCM94309MP Mini-PCI Card User's Manual Jun. 26, 2003 (Draft 1.0) User manual 1 Copyright statement No part of this publication may be reproduced, stored in a retrieval system, or transmitted
150Mbps N Wireless USB Adapter
 LevelOne User Manual WUA-0614 / WUA-0624 150Mbps N Wireless USB Adapter 1.1 Safety FCC WARNING This equipment has been tested and found to comply with the limits for a Class B digital device, pursuant
Wireless USB 600AC USER MANUAL. Dual Band USB Adapter. HNW600ACU Rev
 Wireless USB 600AC Dual Band USB Adapter USER MANUAL HNW600ACU Rev. 2.0 www.hamletcom.com Table of Contents 1. Introduction... 4 1.1 Product Features... 4 1.2 Package contents... 4 2. Wireless USB Adapter
AIRNET 54Mb b/g High Power USB Adapter. User s Manual
 AIRNET 54Mb 802.11b/g High Power USB Adapter User s Manual FCC Certifications Federal Communication Commission Interference Statement This equipment has been tested and found to comply with the limits
Wi-Fi 300N USER MANUAL. Nano USB Adapter HNWU300NN.
 Wi-Fi 300N Nano USB Adapter USER MANUAL HNWU300NN www.hamletcom.com Table of Contents 1. Introduction... 4! 1.1 Product Features... 4! 1.2 Package contents... 4! 2. Wireless USB Adapter Installation...
BR411AP n Wireless Access Point and Bridge
 BR411AP 802.11n Wireless Access Point and Bridge The BR411AP provides connectivity between Ethernet wired networks and radio-equipped wireless devices. It is an easy, web-based setup for installation and
WNRT-627. Data Sheet. Europe/ ETSI: 2.412~2.472GHz (13 Channels) Japan/ TELEC: 2.412~2.484GHz (14 Channels) RF Power.
 Japan/ TELEC: 2.412~2.484GHz (14 Channels) RF Power.") 300Mbps 802.11n Wireless Broadband Router Ultra High Speed 802.11n Wireless The WNRT-627 features latest IEEE 802.11n radio with 2T2R MIMO antenna technology to provide improved wireless speed and coverage
300Mbps 802.11n Wireless Broadband Router Ultra High Speed 802.11n Wireless The WNRT-627 features latest IEEE 802.11n radio with 2T2R MIMO antenna technology to provide improved wireless speed and coverage
WUG2690 User s Manual
 802.11b+g Wireless LAN USB Adapter WUG2690 User s Manual Federal Communication Commission Interference Statement This equipment has been tested and found to comply with the limits for a Class B digital
DG-WR3001N. 300Mbps Wireless Repeater. User Manual
 DG-WR3001N 300Mbps Wireless Repeater User Manual V1.1 2012-07-09 As our products undergo continuous development the specifications are subject to change without prior notice COPYRIGHT Copyright 2012 by
Outdoor Wireless USB Adapter User Guide
 Outdoor Wireless USB Adapter User Guide FCC STATEMENT This equipment has been tested and found to comply with the limits for a Class B digital device, pursuant to part 15 of the FCC Rules. These limits
WL580E. DUAL BAND WALL PLUGGED 300Mbps WIRELESS-N REPEATER
 WL580E DUAL BAND WALL PLUGGED 300Mbps WIRELESS-N REPEATER Copyright 2014 All rights reserved. No part of this document may be reproduced, republished, or retransmitted in any form or by any means whatsoever,
54Mbps Wireless Access Point With 5-Port Switch
 54Mbps Wireless Access Point With 5-Port Switch WAP-4035 User s Manual Copyright Copyright 2005 by PLANET Technology Corp. All rights reserved. No part of this publication may be reproduced, transmitted,
AC750 Wireless Dual-Band Router CR2. User Manual
 AC750 Wireless Dual-Band Router CR2 User Manual Version 1.0 4/25/2014 Table of Content Chapter 1 Introduction... 3 1.1 Features... 3 1.2 System Requirement... 3 1.3 Package Contents... 4 Chapter 2 Hardware
WRT300N-DD User Manual
 WRT300N-DD User Manual Contents Features... 3 Configuring the Router... 3 1 Operation Mode... 8 2 Internet Settings... 8 2.1 WAN... 9 2.2 LAN... 13 2.3 DHCP clients... 15 2.4 Advanced Routing... 15 2.5
IAP1200. User Manual / v1.0
 IAP1200 User Manual 11-2016 / v1.0 CONTENTS I. Product Information...2 I-1. Package Contents... 2 I-2. System Requirements... 3 I-3. Hardware Overview... 3 I-4. LED Status... 4 I-5. Reset... 5 I-6. Safety
EW-7438RPn Mini User Manual
 EW-7438RPn Mini User Manual 04-2015 / v1.1 CONTENTS I. Product Information... 1 I-1. Package Contents... 1 I-2. System Requirements... 1 I-3. LED Status... 1 I-4. Hardware Overview... 3 I-5. Safety Information...
AM4000D Outdoor CPE User Manual
 AM4000D Outdoor CPE User Manual Page 1 Table of contents 1. OVERVIEW... 4 1.1. USER INTERFACE SPECIFICATION... 4 1.2. LTE INTERFACE SPECIFICATION... 4 2. GETTINGSTARTED... 4 2.1. PACKING LIST AND CPE UNIT...
WAP1750 User Manual / v1.0
 WAP1750 User Manual 02 2014 / v1.0 CONTENTS I. Product Information... 4 I 1. Package Contents... 4 I 2. System Requirements... 5 I 3. Hardware Overview... 5 I 4. LED Status... 6 I 5. Reset... 6 I 6. Magnetic
User Manual. 150Mbps Wireless N Access Point FWA-600ND. User Manual / V2.0
 User Manual FWA-600ND User Manual / V2.0 2 Copyright Statement PHICOMM is the registered trademark of Shanghai Feixun Communication Co., Ltd. Other trademark or trade name mentioned herein are the trademark
802.11a/b/g Access Point. User s Guide
 802.11a/b/g Access Point User s Guide FCC Certifications This equipment has been tested and found to comply with the limits for a Class B digital device, pursuant to Part 15 of the FCC Rules. These limits
Wireless 11n AP Router 1T1R
 Wireless 11n AP Router 1T1R Rev: 1.0.0rp FCC STATEMENT This equipment has been tested and found to comply with the limits for a Class B digital device, pursuant to part 15 of the FCC Rules. These limits
802.11b Wireless. LAN Cardbus. User Guide
 802.11b Wireless LAN Cardbus User Guide COPYRIGHT Information in this document is subject to change without notice. Companies, names, and data used in examples are fictitious unless otherwise noted. No
Wireless-N Access Point
 Wireless-N Access Point User s Manual Version 1.0 (April, 2008) COPYRIGHT Copyright 2008/2009 by this company. All rights reserved. No part of this publication may be reproduced, transmitted, transcribed,
Wired / Wireless USB2.0 MFP Print Server FPS-1010M / FPS-1010MG. User s Manual. Version: 2.0 (January, 2008)
") Wired / Wireless USB2.0 MFP Print Server FPS-1010M / FPS-1010MG User s Manual Version: 2.0 (January, 2008) Copyright Copyright 2008 by PLANET Technology Corp. All rights reserved. No part of this publication
Wired / Wireless USB2.0 MFP Print Server FPS-1010M / FPS-1010MG User s Manual Version: 2.0 (January, 2008) Copyright Copyright 2008 by PLANET Technology Corp. All rights reserved. No part of this publication
FCC CAUTION SETTING... 9
 1 FCC CAUTION... 3 1 INTRODUCTION... 5 1.1 LED INDICATORS... 6 1.2 PRODUCT APPEARANCE... 7 2 INSTALLATION DIAGRAM... 7 3 SETTING... 9 3.1 USING LAPTOP... 9 3.2 USING IPHONE/IPAD... 13 3.3 USING ANDROID
WiFi-Repeater User Manual. Quick Installation Guide(Q.I.G.) REV.1.2
 REV.1.2") WiFi-Repeater User Manual Quick Installation Guide(Q.I.G.) REV.1.2 Introduction: The WiFi Repeater is a combined wired/wireless network connection device designed specifically for small business, office,
WiFi-Repeater User Manual Quick Installation Guide(Q.I.G.) REV.1.2 Introduction: The WiFi Repeater is a combined wired/wireless network connection device designed specifically for small business, office,
NMS USER MANUAL. WAP-EN Series Wireless Access Points. Version 1.2, June 2017
 NMS USER MANUAL WAP-EN Series Wireless Access Points Version 1.2, June 2017 Copyright Copyright 2017 Comtrend Corporation. All rights reserved. The information contained herein is proprietary to Comtrend
1-Port USB Print Server quick installation guide Model
 1-Port USB Wireless Print Server quick installation guide Model 509060 INT-509060-QIG-0508-01 Thank you for purchasing the INTELLINET NETWORK SOLUTIONS 1-Port USB Wireless Print Server, Model 509060. This
USER S MANUAL. Outdoor Wireless-1750AC Managed Access Point Pro. website
 Outdoor Wireless-1750AC Managed Access Point Pro HOW17ACM website www.hawkingtech.com e-mail techsupport@hawkingtech.com USER S MANUAL COPYRIGHT 2017 HAWKING TECHNOLOGIES,INC. ALL RIGHTS RESERVED. COPYRIGHT
U S E R M A N U A L b/g PC CARD
 U S E R M A N U A L 802.11b/g PC CARD Table of Content CHAPTER 1 INTRODUCTION... 1 1.1 WIRELESS LAN FEATURE FUNCTIONS... 1 1.2 REGULATORY NOTICE... 1 1.2.1 FCC Class B Statement...1 1.2.2 Canadian Regulatory
NA502 Multiple RF Home Gateway
 NA502 Multiple RF Home Gateway User Guide i Table of Contents CHAPTER 1 INTRODUCTION... 1 Package Contents... 1 Features... 1 LEDs... 2 CHAPTER 2 INITIAL INSTALLATION... 4 Requirements... 4 Procedure...
300 Mbps High Gain Wireless USB Adapter U6
 300 Mbps High Gain Wireless USB Adapter U6 Preface Thank you for choosing Tenda! Please read this user guide before you start with U6. Conventions The typographical elements that may be found in this document
WAP1750 User Manual / v1.0
 WAP1750 User Manual 05-2014 / v1.0 CONTENTS I. Product Information... 1 I-1. Package Contents... 1 I-2. System Requirements... 2 I-3. Hardware Overview... 2 I-4. LED Status... 3 I-5. Reset... 3 I-6. Magnetic
WRE2206. User s Guide. Quick Start Guide. Wireless N300 Range Extender. Default Details. Version 1.00 Edition 1, 01/2015
 WRE2206 Wireless N300 Range Extender Version 1.00 Edition 1, 01/2015 Quick Start Guide User s Guide Default Details Web Address http://zyxelsetup OR http://192.168.1.2 www.zyxel.com User Name admin Password
TL-WN353GD 54M Wireless PCI Adapter
 TL-WN353GD 54M Wireless PCI Adapter Rev: 1.0.1 1910010046 COPYRIGHT & TRADEMARKS Specifications are subject to change without notice. is a registered trademark of TP-LINK TECHNOLOGIES CO., LTD. Other brands
EAP N Multi-Function AP/Repeater
 EAP9550 11N Multi-Function AP/Repeater Table of Content 1. Introduction...3 1.1. Features and Benefits...3 1.2. Package Contents...4 1.3. System Requirement...4 2. Modes...5 2.1. Access Point...5 2.2.
USER MANUAL. WAP-EN Series Wireless Access Points. Version 1.2,0 June 2017
 USER MANUAL WAP-EN Series Wireless Access Points Version 1.2,0 June 2017 FCC Compliance This equipment has been tested and found to comply with the limits for a Class B Digital Device, pursuant to part
54M Wireless LAN CardBus Card
 54M Wireless LAN CardBus Card User s Manual Ver.2.0 Federal Communication Commission Interference Statement This equipment has been tested and found to comply with the limits for a Class B digital device,
3G-6408n User Manual
 3G-6408n User Manual 05-2012 / v1.0 COPYRIGHT Copyright Edimax Technology Co., Ltd. all rights reserved. No part of this publication may be reproduced, transmitted, transcribed, stored in a retrieval system,
Table of Contents. Chapter 1 Product Overview Features Package Contents LED Indicator and Panel Description...
 Copyright Statement is the registered trademark of Monoprice. All the products and product names mentioned herein are the trademarks or registered trademarks of their respective holders. Copyright of the
WIRELESS-N ACCESS POINT USER MANUAL
 WIRELESS-N ACCESS POINT USER MANUAL MODELS: 524704 524728 524735 Shown: Model 524728 INT-524704/524728/524735-UM-0809-01 Federal Communications Commission Interference Statement FCC Part 15 This equipment
PW-DN M Mini Wireless N USB Adapter
 Rev: 1.0.0 COPYRIGHT & TRADEMARKS Specifications are subject to change without notice. is a registered trademark of PROWARE TECHNOLOGIES CO., LTD. Other brands and product names are trademarks or registered
IEEE g CardBus Adapter. User s Guide
 IEEE 802.11g CardBus Adapter User s Guide Regulatory notes and statements Wireless LAN, Health and Authorization for use Radio frequency electromagnetic energy is emitted from Wireless LAN devices. The
Federal Communication Commission Interference Statement
 COPYRIGHT Copyright 2008/2009 by this company. All rights reserved. No part of this publication may be reproduced, transmitted, transcribed, stored in a retrieval system, or translated into any language
Wireless LAN Card. User s Manual. Contents. A i
 A i Contents Wireless LAN Card User s Manual The user guide is fit for both Long Range Wireless LAN Card WPC- 8110 and Wireless LAN Card WPC-2110 CHAPTER 1. INTRODUCTION... 1 1.1 PACKAGE CONTENTS... 1
COPYRIGHT. Linux Open Source Code Certain Edimax products include software codes developed by third parties, which are
 COPYRIGHT Copyright Edimax Technology Co., Ltd. all rights reserved. No part of this publication may be reproduced, transmitted, transcribed, stored in a retrieval system, or translated into any language
TL-PS110U Single USB2.0 Port Fast Ethernet Print Server
 Single USB2.0 Port Fast Ethernet Print Server Rev: 3.0.0 1910012229 COPYRIGHT & TRADEMARKS Specifications are subject to change without notice. is a registered trademark of TP-LINK TECHNOLOGIES CO., LTD.
CE MARK WARNING LIMITED WARRANTY
 CE MARK WARNING This is a Class B product. In a domestic environment, this product may cause radio interference, in which case the user may be required to take adequate measures. LIMITED WARRANTY Hawking
Thumb Size IEEE g Wireless LAN USB 2.0 Adapter. User s Guide
 Thumb Size IEEE 802.11g Wireless LAN USB 2.0 Adapter User s Guide Regulatory notes and statements Wireless LAN, Health and Authorization for use Radio frequency electromagnetic energy is emitted from Wireless
User Guide of AU-4612
 1 User Guide of AU-4612 Installing the software of AU-4612...3 Configuring your wireless network (with Microsoft Zero Configuration Tool)...12 Wi-Fi Protect Setup (WPS)...14 Pin Input Config (PIN)...15
Federal Communication Commission Interference Statement
 Copyright Copyright 2014 by PLANET Technology Corp. All rights reserved. No part of this publication may be reproduced, transmitted, transcribed, stored in a retrieval system, or translated into any language
USB Wireless Network Adapter User s Manual
 USB Wireless Network Adapter User s Manual Rev 0.9 Regulatory compliance FCC Warning This equipment has been tested and found to comply with the limits for a Class B digital device, pursuant to part 15
1. Package contents. 2. Connecting ADSL modem and wireless router
 1. Package contents WL-500W wireless router x 1 Power adapter x 1 Utility CD x 1 RJ45 cable x 1 Quick Start Guide x 1 2. Connecting ADSL modem and wireless router 1) Cable connection Wall power outlet
FCC CAUTION SETTING... 9
 1 FCC CAUTION... 3 1 INTRODUCTION... 5 1.1 LED INDICATORS... 6 1.2 PRODUCT APPEARANCE... 6 2 INSTALLATION DIAGRAM... 7 3 SETTING... 9 3.1 USING LAPTOP... 9 3.2 USING IPHONE/IPAD... 13 3.3 USING ANDROID
Version /01/2013. User Manual. DAP-1665 Wireless AC1200 Dual Band Access Point DAP-1665
 Version 1.0 10/01/2013 User Manual DAP-1665 Wireless AC1200 Dual Band Access Point DAP-1665 Table of Contents Product Overview... 4 Package Contents... 4 System Requirements... 5 Introduction... 6 Features...
BR-6428HPn User Manual
 BR-6428HPn User Manual 05-2012 / v1.0 COPYRIGHT Copyright Edimax Technology Co., Ltd. all rights reserved. No part of this publication may be reproduced, transmitted, transcribed, stored in a retrieval
WAP-EN1200C. NMS User Manual. Version 1.0.1, August 2016
 WAP-EN1200C NMS User Manual Version 1.0.1, August 2016 FCC Compliance This equipment has been tested and found to comply with the limits for a Class B Digital Device, pursuant to part 15 of the FCC Rules.
User s Manual of PL m AV2 Powerline Ethernet Bridge PL-802
 600m AV2 Powerline Ethernet Bridge PL-802 1 Copyright Copyright 2014 by PLANET Technology Corp. All rights reserved. No part of this publication may be reproduced, transmitted, transcribed, stored in a
User s Guide AWUS036NHA. 150Mbps Wireless High Gain USB Adapter
 User s Guide AWUS036NHA 150Mbps Wireless High Gain USB Adapter FCC STATEMENT This equipment has been tested and found to comply with the limits for a Class B digital device, pursuant to part 15 of the
COPYRIGHT LIMITED WARRANTY
 COPYRIGHT Copyright 2008/2009 by Hawking Technologies, Inc. All rights reserved. No part of this publication may be reproduced, transmitted, transcribed, stored in a retrieval system, or translated into
EW-7478AC User Manual
 EW-7478AC User Manual 03-2016 / v1.0 CONTENTS I. Product Information...1 I-1. Package Contents... 1 I-2. System Requirements... 1 I-3. LED Status... 2 I-4. Switch... 3 I-5. WPS Setup... 5 I-6. WPS Button
Wireless LAN Access Point
 Wireless LAN Access Point IEEE 802.11b/g 54Mbps 501903 User s Manual Table of Contents Chapter 1 Introduction... 1 1.1 Package Contents... 2 1.2 Features... 2 1.3 Specifications... 2 1.4 Physical Description...
Federal Communication Commission Interference Statement
 Copyright Copyright 2014 by PLANET Technology Corp. All rights reserved. No part of this publication may be reproduced, transmitted, transcribed, stored in a retrieval system, or translated into any language
APC 2Mi. Quick Installation Guide. Revision February Copyright 2011 Deliberant
 APC 2Mi Quick Installation Guide Revision 1.2 19 February 2011 Copyright 2011 Deliberant www.deliberant.com Copyright 2011 Deliberant This user s guide and the software described in it are copyrighted
PW-DN427 Wireless Lite-N USB Adapter
 Wireless Lite-N USB Adapter Rev: 1.0.0 FCC STATEMENT This equipment has been tested and found to comply with the limits for a Class B digital device, pursuant to part 15 of the FCC Rules. These limits
Chapter 1 Introduction
 Copyright Statement is the registered trademark of Zonet Technology Inc. All the products and product names mentioned herein are the trademarks or registered trademarks of their respective holders. Copyright
WIRELESS 300N OUTDOOR POE ACCESS POINT USER MANUAL
 WIRELESS 300N OUTDOOR POE ACCESS POINT USER MANUAL MODEL 524711 INT-524711-UM-1209-02 Federal Communications Commission Interference Statement FCC Part 15 This equipment has been tested and found to comply