Xanté and Ilumina are registered trademarks of Xanté Corporation. 3M is a trademark of 3M Company.
|
|
|
- Jeffery Anthony
- 6 years ago
- Views:
Transcription

1 1
2 Trademarks Xanté and Ilumina are registered trademarks of Xanté Corporation. 3M is a trademark of 3M Company. Adobe and Adobe PostScript are registered trademarks of Adobe Systems Incorporated. Avery is a trademark of Dinnison Corporation. Epson is a registered trademark of Seiko Epson Corporation. Windows is a registered trademark of Microsoft Corporation. IBM is a registered trademark of IBM Corporation. Hammermill is a registered trademark of International Paper Company. Wausau Paper is a trademark of Wausau Paper Corp. All other brand and product names are trademarks, registered trademarks, or service marks of their respective holders. 2 This manual is Copyrighted 2006 by Xanté Corporation. All Rights Reserved. Printed in the USA. This manual may not be copied in whole or in part, nor transferred to any other media or language without the express written permission of Xanté Corporation. Xanté Corporation reserves the right to make changes to this manual and to the equipment described herein without notice. Every effort has been made to ensure that this manual is free of inaccuracies and omissions. However, Xanté Corporation makes no warranty of any kind including, but not limited to, any implied warranties of merchantability and fitness for a particular purpose with regard to this manual. Xanté Corporation assumes no responsibility for, or liability for, errors contained in this manual or for incidental, special, or consequential damages arising out of the furnishing of this manual, or the use of this manual in operating the equipment, or in connection with the performance of the equipment when so operated.
3 Xanté Corporation 2800 Dauphin Street Mobile, AL Phone: , Fax: Xanté Europe Marketing RE Duiven The Netherlands Tel.: Fax: Internet: SAFETY INFORMATION Always use the Ilumina in a well ventilated area. Allow enough room around the Ilumina for adequate ventilation and easy access to the paper trays. If you place the Ilumina in an enclosure, ensure it is properly ventilated. Do not use the Ilumina near water. Do not spill any type of liquid into it. Be certain that your power source matches the rating listed on the back of the Ilumina. If you are unsure, contact your dealer or local power company. Do not insert anything into the ventilation slots on the Ilumina. You could cause an electrical shock or electrical arcing, which could cause a fire. Aside from the routine maintenance described in the documentation, do not try to service the Ilumina yourself. Removing the cover may expose you to shocks or other electrical hazards. For more information, please refer to the USER'S GUIDE on the Documentation CD. 3
4 Table of Contents Setup...7 ORDERING SUPPLIES...10 How to Order r Order Numbers...10 Toner Cartridges, Type C Image Drums, Type C Other Consumables Changing Settings...12 MENU STRUCTURE...12 Configuration...12 Print Information...12 Print Secure Job...12 Menus...12 Administrative Setup...13 Calibration...13 SETTINGS...13 Settings by Media Weight Individual Print Jobs...13 All Print Jobs (Defaults)...14 Reset to Factory Defaults...14 Settings by Paper Weight US Bond...15 Index...16 Settings by Paper Tray...16 Tray Optional Trays...17 MP (Multi-Purpose) Tray...17 Settings by Media Type...18 Paper...18 Labels, Transparencies, Envelopes Thick Paper Media Select Switch...19 RECOMMENDED MEDIA PAPER...20 Do Not Use...20 Sample Ream Label...21 LABELS...21 Individual Print Jobs...21 Make Labels the Default TRANSPARENCIES...22 Individual Print Jobs...22 Make Transparency the Default For Tray For MP Tray...23 ENVELOPES...23 Individual Print Jobs...23 Make Envelopes the Default For MP Tray...24 THICK PAPER...24 Individual Print Jobs
5 Make Thick Paper the Default Tray 1, 2, 3, 4, or MP Tray...24 LOADING TRAYS...25 Loading Trays Loading Letterhead Loading the MP Tray...26 Loading Letterhead in MP Tray...26 Transparencies & Labels...26 Envelopes...26 Check the MP Tray Configuration...27 EXIT PATHS...27 Face Down...27 Face Up...27 SECURE PRINT...28 Storing Jobs to Hard Disk Drive...28 To Print the Document To Delete the Document CONTROL PANEL Ready Light Attention Light Power Save...29 To Disable Power Save...29 Set the Time Interval...30 CLEANING LED HEADS...30 How to Clean REPORTS...31 Printing Reports...31 TROUBLESHOOTING...32 Using the Help Button...32 Paper Jams...32 ETHERNET INTERFACE FOR TCP/IP...33 Setup...33 Assign an IP Address to the Ilumina.34 USB INTERFACE...35 Connect the USB Cable...35 PARALLEL INTERFACE (LPT1) 36 Windows Installation...36 Select a Printer Driver in Windows...36 PostScript Printer Driver r PCL Printer Driver r Installing Optional Components...37 TCP/IP Driver Install...37 LPR Utility to Discover USB Driver Install...38 Enable the USB Port Print a Test Page...40 Parallel (LPT1) Driver Install...40 Print a Test Page...41
6 Macintosh Installation...41 PostScript Printer Driver r Installing Optional Components...41 Installing Additional Utilities...41 Installation for Mac OS Ethernet and USB Driver Install...42 Ethernet t Desktop Icon...43 USB Desktop Icon...44 Installation for Mac OS X...44 Ethernet and USB Driver Install...44 Adding the Ilumina using Ethernet t Adding the Ilumina using USB...45 Configuring or Installing Options...46 Windows...46 Mac OS Mac OS X...46 Setting Default Software Options...47 Windows...47 Mac OS Mac OS X...47 Installing Additional Utilities...47 Windows...48 Mac OS Mac OS X...48 PDF or On-Line Manuals...48 Requirements View the Manuals...49 Copy the Manuals...49 Service and Support...49


7 SETUP Your Ilumina set up will take about minutes. 1. Remove top packing pieces. 2. Open protective plastic bag. 5. Lift the Ilumina and place on selected location. Always use at least two people to lift or move the Ilumina. 6. Remove any shipping tape. 3. Confirm package contents: Ilumina Light-shield bags Power Cord Toner Cartridges Ferrite Core for network models CDs Paper Catcher. 4. Select a location for your Ilumina. 7. Lift the top cover. 8. Lift operator panel, open front cover, and remove tape. Caution! Do not expose drum to direct sunlight or let it sit in room light for more than 5 minutes. 7


8 11. Shake toner cartridge from side to side to distribute toner. Remove sealing tape from toner cartridge. 9. Remove colored image drum packing pieces. Remove tape. Remove protective sheet. 12. Lock toner cartridge with colored lever. Install remaining toner cartridges. 10. Remove locks and seals. 13. Close the top cover. 8

 to paper size.")
9 supplied with the printer. Use of a power cord NOT supplied with this printer, or an extension cord, may result in overheating, and could be a safety hazard. 14. Pull out the paper tray. Remove packing piece. 18. Remove the backing from the VELCRO strip on the back of the Quick Reference Guide and apply the guide to the Ilumina. 15. Set guides (a,b) to paper size. Load paper. Gently replace paper tray. 16. Install paper catcher. 17. Insert the power cord. Do not connect this product to an uninterruptible power supply (UPS). Please contact Xanté at for more information. Be sure to use 16A AC power cord 9
 Send Xanté an email from www.xante.")

10 ORDERING SUPPLIES How to Order Consult the vendor where you purchased your Ilumina Consult an Authorized Xanté Sales or Service Vendor Call Xanté Consumables direct at (US and Canada) Send Xanté an from Order Numbers Use only Type C7 Toner Cartridge and Image Drums. Toner Cartridges, Type C7 Be sure to register your Ilumina at Color Part # Cyan Magenta Yellow Black Pack Assorted


11 Image Drums, Type C7 Other Consumables Color Part # Cyan Magenta Yellow Black Pack Assorted Consumable Part # Transfer Belt (1) Fuser (2) 110v v Toner Waste Bottle
![Changing Settings Press [MENU] Use the key to scroll down to the function you wish to change Press [ENTER] Continue to use the and](/docs-images/79/79354326/images/12-0.jpg "[ENTER] keys to locate the desired item Press [ENTER] and an asterisk will appear next to the chosen setting Press [ON LINE] to exit the")


12 Changing Settings Press [MENU] Use the key to scroll down to the function you wish to change Press [ENTER] Continue to use the and [ENTER] keys to locate the desired item Press [ENTER] and an asterisk will appear next to the chosen setting Press [ON LINE] to exit the Menu MENU STRUCTURE For more information, see the User Guide on the Documentation CD provided with your Ilumina or at 12 Configuration Page Count and Consumable Life Network Settings Multi-Purpose Tray Configuration System Settings Print Information Ilumina & Network Configuration Lists: HDD (hard disk drive) files, Fonts, etc. Error Log Engine Status Print Secure Job Requires Admin Password Print out confidential documents downloaded to the HDD Menus Set the size, weight and type of media for the various feed trays Adjust system settings
13 Administrative Setup Requires Admin Password Network Setup Print Setup PS and PCL Setup Color Setup Memory and Flash Memory Setup HDD and System Setup Change Administrative Password Reset/Save/Restore Settings Calibration Density Adjustment Registration Color Tuning The default password is "aaaaaa" SETTINGS Settings by Media Weight The default media weight setting for The Multi-Purpose (MP) Tray is "Ultra Heavy 3". The default media weight setting for Tray 1 is "Auto". Individual Print Jobs If you are using special media for only one print job, you can adjust the media settings in the driver. Load the media in the appropriate tray (usually the MP tray) and adjust the media settings as needed. 13
14 All Print Jobs (Defaults) Reset to Factory Defaults Press [MENU] Press key to "Menus" and press [ENTER] Highlight "Tray Configuration" and press [ENTER] Press key to select the tray to be configured and press [ENTER] Use the and [ENTER] to make your changes in the submenus Press [ON LINE] to exit the Menu Press [MENU] Use the key to locate "Admin Setup" and press [ENTER]. "Enter Password" will appear on the screen Use the and keys to set the first digit in the password then press [ENTER]. Repeat the previous step until all four digits of the password are completed and press [ENTER] Use the key to locate "Settings" and press [ENTER] Highlight "Reset Settings" and press [ENTER] Press [ENTER] to execute. The Ilumina will reset and return to the Ready-to- Print state 14
15 Settings by Paper Weight Select the appropriate settings in either the front panel or in the Ilumina driver. Any setting changed in the Ilumina driver overrides the front panel settings. To determine if a paper weight is US Bond or Index, check the metric equivalent. Example: 35 lb. US Bond = 132 g/m 2 35 lb. Index = 64 g/m 2 For more information, go to US Bond Setting Auto (Default) US Bond (metric) 20 to 57 lb. (75 to 214 g/m 2 ) Light 20 lb. (75 g/m 2 ) Medium Light Medium Medium Heavy Heavy Ultra Heavy 1 Ultra Heavy 2 Ultra Heavy 3 [MP Tray only] 20 to 21 lb. (75 to 90 g/m 2 ) 22 to 24 lb. (90 to 105 g/m 2 ) 25 to 28 lb. (105 to 110 g/m 2 ) 29 to 34 lb. (110 to 132 g/m 2 ) 35 to 50 lb. (132 to 188 g/m 2 ) 51 to 58 lb. (192 to 218 g/m 2 ) 59 to 185 lb. (222 to 502g/m 2 ) 15
16 Index Settings Auto (Default) Light Medium Light Medium Medium Heavy Heavy Ultra Heavy 1 Ultra Heavy 2 Ultra Heavy 3 [MP Tray only] Index (metric) 35 to lb. (64 to 216 g/m 2 ) 35 lb. (64 g/m 2 ) 37 to 40 lb. (67 to 72 g/m 2 ) 42 to 50 lb. (76 to 90 g/m 2 ) 52 to 56 lb. (94 to 101 g/m 2 ) 60 to 71 lb. (108 to 128 g/m 2 ) 73 to 104 lb. (132 to 188 g/m 2 ) 106 to 141 lb. (192 to 256 g/m 2 ) 123 to 277 lb. (222 to 502 g/m 2 ) 16 Settings by Paper Tray Tray 1 Media Weight (US Bond) Media Size Capacity 75 to 216 g/m 2 Duplexing: 75 to 120 g/m 2 * Paper: Min. 4.1" x 5.8" (105 x 148 mm) Max. 12.9" x 18" (305 x 457 mm) Custom sizes must be defi ned in driver before printing. Transparencies: Letter or A4 530 Sheets 75 g/m 2 paper 200 Transparencies * Duplex printing is restricted to paper only between g/m 2 * If you experience curling with g/m 2 paper, switch to 105 g/m 2
17 Optional Trays Optional Trays 2 and 3 Optional 3 Tray High Capacity Feeder Media Weight (US Bond) Media Size Tray Capacity 75 to 216 g/m 2 Duplexing: 75 to 120 g/m 2 Paper: Min. 5.8" x 8.3" (148 x 210 mm) Max. 12.9" x 18" (305 x 457 mm) 530 Sheets 75 g/m 2 paper No Transparencies Multi-Purpose (MP) Tray Media Weight (US Bond) Media Size Capacity Paper: 75 to 427 g/m 2 Duplexing: 75 to 120 g/m 2 Banners: 75 to 427 g/m 2 Paper: Min. 3" x 5" (76 x 127 mm) Max. 12.9" x 18" (305 x 457 mm) Banners: up to 12.9" W x 47.25" L (305 mm x 1200 mm) Transparencies: Letter or A4 230 sheets 75 g/m 2 paper 100 Transparencies 25 Envelopes Label Sheets Apx. 1" (2.5 cm) high 17
18 Settings by Media Type Paper Size Letter, Legal-13/ 13.5/14, Executive, Tabloid, Tabloid Extra, A3, A3 Wide, A3 Nobi, A4, A5, B4, B5 A6 Custom: Min. 4.1" x 5.8", Max. 12.9" x 18" Custom: Min. 5.8" x 8.3", Max. 12.9" x 18" Custom: Min. 3" x 5", Max. 12.9" x 18" Banners: Max.12.9" x 47.25" Feed Tray // Exit Tray All Trays Face-Down up to 176 g/m 2 Face-Up up to 216 g/m 2 Tray 1 or MP Tray Face-Up only Tray 1 Face-Up only Trays 2 to 5 Face-Up only MP Tray Face-Up only up to 427 g/m 2 Labels, Transparencies, Envelopes Media Size Type Feed Tray // Exit Tray Labels Trans. Letter A4 Letter A4 Label 1 Label 2 MP Tray Trans. Tray 1 Face-Up MP Tray Face-Up Env. Com-10 N.A. MP Tray Face-Up 18

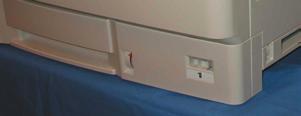
19 Thick Paper Media Size Media Weight Feed Tray Letter, Legal-13 Legal-13.5 Legal-14 Executive Tabloid Tabloid Extra A3, A3 Wide A3 Nobi A4, A5 B4, B5 Custom: Min. 4.1" x 5.8" Custom: Min. 5.8" x 8.3" Custom: Min. 3" x 5" Banner: Max. 12.9" x 47.25" up to 216 g/m 2 Any Tray up to 502 g/m 2 MP Tray up to 216 g/m 2 Tray 1 up to Trays g/m 2 to 5 up to 502 g/m 2 MP Tray up to 502 g/m 2 MP Tray MEDIA SELECT SWITCH The Ilumina is equipped with a Media Select switch located next to the MP Tray. The Media Select switch configures the Ilumina for printing on stock heavier than 330 g/m 2. When printing on media greater than 330 g/m 2, push the switch up. A light in the switch will indicate when the switch is turned on. When printing on media less than 330 g/m 2, push the Media Select switch down. 19
20 RECOMMENDED MEDIA Media Type Paper Labels Thick Recommended Letter: Hammermill Laser Print Radiant White, 90.3 g/m 2 Xerox 4024, 75.2 g/m 2 Tabloid/Tabloid Extra: Hammermill Laser Print Radiant White, 90.3 g/m 2 Letter: Avery M CG3720 A4: Avery 7162, 7664, 7666 All Sizes: Kromekote C1S Kromekote C2S Mac-Cote C1S Mac-Cote C2S Mohawk Smooth Superfine Cover Wausau Exact Index up to 502 g/m 2 PAPER Do Not Use Heavily Coated Paper Embossed or Textured Paper Paper with Cutouts, Perforations, or Excessive Paper Dust Xanté highly recommends that all printing be accomplished on pre-converted papers. Converted sheet types Xanté is concerned with include, but are not limited to: scored, perforated, embossed, debossed, ragged edge, textured, and foil papers. These converted types of paper media can cause difficulties for the Ilumina. Although printing on converted papers is possible, doing so can limit the printer s performance. Optimal ratings as quoted on the Ilumina spec sheet will be impacted anytime the user deviates from printing with the standard pre-converted media. 20
21 Sample Ream Label Media Size, US / Metric 2. Media Weight, US Bond / Metric 3. Number of Sheets in Package 4. Manufacturer Name for Media LABELS Labels must be designated for laser printers, must cover the entire carrier sheet and the adhesive must not be exposed. Individual Print Jobs Use the following driver settings: Source = MP Tray Size = Letter/A4 Long Edge Letter/A4 Short Edge Type = Labels Media Size = Off For Windows XP/NT/2000 Select [Properties] then [Advanced] For Windows Me/98 Select [Properties] then the [Setup] tab Choose [Paper Feed Options] Choose media from the drop down box 21
22 Make Labels the Default Change the default settings on the front panel of the Ilumina: Select [Menus] Select [Tray Configuration] Select [MP Tray Config] Select [Paper Size] Letter Long Edge / Letter Short Edge A4 Long Edge / A4 Short Edge Select [Media Type] Labels Select [Media Weight] Heavy / Ultra Heavy 1 Ultra Heavy 2 / Ultra Heavy 3 TRANSPARENCIES For more information, see section titled Labels, Transparencies, Envelopes. Avoid office transparencies designed for use with marker pens. These will melt in the fuser and cause damage. Individual Print Jobs Use the following driver settings: Source = Tray 1 or MP Tray Size = Letter/A4 Long Edge Letter/A4 Short edge Type = Transparency Media Size = Off 22
![Make Transparency the Default Change the default settings on the front panel of the Ilumina: For Tray 1 Select [Menus] Select [Tray Configuration] Select [Tray1 Config] Select [Paper Size] Letter](/docs-images/79/79354326/images/23-0.jpg "Long Edge / Letter Short Edge A4 Long Edge / A4 Short Edge Select [Media Type] Transparency For MP Tray Select [Menus] Select [Tray Configuration] Select [MP Tray Config] Select [Paper Size] Letter")
![Long Edge / Letter Short Edge A4 Long Edge / A4 Short Edge Select [Media Type] Transparency 23 ENVELOPES Feed side flap envelopes with the flap side down and flap in first.](/docs-images/79/79354326/images/23-1.jpg "Feed end flap envelopes with the flap down and flap toward the back of the Ilumina. For more information, see section titled Labels, Transparencies, Envelopes.")
23 Make Transparency the Default Change the default settings on the front panel of the Ilumina: For Tray 1 Select [Menus] Select [Tray Configuration] Select [Tray1 Config] Select [Paper Size] Letter Long Edge / Letter Short Edge A4 Long Edge / A4 Short Edge Select [Media Type] Transparency For MP Tray Select [Menus] Select [Tray Configuration] Select [MP Tray Config] Select [Paper Size] Letter Long Edge / Letter Short Edge A4 Long Edge / A4 Short Edge Select [Media Type] Transparency 23 ENVELOPES Feed side flap envelopes with the flap side down and flap in first. Feed end flap envelopes with the flap down and flap toward the back of the Ilumina. For more information, see section titled Labels, Transparencies, Envelopes. For the best print results, use only the recommended envelopes. Never use envelopes with metal clasps, snaps, windows, or V-flap. Individual Print Jobs Use the following driver settings: Source = MP Tray Size = COM-10
24 Make Envelopes the Default Change the default settings on the front panel of the Ilumina: For MP Tray Select [Menus] Select [Tray Configuration] Select [MP Tray Config] Select [Paper Size] Com-10 THICK PAPER For more information, see section titled "Settings By Paper Weight" earlier in this document. To prevent damage to the Ilumina, it is very important to check the media setting before printing. Individual Print Jobs Use the following driver settings: Media Weight = Medium Heavy / Heavy Ultra Heavy 1 / Ultra Heavy 2 Ultra Heavy 3 24 Make Thick Paper the Default Change the default settings on the front panel of the Ilumina: Tray 1, 2, 3, 4, or 5 Select [Menus] Select [Tray Configuration] Select [Tray X Config] Select [Media Weight] Medium Heavy / Heavy Ultra Heavy 1 / Ultra Heavy 2 MP Tray Select [Menus] Select [Tray Configuration] Select [MP Tray Config] Select [Media Weight] Medium Heavy / Heavy Ultra Heavy 1 / Ultra Heavy 2 Ultra Heavy 3


25 LOADING TRAYS Loading Trays 1-5 Loading Letterhead Long edge feed face down, top toward the back of the Ilumina. Short edge feed face down, top to the right: Load letterhead stationery with the printed side down. For more information, see the "User's Guide" on the Documentation CD or visit 25


26 Loading the MP Tray Loading Letterhead in MP Tray Long edge feed Top toward the back of the tray Left side will feed into the Ilumina Short edge feed Top edge feeds into the Ilumina Transparencies & Labels Print Side Up Long Edge Feed Envelopes Flap Side Down Flap Edge First 26 Always load media into the MP Tray with the printed side up.


![Select [ ]](/docs-images/79/79354326/images/27-2.jpg "Select [MP")
![Config] Select](/docs-images/79/79354326/images/27-3.jpg "[Paper Size]")


27 Check the MP Tray Configuration Select [Menus] Select [Tray Configuration] Select [MP Tray Config] Select [Paper Size] Select [Media Type] Face Up This tray is located on the opposite side of the MP Tray and can hold up to 230 sheets of 75 g/m 2 paper. This tray MUST be used for special media such as heavy papers. The face up exit tray provides a straight-through paper feed path when printing, transparencies, labels, heavy card stock, etc. The default is Letter Long Edge. EXIT PATHS Face Down This tray is located on top of the Ilumina and can hold up to 500 sheets of 75 g/m 2 paper. 27
28 SECURE PRINT Storing Jobs to Hard Disk Drive The document must first be assigned a password and then processed to print which allows it to be saved to the HDD. To Print the Document You must go to the front panel and enter the password. Press [MENU] Select [Print Secure Job] Use the and keys to enter the first digit of your password and press [ENTER] to move to the next digit. Repeat the process and press [ENTER] again when complete Select [Print] and press [ENTER] Choose the [Set Collating Amount] and press [ENTER] Secure Print: The document prints and it is deleted from the hard disk drive Store to HDD: The document prints and it remains stored until deleted 28 To Delete the Document Press [MENU] Select [Print Secure Job] Use the and keys to enter the first digit of your password and press [ENTER] to move to the next digit. Repeat the process and press [ENTER] again when complete Select [Print] and press [ENTER] Select [Delete] and press [ENTER] Select [Yes] to confirm Press [ENTER] again to exit the Menu For more information, see the "User's Guide" on the Documentation CD or visit

 29 OFF Normal")
 Power Save Power Save")
.")


29 CONTROL PANEL Ready Light ON The Ilumina has power OFF The Ilumina does not have power Flashing The Ilumina is receiving data Attention Light ON The Ilumina needs attention, but will continue to operate. An error message will display (i.e., "TONER LOW") 29 OFF Normal Flashing The Ilumina needs attention immediately. An error message will display (i.e., PAPER JAM) Power Save Power Save determines how long the Ilumina waits before going into standby mode (default is 60 minutes). This saves energy, however it requires time to warm up when it receives a new print job. To Disable Power Save Change the default settings on the front panel of the Ilumina: Turn the Ilumina ON while holding [ENTER] and wait until it displays the Boot Menu setup Select [Power Setup] Select [Power Save] Select [Disable] Press [ON LINE] to exit the Menu
30 Set the Time Interval Press [MENU] Select [Menus] Select [System Adjust] Select [Power Save Time] Press key to select the time interval Press [ON LINE] to exit the Menu CLEANING LED HEADS It is recommended to clean the LED heads under the following conditions: When you install a new toner cartridge When the printed sheets show faded images, white stripes, or blurred letters When toner scatter is visible When paper jams occur on the transfer belt under the LED heads How to Clean Lift the top cover halfway up. This allows you access to the LED heads, bypassing the guards. 30

 to")


![Press [MENU] Select](/docs-images/79/79354326/images/31-8.jpg "[Print Information] Press")


![[Network] A single-page](/docs-images/79/79354326/images/31-12.jpg "detailed list of network")
31 Use the lens cleaner supplied with the toner cartridge (or a clean, soft, lint-free cloth) to gently wipe the LED heads. Close the lid when finished. REPORTS Printing Reports Make sure the Drum Basket is fully secured before closing the cover. Failure to secure the Drum Basket could cause damage to the Ilumina and hinder or prevent normal operation. Press [MENU] Select [Print Information] Press key to select a report: [Configuration] General information on your Ilumina configuration, plus a listing of the current menu settings [Network] A single-page detailed list of network information [File List] Creates a list of files stored on the hard disk drive 31
![[PCL Font List] Prints a list of common PCL fonts [IBM PPR Font List] Produces a list of IBM ProPrinter emulation fonts in the Ilumina [Epson FX Font List] Creates a list of Epson FX emulation fonts](/docs-images/79/79354326/images/32-0.jpg "stored in the Ilumina Press [ENTER] to make your selection.")

32 [PCL Font List] Prints a list of common PCL fonts [IBM PPR Font List] Produces a list of IBM ProPrinter emulation fonts in the Ilumina [Epson FX Font List] Creates a list of Epson FX emulation fonts stored in the Ilumina Press [ENTER] to make your selection. The report will print automatically and the Ilumina will return to the Ready-to- Print state For more information, see the "User's Guide" or "Printing Guide" on the Documentation CD or visit 32 TROUBLESHOOTING Using the Help Button When an error message appears on the control panel, press [HELP] to display information to correct the error. Use the key to move down through the Help information. Paper Jams If you are experiencing frequent paper jams, check the following items. Is the Ilumina on a level surface? Is your media within specifications listed earlier in this document? Media that are too light or too heavy will often cause jams. Are the tray and media settings in the front panel and driver appropriate for the media being used? Do not use creased or curled media.

33 Is static causing the media to stick together? Remove the paper in the tray, fan and realign the stack in the tray. The feed rollers may need cleaning. If envelopes are jamming, make sure the stack is properly aligned and that they are loaded properly. Load envelopes with the flap down and top edge feeding into the Ilumina. ETHERNET INTERFACE FOR TCP/IP Setup Install the Ferrite Core In order to reduce electromagnetic interference noise that interferes with TVs or other appliances you must place the enclosed ferrite core on the network cable connected to your printer. To Install the Ferrite Core: 1. Disconnect the network cable from the Ilumina, if necessary. 2. Loop the cable to keep the ferrite core in place. 33

34 3. Place the open core about 1 inch from the cable connector on the Ilumina end. 4. Press the two halves of the core together until they click shut. This safeguard is an FCC requirement. 5. Connect the Ethernet cable between the Ilumina and the Ethernet hub. 6. Turn the Ilumina ON. 7. Use the front panel to assign the IP Address. Assign an IP Address to the Ilumina If you are not using DHCP, you need to obtain an IP Address from your network Administrator and enter it using the front panel: 1. Confirm that the Ilumina displays [Ready To Print]. 2. Press until [Admin Setup] displays. Press ENTER. 3. Enter the password. Press either or to enter the first figure of the password. Press ENTER to proceed to the next figure. The default password is Hold down the key more than two seconds to fast forward. 4. Press ENTER again after completing the password. 5. Press until [Network Setup] displays. Press ENTER. 34
![6. Press until [Slot1: 100/10 Base] displays. Press ENTER. 7. Press until [IP Address] displays. Press ENTER. 8.](/docs-images/79/79354326/images/35-0.jpg "Press either or to set the first figure of the IP address. Press ENTER to proceed to the next section of numbers. 9.")
![Repeat steps 8 and 9 to set all digits. 10. Press and repeat steps 7 through 10 to set the [Subnet Mask] and [Gateway Address]. 11.](/docs-images/79/79354326/images/35-1.jpg "Press ONLINE until [Ready To Print] displays. USB cable version 2.0 or above. PC running Windows 98 or above. Mac running OS 9.")

35 6. Press until [Slot1: 100/10 Base] displays. Press ENTER. 7. Press until [IP Address] displays. Press ENTER. 8. Press either or to set the first figure of the IP address. Press ENTER to proceed to the next section of numbers. 9. Repeat steps 8 and 9 to set all digits. 10. Press and repeat steps 7 through 10 to set the [Subnet Mask] and [Gateway Address]. 11. Press ONLINE until [Ready To Print] displays. USB cable version 2.0 or above. PC running Windows 98 or above. Mac running OS 9.04 or above. 1. Turn Ilumina power OFF. 2. Connect the USB cable between the Ilumina and the computer. Printer operation is not assured if a USB compatible device is connected concurrently with it. If a USB hub is used, it must be directly connected to the computer. USB INTERFACE Connect the USB Cable Requirements: 35
36 PARALLEL INTERFACE (LPT1) Connect the Parallel Cable Requirements: PC running Windows 98 or above. Bidirectional (IEEE 1284 compliant) parallel cable. The cable must be shielded and UL and CSA approved. 1. Make sure the Ilumina is powered OFF. 2. Connect a parallel cable between the Ilumina and computer. WINDOWS INSTALLATION Select a Printer Driver in Windows Select a driver appropriate for your application. PostScript Printer Driver If you use PostScript fonts, or you will be printing PostScript graphics, choose this driver. Performance is faster and graphics print at their best quality. PCL Printer Driver If you use TrueType fonts and you do not print PostScript (including.eps files) graphics, choose this driver. This is more efficient and gives good results. You can install both drivers and use either one depending on your application. However, each driver must be installed individually. 36
37 Installing Optional Components If your Ilumina has optional components (i.e., additional paper trays, RAM, etc.), they must be activated before they can be used. TCP/IP Driver Install 1. Make sure the Ethernet cable is connected and your Ilumina is turned ON. 2. Insert CD1 into your CD-ROM drive. The CD will autorun. If it does not autorun, click [Start] [Run] [Browse]. Browse to your CD-ROM drive. Double-click [Install.exe]. 3. The License Agreement will appear. Click [Next] to accept. 4. Select your language if needed. 5. Select [Custom Install] to install the printer driver and software utilities. To install only the Ilumina driver, select [Minimal Install] and skip to Step Select [Printer Driver Installer] Select [Network Printer]. Click [Next]. 8. Select [Directly to the Network] using [TCP/IP]. Click [Next]. 9. The TCP/IP Connection screen will appear. Select [Search Address]. Click [Next]. 10. Highlight your Ilumina. Click [Next]. 11. Select the [PS] or [PCL] driver under Printer Emulation. Click [Next]. 12. Follow the on-screen instructions to complete the installation. LPR Utility to Discover The LPR Utility is installed automatically with the network Ilumina drivers.
38 In order to send documents to the Ilumina, the LPR utility must be installed. LPR installs automatically when the drivers are installed using the Menu Installer as instructed here. If drivers are installed using Windows Add Printer Wizard, you must manually load the LPR Utility from the Menu Installer on CD1. To do this, click [Custom Install] [Network Software] [Installation/ Config] [LPR Utility]. To discover the Ilumina, do the following: 1. Click [Start] [Programs] [Xanté] [Xanté LPR Utility]. 2. Click [Remote Print]. Then, click [Add Printer]. 3. Select your Ilumina from the drop-down list 4. Enter the IP Address manually or click [Discover] and wait for the Ilumina to be discovered. 5. Click [OK]. USB Driver Install The installation procedure may vary slightly depending on the operating system you are using. Drivers are provided for Windows XP/2000/ Me/ Make sure the USB cable is connected and your Ilumina is turned OFF. 2. Insert CD1 into your CD-ROM drive. The CD will autorun. If it does not autorun, click [Start] [Run] [Browse]. Browse to your CD-ROM drive. Double-click [Install.exe]. 3. The License Agreement will appear. Click [Next] to accept. 38
39 4. Select your language if needed. 5. Select [Custom Install] to install the printer driver and software utilities. To install only the Ilumina driver, select [Minimal Install] and skip the next step. 6. Select [Printer Driver Installer]. 7. Select [Local Printer]. Click [Next]. 8. Select [USB]. Click [Next]. 9. Select the [PS] or [PCL] driver under Printer Emulation. Click [Next]. 10. If prompted, type a name for your Ilumina. Click [Next]. 11. If prompted, select Do not share this printer. Click [Next]. 12. Drivers will begin to copy. If a connect cable message appears, follow the on-screen instructions. 13. Switch the Ilumina ON. If the New Hardware Found Wizard displays: On Win 98: Select Search for the best driver for your device Click [Next]. Select your CD-ROM drive then click [Next]. On Win XP and Win Me: Select Install the software Automatically or Automatic Search... and click [Next]. 14. Click [Finish] to complete the installation. Enable the USB Port 1. Click [Start] [Settings] [Printers]. 2. Right click the Ilumina icon and go to [Properties]. 39
40 3. Click the [Ports] or [Details] tab according to your version of Windows. 4. Select the [USB001] or [OP1USB1] port under Print to the following port. Print a Test Page 1. Click [Start] [Settings] [Printers]. 2. Right click the Ilumina icon and go to [Properties]. 3. Click the [General Tab] and click the [Print Test Page] button. 4. Click [OK] to close the Properties window. Parallel (LPT1) Driver Install The installation procedure may vary slightly depending on the operating system you are using. Drivers are provided for Windows XP/2000/ Me/ Make sure the parallel cable is connected and that your Ilumina is turned OFF. 2. Insert CD1 into your CD-ROM drive. The CD will autorun. If it does not autorun, click [Start] [Run] [Browse]. Browse to your CD-ROM drive. Double-click [Install.exe]. 3. The License Agreement will appear. Click [Next] to accept. 4. Select your language if needed. 5. Select [Custom Install] to install the printer driver and software utilities. To install only the Ilumina driver, select [Minimal Install] and skip the next step. 6. Select [Printer Driver Installer]. 7. Select [Local Printer]. Click [Next]. 8. Select [LPT1]. Click [Next]. 40
41 9. Select the [PS] or [PCL] driver under Printer Emulation. Click [Next]. 10. If prompted, type a name for your Ilumina. Click [Next]. 11. If prompted, select Do not share this printer. Click [Next]. 12. Follow the on-screen instructions to compete the installation. Click [Finish]. 13. Switch the Ilumina ON. Print a Test Page 1. Click [Start] [Settings] [Printers]. 2. Right click the Ilumina icon and go to [Properties]. 3. Click the [General Tab] and click the [Print Test Page] button. 4. Click [OK] to close the Properties window. MACINTOSH INSTALLATION PostScript Printer Driver If you use PostScript fonts, or you will be printing PostScript graphics, choose this driver. Performance is faster and graphics print at their best quality. The PCL Driver is not available for Mac OS. Installing Optional Components If your Ilumina has optional components (i.e., additional paper trays, RAM, etc.), they must be activated before they can be used. See Chapter 5 for instruction on how to activate these options for your operating system. Installing Additional Utilities In the CD1 Menu Installer you can install additional Network and Productivity Software. For more information on these utilities see the Utilities Guide. 41
![Not all utilities are available for all versions of Mac OS. See the OS versions listed on the [Custom Install] screen. To install additional utilities, select [Custom Install].](/docs-images/79/79354326/images/42-0.jpg "Click the box next to each utility that you want to install and click [Install]. Installation for Mac OS 9 Ethernet and USB Driver Install 1.")
42 Not all utilities are available for all versions of Mac OS. See the OS versions listed on the [Custom Install] screen. To install additional utilities, select [Custom Install]. Click the box next to each utility that you want to install and click [Install]. Installation for Mac OS 9 Ethernet and USB Driver Install 1. Make sure the Ethernet cable is connected and your Ilumina is turned ON. 2. Insert CD1 into your CD-ROM drive. 3. Double-click the Xanté CD icon that appears on the desktop. 4. Double-click the folders for [Mac] [Driver Installers]. 5. Double-click your language folder. 6. Double-click the [Mac Installer Ilumina] icon. Click [Continue]. 7. Click [Accept] to accept the License Agreement. 8. To select the Ilumina driver plus additional utilities, click [Install]. To install only the Ilumina driver, click [Custom Install]. 42
43 9. When the installation is complete, click [Quit]. 10. Continue to the Creating the Desktop Icon for Ethernet or USB. Ethernet Desktop Icon 1. Select [Chooser] from the Apple dropdown menu. 2. Highlight the AdobePS icon and your Ilumina on the right. Click [Create]. 3. Wait until your system finishes the Ilumina setup and the desktop icon appears on your desktop. 4. Close the [Chooser] window. If you need to verify the Ilumina name, press the print server test button to print the Configuration pages. The Ilumina name is on the second page. Test Button 43
44 USB Desktop Icon 1. Locate and double-click the [Desktop Printer Utility] on your hard drive. Normally located on the hard drive under [Applications] [Utilities] [AdobePS Components]. 2. In the drop-down box, select [AdobePS]. 3. Highlight [Printer (USB)] under Create Desktop. Click [OK]. 4. Under Postscript Printer Description (PPD) click [Change]. 5. Highlight your Xanté Ilumina. Click [OK]. 6. Under USB Printer Selection click [Change]. 7. Highlight your Xanté Ilumina. Click [OK]. 8. Click [Create] and the Ilumina icon will appear on the desktop. Close [Chooser]. 9. Print a test page from TextEdit or your chosen application. Installation for Mac OS X Ethernet and USB Driver Install 1. Make sure the Ethernet cable is connected and your Ilumina is turned ON. 2. Insert CD1 into your CD-ROM drive. 3. Double-click the Xanté CD icon that appears on the desktop. 4. Double-click the folders for [Mac] [Driver Installers]. 5. Double-click your language folder. 6. Double-click the [Mac Installer Ilumina] icon. Click [Continue]. You must be an Admin user to install drivers. 7. Click [Accept] to accept the License Agreement. 8. Click on the drop-down menu. Select the MAC OS X you are using. 44
![6. Print a test page from TextEdit or your chosen application. Adding the Ilumina using USB 1. Open [Printer Setup Utility] or [Print Center]. Click [Add Printer].](/docs-images/79/79354326/images/45-0.jpg "Normally located under [Applications] [Utilities]. 9. Click [Install]. 10. Click [Continue] to install additional utilities or click [Quit]. 11. Continue to the Adding the Ilumina for Ethernet or USB.")
45 6. Print a test page from TextEdit or your chosen application. Adding the Ilumina using USB 1. Open [Printer Setup Utility] or [Print Center]. Click [Add Printer]. Normally located under [Applications] [Utilities]. 9. Click [Install]. 10. Click [Continue] to install additional utilities or click [Quit]. 11. Continue to the Adding the Ilumina for Ethernet or USB. Adding the Ilumina using Ethernet 1. Open [Printer Setup Utility] or [Print Center]. Click [Add Printer]. Normally located under [Applications] [Utilities]. 2. Select [IP Printing] or [Line Printer Daemon] from the drop down menu. 3. Enter the IP Address for your Ilumina. 4. Enter Ilumina for the queue name. 5. Verify that Print Using displays [Xanté Ilumina(PS)]. Click [Add]. 2. Select [USB] from the drop down menu. 3. Follow the on-screen instructions to complete the installation. 4. Print a test page from TextEdit or your chosen application. 45
46 Configuring or Installing Options If your Ilumina has optional components (i.e., additional paper trays, RAM, etc.), they must be activated before they can be used. Installable options configuration is only available on OS X 10.2 and above. Windows 1. Click [Start] [Settings] [Printers]. 2. Right click the Ilumina icon and go to [Properties]. 3. Windows 2000 / XP / NT Click the [Device Settings Tab] and scroll down to [Installable Options]. Windows Me / 98 Click the [Device Options Tab] and go to [Installable Options] section. 4. Highlight and select installed options from the drop down menu. 5. Click [OK] to close the Properties window. 6. Options will now be available from within your applications. Mac OS 9 1. Select [Chooser] from the Apple drop-down menu. 2. Highlight the AdobePS icon and your Ilumina. Click [Setup]. 3. Select [Configure] and select installed options from the drop down menu. 4. Close [Chooser] and options will be available from within your Mac OS X applications. 1. Open [Printer Setup Utility]. 2. Highlight the Ilumina and click [Show Info]. 3. Click on [Name & Location] and select [Installable Options]. 4. Highlight and select installed options from the drop down menu. 5. Click [Apply Changes] and close the [Printer Setup Utility]. 6. Options will now be available from within your applications. 46
47 Setting Default Software Options This section details how to access the software options from each operating system. For specific information on the individual software options see the Printing Guide. Windows 1. Click [Start] [Settings] [Printers]. 2. Right click the Ilumina icon and go to [Properties]. 3. Windows 2000 / XP / NT Click the [General Tab] and click the [Printing Preferences] button. Choose your default settings on the [Layout], [Paper/Quality], [Job Option], and [Color] Tabs and [Advanced] buttons. Windows Me / 98 Click the [Device Options Tab] and go to [Printer Features] section. Highlight and select installed options from the drop down menu. 4. Click [OK] to close the Properties window. The settings can be changed on a per-job basis from [Properties] in Mac OS 9 the application print window. 1. From your application, click [File] [Print]. 2. Select [General] and scroll down the list of available options. 3. Click [Save Settings] to set the default Mac OS X options. 1. From your application, click [File] [Print]. 2. Select [General] and scroll down the list of available options. 3. Click Presets and scroll to [Save As] to save the default options. Installing Additional Utilities In the CD1 Menu Installer you can install additional Network and Productivity Software. For more information on these utilities see the Utilities Guide. 47
48 Windows To install Network Utilities, select [Custom Install] [Network Software]. Select [Administration Tools] to install network management tools or [Installation/Config] to install utilities for network printing, installation and configuration. To install Productivity Software, select [Custom Install] [Productivity Software] to install color and storage device management software. Mac OS 9 To install additional utilities, select the [Xanté CD icon] [Mac] [Driver Installers] [Language Folder] [Mac Installer Ilumina] icon. To install all options, click [Install] or select [Custom Install] and click the boxes next to each utility that you want to install and then click [Install]. Mac OS X To install additional utilities, select the [Xanté CD icon] [Mac] [Driver Installers] [Language Folder] [Mac Installer Ilumina] icon. Select [Custom 48 Install] and click the boxes next to each utility that you want to install and click [Install]. Not all utilities are available for all versions of Mac OS. See the OS versions listed on the [Custom Install] screen. You must be an Admin user to install additional utilities. PDF or On-Line Manuals For additional information on using Ilumina features as well as Ilumina utilities, see the reference manual located on CD2 or on Requirements Microsoft Internet Explorer version 4.0 or higher and Acrobat Reader.
49 View the Manuals To open the PDF manuals, you must have Acrobat Reader installed. 1. Insert CD2 into your CD-ROM drive. The CD will autorun. If it does not autorun, click [Start] [Run] [Browse]. Browse to your CD-ROM drive. Double-click [XInstall.exe]. 2. Click on the appropriate button to view the PDF manual. Click [Exit] to quit. Copy the Manuals To open the PDF manuals, you must have Acrobat Reader installed. 1. Insert CD2 into your CD-ROM drive. The CD will autorun. If it does not autorun, click [Start] [Run] [Browse]. Browse to your CD-ROM drive. Double-click [XInstall.exe]. 2. Click on the [Copy Manuals to Desktop] button. Click [Exit] to quit. 49 Service and Support If you need further assistance please visit our web site: In the U.S. and Canada, call: In Europe, call: +31-(0) a.m. - 6 p.m. CST; Monday - Friday Fax: Other areas, contact your authorized Ilumina vendor. Rev2:
Software Installation Guide
 Software Installation Guide Xanté Corporation 2800 Dauphin St., Suite 100 Mobile, AL 36606-2400 P.O. Box 16526, Mobile, AL 36616-0526 Phone: 800-926-8839, 251-473-6502 Fax: 251-473-6503 Web Site: www.xante.com
Trademarks. Xanté Corporation 2800 Dauphin Street Mobile, AL Phone: (800) , (251) Fax: (251)
 , (251) Fax: (251)") 1 Trademarks Xanté and Ilumina Digital Envelope Press are registered trademarks of Xanté Corporation. Adobe and Adobe PostScript are registered trademarks of Adobe Systems Incorporated. Windows is a registered
1 Trademarks Xanté and Ilumina Digital Envelope Press are registered trademarks of Xanté Corporation. Adobe and Adobe PostScript are registered trademarks of Adobe Systems Incorporated. Windows is a registered
Contents Replacement Supplies Loading Print Media Menu Exit Paths
 Contents Replacement Supplies......... 2 Purchasing Information.......... 2 Oki Services................... 4 Menu....................... 5 Changing Settings.............. 5 Structure.....................
C9600 Software Installation Guide
 C9600 Software Installation Guide Table of Contents Network Installation...2 Windows...2 Novell...6 Windows Installation...7 USB Connection...7 Parallel Connection...10 Macintosh Installation...12 OS 9.1
Xanté is a registered trademark of Xanté Corporation.
 Xanté is a registered trademark of Xanté Corporation. Adobe ; Adobe PageMaker ; Adobe PostScript, the PostScript, and Adobe logos are registered trademarks of Adobe Systems Incorporated. Adobe Acrobat
Quick Reference Manual
 Quick Reference Manual 100-100578 Trademarks XANTÉ is a registered trademark of XANTÉ CORPORATION. Adobe ; Adobe PageMaker ; Adobe PostScript, the PostScript, and Adobe logos are registered trademarks
Important safety warnings follow. Be sure to read and observe all safety warnings in this Handy Reference.
 Important safety warnings follow. Be sure to read and observe all safety warnings in this Handy Reference. 59375801 Contents Walk-Up Operation........... 3 The Scanner Control Panel...... 4 Using the Scanner/Copier.......
Trademarks. Copyright This manual is Copyrighted 2006 by Xanté Corporation. All Rights Reserved. Printed in the USA.
 Trademarks Xanté is a registered trademark of Xanté Corporation. Adobe ; Adobe PageMaker ; Adobe PostScript, the PostScript, and Adobe logos are registered trademarks of Adobe Systems Incorporated. Adobe
Quick Reference Manual
 Quick Reference Manual 100-100555 Trademarks XANTÉ is a registered trademark of XANTÉ CORPORATION. Adobe ; Adobe PageMaker ; Adobe PostScript, the PostScript, and Adobe logos are registered trademarks
Contents Ordering Replacement Supplies...2 Media Settings...3 Changing Default Media Settings Loading Media Selecting/Using
 Contents Ordering Replacement Supplies...2 Media Settings...3 Default Media Settings...3 Ranges for Printer Media Weight Settings... 4 Changing Default Media Settings Trays 1, 2, 3... 5 Multi-Purpose (MP)
Computer Connections & Software Install Guide
 C5400 & C5400n Computer Connections & Software Install Guide Installation Overview: Windows Network Installation: Model C5400n Only Ethernet Connection... 2 Software: TCP/IP... 3 Software: Novell... 8
ES 2024/2024e and ES 3037/3037e Software Installation Guide
 ES 2024/2024e and ES 3037/3037e Software Installation Guide Installation Checklist Which Printer Driver?... 2 USB Versus Parallel Interface: Windows... 2 Installation... 3 Network Installation... 3 Connect
Executive Series 1220n Computer Connections & Software Install Guide
 Executive Series 1220n Computer Connections & Software Install Guide Installation Checklist Network Install: Hardware...2 Network Install: Software...3 TCP/IP...3 Novell...6 Local Install: Windows USB
Contents Ordering Replacement Supplies Media Settings
 Contents Ordering Replacement Supplies..................... 2 Media Settings.................................. 3 Defaults...................................... 3 Media Weight Settings............................
Handy Reference Guide. Record your printer s Serial Number:
 Handy Reference Guide 59344003 Record your printer s Serial Number: For the latest info, go to http://my.okidata.com. For more detailed information, see your on-line User s Guide (on the Publications CD
ES3640e MFP Software Installation Guide
 ES3640e MFP Software Installation Guide About this Guide This guide describes the initial printer driver installation. For more detailed information, refer to the EFI User Software Installation Guide and
C5800 Ldn User s Guide
 59382001_cvr.jpg Copyright Information Copyright 2006 by Oki Data. All Rights Reserved Document Information P/N 59382001, Revision 1.2 January, 2006 Disclaimer Every effort has been made to ensure that
Chapter 1 - Introduction and Installation ScreenWriter 4 Printer
 Chapter 1 - Introduction and Installation ScreenWriter 4 Printer Fig. 1.1 ScreenWriter 4 Printer The ScreenWriter 4 is designed for high-end silk-screen and graphics applications. Standard density and
Setup Guide. Overview Check Contents. ➊ Printer ➋ Toner ➌ Power Cord
 1 Setup Guide Overview Check Contents ➊ ➊ Printer ➋ Toner ➌ Power Cord ➍ CD ➏ ➎ Light-Shield Bag (to protect image drum from light when it is removed from printer) ➏ Setup Guide, Warranty and Regulatory
DIGITAL COLOR PRESS DIGITAL ENVELOPE PRESS DIGITAL PRODUCTION PRESS. Utilities Guide
 DIGITAL COLOR PRESS DIGITAL ENVELOPE PRESS DIGITAL PRODUCTION PRESS Utilities Guide Xanté Corporation 2800 Dauphin St., Suite 100 Mobile, AL 36606-2400 P.O. Box 16526, Mobile, AL 36616-0526 Phone: 251-473-6502
OKI C9000 Series Setup Guide
 OKI C9000 Series Setup Guide Installation Checklist: Please cut this page out and use it as a guide when installing your printer. 1 Install the Printer h Select a Location (see p. 3) h Unpack (see p. 4)
Changing the Size of the Paper in the Paper Tray For Local Printing For Network Printing (WorkCentre PE120i only)...1.
...1.") Quick Start Guide CONTENTS Step 1: Unpacking... 1.3 Step 2: Installing the Toner Cartridge... 1.5 Step 3: Loading Paper... 1.7 Changing the Size of the Paper in the Paper Tray.. 1.9 Step 4: Connecting
Quick Start Guide CONTENTS Step 1: Unpacking... 1.3 Step 2: Installing the Toner Cartridge... 1.5 Step 3: Loading Paper... 1.7 Changing the Size of the Paper in the Paper Tray.. 1.9 Step 4: Connecting
STEP 1. Setting Up the Machine STEP 2. Installing the Printer Driver. Setup is Complete!
 Laser Printer HL-5240 HL-5240L HL-5250DN Quick Setup Guide Before you can use the printer, you must set up the hardware and install the driver. Please read this Quick Setup Guide for proper set up and
C5150n, C5200ne & C5200n Computer Connections & Software Install Guide
 C5150n, C5200ne & C5200n Computer Connections & Software Install Guide Installation Overview: Windows Windows TCP/IP Network Installation: C5150n & C5200ne Ethernet Connection... 2 Software... 3 Windows
WorkForce Pro WP-4090 User's Guide
 WorkForce Pro WP-4090 User's Guide Contents WorkForce Pro WP-4090 User's Guide... 9 Product Basics... 10 Printer Parts Locations... 10 Printer Parts - Top... 11 Printer Parts - Back... 12 Printer Parts
3 Sleep button Enable Sleep mode or Hibernate mode. Notes:
 Quick Reference Use the To 3 Sleep button Enable Sleep mode or Hibernate mode. Indicator light color and its corresponding printer status Indicator light Printer status Off The printer is off or in Hibernate
Ready Reference Guide
 Ready Reference Guide English HP LaserJet 8100, 8100 N, and 8100 DN Printers Ready Reference Guide HP LaserJet 8100, 8100 N, and 8100 DN Printers Copyright Hewlett-Packard Company 1998 All Rights Reserved.
Quick Setup Guide MFC-8220
 Quick Setup Guide MFC-8220 Before you can use the MFC, you must set up the hardware and install the driver. Please read this Quick Setup Guide for proper set up and installation instructions. Step 1 Step
LBP-810 Laser Printer
 LBP-810 Laser Printer Getting Started Guide IMPORTANT: Read this manual carefully before using your printer. Save this manual for future reference. Copyright Copyright 2001 Canon Inc. All information in
Remove the accessory tray and check the contents. Toner cartridges (1 each: black, magenta, cyan, yellow)
") Overview 1 2 3 4 5 6 7 8 9 10 11 Unpack... 1 Install the Toner Waste Box... 4 Install the Oil Roller... 5 Prepare the Image Drums... 6 Install the Toner Cartridges... 7 Load paper... 8 Connect to Your
Overview 1 2 3 4 5 6 7 8 9 10 11 Unpack... 1 Install the Toner Waste Box... 4 Install the Oil Roller... 5 Prepare the Image Drums... 6 Install the Toner Cartridges... 7 Load paper... 8 Connect to Your
Quick Setup Guide Imagistics ix 2701
 Quick Setup Guide Imagistics ix 2701 Before you can use the machine, you must set up the hardware and install the driver. Please read this Quick Setup Guide for proper set up and installation instructions.
ES1624 MFP Setup and Installation Guide
 ES1624 MFP Setup and Installation Guide Installation Overview Notes, Cautions, and Warnings...4 Select Location...4 Checking Package Contents...4 Scanning Unit... 4 Printing Unit... 4 Setting Up the Printing
Read this Quick Setup Guide before using the printer. Before you can use the printer, you must set up the hardware and install the driver.
 Read this Quick Setup Guide before using the printer. Before you can use the printer, you must set up the hardware and install the driver. Step 1 Laser Printer HL-6050D/6050DN Step 2 Setting Up Your Printer
Laser Printer WL-660 Series for Windows Quick Setup Guide
 Laser Printer WL-660 Series for Windows Quick Setup Guide First read this Quick Setup Guide to set up your printer and prepare your computer for the printer. CAUTION This printer has been designed specially
HP LaserJet 8100, 8100 N, and 8100 DN Printers Getting Started Guide. English
 HP LaserJet 8100, 8100 N, and 8100 DN Printers Getting Started Guide English HP LaserJet 8100, 8100 N, and 8100 DN Printers Getting Started Guide Copyright Hewlett-Packard Company 1998 All Rights Reserved.
Loading paper and specialty media Learning about the printer. Stop all printer activity. 7 Back button Return to the previous screen.
 Quick Reference Use the 6 Stop or Cancel button To Stop all printer activity. Loading paper and specialty media Learning about the printer Using the printer control panel 0 Use the 9 To Display View the
Learning about the printer...5. Loading paper and specialty media...9
 Quick Reference Contents Learning about the printer...5 Using the printer control panel...5 Understanding the printer control panel light sequences...6 Loading paper and specialty media...9 Setting the
Lexmark E320/E322. User s Reference. April
 Lexmark E320/E322 User s Reference April 2001 www.lexmark.com Table of contents Chapter 1: Printer overview... 5 About your printer... 5 Chapter 2: Using the operator panel... 7 Chapter 3: Canceling a
C910 User s Guide
 C910 User s Guide 59102301 my.okidata.com Copyright Information Copyright 2010 by Oki Data. All Rights Reserved C910 User s Guide P/N 59102301 Revision 1.1 September, 2010 Disclaimer Every effort has been
C813n C823n/C823dn C833n/C833dn C843n/C843dn ES8433 ES8443
 C813n C823n/C823dn C833n/C833dn C843n/C843dn ES8433 ES8443 About This Manual Terms in this document The following terms are used in this manual. Indicates important information on operations. Make sure
Startup Guide C01
 Startup Guide 4012988-00 C01 Startup Guide English Where to Find Information........................ 2 Safety Instructions.............................. 4 Important Safety Instructions...........................
Document Centre 286/236 Series PostScript User Guide
 Document Centre 286/236 Series PostScript User Guide The AppleTalk protocols and computer programs are licenced from Apple Computer, Inc. AppleTalk, EtherTalk, Apple and Macintosh are trademarks of Apple
pro930 The tabloid printer for incredible color output and consistently accurate color matching
 pro930 The tabloid printer for incredible color output and consistently accurate color matching pro930 A digital color printer on which you can stake your reputation. Your customers judge you by the quality
Quick Reference Guide. ineo 3301P
 ineo 3301P Contents 1 Learning about the printer... 3 Using the printer control panel... 3 Understanding the colors of the Sleep button and indicator lights... 4 Setting the paper size and type... 5 Configuring
Quick Reference. ineo 3300P
 ineo 3300P Contents 1 Learning about the printer... 3 Using the printer control panel... 3 Understanding the printer control panel light sequences... 4 2 Loading paper and specialty media... 9 Setting
Port Connections This section covers parallel and Ethernet connections.
 CHAPTER 3 PC Setup This chapter covers connecting the printer and installing utilities, drivers, and related files on PC hosts. Port Connections This section covers parallel and Ethernet connections. Parallel
A warning provides additional information which, if ignored, may result in a risk of personal injury.
 About This Manual Terms in this document The following terms are used in this manual. Indicates important information on operations. Make sure to read sections with this mark. Indicates additional information
A warning provides additional information which, if ignored, may result in a risk of personal injury.
 Pro8432WT About This Manual Terms in this document The following terms are used in this manual. Indicates important information on operations. Make sure to read sections with this mark. Indicates additional
Unpack the machine and its components. Cassette/Multi-purpose tray
 Set-Up Sheet Thank you for purchasing the Canon imageclass D320. To get your machine ready for use, please follow the instructions in this Set-Up Sheet before referring to any other documentation. Unpack
Quick Start Guide. Chapter 1 : Setting the Machine. Unpack the machine and its components. Check that you have the following: Machine
 Quick Start Guide READ THIS FIRST Thank you for purchasing Canon Color imageclass MF8180c. To get your machine ready for use, please follow the instructions in this document before referring to any other
Quick Setup Guide MFC-8440
 Quick Setup Guide MFC-8440 MFC-8840D MFC-8840DN Before you can use the MFC, you must set up the hardware and install the driver. Please read this Quick Setup Guide for proper set up and installation instructions.
 Copyright Information Copyright 2008 by Oki Data. All Rights Reserved Document Information C9650 User s Guide P/N 59306401 Revision 1.2 August, 2008 Disclaimer Every effort has been made to ensure that
Improper Setup icons alert you to devices and operations that are not compatible with the machine.
 Warning Caution Improper Setup Note User s Guide Warnings tell you what to do to prevent possible personal injury. Cautions specify procedures you must follow or avoid to prevent possible damage to the
Important! Save the box and shipping materials for transporting the MultiPASS in the future.
 Step 1: Unpack the MultiPASS 1. Carefully remove all items from the box. Remove these items from the documentation package: Quick Start Guide, the Canon Creative for MultiPASS CD-ROM, Registration card,
C5100 Computer Connections & Software Install Guide
 C5100 Computer Connections & Software Install Guide Installation Checklist Network Install: Hardware...4 Connect to the Network Port...4 Network Install: Software...5 TCP/IP...5 Local Install: USB, Hardware...7
Quick Start Guide BUBBLE JET PRINTER. Table of Contents QA V01. Preface 1. Shipping Materials 1. Introduction 1.
 BUBBLE JET PRINTER Quick Start Guide Table of Contents Preface 1 Shipping Materials 1 Introduction 1 Setting Up 2 Preparing the Printer 2 Installing the Print Head 3 Connecting the Printer to the Computer
C520, C522, and C524. User s Guide. June 2005
 C520, C522, and C524 User s Guide Lexmark and Lexmark with diamond design are trademarks of Lexmark International, Inc., registered in the United States and/or other countries. 2005 Lexmark International,
PostScript3. Operating Instructions. PostScript 3 - Setting Up for Printing Printer Utility for Mac Appendix
 Operating Instructions PostScript3 2 3 PostScript 3 - Setting Up for Printing Printer Utility for Mac Appendix Read this manual carefully before you use this machine and keep it handy for future reference.
8 USB port Connect a flash drive to the printer. Notes:
 Quick Reference Using the 2.4-inch display printer model Learning about the printer Using the printer control panel 3 2 3 4 5 6 7 Use the 2 To 0 Display View the printer status and messages. 2 Left arrow
EPSON. ActionLaser Read This First
 EPSON ActionLaser 1600 Read This First This booklet is to help you set up your printer and begin printing quickly. It also gives you instructions for routine maintenance. If you need detailed information
Printer Reference. Operating Instructions
 Operating Instructions Printer Reference 1 2 3 4 5 Preparing the Machine Setting Up the Printer Driver Other Print Operations The Functions and Settings of the Machine Appendix Read this manual carefully
virtual families repair wall virtual families repair wall
 Virtual families repair wall. Note Virtual families repair wall change the print quality settings Load with the top down and the find the solution to common printer problems. Printer does not pull paper
Start Here. Unpack. 1 Make sure you have these items: 2 Remove all the packing materials and tape.
 Epson Stylus Pro 3880 Start Here Unpack 1 Make sure you have these items: Printer Power cord CD-ROM User's Guide Ink cartridges Rear sheet guide Limited Warranty Warning: The printer weighs about 43 pounds
Scroll through menus or move between screens and menu options. Increase the numeric value of an option or setting being displayed. Save settings.
 Quick Reference Learning about the printer Use the 5 Right arrow button To Scroll through menus or move between screens and menu options. Increase the numeric value of an option or setting being displayed.
MODEL: MX-C300P MX-C300PL DIGITAL FULL COLOR PRINTER OPERATION GUIDE
 MODEL: MX-C300P MX-C300PL DIGITAL FULL COLOR PRINTER OPERATION GUIDE INTRODUCTION This manual describes MX-C300P/MX-C300PL Digital full color printer system. Where "MX-XXXX" appears in this manual, please
Copyright Information
 59367801_cvr.jpg Copyright Information Document Name P/N 59367801 Revision 1.2 Disclaimer Every effort has been made to ensure that the information in this document is complete, accurate, and up-to-date.
Storing the Printer Use the following procedure when storing the printer for an extended period. Maintenance and Specifications 6-1
 Chapter 6 - Maintenance and Specifications Introduction Your PlateMaker 4 printer requires minimal maintenance. This chapter describes how to handle, store, move, and clean your printer and contains technical
Product Parts Front view... 2 Rear view... 2 Inside the product... 3 Scanner parts... 3 Control panel... 4
 Table of Contents Product Parts Front view................................................................. 2 Rear view.................................................................. 2 Inside the product...........................................................
Quick Reference. Understanding the Operator Panel. Understanding the operator panel lights. Quick Reference
 Quick Reference Understanding the Operator Panel The printer operator panel has two buttons and two lights. Lights indicate the status of the printer. Buttons are used to continue or cancel the current
Printing Guide. Xanté Corporation 2800 Dauphin St., Mobile, AL Phone: , Fax: Web Site:
 Printing Guide Xanté Corporation 2800 Dauphin St., Mobile, AL 36606-2400 Phone: 800-926-8839, 251-473-6502 Fax: 251-473-6503 Web Site: www.xante.com Ilumina Printing Guide v2 7/29/09 Trademarks Xanté and
LASER PRINTER. Software Setup Guide BEFORE INSTALLING THE SOFTWARE SETUP IN A WINDOWS ENVIRONMENT SETUP IN A MACINTOSH ENVIRONMENT TROUBLESHOOTING
 MODEL: MX-B400P LASER PRINTER Software Setup Guide BEFORE INSTALLING THE SOFTWARE SETUP IN A WINDOWS ENVIRONMENT SETUP IN A MACINTOSH ENVIRONMENT TROUBLESHOOTING Keep this manual close at hand for reference
Printing Your First Page. Attaching the Paper Support. Plugging in the Printer. Checking the Printer
 Printing Your First Page Attaching the Paper Support Checking the Printer Plugging in the Printer Installing the Ink Cartridges Installing the Printer Software Connecting the Printer 4011307 XXX-00 Attaching
00-Cover&Contents 7/16/99 7:37 PM Page 1. LASER PRINTER ML-5000A Setup Guide
 00-Cover&Contents 7/16/99 7:37 PM Page 1 LASER PRINTER ML-5000A Setup Guide 01-Setup 7/20/99 9:25 AM Page 2 Control Locations and Functions Front View Automatic Paper Feeder Holds 150 sheets of paper.
Laser Printer P2500. Quick Setup Guide. Read this Setup Guide before you set up the printer.
 Laser Printer P2500 Quick Setup Guide Read this Setup Guide before you set up the printer. Before you can use the printer, you must set up the hardware and install the printer and scanner drivers. Identify
PostScript User Guide
 CopyCentre WorkCentre WorkCentre Pro PostScript User Guide 604P18089 Prepared by: The Document Company Xerox GKLS European Operations Bessemer Road Welwyn Garden City Hertfordshire AL7 1HE ENGLAND 2005
WorkCentre 6400 Color Multifunction Printer
 WorkCentre 6400 Color Multifunction Printer WorkCentre 6400S A full-featured multifunction printer with automatic 2-sided print/copy/ scan capabilities WorkCentre 6400X All of the features of the 6400S
Use the To. 4 Keypad Enter numbers, letters, or symbols on the printer. Stop all printer activity. 6 Indicator light Check the status of the printer.
 Quick Reference Learning about the printer Using the control panel Use the To 4 Keypad Enter numbers, letters, or symbols on the printer. 5 Stop or Cancel button Stop all printer activity. 6 Indicator
Installing the Printer Software
 4 Printing Your First Page Attaching the Paper Support 7 1 Checking the Printer 6 2 Plugging in the Printer 3 Installing the Ink Cartridges 5 Installing the Printer Software Connecting the Printer 4012581-00
Printed in the United States of America
 Xerox Corporation Global Knowledge & Language Services 800 Phillip Road Building 845 17S Webster, New York 14580 USA 2000 Xerox Corporation. All rights reserved. Copyright protection claimed includes all
Setting Up the Machine. Setup is Complete!
 DCP-7020 Before you can use the machine, you must set up the hardware and install the software. Please read this Quick Setup Guide for the correct setup procedure and installation instructions. Step 1
Contents Replacement Supplies... 3 Using the Address Book Using Profiles Loading Media Control Panel Keys... 6
 Contents Replacement Supplies... 3 Where to Purchase... 3 Part Numbers...3 Measuring Usage...5 Take Advantage of OKI s Supply Manager!...5 Check Out OKI Managed Services...5 Control Panel Keys... 6 Status
EPSON ActionLaser Read This First. eepa POLLUTION PREVENTER
 EPSON ActionLaser 1400 Read This First eepa POLLUTION PREVENTER This booklet is to help you set up your printer and begin printing quickly. It also gives you instructions for routine maintenance. If you
table of contents notices special features getting started printing hp deskjet 6120 series printer
 hp deskjet 6120 series printer table of contents notices notices and acknowledgements terms and conventions accessibility using the onscreen user's guide special features getting started printer features
Quick Setup Guide DCP-9040CN STEP 1 STEP 2. Setup is Complete! Setting Up the Machine. Installing the Driver & Software
 DCP-9040CN Quick Setup Guide Before you can use the machine, you must set up the hardware and install the driver. Please read this Quick Setup Guide for proper set up and installation instructions. STEP
X925. Maintenance Guide
 X925 Maintenance Guide April 2011 www.lexmark.com Contents...3 Cleaning the exterior of the printer...3 Cleaning the scanner glass...3 Cleaning the ADF parts...4 Cleaning the printhead lenses...5 Storing
HP LaserJet 3390/3392 Getting Started Guide
 HP LaserJet 3390/3392 Getting Started Guide HP LaserJet 3390/3392 all-in-one Start Guide Copyright Information 2006 Copyright Hewlett-Packard Development Company, L.P. Reproduction, adaptation or translation
Port Connection: Ethernet Port To connect to the Ethernet port
 Chapter 2 - Macintosh Setup Introduction This chapter describes your printer s Macintosh setup, including connecting to the Ethernet port, as well as installing utilities, drivers, your printer s PPD (PostScript
Printing System Driver User Guide
 Printing System Driver User Guide Legal Notes Unauthorized reproduction of all or part of this guide is prohibited. The information in this guide is subject to change for improvement without notice. We
Printed on recycled paper with at least 10% post-consumer content. Setup Guide
 Printed on recycled paper with at least 10% post-consumer content Setup Guide All rights reserved. No part of this publication may be reproduced, stored in a retrieval system, or transmitted in any form
Hard Disk Drive (HDD) Data Protection Kit Installation Instructions
 Data Protection Kit Installation Instructions") Hard Disk Drive (HDD) Data Protection Kit Installation Instructions 59399801 2009 by Oki Data Americas, Inc. All rights reserved. Disclaimer Every effort has been made to ensure that the information in
Hard Disk Drive (HDD) Data Protection Kit Installation Instructions 59399801 2009 by Oki Data Americas, Inc. All rights reserved. Disclaimer Every effort has been made to ensure that the information in
Quick Setup Guide DCP-110C
 Quick Setup Guide DCP-110C Before you can use the machine, you must set up the hardware and install the driver. Please read this Quick Setup Guide for proper set up and installation instructions. Step
Lexmark 1400 Series. User's Guide
 Lexmark 1400 Series User's Guide February 2007 www.lexmark.com Lexmark and Lexmark with diamond design are trademarks of Lexmark International, Inc., registered in the United States and/or other countries.
2. PRINT SERVER INSTALLATION...
 TABLE OF CONTENTS COPYRIGHT...2 1. INTRODUCTION...3 PRODUCT OVERVIEW...3 COMPONENTS AND FEATURES...3 HARDWARE INSTALLATION...4 NETWORK ENVIRONMENT...5 2. PRINT SERVER INSTALLATION...6 PREPARATION...6 CONFIGURATION
UNITED STATES GOVERNMENT RESTRICTED RIGHTS
 OPTRA E310 First Edition (January 1999) The following paragraph does not apply to any country where such provisions are inconsistent with local law: LEXMARK INTERNATIONAL, INC. PROVIDES THIS PUBLICATION
Quick Setup Guide MFC-3320CN
 Quick Setup Guide MFC-3320CN Before you can use the MFC, you must set up the hardware and install the driver. Please read this Quick Setup Guide for proper set up and installation instructions. Step 1
9 Start button Start a job, depending on which mode is selected. 10 Fax button Send faxes. 11 Back button Return to the previous screen.
 Quick Reference Use the To 9 Start button Start a job, depending on which mode is selected. > Settings > > Paper Menu > > Paper Size/Type > Learning about the printer Using the printer control panel 10
Check the status of the printer. 7 USB port Connect a USB a flash drive to the printer. Note: Only the front USB port supports flash drives.
 Quick Reference Use the 6 Indicator light Check the status of the printer. Learning about the printer Using the printer control panel 7 USB port Connect a USB a flash drive to the printer. Note: Only the
ip3600 series Getting Started =Read Me First= Photo Printer
 Photo Printer ip3600 series Getting Started =Read Me First= Make sure to read this manual before using the printer. Please keep it in hand for future reference. Symbols The following symbols are used to
Networking the printer
 Networking the printer General networking Networking overview A network is a collection of devices such as computers, printers, Ethernet hubs, wireless access points, and routers connected together for