aaxa TECHNOLOGIES User Guide
|
|
|
- Tabitha Ramsey
- 5 years ago
- Views:
Transcription

1 aaxa TECHNOLOGIES User Guide


2 Caution! WARNING: Please use this product as instructed. Misuse may cause injury or death. DO NOT use while driving. DO NOT expose to water or wet surfaces. Electric shock may occur. DO NOT expose the projected LED image to your eyes or the eyes of others. DO NOT block or restrict airflow from ventilation holes as this may cause the projector to overheat. Keep the projector and charger away from any heat sources. Caution for Headphone Use Prolonged use at high volume may impair your hearing. High volume during walking or driving may cause distractions and result in injury or death.
3 Table of Contents Chapter 1: At a Glance P300 Neo-S Introduction Remote & Touchpad Accessories Chapter 2: Getting Started Focus Adjustment / Throw Distance Navigating the Main Menu Connecting to WiFi Connecting to a BT device Loading External Content Chapter 3: Menu Screens Videos Menu Photos Menu Connecting via Digital Input Connecting via VGA Connecting to Composite Video Browser Streaming Applications Apps Smartphone Mirroring Office Chapter 4: Settings Menu Brightness Settings WiFi Settings Advanced Settings Language Display Settings Bluetooth Settings Backup & Reset About Chapter 5: Technical Details Troubleshooting Specifications Notes
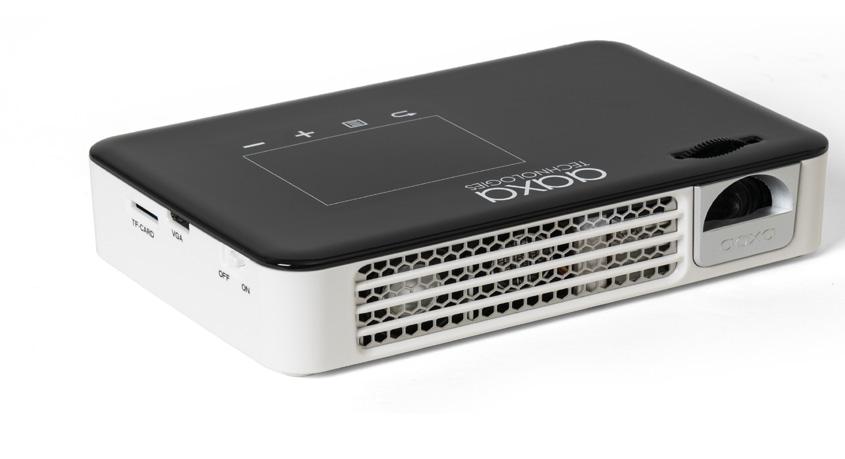
4 P300 Neo-S at a Glance Chapter 1 Main Unit Front/Back Touchpad Mini-VGA Port TF Card Slot On/Off Switch Focus Adjustment Power Port Headphone Out AV Port Digital Input USB Port 1

5 Remote & Touchpad Power On/Off Main Menu Navigation Volume Down Keystone Adjustment Select Source Volume Up Keystone Adjustment Media Player Menu Navigation Remote NOTE: Pressing power on the remote while it is on will put your projector in standby mode. In order to fully turn the projector off, the On/Off switch must be in the Off position. 2

6 Remote & Touchpad Cont. The P300 Neo-S incorporates a capacitive touchpad directly onto the top of the projector. This touchpad works in conjunction with a pointer and allows users to select icons, APKs, and scroll through the menu system. The touchpad can be used in conjunction with the Back and Volume buttons below the touchpad. Please note that the P300 Neo-S allows for 2-finger scrolling. In order to scroll up, use 2 fingers on the touchpad and swipe up. In order to scrool down, use 2 fingers on the touchpad and swipe down. The P300 Neo-S allows 2-finger touch as a substitute for the Back button. 3


7 Accessories A/V Cable Tripod Power Adapter Remote *Under various circumstances, the actual accessories may be different from those shown in the pictures above. Additional accessories are available for purchase at 4
8 Getting Started Chapter 2 Plugging In the projector 1. The P300 Neo-S needs to be plugged in and charged for four to five hours before operation. Please ensure the On/Off switch is in the Off position during this time Powering ON the projector 1. Connect the power cord to the P300 Neo-S. 2. Connect the other end of the power cord into the wall power source. 3. Move the On/Off swtich to the On position. Your projector should start up. Powering OFF the projector 1. To turn off the projector, use the power button on the remote or the On/Off switch. Using the On/Off switch will fully turn off the projector. Connecting to WiFi 1. View page 8 for details. Connecting to a Bluetooth Device 1. View page 10 for details. 5

9 Focus Adjustment / Throw Distance Focus Adjustment Spin the focus wheel left or right until the image becomes clear. Throw Distance Chart Throw Distance Unit: Inches Diagonal Size Unit: Inches DIAGONAL SCREEN SIZE 16:9 Aspect Ratio Throw Ratio 1.5 *minimum throw distance: 15 inches 6

10 Navigating the Main Menu Main Menu The Main Menu allows access to all the features of the P300 Neo Smart Projector. Inputs Digital Input- Brings up connection via Digital Input VGA - Brings up connectiong via VGA Video-RCA - Brings up connection via A/V Main Menu Features Videos - View videos from external devices such as TF card and USB Photos - View photos from external devices such as TF card and USB Browser - Brings up a browser Streaming - Brings up Youtube, Netflix, Hulu, Twitch, HBO Go and Amazon Prime Video Apps - Brings up all apps that are already preinstalled or downloaded Mirroring - Bring up app to mirror your phone screen on the projector screen Settings - Brings up Application Manager, Network Settings, Bluetooth Settings, Language Settings, Backup&Reset, Projector Settings, etc Office - View files from external devices such as TF card and USB 7

11 Connecting to WiFi Connecting to WiFi: Select the Settings icon (Fig. 2.1). Select the Network Settings option and navigate to your WiFi network and click on it to connect. A window will appear and ask for a password, please type it in. When finished, press Connect and the projector will connect to your WiFi (Fig. 2.2). Fig. 2.1 Fig. 2.2 Please see next page for steps to establish to a WiFi connection. 8
12 Connecting to WiFi FAQ Connecting to WiFi: The P300 Neo-S features a WiFi chipset capable of b/g/n connection. This means it is compatible with most WiFi routers. To connect to a WiFi router, follow the following steps: Step 1: Access the Network Settings Submenu: Settings -> Network Settings Step 2: Turn WiFi radio to On by highlighting and toggling the WiFi Button under WiFi settings Step 3: Select the appropriate Router Step 4: Enter the router password in the password selection (by pressing OK ). It is recommended that the automatic IP address acquisition be turned on Troubleshooting 1. Unable to connect a. Check Security Settings WPA/WPA2 PSK b. Check if Router is in range 9
. The projector features a Bluetooth radio.")
13 Connecting to a Bluetooth Device Connecting to Bluetooth: Select the Settings icon (Fig. 2.8). Select the Bluetooth Settings option and navigate to your Bluetooth Device and click on it to connect (Fig. 2.9). The projector features a Bluetooth radio. The Bluetooth radio is designed to connect Bluetooth enabled device, typically a Bluetooth mouse or speaker. The projector supports one Bluetooth device at a time. Fig. 2.8 Fig. 2.9 Please see next page for steps to connect to a Bluetooth device 10
14 Bluetooth Speaker or Mouse To connect a Bluetooth Speaker or Mouse Step 1: Access the Bluetooth Menu (Settings Bluetooth) Step 2: Turn on Bluetooth functionality Step 3: Turn on your Bluetooth device and enable discovery. This varies with each device. Some devices require the power switch to be turned ON. Other devices have a Bluetooth icon that is pressed to make the device discoverable Step 4: If your device does not pop up automatically, click on the three vertical dots at the top of the page and click Refresh Step 5: Highlight your device and click OK to connect. Your device should show connecting. If a PIN is asked, try 0000 or 1234 these are the standard PIN codes. If this does not work, check with your device manufacturer for the PIN 11
15 Troubleshooting Disconnecting. It takes seconds for a BT device to connect or disconnect from the system. Failure to wait for this time could result in an improper connection. Check to ensure device is connected in the BT submenu. If the Bluetooth device does not automatically reconnect please go to the Bluetooth settings and press on the device to reconnnect to it. If the device still does not reconnect please press on the icon on the right of the device s name to unpair the device and pair it again. 12

")
16 Loading External Content The P300 Neo-S can read files directly from both a TF Card and USB Drive. Supported file types include: MP3 / WMA / OGG / WAV AVI / JPG / GIF/ BMP / TXT / PPT / DOC / XLS/ PDF (up to 32 GB) (up to 32 GB) 13

.")
17 Loading External Content Cont. How to insert your TF Card Slide in your TF card into the TF card slot on the side of the P300 Neo-S (as shown in picture). Gently slide the TF card until it clicks into place. (up to 32 GB) 14
18 Loading External Content Cont. How to insert your USB Drive Slide your USB Drive into the USB port. Gently slide the drive until it cannot go in any further. (up to 32 GB) 15
19 Loading External Content Cont. Once your TF Card or USB Drive is inserted into the projector, the TF Card or USB Drive Storage will be loaded automatically and the content can be found through: Photos & Videos Menu Videos and Photos can be played by clicking Photos & Video on the Main Menu. Files Menu All files can be shown by clicking Files on the Main Menu. Office Menu.pdf,.docx,.xls,.ppt,.txt can be shown by clicking Office on the Main Menu. 16
. All sources will be displayed. Select the source and choose the video you want to view (Fig 3.2). Fig. 3.1 Fig. 3.2 17")
20 Menu Screens Chapter 3 Video Menu To view videos, access the content via the Photos & Videos icon or the Files icon (Fig 3.1). All sources will be displayed. Select the source and choose the video you want to view (Fig 3.2). Fig. 3.1 Fig
21 Video Submenu While Playing Videos While playing videos the volume is adjustable. To adjust volume, press the volume buttons on the remote or projector. Further controls are available in the Video Player Submenu - which is accessed through the OK button. Please note, further controls only show up when viewing the video through VLC. OK Enter Video Submenu To open/hide the video playback menu, use the OK Buttons on the remote. The Video Submenu allows the following functions i. Lock - No other video options will be present when the video is locked ii. Subtitles iii. Play/Pause iii. Additional options (see next page for details) iv. Go Back v. Screen control 18
22 Video Submenu Cont. More functions can be accessed by clicking the 3-horizontal points or by pressing the Up arrow on your remote control i. Sleep Timer ii. Playback Speed iii. Jump to Time iv. Equalizer v. Play as Audio vi. Subtitle Delay / Audio Delay vii. Repeat Mode viii. Digital Audio Output (Passthrough) 19
? 1.")
23 Video Submenu Cont. How do I loop a video? 1. On the Submenu, click the 3-horizontal points to access more functions. 2. Click the bottom left icon and select Repeat All or Repeat 1 3. To repeat a specific video, select Repeat One. 4. To repeat all videos, select Repeat All. How do I turn on the subtitles (if available)? 1. On the Submenu, click the icon to the left of the Play icon. 2. Select Subtitles if the subtitles are hardcoded into video. 3. If using a seperate subtitle file, click Select subtitle file first and choose the external selection. Subtitle Menu Options Menu * After the entire list has played, the projector will automatically go back to the video list. 20


24 Photos Menu Fig. 3.3 To view pictures, access the content via the Photos & Videos icon or the Files icon (Fig 3.3). All albums from internal and external storage will be displayed (Fig 3.4). Select the album and choose the picture you want to view (Fig 3.5). Fig. 3.4 Fig

25 Photo Menu Cont. To access to the previous photo, use the Top or Left arrow keys on the remote. To access to the next photo, use the Bottom or Right arrow keys on the remote. Double tap the touchpad once or use two fingers and slide down on the touchpad to zoom in on the picture. Double tap the touchpad again or use two fingers and slide up on the touchpad to return the picture to its original size. 22
26 Connecting to a Device via Digital Input First, a digital input cable is required from your P300 Neo-S to your other device. In the Main Menu Select the Inputs Icon Then select the Digital Video Icon Connectivity to Multimedia Devices The P300 Neo-S can connect to many media devices including: computers, laptops, iphones, ipads, DVD players, smart phones, cameras, video game consoles and other peripherals with ease. *Some smartphones require video out capabilities to be displayed with the P300 Neo-S. Check with your phone manufacturer. 23
27 Connecting to Digital Input Video Devices Step 1: Connect one end of the Digital Input Cable to your device s Digital Input port.. Step 2: Connect the other end of the Digital Input Cable to your P300 Neo s Digital Input port. Step 3: In the Main Menu, select the Digital Video Icon. Your P300 Neo-S should now be mirroring the content from your device. Note: If you re connecting to a computer or laptop and the projector does not automatically mirror it, read onto the next page for more information. 24
28 Connecting to a Computer via Digital Input Step 4: After connecting your projector to your computer or laptop via a digital input cable, you may need to enabe Digital Video output on your computer. To enable Digital Video output on your computer most computers require turning on the video output feature. Each computer is different. Please consult your owner s manual for instructions to enable Digital Video output. Below are standard instructions for a Windows 10 computer not all systems are the same. Step 5: Press Windows+P to toggle through display settings. Select either Duplicate or Extend depending on your viewing option. *NOTE: Different operating systems may differ Step 6: 1. Right click on computer desktop and select Screen Resolution. 2. Display Properties window will pop up and select the Advance Display Settings. 3. Please make sure the Multiple displays has the Duplicate these displays option selected and the Resolution is 1920 x 1080 or below as pictured in the red box. 4. If the image is blurry or the text is not legible, adjust the screen resolution. 25


29 Connecting to a Computer via VGA First, a VGA adapter cable is required from your P300 Neo-S to your computer. This can be purchased on the AAXA website at Step 1: Connect one end of the VGA adapter cable to your computer s VGA port. Step 2: Connect the other end of the VGA adapter cable to your P300 Neo s VGA port. Step 3: In the Main Menu select the Inputs icon and then the VGA icon. Select the Inputs Icon Then select the VGA Icon 26


30 Connecting to a Computer via VGA Cont. Step 4: Enabling VGA output on your Computer To enable VGA output on your computer most computers require turning on the video output feature. Each computer is different. Please consult your owner s manual for instructions to enable VGA output. Below are standard instructions for a Windows 10 computer not all systems are the same. Step 5: Press Windows+P to toggle through display settings. Select either Duplicate or Extend depending on your viewing option. *NOTE: different operating systems may differ Step 6: 1. Right click on computer desktop and select Screen Resolution 2. Display Properties window will pop up and select the Advance Display Settings 3. Please make sure the Multiple displays has the Duplicate these displays option selected and the Resolution is 1920 x 1080 or below as pictured in the red box. 4. If the image is blurry or the text is not legible, adjust the screen resolution. 27


 to")
31 Connecting to Composite Video Step 1: Connect the 3.5mm Composite A/V Cable to the side of the P300 Neo-S Step 2: Connect the composite end of the AV Cable (Red, White,Yellow) to your own male AV cable. 28
32 Connecting to Composite Video Cont. Step 3: In the Main Menu Step 4: Turn on your multimedia device. Select the Video-RCA Icon 29
33 Browser Browser To access any website, select Browser from the Main Menu. Put the address you would like to access by using the touchpad Main Menu Screen 30

34 Streaming Applications Streaming Application To access Streaming Applications, select Streaming Apps from the Main Menu. The P300 Neo-S enables video streaming from selected applications. Main Menu Screen Streaming Screen Streaming applications are accessible after a WiFi internet connection is established. Most applications require a log-in account. 31
35 Streaming Applications Cont. Troubleshooting Application Hangs or Freezes Try clearing the cache (see Settings -> Storage) Click on Cached data and then select OK when prompted. Update Required If an update is required, you may be able to obtain through the Google Play Store found in the Apps Poor Video Playback Possible Causes: Poor WiFi Connection Too many open applications More than one Bluetooth device connected 32
. The application will open allowing you to select an app you would like to open (Fig. 2.11). Fig. 2.10 Fig. 2.11 33")
36 Apps All apps can be found and accessed under Apps from the Main Menu. Open an app: Select the Apps icon (Fig. 2.10). The application will open allowing you to select an app you would like to open (Fig. 2.11). Fig Fig
. The application will open allowing you to activate Airplay on your iphone or ipad (Fig. 2.13). Fig.")
37 Smartphone Mirroring The P300 Neo-S employs a HappyCast smartphone mirroring system that is compatible with both Apple Airplay as well as Android systems. Mirroring with an iphone or ipad: Select the Mirroring icon (Fig. 2.12). The application will open allowing you to activate Airplay on your iphone or ipad (Fig. 2.13). Fig Fig

38 iphone Smartphone Mirroring Projector After the HappyCast App is open on the projector, you can go to your iphone or ipad If the HappyCast App prompts you to update, we recommend updating the application before proceeding. Turning on Airplay Swipe up on your iphone or ipad to access the Control Center, as shown to the left Select Sceen Mirroring and it will show you the HappyCast connection. Select it and your device should now be mirrored on the projector. * Both Projector and Apple devices must use the same WiFi connection. 35

39 Android Smartphone Mirroring Downloading HappyCast App Please vist this URL: on your Android phone to download HappyCast. After installing the apk on the phone, open the HappyCast App and connect to the projector s HappyCast connection. Projector If the HappyCast App prompts you to update, we recommend updating the application before proceeding. * Both Projector and Android smartphone must use the same WiFi connection. 36

40 Office Menu Microsoft Office and Adobe PDF Documents Microsoft Office and Adobe PDF Documents can be viewed with the document viewer application. To access the document viewer, select Office from the Main Menu. Main Menu Screen 37
41 Viewing Office Documents Cont. Choosing Documents to View In the Office application, select Open or Cloud Storage to view the files you wish to see. Office Main Menu Office Viewer Application Documents from the TF Card and USB Drive can be viewed. Documents from Dropbox with accounts connected may be viewed. Supported file formats include *.DOC, *.XLS, *.PPT, *.PDF. Some file versions may not be compatible and file names must be alphanumeric only. Note: While some Cloud Storage features may work, this functionality is not intended to be supported 38
42 Viewing Office Documents Cont. Step 1: Open Office Step 2: Select Source 39

43 Viewing Office Documents Cont. Step 3: Highlight the Office File and click OK Step 4: The file should display automatically Note: For a more comprehensive user guide please visit our FAQ section or search online for Kingsoft WPS Office Viewer user guide Need help with the document viewer? Please us at pro_support@aaxatech.com 40
44 Settings Menu Chapter 4 The Settings Menu can be accessed by selecting Settings on the Main Menu Within the Settings Menu, there are eight submenus that allow you to customize your P300 Neo-S. Brightness Settings WiFi Settings Advanced Settings Languange Settings Display Settings Bluetooth (BT) Settings Backup & Reset About 41

45 Brightness Settings Brightness Settings There are 3 different power modes for the P300 Neo Smart Projector: ECO: A battery saving mode that reduces picture brughtness. This will provide a 90 minute battery runtime. Standard: A normal mode. Only available while plugged in. Boost: The brightest mode. Only available while plugged in. Brightness Settings 42
46 WiFi Settings Network Settings Please see Connecting to WiFi section on Page 8 Click the 3 vertical points on the top-right corner and choose from Add network, Saved networks, Refresh, and Advanced to adjust WiFi settings Within Advanced Network Notification- Choose whether to notify when a public internet is available Scanning always available - Choose whether to scan for networks all the time Keep WiFi on during sleep - Selection from Always, Only when plugged in, Never, and WiFi intelligent sleep WiFi Direct- This feature has been disabled Network Settings 43

47 Advanced Settings All settings can be found through Advanced Settings Wireless & Networks - WiFi, Bluetooth and Data Usage Device - Display, Sound & Notification, Storage, Apps, and Screenshot Setting Personal - Accounts, Language & Input, and Backup & Reset System - Date & Time and About Device 44

48 Language Settings Language Settings Selecting a Language: The projector supports more than 30 languages Keyboard & Input Method: The input method is a standard AOSP English keyboard Speech: Text-to-speech output Mouse/Trackpad: Pointer speed is adjustable Language Settings 45
49 Display Settings Projection Settings Projection Mode: Allows the user to flip the projected image. Keystone Correction: Allows the user to manually make keystone adjustments. Color Mode: Changes the picture mode to different settings depending on your usage. Projection Settings 46
50 Bluetooth Settings Bluetooth Settings For Bluetooth Connectivity please see the Bluetooth (BT) page (Page 10) Bluetooth Enable On/Off After clicking the 3 vertical points on the top-right corner, there are three functions that can be chosen: Refresh, Rename the device, and Show received files The projector is visible to nearby devices while Bluetooth settings are open Bluetooth Settings 47
51 Backup & Reset Back Up My Data Back up app data, WiFi passwords, and other settings to Google servers. Backup Account Set a backup account to backup the data. Automatic Restore Use this function to allow the automatic restore when reinstalling an app. Factory Data Reset Erase all data on the device. Backup & Reset 48
52 About The About displays the basic information of the projector which includes: Status Legal Information Regulatory Information Model Number Android Version Android Security Patch Level Baseband Version Kernel Version Build Number About 49
53 Technical Details Chapter 5 Troubleshooting IMAGE IS BLURRED Possible Causes The Projector is not in focus Solution Adjust the focus with the focus adjustment dial until the image comes into focus The Projector is offset from plane / angle of operation Move the projector so that it is both 180 degrees and on an even plane with the screen NO SYNC, NO SIGNAL Be sure to setup the computer to enable a video signal output. On some laptops this is done by pressing and holding Function F5 key. If using the P300 Neo-S as an external monitor on Windows based systems, this can be done by selecting extend my desktop to this monitor. The native resolution of the P300 Neo Smart projector is 1280x720 (720P). Depending on the video driver different resolutions may need to be selected for proper output 50
54 Technical Details Cont. Troubleshooting THE PROJECTOR DOES NOT TURN ON Possible Causes There is no power The On/Off switch is not on the On position NO PICTURE / FILE NOT SUPPORTED Possible Causes The video source is not properly connected or selected Solution Check to ensure the power outlet source is good. Check the power adapter to ensure a proper connection with the wall outlet as well as the projector. Confirm that the unit is charged and has enough power To power on the projector, the On/Off switch must be on the On position. The unit should automatically turn on once the switch is in the On position Solution Check the video source signal to ensure that it is properly connected. Select the current input source by choosing the input desired from the main menu Incorrect file extension / Video is encoded with incorrect codec Please refer to Specifications page to see which file types and codec are supported. Verify that the file was encoded properly 51
55 Specifications Brightness: Max Resolution: Native Resolution: Contrast Ratio: Aspect Ratio: Projection Lens: Image Size: Lamp: Video in: Audio Out: Color: TF Card: USB: Dimensions: Weight: Power Consumption: Battery Life: Supported File Formats: Conformances: Android Operating System: Processor: RAM: Onboard Storage: WiFi: Bluetooth: 400Lumens 1920x1080 (1080p) 1280x720 (720p) 1000:1 16:9 Manual Focus 10~120 inches Triple RGB LEDs with Vibrant Color Technology Life 30,000hrs Composite A/V (3.5mm Jack) Digital Input (Mini) (compatible) 3.5 mm audio jack Black / White) TF Card Slot (32GB maximum) Full Size USB 2.0 (32GB maximum) 5.5 x 3.5 x lbs 24 W 90 Minute Li-Ion Rechargeable Battery MP3, WMA, OGG, WAV, AVI, BMP, JPG,TXT, GIF, XLS, PPT, DOC, PDF CE, FCC Class A 5.1 Lollipop Quad-Core ARM Cortex A7 1GB 8GB b/g/n
56 Notes 53
57 Please direct all customer service inquiries to: AAXA Technologies, Inc Mitchell N., Unit #B Irvine, CA (714)
aaxa TECHNOLOGIES User Guide
 aaxa TECHNOLOGIES User Guide Caution! WARNING: Please use this product as instructed. Misuse may cause injury or death. DO NOT use while driving. DO NOT expose to water or wet surfaces. Electric shock
aaxa TECHNOLOGIES User Guide
 aaxa TECHNOLOGIES User Guide Caution! WARNING: Please use this product as instructed. Misuse may cause injury or death. DO NOT use while driving. DO NOT expose to water or wet surfaces. Electric shock
aaxa TECHNOLOGIES User Guide
 aaxa TECHNOLOGIES User Guide Caution! WARNING: Please use this product as instructed. Misuse may cause injury or death. DO NOT use while driving DO NOT expose to water or wet surfaces. Electric shock may
aaxa TECHNOLOGIES User Guide
 aaxa TECHNOLOGIES User Guide Caution! WARNING: Please use this product as instructed. Misuse may cause injury or death. DO NOT use while driving DO NOT expose to water or wet surfaces. Electric shock may
aaxa TECHNOLOGIES User Guide
 aaxa TECHNOLOGIES User Guide Vertical Operation The HD Pico can be used for vertical operation (Ceiling projection). To use the HD Pico for Ceiling projection set the HD Pico in "Eco mode". Only an TF
aaxa TECHNOLOGIES User Guide
 aaxa TECHNOLOGIES User Guide Caution! WARNING: Please use this product as instructed. Misuse may cause injury or death. DO NOT use while driving DO NOT expose to water or wet surfaces. Electric shock may
aaxa TECHNOLOGIES User Guide
 aaxa TECHNOLOGIES User Guide Caution! WARNING: Please use this product as instructed. Misuse may cause injury or death. DO NOT use while driving DO NOT expose to water or wet surfaces. Electric shock may
aaxa P4X Pico Projector TECHNOLOGIES User Guide
 aaxa TECHNOLOGIES P4X Pico Projector User Guide Caution! WARNING: Please use this product as instructed. Misuse may cause injury or death. DO NOT use while driving DO NOT expose to water or wet surfaces.
aaxa TECHNOLOGIES User Guide
 aaxa TECHNOLOGIES User Guide Caution! WARNING: Please use this product as instructed. Misuse may cause injury or death. DO NOT use while driving DO NOT expose to water or wet surfaces. Electric shock may
TECHNOLOGIES. P2jr Pico Projector. User Guide
 aaxa TECHNOLOGIES P2jr Pico Projector User Guide Caution! WARNING: Please use this product as instructed. Misuse may cause injury or death. DO NOT use while driving DO NOT expose to water or wet surfaces.
aaxa TECHNOLOGIES PICO PROJECTOR User Guide
 aaxa TECHNOLOGIES PICO PROJECTOR User Guide Caution! WARNING: Please use this product as instructed. Misuse may cause injury or death. DO NOT use while driving DO NOT expose to water or wet surfaces. Electric
aaxa TECHNOLOGIES User Guide
 aaxa TECHNOLOGIES User Guide Caution! WARNING: Please use this product as instructed. Misuse may cause injury or death. DO NOT use while driving DO NOT expose to water or wet surfaces. Electric shock may
aaxa TECHNOLOGIES User Guide
 aaxa TECHNOLOGIES User Guide Caution! WARNING: Please use this product as instructed. Misuse may cause injury or death. DO NOT use while driving. DO NOT expose to water or wet surfaces. Electric shock
aaxa P3OO Pico Projector TECHNOLOGIES User Guide
 aaxa TECHNOLOGIES P3OO Pico Projector User Guide Caution! WARNING: Please use this product as instructed. Misuse may cause injury or death. DO NOT use while driving DO NOT expose to water or wet surfaces.
aaxa Pico Projector TECHNOLOGIES User Guide
 aaxa TECHNOLOGIES Pico Projector User Guide Caution! WARNING: Please use this product as instructed. Misuse may cause injury or death. DO NOT use while driving. DO NOT expose to water or wet surfaces.
aaxa TECHNOLOGIES User Guide
 aaxa TECHNOLOGIES User Guide Caution! WARNING: Please use this product as instructed. Misuse may cause injury or death. DO NOT use while driving. DO NOT expose to water or wet surfaces. Electric shock
aaxa P3 Pico Projector TECHNOLOGIES User Guide
 aaxa TECHNOLOGIES P3 Pico Projector User Guide Caution! WARNING: Please use this product as instructed. Misuse may cause injury or death. *Do not operate the Projector in direct sunlight or near heat sources
aaxa P4 Pico Projector TECHNOLOGIES User Guide
 aaxa TECHNOLOGIES P4 Pico Projector User Guide Caution! WARNING: Please use this product as instructed. Misuse may cause injury or death. DO NOT use while driving DO NOT expose to water or wet surfaces.
TECHNOLOGIES. User Guide
 aaxa TECHNOLOGIES User Guide Quick Start Guide Step 4: Settings Button Step 1: Power Adapter Port Step 2: Power Button Step 3: Adjust Focus Step 1: Connect the power adapter Step 2: Press the Power button
*Do not operate the projector near water such as by the sink or bathtub as this may cause electric shock.
 Table of Contents Table of Contents 1 Warnings 2 Overview 3 Remote Control Functions 4 Packing List 5 General Operation 6 Startup and control Shutdown Positioning / Throw Distance / Focus 7 Connecting
WARNINGS. *Do not operate the Projector in direct sunlight or near heat sources such as heaters, fires, and stoves as this may cause a fire hazard.
 WARNINGS *Do not operate the Projector in direct sunlight or near heat sources such as heaters, fires, and stoves as this may cause a fire hazard. *Do not operate the projector close to sources of steam
AAXA Technologies P700 HD LED Pico Projector - Troubleshooting & Firmware Update Guide
 Troubleshooting: Image is blurred/picture not bright enough The Projector is not in focus Adjust the focus with the focus adjustment dial until the image comes into focus. Move the projector so that it
User s Manual BeamPod User Manual
 User s Manual BeamPod General Safety Information 1. Keep the device and packaging materials out of reach of infants and children. 2. Keep the power adapter and other contacts from water, Dry your hands
Limited Edition Product Overview
 Limited Edition Product Overview INTRODUCTION REDEFINING LUXURY beléci is built with impeccable craftsmanship and is designed to meet the 21st century mobile security challenges with its built-in CodeTel
For Model No. MP709 User Manual
 For Model No. MP709 EN User Manual This manual contains important safety precautions and information of correct use. Please be sure to read this manual carefully before use so as to avoid any accidents.
4 Projector Features DMD FEATURE. Light Source & Lifespan: OSRAM. Market brightness: LED(R.GB) Q8 (Up to 30,000 hours) 500 Lumens
 Q8 (Up to 30,000 hours) 500 Lumens") User Manual defective 02 4 Projector Features DMD FEATURE Display Technology: DLP(0.3" 720P DMD) Resolution: 1280*720 (support 1080p video) Market brightness: Light Source & Lifespan: OSRAM 500 Lumens
User Manual defective 02 4 Projector Features DMD FEATURE Display Technology: DLP(0.3" 720P DMD) Resolution: 1280*720 (support 1080p video) Market brightness: Light Source & Lifespan: OSRAM 500 Lumens
NID- 7006A. Memory Powered by Android TM OS 4.1
 THE NEW GENERATION IN TECHNOLOGY NID- 7006A Core TM 7 Tablet PC with 8GB Built- In Memory Powered by Android TM OS 4.1 Basic Introduction... 1 Quick Start... 1 Battery management and charging... 1 Boot
PENDOPAD 10.1 QUICKSTART T GUIDE USER MANUAL PNDPP42DG10BLK. > Please read carefully before use
 PENDOPAD 10.1 PNDPP42DG10BLK QUICKSTART T GUIDE & USER MANUAL > Please read carefully before use This manual contains important safety precautions and information of correct use. Please be sure to read
1. Notes. 2. Accessories. 3. Main Functions
 Contents 1. Notes... 2 2. Accessories... 2 3. Main Functions... 2 4. Appearance And Buttons... 3 5. MID Hardware Parameters... 4 6. MID Use And Preparation... 4 7. Keys Functions... 4 8. Start-up And Shutdown...
1. Introduction P Package Contents 1.
 1 Contents 1. Introduction ------------------------------------------------------------------------------- P. 3-5 1.1 Package Contents 1.2 Tablet Overview 2. Using the Tablet for the first time ---------------------------------------------------
AirServer Connect User Guide
 1 Contents Welcome... 3 Unique features... 3 Set up your AirServer Connect... 4 The Home Screen... 5 Navigating Menus... 5 Configuring Basic Settings... 6 Screen Mirroring Methods... 7 Airplay... 7 Mac...
PENDOPAD 9.7 QUICKSTART GUIDE & USER MANUAL PNDPP42DG9BLK. > Please read carefully before use
 PENDOPAD 9.7 PNDPP42DG9BLK QUICKSTART GUIDE & USER MANUAL > Please read carefully before use This manual contains important safety precautions and information of correct use. Please be sure to read this
Tablet PC User Manual
 Tablet PC User Manual Please read all instructions carefully before use to get the most out of your Time2Touch Tablet PC. The design and features are subject to change without notice. Contents Important
1. Introduction P Package Contents 1.
 1 Contents 1. Introduction ------------------------------------------------------------------------------- P. 3-5 1.1 Package Contents 1.2 Tablet Overview 2. Using the Tablet for the first time ---------------------------------------------------
User s Manual Smart Interactive Conferencing Whiteboard
 User s Manual Smart Interactive Conferencing Whiteboard 800-930-5030 www.uberdisplay.com Contents I. Introduction... 3 II. Safety Warnings... 4 III. List of Accessories... 6 IV. Startup... 7 1. Power On...
For Model No. MPG7. User Manual
 For Model No. MPG7 EN User Manual This manual contains important safety precautions and information of correct use. Please be sure to read this manual carefully before use so as to avoid any accidents.
Lenovo IdeaPad Flex 10
 Lenovo IdeaPad Flex 10 User Guide Read the safety notices and important tips in the included manuals before using your computer. Notes Before using the product, be sure to read Lenovo Safety and General
Visual Land V TOUCH PRO
 Visual Land V TOUCH PRO Information in this manual are subject to change without notice. FEATURES 2.8 inch wide touch screen, 320X240 dot matrix full color high speed TFT screen Support MP3, WMA, RA, WAV
Navigating Pipsqueak. Use the arrow keys to navigate Yip Yap = Select, Red Button = Back Up
 Pipsqueak Quick Start Guide Download the free Yip Yap Smartphone App for parents! Search Pipsqueak on the Google Play or ios App Store, then login with Facebook or create a Login ID and password. Personalize
BEAT 2.0 USER MANUAL
 BEAT 2.0 USER MANUAL FCC ID: 2ADLJBEAT20 The device complies with part 15 of the FCC Rules. Operation is subject to the following two conditions: (1) This device may not cause harmful interference, and
For Model No. MPQC 994 IPS. User Manual
 For Model No. MPQC 994 IPS EN User Manual This manual contains important safety precautions and information of correct use. Please be sure to read this manual carefully before use so as to avoid any accidents.
LIGHTCAST V1.2 Software Guide for projectors
 LIGHTCAST V1.2 Software Guide for projectors 009-1683-01 CONTENTS Introduction...3 Registration when using a LightCast Key...4 Basic Navigation... 7 Using the remote and projector keypad... 7 Using the
H10 ios App V2.0 User Manual
 H10 ios App V2.0 User Manual 2 1. Spec and System Requirements... 3 2. Setting up H10 Device... 5 3. ios App V2.0 Overview... 8 4. Regarding File Format... 13 5. How to Play and View Your Media Files...
Lenovo Miix User Guide. Read the safety notices and important tips in the included manuals before using your computer.
 Lenovo Miix 2 11 User Guide Read the safety notices and important tips in the included manuals before using your computer. Notes Before using the product, be sure to read Lenovo Safety and General Information
xtab 7Q Tablet PC User s manual
 xtab 7Q Tablet PC User s manual TABLE OF CONTENTS INTRODUCTION... 3 I - GETTING STARTED... 3 Important Safety Precautions... 3 Cleaning the Panel... 3 Cleaning the Tablet... 3 Features... 4 Buttons Overview...
Insignia Flex Tablet (NS-14T004) FAQ. February 2014
 FAQ. February 2014") Insignia Flex Tablet (NS-14T004) FAQ February 2014 Setup... 2 Question 1: How do I set up my tablet for the first time?... 2 Android... 2 Question 2: What is Android Jelly Bean?... 2 Question 3: How are
Insignia Flex Tablet (NS-14T004) FAQ February 2014 Setup... 2 Question 1: How do I set up my tablet for the first time?... 2 Android... 2 Question 2: What is Android Jelly Bean?... 2 Question 3: How are
TM101W635L User s Guide
 TM101W635L User s Guide Customer Service NuVision Customer Service www.nuvision.com/assistance Phone: (800) 890-1288 Hours: 8:30am to 5:30pm PST M-F Email: cs@nuvision.com Register your tablet today at
STUDIO 7.0 USER MANUAL
 STUDIO 7.0 USER MANUAL 1 Table of Contents Safety Information... 3 Appearance and Key Functions... 4 Introduction... 5 Call Functions... 6 Notifications Bar... 7 Contacts... 8 Messaging... 9 Internet Browser...
Tablet PC. Android 5.1 User Manual
 Tablet PC Android 5.1 User Manual Tablet of Contents Specifications. What s inside the box Tablet Parts Getting started... How to use TF card How to connect to PC Connection to Internet.. Camera. Trouble
NEO 4.5. User Manual
 1 NEO 4.5 User Manual Table of Contents Safety Information... 3 Appearance and Key Function... 4 Introduction... 5 Call Functions... 6 Contacts... 7 Messaging... 8 Internet Browser... 9 Bluetooth & Wi-Fi...
Adapt ADPP-305 Projector User Manual
 Adapt ADPP-305 Projector User Manual I IMPORTANT: Please read before use Before using the product, please read the manual carefully. This product has 4GB memory, and can receive an additional TF/Micro
PLDANDHR1056KT. Android Touchscreen Tablet Entertainment Display Bundle
 PLDANDHR1056KT Android Touchscreen Tablet Entertainment Display Bundle Dual Vehicle Headrest Mount Multimedia Systems with Bluetooth, Wi-Fi & App Download (10.5 -inch) FRONT PANEL MULTIMEDIA PLAYER 1.
battery icon in the bottom right corner of the display screen.
 ATTENTION: This handbook contains important information regarding the safe and correct use of your tablet. Please be sure to read the following in order to maximize your enjoyment of the device and to
Tablet PC User Manual
 Tablet PC User Manual Please read all instructions carefully before use to get the most out of your Time2Touch Tablet PC. The design and features are subject to change without notice. Contents Important
User Manual. Product Model: MiTraveler 7D-8B. OS: Android 4.1
 User Manual Product Model: MiTraveler 7D-8B OS: Android 4.1 Tablet of Contents Specifications.1 What s inside the box 2 Tablet Parts 2 Getting started...2 Connection to Internet..6 Task Bar..8 Install
Contents. Introduction. Getting Started. Navigating your Device. Customizing the Panels. Pure Android Audio. E-Books. Browsing the Internet
 Contents Introduction Getting Started Your Device at a Glance Charging Assembling the Power Adapter Turning On/Off, Unlocking Setting to Sleep and Waking Up Connecting to a Computer Navigating your Device
Using memory cards (not supplied)
") Chapter 1. Getting to know your computer Using memory cards (not supplied) Your computer supports the following types of memory cards: Secure Digital (SD) card Secure Digital High Capacity (SDHC) card
Chapter 1. Getting to know your computer Using memory cards (not supplied) Your computer supports the following types of memory cards: Secure Digital (SD) card Secure Digital High Capacity (SDHC) card
Contents. Introduction
 Page 1 of 15 Contents Introduction Getting Started Your Device at a Glance Charging Assembling the Power Adapter Turning On/Off, Unlocking Setting to Sleep and Waking Up Inserting and Removing a microsd
Lenovo ideapad 710S-13ISK
 Lenovo ideapad 710S-13ISK User Guide Read Read the the safety safety notices notices and and important important tips tips in in the the included manuals before using your computer. included manuals before
SMART PROJECTOR USER MANUAL. Please read the manual carefully before using and keep it in a safe place for future reference..
 SMART PROJECTOR USER MANUAL Please read the manual carefully before using and keep it in a safe place for future reference.. Contents 1 Introduction... 1 2 Specification... 2 3 Package Content... 3 4
User Guide Models: ELT0801H and ELT0703H
 User Guide Models: ELT0801H and ELT0703H Designed by the EPIK Learning Company California, USA Welcome! Thank you for purchasing your new HIGHQ Learning Tab. This User Guide will provide step-by-step instructions
HotSpot USER MANUAL. twitter.com/vortexcellular facebook.com/vortexcellular instagram.com/vortexcellular
 HotSpot USER MANUAL www.vortexcellular.com twitter.com/vortexcellular facebook.com/vortexcellular instagram.com/vortexcellular 1 Contents Quick User Guide... 2 1. Power On/Off... 2 2. Turn On /Off Screen...
Lenovo ideapad 720S-13IKB ideapad 720S Touch-13IKB ideapad 720S-13ARR
 Lenovo ideapad 720S-13IKB ideapad 720S Touch-13IKB ideapad 720S-13ARR User Guide Read Read the the safety safety notices notices and and important important tips tips in in the the included manuals before
Cloud Frame User's Manual
 Cloud Frame User's Manual For ongoing product improvement, this manual is subject to modification without prior notice. MODEL: CPF708 Before Operation Product Introduction Safety Precautions 2 3 Basic
1. Introduction. 1.1 Cosmo Specifications
 1. Introduction 1.1 Cosmo Specifications Details CPU Memory Storage Operating System Connectivity Sensor Camera Display Video Formats Description Quad Core 1.3 GHz ARM Cortex A7 Processor 512MB RAM 8 GB
EziNav G3 User Manual
 EziNav G3 User Manual 4.3 Touchscreen GPS with Bluetooth About this User Manual Congratulations on your purchase of your Kogan EziNav G3 GPS. This user manual provides information regarding the various
Contents. Introduction. Getting Started. Navigating your Device. Customizing the Panels. Pure Android Audio. E-Books
 Contents Introduction Getting Started Your Device at a Glance Charging Assembling the Power Adapter Turning On/Off, Unlocking Setting to Sleep and Waking Up Inserting and Removing a microsd Card Connecting
AV Guide for Mayes Center (232 Rosenau Hall)
") AV Guide for Mayes Center (232 Rosenau Hall) AV Services: (919) 966-6536, Rosenau 233 Table of Contents (click on a topic to skip to that section) Getting Started... 2 To Display the Room Computer... 4
AV Guide for Mayes Center (232 Rosenau Hall) AV Services: (919) 966-6536, Rosenau 233 Table of Contents (click on a topic to skip to that section) Getting Started... 2 To Display the Room Computer... 4
User Guide. Model: ELT0702
 User Guide Model: ELT0702 Welcome! Thank you for purchasing your new Epik Learning Tab Jr. This User Guide will provide step-by-step instructions to help you learn to use your new device. After opening
Using GIGABYTE Notebook for the First Time
 Congratulations on your purchase of the GIGABYTE Notebook P7! This Manual will help you to get started with setting up your notebook. For more detailed information, please visit our website at http://www.gigabyte.com.
Getting to know your IPad. Question: How many of you own or have spent time with an IPhone, IPod touch, or IPad?
 Getting to know your IPad Today's agenda: Question: How many of you own or have spent time with an IPhone, IPod touch, or IPad? Setting up an ITunes account Tour ITunes on the computer Explore IPad controls
Lenovo ideapad D330-10IGM
 Lenovo ideapad D330-10IGM User Guide Read the safety notices and important tips in the included manuals before using your computer. Notes Before using the product, be sure to read Lenovo Safety and General
700TSU INSTALLATION MANUAL
 M 700TSU INSTALLATION MANUAL 2 Table of Contents Features...03 Specifications...04 Quick-Start...05 Remote Control...07 Hardware Installation...10 Software Installation...14 Touch Screen Driver Installation
Karbonn All rights reserved
 User Manual V97 HD Table of Contents Safety instructions ------------------------------------------------------------------ 3 Device overview --------------------------------------------------------------------
Windows " Intel Apollo Lake N3350 Clamshell Laptop
 TRAVELBOOK M13 by TRAVELTEK Windows 10 13.3" Intel Apollo Lake N3350 Clamshell Laptop User Manual Introduction Thank you for purchasing the Travelbook M13 which comes with the newest Intel Apollo Lake
Lenovo Yoga User Guide. Read the safety notices and important tips in the included manuals before using your computer.
 Lenovo Yoga 2 13 User Guide Read the safety notices and important tips in the included manuals before using your computer. Notes Before using the product, be sure to read Lenovo Safety and General Information
Help Guide MP-CL1A m. 120 inches. 2.3 m. 80 inches m. 40 inches. 3-MP Sony Corporation
 Help Guide MP-CL1A 3.45 m 120 inches 2.3 m 80 inches 1.15 m 40 inches 3-MP0-107-02 2016 Sony Corporation Parts and Controls CAUTION Do not point the laser light directly at eyes or people, nor look into
SC600W WIFI IP HIDDEN CAMERA
 USER MANUAL SC600W WIFI IP HIDDEN CAMERA 1 YEAR WARRANTY All RecorderGear brand products are backed by our 1 Year Warranty. For full details visit WWW.RECORDERGEAR.COM This Device is Compliant with USA
Thank you for purchasing a Danew product. Your DSlide Has been designed to offer you a unique game experience on a touch tablet.
 USER GUIDE Thank you for purchasing a Danew product. Your DSlide Has been designed to offer you a unique game experience on a touch tablet. Before using your device, read carefully the use instructions
Lenovo ideapad 110S. User Guide. ideapad 110S-11IBR. Read the safety notices and important tips in the included manuals before using your computer.
 Lenovo ideapad 110S ideapad 110S-11IBR User Guide Read the safety notices and important tips in the included manuals before using your computer. Notes Before using the product, be sure to read Lenovo Safety
This guide describes features that are common to most models. Some features may not be available on your tablet.
 User Guide Copyright 2013 Hewlett-Packard Development Company, L.P. Bluetooth is a trademark owned by its proprietor and used by Hewlett-Packard Company under license. Google is a trademark of Google Inc.
FAQ For IDOL 5S. SW: v4e1z+ul
 FAQ For IDOL 5S SW: v4e1z+ul i. Basic Setting 1. How can I set up my Alcatel device when I turn it on for the first time? The first time you turn on the phone, you will see a welcome screen. You can start
Downloaded from manuals search engine. Quick Start
 Quick Start Thank you for purchasing the Mobile WiFi. This Mobile WiFi brings you a high speed wireless network connection. This document will help you understand your Mobile WiFi so you can start using
ZOTAC ZBOX nano. User s Manual
 User s Manual ZOTAC ZBOX nano No part of this manual, including the products and software described in it, may be reproduced, transmitted, transcribed, stored in a retrieval system, or translated into
QK5P1000-Manual_Cover-135x135mm_PrintReady.eps 1 2/7/ :52:09 AM CMY 291-MB384-01S4F
 QK5P1000-Manual_Cover-135x135mm_PrintReady.eps 1 2/7/2018 11:52:09 AM C M Y CM MY CY CMY K 291-MB384-01S4F User s Manual No part of this manual, including the products and software described in it, may
Aspera R7. User Manual
 1 Aspera R7 User Manual Contents Safety Information... 3 Appearance and Key Function... 5 Introduction... 6 Call Functions... 7 Notifications Bar... 8 Contacts... 9 Messaging... 9 Bluetooth and Wi-Fi...
Hi-Res 8 Wi-Fi Digital Picture Frame with MP3 player Table of Contents
 Hi-Res 8 Wi-Fi Digital Picture Frame with MP3 player Table of Contents Before Using the Digital Picture Frame...3 Introduction...3 Features and Specs...3 Package contents...4 Digital Picture Frame Layout...5
HIGH POWER STREET DANCE BOOMBOX
 HIGH POWER STREET DANCE BOOMBOX PBMSPG260L USER MANUAL Location of Controls 1. POWER SWITCH 2. DC IN JACK 3. USB PORT 4. AUX IN JACK 5. BATTERY INDICATOR 6. BLUETOOTH INDICATOR 7. GUITAR INPUT JACK 8.
ZOTAC ZBOX nano. User s Manual
 User s Manual ZOTAC ZBOX nano No part of this manual, including the products and software described in it, may be reproduced, transmitted, transcribed, stored in a retrieval system, or translated into
Preface. Statement & Disclaimer
 Preface Thank you very much for choosing our Smart TV Box. For your convenience, and reference, please refer to the provided manual for setup and operation instructions. Statement & Disclaimer We have
Model: AMI-TT4 USER MANUAL
 Model: AMI-TT4 EN USER MANUAL Introduction This manual contains detailed instructions and notes on the operation and use of this device. For your safety and bene it, read this manual carefully before using
ipod classic User Guide
 ipod classic User Guide Contents 4 Chapter 1: ipod classic Basics 5 ipod classic at a glance 5 Using ipod classic controls 7 Disabling ipod classic controls 8 Using ipod classic menus 8 Adding or removing
ZOTAC ZBOX. User s Manual
 User s Manual ZOTAC ZBOX No part of this manual, including the products and software described in it, may be reproduced, transmitted, transcribed, stored in a retrieval system, or translated into any language
705 INSTALLATION MANUAL
 705 INSTALLATION MANUAL 2 Table of Contents Features...03 Specifications...04 Quick - Start...05 Remote Control...07 Hardware Installation...10 705 Models Additional Info...14 Owner s Record...15 3 Features
TCC8803 PAD User Manual
 TCC8803 PAD User Manual Important Safety Instructions Please read the following instructions carefully before using this player. Do not remove the T-Flash card while it s in use to avoid damage to the
IdeaTab A1000L-F. User Guide V1.0. Please read the Important safety and handling information in the supplied manuals before use.
 IdeaTab A1000L - UserGuide IdeaTab A1000L-F User Guide V1.0 Please read the Important safety and handling information in the supplied manuals before use. file:///c /Users/xieqy1/Desktop/EN UG/index.html[2013/8/14
SC550W WIFI IP HIDDEN CAMERA
 USER MANUAL SC550W WIFI IP HIDDEN CAMERA 1 YEAR WARRANTY All RecorderGear brand products are backed by our 1 Year Warranty. For full details visit WWW.RECORDERGEAR.COM This Device is Compliant with USA
/ QUICK START GUIDE. Mobile Projector
 / QUICK START GUIDE Mobile Projector 1 STEP 1 - POWER UP Power Button Press and hold the power buttons for 5 seconds to turn on the device. (It may take a few seconds for the Cube to start projecting an
CONTENT COMPONENTS OF PROJECTOR... 2 SPECIFICATION... 3 INSTRUCTION MANUAL... 3 CHARGING THE PROJECTOR... 3 SET UP... 4
 MP50M User Manual CONTENT COMPONENTS OF PROJECTOR... 2 SPECIFICATION... 3 INSTRUCTION MANUAL... 3 CHARGING THE PROJECTOR... 3 SET UP... 4 POWERING UP AND VIEWING MEDIA... 4 ADJUSTING VOLUME... 5 ADJUSTING
Thank you for purchasing the Mobile WiFi. This Mobile WiFi brings you a high speed wireless network connection.
 Quick Start Thank you for purchasing the Mobile WiFi. This Mobile WiFi brings you a high speed wireless network connection. This document will help you understand your Mobile WiFi so you can start using