How to: Manage Forms for Enrollment, Registration, & Data Updates
|
|
|
- Candice Murphy
- 5 years ago
- Views:
Transcription


1 The tx Suite How To Guide Series tx Connect Administrator Web-based Access for Teachers, Parents, and Students How to: Manage Forms for Enrollment, Registration, & Data Updates Developed by the TEXAS COMPUTER COOPERATIVE

2 Copyright 2017 by Texas Computer Cooperative All rights reserved 1314 Hines Avenue San Antonio, TX
3 Contents OvOverview... 3 Terminology... 3 Prerequisites... 3 Checklist Overview... 3 Types of Forms... 4 Access the Forms Management Pages... 5 Upload Static Forms... 9 Select Student Data Fields Create Forms Note the Standard Forms...16 Create a Form Using a Static Document...16 Create a Form Using Data Fields...18 Establish Settings for New Student Enrollment Forms...25 Modify Forms As Needed...28 Create a Spanish Version of a Static Form...28 Create Groups and Add Forms to Groups Update a Default Group...30 Add a New Group...33 Set Up Online Registration Enable Forms for Parents Conclusion Next Steps...47 Form Usage
4 2
5 OvOverview The txconnect Admin Forms Managements pages allow district-level administrative users to manage forms for new student enrollment, online student registration, and student data updates, including static printable forms, customized dynamic forms, and standard forms. Terminology New Student Enrollment - The one-time process of enrolling a new student in the district. Online Student Registration - The annual review and updates to student records for existing students (i.e., students already enrolled in the district), such as demographic data updates and standard forms. Student Data Updates - The ongoing maintenance of records for existing students, such as changes to contact information. Prerequisites You must have district-level administrative access to txconnect. Any static forms must be ready for upload and saved in a valid format. All forms should be ADA compliant. This guide is based on txconnect Checklist Overview The following administrator steps are covered in this guide: Access the Forms Management pages. Upload static forms. Set options for dynamic form fields. Create forms. Create groups and add forms to groups. Enable forms in txconnect for parents. 3

6 Types of Forms Three types of forms may be used: Static forms cannot be updated online; they can by viewed, printed, completed by hand, and returned to the campus. Static forms can be delivered in various formats, such as Microsoft Word or PDF. Dynamic forms are presented online and can be completed and submitted online. These forms may include student demographic updates. Standard forms are predefined district-level forms that are common throughout Texas. The forms cannot be edited by administrators, but you can determine whether or not they are available to parents by including (or excluding) them from groups. 4


7 Access the Forms Management Pages The Forms Management pages can be accessed from the txconnect Administrator Options page. Administrator access to txconnect is accomplished by a separate Administrator Login page using the AdminLogin.aspx file name in the application URL. 1. From the Administrator Login page, type your administrative user name and password, and then click Log In. The Administrator Options page is displayed with User Administration as the default tab. 2. Click the Settings tab. 3. Scroll down to the Student Data, Online Registration & New Student Enrollment section where the following fields are displayed but should be skipped for now. They will be set in a subsequent step. z The Allow parents access to Student Data forms field is set to No by default. Leave this field set to No until setup is complete. z Leave the Active Online Registration From and To (date range) fields blank for now. z The What school year will Online Registration and District Online Registration confirmation message fields can be set once setup is complete. z The Allow parent access to New Student Enrollment field is set to No by default. Leave this field set to No until setup is complete. 5


8 z Leave the New Student Enrollment Authentication Type field set to the default setting for now. 4. Click the Forms Management page link. The Forms Management page is displayed. On the Forms Management page, a different menu is displayed. 6


9 z Click Admin to return to the main menu at any time. z On the left side of the page are links to the menu items. z On the right side of the page under Summary Information is data on the number of existing forms and columns. ßß ßß Some forms and columns are included automatically. Archived forms include forms that may still be needed for reporting purposes but are no longer used for data collection. Forms can be archived (or unarchived) on the Form Editor page. 7
10 8

11 Upload Static Forms The Static Document Management page allows you to maintain a pool of read-only forms that parents can view and print as needed. Static forms are documents that cannot be updated online; they can be viewed, printed, completed by hand, and returned to the campus. These forms will vary by district and campus and may include documents such as campus and district calendars, school supply lists, acknowledgement forms, or surveys. From the Static Documents page, you can upload forms from your PC to the txconnect server. Parents will be able to access these forms from txconnect for new student enrollment, annual student registration, and ongoing student data maintenance. You can upload documents in the following formats:.doc or.docx (Microsoft Word).pdf (Adobe Acrobat).xls or.xlsx (Microsoft Excel) NOTE:»» Any static forms you upload should be ADA compliant.»» If you will be creating English and Spanish versions of static forms, you must upload an English and Spanish version of each form. Administrator Options > Settings > Forms Management > Static Documents On this page, you will only upload the documents. You will create a form for each document in a subsequent step. 1. Under Upload a document, click Choose File to locate the form on your PC that you want to upload. A dialog box opens allowing you to select the file. 2. Locate and select the form. The file name is displayed. 9


12 3. Click Upload File to upload the selected file to the txconnect server. The file is uploaded to the server, and the file name and file size are displayed under All Documents. 4. Add additional files as needed. They are listed alphabetically. 5. Below the Upload File button, statistical information is displayed indicating the total number of documents uploaded and the total file size for all uploaded documents. 6. To delete a document from the txconnect server, click the delete icon. You are prompted to confirm that you want to delete the file. Click OK. NOTE: You cannot delete a document if it is in use (i.e., added to a form). The is not displayed. 10

13 Select Student Data Fields The Form Field Management page allows you to set options for the fields that will be used for student enrollment, registration, and data update forms. Examples of fields are first name, last name, middle name, and birth date. The list of Available Fields is added automatically. You can set options for each field, such as whether it can be displayed to the parent on a form in txconnect. On this page you will set options for the fields. You will add the fields to a form in a subsequent step. Administrator Options > Settings > Forms Management > Form Fields 1. Under Available Fields, a list of all available fields is displayed. z The list includes the database field (i.e., column) name, database table name, and the application with which the field is associated (such as Health or Registration). z The Seq field indicates if the field is from a vertical table. ßß ßß ß ß blank = a single record for the student, such as a birth date (i.e., not a vertical table). asterisk (*) = multiple records for the student, such as multiple contact records. For example, the demo contact table has a sequence identifier for each person entered. (itccs only) sequence number = a hard-coded sequence resulting in a static number of multiple-records. If there are two contacts entered, they would have sequence numbers of 01 and
 indicates that the field cannot be updated by a parent, and this overrides all other settings for this field related to editing and updating.")
14 z The Updateable column indicates if the data in the field can be updated by a parent. This is set automatically and cannot be changed. ßß ßß true (i.e., yes) indicates that the field can be updated by a parent. You can override this setting in a subsequent step. false (i.e., no) indicates that the field cannot be updated by a parent, and this overrides all other settings for this field related to editing and updating. z You can click the column heading to sort the grid by that column. Click it once to sort the column in ascending order. Click it again to sort the column in descending order. 2. Click under Edit to edit settings for a particular field. The Edit Field Information section is displayed on the left side of the page. 12

15 z The Selected Field field indicates the database name for the selected field. For a field in a vertical table, an asterisk or a sequence number is displayed in parentheses next to the field name. z The From Table field indicates the database name for the table in which the selected field exists. z Under Default friendly display name, a friendly name for the selected field is displayed as it will appear on the form in both English and Spanish. For example, if the database field name is DOB, the friendly name might be Date of Birth (English) and Fecha de nacimiento (Spanish). The friendly name is set automatically and cannot be changed from this page; however, you can modify the friendly name when you add it to a form in a subsequent step. z For Is field visible to the user, select Yes to allow the field to be displayed for the parent on a form in txconnect. If you select No, the field cannot be displayed on any forms for parents to see. If the field is set to No, this setting overrides all other visibility settings. z The Will this field require an admin s review field is not currently in use. Whether you select Yes or No, any change must be approved by an administrator. z The Is physical documentation required for changes field is not currently in use. z Under Default instructions or information for this field, type any special instructions for the parent that are specific to the field, up to 500 characters, in both English and Spanish. If Spanish instructions are not provided, English instructions will be displayed even if the parent is viewing txconnect in Spanish. 3. Click Save. 13

16 A message is displayed indicating that the data was saved successfully. 4. Repeat these steps for each column that will be used in a form. 14

17 Create Forms The Form Management page allows you to create new forms, as well as delete and edit existing forms. Two types of forms can be created: Static forms can be created using the static documents you have already uploaded. Dynamic forms can be created using the columns (fields) you modified in previous steps. Standard forms are included automatically and do not need to be created. NOTE: A form must be added to a group (or to the Online Registration template) in order to be accessible to parents. You will add a form to a group or to the template in a subsequent step. Administrator Options > Settings > Forms Management > Forms Under Available Forms, any existing forms are listed, including those that are added automatically. Initially, only standard forms and New Student forms are included. These are included automatically and cannot be removed. The grid displays the form name, type of form (i.e., standard, static or dynamic), and the campus with which the form is associated (if applicable). If the Campus column is blank, the form is associated with all campuses in the district. The Editable field indicates if the form is editable. This does not apply to static forms. The Columns field displays the number of columns (i.e., fields) currently added to the form. This does not apply to static forms. 15

18 You can click the column heading to sort the grid by that column. Click it once to sort the column in ascending order. Click it again to sort the column in descending order. By default, archived forms are not displayed. Click show archived to view any archived forms. Click show active to return to the list of active forms. Forms can be archived (or un-archived) on the Form Editor page. Note the Standard Forms Several standard forms are included automatically. The Type is set to standard. Standard forms cannot be modified or deleted; the spyglass and delete icons are not available. Create a Form Using a Static Document If you uploaded any static documents, you must create a form using each static document in order to make it accessible to parents. NOTE: To create a Spanish version of a static form, you will need to set the Current Language Context for the form to Spanish. This will be done in a subsequent step using the Form Editor page once the static form is created. 16


19 1. To create a static form, do the following under New Form: z In the Name field, type a name for the new form, up to 50 characters. z In the Campus field, select a campus in order to assign the form to a specific campus. Or, select None if the form is used for all campuses in the district. z In the Visible field, select Yes if you want the form to visible to parents in txconnect. z Select the form from the list in the drop-down field. z Under Special Instructions or information for this form, type any specific district-level instructions for the form, up to 2000 characters. 2. Click Add. A message is displayed indicating that the static form was successfully added. 17


20 3. Repeat for all remaining static forms. Create a Form Using Data Fields 1. To create a new dynamic form, do the following under New Form: z In the Name field, type a name for the new form, up to 50 characters. z In the Campus field, select a campus in order to assign the form to a specific campus. Or, select None if the form is used for all campuses in the district. z In the Visible field, select Yes if you want the form to visible to parents in txconnect. 18
21 z Leave the drop-down field set to No Document if you are creating a dynamic form. z Under Special Instructions or information for this form, type any specific instructions for the form, up to 2000 characters. 2. Click Add. The form opens on the Form Editor page where you can add fields and make other modifications. 3. In the Current Language Context field, select the language of the form you are editing. 4. The Name and Campus fields display the name and campus as entered in the previous step. You can modify the fields if necessary. The name should be typed in the language selected in Current Language Context. If a Spanish name is not provided, the English name will be displayed even if the parent is viewing txconnect in Spanish. 5. In the Editable field, select Yes if you want the fields on the form to be editable. Otherwise, select No. 6. The Visible field displays the setting entered on the previous page. You can change the setting if necessary. 7. The Archived field allows you to indicate if you want to archive the form. This can be used to retain forms that may still be needed for reporting purposes but are no longer used for data collection. An archived form is still accessible, but is grouped with other archived forms for organizational purposes. Leave the field set to No unless the form is no longer in use. 8. The Special Instructions or information for this form text box displays any text entered on the previous page. You can modify the text if necessary, up to 2000 characters. The message should be typed in the language selected in Current Language Context. If Spanish instructions are not provided, English instructions will be displayed even if the parent is viewing txconnect in Spanish. 19
 you want to add to the form.")
.")
22 9. Under Form Fields, add the fields to the form. You must add at least one field to a form for the form to be valid. z Click either Add button to add a new field to the form. A row is displayed in the grid. z In the Field Name field, select the table-column (i.e., field) you want to add to the form. The drop down lists all possible columns, including the column name, sequence number (if applicable), and table name. Once you select a table-column, all subsequent columns that you add to the form must come from the same type of table (either vertical with multiple records, or single record). The drop-down list in the subsequent rows will filter out the tables that can no longer be selected based on the selection in the first row. ßß ßß A hyphen indicates a flat (single-record) table. An asterisk indicates a vertical (multi-record) table. NOTE: For vertical table, some fields are mandatory, and they will automatically be added to the form even if you no not select them. z In the Friendly Name field, the default friendly name for the field is displayed. You can modify the name as needed. The field can be up to 50 characters. The name should be typed in the language selected in Current Language Context. If a Spanish name is not provided, the English name will be displayed even if the 20

23 parent is viewing txconnect in Spanish. z The Order column allows you to indicate the order in which you want the fields to be displayed on the form. For example, type 1 if you want to field to be displayed at the top of the form. z The Field Set field allows you to group related fields together in the form. For example, you could type Contact for all fields that are related to the student s contact information. The field set should be typed in the language selected in Current Language Context. If a Spanish field set name is not provided, the English field set name will be displayed even if the parent is viewing txconnect in Spanish. The fields that you want to physically group together should also be together as indicated by the Order field. The fields with the same Field Set are grouped together in a box, but only if they are adjacent in the order. The box is drawn around one or more sequential fields that have a Field Set specified. z Select Edit if the field can be updated by parents on the form. If selected, the form field will be editable if it is also set to editable at the campus level. If not selected, it will override any other settings, and the form field will not be editable. z Select Req if the field is required of the parents. You cannot select this field unless it is editable. z Select Bold if you want the field to be displayed in a bold font. z Select Italics if you want the field to be displayed in an italic font. z Under Color, click the box to select a color for the field, if you prefer a color other than black. A box opens that provides seven color choices, as well as the option for no color (i.e., black). Click a color to select it, and the box closes. z Under Bg Color, click the box to select a background color for the field. A box opens that provides seven background color choices, as well as the option for no color. 21


24 Click a color to select it, and the box closes. NOTE: The form is automatically shaded with an alternating (light/dark) gray background when displayed for parents in txconnect. If you do not select a color, or if you select No Color, the background will be gray. z Under Instructions, click the Instructions button to view any existing default instructions and add additional instructions. A pop-up box opens. ßß ßß ßß ßß Under Default instructions, any default instructions entered on the Form Field Management page are displayed. They cannot be changed here. Under Field Instructions, add or update any additional instructions for the field. These instructions will be appended to the default instructions when the parent accesses the form in txconnect. Select Bold if you want the instructions to be displayed in a bold font. This selection will apply to all text typed in the Field Instructions area. Select Italics if you want the instructions to be displayed in an italic font. This selection will apply to all text typed in the Field Instructions area. 22
.")


25 ßß Click the Color box if you want the instructions to be displayed in a color. A box opens that provides seven color choices, as well as the option for no color (i.e., black). Click a color to select it, or click No Color, and the box closes. This selection will apply to all text typed in the Field Instructions area. Click Close to close the Instructions pop-up box. 10. To remove a field from the form, click the delete icon for the field. It is removed from the list, but it is not actually deleted until you click Save. 11. Click Save. If you created a form with fields from a vertical table, some required additional fields may be added automatically. If so, a message is displayed prompting you to review the fields before saving. 23


26 Note the added fields. These fields cannot be removed; the delete icon displayed. is not 12. Click Save again. Based on the settings in the example above, the form will look like this to the parent in txconnect: NOTE: Several dynamic form fields have automatic edits. To view a list of field-level edits, see the online Help. 24
 added.")
27 13. Click < Forms to return to the Form Management page, and create or edit another form. Establish Settings for New Student Enrollment Forms New Student forms are dynamic forms. Several New Student forms are included automatically and already have columns (i.e., fields) added. These forms cannot be deleted or renamed; however, you can modify some of the default settings for each form column. 1. Under Available Forms, click the spyglass icon under Options. The form opens on the Form Editor page where you can make changes. 25

28 2. In the Current Language Context field, select the language of the form you are editing. 3. The Name, Campus, Editable, and Visible fields display the default information and cannot be changed here. New Student forms cannot be archived. 4. Under Special Instructions or information for this form, type any specific districtlevel instructions for the form, up to 2000 characters. 5. You cannot add columns to a New Student form; the Add button is disabled. However, you can modify the following settings for existing columns: z In the Friendly Name field, the default friendly name is displayed. You can modify the name as needed. The field can be up to 50 characters. z The Order column allows you to indicate the order in which the fields are displayed on the form. For example, type 1 if you want to field to be displayed at the top of the form. z The Field Set field allows you to group related fields together in the form. For example, you could type Mailing Address for all fields that are related to the student s mailing address. The fields that you want to physically group together should also be together as indicated by the Order field. The fields with the same Field Set are grouped together in a box, but only if they are adjacent in the order. The box is drawn around one or more sequential fields that have a Field Set specified. z Select Vis (visible) if you want the field to be visible to parents on the form. Clear the Vis field if you do not want the field visible to parents. The setting of this field overrides all other visibility settings. z Select Edit if the field can be updated by parents on the form. If selected, the form field will be editable, but only if the field is also set to Updateable=true on 26

29 the Form Column Management page. If Edit is not selected, it will override the other settings, and the form field will not be editable. z Select Req if the field is required of the parents. If this field is selected, be sure Edit is also selected. z Under Instructions, click the Instructions button to view any existing default instructions and add additional instructions for the field. A window opens. ßß ßß ßß Under Default Instructions, any instructions entered on the Form Field Management page are displayed. They cannot be changed here. Under Field Instructions, add or update any additional instructions for the field. These instructions will be appended to the default instructions when the parent accesses the form in txconnect. Click Close. 6. Click Save. 7. Click < Forms to return to the Form Management page, and modify settings for another form. 27

30 Modify Forms As Needed Only static and dynamic forms can be modified or deleted. Default forms cannot be deleted, and only some fields can be updated. 1. To edit an existing form, under Available Forms, click the spyglass icon. The form opens on the Form Editor page where you can make changes. 2. To delete an existing form, under Available Forms, click the delete icon. You are prompted to confirm that you wish to delete the form. Click OK. NOTE: You cannot delete a form if it belongs to a group or if data exists for the form (i.e., if a parent has submitted changes associated with the form). The is not displayed. Create a Spanish Version of a Static Form You must have already uploaded a Spanish version of the static form, and you must have created a form using the Spanish document. 1. Click the spyglass icon for the form. The form opens on the Form Editor page where you can make changes. 2. In the Language Context field, select Spanish. 3. Ensure that the Spanish version of the form is selected for Static document selection. 4. Ensure that the Name and Special instructions are provided in Spanish. 5. Click Save. 28
 in order to be accessible to parents.")
31 Create Groups and Add Forms to Groups The Form Group Management page allows you to create and edit form group headings so you can group related forms. Some groups are included automatically. NOTE: A form must be added to a group (or to the Online Registration template which is described in the next chapter) in order to be accessible to parents. Administrator Options > Settings > Forms Management > Form Groups On the right side of the page, any existing group names are displayed, including those that are included automatically. The list includes the group name and number of forms currently associated with a group. Groups fall into one of three categories: New Student Enrollment External (Public Documents) Student Data Editing Any existing groups are displayed below the group headings, including those that are included automatically: Under New Student Enrollment: The New Student Enrollment Forms group is used to provide any static and standard forms required for enrolling a new student in the district. Any static and/or standard forms added to this group will be displayed when a parent goes through the new 29
32 student enrollment process online (Step 5). Under External (Public Documents): For forms in groups under this heading, the parent does not need to have a txconnect account or log on in order to access the forms. Only static document forms can be added to these groups. If at least one static document form has been added to an external group, the parent can click the link from the txconnect login page to access the documents. The Enrollment and Calendars groups are included by default. Under Student Data Editing: Initially, no groups are listed. Or, any groups created by the district prior to release 2.12 (Summer 2017) are listed. Under Form Count: The first number indicates the number of active forms in the group. The second number (in parentheses) indicates the number of archived forms in the group. Forms can be archived (or un-archived) on the Form Editor page. NOTE: Standard forms must be added to a group in order for parents to see them in txconnect. You can create a new group for standard forms, or you can add them to an existing group. Update a Default Group For groups that are included by default, you can only modify the Special instructions or information for this form grouping field and add forms to the group. External groups only allow you to add static forms. The New Student Enrollment Forms group allows you to add static and standard forms. You cannot change the name of a default group. 1. To edit a default group, click under Available Groups. The group details are displayed on the left side of the page under Form Group Detail. 30


33 2. In the Language Context field, select the language of the forms in the group. 3. Under Special instructions or information for this form grouping, add or update any special instructions for the form group, such as clarification about which forms are included in the group. The instructions should be typed in the language selected in Current Language Context. If Spanish instructions are not provided, English instructions will be displayed even if the parent is viewing txconnect in Spanish. 4. To add a form to a group, click Add. A grid is displayed allowing you to associate forms with the group. z In the Form Name field, select the form from the drop down. All available forms are listed in alphabetical order, including standard forms, which are automatically included. 31
34 z In the Order field, type the number indicating the order in which you want the forms to be listed within the group. For example, type 1 if you want the form to be listed first in the group, type 1 for the next, etc. z Select No Signature if the form has no data input fields or the parent is not required to acknowledge or submit the form. This only applies to forms that are for information purposes only, such as a school supply list or calendar. When selected, the form will not have any buttons displayed to the parent in txconnect allowing him to submit or acknowledge the form. The form will simply be displayed to the parent as a read-only form. NOTE:»» For New Student Enrollment Forms, the field is disabled. The field is blank by default and cannot be selected.»» For External forms, the field is disabled. The field is selected by default and cannot be cleared. z Select Visible to make the form visible to parents. If the field is not selected, the form will not be displayed in txconnect, even if it is associated with a group. This field can be used if you need to temporarily or quickly block access to the form, for example, if you need to make corrections to the content. z Select Required to indicate to the parent that the form is required and the parent must either submit required data or acknowledge that he has reviewed the form. If selected: ßß ßß If the form has data fields that must be input, the Submit Data with Electronic Signature button is displayed on the form in the parent portal, and the parent will be required to enter data and submit the form. If the form has no data fields but the parent must acknowledge that he has reviewed the form, the Submit Electronic Signature button is displayed on the form in the parent portal, and the parent will be required to submit the form. NOTE: This field is set automatically for some form types:»» For External and any other static forms, the field is disabled. The field is blank by default and cannot be selected.»» For standard forms in New Student Enrollment, the field is disabled. The field is selected by default and cannot be cleared. 5. Click Add again to add another form. The Add button is disabled once there are no additional forms that can be added to a group. 6. Click Save. The Form Count is updated to include the new form(s). 32


35 Add a New Group 1. To add a new group, do the following under Form Group Detail: z Click Add New Group. Any data in the fields is cleared allowing you to enter another group. z In the Language Context field, select the language of the forms in the group. z In the Group Type field, indicate the category for the new group. 33
 - The group will be added to the External (Public Documents) category.")
36 ßß ßß Student Data - The group will be added to the Student Data Editing category. This is the appropriate category for forms related to student data updates. A parent will need to be logged on to txconnect to have access to forms in this category. External (No login required) - The group will be added to the External (Public Documents) category. This is the appropriate category for static forms that you want to provide to the public without requiring a login. On the txconnect Login page, the user can click the link under Need Documents to go to the Public Documents page where the forms can be downloaded. z In the Name field, type a name for the group. NOTE: The name Registration is used by an internal system group and cannot be used for a district s forms. Instead, enter a name such as MISD Annual Registration Forms. z Under Special instructions or information for this form grouping, type any special instructions for the form group, such as clarification about which forms should be associated. Type the instructions in the language selected in the Language Context field. If Spanish instructions are not provided, English instructions will be displayed even if the parent is viewing txconnect in Spanish. z Any existing forms for the group are listed. Otherwise, the message Please add forms to your group... is displayed. 2. To add a form to a group, do the following: z Click Add. A grid is displayed allowing you to associate forms with the group. z In the Form Name field, select the form. All available forms are listed in alphabetical order, including standard forms, which are automatically included. 34
37 z In the Order field, type the number indicating the order in which you want the forms to be listed within the group. For example, type 1 if you want the form to be listed first in the group. z Select No Signature if the form has no data input fields or the parent is not required to acknowledge or submit the form. This only applies to forms that are for information purposes only, such as a school supply list or calendar. When selected, the form will not have any buttons displayed to the parent in txconnect allowing him to submit or acknowledge the form. The form will simply be displayed to the parent as a read-only form. NOTE:»» For External forms, the field is disabled. The field is selected by default and cannot be cleared. z Select Visible to make the form visible to parents. If the field is not selected, the form will not be displayed in txconnect, even if it is associated with a group. This field can be used if you need to temporarily or quickly block access to the form, for example, if you need to make corrections to the content. z Select Required to indicate to the parent that the form is required and the parent must either submit required data or acknowledge that he has reviewed the form. If selected: ßß ßß If the form has data fields that must be input, the Submit Data with Electronic Signature button is displayed on the form in the parent portal, and the parent will be required to enter data and submit the form. If the form has no data fields but the parent must acknowledge that he has reviewed the form, the Submit Electronic Signature button is displayed on the form in the parent portal, and the parent will be required to submit the form. NOTE: This field is set automatically for some form types:»» For External and any other static forms, the field is disabled. The field is blank by default and cannot be selected.»» For standard forms, the field is disabled. The field is selected by default and cannot be cleared. z Click Add again to add another form. The Add button is disabled once there are no additional forms that can be added to a group. 3. To delete a form from a group, click the delete icon under Associated Forms. 35


38 The form is removed from the list, but it is not actually deleted from the list until you click Save. If you leave or select another group before saving, the form will remain in the group. 4. Click Save. The group is listed on the right under the heading indicated by the Group Type field. 5. Click New to add another group. The data in the fields is cleared allowing you to enter another group. Unsaved data is lost. 6. To edit an existing group, click the spyglass icon. The fields on the left side of the page display the data for the selected group. Update data and forms as needed, and click Save. 36


39 7. To delete a group, click the delete icon on the right. You are prompted to confirm that you want to delete the group. Click OK. NOTE: You cannot delete a group that has forms associated with it, or a group that is included by default. The is not displayed. 37
40 38

41 Set Up Online Registration NEW FOR RELEASE 2.12: This page allows district-level users to create a template (i.e., set of forms) for student Online Registration. NOTE: Online Registration refers to forms required annually for students, which is not the same as New Student Enrollment. When Online Registration is enabled at the district, these forms will be displayed to parents when they are logged on to txconnect, and will have notifications indicating which forms are completed and which still require the parent s attention. Administrator Options > Settings > Forms Management > Online Registration On the right under Online Registration Date Range, the following data is displayed for your reference as entered on txconnect Admin > Settings and cannot be updated here. Beginning/Ending on - The beginning and ending dates for online registration for the specified school year are displayed. School Year - The school year for which students are registering during this date range is displayed. Initially no forms are listed on the right side of the page. 1. On the left under Available Forms is the list of all existing district-level forms (created on the Form Management page), excluding any campus-level forms and forms that are specifically for New Student Enrollment, is displayed. 39
 for annual online registration that includes only the fields that districts want parents")

42 z = Static form z = Dynamic form z = Standard form NOTE:»» By default, the Registration form is included, which contains all possible fields a parent may need to review annually. TIP: It is recommended that districts create a customized registration form (using the Form Management page) for annual online registration that includes only the fields that districts want parents to review annually.»» Also, the Home Language Survey standard form, which is required for new student enrollment, is only required once when the student enrolls in the district. This form is not listed for Online Registration. 2. To add a form to the Online Registration template, click the blue arrow button next to the form you want to add. z The form moves to the right. z The first form you add is listed as Step 1. The next form you add is Step 2, and so on. 40


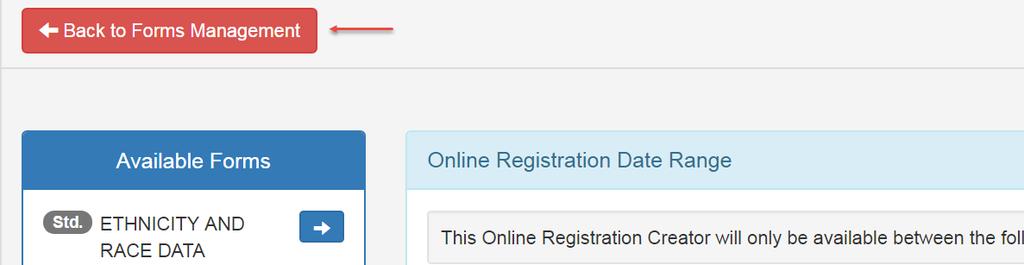
43 NOTE: Instructions for each form are displayed below the form name as entered on the Form Editor page and cannot be updated here. 3. Continue adding all forms required for Online Registration. 4. As forms are added, they are listed in the order in which they were added; however you can rearrange them as needed using one of the following methods: z Click Move Up or Move Down to move the form up or down in the list. z Use the number option to number the forms. Click the number to access the drop-down list. Select a number from the drop-down list. Forms will be listed numerically according to the number. z Click Remove Step to remove the form from the template. It is again listed under Available Forms. 5. To edit a form, click the form name. The form opens on the Form Editor page where you can make changes. NOTE: Standard forms cannot be edited. You cannot click the form name. 6. Changes to the template are saved automatically; there is no Save button. 7. Click Back to Forms Management to return to that page. 41
44 42

45 Enable Forms for Parents Once forms are set up, you can enable student data updates, online student registration, and new student enrollment in txconnect throughout the district, and manage other form settings. Administrator Options > Settings Scroll down to the Student Data, Online Registration & New Student Enrollment fields. Enable parents to update current year student data: Student Data forms are any visible forms added to groups in the Student Data Editing category. The Allow parents access to Student Data forms field is set to No by default. To allow 43
46 parents to update online student data in txconnect, select Yes. When set to Yes, the following is available in txconnect for parents: Summary page - Click. My Account page - Click. Both buttons open the page where the parent can update a student s data for the current school year, such as a change to a phone number. Also, the Need Documents link is enabled on the txconnect login page allowing a parent to access public static forms, such as a calendar. The link is only displayed if at least one public document exists. This field is automatically saved when it is updated. There is no Save button. Enable parents to complete annual student registration: Student Registration forms are any visible forms added to the Online Registration template. 1. In the Active Online Registration date range From and To fields, specify the beginning and ending dates for active online registration. Click Save. z If dates are entered, and the current date is within these dates, and the parent has enrolled and added a student to his txconnect account: ßß The parent will be prompted with a pop-up message on the Summary page to use the online registration features in txconnect. ßß The button is displayed on the Summary page. The parent can click the button to go to the page where she can complete the student s registration forms. z If no dates are entered, or if the current date is outside the date range, the pop-up message and button are not displayed to parents on the Summary page. 2. In the What school year will Online Registration be running for field, type the four-digit school year for which the Active Online Registration dates apply (i.e., the upcoming school year). 3. Under District Online Registration confirmation message, type a message that will be displayed to a parent once he successfully adds or updates online student registration information in txconnect. Click Update Message. 44
47 Enable parents to enroll a new student: New Student Enrollment forms are any forms added to the New Student Enrollment Forms group. These forms can be either static or standard. 1. The Allow parent access to New Student Enrollment field is set to No by default. When you are ready to enable new student enrollment in txconnect, select Yes. When set to Yes, the Have a New Student link is displayed on the txconnect Login page allowing a parent to enroll a new student in the district. 2. In the New Student Enrollment Authentication Type field, indicate if you want to use or CAPTCHA validation for new student enrollment. z Select to validate a user by . With this validation process, an message is sent to the parent s address containing an enrollment key. The parent must enter the key (either by typing or copying/pasting) into a field in order to continue. z Select CAPTCHA to validate a user by CAPTCHA, which is a tool that protects websites against bots by generating codes that humans can pass but computer programs cannot pass. This option should only be used during short-term enrollment events such as Kinder Roundup. When this option is enabled, CAPTCHA validation will display a six-character code on the enrollment page that the parent will have to type accurately in order to proceed through the new student enrollment process. The enrollment key is automatically generated once the parent correctly enters the CAPTCHA code. An message is sent to the parent containing the enrollment key for his records. 3. These fields are automatically saved as they are updated. There is no Save button. 45
48 46
49 Next Steps Conclusion As students are enrolled online in txconnect, an administrator must review each enrollment request, create a record for each registered student, and assign a Student Portal ID to each student. As parents update data for their students, campus staff must review and approve each change. As parents submit data and forms from txconnect, the campus staff can monitor the status and identify students who are missing required forms. These tasks are handled in the Student (itccs or TxEIS) Registration application. Form Usage The Form Usage page in txconnect Forms Management provides the following access: Usage Statistics - Displays statistical information about form usage by parent and form. Individual Form Information - Allows you to view the number of acceptance records for a specific form by district, campus, or parent. For explanations of this information, view the online Help for the Form Usage page. 47
50 48
51
52 Web-based Access for Teachers, Parents, and Students
How to: Manage Forms for New Student Enrollment & Registration. Web-based Access for Teachers, Parents, and Students. The tx Suite How To Guide Series
 The tx Suite How To Guide Series tx Connect Administrator Web-based Access for Teachers, Parents, and Students How to: Manage Forms for New Student Enrollment & Registration Developed by the TEXAS COMPUTER
UPDATE STUDENT YEARLY REGISTRATION & CURRENT YEAR DATA
 The txsuite How To Guide Series txconnect Parent Web-based Access for Teachers, Parents, and Students How to: UPDATE STUDENT YEARLY REGISTRATION & CURRENT YEAR DATA Developed by the T E XA S CO M P U T
APPROVE STUDENT REGISTRATION CHANGES AND MONITOR FORMS D
 The TxEIS How To Guide Series TxEIS Registration How to: APPROVE STUDENT REGISTRATION CHANGES AND MONITOR FORMS Developed by the TEXAS COMPUTER COOPERATIVE Copyright 2016 by Texas Computer Cooperative
How to: Enroll a New Student in the District
 The txsuite How To Guide Series txconnect Parent Web-based Access for Teachers, Parents, and Students How to: Enroll a New Student in the District Developed by the T E XA S CO M P U T E R CO O P E R AT
Enroll a New Student
 The txsuite How To Guide Series Connect tx Web-based Access for Teachers, Parents, and Students How to: Enroll a New Student Developed by the T E XA S CO M P U T E R CO O P E R AT I V E Business and Student
How to: Manage a txgradebook Discipline Referral
 The txsuite How To Guide Series tx Gradebook Administrator Web-based Access for Teachers, Parents, and Students How to: Manage a txgradebook Discipline Referral Developed by the T e xa s Co m p u t e r
UPDATE FORMS FOR ANNUAL REGISTRATION
 UPDATE FORMS FOR ANNUAL REGISTRATION Campuses typically require enrolled students to re-register each year for the upcoming school year and to complete forms that are required annually. Online registration
New Student Online Enrollment through txconnect
 New Student Online Enrollment through txconnect Parents with students new to the district will be able to complete basic enrollment information through the New Student Enrollment section available in txconnect
Training Guide. Discipline. May 2012
 Training Guide Discipline May 2012 Copyright 2012 by Texas Computer Cooperative All rights reserved Education Service Center, Region 20 1314 Hines Avenue San Antonio, TX 78208-1899 This manual was prepared
TxEIS txconnect Training Guide August, 2012
 August, 2012 Education Service Center 3001 North Freeway Fort Worth, Texas 76106 Contents Introduction...3 How to Display a Page in another Language..4 How to Display Help 5 How to Contact the Teacher..6
How to: Set and Receive Alerts
 The txsuite How To Guide Series Connect tx Web-based Access for Teachers, Parents, and Students How to: Set and Receive Alerts Developed by the T E XA S CO M P U T E R CO O P E R AT I V E Business and
Query Studio Training Guide Cognos 8 February 2010 DRAFT. Arkansas Public School Computer Network 101 East Capitol, Suite 101 Little Rock, AR 72201
 Query Studio Training Guide Cognos 8 February 2010 DRAFT Arkansas Public School Computer Network 101 East Capitol, Suite 101 Little Rock, AR 72201 2 Table of Contents Accessing Cognos Query Studio... 5
TEXAS COMPUTER COOPERATIVE
 STUDENT Overview Guide Developed by the TEXAS COMPUTER COOPERATIVE Copyright 2016 by Texas Computer Cooperative All rights reserved 1314 Hines Avenue San Antonio, TX 78208-1899 Contents Introduction to
New Student Form Registration Online Parent Guide. McMinnville School District
 New Student Form Registration Online Parent Guide McMinnville School District 2016-17 Steps for Enrollment Online Process 1. Create an e-mail account if you do not have one. Create an e-mail account if
Aspen Mobile for Students and Families
 Aspen Mobile for Students and Families With Aspen's Student and Family portals, teachers, parents, and students have an arena for open communication. And, parents can see all of their children's information
NAVIGATING THE PARENT PORTAL
 NAVIGATING THE PARENT PORTAL Log in to the Campus Portal with your user name and password. Click the log in button. Once logged in, an index of accessible information for the household as a whole is listed
Test Information and Distribution Engine
 SC-Alt Test Information and Distribution Engine User Guide 2018 2019 Published January 14, 2019 Prepared by the American Institutes for Research Descriptions of the operation of the Test Information Distribution
Secure Transfer Site (STS) User Manual
 User Manual") Secure Transfer Site (STS) User Manual (Revised 3/1/12) Table of Contents Basic System Display Information... 3 Command Buttons with Text... 3 Data Entry Boxes Required / Enabled... 3 Connecting to the
Secure Transfer Site (STS) User Manual (Revised 3/1/12) Table of Contents Basic System Display Information... 3 Command Buttons with Text... 3 Data Entry Boxes Required / Enabled... 3 Connecting to the
STUDENT REGISTRATION DATABASE (SRD) TABLE of CONTENTS
 TABLE of CONTENTS") STUDENT REGISTRATION DATABASE (SRD) TABLE of CONTENTS FUNCTION LOCATION Teacher Registration 2-3 Certification Box (must be checked 6 before submitting scores for AT/TAR) Count-Column Button 4 Current
STUDENT REGISTRATION DATABASE (SRD) TABLE of CONTENTS FUNCTION LOCATION Teacher Registration 2-3 Certification Box (must be checked 6 before submitting scores for AT/TAR) Count-Column Button 4 Current
Student Forms Table of Contents
 Student Forms Updated Summer 2012 Student Forms Table of Contents Student Forms Form Categories... 1 Creating a Form... 2 Publishing a Form and making it Active... 2 General Tab... 2 Form Editor Tab...
How to Create a Parent Portal Account
 How to Create a Parent Portal Account Created 9/28/15 Copyright 2015 by Region 7 Education Service Center. All rights reserved. Page 1 Created 9/28/15 Copyright 2015 by Region 7 Education Service Center.
Acuity 504. User Guide. Administrators 504 Coordinators Teachers. MSB Customer Care msb-services.
 TM Acuity 504 User Guide Administrators 504 Coordinators Teachers MSB Customer Care 800.810.4220 support@ Copyright 2014 MSB All rights reserved 1 Copyright MSB 2014 Table of Contents MSB Mission Statement...
The TxEIS How To Guide Series. Business. How to: CLOSE END OF FISCAL YEAR. Developed by the TEXAS COMPUTER COOPERATIVE
 The TxEIS How To Guide Series Business How to: CLOSE END OF FISCAL YEAR Developed by the TEXAS COMPUTER COOPERATIVE Copyright 2016 by Texas Computer Cooperative All rights reserved 1314 Hines Avenue San
All Applications Release Bulletin January 2010
 All Applications Release Bulletin January 2010 In this bulletin... Online Enrollment: HTML Forms for Contracts 2 System Administration: MBP Online User Accounts 11 About Release 91_6 This release includes
WEST TEXAS A&M UNIVERSITY
 WEST TEXAS A&M UNIVERSITY Instructional Technology Services WTClass Training Manual Grade Center July 2014 WTClass Blackboard 9.1 For technical support call (806) 651-4357 Support website: http://angel.wtamu.edu/online
Online Forms with FormWorks
 User Manual Online Forms with FormWorks This document was created to help schools utilize the web-based applications offered by DMAC Solutions. Click on the sections below or scroll to the next page to
eschoolplus+ Cognos Query Studio Training Guide Version 2.4
 + Training Guide Version 2.4 May 2015 Arkansas Public School Computer Network This page was intentionally left blank Page 2 of 68 Table of Contents... 5 Accessing... 5 Working in Query Studio... 8 Query
Welcome to Online Registration For Retuning Students
 Step #1 Welcome to Online Registration For Retuning Students In order to proceed with online registration you MUST have an active email address on file at your student s campus as well as an active Parent
Registration and Login
 Registration and Login When a parent accesses txconnect, the following Login page is displayed. The parent needs to register as a new user. How to Register as a New User The registration process is self-administered,
Pay Stub On-line. Systems Utilization. San Diego County Office of Education
 Pay Stub On-line I. Before Logging on II. To Register III. Log In IV. Forgot Password V. Direct Deposit Pay Stubs VI. Change Email Address VII. Change Password VIII. Troubleshooting IX. Sign Out Systems
Attendance. Contents
 2.0.0000 Attendance Contents Introduction... 3 Main Menu... 4 Change School Year and Campus... 4 Student Information... 4 Change Application... 6 Exit Application... 6 Online Help... 6 System Requirements
connected New User Guide
 connected New User Guide This guide will walk you through how to accomplish the following for programs launched through the McGraw-Hill connected website: Create a Teacher Account Redeem Content Create
Focus University Training Document
 Focus University Training Document FOCUS Training: Nurses/Health Training Agenda Basic Navigation of SIS Searching for Students More Search Options Student Record and Sub menus o General Demographics o
eschoolplus+ General Information Training Guide Version 2.4
 eschoolplus+ General Information Training Guide Version 2.4 August 2013 Arkansas Public School Computer Network This page is intentionally left blank 8/23/2013 Page 2 of 29 Table of Contents eschoolplus
Test Information and Distribution Engine
 Test Information and Distribution Engine User Guide 2017-2018 Published March 28, 2018 Prepared by the American Institutes for Research Descriptions of the operation of the Test Information Distribution
Student Assessment of Growth and Excellence (SAGE)
") Student Assessment of Growth and Excellence (SAGE) TIDE User Guide 2017 2018 Published August 14, 2017 Prepared by the American Institutes for Research Descriptions of the operation of the Test Information
Student Assessment of Growth and Excellence (SAGE) TIDE User Guide 2017 2018 Published August 14, 2017 Prepared by the American Institutes for Research Descriptions of the operation of the Test Information
Student Online Registration Version 2.0. Getting Started
 1 Getting Started Before you begin the Student Online Registration you must have an e-mail address and immediate access to read email messages from it. To use the Student Online Registration, you must
Online Registration. Texas Skyward User Group Conference Yanira Benavides Pearland ISD Data Analyst
 Online Registration Texas Skyward User Group Conference Yanira Benavides Pearland ISD Data Analyst ONLINE REGISTRATION OVERVIEW Online Registration allows parents to verify and update student information,
Parent Portal. Registration and Login
 EPISD Parent Portal Registration and Login Parent Portal Overview Register Online 1. Step-by-step tutorial 2. Register together Login Objectives 1. View Report Card and Attendance 2. Email teacher as introduction
STUDENT REGISTRATION DATABASE (SRD) TABLE of CONTENTS
 TABLE of CONTENTS") STUDENT REGISTRATION DATABASE (SRD) TABLE of CONTENTS FUNCTION LOCATION Teacher Registration 2 3 Certification Box (must be checked 6 7 before submitting scores for AT/TAR) Count Column Button 5 Current
STUDENT REGISTRATION DATABASE (SRD) TABLE of CONTENTS FUNCTION LOCATION Teacher Registration 2 3 Certification Box (must be checked 6 7 before submitting scores for AT/TAR) Count Column Button 5 Current
Parent User Guide.
 Parent User Guide www.intellimedia.ca Table of Contents INTRODUCTION 3 PARENT USER INSTRUCTIONS 4 PARENT ACCESS TO SCHOOLENGAGE 5 NEW PARENT SIGN UP 5 EXISTING PARENT SIGN IN PARENT PORTAL 7 EXISTING PARENT
Please contact your Athletic Trainer with any questions or for assistance throughout this process.
 Current students - you KNOW your ID and Password? CLICK HERE Current students - you DO NOT KNOW your ID and Password? CLICK HERE New students - you DO NOT have a NExTT account? CLICK HERE Please contact
User Guide for PRIME Registry Sign-Up
 User Guide for PRIME Registry Sign-Up Version 1.3 May 2016 Page 0 of 20 Copyright 2016 American Board Of Family Medicine and FIGmd Inc. All rights reserved. No part of this document may be Contents SIGN
SRX Student Records Exchange System
 SRX Student Records Exchange System Institution Accounts - User Guide Department of Education of Puerto Rico April 2018 Version 1.2 Prepared By Nagnoi, LLC. Puerto Rico Department of Education Student
Online Student Enrollment Parent Portal (SPS Staff Only: Non-Resident Students)
") Online Student Enrollment Parent Portal (SPS Staff Only: Non-Resident Students) Below is a set of detailed instructions and the link to the District s Online Enrollment Application: Go to the District
Online Student Enrollment Parent Portal (SPS Staff Only: Non-Resident Students) Below is a set of detailed instructions and the link to the District s Online Enrollment Application: Go to the District
RTIm Direct User Manual
 RTIm Direct User Manual Centris Group 100 Merrick Road Suite 418 E Rockville Centre, NY 11570 516-766-4448 Customer Log In Reset Password Messaging Within RTIm Direct My Student Page Filters Student Details
erequest How to apply guide
 Overview is an application that assists UCB in request life cycle management. UCB has clear guidance in place on what they can support or sponsor. Online requests will go through an internal review and
You will need the unique URL for your site and your username and password to login to Data- Director.
 Getting Started Step 1: Login to the DataDirector website: You will need the unique URL for your site and your username and password to login to Data- Director. You may change your password after you login.
Grade Center. Powered by
 Grade Center Grade Center About the Grade Center Setting Up the Grade Center Creating and Managing Grade Center Columns Entering Grades Viewing Grade Details Including Comments With a Grade Entry Overriding
PowerSchool Student and Parent Portal User Guide. https://powerschool.gpcsd.ca/public
 PowerSchool Student and Parent Portal User Guide https://powerschool.gpcsd.ca/public Released June 2017 Document Owner: Documentation Services This edition applies to Release 11.x of the PowerSchool software
Infinite Campus Online Registration Existing Students
 INFINITE CAMPUS SYSTEMS SUPPORT TEAM USER SUPPORT SERVICES: User Guide Infinite Campus Online Registration Existing Students March 2017 TABLE OF CONTENTS ONLINE REGISTRATION Welcome to GIPS online registration.
Do NOT navigate this document by scrolling page by page. Navigate these instructions by clicking the hyperlinks.
 1 v.5-10-17 Click ONE of the four boxes below. Do NOT navigate this document by scrolling page by page. Navigate these instructions by clicking the hyperlinks. Incoming students I am a new student and
PowerSchool User Guide For Parents
 PowerSchool User Guide For Parents https://powerschool.gpcsd.ca/public Table of Contents Understanding Power School Parent Portal... 2 Introduction... 2 Let s Get Started... 2 Creating Your PowerSchool
Transfer Student Records
 Transfer Student Records Students transfer in and out of school districts on a regular basis. This exciting new feature provides districts the ability to transfer student records from one district to another,
Texas Education Agency
 Texas Education Agency TSDS UNIQUE ID TSDS Unique ID User Guide April 02, 2018 TSDS Unique ID User Guide Table of Contents About This Guide... 5 Definitions, Acronyms, and Abbreviations... 5 About the
Campus PORTAL INSTRUCTIONAL PACKET for FCE Leads. August 23, 2016
 Campus PORTAL INSTRUCTIONAL PACKET for FCE Leads August 23, 2016 Table of Contents Contents TABLE OF CONTENTS... 2 SECTION 1 ACCESSING INFINITE CAMPUS... 3 PARENT PORTAL LETTER... 3 ACCOUNT ACTIVATION...
OBSERVATION 360 USER GUIDE. Fostering Teacher Growth to Advance Student Achievement
 1 OBSERVATION 360 USER GUIDE Fostering Teacher Growth to Advance Student Achievement 2010 School Improvement Network 800 572.1153 www.schoolimprovement.com 32 West Center Street, Midvale, UT 84047 1 2
HHH Instructional Computing Fall
 Quick Start Guide for School Web Lockers Teacher log-on is the same as for Infinite Campus Student log-on is the same initial log on to the network except no school year is required before their user name
TEKS Assessment Generator (TAG)
") Revised: 7/12/18 User Manual TEKS Assessment Generator (TAG) This document was created to help schools utilize the web-based applications offered by DMAC Solutions. Click on the sections below or scroll
Revised: 7/12/18 User Manual TEKS Assessment Generator (TAG) This document was created to help schools utilize the web-based applications offered by DMAC Solutions. Click on the sections below or scroll
HeadMaster: Setting HeadMaster Up Part I
 HeadMaster: Setting HeadMaster Up Part I 1 Copyright Copyright 2014 ACS Technologies Group, Inc. All rights reserved. Reproduction of any part of this publication by mechanical or electronic means, including
Parent Instructions for Registration in Genius Course Requests, Drop Requests & Transcripts
 Parent Instructions for Registration in Genius Course Requests, Drop Requests & Transcripts To begin, log in to the NSO Genius page: http://mn.geniussis.com/publicwelcome.aspx?id=2 There is also a link
PeopleSoft Departmental Student Records Training. Bloomsburg University
 PeopleSoft Departmental Student Records Training Bloomsburg University 1 Table of Contents Bloomsburg University Training Notes... 3 Terminology Crosswalk... 3 Term Code Logic... 3 Viewing a Student s
The Fairfield Schools Infinite Campus Portal: Parent Guide
 The Fairfield Schools Infinite Campus Portal: Parent Guide This is the first screen you will see. The Child s picture in this example has been redacted, but would be in this location if you have one child
INTRODUCTION. The Human Resources department has implemented this system in order to automate many of the tasks of the employment application process.
 User Guide INTRODUCTION The Human Resources department has implemented this system in order to automate many of the tasks of the employment application process. You will use this system to complete three
Parent Portal User Guide
 Parent Portal User Guide Table of Contents LOGIN TO THE PARENT PORTAL... 2 RETRIEVE LOST LOGIN DETAILS... 3 CHANGE YOUR PASSWORD... 5 CHANGE OR CONFIRM YOUR DETAILS & MEDICAL INFORMATION... 6 NAVIGATING
Using the WorldCat Digital Collection Gateway
 Using the WorldCat Digital Collection Gateway This tutorial leads you through the steps for configuring your CONTENTdm collections for use with the Digital Collection Gateway and using the Digital Collection
ACER Online Assessment and Reporting System (OARS) User Guide
 User Guide") ACER Online Assessment and Reporting System (OARS) User Guide January 2015 Contents Quick guide... 3 Overview... 4 System requirements... 4 Account access... 4 Account set up... 5 Create student groups
ACER Online Assessment and Reporting System (OARS) User Guide January 2015 Contents Quick guide... 3 Overview... 4 System requirements... 4 Account access... 4 Account set up... 5 Create student groups
eschoolplus Feature Release Notes
 eschoolplus Feature Release Notes Software Version: 3.0 Service Pack 1 Release Date: Q2 2013 Copyright 2013 by SunGard K-12 Education, 3 W. Broad Street, Suite 1, Bethlehem, PA 18018. All rights reserved.
Beach Park School District #3 Overview and User Guide
 Beach Park School District #3 Overview and User Guide PowerSchool Parent Portal gives parents access to confidential real-time information such as attendance, grades, assignments, and so much more! It
User Guide. Chapter 6. Teacher Pages
 User Guide Chapter 6 s Table of Contents Introduction... 5 Tips for s... 6 Pitfalls... 7 Key Information... 8 I. How to add a... 8 II. How to Edit... 10 SharpSchool s WYSIWYG Editor... 11 Publish a...
Center for Faculty Development and Support. Google Docs Tutorial
 Center for Faculty Development and Support Google Docs Tutorial Table of Contents Overview... 3 Learning Objectives... 3 Access Google Drive... 3 Introduction... 4 Create a Google Document... 4 Upload
Navigating Your Profile
 Part 1: Profile Login Navigating Your Profile 1. Start at the Greater Kansas City Community Foundation s home page, www.growyourgiving.org. Select Nonprofit Search. 2. This is the Nonprofit Search home
Early Childhood Data System (ECDS) Kindergarten Data Submission. User Guide Updated April 27, 2017
 Kindergarten Data Submission. User Guide Updated April 27, 2017") 2016 2017 Early Childhood Data System (ECDS) Kindergarten Data Submission User Guide Updated April 27, 2017 Content New and Improved ECDS: 3 TSDS ECDS Cheat Sheet for 2016 17 Changes 3 Shared PEIMS Data
2016 2017 Early Childhood Data System (ECDS) Kindergarten Data Submission User Guide Updated April 27, 2017 Content New and Improved ECDS: 3 TSDS ECDS Cheat Sheet for 2016 17 Changes 3 Shared PEIMS Data
Layout and display. STILOG IST, all rights reserved
 2 Table of Contents I. Main Window... 1 1. DEFINITION... 1 2. LIST OF WINDOW ELEMENTS... 1 Quick Access Bar... 1 Menu Bar... 1 Windows... 2 Status bar... 2 Pop-up menu... 4 II. Menu Bar... 5 1. DEFINITION...
Parent Student Portal User Guide. Version 3.1,
 Parent Student Portal User Guide Version 3.1, 3.21.14 Version 3.1, 3.21.14 Table of Contents 4 The Login Page Students Authorized Users Password Reset 5 The PSP Display Icons Header Side Navigation Panel
TEACHER PAGES USER MANUAL CHAPTER 6 SHARPSCHOOL. For more information, please visit: Chapter 6 Teacher Pages
 SHARPSCHOOL USER MANUAL CHAPTER 6 TEACHER PAGES For more information, please visit: www.customernet.sharpschool.com 0 TABLE OF CONTENTS 1. 2. 3. 4. 5. 6. 7. 8. 9. 10. 11. INTRODUCTION... 1 I. TEACHER PAGE
Schoolwires Manual For Department Web Editors Georgetown ISD
 Scho oolwires Manual For Department Web Editors Georgetown ISD Schoolwires Manual for Department Web Editors Table of Contents I. District Web Publishing Guidelines for Departments Site Administration
Web Content Management
 Web Content Management With Drupal Department User Guide Version 1.1 1 Table of Contents Overview 3 Getting Started 3 Writing for the Web 4 Speak to Your Audience 4 Keep it Professional 4 Introducing:
Test Information and Distribution Engine
 Montana Comprehensive Assessment System Test Information and Distribution Engine User Guide 2018-2019 Published January 10, 2019 Prepared by the American Institutes for Research and Measured Progress Descriptions
IDRP Portal User Guide for Providers and Plans
 IDRP Portal User Guide for Providers and Plans Version 1.0, September 2017 Controlled electronic version prevails over printed copy of this document. Provided by MAXIMUS Federal Services, Folsom, CA. Work
1. If you have multiple students attending SJUSD, select a student from the drop-down on the top-left of the screen
 http://go.sjusd.org/icparentportal INFINITE CAMPUS PARENT/STUDENT PORTAL 1. If you have multiple students attending SJUSD, select a student from the drop-down on the top-left of the screen 2. Calendar
Sourcing. Supplier Maintenance and Company Administration Buyer User Guide
 Sourcing Supplier Maintenance and Company Administration Buyer User Guide Version 6.1 Ion Wave Technologies, Inc. 2002-2008 Table of Contents Table of Contents...2 Welcome to Supplier Maintenance and Company
Wholesale Lockbox User Guide
 Wholesale Lockbox User Guide August 2017 Copyright 2017 City National Bank City National Bank Member FDIC For Client Use Only Table of Contents Introduction... 3 Getting Started... 4 System Requirements...
WAPS Online Registration User Guide For families NEW to WAPS
 WAPS Online Registration User Guide For families NEW to WAPS To start the WAPS Online Registration process go to the Winona Area Public Schools webpage at www.winonaschools.org and click on Enroll at the
User Manual. PGP-Intervention
 User Manual PGP-Intervention This document was created to help schools utilize the web-based applications offered by DMAC Solutions. Click on the sections below or scroll to the next page to see step-by-step
User Guide. Customer Self Service (CSS) Web Application Progress Software Corporation. All rights reserved.
 Web Application Progress Software Corporation. All rights reserved.") User Guide Customer Self Service (CSS) Web Application 1993-2017 Progress Software Corporation. Version 2.1 March 2017 Table of Contents Welcome... 3 Accessing the Customer Self Service (CSS) Web Application...
User Guide Customer Self Service (CSS) Web Application 1993-2017 Progress Software Corporation. Version 2.1 March 2017 Table of Contents Welcome... 3 Accessing the Customer Self Service (CSS) Web Application...
Returning student-athletes
 v. 3-16-18 - Contact Jcampbell@vivature.com for edits. Page 1 Click ONE of the three boxes below. Click links throughout to navigate instructions. Returning student-athletes I DO NOT KNOW/REMEMBER my Athletic
Creating Interactive PDF Forms
 Creating Interactive PDF Forms Using Adobe Acrobat X Pro for the Mac University Information Technology Services Training, Outreach, Learning Technologies and Video Production Copyright 2012 KSU Department
Finding Your Way Around Aspen IMS
 Finding Your Way Around Aspen IMS 12181A 60 minutes - - - - - - - - - - - - - - - - - - - - - - - - - - - - - - - - - - - - - - - - - - - - - - - - - Description Knowing your way around Aspen IMS makes
PeopleSoft Faculty Center, Advisor Center & Enrollment. Bloomsburg University
 PeopleSoft Faculty Center, Advisor Center & Enrollment Bloomsburg University 1 Table of Contents Bloomsburg University Training Notes... 3 Terminology Crosswalk... 3 Term Code Logic... 3 View My Schedule
Redwater ISD Teacher Web Pages
 Redwater ISD Teacher Web Pages Guidelines for Teacher Web Pages 1 Edit the Homepage Template 3 Add Your Syllabus to Your Document Drawer (Not Required for ES/MS) 4 Add a Link to Your Syllabus on Your Homepage
Campus. Online Registration Processing. Student Information Systems
 CLARK COUNTY SCHOOL DISTRICT TECHNOLOGY & INFORMATION SYSTEMS SERVICES DIVISION EMPLOYEE BUSINESS TRAINING DEPARTMENT Student Information Systems Campus Online Registration Processing Revised: March 2017
NEW STUDENT ONLINE ENROLLMENT-PARENT TUTORIAL
 New Student Online Enrollment (NSOE) allows you the convenience of initiating the enrollment process of your student from any computer, at any time. Already have a student in the district? Log into your
SIS Modernization Faculty (Instructor) Portal Training Guide
 Portal Training Guide") Faculty (Instructor) Portal Training Guide Created on August 2017 Table of Contents Introduction to the New Faculty Portal... 1 Logging into the Faculty Portal... 1 Navigating the Faculty Portal... 5 Using
Faculty (Instructor) Portal Training Guide Created on August 2017 Table of Contents Introduction to the New Faculty Portal... 1 Logging into the Faculty Portal... 1 Navigating the Faculty Portal... 5 Using
TrainingFinder Real-time Affiliate Integrated Network (TRAIN) Administrator Handbook. Version 3.2 (3/26/08) Public Health Foundation
 Administrator Handbook. Version 3.2 (3/26/08) Public Health Foundation") TrainingFinder Real-time Affiliate Integrated Network (TRAIN) Administrator Handbook Version 3.2 (3/26/08) Public Health Foundation Table of Contents About This Handbook 5 TRAIN Administrative Basics 6
TrainingFinder Real-time Affiliate Integrated Network (TRAIN) Administrator Handbook Version 3.2 (3/26/08) Public Health Foundation Table of Contents About This Handbook 5 TRAIN Administrative Basics 6
LCASD Online Registration System. For Summer School
 LCASD Online Registration System For Summer School WELCOME! This guide is for NEW Parents/Guardians who do not yet have an Infinite Campus Portal user account. Existing families who already have a Portal
2017 Edulink Systems, Inc. All rights reserved.
 Intouch Notification Service, Intouch Web Portal, Intouch Autodialer, Intouch Online and Intouch Reports are either registered trademarks or trademarks of Edulink Systems, Inc. in the United States and/or
AASD Online Enrollment - EXISTING FAMILIES -
 A Guide to use the AASD online enrollment system. This guide is only for parents/guardians who have an existing Infinite Campus Portal username and password. If you forgot your username and password, please
Instructions for New Markets Tax Credit Program Applicants in Electronic Handbooks
 Instructions for New Markets Tax Credit Program Applicants in Electronic Handbooks General Instructions for All NMTC Applicants: Required Software Internet Explorer 5.5 or Netscape Navigator 6.0 (ensure
Expense Management Asset Management
 Expense Management Asset Management User Guide NEC NEC Corporation November 2010 NDA-31136, Revision 1 Liability Disclaimer NEC Corporation reserves the right to change the specifications, functions, or