ClinicalConnect TM eunity TM Training Guide
|
|
|
- Edward Tracy Harper
- 5 years ago
- Views:
Transcription
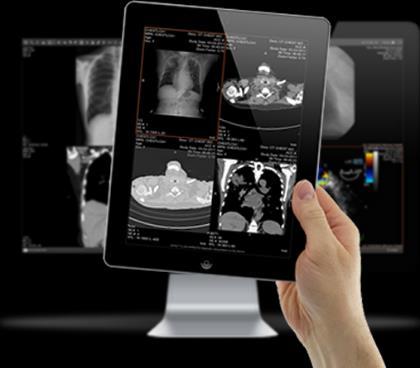

1 ClinicalConnect TM eunity TM Training Guide October, 2013

2 Launch eunity TM from ClinicalConnect TM Search and select the patient whose record you wish to view. Navigate to the Radiology module in ClinicalConnect TM.

3 Launch eunity TM from ClinicalConnect TM To launch the exam images in the eunitytm viewer, click the camera icon. To view the radiology report at the bottom of the page, click anywhere on the report line. The report displays at the bottom of the ClinicalConnect TM page, and is not accessible from the eunity TM viewer.

4 Launch eunity TM from ClinicalConnect TM By clicking the camera icon, ClinicalConnect TM performs a study level launch with the eunity TM viewer in a new window.
5 Viewing a Study Click the Show Available Series tab to display the available series. Click the push pin button to keep the series tray open. Press again to close the series tray.

6 Study Display Screen The available tools are located in the toolbar at the top of the screen. Tools will function differently depending on the type of study being viewed. See the tools section for a description of the features. Additional tools are available by clicking the expand button.

7 Navigating Drag thumbnail to display view. To change the series being displayed, scroll through the series tray using the right and left cursor keys or left-click on the series thumbnail and drag it into the display view.

8 Navigating Active series is highlighted orange. Images in view but not active are highlighted blue. Left click inside the display view and drag the mouse up or down to scroll through images. Series with a folded corner have had at least one image viewed. Navigate images within a series by using the mouse wheel, the up and down cursor keys, or by left-clicking the mouse on the display view and moving the mouse up and down. The home key navigates to the first image (lowest number) and the end key navigates to the last image (highest number).
9 Standard Tools Navigation When using some tools (e.g. zoom/pan, window & level) you will be able to navigate through images and series by using the up and down arrow keys. Click the navigation button to allow access to the full range of navigation options (mouse wheel, dragging mouse within the display view, etc.). Zoom/Pan - Select the tool then scroll the mouse wheel to zoom. Once zoomed, click and drag the left mouse button to pan or move the image within the view port. If you wish to navigate through images while zoom is active, use the up and down arrow keys. Window and Level - Select the tool then hold down the left mouse button and move the mouse up, down, left or right to window and level. Hold down the CTRL key and left mouse button for fine window and level control. If you wish to navigate through images while zoom is active, use the up and down arrow keys Reset Window & Level Click on the reset window and level button to return to the initial presentation
10 Standard Tools Window Level Presets Drop down provides access to site-level, modality specific Window Level presets. Invert - Left click to invert black to white and white to black. Flip Left click to flip an image vertically. Rotate Right Left click to rotate an image 90 degrees clockwise. Rotate Left Left click to rotate an image 90 degrees counter clockwise. Toggle Demographics - Left click to toggle patient and study information on and off.

11 Standard Tools Cine Click to play a series of images like a movie. It is possible to window & level and zoom while a cine run is playing. Play/Pause Starts and stops the playing of the cine tool. Rock/Loop Toggle between looping over the images or rocking back and forth. Target Frame Rate The target frame rate for displaying images. Actual Frame Rate The actual frame rate is displayed next to the target frame rate. This is impacted by factors including power of the client machine, memory and data transfer rates. Trim Slider Allows for manual setting of the start and end points. Current Position The position of the current frame on the display slider. Current Frame Textual identification of current frame position within the displayed series.
 in each of the eligible series viewports that correspond to the position of the command")
12 Advanced Tools Triangulation Triangulate orthogonal series that have the same frame of reference identifier. Select the Triangulation tool and co-locate a crosshair cursor (+) in each of the eligible series viewports that correspond to the position of the command cursor (arrow) in the active or control viewport.
13 Advanced Tools Scout/Reference Lines Select the reference lines tool and turn on triangulation. All scout images in a study are combined into a single series and placed at the start of the series tray. If a series is selected, the lines on the scout represent the selected (highlighted orange) series. A single yellow line represents the currently displayed image in the series. Two white lines indicate the intersection of the first and last image of the series.

14 Advanced Tools Linked Series Perform a set of common operations (navigate, zoom, pan, etc.) on a group or series that have the same frame of reference identifier. Navigation Linking Groups images by plane. Images of different orientations will navigate separately from other orientations. Zoom and Pan Linking Groups images by orientation. Window Level Linking Groups series by modality and localizer type. Only images of a specific modality will be window leveled together.
15 Measurement Tools All measurements are calibrated based on information received from the modality. Linear Measurement Click the left mouse button, drag the mouse, and then click the left mouse button again to complete the length measurement. Ellipse ROI (Region of Interest) Select the tool then left click and drag the mouse to raw an ellipse. Angle Measurement Select the tool. Left click to create your start point. Move the mouse and then left click again to create a line. Move the mouse and left click again to complete the angle. Freeform ROI (Region of Interest)/Doppler Envelope - Select the tool and then left click as many times as required around the ROI. When finished, click the starting point to complete the freeform measurement.
16 Measurement Tools All measurements are calibrated based on information received by the modality. Cobb Angle Select the tool. A single left click starts the measurement and a second left click ends the measurement. Eraser Select the tool and then left click on measurement or markup to erase. Pressing the delete key on the host computer s keyboard will also erase the selected markup. Revert to Original Left click to reset a series of images to the original state. Note: Understanding how an image is calibrated is essential to understanding measurement values. For example, if an X-Ray is not calibrated to a maker of known size by the anatomy of interest (e.g. a fiducial) clinicians may need to account for X-Ray magnification. See the online help for a full description of calibration descriptions.
17 Markup ad Annotation Tools The Markup and Annotation tools allow users to apply markup to an image but do not supply any measurement information. These markups are added, removed and edited in the same manner as the measurement tools. While annotations can be printed, they cannot be saved. Line Markup - using the Line tool. Using the mouse, a single left click starts the annotation and a second left click ends the annotation. Annotations can be edited by selecting them to be active and dragging the associated handles. Arrow Markup - Users can apply an arrow annotation using the Arrow tool. Using the mouse, a single left click starts the annotation and a second left click ends the annotation. Annotations can be edited by selecting them to be active and dragging the associated handles. Freeform Markup - Using the mouse, a user can select a number of points for the freeform. Clicking on the first point selected, or double-clicking the mouse, ends the measurement. Annotations can be edited by selecting them to be active and dragging the associated handles. Text Annotation - Using the mouse, a user can select the initial placement. A text box will appear where the user can input up to 35 characters. Note: The text annotation tool cannot be used in Full Screen Mode. Text can be edited by double-clicking on that annotation and moved by dragging the text to a different point on the screen. Spine Labeling - Upon selection of the tool, the Spine Labeling panel will appear to allow selection of specific labels. Choose a label from the list and click on an image to place the label. Similar to other annotations, labels can be moved by clicking-and-dragging. For convenience, after placing a label the labels will automatically advance based on the order in the list. Labels can be removed by deselecting them in the panel window.
18 Export/Print Tools Export The export image tool allows the user to export the selected image to JPEG or PNG format. Demographics and markups are not exported with the image. Print The paper print tool allows the user to print the selected image to paper, with or without annotations and/or markups.
19 Collaboration Collaboration allows individuals to share their screen with other participants, across all supported eunity platforms (web-browser and mobile devices).when collaborating, changes made to your view will be sent to other participants. Similarly, changes made by other participants will be applied to your view. This includes cursors, markup, layout, thumbnail bar up/down and image manipulation such as Window/Level and Invert. Starting a session Log into eunity TM (or launch through ClinicalConnect TM ), open desired study and toggle the collaborate button to the on position. When the connection indicator turns green, the session has started and any change made to the study are now being shared. Joining a session Log into eunity TM (or launch through ClinicalConnect TM ), open the study that is being viewed by other participants and toggle the collaborate button to the on position. When the connection indicator has turned to green, you have joined the session and your view should synchronize to that of the other participants. Leaving a session To leave a collaboration session, toggle the collaborate button to the off position. When the connection indicator has turned to red, you have successfully left the session. Connected Attempting to Connect Not Connected
.")

20 Viewing an Exam with Multiple Studies A warning message may appear when launching some studies (most often CT exams). Click OK to view the study normally. Click Study List to access additional studies from HHS PACS on the current patient. Study launches as usual.

21 Viewing an Exam with Multiple Studies Clicking on Study List launches the study with the Study Information tab open. Study information can be accessed on any exam from the icon.

22 Study Information The Study Information feature allows users to view a complete list of imaging exams performed at HHS within the eunity TM window. The Study List displays the list of exams. Clicking any study from the list will launch it within the current window, while the exam previously viewed remains tagged along the bottom of the screen. The Study Details tab displays patient demographic data, as well as exam identifying data.
23 Display Formats Series in a view port is outlined in blue. Active view port is outlined in orange. Display formats are available from the toolbar. Icons with a dotted line represent image level display formats. Icons with a solid line represent series level display formats. Study level display formats are available via ClinicalConnect TM using the Study List tab through the Study Information icon.

24 Lossy Image Display If we receive a file from the archive that has been lossy compressed (potentially resulting in lost data or quality), an icon is displayed in the demographics that identifies the image data as lossy and summarizes the compression ratio. eunity will only display the image as lossy, if it was received that way from the archive. Hover your mouse over the icon to display a tooltip with additional lossy information (type of image compression, compression ratio and derivation description).
25 On-Line Help On-line help is available from within the application by left-clicking on the? symbol. Left-click on the eunity icon to view product information.
26 Intended Use Canada eunity TM is a software application that displays medical image data and associated clinical reports. eunity TM performs operations relating to the transfer, storage, display, and measurement of image data. eunity TM allows users to perform image manipulations, including window/level, rotation, measurement and markup. The communication and storage components of the eunity TM system are primarily DICOM communication over TCP/IP networks, digital image storage on computer hard disk drives. It is the User's responsibility to ensure that eunity TM is used with appropriate display hardware and that image type and quality are suitable for their intended clinical application based on the regulations and / or their professional association s guidelines pertaining to the anatomy and pathology being studied. Mammographic images and digitized film screen images must not be used for diagnostic interpretations. When used on mobile devices, eunity is for reference and referral only.
27 User Support For use of eunity TM through ClinicalConnect TM, user technical support is provided by the HHS ICT Helpdesk. Please direct all user support inquiries to: ClinicalConnect TM info.clinicalconnect.ca 293 Wellington St. N., Suite 108 Hamilton, ON. Canada L8L 8E7 All other trademarks are property of their respective owners. Specifications are subject to change without notice. Some configurations may be pending regulatory clearance; please contact Client Outlook for information on specific configurations. eunity is not intended for the primary interpretation of mammography images. eunity is not intended for the diagnostic use when viewed on mobile devices. When used for primary interpretation the system must be used with display monitors that meet or exceed local guidance and regulations.
1 Filter the search by entering search criteria; 2 Enter a range of dates in which to search. 3 You can filter the search by modality type.
 efilm / Managing Studies STUDY MANAGER How to use the study manager The Study Manager can search for four different types of exams: Local Exams: studies stored on your workstation s hard drive. Remote
To access the images that accompany a Radiology result from Memorial Health System select the document in Chart Viewer and click on View.
 ImageLink To access the images that accompany a Radiology result from Memorial Health System select the document in Chart Viewer and click on View. On the upper right side of the Order Viewer select the
Medical Image Viewer Guide
 Cloud Medical Image Management Medical Image Viewer Guide March 2016 Table of Contents Indications for Use 3 Browser Requirements 3 User Interface Overview 4-5 Study Page 6 Main Toolbar 7 Sub-Toolbars
Ambra User Guide. If you need help. Ambra Support (any time)
") If you need help Ambra Support 888 315 0790 (any time) support@ambrahealth.com Ambra User Guide Envision Radiology, a Health Images Organization, has provided a list of your site s personnel that need
If you need help Ambra Support 888 315 0790 (any time) support@ambrahealth.com Ambra User Guide Envision Radiology, a Health Images Organization, has provided a list of your site s personnel that need
Quick Guide Software Version 4.4
 Quick Guide Software Version 4.4 On-Call Clinical Consultants 1-888-FUJIMED We re here to assist you with questions about operating your equipment. Locating a Study in Worklist 1. Double-click the Synapse
Voxar 3D ColonMetrix. Reference Guide
 Voxar 3D ColonMetrix Reference Guide The software described in this document is furnished under a license, and may be used or copied only according to the terms of such license. Toshiba means, Toshiba
Quick Reference Guide
 Key functions Quick Reference Guide Philips isite Enterprise Version 3.6 Enhance mouse cursor mode Function Wheel mouse 2-button mouse Adjust WW/WL Left click and drag Left click and drag Scroll/Cine Wheel
Visage 7 Clinical Training Basic Features
 Visage 7 Clinical Training Basic Features Contents Overview... 4 Usage... 4 Client Server Architecture... 5 Client Login... 6 Study Browser... 7 Query Section... 8 Study Labels... 10 Query Labeled Studies...
Instructions for Display of Imaging Studies Using Stentor isite
 Instructions for Display of Imaging Studies Using Stentor isite Open http://isite.rad.tju.edu in Internet Explorer Log-In: Enter your user name (case Sensitive) and password (case sensitive) and press
Using IPACS Webserver:
 Using IPACS Webserver: Logging On: The IPACS Webserver can be accessed from any PC with internet connectivity. 1. Open Internet Explorer or your internet service provider. 2. Type the IPACS web address
Using TeraRecon intuition Viewer with STAT Quick Reference Guide
 Using TeraRecon intuition Viewer with STAT Quick Reference Guide 1. Launching intuition 2. 3D Assessment of Coronary Arteries for Stenosis 3. Time Volume Analysis (TVA) for Determination of Left Ventricular
New HTML Client book icon
 Synapse Mobility 5.3 Web Quick Start Guide Synapse Mobility is FDA 510(k) cleared for primary diagnostic use on all modalities except mammography. Synapse Mobility Web is not to be used for diagnostic
Opal RAD User Manual
 Opal RAD Mini Manual Table of Contents Basic Workflow of Opal RAD... 3 Introduction... 4 Logging On... 5 The Study List screen... 6 Searching and Sorting Your Studies... 7 Installing and Updating the Image
14 July Ver CRView V3 User Guide. 1 P a g e
 Ver. 080707 CRView V3 User Guide 1 P a g e Contents Copyright notice... 3 Trademarks... 3 System requirements... 4 Required hardware... 4 Recommended hardware... 4 Installing CRView... 5 Installing from
Instructions for using Borg and Ide CONNECT. Referring Provider Portal. Version 3.5.
 Instructions for using Borg and Ide CONNECT Referring Provider Portal www.borgideconnect.com Version 3.5 Topic Table of Name Contents Description Getting Started...1 Home Page and Finding Patient Exams...2
Contents Lexmark International Technology S.A. All rights reserved. Page i , Rev 1.0
 Contents Contents 1. Overview... 1 1.1 About NilRead... 1 1.2 Intended use within the USA... 1 1.3 Manufacturer... 2 1.4 Supported modalities... 2 1.5 User interface overview... 2 1.6 Toolbar overview...
VIMED JWEB Manual. Victorian Stroke Telemedicine. Version: 1.0. Created by: Grant Stephens. Page 1 of 17
 VIMED JWEB Manual Victorian Stroke Telemedicine Version: 1.0 Created by: Grant Stephens Page 1 of 17 1 Table of Contents 1 Table of Contents... 2 2 What is JWEB?... 4 3 Accessing JWEB... 4 3.1 For Mac
Vizit Pro User Manual
 Vizit Pro User Manual 1 Table of Contents Vizit Pro User Manual... 1 Using Vizit Pro... 3 The Vizit Pro User Interface... 3 Toolbars... 4 File Tab Toolbar... 4 Edit Tab Toolbar... 5 Annotations Tab Toolbar...
Synapse Quick Guide PACS
 The FUJIFILM UK Limited Pension and Life Assurance Scheme provides a range of benefits that are competitive when compared with those of other UK companies. The benefits are designed to ensure that you
PACS Web. Training Documentation
 PACS Web Training Documentation Table of Contents Section Page 1. LOGIN TO PACS WEB... 2 2. LOGOUT OF PACS WEB... 4 3. SEARCHING FOR A PATIENT... 5 4. PACS WEB REPORTS... 10 4.1. PATIENT INFO BUTTON...
On Call Imaging Specialists. We re here to assist you with questions about operating your equipment. Pocket Quick Guide. Software version 3.2.
 On Call Imaging Specialists 1800 060 209 We re here to assist you with questions about operating your equipment. Pocket Quick Guide Software version 3.2.1 Locating a Study in Worklist 1. Double Click the
Diagnostic Viewer User Manual
 Diagnostic Viewer User Manual NovaPACS Diagnostic Viewer User Manual March 28, 2013 Version 8.0.7 Copyright 2013 Novarad Corporation. All rights reserved. This publication may not be copied, reproduced,
Contents Lexmark International Technology S.A. All rights reserved. i
 Contents Contents 1. Overview 1 About NilRead 1 Intended use within the USA 1 Manufacturer 2 Supported modalities 2 User interface overview 2 Toolbar and side panel overview 3 Customize the image viewing
RemotEye Viewer, version 9. User Manual
 RemotEye Viewer, version 9 User Manual Table of Contents 1 ABBREVIATIONS... 6 2 INDICATIONS FOR USE... 6 3 BEFORE YOU BEGIN... 6 3.1 MINIMUM HARDWARE REQUIREMENTS... 7 3.2 SUPPORTED OPERATING SYSTEMS...
ClinicalExpress Operator s Guide. version 6.1 for general radiography and mammography
 ClinicalExpress Operator s Guide version 6.1 for general radiography and mammography Copyright by VIDAR Systems Corporation. All rights reserved. No part of this publication may be reproduced, stored in
The gray notepad indicates that no note or report is attached to the study.
 IntegradWeb PACS Quick Start User Guide This guide includes all the information you need to begin using IntegradWeb PACS. It is organized according to a logical workflow stepping you through the initial
VXVUE USER GUIDE. For Technical Support Questions please call 888.4VETRAY or Page1
 The following describes VXvue software as it pertains to end user applications. Detailed instructions are included in the ViewWorks Setup Guide and ViewWorks Control Setup Operation provided with each
icatvision Quick Reference
 icatvision Quick Reference Navigating the i-cat Interface This guide shows how to: View reconstructed images Use main features and tools to optimize an image. REMINDER Images are displayed as if you are
McKesson Radiology Display Protocol Manual
 McKesson Radiology Display Protocol Manual Table of Contents Preparing a Site for Display Protocols... 5 Best Practices for Creating Display Protocols... 6 Creating a New Display Protocol... 7 Creating
AutoCAD 2009 User InterfaceChapter1:
 AutoCAD 2009 User InterfaceChapter1: Chapter 1 The AutoCAD 2009 interface has been enhanced to make AutoCAD even easier to use, while making as much screen space available as possible. In this chapter,
Getting Started with ShowcaseChapter1:
 Chapter 1 Getting Started with ShowcaseChapter1: In this chapter, you learn the purpose of Autodesk Showcase, about its interface, and how to import geometry and adjust imported geometry. Objectives After
The walkthrough is available at /
 The walkthrough is available at https://downloads.openmicroscopy.org/presentations/2018/gbi-sydney / Description We will demonstrate a number of features of the OMERO platform using an OMERO server based
Press the Plus + key to zoom in. Press the Minus - key to zoom out. Scroll the mouse wheel away from you to zoom in; towards you to zoom out.
 Navigate Around the Map Interactive maps provide many choices for displaying information, searching for more details, and moving around the map. Most navigation uses the mouse, but at times you may also
VXvue User Manual (For Human Use)
") VXvue User Manual (For Human Use) Page 2 of 90 Revision History Version Date Description 1.0 2012-03-20 Initial Release Page 3 of 90 Contents Safety and Regulatory... 8 Safety Notice... 8 1. Introduction...
VXvue User Manual (For Human Use) Page 2 of 90 Revision History Version Date Description 1.0 2012-03-20 Initial Release Page 3 of 90 Contents Safety and Regulatory... 8 Safety Notice... 8 1. Introduction...
CHILI /Web. Intelligent image distribution inside and outside the hospital. Product Specification
 CHILI /Web Intelligent image distribution inside and outside the hospital Product Specification CHILI /Web CHILI/Web is an image distribution and teleradiology solution based on a proven and extensible
7 Working With Studies
 7 Working With Studies The Terason software provides many tools for you to work with studies. These tools allow: Storing Images and Loops; see page 113 Reviewing Patient Studies; see page 115 Exporting
TABLE OF CONTENTS. 1 Installation Instructions 1.1 Prior to Install 1.2 Download the software 1.3 Obtaining the PIKO-PACS by Opal License
 1 TABLE OF CONTENTS 1 Installation Instructions 1.1 Prior to Install 1.2 Download the software 1.3 Obtaining the PIKO-PACS by Opal License 2 Introduction to PikoPACS by Opal 2.1 What is PikoPACS by Opal?
IMAGE STUDIO LITE. Tutorial Guide Featuring Image Studio Analysis Software Version 3.1
 IMAGE STUDIO LITE Tutorial Guide Featuring Image Studio Analysis Software Version 3.1 Notice The information contained in this document is subject to change without notice. LI-COR MAKES NO WARRANTY OF
Athena Radiology Medical Workstation
 High productivity and integration Athena DICOM Viewer is being designed according with the suggestions and the necessities of medical radiologists. From the design of its interface to the advanced image
Vitrea 2. Softread. version 4.0. User Guide VPMC-8154A
 Vitrea 2 version 4.0 Softread User Guide VPMC-8154A Vital Images, Inc. April 17, 2007 Protected by U.S. Patents 5,986,662; 6,130,671; 6,219,059; 7,031,504; Other Patents Pending in the U.S. and other countries.
PACS Scan Mobile. User Help. Version: Written by: Product Knowledge, R&D Date: September 2016 LX-DOC-PSM2.0.1-UH-EN-REVB
 PACS Scan Mobile User Help Version: 2.0.1 Written by: Product Knowledge, R&D Date: September 2016 2016 Lexmark. All rights reserved. Lexmark is a trademark of Lexmark International Inc., registered in
Medis Suite 3.0. Quick Start Manual. October 6, v3.0
 Medis Suite 3.0 Quick Start Manual October 6, 2017 9.45.250.30.2 v3.0 Medis medical imaging systems bv Schuttersveld 9, 2316 XG Leiden, the Netherlands http://www.medis.nl Medis medical imaging systems
Zero Foot- Print Browser * Mobile Device Viewing Of Medical Images
 Zero Foot- Print Browser * Mobile Device Viewing Of Medical Images WEBWORKS, an integral component of Roentgen Works, is a 100% browserbased viewer for medical images, reports and related files. It enables
5 Working With Studies
 5 Working With Studies The Terason software provides many tools for you to work with studies. These tools allow: Storing Images and Loops; see page 90 Reviewing Patient Studies; see page 92 Exporting Studies;
RadiAnt DICOM Viewer. User manual. Version /31/2018. Copyright Medixant. All rights reserved.
 RadiAnt DICOM Viewer User manual Version 4.6.9 10/31/2018 https://www.radiantviewer.com Copyright 2009-2018 Medixant. All rights reserved. Table of contents 3 Table of contents 1 Welcome to RadiAnt DICOM
CHILI /Workstation. Reporting multi modal digital images. Product Specification
 CHILI /Workstation Reporting multi modal digital images Product Specification CHILI /Workstation CHILI/Workstation is a diagnostic PACS workstation with additional functions for teleradiology. CHILI/Workstation
XnView Image Viewer. a ZOOMERS guide
 XnView Image Viewer a ZOOMERS guide Introduction...2 Browser Mode... 5 Image View Mode...14 Printing... 22 Image Editing...26 Configuration... 34 Note that this guide is for XnView version 1.8. The current
VIEW. a short tutorial. quick start
 VIEW a short tutorial quick start VERSiON 3.0 Contents Inhalt Introduction........................................................... 3 Import of DICOM media....................................................
Contents Lexmark International Technology S.A. All rights reserved. Page i , Rev 1.0
 Contents Contents 1. Overview... 1 1.1 About NilRead... 1 1.2 Intended use within the USA... 1 1.3 Manufacturer... 2 1.4 Supported modalities... 2 1.5 User interface overview... 2 1.6 Toolbar overview...
Quick Guide for Photoshop CC Basics April 2016 Training:
 Photoshop CC Basics Creating a New File 1. Click File > New 2. Keep Default Photoshop Size selected in the Preset drop-down list. 3. Click OK. Showing Rulers 1. On the Menu bar, click View. 2. Click Rulers.
PACS ADMIN. Quick Reference Guide
 Quick Reference Guide PACS ADMIN Creating Domain Users.......................................................... Adding NOVARAD Users......................................................... Adding Console
Contents Lexmark International Technology S.A. All rights reserved. i
 Contents Contents 1. Overview 1 About NilRead 1 Intended use within the USA 1 Contact us 2 Supported modalities 2 User interface overview 2 Toolbar and side panel overview 3 Customize the image viewing
EPILOG PREOP. Viewer Interpretation Guideline
 EPILOG PREOP Viewer Interpretation Guideline Starting the viewer Launch the viewer for a patient by clicking this icon. A new browser tab or window will open. Data loading To ensure smooth switching between
Physicians Quick Guide. Software Version 5.3
 Physicians Quick Guide Software Version 5.3 1 DOC-0033746-A 9/20/2016 Locating a Study in Worklist or Folder 1. Log on to Synapse using the method prescribed by your PACS administrator 2. If prompted,
UM-BQC
 BRIT QC May 2007 Release 7.1.0.9 UM-BQC-007.1.0.9-0001 Table of Contents Notices and Copyrights Notice This document is subject to change without notice and does not represent a commitment by BRIT Systems,
XnView 1.9. a ZOOMERS guide. Introduction...2 Browser Mode... 5 Image View Mode...15 Printing Image Editing...28 Configuration...
 XnView 1.9 a ZOOMERS guide Introduction...2 Browser Mode... 5 Image View Mode...15 Printing... 22 Image Editing...28 Configuration... 36 Written by Chorlton Workshop for hsbp Introduction This is a guide
DDX-R Quick Start Guide
 DDX-R Quick Start Guide Imaging Support 1-855-726-9995 www.scilvet.com Contents USING DDX-R... 2 Opening a Patient File... 2 Opening a New Patient File... 3 Screen Layout... 3 ACQUIRING IMAGES ON A PATIENT...
SiteAware Viewer. Quick Start Guide
 SiteAware Viewer Quick Start Guide Login Screen 1. Enter SiteAware provided username (an email address) and password 2. Click Login 3. Click Forgot Password to request a password reset 4. Sign Up option
Carestream Vita user quick guide. Software version 3.2 From April 2012
 Carestream Vita user quick guide Software version 3.2 From April 2012 1 Carestream Vita user quick guide Software version 3.2 from April 2012 1. To switch your Vita on Press the power button on the PC
Copyright Notice. Trademarks
 Copyright Notice All rights reserved. No part of this publication may be reproduced, stored in a retrieval system, or transmitted in any form or by any means, electronic, mechanical, photocopying, recording,
Learn Image Segmentation Basics with Hands-on Introduction to ITK-SNAP. RSNA 2016 Courses RCB22 and RCB54
 Learn Image Segmentation Basics with Hands-on Introduction to ITK-SNAP RSNA 2016 Courses RCB22 and RCB54 RCB22 Mon, Nov 28 10:30-12:00 PM, Room S401CD RCB54 Thu, Dec 1 2:30-4:30 PM, Room S401CD Presenters:
SIVIC GUI Overview. SIVIC GUI Layout Overview
 SIVIC GUI Overview SIVIC GUI Layout Overview At the top of the SIVIC GUI is a row of buttons called the Toolbar. It is a quick interface for loading datasets, controlling how the mouse manipulates the
Centricity Cardio Workflow (CCW)
") Centricity Cardio Workflow (CCW) Staff Application Training 1. Open/log into, Verify that Worklist and Filters are set appropriately. Examination Echo Staff Current User Your organization You should see
Centricity Cardio Workflow (CCW) Staff Application Training 1. Open/log into, Verify that Worklist and Filters are set appropriately. Examination Echo Staff Current User Your organization You should see
1 ZoomBrowser EX Software User Guide 5.0
 1 ZoomBrowser EX Software User Guide 5.0 Table of Contents (1/2) Chapter 1 Chapter 2 Chapter 3 What is ZoomBrowser EX? What Can ZoomBrowser EX Do?... 4 Guide to the ZoomBrowser EX Windows... 5 Task Buttons
Gear View QC. User Help. Version Written by: Product Documentation and R&D Date: August 2015 LX-DOC-GVQC UH-EN-REVA
 Gear View QC User Help Version 2.2.0 Written by: Product Documentation and R&D Date: August 2015 2015 Lexmark International Technology, S.A. All rights reserved. No part of this publication may be reproduced,
Avigilon Control Center Web Client User Guide
 Avigilon Control Center Web Client User Guide Version: 4.12 Standard PDF-WEBCLIENT-S-E-Rev2 Copyright 2013 Avigilon. All rights reserved. The information presented is subject to change without notice.
Web Viewer Guide. HiPER LOOK Version Copyright 2016 PIXIA Corp. All Rights Reserved.
 Web Viewer Guide 2016 HiPER LOOK Version 1.4.16.0 Copyright 2016 PIXIA Corp. All Rights Reserved. Table of Contents 1 System Requirements... 5 1.1 Prerequisites... 5 1.2 Web Browser... 5 2 HiPER LOOK Web
End User Guide. 2.1 Getting Started Toolbar Right-click Contextual Menu Navigation Panels... 2
 TABLE OF CONTENTS 1 OVERVIEW...1 2 WEB VIEWER DEMO ON DESKTOP...1 2.1 Getting Started... 1 2.1.1 Toolbar... 1 2.1.2 Right-click Contextual Menu... 2 2.1.3 Navigation Panels... 2 2.1.4 Floating Toolbar...
Acrobat X Professional
 Acrobat X Professional Toolbar Well Page Navigations/Page Indicator Buttons for paging through document Scroll Bar/box page indicator appears when using the scroll button to navigate. When you release
CROSS SECTIONAL IMAGING IN OSIRIX
 CROSS SECTIONAL IMAGING IN OSIRIX Supporting Documentation James Ricketts INDEX 1. Importing Images 2. Exporting Images 3. Cutting Down Series 4. Changing the default windowing 5. Anonymise an Ultrasound
Bombardier Business Aircraft Customer Services. Technical Publications. SmartPubs Viewer 3.0 User Guide. Updated January 2013 [2013]
![Bombardier Business Aircraft Customer Services. Technical Publications. SmartPubs Viewer 3.0 User Guide. Updated January 2013 [2013]](/thumbs/90/103657167.jpg "Bombardier Business Aircraft Customer Services. Technical Publications. SmartPubs Viewer 3.0 User Guide. Updated January 2013 [2013]") Bombardier Business Aircraft Customer Services Technical Publications SmartPubs Viewer 3.0 User Guide Updated January 2013 [2013] Table of Contents Application Views... 5 Collection View... 5 Manual View...
Bombardier Business Aircraft Customer Services Technical Publications SmartPubs Viewer 3.0 User Guide Updated January 2013 [2013] Table of Contents Application Views... 5 Collection View... 5 Manual View...
SeeSnake HQ User Guide
 SeeSnake HQ User Guide SeeSnake HQ Version 1.53.85.1426 23 May 2010 About SeeSnake HQ 3 Digital Technology 3 Installation and Updates 5 Windows XP 5 Windows Vista 5 Windows 7 5 The Home Window 6 Home Toolbar
OnPoint s Guide to MimioStudio 9
 1 OnPoint s Guide to MimioStudio 9 Getting started with MimioStudio 9 Mimio Studio 9 Notebook Overview.... 2 MimioStudio 9 Notebook...... 3 MimioStudio 9 ActivityWizard.. 4 MimioStudio 9 Tools Overview......
AORTA CTA VPMC-12419
 AORTA CTA VPMC-12419 Workflow Overview: The Aorta can be post-processed in various ways. Auto Bone Removal and Vessel Pick provide a quick overview of the entire Aorta. Vessel Probe creates a centerline
Using the Markup Commands
 Using SoftPlan review 1 Using the Markup Commands The Markup menu supplies various commands that allow you to add changes, comments, and suggestions to a drawing or to specific areas of a drawing. To open
Community Medical Centers EMR 10.1 Physician Reference
 Community Medical Centers EMR 10.1 Physician Reference Contents: Section Page Number 1. Logging On...1 2. Completing Signature Deficiencies...2 3. AutoSign...4 4. Completing Dictation Deficiencies...4
LIGHTCONVERSE TOOLS Interface Overview
 MANUAL 1 Contents Contents... 1 LIGHTCONVERSE TOOLS Interface Overview... 2 Tool Manager... 3 Mouse... 4 Mouse Control Operation:... 4 3D Space Area... 4 Modes... 5 Balance Calculator in Warehouse Mode...
Exercise 2a: Load, Animate and Review a Model
 Exercise 2a: Load, Animate and Review a Model This exercise uses the file bumper_deck.key and the corresponding d3plot. Step 1: Load the solver input and result files, bumper_deck.key and d3plot. 1. From
imovie Guide Create a new imovie Project The imovie Interface
 imovie Guide Create a new imovie Project. Open imovie.. From the FILE menu choose NEW PROJECT. Enter an appropriate title, choose WIDESCREEN (6:9) for Aspect Ratio, and leave NONE selected for the theme.
OnBase - EDM Services (Electronic Document Management Services)
") OnBase - EDM Services (Electronic Document Management Services) Overview EDM Services contains the following features: EDM Briefcase Prerequisites The EDM Briefcase allows you to: Document Templates Image
OnBase - EDM Services (Electronic Document Management Services) Overview EDM Services contains the following features: EDM Briefcase Prerequisites The EDM Briefcase allows you to: Document Templates Image
Editing Videos. Overview. 1. Open the Editor
 Editing Videos Overview The Panopto editor allows for easy web-based editing from any modern browser. You can perform quick, non-destructive edits to any video on the Panopto platform and deliver exactly
Bringing Learning to Life in VR. Teacher s Guide to Cyber Anatomy 3D
 Bringing Learning to Life in VR Teacher s Guide to Cyber Anatomy 3D Contents How to Get the Most From Cyber Anatomy 3D for zspace Transform your classroom with compelling, innovative technology that can
Autodesk Fusion 360 Training: The Future of Making Things Attendee Guide
 Autodesk Fusion 360 Training: The Future of Making Things Attendee Guide Abstract After completing this workshop, you will have a basic understanding of editing 3D models using Autodesk Fusion 360 TM to
Palm Reader Handbook
 Palm Reader Handbook Copyright 2000-2002 Palm, Inc. All rights reserved. Graffiti, HotSync, the Palm logo, and Palm OS are registered trademarks of Palm, Inc. The HotSync logo and Palm are trademarks of
Avigilon Gateway Web Client User Guide. Version 6.10
 Avigilon Gateway Web Client User Guide Version 6.10 2006-2018, Avigilon Corporation. All rights reserved. AVIGILON, the AVIGILON logo, AVIGILON CONTROL CENTER, ACC, and TRUSTED SECURITY SOLUTIONS. are
Extended Brilliance Workspace v3.5 Report Template Editor
 Extended Brilliance Workspace v3.5 Report Template Editor This is an application guide for Extended Brilliance Workspace v3.5. For more detailed information, please refer to the Philips operator or user
Business Products Quick Reference Bundle
 Business Products Quick Reference Bundle TABLE OF CONTENTS Section 1 Getting Started with Your SMART Board 800 Series Interactive Whiteboard 4 Subsection 1.1 Turning On Your Interactive Whiteboard 4 Subsection
Collaborate Ultra: Sharing Content
 Collaborate Ultra: Sharing Content The Share Content pane on the Collaborate Panel provides five links, three of which are actually for sharing content: Whiteboard, Applications, and Files. There is also
Website address: hrapacs.com. Logging in. The home page. Page 2 of 7. Click on the check box to save your login info. List of Studies done
 670 Ponahawai Street, Suite 110 Hilo, Hawaii 96720 Phone: (800) 933-2540 Fax: (808) 769-5636 82 Puuhonu Place, Suite 102 Hilo, Hawaii 96720 Phone: (808) 961-4745 Fax: (808) 933-2532 77-311 Sunset Drive
This guide will help you with many of the basics of operation for your Epson 485wi BrightLink Projector with interactive functionality.
 This guide will help you with many of the basics of operation for your Epson 485wi BrightLink Projector with interactive functionality. If you need further assistance with questions, you can refer to the
5.2. Click these tabs to jump to the Table of Contents, Index or start of each chapter.
 5.2 Click these tabs to jump to the, or start of each chapter. Click this button to advance to the next page. Click this button to return to the previous page. (Since this is the starting page, the [Back]
Greater Bridgeport Regional Council Municipal GIS Viewer Training April 2015
 Greater Bridgeport Regional Council Municipal GIS Viewer Training April 2015 GBRC GIS Web Training Table of Contents Introduction........................................................... 3 Viewer Components.......................................................
IDL Tutorial. Working with Images. Copyright 2008 ITT Visual Information Solutions All Rights Reserved
 IDL Tutorial Working with Images Copyright 2008 ITT Visual Information Solutions All Rights Reserved http://www.ittvis.com/ IDL is a registered trademark of ITT Visual Information Solutions for the computer
efilm Workstation Quick Reference
 efilm Workstation Quick Reference Toolbar Features Customizing the Toolbar Toolbar Properties NOTE: Some tools have function key shortcuts, which can be adjusted. You can alter the mouse button selection
Digital Content e-reader Features Overview
 Digital Content e-reader Features Overview Announcing the launch of our new digital content e-reader. This brief overview will demonstrate some of the most important features of our new e-reader. Once
Avigilon Control Center Standard Web Client User Guide. Version 5.6
 Avigilon Control Center Standard Web Client User Guide Version 5.6 2006-2015, Avigilon Corporation. All rights reserved. Unless expressly granted in writing, no license is granted with respect to any copyright,
Contents... 1 Installation... 3
 Contents Contents... 1 Installation... 3 1 Prerequisites (check for.net framework 3.5)... 3 Install Doctor Eye... 3 Start Using Doctor Eye... 4 How to create a new user... 4 The Main Window... 4 Open a
StickFont Editor v1.01 User Manual. Copyright 2012 NCPlot Software LLC
 StickFont Editor v1.01 User Manual Copyright 2012 NCPlot Software LLC StickFont Editor Manual Table of Contents Welcome... 1 Registering StickFont Editor... 3 Getting Started... 5 Getting Started...
VM Medical WS User Manual. Medical WorkStation. User Manual. 1
 Medical WorkStation User Manual 1 Table of Contents Considerations... 3 Study List Window... 4 Tools... 5 Search... 5 Study... 6 Query Retrieve... 6 Quick Tools... 7 Quick Search tools... 7 Study Quick
IMAGESCOPE INSTALLATION AND QUICK START GUIDE
 IMAGESCOPE INSTALLATION AND QUICK START GUIDE This document provides a quick start explanation of how to use Aperio s Release 6 ImageScope software to view digital slides. Aperio Technologies, Inc. Worldwide