AF Setting Guidebook
|
|
|
- Alison Armstrong
- 5 years ago
- Views:
Transcription

1 CONTENTS Chapter 1 Chapter 2 AF Setting Guidebook Detailed explanations of settings for utilizing improved high-performance AF features to capture that perfect moment Chapter 3 Chapter 4 Chapter 5 Chapter 6 1
2 CONTENTS Chapter 1 Chapter 2 Chapter 3 Chapter 4 Chapter 5 Chapter 6 CONTENTS Features of the EOS-1D X Mark II New AF algorithm and AI Servo AF III+ New AF Setting Operability Chapter 1 AF Configuration Tool [Presets] Chapter 2 AF Configuration Tool [Parameters] Chapter 3 AF area selection modes Chapter 4 EOS-1D X Mark II 61-Point Reticular AF Cross-type Points Chapter 5 Release property settings and anti-flicker shooting Chapter 6 Utilizing the AF and Movie Servo AF Other useful functions 2
3 CONTENTS Chapter 1 Chapter 2 Chapter 3 Chapter 4 Chapter 5 Chapter 6 Features of the EOS-1D X Mark II New AF Custom Guide Functions that Control 61-Point Reticular AF The EOS-1D X Mark II is equipped with a newlydeveloped 61-Point High-Density Reticular AF II. By arranging the 61 AF points in a high concentration, the level of composition freedom, and tracking performance of fast moving subjects is improved. In combination with AI Servo AF III+, which incorporates a new algorithm, ensuring accurate focusing on a subject is possible. You can also effectively set AI Servo AF features using the AF Configuration Tool. Because you can choose from six different presets, the correct settings are quick and easy, without all the trouble that comes from adjusting settings for individual parameters to match the subject or scene. 3
4 CONTENTS Chapter 1 Chapter 2 Chapter 3 Chapter 4 Chapter 5 Chapter 6 New algorithm of AI Servo AF III+ Improved support capability for difficult to capture movement of subjects that come close, then move away The main improved point of the AF system on the EOS- 1DX Mark II is the use of AI Servo AF III+ with an even more sophisticated predictive AF algorithm. For shooting sports and wildlife with erratic movement, AI Servo AF III capable of stable subject tracking was included in the EOS-1D X. In cases where obstacles may obscure the subject, and when the subject moves away from the AF point briefly, it is equipped with performance capable of tracking the subject. With the AI Servo AF III+ included this time, support is improved for subjects that approach then move away suddenly, that had been difficult to focus on up until now. Movement such as motorcycles and racecars that approach corners, to figure skating and speed skating. Even in cases like these, AI Servo AF III+ on the EOS-1D X Mark II is capable of continuously tracking subjects that move away from the camera. Handling is improved for a variety of movement, with the refined AF algorithm AI Servo AF III+. 4


![As predictive AF is improved in AI Servo AF III+, the AF Configuration Tool [Case 1] can provide](/docs-images/83/87151151/images/5-2.jpg "support for a variety of shooting scenes.")
5 CONTENTS Chapter 1 Chapter 2 Chapter 3 Chapter 4 Chapter 5 Chapter 6 AI Servo AF III+ effective scenes Continuously capture motorcycles as they approach and move away Hints & Tips With Case 1, support for even more scenes is possible. Case 2 to 6 also provide improved support for subjects coming close, and moving away. As predictive AF is improved in AI Servo AF III+, the AF Configuration Tool [Case 1] can provide support for a variety of shooting scenes. In addition, support for movement such as coming closer and moving away suddenly in all Case 2 Case 6 settings has improved compared to the EOS-1D X. 5
6 CONTENTS Chapter 1 Chapter 2 Chapter 3 Chapter 4 Chapter 5 Chapter 6 EOS-1D X Mark II AF setting operability All AF-related menu functions now in a separate menu Displays the tab position The AF1 tab includes AF-related setting items in the AF menu the AF Configuration Tool 6 Tab name The AF1 tab is important when shooting moving subjects using the AI Servo AF on the EOS-1D X Mark II. It is possible to effectively set AI Servo AF characteristics by selecting the option that closely matches the scene with the AF Configuration Tool.
7 CONTENTS Chapter 1 Chapter 2 Chapter 3 Chapter 4 Chapter 5 Chapter 6 The Various AF-related functions are now incorporated into an AF menu tab On the EOS-1D X Mark II, the various AF-related settings have been incorporated into the AF menu tab, the same as the EOS-1D X. This makes smooth access to AFrelated settings possible. In particular, the AF Configuration Tool included in tab AF1 can be used to easily set the AI Servo AF characteristics, making it an important feature that takes advantage of the advanced AF performance on the EOS-1D X Mark II. By selecting from six presets (Case 1 - Case 6), it is possible to set the AI Servo AF characteristics to most accurately suit the subject's movement, and scene conditions. It is also possible for fine control to adjust each parameter separately. (Refer to P for AF Configuration Tool details.) Tabs [AF2] [AF5] include a variety of settings such as shutter-release timing settings, a setting for the number of AF points that can be set manually, so this makes it possible to make detailed settings that match your shooting style. 7
![CONTENTS Chapter 1 Chapter 2 Chapter 3 Chapter 4 Chapter 5 Chapter 6 Various settings for AF-related features can be made with AF menus [AF2] - [AF5] AF2 AI Servo Settings related to shutter-release](/docs-images/83/87151151/images/8-0.jpg "timing when using AI Servo AF and continuous shooting The [AF2] tab includes settings related to the camera priority concerning shutter-release timing when using AI Servo AF.")
![[AI Servo 1st image priority] and [AI Servo 2nd image priority] make it possible to make focusing the priority slowing the shutter-release timing, or prioritize faster shutter-release.](/docs-images/83/87151151/images/8-1.jpg "8 AF3 One-Shot AF Settings related to focusing and shutter release timing etc.")
8 CONTENTS Chapter 1 Chapter 2 Chapter 3 Chapter 4 Chapter 5 Chapter 6 Various settings for AF-related features can be made with AF menus [AF2] - [AF5] AF2 AI Servo Settings related to shutter-release timing when using AI Servo AF and continuous shooting The [AF2] tab includes settings related to the camera priority concerning shutter-release timing when using AI Servo AF. [AI Servo 1st image priority] and [AI Servo 2nd image priority] make it possible to make focusing the priority slowing the shutter-release timing, or prioritize faster shutter-release. 8 AF3 One-Shot AF Settings related to focusing and shutter release timing etc. when using One-Shot AF Within the [AF3] tab, the [One-Shot AF release priority] settings sets focusing and shutter-release timing when using One-Shot AF. The options [Lens electronic MF] and [AF-assist beam firing] control the manual focus operation of some lenses and the operation of AF assist function of attached Speedlites.

![:eos itr AF] [AF area selection mode] [Automatic AF point selection criteria], [Selectable AF points], [AF area selection mode], [AF area selection method], and [Orientation linked AF point].](/docs-images/83/87151151/images/9-1.jpg "In addition, there is the [Lens drive when AF impossible] option in this menu tab. AF5 Includes general settings related to display of AF points, etc.")
9 CONTENTS Chapter 1 Chapter 2 Chapter 3 Chapter 4 Chapter 5 Chapter 6 9 AF4 Includes general settings related to AF point selection Select which and how AF points are selected. This menu includes settings related to [Auto AF pt sel.:eos itr AF] [AF area selection mode] [Automatic AF point selection criteria], [Selectable AF points], [AF area selection mode], [AF area selection method], and [Orientation linked AF point]. In addition, there is the [Lens drive when AF impossible] option in this menu tab. AF5 Includes general settings related to display of AF points, etc. Within [AF5] tab are settings that control how AF points are displayed in the viewfinder such as [AF point display during focus], [AF point brightness], and [AF status in viewfinder]. With the [AF point selection movement] the AF point selection can stop at the peripheral AF point or instead loop back to the opposite side of the AF area. For those who need to make fine adjustments to the focus position [AF Microadjustment] is available.
10 CONTENTS Chapter 1 Chapter 2 Chapter 3 Chapter 4 Chapter 5 Chapter 6 Chapter 1 AF Configuration Tool [Presets] Overview of AF Configuration Tool [Presets] Case 1 Versatile multi-purpose setting Case 2 Continue to focus-track even when the subject momentarily moves from the AF points Case 3 Focus instantly on subjects that move into the AF points Case 4 Focus track subjects that accelerate or decelerate quickly Case 5 Focus on subjects with erratic movement Case 6 Focus on subjects with erratic movement and changes in speed 10
![CONTENTS Chapter 1 Chapter 2 Chapter 3 Chapter 4 Overview of AF Configuration Tool [Presets] A combination of parameters to best suit the characteristics of subject movement have been used to create](/docs-images/83/87151151/images/11-0.jpg "the presets from Case 1 Case 6. By selecting the appropriate icon, the different AI Servo AF settings can be selected to suit the subject.")
11 CONTENTS Chapter 1 Chapter 2 Chapter 3 Chapter 4 Overview of AF Configuration Tool [Presets] A combination of parameters to best suit the characteristics of subject movement have been used to create the presets from Case 1 Case 6. By selecting the appropriate icon, the different AI Servo AF settings can be selected to suit the subject. Case 1 Case 2 Case 3 The best parameters for different subjects and shooting scenes are combined into presets from Case 1-6 Versatile multi-purpose setting Continue to track subjects, ignoring possible obstacles Instantly focus on subjects suddenly entering AF points Chapter 5 Case 4 Case 5 For subjects that accelerate or decelerate quickly For erratic subjects, moving in any direction* Chapter 6 Case 6 For subjects that change speed and move erratically* *This setting is not available with the Single-point Spot AF (Manual selection) and Single-point AF (Manual selection) modes 11
12 CONTENTS Chapter 1 Chapter 2 Chapter 3 Chapter 4 Select from Case 1 - Case 6 to match subject scenarios When the [AF1] tab on the EOS-1D X Mark II is opened, 6 icons representing sports disciplines are displayed. These are the presets of the AF Configuration Tool. Different presets to match the characteristics of the type of subject and its movement, and the shooting conditions, can be selected from Case 1 - Case 6. By simply selecting one of these cases, settings for the AI Servo AF characteristics that match the scene will be used. These six presets are combinations of the following three parameters, [Tracking sensitivity], [Accel./decel. tracking], and [AF pt auto switching] (P ). Using the presets sets the parameters in the most effective way. However, if you wish, it is also possible to manually adjust the parameters individually. Chapter 5 Chapter 6 The AF Configuration Tool is a function for setting AI Servo AF characteristics. Therefore, it is effective when you want to make settings with the AF operation set to [AI Servo AF]. 12

13 CONTENTS Chapter 1 Chapter 2 Chapter 3 Chapter 4 Hints & Tips By pressing the button while any Case is displayed on the screen, text information of AF setting characteristics or examples of shooting scenes can be confirmed. Moving the purple square over Case 1 Case 6 will display the name of each case, for example [Case1 Versatile multi-purpose setting]. If you want more detailed information, you can press the INFO button. This will display the help screen containing information about shooting scene examples and which settings to alter and when. Press the Chapter 5 button Chapter 6 13


![[AF Configuration Tool] [Case 1] is the basic AI Servo AF setting on the EOS-1D X Mark II.](/docs-images/83/87151151/images/14-2.jpg "As its name indicates, it is versatile and achieves a high level of tracking performance in a wide")
14 CONTENTS Chapter 1 Chapter 2 Chapter 3 Chapter 4 Chapter 5 Chapter 6 Case 1 Versatile multi-purpose setting The [AF Configuration Tool] [Case 1] is the basic AI Servo AF setting on the EOS-1D X Mark II. Precise and accurate focusing is possible for a wide range of subjects Parameter default settings Subject tracking sensitivity [0] Accelerate / decelerate Tracking [0] AF point auto switching [0] The [AF Configuration Tool] [Case 1] is the basic AI Servo AF setting on the EOS-1D X Mark II. As its name indicates, it is versatile and achieves a high level of tracking performance in a wide variety of scenes. 14
15 CONTENTS Chapter 1 Chapter 2 Chapter 3 Chapter 4 Equipped with AI Servo AF III+, the EOS-1D X Mark II has improved flexibility in handling a variety of moving subjects, and superior prediction of movement for more accurate focusing. Even with a variety of difficult elements such as extremely fast movement, sudden changes in speed, and interruptions by obstacles, it is able to capture the subject. Therefore, the standard setting Case 1 supports a wide range of movement as is, making it possible to AF track subjects. Furthermore, by improving AI Servo AF III+, handling of subjects that come close and then move away, such as motorcycles going through a hairpin curve is improved. As a result, even for scenes where tracking was not possible on the EOS-1D X, there are more cases that can be handled by Case 1 on the EOS-1D X Mark II. Shooting with Case 1 is highly recommended as you will be able to obtain satisfying results, when shooting a variety of sports and moving subjects. When more specific settings for individual cases are desired, please try Case 2 Case 6 to match shooting conditions. Chapter 5 Chapter 6 15
16 CONTENTS Chapter 1 Chapter 2 Chapter 3 Chapter 4 Chapter 5 Chapter 6 Case 1 Photo Touch to enlarge image Case 1 can be used to great advantage when shooting moving subjects, making it possible to accurately capture fast subjects. Hints & Tips AI Servo AF III+ makes it possible to carry out precise focus for subjects in a wide variety of conditions AF on the EOS-1D X Mark II is equipped with an improved focus tracking algorithm, AI Servo AF III+. It supports an even greater variety of subject movement than before. (P. 4 5) 16
17 CONTENTS Chapter 1 Chapter 2 Chapter 3 Chapter 4 Chapter 5 Chapter 6 Case 2 Continue to focus-track even when the subject momentarily moves from the AF points Case 2 is an effective setting for shooting fast moving subjects when they move away from the selected AF point, or when obstacles may momentarily obscure the subject. Effective when shooting scenes with fast moving subjects, or when an obstacle momentarily appears in front of the subject Parameter default settings Subject tracking sensitivity [Locked on: -1] Accelerate / decelerate Tracking [0] AF point auto switching [0] Case 2 is an effective setting for shooting fast moving subjects when they move away from the selected AF point, or when obstacles may momentarily obscure the subject. 17
, similarly when an obstacle obscures the subject, focus can shift to the obstacle.")
18 CONTENTS Chapter 1 Chapter 2 Chapter 3 Chapter 4 Chapter 5 Chapter 6 Sometimes when the subject moves from the selected AF point, focus can shift to the background (resulting in an out of focus subject), similarly when an obstacle obscures the subject, focus can shift to the obstacle. By selecting Case 2 in situations like these, the camera will attempt to continue to focus-track the desired subject. When a subject moves away from the AF points for an extended period (such as swimmers doing the butterfly stroke, or sports where the subject is hidden for intervals), even better performance may be achieved by manually setting the [Tracking sensitivity] parameter to [-2]. Case 2 Photo Touch to enlarge image Try selecting Case 2 when shooting a track and field event. The arms of runner closest to the camera will overlap the lead runner targeted with the AF point, however, there will be no impact and it will be possible to continuously focus on the lead runner. 18
. By selecting Case 2 for situations like this, it will be easier to focus track the subject.")
19 CONTENTS Chapter 1 Chapter 2 Chapter 3 Chapter 4 Example of a fast moving subject where the focus has shifted to the background (photo). By selecting Case 2 for situations like this, it will be easier to focus track the subject. Chapter 5 Chapter 6 19
20 CONTENTS Chapter 1 Chapter 2 Chapter 3 Chapter 4 Chapter 5 Chapter 6 Case 3 Focus instantly on subjects that move into the AF points Case 3 is the ideal setting for situations when you want to focus quickly on subjects in the AF points. Effective when you want to continuously photograph targeted athletes one after the other Parameter default settings Subject tracking sensitivity [Responsive: +1] Accelerate / decelerate Tracking [+1] AF point auto switching [0] In Case 3, the [Tracking sensitivity] parameter is set to [+1]. As a result, subjects that come into the AF points will be focused on more quickly. This setting is most effective when subjects appear suddenly in the frame (for example photographing skiers in an alpine skiing downhill race). 20
21 CONTENTS Chapter 1 Chapter 2 Chapter 3 Chapter 4 In other shooting situations, this setting can be extremely effective when switching between different subjects you want to shoot (for example, at the start of a bicycle road race, when you want to shoot continuously and switch from cyclist to cyclist while focusing). When set to Case 3, if the subject moves away from the AF points, the camera may quickly refocus on a different subject or background, in contrast to Case 2. Therefore, it is recommended that you use this setting only when you have a particular objective as indicated above. Chapter 5 Chapter 6 21


22 CONTENTS Chapter 1 Chapter 2 Chapter 3 Chapter 4 Change the target in sequence and shoot continually 1. Shoot the whole group while focusing on the cyclist in the center 2. Focus on the lead cyclist Chapter 5 Chapter 6 22


23 CONTENTS Chapter 1 Chapter 2 Chapter 3 Chapter 4 Chapter 5 Chapter 6 3. Focus on the right side cyclist 4. Focus on the left side cyclist A scene with cyclists coming towards the camera. While focusing on the lead cyclist you may wish to switch focus to the other cyclists within the group whilst shooting continuously with AF. In this situation, by selecting Case 3, you can achieve the desired focus on each subject. 23
24 CONTENTS Chapter 1 Chapter 2 Chapter 3 Chapter 4 Chapter 5 Chapter 6 Case 4 Focus track subjects that accelerate or decelerate quickly Subjects suddenly going from static moving or suddenly stopping can occur in various sports and situations. In these situations, Case 4 is most effective. Effective when a subject's speed changes rapidly Parameter default settings Subject tracking sensitivity [0] Accelerate / decelerate Tracking [+1] AF point auto switching [0] When shooting sports, there are many situations where it is necessary to deal with fast moving athletes. However, fast moving in this case is not limited to just high speed. Subjects suddenly going from static to moving or suddenly stopping can occur in various sports and situations. 24
25 CONTENTS Chapter 1 Chapter 2 Chapter 3 Chapter 4 Chapter 5 Chapter 6 In these situations, Case 4 is most effective. With the [Accel./decel. tracking] parameter set to [+1], the AI Servo AF will work to focus track any changes in speed, including sudden stops and acceleration. This makes Case 4 the most effective setting for shooting soccer, rugby, basketball or sports where there is a lot of running and stopping, as well as changes of direction which was difficult for Case 1 to track. It is also effective for cornering during motor sports (sudden deceleration and acceleration), and starting dashes. Case 4 Photo Touch to enlarge image For example, the start of a track and field event. With Case 4, the movement of the runner is captured in the moment from the resting state to sudden acceleration. By using Case 4 the AF system reacts to sudden changes in speed, allowing accurate focusing of the starting dash moment. 25

26 CONTENTS Chapter 1 Chapter 2 Chapter 3 Chapter 4 Continuously track runners as they suddenly speed up to run in a short-distance sprint. Chapter 5 Chapter 6 26
27 CONTENTS Chapter 1 Chapter 2 Chapter 3 Chapter 4 Chapter 5 Chapter 6 Case 5 Focus on subjects with erratic movement Case 5 is most effective for subjects with large amount of movements which could occur in any direction. This setting is recommended for use in automatic selection AF, Zone AF, and AF point expansion modes. *With Single-point AF and Spot AF, as AF point auto switching is unavailable, in the default setting operation will be the same as Case 1. For focusing on subjects with large up-down and right-left movements Parameter default settings Subject tracking sensitivity [0] Accelerate / decelerate Tracking [0] AF point auto switching [+1] 27
![CONTENTS Chapter 1 Chapter 2 Chapter 3 Chapter 4 Chapter 5 Chapter 6 In Case 5, [AF pt auto switching] is set to [+1], when the subject moves away from the manually selected AF point (AF points](/docs-images/83/87151151/images/28-0.jpg "focused on initially with Auto selection AF, Large Zone AF, Zone AF), focusing automatically switches to other AF points that cover the subject.")
28 CONTENTS Chapter 1 Chapter 2 Chapter 3 Chapter 4 Chapter 5 Chapter 6 In Case 5, [AF pt auto switching] is set to [+1], when the subject moves away from the manually selected AF point (AF points focused on initially with Auto selection AF, Large Zone AF, Zone AF), focusing automatically switches to other AF points that cover the subject. As a result, even when the subject continuously leaves the selected AF point, it is possible to increase the ratio of photos that are in focus. This setting is most effective when shooting distinctive sports with erratic movement such as figure skating and skateboarding, or when the shooting distance is close with relatively fast-moving subjects. A race motorcycle driving extremely close to the photographer. With Case 5 selected, it is effective in cases where it would be difficult to track a relatively fastmoving subject with one point. 28


29 CONTENTS Chapter 1 Chapter 2 Chapter 3 Chapter 4 It is possible to focus on subjects that move erratically in any direction Inline skating on a half-pipe. Capturing the moments when the skater is jumping and twisting is easier with Case 5. Chapter 5 Chapter 6 29
30 CONTENTS Chapter 1 Chapter 2 Chapter 3 Chapter 4 Chapter 5 Chapter 6 Case 6 Focus on subjects with erratic movement and changes in speed Case 6 is a setting that combines features of both Case 4, and Case 5. Effective when shooting sports that feature lots of quick movements Parameter default settings Subject tracking sensitivity [0] Accelerate / decelerate Tracking [+1] AF point auto switching [+1] Case 6 is a setting that combines features of both Case 4 (support for sudden changes in speed), and Case 5 (support for erratic movement in any direction). [Accel./ decel. tracking] and [AF pt auto switching] parameters are both [+1]. 30

31 CONTENTS Chapter 1 Chapter 2 Chapter 3 Chapter 4 Chapter 5 Chapter 6 Therefore, Case 6 is an effective setting for subjects that stop and start suddenly, and also have erratic movement which could happen in any direction, and it is recommended when using Auto selection AF, Large Zone AF, Zone AF, and AF point expansion. This scene is rhythmic gymnastics with large jumping movements from a resting position. This setting is effective in scenes where there are large movements followed by complete stops in movement. *With Single-point AF and Spot AF, AF point auto switching is unavailable. A rhythmic gymnast making sudden big jumps can be captured when shooting with Case 6. 31


32 CONTENTS Chapter 1 Chapter 2 Chapter 3 Chapter 4 Chapter 5 Chapter 6 32
33 CONTENTS Chapter 1 Chapter 2 Chapter 2 AF Configuration Tool [Parameters] Subject tracking characteristics Accelerate / decelerate Tracking characteristics AF point auto switching characteristics Chapter 3 Chapter 4 Chapter 5 Chapter 6 33
34 CONTENTS Chapter 1 Chapter 2 Chapter 3 Subject tracking characteristics [Tracking sensitivity] is the parameter that sets how the subject is tracked with AI Servo AF when an obstacle appears in front of the AF frame or when the AF frame has moved away from the subject. [Locked on] can be effective when an obstacle crosses in front of the subject and preventing focus jumps to the background [Locked on: -] Chapter 4 Chapter 5 Chapter 6 [Responsive: +] Choose any [Case] and push button, then press to select [Tracking sensitivity] and adjust level by turning. 34
35 CONTENTS Chapter 1 Chapter 2 Chapter 3 Chapter 4 This setting allows obstacles that pass in front of the subject to be ignored, as well as focusing on new subjects With the AF Configuration Tool on the EOS-1D X Mark II, not only can you select from Case 1 - Case 6, but three parameters for each can be adjusted individually. [Tracking sensitivity] is the parameter that can be set to track a subject that the AF point had b e e n f o l l o w i n g until a different subject (or background) got in the way. The [Locked on: -2/-1] setting excludes subjects that come into the AF point as obstacles, and continues to focus on the original subject. Selecting -2 results in the targeted subject being tracked for a longer time before focus changes to the subject now in the AF point. The [Responsive: +1/+2] setting determines that subjects that come into the AF point are new subjects to be focused, and quickly focuses. It is also effective when you want to quickly focus on subjects that are hidden and appear suddenly. Chapter 5 Chapter 6 35
![CONTENTS Chapter 1 Chapter 2 An example where [Locked on: -2/1] is effective When another rider, or a photographer,](/docs-images/83/87151151/images/36-0.jpg "crosses in front of the subject, focus can shift to the foreground/ background.")

36 CONTENTS Chapter 1 Chapter 2 An example where [Locked on: -2/1] is effective When another rider, or a photographer, crosses in front of the subject, focus can shift to the foreground/ background. Chapter 3 Chapter 4 Chapter 5 Chapter 6 Example where a photographer momentarily comes in front of the rider being tracked, then the rider appears again. With the [Locked on: -1] setting, the photographer in front is not focused on, and it is possible to continuously track the rider. 36
![CONTENTS Chapter 1 Chapter 2 An example where [Responsive: +1/+2] is effective When you want to quickly switch between the athlete in focus, while continuing to use AF.](/docs-images/83/87151151/images/37-0.jpg "Chapter 3 Chapter 4 Chapter 5 Chapter 6 Example where a soccer player dribbling the ball passes it to a teammate, and the player that received the ball dribbles it in a")
![different direction. The [Responsive: +1/+2] setting is effective when you want to quickly switch between players while continuing to focus with AI Servo AF.](/docs-images/83/87151151/images/37-1.jpg "It is effective in a variety of cases such as in baseball when you want to quickly switch subjects between a player running in an attempt to steal a base, or a pitcher")
37 CONTENTS Chapter 1 Chapter 2 An example where [Responsive: +1/+2] is effective When you want to quickly switch between the athlete in focus, while continuing to use AF. Chapter 3 Chapter 4 Chapter 5 Chapter 6 Example where a soccer player dribbling the ball passes it to a teammate, and the player that received the ball dribbles it in a different direction. The [Responsive: +1/+2] setting is effective when you want to quickly switch between players while continuing to focus with AI Servo AF. It is effective in a variety of cases such as in baseball when you want to quickly switch subjects between a player running in an attempt to steal a base, or a pitcher starting to throw the ball. 37

38 CONTENTS Chapter 1 Chapter 2 Chapter 3 Accelerate / decelerate Tracking characteristics [Accel./decel. tracking] is a tracking setting for subjects that experience changes in speed and move or stop suddenly. [-1/-2] is effective for subjects with minor speed changes [-2] Chapter 4 Chapter 5 Chapter 6 [0] Choose any [Case] and push button, then press to select [Accel./decel. tracking] and adjust level by turning. 38
39 CONTENTS Chapter 1 Chapter 2 Chapter 3 Chapter 4 A minus setting for subjects with a long shooting distance such as soccer provides more stable focus The default setting is [0], which is best for shooting subjects that move at steady speeds, or do not experience significant changes in speeds. [+1/+2] are best for shooting subjects that suddenly start or stop moving, or suddenly accelerate or decelerate. This setting enables the camera to continue focusing on the desired subject even when it experiences significant, split-second changes in speed. For example, the camera becomes less likely to focus behind an approaching subject that moves suddenly, and less likely to focus in front of a subject when it stops suddenly, which would result in a blurred subject. [+2] can handle greater changes in speed than [+1]. [-1/-2] are effective for shooting far away subjects with small changes in speed when you want to focus on minimizing the effects of obstructions passing by in the foreground of the shot. Chapter 5 Chapter 6 39
![CONTENTS Chapter 1 Chapter 2 Examples where the [-] setting is effective Sports with far-away subjects that experience relatively minor changes in speed, and](/docs-images/83/87151151/images/40-0.jpg "obstructions that often pass in front of the subject. Chapter 3 Chapter 4 Chapter 5 Chapter 6 [Accel.")
![/decel tracking] option [-1/2] is a new parameter for shooting in situations where far-away subjects experience minor changes in speed, and many obstructions](/docs-images/83/87151151/images/40-1.jpg "pass by in the foreground.")

40 CONTENTS Chapter 1 Chapter 2 Examples where the [-] setting is effective Sports with far-away subjects that experience relatively minor changes in speed, and obstructions that often pass in front of the subject. Chapter 3 Chapter 4 Chapter 5 Chapter 6 [Accel./decel tracking] option [-1/2] is a new parameter for shooting in situations where far-away subjects experience minor changes in speed, and many obstructions pass by in the foreground. Specifically, this setting is effective for sports with wide playing fields, such as soccer, when you want to capture action on the far side of the field. In many cases when photographing such a scene, another athlete moves across the foreground when the subject you are aiming for is experiencing relatively minor changes in speed (the relative speed changes become more significant when the shooting distance is closer). In such a situation, [-1/2] is more effective than a setting of [0] for foreground obstructions. 40
![CONTENTS Chapter 1 Chapter 2 Chapter 3 Chapter 4 Chapter 5 Chapter 6 Examples where the [0] setting is effective Track and field events where constant speed is common [0] Photo](/docs-images/83/87151151/images/41-1.jpg "Touch to enlarge image A track and field example where an athlete is running directly towards the camera. [0] is most suitable for taking shots of subjects in this situation.")
41 CONTENTS Chapter 1 Chapter 2 Chapter 3 Chapter 4 Chapter 5 Chapter 6 Examples where the [0] setting is effective Track and field events where constant speed is common [0] Photo Touch to enlarge image A track and field example where an athlete is running directly towards the camera. [0] is most suitable for taking shots of subjects in this situation. 41
42 CONTENTS Chapter 1 Chapter 2 Chapter 3 Chapter 4 Chapter 5 Chapter 6 Examples where the [+] setting is effective Sports where athletes movement suddenly stops or starts [+] Photo Touch to enlarge image Example of a long-jump landing. As a result of the athlete suddenly decelerating as they land, a normal setting may not be able to capture it, however, it is possible to continue focusing on the athlete with [Accelerate / decelerate Tracking] set to [+1]. 42
![CONTENTS Chapter 1 Chapter 2 Chapter 3 AF pt auto switching characteristics The [AF pt auto switching] parameter is used for setting characteristics of AF point switching when the subject has a lot](/docs-images/83/87151151/images/43-0.jpg "of movements.")
43 CONTENTS Chapter 1 Chapter 2 Chapter 3 AF pt auto switching characteristics The [AF pt auto switching] parameter is used for setting characteristics of AF point switching when the subject has a lot of movements. [+1/+2] setting is most effective for sports with lots of movement where the subject can easily move out of the selected AF point [0] Chapter 4 Chapter 5 Chapter 6 [+1] Choose any [Case] and push button, then press to select [AF pt auto switching] and adjust level by turning. 43
44 CONTENTS Chapter 1 Chapter 2 Chapter 3 Chapter 4 Set how rapidly the AF point switches to a new AF point for moving subjects The [AF pt auto switching] parameter is only for switching between multiple AF points, so it is unavailable when using AF area selection modes [Single-point Spot AF] and [Single-point AF]. The [0] setting is a standard setting for moderate switching of AF points. The [+1/+2] settings are used when shooting subjects with erratic movement which could happen in any direction. When a manually selected AF point (AF point being focused during Auto selection AF, Large Zone AF, Zone AF) leaves the subject, it will aggressively switch to surrounding AF points to capture the subject. Use the [+] setting when you want the camera to automatically decide (switch) to use a new AF point, and the [0] setting is used when you want to place emphasis on manually selected AF points to track the subject. Chapter 5 Chapter 6 44
45 CONTENTS Chapter 1 Chapter 2 Chapter 3 Chapter 4 Chapter 5 Chapter 6 Examples where [0] is most effective Sports with comparatively big movements, and not very fast [0] Photo Touch to enlarge image Example of an athlete warming up or moving around. The [0] setting is recommended when shooting subjects that do not move significantly. 45
![CONTENTS Chapter 1 Chapter 2 Chapter 3 Chapter 4 Examples where [+] is effective Fast moving sports with big movements, where the AF points can lose the subject easily A rhythmic](/docs-images/83/87151151/images/46-0.jpg "gymnast showing lots of movements in all directions. Use the [+1] setting in order to capture the movement by taking advantage of rapidly shifting AF points.")
46 CONTENTS Chapter 1 Chapter 2 Chapter 3 Chapter 4 Examples where [+] is effective Fast moving sports with big movements, where the AF points can lose the subject easily A rhythmic gymnast showing lots of movements in all directions. Use the [+1] setting in order to capture the movement by taking advantage of rapidly shifting AF points. Chapter 5 Chapter 6 46
47 CONTENTS Chapter 1 Chapter 2 Tip for AF setting Change the level of Accelerate / decelerate Tracking and AF point auto switching for appropriate shooting results. Accelerate / decelerate Tracking and AF point auto switching are part of the camera's automatic functions. Therefore, it is not always possible that these automatic functions reflect 100% of your intended idea. If you feel unhappy with shooting results, try to change the effective level of their functions. Chapter 3 Chapter 4 Chapter 5 Chapter 6 47
48 CONTENTS Chapter 1 Chapter 2 Chapter 3 Chapter 4 Chapter 5 Chapter 3 AF area selection modes Overview of AF area selection modes Single-point Spot AF Single-point AF AF point expansion (up, down, left, and right) (surrounding points) Zone AF Large Zone AF Auto selection AF Chapter 6 EOS itr AF 48
49 CONTENTS Chapter 1 Chapter 2 Chapter 3 Overview of AF area selection modes Change the AF point selection to match your shooting style AF area selection modes can be selected to match the subject and conditions Using only one AF point Chapter 4 Chapter 5 Chapter 6 Using multiple AF points (zone) The AF area selection modes make it possible to set how many of the 61-point AF are available to be used. Set the selection method of AF points that matches the subject and shooting conditions. 49


50 CONTENTS Chapter 1 Chapter 2 Chapter 3 How to set the AF area selection mode After pressing the button, each time the button is pressed, the [AF area selection mode] changes. If you prefer, you can switch the mode with the Main Dial after pressing the button, by setting [AF area selection method] to [ -> Main Dial] in the menu s [AF4] tab. Chapter 4 Press the button Chapter 5 Chapter 6 The mode changes each time the button is pressed 50
51 CONTENTS Chapter 1 Chapter 2 Chapter 3 Chapter 4 Choose whether only one AF point is used, or select from a vast array of AF selection options The EOS-1D X Mark II is equipped with 61-point AF. Not only can all these AF points each be selected individually, automatic switching between multiple AF points to track the subject is also possible. The [AF area selection mode] setting allows the selection of these AF point modes. The two types of modes in which you can manually select a single AF point to focus with are [Single-point Spot AF] and [Single-point AF]. The four modes that can switch automatically between multiple AF points to capture moving subjects are AF point expansion (Manual selection, 4 points [ ]), AF point expansion (Manual selection, surrounding 8 points), Large Zone AF, and Auto selection of AF (during AI Servo AF). Mode features are explained from P , so you can select the mode best suited to your subject's characteristics and shooting scene. Chapter 5 Chapter 6 51
52 CONTENTS Chapter 1 Chapter 2 Chapter 3 Chapter 4 Chapter 5 Chapter 6 Single-point Spot AF It is possible to focus on a very narrow area with a single manually selected point. Single-point AF The default setting. With this mode it is possible to focus with a single manually selected point. AF point expansion (four surrounding points) Focus using one manually selected point assisted by 4 other AF points (up, down, left, and right). 52
53 CONTENTS Chapter 1 Chapter 2 Chapter 3 Chapter 4 Chapter 5 Chapter 6 AF point expansion (eight surrounding points) Focus using one manually selected point assisted by the surrounding points. Zone AF (Manual selection of zone) The 61 AF points are divided into nine zones, and focus is made with the AF points in the selected zone. Large Zone AF (Manual selection of zone) The 61 AF points are divided into three zones, left, center, and right, and focus is made with the selected zone. 53
54 CONTENTS Chapter 1 Chapter 2 Chapter 3 Automatic selection AF All AF points are used with this mode, and the camera selects and focuses automatically. Chapter 4 Chapter 5 Chapter 6 54
55 CONTENTS Chapter 1 Chapter 2 Chapter 3 Chapter 4 Chapter 5 Chapter 6 Single-point Spot AF [Single-point spot AF] mode can be used to focus on a small area of the subject AF Focusing on a small or narrow area When set to [Single-point spot AF], a small rectangle is displayed inside the manually selected AF point. [Single-point spot AF] mode makes it possible to focus on the exact area even when there is an obstacle near the area you want to focus on. A common example when shooting sports is when you want to focus on the eyes of a rider wearing a helmet. With normal settings, the AF point can easily get caught on the edge of the helmet near the eye, resulting in the camera focusing on this edge. In situations like this, [Single-point Spot AF] makes it possible to focus more accurately on the rider s eye. 55
![CONTENTS Chapter 1 Chapter 2 Chapter 3 Chapter 4 Chapter 5 Chapter 6 Hints & Tips Modes other than [Single-point spot AF] are recommended when shooting fast moving subjects As [Single-point Spot AF]](/docs-images/83/87151151/images/56-0.jpg "only focuses on one very small area, it is not really suited to capturing fast moving subjects when set to AI Servo AF and may take longer to focus than other AF area selection modes.")
56 CONTENTS Chapter 1 Chapter 2 Chapter 3 Chapter 4 Chapter 5 Chapter 6 Hints & Tips Modes other than [Single-point spot AF] are recommended when shooting fast moving subjects As [Single-point Spot AF] only focuses on one very small area, it is not really suited to capturing fast moving subjects when set to AI Servo AF and may take longer to focus than other AF area selection modes. Touch to enlarge image Snapshot of a motorcycle rider wearing a helmet. Focus was pinpointed on the eye using [Single-point spot AF]. Single-point spot AF Photo It is possible to focus on pinpoints such as the eye when a helmet is being worn 56
![CONTENTS Chapter 1 Chapter 2 Chapter 3 [Single-point spot AF] is effective when there is something like the edge of the helmet, or visor near the eye you want](/docs-images/83/87151151/images/57-0.jpg "to focus on. With standard AF systems this can result in the AF system focusing on these edges rather than eye of the subject.")
57 CONTENTS Chapter 1 Chapter 2 Chapter 3 [Single-point spot AF] is effective when there is something like the edge of the helmet, or visor near the eye you want to focus on. With standard AF systems this can result in the AF system focusing on these edges rather than eye of the subject. Chapter 4 Chapter 5 Chapter 6 57
58 CONTENTS Chapter 1 Chapter 2 Chapter 3 Chapter 4 Single-point AF Single-point AF is an easy to use mode for still life photos etc. in One-shot AF Single-point AF is a mode where one manually selected AF point is used to focus. For experienced photographers or when it is easy to track the subject with a single AF point, AI Servo AF can be utilized when continuously shooting moving subjects. However, this mode is more effective for shooting still life and landscapes with One-shot AF mode. Chapter 5 Chapter 6 58
59 CONTENTS Chapter 1 Chapter 2 Chapter 3 AF point expansion (up, down, left, and right) (surrounding points) [AF point expansion] is an AF area selection mode that is best selected when shooting sports. For fast moving subjects that are difficult to track with a single AF point AF point expansion (up, down, left, and right) Chapter 4 Chapter 5 Chapter 6 AF point expansion (surrounding points) Viewfinder display of [AF point expansion]. The manually selected AF point and surrounding points lights up. 59
60 CONTENTS Chapter 1 Chapter 2 Chapter 3 Using this setting shifts the focus point used from a manually selected AF point, to an adjacent (up, down, left, and right, or surrounding) AF point, to aid focus tracking. When using this setting it is easier to obtain the desired composition as the subject is captured centering around the manually selected AF point. Based on the subject's movement characteristics, (i.e. likelihood of subject moving from the selected AF point) and the size of the subject within the frame, select either AF point expansion (up, down, left, and right) or AF point expansion (surrounding points). In addition, when the subject has a lot of movement, setting Case 5 or Case 6 from the AF Configuration Tool is also recommended. Chapter 4 Chapter 5 Chapter 6 60
![CONTENTS Chapter 1 Chapter 2 Chapter 3 Chapter 4 This mode is ideal for sports photography [AF point expansion] mode can be used for a wide range of sporting](/docs-images/83/87151151/images/61-0.jpg "events with erratic movement. [AF point expansion (Up, down, left, and right)] was able to accurately capture the dribbling soccer player.")
61 CONTENTS Chapter 1 Chapter 2 Chapter 3 Chapter 4 This mode is ideal for sports photography [AF point expansion] mode can be used for a wide range of sporting events with erratic movement. [AF point expansion (Up, down, left, and right)] was able to accurately capture the dribbling soccer player. Chapter 5 Chapter 6 61
![CONTENTS Chapter 1 Chapter 2 Chapter 3 Chapter 4 As switching of the AF point takes place centered around the selected AF point with [AF point expansion], this mode makes it easy to obtain the](/docs-images/83/87151151/images/62-0.jpg "desired composition. This high jump athlete was captured with [AF point expansion (surrounding)].")
62 CONTENTS Chapter 1 Chapter 2 Chapter 3 Chapter 4 As switching of the AF point takes place centered around the selected AF point with [AF point expansion], this mode makes it easy to obtain the desired composition. This high jump athlete was captured with [AF point expansion (surrounding)]. Hints & Tips [Up, down, left, and right] and [surrounding] options can be selected according to the Chapter 5 Chapter 6 difficulty of reading the movement, and the relative importance to the central AF point When shooting subjects which might be difficult to determine movement, select [surrounding] mode, and when you want to focus on the area covered by the central (manually selected) AF point it s better to select the [Up, down, left, and right] mode. 62
63 CONTENTS Chapter 1 Chapter 2 Chapter 3 Chapter 4 Chapter 5 Chapter 6 Zone AF With the [Zone AF] mode, one of nine focusing zones can be selected, and the AF point is automatically selected from within that zone. Effective for capturing subjects within a selected zone The selected AF points display in [Zone AF]. Zone AF differs from [AF point expansion], in which AF tracking is based around the manually selected AF point. With Zone AF the camera decides the position to focus on the subject within the zone, so it is effective for these situations when focusing with single-point AF or AF point expansion is difficult. This mode is easy to use when you want to focus on areas of the subject that are a larger size, making it possible to easily capture the appropriate area. 63
64 CONTENTS Chapter 1 Chapter 2 Chapter 3 Selection can be made from nine focusing zones The 61 AF points are divided into three blocks, left, center, and right, and each has upper, central, and lower zones, and the desired location can be selected from these nine zones. Chapter 4 Chapter 5 Chapter 6 64

65 CONTENTS Chapter 1 Chapter 2 Chapter 3 Chapter 4 For larger subjects or subjects that move over a larger area Zone AF Photo Touch to enlarge image A photo of a moment of action as runners jump over hurdles shot with [Zone AF]. In order to focus on the closest runner, as well as fit the runner in the back on the right of the screen, this shot was taken by selecting the upper left zone. Chapter 5 Chapter 6 65
66 CONTENTS Chapter 1 Chapter 2 Chapter 3 Chapter 4 Chapter 5 Chapter 6 Large Zone AF With the [Large Zone AF] mode, one of three large focusing zones (left, center, and right) can be selected, and the AF point is automatically selected from within that zone. This mode is effective when you want to capture subjects in a large area consisting of left, center, and right. The selected range of AF points display in [Large Zone AF]. This AF area selection mode is newly included on the EOS-1D X Mark II. The AF points are divided into large zones of left, center, and right (top, center, and bottom in the vertical position), and as Auto selection AF takes place within the selected zone, it is effective when you want to shoot with the subject roughly fitted within the screen. This mode can be used effectively in combination with Auto selection AF, improved tracking performance, and improved EOS itr AF (p.74). 66
67 CONTENTS Chapter 1 Chapter 2 Chapter 3 Selection can be made from three focusing zones The 61 AF points are divided into three main zones, left, center, and right, and auto selection AF takes place within the selected zone. Chapter 4 Chapter 5 Chapter 6 67

68 CONTENTS Chapter 1 Chapter 2 Chapter 3 Chapter 4 Chapter 5 Chapter 6 Subjects can be captured in large zones with this mode Large Zone AF Photo Touch to enlarge image Vertically shot photo of a motorcycle coming towards the camera around a corner in a motorsport event. The bottom area of [Large Zone AF] was selected, and the photo shot with the background composing a large portion of the upper part of the screen. 68
69 CONTENTS Chapter 1 Chapter 2 Chapter 3 Auto selection AF When using [Auto selection AF] during [AI Servo AF], focusing will start from the manually selected AF point. The camera will automatically change the AF point selecting from all 61 points as the subject moves. AI Servo AF with all 61 points used for automatic tracking One-Shot AF Chapter 4 Chapter 5 Chapter 6 AI Servo AF When using [One-Shot AF], a single AF point is selected automatically from the 61 points. When using [AI Servo AF], AF starts from the manually selected AF point and then selects the most appropriate from all 61 points. 69
70 CONTENTS Chapter 1 Chapter 2 Chapter 3 Chapter 4 The AF points are arranged in a wide area so it is useful for capturing and tracking of subjects. However, depending on the shooting conditions or if the subject is small, tracking may not be possible so caution is necessary. [Auto selection AF] is effective when shooting subjects with unreadable movement that cannot be captured with [AF point expansion] or [Zone AF] (figure skating jump scenes for example). Another effective use is when you want to take action images for publication/articles with lots of space in the composition for text etc. In the examples below, shooting began by capturing the targeted cyclist first with a manually selected AF point (in the center etc.). From there, while continuously shooting and moving the camera (lens) to the left or right, it is possible to position the lead cyclist off to one side and include a lot of background (focusing continues to track the cyclist by automatically switching AF points). This technique is effective when you want to include both the subject and the background in the composition when shooting. Chapter 5 Chapter 6 70


71 CONTENTS Chapter 1 Chapter 2 Chapter 3 Chapter 4 Capture the subject with an AF point near the Chapter 5 Chapter 6 center, and then by moving the camera to the left, you can compose a photo with space on the left side of the frame. Shooting started by pinpointing focus on the leader of a cycling road race with a manually selected AF point. While taking continuous shots, the camera was moved to the left so the following cyclists on the left of the leader are rendered beautifully out of focus in the background. 71

72 CONTENTS Chapter 1 Chapter 2 Chapter 3 Chapter 4 Auto selection AF is effective to include the background (on the right or left) in the photo Hints & Tips With AF4 [Initial AF pt for AI Servo AF during Auto selection AF], it is possible to have Auto selection AF start from a manually Chapter 5 Chapter 6 selected AF point. During AI Servo AF, if the [Initial AF pt for AI Servo AF during Auto selection AF] setting is [Auto], the first subject to be captured will be selected automatically. When you want to start shooting from a manually selected AF point, set to a setting other than [Auto]. (Refer to P. 121) 72
73 CONTENTS Chapter 1 Chapter 2 Chapter 3 Chapter 4 Chapter 5 Chapter 6 EOS itr (intelligent tracking and recognition) AF This is the algorithm used to determine AF point auto switching during [Auto selection AF], [Large Zone AF], and [Zone AF]. By detecting people's faces and subject's colors, extremely accurate subject detection and tracking is possible. EOS itr AF does not operate outside of [Auto selection AF], [Large Zone AF], and [Zone AF]. Increased precision of face and color detection, and improved auto selection and tracking performance EOS isa (Intelligent Subject Analysis) System analyzes the subject for brightness, color, people and scene types etc. EOS itr (Intelligent Tracking and Recognition) AF performs the automatic selection of AF points, and tracking based on the EOS isa information such as the detected subject s face, color, or shape. Use of the 360,000 dot RGB + IR metering sensor makes it possible to effectively detect, select, and track faces that appear on the screen even when they are small. [Enable (face detection)], [Enable], and [Disable] can be set according to the photographic objective. 73
![CONTENTS Chapter 1 Chapter 2 Chapter 3 Chapter 4 Chapter 5 Chapter 6 Automatic selection: EOS itr AF [EOS itr AF (Face priority)] With priority on people's face information, AF point selection and](/docs-images/83/87151151/images/74-0.jpg "subject detection is performed baesd on AF and subject s color information. It is effective when you want to perform tracking with emphasis on faces.")
74 CONTENTS Chapter 1 Chapter 2 Chapter 3 Chapter 4 Chapter 5 Chapter 6 Automatic selection: EOS itr AF [EOS itr AF (Face priority)] With priority on people's face information, AF point selection and subject detection is performed baesd on AF and subject s color information. It is effective when you want to perform tracking with emphasis on faces. [EOS itr AF] In addition to face information and color information, face tracking of the subject is performed with emphasis on the information for the position first focused on during AI Servo AF. Select when you want to efficiently use EOS itr AF even when a face cannot be detected, or the subject is not a person. [Disable] This performs AF point selection and subject tracking with only AF information, and does not use face information or color information. 74
] A photo of an athlete photographed in the center of the screen")

![priority)].](/docs-images/83/87151151/images/75-2.jpg "In this way, even when the location of a person's face moves around the screen")
75 CONTENTS Chapter 1 Chapter 2 Chapter 3 Track and focus on the athlete s face with [EOS itr AF (Face priority)] A photo of an athlete photographed in the center of the screen as she leaps during the long-jump. It was shot using [Auto selection AF] with EOS itr AF set to [EOS itr AF (Face priority)]. In this way, even when the location of a person's face moves around the screen erratically, it is possible to track the subject while precisely selecting the subject with [EOS itr AF (Face priority)]. Chapter 4 Chapter 5 Chapter 6 75
76 CONTENTS Chapter 1 Chapter 2 Chapter 3 Chapter 4 Chapter 5 Chapter 6 Chapter 4 61-point AF Overview of EOS-1D X 61-Point High-Density Reticular AF II 61-point AF (1) The number and placement of cross-type points when using f/2.8 lenses 61-point AF (2) The number and placement of cross-type points when using f/4 lenses 61-point AF (3) The number and placement of cross-type points when using f/5.6 lenses 61-point AF (4) The number and placement of cross-type points when using f/8 lenses 76
77 CONTENTS Chapter 1 Chapter 2 Chapter 3 Chapter 4 Overview of EOS-1D X 61-Point High-Density Reticular AF II The 61-point AF has numerous cross-type points for great tracking performance Up to 41-point cross-type AF enabling superior tracking performance with most lenses The following diagram shows the distribution of the 61-point cross-type AF points on the EOS-1D X Mark II. The five vertical AF points at the center operate as dual cross-type AF points at f/2.8, and 20 other AF points on left and right operate at f/4 and as cross-type at f/5.6. The many AF points make it possible to focus with high precision and high tracking performance. Chapter 5 Chapter 6 *The colored AF points are for illustrative purpose only. This does not represent the actual viewfinder display. f/2.8 and f/5.6 cross-type AF (dual-cross AF) f/5.6 cross-type AF f/4 (vertical-line focusing) + f/5.6 (horizontal-line focusing) cross-type AF f/5.6 (horizontal-line focusing) AF 77

78 CONTENTS Chapter 1 Chapter 2 Chapter 3 Chapter 4 Newly developed 61-point AF sensor In order to achieve even higher performance AF than the EOS-1D X, a newly developed AF sensor is included on the EOS-1D X Mark II. The expanded area of AF point allocation allows freedom of composition, and the large number of cross-type AF points achieves great tracking performance. And as a result of two-line AF sensors in a zigzag pattern, tracking performance is improved for low contrast subjects as well. In addition to all AF points supporting f/8 AF, basic performance is improved so the center AF points expand to low-intensity limit EV-3. Cross type AF: f/4 horizontal-line + f/5.6/f/8 vertical-line Cross type AF: f/5.6/f/8 vertical-line + f/5.6/f/8 horizontal-line Chapter 5 Chapter 6 f/5.6/f/8 vertical-line AF 78 Dual cross type AF: f/2.8 right diagonal-line + f/2.8 left diagonal-line, f/5.6/f/8 vertical-line + f/5.6/f/8 horizontal-line
79 CONTENTS Chapter 1 Chapter 2 Chapter 3 Chapter 4 Chapter 5 Chapter 6 Up to 41-point AF cross focusing is possible even using lenses with a maximum aperture f-number of f/4. In addition, f/8 AF is possible with all 61 AF points The AF system of the EOS-1D X Mark II has many attractive features such as the high level of composition freedom with 61 different AF points, AF area selection modes that utilize the merits of the multi-point AF system, and implementation of the AF Configuration Tool which takes advantage of the improved AI Servo AF. In addition to these, is the high precision and improved tracking performance of each AF point to capture the subject. The same as the EOS-1D X, most f/2.8 - f/4 lenses can utilize the high-performance 41-point cross- type AF points. Thank to the numerous high precision f/2.8 and f/4 AF points, focusing with higher precision than before when using larger aperture lenses can be achieved. Also, on the EOS-1D X the only f/8 supported points were the center point the center point, and AF point expansion to the four points on the top, bottom, and left, so being able to use all 61 points is a main feature. Even with the condition of a maximum aperture value of f/8 using an extender, etc., it is now possible to use all AF points with high precision focusing. 79


80 CONTENTS Chapter 1 Chapter 2 Chapter 3 Chapter 4 Chapter 5 Chapter 6 61-point AF (1) The number and placement of cross-type points when using f/2.8 lenses 41-point cross-type AF points and 5 Dual Cross -f/2.8 AF points can be used with many lenses Most large-aperture lenses with a maximum aperture up to f/2.8 are in Group A. With this group, the five vertical f/2.8 dual-cross AF points, and the left and right f/4 and f/5.6 cross-type AF points (20 points) can be used. There are a total of 41 cross-type points including the f/5.6 cross-type points. Lenses with a maximum aperture of f/2.8 in Group B, will only have a single f/2.8 dual-cross AF point in the center. 80 EF400mm F2.8L IS II USM EF85mm F1.2L II USM
81 CONTENTS Chapter 1 Chapter 2 Chapter 3 Chapter 4 Chapter 5 Chapter 6 Group A 41-point cross-type AF, with five f/2.8 dual-cross AF points at the center AF focusing is possible with all 61 points. All AF area selection modes can be chosen. Major lenses EF24mm F1.4L USM EF35mm F2 IS USM EF35mm F1.4L II USM EF50mm F1.0L USM EF50mm F1.4 USM EF50mm F1.8 STM EF85mm F1.2L II USM EF100mm F2 USM EF135mm F2L USM + Ext EF1.4x EF200mm F1.8L USM EF200mm F2L IS USM EF200mm F2.8L USM EF300mm F2.8L USM EF300mm F2.8L IS II USM EF400mm F2.8L II USM EF400mm F2.8L IS II USM TS-E90mm F2.8* EF16-35mm F2.8L II USM EF35mm F1.4L USM EF24-70mm F2.8L II USM EF70-200mm F2.8L IS USM 81 f/2.8 and f/5.6/f/8 (dual-cross AF) f/4 and f/5.6/f/8 (cross-type AF) f/5.6 and f/8 (cross-type AF) f/5.6 and f/8 (horizontal-line focusing AF EF24mm F1.4L II USM EF28mm F1.8 USM EF35mm F2 IS USM EF50mm F1.2L USM EF50mm F1.8 II EF85mm F1.2L USM EF85mm F1.8 USM EF135mm F2L USM EF135mm F2.8 (with soft focus) EF200mm F1.8L USM + Ext EF1.4x EF200mm F2L IS USM + Ext EF1.4x EF200mm F2.8L II USM EF300mm F2.8L IS USM EF400mm F2.8L USM EF400mm F2.8L IS USM TS-E45mm F2.8* EF16-35mm F2.8L USM EF17-35mm F2.8L USM EF28-70mm F2.8L USM EF70-200mm F2.8L USM EF70-200mm F2.8L IS II USM * Focus confirmation light works during manual focus (without any tilt or shift movements). Ext EF1.4x is an abbreviation of various EF 1.4x Extenders.
82 CONTENTS Chapter 1 Chapter 2 Chapter 3 Chapter 4 Chapter 5 Chapter 6 Group B 41-point cross-type AF, with one f/2.8 dual-cross AF point at the center AF focusing is possible with all 61 points. All AF area selection modes are available. Group D 82 Major lenses EF14mm F2.8L USM EF14mm F2.8L II USM EF15mm F2.8 Fisheye EF20mm F2.8 USM EF24mm F2.8 EF24mm F2.8 IS USM EF28mm F2.8 IS USM EF24-70mm F2.8L USM 31-point cross-type AF, with one f/2.8 dual-cross AF point at the center AF focusing is possible with 61 points. All AF area selection modes are available. Major lenses EF28mm F2.8 EF40mm F2.8 STM


83 CONTENTS Chapter 1 Chapter 2 Chapter 3 Chapter 4 Chapter 5 Chapter 6 61-point AF (2) The number and placement of cross-type points when using f/4 lenses 41-point cross-type AF points can be used In Group C, 41-point cross-type AF points can be used with lenses having an f/4 maximum aperture (or many f/2.8 maximum aperture lenses using the EF 1.4x Extenders). Of these, the 20 points on the left and right are f/4 and f/5.6 cross-type AF providing even higher precision focusing in these areas than with previous cameras. Some macro lenses with a maximum aperture of f/2.8 are also included. EF70-200mm f/4l IS USM 83 EF16-35mm f/4 L IS USM
84 CONTENTS Chapter 1 Chapter 2 Chapter 3 Chapter 4 Chapter 5 Chapter 6 Group C 41-point cross-type AF points available, and they can be used with a high level of tracking performance AF focusing is possible with all 61 points. All AF area selection modes are available. Major lenses EF50mm f/2.5 Compact Macro EF100mm F2.8L Macro IS USM EF300mm F4L IS USM EF200mm F2.8L USM + Ext EF1.4x EF300mm F2.8L USM + Ext EF1.4x EF300mm F2.8L IS II USM + Ext EF1.4x EF400mm F2.8L II USM + Ext EF1.4x EF400mm F2.8L IS II USM + Ext EF1.4x EF200mm F1.8L USM + Ext EF2x EF8-15mm F4L fisheye USM EF17-40mm F4L USM EF24-105mm F4L IS USM EF70-200mm F4L IS USM EF70-200mm F2.8L USM + Ext EF1.4x EF70-200mm F2.8L IS II USM + Ext EF1.4x EF500mm F4L IS USM EF600mm F4L USM EF600mm F4L IS II USM TS-E24mm F3.5L 84 EF100mm F2.8 Macro EF300mm F4L USM EF400mm F4DO IS USM EF200mm F2.8L II USM + Ext EF1.4x EF300mm F2.8L IS USM + Ext EF1.4x EF400mm F2.8L USM + Ext EF1.4x EF400mm F2.8L IS USM + Ext EF1.4x EF135mm F2L USM + Ext EF2x EF200mm F2L IS USM + Ext EF2x EF16-35mm F4L IS USM EF24-70mm F4L IS USM EF28-80mm F2.8-4L USM EF70-200mm F4L USM EF70-200mm F2.8L IS USM + Ext EF1.4x EF400mm F4 DO IS II USM EF500mm F4L IS II USM EF600mm F4L IS USM TS-E17mm F4L TS-E24mm F3.5L II
85 CONTENTS Chapter 1 Chapter 2 Chapter 3 Chapter 4 Group E 31-point cross-type AF points available, with 10 cross-type points supported f/4 + f/5.6 AF can be carried out using 61 points You can choose all AF area selection modes. Major lenses EF11-24mm F4L USM EF mmF4L IS USM Ext 1.4 Chapter 5 Chapter 6 85
, almost all")

86 CONTENTS Chapter 1 Chapter 2 Chapter 3 Chapter 4 61-point AF (3) The number and placement of cross-type points when using f/5.6 lenses The majority of lenses can make use of the central 21-point cross-type AF With the exception of a small group of lenses (groups G and H), almost all lenses that have a maximum aperture up to f/5.6 are included in Group F, and can use the 21-point cross-type AF (f/5.6 cross-type) in the central area. Many f/2.8 maximum aperture large aperture telephoto lenses when used with the various EF 2x Extenders will fit into this group. EF mm F L IS II USM Chapter 5 Chapter 6 EF70-300mm F4-5.6L IS USM 86
87 CONTENTS Chapter 1 Chapter 2 Chapter 3 Chapter 4 Chapter 5 Chapter 6 Group E The central 21-point cross-type AF can be used AF focusing is possible with 61 points. All AF area selection modes are available. Major lenses EF 50mm f/2.5 compact macro + life size converter EF EF100mm F2.8 Macro USM EF400mm F5.6L USM EF500mm F4.5L USM EF300mm F4L USM + Ext EF1.4x EF300mm F4L IS USM + Ext EF1.4x EF400mm F4 DO IS USM + Ext EF1.4x EF400mm F4DO IS II USM+Ext EF1.4x EF500mm F4L IS USM + Ext EF1.4x EF600mm F4L USM + Ext EF1.4x EF600mm F4L IS USM + Ext EF1.4x EF200mm F2.8L USM + Ext EF2x EF200mm F2.8L II USM + Ext EF2x EF300mm F2.8L USM + Ext EF2x EF300mm F2.8L IS USM + Ext EF2x EF300mm F2.8L IS II USM + Ext EF2x EF400mm F2.8L USM + Ext EF2x EF400mm F2.8L II USM + Ext EF2x EF400mm F2.8L IS USM + Ext EF2x EF400mm F2.8L IS II USM + Ext EF2x EF500mm F4L IS II USM + Ext EF1.4x EF600mm F4L IS II USM + Ext EF1.4x EF24-105mm F IS STM EF70-200mm F2.8L USM + Ext EF2x EF70-200mm F2.8L IS USM + Ext EF2x EF70-200mm F2.8L IS II USM + Ext EF2x EF70-200mm F4L USM + Ext EF1.4x EF70-200mm F4L IS USM + Ext EF1.4x EF28-300mm F L IS USM EF70-300mm F4-5.6 IS USM EF70-300mm F4-5.6L IS USM EF70-300mm F DO IS USM EF mm F L IS USM EF mm F L IS II USM EF mm F4L IS USM +Ext EF 1.4 (*1) - *1 When using built-in Ext EF x1.4 or externally-mounted Ext EF x1.4 87
88 CONTENTS Chapter 1 Chapter 2 Chapter 3 Chapter 4 Group G 21-points cross-type available, total of 47 AF points available to select AF focusing is possible with 47 points (61-point AF is not possible). All AF area selection modes are available. Group H Major lenses EF800mm F5.6L IS USM EF35-350mm F L USM 15-points cross-type available, total of 33 AF points available to select AF focusing is possible with 33 points (61-point AF is not Chapter 5 Chapter 6 possible). All AF area selection modes are available. 88 Major lenses EF180mm F3.5L Macro USM EF180mm F3.5L Macro USM + Ext. EF1.4x EF1200mm F5.6L USM
89 CONTENTS Chapter 1 Chapter 2 Chapter 3 Chapter 4 Group K Single cross-type AF point available You can carry out AF focusing with five points, but it is not possible to manually select the points above, below, to the left and right. The following AF area selection modes are available: Single-point Spot AF, Single-point AF, and AF point expansion (the points above, below, left, and right). f/5.6 and f/8support (vertical-line focusing AF) Major lenses EF35-105mm F EF35-105mm F USM Chapter 5 Chapter 6 89


90 CONTENTS Chapter 1 Chapter 2 Chapter 3 Chapter 4 61-point AF (4) The number and placement of cross-type points when using f/8 lenses AF shooting is possible on most lenses using all AF points with a maximum aperture value of f/8 When using an extender on the EOS-1D X Mark II, AF is possible using all 61 points even on most lens with a total maximum aperture of f/8. This combination of a lens with a maximum aperture value of f/4 + Ext EF2x and a lens with a main maximum aperture value of f/5.6 + Ext EF1.4x belongs in group H. For example, AF focusing is possible even when shooting with an EF2x extender attached to an EF 500mm F4L IS II USM with a focal length of 1000mm, making extra line return that is not needed. EF500mm F4L IS II USM Chapter 5 Chapter 6 90 Extender EF 2x III
91 CONTENTS Chapter 1 Chapter 2 Chapter 3 Chapter 4 Chapter 5 Chapter 6 Group F (f/8 supported AF points) AF is possible with all 61 points Cross-type AF is possible with 21 points AF focusing is possible with all 61 points. All AF area selection modes can be chosen. Major lenses EF400mm F2.8L IS II USM+ Ext EF2x EF400mm F4 DO IS II USM+ Ext EF1.4x EF500mm F4L IS II USM+ Ext EF1.4x EF600mm F4L IS II USM+ Ext EF1.4x EF70-200mm F2.8L IS II USM+ Ext EF2x EF70-200mm F4L IS USM+ Ext EF1.4x EF mm F L IS II USM+ Ext EF1.4x EF mm F4L IS USM Ext 1.4x Ext EF2xIII EF400mm F4 DO IS II USM+ Ext EF2xIII EF400mm F5.6L USM+ Ext EF1.4xIII EF500mm F4L IS USM+ Ext EF2xIII EF600mm F4L IS USM+ Ext EF2xIII EF600mm F4L USM+ Ext EF2xIII EF400mm F2.8L II USM+ Ext EF2x EF600mm F4L USM+ Ext EF1.4x 91 EF400mm F2.8L IS USM+ Ext EF2x EF400mm F4 DO IS USM+ Ext EF1.4x EF500mm F4L IS USM+ Ext EF1.4x EF600mm F4L IS USM+ Ext EF1.4x EF70-200mm F2.8L IS USM+ Ext EF2x EF70-200mm F4L USM+ Ext EF1.4x EF mm F L IS USM+ Ext EF1.4x EF mm F4L IS USM Ext 1.4x: using built-in Ext + Ext EF1.4x III EF400mm F4 DO IS USM+ Ext EF2xIII EF500mm F4L IS II USM+ Ext EF2xIII EF600mm F4L IS II USM+ Ext EF2xIII EF500mm F4.5L USM+ Ext EF1.4xIII EF300mm F2.8L USM+ Ext EF2x EF400mm F2.8L USM+ Ext EF2x EF70-200mm F2.8L USM+ Ext EF2x * Ext EF1.4x is an abbreviation of EF 1.4x Extender, and Ext EF2x is an abbreviation of EF2x Extender. Extenders without the type (I, II, or III) indicated after 1.4x or 2x can be used with all I, II, or III types.
92 CONTENTS Chapter 1 Chapter 2 Chapter 3 Chapter 4 Group I AF is possible with 13 points AF is possible with the center point AF focusing is possible with 13 points. The following AF area selection modes are available: Single-point Spot AF, Single-point AF, Shooting with AF point expansion (up, down, left, and right), Zone AF (manual selection of zone), and Auto selection of 13 AF points. Major lenses EF300mm F4L IS USM+ Ext EF2x III EF300mm F4L USM+ Ex EF2x III EF70-200mm F4L IS USM+ Ext EF2x III EF70-200mm F4L USM+ Ext EF2x III Chapter 5 Chapter 6 92
93 CONTENTS Chapter 1 Chapter 2 Chapter 3 Chapter 4 Chapter 5 Chapter 6 Group J AF is possible with 9 points AF is possible with the center point AF focusing is possible with 9 points. The following AF area selection modes are available: Single-point Spot AF, Single-point AF, Shooting with AF point expansion (up, down, left, and right), and Auto selection of 9 AF points. Major lenses EF mm F L IS II USM+ Ext EF1.4x I/II EF mm F4L IS USM Ext 1.4x+ Ext EF1.4x I/II EF300mm F4L IS USM+ Ext EF2x I/II EF400mm F4 DO IS II USM+ Ext EF2x I/II EF400mm F5.6L USM+ Ext EF1.4x I/II EF500mm F4L IS II USM+ Ext EF2x I/II EF600mm F4L IS II USM+ Ext EF2x I/II EF600mm F4L USM+ Ext EF2x I/II EF70-200mm F4L USM+ Ext EF2x I/II 93 EF mm F L IS USM+ Ext EF1.4x I/II EF mm F4L IS USM Ext 1.4x: using built-in Ext + Ext EF1.4x I/II EF300mm F4L USM+ Ext EF2x I/II EF400mm F4 DO IS USM+ Ext EF2x I/II EF500mm F4.5L USM+ Ext EF1.4x I/II EF500mm F4L II USM+ Ext EF2x I/II EF600mm F4L IS USM+ Ext EF2x I/II EF70-200mm F4L IS USM+ Ext EF2x I/II EF800mm F5.6L IS EF1.4x+ Ext EF1.4x EF1200mm F5.6L USM+ Ext EF1.4x - Ext EF1.4x is an abbreviation of EF 1.4x Extender, and Ext EF2x is an abbreviation of EF2x Extender. Extenders without the type (I, II, or III) indicated after 1.4x or 2x can be used with all I, II, or III types.

94 CONTENTS Chapter 1 Chapter 2 Chapter 3 Chapter 4 Chapter 5 Chapter 6 Capability of f/8 supported AF points When using an extender and a maximum aperture of f/8, all 61 AF points and AF area selection mode can be fully utilized on most lenses. As indicated in the chart on P. 92 "Group F (f/8 supported AF points," with the combination of most lenses and extenders that total a maximum aperture of f/8, AF is possible with all AF points. In addition, in this case the AF area selection modes such as auto selection AF and Zone AF can all be used. Therefore, it is effective when using a combination of Lens Extender EF 2x with a lens with a maximum aperture of f/4, or Lens Extender EF1.4x with a lens with a maximum aperture of f/5.6. Utilizing an extender is recommended when you want to do telephoto shooting with your existing lenses. Shot with Extender EF 2x III attached to EF500mm F4L IS II USM. * Check with Group F, Group I, and Group J on P for combinations of lenses with f/8 supported AF points and extenders. 94
95 CONTENTS Chapter 1 Chapter 2 Chapter 3 Chapter 4 Chapter 5 Chapter 6 Chapter 5 Release property settings and anti-flicker shooting AF operation and shutter-release timing settings Anti-flicker shooting 95


96 CONTENTS Chapter 1 Chapter 2 Chapter 3 Chapter 4 Chapter 5 Chapter 6 AF operation and shutter-release timing settings You can set whether focusing or shutter-release has priority 1 Shutter-release parameters during AI Servo [Set in the AF 2 tab] 1st image parameter [AI Servo 1st image priority] Equal priority This setting gives an equal priority to both focus and shutterrelease. Release priority This setting gives priority to shutter-release and will capture an image even if it is out of focus. It is effective when you want to minimize any delay when shooting, sacrificing AF performance. Focus priority This setting gives priority to focusing on a subject and it will not capture an image unless it is in focus. It is recommended when you want to ensure your images are in focus sacrificing response speed. 96
97 CONTENTS Chapter 1 Chapter 2 Chapter 3 Chapter 4 Chapter 5 Chapter 6 2 Parameters during continuous shooting [AI Servo 2nd image priority] Equal priority This setting gives equal priority to both focus and shooting speed during continuous shooting. The speed of continuous shooting may also slow down when it is dark, or in low contrast. Shooting speed priority This setting gives priority to continuous shooting speed over focus. Continuous shooting speed will not drop. Effective when you want to shoot with an approximate fixed interval between photos. A setting of [-2] will maintain continuous shooting speed. Focus priority This setting gives priority to focusing over continuous shooting speed. It will not shoot a picture unless it is in focus. It is recommended when you want to shoot only after focusing on the subject. This setting makes the most of AF low-light performance but when [+2] is selected the continuous shooting rate will be reduced. 97
![CONTENTS Chapter 1 Chapter 2 Chapter 3 Chapter 4 Chapter 5 Chapter 6 Shutter-release parameter for One-Shot AF [Set in the AF3 tab] [One-Shot AF release priority] Focus priority You cannot shoot a](/docs-images/83/87151151/images/98-0.jpg "picture unless it is in focus. It is effective when you want to shoot only after focusing on the subject. Release priority Priority is on the shooting timing rather than focus.")
98 CONTENTS Chapter 1 Chapter 2 Chapter 3 Chapter 4 Chapter 5 Chapter 6 Shutter-release parameter for One-Shot AF [Set in the AF3 tab] [One-Shot AF release priority] Focus priority You cannot shoot a picture unless it is in focus. It is effective when you want to shoot only after focusing on the subject. Release priority Priority is on the shooting timing rather than focus. It is recommended only when you want to put priority on capturing brief photo opportunities rather than focus. 98

![Anti-flicker shooting [Set in the tab] Anti-flicker shooting When shootin fast shutter speeds under artificial light sources, flickering caused by the flicker of the lights can cause exposure and](/docs-images/83/87151151/images/99-1.jpg "color irregularities. Anti-flicker shooting is a function that reduces the negative influence on exposure and color caused by this kind of flickering by optimizing the shooting timing.")
99 CONTENTS Chapter 1 Chapter 2 Chapter 3 Chapter 4 Chapter 5 Chapter 6 Anti-flicker shooting By controlling the shooting timing, this function makes it possible to reduce exposure and color irregularities that can occur due to flickering lighting during continuous shooting with fast shutter speeds under artificial light sources. Anti-flicker shooting [Set in the tab] Anti-flicker shooting When shootin fast shutter speeds under artificial light sources, flickering caused by the flicker of the lights can cause exposure and color irregularities. Anti-flicker shooting is a function that reduces the negative influence on exposure and color caused by this kind of flickering by optimizing the shooting timing. It is effective when shooting with fast shutter speeds with the kind of light sources that display the [Flicker!] detection icon in the Intelligent Viewfinder (P. 120). * As the influence of flickering can appear with shutter speeds of 1/250 sec. or faster, this is simply a guideline for using [Anti-flicker shooting]. 99


![[Disable], photos shot with Antiflicker shooting set to](/docs-images/83/87151151/images/100-2.jpg "[Enable] can be shot continuously with stable exposure and")

100 CONTENTS Chapter 1 Chapter 2 Chapter 3 Chapter 4 Chapter 5 Chapter 6 Reduction of exposure and color irregularities during anti-flicker shooting Anti-flicker shooting Anti-flicker shooting [Enable] [Disable] When compared to [Disable], photos shot with Antiflicker shooting set to [Enable] can be shot continuously with stable exposure and color. Please note that it does not operate while shooting with the mirror locked up, during Live View shooting, or during movie shooting. 100
101 CONTENTS Chapter 1 Chapter 1 Chapter 2 Chapter 3 Chapter 4 Chapter 5 Chapter 6 Chapter 6 Utilizing the AF and Movie Servo AF Other useful functions (1) Utilizing the AF point setting and registration Automatic switching of AF points for horizontal and vertical shooting Utilizing the AF point setting and registration [Separate AF points: Point only] is added to [Orientation linked AF point] Utilizing the AF point setting and registration Instantly recall AF points using [Switch to registered AF point] Instantly switch AF area selection modes Intelligent Viewfinder II Synchronize initial AF point used for auto selection AF with manually selected point Assigning functions to the button Custom Controls detailed settings 101
102 CONTENTS Chapter 1 Chapter 1 Chapter 2 Chapter 3 Chapter 4 Chapter 5 Chapter 6 Chapter 6 Custom Controls Rotation setting of functions Movie servo AF Using ISO Auto Exposure compensation is possible in M mode and ISO Auto Using ISO Auto Minimum shutter speed during ISO Auto expanded to 1/8000 sec. 102
103 CONTENTS Chapter 1 Chapter 1 Chapter 2 Chapter 3 Chapter 4 Chapter 5 Chapter 6 Utilizing the AF point setting and registration Automatic switching of AF points for horizontal and vertical shooting AF point settings for the horizontal position and the vertical position are especially useful. By selecting [Separate AF pts: Area+pt] from [Orientation linked AF point], individual settings for each of the AF area selection modes and the manually selected AF points can be stored in the camera memory. Automatic switching between registered AF points Use [Orientation linked AF point] in the [AF4] tab to set the AF points for each orientation 1 Set up steps Select the [Separate AF points] options from [Orientation linked AF point] 103
104 CONTENTS Chapter 1 Chapter 1 Chapter 2 Chapter 3 Chapter 4 Chapter 5 Chapter 6 2 A Change the camera position and select the desired AF point or AF mode Horizontal position B Vertical position with grip at the top C Set up steps Vertical position with grip at the bottom Select the AF frame for each position 104

105 CONTENTS Chapter 1 Chapter 1 Chapter 2 Chapter 3 Chapter 4 Chapter 5 Chapter 6 3 Set up steps [AF area selection mode] Select the [AF area selection mode] in each position 105
![CONTENTS Chapter 1 Chapter 1 Chapter 2 Chapter 3 Chapter 4 Chapter 5 Chapter 6 Set up steps First, select [Separate AF pts: Area+pt] from [Orientation linked AF point].](/docs-images/83/87151151/images/106-0.jpg "Next, select the AF area selection mode and the manually selected AF point for each of the positions (orientation) of A) Horizontal position, B) Vertical position with grip at the top, and C)")
106 CONTENTS Chapter 1 Chapter 1 Chapter 2 Chapter 3 Chapter 4 Chapter 5 Chapter 6 Set up steps First, select [Separate AF pts: Area+pt] from [Orientation linked AF point]. Next, select the AF area selection mode and the manually selected AF point for each of the positions (orientation) of A) Horizontal position, B) Vertical position with grip at the top, and C) Vertical position with grip at the bottom. The settings will automatically be remembered. Now, for each of these orientations it will automatically switch to the select mode and AF points. 106
107 CONTENTS Chapter 1 Chapter 1 Chapter 2 Chapter 3 Chapter 4 Chapter 5 Chapter 6 During sporting events or concerts, it is common to change the camera between horizontal and vertical positions. The EOS-1D X Mark II is equipped with an abundance of AF frames to choose from - 61 points to be exact. This provides a high degree of freedom when composing shots, however, one downfall is that, when the uppermost left AF point is selected for shooting while the camera is held in the horizontal position, when the grip is switched to the vertical position, the AF point ends up in the bottommost lower left of the screen. If you want to keep the entire body of the athlete in the frame while focusing on their face, you must choose another AF point. In situations like this, AF point settings for each position are especially useful. By selecting [Separate AF pts: Area+pt] from [Orientation linked AF point], individual settings for each of the AF area selection modes and the manually selected AF points can be stored in the camera memory. In the previous case, for example, if you set the center upper edge AF point beforehand when in the vertical position with the grip at the top, it is possible to have the AF point line up with the position of the face instantly when switching from the horizontal to vertical position. 107
108 CONTENTS Chapter 1 Chapter 1 Chapter 2 Chapter 3 Chapter 4 Chapter 5 Chapter 6 Utilizing the AF point setting and registration [Separate AF points: Point only] is added to [Orientation linked AF point] It is possible to have different AF points but use the same [AF area selection mode], for simple AF operation. Set different AF points but use the same AF area selection mode in vertical and horizontal positions. One more setting of [Orientation linked AF point] is [Separate AF points: Point only]. This lets you set different AF points but use the same AF area selection mode for vertical and horizontal positions. Because settings are simple, this is an excellent feature for shooting in the vertical and horizontal positions with the same [AF area selection mode]. 108
109 CONTENTS Chapter 1 Chapter 1 Chapter 2 Chapter 3 Chapter 4 Chapter 5 Chapter 6 [Separate AF points: Point only] With AF point expansion (Up, down, left, and right) mode, the selected AF point switches as is [Separate AF points: Area+Point] Switch also the [AF area selection mode] in [Select separate AF points: Area + points] 109
![CONTENTS Chapter 1 Chapter 1 Chapter 2 Chapter 3 Chapter 4 Chapter 5 Chapter 6 Utilizing the AF point setting and registration Instantly recall AF points using [Switch to registered AF point] You can](/docs-images/83/87151151/images/110-0.jpg "press a button and instantly switch to a registered AF points. Store your preferred AF point for instant access at the touch of a button Use [Custom Controls] from [C.")
110 CONTENTS Chapter 1 Chapter 1 Chapter 2 Chapter 3 Chapter 4 Chapter 5 Chapter 6 Utilizing the AF point setting and registration Instantly recall AF points using [Switch to registered AF point] You can press a button and instantly switch to a registered AF points. Store your preferred AF point for instant access at the touch of a button Use [Custom Controls] from [C.Fn5: operation] Using the [Custom Controls] option from the custom function [C.Fn5: operation] menu allows an AF point to be registered and recalled instantly. This function can also be used to assign various functions to the different camera controls. 110

 Press the button while pressing the button until you hear a beep.")
111 CONTENTS Chapter 1 Chapter 1 Chapter 2 Chapter 3 Chapter 4 Chapter 5 Chapter 6 A B Set up steps There are two options to customize the controls to register an AF point Assign button, or the [Metering - AF start] to the select [Registered AF point] Assign button then press info and [Switch to registered AF point] to the button,, or button. Press info to select if the option is applied only when the button is held or not Manually select AF points you will want to recall. (This is possible with all AF area selection modes except Zone AF) Press the button while pressing the button until you hear a beep. When the button, or the button are assigned to the function [Metering - AF start], instant switching of registered AF points becomes possible. Press the button in the [Customize Controls] assignment screen, and then select [Registered AF point]. Now when the button is held the AF will use the registered AF point. 111
.")
112 CONTENTS Chapter 1 Chapter 1 Chapter 2 Chapter 3 Chapter 4 Chapter 5 Chapter 6 4 Press the assigned button (selected in stage 1) to switch to the registered AF point. AF point registration and usage is described above. Also, for more advanced usage this setting can be combined with [Orientation linked AF point] setting (described on pages ). Selecting the option [Select separate AF points], from the [Orientation linked AF point] option makes it is possible to register and recall AF points separately for all three positions, vertical (grip top/ bottom), and horizontal as well as the remembered AF point for orientation. How to cancel registered [Switch to registered AF point] Press and. 112
113 CONTENTS Chapter 1 Chapter 1 Chapter 2 Chapter 3 Chapter 4 Chapter 5 Chapter 6 Another function that is effective for quickly switching AF points while shooting is AF point registration and recall feature possible using [Custom Controls]. There are several methods to achieve this; one is to assign registered AF points to a button via [Custom Controls] function. The second method is AF point or [AF area selection mode] registration. By carrying out either of the two options, you can press a button and instantly switch to registered AF points. Registering frequently used AF points, or a strategically placed AF point, enables instant response without the need to reframe or alter the cameras position. Further refinement in operation is possible, with the <Depth-offield preview>, and the < > buttons when set to ([Switch to registered AF point] setting). These buttons provide the possibility to [Switch only while pressed] or [Maintain switching until pressed again] settings, making detailed customization possible. Using these settings enables the camera suit the way you shoot. 113


114 CONTENTS Chapter 1 Chapter 1 Chapter 2 Chapter 3 Chapter 4 Chapter 5 Chapter 6 Shooting the side to side movement of tennis strokes. After photographing the player positioned to the right side with a manually selected AF point at the upper right, it was switched to the AF point registered at the upper left with a single push of a button, then the player was photographed returning a backhand shot positioned to the right side. 114
115 CONTENTS Chapter 1 Chapter 1 Chapter 2 Chapter 3 Chapter 4 Chapter 5 Chapter 6 Instantly switching AF area selection modes By assigning an [AF area selection mode] to a specific button in the [Custom Control] screen, you can continue shooting and switch AF areas instantly with the press of single button without having to move your eye from the viewfinder. Instantly switch AF area selection modes with a single button Assigning functions While shooting with an optional 'AF area selection mode' By pressing the assigned button You can switch the set AF area selection mode 115
116 CONTENTS Chapter 1 Chapter 1 Chapter 2 Chapter 3 Chapter 4 Chapter 5 Chapter 6 Buttons that can be assigned to switching AF area selection modes There are the five buttons that can be assigned to switch AF area selections modes. The button and button can be assigned with [Custom Controls] to [Register/recall shooting functions], and the button and button can be assigned with [Switch to registered AF functions]. 'Register/recal shooting functions' assigned to: AF-ON button AE lock button 'Switch to registered AF functions' assigned to: Lens AF stop button Multi function2 button Depth-of-field preview button 116

![[Register/recall shooting functions] Press the button Select the [AF area selection](/docs-images/83/87151151/images/117-2.jpg "mode] Assign [Register/recall shooting functions] to the button or the button with the")
![custom function s [Custom Controls].](/docs-images/83/87151151/images/117-3.jpg "Press the button on the assign function s selection screen (various functions can be")
117 CONTENTS Chapter 1 Chapter 1 Chapter 2 Chapter 3 Chapter 4 Chapter 5 Chapter 6 Set up steps [Register/recall shooting functions] Assign to the button, or the button to [Register/recall shooting functions] Press the button Select the [AF area selection mode] Assign [Register/recall shooting functions] to the button or the button with the custom function s [Custom Controls]. Press the button on the assign function s selection screen (various functions can be set), and set [AF area selection mode] that you want to use. 117
![CONTENTS Chapter 1 Chapter 1 Chapter 2 Chapter 3 Chapter 4 Chapter 5 Chapter 6 Set up steps [Switch to registered AF functions] Assign to the or depth-of-field preview button Press the button now](/docs-images/83/87151151/images/118-0.jpg "Select the [AF area selection mode] Assign [Switch to registered AF functions] to the button or button with [Custom Controls].")
118 CONTENTS Chapter 1 Chapter 1 Chapter 2 Chapter 3 Chapter 4 Chapter 5 Chapter 6 Set up steps [Switch to registered AF functions] Assign to the or depth-of-field preview button Press the button now Select the [AF area selection mode] Assign [Switch to registered AF functions] to the button or button with [Custom Controls]. Press the button on the assign function s selection screen, and from various AF functions, select the [AF area selection mode], and set to mode that you want to use. 118
119 CONTENTS Chapter 1 Chapter 1 Chapter 2 Chapter 3 Chapter 4 Chapter 5 Chapter 6 AF area selection modes such as [Single-point AF] and [AF point expansion] are effective for switching according to the size and type of subjects. While looking through the viewfinder it can be difficult to change the mode while tracking the subject. However, by assigning the AF area selection modes you want to use to specific buttons, you can switch instantly while continuing shooting. There are five buttons on P. 117 that can be assigned. Think about the characteristics of the sports and subjects you want to shoot beforehand, and assign the AF area selection modes you think you will use. By assigning different modes to each of the five buttons, you can control up to five modes at will. In addition, aside from the AF area selection modes, various functions can be registered and applied, so by making settings as needed, you have the flexibility to handle conditions as they change. 119

120 CONTENTS Chapter 1 Chapter 1 Chapter 2 Chapter 3 Chapter 4 Chapter 5 Chapter 6 Intelligent Viewfinder II In addition to displaying an electronic level at the top of the viewfinder's display, various settings can be displayed at the bottom. Using a transmissive LCD, this viewfinder can display a variety of information in your field of vision. Important camera settings such as AF area selection mode, shooting mode, metering mode, white balance, drive mode, AF operation, and flicker detection can be confirmed, and settings can be changed while looking through the viewfinder. Hints & Tips The items to display are selected from the settings 120 tab s [Viewfinder display] Utilize functions while looking through the viewfinder The EOS-1D X Mark II is equipped with operability to change settings and utilize functions while looking through the viewfinder. Use the AF point setting & registration and Custom Controls described in Chapter 6, and make use of the customization capabilities to quickly change necessary settings.
121 CONTENTS Chapter 1 Chapter 1 Chapter 2 Chapter 3 Chapter 4 Chapter 5 Chapter 6 Synchronize initial AF point used for auto selection AF with manually selected point When switching to [Auto selection AF] from another [AF area selection mode], the setting [Manual AF pt] activates auto selection AF starting with the AF point selected before switching in [Initial AF pt. AI Servo AF]. This is extremely effective for a series of scenes when switching to other modes to [Auto selection AF] for shooting. Use the AF point from another mode to move to auto selection Set [Initial AF pt. tab to [Initial AI Servo AF] of the [AF4] AF pt selected] 121
122 CONTENTS Chapter 1 Chapter 1 Chapter 2 Chapter 3 Chapter 4 Chapter 5 Chapter 6 [Manual selection: 1 point AF] [Auto selection AF] For example, this is effective when switching from [Manual selection: 1 point AF] to [Auto selection AF] when continuously shooting an athlete to track and shoot. 122

123 CONTENTS Chapter 1 Chapter 1 Chapter 2 Chapter 3 Chapter 4 Chapter 5 Chapter 6 Assigning functions to the button This introduces a few useful settings that can be assigned with customization function C.Fn5 [Custom Controls]. 1 Detailed settings for button s [AF/Metering start] Four settings can be assigned such as [AI Servo AF characteristics] In C.Fn5 [Custom Controls], press the 123 button while [AF/Metering start] is selected for and buttons to display the detailed settings screen. You can perform four settings from this screen. Press the button when the Custom Controls is in button In detailed settings, the following four parameters can be set: [AF start position], [AI Servo AF characteristics], [AF operation], and [AF area selection mode]
 to button (Case2) to shoot when there are many obstacles Switch AI Servo AF characteristics")
 to each button, it is possible to switch to the optimal AI Servo AF characteristics depending on the subject and")
124 CONTENTS Chapter 1 Chapter 1 Chapter 2 Chapter 3 Chapter 4 Chapter 5 Chapter 6 This feature makes it possible to instantly switch between continuous shooting modes using the two adjacent buttons Assign [Case1] to When usually using the shoot, use the Example: 124 Assign [Case2] to button (Case1) to button (Case2) to shoot when there are many obstacles Switch AI Servo AF characteristics with the button and button When you assign functions to the and buttons, those two adjacent buttons can be used to instantly switch functions for shooting. For example, when assigning the two often used AI Servo AF characteristics (Cases) to each button, it is possible to switch to the optimal AI Servo AF characteristics depending on the subject and if any obstructions may enter the frame.
![CONTENTS Chapter 1 Chapter 1 Chapter 2 Chapter 3 Chapter 4 Chapter 5 Chapter 6 2 Assign [ONE SHOT AI SERVO] to the and buttons It is](/docs-images/83/87151151/images/125-0.jpg "possible to assign [ONE SHOT AI SERVO] to the and buttons using Custom Controls You can switch the AF operation while the button is")
125 CONTENTS Chapter 1 Chapter 1 Chapter 2 Chapter 3 Chapter 4 Chapter 5 Chapter 6 2 Assign [ONE SHOT AI SERVO] to the and buttons It is possible to assign [ONE SHOT AI SERVO] to the and buttons using Custom Controls You can switch the AF operation while the button is pressed. 125


![viewfinder Although it is possible to assign [ONE SHOT AI SERVO] to](/docs-images/83/87151151/images/126-2.jpg "the and buttons, when it is difficult to press these buttons on the")

126 CONTENTS Chapter 1 Chapter 1 Chapter 2 Chapter 3 Chapter 4 Chapter 5 Chapter 6 When it is difficult to press the 126 and buttons which could be used for assigning functions The buttons can easily be used to switch to One Shot and AI Servo while looking through the viewfinder Although it is possible to assign [ONE SHOT AI SERVO] to the and buttons, when it is difficult to press these buttons on the front of the camera, it is effective to assign this function to the and buttons. When quick shooting is required, you can now instantly switch AF modes.
127 CONTENTS Chapter 1 Chapter 1 Chapter 2 Chapter 3 Chapter 4 Chapter 5 Chapter 6 There are many useful settings that can be assigned to each button with customization function C.Fn5 [Custom Controls]. For example, when using AF functions that can be assigned to the and buttons on the back of the camera, you can instantly switch functions to match the subject and situation without changing how you hold the camera. When [AF/Metering start] is assigned to the or buttons, you can perform detailed settings in [AF start point], [AI Servo AF characteristics (Case)], [AF operation], and [AF area selection mode]. Using those settings, you can instantly switch parameters to match subject movement and characteristics by using the button to switch to Case1, and the button to switch to Case2, or using the button to switch to AI Servo AF, and the button to switch to One Shot. [ONE SHOT AI SERVO] can also be assigned to the and buttons. You can customize controls to meet your preferences or the scene. 127
![CONTENTS Chapter 1 Chapter 1 Chapter 2 Chapter 3 Chapter 4 Chapter 5 Chapter 6 Custom Controls detailed settings When assigning functions with Custom Controls, if the [ ] button](/docs-images/83/87151151/images/128-1.jpg "displays at the bottom left of the screen, there are more detailed function settings available. Detailed setting items have been added to the EOS-1D X Mark II.")
![1 2 Detailed settings added to the EOS-1D X Mark II Detailed settings to assign [ONE SHOT SERVO] to the [Switch only when btn is held] [Switch each time btn is pressed] 128 AI](/docs-images/83/87151151/images/128-2.jpg "buttons Detailed settings for assigning [Direct AF point selection] to the Quick Control Dial/Multi-controller [Direction: AF point switching] and [Direction: Zone AF frame switch]")
128 CONTENTS Chapter 1 Chapter 1 Chapter 2 Chapter 3 Chapter 4 Chapter 5 Chapter 6 Custom Controls detailed settings When assigning functions with Custom Controls, if the [ ] button displays at the bottom left of the screen, there are more detailed function settings available. Detailed setting items have been added to the EOS-1D X Mark II. 1 2 Detailed settings added to the EOS-1D X Mark II Detailed settings to assign [ONE SHOT SERVO] to the [Switch only when btn is held] [Switch each time btn is pressed] 128 AI buttons Detailed settings for assigning [Direct AF point selection] to the Quick Control Dial/Multi-controller [Direction: AF point switching] and [Direction: Zone AF frame switch] detailed settings are possible
129 CONTENTS Chapter 1 Chapter 1 Chapter 2 Chapter 3 Chapter 4 Chapter 5 Chapter 6 When assigning functions to buttons with Custom Controls, the [< > detailed settings] item will display at the bottom left of the setting screen. By pressing the < > button at this time, it is possible to perform detailed settings for the assign function. With the EOS-1D X Mark II, [Switch only when btn is held] and [Switch each time btn is pressed] detailed settings have been added to [One-Shot AF Servo] and [Switch to registered AF point] function assignments. For example, even when you want to use [One-Shot AF] and [AI Servo AF] at about the same ratio, the [Switch each time btn is pressed] detailed setting is effective. In addition, [Direction: AF point switchin] and [Direction: Zone AF frame switch] detailed settings are possible for function assignment of [Direct AF point selection] to the Quick Control Dial. You can utilize the detailed settings to carry out customization for even greater ease of use. 129

130 CONTENTS Chapter 1 Chapter 1 Chapter 2 Chapter 3 Chapter 4 Chapter 5 Chapter 6 Custom Controls Rotation setting of functions By pressing the button, included functions such as ISO speed, white balance, and drive mode can be switched, and each of the settings can be changed. It is possible to switch by rotating through the shooting function settings. Setting of shooting functions is possible without searching with just the button and the dials. Assign [Cycle between the set functions] to the button with [Custom Controls]. By carrying out this assignment, shooting function settings will switch between ISO speed, exposure compensation/aperture value, and white balance, and each setting can be changed with dial operations. 130
 (5) (3) (4) (2) (6) With [Cycle between the set function] assigned, press the 131 (1) button and shooting function settings switch in the order of (1) ISO speed -> (2) Exposure compensation/")

131 CONTENTS Chapter 1 Chapter 1 Chapter 2 Chapter 3 Chapter 4 Chapter 5 Chapter 6 Each time the button is pressed, it is possible to switch the shooting function settings. (7) (5) (3) (4) (2) (6) With [Cycle between the set function] assigned, press the 131 (1) button and shooting function settings switch in the order of (1) ISO speed -> (2) Exposure compensation/ aperture value -> (3) White balance -> (4) Drive mode/af operation -> (5) Flash exposure compensation/metering mode -> (6) AEB settings -> (7) Shooting mode. As shooting setting functions will display within and outside of the viewfinder display, it is possible to perform setting changes of various functions with the By pressing the button and dials while looking through the viewfinder. Display of functions within the viewfinder can be set with [Viewfinder display] settings (P.121). button on the [Cycle between the set functions] setting screen, the detailed settings screen will display. It is possible to select and set the functions to switch.


132 CONTENTS Chapter 1 Chapter 1 Chapter 2 Chapter 3 Chapter 4 Chapter 5 Chapter 6 Movie servo AF By using Dual Pixel CMOS AF, it is now possible to track the subject's movement with AF points and focus with [Movie Servo AF]. By tuning Movie Servo AF for AF speed and subject tracking sensitivity, etc., it is possible to handle a variety of shooting. Dual pixel CMOS AF makes Servo AF possible when shooting movies With the EOS-1D X Mark II, use of advanced phasedifference AF technology and Dual Pixel CMOS AF achieves high-speed and high-precision AF during Live View and movie shooting. [Movie Servo AF] is possible when shooting movies, and it is now possible to track moving subjects while shooting. In addition, as the LCD monitor has a touch panel function, it is possible to set AF points quickly with touch operations. 4K 60p and 50p, Full HD 120p and 100p high image quality, high frame rate movie performance is even more effective to use as a result of the movie AF function. 132
![CONTENTS Chapter 1 Chapter 1 Chapter 2 Chapter 3 Chapter 4 Chapter 5 Chapter 6 [Movie Servo AF speed] settings AF speed and operating conditions of [Movie Servo AF] can be set.](/docs-images/83/87151151/images/133-0.jpg "The [AF speed] setting can be adjusted seven steps in the slow direction, and two steps in the fast direction from the standard speed.")

133 CONTENTS Chapter 1 Chapter 1 Chapter 2 Chapter 3 Chapter 4 Chapter 5 Chapter 6 [Movie Servo AF speed] settings AF speed and operating conditions of [Movie Servo AF] can be set. The [AF speed] setting can be adjusted seven steps in the slow direction, and two steps in the fast direction from the standard speed. For adjusting in the slow direction, when fast focusing would appear unnatural. When the speed prior to shooting is standard, and you only want to use the set speed while shooting, change [When active] from [Always on] to [During shooting]. * This function can be set when Movie Servo AF is set to [Enable], and the AF system is FlexiZoneAF. In addition, it will operate with lenses that support low-speed shifting focus. 133

134 CONTENTS Chapter 1 Chapter 1 Chapter 2 Chapter 3 Chapter 4 Chapter 5 Chapter 6 [Movie Servo AF track sens.] settings When panning during movie servo AF, or when an obstacle moves into the AF points, the responsive characteristics of movie servo AF when the AF points lose the subject can be set to one of seven levels. When set to [Responsive: +2], as it will respond quickly to subjects captured by the AF points, it is effective when you want to shoot while switching subjects. In addition, when set to [Locked on: -], if the AF point loses the subject, or when a different subject suddenly enters it will not respond quickly. It is effective for shooting when obstacles may pass in front of the AF point such as when panning. * This function can be set when Movie Servo AF is set to [Enable], and the AF system is FlexiZoneAF. 134

135 CONTENTS Chapter 1 Chapter 1 Chapter 2 Chapter 3 Chapter 4 Chapter 5 Chapter 6 Using ISO Auto Exposure compensation is now possible in M mode and ISO Auto As a result of exposure compensation by changing the ISO speed in M mode being made possible, exposure compensation with fixed aperture values and shutter speeds is possible. You can control exposure compensation to match your creative intentions Among the two methods for adjusting exposure compensation, the easy method is to adjust it from the quick settings screen, and assigning the exposure compensation function to the SET button for controls while using the viewfinder. When the exposure exceeds the ISO Auto's range, the display level within the viewfinder will differ from the set exposure level. 135

136 CONTENTS Chapter 1 Chapter 1 Chapter 2 Chapter 3 Chapter 4 Chapter 5 Chapter 6 How to control exposure compensation in M mode and ISO Auto 1 Exposure compensation from the quick setting (Q) button In M mode and ISO speed Auto Controlling exposure compensation parameters with the Q button Controlling exposure compensation parameters When M mode and ISO Auto are set, you can use the Q button to enter the quick settings screen to perform exposure compensation. 136
![CONTENTS Chapter 1 Chapter 1 Chapter 2 Chapter 3 Chapter 4 Chapter 5 Chapter 6 2 Assign [Exposure compensation] to the SET](/docs-images/83/87151151/images/137-1.jpg "button In M mode and ISO speed Auto Assign exposure compensation to the SET button using Custom Controls SET button 137")

137 CONTENTS Chapter 1 Chapter 1 Chapter 2 Chapter 3 Chapter 4 Chapter 5 Chapter 6 2 Assign [Exposure compensation] to the SET button In M mode and ISO speed Auto Assign exposure compensation to the SET button using Custom Controls SET button 137 Exposure compensation is available from the main dial Assign the exposure compensation function to the SET button using C.Fn5 [Custom Controls]. Additionally, exposure compensation can be adjusted by operating the main dial while pressing the SET button.
138 CONTENTS Chapter 1 Chapter 1 Chapter 2 Chapter 3 Chapter 4 Chapter 5 Chapter 6 Using ISO Auto Minimum shutter speed at ISO Auto capable of setting to 1/8000 sec. [Min. shutter spd.] can be set up to the fastest shutter speed of 1/8000 sec. as the minimum shutter speed setting. In Av and P modes, you can shoot with reduced subject blur and camera shake due to high shutter speeds. Reduce camera shake and subject blur with high shutter speeds in Av and P modes Another special function of ISO Auto is [Min. shutter speed]. It can be set any shutter speed up to the fastest shutter speed of 1/8000 sec. as the minimum shutter speed setting value. By setting a high shutter speed above a certain value when in ISO Auto you can capture quick-moving subjects with reduced blur, and it is possible to prevent camera shake. Use this to reduce blurring when shooting in Av and P modes. 138

![speed settings] [Min. shutter spd.](/docs-images/83/87151151/images/139-1.jpg "], you can select the minimum shutter speed from")

139 CONTENTS Chapter 1 Chapter 1 Chapter 2 Chapter 3 Chapter 4 Chapter 5 Chapter 6 Set up steps In [ISO speed settings] [Min. shutter spd.], you can select the minimum shutter speed from 1/8000 sec. to 1 sec. in 1 step increments. [AF tab 2] From [ISO speed settings] Select [Min. shutter spd.] And choose a minimum shutter speed 139
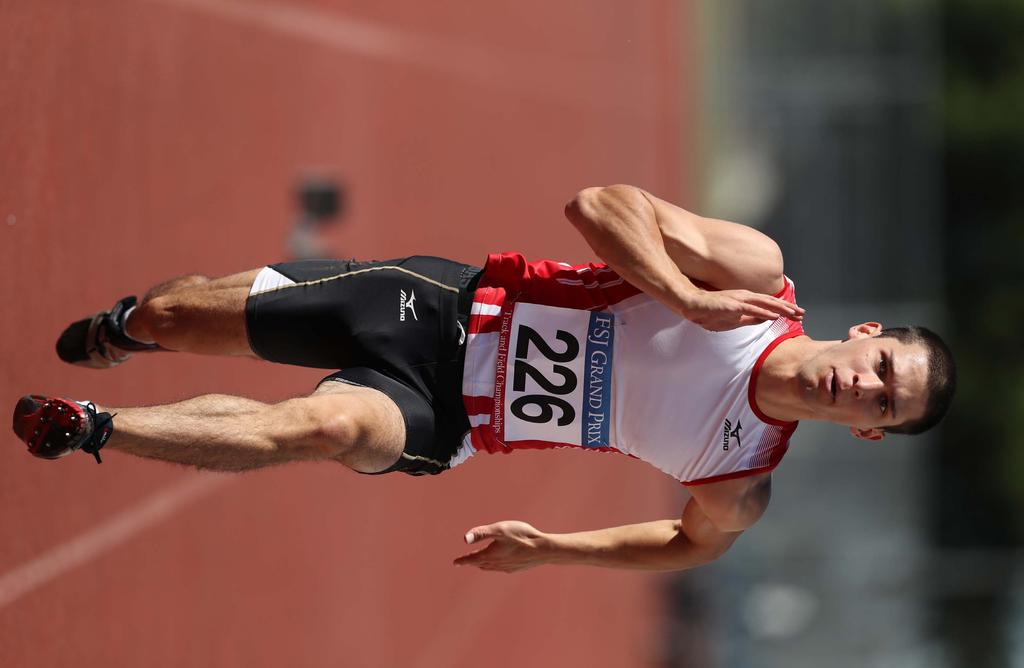
140 140
141 141
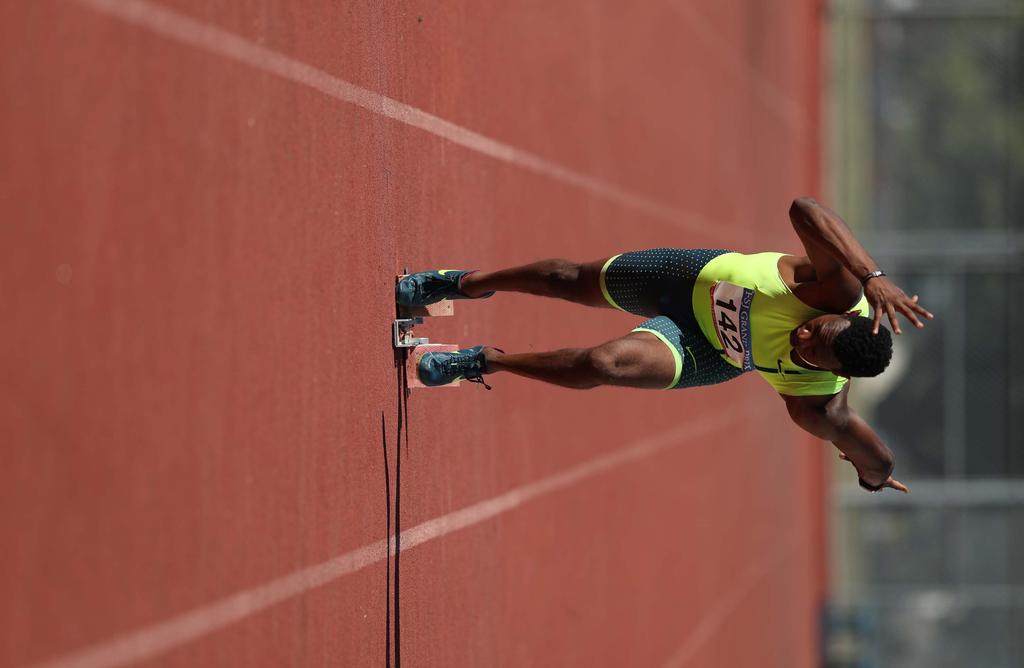
142 142
143 143
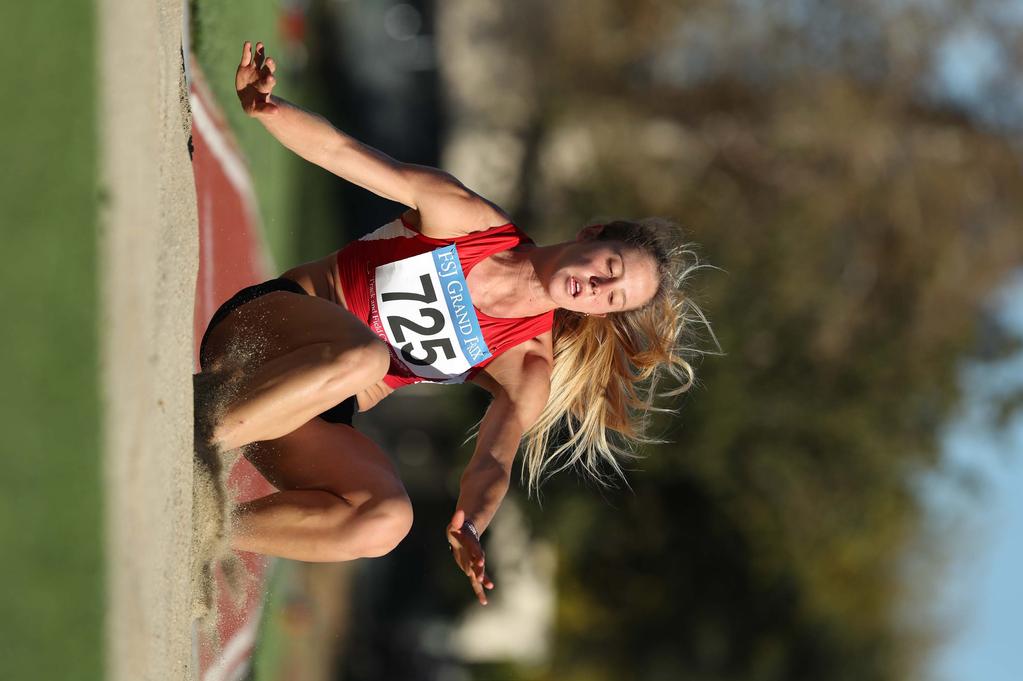
144 144
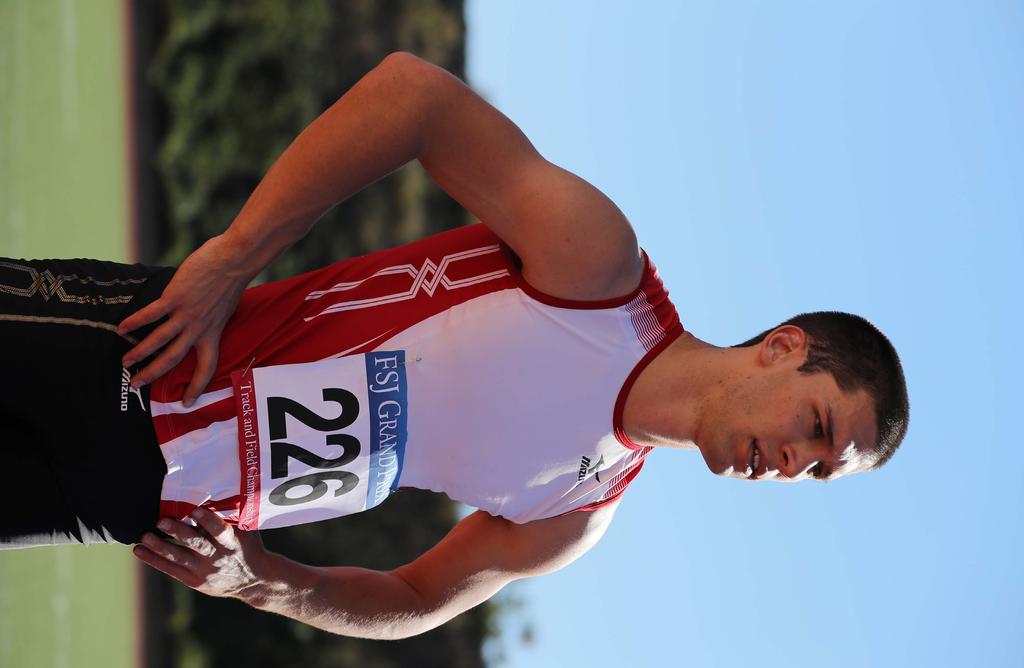
145 145
AF Setting Guidebook. Detailed explanations of how to use the various high precision AF features
 AF Setting Guidebook Detailed explanations of how to use the various high precision AF features AF Setting Guidebook By combining the ultimate in AF performance and easy of use, a wealth of new photographic
AF Setting Guidebook. New! Support the latest firmware ver. 2.0
 New! Support the latest firmware ver. 2.0 AF Setting Guidebook Detailed explanations of how to master high-performance AF features to capture that perfect moment AF Setting Guidebook By combining the ultimate
AF-Setting Guidebook. Detailed explanations of how to master the 65-point cross-type AF
 AF-Setting Guidebook Detailed explanations of how to master the 65-point cross-type AF AF-Setting Guidebook The 65-point AF that covers a wide range of areas, and setting functions that maximize its ability,
AF- Setting Guidebook. Detailed explanations of how to master the 65-point cross-type AF
 AF- Setting Guidebook Detailed explanations of how to master the 65-point cross-type AF AF-Setting Guidebook A powerful and flexible AF system, with 65 AF points* covering a greater area of the entire
Professional. Setting Guide Sports AF Edition Revision 1.0
 Professional Setting Guide Sports AF Edition Revision 1.0 En 2 Table of Contents Sports AF: Autofocus Basics... 3 AF Mode: AF C...3 AF-Area Mode: 25-Point Dynamic-Area AF...3 Focus Tracking with Lock-On...4
LET S FOCUS ON FOCUSING
 LET S FOCUS ON FOCUSING How A Lens Works The distance between the center of the lens and the focal point is called the FOCAL LENGTH. Images are only sharp where the focal plane meets the focal point. To
AF Setup Quick Guide
 AF Setup Quick Guide Introduction Contents This Quick Guide provides a number of sample AF setups that can help make the most of the advanced AF capabilities offered by the α9 in a variety of situations.
In Chapters 4 and 6 I discussed the many options
 Chapter 7: The Custom Menu and the Setup Menu Figure 7-1. Icon for Custom Menu Highlighted In Chapters 4 and 6 I discussed the many options available to you in the Recording and Playback menu systems.
CAPTURE TOMORROW AUTOFOCUS GUIDE
 M I R R O R L E S S R E I N V E N T E D CAPTURE TOMORROW AUTOFOCUS GUIDE FOCUS MODES FOR Z 7 CAMERA Focus option Name Use for: How it works AF-S Single AF Stationary Subjects Press the shutter-release
Personalizing the EOS 1D Mark II with Custom and Personal Functions Part 1 Custom Functions Text copyright E.J. Peiker, all rights reserved
 Personalizing the EOS 1D Mark II with Custom and Personal Functions Part 1 Custom Functions Text copyright E.J. Peiker, all rights reserved Modern digital SLR s offer many ways to customize the performance
two using your LensbAby
 two Using Your Lensbaby 28 Lensbaby Exposure and the Lensbaby When you attach your Lensbaby to your camera for the first time, there are a few settings to review so that you can start taking photos as
Autofocus Modes. The focus and exposure can then be adjusted to fit that face no matter what portion of the picture it is in.
 Autofocus Modes Face detection The camera automatically detects the person s s face. The focus and exposure can then be adjusted to fit that face no matter what portion of the picture it is in. Multi-area
(and what the numbers mean)
") Using Neutral Density Filters (and what the numbers mean) What are ND filters Neutral grey filters that effectively reduce the amount of light entering the lens. On solid ND filters the light-stopping
Using Neutral Density Filters (and what the numbers mean) What are ND filters Neutral grey filters that effectively reduce the amount of light entering the lens. On solid ND filters the light-stopping
Auto Flash Off Portrait Landscape Action
 Exposure Modes Turn the exposure mode dial to P, S, A, M or one of the symbols representing the auto modes. Auto The Auto mode is the simplest exposure mode available. The camera controls most of the settings,
We ll go over a few simple tips for digital photographers.
 Jim West We ll go over a few simple tips for digital photographers. We ll spend a fair amount of time learning the basics of photography and how to use your camera beyond the basic full automatic mode.
Chapter 3-Camera Work
 Chapter 3-Camera Work The perfect camera? Make sure the camera you purchase works for you Is it the right size? Does it have the type of lens you need? What are the features that I want? What type of storage
Shutter Speed and Aperture Setting
 In this unit we look at the finer points of both shutter speed and aperture and how to make full use of them. Shutter Speed and Aperture Setting Ok, how did you go with the first lesson? Did you take the
Section Ⅱ The X-Pro1 CONTENTS 24
 Section Ⅱ The X-Pro1 24 The Hybrid Multi Viewfinder The Optical Viewfinder (OVF) The attraction of optical viewfinders is that they provide a clear optical image with sharp bright brackets superimposed
Leke Alabi Isama. Canon Trainer STREET PHOTOGRAPHY WORKSHOP. Canon Street Photography Workshop
 Leke Alabi Isama. Canon Trainer STREET PHOTOGRAPHY WORKSHOP 1 Getting to know your Equipment 2 Photography - science of recording light 3 CAMERA OBSCURA Light rays from an object pass through a small hole
Instructions on programming the AF emulator Chip
 The leading photography i-store www.tagotech.com Instructions on programming the AF emulator Chip Thank you for purchasing our new revolutionary AF emulator chip for Canon! 2 major difference from ordinary
Topic 4 - Introduction to Metering on a DSLR
 Getting more from your Camera Topic 4 - Introduction to Metering on a DSLR Learning Outcomes In this lesson, we will look at another important feature on a DSLR camera called Metering Mode. By the end
SD Cards = Your Film. Always turn off your camera before removing! First thing, format your card (erases card)
") Core Concepts SD Cards = Your Film Always turn off your camera before removing! First thing, format your card (erases card) Formatting your card Menu Button Top Wheel To Wrench 1 Back Wheel to Format Card
Core Concepts SD Cards = Your Film Always turn off your camera before removing! First thing, format your card (erases card) Formatting your card Menu Button Top Wheel To Wrench 1 Back Wheel to Format Card
Introduction to Photography
 Topic 5 - Basic DSLR Settings Learning Outcomes In this topic, you will learn about the functions of the buttons on the top, the side and the back of your camera. This will give you the platform to begin
BUYING DSLR and MIRRORLESS CAMERAS
 BUYING DSLR and MIRRORLESS CAMERAS CAMERA BUYING GUIDE for Digital SLR and Mirrorless Cameras - 2018 Fall Edition - Copyright 2018 Easy Photo Class All Rights Reserved 1 DSLR & Mirrorless Camera Recommendations
Best Canon Lens For Hd Video 7d General Purpose
 Best Canon Lens For Hd Video 7d General Purpose It is good for video AF in later Canon Rebel models and is considerably wider than the 50mm lens above, which makes it a great little all purpose lens to
Professional. Technical Guide Useful Features
 Professional Technical Guide Useful Features En Table of Contents Custom Controls 5 Custom Control Assignments... 6 Quick Menu Access... 10 Custom Folders... 12 Taking Pictures 15 White Balance Tips and
END OF SEMESTER EXAMINATION 2006/2007 (Held in Aug 2007) B.Sc. ENGINEERING LEVEL 2, JUNE TERM
 B.Sc. ENGINEERING LEVEL 2, JUNE TERM") Page 1 of 6 UNIVERSITY OF MORATUWA, SRI LANKA FACULTY OF ENGINEERING END OF SEMESTER EXAMINATION 2006/2007 (Held in Aug 2007) B.Sc. ENGINEERING LEVEL 2, JUNE TERM DE 229 PHOTOGRAPHY Answer ALL questions
Page 1 of 6 UNIVERSITY OF MORATUWA, SRI LANKA FACULTY OF ENGINEERING END OF SEMESTER EXAMINATION 2006/2007 (Held in Aug 2007) B.Sc. ENGINEERING LEVEL 2, JUNE TERM DE 229 PHOTOGRAPHY Answer ALL questions
Chapter 12-Close-Up and Macro Photography
 Chapter 12-Close-Up and Macro Photography Close-up images all taken with Hipstamatic on the iphone Close-up and Macro Examples All taken with close-up filter or reverse mount lens Macro Close-up Photography
CREATIVE EXPOSURE MODES
 9-6- MM-B08 (E).qxd 0.8. 6: Page 50 DRIVE MODES Focus Lock in Remote Control Mode When your subject is not centered in the focus frame, use manual focus or focus lock. Set the camera to the remotecontrol
Mastering the EOS-1DX
 Especially written for Canon EOS-1DX users Mastering the EOS-1DX A simple, modern approach to mastering the advanced features on your Canon EOS-1DX camera which allows you to take more control, customise
Taking Photographs The Basics
 STEP 3 STEP 5 Taking Photographs The Basics This section details the basic steps involved in taking photographs in User Set A. In this automatic, point-and-shoot mode, the majority of settings are controlled
Analog Line-in.. 2. Canon Legendary Optics Digital Effects DIGIC DV Dual Image Processor. 5
 Analog Line-in.. 2 Canon Legendary Optics... 2 Digital Effects... 3 DIGIC DV Dual Image Processor. 5 Image Stabilizer... 5 Night Mode, Super Night Mode, Night Mode +.. 6 Programmed Auto Exposure. 7 Simultaneous
CAMERAS. A new Camera for H1, H2 and H2F Photographers. Wide range of high performance lenses. Superior Viewfinder program.
 CAMERAS A new Camera for H1, H2 and H2F Photographers The H4X camera body is designed as an upgrade to the current H1, H2 and H2F camera users. It is based on the H4D camera body and it provides new features
Lumix DMC-FZ8 7.2MP 12x High Zoom with Leica Lens. DMC-FZ8 - Silver [Model No: DMC-FZ8]RRP: $659 [GST Inc.]
![Lumix DMC-FZ8 7.2MP 12x High Zoom with Leica Lens. DMC-FZ8 - Silver [Model No: DMC-FZ8]RRP: $659 [GST Inc.]](/thumbs/81/83898234.jpg "Lumix DMC-FZ8 7.2MP 12x High Zoom with Leica Lens. DMC-FZ8 - Silver [Model No: DMC-FZ8]RRP: $659 [GST Inc.]") Lumix DMC-FZ8 7.2MP 12x High Zoom with Leica Lens [DMC-FZ8] 12x Optical Zoom with Easy Manual Operation DMC-FZ8 - Silver [Model No: DMC-FZ8]RRP: $659 [GST Inc.] 12x High Optical Zoom - With this telephoto
Lumix DMC-FZ8 7.2MP 12x High Zoom with Leica Lens [DMC-FZ8] 12x Optical Zoom with Easy Manual Operation DMC-FZ8 - Silver [Model No: DMC-FZ8]RRP: $659 [GST Inc.] 12x High Optical Zoom - With this telephoto
Introduction to Photography
 Introduction to Photography The Camera Digital Cameras The Camera (front & top) The Camera (back & bottom) Digital Camera Modes Scene Modes Landscape Photography What makes a good landscape? http://photography.nationalgeographic.com/phot
CAMERA BASICS. Shutter Speed.
 CAMERA BASICS Shutter Speed. Shutter speed is the length of time that your camera remains open to allow light to reach the film. The shutter can be set for a variety of speeds, ranging usually from 1 second
Mastering the EOS 1DX Mark II
 Mastering the EOS 1DX Mark II Especially written for Canon EOS 1DX Mark II users A simple, modern approach to mastering the advanced features on your Canon EOS 1DX Mark II camera which allows you to take
Camera & Imaging. Capturing Image, Recording Video & Editing Camera Using Display as Viewfinder...7-9
 Capturing Image, Recording Video & Editing... -2 Camera... -3 Using Display as Viewfinder...-3 Single Shot...-5 Normal...-6 Scene...-6 Multi Shot...-6 Photo Combination...- Panorama Shot...- Viewing Captured
UNDERSTANDING METERING MODES
 Photzy UNDERSTANDING METERING MODES Written by Kent DuFault János Csongor Kerekes https://www.flickr.com/photos/kjcs/14362470179/ CONTENTS 01 What are the metering modes? p.4 04 Average p.9 02 Spot p.5
Digital Photography. For beginners
 Digital Photography For beginners Welcome to Digital Photography for beginners. Den Pemberton Your Tutor is: Contact Details: TutorDen@gmail.com Website: www.tutorden.co.uk Paperwork: Enrolment form Progression
Science & Technology Group
 Cannock Chase U3A Science & Technology Group Programme June 12 th PC fundamentals 1: July 17th Camera fundamentals 1 August Tablet PC fundamentals 1 September PC applications 2 (Word, Excel, Music, Photos,
SNOWFLAKES PHOTO BORDER - PHOTOSHOP CS6 / CC
 Photo Effects: Snowflakes Photo Border (Photoshop CS6 / CC) SNOWFLAKES PHOTO BORDER - PHOTOSHOP CS6 / CC In this Photoshop tutorial, we ll learn how to create a simple and fun snowflakes photo border,
NEX-7 Menu Structure
 NEX-7 Menu Structure Shoot Mode Intelligent Auto Program Auto Aperture Priority Shutter Priority Manual Exposure 3D Sweep Panorama Sweep Panorama Anti-Motion Blur Scene Selection Sunset Portrait Sports
Visual Communication: Basics of Photography Appendix 2
 11. Basics of Photography Synopsis This module provides an overview of the basics of photography.. Lectures 11.1 Cameras 11.2 Aperture 11.3 Shutter Speed 11.4 Light 11.5 Composition 11.6 Creative Exercises
Contents. Contents. Perfecting people shots Making your camera a friend.5. Beyond point and shoot Snapping to the next level...
 Contents 1 Making your camera a friend.5 What are the options?... 6 Ready for action: know your buttons.8 Something from the menu?... 10 Staying focused... 12 Look, no hands... 13 Size matters... 14 Setting
Introduction to Shutter Speed in Digital Photography. Read more:
 Introduction to Shutter Speed in Digital Photography Read more: http://digital-photography-school.com/shutterspeed#ixzz26mrybgum What is Shutter Speed? shutter speed is the amount of time that the shutter
Camera & Imaging. Advanced Settings Capturing Still Images Recording Videos Oekaki Photo Library...
 Capturing Image, Recording Movie & Editing... -2 Camera... -3 Using Display as Viewfinder... -3 Single Shot... -5 Normal... -6 Sub Camera... -6 Scene... -6 Face Shot... - Smile Shot... - Multi Shot...
D-595 ZOOM C-500 ZOOM
 DIGITAL CAMERA D-595 ZOOM C-500 ZOOM Advanced Manual Detailed explanations of all the functions for getting the most out of your camera. Basic Operation Shooting Playing Back Printing Online Pictures Camera
Overview Capturing Still Images Recording Videos Various Features Advanced Features
 Overview... - Viewfinder Indicators... -3 Switching s... -5 Capturing Still Images... -6 Capturing Still Images... -6 Recording Videos... -9 Recording Videos... -9 Various Features... - Using Smile Mode...
PROJECT THREE - EMPHASIS
 PROJECT THREE - EMPHASIS INSTRUCTIONS Before you begin this assignment: 1. Read Design Basics, on the two topics of Emphasis and Color. Study the Introduction to Emphasis, the PowerPoint presentation,
Shooting Modes Using Shooting Modes Editing Images Picture Editor Composite
 Camera...-2 Getting Started... -2 Photo Camera... -4 Capturing Still Images... -4 Video Camera... -5 Recording Video... -5 Shooting Modes... - Using Shooting Modes...- Editing Images... -8 Picture Editor...-8
Using DSLR for Video
 Using DSLR for Video Is your DSLR the right tool? Shooting objects moving towards or away from the camera is not well suited for DSLR use, and would be best shot with video camera. This is because Auto
Intended Topics. Low-Cost Underwater Camera Types General Tips Composition Camera Shooting Modes Exposure Strobe Placement Q & A
 By Jim Driggers Intended Topics Low-Cost Underwater Camera Types General Tips Composition Camera Shooting Modes Exposure Strobe Placement Q & A Difference Between Low-Cost Underwater Cameras Types Point
EF180mm f/3.5l MACRO USM
 EF180mm f/3.5l MACRO USM ENG Instruction Thank you for purchasing a Canon product. The Canon EF180mm f/3.5l MACRO USM lens is a high-performance telephoto macro lens for EOS cameras that can be used for
CAMERAS. ADVANTAGES Access to a wide range of lenses/focal lengths. High-resolution sensors. Full range of manual controls and Raw file capture.
 ESSENTIALS essentials cameras 10 CAMERAS When shooting on film was the only option for landscape photographers, bigger was always considered to be better. Large-format cameras loaded with sheet film provided
Tutorial CREATING MAPS STEP 1: PREPARING A NEW DOCUMENT
 A map is an efficient method of providing easy to understand visual information. Creating a map to meet project-specific needs can be a daunting task; however, if you have Canvas at your command, there
USB-FC-110 LYNX USB FOCUS CONTROLLER USER MANUAL
 USB-FC-110 LYNX USB FOCUS CONTROLLER USER MANUAL 2 INTRODUCTION Thank you for choosing the Elvid Lynx USB Focus Controller. The Elvid Lynx gives you remote control over focus and exposure (including shutter
The 2 nd part of the photographic triangle
 The 2 nd part of the photographic triangle Shutter speed refers to the amount of time your sensor is exposed to light. In film photography shutter speed was the length of time that the film was exposed
ACCESSORIES FOR GoPro. GOPRO HERO is a trademark or registered trademark of GoPro, Inc. in the United States and other countries.
 P R E S E N T S ACCESSORIES FOR GoPro GOPRO HERO is a trademark or registered trademark of GoPro, Inc. in the United States and other countries. WRIST STRAP For All GoPro GoPro Specifically designed for
MODULE 6 Digital and Film Photography
 MODULE 6 Digital and Film Photography MODULE 6 Digital and Film Photography Compared Digital & Film Photography 2003, 2007, 2008, 2010 Robert L. Jones, II OnLineAfrica Knowledge Corporation What is a
EF70-300mm F4-5.6 IS USM. Instruction
 EF70-300mm F4-5.6 IS USM Instruction Thank you for purchasing a Canon USM lens. Dedicated to EOS cameras, the Canon EF70-300mm f/4-5.6 IS USM lens is a highperformance telephoto zoom lens equipped with
Great 3D photography starts with the right subject.
 Welcome to the world of digital 3D photography! You are about to discover a new way to capture and share your memories, in 3D! The Finepix Real 3D W3 digital camera is unique in the world of photography,
Using Your Digital Camera
 Using Your Digital Camera Presented by Tallahassee Senior Center Volunteer Instructor: Dr. Mike Francis Email: drmikef@comcast.net http://www.maf1.com/dcc 1 Digital Camera Topics for Everyone Camera Components
For Windows Operating manual
 For Windows Operating manual Thank you for downloading the PENTAX REMOTE Assistant. This document is the Operating Manual for the PENTAX REMOTE Assistant. In order to get the most out of the functions
EF-S60mm f/2.8 MACRO USM COPY ENG. Instruction
 EF-S60mm f/2.8 MACRO USM ENG Instruction Thank you for purchasing a Canon product. The Canon EF-S60mm f/2.8 MACRO USM lens is a macro lens that can be used for normal photography and close-up pictures
SP mm F/4-5.6 Di VC USD for Canon and Nikon (Model A005) SP mm F/4-5.6 Di USD for Sony (Model A005)
 SP mm F/4-5.6 Di USD for Sony (Model A005)") R SP 70-300mm F/4-5.6 Di VC USD for Canon and Nikon (Model A005) SP 70-300mm F/4-5.6 Di USD for Sony (Model A005) Thank you for purchasing the Tamron lens as the latest addition to your photographic equipment.
R SP 70-300mm F/4-5.6 Di VC USD for Canon and Nikon (Model A005) SP 70-300mm F/4-5.6 Di USD for Sony (Model A005) Thank you for purchasing the Tamron lens as the latest addition to your photographic equipment.
SP 90mm F/2.8 Di VC USD 1:1 Macro (Model F004)
") SP 90mm F/2.8 Di VC USD 1:1 Macro (Model F004) Thank you for purchasing the Tamron lens as the latest addition to your photographic equipment. Before using your new lens, please read the contents of this
SP 90mm F/2.8 Di VC USD 1:1 Macro (Model F004) Thank you for purchasing the Tamron lens as the latest addition to your photographic equipment. Before using your new lens, please read the contents of this
MotionGraphix. User Guide. Quick Start. Overview
 MotionGraphix User Guide Quick Start Create a Project Add Elements Position, scale and rotate the elements Change the time and reposition, scale and rotate the elements Change the time again, etc. Double
Compact Manual Camera Digital Best Zoom And Low Light Wide Angle
 Compact Manual Camera Digital Best Zoom And Low Light Wide Angle 10 best compact cameras of 2015 / Whether you're an expert, novice, sports though technically it's any digital camera with a non-removable
Editing Images Picture Editor Composite Printing Printing Images
 Camera...-2 Getting Started... -2 Photo Camera... -4 Capturing Still Images... -4 Video Camera... -5 Recording Video... -5 Review...-6 Opening Saved Files... -6 Shooting Modes... - Using Shooting Modes...
Introduction. Features and Highlights
 Introduction The Nodal Ninja Ultimate M2 Giga (M2G) manual pano head is an ideal solution for capturing high resolution Gigapixel or mosaic type imagery. The M2G will accommodate telephoto lenses up to
Using the Apperture-Priority AE Mode
 Using the Apperture-Priority AE Mode When the desired aperture is selected, an appropriate shutter speed is automatically set by the camera for a proper exposure. The shutter speed dial can be released
SP mm F/2.8 Di VC USD (Model A009)
") SP 70-200mm F/2.8 Di VC USD (Model A009) Thank you for purchasing the Tamron lens as the latest addition to your photographic equipment. Before using your new lens, please read the contents of this Owner
SP 70-200mm F/2.8 Di VC USD (Model A009) Thank you for purchasing the Tamron lens as the latest addition to your photographic equipment. Before using your new lens, please read the contents of this Owner
Lenses & Exposure. Lenses. Exposure. Lens Options Depth of Field Lens Speed Telephotos Wide Angles. Light Control Aperture Shutter ISO Reciprocity
 Lenses & Exposure Lenses Lens Options Depth of Field Lens Speed Telephotos Wide Angles Exposure Light Control Aperture Shutter ISO Reciprocity The Viewfinder Camera viewfinder Image Sensor shutter lens
Camera & Imaging 9-1. Camera Getting Started Editing Images Printing Printing Images
 Camera...-2 Getting Started... -2 Photo Camera... -4 Capturing Still Images... -4 Video Camera... -6 Recording Video... -6 Shooting Modes... -7 Using Shooting Modes... -7 Editing Images... -10 Printing...
Buxton & District U3A Digital Photography Beginners Group Lesson 6: Understanding Exposure. 19 November 2013
 U3A Group Lesson 6: Understanding Exposure 19 November 2013 Programme Buxton & District 19 September Exploring your camera 1 October You ve taken some pictures now what? (Viewing pictures; filing on your
Target User TARGET USER:
 High level 8x optical Mega Zoom 36 290 mm* 3.3 Megapixel 1/2.5-type CCD with primary colour filter Rapid AF with Predictive Focus Control Low power consumption more than 500 frames using 4 AA alkaline
EFFECTS OF STRAY LIGHT ENTERING YOUR CAMERA S VIEWFINDER EYEPIECE. Stanley E. Prevost
 EFFECTS OF STRAY LIGHT ENTERING YOUR CAMERA S VIEWFINDER EYEPIECE Stanley E. Prevost March 12, 2016 Rev. 1 February 26, 2017 Rev. 2 Note: If you use a rangefinder, mirrorless or other non-reflex camera
Type Digital, single-lens reflex, AF/AE camera CF cards (Type I, UDMA 7 supported) CFast card (CFast 2.0 supported)
 CFast card (CFast 2.0 supported)") Type Type Recording media Image sensor size Compatible lenses Digital, single-lens reflex, AF/AE camera CF cards (Type I, UDMA 7 supported) CFast card (CFast 2.0 supported) Approx. 35.9 x 23.9mm Canon
Type Type Recording media Image sensor size Compatible lenses Digital, single-lens reflex, AF/AE camera CF cards (Type I, UDMA 7 supported) CFast card (CFast 2.0 supported) Approx. 35.9 x 23.9mm Canon
AutoCollage 2008 makes it easy to create an AutoCollage from a folder of Images. To create an AutoCollage:
 Page 1 of 18 Using AutoCollage 2008 AutoCollage 2008 makes it easy to create an AutoCollage from a folder of Images. To create an AutoCollage: 1. Click on a folder name in the Image Browser. 2. Once at
PHOTOGRAPHER S GUIDE TO THE FUJIFILM X10
 Index A AC adapter 306 Adobe RGB color space 255 Advanced Anti Blur setting 89, 90, 121 Advanced mode 83 AE/AF-Lock Button menu option 160, 249 AE/AF-Lock Mode menu option 160, 248 AEL/AFL button controlling
28-300mm F/ XR Di VC LD Aspherical [IF] Macro (Model A020)
![28-300mm F/ XR Di VC LD Aspherical [IF] Macro (Model A020)](/thumbs/82/86828397.jpg "28-300mm F/ XR Di VC LD Aspherical [IF] Macro (Model A020)") R 28-300mm F/3.5-6.3 XR Di VC LD Aspherical [IF] Macro (Model A020) Thank you for purchasing the Tamron lens as the latest addition to your photographic equipment. Before using your new lens, please read
R 28-300mm F/3.5-6.3 XR Di VC LD Aspherical [IF] Macro (Model A020) Thank you for purchasing the Tamron lens as the latest addition to your photographic equipment. Before using your new lens, please read
EF85mm f/1.2l II USM
 EF85mm f/1.2l II USM ENG Instruction Thank you for purchasing a Canon product. The Canon EF85mm f/1.2l II USM lens is a high-performance medium telephoto lens developed for EOS cameras. It is equipped
Working with your Camera
 Topic 2 Introduction To Lenses Learning Outcomes By the end of this topic you will have a basic understanding of what lenses you need for specific types of shot. You will also be able to distinguish between
Stills Photography with the Lumix G6
 Stills Photography with the Lumix G6 Preface Modern digital cameras are marvellous pieces of technology that are capable of capturing wonderful images. However, most are needlessly complex. We typically
Benefits of Using the AF-ON Button for Autofocus
 DECEMBER 21, 2017 ADVANCED Benefits of Using the AF-ON Button for Autofocus Featuring MARK ALBERHASKY, GARY SMALL & JAY WATSON Jay Watson D700, AF-S NIKKOR 300mm f/2.8g ED VR II and AF-S Teleconverter
Guide No.: Approx. 9.8/32.1 (ISO 100, in meters/feet) Flash coverage: Approx. 18mm lens angle of view Recharge time: Approx. 3 sec.
 Flash coverage: Approx. 18mm lens angle of view Recharge time: Approx. 3 sec.") Exposure Control Metering mode: 63-zone TTL open-aperture metering Evaluative metering (linked to all AF points) Partial metering (approx. 9.0% of viewfinder at center) Spot metering (approx. 4.0% of viewfinder
Exposure Control Metering mode: 63-zone TTL open-aperture metering Evaluative metering (linked to all AF points) Partial metering (approx. 9.0% of viewfinder at center) Spot metering (approx. 4.0% of viewfinder
Shutter speed. Digital cameras have a shutter similar to this film camera. Shutter open. Shutter closed
 Digital cameras have a shutter similar to this film camera Shutter open Shutter closed Fast shutter speed 250/1 sec at f/5.6 Slow shutter speed 30 sec at f/16 Bulb (for shots longer than 30 seconds) 1/350
Butterflies and Flowers
 Photography Group: Pictorial Session Butterflies and Flowers by Stephen Jones Flowers and Butterflies by Stephen Jones Flowers and Butterflies by Stephen Jones Except as noted, all photos were taken with
Shooting Modes Using Shooting Modes Editing Images Picture Editor Composite
 Camera...-2 Getting Started... -2 Photo Camera... -4 Capturing Still Images... -4 Using Portrait Photography Features...-5 Video Camera... -6 Recording Video... -6 Review...- Opening Saved Files... - Shooting
Digital Imaging Study Questions Chapter 8 /100 Total Points Homework Grade
 Name: Class: Date: Digital Imaging Study Questions Chapter 8 _/100 Total Points Homework Grade True/False Indicate whether the sentence or statement is true or false. 1. You can change the lens on most
Fundamentals of Photography presented by Keith Bauer.
 Fundamentals of Photography presented by Keith Bauer kcbauer@juno.com http://keithbauer.smugmug.com Homework Assignment Composition Class will be February 7, 2012 Please provide 2 images by next Tuesday,
How to create video effects
 Adobe After Affects CC Guide How to create video effects After Effects includes many innovative and expressive video effects, which you apply to layers to add or modify characteristics of still images
Casio Releases Freestyle Digital Camera. Superb for Creating Portraits of Friends and Family
 NEWS RELEASE For Immediate Release Casio Releases Freestyle Digital Camera Superb for Creating Portraits of Friends and Family Rotating Monitor and Frame for Totally Flexible Shooting Style, Make-up Mode
New Features Guide. Version 4.20
 New Features Guide Version 4.20 Features added or changed as a result of firmware updates may no longer match the descriptions in the documentation supplied with this product. Visit our website for information
Editing Images Picture Editor Composite Printing Printing Images
 Camera...-2 Getting Started... -2 Photo Camera... -4 Capturing Still Images... -4 Video Camera... -5 Recording Video... -5 Review...- Opening Saved Files... - Shooting Modes... -7 Using Shooting Modes...
A FAMILY OF POWERFUL CAMERAS WITH A CHOICE FOR EVERYONE
 -SERIES A FAMILY OF POWERFUL CAMERAS WITH A CHOICE FOR EVERYONE The Canon PowerShot G-Series line-up of cameras packs powerful features and impressive picture quality into advanced, easy-to-use compact
Installing and Using Trackside Cameras Revised November 2008
 Installing and Using Trackside Cameras Revised November 2008 Trackside cameras are a useful and creative way to add visual interest to your route. Rather than just look out the windshield of the locomotive
Shutter Control. Photography Technology I
 Shutter Control Photography Technology I The Shutter The shutter is a shield located somewhere between the film and the front of the lens. The shutter protects the film from light entering the lens. Two
How to draw and create shapes
 Adobe Flash Professional Guide How to draw and create shapes You can add artwork to your Adobe Flash Professional documents in two ways: You can import images or draw original artwork in Flash by using