Microsoft Windows NT Microsoft Windows SystemWalker/StorageMGR. Installation Guide V10.0L10
|
|
|
- Beatrice Howard
- 5 years ago
- Views:
Transcription


1 Microsoft Windows NT Microsoft Windows 2000 SystemWalker/StorageMGR Installation Guide V10.0L10
2 Preface ++Purpose This manual explains the installation and customization of the SystemWalker/StorageMGR. SystemWalker is the name of a program that operates and manages FUJITSU' s storage product called "shark". ++Audience This manual is intended for the system manager in charge of managing the storage with the SystemWalker/StorageMGR ++Organization This manual consists of the following chapters 1 through 6 and appendixes A through D. + Chapter 1 Overview of Installation and Environment Setting This chapter describes the overview of the installation of the SystemWalker/StorageMGR in different operating environments, as well as the settings of these environments. + Chapter 2 Installation of SystemWalker/StorageMGR-M This chapter describes the procedure of installing SystemWalker/StorageMGR-M. + Chapter 3 Installation of SystemWalker/StorageMGR-A This chapter describes the procedure of installing SystemWalker/StorageMGR-A. + Chapter 4 Customization of Storage Management Server This chapter describes the procedure to Customization of the Storage Management Server. + Chapter 5 Customization of Storage Server This chapter describes the procedure to Customization of the Storage Server. + Chapter 6 Uninstallation This chapter describes the procedure to uninstall SystemWalker/StorageMGR. + Appendix A Notes on Installation This appendix describes notes when the installation works. + Appendix B Notes on Customization This appendix describes notes when Customization works. + Appendix C Notes on Uninstallation This appendix describes notes when uninstalling works. + Appendix D Installation of Winddows SNMP service This appendix describes the procedure of installing the SNMP service used in the installation work. ++SystemWalker/StorageMGR Titles The set of manuals related to the SystemWalker/StorageMGR consists of the following: SystemWalker/StorageMGR Installation Guide This manual explains the installing of the SystemWalker/StorageMGR. SystemWalker/StorageMGR Operator's Guide This manual explains the operation of the SystemWalker/StorageMGR. SystemWalker/StorageMGR User's Guide This manual explains the operation of the Web-GUI for SystemWalker/StorageMGR. SystemWalker/StorageMGR Messages This manual describes the SystemWalker/StorageMGR generated messages, as well as the necessary responses to them. It is recommended to familiarize oneself with the operations of the System Walker by first reading the "SystemWalker/StorageMGR Operator's Guide", before getting into other manuals of the set. ++ Notes on abbreviations Microsoft(R) Windows NT(R) Server network operating system Version 4.0 and Microsoft(R) Windows NT(R) Workstation operating system Version 4.0 are abbreviated as WindowsNT. Microsoft(R) Windows(R) 95 operating system is abbreviated as Windows95. i
3 Microsoft(R) Windows(R) 98 operating system is abbreviated as Windows98. Microsoft(R) Windows(R) 2000 Professional, Microsoft(R) Windows(R) 2000 Server, and Microsoft(R) Windows(R) 2000 Advanced Server are abbreviated as Windows2000. Microsoft(R) Windows(R) Millennium Edition is abbreviated as Windows Me. SystemWalker/StorageMGR to be operated on Solaris is abbreviated as the Solaris-version SystemWalker/StorageMGR. SystemWalker/StorageMGR's Manager is abbreviated as SystemWalker/StorageMGR-M or StorageMGR-M. SystemWalker/StorageMGR's Agent is abbreviated as SystemWalker/StorageMGR-A or StorageMGR-A. ++Trademarks Windows, WindowsNT, SQL Server and Internet Explorer are registered trademarks of Microsoft Corporation. Netscape logo marks, Netscape product and service names are registered trademarks of Netscape Communications Corporation. Solaris Java, and other Java-related trademarks and logo marks are registered trademarks of Sun Microsystems.inc. UNIX is a registered trademark exclusively licensed for X/Open Company Limited. ORACLE is a registered trademark of Oracle Corporation. ii
4 Chapter 1 Overview of Installation and Environment Setting This chapter is an overview of the installation of SystemWalker/StorageMGR. This chapter also gives a brief description of the environment settings for SystemWalker/StorageMGR under each operating environment. In this chapter, the SystemWalker/StorageMGR-A is abbreviated as StorageMGR-A, and the SystemWalker/StorageMGR-M as StorageMGR-M. 1.1 Installation Type The SystemWalker/StorageMGR installation type depends on the operating environment. The operating environment is explained in chapter 1.2 or later. This chapter explains the types of SystemWalker/StorageMGR servers and their general function Storage server (StorageMGR-A) The Storage server executes the backup, replication, space management, and SAN (Storage Area Network) management operations provided by StorageMGR. SystemWalker/StorageMGR-A installation includes the Storage Server component. But if only one Storage server is available, then install SystemWalker/StorageMGR-M Storage management server (StorageMGR-M) The Storage management server manages the Storage servers and only one Storage management server can be set in the system. SystemWalker/StorageMGR-M installation inlcudes the Storage Management Server component. 1.2 Overview of Installation Procedure Depending on Oper ating Environment When only one Storage server is set In this operating environment, only StorageMGR-M needs to be installed (StorageMGR-M includes the functions of StorageMGR-A). Figure 1.1 When only one Storage server is set +Installation procedure 1. Install SystemWalker/StorageMGR-M. For details, see Chapter 2, "Chapter 2, Installation of SystemWalker/StorageMGR-M." 2. Customize the Storage management server. For details, see "Chapter 4, Customization of Storage Management Server." 1

5 1.2.2 When two or more Storage servers are set When two or more Storage servers are available, set only one of them up as the Storage management server or set up a new server with no disk drive connected as the Storage management server. Each operation environment is explained below When the Storage server is operated as a Storage management server One of the servers functions as a Storage management server. The Storage management server has a repository where the information on operating and management of all Storage servers is stored. When many Storage servers exist, all of them compete for accesses to the repository. This will affect other applications running on to the same server. Therefore, the Storage management server should be considered as a dedicated server. For more details see chapter When a dedicated Storage management server cannot be prepared with the system configuration, becomes an operation form shown in Figure 1.2. ( One Storage management server and others become a Storage server.) Figure 1.2 When the Storage server is operated as a Storage management server +Installation procedure 1. Install the "SystemWalker/StorageMGR-A" on all Storage servers. For details, see "Chapter 3, Installation of SystemWalker/StorageMGR-A." 2. Customize all Storage servers. For details, see "Chapter 5, Customization of Storage Server." 3. Install "SystemWalker/StorageMGR-M" on the Storage management server. For details, see "Chapter 2, Installation of SystemWalker/StorageMGR-M." 4. Customize the Storage management server. For details, see "Chapter 4, Customization of Storage Management Server." When the dedicated Storage management server is prepared It is a composition to manage two or more Storage servers with a dedicated Storage management server. Figure 1.3 When a dedicated Storage server is a Storage management server 2


6 +Installation procedure 1. Install "SystemWalker/StorageMGR-A" on all Storage servers. For details, see "Chapter 3, Installation of SystemWalker/StorageMGR-A." 2. Customize all Storage servers. For details, see "Chapter 5, Customization of Storage Server." 3. Install "SystemWalker/StorageMGR-M" on the Storage management server. For details, see "Chapter 2, Installation of SystemWalker/StorageMGR-M." 4. Customize the Storage management server. For details, see "Chapter 4, Customization of Storage Management Server." When the SP Series is contained in the system The SP Series is the hardware in which the "Basic package of the Storage management processor" is preinstalled when shipped from the factory, and in which the "Solaris-version SystemWalker/StorageMGR-A " or "Solaris-version SystemWalker/StorageMGR-M " has been installed (Solaris-version SystemWalker/StorageMGR is a product contained in the "Basic package of the Storage management processor"). Shown below is a connection diagram between Storage management servers when one of the Storage servers is connected with an SP series computer. Figure 1.4 Connection of Storage management server and Storage server to an SP series computer 3
7 1.3 Combination of SystemWalker/StorageMGR The combination patterns and executable operations are described below. [Table 1.1 Combination patterns] Storage management server type StorageMGR-M SE(V10) StorageMGR-M EE(V10) Function range V5 function V10 function V5 function V10 function Storage server type and version V10 StorageMGR-A SE Yes: Possible; #: Restricted; No: Not possible StorageMGR-A EE V5 StorageMGR-A SE Yes No Yes No Yes No #(*1) No Yes Yes Yes Yes Yes Yes #(*1) #(*1) StorageMGR-A EE (*1): The functions that can be used in a device under control of the Storage server are within the function range V5. For details, refer to the "Software Release Guide SystemWalker/StorageMGR-A." 4
8 Chapter 2 Installation of SystemWalker/Storage MGR-M This chapter explains the installation of the SystemWalker/StorageMGR-M. 2.1 Pre-installation Requirements system environment SystemWalker/StorageMGR-M can only be installed under one of the following environments. Any other system environment is not supported. Microsoft(R) WindowsNT(R) Server V4.0 SP5-6a Microsoft(R) WindowsNT(R) Server V4.0 Enterprise Edition SP5-6a Microsoft(R) Windows(R) 2000 Server SP1 or later Microsoft(R) Windows(R) 2000 Advanced Server SP1 or later When both StorageMGR-M and CentricMGR are located on the same server Before uninstalling CentricMGR, save the StorageMGR-M resources and uninstall StorageMGR. Later, reinstall StorageMGR-M and restore the resources. When then CentricMGR components have been uninstalled, the failure monitoring function, which is a StorageMGR-M SAN management function, cannot operate SymfoWARE components SystemWalker/StorageMGR-M contains the internal SymfoWARE components. Installation of SystemWalker/StorageMGR-M includes the installation of SymfoWARE. However, if the SymfoWARE has been previously installed the SymfoWARE version needs verification Verification of SymfoWARE Server If the SymfoWARE Server is below V4.0L10, uninstall it.then install SymfoWARE Server Enterprise Edition V4.0L10 or later Verification of SymfoWARE Client If the SymfoWARE Client has been installed in the server where the SystemWalker/StorageMGR-M is installed, uninstall the SymfoWARE Client. After the installation of the SystemWalker/StorageMGR-M is completed, reinstall the SymfoWARE Client required software products SystemWalker/StorageMGR-M will be needing the following pre-requisite software: Web Server Component SystemWalker/StorageMGR-M requires any one of the following web servers installed: Microsoft(R) Internet Information Server 3.0 Microsoft(R) Internet Information Server 4.0 Microsoft(R) Internet Information Services Microsoft(R) Windows Scripting Host When using the SystemWalker/StorageMGR-M component also as a Storage server (refer to section ), the following software product must be installed: Microsoft(R) Windows Scripting Host Microsoft(R) Windows Scripting Host can be downloaded using the following URL: Confirmation of SNMP service installation condition To use the Storage management server also as a Storage server, the SNMP service needs to be installed. 5
9 This service is stored on the Windows installation CD. From the Control Panel window, select Add/Remove Programs, Add/Remove, and Management and Monitoring Tool, in this order, and install the Simplified Network Management Tool (SNMP). In case of WindowsNT, Service Pack 5 or later needs to be added after the installation Calculation of Database space To operate SystemWalker/StorageMGR-M, the following databases are required Repository The following database areas are required for the repository. RDB dictionary RDB log file Repository database Table 2.1 gives the minimum space required for each database. [Table 2.1 Required database space] Type RDB dictionary RDB log file Repository database Size 52(MB) 100(MB) Refer to the following expression. (The minimum space required is 65MB.) Calculating the repository capacity: Capacity (MB) = {[(number of servers x 6 + total number of devices x 11) / 40] x 17 + [number of jobs / 100] x 92 + [number of administrators / 15] x } / 1024 Number of servers: The total of Storage management servers and managing Storage servers Total of devices: The total of devices (*1) to be managed by the SystemWalker/StorageMGR. Note that this total is not the total of devices connected to all the Storage servers. *1: Depending on the Storage server to be managed, the "device" corresponds to the following: Storage server type Windows Solaris HP-UX Correspondence to the "device" Partition Slice LUN When the Storage server to be managed is the Solaris version and is executing mirroring with the SynfinityDISK, the number of partitions is equivalent to the total of mirror slices. Number of jobs: Total number of devices in group units when using the space management function Number of administrators: Total number of administrators when using the space management function When there are two or more Storage servers, define the number to be estimated as the total number on all Storage servers. When cluster operation is performed, consider not only logical servers but also physical servers. Round up any fractions in the calculation results for the terms in the square brackets. When the calculated capacity is less than 65 MB, use 65 MB as the minimum required size. If any resulting value from the formula may increase in the future, use a higher memory allotment SAN management repository In the SAN resource management, use the formula below in computing the capacity required for a modifying configuration directory (default: /var/opt). 6
10 Capacity (MB) = 1 + [managing device] x 1.5 For performance management, refer below for the capacity requirement formula per server in accordance with the type of the product. The default value for the number of maintenance days is seven days. The number of logical units maintained is the real number of logical units in which the performance management system maintains the performance for the GR (Disk unit of GR series). Because the performance management system maintains the performance for the GR in 64 LUNs (logical unit number), if you have a request to maintain LUN15 to LUN200, maintain 256 units of information from 0 to 255 (the real number of logical units). Capacity (MB) for GR8xx and GR740: (Number of maintenance days + 1) x 1,500 x number of LUs maintained / 4,096) Capacity (MB) for GR730 and GR720: (Number of maintenance days + 1) x 50 x number of LUs maintained / 126) Capacity (MB) for switches: (Number of maintenance days + 1) x 1.6 Example: When performance information for 512 LUs is maintained for seven days in the GR740, 1,500 megabytes (87 x 1,500 x 512 / 4,096) are required startup account During installation of SystemWalker/StorageMGR, the system inquiries which user should be used as the "startup account." The user specified at this time is used as the account for activating each service of the SystemWalker/StorageMGR or as a manager of "authentication function." For more information of the "authentication function," see Chapter 3 in the "SystemWalker/StorageMGR Operator's Guide." When an existing user is specified as the startup account, confirm that the user satisfies the following requirements: The user belongs to the Administrators group of the local computer. The user's password does not expire. If the startup account that has been specified when installing the SystemWalker/StorageMGR does not belong to the Administrators group, the system automatically makes the startup account belong to the Administrators group. Since the startup account is used as the account for activating the services of the SystemWalker/StorageMGR, the following authority is added when installing the SystemWalker/StorageMGR: Log on as a service Function as a part of the operating system Adding a quota Replacing the process level token Details of the startup account for SystemWalker/StorageMGR: Account a. following characters are not permitted in the account' name: "/ []:; =,+*?<>" b. account's name consisting entirely of spaces and periods is not permitted. c. name's length must not exceed 20 characters. Password a. password's length must not exceed 14 characters Confirmation of Windows SNMP service When SystemWalker/StorageMGR-A/M is installed, the Windows SNMP service must have been installed. This section explains how to check the Windows SNMP service. In performing the procedure, login to the Windows server administrator rights. 1. Installation confirmation and installation of Windows SNMP service a. For WindowsNT 4.0 Select [Control Panel]-[Network], click the Service tab, and confirm that the SNMP service exists. 7

11 If the SNMP service has not been installed, refer to Appendix D, "Installation of SNMP Service" from this wizard and install it. b. For Windows2000 Select [Control Panel]-[Add/Remove Programs]-[Add/Remove] and confirm that the check box for Management and Monitoring Tool has been selected in [Windows Component Wizard] and that the SNMP service is indicated under Details. If there is no check mark, the SNMP service has not been installed. In this case, install the Management and Monitoring Tool from this wizard. For details, see Appendix D, "Installation of Windows SNMP Service." 2. Operation confirmation of Windows SNMP service Select [Start]-[Programs]-[Management Tool]-[Event Viewer] and confirm that the message "SNMP service started normally" is included in the system file. Although the WindowsNT 4.0 SNMP service message is shown 8
12 in the Service tab, check it again using the event viewer in Windows Installation Flow of installation The flow of installing the SystemWalker/StorageMGR-M is shown as follows: 9

13 2.2.2 Installing StorageMGR-M Install SystemWalker/StorageMGR, using the following procedure: 1. Logon to the system. Logon as Administrator on the system where the SystemWalker/StorageMGR will be installed. 10
14 2. Insert the SystemWalker/StorageMGR CD-ROM into the drive and an initial [SystemWalker] window will be displayed. Click [Install SystemWalker/StorageMGR]. 3. Confirming whether the SNMP service has stopped and started. Install processing stops and starts the SNMP service. If there is no problem in stopping and starting the SNMP service, click the [OK] button. If there may be a problem in stopping and starting the SNMP service, click the [Cancel] button to cancel processing. 4. At the following (InstallShield) window click the [Next] button. 5. Click [Installation] in the (InstallShield) window, and then click on [Next]. 11
15 6. Accept the use permission contract displayed on the [License Agreement] window by clicking on [Yes]. 7. Specify the installation directory. If this product is to be installed in directories other than those displayed (default directories), click the [Reffer] button to select the desired directories. After all the proper directories have been selected, click the [Next] button. Note: directories with spaces their names (e.g., Program Files) must not be specified. 12
![8. Input the startup account on the [Startup/Authentication feature manager] window. Input the account's name belonging to the Administrator's group with a password, and click the [Next] button.](/docs-images/91/106433291/images/16-0.jpg "The account name and password must satisfy the following conditions: - Account a. following characters are not permitted in the account' name: \"/ []:; =,+*?<>\" b.")

16 8. Input the startup account on the [Startup/Authentication feature manager] window. Input the account's name belonging to the Administrator's group with a password, and click the [Next] button. The account name and password must satisfy the following conditions: - Account a. following characters are not permitted in the account' name: "/ []:; =,+*?<>" b. account's name consisting entirely of spaces and periods is not permitted. c. name's length must not exceed 20 characters. - Password a. password's length must not exceed 14 characters. For details of the startup account, see Chapter "2.1.5 Startup account." If the account name is not registered, the system adds this account with Administrative rights with the password set not to expire. In addition, the system sets the following user authority: - Log on as a service - Function as part of the operating system - Adding a quota - Replace the process level token 13
![9. Input the port number to be allocated for the service in the [Registering a port number] window.](/docs-images/91/106433291/images/17-0.jpg "The port number to be allocated to the service can be in the range between 1024 and 65535, but the default value is recommended.")
![After the port numbers entry is completed, click the [Next] button. This window will be redisplayed with the accepted port number.](/docs-images/91/106433291/images/17-2.jpg "If the SystemWalker/StorageMGR service name is defined with an ALIAS, the following window will be displayed and the port number specified on the previous screen is ignored.")
17 9. Input the port number to be allocated for the service in the [Registering a port number] window. The port number to be allocated to the service can be in the range between 1024 and 65535, but the default value is recommended. After the port numbers entry is completed, click the [Next] button. This window will be redisplayed with the accepted port number. If the SystemWalker/StorageMGR service name is defined with an ALIAS, the following window will be displayed and the port number specified on the previous screen is ignored. The installation is proceeds. 10. Confirm the settings on the [Start Copying Files] window. If no mistakes are detected, click the [Next] button. To correct or change any settings click the [Back] button. 11. Start the copying. 14
![The file transfer in progress can be viewed on the [Setup Status] window. 12. Confirm the environment settings.](/docs-images/91/106433291/images/18-0.jpg "In the [Environment setup] dialogue, click the [Yes] button to set up the environment now or [No] to do the settings after rebooting the system.")
![If you click [No], the installation-completed window is displayed. Click the [End] button. Then, the [Environment setup] window is automatically displayed after restarting the system.](/docs-images/91/106433291/images/18-1.jpg "For cluster operation of the storage management server, click [No]. 13. Set the database information. By clicking on [Yes] in the [Environment setup] dialogue, the following window is displayed.")
18 The file transfer in progress can be viewed on the [Setup Status] window. 12. Confirm the environment settings. In the [Environment setup] dialogue, click the [Yes] button to set up the environment now or [No] to do the settings after rebooting the system. If you click [No], the installation-completed window is displayed. Click the [End] button. Then, the [Environment setup] window is automatically displayed after restarting the system. For cluster operation of the storage management server, click [No]. 13. Set the database information. By clicking on [Yes] in the [Environment setup] dialogue, the following window is displayed. Change the default directories if you wish and choose the data base size. Then click the [Continue] button. - Database creation folder 15
19 Enter the folder name where each database will be stored, with the absolute path including the drive name. The folder name specified here must be a new NTFS folder. If the specified folder has been formatted by any other system or if it is an existing folder, change it to another folder name. - Database size Specify the database size in MB. Use the value calculated by the "Repository Database Calcuation Expression." If the default value of 65 MB is desired, check the [Default size] check box. 14. Set the IP address and the database access user name. Enter the IP address of the Storage management server (local system), and then the user name/password with which the database will be accessed. At this time, the specified user name needs the local logon authority. Click the [Settings] button. The user name and password must satisfy the following conditions: - Account a. following characters are not permitted in the account' name: "/ []:; =,+*?<>" b. account's name consisting entirely of spaces and periods is not permitted c. name's length must not exceed 20 characters. - Password a. password's length must not exceed 14 characters. - It is recommended to specify the startup account that was specified earlier in the installation. (systemwalker) - If you select a new name here, such as repouser, register it in the system and add the local logon authority to it. 15. Confirm the setting information. The database settings information is displayed confirm the displayed information and click the [Start] button. When the [Start] button is clicked, the database setup processing is automatically performed after restarting the system. 16
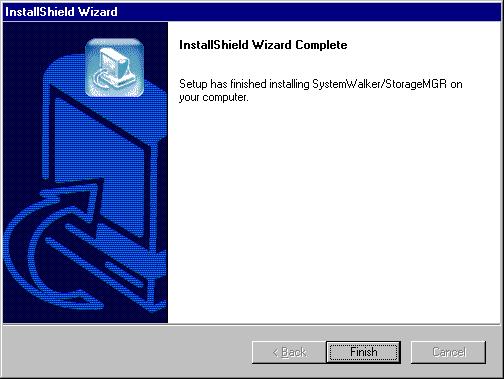
20 16. Finish the installation. Select [restar the computer] and click the [Finish] button to complete the installation. 17
21 18
22 Chapter 3 Installation of SystemWalker/Storage MGR-A This chapter explains the installation of the SystemWalker/StorageMGR-A. 3.1 Pre-installation Requirements System environment Confirm that the system environment corresponds to one of the following. Microsoft(R) WindowsNT(R) Server V4.0 SP5-6a Microsoft(R) WindowsNT(R) Server V4.0 Enterprise Edition SP5-6a Microsoft(R) Windows(R) 2000 Server SP1 Microsoft(R) Windows(R) 2000 Advanced Server SP1 Note: This version of SystemWalker/StorageMGR-A cannot be installed on any other system Required software products Confirm that the following software product is installed Microsoft(R) Windows Scripting Host Confirm that the above software product has been installed. If not installed, install the following product: Microsoft(R) Windows Scripting Host Microsoft(R) Windows Scripting Host can be downloaded using the following URL: Confirmation of SNMP service installation condition To use the SystemWalker/StorageMGR-A as a Storage server, the SNMP service must be installed. This service is stored on the Windows installation CD. From the Control Panel window, select Add/Remove Programs, Add/Remove, and Management and Monitoring Tool, in this order, and install Simplified Network Management Tool (SNMP). For WindowsNT, Service Pack 5 or later must be added after the installation Startup account When newly installing the SystemWalker/StorageMGR, select "startup account" as the user type. This user type can activate each service of the SystemWalker/StorageMGR. To specify the "startup account", the user must satisfy the following conditions: The user belongs to the Administrators group of the local computer. The indefinite password has been set. However, if the user of the specified "startup account" does not belong to the Administrator's group, the system will automatically perform this task. Also, since the "startup account" is used as the account for activating the services of the SystemWalker/StorageMGR, the following authority will be added during installation: Log on as a service Act as part of the operating system Increase quotas Replace a process level token The account name and password must satisfy the following conditions: Account a. following characters are not permitted in the account's name : "/ []:; =,+*?<>" b. account's name consisting entirely of space and periods is not permitted. c. name's length must not exceed 20 characters. Password 19

23 a. password's length must not exceed 14 characters Confirmation of Windows SNMP service For details, see Chapter 2.1.6, "Confirmation of Windows SNMP service." 3.2 Installation Flow of installation The flow of installation is shown as follows: Installing StorageMGR-A Install SystemWalker/StorageMGR-A, using the following procedure: 20
![1. Logon as Administrator 2. Insert the SystemWalker/StorageMGR CD-ROM into the drive and initial [System Walker] window will be displayed. Click [Install SystemWalker/StorageMGR]. 3.](/docs-images/91/106433291/images/24-0.jpg "Confirm whether the SNMP service has stopped and started. Install processing stops and starts the SNMP service. If there is no problem in stopping and starting the SNMP service, click the [OK] button.")
24 1. Logon as Administrator 2. Insert the SystemWalker/StorageMGR CD-ROM into the drive and initial [System Walker] window will be displayed. Click [Install SystemWalker/StorageMGR]. 3. Confirm whether the SNMP service has stopped and started. Install processing stops and starts the SNMP service. If there is no problem in stopping and starting the SNMP service, click the [OK] button. If there may be a problem in stopping and starting the SNMP service, click the [Cancel] button to cancel processing. 4. At the following window (InstallShield) window click the [Next] button. 5. Click [Installation] in the (InstallShield) window, and then click on [Next]. 21
25 6. Accept the use permission contract displayed on the [License Agreement] window by clicking [Yes] button. 7. Specify the installation directory. If this product is to be installed in directories other than those displayed (default directories), click the [Reffer] button to select the desired directories. After all the proper directories have been selected, click the [Next] button. Note: directories with spaces their names (e.g., Program Files) must not be specified. 22
26 8. Input the startup account in the [Register Startup Account] window. Input the account's name belonging to the Administrator's group with a password, and click the [Next] button. The account name and password must satisfy the following conditions: - Account a. following characters are not permitted in the account's name: "/ []:; =,+*?<>" b. account's name consisting of entirely of spaces and periods is not permitted. c. name's length must not exceed 20 characters. - Password a. Password's length must not exceed 14 characters. For details of the startup account, see Chapter "3.1.3 Startup account." If a previously unregistered name is entered, it should be registered as a new account. At this time, the system automatically sets the password to unexpire and assigns it to the Administrator's group. In addition, the system automatically sets the following user's authority: - Log on as a service - Act as part of the operating system - Increase quotas - Replace a process level token 23
![9. Input the port number to be allocated for the service in the [Register Port Number] window.](/docs-images/91/106433291/images/27-1.jpg "The port number to be allocated to the service can be in the range between 1024 and 65535, but the default value is recommended. After the port number entry is completed, click the [Next] button.")
27 9. Input the port number to be allocated for the service in the [Register Port Number] window. The port number to be allocated to the service can be in the range between 1024 and 65535, but the default value is recommended. After the port number entry is completed, click the [Next] button. This window will be redisplayed with the accepted port number. If the SystemWalker/StorageMGR service name is defined with an ALIAS, the following window will be displayed and the port number specified on the previous window is ignored. The installation proceeds. 10. Confirm the settings on the [Start Copying Files] window. If no mistakes are detected, click the [Next] button. To correct or change any settings click the [Back] button. 24
28 11. Copying process will begin, and its progress will be displayed on the [Setup Status] window. 12. To terminate the installer after its completion, click the [Finish] button. 25
29 26

30 Chapter 4 Customization of Storage Management Server This chapter explains the customization of the Storage management server and covers how to cutomize the Storage Management Server. 4.1 Flow of Customizing Storage Management Server The flow of customizing the Storage management server is shown below. SystemWalker/StorageMGR automatically performs the steps shown in green in the flowchart. 4.2 Details of Storage Management Server Customization Set up the Storage management server, using the following procedure: 1. A system is restarted in order to make it the installed environment. If the system has been rebooted as the extension of SystemWalker/StorageMGR-M installation, go to the step Set the database information. If the [Environment Setting] operation was not performed during the SystemWalker/StorageMGR-M installation, the following window is displayed after reactivating the system. Change the displayed information if necessary, and click the [Continue] button. Note: If the [Environment Settings] operation was performed during SystemWalker/StorageMGR-M installation, the window will not be displayed. 27
31 - Database creation folder Enter the folder name where each database will be stored. Specifying the absolute path name including the drive name. The folder name specified here must be a new NTFS folder. If the specified folder has been formatted by any other system or if it is an existing folder, change it to another folder name. - Database size Specify the database size in MB. Use the value calculated by the "Repository database calcuation Expression." If the default value, check the [Default size] button. For cluster operation of the storage management server, click [Cancel]. 3. Set the IP address and database access user. Enter the IP address of the Storage management server (local system), and then the user name/password with which the database will be accessed. The specified user name needs to be part of the local domain users. Click the [Settings] button. This window will not displayed if the [Environment Settings] operation was performed during the installation. The user name and password must satisfy the following conditions: - User name a. Following characters are not permitted in the account's name: "/ []:; =,+*?<>" b. Account's name consisting entirely of space and period is not permitted. c. User's name length must not exceed 20 characters. 28

32 - Password a. Password's length must not exceed 14 characters. - It is recommended to use the startup account that was specified earlier in the installation (StorageMGR-M.) when assigning a user. - If you select a new name here, such as repouser, register it in the system and add the local logon authority to it. 4. Verify the setting information. Confirm the displayed database settings and click [Start]. This automatically performs database setup processing after restarting the system. If the [Environment Settings] operation was performed during the SystemWalker/StorageMGR-M installation, this window would be initially displayed after reactivating the system. 5. The DB Setup processing started. 6. The DB Setup processing is completed. The DB Setup completion window is displayed; click the [Close] button. 29

33 30 7. Set the Web server. The Web server (Microsoft Internet Information Server/Microsoft Internet Information Services) is automatically set. Set the following virtual directory names in the Web server: - swstorage - swstorage-cgi - swstorage-d - swstorage-j 8. Activate each service. Activate the following services of the SystemWalker/StorageMGR. - SystemWalker/StorageMGR ACL Manager - SystemWalker/StorageMGR Communication Service - SystemWalker/StorageMGR GUI Service - SystemWalker/StorageMGR Space Service - SystemWalker/StorageMGR CIMOM - SystemWalker MpWksttr - SymfoWARE RDA RDBSWSTF - SymfoWARE RDB RDBSWSTF For more information on the services, see Chapter 2 in "SystemWalker/StorageMGR Operator's Guide." 9. Web server MIME settings Because the Web window is used, files may need to be downloaded. Therefore, make the required settings so that the files can be downloaded. - For Microsoft Internet Information Server 3.0 No settings are not required. - For Microsoft Internet Information Server 4.0 Make the settings by following the procedure below: 1) Select [Start]-[Programs]-[WindowsNT 4.0 Option Pack]-[Microsoft Internet Information Server]-[Internet Service Manager]. 2) From the displayed tree, select [Internet Information Server]-[Machine Name], right-click to open the pop-up menu, and select Properties. 3) In the computer MIME map on the Internet Information Server tag, click the Edit button. 4) Click the Add button and enter the following items: Related extension : policy Detail type (MIME): application/x-swstf 5) Restart the service "IIS Admin Service." When this service stops, World Wide Web Publishing Service also stops. Therefore, start World Wide Web Publishing Service with IIS Admin Service. - For Microsoft Internet Information Service 5.0 Make the settings by following the procedure below: 1) Select [Start]-[Programs]-[Management Tool]-[Internet Service Manager]. 2) From the displayed tree, select [Internet Information Service]-[Machine Name], then right-click to open the pop-up menu, and select Properties. 3) In the computer MIME map in the Internet Information Server tab, click the Edit button. 4) Select the Add button and enter the following items: Related extension : policy Detail type (MIME): application/x-swstf 5) Restart the service "IIS Admin Service." When this service stops, World Wide Web Publishing Service also stops. Therefore, start World Wide Web Publishing Service with IIS Admin Service. 10. Setting up and starting the SAN management agent. To control the SAN storage and storage management servers using the SAN resource management function (for more information, see Chapter 7, "SAN Resource Management Operation," in the SystemWalker/StorageMGR Operator's Guide), the SAN management agent must be operating on the storage
34 and storage management servers. Follow the procedures given in Chapters and
35 32

36 Chapter 5 Customization of Storage Server This chapter explains the customization of the Storage server and covers how to customize the Storage Management Server. 5.1 Flow of Customizing Storage Server The flow of customizing the Storage server is shown below. The SystemWalker/StorageMGR automatically performs the customization steps shown in green. 5.2 Details of Storage Server Customization Set up the Storage server, using the following procedure: 1. Start the service. Start the SystemWalker/StorageMGR service mentioned below. - SystemWalker/StorageMGR Communication Service 2. Set up and start the SAN management agent. To control the SAN storage and storage management servers using the SAN resource management function (for more information, see Chapter 7, "SAN Resource Management Operation," in the SystemWalker/StorageMGR Operator's Guide), the SAN management agent must be operating on the storage and storage management servers. Follow the procedures given in Chapters and Starting SystemWalker/StorageMGR services Start the SystemWalker/StorageMGR Communication service. For details about this service, see Chapter 2, "Starting and Stopping Services," in the SystemWalker/StorageMGR Operator's Guide Setup of SAN management agent To set up the SAN management agent, take the following action: Automatically start and set up the Windows SNMP service. Define the SNMP community for communicating with the Storage management server. Because the SAN management agent is included in SystemWalker/StorageMGR-M/A, perform the installation described in Chapter 2 or Chapter 3 of this manual before setting it up. Confirm that SANMA is not yet used as a community name. If it has already been used, consult your Fujitsu SE. To use the SystemWalker/StorageMGR-A as a Storage server, the SNMP service must be installed. If the SNMP service has not been installed, refer to Appendix D, "Installation of SNMP Service". By stopping the SNMP service, other products using that service will be affected; therefore, contact the server administrator in advance. In the operation to be explained below, you need to login to the Windows server with administrator rights For WindowsNT Click [Control Panel]-[Service] and confirm that SNMP startup in the service menu is set to Automatic. 33

![Select [Control Panel]-[Network], select](/docs-images/91/106433291/images/37-1.jpg "SNMP Service from the Service tab, and")
37 2. If 1 is incorrect, click Startup, select Auto, and click OK. 3. Select [Control Panel]-[Network], select SNMP Service from the Service tab, and click Properties. 34

38 4. Click the Security tab and click Add Name for the Community to be accepted. 5. Set a community right and community name as follows and click Add. 35

![Open [Start]-[Programs]-[Management Tool]-[Service] and confirm that the startup type of the](/docs-images/91/106433291/images/39-1.jpg "SNMP service in the Service menu is Automatic. 2.")
39 6. Confirm that SANMA was added in the window shown in 4, and click OK For Windows Open [Start]-[Programs]-[Management Tool]-[Service] and confirm that the startup type of the SNMP service in the Service menu is Automatic. 2. If 1 is not set on Automatic, select SNMP Service, right-click, open Properties, and set the startup type to Automatic on the General tab. 36


40 3. Click the Security tab and click Add Name of Community to be Accepted. 4. Set a community right and community name as follows and click Add. 37
 invoked from the Windows SNMP service, the Windows SNMP service needs to be")

41 5. Confirm that SANMA is added in the window shown in 3, and click OK Starting and stopping SAN management agent Because the SAN management agent operates as a Dynamic Link Library (DLL) invoked from the Windows SNMP service, the Windows SNMP service needs to be started and stopped. This chapter explains how to start and stop the SAN management agent. Although the confirmation method to be explained subsequently is for WindowsNT 4.0, the same procedure also applies for Windows Starting SAN management agent 1. Select and start SNMP from window 1 shown in Chapters and , or stop and start it. Otherwise, restart the Windows storage server. In Windows2000, operation is possible even by a right-clicking operation. 2. After starting the SNMP service or rebooting the system, select [Management Tool]-[Event Viewer] and confirm that the following message is displayed. If the SNMP service issues a warning or error message (see Chapter 2.1.6, "Confirmation of SNMP Service") or the following message is not displayed, refer to Chapter 7.12, "SAN Management Agent," in the SystemWalker/StorageMGR Operator's Guide Stopping SAN management agent 1. Select SNMP from the windows shown in Item 1 in Chapters and Item 1 in Chapter and click Stop. If the Windows SNMP service is stopped, the Storage server cannot be monitored from the SystemWalker/StorageMGR SAN management function (refer to Chapter 7, "SAN Management," in the SystemWalker/StorageMGR Operator's Guide). By stopping the Windows SNMP service, other applications using that service will be affected; therefore, contact the Windows server administrator in advance. 38

42 Chapter 6 Uninstallation This chapter explains the uninstallation of the SystemWalker/StorageMGR. 6.1 Uninstallation of SystemWalker/StorageMGR-A Flow of uninstalling SystemWalker/StorageMGR-A The flow of uninstalling the SystemWalker/StorageMGR-A is shown below: Details of SystemWalker/StorageMGR-A uninstallation Uninstall the SystemWalker/StorageMGR, using the following procedure: 1. Uninstall the Storage server. Uninstall the Storage server from the control of the SystemWalker/StorageMGR. For more information on Server deletion method, see Chapter in "Systemwalker/StorageMGR User's Guide." 2. Logon to the system. Logon as an Administrator on the system where SystemWalker/StorageMGR will be uninstalled. 3. Selecting the [Add/Remove Programs] window. By double-clicking the [Add/Remove Programs] icon on the [Control Panel], the following [Add/Remove programs] window is displayed. Select "SystemWalker/StorageMGR" on this window, and execute the following operation: - For the Windows NT Click the [Add/Remove] button. 39
![Click [Remove] on the (InstallShield) window, and then click the](/docs-images/91/106433291/images/43-0.jpg "[Next] button.")
43 Click [Remove] on the (InstallShield) window, and then click the [Next] button. - For the Windows 2000 Click the [Change/Remove] button. 40
![4. The following window is displayed; click the [OK] button. 5. Check whether the SNMP service has stopped and started. Uninstall processing automatically stops and starts the SNMP service.](/docs-images/91/106433291/images/44-2.jpg "If there is no problem in stopping and starting the SNMP service, click the [OK] button.")
44 4. The following window is displayed; click the [OK] button. 5. Check whether the SNMP service has stopped and started. Uninstall processing automatically stops and starts the SNMP service. If there is no problem in stopping and starting the SNMP service, click the [OK] button. If there may be a problem in stopping and starting the SNMP service, click the [Cancel] button to cancel processing. 6. A dialog box will open to request confirmation for deleting the storage server. To delete the server, click the [OK] button. If you are not sure about deleting the storage server, click the [Cancel] button to cancel processing. 7. After the uninstallation has completed, the following confirmation window is displayed. Click the [OK] button. This operation finishes the uninstallation of SystemWalker/StorageMGR. 41


45 8. Restart the system. 9. Delete the backup directory. Manually delete all the files under the Environment Settings directory etc backup data, using the Windows Explorer, etc. 6.2 Uninstallation of SystemWalker/StorageMGR-M Flow of Uninstalling SystemWalker/StorageMGR-M The flow of uninstalling the SystemWalker/StorageMGR-M is shown below: Details of SystemWalker/StorageMGR-M uninstallation Uninstall SystemWalker/StorageMGR-M components using the following procedure: Delete all the Storage servers. Delete all the Storage servers, which are managed by the Storage management server to be uninstalled, from the control of SystemWalker/StorageMGR. For more information on Server deletion method, see Chapter in "SystemWalker/StorageMGR User's Guide." 2. Logon to the system. Logon as an Administrator on the system where the SystemWalker/StorageMGR will be uninstalled.

![Start the [DB unsetup]. Click the [DB unsetup] button. Then, click the [Start] button on the following window. 6. Terminate the [DB unsetup] dialog.](/docs-images/91/106433291/images/46-1.jpg "After the DB unsetup is completed, the following window is displayed. Click the [Close] button. Then click the [Exit] button. 7. Selecting the [Add/Remove Programs] window.")
46 3. Release the Web server setting information. Execute the following command on the DOS prompt window: C: >program directory bin alias -u For details of the above command, see Chapter in "SystemWalker/storageMGR Operator's Guide." 4. Activate the [SystemWalker/StoragrMGR Setup Menu]. Click [Start] -> [Programs] -> [SystemWalker_StorageMGR] -> [DB setup tool] 5. Start the [DB unsetup]. Click the [DB unsetup] button. Then, click the [Start] button on the following window. 6. Terminate the [DB unsetup] dialog. After the DB unsetup is completed, the following window is displayed. Click the [Close] button. Then click the [Exit] button. 7. Selecting the [Add/Remove Programs] window. Double-click the [Add/Remove Programs] icon on the [Control Panel]. Then, the following [Add/Remove Programs] window is displayed. Select "SystemWalker/StorageMGR" on this window, and execute the following operation: - For the Windows NT Click the [Add/Remove] button. 43
47 Select Removeon the [Select Installation] window and click the [Next] button. - For the Windows2000 Click the [Change/Remove] button. 44
![8. The following confirmation window is displayed, click the [OK] button. 9. Check whether the SNMP service has stopped and started.](/docs-images/91/106433291/images/48-3.jpg "Uninstall processing automatically stops and starts the SNMP service. If there is no problem in stopping and starting the SNMP service, click the [OK] button.")
48 8. The following confirmation window is displayed, click the [OK] button. 9. Check whether the SNMP service has stopped and started. Uninstall processing automatically stops and starts the SNMP service. If there is no problem in stopping and starting the SNMP service, click the [OK] button. If there may be a problem in stopping and starting the SNMP service, click the [Cancel] button to cancel processing. If you are not sure about deleting the storage server, click the [Cancel] button to cancel processing. 10. After the uninstallation is completed, the following confirmation window is displayed. Click the [OK] button. This completes the uninstallation of the SystemWalker/StorageMGR. 11. Restart the system. 12. Delete the backup directory. If the Storage management server is used also as a Storage server, manually delete all files under the Environment Settings directory etc backup data, using Windows Explorer, etc. 45
49 46
50 Appendix A Notes on Installation This appendix describes notes when SystemWalker/StorageMGR is introduced. A.1 About Account for Installation It is mandatory that the terminal where SystemWalker/StorageMGR installation is to take place be logged on the system as Administrator. If it is not logged on as Administrator, please log off and log on again as Administrator. A.2 Installation in BDC When the SystemWalker/StorageMGR is to be installed in a backup domain controller (BDC) of Windows NT(R), specify an already existing user. If a new user's specified, it may be impossible to install the SystemWalker/StorageMGR because a new account is not immediately registered. A.3 Reinstallation If a reinstallation should be required, it should be done as follows: When the SystemWalker/StorageMGR-A is installed in the system where the SystemWalker/StorageMGR-A has been installed When the SystemWalker/StorageMGR-M is installed in the system where the SystemWalker/StorageMGR-M has been installed When the SystemWalker/StorageMGR-M is installed in the system where the SystemWalker/StorageMGR-A has been installed When the SystemWalker/StorageMGR-A is installed in the system where the SystemWalker/StorageMGR-M has been installed A.3.1 Operation required before reinstallation When the SystemWalker/StorageMGR-M or SystemWalker/StorageMGR-A is reinstalled in the system where the SystemWalker/StorageMGR-M has been installed, the DB Unsetup processing must be executed beforehand. If the DB Unsetup processing has not been executed, reinstallation cannot be performed. For details of the DB Unsetup processing, refer to Section in "SystemWalker/StorageMGR Operator's Guide." A.3.2 About reinstallation The procedure for installing SystemWalker/StorageMGR on a system differs depending on the version to be installed. If V5 has already been installed, the message "An older version of StorageMGR is already installed" will be displayed, and installation terminates with an error. After manually uninstalling V5, restart the system, and reinstall by issuing the install instruction for SystemWalker/StorageMGR. If V10 has already been installed, it will be uninstalled. After the older version has been uninstalled, restart the system and reinstall by issuing the install instruction for SystemWalker/StorageMGR. 47
51 48
52 Appendix B Notes on Customization This appendix describes notes when Customization of SystemWalker/StorageMGR is done. B.1 Repository Database Size The repository database size is estimated by using the [Repository database estimation expression]. Following should be noted: When the estimation result includes a decimal point, round it up. If the estimation result is less than 65(MB), use at least 65(MB) as the estimated repository size. When the number of servers and the number of partitions may increase, please calculate for the figure. If the Storage server to be managed is the Solaris using SynfinityDISK and when the number of mirrors and the number of devices may increase, please calculate for the figure. 49
53 50
54 Appendix C Notes on Uninstallation This appendix describes notes when Uninstallation of SystemWalker/StorageMGR is done. C.1 Notes before Uninstallation C.1.1 About backup directory When the backup directory is used after the uninstallation because of the system conversion, it must be saved before the uninstallation. For saving the backup directory, use the resource backup command. For details of the resource backup command, see Chapter "Resource backup command (swstresback)" in "SystemWalker/StorageMGR Operator's Guide." The following cases require saving the backup directory: When the user is uninstalling the SystemWalker/StorageMGR-A and has a need for the backup directory of the system after the uninstallation. When the user is uninstalling the SystemWalker/StorageMGR-M in a system where the Storage management server is operated also as the Storage server and has a need for the backup directory of the system after the uninstallation. C.2 Notes on Uninstallation C.2.1 About account for uninstallation To execute the uninstallation, the system must be logged on by the local account belonging to the Administrators group. If the system has been logged on by the domain account, or if the system has been logged on by the local account not belonging to the Administrators group, the system must be logged off and on again by a local account belonging to the Administrators group. C.3 Notes after Uninstallation C.3.1 About directory after uninstallation When SymfoWARE is installed by the SystemWalker/StorageMGR-M, there may be SymfoWARE resources remaining in the directory, after uninstalling the SystemWalker/StorageMGR-M. Before deleting the directory, SymfoWARE must be uninstalled on the [Install/Uninstall Application] window. However, SymfoWARE must be uninstalled only after confirming that no other products are using it. 51
55 52

56 Appendix D Installation of Windows SNMP Service SAN resource management uses SNMP Agents to control the SAN resource information. This appendix describes the procedure for installing the Windows SNMP service for Windows NT 4.0 and Windows2000. D.1 For Windows NT 4.0 D.1.1 Installation flowchart D.1.2 Installing the SNMP service from the CD-ROM 1. Insert the "Windows NT Server" CD-ROM. 2. Select [Control Panel]-[Network], open the Service tab, and click Add. 3. Select SNMP Service and click OK. 53


57 4. Click Continue to start the installation. 5. The SNMP Properties window for setting up the SNMP service will open after the installation. Click Cancel, as this setup will be performed later; an explanation of the SNMP service is provided in this manual in Chapter 5.2, "Setup of SAN Management Agent." 54


58 6. Remove the "Windows NT Server" CD-ROM. 7. Click Yes to reboot the system. 8. After rebooting the system, the following message box will open. Click OK. By reinstalling ServicePack as explained below, the indicated problem can be avoided. D.1.3 Reinstalling Windows ServicePack To add a Windows NT component from the "Windows NT Server" CD-ROM, reinstall the Windows NT ServicePack and update the component. The following describes the installation procedure for Window NT ServicePack that must be performed to start the SNMP service normally. 1. Prepare Windows NT ServicePack. Windows NT ServicePack can be loaded from CD-ROM or downloaded from the Microsoft Corporation web site. However, if the Windows ServicePack has already been installed on the target Windows server, use the storage media that was used during that installation. For questions related to the Windows NT ServicePack, contact the server administrator or your sales agent. 2. When the version of Internet Explorer (IE) on the target Windows NT server is 5.0 or earlier If the applicable conditions are met, reinstall Windows ServicePack by following the installation procedure. 3. When the version of Internet Explorer (IE) on the target Windows NT server is 5.01 ServicePack1 or later If the following message is output in Step 2 or IE 5.01 ServicePack1 or later is used on the server, the standard encryption version of Windows ServicePack cannot be installed. This is because the Windows ServicePack installer does not permit installation on system with a higher encryption level. The term "system with higher encryption level" refers to a product that uses powerful 128-bit encryption. In the case of IE5.5, this encryption is included by default. Because Windows NT ServicePack6 or 6a is a localized 40-bit version, if an attempt is made to install it on a system where IE5.5 is installed, the following message is output and installation fails. In this case, reinstall Windows ServicePack by following the procedure below. Note, however, that this description assumes use of sp6full_i386.exe with Windows ServicePack downloaded from Microsoft's web site. When Windows ServicePack is installed from the CD-ROM, establish an environment in which the procedure for decompression and subsequent operations can be performed. If you have any questions, contact a Fujitsu SE. - Decompress the contents by executing the following command after the DOS Prompt. "sp6full_i386.exe -x" - Open update.inf, which is stored in ServicePack, in Notepad. - Delete the line SCHANNEL.DLL in the [CheckSecurity.System32.files] chapter. - Execute update.exe. 4. After rebooting the system by the operation in Step 1 or 3, confirm that the message shown in Item 8 of Appendix D.1.2 is not output. 5. By the steps above, the SNMP service should be installed in Windows NT 4.0. To confirm, select 55
![[Start]-[Programs]-[Management Tool]-[Event Viewer] and confirm that the](/docs-images/91/106433291/images/59-0.jpg "following message is output. D.2 For Windows 2000 D.2.1 Installation flowchart D.")

59 [Start]-[Programs]-[Management Tool]-[Event Viewer] and confirm that the following message is output. D.2 For Windows 2000 D.2.1 Installation flowchart D.2.2 Installing the SNMP service in Windows Select [Control Panel]-[Add/Remove Programs], select Management and Monitoring Tool for Add/Remove, and click Next. 56


60 2. Click OK. 3. Use "View" to specify the folder shown below. 4. Taking the above steps starts installation. When installation ends, the SNMP service starts automatically. 5. Select [Management Tool]-[Event Viewer] and confirm that the following message is output. 57
Microsoft Windows NT Microsoft Windows SystemWalker/StorageMGR. User's Guide V10.0L10
 Microsoft Windows NT Microsoft Windows 2000 SystemWalker/StorageMGR User's Guide V10.0L10 Preface ++ Purpose This manual explains how to operate Web-GUI with SystemWalker/StorageMGR. SystemWalker is a
SystemWalker/StorageMGR User's Guide Solaris-
 SystemWalker/StorageMGR User's Guide 10.0 -Solaris- Preface ++ Purpose This manual explains how to operate Web-GUI with SystemWalker/StorageMGR. SystemWalker is a generic name for products for operation
Microsoft Windows NT Microsoft Windows Softek AdvancedCopy Manager Operator's Guide V10.0L30
 Microsoft Windows NT Microsoft Windows 2000 Softek AdvancedCopy Manager Operator's Guide V10.0L30 Preface ++ Purpose This manual describes the operations on Softek AdvancedCopy Manager. ++ Intended Readers
Solaris OE. Softek AdvancedCopy Manager User's Guide 10.2
 Solaris OE Softek AdvancedCopy Manager User's Guide 10.2 Preface ++ Purpose This manual explains how to operate Web-GUI with Softek AdvancedCopy Manager. ++ Reader This manual is intended for system managers
ETERNUS SF AdvancedCopy Manager V13.1 GUI User s Guide
 B1WW-8871-02ENZ0(00) ETERNUS SF AdvancedCopy Manager V13.1 GUI User s Guide Preface ++ Purpose This manual explains how to operate the Web-GUI with ETERNUS SF AdvancedCopy Manager. ++ Reader This manual
ETERNUS SF AdvancedCopy Manager V13.2 GUI User s Guide
 B1WW-8871-03ENZ0(00) ETERNUS SF AdvancedCopy Manager V13.2 GUI User s Guide ii Preface ++ Purpose This manual explains how to operate the Web-GUI with ETERNUS SF AdvancedCopy Manager. ++ Reader This manual
ETERNUS SF AdvancedCopy Manager V13.3 Message Guide
 B1WW-8881-05ENZ0 (00) ETERNUS SF AdvancedCopy Manager V13.3 Message Guide ii Preface About This Manual This manual explains the messages output by ETERNUS SF AdvancedCopy Manager. Intended Reader This
Silk Performance Manager Installation and Setup Help
 Silk Performance Manager 18.5 Installation and Setup Help Micro Focus The Lawn 22-30 Old Bath Road Newbury, Berkshire RG14 1QN UK http://www.microfocus.com Copyright 2004-2017 Micro Focus. All rights reserved.
Reporting for Contact Center Setup and Operations Guide. BCM Contact Center
 Reporting for Contact Center Setup and Operations Guide BCM Contact Center Document Number: Document Status: Standard Document Version: 05.01 Date: September 2006 Copyright 2005 2006 Nortel Networks, All
Relativity Designer Installation Guide
 Liant Software Corporation Relativity Designer Installation Guide Version 5 Copyright 1994-2003 by Liant Software Corporation. All rights reserved. Printed in U.S.A. No part of this publication may be
User's Guide (Systemwalker User Management and Single Sign-On Edition)
") Systemwalker Service Quality Coordinator User's Guide (Systemwalker User Management and Single Sign-On Edition) Windows/Solaris/Linux J2X1-7665-02ENZ0(00) January 2013 Preface Purpose of this manual This
Systemwalker Service Quality Coordinator User's Guide (Systemwalker User Management and Single Sign-On Edition) Windows/Solaris/Linux J2X1-7665-02ENZ0(00) January 2013 Preface Purpose of this manual This
User's Guide - Master Schedule Management
 FUJITSU Software Systemwalker Operation Manager User's Guide - Master Schedule Management UNIX/Windows(R) J2X1-3170-14ENZ0(00) May 2015 Preface Purpose of This Document This document describes the Master
ETERNUS SF AdvancedCopy Manager Operator's Guide for Cluster Environment
 ETERNUS SF AdvancedCopy Manager 14.2 Operator's Guide for Cluster Environment J2X1-7452-04ENZ0(00) June 2011 Preface Purpose This manual explains the installation and customization of ETERNUS SF AdvancedCopy
Structure and Overview of Manuals
 FUJITSU Software Systemwalker Operation Manager Structure and Overview of Manuals UNIX/Windows(R) J2X1-6900-08ENZ0(00) May 2015 Introduction Purpose of This Document Please ensure that you read this document
Interstage Business Process Manager Analytics V11.1. Installation Guide. Windows/Solaris/Linux
 Interstage Business Process Manager Analytics V11.1 Installation Guide Windows/Solaris/Linux J2U3-0052-02(00) July 2010 About this Manual This document describes how to install Interstage Business Process
Installation Guide V1.1
 Installation Guide V1.1 The information contained in this manual is the licensed property of Fujitsu Software Technology Corporation. Use of the information contained herein is restricted to the terms
FUJITSU Software Systemwalker Operation Manager. Upgrade Guide. UNIX/Windows(R)
") FUJITSU Software Systemwalker Operation Manager Upgrade Guide UNIX/Windows(R) J2X1-3150-16ENZ0(00) May 2015 Preface Purpose of This Document This document describes the migration method, and notes when
FUJITSU Software Systemwalker Operation Manager Upgrade Guide UNIX/Windows(R) J2X1-3150-16ENZ0(00) May 2015 Preface Purpose of This Document This document describes the migration method, and notes when
HP StorageWorks Performance Advisor. Installation Guide. Version 1.7A
 HP StorageWorks Performance Advisor Installation Guide Version 1.7A notice Copyright 2002-2004 Hewlett-Packard Development Company, L.P. Edition 0402 Part Number B9369-96068 Hewlett-Packard Company makes
FUJITSU Software Interstage Studio V11.1. Installation Guide
 FUJITSU Software Interstage Studio V11.1 Installation Guide B1WD-3159-02ENZ0(00) November 2013 Preface Purpose This manual, the Interstage Studio Installation Guide, explains how to setup Interstage Studio.
ETERNUS SF AdvancedCopy Manager Operator's Guide for Tape Server Option
 ETERNUS SF AdvancedCopy Manager 14.0 Operator's Guide for Tape Server Option J2X1-7453-01ENZ0(00) July 2009 Preface Purpose This manual describes the functionality of ETERNUS SF AdvancedCopy Manager for
WEBSEWSS SINGLE SERVER INSTALLATION INSTRUCTIONS
 2300 East 14th Street Tulsa, Oklahoma 74104 USA Phone: (918) 749-1119 Fax: (918) 749-2217 e-mail: info@statsoft.com WEB: http://www.statsoft.com Notes: WEBSEWSS SINGLE SERVER INSTALLATION INSTRUCTIONS
Administrator for Enterprise Clients: User s Guide. Second Edition
 Administrator for Enterprise Clients: User s Guide Second Edition The correct bibliographic citation for this manual is as follows: SAS Institute Inc. 2002. Administrator for Enterprise Clients: User s
DefendX Software Control-Audit for Hitachi Installation Guide
 DefendX Software Control-Audit for Hitachi Installation Guide Version 4.1 This guide details the method for the installation and initial configuration of DefendX Software Control-Audit for NAS, Hitachi
ETERNUS SF AdvancedCopy Manager V13.2 Operator's Guide (Linux)
") J2UZ-8170-03ENZ0(A) ETERNUS SF AdvancedCopy Manager V13.2 Operator's Guide (Linux) ii Preface ++ Purpose This manual describes the operations available on ETERNUS SF AdvancedCopy Manager. ++ Intended Readers
J2UZ-8170-03ENZ0(A) ETERNUS SF AdvancedCopy Manager V13.2 Operator's Guide (Linux) ii Preface ++ Purpose This manual describes the operations available on ETERNUS SF AdvancedCopy Manager. ++ Intended Readers
NTP Software File Auditor for Hitachi
 NTP Software File Auditor for Hitachi Installation Guide Version 3.3 This guide details the method for the installation and initial configuration of NTP Software File Auditor for NAS, Hitachi Edition,
Installing Essentials
 CHAPTER 1 This chapter describes installing Resource Manager Essentials 3.2 on a Windows system. It consists of: Product Overview Installation Overview Preparing to Install Essentials Importing Data Manually
ETERNUS SF AdvancedCopy Manager GUI User's Guide
 ETERNUS SF AdvancedCopy Manager 14.1 GUI User's Guide J2X1-7450-02ENZ0(00) January 2010 Preface Purpose of the User's Guide The AdvancedCopy Manager GUI User's Guide provides detailed information relating
ETERNUS SF AdvancedCopy Manager V13.1 Operator's Guide for Tape Backup Option
 J2S2-0560-02ENZ0(A) ETERNUS SF AdvancedCopy Manager V13.1 Operator's Guide for Tape Backup Option Preface ++ Purpose This manual describes the functionality of ETERNUS SF AdvancedCopy Manager for Tape
Systemwalker User's Guide - Systemwalker User Management and Single Sign-On. UNIX/Windows(R)
") Systemwalker User's Guide - Systemwalker User Management and Single Sign-On UNIX/Windows(R) J2X1-7470-05ENZ0(00) April 2012 Preface Purpose of This Document This document explains how to install the Systemwalker
Systemwalker User's Guide - Systemwalker User Management and Single Sign-On UNIX/Windows(R) J2X1-7470-05ENZ0(00) April 2012 Preface Purpose of This Document This document explains how to install the Systemwalker
Network Management Utility
 4343-7705-02 Network Management Utility Foreword Welcome Network Management Utility is utility software that provides central control over printers, copiers, and other devices on a network. With Network
Installing the Eigner PLM 5.0 Windows Server
 Installation Manual Installing the Eigner PLM 5.0 Windows Server for Microsoft SQL Server 2000 Part Number WQ501a 2002 Eigner U.S. Headquarters: European Headquarters: EIGNER U.S. Inc. EIGNER Germany GmbH
Oracle8 Enterprise Edition
 Oracle8 Enterprise Edition Release 8.0.6 for Windows NT Part No. A69522-01 Contents Included Products on page 3 Pre-Installation on page 6 System Requirements on page 7 Products Available for Installation
TIE1.80InstallationGuideUK
 Installation Guide 112206 2006 Blackbaud, Inc. This publication, or any part thereof, may not be reproduced or transmitted in any form or by any means, electronic, or mechanical, including photocopying,
PlexService 2.5 Installation Guide
 PlexService 2.5 Installation Guide Copyright 2000-2003 K-Plex Inc. All rights reserved Page 1 Table of Contents 1 Introduction... 3 2 System Requirements... 4 2.1 Hardware... 4 2.2 Software... 4 3 Installation...
SVA NMP Monitor for Unicenter TNG on Windows NT/2000
 SVA NMP Monitor for Unicenter TNG on Windows NT/2000 Installation Guide Version 3.1.1 First Edition Proprietary Information Statement The information in this document is confidential and proprietary to
Copyright FUJITSU LIMITED
 ******************************************************************************** ** ** ** Systemwalker Templates Installation (readme) ** ** - Event Monitor Templates ** ** - Process Monitor Templates
ETERNUS SF AdvancedCopy Manager GUI User's Guide
 ETERNUS SF AdvancedCopy Manager 14.0 GUI User's Guide J2X1-7450-01ENZ0(00) July 2009 Preface Purpose of the User's Guide The AdvancedCopy Manager GUI User's Guide provides detailed information relating
Contents. 1 Introduction... 2 Introduction to Installing and Configuring LEI... 4 Upgrading NotesPump to LEI...
 Contents 1 Introduction... Organization of this Manual... Related Documentation... LEI and DECS Documentation... Other Documentation... Getting Started with Lotus Enterprise Integrator... 2 Introduction
MapMarker Plus Developer Installation Guide
 MapMarker Plus 11.1 Developer Installation Guide Information in this document is subject to change without notice and does not represent a commitment on the part of the vendor or its representatives. No
SIEBEL ANALYTICS INSTALLATION AND CONFIGURATION GUIDE
 SIEBEL ANALYTICS INSTALLATION AND CONFIGURATION GUIDE VERSION 7.7, REV. A MARCH 2004 Siebel Systems, Inc., 2207 Bridgepointe Parkway, San Mateo, CA 94404 Copyright 2004 Siebel Systems, Inc. All rights
10ZiG Technology. Thin Desktop Quick Start Guide
 10ZiG Technology Thin Desktop Quick Start Guide 2010 05 20 Introduction This document is intended as a quick start guide for installing Thin Desktop. After reading this document, you will know how to:
Print Manager Plus 2010 Workgroup Print Tracking and Control
 INTRODUCTION: This is intended to assist in the initial installation or evaluation of Print Manager Plus 2010 Workgroup Edition. This will guide you through tracking your printing whether your workgroup
BEAWebLogic. Portal. MobileAware Interaction Server Installation Guide
 BEAWebLogic Portal MobileAware Interaction Server Installation Guide Version 8.1 with Service Pack 3 (MobileAware Version 1.0) Document Revised: September 2004 Copyright Copyright 2004 BEA Systems, Inc.
Operation Guide: for Clients
 FUJITSU Software Systemwalker Desktop Patrol Operation Guide: for Clients Windows B1WD-3289-07ENZ0(00) March 2018 Preface Purpose of this guide This guide explains the necessary installation settings and
ETERNUS SF Express V15.3/ Storage Cruiser V15.3/ AdvancedCopy Manager V15.3. Migration Guide
 ETERNUS SF Express V15.3/ Storage Cruiser V15.3/ AdvancedCopy Manager V15.3 Migration Guide B1FW-5958-06ENZ0(00) June 2013 Preface Purpose This manual describes how to upgrade to this version from the
NTP Software Defendex (formerly known as NTP Software File Auditor) for NetApp
 for NetApp") NTP Software Defendex (formerly known as NTP Software File Auditor) for NetApp Installation Guide This guide provides a short introduction to the installation and initial configuration of NTP Software
NTP Software Defendex (formerly known as NTP Software File Auditor) for NetApp Installation Guide This guide provides a short introduction to the installation and initial configuration of NTP Software
Laser Beam Printer. Network Guide. IMPORTANT: Read this manual carefully before using your printer. Save this manual for future reference.
 Laser Beam Printer Network Guide IMPORTANT: Read this manual carefully before using your printer. Save this manual for future reference. ENG Network Guide How This Manual Is Organized Chapter 1 Before
Eclipse 6.2 Conversion
 1 Eclipse 6.2 Conversion 1) Determine your Eclipse Workstation & Server Location Complete the steps below before you continue, they will be used in future conversion steps. You are responsible for knowing
User's Guide (Website Management Functions Edition)
") Systemwalker Service Quality Coordinator User's Guide (Website Management Functions Edition) Windows/Solaris/Linux J2X1-6860-03ENZ0(00) May 2011 Preface Purpose of this manual This manual explains how
Systemwalker Service Quality Coordinator User's Guide (Website Management Functions Edition) Windows/Solaris/Linux J2X1-6860-03ENZ0(00) May 2011 Preface Purpose of this manual This manual explains how
RC2000. User's Guide
 RC2000 User's Guide Edition February 2003 Preface Purpose This manual describes the functions and operation of RC2000. RC2000 is a software product that provides functions for operating an OS console
NTP Software File Auditor for Windows Edition
 NTP Software File Auditor for Windows Edition An NTP Software Installation Guide Abstract This guide provides a short introduction to installation and initial configuration of NTP Software File Auditor
PageScope. Job Spooler Ver User s Guide. Job Spooler
 PageScope Job Spooler Ver. 1.6 User s Guide Job Spooler Contents Contents 1 Introduction 1.1 Welcome... 1-1 Trademark Acknowledgements... 1-1 1.2 Overview... 1-2 1.3 System Requirements... 1-3 Server computer...
Installation and Setup Guide for Client
 FUJITSU Software Symfoware Server V12.0.0 Installation and Setup Guide for Client Windows/Linux J2UL-1735-03ENZ0(00) November 2013 Preface Purpose of this document This document describes how to install
Very Important: Conversion Pre-Planning Creating Your Single User Database Converting from Version 1.x, 2.x, or 3.x...
 INTRODUCTION... 2 INSTALLATION PRE-PLANNING... 2 Very Important:... 2 Conversion Pre-Planning... 2 INSTALLATION STAGE... 3 CONFIGURATION STAGE... 3 Creating Your Single User Database... 4 Opening an Existing
BEA WebLogic Mobility Server Installation Guide
 BEA WebLogic Mobility Server Installation Guide Version 3.4 March 2006 Copyright Copyright 1995-2005 BEA Systems, Inc. All Rights Reserved. Restricted Rights Legend This software is protected by copyright,
ETERNUS SF AdvancedCopy Manager V15.0. Quick Reference
 ETERNUS SF AdvancedCopy Manager V15.0 Quick Reference B1FW-5967-02ENZ0(00) April 2012 Preface Purpose This manual describes the pre-installation requirements, installation procedure, configuration procedure,
Upgrading to Parallels Virtuozzo Containers 4.0 for Windows. Contents. About This Document
 Upgrading to Parallels Virtuozzo Containers 4.0 for Windows About This Document This document familiarizes you with the way to upgrade the following versions of the Virtuozzo for Windows software to Parallels
ETERNUS SF Express V15.1/ Storage Cruiser V15.1/ AdvancedCopy Manager V15.1. Migration Guide
 ETERNUS SF Express V15.1/ Storage Cruiser V15.1/ AdvancedCopy Manager V15.1 Migration Guide B1FW-5958-03ENZ0(00) August 2012 Preface Purpose This manual describes how to upgrade to this version from the
Inmagic Content Server Enterprise Inmagic Content Server Standard Version 1.3 Installation Notes
 Inmagic Content Server Enterprise Inmagic Content Server Standard Version 1.3 Installation Notes Thank you for purchasing Inmagic Content Server. Content Server is an enterprise-wide scalable content management
INSTALLATION AND SIGN-ON
 T ECHNICAL NOTE Product: PayBase 8.5 Last modified: December 4, 2007 10:45 am Created by: Development Inside this note: PayBase Client Installation PayBase Removal INSTALLATION AND SIGN-ON This technical
LPR for Windows 95/98/Me/2000 TCP/IP Printing User s Guide
 LPR for Windows 95/98/Me/2000 TCP/IP Printing User s Guide Rev. 02 (August, 2001) Copyright Statement Trademarks Copyright 1997 No part of this publication may be reproduced in any form or by any means
SAS Activity-Based Management Server Software 6.1 for Windows
 Installation Instructions SAS Activity-Based Management Server Software 6.1 for Windows Pre-installation Checklist Before you start to install or upgrade SAS Activity-Based Management Server, please follow
Océ Administrator s Guide. Océ PRISMAaudit V3.02 Device Manager
 Océ Administrator s Guide Océ PRISMAaudit V3.02 Device Manager Copyright Océ Printing Systems GmbH 2000 All rights reserved, including rights of translation, reprinting, reproduction by copying or any
Installing IPM on Windows
 CHAPTER 5 This chapter describes how to install the IPM server software on Windows NT, Windows 2000 Professional, or Windows 2000 Server system, and how to install the IPM client software on a Windows
Areas Covered. Chapter 1 Features (Product Overview/Note) Chapter 2 Installation Flow and Note. Chapter 3 Installing Global Array Manager (GAM)
 Chapter 2 Installation Flow and Note. Chapter 3 Installing Global Array Manager (GAM)") PRIMERGY RX200 S2 Onboard SCSI RAID User s Guide Areas Covered Chapter 1 Features (Product Overview/Note) This chapter explains the overview of the disk array and features of this product. Chapter 2 Installation
PRIMERGY RX200 S2 Onboard SCSI RAID User s Guide Areas Covered Chapter 1 Features (Product Overview/Note) This chapter explains the overview of the disk array and features of this product. Chapter 2 Installation
Dell EMC Unity Family
 Dell EMC Unity Family Version 4.2 Configuring Hosts to Access Fibre Channel (FC) or iscsi Storage 302-002-568 REV 03 Copyright 2016-2017 Dell Inc. or its subsidiaries. All rights reserved. Published July
Tivoli Access Manager for Enterprise Single Sign-On
 Tivoli Access Manager for Enterprise Single Sign-On Version 6.0 Installation and Setup Guide GC23-6349-03 Tivoli Access Manager for Enterprise Single Sign-On Version 6.0 Installation and Setup Guide GC23-6349-03
Lasso Continuous Data Protection Lasso CDP Client Guide August 2005, Version Lasso CDP Client Guide Page 1 of All Rights Reserved.
 Lasso CDP Client Guide August 2005, Version 1.6.8 Lasso CDP Client Guide Page 1 of 32 Copyright Copyright 2005 Lasso Logic, LLC. All Rights Reserved. No part of this publication may be reproduced, stored
Troubleshooting Guide
 FUJITSU Software Systemwalker Desktop Keeper Troubleshooting Guide Windows B1WD-0901-11ENZ0(00) July 2015 Preface Overview This guide describes the resolutions for problems that occur when any of the following
Upgrading from Call Center Reporting to Reporting for Call Center
 Upgrading from Call Center Reporting to Reporting for Call Center www.nortelnetworks.com 2003 Nortel Networks i Table of Contents Table of Contents Change History...1 How to use this guide...2 Introduction...
Instructions to update Digimax application software (a.k.a. firmware)
") Instructions to update Digimax application software (a.k.a. firmware) These instructions are for updating the application software from 1.0.0.0, V1.0.1.0, V1.0.2.0, 1.0.3.0 (07093001), & 1.0.3.0 (07110801),
Instructions to update Digimax application software (a.k.a. firmware) These instructions are for updating the application software from 1.0.0.0, V1.0.1.0, V1.0.2.0, 1.0.3.0 (07093001), & 1.0.3.0 (07110801),
Alti-MSCRM 2.0. Server and Client Manual. for AltiWare Open Edition (OE/ACC) Release 5.0, and AltiContact Manager (ACM) Release 5.
 Release 5.0, and AltiContact Manager (ACM) Release 5.") Alti-MSCRM 2.0 for AltiWare Open Edition (OE/ACC) Release 5.0, and AltiContact Manager (ACM) Release 5.0 Server and Client Manual Revised 04/2004 WARNING! Toll fraud is committed when individuals unlawfully
Alti-MSCRM 2.0 for AltiWare Open Edition (OE/ACC) Release 5.0, and AltiContact Manager (ACM) Release 5.0 Server and Client Manual Revised 04/2004 WARNING! Toll fraud is committed when individuals unlawfully
eftp Application User Guide
 Team A eftp User Guide 1/30 eftp Application User Guide Table of Contents Page 1. Acknowledgement 2 2. Introduction a. Welcome eftp Audience 3 b. What s in this manual 3 c. Manual Conventions 3 d. Getting
Xerox CentreWare for Tivoli NetView Users Guide Version 1.1.8
 Xerox CentreWare for Tivoli NetView Users Guide Version 1.1.8 2009 by Xerox Corporation. All rights reserved. Copyright protection claimed includes all forms and matters of copyright material and information
ETERNUS SF AdvancedCopy Manager Overview
 ETERNUS SF AdvancedCopy Manager 14.2 Overview J2X1-7443-04ENZ0(00) June 2011 Preface Purpose This manual provides an overview of the ETERNUS SF AdvancedCopy Manager. This manual describes the ETERNUS SF
Relius Administration Version 16.0 (and higher) Component Installation and Configuration. July 6, 2011
 Component Installation and Configuration. July 6, 2011") Relius Administration Version 16.0 (and higher) Component Installation and Configuration July 6, 2011 Table Of Content Section Subject 1 Overview 2 Preliminary Steps 3 Installing the Oracle Client 4 Installing
Relius Administration Version 16.0 (and higher) Component Installation and Configuration July 6, 2011 Table Of Content Section Subject 1 Overview 2 Preliminary Steps 3 Installing the Oracle Client 4 Installing
Installation and Administration Guide
 SWIFTNet Interfaces SWIFTAlliance Workstation 6.0 Installation and Administration Guide This guide is intended for the person responsible for installing and administering SWIFTAlliance Workstation. Prior
PageScope My Print Manager Ver. 1.0 Administrator s Guide
 PageScope My Print Manager Ver. 1.0 Administrator s Guide My Print Manager Contents 1 Overview 1.1 My Print Manager... 1-1 System Configuration... 1- Users... 1-3 1.1.1 The Features of My Print Manager...
ChromQuest 4.2 Chromatography Data System
 ChromQuest 4.2 Chromatography Data System Installation Guide CHROM-97200 Revision A April 2005 2006 Thermo Electron Corporation. All rights reserved. Surveyor is a registered trademark and ChromQuest is
Installing the IBM ServeRAID Cluster Solution
 Installing the IBM ServeRAID Cluster Solution For IBM Netfinity ServeRAID-4x Ultra160 SCSI Controllers Copyright IBM Corp. 2000 1 2 IBM Netfinity Installing the IBM ServeRAID Cluster Solution Chapter 1.
Upgrading from Call Center Reporting to
 Upgrading from Call Center Reporting to Reporting for Call Center Upgrade Document Reporting for Call Center Release 2.2.1xx Document Number: 200-0400-110 Document Status: Standard Document Version: 3.02
FAS Asset Accounting FAS CIP Accounting FAS Asset Inventory SQL Server Installation & Administration Guide Version
 FAS Asset Accounting FAS CIP Accounting FAS Asset Inventory SQL Server Installation & Administration Guide Version 2009.1 2009 Sage Software, Inc. All rights reserved. Published by Sage 2325 Dulles Corner
Deploying HP SIM 6.x on MSCS clusters on Windows 2008 with SQL Server 2008 SP1 White Paper
 Deploying HP SIM 6.x on MSCS clusters on Windows 2008 with SQL Server 2008 SP1 White Paper Table of Contents Abstract... 2 Introduction... 2 System infrastructure... 3 Storage configuration... 3 IP addresses...
Enhanced Support Facility User s Guide for Web-Based Admin View (PRIMEPOWER)
") J2S1-1520-05ENZ2(A) Enhanced Support Facility User s Guide for Web-Based Admin View (PRIMEPOWER) Preface Preface Purpose This manual is Enhanced Support Facility User s Guide For Web-Based Admin View Features
J2S1-1520-05ENZ2(A) Enhanced Support Facility User s Guide for Web-Based Admin View (PRIMEPOWER) Preface Preface Purpose This manual is Enhanced Support Facility User s Guide For Web-Based Admin View Features
HR-Lite Database & Web Service Setup Guide
 HR-Lite Database & Web Service Setup Guide Version: 1.00 HR21 Limited All rights reserved. No part of this document may be reproduced or transmitted in any form or by any means, electronic or mechanical,
Configure Windows Server 2003 Release 2 Server Network File Share (NFS) as an authenticated storage repository for XenServer
 as an authenticated storage repository for XenServer") Summary This document outlines the process to perform the following tasks. 1. Configure Windows Server 2003 Release 2 Server Network File Share (NFS) as an authenticated storage repository for XenServer.
Summary This document outlines the process to perform the following tasks. 1. Configure Windows Server 2003 Release 2 Server Network File Share (NFS) as an authenticated storage repository for XenServer.
MapMarker Plus Desktop Installation Guide
 MapMarker Plus 11.0 Desktop Installation Guide Information in this document is subject to change without notice and does not represent a commitment on the part of the vendor or its representatives. No
BEAWebLogic. Enterprise Security. WebLogic Server v8.1 Installation
 BEAWebLogic Enterprise Security WebLogic Server v8.1 Installation Product Version: 4.2 Service Pack 2 Document Revised: October 27, 2005 Copyright Copyright 2005 BEA Systems, Inc. All Rights Reserved.
Status Web Evaluator s Guide Software Pursuits, Inc.
 Status Web Evaluator s Guide 2018 Table of Contents Introduction... 2 System Requirements... 2 Contact Information... 2 Installing Microsoft IIS... 2 Verifying Microsoft IIS Features... 9 Installing the
EXPRESSCLUSTER X Integrated WebManager
 EXPRESSCLUSTER X Integrated WebManager Administrator s Guide 10/02/2017 12th Edition Revision History Edition Revised Date Description 1st 06/15/2009 New manual 2nd 09/30/2009 This manual has been updated
Pension System/Windows. Installation Guide
 Pension System/Windows Installation Guide Updated for Microsoft SQL Server 2014 & MS SQL Express 2014 DATAIR Employee Benefit Systems, Inc. 735 N. Cass Ave. Westmont, IL 60559-1100 V: (630) 325-2600 F:
Copyright Autodesk, Inc.
 Customer and Administration Building, Ditzingen, Germany - Design by Barkow Leibinger Architects Copyright 2003-2008 Autodesk, Inc. Table of Contents 1 Introduction... 3 What is Facility Manager?... 3
This guide consists of the following two chapters and an appendix. Chapter 1 Installing ETERNUSmgr This chapter describes how to install ETERNUSmgr.
 Preface This installation guide explains how to install the "ETERNUSmgr for HP-UX" storage system management software on an ETERNUS DX400 series, ETERNUS DX8000 series, ETERNUS2000, ETERNUS4000, ETERNUS8000,
LexisNexis PCLaw Installation & Upgrade Guide
 LexisNexis PCLaw Version 16 2017 LexisNexis All rights reserved. Copyright 2017 LexisNexis. All rights reserved. No part of this work may be reproduced or transmitted in any form or by any means, electronic
500 Series Installation Guide
 500 Series Installation Guide Revision 1.9 September, 2010 Disclaimer: The specifications in this document are subject to change without notice. All trademarks mentioned in this document are the property
Installation and Upgrade Instructions DDM 2016
 DDM 2016 Contents Introduction... 3 Pre-Requisites... 3 Software and Hardware Requirements - Server... 3 Software and Hardware Requirements - Clients... 3 Microsoft SQL Server Notes... 4 DDM Server Installation...
Abila MIP. Installation Guide
 This is a publication of Abila, Inc. Version 2018.1.0 2017 Abila, Inc. and its affiliated entities. All rights reserved. Abila, the Abila logos, and the Abila product and service names mentioned herein
Installation Instructions for SAS Activity-Based Management 6.2
 Installation Instructions for SAS Activity-Based Management 6.2 Copyright Notice The correct bibliographic citation for this manual is as follows: SAS Institute Inc., Installation Instructions for SAS
ehealth Integration for HP OpenView User Guide
 ehealth Integration for HP OpenView User Guide MN-NHHPOV-003 July 2005 Important Notice Concord Communications, Inc., ehealth, ehealth Suite, the Concord Logo, eroi, AdvantEDGE, SystemEDGE, Live Health,
Installing Intellicus DotNet Client on Windows. Version: 16.0
 Installing Intellicus DotNet Client on Windows Version: 16.0 Copyright 2015 Intellicus Technologies This document and its content is copyrighted material of Intellicus Technologies. The content may not