Installation Guide Single Server Demo environment of IBM Connections V5.5 CR1 and IBM Docs 2.0
|
|
|
- Sharleen Dawson
- 6 years ago
- Views:
Transcription

1 Installation Guide Single Server Demo environment of IBM Connections V5.5 CR1 and IBM Docs 2.0 Ivan Mikhalychev IBM Collaboration Solutions Technical professional version 1.1 1
2 Table of Contents Introduction...3 Prepare your VM environment...5 Unpack files for installation...6 Installing and setting up IBM Domino as LDAP and SMTP server...8 Installation of IBM DB Installation and configuration of the WebSphere Application Server...68 Configuring WAS to use the IBM HTTP Server Installation of the IBM Tivoli Directory Integrator IBM Connections Database creation and user population Installation of IBM Connections IBM Connections post installation configuration steps Configuring Filenet Installation of IBM Docs Verifying the Docs installation Installation of Cognos Create Windows services for node agents Installation of IBM Connections CR1 update
3 Introduction This document was created while installing a classroom education environment with IBM Connections 5.5 including Cognos, Filenet and IBM Docs. This document can help and aid you in your own installation but always keep in mind, that for this virtualized environment everything runs in a single VM, which is not supported. Also Keep in mind, that not all required patches for a production environment have been applied here. This installation guide covers: 1. Installing and setting up a Domino Server as LDAP 2. Installing and setting up DB2 3. Installing and setting up WebSphere Application Server 4. Installing and setting up Tivoli Directory Integrator 5. Installing and setting up IBM Connections Setting up Filenet 7. Setting up Cognos 8. Installing and setting up IBM Docs This installation was run on a ESX server VM with 24 GB of RAM assigned to the VMWare with Windows 7 64 Bit running as the server environment. 120 GB have been assigned for the virtual hard drive. Also I suggest you do use a SSD for the installation. I am not sure, if a regular HDD in a notebook is fast enough. Even though the installation of all components is possible on Windows 7, you may use Windows Server environment 2008 or 2012 which is supported according to system requirements. The process of installation is mostly the same. The following Software has been used for this installation: IBM Domino Server V bit for Windows English IBM Notes, Domino Designer and Admin V9.0.1 for Windows XP,Vista and Windows 7 32 Bit English IBM Installation Manager for Windows 64 IBM DB2 V10.5 FP7 universal for Windows Multilingual IBM Tivoli Directory Integrator Identity Edition V7.1.1 for Windows - x86-64, Multilingual + FP5 IBM WebSphere Application Server Network Deployment V8.5.5 for Multiplatform Multilingual + FP9 IBM WebSphere Application Server V8.5.5 Supplements for Multiplatform Multilingual IBM Connections V5.5 IBM Cognos Business Intelligence Server 64-bit IBM Cognos Intelligence Transformer IBM FileNet Content Engine Platform IBM Content Navigator FP 7 IBM Docs V2.0 for Windows 3

4 Partnumbers: All Partnumbers can be found here: The list of all files will possible look like this: For DB2 installation you usually download only fixpack package from FixPack Central. The fixpack package also contains all basic packages. There is no need to dowload and install DB2 10 first and then the Fixpack. For your installation use latest fixpacks from FixPack Central. 4


5 Prepare your VM environment It's better to change the name of your Windows computer to make it corresponding to the names of your DB2/WAS servers: Also edit your hosts file and add the line with actual IP address of your machine and hostnames ics.ibmdemo.com, ics which we will use for servers during the installation. 5
6 Unpack files for installation Some of the files need to be unpacked before being installed. You may unpack all needed files in advance or during the installation process. For this particular installation process unpack the files into following folders: Be careful when unpacking packages for WAS ND 8.5. Unpack all 3 parts of WAS archive to the same directory. Then unpack 3 parts of WAS ND Supplements to another directory for Supplements. Do the same for FixPack packages unpack into 3 directories for WAS FP, WAS Supplements FP and WAS WCT FP. That would make installation process easier. Please, check twice that you didn't mix with the packages as the content is quite similar 6
.")

7 Also be careful when unpacking files for FileNet (Connections CCM). You need to unpack all archives into the same directory, installation files first, then FixPacks. Merge directories and overwrite files when asked. 7


8 Installing and setting up IBM Domino as LDAP and SMTP server First we need to install the IBM Domino server. Run the installer. The files will now be unzipped. 8

9 Now the installer starts and we click next. Now we need to accept the license agreement and click next. 9
10 Choose a path to install IBM Domino to. In all of the installation parts I will install into C:\IBM and always remove the Program Files. I strongly suggest you do so, too, to avoid issues with the Space in Program Files and keep the directory length name as short as possible. 10

11 Choose the data directory: Choose Domino Enterprise Server: 11
12 Click next at the summary screen. The installation will now begin. Once the installation is done, it should only take a couple of minutes, click Finish. 12


13 Now we install the IBM Notes Admin client. The first option will unpack the files and delete them after the installation. 13

14 Once the installer has started click next. Accept the licence agreement and click Next. 14


15 Now choose the path for the installation and the data directory. I suggest to remove the Program Files part. Click next to continue. 15


16 Now we need to add the IBM Domino Administrator to the feature being installed. Then click Next. 16


17 You can leave all options ticked. Click Install to start the installation. Once the installation is done click Finish. 17


18 Now we start the Domino server for the first time to configure it. On the start up screen click Next. 18


19 We are going to install our first server and it will be a stand-alone server, therefore we just click Next. Here we give the Server a name and title. I suggest you keep the standard ics. You can choose freely though, but if you choose your own, make sure to write it down, as you will need it later. Then click Next. 19

 for the password.")
20 Now we choose an organization name and a password for the Certifier. Choose ibmdemo for the Organization name and passw0rd (with zero) for the password. One the next screen the Domino Domain name should be ibmdemo. 20

 we need")
21 Now we will create the Domino Administrator. Just choose Administrator for the last name and passw0rd as password. You may want to select to save a local copy of the ID file to have access to it. Click next. While we do not want the HTTP Services set up (we will use the IBM HTTP Server later on) we need the Internet Mail Clients for SMTP and the Directory services selected for LDAP. Click Next. 21


22 On the next screen you may have to add the hostname. Click Customize. Add the Host Name of you machine (e.g. ics.ibmdemo.com) to the qualified hostname and click OK. 22


23 Click Next. Again, just click next. 23


24 Now at the summary screen click on Setup. Once the setup is done click on Finish. 24

25 Now we start the Domino server again. I suggest to have the Domino Server always started as a Windows service as system startup, as we will need it whenever we start WebSphere and IBM Connections and Notes. Then click OK. Optional: Since the Domino server is started as a system service we cannot see if it working and what is doing at the moment. If you would like to use the console and see the current activity of the server start the IBM Domino Console: 25

26 Once you re done you can just close the console. It will not stop or shutdown the Domino server. 26

27 Now we need to create some users and configure some setting in the Domino Server. To do so please start the IBM Domino Admin Client: Since this is the first start, we will need to configure the Notes Admin client. Click next. 27


.")
28 Enter Administrator as your name and the Domino Server name you chose. If you used the same as in my instructions and screenshots it will be ics. Now click next. Now enter passw0rd and click Log In (or use the password you chose). We do not have Sametime installed and therefore unselect Setup instant messaging and click next. 28


29 On the next screen just click Finish. With clicking OK the Notes Admin client is set up. 29

30 You now will be greeted by an information screen. Select Don t show this again and then close this welcome screen. 30

31 Now on the People & Groups Section click on People. 31

32 On the right side click on the Triangle next to people to open more options. Click on Register to create some users to administer and use IBM Connections and IBM Notes with. 32


33 Now click on Certifier ID and select it. You will find the ID File in C:\IBM\Domino\data\cert.id if you followed the screenshots. 33

34 Now click OK. The password for the Certifier is passw0rd, if you did not choose a different one earlier on. 34

35 Now we register the users. Select Advanced to have some more options. 35
. Then click on Password Options.")
36 Enter Firstname, Last Name and a password (I always choose passw0rd for this environment). Then click on Password Options. 36

37 Now lower the Password Quality Scale (do this only, if this is a test environment) and select Set internet password. Now the Notes password will also be used to set the internet password. Not setting this will result in users being unable to log in into IBM Connections. 37

38 In the Address settings you can change the address to a different value. 38
39 Optional you can also have the ID file for the user stored locally. 39

40 Now click on the green check mark to have the user added to the list of people to create and register. 40

41 Click on Basics to create the next user. Create some more users. 41

42 Important: Also create two more users: Cognos Admin and Filenet Admin. They automatically should have the short names cadmin and fadmin. I suggest to give them the password passw0rd, if you want to follow the instructions. Otherwise write them down, as they will be needed later. 42


43 Once you are done click on Register All and click OK on the following pop-up. 43

44 You can now close the user creation screen by clicking on Done. 44

45 By default users can only log in with limited variations in their name. We want them to be able to log in with their name, short name and -address alike, therefore we need to change a security setting, which prevents users from doing this. To do so, click on the Configuration tab. Open the Server section on the left side and click on Current Server Document. 45


46 In there select the Security tab. Now click on Edit Server. 46


47 Now search for the Section Internet Access and change the setting for Internet Authentication to More name variations with lower security. 47


48 Then click on Save & Close. With that we can close the Domino Administration client. 48

49 49


50 Installation of IBM DB2 In the next step we are going to install IBM DB2. DB2 will be used to store information and user data from IBM Connections and IBM Docs. There is no need to install DB2 10 first and then the Fixpack. You can install the Fixpack right away, as it also contains all basic packages. Unzip the package if you didn't do it on previous steps. Change the default Temp folder to current directory. Now start the setup program. 50

51 Click on Install a Product. 51


52 Now click on Install New underneath the DB2 Version 10.5 Fix Pack 7 Workgroup, Enterprise and Advanced Editions section. This will start the installer. Note: From DB 10.5 on you will not install a specific version but DB2 Server instead. The version of DB2 running is only defined by the license file used to activiatedb2. 52

53 Click Next. 53


54 Accept the license agreement and click next. Click next. 54


55 Again, click next. Remove the Program Files part. Then click next. 55


56 Again change the path. Click Next. We use db2admin as the Admin user for DB2 and choose the password passw0rd. 56

57 Click Next. 57

58 We do not want to setup notifications, therefore unselect it and click next. 58


59 The defaults are fine, therefore click next. Now with clicking Finish we can start the installation. This will take a few moments. 59


60 After the installation click Next. And now Finish. 60


61 Now we need to add the license file. Otherwise DB2 will stop working after 90 days. The license is provided as part of IBM Connections, but needs to be downloaded together with all other IBM Connections packages. In my case the file is packed in DB2_ESE_AUSI_QS_Activ_ zip Unpack zip into Installs\2_DB2\ Folder and go to C:\Installs\2_DB2\ese_u\db2\license in command line. 61


62 From there we start the following command to register the license: db2licm -a db2ese_u.lic You will then see that the license has been added successfully. Now we will create a local user with limited access to the Connections databases. While we can use the db2admin for that, it is highly recommended to use a user without full admin rights. To do so, right click on the Computer icon on the desktop and click on Manage. 62


63 Then open System Tools in the left pane and click on Local Users and Groups, and then double click on Users. Now do a right click in the middle pane and select New User... 63


64 Name the user lcuser and enter a full name and description. For this installation I suggest using the password passw0rd. Select User cannot change password and, this very important, password never expires. If you do not set this, windows policies may disable the password if it is not changed after a certain amount of time with the result of IBM Connections not working anymore, as it cannot access its databases. The click Create. Now close this window by clicking Close. 64

65 Next we need to add this user to the DB2USERS group. Double click on Local Users and Groups in the left pane and then click on Groups. In the middle pane double click now on DB2USERS. 65


66 This brings up the group membership panel. Click on Add.. Now type lcuser and then click on Check Names. 66


67 The user should be found. Now click OK to add it to the group. Last but not least click okay to close the group membership panel. 67

68 Installation and configuration of the WebSphere Application Server IBM Connections run as applications within the IBM WebSphere Application Server (WAS). To install IBM Connections modules we will need to install WAS as a Network Deployment with a Deployment Manager as well as a first Application Server Node. To install WAS we first need to install the IBM Installation Manager, which handles all packages that need to be installed. You can either download it separately or use the one that comes as part of the IBM Connections package. There you can find it in the Installs\IBM Installation Manager folder. Unpack the archive if it's not done before. Start the install program. Click next. 68

69 Accept the terms and conditions and click next. 69
70 Remove the Program Path part of the path and click next. 70

71 Now click Install. 71
72 Now click on Restart Installation Manager to start the installation of WAS
73 Now we need to add the WAS installation repositories as well as the supplemental installation repositories to the installer. The supplemental contains for example the IBM HTTP Server as well as the WebServer Plugin for configuring the IBM HTTP Server from WAS. Click on File, then preferences. 73


74 Now deselect the already existing repository. Next you click on Add repository... 74


75 .. and click on browse.. and select the repository.config from your WAS installation folder. Now click Open. 75


76 Next you click OK. Now we add the repository for the WAS Supplementals. Click on Add Repository again 76


77 ... and then browse and navigate to the repository.config from your WAS Supplemental install directory. 77

78 Then click OK. If you have Fixpacks for WAS to install you also add the repositories for the Fixpacks for WAS and the WAS Supplementals and WAS WCT the same way as we did before. For latest fixpacks check IBM FixCentral. Click OK to continue. 78

79 Now click on Install. 79

80 The installer will now ask you, which Software you would like to install. Select the IBM HTTP Server, IBM WebSphere Application Server Network Deployment, Web Server Plug-ins WebSphere Customization Toolbox. Then click Next. 80


81 Now accept the license agreements Remove the Program Files part of the path and click Next. 81

82 Attention! On this screen you will need to select each component after the other and remove the Program Files part in each of the parts. After you did this 4 times, click Next. 82

83 On the next screen click on Next. I do not suggest selecting other languages packages then English, as this may trigger the log files to be written in a language other than English. As IBM Connections a perfect solution, you will never have to provide log files to the Support team. But in the unlikely case of this happening, having the log files in Hungarian for example does not make the job for the Support team easier. ;-) 83

84 All packages should be selected. Click Next. 84

85 Now the installer wants to get some information for the IBM HTTP Server. Make sure, that the screen is set as in the screenshot below and click Next. 85

86 At the summary screen click Install. The installation will start now. Depending on the machine and HDD speed the installation can take a few minutes. 86

87 Once the installation has finished successfully select the Profile Management Tool and click Finish to close the installer. 87
88 So far we have just installed an empty hull. We now need to create the Deployment Manager as well as the first node. For that we click Create 88
 and click Next.")
89 Then select Cell (deployment manager and a federated application server) and click Next. 89

90 Choose Typical profile creation and click Next. 90

91 At the next screen choose wasadmin for the user name and to follow this guide I suggest choosing passw0rd as password. Then click Next. 91

92 At the summary screen click Create. This may take a few moments. 92

93 Once it is done deselect the Launch of the First steps console and click on Finish. 93


94 Now close the application. Now start the WebSphere Customization Toolbox in Start / All Programs / IBM WebSphere / WebSphere Customization Toolbox V8.5 94

95 Select Web Server Plug-ins Configuration Tool and press Launch Selected Tool. 95

96 On the new screen click on Add... 96

 and click")
97 Now choose a name like webserver1 and browse to the location where the Plugin was installed and select it (C:\IBM\WebSphere\PlugIns ) and click Finish. 97


98 Now we need to create the plug-in configuration. To do so click on Create... 98
99 Now choose the IBM HTTP Server V8.5 and click Next. 99

100 Point to the folder where the httpd.conf is located. If you followed the guide you will only need to remove the Program Files part of the path and then click Next. 100

101 The next screens will configure the IBM HTTP Server Administration Server. It allows you to configure and start / restart the HTTP Server remotely using the WAS Web interface. The port 8008 should be fine. Now enter a HTTP Admin as well as a password. For our environment I suggest using wasadmin for the user and passw0rd for the password. Then click Next. 101

102 The admin task should run as a windows service and should be logged on as a local system account. For our environment the Startup type Automatic is good, too. For security reasons this should be set to manual in production environments. 102
103 Now the Web Server needs a name. Use webserver1 and click Next. 103

104 On the next screen select (Local), as we have everything installed on a single server. Browse to C:\IBM\WebSphere\AppServer and select it. Then click on Next. 104

105 105
106 From the Dropdown menu make sure that AppSrv01 is selected, not the Deployment Manager (Dmgr01). Then click Next. 106

107 You now get another summary screen. Click Configure to start the configuration. 107

108 Once the configuration is finished you should see a green Success. Click Finish to close the panel. You can also quit the Customization Tool now. 108


109 Now we need to start the Deployment Manager as well as the Nodeagent to configure the security details for our WebSphere environment. Start the Services panel from Start / Administrative Tools / Services. Then start the IBM WebSphere AppServer service. This will start the Deployment Manager. 109

110 Next we start a Command Prompt to start the nodeagent. Go to C:\IBM\WebSphere\AppServer\profiles\AppSrv01\bin and run the startnode.bat command. Once the you get the message Server nodeagent open for e-business start the WebSphere Administrative console. 110
111 The browser will now open and present you with a warning about an untrusted SSL certificate. Since WAS uses a selfsigned certificate in our environment this is to be expected. Open the I Understand the Risk section and click on Add Exception... (The error message and wording may be different depending on the default browser on your system. The example shown is from Firefox). 111


112 Now click on Confirm Security Exception on the following screen. Note: I recommend to add the page to your bookmarks in browser and display it on bookmarks panel as you will need to access WebSphere console several times during the installation. 112

113 Now the WebSphere Login screen should appear. Log in as wasadmin using passw0rd as password. On the left hand click on System administration. 113

114 Now click on Console preferences. Now select Synchronize changes with Nodes and click Apply. This will ensure, that all changes made are automatically synched down to all nodes (assuming, that the nodeagents are running). 114

.")
115 Next click on Security on the left side, followed by Global security. On the right side click now Web and SIP security and then Single sign-on (SSO). Here we will set the SSO settings for our environment. 115
116 For the domain name choose.ibmdemo.com (with a leading Dot) and select Interoperability mode. For the LTPA V1 cookie name use LtpaToken and for LTPA V2 type LtpaToken2 (spelled exactly like that). Then click OK. 116

117 Now click on Configure at the bottom of the middle pane. For single sign on with other servers such as Domino we need to change the realm name. 117


118 The realm name must be the hostname of the LDAP server including the port. In our case type: ics.ibmdemo.com:389 then click Apply. You may need to re-set the wasadmin password: Choose passw0rd again and click OK. 118
.")

119 Click on Configure at the bottom of the middle pane again then next click on Add repositories (LDAP, custom, etc.)... From the New Repository drop down menu select LDAP repository. In the Repository identifier type a name for the Repository. It can be any name. Choose IBM Lotus Domino as the Directory Type. 119
120 In the primary host name type the name of the host name of the LDAP. In our case: ics.ibmdemo.com The bind user is the Domino Administrator. Therefore enter Administrator and passw0rd. In the Federated repository properties for login you can add other means of logging in aside from from the uid / short name, such as for the address. Just make sure to let uid stand in the first place, as this is needed for Filenet to work without further customizing. Then click okay. 120

121 In the next screen enter root in the Unique distinguished name of the base and click OK. Then click OK again. 121
122 On the main security page set the check mark at Enable application security and click on apply. 122

123 Now we click Save at the top of the page to write the changes in the WAS configuration. The changes will now be propagated to all attached nodes. Once you see that the synchronization is complete click OK. Now is a very good time to reboot. Please do so. 123

124 Once the machine is back up running everything we need should be started automatically. The only thing not started as a service, yet, is the nodeagent. We will add the nodeagents as services at the end of the installation. Start a Command Prompt to start the nodeagent again. Go to C:\IBM\WebSphere\AppServer\profiles\AppSrv01\bin and run the startnode.bat command. To test if our WAS configuration against the LDAP works we start the Administrative console again (you may also click the bookmark in your browser)


125 ... log in to the browser window... and click on Users and Groups followed by Manage Users 125

126 If we did everything right we should now see the users we have in our LDAP. 126

127 Configuring WAS to use the IBM HTTP Server Next we add the IBM HTTP Server to the WebSphere configuration. To do so, we first need to copy the configurewebserver1.bat file from the /IBM/WebSphere/Plugins/bin to the /IBM/WebSphere/AppServer/bin directory. 127


128 Now we need to run the command configurewebserver1.bat -user wasadmin -password passw0rd from /WebSphere/AppServer/bin. 128
.")
129 Next we need to create a key store with a self-signed SSL certificate for the IBM HTTP server for communicating with the end-user browsers as well as back to the WAS. To do so start the Key Management Utility (also called ikeyman). 129

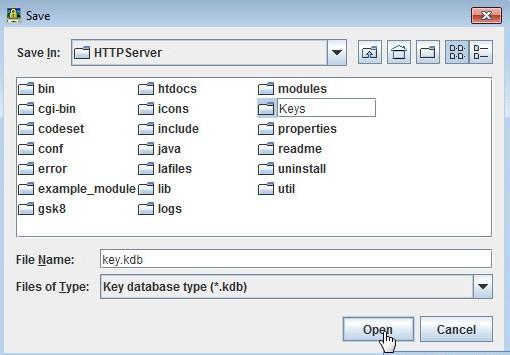
130 Then click on Key Database File and then New The key database type must be CMS. You can change the filename but I suggest you leave it as it is. I would create a new folder underneath C:\IBM\HTTPServer called Keys and have the keystore created there: 130

131 131


.")
132 Give the Keystore a password. The standard password is WebAS (you should not use it on production environment, as this is widely known, but for this test environment this is fine). Also select Stash password to a file. Then click OK. 132

133 Now that we have created the keystore, we need to add a certificate. Since we do not want to create a real one we click on New Self-Signed 133

134 Fill in at least the Key label and the Common Name. I suggest to prolong the time this certificate is valid. Then click OK. 134

135 The certificate is saved automatically, so you can just close the program. 135

136 Now we need to configure the Webserver to use SSL. Edit the httpd.conf in C:\IBM\HTTPServer\conf\ At the bottom of the file add the following: LoadModule ibm_ssl_module modules/mod_ibm_ssl.so <IfModule mod_ibm_ssl.c> Listen :443 <VirtualHost *:443> ServerName ics.ibmdemo.com #DocumentRoot C:\IBM\HTTPServer\htdocs SSLEnable </VirtualHost> </IfModule> SSLDisable Keyfile "C:\IBM\HTTPServer\Keys\key.kdb" SSLStashFile "C:\IBM\HTTPServer\Keys\key.sth" 136


137 Then save the file and restart the webserver in the web admin interface. 137


138 Now select the checkmark in front of the webserver1 and stop the server. Once stopped, the round symbol on the right should turn red. Now select it again and start the server. Once it is started the symbol to the right should turn green again. 138

139 To test that our SSL configuration works open a new tab in the browser and go to: You should need to accept the certificate and then see the webserver welcome page. 139


140 140

141 Next we need to do some additional configurations for the HTTP Server. Now click on webserver1. On the next screen click on Plug-In properties on the right side. 141

142 Now click on Copy to Web server key store directory. This will copy the WebSphere SSL keystore to the Webserver so the HTTP Server is able to trust the WAS for SSL. 142
143 Then click OK followed by another OK on the next page. 143

144 Then click Save again and wait for the changes to be synched. 144


145 Now select the checkmark in front of the webserver1 and stop the server. Once stopped, the round symbol on the right should turn red. Now select it again and start the server. Once it is started the symbol to the right should turn green again. 145
). Go to System administration/ Deployment Manager and on the right side click first on Java and Process Management and then Process definition.")
146 Before installing IBM Connections it is also a good idea to increase the heap size of the DeploymentManager, as the installation can fail with an out of memory error otherwise (but does not have to. ;)). Go to System administration/ Deployment Manager and on the right side click first on Java and Process Management and then Process definition. Then Java Virtual Machine On this page, set the heap size to higher value such as 1500 for the inital and 3000 for the maximum heap size. Then click OK and after this save the changes. 146

147 The one more configuration that is better to do when installing test environment with restricted resources is to increase WAS SOAP response timeout value. Otherwise the installation may fail by server timeout. To do this go to WAS properties directory for Dmgr profile C:\IBM\WebSphere\AppServer\profiles\Dmgr01\properties and edit soap.client.props file: 147

148 Change the value of com.ibm.soap.requesttimeout from 180 to Do the same for C:\IBM\WebSphere\AppServer\profiles\AppSrv01\properties\soap.client.props file. After making these changes, stop the Node Agent: You may need to enter your login and password for wasadmin. Then restart Deployment Manager. 148

149 And start Node Agent again. 149

150 Installation of the IBM Tivoli Directory Integrator To import the user data from the LDAP to our DB2 we need the help of a tool called IBM Tivoli Directory Integrator. In combination with the Population Wizard it will populate all users from the LDAP into the People DB in DB2. Unpack the files from archive. To start the installation start the Launchpad. 150

151 Then click on Install IBM Tivoli Directory Integrator. 151


152 Then click on Tivoli Directory Integrator Installer. Choose a language of your liking (English) and click OK. 152

153 Click Next. Click Next. 153

154 Accept the license agreement and click Next. Remove the Program Files part of the path and click Next. 154
155 Choose a Typical installation and click Next. 155


156 Make sure to select Do not specify use current working directory at startup time, then click Next. Click Next. 156
157 Click Next. Click Next. 157
158 Click Next. At the summary screen click Install. 158

159 Once the installation has finished click Done. and close the installer. Now we need to apply Fixpack 5. Copy the TDI FP0005.zip and the UpdateInstaller.jar files from the Fixpack Archive to C:\IBM\TDI\V7.1.1\maintenance. 159


160 Replace existing UpdateInstaller.jar if needed. Now we need to open a command prompt go to C:\IBM\TDI\V7.1.1\bin\ and run the following command: applyupdates.bat -update C:\IBM\TDI\V7.1.1\maintenance\TDI FP0005.zip After some minutes you should be back at the prompt. You can now close the command prompt. 160

161 IBM Connections Database creation and user population In the next step we need to create the required databases and fill the People DB with the user data from the LDAP. We do this with the provided Connections Wizards. Extract IBM_Connections_5.5_Wiz_win.exe to the same installation directory. Start the dbwizard. 161

162 Click Next on the Welcome screen. 162

163 Select Create, as we want to create the databases. 163

164 Now select DB2 and point to the DB2 installation location, if it not filled out automatically. Click Next. 164

165 Check all. Then click Next to continue. 165

166 On the next screen click Create. 166

167 The following screen will show the commands the DB creation wizard will run. Click execute to start the creation. Now it is time to be patient, as the database creation can take some time. This can be anything between 5 minutes and 20, depending on the speed of the system. 167

168 At the end the database creation should be successful. Click Finish to close the wizard. 168


169 Now we need to start the population Wizard to import the user data to the DB2. Click Next on the Welcome screen. 169

170 Enter the correct path to the TDI. If you followed the instructions you should only need to remove the Program Files part of the path. Click Next. 170

171 Choose the correct database type. In our case: DB2. 171

172 Now we need to fill out the host name, the JDBC driver library path as well as the lcuser password. In my environment the hostname is ics.ibmdemo.com, the JDBC path is C:\IBM\SQLLIB\java and the password of lcuser is passw0rd. Click Next. 172

173 Now we need to enter the hostname and port of the LDAP Server. In this case: ics.ibmdemo.com with port 389. Click Next. 173


174 The LDAP bind user is Administrator in our case and the password is passw0rd. Click next. The search base in our environment is o=ibmdemo. The search filter is correct and works in most cases. Click Next. 174

175 In the profiles database mapping we can map the fields from the LDAP to the fields in the DB2 / Connections. For our test environment the default is fine. Click Next. 175

176 Click Next on the following panel. 176

177 Now click Configure to start the population. 177

178 You should see that the user import was successful. Then click Finish. Now that we are done with the prerequisites now would be a good time for a snapshot / backup. 178

179 Installation of IBM Connections 5.5 Note: if you have only 120GB HDD, it's better to clear WAS installation files before intalling Connections to make more space on disk. Delete files from 3_WASND_8.5.5 directory and then empty Recycle Bin. So far we only prepared the prerequisites for IBM Connections. You will notice in real world installations that this will take the major part of the installation time, as usually different departments will need to be involved. Now we start the IBM Connections Launchpad. 179

180 Click on Install IBM Connections

181 Then click on Start the IBM Connections installation wizard. 181

182 Click Next. 182

183 Accept the license agreement. 183

184 Remove the Program Files from the path and click Next. 184
185 Scroll down and also select the Add-on Features. This enables the installation of Filenet. Keep in mind, that the normal license does not cover Filenet, unless you have acquired the IBM Connections Content Manager edition. Click Next. Now we define the settings for the WebSphere Application Server Deployment Manager. 185


186 Browse to C:\IBM\WebSphere\AppServer for the Installation location and choose Dmgr01 as Deployment Manager Profile. The hostname in our case is ics.ibmdemo.com. Then you need to enter the wasadmin with passw0rd as the Administrator data. After that click on Validate. The installer will now verify the data supplied. You cannot click Next until that verification was successful. Click Next once you got the successful message. 186

187 The next panel will cover the installation of Filenet. Select Install Now. The Filenet user ID we created is fadmin with passw0rd as password. Last you need to provide the location of the install files and fixpacks. In my demo environment it is C:\Install\6_FileNet. Note: if you didn't unpack the files - do it according with instructions in the beginning of this guide. You need to have 5.EXE files in one directory as a result. If you have latest FixPack on this screen change the names of the files for FixPack accordingly. Then click validate followed by Next after the successful validation. 187

188 188

189 Now we need to select the size of the deployment. Normally I do not suggest using a small deployment. But since we are very constrained on resources on a single VM, we choose it. This will install all component in a single Cluster. Choose a name for the Cluster such as ConnectionsCluster. Then click Next. 189

190 Now we need to provide the information regarding the database. We have all databases in the same database instance. Our Database Type is DB2. Enter the hostname of the database-server. In my case it is ics.ibmdemo.com. Next we need to provide the location of the JDBC driver. Since we have DB2 installed on the same machine you can find them in C:\IBM\SQLLIB\java. Then select that we Use the same password for all applications. When using the Database Creation Wizard the databases will all be accessed by the lcuser. Enter the password chosen. In our case: passw0rd. 190

191 Then click Validate. The installer will now try to access each of the databases. Once successful click Next. 191

192 New in the Connections 5.5 installation is the ability to configure the server for the HTTP server directly. Select Do now and then select the webserver (webserver1 in our case). Then click next. 192

193 Cognos will be installed via a separate Wizard, so set the check mark at Do Later and click Next. 193
 and click Validate")
194 Now we define, where the shared directory for IBM Connections data will be. Remove the Program Files path parts (or input paths manually) and click Validate followed by Next. 194

195 The last information the installer needs are the SMTP notification details. For our environment we Enable Notifications only and use a WebSphere Java Mail Session. The hostname of our SMTP messaging server is ics.ibmdemo.com. Click Next. Now you can optionally define users as Administrator and Moderator. You can fill with some of the shortnames of users you registered in LDAP or leave the fields empty. Then click Next. 195
 The installation will take at least 60 minutes (this is the fastest I have seen, yet), but depending on HDD and computer speed this can take up even two hours.")
196 This is the final summary screen before the installation. Click on Install. Now it is a good time to grab a coffee, take a nap or read some s. ;) The installation will take at least 60 minutes (this is the fastest I have seen, yet), but depending on HDD and computer speed this can take up even two hours. Before installing you should check if you have a Antivirus with on-access scan running. If so, disable it if possible. I ve had installations taking longer than 8 hours due to this. 196
197 197

198 IBM Connections post installation configuration steps Once the installation is finished, there are still some steps to do, before we can use it. First we want to restart the WebSphere Application Server Deployment Manager. 198


199 Once that is done start a Command Prompt to start the nodeagent of the cluster IBM Connections was installed in. 199
200 Now we want to start the WebSphere Administrative console to start the Connections cluster to check functionality. Log in as wasadmin / passw0rd Now go to Servers / Clusters / WebSphere application server clusters. 200


201 Then select the checkmark in front of the ConnectionsCluster and click Start. Start the server will take some time. I suggest watching the Task Manager and wait for the CPU Usage to slow down. Ultimately you d be watching the logfiles and checking for the words open for e-buiness or refresh server status in console. The status icon should be solid green arrow. 201


202 Now we need to log out of the webconsole, as due to the Single Sign on we d log into Connections as wasadmin, who is not a valid user, as he is not part of the LDAP and therefore was not populated into the People DB. In a new tab we now can go to the IBM Connections URL. Go to: You should be able to test everything now. Log in as one of registered users. 202

203 203

204 In case browser warns you about untrusted connection add exception as usual. 204
205 205


206 Configuring Filenet Now we need configure Filenet, to enable the libraries in Communities. To do so start a Command Prompt. Now go to C:\IBM\Connections\ccmDomainTool There run the creategcd.bat batchfile. 206

207 When asked enter wasadmin for the Deployment Manager admin: 207


208 Now enter passw0rd for the password: When asked if you want to regenerate the dminfo.properties type Y and hit Enter to do so. Failing to do so may result in a failed installation, if some wrong data is in this file. 208


209 When asked for the Groupname just hit Enter. You should see everything being done successfully: 209

210 Now we need to create the ObjectStore. Run the createobjectstore.bat batchfile to start the process. Enter wasadmin when asked for the Dmgr admin.. 210


211 ... and passw0rd for the password. Again hit Y and Enter to have the dminfo.properties refreshed. 211


212 Hit enter when asked for the group name. You will then see some Addons being installed and then it will ask if you want to test the activity stream. You will need to provide the URL to your Connections environment Just hit Enter to continue. 212


213 You should see Creating Object Store finished. Now we need to restart both of the Filenet Application. In the WebSphere Administration Console go to Applications / Application Types / WebSphere enterprise applications and stop the applications FileNetEngine and navigator: 213


214 Then check them again and start. Now Log Off the console, open a new tab in the browser and go to ics.ibmdemo.com/homepage and Log In. Then go to Communities....and create a new Community. 214
215 Then click on Community Actions and then Add Apps. 215

216 Then click the + next to Library. This will add the Filenet Widget. You should now be able to add you first file. Just upload any file to test if it works. 216

217 217
218 218

219 Installation of IBM Docs 2.0 I put the installation of IBM Docs before installation of Cognos Metrics in this guide as it better fits the flow of my classroom events. You may do it vice versa if you like. First we need to create two shares for IBM Docs. We create them in C:\IBM and name them DocsShare and ViewerShare. User Account Control (UAC) is a security mechanism that you might have encountered before, because it is causing the constant questions if you are sure you want to this or that? in Windows. This is generally meant to prevent harmful applications from doing their work secretly. In our case it will unfortunately also prevent the remote installation jobs from WebSphere to fail. Therefore make sure it is turned off. Important: This setting needs a reboot to be effective. 219

220 220

221 Note: If you rebooted your machine after changing the settings, make sure that Deployment Manager windows service is started, also start Node Agent and Connections Cluster. Also make sure that Windows service Remote Registry is started. Note: it's better to clear some installation files before intalling Docs to make more space on disk. Delete files from 6_FileNet directory and then empty Recycle Bin. 221

222 Now we need to install Python 2.7.x. Attention: Installing Python 3.x will result in a failing installation, as the command syntax has changed and is incompatible to 2.7.x scripts. 222


223 We can install it for all users. Click Next. The suggested path is fine. Click Next. 223

224 Make sure Add python.exe to Path is selected! Click Next again. And now click Finish. 224


225 Check if the Python Path variable has been correctly set: Right click on Computer on the Desktop and click on Properties. Then click on Advanced system settings.. 225


226 ... followed by Environment Variables If they are not present in Path, click on Edit. 226


227 At the end of the Variable value line add ;C:\Python27 (pay attention to the leading semicolon) and click OK. Click OK again to close the window. 227

228 Click OK for one more time. 228
229 Creating the IBM Docs database Now you start a new Command Prompt. Type db2cmd and hit enter to start the DB2 command line environment. In the newly opened window navigate to the Docs installation files directory /setupdb and execute the createdb.bat. You need to be patient, it may appear that nothing happens for a few minutes. 229


230 Some minutes later you should see all commands have been completed successfully. Now run the updatedbschema.bat command. The databases have been created with access rights to a user called DocsUser. As we want to use the same user as we use with IBM Connections, we need to grant access to lcuser. In the same folder edit appgrants.sql. Replace all occurrences of DOCSUSER with LCUSER and save the document. 230


231 Save the file. 231

232 Now go back to the DB2 command line processor and run the following command: db2 -f appgrants.sql You should see all command being run successfully. If you do get errors make sure you are in the DB2 command line processor and not accidentally back in the Windows Command Line. IBM Docs now comes with a new graphical installer based on IBM Installation Manager. This will make the installation much easier for us. 232


233 We now need to start the Installation Manager. Click on File / Preferences Deselect all existing repositories and click on Add Repository 233


234 Click on Browse and go to../docsinstallpackage/repository.config and click Open Now click OK. And OK again. Now we click on Install. 234

235 Select IBM Connections Docs and click Next 235

236 Accept the license terms. The default directory is fine so click Next. 236

237 We have installed IBM Connections as CCM, meaning together with Filenet so you can select Connections and Content Manager to integrate Docs with CCM Libraries as well as Files. But this option need some additional prework not covered in this guide. The necessary steps are well documentend in the IBM Docs Knowledge center: By now we skip this process to save time. So check Connections option only. Deselect the Docs Proxy Server, as it is only needed, when you have more than one Docs Server. Click Next. 237

238 On the next panel you need to affirm that you disabled UAC. 238

239 Now enter the wasadmin and corresponding password (in our case wasadmin / passw0rd) and click on browse. Go to C:\IBM\WebSphere\AppServer\Profiles\AppSrv01 and click OK. Now click validate. You will get no confirmation pop up. Once the Next button becomes available click it. 239

240 Now we need to map the Nodes to the Applications. Map all application and the Webserver to the first node by first selecting the nodename and then the >> button at the proper application. Now we need to scroll down and click on validate. Again click on Next once it comes available. Now we need to supply the local Admin username and password. This is necessary since 240

241 it is a remote deployment from the Deployment Manager. It just happens to be on the same machine in our case. Enter Administrator and passw0rd in all instances. Then click Validate. Click Next once it comes available. 241
242 We have no chat installed, so we just click Next. On the DB2 Panel enter the following values and then click Next: Database server: ics.ibmdemo.com User Name: lcuser Password: passw0rd Database product: DB2 Database name : CONCORD JDBC driver Library path : C:\IBM\SQLLIB\java 242

243 243

244 The following panel is a bit confusing when installing everything locally. Fill it out as follows and click Next: 244

245 Now it wants to know where to install the Conversion Server and how many CPU cores to use. For the path choose C:\IBM\Conversion and reduce the cores to 2. The port should be fine. 245

246 Choose C:\IBM\Docs for the installation target for the Docs component and click Next. 246
247 On the next Panel we don t need to do anything and can click Next. 247

248 Now we need to provide the directories for the Extension and Daemon installation. For the Extension directory browse to C:\IBM\Connections\data\shared\provision\webresources. The Daemon should be installed in C:\IBM\Connections\data\shared\. Click Next. 248

249 Now we can choose whether the Web and Connections server should be restarted during the installation. This is useful when installing IBM Connections Docs in production environments because it allows you to do the Docs installation at any time and to the Restart of the production Connections environment in a specific maintenance time frame. Of course setting both to No will also decrease the installation time a lot, since the Connections Server do not get restarted once with each feature installed. Since time does not matter we choose Yes for both. Click Next. 249

250 Click Next on the configuration file overview panel. 250

251 Now you click on Install and grab a coffee or two. During the installation two black windows will pop up. This is expected (and annoying, as they pop up every few minutes). These are the conversion tasks running. At the end of the installation we will alter the Task Scheduler to have them started hidden. So long just minimize them once they pop up. 251

252 In the end you should see the following screen: 252

253 Verifying the Docs installation Log out of the web administration console (if you re still logged in). And go to Log In... and create a new Document to test if the Docs Editor component is working.. 253

254 254

255 This tells us, that the Docs Editor works. Now enter some data and then click on File / Publish Version. 255


256 Enter a description and click Publish. This message shows you, that the version has been published. 256


257 You can also try Spreadsheet and Presentation editors and upload some existing documents to Connections Files to edit and preview. Now there are only two last things to do: Change some settings in the Task Scheduler. Go to the Windows Task Scheduler: Double Click on the kill_timeout task. 257

258 Change it to run whether the user is logged on or not and select Do not store password. Also select hidden and then OK. 258


259 We do the same with the sym_monitor: Double click it Change it to run whether the user is logged on or not and select Do not store password. Also select hidden and then OK. 259
260 From the next reboot on the two back windows should not appear anymore. 260


261 Installation of Cognos Now we need to install and configure Cognos. Note: If the resources of your VM are limited I suggest you to stop IBM Docs clusters before installation of Cognos. Also make sure, that you have at least 20-25GB of free space on disk. Delete installation files and archives for Docs and other installed software if needed. 261

262 First we need to create a new WebSphere Application profile. To do so, start the Profile Management Tool. Now click Create.. 262

263 263

264 Select Application Server and then click Next. 264

265 As we have a Typical profile creation click Next. 265

266 You must choose the same username and password for the administrator as in the existing deployment, otherwise the federation of the WAS into the cell will fail. So use wasadmin and passw0rd for this guide. Then click Next. 266

267 Review the summary screen and then click Create. 267

268 We do not need the First steps console, unselect it and click Finish and close the WebSphere Customization Toolbox. 268
269 269


270 Note: If the resources of your VM are limited I also suggest you to increase SOAP timeout in your new server properties for this installation (do not do that on production environment). Go to C:\IBM\WebSphere\AppServer\profiles\AppSrv02\properties and edit file soap.client.props. Increase the value of com.ibm.soap.requesttimeout to


271 Now we start the newly created server. Go to C:\IBM\WebSphere\AppServer\profiles\AppSrv02\bin and run startserver.bat server1. Then go to the Cognos Windows install directory and start the install: 271

272 272

273 Select Cognos Wizard and Click Next. 273

274 Accept the license agreement and click Next. 274

275 Change the path to C:\IBM\Cognos and then click Next. 275

276 Make sure all components are selected except for the secondary BI Server. Then click Next. Now we need to provide the information about WAS. The installation location is C:\IBM\WebSphere\AppServer. For the Local node profile ensure you select AppSrv02 and the hostname ics.ibmdemo.com. For the Administrator ID use wasadmin and passw0rd. The SOAP port should be correct. 276

277 Now we also need to enter the data of the Dmgr we deploy the AppSrv02 into. Hostname is also ics.ibmdemo.com with the SOAP port being 8879 by default and the Admin user also being wasadmin with passw0rd. Then click Validate. 277


278 If the Validation was successful click Next. 278

279 It is now asking for a Web Context root. You can choose Cognos. 279


280 Now Cognos needs to know how to access the two databases required. Database Type is DB2 and you can find the JDBC driver in C:\IBM\SQLLIB\java, as we are on the same server where DB2 is installed on. The password will be passw0rd. For the name of the Metrics database enter Metrics. Then click validate. If the validation was successful click Next. 280

281 The Cognos installer now wants to know the Cognos admin which is cadmin with passw0rd as password. The BI Server installer can be found in C:\Installs\CognosBI\winx64h\issetup.exe For the PowerCubes click on Browse and go to C:\IBM and create a folder with the name PowerCubes. 281

282 Now we need to provide the location of the Cognos Transformer install file. You can find it in C:\Installs\CognosTrnsfrmr\win32\issetup.exe. Then click Next. 282

283 On the next screen you can define the users, who will have access to Connections Metrics. Select Add only users now and add one or more users, separated with so we can test our metrics after installation. 283

284 On the summary screen hit Install. 284

285 A while later you will see the success screen. Click Finish to close it. 285

286 Now we need to copy the Websphere keystore again to the IBM HTTP Server since a new SSL certificate from the newly added WebSphere server has been added. Go to the web administration console: Go to Servers / Server Types / Web servers.. 286

287 and click on webserver1. On the rights side click on Plug-in properties. 287
288 Now click Copy to Web server key store directory. 288
289 Then click OK. Now click Save to store and propagate the changes done. 289
290 290

291 Next we need to manually run the task to create the PowerCubes, as it only runs once in a while and we don t want to wait for that to happen. So we start the Windows Task Scheduler: 291

292 Click on Task Scheduler Library on the left and then right click the MetricsCubeWeeklyRebuild and click Run. 292

293 Now it is a good idea to check the C:\IBM\CognosPowerCubes folder and see if files and folders are being created. Once no changes are done anymore it is time for a reboot. Once the server is back up running we need to start the two nodeagents to then start the Application servers. Open a command prompt. 293
294 Start the nodeagents of AppSrv01 and AppSrv02: 294

295 Then log into the web administration console and go to Servers / Clusters / WebSphere application server clusters. 295


296 Now we start the CognosCluster. Once the CPU Usage in the task manager idles down and Status in web administration console indicates that cluster is running we start the Connections cluster. 296

297 When the CPU usage has idled down again and Status in web administration console indicates that cluster is running we log out of the web administration console. 297

298 and log into Connections using cadmin / passw0rd in a new browser window. 298


299 Now we click on Metrics. Note: you may need to add address to browser exceptions in order to load metrics for the first time. 299

300 300
301 Very likely you will have no available data, since Connections has not been used, yet. You can try to change the View from Last 4 weeks to Last 7 days, as the Last 4 weeks view does not contain the current day. Once done log out again. With this we are done installing IBM Connections 5.5! Congratulations! 301

302 Create Windows services for node agents To create the windows service for the first node agent go to C:\IBM\WebSphere\AppServer\bin and run the following command: WASService.exe -add nodeagent_con_docs -servername nodeagent -profilepath "C:\IBM\WebSphere\AppServer\profiles\AppSrv01" -stopargs "-user wasadmin -password password" -userid Administrator -password passw0rd -starttype automatic 302
303 For the second nodeagent run this command: WASService.exe -add nodeagent_cognos -servername nodeagent -profilepath "C:\IBM\WebSphere\AppServer\profiles\AppSrv02" -stopargs "-user wasadmin -password password" -userid Administrator -password passw0rd -starttype automatic With that all nodeagents are started automatically at reboot. For our environment we will not set the Connections, Cognos and IBM Docs servers to start automatically, as with our limited resources in this All-In-One-VMware it is wise to only start the server needed each time. 303

304 Installation of IBM Connections CR1 update When upgrading IBM Connections 5.5 to CR1 level refer to the following technotes: Update strategy for IBM Connections uid=swg #s5 Fix list for IBM Connections 5.5 CR1 uid=swg Updating the IBM Connections 5.5 databases for Cumulative Refresh 1 (CR1) For upgrate to CR1 you will need an upgrade package for IBM Connections as long as update script for database. For this installation we already installed Cognos Wizard 5.5 CR1 so we won't need to update Cognos. First unpack the CR1 package for Connections into some temp directory: 304

305 Ensure the WebSphere Application Server Deployment Manager is started and all node agents and application servers/clusters are shutdown. 305


306 Run the IBM Installation Manager apply the CR. Configure the repository in the IBM Installation Manager From the IBM Installation Manager menu, click File > Preferences. Deselect all repositories that are currently selected. Click Repositories from the left navigation > Add Repository 306

307 Click Browse to navigate to the location of the CR and then click OK. In our case for example: C:\Installs\CR1\Updates\repository.config The IBM Installation Manager indicates if it can connect to the repository. Click OK to save the new repository. 307

308 Click Update in the Installation Manager. 308

309 The package group panel appears. Select the IBM Connections package group and click Next. 309

310 Select the package group for 5.5 CR1 and click Next. 310

311 Review and accept the license agreement by clicking I accept terms in the license agreements and then click Next. 311

312 Ensure that all the applications are selected and click Next. Note: All of the installed applications are selected by default. If you add any of the nonselected applications, those applications will be installed. If you clear any of the selected applications, those applications will be uninstalled. 312
 and click Validate. Once the administrative ID is validated, click Next.")
313 Enter the administrative ID and password of the Deployment Manager (wasadmin / passw0rd) and click Validate. Once the administrative ID is validated, click Next. 313

314 Review the summary information and click Update. 314

315 When the update is completed, click Finish button. 315
316 Start node agents, then perform a full synchronization to push the update to all nodes. Check the SystemOut.log of each nodeagent to ensure synchronization completed successfully. 316


317 Update Connections Databases To apply the database updates: Unpack database script package for the CR1. 317

318 The ZIP archive contains the complete set of SQL scripts and database update commands needed to upgrade the databases to the 5.5 CR1 database versions. Within the ZIP archive, there is a readme file with the specific commands you need to run for your database type. Go to 55cr1-database-updates\From-55\db2 directory and ppen readme file. Run command line, then start DB2 console - db2cmd In db2 command line navigate to the same location of the SQL script for DB2..\55cr1-database-updates\From-55\db2 Run the commands for DB2 from readme file. 318

319 Stop the Node Agent. 319
")
320 Delete the contents of the cache under the App Server (i.e. C:\IBM\WebSphere\AppServer\profiles\AppSrv01\temp) 320

321 Start node agents, then perform a full synchronization to push the update to all nodes. Check the SystemOut.log of each node agent to ensure synchronization completed successfully. Start the Connections Cluster. 321

322 Check that homepage all IBM Connections applications work properly. I hope you were successful in installing everything! If you have any comments please feel free to contact me! I also invite you to join the IBM Social Collaboration community on DeveloperWorks to ask questions, check for latest versions of this document and many more information: communityuuid=4021cbfe-77ed-4a39-89de-59b2fd63adb5 Thank you! Special thanks to Martti Garden, IBM Technical Lead for Social on whose Installation guides this document is based on. 322
V7.0. cover. Front cover. IBM Connections 4.5 Deployment Scenarios. Deployment Scenarios ERC 1.0
 V7.0 cover Front cover IBM Connections 4.5 Deployment Scenarios Deployment Scenarios ERC 1.0 Deployment Scenarios Trademarks IBM, the IBM logo, and ibm.com are trademarks or registered trademarks of International
Lotus Connections 2.5 Install
 Copyright IBM Corporation All rights reserved Lotus Connections 2.5 Install Contact you local IBM Representative for more information IBM Corporation Page 1 of 108 The architecture used in this guide is
Configuring an IBM Forms 8.0 Cluster using WebSphere Application Server v
 Configuring an IBM Forms 8.0 Cluster using WebSphere Application Server v8.0.0.4 Preface Authored By: Celine Hall (celine.hall@ca.ibm.com) IBM Forms Level 2 Technical Support IBM Canada Lab Victoria, BC
Installation and Setup of IBM Lotus Sametime From Zero to Hero The Next Generation
 Installation and Setup of IBM Lotus Sametime 8.5.1 From Zero to Hero The Next Generation Frank Altenburg Senior Field Support Engineer frank.altenburg@de.ibm.com Agenda Components of IBM Lotus Sametime
Architecture & Deployment
 Architecture & Deployment IBM Connections 5.0 Workshop Author: Paul Godby IBM Ecosystem Development Duration: 30 minutes 2014 IBM Corporation Agenda IBM Connections lications Prerequisite Software Deployment
Upgrade to IBM Connections 5.0 CR4 from IBM Connections 5.0 CR3 With Connections Content Manager (CCM)
") Upgrade to IBM Connections 5.0 CR4 from IBM Connections 5.0 CR3 With Connections Content Manager (CCM) 2016-03-10 3/2016 Page 1 Summary Upgrade to IBM Connections 5.0 CR4 (with CCM) 1 Introduction... 3
Upgrade to IBM Connections 5.0 CR4 from IBM Connections 5.0 CR3 With Connections Content Manager (CCM) 2016-03-10 3/2016 Page 1 Summary Upgrade to IBM Connections 5.0 CR4 (with CCM) 1 Introduction... 3
Show 201 Installation and Setup of IBM Lotus Sametime From Zero to Hero The Next Generation
 Show 201 Installation and Setup of IBM Lotus Sametime 8.5.1 From Zero to Hero The Next Generation Frank Altenburg SME for Sametime IBM Volker Juergensen Senior IT Specialist IBM 2011 IBM Corporation Agenda
Upgrade to IBM Connections 6.0 CR2 from IBM Connections 6.0 CR1 and IFR1 With Connections Content Manager (CCM)
") Upgrade to IBM Connections 6.0 CR2 from IBM Connections 6.0 CR1 and IFR1 With Connections Content Manager (CCM) 6/25/2018 Page 1 6/25/2018 Page 2 Summary 1 Introduction... 4 2 Part Numbers & Fixes... 5
Upgrade to IBM Connections 6.0 CR2 from IBM Connections 6.0 CR1 and IFR1 With Connections Content Manager (CCM) 6/25/2018 Page 1 6/25/2018 Page 2 Summary 1 Introduction... 4 2 Part Numbers & Fixes... 5
Deployment Scenario: WebSphere Portal Mashup integration and page builder
 Deployment Scenario: WebSphere Portal 6.1.5 Mashup integration and page builder Deployment Scenario: WebSphere Portal 6.1.5 Mashup integration and page builder...1 Abstract...2 Portal Mashup integration
WA2031 WebSphere Application Server 8.0 Administration on Windows. Student Labs. Web Age Solutions Inc. Copyright 2012 Web Age Solutions Inc.
 WA2031 WebSphere Application Server 8.0 Administration on Windows Student Labs Web Age Solutions Inc. Copyright 2012 Web Age Solutions Inc. 1 Table of Contents Directory Paths Used in Labs...3 Lab Notes...4
Partner Integration Portal (PIP) Installation Guide
 Installation Guide") Partner Integration Portal (PIP) Installation Guide Last Update: 12/3/13 Digital Gateway, Inc. All rights reserved Page 1 TABLE OF CONTENTS INSTALLING PARTNER INTEGRATION PORTAL (PIP)... 3 DOWNLOADING
Partner Integration Portal (PIP) Installation Guide Last Update: 12/3/13 Digital Gateway, Inc. All rights reserved Page 1 TABLE OF CONTENTS INSTALLING PARTNER INTEGRATION PORTAL (PIP)... 3 DOWNLOADING
Tips for Using the Integrated Solution Console (ISC) and Sametime System Console (SSC) with IBM Sametime
 and Sametime System Console (SSC) with IBM Sametime") Tips for Using the Integrated Solution Console (ISC) and Sametime System Console (SSC) with IBM Sametime October 28, 2015 Miguel Macias, Sandy Lee, Casey Toole IBM Corporation 2015 1 Agenda Integrated
Tips for Using the Integrated Solution Console (ISC) and Sametime System Console (SSC) with IBM Sametime October 28, 2015 Miguel Macias, Sandy Lee, Casey Toole IBM Corporation 2015 1 Agenda Integrated
IBM Lotus Sametime Media Manager Cluster Deployment Walk-through Part VI- Bandwidth Manager IBM Corporation
 IBM Lotus Sametime 8.5.2 Media Manager Cluster Deployment Walk-through Part VI- Bandwidth Manager Prerequisites for this part of the walk-through We've completed parts I, II, II, IV, and V Lotus Domino
WebSphere Application Server V7: Administration Consoles and Commands
 Chapter 5 of WebSphere Application Server V7 Administration and Configuration Guide, SG24-7615 WebSphere Application Server V7: Administration Consoles and Commands WebSphere application server properties
EVALUATION ONLY. WA2097 WebSphere Application Server 8.5 Administration on Linux. Student Labs. Web Age Solutions Inc.
 WA2097 WebSphere Application Server 8.5 Administration on Linux Student Labs Web Age Solutions Inc. Copyright 2013 Web Age Solutions Inc. 1 Table of Contents Directory Paths Used in Labs...3 Lab Notes...4
APAR PO06620 Installation Instructions
 IBM Corporation APAR PO06620 Installation Instructions IBM Counter Fraud Management 1.5.0.5 IBM Counter Fraud Development 3-31-2017 Table of Contents 1 Fix readme... 1 2 Abstract... 1 3 Contents... 1 4
WA1973 IBM Business Process Manager 8.0 Programming Using IBM Integration Designer. Classroom Setup Guide. Web Age Solutions Inc.
 WA1973 IBM Business Process Manager 8.0 Programming Using IBM Integration Designer Classroom Setup Guide Web Age Solutions Inc. Web Age Solutions Inc. 1 Table of Contents Part 1 - Minimum Hardware...3
Implementing Single-Sign-On(SSO) for APM UI
 for APM UI") Implementing Single-Sign-On(SSO) for APM UI 1.Introduction...2 2.Overview of SSO with LTPA...3 3.Installing and configuring TDS...5 3.1.Installing TDS 6.3...5 3.2.Changing the administrator password (Optional)...7
Implementing Single-Sign-On(SSO) for APM UI 1.Introduction...2 2.Overview of SSO with LTPA...3 3.Installing and configuring TDS...5 3.1.Installing TDS 6.3...5 3.2.Changing the administrator password (Optional)...7
NetBackup 7.6 Replication Director A Hands On Experience
 NetBackup 7.6 Replication Director A Hands On Experience Description Through this hands on lab you can test drive Replication Director and experience for yourself this easy to use, powerful feature. Once
Version Installation Guide. 1 Bocada Installation Guide
 Version 19.4 Installation Guide 1 Bocada Installation Guide Copyright 2019 Bocada LLC. All Rights Reserved. Bocada and BackupReport are registered trademarks of Bocada LLC. Vision, Prism, vpconnect, and
Laserfiche Rio 10.3: Deployment Guide. White Paper
 Laserfiche Rio 10.3: Deployment Guide White Paper January 2018 Table of Contents How Laserfiche Licensing Works... 4 Types of Licenses... 4 Named User Licenses... 4 WebLink Public Portal Licenses... 6
Ensuring a smooth upgrade to Sametime and IFR 1
 Ensuring a smooth upgrade to Sametime 8.5.2 and 8.5.2 IFR 1 Tony Payne, Sametime L3 February 29,2012 2011 IBM Corporation Agenda Plan Prepare Execute Troubleshoot Validate Known Fixes 2011 IBM Corporation
High Availability for IBM FileNet Content Engine on WebSphere Application Server
 IBM High Availability for IBM FileNet Content Engine on WebSphere Application Server An in-depth guide for users to setup a High Availability environment for enterprise based application like IBM FileNet
Enterprise Vault.cloud CloudLink Google Account Synchronization Guide. CloudLink to 4.0.3
 Enterprise Vault.cloud CloudLink Google Account Synchronization Guide CloudLink 4.0.1 to 4.0.3 Enterprise Vault.cloud: CloudLink Google Account Synchronization Guide Last updated: 2018-06-08. Legal Notice
Status Web Evaluator s Guide Software Pursuits, Inc.
 Status Web Evaluator s Guide 2018 Table of Contents Introduction... 2 System Requirements... 2 Contact Information... 2 Installing Microsoft IIS... 2 Verifying Microsoft IIS Features... 9 Installing the
Lotusphere IBM Collaboration Solutions Development Lab
 Lotusphere 2012 IBM Collaboration Solutions Development Lab Lab #6 Deliver Real-time Collaboration and Social Software by Integrating IBM WebSphere Portal with IBM Connections, IBM Sametime and inotes
User guide NotifySCM Installer
 User guide NotifySCM Installer TABLE OF CONTENTS 1 Overview... 3 2 Office 365 Users synchronization... 3 3 Installation... 5 4 Starting the server... 17 2 P a g e 1 OVERVIEW This user guide provides instruction
IBM Collaboration Solutions. Powered by IBM SmartCloud Meetings IBM Corporation
 Install, Deploy, and Troubleshoot IBM Connection Content Manager Open Mic - March 12, 2014 Charlie Price Advisory Software Engineer Jonathan King Advisory Software Engineer IBM Collaboration Solutions
DOWNLOAD PDF SQL SERVER 2012 STEP BY STEP
 Chapter 1 : Microsoft SQL Server Step by Step - PDF Free Download - Fox ebook Your hands-on, step-by-step guide to building applications with Microsoft SQL Server Teach yourself the programming fundamentals
SAP GUI 7.30 for Windows Computer
 SAP GUI 7.30 for Windows Computer Student and Faculty Installation Instructions Table of Contents Caution:... 2 System Requirements:... 2 System Memory (RAM) requirements:... 2 Disk Space requirements:...
Vijai Gandikota IBM Discovery Support
 Installation and configuration of the IBM HTTP Server and its plugin for IBM WebSphere Application Server V 8.0 for installation with IBM Content Analytics with Enterprise Search 3.0 Vijai Gandikota IBM
IBM InfoSphere Information Server Single Sign-On (SSO) by using SAML 2.0 and Tivoli Federated Identity Manager (TFIM)
 by using SAML 2.0 and Tivoli Federated Identity Manager (TFIM)") IBM InfoSphere Information Server IBM InfoSphere Information Server Single Sign-On (SSO) by using SAML 2.0 and Tivoli Federated Identity Manager (TFIM) Installation and Configuration Guide Copyright International
IBM InfoSphere Information Server IBM InfoSphere Information Server Single Sign-On (SSO) by using SAML 2.0 and Tivoli Federated Identity Manager (TFIM) Installation and Configuration Guide Copyright International
SAML-Based SSO Configuration
 Prerequisites, page 1 SAML SSO Configuration Task Flow, page 5 Reconfigure OpenAM SSO to SAML SSO Following an Upgrade, page 9 SAML SSO Deployment Interactions and Restrictions, page 9 Prerequisites NTP
Policy Manager for IBM WebSphere DataPower 7.2: Configuration Guide
 Policy Manager for IBM WebSphere DataPower 7.2: Configuration Guide Policy Manager for IBM WebSphere DataPower Configuration Guide SOAPMDP_Config_7.2.0 Copyright Copyright 2015 SOA Software, Inc. All rights
WA1561 WebSphere Application Server v6.1 Administration. Classroom Setup Guide. Web Age Solutions Inc. Copyright Web Age Solutions Inc.
 WA1561 WebSphere Application Server v6.1 Administration Classroom Setup Guide Web Age Solutions Inc. Copyright Web Age Solutions Inc. 1 Table of Contents Classroom Requirements...3 Part 1 - Minimum Hardware
Domino Integration DME 4.6 IBM Lotus Domino
 DME 4.6 IBM Lotus Domino Document version 1.3 Published 10-05-2017 Contents... 3 Authentication and authorization: LDAP... 4 LDAP identity...4 Access groups...5 User information retrieval...6 Configuration...6
How to Enable SSL between IHS and WAS for Lotus Connections
 How to Enable SSL between IHS and WAS for Lotus Connections Overview This document describes how to utilize Secure Sockets Layer (SSL) to secure the Lotus Connections application in your environment. SSL
Getting Started. In this chapter, you will learn: 2.1 Introduction
 DB2Express.book Page 9 Thursday, August 26, 2004 3:59 PM CHAPTER 2 Getting Started In this chapter, you will learn: How to install DB2 Express server and client How to create the DB2 SAMPLE database How
Privileged Identity App Launcher and Session Recording
 Privileged Identity App Launcher and Session Recording 2018 Bomgar Corporation. All rights reserved worldwide. BOMGAR and the BOMGAR logo are trademarks of Bomgar Corporation; other trademarks shown are
Installing and Configuring vcloud Connector
 Installing and Configuring vcloud Connector vcloud Connector 2.5.0 This document supports the version of each product listed and supports all subsequent versions until the document is replaced by a new
Installing and Configuring vcloud Connector
 Installing and Configuring vcloud Connector vcloud Connector 2.6.0 This document supports the version of each product listed and supports all subsequent versions until the document is replaced by a new
WA1976 WebSphere Application Server 7.0 Administration Fundamentals. Classroom Setup Guide. Web Age Solutions Inc.
 WA1976 WebSphere Application Server 7.0 Administration Fundamentals Classroom Setup Guide Web Age Solutions Inc. Copyright Web Age Solutions Inc. 1 01/28/09 Table of Contents Classroom Requirements...3
As you learned in Chapter 1, the architectural variations you can construct using
 2 Installation and Configuration Overview As you learned in Chapter 1, the architectural variations you can construct using WebSphere Application Server V6 range from the very simple to the fairly complex.
WA1561 WebSphere Application Server v6.1 Administration. Classroom Setup Guide. Web Age Solutions Inc. Copyright Web Age Solutions Inc.
 WA1561 WebSphere Application Server v6.1 Administration Classroom Setup Guide Web Age Solutions Inc. 1 Table of Contents Classroom Requirements...3 Part 1 - Minimum Hardware Requirements...3 Part 2 - Minimum
Upgrade to IBM Connections 5.5 CR2 from IBM Connections 5.5 CR1 With Connections Content Manager (CCM)
") Upgrade to IBM Connections 5.5 CR2 from IBM Connections 5.5 CR1 With Connections Content Manager (CCM) 2016-12-19 12/19/2016 Page 1 Summary Upgrade to IBM Connections 5.5 CR2 (with CCM) 1 Introduction...
Upgrade to IBM Connections 5.5 CR2 from IBM Connections 5.5 CR1 With Connections Content Manager (CCM) 2016-12-19 12/19/2016 Page 1 Summary Upgrade to IBM Connections 5.5 CR2 (with CCM) 1 Introduction...
Lotus Learning Management System R1
 Lotus Learning Management System R1 Version 1.0.4 March 2004 Quick Install Guide G210-1793-00 Disclaimer THE INFORMATION CONTAINED IN THIS DOCUMENTATION IS PROVIDED FOR INFORMATIONAL PURPOSES ONLY. WHILE
WA2031 WebSphere Application Server 8.0 Administration on Windows. Classroom Setup Guide. Web Age Solutions Inc.
 WA2031 WebSphere Application Server 8.0 Administration on Windows Classroom Setup Guide Web Age Solutions Inc. 1 Table of Contents Part 1 - Minimum Hardware Requirements...3 Part 2 - Minimum Software Requirements...3
BlackBerry Enterprise Server for Microsoft Office 365. Version: 1.0. Administration Guide
 BlackBerry Enterprise Server for Microsoft Office 365 Version: 1.0 Administration Guide Published: 2013-01-29 SWD-20130131125552322 Contents 1 Related resources... 18 2 About BlackBerry Enterprise Server
Extended Search Administration
 IBM Lotus Extended Search Extended Search Administration Version 4 Release 0.1 SC27-1404-02 IBM Lotus Extended Search Extended Search Administration Version 4 Release 0.1 SC27-1404-02 Note! Before using
WA1937 WebSphere Portal 7.0 Programming. Classroom Setup Guide. Web Age Solutions Inc. Copyright 2012 Web Age Solutions Inc. 1
 WA1937 WebSphere Portal 7.0 Programming Classroom Setup Guide Web Age Solutions Inc. Copyright 2012 Web Age Solutions Inc. 1 Table of Contents Part 1 - Minimum Hardware Requirements...3 Part 2 - Minimum
Application Notes for Installing and Configuring Avaya Control Manager Enterprise Edition in a High Availability mode.
 Application Notes for Installing and Configuring Avaya Control Manager Enterprise Edition in a High Availability mode. Abstract This Application Note describes the steps required for installing and configuring
WA1804 WebSphere Enterprise Service Bus v6.2 Administration. Classroom Setup Guide. Web Age Solutions Inc. Copyright Web Age Solutions Inc.
 WA1804 WebSphere Enterprise Service Bus v6.2 Administration Classroom Setup Guide Web Age Solutions Inc. 1 Table of Contents Part 1 - Minimum Hardware Requirements...3 Part 2 - Minimum Software Requirements...4
CIS 231 Windows 10 Install Lab # 3
 CIS 231 Windows 10 Install Lab # 3 1) To avoid certain problems later in the lab, use Chrome as your browser: open this url: https://vweb.bristolcc.edu 2) Here again, to avoid certain problems later in
Hands-on Lab Session 9909 Introduction to Application Performance Management: Monitoring. Timothy Burris, Cloud Adoption & Technical Enablement
 Hands-on Lab Session 9909 Introduction to Application Performance Management: Monitoring Timothy Burris, Cloud Adoption & Technical Enablement Copyright IBM Corporation 2017 IBM, the IBM logo and ibm.com
HTML Server on WebSphere Reference Guide Release 9.2.x for UNIX
 [1]JD Edwards EnterpriseOne HTML Server on WebSphere Reference Guide Release 9.2.x for UNIX E55808-05 November 2017 Describes reference material for the HTML Server. JD Edwards EnterpriseOne HTML Server
NotifySCM Workspace Administration Guide
 NotifySCM Workspace Administration Guide TABLE OF CONTENTS 1 Overview... 3 2 Login... 4 2.1 Main View... 5 3 Manage... 6 3.1 PIM... 6 3.2 Document...12 3.3 Server...13 4 Workspace Configuration... 14 4.1
DEPLOYMENT GUIDE DEPLOYING F5 WITH ORACLE ACCESS MANAGER
 DEPLOYMENT GUIDE DEPLOYING F5 WITH ORACLE ACCESS MANAGER Table of Contents Table of Contents Introducing the F5 and Oracle Access Manager configuration Prerequisites and configuration notes... 1 Configuration
Introduction... 5 Configuring Single Sign-On... 7 Prerequisites for Configuring Single Sign-On... 7 Installing Oracle HTTP Server...
 Oracle Access Manager Configuration Guide for On-Premises Version 17 October 2017 Contents Introduction... 5 Configuring Single Sign-On... 7 Prerequisites for Configuring Single Sign-On... 7 Installing
IBM SECURITY PRIVILEGED IDENTITY MANAGER
 IBM SECURITY PRIVILEGED IDENTITY MANAGER Integration with IBM Security Access Manager (ISAM) for One-time Password (OTP) Configuration Cookbook Version 2.0 Contents 1. Introduction 5 2. Requirements for
Using vrealize Operations Tenant App as a Service Provider
 Using vrealize Operations Tenant App as a Service Provider Using vrealize Operations Tenant App as a Service Provider You can find the most up-to-date technical documentation on the VMware Web site at:
KYOCERA Net Admin Installation Guide
 KYOCERA Net Admin Guide Legal Notes Unauthorized reproduction of all or part of this guide is prohibited. The information in this guide is subject to change without notice. We cannot be held liable for
IBM WebSphere Java Batch Lab
 IBM WebSphere Java Batch Lab What are we going to do? First we are going to set up a development environment on your workstation. Download and install Eclipse IBM WebSphere Developer Tools IBM Liberty
Send the Ctrl-Alt-Delete key sequence to the Guest OS one of two ways: Key sequence: Ctlr-Alt-Ins Menu Sequence: VM / Guest / Send Ctrl-Alt-Delete
 CIS 231 Windows 2008 Server Install Lab #1 (Virtual Machines) Keys to Remember when using the vsphere client. Send the Ctrl-Alt-Delete key sequence to the Guest OS one of two ways: Key sequence: Ctlr-Alt-Ins
Cloud Help for Community Managers...3. Release Notes System Requirements Administering Jive for Office... 6
 for Office Contents 2 Contents Cloud Help for Community Managers...3 Release Notes... 4 System Requirements... 5 Administering Jive for Office... 6 Getting Set Up...6 Installing the Extended API JAR File...6
Migrating vrealize Automation 6.2 to 7.2
 Migrating vrealize Automation 6.2 to 7.2 vrealize Automation 7.2 This document supports the version of each product listed and supports all subsequent versions until the document is replaced by a new edition.
Installing AX Server with PostgreSQL (multi-server)
") Installing AX Server with PostgreSQL (multi-server) Version: 13 Published: Wednesday, November 29, 2017 ACL Services Ltd. 2017 Table of contents Table of contents Table of contents 3 Introduction 7 Intended
Installing AX Server with PostgreSQL (multi-server) Version: 13 Published: Wednesday, November 29, 2017 ACL Services Ltd. 2017 Table of contents Table of contents Table of contents 3 Introduction 7 Intended
8.0 Help for Community Managers Release Notes System Requirements Administering Jive for Office... 6
 for Office Contents 2 Contents 8.0 Help for Community Managers... 3 Release Notes... 4 System Requirements... 5 Administering Jive for Office... 6 Getting Set Up...6 Installing the Extended API JAR File...6
Proofpoint Threat Response
 Proofpoint Threat Response Threat Response Auto Pull (TRAP) - Installation Guide Proofpoint, Inc. 892 Ross Drive Sunnyvale, CA 94089 United States Tel +1 408 517 4710 www.proofpoint.com Copyright Notice
Integrating IBM Content Navigator with IBM Enterprise Records using plugin
 IBM Integrating IBM Content Navigator with IBM Enterprise Records using plugin Suneetha Kaditi & Rohit M Pujar 10/24/2014 Abstract: This article provides the basic step by step process of installing and
software Lotus LearningSpace - Virtual Classroom V1.1 Installation Guide
 software Lotus LearningSpace - Virtual Classroom V1.1 Installation Guide COPYRIGHT Disclaimer THIS DOCUMENTATION IS PROVIDED FOR REFERENCE PURPOSES ONLY. WHILE EFFORTS WERE MADE TO VERIFY THE COMPLETENESS
V7.0. cover. Front cover. IBM Connections 4 Public Deployment Scenarios. Deployment Scenarios ERC 1.0
 V7.0 cover Front cover IBM Connections 4 Public Deployment Scenarios Deployment Scenarios ERC 1.0 Deployment Scenarios Trademarks IBM and the IBM logo are registered trademarks of International Business
Contents Introduction... 5 Configuring Single Sign-On... 7 Configuring Identity Federation Using SAML 2.0 Authentication... 29
 Oracle Access Manager Configuration Guide 16 R1 March 2016 Contents Introduction... 5 Configuring Single Sign-On... 7 Prerequisites for Configuring Single Sign-On... 8 Installing Oracle HTTP Server...
DBXL AZURE INSTALLATION GUIDE
 Page 1 of 48 DBXL AZURE INSTALLATION GUIDE LAST UPDATED: October 25, 2016 ADDING A VIRTUAL MACHINE ON MICROSOFT AZURE Login to your Microsoft Azure site. Create a new Virtual Machine instance by clicking
VMware AirWatch: Directory and Certificate Authority
 Table of Contents Lab Overview - HOL-1857-06-UEM - VMware AirWatch: Directory and Certificate Authority Integration... 2 Lab Guidance... 3 Module 1 - Advanced AirWatch Configuration, AD Integration/Certificates
REVISED 1 AUGUST REVIEWER'S GUIDE FOR VMWARE APP VOLUMES VMware App Volumes and later
 REVISED 1 AUGUST 2018 REVIEWER'S GUIDE FOR VMWARE APP VOLUMES VMware App Volumes 2.13.1 and later Table of Contents Introduction Audience What You Will Learn Navigating This Document for App Volumes Use
Exam Name: IBM Certified System Administrator - WebSphere Application Server Network Deployment V7.0
 Vendor: IBM Exam Code: 000-377 Exam Name: IBM Certified System Administrator - WebSphere Application Server Network Deployment V7.0 Version: Demo QUESTION 1 An administrator would like to use the Centralized
Automation Anywhere Enterprise 10 LTS
 Automation Anywhere Enterprise 10 LTS Document Version: 1.3 Installation Guide Date of Publication: 15 th November, 2016 Update(s) to this document edition: Table of Contents 1. Client Prerequisites Processor
REVISED 1 AUGUST QUICK-START TUTORIAL FOR VMWARE APP VOLUMES VMware App Volumes and later
 REVISED 1 AUGUST 2018 QUICK-START TUTORIAL FOR VMWARE APP VOLUMES VMware App Volumes 2.13.1 and later Table of Contents Introduction Audience What You Will Learn Navigating This Document for App Volumes
Send document feedack to
 CHAPTER 9 This chapter includes the following topics: Introduction to Administration, page 9-1 Host Administration, page 9-2 System Administration, page 9-13 Profile Spaces, page 9-33 User Metadata, page
NBC-IG Installation Guide. Version 7.2
 Installation Guide Version 7.2 2017 Nuance Business Connect 7.2 Installation Guide Document Revision History Revision Date August 8, 2017 Revision List Updated supported SQL Server versions June 14, 2017
Zemana Endpoint Security Administration Guide. Version
 Zemana Endpoint Security Administration Guide Version 1.9.290 Introduction 4 What is Zemana Endpoint Security? 4 What is Zemana Control Center? 4 How do Endpoint Agents and Control Center communicate with
Get Started Installing IBM Lotus Sametime You Too Can Be a WAS Admin! OR 140 Slides In 60 Minutes
 Get Started Installing IBM Lotus Sametime 8.5.1 You Too Can Be a WAS Admin! OR 140 Slides In 60 Minutes Gabriella Davis Technical Director The Turtle Partnership About Me Gabriella Davis The Turtle Partnership
Lotus Learning Management System R1
 Lotus Learning Management System R1 Version 1.0.4 March 2004 Administrator's Guide G210-1785-00 Contents Chapter 1 Introduction to the Learning Management System and Administration...1 Understanding the
Sidewinder Control Center
 Sidewinder Control Center Installation and Migration Guide 5.3.2P12 Revision A Contents Installing and upgrading Control Center on page 2 Decide to install or upgrade on page 2 Prepare to install Control
USER GUIDE Summer 2015
 USER GUIDE Summer 2015 Copyright and Disclaimer This document, as well as the software described in it, is furnished under license of the Instant Technologies Software Evaluation Agreement and may be used
WA1547 WebSphere Portal v6 Programming. Classroom Setup Guide. Web Age Solutions Inc. Copyright Web Age Solutions Inc.
 WA1547 WebSphere Portal v6 Programming Classroom Setup Guide Web Age Solutions Inc. 1 Table of Contents Classroom Requirements...3 Part 1 - Minimum Hardware Requirements...3 Part 2 - Minimum Software Requirements...3
System Administration
 Most of SocialMiner system administration is performed using the panel. This section describes the parts of the panel as well as other administrative procedures including backup and restore, managing certificates,
Setting Up the Server
 Managing Licenses, page 1 Cross-launch from Prime Collaboration Provisioning, page 5 Integrating Prime Collaboration Servers, page 6 Single Sign-On for Prime Collaboration, page 7 Changing the SSL Port,
Remote Access Application Viewer User Guide. Version 2.3
 Remote Access Application Viewer User Guide Version 2.3 Table of Contents Table of Contents... 2 Logging into Application Viewer... 4 Setting up your browser for the first time... 8 Internet Explorer...
Installation and Setup of IBM Sametime From Zero to Hero Part 2 Edge Components
 IBM Collaboration Solutions Installation and Setup of IBM Sametime 8.5.2 From Zero to Hero Part 2 Edge Components Frank Altenburg SME for Sametime IBM Collaboration Solutions mailto:frank.altenburg@de.ibm.com
Cisco CVP VoiceXML 3.1. Installation Guide
 Cisco CVP VoiceXML 3.1 CISCO CVP VOICEXML 3.1 Publication date: October 2005 Copyright (C) 2001-2005 Audium Corporation. All rights reserved. Distributed by Cisco Systems, Inc. under license from Audium
WebAnalyzer Plus Getting Started Guide
 WebAnalyzer Plus Getting Started Guide www.manageengine.com/web-analytics Contents 1 Introduction 4 2 3 4 5 WebAnalyzer Plus Overview Getting Started System Requirements Installation Starting and Accessing
Kaseya 2. Installation guide. Version R8. English
 Kaseya 2 Kaseya Server Setup Installation guide Version R8 English October 24, 2014 Agreement The purchase and use of all Software and Services is subject to the Agreement as defined in Kaseya s Click-Accept
Perceptive TransForm E-Forms Manager 8.x. Installation and Configuration Guide March 1, 2012
 Perceptive TransForm E-Forms Manager 8.x Installation and Configuration Guide March 1, 2012 Table of Contents 1 Introduction... 3 1.1 Intended Audience... 3 1.2 Related Resources and Documentation... 3
Threat Response Auto Pull (TRAP) - Installation Guide
 - Installation Guide") Threat Response Auto Pull (TRAP) - Installation Guide Installation guide provides information on how to get Threat Response Auto Pull (TRAP) [/trapguides/trap-about/] up and running in your environment.
Threat Response Auto Pull (TRAP) - Installation Guide Installation guide provides information on how to get Threat Response Auto Pull (TRAP) [/trapguides/trap-about/] up and running in your environment.
Lotus IBM Lotus Virtual Classroom. Version Installation Guide G
 Lotus IBM Lotus Virtual Classroom Version 1.1.2 Installation Guide G210-1900-00 Terms of Use Disclaimer THE INFORMATION CONTAINED IN THIS DOCUMENTATION IS PROVIDED FOR INFORMATIONAL PURPOSES ONLY. WHILE
VMware Identity Manager Connector Installation and Configuration (Legacy Mode)
") VMware Identity Manager Connector Installation and Configuration (Legacy Mode) VMware Identity Manager This document supports the version of each product listed and supports all subsequent versions until
VMware Identity Manager Connector Installation and Configuration (Legacy Mode) VMware Identity Manager This document supports the version of each product listed and supports all subsequent versions until
Your . A setup guide. Last updated March 7, Kingsford Avenue, Glasgow G44 3EU
 fuzzylime WE KNOW DESIGN WEB DESIGN AND CONTENT MANAGEMENT 19 Kingsford Avenue, Glasgow G44 3EU 0141 416 1040 hello@fuzzylime.co.uk www.fuzzylime.co.uk Your email A setup guide Last updated March 7, 2017
Amazon AppStream 2.0: SOLIDWORKS Deployment Guide
 2018 Amazon AppStream 2.0: SOLIDWORKS Deployment Guide Build an Amazon AppStream 2.0 environment to stream SOLIDWORKS to your users June 2018 https://aws.amazon.com/appstream2/ 1 Welcome This guide describes
IBM Atlas Policy Distribution Administrators Guide: IER Connector. for IBM Atlas Suite v6
 IBM Atlas Policy Distribution Administrators Guide: IER Connector for IBM Atlas Suite v6 IBM Atlas Policy Distribution: IER Connector This edition applies to version 6.0 of IBM Atlas Suite (product numbers