TERMINAL SERVICE PLUS DOCUMENTATION
|
|
|
- Phebe McDaniel
- 5 years ago
- Views:
Transcription

1 TERMINAL SERVICE PLUS DOCUMENTATION
2 General information Prerequisites Installation Get Started TSplus Editions Activating your license Activating your support license Updating Terminal Service Plus Upgrading Terminal Service Plus Securing a Terminal Service Plus server Fundamental Features Server Management Application Publishing Assigning Applications to Users or Groups Portable Client Generator Edit or Delete the Parameters of a Generated Client RemoteApp and Seamless Connection Clients RemoteApp on Client Feature Remote Taskbar and Desktop Themes Floating Panel and Application Panel File Transfer Secured Folder Sharing Open Files on Client Side Open URLs on Client Side Remote Printing Universal Printer Printing with Standard RDP Printer-Mapping Feature Using the Web to Access your Server Built-in Web Server Management Services and Ports Web Applications Portal RemoteApp Plugin Creating and Customizing HTML Web Access pages Web Credentials Using IIS (Microsoft Internet Information Services) Using Apache Securing your Web Connection Free and Easy-to-install SSL Certificate HTTPS & SSL Third Party Certificates Tutorial Choosing your Ciphers Suites to enhance security How to activate Double-Factor Authentication (2FA)
3 Mobile Client (HTML5) Remote Connection from an iphone / ipad / Android device HTML5 Client: Supported Browsers HTML5 Client: Using Gestures on mobile devices (Touch) HTML5 Client: Using File Transfer HTML5 Client: Using Clipboard HTML5 Client: Using two languages HTML5: Changing language to Chinese HTML5 Server Memory Usage TSplus App Pre-Requisites Configuration Gateway Features Gateway Feature Managing Gateway Users Gateway Server: Prevent RDP Access and allow HTTP Using the Load Balancing Feature Using the Reverse Proxy feature Using servers behind Reverse Proxy Farm Features Farm Overview Farm Prerequisites Farm Setup Farm Manager Advanced Features Web Applications Portal: Parameters in URL address Web logon page: How to close the Logon form after logon Web logon page: How to change the logon Splashscreen Html Pages and Customization How to completely customize the Web Access Page beyond the Web Portal capabilities? Web logon page: How to open the HTML5 client in the same tab How To: Add a Custom HTTP Header Enforce HTTPS Protocol Enforce the use of web portal to connect to the server Web Autologon: connect from web without portal HTML5 Client: RDP session resolution on mobile devices HTML5 Client: How to maximize the browser window HTML5 Client: Parameters in URL address How To: Mount a logical drive HTML5 Client: What is the difference between Websockets and XHR? How To: Bind Web Server to Several Network Cards Run Windows client under Proxy Environment Activating Mutual SSL Authentication
4 Terminal Service Plus Prerequisites Terminal Service Plus - Documentation 1) Hardware Terminal Service Plus can work on your PC and here is the minimal recommended hardware: Number of users Equipment for XP/2003 Windows 2008/2012/2016 or 7 to and above 1 GB ONE CPU 1 GB One CPU 2 GHZ I5 or above 4 GB One CPU 2.5 GHZ I5 or above 16 GB Dual CPU I5 or above 4 GB One CPU 2 GHZ I5 or above 8 GB One CPU 2 GHZ 8 GB One CPU I7 or Xeon 16 GB Dual CPU - SSD Disk dedicated to the system Over 50 concurrent sessions, we recommend using a farm of servers. Each server (physical or virtual ones) handling up to 50 concurrent users. Comment: The type of hardware you need will mostly depend on what kind of resources the applications you wish to publish consume the most (CPU/memory/Disk). You might consider getting a server with SSD drives if you plan on using an application that accesses a database on your TSplus server as it will greatly enhance the performances. 2) Operating system Your hardware must use one of the operating systems below: Windows XP Professional or Windows XP Home. Windows Vista Home Premium, Professional, Corporate or Ultimate Edition Windows 7 Home Premium, Professional, Corporate or Ultimate Edition Windows 8 Professional/8.1 Windows 10 Windows 2003 Server or 2003 SBS Windows 2008 Server or 2008 R2/SBS Windows 2012 Server or 2012 R2 Windows 2016 Server 32 and 64-bit are supported. If you install TSplus on Windows 2003 to 2016 make sure the RDS or Terminal Services roles as well as the RDS Terminal Services licensing role are not installed before installing TSplus. If these roles were present, remove them and reboot. For any Windows Home edition, you will need to create local administrators users accounts in order to be able to connect remotely.

5 3) Network parameters The Terminal Service Plus "server" must have a fixed IP address: Remote access (from Wide Area Network - WAN) A DSL connection is recommended as well as a public fixed address. Without a fixed IP address, you should install a dynamic DNS service like More information about how to set this up can be found here. The TCP RDP port (by default 3389) must be opened both ways on your firewall.


6 Terminal Service Plus Installation Terminal Service Plus - Documentation Run Terminal Service Plus Setup program and then follow the installation steps. First, choose your preferred language. Click on "I accept the agreement". A message then appears to ask you to confirm the TSplus files creation on C: The installation path is mandatory: %ProgramFiles%\TSplus


7 Web servers are listening on ports 80 and 443 by default. We recommend you accept our TSplus default installation settings. According to our experience, most of the production issues are due to Windows security features. You can still modify these ports if you wish during installation or at any time on the Built-in Web Server Management of the AdminTool. Just make sure that the defined ports are available, and that Java is installed on the server. The progress bar appears and allows you to follow the progress of the process.
 to your TSplus system: For more")
8 Since TSplus version, you will have the choice to install RDS-Knight, our powerful Security Add-On, in its Ultimate trial version (All Security features free to use for 2 weeks) to your TSplus system: For more information about this product, see pages about RDS-Knight Ultimate included features and documentation. Then the TSplus logo appears and a window informs you about the completion of the installation. To use TSplus, you must reboot your system. The trial period delivers a full product for 15 days and 5 concurrent users. See the video for the installation.
9 TSplus: Get started Step 1: Installation. Installing Terminal Service Plus is an easy process. Just download it from our web site, run the Setup-TSplus.exe program and wait until the program asks you to reboot. We recommend you install Java prior to start the setup program. Java is mandatory to benefit from our great Web Access technology. See the previous documentation and the video for installation. Files are decompressed and copied into: C:\Program Files\TSplus folder (32-bit systems) C:\Program Files(x86)\TSplus folder (64-bit systems). The trial version is a full TSplus Enterprise Edition and enables up to 5 concurrent users for a period of 15 days. After rebooting you will see 2 new icons on your Desktop: The AdminTool is what you need to use TSplus. The Portable Client Generator will create a TSplus connection client for your users. Pre-requisites: On Server side: From Windows XP Pro to W10 with at least 2GB of memory. The operating system must be on the C drive. On Windows Server Environment (2003 to 2016) please make sure that the TSE/RDS role and the TSE/RDS licensing role are not installed to prevent conflict with TSplus services. It is mandatory to use a fixed private IP address and a fixed public IP address. If your ISP (Internet Service Provider) did not provide you with a fixed public IP address, you need to subscribe to a free DNS account, see this tutorial for more information. On Client side: Microsoft workstation: Windows XP, W7, W8 and W10 are supported. A PDF Reader (like FoxIt) and Java should be installed on the users PCs. Macintosh workstation: You can use any MAC RDP client, or TSplus HTML5 clients. Linux Workstation: You can use Linux Rdesktop RDP client or TSplus HTML5 clients.

10 Step 2: Creating users. After reboot, the TSplus host is almost ready to go. The first action will be to create users and the AdminTool will help you to do so:

11 Each user must have a logon AND a password. Beware when you create users of the box checked by default: "User must change password at next logon", if you don't want your user to change his/her password each time, uncheck this box and check the "Password never expires" or "User cannot change password". For Windows 10 Home users, the process to create users is different, since you will get this error message if you wish to create users with TSplus: Open the Start menu and click on Settings, then on Accounts, select the 'Family and other Users' tab, and click on the 'add someone else to this PC' button: On the 'How will this person sign in?' window, click on the 'I don't have this person sign-in information' line at the bottom. On the next window: 'Let's create your account', click on the 'Add a user without a Microsoft account' line at the bottom and finally, fill-in the required fields to create your user.
12 Step 3: Select the most suitable client for your needs. TSplus complies with Windows RDP protocol. So, any user can connect locally or remotely with a standard Remote Desktop Connection client (mstsc.exe) or any RDP compatible client. To fully benefit from the TSplus advanced features (Seamless client, RemoteApp, Universal Printer ) you can use a TSplus generated client or the TSplus Web Portal. TSplus is a very flexible solution and offers multiple ways to open a session: Classic Remote Desktop Connection (MSTSC.EXE). Portable TSplus RDP client which will display a windowed environment for your remote connection that you can minimize in the Windows taskbar. TSplus Seamless client which will only display applications and no desktop. MS RemoteAPP client which will display application using the native MS RemoteApp. Windows client over the TSplus Web Portal. HTML5 client over the TSplus Web Portal. These clients give the user the following experience: With Remote Desktop Connection (mstsc.exe) Connection: The connection is a very standard one. The Universal Printer is not supported with this type of connection. Display: Users will see their session within a Remote Desktop window. This desktop displays the content of the user s desktop folder. If the administrator has assigned specific applications with the AdminTool, only these applications will be displayed (no taskbar, no Desktop). TSplus RDP generated client. This is a unique TSplus solution, it empowers local and remote users to connect using one single dedicated program. It includes the connection program, the Universal Printing advanced feature, portability with high level of security while keeping it very simple for the users. So, it is much better than a classic Remote Desktop Connection. For more information about client generation, see this documentation. The TSplus Remote App client (or the Seamless one). Remote applications will exactly look like any local application. Instead of a classical Remote Desktop window, you will be free to switch between your local and remote applications without having to minimize a Remote Desktop window. If your TSplus host does not supports the MS RemoteApp (for operating systems older than Windows 7 or Server 2008, and that you don't have RDP6), you can use the TSplus Seamless alternative for the RemoteApp technology. For more information, see this documentation. Accessing your TSplus server from a remote location In order to access your TSplus server from a remote location, you will have to create a port forwarding or port redirection rule of 3389/80/443 ports depending on your preferred connection method. You can change the RDP port on the "change the RDP port tile" on the server tab:
13 The 80/443 ports can be changed on the manage web servers tile, more information about changing communication ports can be found here. Step 4: Application publishing and Application Control. One of TSplus major benefit is the freedom to assign application to user(s) or to a group of users using the AdminTool. If you assign one application to a user, he will only see this application. You also can assign him the TSplus Taskbar, the Floating Panel or the Application Panel to display multiple applications. You can of course decide to publish a full Remote Desktop if you want to. On this example, the administrator has decided that the user 'John' will get the TSplus Taskbar with the Desktop folder and 5 applications: Notepad, Foxit, Excel, Powerpoint and Calc. See this documentation and this video for more information. Please visit our support pages on our web site where you will find an on-line guide, an FAQ, a Forum and video tutorials. For any question, please contact support or send an to: support@terminalserviceplus.com. ENJOY your use of TSplus!
14 How to identify your TSplus Edition Terminal Service Plus - Documentation You can see the type of License you purchased on the License Tile, under your Serial Number, as well as the number of users next to the number of connections: TSplus has merged old licenses into one in order to gain more clarity. The System and Printer Editions still have the same core features: TSplus Administrator Tool (AdminTool), Concurrent connections support, Application Control per user and/or per groups, TSplus Remote Taskbar and/or TSplus Floating Panel, Remote Desktop access, TSplus Portable Client Generator, Seamless and RemoteApp connection client, Fully compliant with RDP protocol, Dual Screen support, bi-directional Sound, RemoteFX when compatible with Windows version, Local and Remote connection support, Workgroup and Active Directory users support. The Printer Edition enables you to print from any location, without having to install any specific driver. The old licenses names were the following: Web Access Edition (Which incorporated connection from any web browser with TSplus HTTP Web Server). The Secure Web Edition (Which incorporated http + https access with ssh tunneling). The Mobile Web Edition (Which incorporated the Web Access and Secure Web Editions features HTML5 access on mobile devices). They are now merged with the Mobile Web Edition.
15 The Mobile Edition enables you to: Connect from any web browser with TSplus HTTP Web Server, Entirely secured connection from any web browser with TSplus HTTPS Web Server and SSH server, HTML pages includes Windows and HTML5 web access clients, Easily connect from iphone/ipad and Android devices, also with the TSplus Mobile App, Customize logon web page with TSplus easy-to-use Webmaster Toolkit, With TSplus Web Applications Portal, users can access their application list inside their web browser, Instead of Windows Credentials, TSplus Web Credentials allows users to connect with only an or a pin-code, Universal Printer enables you to print from any location, without having to install any specific printer driver. The Enterprise Edition includes all the following features: Support an unlimited number of servers within each TSplus Farm, Thousands of users working concurrently on a scalable Load-Balanced architecture, Single Enterprise Portal to access all your TSplus servers, The ability to assign one or several Application Server(s) to users or groups of users, Load Balancing and Failover support included.
16 Locating TSplus serial number and activating it Option One This will appear on Windows startup: Option Two Locate the Administrator Tool on your desktop: If you cannot find the admin tool shortcut, it should be located in the desktop folder, on the administrator account used to download TSplus. You can also find the TSplus folder on this path: 'C:\Program Files (x86)\tsplus\userdesktop\files'. Double-click on it, then click on the license tile. You can now see the Serial Number:


17 Activating your license When you order a license, connect to our Licensing Portal and enter your Order Number, your address and your Serial Number: You will get your license.lic file, then, on the Admin Tool, click on the "Activate your license" tile: Locate your license.lic file, then open it, your license is activated!
18 Activating your support license file Terminal Service Plus - Documentation The 8.20 version of TSplus introduced a new and easy way to handle your annual support contract. Please update your version to the latest release before following this procedure. The support services include our worldwide Ticket/ support service, Forum access, license rehosting, FAQ and tutorial support. The update services include the delivery of Update codes, the right to install and to use any new release, patch and updates. The update code is requested once a year to be able to apply the Update Release patch. It is delivered by our support team on demand. This update code is now replaced with a support.lic file that you can activate in the licensing tile of the Admin Tool. We are investing every day to enhance TSplus and to fix all known issues. So, we recommend all our customers to keep their TSplus installation updated. The annual fee is not expensive and is available here: Annual Support & Updates services. Step One Locate the Admin Tool on your desktop: If you cannot find the admin tool shortcut, it should be located in the desktop folder on the administrator account used to download TSplus. You can also find the TSplus folder on this path: 'C:\Program Files (x86)\tsplus\userdesktop\files'. Double-click on it, then click on the license tile. You can now see the Serial Number:
19 Step Two Connect to the Licensing Portal by entering your Order Number, your address and your Serial Number: You will get a Support.lic file. Step Three Click on the "Activate your license" tile: Then select "Extend Support period":

20 Then locate your Support.lic file and open it in order to activate it!


21 Updating Terminal Service Plus Terminal Service Plus - Documentation Our development team is working on a daily-basis to ensure the stability and compatibility of TSplus with the latest versions of Microsoft Operating Systems and the latest Updates. We are proud to provide you with new features and enhancements every week. This is why it is recommended to keep your server up to date. By subscribing to our annual Support and Updates Services, you will have access to the latest Updates and bug fixes. In order to see which TSplus version you have and update it: You can check the status of your TSplus release by opening an Admin Tool, click on the license tile, then you can see your current version: You can then click on the "Check for Update" tile "Check for Updates" tile. Since TSplus version, the AdminTool automatically downloads: and applies the Update Release program when requested: You still can download it via this link: Update Release and apply it manually.

22 The Update Release program is designed to keep your current TSplus settings safe. It is not required to reboot after Update; however, we do recommend doing so. If you have not subscribed yet for TSplus Update/Support services, or if your subscription has expired, you will not be able to run the Update Release program. In such case, we advise you to place your order using the following link: You will receive back the proper information to download your support.lic file. Activating your Update/Support services is an easy process described here. Just for specific requirements, the TSplus Support team can deliver an Emergency Update code which will unlock the Update Release program. Since TSplus version, you will have the choice to install RDS-Knight, our powerful Security Add-On, in its Ultimate trial version (All Security features free to use for 2 weeks) to your TSplus system: For more information about this product, see pages about RDS-Knight Ultimate included features and documentation.

23 Upgrading your TSplus version Terminal Service Plus - Documentation If you wish to upgrade your current version of TSplus, in order to add more users or more features, click on the "Upgrade Edition or add users" tab on the License tile: On the displayed window, you can see which edition you currently have and your number of users. Below is your Upgrade License Code: When you click on the "Check Upgrade price" button, the following webpage opens, and you can choose which edition you wish to upgrade to, with the number of users.
24 For example, here from a Mobile Web Edition to an Enterprise version: If you have a version 7.xx or below, go to this page and download the Upgrade License Code generation program, available at the bottom of the page, in order to get your Upgrade License Code.
25 Securing a Terminal Service Plus server Overview Securing any server is a never-ending story where every expert could add another chapter. TSplus benefits from and is compatible with existing security infrastructure in a company (Active Directory, GPOs, HTTPS servers, SSL or SSL telecommunication systems, VPN, access control with or without ID cards, etc). For customers who want to easily secure their servers, TSplus offers a set of simple and effective ways to enforce good levels of security. Changing the RDP port number and setting up the firewall With the AdminTool, you can select a different TCP/IP port number for the RDP service to accept connections on. The default one is 3389.You can choose any arbitrary port, assuming that it is not already used on your network and that you set the same port number on your firewalls and on each TSplus user access programs. TSplus includes a unique port forwarding and tunneling capability: regardless the RDP port that has been set, the RDP will also be available on the HTTP and on the HTTPS port number! If users want to access your TSplus server outside from your network, you must ensure all incoming connections on the port chosen are forwarded to the TSplus server. On the Server tab, click on the "Change RDP Port" tile:

26 Server side security options The AdminTool allows you to deny access to any user that is not using a TSplus connection program generated by the administrator. In this case, any user that would attempt to open a session with any Remote Desktop client other than the TSplus one (assuming he has the correct server address, the port number, a valid logon and a valid password) will be disconnected automatically. The administrator can decide that only members of the Remote Desktop User group will be allowed to open a session. The administrator can decide that a password is mandatory to open a session. Through setting the applicable local Group Policy, the administrator can specify whether to enforce an encryption level for all data sent between the client and the remote computer during a Terminal Services session. If the status is set to Enabled, encryption for all connections to the server is set to the level decided by the administrator. By default, encryption is set to High. The administrator can also set as a rule that only users with a TSplus connection client will be able to open a session. Any incoming access with a standard RDP or a web access will be automatically rejected. Hiding the server disk drives: The AdminTool includes a tool that enables hiding the server disk drives to prevent users from accessing folders through My Computer or standard Windows dialog boxes. On the Security tab, click on "Hide Disk drives": This tool works globally. This means that even the administrator will not have a normal access to drives after the settings have been applied. On the example below, all drivers have been selected with the "select all" button, which will check all the boxes corresponding to drives that will be hidden to everybody:

27 Notes: This functionality is powerful and does not disable the access to the disk drives. It just prevents the user to display it. The tool flags the disks drives as hidden, but it also adds the HIDDEN property to the entire root folders and users list in Document and Settings. If the administrator wants to see these files he must: 1. Type the disk drive letter. For example: D:\ which will take you to the D: drive. 2. Turn on SHOW HIDDEN FILES AND FOLDERS in the folder view properties. Advanced security options You can find multiple advanced security options if you click on the tab of the same name on the Security tile:

28 Deny access from Microsoft RDP client: Prevent anyone to be able to connect using mstsc.exe. Deny access from Outside: It means that only private IPs from LAN will be able to open a session. Limit access to the members of Remote Desktop users: This limit applies only to this local group of users (which you can see by clicking on the Users and Groups tile. Encrypts end-to-end communications: High Encrypts client/server communication using 128-bit encryption. Use this level when the clients accessing the terminal server also support 128-bit encryption. Block all incoming access to this server: All alive sessions will remain active, while all incoming connections attempts will be blocked. Make sure that you can physically access the console of the server if you check this box. Do not use this option if your server is hosted on a Cloud environment. Disable UAC and enhance Windows Access: Deactivates the User Accounts Controls, remove all unwanted security pop-ups from Windows. users limitation (messages) while launching applications. The "Allow Windows Key" box allow the use of the Windows keys and combinations inside a TSplus session. Allow only users with, at least, one assigned application: User with one application and more are allowed to open a session. Allow CUT/PASTE within a session: unchecking this box will disable the CTRL C/CTRL V commands. Web Portal Access Restrictions No Restriction Web Portal is mandatory for everyone: users can only connect via the Web Portal. Web Portal is mandatory, except for Admins: users can only connect via the Web Portal, except Administrators. Prohibit the Web Portal for Admins accounts: Administrators cannot connect via the Web Portal. Administrator Pin Code The Administrator can secure the Administrator Tool access by setting a pin code which will be asked at every start: RDS-Knight Ultimate Since TSplus version, you will find a one-of-a-kind Security Add-on Tool, which you can launch on the Security tab:

29 Which brings 5 powerful features, documented on this page. The Brute-Force Attacks Defender role on the Web Portal is described on this page. SSL Certificates SSL Certificates process is detail on these pages: HTTPS, SSL & Certificates Tutorials. TSplus provides an easy-to-use tool to generate of a free and valid SSL certificate. Choose your Ciphers Suites to enhance Security. TSplus access program security options: The TSplus client generator gives the capability, on its Security tab, to lock the TSplus client to: A specific PC name. It means this program will not be able to start from any other PC. A physical drive serial number (PC HDD or USB stick). This is a very easy and powerful way to set a high level of security. The only way to connect is with a specific client, and this specific client can only start on a specific USB stick or PC HDD. Some of our customers are delivering fingerprint-reading USB sticks to each of their users and each generate d program is locked to the device serial number. This way, they can restrict access to the client's program itself, as well as ensuring it cannot be copied off the USB stick and used elsewhere. For more security feature information, check our FAQ.
30 Server Management Management of users and sessions The session manager is located on the Server's tab and enables you to monitor your users sessions. You can display your server's task manager, and you have the possibilities to active a remote control, disconnect, logoff or send a message to your users.


31 You can activate the remote control via a remote session with an admin account on the following Operating Systems: Windows 2008 R2 Windows 2012 R2 Windows 2016 Windows 7 Windows 8.1 Windows 10 - On Windows XP, 2003, Vista, and 2008 there is no remote-control button. - On Windows 2012 and 8 a message appears advising you to update to 2012 R2 or 8.1. When you activate the remote control for a user's session, this message appears, indicating the keyboard shortcut to end the session: On the client side, this message appears to accept the remote control: You can also send a message to your user:

32 Message appearing on Client Side The Users and Groups tab allows you to add/edit or delete users. See this documentation for more information.
33 With the Group Policies (GPO) tab, you can set various connection settings for each session and user:

34 Services The Windows System Toolkit is an enhanced control panel, summarizing all the Windows Administration tools.
35 You can also launch the "Server Properties" tab to have an overview of the control panel. You can see all the services on your server and their status on the Services tile.

36 Server Properties Ports With the Server WAN IP tab, you can see the IP and Wan address of your server: You can change the Server communication port with the "Change RDP port" tab: See this documentation.

37 Backup and restore your server parameters Terminal Service Plus - Documentation You can backup or restore your server parameters by clicking on the tile of the same name. The backup and restore are made on this folder: Backing up your parameters will allow you to save your TSplus license, your custom web Portal page, assigned applications as well as all your TSplus settings. Session Opening Preference The session opening preference allows you to choose your shell session preference, your logon preferences, and the background color of your sessions.


38 By default, on these logon preferences are enabled: The "Display progress bar during logon". "Enable Time Zone Redirection" which enables the client computer to redirect its time zone settings to the Remote Desktop Services session. If you enable this policy setting, clients that are capable of time zone redirection send their time zone information to the server. You can also set a full Desktop for all your users and get a display the last connected users by ticking the corresponding boxes. You can customize your users sessions by adding a new Background Color, another logo or none and use the session name of your choice. Reboot your server Click on the "Reboot the server tab" to reboot your server.
39 Application Publishing Overview TSplus supports 4 different kinds of Application Publishing: Microsoft Remote Desktop. The user will see the full Windows Remote Desktop in the session. TSplus Taskbar. Any application, folder, shortcuts, documents copied on the user's Desktop folder will be published with the TSplus Remote Taskbar. In this case, the user does not have any access to applications other than those decided by the administrator. Application Control has a much finer grain. The Floating and Application Panels. All the applications can be published on a mini drop-down list or on a folder which you can customize. Assigning one, two, three, or more specific applications to a user/group. In this case the user will only see their assigned applications when opening a session. There is a priority rule to remember: The Microsoft Remote Desktop has the highest priority, then the TSplus Taskbar, then specific applications. If a user has a specific application assigned and TSplus taskbar or Microsoft Remote Desktop, they will not see the specific application because they have a lower priority. Managing Application using the Admin Tool You will add or delete applications using the AdminTool, by clicking on the "Application Publishing tab" on the Applications tile:
40 1. Foxit is published as an example. To publish an application, click on the "Add a new application" button, then locate the path of the executable of your application by clicking on browse, then set a name for this application in the dedicated field. 2. You must click on the "Save" button to store any modification. 3. After declaring a new application, we recommend using the "Test (start selected)" button to check that the application is functional before assigning it to your users. 4. You can specify for each application if it will be launched maximized, minimized, assigned to all users or if it will be hidden after launch. 5. You can add a command line option if you need to add some extra parameters which are usually set in the shortcut properties of the application. 6. Since TSplus version, you can move up or down declared applications for a better presentation on the Floating Panel. Publishing applications from Start Menu You can also publish applications from the Start Menu of your server, by clicking on the "Application from Start Menu" button on the previous window or on this tab:
41 Select and save the desired applications to publish: Important remarks After installation, the default setting is: Any RDP user will see the complete Microsoft Remote Desktop. The TSplus Taskbar publishes all shortcuts copied in the user's Desktop folder. When selecting the TSplus Taskbar, you can request to automatically copy any of the shortcuts available in the All Users Desktop folder and/or, to automatically create shortcuts from applications assigned to the users with Application Control. See the video on how to publish applications.
42 Assigning Applications to Users or Groups Overview Once you have published some applications, you can assign them to one or more users and/or groups. To do so, click on the "Assign Application" tile in the "Applications" section of the AdminTool. The following window will be displayed. It allows you to assign applications to a selected user or group:
43 How to Assign an Application to a user (or a group) In the left tree view, you can see a complete list of all your users and groups (local as well as from your Active Directory if any). All users and groups having at least one application assigned are displayed with their name in bold. In the left tree view, click on a user (or a group): his currently assigned applications will be checked in the right tree view. You can check an application to assign it to the currently selected user (or group). You can uncheck an application to unassign it. Changes made to users and groups assignments are instantly applied. Change all Applications Assignments You can change which application is available to which user/group on the same window. It is a good way to visually check the current application assignments. In this example, the users John and Julia, as well as any member of the "Users" Group will be able to use Notepad, Foxit, Excel, Powerpoint and calc applications: Important remarks when using TSplus Seamless Client With the TSplus Seamless Client, the users will not display the Microsoft Remote Desktop windows. The applications can be found on the local desktop as if they were native local applications. Users will only see the applications assigned by the administrator.
44 If a user has the right to use the default Microsoft Remote Desktop, the Seamless Client will display a background color to avoid having both the Remote and the Local Desktop icons piled on the screen. The Seamless Client session is held open only when an application is running and being pushed through to the local client. If no application has been assigned to this user, TSplus will automatically use the TSplus Taskbar. If a user has specific applications assigned, they will seamlessly see these applications when the session is opened. When the last application is closed the session ends. Rules for Microsoft Remote Desktop, TSplus Remote Taskbar Floating Panel and Application Panel You can customize your user's work environment by assigning one application out of these four: Microsoft Remote Desktop, TSplus Remote Taskbar, Floating Panel and Application Panel. If no application is assigned to one user, he will see the Microsoft Remote Desktop which will display the Desktop folder shortcuts. If one user has several allocations plus the Microsoft Remote Desktop, he will see a remote desktop. If a user has several applications plus the TSplus Taskbar, he will see the Taskbar displaying his Desktop folder shortcuts. For more information on the Remote Taskbar and Floating Panel, see these documentations: Remote Taskbar, Floating and Application Panels. RemoteApp Menu on Client Since TSplus version, the Administrator can enable a RemoteApp menu by ticking this box at the bottom of the Assign Applications window: The Administrator must then generate a new connection client. Each user will be able see, on his START menu, and within his SISTRAY icons, the list of his assigned applications. Without using his generated client, he will be able to select within these "Local Menus" one of these applications and to start it as a RemoteAPP. Once launched, this menu is available even after the user ended his session or rebooted his pc.
45 For more information, see this page. Running scripts/programs on session opening If you want to start a script when the session opens, you must name it LOGON.BAT or LOGON.CMD and copy this script: In the Application Data folder of All Users if this script applies to all users, In the Application Data of the user if this script applies to this user. If you want to start a script on the client side when a session is opening, you just have to name a program STARTUP.EXE and to copy it at the home drive of the user PC (C:\startup.exe). If you want a program to be started as a service when the TSplus server reboots you have to name this program STARTUP.EXE and copy it in the folder: C:\Program Files\TSplus\UserDesktop\Files\ See this video on how to assign applications.

46 Portable Client Generator Terminal Service Plus - Documentation Overview TSplus creates by default an icon for the Portable Client Generator: It can also be accessed on the Server's tile of the AdminTool: It enables you to create 3 types of connection clients which can be copied to the users' Desktop or onto a USB stick for portable use. Since TSplus release, the client generator has been redesigned to be numerically signed and to avoid false/positive antiviruses reactions. Instead of a ".exe" program, the new Client Generator is creating a flat encrypted file with the extension ".connect":

47 Pre-requisite on Client side On client side, each user will have to run a signed program named "Setup-ConnectionClient.exe as a pre-requisite. This program is available on your server, in the TSplus program folder: TSplus\Clients\WindowsClient: or by downloading it. Main window - General Settings Server Address: Enter the IP address of the server to which the client must be connected. Port Number: Enter the server port number. The default is 3389.
48 Credentials Username and Password: If you enter a username and password, the client program will not ask the user to retype it at each session. To reset this logon/password saving, you must create and edit a shortcut of the Remote Desktop Client and add the -reset on switch at the end of the target field. If you don't want to save credentials, enter "nosavecredential" in the logon field of the Portable Client Generator. If you don't want to display the logon window with the user name, password and domain name, simply enter "nopassword" on the password field. If you want to enable autologon, enter *SSO in the username field, the client program will just ask for username and password during the very first connection. It will save this information on the user's workstation so that the user doesn't have to identify himself ever again. If you want the current local user's name to be displayed as a logon for the session, enter **, or %USERNAME% in the logon field. Domain name: Enter a domain name if any. Preferred Display Mode: You can choose your preferred Display Mode between: The classical Remote Desktop, displaying your remote session environment. The Microsoft RemoteApp connection client, for displaying your remote applications as if they were installed locally. It has a better graphical performance over minimized applications. The Seamless Client, which works the same as RemoteApp, but for older versions of Windows such as Windows XP and Terminal Service Plus Seamless vs Microsoft RemoteApp Microsoft RemoteApp is a Microsoft feature which requires Windows 7 Enterprise or Ultimate, Windows 8 Enterprise or Windows Server 2008 to Server All users PCs must have at least a RDP6 client. Unlike the Seamless client, the RemoteApp connection client does not depend on the transparency color settings. You can change the RemoteApp client display and Printing preferences on the Web tab of the Admintool. Minimized applications can be directly found inside the Windows taskbar, like local applications. Terminal Service Plus Seamless delivers a similar user experience and is available on any Windows host system. Based on one transparency color selected by the Administrator, the Microsoft Remote Desktop is not displayed anymore, and the user will just see his published applications. The Seamless color can be modified and must be the same when using the AdminTool and the Portable Client Generator. More information on these types of clients can be found here. Network speed: You can also now choose between two options depending on your network speed: Disabling background display & graphic animations for low speed networks. Enabling background display and graphic animations for fiber optic or fast network. Client name: You can name your client as you wish. Client icon: You can upload an icon for your client.
49 Display On this tab, you change the color and the session screen resolution. You can also adapt your session for a dualscreen, span it or smart-size it and you can enable the TAB command into the session. Remote Desktop Client features On this tab, you can choose which resolution you want to enable for the user: You can check the boxes to enable smart-sizing of the Remote Desktop, and if you want the Remote Desktop not to hide or overlap the local taskbar.
50 Local Resources The local resources tab gathers all the devices that you may redirect in your remote session. Printers correspond to LPT ports, and COM Ports correspond to Serial Ports. Since TSplus version, these local devices are selected by default. Below, you can choose your option for printing, with the universal printer: Local PDF Reader preview: The document will be rendered as a PDF and the local Acrobat Reader will open the file. The user can print it or save a copy on his local disk drive. Print on the user's default printer: the document will be automatically pushed to the user's default printer (the local print driver is included in the TSplus connection client). Select a local printer: The user can select one of his local printers (the local print driver is included in the TSplus connection client). If you do not have a PDF Reader installed on your machine, we recommend the use of Foxit Reader. See our video tutorial on how to print. Program
51 You can set a startup application via the Portable Client Generator, and specify its path, directory and parameters, since the release. However, we recommend you use the AdminTool to assign the desired applications. Security TSplus offers two extra layers of physical security to keep your users' connections safe. The connection can be locked to the ID of a USB key, locked to a computer name, or you can use both layers of security simultaneously. If locked to a USB key, the user can initiate a connection from any qualifying windows computer by inserting the USB key and using the connection program placed there by the administrator. If locked to a computer name, the user can only successfully connect from the computer whose name has been registered with the server for that user's portable client connection. If both security options are used, the user is limited to connecting from their specific device and only if the correct preconfigured USB key is in place. In order to lock a connection client onto a USB key you can do so by copying the client generator located in: C:\Program Files (x86)\tsplus\clients\windowsclient. Now double click on the client generator and check the lock on serial number box located on the security tab. Once it is done, you can delete the client generator from the USB key. The generated connection client is now locked on your USB key. You can delete the client generator that you copied on the USB key afterwards. You can define the time limit from the first use date of a generated client by entering the value on the time limit box. (which is by default set to "no limit"). The box below enables you to not display the ability to save credentials for a generated client. Load-Balancing You can also enable the Load Balancing to connect to one server of your farm. Do not check the "Use Load- Balancing" box if you did not activate the Load-Balancing feature on your server. You will need to enter the gateway Web Portal port, which should be the same as the default web port used on all the servers of your farm.
52 Client Customization is possible. See the next documentation to know how to modify the client's icon and edit or delete its parameters.


53 Edit or Delete the Parameters of a Generated Client There are many reasons why you would want to change the parameters of your connection client: the IP address of your TSplus server changed, you need to add the printer redirection or change the universal printer settings or so on... You first need to create a shortcut of the ConnectLauncher.exe file, located on the RDP6 folder of the user's profile:


54 Then, right click on it and hit properties. Place your mouse at the end of the "target" field and type in "clientname.connect /?" Now click OK and double click on the shortcut. A list of switches appears:


55 Click OK, you are asked if you want to check your parameters, click Yes. Click OK, the list of all the parameters appears in a small window. You can now edit them to match your preferences, you will need to log off and log on again to apply the changes. Clean the Parameters of a Generated Client If you upgraded your TSplus version from a 7.X version to an 8.X or above, then you will need to generate new connection clients. If the newly generated connection client has the same name than the previous one, you will to clear to the client cache, by following this procedure: Create a shortcut of your connection client, right click and hit properties. Place your mouse at the end of the "target" field and type in /clean.


56 Change your client's icon In order to change the generated client s icon, just create a shortcut of the client and go to the shortcut s properties:
57 Remoteapp and Seamless Connection Clients You can choose between 3 display modes on the general tab of the client generator: RemoteApp connection client The RemoteApp connection client, contrary to the Seamless client, does not depend on the transparency color settings. This allows for perfect application display as well as native Windows behavior. On the Client side, the installation of RDP6 or above is required. On the Server side, TSplus must be installed on a machine running Windows 7 Ultimate or Enterprise, Windows 8 or 8.1 Enterprise, W10 or Windows Server 2008 to You can change the RemoteApp client display and Printing preferences on the Web tab of the Admintool: Minimized applications can be found-directly inside the Windows taskbar, like a local application.

58 On this example, Firefox and Paint are launched locally; Notepad, Word and Foxit are launched remotely: Seamless connection client The Seamless connection client works on every Operating System, regardless of the version on the client or on the server side. When connecting remotely in seamless mode, you can access your applications as if they were installed locally on your computer. A transparency color can be set manually to insure your application will appear perfectly. You can choose from green, blue, or pink. (green, blue or pink). Or on the server tab of the AdminTool:
59 The Seamless Client is based on one transparency color selected by the Administrator. Since the Remote Desktop background color is painted with the selected transparent color, the Microsoft Remote Desktop is not displayed anymore, and the user will just see his published applications. Warning: Installation default is green and should work fine with most applications. We offer you the choice between 3 transparency colors: Pink, Green and Blue. Of course, the server and the connection clients must use the same color. Some elements on an application can also not be visible anymore because of the transparency color. For both the Remoteapp and the Seamless connection clients, you can choose to publish one unique application to be launched seamlessly at the user's logon. You can also publish applications with the TSplus Remote Taskbar, the Floating Panel or the Application Panel.

60 RemoteApp On Client Feature Terminal Service Plus - Documentation In the past the generated TSplus Portable client was the usual method for a user to start applications. The release introduces an icon in the notification area which gives to each user the list of all of his Remote Applications. Within this application list, the user can select the one he wants to start. This is a new way for administrators to deliver remote applications (referred to as RemoteApps ) to their users. Specifically, RemoteApp On Client enables a straightforward publishing process that allows applications installed directly on the server to be provided to users, allows RemoteApp programs to run side-by-side with local programs, and offers integration with a custom launcher application to make it simple for users to find and launch RemoteApp programs. The user Application list will also appear in the Start menu under All Programs in a folder called My Remote Applications. To deploy this new amazing TSplus capability is simple: The Administrator have generated new connection clients and to allow it with the AdminTool. This guide will explain step by step what will happen when the administrator will enable this new feature and will deliver to his users a new generated connection client. Example: The user "Laura" is using TSplus to access her remote application. To do so, she is using a generated client named LauraPortableClient.exe. When she runs it on her PC she gets the following result: However, the administrator did provide her a new one, created with the TSplus release. She will have to run it at least once to benefit from the new RemoteApp On Client feature. When the administrator is adding/removing application to a user, such change will be set on the server side at the next logon. It means that the current session will not reflect such modification.

61 The Application Control tile of the AdminTool has an option to enable or to disable this RemoteApp On Client feature, at the bottom of the window: What will happen on her PC when she will run once her new generated client: She will see a new icon in the Notification Area of her local task bar: My Remote Applications new icon Application list menu

62 She will also see a new entry within her Start menu Program list named "My Remote Applications": She will now be able to select one of these listed applications and to start it as a RemoteApp. She will not need to use the provided LauraPortableClient.exe generated client. For example, if she selects the Floating Panel, she will get this result:

63 Technical background behind this new technology. The new generated client of the release is adding several files within C:\Users\%UserName%\RDP6 folder of the local PC's user profile. MyRemoteApp.exe and MyRemoteApp.bin are the program codes which are started to create the new icon in the notification area and the new entry in the All Programs list of the Start button. MyRemoteApp.ini is a file received from the server. It is providing the details of each application which are assigned to this user on the server side. It is updated at each new connection to the server. Usually, it takes 30 seconds after each logon to receive this file from the server. RemoteApp.txt is providing the name of the last generated client started on this PC. Comments: If the user has administrator right on his own PC, MyRemoteApp.exe will be started automatically at each reboot and the Start button will be updated too. Else, the administrator must run once the new generated client "As Administrator" to enable the new feature. Doing so, he will create the proper registry entries in HKLM. If a user is connecting to only one server, this new system is perfect. However, if he is using several connection clients to open session on different servers you should keep in mind that the file MyRemoteApp.ini will be updated with the values of the last connection. It can be confusing for the user and in such deployment case we recommend no to use this new feature.
64 Remote Taskbar and Desktops themes Administrator tools on the server Terminal Service Plus - Documentation With the AdminTool, the Administrator can choose between 4 display modes when he assigns applications: The Microsoft Remote Desktop, The Remote Taskbar, The Floating Panel or The Application Panel. The Remote Taskbar, Floating and Application Panels are available for any connection method. TSplus Remote Taskbar When you assign applications to a user, you can enable the TSplus remote taskbar. The TSplus Taskbar is extremely useful when a session is run with the Seamless TSplus connection program. The user can launch remote applications with one click on the TSplus taskbar and still have the full local Desktop available. You can assign the Remote Taskbar when assigning applications to your users: The Administrator can easily decide what will be the default Remote Desktop theme the user will see when opening a session. On the Applications tab, click on the "Customize Taskbar" tile.

.")
65 Only the Administrator can choose the themes for his users. He can choose to display the maximized applications in full-screen mode or not to overlap the TSplus taskbar as well as the Silver or Blue taskbars. Systray icons can also be hidden by ticking the hide systray icons box. Since TSplus release, minimized buttons position on the taskbar can be changed (on top of the screen, on the bottom, on the right, the left side, or in the center). By editing the users menu, the Administrator can add/suppress applications and functionalities. Customization of the users menu is easy. The content of the users menu (located in Program Files/TSplus/UserDesktop/mainmenu.mnu) is modifiable by the administrator using Notepad:


66 Seamless connection program On the applications tile of the AdminTool the administrator can select 3 different styles of Remote Desktop TSplus Taskbar. The TSplus Taskbar is extremely useful when a session is run with the Seamless TSplus connection program. The user can launch remote applications with one click on the TSplus taskbar and still have the full local Desktop available. Right-side Blue theme taskbar Right-side Silver theme taskbar


67 On Top taskbar Overlapping the Windows taskbar with the Seamless connection client If you want your maximized applications to overlap the Windows taskbar, click on this box, on the Seamless client tab:

68 Thin-client or any RDP based connection program With the AdminTool, the Administrator can easily decide what will be the default Remote Desktop theme the user will see when opening a session. He has the choice between 4 different styles of full screen Remote Desktop. The standard Microsoft Remote Desktop can also be used if preferred. Because these TSplus Desktops are full screen desktops, the user's display is entirely filled when a session is opened from dedicated thin-clients, any RDP based client, or accessed from a web page or TSplus Remote Desktop clients. There are benefits over a standard Remote Desktop. It enhances the server security (no START button neither full control of the Desktop). Standard Microsoft Remote Desktop

69 The user has a complete desktop including Start Button and full control of the desktop To assign to complete desktop, just assign the Microsoft Remote Desktop application. In order to change the Desktop themes, you will have to assign the TSplus Remote Taskbar and choose between the 3 suggested themes: TSplus Desktop theme one


70 TSplus Desktop theme two TSplus logon theme


71 Customized theme For each theme, the Administrator can customize it and for example, display the Corporate logo. He can also add his own Desktop wallpaper by selecting one of the Desktop themes and by clicking on the Replace logo/wallpaper button to select your.jpg file, for example: You can add your own Desktop wallpaper by selecting one of the Desktop themes and by clicking on the Replace logo/wallpaper button to select your.jpg file, for example:
72 Floating Panel and Application Panel Terminal Service Plus - Documentation You can choose to enable the Floating or the Application Panel for your users or groups. These two ways of publishing applications are available for any connection method. Floating Panel If activated with the assigned applications, you can see on the middle-left of the user screen the mini drop-down list of applications or floating panel (very much appreciated by TSplus users). Assign it as an application: Under the "Customize Floating Panel" tile you can customize the Floating Panel at your convenience.

73 These various options can allow you to customize the end user's experience. Here are the different Floating Panel display options, where you can set your preferred color for the background and for the text, with or without slider, with or without your logo, with or without the minimize/close buttons, display only icons...and also your suggested Logoff icon! Please note that over 8 applications, the Floating Panel automatically switch to small-size. If you still want it to display the Applications names, select "Do not switch to Small Size (Only Icons) over 8 applications.
74 The Folder Panel is customizable as well and enables to display the assigned applications, the user Desktop folder or one specific folder content in your session with many display options: You can change the Folder Panel size, position and style (Pop-up or Windows) at your convenience: Application Panel The Application Panel gives you the possibility to organize the displayed applications, exactly like on the Web Application Portal, but by simply assigning it to one user or group:


75 The Administrator can customize it by choosing to display the TSplus logo or his own logo, display the line header below the logo and the footer, change the color or choose to not display any of it at all by unselecting the corresponding boxes. He can also adjust the number of displayed applications by lines and columns by entering the number of applications displayed per line, as well as the alignment of the Application panel. For example, display six Apps in one column, without logo; or displayed on 2 columns and 3 lines, with the TSplus logo:


76 Fast and easy File Transfer between the User and the Server Overview TSplus includes a unique method of transferring files: from the local user workstation => to the user Remote Desktop from the TSplus server => to the local user Desktop Because the file transfers are based on a Virtual Channel, it is a lot faster than a file copy, and it can even be done when the local user disk drives are not mapped. FileTransfer program and Generated Clients The File Transfer program is located in your TSplus program folder, under the name "FileTransfer.exe" into the following path: "UserDesktop\files": Transferring files Transferring files is very easy. First, launch the File Transfer (for instance by using TSplus Floating Panel):
 Finally, right click on the file that you want to transfer to the other side, and click on \"Send to server\" (or \"Send to client\"): File Transfer works from the local workstation")
77 Then navigate to your file using the folders tree: server's folders and files are on the left part of the window (server side) local workstation's folders and files are on the right part of the window (client side) Finally, right click on the file that you want to transfer to the other side, and click on "Send to server" (or "Send to client"): File Transfer works from the local workstation to the server, as well as the other way around (from the server to the local workstation).


78 Secured Folder Sharing - Folder.exe Terminal Service Plus - Documentation The Folder application will securely display the content of a folder that you will make available for your users. First, create a folder on your server with Applications or documents that you want to share. Open an explorer.exe and locate the folder.exe application in C:\Program Files\tsplus\UserDesktop\files: Create a shortcut of this file. Edit the properties of this shortcut by right clicking on it. Then modify the target path of the shortcut by entering the path of your applications folder on the "Target" line, after the original target path, for example: "C:\Program Files\tsplus\UserDesktop\files\folder.exe" "C:\Shared Folder"
79 When you open the folder.exe shortcut, it should look like this (with your own documents and applications): This shortcut can be copied to a user's profile desktop folder or you can publish the folder.exe for a user as an application. If you do the latest, you will have to indicate the path of your folder in the Command Line option section: There is an alternative way of sharing a Folder of documents.
80 Publishing a shared folder as a unique application: Open an Admin Tool. Click on the Management of published application tab. In the display name type in the name of the shared folder or any name you want. Click on the browse button located on the right side of the "Path/Filename" field and locate C:\Windows\explorer.exe. The start directory will be filled in automatically with the path of explorer.exe. In the Command line option field, type in the path of the shared folder, it can be a local folder or a network shared folder using a UNC path (example: data\shared folder). Fill in the field below with your shared folder information:

81 Then click on "Save". Click on the "Assign application" tab. Check the TSplus Remote Taskbar and Shared Folder boxes: Here is the result, when you open a session with an rdp client, you will see the TSplus taskbar with the shared folder application:

82 You can also do this with the floating panel. Open an admin tool and click on the "Assign application" tab. Check the Floating Panel and the Shared Folder boxes. Here is the result:
83 Open Files on Client Side Overview Terminal Service Plus - Documentation This feature is a powerful one. It allows to open documents located on the server on the client side depending on its file extension. For instance, you can open a Microsoft Office Word document without having Office installed on your server. The.docx (or.xlsx) document is automatically uploaded on the user side where the local Office will be used to open it. If you are hosting your application on a Cloud server and if your application is generating an Excel, Access or Word document, this feature prevents to care about Office licenses on the server. Configuring a File Type to open on the client side The tile "Open Files on Client Side" is located in the "Server" tab of the AdminTool. Click on it to display the configuration window: The button "Add a new File Type" allows you to add an extension (such as ".docx" for Microsoft Office Word ) to the list. All the files having an extension in this list will then be opened on client side, provided that you use one of Terminal Service Plus connection clients: Any generated Terminal Service Plus Client (Seamless, RemoteApp or RDP) Any Windows connection from the Terminal Service Plus Web Portal Any HTML5 connection from Terminal Service Plus Web Portal Warning: this feature is not supported for: Any RDP client (mstsc for example)
84 Troubleshooting If you have configured a file type to open on client side, and it is not working (i.e. the file is still opened on its own computer), then we advise you to check the "Open With" list in Windows context-menu: right-click on the file. click on the "Open With" menu item. if there is more than one application in this list, click on "Choose default program" and select "OpenOnClient.exe". This Terminal Service Plus great tool applies its configuration to all users using the computer, however please keep in mind the following rules: Windows allows each user to change this default opening program with another program of its choice. Using HTML5 connection client, the file will be downloaded and managed by the local browser. Some browsers treat some file types in specific ways, so browser's settings should also be checked twice. These rules explain most of the issues when using the Open On Client feature, that is why we advise you to start by checking the default program: for the logged user on the server for the user on the client for the browser on the client (when using HTML5)

85 Open URLs on Client Side Overview Terminal Service Plus - Documentation This feature is a powerful one. It allows to open on the client side every websites links and websites shortcuts located on the server. For instance, you can open YouTube videos directly on the client, thus saving lots of bandwidth and CPU power on your server. The web address (URL) is automatically transferred on the user side where the local default browser will be used to open it. Enabling this Feature on a server The tile "Open URLs on Client Side" is located in the "Server" tab of the AdminTool. Click on it to display the configuration window: The button "Activate URLs opening on user side" allows you to activate this feature for all users on the server. In order to fully enable this feature, every user will have to restart its session (logoff then login) before they can use this feature. All the web links and shortcuts will then be opened on client side, provided that you use one of Terminal Service Plus connection clients: Any generated Terminal Service Plus Client (Seamless, RemoteApp or RDP) Any Windows connection from the Terminal Service Plus Web Portal Warning: this feature is not supported for: Any RDP client (mstsc for example). Any HTML5 connection from Terminal Service Plus Web Portal. Windows 8 and 8.1 Starting with Windows 8, Microsoft has forbidden automatic change of user's default browser. This is why, once the feature is activated on the server, every user will have to choose 'Url On Client' when asked for a default browser. This window will only be displayed the first time a user opens a web link. Unfortunately, this is Microsoft Windows policy and we are not aware of any workaround.
86 Advanced printing option: Universal Printer The TSplus Universal Printer allows you to print documents from any PC or mobile device. See the video tutorial to print with the Universal Printer. Universal Printer versions You can check which Universal Printer version is installed on the License tab of the AdminTool: Universal Printer Manager Since the release of TSplus version, you can find the Universal Printer Manager tile on the Server tab of the AdminTool:
87 The Universal Printer Manager gathers all the required tools to install, uninstall, display and handle the Universal Printer options. This tool enables administrators to help users with dynamic printing requirements. Information can be found at the top concerning the current universal printer status: You can check if the newest version, which uses GhostScript, is installed. You can see if the printer is ready. And you can verify that the printer is set to default. The Buttons below allow you to: Install the Universal Printer (CUSTPDF) which is the old printer, before TSplus version 9. Install the New Universal Printer (Ghostscript), which is more stable with more printing format support. Remove the Universal Printer. Set it as default printer. View Printer: Opens a window where you can see the status of your printing documents, pause, resume or cancel the print job. You can also set your printing preferences and properties. Universal Printer Properties: Opens this window, where you can see all the printing properties. After the General Tab, there are tabs for sharing, ports, advanced, color management, security and device settings. On the Printer Manager tile, you can also set the Paper size for printing to A4 or Letter.
88 Printing with the Universal Printer Terminal Service Plus - Documentation When selecting this printer, the document to print is automatically converted into a PDF format file. This PDF file is automatically pushed to the local PDF Reader of the user's workstation. You can choose from 3 printing options on the local resources tab of the Portable Client generator: Local PDF Reader preview: the document will be pushed, and the local Acrobat Reader will open with the generated PDF file. The user can print it or save a copy on his local disk drive. Print on the user's default printer: the document will be automatically pushed to the default user's printer (the local printing driver is included into the TSplus connection client). Key value: This option is to be used for people who have a lot of printing to do per day and use the same printer for this purpose). Select a local printer: The user can select one of his local printer (the local printing driver is included into the TSplus connection client). If you do not have a PDF Reader installed on your machine, we recommend the use of Foxit Reader. If you do not have a PDF Reader installed on your machine, we recommend the use of Foxit Reader.

89 Customize page format printing Terminal Service Plus - Documentation If you want to have a specific page format and your printer is not compatible with printer redirection, you can set the Universal Printer page format by opening the Devices and Printers menu of the Control Panel. Right click on the Universal Printer, then click on Properties: Click on Preferences, then on Advanced:

90 Go to Ghostscript PDF Advanced Document Settings / Paper Output / Paper size / PostScript Custom Page. Finally, click on Edit Customized Page Size and enter your preferred settings. This is especially helpful with receipt and label printers.

91 Printing with Standard RDP Printer-Mapping Feature This is commonly used by Remote Desktop users and is equivalent to what you would have with Microsoft Terminal Services. If you plan to use exotic printers, be sure to check the box for printers in the local resources tab of the client generator. Most of the time it will require that you install the same version of printer drivers on client side and on server in order to work properly. This means that if your server is a Windows bit and your client computers are installed with Windows XP 32-bit, you will need to install the 32-bit XP Printer Drivers on the server. Click on the Start Menu, then on Devices and Printers. Select the Universal Printer or any other printer, to display the Print server properties button at the top of the window:

92 Once in the Print Server Properties, click on the Driver tab to manually add your (for example) XP 32-bit drivers: You can also directly install your printer drivers using information and drivers from the Printer Manufacturer Website. It is recommended to check your hardware manual for an installation procedure in a terminal server environment. If you are using USB printers, make sure you updated the RDP protocol of your client computer to RDP version 6 or above to ensure maximum compatibility with redirected printers. For the best results, it is recommended not to use USB printers. Compatibility and reliability are improved when using COM or LPT printers. Some exotic printers, such as label or receipt printers, may not be suitable to be redirected in a TSplus session, you should always check with your hardware manufacturer for compatibility and installation procedures in an RDS or terminal server environment, which is very close to TSplus in this case. See the video tutorial to print with Standard RDP printer-mapping feature.
93 Built-in Web Server Management Terminal Service Plus - Documentation Your Remote Desktop Server must be available, easy-to-access and safe. That s why TSplus utilizes a built-in Web Server which helps you easily manage its status and operations. A Management Console is available in the Administrator Tool. This Management Console enables you to configure Terminal Service Plus Built-in Web Server. When you install TSplus, web servers are listening on ports 80 and 443 by default. Make sure that the defined ports are available, and that Java is installed on the server. See the video about Web Features. Web Server Components Status The status of the Web Server main components is displayed in the Web Server Management Console. A red "X" indicates that the service is Stopped. A ticked box indicates that the service is Running. Restart / Stop the Web Server Service If you click on the "Restart Web Servers" button, the Web Servers will be restarted. If you click on the "Stop Web Servers" button, the Web servers will be stopped. The HTTP and HTTPS server status will now display an orange "X" indicating that the HTTP / HTTPS services are stopped:
94 Manage Web Servers On this tile, you can choose to use a different HTTP web server, modify the Web Server root path and the HTTP/HTTPS ports number. Once again, make sure that these ports are available before changing them. Once these modifications done, click on save and the AdminTool will restart. Disable HTTP only or HTTP on HTTPS See this documentation for more information. For more in-depth information about servers customization and preferences, see these pages: Web Portal Preferences, Web Applications Portal, Web Credentials.

95 Services and Ports Services Running Services for the TSplus HTTP / HTTPS / HTML5 / SSH: Ports Considerations (Local Machine and Firewall / Router) Terminal Service Plus only requires either Port 80 or Port 443 to be opened. Port 3389 can stay closed. To change the Ports: Open an Admin Tool and click on the Web tile. Then click on the "Manage Web Servers" tile:

96 At the bottom of the window, you can see the Web Servers Options: Change the HTTP and/or HTTPS port number with your chosen value. Click save. Make sure that the port you entered is not currently used by another application to avoid any conflict, if a conflict occur TSplus web server will not work. Here is a non- exhaustive list of TCP ports that might be used by an application on your server. Click on "Save and Restart AdminTool" to apply your new settings. You can also click on "Restart Web servers", if the modification was not considered: How to change the Communication Port Open the Admin tool and click on the server tile.
97 Click on "Change RDP port". The value currently in used is displayed, here by default it is the 3389 port that is used. Enter the new port number in the corresponding window. Make sure that the port you entered is not currently used by another application to avoid any conflict, if a conflict occur TSplus will not work. A reboot of the server is mandatory for the changes to apply.
98 Web Applications Portal Overview Terminal Service Plus Web Application Portal provides a single, flexible solution that can streamline application and desktop deployment and life-cycle management to reduce IT costs. By centrally managing and web delivering on-demand applications, IT can improve the success rate of application deployment providing role-based management, application control, security and users support. Terminal Service Plus Web Application Portal virtualizes and transforms Windows apps and desktops into a secure on-demand service. With Web Application Portal, you will be able to publish Microsoft Windows applications (business applications, Office applications...) to the web. As in Citrix, your users can access their applications directly from the Internet, simply by clicking on the application icon in the Portal web page, directly inside their own Internet browser. Managing your Web Applications The Web Application Portal feature is fully integrated in Terminal Service Plus. It means that all the applications published by Terminal Service Plus Applications Publishing feature can be used in the Web Applications Portal. If you would like to know more about this publication process, feel free to review our documentation about Application Publishing and Assigning Applications to Users or Groups. Designing your Web Applications Portal In the Admin Tool, open the "Web" tab and click on the "Applications Portal" tile.


99 To generate a web access page with the Web Applications Portal feature activated, check the "Enable Applications Portal" checkbox. You can customize your web access page to your liking, then click on "Publish" to publish this new web access page. Note: You can change the box and the box border colors only for the Classic themes which can be changed on the Web Portal Design tile. Using the Web Applications Portal In this example we have published the new web access page with the default name "index". To access it, open a web browser and go to (in this example we use directly from the server itself). The first web page displayed is the standard Terminal Service Plus web logon page:


100 Once logged in, a new web page is displayed, this is the Web Applications Portal: As you can see, the user gets an icon for every published application that he has access to. The user can now click on one or more icon, in order to remotely open the matching application in a new tab: Brute-Force Attacks Defense Since TSplus release, brute-force attacks on the Web Portal are now blocked when users enter wrong credentials. After 10 attempts during a period of 10 minutes, the Web Portal will prohibit the user to logon for 20 minutes.
101 These are the default settings which are customizable on the hb.exe.config file located on the TSplus folder: TSplus\Clients\www\cgi-bin\hb.exe.config in the "appsettings" paragraph. You can check all blocked connections and logs on the Brute-Force Defender tile of RDS-Knight Ultimate Protection: This functionality is visible and active after the first Web Portal connection. Important Notes The Web Applications Portal feature is compatible with Farm / Gateway configuration and it also supports load-balancing. In a Farm / Gateway configuration, the Applications must be published and assigned on every server of the farm at the moment. In terms of Terminal Service Plus licensing, a user can open several applications at the same time without counting for more than 1 user.


102 Remote App Plugin Since the new 8.40 version of TSplus, there is no need any more for a Java plugin to be installed on the client browser. You can now access the Windows RemoteApp client by downloading and installing a small Windows plugin. This operation is fast and needed only once per client. This is the message displayed after you download the RemoteApp plugin: When using Firefox, this message will be displayed on your first connection. If you choose the remember my choices option, the notification will be disabled upon future connections:
103 Creating and Customizing HTML Web Access pages Using the Web Portal Preferences, you will be able to create your own customized HTML Web Access pages - and there is no need to be a web developer! Web Portal Design You will be able to customize all the display and graphic settings, as well as adding your own logo. You have the choice between a collection of 20 photos, where you can also add your own, the color theme with the background color of your choice or the classic themes.

104 Some advanced tips: You don't have to click on a "Choose..." button if you already know a color code: just type it in the input. Be careful with the real size of the pictures: your page could be quite bad-looking if a picture is too big. Do not hesitate to use the "Preview" button on the bottom, it's fast and easy! Saving typed values and Resetting to default ones When you close this window, all the values you typed and checked are saved. If you want to reset these values to values by default, click on the "Reset" button on the bottom. Web Portal Preferences
105 This tile allows you to configure the Web Access page: Default Values": you can specify a default login, password and domain that will auto-populate the login fields. All of the settings present here are saved in the index.html file, which can be copied and renamed to your preference. "Show the Domain Field": when checked, the Domain field is included in the login information request. "Keyboard": only for advanced administrators who have special keyboard requirements. "Available Clients": choose between 2 types of web connection clients. If both are checked, the user will have the choice. "Gateway Portal": check it to activate a Gateway Portal enabled page. This feature adds an extra authentication step when you assign a server to a user or group. (More information on the Gateway feature can be found here). "Upload - Download": choose source and destination paths for file uploads and downloads. Web Credentials The "Web Credentials" section allows you to enable (or disable) the Web Credentials feature. When using Web Credentials, you might want to allow empty passwords. If you only have Web Credentials with empty passwords, we recommend that you uncheck the "Show Password Field" option, in order to simplify even more the web login page.
 or Standard RDP.")
106 Remote App tile This tile is for Windows clients specific settings. You can choose your display between RemoteApp (remote connection without the remote desktop) or Standard RDP. You can also decide if you want documents to be printed on the user default printer, display a local preview or the local printer choice. HTML5 tile
107 On this tile, you can edit the parameters for the HTML5 web display. More information on this page. HTML5 Top Menu Tile This tile enables you to choose the applications to display on level 1 or 2 on the Top Menu of your generated remote web session. You can also edit these applications in order for them to appear on a specific client type: pc, mobile, ios... on or all of them.
108 Generating the HTML Web Access page We advise you to try a "Preview" before generating a new HTML Web Access page. Once you are pleased by the preview, then you can click on the "Publish" button to generate and publish the page to your web server's root folder. You will be asked for a page name. If you want to overwrite your default page, use "index". In this case, the newly published web page will be accessible at:
109 Web Credentials Overview Terminal Service Plus Web Credentials is a state-of-the-art unique feature, which allows users to connect with just an address or a pin-code. With Web Credentials, you can secure your server's access with the address of a user, or with a simple pin-code generated by your business application. One of the great benefits of this feature is that these credentials ( or pin-code) are pure web credentials: the user will not know the Windows user account he is currently using, and he does not need to know a real Windows login/password to connect to his application! With Web Credentials, you will be able to define custom pure web credentials and match them to any existing Windows / Active Directory user account. The user will then be able to connect using these custom credentials, instead of the Windows / Active Directory ones. Managing your Web Credentials In the Admin Tool, open the "Web" tab and click on the "Web Credentials" tile. The Web Credentials Manager will open and display this window:

110 You can now create a new Web Credential by matching a custom login and (optional) password with an existing Windows / Active Directory user account, as shown below: Since TSplus 9.50 version, you can also decide the maximum number of concurrent sessions for a user. You can also edit and remove an existing Web Credential, thus changing or disabling any custom credentials you configured. Alternatively, you can create web credentials via a command line: On the Windows Start Menu, on the execute field, type in: 'cmd.exe' (or in Programs/Accessories > 'Windows Power Shell') Then, in order to go to the right folder, type: cd "C:\Program Files (x86)\tsplus\userdesktop\files", then press Enter to validate. To add a new Web Credential, type: WebCredentials.exe /add your_web_login your_web_password your_windows_login your_windows_password To add a blank credential, type two double quotes: "" to indicate a blank text. To delete a web credential, type: WebCredentials.exe /remove your_web_login Important Notes Please note the following limitations: In a Farm / Gateway configuration, Web Credentials only support the load-balancing mode (i.e. it does not work with server-assigned mode.) In a Farm / Gateway configuration with the load-balancing mode, the Web Credentials must be defined on every server of the farm at the moment.
 IIS configuration Install IIS with the following modules: CGI, ISAPI Extensions and ISAPI Filters.")

111 How to use IIS rather than Terminal Service Plus default Web servers Pre-requisites It can be a good idea to Update Terminal Service Plus to be sure that you get the latest TSplus programs. 1) IIS configuration Install IIS with the following modules: CGI, ISAPI Extensions and ISAPI Filters. Configuring the IIS Port : Access the IIS management console, expand the list below your server name, then Expand the "Sites" menu and right click on "Default Web Site" and click on "Edit Bindings": Click on "http" and "Edit". Change the port to 81 and click Ok, and then click on Close: Then, restart the IIS Manager.


112 2) Create virtual directory for CGI In the left panel menu, expand the menu under your server, then "Sites," and right-click on your site to add a new "virtual directory", as shown on the image below: On the window that will open fill in as follows: Alias: cgi-bin Physical path: "C:\Program Files(x86)\TSplus\Clients\www\cgi-bin"


113 Then click "OK" and you will see that the "cgi-bin" virtual directory has been added to your IIS Web site. Now, rightclick this "cgi-bin" virtual directory and click on "Convert to Application". Click "OK" and accept the default settings. Then select the "Handler Mappings" icon for this folder on the right side of the Manager window:


114 Now click on "Edit Feature Permissions": Check the "Execute" checkbox and click OK: 3) Configure CGI extension permission Now, the last step is to allow the CGI extension to run on the server. Click on the "ISAPI and CGI Restrictions" icon. This can be found by clicking on the machine name in the menu on the left side of the window. On the "ISAPI and CGI Restrictions" page, click "Add..." on the right side of the window. Now specify the full path to the "hb.exe" file hosted in the TSplus folder. Be sure to check the "Allow extension path to execute" option, as Illustrate the following images:


115 4) Add Mime types in IIS Open a command prompt as an administrator and run the following commands: %SystemRoot%\system32\inetsrv\appcmd set config /section:staticcontent /+[fileextension='.dat',mimetype='text/plain'] %SystemRoot%\system32\inetsrv\appcmd set config /section:staticcontent /+[fileextension='.',mimetype='text/plain'] Restart IIS.
116 5) Configure IIS Directory Permissions Give full permission to the group "Everyone" in the directory "C:\inetpub\wwwroot" 6) Configure TSplus Click on the Web tile of the AdminTool, then click on the Manage webservers tile: Choose the "Use a Different HTTP server" option:

117 Then, on the same window, click on "Select a new Web Server root path", and put the path of the IIS directory, which should be something like: "C: \ inetpub \ wwwroot". Now click on "Save and Restart the AdminTool. The following messages will appear: Wait. The Admintool will be closed automatically. Then open the Admintool again and click on the Web tile.
118 Finally, restart the web servers: 7) Test with local host Warning: Use a different user account. If you try with your current user account from your own RDP session to the server, then you will be disconnected and not be able to reconnect.
119 How to use Apache rather than Terminal Service Plus default Web server Pre-requisites It can be a good idea to Update Terminal Service Plus to be sure that you get the latest TSplus programs. 1) Start the AdminTool and go to the Web Tab Click on the Manage Web Servers tile, check Use a different HTTP web server because you want to use Apache. A pop-up will recommend you change Apache HTTP port to 81. Then, click on the web folder tile and use the button Select a new Web Server root path to tell TSplus where will be the new web folder root. TSplus will copy the requested files/folders into this new root folder and, at this point, the TSplus setting for Apache is near completion. It s now time to set up Apache. 2) Setting up Apache Change the HTTP from 80 to 81. The specific way of doing this depends on your Apache version and your current Apache settings. We advise you to backup any Apache settings file before modifying them, so you will have a way to restore them if needed. Usually you can change Apache listening port by editing the file httpd.conf found in "Apache\conf" directory: Listen 81 Once it is done, restart the Apache service.


120 3) Going back to TSplus Web Servers Management tool You can set the HTTP and HTTPS ports in TSplus Web Management tool. We recommend using standard ports, but this feature can be handy when trying to avoid a conflict with another process. 4) Last steps For the Universal Printer, we need to be able to write in the PRINTS folder. So, verify that Everyone/Users... have full rights on.../prints folder.
121 Then select the.html file you wish to use as a Web Access page in: 'C:\Program Files (x86)\tsplus\clients\www' and copy it as index.html in your web root folder, typically this is the "Apache\htdocs" directory. 5) Specific Settings for TSplus Gateway Portal, Load Balancing and/or HTML5 file transfer If you want to use this Apache based system as a TSplus Gateway Portal and/or use TSplus Gateway Portal Load Balancing feature and/or use HTML5 file transfer feature, you will need to allow the execution of TSplus GCI scripts by Apache. First, you must have the CGI module enabled in Apache. Edit the file httpd.conf found in "Apache\conf" directory, and search for a line looking like: ;LoadModule cgi_module modules/mod_cgi.so Remove the ";" to enable the CGI module: LoadModule cgi_module modules/mod_cgi.so Then, find a line starting by: AddHandler cgi-script And add the.exe extension to authorize.exe files to be handled as CGI programs by Apache: AddHandler cgi-script..exe Finally, you must tell Apache that the TSplus "cgi-bin" folder contains CGI programs. To do so, you must add the following line in the file httpd.conf found in "Apache\conf" directory: ScriptAlias /cgi-bin/ "C:/Program Files (x86)/tsplus/clients/www/cgi-bin/" Once it is done, restart the Apache service. If you face any issue setting up CGI on your Apache server, please refer to the Official Apache documentation. Checking your settings: To validate your settings, please open a web browser on your server and go to bin/hb.exe. If you get an Apache error page, you have an issue in your Apache configuration. If you get a line of text/numbers, everything is fine!

122 Free and Easy-to-install SSL Certificate Overview Starting with version 9.20, Terminal Service Plus provides an easy to use feature to generate of a free and valid SSL certificate. In 3 mouse clicks you will get a secured valid certificate, renewed automatically, and configured automatically into Terminal Service Plus built-in web server. This feature uses Let's Encrypt to provide a free and secure SSL certificate for your HTTPS connections. Prerequisites Please ensure that your Terminal Service Plus server meet these requirements before using the Free Certificate Manager: You must use Terminal Service Plus built-in web server listening on port 80 for HTTP. This is required by Let's Encrypt domain ownership validation process. Your server's domain name must be accessible from the public Internet. This is required as well to validate that you are the real owner of the domain. You must run this program on the Gateway server or a Standalone server, not an Application server (except if your Application Server is accessible from the public Internet and has a public domain name). It is not possible to get a certificate for an IP address, be it public or private. It is not possible to get a certificate for an internal domain name (i.e. a domain which only resolves inside your private network). Free Certificate Manager GUI To open Terminal Service Plus Free Certificate Manager GUI, open Terminal Service Plus AdminTool, click on "Security", then click on "Generate a free valid SSL Certificate as shown in the screenshot below:

123 The Free Certificate Manager GUI will open and remind you about the prerequisites, as shown on the screenshot below: Please read carefully and check that your server meets all the requirements, then click on the "Next" button. Step 1: Enter your As shown in the screenshot below, you only need to enter a valid address. This will not be used to spam you. Actually, it will not even be sent to Terminal Service Plus or any third party, except the certificate issuer: Let's Encrypt. They will only contact you if needed, according to their Terms Of Service.


124 Enter a valid , then click on the "Next" button. Step 2: Accept the Terms Of Service As shown in the screenshot below, you will be able to open Let's Encrypt Terms Of Service by clicking on the big button. To accept these Terms of Service and continue, check the checkbox and click on the "Next" button. Step 3: Enter the server's Domain Name As shown in the screenshot below, you only need to enter your server's public domain name.
.")
125 This is the public Internet accessible Domain Name, something like gateway.your-company.com. You can also enter another domain name or a subdomain name, separated with a comma. Example: "server1.example.com, As explained in the GUI, do not add a protocol prefix and/or a port suffix, just enter the clean domain name(s). The certificate will be generated for this domain name, and it will only be valid on a web page hosted at this domain name. If your users connect to your Web Portal using then you must enter "server1.example.com". Enjoy your Certificate! Terminal Service Plus Free Certificate Manager will now use all the data to connect with Let's Encrypt, validate that you really own the domain name you typed, and get the matching valid certificate. Once the program receives the certificate, it will automatically handle all the required file format conversions and softly reload Terminal Service Plus built-in web server in order to apply the new certificate to every new connection. The web server is not restarted, and no connection is stopped. Certificate Renewal Let's Encrypt certificates are valid for 90 days. Terminal Service Plus will automatically renew the certificate every 60 days for safety. A check is done at every reboot of the Windows server, and then every 24 hours. You can manually renew your certificate by opening the Free Certificate Manager tool. It will display the domain name of the certificate and its expiration date, as shown in the screenshot below.
126 To manually renew your certificate, just click on the "Next" button. The "Reset Domain" button on this window deletes the SSL certificate and reconfigure the Web Server to its original state before using the Certificate Manager. Best Practices If no error occurs, Terminal Service Plus will renew the certificate automatically every 60 days. We recommend that you check every days that your certificate has been automatically renewed. We also recommend you backup at least every month the following folder and its sub-folders: C:\Program Files (x86)\tsplus\userdesktop\files\.lego This is an internal folder, containing your Let's Encrypt account private key, as well as the key pair of your certificate. Troubleshooting In case of an error, please contact support and them the following log file: C:\Program Files (x86)\tsplus\userdesktop\files\.lego\logs\cli.log This log file (and maybe the other log files in the same folder) should help our support team to investigate and to better understand the issue. If you want to restore a previously used certificate, go to the folder: C:\Program Files (x86)\tsplus\clients\webserver It will contain every "cert.jks" files used. These are the "key store" files and we never delete them, we only rename them with the date and time of their disabling. Error Codes Error 801: Free Certificate Manager was not able to register your Let's Encrypt account. Check your Internet connection. Check that your is not already registered at Let's Encrypt. Try again with another . Error 802 & Error 803: Free Certificate Manager could not retrieve Let's Encrypt Terms Of Service URL address. This is a non-blocking error: you still can continue and accept Let's Encrypt Terms Of Service - be sure to read them from your browser first of course. Error 804: Free Certificate Manager was not able to validate your agreement to Let's Encrypt Terms Of Service with Let's Encrypt servers. Check your Internet connection. Try again. Error 805 & Error 806: Free Certificate Manager was not able to validate that you own the domain you entered during certificate creation (Error 805) or certificate renewal (Error 806). Check again all the prerequisites. Check your Internet connection. Check that your web server is listening on port 80. Check that you do not use a third-party web server such as IIS or Apache. Check that your domain name is accessible from the public Internet.
127 HTTPS & SSL Certificates Tutorial Terminal Service Plus HTTPS & SSL Features Terminal Service Plus - Documentation The Web Server included with Terminal Service Plus can manage HTTPS protocol, SSL encryption with either self-signed certificate or CA certificate delivered by a Certificate Authority (CA). The HTTPS protocol encrypts the communication between the client and the server. The unique certificate, generated from a 2048 Bits RSA key, includes the encryption key and the certification of the Server or the Domain Name on which the user is connected. The user is informed that the communication is encrypted and the Server or Domain name is certified by a Certification Authority. This information appears in the address bar of the navigator, as a green padlock. In this tutorial, we will learn how to install a certificate in the Terminal Service Plus Web Server, providing users the security of HTTPS, 2048 SSL encryption and Domain name certification. In order to receive an SSL Certificate we recommend you purchase it from a trusted vendor as GoDaddy or DigiCert. Please follow this procedure to order and install your SSL on the TSplus Gateway / Server. Tutorial Content 1. Certificates and Certification process 1. Certification Process 2. The Certificates 3. Certificates Properties 4. Important notice about the Key Pair (Private Key) 2. How to do a CA Request and Get a Certificate 1. Reminder - Certification process 2. How to generate a CSR (Certificate Signing Request) 3. How to get a SSL Cert 4. How do I generate what I need for TSplus? 3. Trouble shooting 1. I received only one file (.crt or cer) which contains MydomainName.com Certificate 2. My private key is.pem. I cannot import my private key in Portecle 3. HTTPS errors 4. Notice concerning Terminal Service Plus and Microsoft IIS web server
 The generation of a Key Pair or Private Key in standard RSA 2048 bits. This key will be used to generate a CA Request based on it. b) The CA Request generated is transmitted to the CA.")
128 Certificates and Certification process 1. Certification Process Terminal Service Plus - Documentation The certificates are delivered by the Certificates Authorities (CA). This is a 3-step process. a) The generation of a Key Pair or Private Key in standard RSA 2048 bits. This key will be used to generate a CA Request based on it. b) The CA Request generated is transmitted to the CA. It contains all the necessary information in order for the provider to deliver a certificate (Country Name 2 letters code, State or Province Full Name, Locality Name, Organization Name e.g. Company, Organization Unit Name e.g. Section, valid address and Common Name (CN) e.g. MyDomainName.com). c) The Certificate authority verifies the information you transmitted, returns the certificate, and eventually also intermediate certificates that are required to access your certificate. It contains your certificate certifying your Domain name, and eventually also intermediates Certificates that are requisite to access to your certificate. The certificate also contains the CA Reply (the validated Private Key). Once you have the certificate, the CA reply, its key pair (private key), and the intermediates certificates, they must be imported in the key store handled by Terminal Service Plus. 2. The Certificates The delivery usually contains several files. Each file is a certificate. As said previously, the authority delivers the certificate of your Domain name and intermediates Certificates that are mandatory to access to your certificate. The common format file is.cer or.crt. These extensions are recognized by the OS which associates the certificate Icon. In our example above, we received 4 files (.crt). The first, second and third are intermediate certificates (CARoot, TrustCA, DomainValidationCA). The fourth is our Certificate which certifies our domain name MyDomainName.crt. They all have to be installed together. For a best understanding of how to proceed, let s examine the certificates. 3. Certificates Properties The properties of the certificate CA Root show its path. Each certificate has a path from the root to the certificate of your domain name.


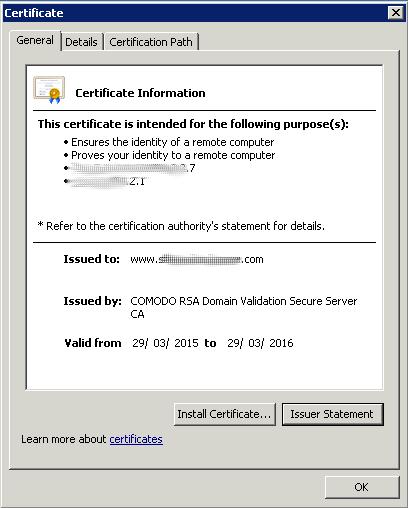

129

130 The properties of our certificate show all the general information about the certificate (purposes, addresses, issued to (CN), issued by and validity. What is important to notice is the certification path. It includes the entire path needed to access our certificate. It displays all the intermediate certificates that are included inside ours. This is a simple process. We must import this entire certification path, plus the Key Pair in the Terminal Service Plus Key store file. Use Windows certificate manager to import keypair and all certificates into Windows keystore as described in Certificates and Certification process (make keypair exportable when importing!) and then export that key back from Windows key store by checking the option "Include all certificates in the certification path if possible". For the format choose per example *.p12 Now create a new key store in JKS format on Portecle, and go to Tools>Import Key Pair and import that *.p12 file: 4. Important notice about the Key Pair (Private Key) The key Pair is the RSA 2048 Bit key generated for the CA Request of the certificate. It has been generated either in the Portecle add-on we provide, or with another generator available like openssl, IIS, or online sites, CA provider s applications. You must have and keep this Private Key. It is either a flat file text format unsecured.pem or a secured format.p12 or.pfx. The Private Key generated is mandatory to be able installing correctly the certificates. Back to HTTPS, SSL & Certificates Tutorial Summary
131 How to do a CA Request and Get a Certificate As a reminder, here is the certification process explained. This process can be done either in the Portecle add-on we provide, or with another generator available like openssl, IIS, or online sites, CA provider s applications. 1. Reminder - Certification process The certificates are delivered by the Certificates Authorities (CA). This is a 3-step process. a) The generation of a Key Pair or Private Key in standard RSA 2048 bits. This key will be used to generate a CA Request based on it. b) The CA Request generated is transmitted to the CA. It contains all the information that are necessaries to the provider to deliver a certificate (Country Name 2 letters code, State or Province Full Name, Locality Name, Organization Name e.g Company, Organization Unit Name e.g Section, valid address and Common Name (CN) e.g. MyDomainName.com). The main job consists to create the Request inquiring correctly a form which asks for all the information listed above. c) The Certificate authority verifies the information you transmitted and returns the certificate. It contains your certificate certifying your Domain name, and eventually also intermediates Certificates that are requisite to access to your certificate. The certificate also contains the CA Reply (the validated Private Key). Once you have the certificate, the CA reply, its key pair (private key), and the intermediates certificates, they must be imported in the keystore handled by Terminal Service Plus. 2. How to generate a CSR (Certificate Signing Request) You will need Microsoft IIS installed on a server or even your desktop. Simply Turn features on and off for Internet Information Services except for FTP (it can be removed later). 1) Open Internet Information Services (IIS) Manager 1.From Start, select Administrative Tools, and then select Internet Information Services (IIS) Manager. 2.In the Connections panel on the left, click the server name for which you want to generate the CSR. 3.In the middle panel, double-click Server Certificates. 4.In the Actions panel on the right, click Create Certificate Request. 5.Enter the following Distinguished Name Properties, and then click on Next: The following characters are not accepted when entering information:< > # $ % ^ * / \ ( )? & - Common Name The fully-qualified domain name (FQDN) or URL for which you plan to use your certificate (the area of your site you want customers to connect to using SSL). - An SSL certificate issued for is not valid for secure.coolexample.com. If you want your SSL to cover secure.coolexample.com, make sure the common name submitted in the CSR is secure.coolexample.com. - If you are requesting a wildcard certificate, add an asterisk () on the left side of the Common Name (e.g.,.coolexample.com or *.secure.coolexample.com). Organization The name in which your business is legally registered. The organization must be the legal registrant of the domain name in the certificate request. If you are enrolling as an individual, enter the certificate requester s name in the Organization field, and the Doing Business As (DBA) name in the Organizational Unit field. Organizational Unit Use this field to differentiate between divisions within an organization (such as Engineering or Human Resources ). City/Locality The full name of the city in which your organization is registered/located. Do not abbreviate. State/Province The full name of state or province where your organization is located. Do not abbreviate. Country The two-letter International Organization for Standardization- (ISO-) format country code for the country in which your organization is legally registered.
 Open the csr which you have just saved with Notepad.")
132 6.For Cryptographic service provider, select Microsoft RSA SChannel Cryptographic Provider. 7.For Bit length, select 2048 or higher, and then click Next. 8.Click, enter the location and file name for your CSR, and then click Finish. 3. How to get a SSL Cert 1) Open the csr which you have just saved with Notepad. Copy all of the text, including -BEGIN NEW CERTIFICATE REQUEST - and -END CERTIFICATE REQUEST - 2) Log into your preferred SSL Cert vendor and create or re-key a SSL Cert. Paste all of the text, including -BEGIN NEW CERTIFICATE REQUEST - and -END CERTIFICATE REQUEST - Complete your vendors instructions and wait until it is ready. When you download it please use the IIS option. When the new cert is ready, please download it. It will be in a.zip. After the download unzip it. Now that you have the cert what do you do? 1.Click Start, mouse-over Administrative Tools, and then click Internet Services Manager. 2.In the Internet Information Services (IIS) Manager window, select your server. 3. Scroll to the bottom, and then double-click Server Certificates. 4. From the Actions panel on the right, click on Complete Certificate Request To locate your certificate file, click. 6. In the Open window, select. as your file name extension, select your certificate (it might be saved as a.txt,.cer, or.crt), and then click on Open. 7. In the Complete Certificate Request window, enter a Friendly name for the certificate file, and then click OK. For Wildcard SSL certificates make sure your Friendly Name to matches your Common Name (i.e. *.coolexample.com) 4. How do I generate what I need for TSplus? 1) Download and install (for example) the DigiCert Certificate Utility ( a) click on SSL. b) click on Refresh. You will now see the cert that you have installed Highlight your cert:

133 Click on the bottom button Export Certificate : Ensure that Yes, export the private key and pfx file / Include all certificates in the certification path if possible are checked off. Next, Save the file in the folder with the certs that you have unzipped. For importation of your SSL certificate see this documentation. Back to HTTPS, SSL & Certificates Tutorial Summary


134 Trouble shooting 1. I received only one file (.crt or cer) which contains MydomainName.com Certificate Look at the path in the certificate properties. If your certificate is at the root, then you don t have any intermediate certificate. You must only import the.cer ou crt you received. If the path contains others intermediates certificates, then they will be needed. You can export theses certificates included in yours and create a file by certificate. You can export each certificate listed in the path and get one file per certificate. Double click on the certificate you want to export. Then go to Details / Copy to file.

135 Click next. Default values are ok. Click next until you have to give a name. Confirm your exportation. The result is a file.cer containing only the certificate exported. Repeat this exportation for each level of the path. 2. My private key is.pem. I cannot import my private key in Portecle You can convert your.pem in pfx format with Tools or online sites. For example, on this site: You must have your Private Key and your certificate (e.g. MyDomainName.com) Browse to select the certificate to convert and the Private Key that goes with it. Current certificate type is PEM. Type to convert to is PFX (PKCS#12). As.pfx is a secured format, you must enter a password. You can choose whatever you want, but, at least, you will have to set it to 'secret'. So you should enter the password 'secret'. The result is a.pfx format that you will be able to import in Portecle. As we saw in the installation section, this Private Key imported in Portecle must receive a CA Reply. See section Installation / CA reply for further information.


136 3. HTTPS errors SSL error no cypher overlaps. The Private Key or the Key Pair has not been imported in cert.jks or is invalid. Other errors types give the same screen with another error code. Take a look at this code error. It concerns the certificate and something with it that goes wrong. It is usually because one of the fields of the certificate is not valid or blank. Have a look to your certificate Properties and Request. Verify that all the fields are correct. Report to section how to do a Request for more information. 4. Notice concerning Terminal Service Plus and Microsoft IIS web server Please refer to our documentation about using IIS with Terminal Service Plus. However, here is some important information about IIS and certificates: When using IIS, the certificate has to be installed in the keystore cert.jks. This must be done in the same way as if we were using Terminal Service Plus Web Server, and as described in the previous chapter. Don't bind the 443 HTTPS port IN IIS, as this is the Terminal Service Plus Web server that handles the HTTPS protocol, the certificate and its encryption. Not any bind has to be created on port 443. So, IIS must only have port 81 bound. We are free to use IIS Request Tool to create the Private Key and the CA Request. It is simple to export the Private Key from IIS (IIS/Default site/certificates) in the.pfx format and import it in cert.jks as described in the previous chapter. Back to HTTPS, SSL & Certificates Tutorial Summary
137 Choosing your Ciphers Suites to enhance security Overview TLS/SSL, the security behind HTTPS, can use several different algorithms to secure, encrypt and authenticate a connection. The choice of the algorithm to use is decided by an agreement between the server and the client, depending on which algorithms are available on each side. A cipher suite is a named combination of authentication, encryption, message authentication and key exchange algorithms. Terminal Service Plus server can handle a lot of different ciphers suites. Some of them are more secure than others, but some old/legacy browsers might require relatively weak algorithms to connect. This is the reason why Terminal Service Plus let you choose the ciphers suites you want to enable. Of course, Terminal Service Plus also has an easy setting to disable the weakest algorithms, thus enhancing your connections security. Ciphers Selection GUI To open Terminal Service Plus Ciphers Selection GUI, open Terminal Service Plus AdminTool, click on "Security", then click on "SSL Ciphers Selection" as shown in the screenshot below:

138 The Ciphers Selection GUI will open, as shown here: Enabling/Disabling a Cipher Suite You can easily enable a cipher suite by checking its checkbox and disable a cipher suite by unchecking it. When your selection is done, click on "Save". This will save your selection and reload the new configuration in Terminal Service Plus built-in web server. Your new ciphers suites selection is instantly applied for every new connection to your server. Recommended Ciphers Suites Selection We recommend to most administrator to use our recommended ciphers suites selection, by simply clicking on the "Disable weak ciphers" button and then on the "Save" button. This action will disable all ciphers suites which are currently known to be weak. You can check with SSL Labs Online Testing Tool: without those weak ciphers suites you should get the maximum grade: A!

139 Activating Double-Factor Authentication You can integrate the Double-Factor Authentication for TSplus with SAASPASS, the Leader of Multi-Factor Authentication. The SAASPASS-TSplus integration is a quick and straightforward process. Before you start, please make sure that your server is accessible from out of your network. If your server cannot be accessed by SAASPASS you will not be able to use Scan Barcode, Proximity Login and One-Time Password to log in. The SAASPASS-TSplus integration can be done by following these steps (These instructions may be different on some Windows Server versions. Prerequisites Make sure you meet the pre-requisites before continuing the integration: Installed latest version of TSplus. Installed the SAASPASS mobile application or Desktop client. Company registration for SAASPASS from the admin portal at Reachable server from SAASPASS for Login options as Scan Barcode and Proximity. SAASPASS is reachable from the server. Installed IIS with the following modules: CGI, ISAPI Extensions and ISAPI Filters. WebSocket Protocol and ASP.NET 4.5 installed on the server. Note: Load-Balancing is not compatible with SAASPASS Double-factor authentication.


140 STEP 1 Download SAASPASS-TSplus plugin archive from here and extract the content into C://inetpub/wwwwroot/SAASPASS-TSPlus: Give full permission to the group "Everyone" in the directory "C:\inetpub\wwwroot". STEP 2 Open IIS Manager, right-click on Sites and then click on Add Web Site. Fill the from with appropriate data, where the Physical Path will point to the extracted content of the archive. Don t forget to specify the http port to 81.


141 STEP 3 The cgi-bin virtual directory is already created under the SAASPASS-TSplus website, and you will have to convert it as an application: Then, double-click on the "Handler Mappings" icon for this folder on the right side of the Manager window:


142 Now, right-click on CGI-exe and click on "Edit Feature Permissions": Check the "Execute" checkbox and click OK: STEP 4 Configure CGI extension permission Then, allow the CGI extension to run on the server. Click on the "ISAPI and CGI Restrictions" icon. This can be found by clicking on the machine name in the menu on the left side of the window:

143 On the "ISAPI and CGI Restrictions" page, click "Add..." on the right side of the window. Now specify the full path to the "hb.exe" file hosted in the TSplus folder. Be sure to check the "Allow extension path to execute" option, as Illustrate the following screenshots: STEP 5 Add Mime types in IIS Double-click on the Mime Types icon:

![/section:staticcontent /+[fileextension='.dat',mimetype='text/plain'] %SystemRoot%\system32\inetsrv\appcmd set config /section:staticcontent /+[fileextension='.](/docs-images/87/96809740/images/144-2.jpg "',mimetype='text/plain'] Then restart IIS.")
144 And verify that the. and.dat extensions appear with a text/plain MIME type: Otherwise, add them by opening a command prompt as an administrator and run the following commands: %SystemRoot%\system32\inetsrv\appcmd set config /section:staticcontent /+[fileextension='.dat',mimetype='text/plain'] %SystemRoot%\system32\inetsrv\appcmd set config /section:staticcontent /+[fileextension='.',mimetype='text/plain'] Then restart IIS. STEP 6 Once you set up the SAASPASS-TSplus plugin to run under IIS, now we need to change TSplus to use IIS Server instead of the built-in server: Open the TSplus Administrator Tool and click on the Manage Web Servers tile under the Web Tab. Select Use a different HTTP Web server Then, change the Web server root path to point to ISS SAASPASS-TSplus. Save the changes, the AdminTool will restart.


145 STEP 7 On the SAASPASS Portal, when switched to Company mode, you can add users on the Groups & Users tile and TSplus on the Company Applications tile: You can see that the application is running, and one user or group is connected. STEP 8 Once everything is in place, open IIS Manager and go to Application Settings for the SAASPASS-TSplus site.
146 Enter the correct values for your application APIKEY and APIPASSWORD, which you can get from APP KEY & PASSWORD on the SAASPASS Admin Portal when you are managing your Application. STEP 9 Under the TSplus application on the SAASPASS Admin Portal, open Application Settings and enter your desired IP Filter, as well as the TSplus URL, with your domain name, for example:


147 STEP 10 To add the RemoteApp or the Load Balancing options under TSplus to configure it please see this documentation page and this one. For SSL setup instructions please refer to this documentation. STEP 11 Open the TSplus AdminTool and navigate to Security -> Advanced Security. Enable 'Deny access from Microsoft RDP client' and 'Encrypts end-to-end communications'. Save the changes. Restart TSplus. You are all set, now you can login to TSplus with SAASPASS:
148 Remote Connection from an iphone / ipad / Android device You can connect to your Terminal Service Plus server from any mobile device supporting the HTML5 technology, such as: an iphone an ipad an Android smartphone an Android tablet Edit the preferences for Mobile devices Since the release, the TSplus HTML5 client has been greatly enhanced to offer the best possible user experience even from Smartphones or tablets. The keyboard has been redesigned to automatically pop-up when the focus is over an entry field. The mouse pointer has been redesigned to facilitate the selection of buttons and fields even if located on the left or the bottom borders of a Smartphone. You can set up various different HTML5 settings for mobile devices or computers on the HTML5 client tab of the Web Tile: Display the menu bar for all devices and computers or for mobile devices only. Enable or Disable File Transfer. Allow the Ctrl + Alt + Del shortcut on a specific type of device. Choose your favorite Top Menu display between transparency and solid. The number of graphical color bits. The Connection Timeout. Show or Hide Warning Messages. Enable or disable sounds. Choose your favorite background color. Add a logo to the background. Change the logon screen message and animated gif, as well as its display time in milliseconds. Smartphone and tablets Preferences: If the administrator uses the software keyboard, when it is hiding an entry field, the application is moved up and the user is still able to see what he is typing. The administrator can select a small, a medium or a large size for the mouse pointer or no mouse pointer at all. It makes intuitive for the user to navigate inside his application. He can also select the level of transparency for mouse and keyboard.
149 Edit the HTML5 Top Menu On the HTML5 Top Menu tab, you can add applications that will be displayed on the first or second level of the Top Menu in HTML5: On level one, you can find the integrated HTML5 features: printing, file transfer and a clipboard. (For more information about these features, go to these pages: Universal Printer for HTML5, Using file transfer and Using Clipboard.) On this example, Foxit and Excel are published on level 2:


150 And can be found under the integrated features on the top menu into the HTML5 session: Furthermore, the top-right icon allows you to switch your session to fullscreen. Terminal Service Plus built-in HTML5 client provides the user a completely new menu on tablets and mobile devices. With this new menu the user gets an easy access to mobile keyboard and right click, but also to file sharing and to our unique Universal Printing feature! Please refer to this documentation for how to use the mini mouse and keyboard. Language selection You can now change the language with the language button at the right of the top menu:

151 You can choose the language for the specific country you wish to on this menu: Brute-Force Attacks Defense Since TSplus release, brute-force attacks on the Web Portal are now blocked when users enter wrong credentials. After 10 attempts during a period of 10 minutes, the Web Portal will prohibit the user to logon for 20 minutes:
152 These are the default settings which are customizable on the hb.exe.config file located on the TSplus folder: TSplus\Clients\www\cgi-bin\hb.exe.config in the "appsettings" paragraph. You can check all blocked connections and logs on the Brute-Force Defender tile of RDS-Knight Ultimate Protection: This functionality is visible and active after the first Web Portal connection.
153 HTML5 Client: Supported Browsers Terminal Service Plus - Documentation If your browser shows red warning on start by using HTML5 client It means that your browser does not support Websockets or your browser does not support Canvas. Such browsers that do not support these technologies are IE6, IE7, IE8, IE9 and need FLASH to emulate these features. Browsers supporting Websocket and Canvas Browsers Canvas Websocket FireFox Full Full starting by version 4 Chrome Full Full in most known versions on PC's Opera Full Full in newest versions IE6 IE7 IE8 IE9 Flash Flash Flash Flash Flash (emulated and no proxy support) XHR (with proxy support) Flash (emulated and no proxy support) XHR (with proxy support) Flash (emulated and no proxy support) XHR (with proxy support) Flash (emulated and no proxy support) XHR (with proxy support) IE10 Full Full Android native Full XHR Opera mobile Full Full in newest versions Firefox mobile Full Full Safari mobile Full Full in the newest versions up ios4, else emulated via XHR Also see: What's the difference between Websockets and XHR? If your browser automatically reloads the pages to HTTPS address It means that Websockets transport is not supported. This is the case on several Android native mobile browsers. It is due to the fact that the browser automatically switches to XHR transport. But because this transport layers on long distances with HTTP protocol, each request creates new connection. It is very slow and unstable to create new connections (up to 20 new connections per second), therefore to avoid this instability the program is conceived so that the page reloads automatically to HTTPS address to enforce HTTPS connection. Physically you also get mostly persistent secured connection and much more stable on long distances. So, the browser s logic reuses already established SSL connection instead of creating a new connection like by the use of HTTP protocol. This behavior can be changed by the following option on the setting.js file located in the TSplus program folder under this path: Clients\www\software\html5\settings.js: forcesslforxhr = false; But it is absolutely not recommended to disable the use of SSL in XHR mode. *If you do not have a file named "settings.js" in the "C:\Program Files (x86)\tsplus\clients\www\software\html5" folder, then your TSplus version is older and this documentation does not apply. Please update your system first or contact support.
154 HTML5 Client: Using Gestures on mobile devices (Touch) Using screen area: 1. Easy touch on screen = mouse move to touched position and left mouse click 2. Fast double tap on screen = mouse move to touched position and left mouse double click 3. Touch and hold for one second on screen = mouse move to touched position and right mouse click 4. Touch and move outside of cursor area = scrolling the visible session frame (this is native browsers behavior for scrolling especially after pinch-zoom) 5. Touch in cursor area and move = mouse cursor moving only 6. Double tap inside cursor area and move = left mouse down and mouse moving Useful for moving window, moving elements, resizing. 7. Double tap on screen (outside of cursor area) and move finger down/up = middle mouse scrolling. Useful for scrolling pages or view pdf's. 8. Pinch zoom with two fingers = zoom the RDP session frame (this is native browsers behavior) Using mouse pad area - additional functions in the middle point of mouse pad: 1. Easy touch in the middle = left mouse click 2. Double tap in the middle = left mouse double click 3. Touch and move in the middle = mouse move and mouse pad moving 4. Touch and hold for one second = right mouse click Keyboard mode on: 1. Easy touch on screen = focus lose, keyboard disabled (this is native browsers behavior) but this will fire mouse move and left mouse click. 2. Fast double tap = mouse move and left mouse click (without keyboard disabling) Useful to reposition the cursor, set focus on different character and stay at the same time in keyboard mode. 3. +Functions of mouse pad described above

155 HTML5 Client: Using File Transfer Use the top menu for file transfer. Terminal Service Plus - Documentation Unlike real RDP session the browsers do not allow to access the hard drives directly, the file transfer is emulated. The sub-folder of gateway gets mounted as a WebFile device into your RDP session. Inside the RDP session you can access it via Explorer by clicking on "WebFile" or call "\tsclient\webfile" directly:


156 There are three different ways to transfer a file: From the local computer to the server: From the server to the local computer:


157 The file manager which enables you to transfer files from the local computer to the server, with an history of the transferred files: On the browser side the files are showed inside the browser's list menu. It can be opened via action menu or with Shift + F12. When you copy files with Explorer into the WebFile folder, this triggers automatically the event about the creation of a new file in the WebFile folder and the browser menu opens/refreshes automatically to show the new file:
158 When using a custom folder, make sure this folder exists on client and server sides. You can set the upload/download destination folder on the Web Portal preferences tile on the web tab of the Admin Tool: If you want to avoid this behavior, set the following line on the setting.js file which path is by default: C:\Program Files (x86)\tsplus\clients\www\software\html5\settings.js :dropboxonnewfile = 0; Additionally, you can set: sharedfolder = "yes"; to show shared folder and share your files with other users (disabled by default). If you do not have a file named "settings.js" in the "C:\Program Files (x86)\tsplus\clients\www\software\html5" folder, then your TSplus version is older and this documentation does not apply. Please update your system first or contact support. By default, explorer is used to transfer files. You can also directly download your files from server to client by checking the "use TSplus GUI" below on the Web Portal Preferences window and copy any files into the webfile folder.

159 HTML5 Client: Using Clipboard Terminal Service Plus - Documentation The clipboard can be found on the HTML5 Top menu, with this icon: Most browsers except older MSIE browsers do not support the direct clipboard reading and writing due to security reasons. To copy the text from session to clipboard use Ctrl+C and to insert the text from clipboard use Ctrl+V. But pay attention when you copy the text with Ctrl+C, wait some time before releasing the pushed Ctrl+C buttons, because if the requested clipboard text arrives after you release this key combination, the text will not be added to your environment clipboard. This way uses a native browser clipboard copy support initiated by Ctrl+C. Alternatively, you can use the clipboard menu to copy from and to insert the text into RDP session clipboard. There you can just insert the text into RDP session clipboard or add it to clipboard and auto-initiate Ctrl+C on RDP session side to insert text. The clipboard menu can be opened via action menu or Shift + F11. When you copy the clipboard with mouse inside a RDP session, the text gets sent to browser and as soon as you go out of browser focus, the clipboard menu appears automatically to inform you that there was a clipboard text and that you did not add it to your clipboard environment. To avoid this behavior set the following line on the settings.js file on the Clients folder, by default, the path is: C:\Program Files(x86)\tsplus\Clients\www\software\html5\settings.js : openonclipblur = false; If you do not have a file named "settings.js" in the "C:\Program Files (x86)\tsplus\clients\www\software\html5" folder, then your TSplus version is older and this documentation does not apply. Please update your system first or contact support.
160 HTML5 Client: Using two languages Terminal Service Plus - Documentation First, you need to decide which language you want to have by default. The browsers actually never report set keyboard language, the browser reports only language of browser, where the program can assume, which language should be preferred. For example, if your browser is in French, then you get French as standard language, in German language you will get German and so on. If you accidentally install English version of browser instead of your language, then you will get english as auto-recognized language. Therefore, to avoid this, you can force your language on the page Clients\www\index.html, as example for german: var lang = 'de_de'; Remember, changing this variable inside Clients\www\software\html5.html will not affect the language, since this variable gets overwritten by parent window, where you opened this page from. On your HTML5 installation inside Clients\www\software\html5\languages\ you will find known languages. Inside the RDP session you should switch to wished language, the program will then automatically switch the used translation table. Since it is not native client, but used via browser, you need to synchronize your local keyboard language with remote RDP language manually. That means, if you set German inside RDP session, you have to switch to German on your local system to be able to type specific German chars. If you set to English inside RDP session, then switch to English on your local system too, and vice versa. If you notice some problems with keyboard input, please first check that the option in Clients\www\software\html5\settings.js: preferchars = true; is really set to true and not false. If you do not have a file named "settings.js" in the "C:\Program Files (x86)\tsplus\clients\www\software\html5" folder, then your TSplus version is older and this documentation does not apply. Please update your system first or contact support.


161 HTML5: Changing language to Chinese You need Windows 7 Enterprise or Ultimate / Windows 8 Enterprise or Professional to use multi-language on one system. You can install every language on the system if you need. You could publish a language applet for users to change their own O/S language of UI and add IME (Input Method Editor). For Windows 7: control /name Microsoft.RegionAndLanguage For Windows 8: control /name Microsoft.Language Complete List:


162 Optional: this is how to restrict the Control Panel behavior for users by GPO: Users can change O/S language of UI after logon system. (Users have to logout and logon again to take effect after changing this setting).


163 The user has to select Chinese IME first to input Chinese chars.
164 HTML5 Server Memory Usage Terminal Service Plus - Documentation Terminal Service Plus HTML5 Server runs on JAVA. Understanding how JAVA handles memory help to understand Terminal Service Plus HTML5 Server memory usage. Assigned memory When Java runs, it tries to allocate 25% of the computer physical memory. This memory is "assigned" but not directly used - it is not the real memory usage that one can see in Windows Task Manager. JAVA platform: 32-bit vs 64-bit There is one big difference between these two platforms: JAVA 32-bit cannot handle more than 4GB of RAM by definition. Since it will allocate 25% of all available memory, it will allocate at most 1GB, assuming there is 4GB physical memory. If there is only 2GB physical memory, it will only allocate 500MB, etc. JAVA 64-bit can handle a lot more than 4GB (theoretically up to 16 exabytes), so the allocated memory will only depend on physical memory. JAVA memory management JAVA is a "virtual machine". It means that JAVA handles memory management on its own. Once JAVA allocates some memory, even when it does not need it anymore, it will not automatically give it back to the system. This is for performance reasons, as memory allocating and de-allocating are CPU intensive tasks. JAVA will usually wait until it has a big chunk of unused memory before giving it back to the system. The size of this big chunk directly depends on the size of the computer physical memory. The more physical memory on a computer, the more memory is allocated by JAVA. Terminal Service Plus HTML5 Server Memory Usage All these technical details are the reason why one can open Windows Task Manager and think that Terminal Service Plus HTML5 Server uses a lot of memory, or that JAVA 32 bits uses less memory than JAVA 64 bits. Actually, the memory really used by Terminal Service Plus HTML5 Server is directly related to the number of opened HTML5 sessions. The more available memory on the computer, the more HTML5 sessions you can open. HTML5 Session Memory Usage The memory used by an HTML5 session depend on the user activities (applications and programs used, Word/Excel versus drawing-intensive programs) and the connectivity method established between the Terminal Service Plus HTML5 Server and the client computer. In the general use case, an HTML5 session will use 30 MB of memory (standard use, binary websockets connectivity). In the worst case, a session will use up to 100 MB of memory (intensive use, "XHR" fallback connectivity for older browsers).

165 TSplus App The TSplus App allows you to connect to your TSplus server from any device, anywhere! Just like TSplus, it provides fast and stable remote connections from tablets and smartphones to Windows desktops and business applications. Access your applications and business data in real time and easily print any document and photo you need on the nearest local printer. For more information and download links: Pre-requisites Hardware Requirements and Operating Systems The TSplus App is available on PCs, mobiles and tablets with the following OSs: Windows, ios, Android from 4.4 version and Linux. Pre-requisites The host site must be a TSplus Mobile Web or Enterprise system. The release (and over) must be installed on this host.


166 TSplus App Configuration The user interface and configuration are simple and intuitive. First, add a TSplus server by clicking on the bottom right button: Then, add your server information and configure it: Enter its its host name or IP address. SSL is disabled by default, but you can choose to enable it. Warning: SSL Activation only works if you installed a valid SSL Certificate on your TSplus server. See this documentation for more information.


167 Enter its display name, which is optional. Enter your user's credentials with the domain or user name and its password.. Then click on the top right button to save. You can now click on your server to access your applications:
168 Gateway Feature Terminal Service Plus Gateway has a lot of benefits. It allows you to assign servers to users or groups. Doing so, your users will be able to access the servers that are assigned to them. This feature is useful if you plan on having a large number of users, but is not compatible with load-balancing. Gateway Tab Open the Admin Tool and click on the Gateway tile: Overview A server can be set as the Gateway of your farm of servers. You can Add/Edit/Remove servers from your farm. You can assign one or several servers to a user / a local group / an Active Directory group. According to his credential, the user will be able to choose which server he wants to access in the list of servers assigned to him. If the farm is within a Domain, the Gateway will use his AD credentials and the user will connect with Single Sign-On (SSO). Otherwise, he must have the same local credentials on each server.
169 Managing the Servers of the Gateway Terminal Service Plus - Documentation To manage the servers please click on the "Assign servers to users" tile: Then click on the "Manage Servers" button. The window "Add, Edit or Remove Servers from your Gateway Portal" will open:

170 When you click on the "Add a new Server" button you can then add a Terminal Service Plus Server by Display name and IP address (you can type an IP or a domain name, without a port number): When you are done, please click the "Save" button to add the server to the Servers list. To remove a server from the Servers list, click on the server you want to remove and then click on the "Remove Server" button. After a confirmation message, the server will then be removed from the list. You can also edit a server by selecting it on the list and clicking on the "Edit Server" button. The "Manage Users" button is explained in Managing Gateway Users. TSplus Farm of Servers Architecture There are 2 options to deploy a TSplus farms of servers: Option 1: All your servers have public IP addresses and can be reached from the Internet. OR Option 2: Only the Gateway Portal can be reached from the Internet. The Gateway is providing a Reverse Proxy Role. In both options: Every server has the same TSplus configuration. Every server has the same HTTP/HTTPS ports. To publish a new Application just add it the AdminTool on the Gateway Portal. Of course, make sure that this application is installed on the targeted Application Servers. All Web Access types are available without any specific configuration: RemoteApp and HTML5 clients. In the Admin Tool, click on the Web tile, then click on the Web Portal Preferences tile.
171 Check the "Generate a Gateway Portal enabled Web Page" box, then click on "Save". On the Web Access page, your users will be able to choose between the servers that were assigned to them: Option 1 - All Servers have their own Public IP Address and can be reached from the Internet. This is the recommended architecture to use Terminal Service Plus Gateway. This architecture follows best practices and allows the IT Administrator to industrialize its environment: Every server has the same Terminal Service Plus configuration. Every server has the same HTTP/HTTPS ports. Deploying a new Application server is only a matter of minutes (just add the server to the farm in the AdminTool on the Gateway server). With this architecture, all access types are available without any specific configuration: RemoteApp and HTML5 clients.

172 This architecture is described in the diagram below: * * * Option 2: Only the Gateway Portal can be reached from the Internet and includes a Reverse Proxy Role. Terminal Service Plus Gateway can also be set up with only 1 Public IP Address. The Gateway redirects any external connection request to any available server. If you do not use the load balancing feature, users will connect to their assigned server(s).
173 This architecture is described in the diagram below: For more information about the Reverse Proxy Role, see the Reverse Proxy Feature documentation. TSplus farm of Servers without Load Balancing You can set a range of Application Servers. Each of them with different types of applications (Accountancy Server, Payroll Server, Office Automation Servers ). In such deployment, the Administrator will enter a list of servers and will assign servers to users. For example, the user John will be allowed to access to the 3 servers, but the user Paul will have access only to the Payroll Server. To setup this kind of Farm, please read: Managing Gateway Users. Load Balancing and Failover: When the load balancing is activated, it is no more the user who selects the Server where he is going to open a session. It is the TSplus load balancer which checks which server is less loaded and will assign it to the incoming user request. To setup a load balanced Farm of Servers, please read this page.
174 Managing Gateway Users Managing Users of the Gateway Terminal Service Plus - Documentation Warning: Don't add users or groups here if you aim to use load-balancing. To manage the users please click on the "Assign Servers to Users" button. The window "Assign Servers per User or per Groups" will open: To assign a server to a user, simply click on the user in the "Users and Groups" list and then check the server's checkbox in the "Servers" list. To remove a server from a user, simply click on the user in the "Users and Groups" list and then uncheck the server's checkbox in the "Servers" list.

175 Notes The server must be added first to assign it to a user. To add a server, click on the "Manage Servers" button to open the Gateway Servers Management tool. The example above is for a Domain or a Workgroup. If you use a workgroup the users logins must be the same on each Terminal Service Plus server that you assign. Example of what you will get when users connect to the Gateway John can select the server. He wants and will get an auto-logon to this server: If he types a wrong password, John will have to retype his password:


176 Julia has a different list of possible servers: Someone tries to hack the Gateway. He does not see any server and the Gateway blocks his web access.

177 Gateway Server: Prevent RDP access and allow HTTP There are 2 ways to access the Gateway Server: - HTML5 / HTML - RDP Session (via the Gateway IP/DNS Port number) How to LOCK DOWN HTML/HTML5 We can use mstsc with a PORT number and RDP into a TSplus Application / Gateway Server. However, if we use the advanced Security tools on the TSplus Admin Console on the Gateway Server, by going on the Security tile/tab, then by clicking on the advanced security options tile : the access is denied when trying to connect with RDP. To avoid this behavior, on the Gateway Server, you will have to do the following: Go to Gpedit.msc, then under Computer Configuration, click on the Administrative Templates folder, on the Windows Components folder and on Remote Desktop Services:


178 Then, click on the Remote Desktop Connection Client folder, double-click on the "Allow.rdp files from unknown publishers" setting and enable it, as well as the "Configure server authentication for client": Under the Remote Desktop Client menu, click on the Remote Desktop Session Host folder, then on the Security folder. Enable the "Require user authentication for remote connections by using Network Level Authentication" setting:

179 Load Balancing Feature Pre-requisites Using this feature, you will be able to manage a load balanced environment. It means that the load of all your users will be distributed between your servers. The workload will be shared between all the servers of your farm. Load Balancing enables to use an unlimited number of servers with load balancing. This very powerful and advanced capability is to be used when a large number of users/servers has to be deployed. Warning: Load Balancing is not compatible with the Gateway Feature (allowing you to assign servers to users/groups, see this documentation for more information.) Usually we recommend using one server for 50 concurrent users. For standard commercial application written in VB, C, C++, Delphi or Uniface you can go up to 100 concurrent users especially if you decide to use XP 64-bit which, according to our experience, tops most operating systems delivered by Microsoft. XP or Windows 7 are much more stable operating systems. For W7, we recommend using the 64-bit version. Generated Clients and Web Access There are two ways to connect to a Load Balanced cluster: Using a Generated Client (executable program, created by the Portable Client Generator) Using a Web Portal Access by activating it on the Web Portal Preferences window.
180 Load Balancing Main Window The main window displays a lot of data and allows you to configure Load Balancing. It lists all the servers in your Load Balanced server farm and allows you to add a new server (by clicking on the "Add a new Server" button) or displays an existing server (by clicking on it). It also allows you to enable, disable and configure the Load Balancing (more on this below).
181 Enabling/Disabling Load Balancing Terminal Service Plus - Documentation On top of the Gateway Portal Load Balancing window, you will see a big button: This button displays the current state of the Load Balancing. If you click on it, it will enable or disable the Load Balancing depending on its current state. Here is the button when the Load Balancing is Disabled. A click on it will activate it and disable the Users/Servers Assignment. Here is the button when the Load Balancing is Enabled. A click on it will deactivate it and enable the Users/Servers Assignment. How does Load Balancing choose a server? When Load Balancing is enabled, the user will be sent to the less loaded server at the time of his connection. Configuring the Computation of Servers' Loads To determinate which is the less loaded server, the load of every server is computed using a weighted average between several performance indicators: number of connected users processor usage memory usage disk usage You can modify the weight (importance) of these indicators by using the following sliders: Using these sliders, you will be able to fine-tune the Load Balancing, and to optimize it to your own needs. For instance, if your users launch a business application with big memory requirements, it might be a good idea to increase the impact of the RAM in the load computation using the "Memory" slider. You can also reset these values by clicking on the "Back to Default Settings" button. How is Server's Load computed? The load of each server is computed when needed in order to decide on which server the user must be sent. For this computation, we use a weighted average between 4 hardware metrics.

182 The 4 sliders allow you to give more (or less) weight on each of these metrics, which are: Users: number of connected users CPU: percentage of non-idle processor time Memory: percentage of used memory I/O: percentage of non-idle disk time For example, if you put the "Memory" slider on its right side and all the other sliders on their left side, the load of each servers will be computed using almost only the percentage of used memory - and your users will be sent to the server having the most available memory. When a slider is completely on the left, the weight used in load computation will be 1. When a slider is completely on the left, the weight used in load computation will be 100. Moreover, the load of a given server depends on the ratio [ used resources / total resources ] ; so if a server A is twice as powerful as a server B, twice more users should be sent to server A than to server B (all other things being equals). Adding a new Server To add a new server, simply click on the "Add a new Server" button. The following window will be displayed: The "Display Name" is the title that will be shown to your users on the Web Access HTML page. It is supposed to be more user- friendly than a technical value (such as an IP), for instance "US Server" or "Blue Zone". The server address is reachable with http or https ports. When using the Gateway Portal Load Balancing, the "RDP Port" will not be used. It is only used when connecting using a Generated Client. We advise you to keep the default setting ("Same as web"). You also have the possibility to enable or disable the server. Editing an existing Server To modify an existing server, simply click on the "Edit" button of the server you want to update. The following window will be displayed:
183 The progress bar shows the current load of the server. It also confirms you that the server is well configured and can be contacted by the Gateway. Load Balancing using a Connection Client You are not using the Reverse Proxy role of the Gateway (default case) This is the default case if you just installed Terminal Service Plus. In this case, if you want to generate a Connection Client to connect to a given Application server, then: Do not check the "Use Load-Balancing" checkbox on the on the Gateway Portal tab of the Connection Client Generator: Use the public IP address or hostname of your Application Server directly in the "Server" field. However, if you want to generate a Connection Client to connect to the less loaded server and use Load Balancing, then: Check the "Use Load-Balancing" checkbox on the Connection Client Generator:
184 Use the public IP address or hostname of your Gateway Server directly in the "Server" field. You are using the Reverse Proxy role of the Gateway ("/~~" in URL) See this page. Activating the Load Balancing for a Gateway Portal access Activating Load Balancing is really easy. It only takes three steps: 1) Generate a Web Access page with the option "Generate a Gateway Portal enabled Web Page" checked, by clicking on the Web Portal Preferences tile of the Web tab: 2) Enable Load Balancing by clicking on the "Enable/Disable Load Balancing" button (in the Load Balancing Manager, located on the Gateway tab of the AdminTool):

185 3) Open a browser and navigate to the Web Access page you generated in step 1 (by default: After typing a login, you will see that the Web Access page choose the less loaded server of your farm: Activating the sticky session feature Regardless of your connection method, you will always be able to activate the sticky session feature by clicking on the right button of the Load balancing window: It will allow you to reconnect to a disconnected session instead of opening a new session on a different server.

186 Using the Reverse Proxy Server Feature This feature is available in the TSplus Enterprise Edition. The Reverse Proxy system acts as an intermediary for its associated servers to be contacted by any client. The advantage of using a reverse-proxy is simple: you will no longer need to create as many port redirection rules as your number of TSplus servers. In TSplus, it provides a unique access point to a farm of load-balanced TSplus servers: This unique access point will be your Gateway Portal Server. Since this server is going to be accessed remotely, you will need to set up one port redirection rule on your router, including the http or https ports depending on your preference (80 being the default port for http and 443 for https). Click on the Gateway tile then click on the "Reverse-Proxy Server Role" tile:


187 The Gateway Public IP must be set with a fixed valid IP address. Select Http or Https for your preferred connection method, the servers of your farm must be able to communicate with each other on either port 80 or 443, depending on which connection method you use. It is also important that your windows firewall don't block these ports. Enable the load-balancing feature if you wish to load-balance your farm. If you do not activate this feature, you will need to assign the servers of your farm to the Users or Groups. More information on this subject can be found here. Click on "Add an Application server" and fill in the Display Name for your server, its hostname in the Internal Name field and its Private (LAN) IP address, then click on "Save".
188 Once you completed your list of servers, click on "Save Gateway Reverse-Proxy settings" and restart the Web services located in the Admin Tool's Web tile. Reverse-Proxy and Generated Connection Clients You can generate a Connection Client which will connect to an Application Server through the Reverse-Proxy Server. To do so, assuming that your gateway has public IP and your backend server has internal name "srv2", then use the special URL :443/~~srv2 in the server address field of the Connection Client Generator. For example: Don't forget to also check this box: Unless you want to connect to a given Application server.
189 Using servers behind Reverse Proxy Terminal Service Plus - Documentation It is possible to use servers behind reverse proxies via xhr-polling, with some limitations. As described here, Websockets are not part of HTTP protocol, even if first http request looks like http request, actually, it isn't, therefore most known reverse proxies do not support Websockets and drop many important areas of first Websocket request. If you know that the server is behind reverse proxy, disable Websockets by setting this option in Clients\www\software\html5\settings.js : disablewebsocket = true; That will enforce the usage of XHR-polling and avoid time delay when connecting. If you do not have a file named "settings.js" in the "C:\Program Files (x86)\tsplus\clients\www\software\html5" folder, then your TSplus version is older and this documentation does not apply. Please update your system first or contact support. Please note that the usage of XHR-polling is not as stable as Websockets due its connection nature. The other limitation using Xhr polling via reverse proxy is the poor support on files upload. While working with XHR in direct connection, done for example via Apache reverse proxy, Apache can accidentally interrupt the file's upload.
190 Farm Overview Naming The goal of TSplus Farm features is to allow the Administrator to manage all his TSplus servers from a single server. This server is named the Farm Controller. The TSplus servers in the Farm are named the Application Servers, or just Servers. Finally, the application which allows the Administrator to manage and monitor his Farm is named the Farm Manager. Releases History API 1.4 (released with TSplus 10.10) Load-Balancing centralized monitoring Enable/Disable a Server in TSplus Load-Balancing Manager Translations in multiple languages (TSplus language will be used) Several settings added + display bugs fixed API 1.3 (released with TSplus 9.70) Settings centralized monitoring and management (Global settings / Floating Panel / RemoteApp Client / HTML5 Client) API 1.2 (released with TSplus 9.60) Farm Manager Servers centralized management (add/remove) Sessions centralized monitoring and management (messages/disconnect/logoff) API 1.1 (released with TSplus 9.30) Load-Balancing internals Load-Balancing Sticky-Sessions
191 Farm Prerequisites Hardware Requirements Farm Controller and Application Servers have the standard Terminal Service Plus requirements for hardware. Operating System Requirements Farm Controller and Application Servers must use one of the following Operating System: Windows 7 Windows Server 2008 R2 Windows 8 Windows Server 2012 Windows 8.1 Windows Server 2012 R2 Windows 10 Windows Server and 64-bit platforms are supported. Network Requirements Every Application Server must be accessible from the Farm Controller. More specifically, the Farm Controller will issue requests to every Application Server on its API port (19955 by default) and this port must be opened on any firewall standing between the Farm Controller and Application Servers. The network latency must be low between the Farm Controller and Application Servers. A latency under 200 ms is recommended, a latency under ms is required. Software Requirements.NET 2.0 or higher is required - a compatible.net version is enabled by default on every Operating System supported for Terminal Service Plus Farm Terminal Service Plus License and Version Requirements Terminal Service Plus must be in "Enterprise" edition on the Farm Controller and on all the Application Servers. All the servers must also run the same version of Terminal Service Plus. Configuration Requirements Farm Controller and Application Servers must have the same date/time configured. It is highly recommended to synchronize the Windows clock of all servers with an Internet Time Server if not already done. Users Requirements An Active Directory is not required, however if you do have an Active Directory, then your Domain Administrators must also be Local Administrators of the Farm Controller to be able to use Terminal Service Plus Farm Manager.

192 Farm Setup Promoting a Server to Farm Controller role Open an Administrator session on the server which will become the Farm Controller (usually this is the "Gateway" server). Open Terminal Service Plus AdminTool, click on "Gateway" tab, then on "Farm Manager" as shown below: The following dialog box will be displayed: Click on "Yes" to promote the current Server: it will become the Controller of your Farm. Next, the Farm Manager main window will be displayed: this is the Farm Manager, the centralized farm administration user interface. Adding an Application Server to the Farm Once there is a Farm Controller, you can add Application Servers to the Farm. To do so, open an Administrator session on the Application Server you want to add to the Farm.

193 Open Terminal Service Plus AdminTool, click on "Gateway" tab, then on "Join Farm Controller" as shown below: The following window will be displayed: This is the server's "Key". This Key is the "password" of your server for every Terminal Service Plus farm related features. Treat this Key as a password: do not communicate it to anyone, do not display it publicly. Now open an Administrator session on the Farm Controller and open the Farm Manager on it:

194 On the default "Servers" tab, click on the "Add" button. The following window will be displayed: Enter the Application Server details, as well as the Key you retrieved just before, then click on the "Save" button to add the Application Server to the Farm.
195 Farm Manager Overview The Farm Manager is Terminal Service Plus centralized farm administration user interface. In future versions of Terminal Service Plus, our goal is that the Administrator will be able to administer all his Terminal Service Plus servers from a centralized location, namely the Farm Manager application running on the Farm Controller server. To run the Farm Manager application, open an Administrator session on the server which will become the Farm Controller, then Open Terminal Service Plus AdminTool, click on the "Gateway" tab and then on "Farm Manager" as shown below: Servers The "Servers" tab is displayed by default when launching the Farm Manager:
196 On this tab, you can see the list of Application Servers in the Farm, add a new Application Server to the Farm and perform several actions on an Application Server by selecting it and clicking on one of the following buttons: "Connect to Server": open the default RDP client and connect automatically to the selected server. If your credentials are saved in MSTSC they will be used, otherwise you will have to enter your credentials. "Details": show a window with the selected server details: name, hostname, ports, versions. "Remove": permanently remove the selected server from the farm (you can still add it again later with the "Add" button). "Enable": set the state of the selected server to "Active" (this is the default state). "Disable": set the state of the selected server to "Disable" (this state will be used later for Load-Balancing feature and users-draining use cases). "Refresh": perform a full refresh of the list of Application Servers. The list of User Sessions is automatically refreshed every 5 seconds. This automatic refresh stops if the selected server becomes unavailable. A click on the "Refresh" button will resume the automatic refresh. Sessions Click on the "Sessions" menu to display the following tab: On this tab, you can see the list of User Sessions on any Application Server of the Farm, connect to the selected Application Server and perform several actions on one or several User Session(s) by selecting it/them and clicking on one of the following buttons: "Disconnect": disconnect the selected user session(s) (the user will still be able to connect back to his session). "Logoff": log off the selected user session(s) (every unsaved modification will be lost, applications will be shut down abruptly). "Send Message": display a window to enter a title and a text, then send this message to the selected user session(s). "Refresh": perform a full refresh of the list of user sessions for the selected server. The list of User Sessions is automatically refreshed every 5 seconds. This automatic refresh stops if the selected server becomes unavailable. A click on the "Refresh" button will resume the automatic refresh.

197 Settings Click on the "Settings" menu to display the following tab: Using this Farm Manager feature, you can configure all the Application Servers in your Farm from a centralized location. In this tab, you can see the list of all the settings which can be managed at the Farm level. To edit a setting, either click on it in the settings list and click on the "Edit..." button or just double-click on the setting. The following window will be displayed: If you want to apply this setting to all the Application Servers in your Farm, click on "Configured" and choose a value.


198 If you do not want to set this setting at the Farm level, click on "Not Configured". In this case, the existing values will not be changed on the Application Servers. Once you have set all the settings you wanted to change, click on "Apply all..." to apply all your configured settings on your Farm's servers. The following window will be displayed: Check all the servers on which you want to apply your configured settings, then click on "OK". The following window will be displayed, allowing you to monitor the task progress: All the settings marked as "Configured" have now been updated on all the selected Servers.
199 Load-Balancing Click on the "Load-Balancing" menu to display the following tab: In this tab, you can see the list of Load-Balanced Servers Status and perform several actions on an Application Server by selecting it and clicking on one of the following buttons: "Connect to Server": open the default RDP client and connect automatically to the selected server. If your credentials are saved in MSTSC they will be used, otherwise you will have to enter your credentials. "Refresh": perform a full refresh of the list of load-balanced servers status. The list of Load-Balanced Servers Status is automatically refreshed every 5 seconds. This automatic refresh stops if the connection becomes unavailable. A click on the "Refresh" button will resume the automatic refresh.
200 Web Applications Portal: Parameters in URL address If you want to bypass Terminal Service Plus standard logon Web Access page when using the Web Applications Portal and go directly to the Web Applications Portal page, you must specify several parameters in the URL address: user login password user domain server port client type (HTML5 or Windows) Here is an example of a full URL address for user "john" with password "demo" on localhost server with an HTML5 client: type=html5 The domain, server, port and type parameters being optional, the following URL address has exactly the same behavior: To use a Windows client, use: &type=remoteaccess Using those parameters in the URL address, you can go directly to the Web Applications Portal page. You do not have to specify all these parameters at the same time: the parameters not specified will have their default configured value.
201 Web logon page: How to close the Logon form after logon Overview On the Web logon page, when the user clicks on the "Log on" button, the chosen client (HTML5 or Windows) is opened in a new browser's tab. Sometimes, and more specifically when using the Windows client, you might want to hide the logon form to the user, for instance in order to avoid the user to click again on the "Log-on" button. Depending on the Internet browser used, you have two choices on how to change this default behavior. Both solutions require you to modify a JavaScript file. Solution A: Closing the Logon tab - For Internet Explorer only In this solution, when the user clicks on the "Log on" button, the chosen client will be opened in a new browser's tab and the Logon tab will close itself. Depending on the Internet Explorer version, a small message window might be displayed to the user, asking him to confirm that he wants to close this tab. Edit the file "common.js" file which is stored into the "C:\Program Files (x86)\tsplus\clients\www\software" folder. We advise you to use a text editor such as Notepad or Notepad++ (do not use Word). Search for these lines: p = 'software/remoteapp.html'; window.name = " " + window.opforfalse; if (cpwin!= false) { cpwin.name = window.opforfalse; cpwin.location.replace(hostgateway + jwtsclicklinkbefore(getside(), p)); } else { window.open(hostgateway + jwtsclicklinkbefore(getside(), p), window.opforfalse); } And replace them by those lines: p = 'software/remoteapp.html'; window.name = " " + window.opforfalse; if (cpwin!= false) { cpwin.name = window.opforfalse; cpwin.location.replace(hostgateway + jwtsclicklinkbefore(getside(), p)); } else { window.open(hostgateway + jwtsclicklinkbefore(getside(), p), window.opforfalse); } window.open('','_parent',''); window.close(); We recommend you clear your browser's cache after saving the changed JavaScript file. Solution B: Redirecting the Logon tab to another web page - For all browsers In this solution, when the user clicks on the "Log on" button, the chosen client will be opened in a new browser's tab and the Logon tab will automatically navigate to another web page. You are free to use any existing Internet address (URL) such as " or " or you can create your own web page by using "thankyou.html" as the URL and creating a file named "thankyou.html" in the "C:\Program Files (x86)\tsplus\clients\www" folder and putting HTML content in it. Edit the file "common.js" file which is stored into the "C:\Program Files (x86)\tsplus\clients\www\software" folder. We advise you to use a text editor such as Notepad or Notepad++ (do not use Word).
202 Search for these lines: p = 'software/remoteapp.html'; window.name = " " + window.opforfalse; if (cpwin!= false) { cpwin.name = window.opforfalse; cpwin.location.replace(hostgateway + jwtsclicklinkbefore(getside(), p)); } else { window.open(hostgateway + jwtsclicklinkbefore(getside(), p), window.opforfalse); } And replace them by those lines: p = 'software/remoteapp.html'; window.name = " " + window.opforfalse; if (cpwin!= false) { cpwin.name = window.opforfalse; cpwin.location.replace(hostgateway + jwtsclicklinkbefore(getside(), p)); } else { window.open(hostgateway + jwtsclicklinkbefore(getside(), p), window.opforfalse); } window.location.href = " We recommend you clear your browser's cache after saving the changed JavaScript file.
203 Web logon page: How to change the logon Splashscreen Overview When the remote connection is loading, the HTML5 and Windows clients are displaying a default splashscreen such as the screenshot below: You can customize this content by modifying the Javascript configuration file. HTML5 Client 1.1. Creating your customized Splashscreen content Any content in text or HTML can be used for the Splashscreen. Also, if you need to use simple quotes ( ' ) or double quotes ( " ) you will have to write a backslash before ( \' and \" ) instead of just the quotes. Finally, please note that the content must be written in only 1 line. The following example is a valid content for the Splashscreen: <h1>this is my customized splashscreen</h1>please say \"hello\"!<img src='html5/imgs/ring64.gi f' border=0> It will display a title ("This is my customized splashscreen"), a text ("Please say hello!") and the animated ring picture as in the standard TSplus Splashscreen Modifying the Splashscreen data to use your own content If you do not have a file named "settings.js" in the "C:\Program Files (x86)\tsplus\clients\www\software\html5" folder, then your TSplus version is older and this documentation does not apply. Please update your system first or contact support. Edit the file "settings.js" located in the "C:\Program Files (x86)\tsplus\clients\www\software\html5" folder. We advise you to use a text editor such as Notepad or Notepad++ (do not use Word). Search for the line starting by this: splashscreencontent = " Replace it completely by the following line: splashscreencontent = "your customized content here"; Do not forget the ending double quotes and semi-colon ( "; ). If you wish to lengthen the duration of the logon splashscreen in HTML5, you can do so by modifying the value in milliseconds: W.splashscreentime = 5000; //splash screen play time. We recommend you clear your browser's cache after saving the changed html page.
\tsplus\clients\www Index.html page is the default web page.")
204 HTML Pages and Customization Terminal Service Plus - Documentation You can edit the provided HTML pages with Notepad or Notepad++ to customize it user interface. index.html page The index.html is located in Web Server root folder path. C:\Program Files (x86)\tsplus\clients\www Index.html page is the default web page. It s like a front-end Portal page with links to the connection pages which are located in \www\ folder. This web page can be copied and renamed to allow multiple configuration and / or logon information. For example, let's copy and rename index.html into index2.html, this page will be available using this url: Beware that if you change the "index.html" file name to "index2.html" and that you are using the Web Applications Portal, then you must change the following variable on this file: "page_configuration["applications_portal"] = "index_applications.html" to "index2_applications.html" then rename the "index_applications.html" file into "index_2applications.html". The default index.html includes all possible options: RemoteApp access to applications, connection outside the Web Browser Connection using HTML5 from any device Local printing preferences You will be able to change header and footer in the Web portal design feature on the web portal preferences tile of the Web tab.

205 By editing the index.html web page, you will have access to various settings: // Access Configuration var user = ""; // Login to use when connecting to the remote server (leave "" to use the login typed in this page) var pass = ""; // Password to use when connecting to the remote server (leave "" to use the password typed in this page) var domain = ""; // Domain to use when connecting to the remote server (leave "" to use the domain typed in this page) var server = " "; // Server to connect to (leave "" to use localhost and/or the server chosen in this page) var port = ""; // Port to connect to (leave "" to use localhost and/or the port of the server chosen in this page) var lang = "as_browser"; // Language to use var serverhtml5 = " "; // Server to connect to, when using HTML5 client var porthtml5 = "3389"; // Port to connect to, when using HTML5 client var cmdline = ""; // Optional text that will be put in the server's clipboard once connected // End of Access Configuration For example, I will preset demo/psw as login/password by editing: var user = "Demo"; var pass = "Psw"; Doing so, pre-filled credentials are made visible at each visit of the portal. Another very important configuration file is settings.js, located in C:\Program Files (x86)\tsplus\clients\www\software\html5: This file contains various settings for the HTML5 web client like disabling sound, clipboard or allowing session reconnection if browser tab is closed. Disabling clipboard: "W.clipboard = "yes"; //or "no" "


206 Disabling sound is done with this setting: "W.playsound = false;" Changing default resolution for Mobile devices: "W.viewportwidth = "1024" " - The height gets computed by browser. Forcing HTTPS for remote connection: "W.forcealways_ssl = true;" Allowing session reconnection when browser tab is closed: "W.send_logoff = false;" Adding a warning pop up to prevent closing the browser tab: search the "W.pageUnloadMessage = "" " parameter. I have set an example of message to be used below : W.pageUnloadMessage = "Closing this tab will disconnect your remote session, are you sure?"; //Dialog to return when page unloads. //1. Important notice, own dialogs are not supported in all browsers. //2. HTML standard does not distinguish between page refresh and page close action, the dialog will popup on page refresh too. The general settings for the RemoteApp web page is stored on the software, in two different files: remoteapp.html and remoteapp2.js.
207 Example of available settings present in remoteapp2.js : // Remote Desktop Server var remoteapp2_server = ''; var remoteapp2_port = '443'; // Windows Authentication var remoteapp2_user = ''; var remoteapp2_psw = ''; var remoteapp2_domain = ''; // Optional Command Line Parameters var remoteapp2_apppath = ''; // Seamless/RemoteApp mode var remoteapp2_wallp = 'green'; var remoteapp2_seamless = 'off'; var remoteapp2_remoteapp = 'on'; // Screen var remoteapp2_color = '32'; var remoteapp2_full = '2'; var remoteapp2_width = ''; var remoteapp2_height = ''; var remoteapp2_scale = '100'; var remoteapp2_smartsizing = '1'; var remoteapp2_dualscreen = 'off'; var remoteapp2_span = 'off'; // Disks mapping (required for printing) var remoteapp2_disk = '1'; // Printing var remoteapp2_printer = 'off'; var remoteapp2_preview = 'off'; var remoteapp2_default = 'on'; var remoteapp2_select = 'off'; // Hardware var remoteapp2_com = '0'; var remoteapp2_smartcard = '0'; var remoteapp2_serial = 'off'; var remoteapp2_usb = 'off'; var remoteapp2_sound = 'on'; var remoteapp2_directx = 'off'; // Miscellaneous var remoteapp2_alttab = '0'; var remoteapp2_firewall = '1'; var remoteapp2_localtb = '32'; var remoteapp2_lock = 'off'; var remoteapp2_rdp5 = 'off'; var remoteapp2_reset = 'off';
208 How to completely customize the Web Access Page beyond the Web Portal capabilities? Overview By using the Web Portal you can customize Terminal Service Plus Web Access Pages in an extensive way. However, in some cases, this is not enough. In these cases, you can completely customize the Web Access Page, beyond the Web Portal capabilities, by modifying by yourself the Web Access Page generated by the Webmaster Toolkit. Warning, this documentation is intended only for skilled Web developers. Generating mandatory settings In order to include the mandatory settings in your Web Access page, we recommend that you start by generating your Web Access Page by using the Web Portal. Files location The Web Access Page will be generated in the "C:\Program Files (x86)\tsplus\clients\www" folder, for instance if you choose "index" as the page name, it will be the file named "index.html" in this folder. It is a standard HTML file, so you can use all your knowledge of HTML, JavaScript and CSS programming languages to develop your custom page. All the files inclusion are written relatively to the "C:\Program Files (x86)\tsplus\clients\www" folder. For instance, the main CSS styles file is located at "C:\Program Files (x86)\tsplus\clients\www\software\common.css", so it is included in the HTML Web Access Page file by the following line: <link rel="stylesheet" type="text/css" href="software/common.css" /> Minimal Web Access Page Starting from an HTML file generated by the Web Portal Preferences, we will reduce it down to a minimal Web Access Page. We advise you to use a text editor such as Notepad or Notepad++ (do not use Word). After our work, it will look like the screenshot below: First, you must keep everything that is between the HTML tags: - meta tags to force browsers to clear their cache -.js files inclusions - JavaScript settings declarations.
209 Then, you can reduce the content between the 'body' and '/body' HTML tags down to these few lines: <body onkeypress="checkkey(event);" onload="setall();" style="padding:20px;"> <form name="logonform"> <div><input type="text" name="login" id="editbox1" onblur="onlogintyped();" value=""/> </div><br/> <div id="tr-password"><input type="password" name="password" id="editbox2" onfocus="on PasswordFocused();" value=""/></div><br/> <div id="trdomain"><input type="text" name="domain" id="editbox3" value="" /></div><br/> <input id="buttonlogon" type="button" value="log on" onclick="cplogon();" /><br/> <br/> <div id="accesstypeuserpanel" style="margin:0;"> <label id="label_accesstypeuserchoice_html5" for="accesstypeuserchoice_html5"><inp ut type="radio" value="html5" name="accesstypeuserchoice" id="accesstypeuserchoice_html5" chec ked="checked"> HTML5 client</label> <label id="label_accesstypeuserchoice_remoteapp" for="accesstypeuserchoice_remoteapp"><input type="radio" value="remoteapp" name="accesstypeuserchoice" id="accesstypeuserchoice _remoteapp"> RemoteApp</label> </div> </form> </body> Refresh the web page in your web browser, and you should get the minimal page of the above screenshot. We recommend you clear your browser's cache after saving any changed file. Finally, it is now up to you! As long as you keep the calls to JavaScripts functions on specific events and the given identifiers (id="..."), your fully customized Web Access Page will be working fine!
210 Web logon page: How to open the HTML5 client in the same tab Overview On the Web logon page, when the user clicks on the "Log on" button, the HTML5 client is opened in a new browser's tab. You can change this behavior and have the HTML5 client to open in the same browser tab as the Web logon page by modifying a JavaScript file. Modifying the common.js file Edit the file "common.js" file which is stored into the "C:\Program Files (x86)\tsplus\clients\www\software" folder. We advise you to use a text editor such as Notepad or Notepad++ (do not use Word). Add this line: var openinsamewindow = true; We recommend you clear your browser's cache after saving the changed JavaScript file. Modifying the common_applications.js file If you are using Terminal Service Plus Web Applications Portal feature, then you need to edit a second file. Edit the file "common_applications.js" file which is stored into the "C:\Program Files(x86)\TSplus\Clients\www\software" folder. We advise you to use a text editor such as Notepad or Notepad++ (do *not* use Word). Search for these lines: if (childurl!= '') { child = window.open(childurl, childname); childrenwindows[childrenwindows.length] = child; } And replace them by those lines: if (childurl!= '') { location.href = childurl + '#'; } We recommend you clear your browser's cache after saving the changed JavaScript files.
211 How To: Add a Custom HTTP Header Prerequisites Terminal Service Plus - Documentation This feature is very technical, and this documentation is only for technical experts. You should be familiar with HTTP protocol as well as HTTP Headers. Overview Some use case might require that Terminal Service Plus web server returns one or more custom HTTP Headers in addition to the standard ones. This feature answers this specific need. Setting up a custom HTTP Header To add your own custom HTTP Header, you need to: Create the file "headers.bin" in the folder "C:\Program Files(x86)\TSplus\Clients\webserver" Add the custom headers separated by new line, for instance case: header1=x-frame-options Restart webserver (AdminTool > Web > Restart Web Servers) to apply changes Terminal Service Plus server will now respond to all queries with this custom HTTP Header in addition to the standard ones.
212 Enforce HTTPS protocol Standard Case Terminal Service Plus - Documentation Starting from Terminal Service Plus version 9.20, you can redirect every web request which uses HTTP to the HTTPS secure protocol. To activate this feature on a server, create (or edit) the file "C:\Program Files (x86)\tsplus\clients\webserver\settings.bin" and add the following line: disable_http_only=true Save the file and restart Terminal Service Plus web servers (AdminTool > Web > Restart Web Servers or reread configuration by accessing Once this feature is enabled, you can try to browse to the insecure web page at: and it will automatically redirect your request to the secure Web Portal page at: Special case: Custom Web Ports If you are using a specific port to serve HTTPS, then create (or edit) the file "C:\Program Files (x86)\tsplus\clients\webserver\settings.bin" and use the following line instead of the line described above: disable_http_only="domain.com:4431" where domain.com is your own server host name and 4431 is your HTTPS custom port. Save the file and restart Terminal Service Plus web servers (AdminTool > Web > Restart Web Servers). Once this feature is enabled, you can try to browse to the insecure web page at: And it will automatically redirect your request to the secure Web Portal page at: Comment: Even if this is not secure but you wish to disable ssl/https on http port then edit the settings.bin file and add: disable_ssl_on_http=true, save and restart the servers. Disable http on https By default, it is allowed to access So it allows http on port 443 or allow https on port 80, it does not have impact on security and makes it easy to fallback to degraded xhr-connection when no websockets support is possible But if wished to disable it, edit the settings.bin file and add the following line: Then restart Terminal Service Plus web servers (AdminTool > Web > Restart Web Servers or reread configuration HTTPS Enforcement and Free SSL Certificate Validation Please note that this HTTPS Enforcement feature is fully compatible with our Free SSL Certificate feature.
213 Enforce the use of web portal to connect to the server Starting from Terminal Service Plus version 6.60, you can block/disable any attempt to connect using mstsc.exe (or any RDP clients) over the open/redirected port (80 or 443). This feature only allows accesses from the Terminal Service Plus Web Portal and disables any other RDP connection on port 80/443. To activate this feature on a server, edit the file C:\Program Files (x86)\tsplus\userdesktop\files\appcontrol.ini and add/modify the following variable: [Security] Block_rdp_splitter=yes
214 Web Autologon: connect from web without portal Overview Terminal Service Plus Web Portal allows users to connect to their remote servers from any web browser simply by using their Windows credentials. Sometimes however, you want to connect automatically when you launch a given URL address. This feature is called Web Autologon. With Web Autologon, you will connect using the settings (login, password, ports,...) specified in specific Terminal Service Plus files. Web Autologon using HTML5 client You will be able to connect directly by browsing to You can modify the connection settings by editing the following file with Notepad or any text editor (such as Notepad++ - do not use MS Word): C:\Program Files (x86)\tsplus\clients\www\software\html5\settings.js You will need to specify at least a login and a password in order to benefit from Web Autologon. You might need to refresh the page on your web browser after modifying this file. Web Autologon using RemoteApp Web Client You will be able to connect directly by browsing to You can modify the connection settings by editing the following file with Notepad or any text editor (such as Notepad++ - do not use MS Word): C:\Program Files (x86)\tsplus\clients\www\software\remoteapp2.js You will need to specify at least a login and a password in order to benefit from Web Autologon. You might need to refresh the page on your web browser after modifying this file. Enable multiple user sessions using the same credentials If you want to enable multiple user sessions using the same credentials, then you can follow this procedure. You can copy the index.html file located in: 'C:\Program Files (x86)\tsplus\clients\www' as many times as your number of users. You can rename it and then access it with the url: Edit the paragraph corresponding to users credentials: Access Configuration var user = ""; // Login to use when connecting to the remote server (leave "" to use the login typed in this page) var pass = ""; // Password to use when connecting to the remote server (leave "" to use the password typed in this page) var domain = ""; You can copy the index.html file as much time as you want, renaming it with the username will make it easier for you to provide a personal link.
215 HTML5 Client : RDP session resolution on mobile devices The common screen resolution by most devices, especially mobile phones is 320x480, but that is obviously not sufficient to create the RDP session. Therefore, the resolution was preset to 800 in width. The height of resolution gets recomputed by hidden browsers native logic. The higher the width the bigger the height. As an example, standard resolution is 320x480, now when you set the viewport to 800, the browser recomputes the value for height for example to 800x904, when you set the width to 1280, then it's 1280x1160 etc. The height and width depend on landscape/portrait view of your device, like 800x904 or 904x800 etc. Each browser can recompute it on its own logic to fit the rdp screen into the viewport of your device and may differ depending on the browser even when used on same device. If you set the height manually, then you will break the viewport ratio of your device and the final RDP session will be out of your port view, and to reach these areas you will have to scroll to wished positions. Therefore, it is recommended not to set height manually, but let the device choose automatically the height. If you need more height, increase the width! By testing on mobile phone devices, the good value for width was 800. Though you must pay attention: the CPU's on most mobile phones are usually slow, therefore when you increase the height, it will increase the CPU load. On tablet devices the CPU's are faster, therefore it is recommended to set the width to higher value like 1280 and allow the device to recompute the value for height. Because some browsers like FireFox mobile do not allow the setting of viewport after page loading, this value was set fixed into the Clients\www\software\html5.html file: <meta name="viewport" content="width=800, maximum-scale=1.4"> For example, change it to: <meta name="viewport" content="width=1280, maximum-scale=1.4"> to increase width and at same time height recomputed by browsers native internal logic. As a second example, changing it to: <meta name="viewport" content="width=1280, height=1400, maximum-scale=1.4"> would break viewport area and RDP session would not fit the screen.
216 HTML5 Client: How to maximize the browser window Overview The RDP protocol does not allow to resize while connected without a reconnection. Please note that you will get the best experience possible from Terminal Service Plus HTML5 client by connecting with a maximized browser. However, if you want to force the browser window to be as big as possible, you can try to "force" the HTML5 window to open with the maximum size (but not as a "maximized" window, due to internet browsers security limitations). Maximizing the browser window You will have to modify the file "Clients\www\software\common.js" located in your Terminal Service Plus directory. We advise you to use a text editor such as Notepad++ (do not use Word). In order to have a browser window which uses all the screen, you will have to modify the line(s) with "window.open" in it, and add the following text: "screenx=0,screeny=0,left=0,top=0,fullscreen=yes,width="+(screen.availwidth-5)+",height="+(screen.availheight- (55)) This allows IE/Chrome/Firefox/Safari to open the window with a screen size (minus Windows bar). Unfortunately, it is not possible to force a web browser to "maximize" the window in a "fullscreen" Windows type. Open the file and search "window.open(" Then add the new at the end before the brackets, for example: 'window.open(hostgateway + jwtsclicklinkbefore(getside(), p), window.opforfalse);' will become: 'window.open(hostgateway + jwtsclicklinkbefore(getside(), p), window.opforfalse, "screenx=0,screeny=0,left=0,top=0,fullscreen=yes,width="+(screen.availwidth-5)+",height="+(screen.availheight- (55)));' And again: tmpwin = window.open(p, '_blank'); //Chrome needs _blank will become: 'tmpwin = window.open(p, '_blank', "screenx=0,screeny=0,left=0,top=0,fullscreen=yes,width="+(screen.availwidth- 5)+",height="+(screen.availHeight-(55))); //Chrome needs _blank' And again: 'success = window.open(p, k);' will become: success = window.open(p, k, "screenx=0,screeny=0,left=0,top=0,fullscreen=yes,width="+(screen.a vailwidth- 5)+",height="+(screen.availHeight-(55))); And finally: 'cpwin = window.open("about:blank", n);' will become: 'cpwin = window.open("about:blank", n, "screenx=0,screeny=0,left=0,top=0,fullscreen=yes,width=" +(screen.availwidth-5)+",height="+(screen.availheight-(55)));'
217 HTML5 Client: Parameters in URL address When using Terminal Service Plus HTML5 client to connect to a remote server, you can specify several parameters in the URL address to override default parameters, such as: user login user password program to run startup directory for the program to run command line for the program to run Run a Specific Application Here is an example of a full URL address to open a remote session for user "john" with password "demo" and by starting standard notepad upon session opening: system32\\\\notepad.exe&startupdir=c:\\\\windows\\\\system32¶ms= Please note that in the URL address all slashes characters must be repeated 4 times. You do not have to specify all these parameters at the same time: the parameters not specified will have their default configured value. Connect with Web Credentials If you want to use a Web Credential to connect, you can pass it in an URL by adding an "@" before the Web Login. Here is an example of a URL address to open a remote session for Web Credentials "1234" with password "demo":


218 How to mount a logical drive within a TSplus session This tutorial will cover the following aspects: How to deploy a logon script and have multiple logon scripts scenarii. Mounting a specific folder within a session from client or server side. If you wish to publish a folder on a logical virtual drive for your users, just follow this procedure: Prior to creating the script, open windows explorer and click on "Folder and search options". Then, click on the view tab and uncheck the box "Hide extensions for known types":


219 Create a text document and modify the extension by naming it "logon.bat": Inside the file, enter for example this command to publish the local Documents folder: "subst Y: tsclient\c\users\%username%\documents" Then, on the start menu, type in gpedit.msc on the search taskbar. We are going to use local policy so that every user connecting to this server launches the script. Go into the user's configuration menu, then into the Windows settings, and finally, into Scripts (Logon/Logoff) Double click on the Logon script, then click on "Add", then on "Browse".

220 Then, click on "Show Files" button on the Logon Propeties window and copy your logon.bat script into the path given by the Policy Editor, i.e.: "C:\Windows\System32\GroupPolicy\User\Scripts\Logon" You can copy this logon.bat file in C:\ProgramData if you want this script to be executed for all of your users. If you need a specific logon script for each user then copy the script in C:\Users\Username\AppData\Roaming Now how do we make this Y drive appear in the user session? There many ways to achieve this. You can create a new application within the admin tool and assign it to your users, doing so the shortcut will appear in the session:
221 If you connect to a session with mstsc.exe, don't forget to go to the options menu, and on the Local Resources tab, under Local devices and resources, click on "More", then check the box "Drives". If you want to assign this script only for non-admin users, follow this tutorial. If you want to secure the access of a folder, see our documentation to publish a secured folder.
222 HTML5 Client: What is the difference between Websockets and XHR? Websockets is the persistent connection that can be used to receive/send data without sequential order and without http header. Xhr-polling creates new request with http header and waits for answer with http header, also sequential order. Doing so, XHR data flow always looks like this: HTTP_HEADER_REQUEST -> HTTP_HEADER_ANSWER HTTP_HEADER_REQUEST -> HTTP_HEADER_ANSWER and so on Before the data can be downloaded, it must be requested with HTTP_HEADER, therefore its name: xhr-polling. Websockets data flow may look like this: FRAME_DATA_SEND FRAME_DATA_SEND FRAME_DATA_RECEIVE FRAME_DATA_SEND FRAME_DATA_RECEIVE FRAME_DATA_RECEIVE This is random data sending/receiving without special sequential order and without any http header data. That makes the usage with reverse proxies impossible due to the lack of Websockets support by most known reverse proxies; but half of the xhr transport may work with Apache reverse proxy. Also see: HTML5 Client: Supported Browsers
223 How To: Bind Web Server to Several Network Cards Overview Some use case might require that Terminal Service Plus web server listens on more than one network card, for instance if the server belongs to several different networks. This feature answers this specific need. Binding Web Server to Several Network Cards To bind Terminal Service Plus web server to several network cards, you need to: Create the file "ettings.bin" in the folder "C:\Program Files (x86)\tsplus\clients\webserver" Add the following line with all the local IP addresses for all the network cards you want to bind to, for instance: bind_nic=" "," " Restart webserver (AdminTool > Web > Restart Web Servers) to apply changes Terminal Service Plus web server will now listen to all queries from all the binded network cards (in our example case the binding would be done to , and automatically).
224 Run Windows client under Proxy environment Usually the SSH package support HTTP(S) proxies and this should be sufficient to overcome most known proxies. However, there are existing very difficult cases, where the proxy environment cannot be properly recognized, is hidden from third party software or the target servers are behind reverse proxies. For such difficult cases the software contains Non-SSH solution called "Rescue mode". If you can establish HTML5 connection, then you can be sure this software will help you to establish native socket connections through Websocket(FF, Chrome, Opera, IE10 etc) or XHR (IE6-IE9). Be careful, some proxies allow Websocket/XHR traffic only via HTTPS layer, so use https address instead of http. If proxy does not ask for proxy authentication and you can access pages via browser: 1. Open http(s)://yourserver.com/software/html5/jwres/ 2. Wait for successful connection (and authorize Java execution if asked) 3. Click on the red text "open the link" to open the working web access page 4. Use Windows client access as usual If proxy requests proxy authentication and you can access pages via browser: 1. Open http(s)://yourserver.com/software/html5/jwres/ 2. If the proxy requests for authentication for java applets, press "cancel" 3. Click on "Download LocalWebserver", and execute it after successful download, that will start local http server on port Click on "Force Applet loading from this will reload the page with loading of jars from local http server 5. Wait for successful connection 6. Click on the red text "open the link" to open the working web access page 7. Use Windows client access as usual

225 Activating Mutual SSL Authentication What is Mutual Authentication? Terminal Service Plus - Documentation Many people are expecting extra security and Mutual authentication is already supported in Terminal Service Plus. It is usually implemented by banks or government bodies. To understand what that is, we can compare it to a standard SSL process where you will add extra check to verify if the user web browser is allowing SSL connection. You know what your server-side SSL certificate is. Imagine that the certificate is imported into the web browser to ensure that this specific web browser is trusted to create a connection. In the first step of communication, the web browser is acting as a client and in the second step, it is the reverse. At the end both side, client web browser and web server, have accepted the authority and the connection can start. A more complete definition: Mutual SSL authentication or certificate-based mutual authentication refers to two parties authenticating each other through verifying the provided digital certificate so that both parties are assured of the others' identity. In technology terms, it refers to a client (web browser or client application) authenticating themselves to a server (website or server application) and that server also authenticating itself to the client through verifying the public key certificate/digital certificate issued by the trusted Certificate Authorities (CAs). Because authentication relies on digital certificates, certification authorities such as Verisign or Microsoft Certificate Server are an important part of the mutual authentication process. Activating it on TSplus TSplus built-in web server enables to setup mutual authentication. To enable the mutual authentication, follow this process: You will have to install the latest Java Development Kit (JDK), available from > Downloads > JDK.
TERMINAL SERVICE PLUS DOCUMENTATION
 TERMINAL SERVICE PLUS DOCUMENTATION General information Prerequisites Installation Get Started TSplus Editions Activating your license Activating your support license Updating Terminal Service Plus Upgrading
Remote Desktop Plus. Documentation
 Remote Desktop Plus Documentation General information Prerequisites Installation Get Started RDPlus Editions Activating your license Activating your support license Updating Remote Desktop Plus Upgrading
User Guide AppAnywhere
 User Guide AppAnywhere Spectra AppAnywhere product range is the greatest offering of the world market today! It is a powerful and the easiest way to publish any of your Windows application on a LAN or
Choiceclouds User Guide. Administration & Configuration for Choiceclouds Remote Desktop Software
 Choiceclouds User Guide Administration & Configuration for Choiceclouds Remote Desktop Software 1 Contents Introduction 3 Pre-requisites. 3 Hardware.. 4 Operating System 4 Andriod RDP or HTML5 5 iphone
Contents. Table of Contents. Foreword. Part I RDPlus User Guide. 2 Prerequisites 3 Installation. Index <COPYRIGHT>
 Contents I Table of Contents Foreword Part I 0 2 1 Overview... 2 2 Prerequisites... 3 3 Installation... 5 4 Customization... and Parameter Settings 8 Administration... Tools 10 Application... Publishing
TSPLUS PRODUCTS CATALOG RDP Software Editor 1
 TSPLUS PRODUCTS CATALOG RDP Software Editor 1 Visit our page www.terminalserviceplus.com Have a look at the various features that TSplus offers, try our Demo sessions, check our tutorial videos, ask for
Terminal Service Plus Documentation
 Terminal Service Plus Documentation Video Tutorials :Terminal Service Plus Essential Video Tutorials AdminTool Administrator Guide : Click on AdminTool tiles and display its administrator guide PDF Version
pinremote Manual Version 4.0
 pinremote Manual Version 4.0 Page 1 Table of content 1 Introduction... 4 2 Setup... 5 2.1 Requirements server... 5 2.2 Requirements client... 5 2.3 Setup process... 6 2.3.1 Single Server... 8 2.3.2 Cluster...
Parallels Remote Application Server
 Parallels Remote Application Server Parallels Client for Mac User's Guide v16 Parallels International GmbH Vordergasse 59 8200 Schaffhausen Switzerland Tel: + 41 52 672 20 30 www.parallels.com Copyright
Release Notes. TSplus release announcement:
 Release Notes TSplus 11.70 release announcement: TSplus Alternate Shell: Following the October 10 Windows Update, administrators allowing their users to start a Remote Desktop saw the Windows shell as
Release Notes. TSplus release announcement:
 Release Notes TSplus 11.30 release announcement: On the Program tab of the Client Generator, you can now specify for the Startup Program: - The application full path. - The application startup Directory.
Parallels Remote Application Server
 Parallels Remote Application Server Parallels Client for Windows User's Guide v16.1 Parallels International GmbH Vordergasse 59 8200 Schaffhausen Switzerland Tel: + 41 52 672 20 30 www.parallels.com Copyright
NetExtender for SSL-VPN
 NetExtender for SSL-VPN Document Scope This document describes how to plan, design, implement, and manage the NetExtender feature in a SonicWALL SSL-VPN Environment. This document contains the following
ThinPoint Quick Installation Guide - 1 -
 ThinPoint Quick Start Guide ThinPoint Quick Installation Guide - 1 - ThinPoint Quick Start Guide (Fourth Edition, April 2008) Published by: NetLeverage Pty. Ltd. Suite 17, 17 International Business Centre
WINDOWS HOST GUIDE. Remote Support & Management PC Mac Tablet Smartphone Embedded device. WiseMo Host module on your PC or Server
 WINDOWS HOST GUIDE Remote Support & Management PC Mac Tablet Smartphone Embedded device WiseMo Guest module for example on your Windows PC WiseMo Host module on your PC or Server WiseMo develops software
Parallels Remote Application Server
 Parallels Remote Application Server Parallels Client for Windows User's Guide v15.5 Parallels International GmbH Vordergasse 59 8200 Schaffhausen Switzerland Tel: + 41 52 672 20 30 www.parallels.com Copyright
Version June 2016
 HOSTING GUIDE Version 3.2.3 June 2016 This guide is sold in conjunction with the VETtrak Hosting Serv ice and is current at the time of purchase. Later v ersions are av ailable for download from www.v
Accessing CharityMaster data from another location
 Accessing CharityMaster data from another location When all of your computers are on the same Local Area Network (LAN), you can place the back end files (including your data and the Word templates) onto
Avalanche Remote Control User Guide. Version 4.1
 Avalanche Remote Control User Guide Version 4.1 ii Copyright 2012 by Wavelink Corporation. All rights reserved. Wavelink Corporation 10808 South River Front Parkway, Suite 200 South Jordan, Utah 84095
Splashtop Enterprise for IoT Devices - Quick Start Guide v1.0
 Introduction For information about different deployment choices, please see chapter 3 of the full Splashtop Center Administrator s Guide. Splashtop Enterprise for IoT Devices is comprised of three components:
Installing and Configuring VMware Identity Manager Connector (Windows) OCT 2018 VMware Identity Manager VMware Identity Manager 3.
 OCT 2018 VMware Identity Manager VMware Identity Manager 3.") Installing and Configuring VMware Identity Manager Connector 2018.8.1.0 (Windows) OCT 2018 VMware Identity Manager VMware Identity Manager 3.3 You can find the most up-to-date technical documentation on
Installing and Configuring VMware Identity Manager Connector 2018.8.1.0 (Windows) OCT 2018 VMware Identity Manager VMware Identity Manager 3.3 You can find the most up-to-date technical documentation on
Veriato Recon / 360. Version 9.0.3
 Veriato Recon / 360 Version 9.0.3 1/3/2018 Upgrade Guide January 3, 2018 Table of Contents Before You Begin... 1 What's New... 1 How the System Works... 1 Upgrade Support... 6 Update Antivirus Exclusions...
Parallels Remote Application Server
 Parallels Remote Application Server Parallels Client for Android User's Guide v16.2 Parallels International GmbH Vordergasse 59 8200 Schaffhausen Switzerland Tel: + 41 52 672 20 30 www.parallels.com Copyright
Parallels Remote Application Server 15 Beta Beta Guide
 Parallels Remote Application Server 15 Beta Beta Guide Version 1 Copyright 1999 2015 Parallels IP Holdings GmbH and its affiliates. All rights reserved. All other marks and names mentioned herein may be
Password Memory 7 User s Guide
 C O D E : A E R O T E C H N O L O G I E S Password Memory 7 User s Guide 2007-2018 by code:aero technologies Phone: +1 (321) 285.7447 E-mail: info@codeaero.com Table of Contents How secure is Password
Aqua Connect Remote Desktop Services 3.9 User Manual
 Aqua Connect Remote Desktop Services 3.9 User Manual Table of Contents Table of Contents...2 About Aqua Connect Remote Desktop Services...3 Features... 3 System Requirements... 4 Hardware... 4 Software...
Installing and Configuring Citrix XenApp 6.5 (Part 1)
") Installing and Configuring Citrix XenApp 6.5 (Part 1) Introduction The first part of this series describes the installation steps of the first server (which will create the XenApp environment) and the
Installing and Configuring Citrix XenApp 6.5 (Part 1) Introduction The first part of this series describes the installation steps of the first server (which will create the XenApp environment) and the
MAC HOST GUIDE. Remote Support & Management PC Mac Tablet Smartphone Embedded device. WiseMo Host module on your Mac computer
 MAC HOST GUIDE Remote Support & Management PC Mac Tablet Smartphone Embedded device WiseMo Guest module for example on your Windows PC WiseMo Host module on your Mac computer WiseMo develops software for
Privileged Identity App Launcher and Session Recording
 Privileged Identity App Launcher and Session Recording 2003-2018 BeyondTrust, Inc. All Rights Reserved. BEYONDTRUST, its logo, and JUMP are trademarks of BeyondTrust, Inc. Other trademarks are the property
Copyright Jetro Platforms, Ltd. All rights reserved.
 Important Notice Copyright 2001 2009 Jetro Platforms, Ltd. All rights reserved. This document is furnished by Jetro Platforms for information purposes only to licensed users of the Jetro COCKPIT product.
Agent and Agent Browser. Updated Friday, January 26, Autotask Corporation
 Agent and Agent Browser Updated Friday, January 26, 2018 2018 Autotask Corporation Table of Contents Table of Contents 2 The AEM Agent and Agent Browser 3 AEM Agent 5 Privacy Mode 9 Agent Browser 11 Agent
How Parallels RAS Enhances Microsoft RDS. White Paper Parallels Remote Application Server
 How Parallels RAS Enhances Microsoft RDS White Paper Parallels Remote Application Server Table of Contents Introduction... 3 Overview of Microsoft Remote Desktop Services... 3 Microsoft RDS Pain Points...
Deployment User Guide
 Deployment User Guide Version: 010319-2 Contents STEP 1: (Windows Users Only): Determine if your PC is running the 32-bit or 64-bit version of Windows. If you are not a PC user, please proceed to step
DSS User Guide. End User Guide. - i -
 DSS User Guide End User Guide - i - DSS User Guide Table of Contents End User Guide... 1 Table of Contents... 2 Part 1: Getting Started... 1 How to Log in to the Web Portal... 1 How to Manage Account Settings...
Migrating from Citrix XenApp (IMA / FMA) to Parallels Remote Application Server
 to Parallels Remote Application Server") Parallels Remote Application Server Migrating from Citrix XenApp (IMA / FMA) to Parallels Remote Application Server Contents 1. Introduction a. Why Should You Migrate from Citrix to Parallels RAS b. Overview
Parallels Remote Application Server Migrating from Citrix XenApp (IMA / FMA) to Parallels Remote Application Server Contents 1. Introduction a. Why Should You Migrate from Citrix to Parallels RAS b. Overview
Sage 200c Professional. System Requirements and Prerequisites
 Sage 200c Professional System Requirements and Prerequisites Copyright statement Sage (UK) Limited, 2018. All rights reserved. If this documentation includes advice or information relating to any matter
HySecure Quick Start Guide. HySecure 5.0
 HySecure Quick Start Guide HySecure 5.0 Last Updated: 25 May 2017 2012-2017 Propalms Technologies Private Limited. All rights reserved. The information contained in this document represents the current
VMware Identity Manager Cloud Deployment. DEC 2017 VMware AirWatch 9.2 VMware Identity Manager
 VMware Identity Manager Cloud Deployment DEC 2017 VMware AirWatch 9.2 VMware Identity Manager You can find the most up-to-date technical documentation on the VMware website at: https://docs.vmware.com/
VMware Identity Manager Cloud Deployment. Modified on 01 OCT 2017 VMware Identity Manager
 VMware Identity Manager Cloud Deployment Modified on 01 OCT 2017 VMware Identity Manager You can find the most up-to-date technical documentation on the VMware Web site at: https://docs.vmware.com/ The
Administration. STILOG IST, all rights reserved
 2 Table of Contents I. Admin Center... 1 1. ACCESS... 1 Starting the Admin Center application... 1 2. General Settings... 2 Home page... 3 Client... 4 Application... 5 VPPortal... 6 3. Password Configuration...
VMware AirWatch Cloud Connector Guide ACC Installation and Integration
 VMware AirWatch Cloud Connector Guide ACC Installation and Integration Workspace ONE UEM v1810 Have documentation feedback? Submit a Documentation Feedback support ticket using the Support Wizard on support.air-watch.com.
Sophos Mobile as a Service
 startup guide Product Version: 8 Contents About this guide... 1 What are the key steps?... 2 Change your password... 3 Change your login name... 4 Activate Mobile Advanced licenses...5 Check your licenses...6
Install and upgrade Qlik Sense. Qlik Sense 3.0 Copyright QlikTech International AB. All rights reserved.
 Install and upgrade Qlik Sense Qlik Sense 3.0 Copyright 1993-2016 QlikTech International AB. All rights reserved. Copyright 1993-2016 QlikTech International AB. All rights reserved. Qlik, QlikTech, Qlik
FUJITSU Cloud Service S5. Introduction Guide. Ver. 1.3 FUJITSU AMERICA, INC.
 FUJITSU Cloud Service S5 Introduction Guide Ver. 1.3 FUJITSU AMERICA, INC. 1 FUJITSU Cloud Service S5 Introduction Guide Ver. 1.3 Date of publish: September, 2011 All Rights Reserved, Copyright FUJITSU
Sophos Mobile SaaS startup guide. Product version: 7.1
 Sophos Mobile SaaS startup guide Product version: 7.1 Contents 1 About this guide...4 2 What are the key steps?...5 3 Change your password...6 4 Change your login name...7 5 Activate SMC Advanced licenses...8
ApplicationServer XG Version 11. Last updated:
 ApplicationServer XG Version 11 Last updated: 2013-10-09 Table of Contents Introduction to 2X ApplicationServer... 1 What is 2X ApplicationServer?... 1 How does it work?... 1 About This Document... 1 Introduction...
ThinRDP Server. HTML5 Remote Desktop Client Administrator's guide
 ThinRDP Server HTML5 Remote Desktop Client Administrator's guide 2 ThinRDP Server Administrator's Guide Table of Contents About this document 6 Introduction 7 Architecture 9 Security 12 Getting Started
BACKUP APP V7 CLOUUD FILE BACKUP & RESTORE GUIDE FOR WINDOWS
 V7 CLOUUD FILE BACKUP & RESTORE GUIDE FOR WINDOWS Table of Contents 1 Overview... 1 1.1 About This Document... 7 2 Preparing for Backup and Restore... 8 2.1 Hardware Requirement... 8 2.2 Software Requirement...
Bomgar Vault Server Installation Guide
 Bomgar Vault 17.2.1 Server Installation Guide 2017 Bomgar Corporation. All rights reserved worldwide. BOMGAR and the BOMGAR logo are trademarks of Bomgar Corporation; other trademarks shown are the property
KYOCERA Net Admin User Guide
 KYOCERA Net Admin User Guide Legal Notes Unauthorized reproduction of all or part of this guide is prohibited. The information in this guide is subject to change without notice. We cannot be held liable
Sage 200c Professional. System Requirements and Prerequisites
 Sage 200c Professional System Requirements and Prerequisites Copyright statement Sage (UK) Limited, 2017. All rights reserved. If this documentation includes advice or information relating to any matter
Sage 200c Professional. System Requirements and Prerequisites
 Sage 200c Professional System Requirements and Prerequisites Copyright statement Sage (UK) Limited, 2017. All rights reserved. If this documentation includes advice or information relating to any matter
Backup App V7. Quick Start Guide for Windows
 Backup App V7 Quick Start Guide for Windows Revision History Date Descriptions Type of modification 30 Jun 2016 First Draft New 25 Nov 2016 Added Restore Options to Ch 8 Restoring Data; Combined Technical
End User Manual. December 2014 V1.0
 End User Manual December 2014 V1.0 Contents Getting Started... 4 How to Log into the Web Portal... 5 How to Manage Account Settings... 6 The Web Portal... 8 How to Upload Files in the Web Portal... 9 How
WINDOWS GUEST GUIDE. Remote Support & Management PC Mac Tablet Smartphone Embedded device. WiseMo Host module on your computer or device
 WINDOWS GUEST GUIDE Remote Support & Management PC Mac Tablet Smartphone Embedded device WiseMo Guest module on your Windows PC WiseMo Host module on your computer or device 1. An Introduction WiseMo develops
Table of Contents. VMware AirWatch: Technology Partner Integration
 Table of Contents Lab Overview - HOL-1857-08-UEM - Workspace ONE UEM - Technology Partner Integration... 2 Lab Guidance... 3 Module 1 - F5 Integration with Workspace ONE UEM (30 min)... 9 Introduction...
Deploying VMware Identity Manager in the DMZ. JULY 2018 VMware Identity Manager 3.2
 Deploying VMware Identity Manager in the DMZ JULY 2018 VMware Identity Manager 3.2 You can find the most up-to-date technical documentation on the VMware website at: https://docs.vmware.com/ If you have
DigitalPersona Pro Enterprise
 DigitalPersona Pro Enterprise Quick Start Guide Version 5 DATA PROTECTION REMOTE ACCESS SECURE COMMUNICATION STRONG AUTHENTICATION ACCESS RECOVERY SINGLE SIGN-ON DigitalPersona Pro Enterprise DigitalPersona
Anchor User Guide. Presented by: Last Revised: August 07, 2017
 Anchor User Guide Presented by: Last Revised: August 07, 2017 TABLE OF CONTENTS GETTING STARTED... 1 How to Log In to the Web Portal... 1 How to Manage Account Settings... 2 How to Configure Two-Step Authentication...
Remote Desktop Web Connection Activex Control Could Not Be Installed Xp
 Remote Desktop Web Connection Activex Control Could Not Be Installed Xp Windows XP & Vista machines can connect without any issues. I have certain Where can I download this ActiveX and get it installed?
Tableau Server on Microsoft Azure:
 Tableau Server on Microsoft Azure: Deployment Guidelines and Best Practices April 2017 Table of Contents Abstract...3 Introduction to Tableau With Microsoft Azure...3 Option 1 Self Deployment via Azure
271 Waverley Oaks Rd. Telephone: Suite 206 Waltham, MA USA
 Contacting Leostream Leostream Corporation http://www.leostream.com 271 Waverley Oaks Rd. Telephone: +1 781 890 2019 Suite 206 Waltham, MA 02452 USA To submit an enhancement request, email features@leostream.com.
Privileged Remote Access 18.3 Access Console User Guide
 Privileged Remote Access 18.3 Access Console User Guide 2003-2019 BeyondTrust Corporation. All Rights Reserved. BEYONDTRUST, its logo, and JUMP are trademarks of BeyondTrust Corporation. Other trademarks
PROXY Pro Web Console Operations v10.0. User Guide October 2017
 PROXY Pro Web Console Operations v10.0 User Guide October 2017 Table of contents 1. Intro and Overview...5 Web Console Landing Page...6 Definitions...7 Account Users...9 Common Header Fields...10 Menu
PROXY Pro Deployment Tool v10.0. User Guide October 2017
 PROXY Pro Deployment Tool v10.0 User Guide October 2017 Table of contents 1. System Requirements...3 2. Target Computer Requirements...4 3. Deployment Tool Operation...5 3.1 Loading a Host Install File...6
Comodo Dome Firewall Central Manager Software Version 1.2
 3rat Comodo Dome Firewall Central Manager Software Version 1.2 Administrator Guide Guide Version 1.2.042418 Comodo Security Solutions 1255 Broad Street Clifton, NJ 07013 Table of Contents 1 Introduction
Acronis and Acronis Secure Zone are registered trademarks of Acronis International GmbH.
 1 Copyright Acronis International GmbH, 2002-2015 Copyright Statement Copyright Acronis International GmbH, 2002-2015. All rights reserved. Acronis and Acronis Secure Zone are registered trademarks of
KYOCERA Net Admin Installation Guide
 KYOCERA Net Admin Guide Legal Notes Unauthorized reproduction of all or part of this guide is prohibited. The information in this guide is subject to change without notice. We cannot be held liable for
Sophos Mobile Control SaaS startup guide. Product version: 7
 Sophos Mobile Control SaaS startup guide Product version: 7 Contents 1 About this guide...4 2 About Sophos Mobile Control...5 3 What are the key steps?...7 4 Change your password...8 5 Change your login
ios GUEST GUIDE Remote Support & Management PC Mac Tablet Smartphone Embedded device 1. An Introduction WiseMo Host module on your computer or device
 ios GUEST GUIDE Remote Support & Management PC Mac Tablet Smartphone Embedded device WiseMo Guest module on your iphone / ipad WiseMo Host module on your computer or device 1. An Introduction WiseMo develops
VMware Horizon Client for Chrome OS User Guide. 04 JAN 2018 VMware Horizon Client for Chrome OS 4.7
 VMware Horizon Client for Chrome OS User Guide 04 JAN 2018 VMware Horizon Client for Chrome OS 4.7 You can find the most up-to-date technical documentation on the VMware website at: https://docs.vmware.com/
CPM. Quick Start Guide V2.4.0
 CPM Quick Start Guide V2.4.0 1 Content 1 Introduction... 3 Launching the instance... 3 CloudFormation... 3 CPM Server Instance Connectivity... 3 2 CPM Server Instance Configuration... 4 CPM Server Configuration...
Privileged Access Access Console User Guide 18.1
 Privileged Access Access Console User Guide 18.1 2017 Bomgar Corporation. All rights reserved worldwide. BOMGAR and the BOMGAR logo are trademarks of Bomgar Corporation; other trademarks shown are the
BIG-IP Access Policy Manager : Portal Access. Version 13.0
 BIG-IP Access Policy Manager : Portal Access Version 13.0 Table of Contents Table of Contents Overview of Portal Access...7 Overview: What is portal access?...7 About portal access configuration elements...
Connectivity options configuration
 Global Connection Settings dialog box, page 1 Connectivity options access, page 5 Advanced details about ICA and RDP connections, page 18 Global Connection Settings dialog box While it is not recommended
Receiver for BlackBerry 2.2
 Receiver for BlackBerry 2.2 2015-04-19 05:21:53 UTC 2015 Citrix Systems, Inc. All rights reserved. Terms of Use Trademarks Privacy Statement Contents Receiver for BlackBerry 2.2... 3 About This Release...
VMware Workspace ONE UEM VMware AirWatch Cloud Connector
 VMware AirWatch Cloud Connector VMware Workspace ONE UEM 1811 You can find the most up-to-date technical documentation on the VMware website at: https://docs.vmware.com/ If you have comments about this
Print Audit 6. Print Audit 6 Documentation Apr :07. Version: Date:
 Print Audit 6 Version: Date: 37 21-Apr-2015 23:07 Table of Contents Browse Documents:..................................................... 3 Database Documentation.................................................
High Availability Enabling SSL Database Migration Auto Backup and Auto Update Mail Server and Proxy Settings Support...
 Quick Start Guide Table of Contents Overview... 4 Deployment... 4 System Requirements... 4 Installation... 6 Working with AD360... 8 Starting AD360... 8 Launching AD360 client... 9 Stopping AD360... 9
Cisco NAC Appliance Agents
 10 CHAPTER This chapter presents overviews, login flow, and session termination dialogs for the following Cisco NAC Appliance access portals: Cisco NAC Agent, page 10-1 Cisco NAC Web Agent, page 10-28
Table of Contents HOL-1757-MBL-6
 Table of Contents Lab Overview - - VMware AirWatch: Technology Partner Integration... 2 Lab Guidance... 3 Module 1 - F5 Integration with AirWatch (30 min)... 8 Getting Started... 9 F5 BigIP Configuration...
Parallels Remote Application Server
 Parallels Remote Application Server Parallels Client for ios User's Guide v16 Parallels International GmbH Vordergasse 59 8200 Schaffhausen Switzerland Tel: + 41 52 672 20 30 www.parallels.com Copyright
Client Installation Guide
 Client Installation Guide Version 2.3 April 2014 Purpose of this document This document is designed to assist you in installing the RMS client onto your workstations. The RMS client needs to be installed
Windows 10 Tips and Tricks
 Windows 10 Tips and Tricks You've made the move to Windows 10. The Start Menu has returned and its cloud integration is obvious, but most everything else is unfamiliar. This session will help you setup
PMS 138 C Moto Black spine width spine width 100% 100%
 Series MOTOROLA and the Stylized M Logo are registered in the US Patent & Trademark Office. All other product or service names are the property of their respective owners. 2009 Motorola, Inc. Table of
One Solution. training guide. Getting started with Clarity Professional v5.1
 Marketing Sales One Solution Website training guide Orders Getting started with Clarity Professional v5.1 Contents - Introduction - Minimum system requirements - Downloading and installing v5 and v5.1
Deploying Citrix MetaFrame with the FirePass Controller
 Deployment Guide Deploying Citrix Presentation Server (MetaFrame) with the FirePass Controller Deploying Citrix MetaFrame with the FirePass Controller Welcome to the F5 FirePass controller Deployment Guide
Installation Guide. Contents. Overview. Dell SonicWALL Advanced Reporting Installation Guide. Secure Remote Access. SonicOS
 Secure Remote Access SonicOS Contents Overview...1 Server Requirements...2 Licensing and Activation...2 Installing and Upgrading...4 Collecting Dell SonicWALL Aventail Access Logs...8 Initial Setup of
Privileged Identity App Launcher and Session Recording
 Privileged Identity App Launcher and Session Recording 2018 Bomgar Corporation. All rights reserved worldwide. BOMGAR and the BOMGAR logo are trademarks of Bomgar Corporation; other trademarks shown are
Thank you for your purchase of the KX II, the industry's most full-featured, enterprise-class, secure, digital KVM (Keyboard, Video, Mouse) switch.
 switch.") Dominion KX II Quick Setup Guide Thank you for your purchase of the KX II, the industry's most full-featured, enterprise-class, secure, digital KVM (Keyboard, Video, Mouse) switch. This Quick Setup Guide
Dominion KX II Quick Setup Guide Thank you for your purchase of the KX II, the industry's most full-featured, enterprise-class, secure, digital KVM (Keyboard, Video, Mouse) switch. This Quick Setup Guide
Security Enhancements
 OVERVIEW Security Enhancements February 9, 2009 Abstract This paper provides an introduction to the security enhancements in Microsoft Windows 7. Built upon the security foundations of Windows Vista, Windows
Cisco Unified Serviceability
 Cisco Unified Serviceability Introduction, page 1 Installation, page 5 Introduction This document uses the following abbreviations to identify administration differences for these Cisco products: Unified
BIG-IP Access Policy Manager : Portal Access. Version 12.1
 BIG-IP Access Policy Manager : Portal Access Version 12.1 Table of Contents Table of Contents Overview of Portal Access...7 Overview: What is portal access?...7 About portal access configuration elements...7
DreamFactory Security Guide
 DreamFactory Security Guide This white paper is designed to provide security information about DreamFactory. The sections below discuss the inherently secure characteristics of the platform and the explicit
Virtual CD TS 1 Introduction... 3
 Table of Contents Table of Contents Virtual CD TS 1 Introduction... 3 Document Conventions...... 4 What Virtual CD TS Can Do for You...... 5 New Features in Version 10...... 6 Virtual CD TS Licensing......
Gateway Guide. Leostream Gateway. Advanced Capacity and Connection Management for Hybrid Clouds
 Gateway Guide Leostream Gateway Advanced Capacity and Connection Management for Hybrid Clouds Version 9.0 June 2018 Contacting Leostream Leostream Corporation 271 Waverley Oaks Rd Suite 206 Waltham, MA
Privileged Remote Access Jumpoint Guide
 Privileged Remote Access Jumpoint Guide 2003-2018 BeyondTrust, Inc. All Rights Reserved. BEYONDTRUST, its logo, and JUMP are trademarks of BeyondTrust, Inc. Other trademarks are the property of their respective
DeltaV Mobile. Introduction. Product Data Sheet September DeltaV Distributed Control System
 DeltaV Distributed Control System Product Data Sheet September 2017 DeltaV Mobile Make faster and better decisions with secure, read-only access to your critical operational data, whenever and wherever
Installation Guide. EventTracker Enterprise. Install Guide Centre Park Drive Publication Date: Aug 03, U.S. Toll Free:
 EventTracker Enterprise Install Guide 8815 Centre Park Drive Publication Date: Aug 03, 2010 Columbia MD 21045 U.S. Toll Free: 877.333.1433 Abstract The purpose of this document is to help users install
CPM Quick Start Guide V2.2.0
 CPM Quick Start Guide V2.2.0 1 Content 1 Introduction... 3 1.1 Launching the instance... 3 1.2 CPM Server Instance Connectivity... 3 2 CPM Server Instance Configuration... 3 3 Creating a Simple Backup