2 P age. Pete s Pagebuilder revised: March 2008
|
|
|
- Spencer Alexander Crawford
- 6 years ago
- Views:
Transcription

1 AKA DNN 4
2 Table of Content Introduction... 4 Admin Tool Bar... 5 Site Settings... 7 Basic Settings... 7 Site Details... 7 Site Marketing... 8 Appearance... 9 Advance Settings... 9 Usability Settings... 9 Other Settings Pages Security Roles Add New Role Group Add New Role Edit Security Role Basic Settings User Roles User Accounts User Information Page Manage Roles Vendors Banner Advertising Edit Banner Mass File Manager Folder Security Settings Recycle Bin Appendix A: Page Skins DNN Blue DNN Gray Horizontal Menu DNN Gray Vertical menu Pete s Pagebuilder P age
3 Rad UTEP Default Skin Panes Blue Panes Blue No Breadcrumb Panes Blue No Menu P age


 747-5940 or Instructional Support Services (ISS) at")
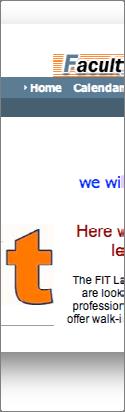
4 Introduction Pete s Pagebuilder is UTEP s departmental content management system otherwise known as DNN. Adopted for its ease of use and adaptability, Pete s Pagebuilder adds new controls to allow the user to easily modify a webpage (portal). With UTEP standardized top bar and footer, adding information or migratingg to Pete s Pagebuilder is easy to do from any computer with internet access, although some users on MACs may have problems if not using Firefox. A new portal willl look something like this: In order to make changes, the user should gain Administrative/update privileges to the portal. This will allow the user to Login using the link on the right hand side of the top bar to open the Login fields. This type of access should only be granted by the site owner once the requesting person has been to training. For training, you will need to contact the Fit Lab at (915) or Instructional Support Services (ISS) at (915) With Pete s Pagebuilder, the user will login with their standard UTEP login and password (ignoring any system generated s). In some cases, user accounts may vary if you have a special portal built outside of the regular DNN instance 4 P age


5 Admin Tool Bar Once logged in, the Administrator will see an Administrative Tool Bar (Control Panel) across the top of the page: If you do not see the Control Panel click Show Control Panel View mode will let you see exactly what the non-admins see Edit mode will let you edit the page. From left to right the Admin Tool Bar has Page Functions that allow you to Add a Page, Change the Settings for a Page, Delete a Page, Copy a Page or Show the Design elements of a page. Add a Page Shows the Design elements Change the settingss Delete a Page Copy a Page 5 P age


6 This is followed by Module adding functions of a New or Existing Module. You can select the type of module You have the option to Add a New Module or Add an existing module You can select in which Pane you want the module You can change the title of the module Accomplish the same function: Add a module Always leave it like this: Same as page You can select the alignment of the module If you have two modules here you can select if you want it on the top or bottom Remember: Adding an existing module links the modules together, so if you make a change in one it will change the other. Lastly there are Common Tasks that quick link to administrative functions from the Admin Drop Down: Site links to Site Settings, Users to the User Manager and Files to the File Manger. Help is also listed but should be ignored since it refers to DNN information that is not consistent with UTEP s configuration of DNN. Site Settings Link Help should be ignored since it refers to DNNN information that is not consistent with UTEP s configuration of DNNN Users Manager Link Security Roles Link File Manager Link 6 P age


7 Site Settings This administrative function can be reached from both the Common Tasks link for Site or under the Admin Dropdown. This will allow the user to change general settings for the entire portal. Basic Settings In this section, you can set up the basic settings for your site. Site Details Title: Description: Keywords: Copyright: GUID: This is the Title for your portal. The text you enter will show up in the Title Bar. This is the description about your site only admins will see the description Enter some keywords for your site (separated by commas). These keywords are used by search engines to help index your site. This needs to read The University of Texas at El Paso 500 W. University Ave. El Paso, TX The globally unique identifier which can be used to identify this portal. 7 P age

.")


 in the Verification textbox and click Create. Return to Google and select the Verify button.")
8 Site Marketing Search Engine: Site Map URL: Verification: This is where you submit your site to the selected search engine for ndexing. Submit your Site Map to Google for better search optimization. Click Submit to get a Google Webmaster Tools account and verify your site ownership ( using the Verification option below ). Once verified, you can select the Add General Web Sitemap option on the Google Sitemaps tab, and paste the Site Map URL displayed. When signing up with Google Webmaster Tools you will need to Verify your site ownership. Choose the "Upload an HTML file" method from the Google Verification screen. Enter the filename displayed ( ie. google53c0cef435b2b81e.html ) in the Verification textbox and click Create. Return to Google and select the Verify button. Advertise: Advertise your site on Google. This allows your text banners to appear in the Google search results as well as affiliate web sites. Banners: This needs to be set to have Site selected so that your banner will appear. 8 P age


9 Appearance Portal Skin: Portal Container: Admin Skin: Admin Container: The selected skin will be applied to all pages on the site, unless overridden at the Page level. (Recommended to set this here so that the site has a consistent professional look) The selected container will be applied to all modules on the site, unless overridden at the Page or Module level. (Not recommended at this level) The selected skin will be applied to all admin pages on the site. The selected container will be applied to all admin modules on the site. Advance Settings In this section, you can set up more advanced settings for your site. The first setting under the Advanced Settings is Usability Settings. This setting will allow the administrator to set up advanced Control panel settings: Usability Settings Inline Editor Enabled: Select this option if you wish for inline editing to be enabled on your site. Control Panel Mode: Select the default Control Panel Mode for authorized users of your site. Control Panel Visibility: Select the default Control Panel Visibility for authorized users of your site. Control Panel Security: Select whether the Control Panel will be displayed for Page Editors or Module Editors. 9 P age

 The Default Language")


10 Other Settings This setting will allow the administrator to set up Administrator, Language and Time Zone settings. Administrator: Default Language: Portal TimeZone: The Administrator User for the site. (This admin cannot be deleted from the administrator r s security role) The Default Language for the site. The Time Zone for the location of the site. Pages This tool allows the user to manage the Pages within the Portal. New Pages can be added here at the top of the page or on any page with the Admin Toolbar. Pages are listed in the window and can be resorted with the Arrows to the right of the window. The pencil allows you to change the settings for the page you select in the window (this is the only way you can adjust pages that are linked to a URL or File. Move Selected Page Up In Current Level Move Selected Page Down In Current Level Move Selected Page Up One Hierarchical Level Move Selected Page Down One Hierarchical Level Edit Selected Page View Selected Page Delete Selected Page The magnifying glass takes you to the page selected. This is used for hidden pages on the site for ease of navigation. 10 P age


.")


11 Security Roles Security Roles allows the administrator the ability to assign users to Groups. These groups can then be assigned rights to View and/or Change (Edit) web page(s) or module(s). Add New Role Group This option allows you to organize your Security Roles in multiple folders. To do this click on Addd New Role Group The Edit Role Group boxes will appear. Group Name: Enter the Group/Folder name. Description: Do addd a description so that you or any other Admin will know why this Group/Folder was created. Click update aand new field has been added 11 P age


12 When you click on the dropbox you will see your new role. Add New Role To add a new roll click on Add New Role 12 P age

.")
13 Edit Security Role Administrators have full access to change the entire Portal. Registered Users have either logged into the page or visited from a page they were logged into such as the MyUTEP portal. They have no additional rights but can be designated to see information after login if the Admin so desires. New roles can be created also by clicking Add New Role and filling in the Role Name (be sure not to assign Public Role nor Auto Assignment). To add userss to a role other than Registered Users, click the Pencil in front of the Role. Basic Settings Role Name: Description: Enter name you want to give this role. Enter the description of this role Role Group: Select the Group role you want this role to belong to or leave it in Global Roles so it will show up on the first page Do not set Public Role or Auto Assignment you do not want any security role you create open to the public nor do you want everyone automatically assigned to your role. Do not use or set anythng under Advance Settings At the bottom of the page you will see Manage Users in this Role. Click here to add users to a Security Role (thiss is the preferred method). If the user previously exists, you can select them from the list (uncheck Send Notification) delete the Expiry Date or type one in the field and click Add User. 13 P age
.")
.")


.")
14 User Roles User Name: Enter The User Name and click Validate to confirm Effective Date: Specify The Date This Role Assignment Should Start (Optional). Entering No Value Will Indicate that the role will start immediately. Expiry Date: Specify The Date This Role Assignment Should Expire (Optional). Entering No Value Will Indicate No Expiry Date. User Accounts Users are listed here in order by Username. This includes alll Registered Users these Users have merely logged into your site, they have no additional rights unless you have specified them to. There is also a search capability that looks for Users by Username (UTEP login). Users can be added in two ways: 1) By logging into the Portal, or 2)By being added manually, begin be clicking Add New User above the User icon. 14 P age

15 User Informationn Page User Name: First Name: Last Name: Display Name: Address: Enter a username (1 st part of the UTEP ) Enter a First Name Enter a Last Name Provide a Display Name Enter a valid UTEP address Authorize: Authorize this user Notify: Send an to the user'ss address letting them know they have been added Random Password: Do not check this box to generate a random password Password: Enter a the User Name for this user Confirm Password: Re-enter a the User Name for this user The Manage Roles for User option will display what roles the user has on a particular portal. This option will also allow the administrator to add a role to an approved user. It is important to verify that a user requesting any type of editing rights has completed the training. 15 P age


16 Do not click or update anything on this screen except Delete if you want to delete this person or Manage Roles for this User if you want to add or update a security role for this user. Manage Roles Security Role: Enter The User Name and click Validate to confirm Effective Date: Specify The Date This Role Assignment Should Start (Optional). Entering No Value Will Indicate that the role will start immediately. Expiry Date: Specify The Date This Role Assignment Should Expire (Optional). Entering No Value Will Indicate No Expiry Date. Send Notification: This will send the User notification that they have been added to the specified role 16 P age
.")


17 Vendors Vendors are used to display banner images across the top of the page. The standard size for a banner is 760x90 pixels (and should be at 72 pixels per inch). Anything larger will stretch your page and make navigationn difficult. Vendors are listed alphabetically from the list below: To add a Vendor, click on Add New Vendor to open the following screen: Fill in the fields in the Vendor Details and uncheck the Address Details checkboxes as these are not required and click Update. Company: Enter the name of the Department/Faculty/College First Name: Last Name: First name of your contact person or admin Last name of your contact person or admin Address: of the Department/Faculty/College/contact person 17 P age


18 Banner Advertising This will take you back to the first screen. Click the pencil in front of the vendor you created Now find the + sign in front of Banner Advertising. After, click Add New Banner: This is going to allow you to point the Banner image you should ready have uploaded in the file Manager. Be sure to give it a banner Name that describes the image as this will serve as the Alternatee Text, Type should remain Banner. Edit Banner Banner Name: Banner Type: Enter a name for the Banner. The Name will be displayed as alternatee text for the displayed image Select a type of Banner to display Banner Group: Enter a banner group if you wish to relate a set of banners 18 P age
. For text banners you should specify the URL you want displayed in the ad text. Enter the banner image width.")
19 Link Type: Image/Link: Width: Height: Text/Script: Select whether your Banner is from an external source or on your site For graphical banners you should specify the banner image ( by either uploading an image file or linking to a remotee image file via URL ). For text banners you should specify the URL you want displayed in the ad text. Enter the banner image width. This is optional for image banners but is mandatory for flash banners. Enter the banner image height. This is optional for image banners but is mandatory for flash banners. Enter a banner description. This will be used as alternate text for Image banners or as the actual text for Text banners 19 P age
.")

20 URL: CPM/Cost: Impressions: Start Date: Enter the URL which you wish the user to be directed to if they click the banner. If you do not enter a URL, the URL for the Vendor will be used Do not use. CPM is the cost for 1000 Impressions. Cost may also be a flat fee. Enter the number of Impressionss to display. For unlimited Impressions enter Zero (0). Use the Start Date to control when the banner should start End Date: Use the End Date to control when the banner should end Criteria: Specify whether the banner should end when the Impressions are used AND/OR the End Date is past Extra fields include URL which allows your Banner to become a hyperlink and Start and End Dates to have it turn itself off and on. Click Update to save the image which will take you back to the Vendor information and now display your Banner. Banner can be self developed but should match the page colors and need to remain UTEP related, no personal images. They can also be requested through IT Web Development, contact the Help Desk to initiate the request. 20 P age
21 Mass The function allows the user to send s directly from the portal to a User Role (group). It also allows additional users to be added. Simply select the Role, type in the Subject and Message and click Send at the bottom of the page (this does not replace a Outlook nor does it allow you to migrate from Outlook to DNN; additionally it will not work when is down). User Role(s): You can select the User Roles that are to receive this message. eg All Administrators, or all Registered Users. List: From: Subject: You can add addresses, separated by a ";". Enter the 'From' address of the message. Enter the subject of this message. Mass Newsletters can be written using the included editor: 21 P age


22 The editor is similar to many Word processor programs. The advanced settings can be used to set up your . Attachment: Select an Attachment for this message. (Optional) Replace Tokens: Does the text contain any tokens, that shall be replaced with current environment values? Note: User tokens are replaced only, if send method is "TO"" Priority: Send Method: Send Action: Select the priority for this message. Select the method for this to be sent. Select how you want the message to be sent. 22 P age


 at the end of the row to select or deselect")


23 File Manager The File Manager is the store house for all files to be used on the Portal. This includes all display images and files to download. Files uploaded in other places within your portal are filed into this repository. The File Manager allows you to create Folders to move files into. These are displayed in the left window and are addedd by typing the name in the Field and Add Folder To create, type the name of the new Files can then be sorted within the folders to make then easier to manage for the Administrator. Simply select the file by clicking the Checkbox(es) at the end of the row to select or deselect files to move. Click Move Files from the icons above. Organizing folders becomes more imperative now with the security settings changes requiring you to set the permissions for your users to view your documents. A word of warning, organization of images or files into folders may cause for the Portal to contain broken hyperlinks and image displays (typically a red X will show where an image used to be). Be careful moving files into folders or move them individually until you are comfortable with the Portal setup. 23 P age


24 Folder Security Settings You must set the Security Settings on what role can view/ /update the folder: Remember if you select a particularr user the only way to delete them is to delete them from the User Account menu. Recyclee Bin This is the menu that displays any module or page that has been deleted from the site, much like the trash folder on the computer. This will restore the page or module. This will permanently delete your page/module If you do not or cannot restore your module to its original page, click on the dropbox to select the page to restore the module. Click Empty Recycle Bin to clear out all pages/modules. You need to do this regularly to prevent system confusion with similarly named pages/modules. 24 P age


25 Appendix A: Page Skins DNN Blue DNN Gray Horizontal Menu 25 P age


26 DNN Gray Vertical menu Pete s Pagebuilder 26 P age


27 Rad UTEP Default Skin 3 Panes Blue 27 P age


28 3 Panes Blue No Breadcrumb 3 Panes Blue No Menu 28 P age
2 P age. Pete s Pagebuilder revised: March 2008
 AKA DNN 4 Table of Content Introduction... 3 Admin Tool Bar... 4 Page Management... 6 Advanced Settings:... 7 Modules... 9 Moving Modules... 10 Universal Module Settings... 11 Basic Settings... 11 Advanced
EFM Community 3.1 Portal Administration Guide
 EFM Community 3.1 Portal Administration Guide WHITE PAPER For technical support please call: 1-800-787-8755 Or visit: Hwww.Vovici.comH Please contact Vovici technical support if you believe any of the
DotNetNuke 5.1 Superuser Manual
 DotNetNuke 5.1 Superuser Manual Administration DotNetNuke Corporation 1825 S. Grant St. Suite 240 San Mateo, CA 94402 www.dotnetnuke.com 650.288.3150 Copyright 2009, DotNetNuke Corporation. All Rights
SharePoint: Fundamentals
 SharePoint: Fundamentals This class will introduce you to SharePoint and cover components available to end users in a typical SharePoint site. To access SharePoint, you will need to log into Office 365.
SharePoint: Fundamentals
 SharePoint: Fundamentals This class will introduce you to SharePoint and cover components available to end users in a typical SharePoint site. To access SharePoint, you will need to log into Office 365.
Table of Contents Brainshark. All rights reserved.
 Table of Contents Administrator Reference Guide... 2 Introduction... 2 Topics... 2 Folders... 3 Manage Folders... 3 Edit Folder... 3 Edit Folder Properties... 3 Assign Folder Permissions (Viewer, Author,
Learn how to login to Sitefinity and what possible errors you can get if you do not have proper permissions.
 USER GUIDE This guide is intended for users of all levels of expertise. The guide describes in detail Sitefinity user interface - from logging to completing a project. Use it to learn how to create pages
Roxen Content Provider
 Roxen Content Provider Generation 3 Templates Purpose This workbook is designed to provide a training and reference tool for placing University of Alaska information on the World Wide Web (WWW) using the
Using the Self-Service Portal
 UBC Workspace 2.0 Using the Self-Service Portal Using the Self-Service Portal to access and manage your content July 2017 Table of Contents Introduction... 3 Overview... 3 User Types... 4 Compliance and
Evoq 9 Content Managers Training Manual
 Evoq 9 Content Managers Training Manual Table of Contents Chapter 1: User Login... 2 User Login...2 User Login Screen...2 User Logout...2 Chapter 2: Navigating within Evoq 9...3 Editing Bar...3 Dashboard...4
Training Manual and Help File
 Training Manual and Help File 30.06.2011 Update Manage Grow Welcome to your new Juniper Website Management System with CMS Introduction The Juniper Website Management System with CMS (Website Content Management
AGENT123. Full Q&A and Tutorials Table of Contents. Website IDX Agent Gallery Step-by-Step Tutorials
 AGENT123 Full Q&A and Tutorials Table of Contents Website IDX Agent Gallery Step-by-Step Tutorials WEBSITE General 1. How do I log into my website? 2. How do I change the Meta Tags on my website? 3. How
Evoq 8 Content Managers Training Manual
 Evoq 8 Content Managers Training Manual Table of Contents Chapter 1: User Login... 2 User Login...2 User Login Screen...2 User Logout...2 Chapter 2: Navigating within Evoq 8...3 Editing Bar...3 Dashboard...4
ACTIVE CAMPUS PORTAL ADVANCED (SHAREPOINT BASICS)
") ACTIVE CAMPUS PORTAL ADVANCED (SHAREPOINT BASICS) Training for Points of Contacts How SharePoint fits into Active Campus Portal Introduction to SharePoint Services Working with Lists Working with Libraries
ACTIVE CAMPUS PORTAL ADVANCED (SHAREPOINT BASICS) Training for Points of Contacts How SharePoint fits into Active Campus Portal Introduction to SharePoint Services Working with Lists Working with Libraries
Lava New Media s CMS. Documentation Page 1
 Lava New Media s CMS Documentation 5.12.2010 Page 1 Table of Contents Logging On to the Content Management System 3 Introduction to the CMS 3 What is the page tree? 4 Editing Web Pages 5 How to use the
What is OU Campus? Log into OU Campus
 OU Campus v10 Content Providers User Guide This document is designed to provide (level 5) Content Providers with basic information needed to do most tasks. Those needing additional information are encouraged
Managing Your Website with Convert Community. My MU Health and My MU Health Nursing
 Managing Your Website with Convert Community My MU Health and My MU Health Nursing Managing Your Website with Convert Community LOGGING IN... 4 LOG IN TO CONVERT COMMUNITY... 4 LOG OFF CORRECTLY... 4 GETTING
Hands-On Introduction to Queens College Web Sites
 Hands-On Introduction to Queens College Web Sites This handout accompanies training workshops for Queens College Content Editors who will manage and maintain the web content in their areas. Overview of
Quick Administration Guide
 Quick Administration Guide 1 Introduction... 10 What is DotNetNuke?... 10 The Purpose of this Guide... 10 Terminology... 10 Which Sections Should I Read?... 10 Getting More Help... 10 DotNetNuke Concepts...
Microsoft Windows SharePoint Services
 Microsoft Windows SharePoint Services SITE ADMIN USER TRAINING 1 Introduction What is Microsoft Windows SharePoint Services? Windows SharePoint Services (referred to generically as SharePoint) is a tool
Instructions for Editing in the new System DNN9 the Upgrade from DNN8
 Instructions for Editing in the new System DNN9 the Upgrade from DNN8 We all hate change, but going forward is the best way to go. Security needs to be top of the range and your websites need to be faster
Files.Kennesaw.Edu. Kennesaw State University Information Technology Services. Introduces. Presented by the ITS Technology Outreach Team
 Kennesaw State University Information Technology Services Introduces Files.Kennesaw.Edu Presented by the ITS Technology Outreach Team Last Updated 08/12/13 Powered by Xythos Copyright 2006, Xythos Software
Go to the Directory at and click on the Login link.
 Welcome to Terra Dotta s Study Abroad Directory! Creating your programs for the directory is a simple task. These instructions will outline how to create, activate and update your program brochures. Logging
2 Document Manager Lite v5.2 User Guide
 This document was produced by Voloper Creations Inc. 2000 2009 Voloper Creations Inc. All Rights Reserved Brands or product names are trademarks or registered trademarks of their respective holders. The
Self-Service Portal Implementation Guide
 Self-Service Portal Implementation Guide Salesforce, Spring 6 @salesforcedocs Last updated: April 7, 06 Copyright 000 06 salesforce.com, inc. All rights reserved. Salesforce is a registered trademark of
Blackboard Content Collection Overview
 CONTENTS Accessing the Blackboard Content Collection 1 Uploading Files 2 Creating Subfolders 2 About Permissions 3 Assigning Permissions to Specific Users 3 Making a Folder Public to all Winthrop Faculty/Staff
Login 2. The Control Panel 3. Add a Page 5. Edit HTML Pro Module Content 8. Add New Module Events 12. Add New Module Banner 16
 Table of Contents Section Page Login 2 The Control Panel 3 Add a Page 5 Edit HTML Pro Module Content 8 Add New Module Events 12 Add New Module Banner 16 Upload Images 23 Upload and Link Documents 29 1
Swiiit User Guide 09/11/2016
 Swiiit User Guide 09/11/2016 Contents Getting Started... 4 Overview of Main Tools... 5 Webpages... 6 Main pages (Sections)... 6 Rearrange Sections... 6 Subpages... 7 Change the Title of a Webpage... 8
DotNetNuke v9 CMS. User Training Manual. Provided by:
 DotNetNuke v9 CMS User Training Manual Provided by: Last Updated: December 31, 2017 Table of Contents CHAPTER 1: USER LOGIN... 4 USER LOGIN... 4 LOGOUT... 4 CHANGING YOUR PASSWORD... 5 CHAPTER 2: HOW TO
File Cabinet Manager
 Tool Box File Cabinet Manager Java File Cabinet Manager Password Protection Website Statistics Image Tool Image Tool - Resize Image Tool - Crop Image Tool - Transparent Form Processor Manager Form Processor
User Guide. Last Updated June 201 6
 User Guide Last Updated June 201 6 1 TABLE OF CONTENTS 1 Basics 4 1.1Logging In 4 1.2Dashboard 5 1.2.1 Tabs 5 1.2.2 Action Items 6 1.2.3 Coordinator s Dashboard 6 2 Forms 6 2.1Common Form Operations 6
User Guide. BlackBerry Workspaces for Windows. Version 5.5
 User Guide BlackBerry Workspaces for Windows Version 5.5 Published: 2017-03-30 SWD-20170330110027321 Contents Introducing BlackBerry Workspaces for Windows... 6 Getting Started... 7 Setting up and installing
Secure Client Portal - User Guide
 Secure Client Portal - User Guide March 2014 03.19.2014-16:00 p.m. - CEH Draft Before You Begin Please read this User Guide in it's entirety before submitting a support ticket or calling GetNetSet for
BE Share. Microsoft Office SharePoint Server 2010 Basic Training Guide
 BE Share Microsoft Office SharePoint Server 2010 Basic Training Guide Site Contributor Table of Contents Table of Contents Connecting From Home... 2 Introduction to BE Share Sites... 3 Navigating SharePoint
DotNetNuke v9.2 CMS. User Training Manual. Provided by:
 DotNetNuke v9.2 CMS User Training Manual Provided by: Last Updated: February 22, 2019 Table of Contents CHAPTER 1: USER LOGIN... 4 USER LOGIN... 4 LOGOUT... 4 CHANGING YOUR PASSWORD... 5 CHAPTER 2: HOW
Medversant Client Portal User Guide
 Medversant Client Portal User Guide THE ONLINE, CENTRALIZED PORTAL CREATED EXCLUSIVELY FOR MEDVERSANT S CLIENTS TO STREAMLINE DATA ACCESS AND INCREASE PROCESS TRANSPARENCY. Version 2.0 System Requirements
Easy Survey Creator: User s Guide
 Easy Survey Creator: User s Guide The Easy Survey Creator software is designed to enable faculty, staff, and students at the University of Iowa Psychology Department to quickly and easily create surveys
Version 1.4. FaxCore User Manual
 Version 1.4 FaxCore User Manual Table of Contents Introduction... 1 Contacting FaxCore... 1 Getting Started... 2 Understanding FaxCore s User Interface... 4 Settings: Your User Profile... 4 Personal Information
Information Technology Services
 Information Technology Services Quick Start Guide for Cascade Server Quick Start Guide Sections: Logging into Cascade Server... 3 Dashboard... 4 Main Navigation... 4 Search Field... 4 Left hand Navigation/Asset
Web Manager 2.0 User s Manual Table of Contents
 Web Manager 2.0 User s Manual Table of Contents Table of Contents... 1 Web Manager 2.0 Introduction... 2 Rights and Permissions... 2 User Access Levels... 2 Normal Access... 2 Publisher Access... 2 WM2
Xtender. Scanning & Indexing
 Xtender Scanning & Indexing 1 TABLE OF CONTENTS Introduction to Xtender -------------------------------------------------------------------------------- 2 Gaining Access --------------------------------------------------------------------------------------------
WAM!NET Submission Icons. Help Guide. March 2015
 WAM!NET Submission Icons Help Guide March 2015 Document Contents 1 Introduction...2 1.1 Submission Option Resource...2 1.2 Submission Icon Type...3 1.2.1 Authenticated Submission Icons...3 1.2.2 Anonymous
User Guide. RACER Date 09/29/17
 User Guide RACER Date 09/29/17 1 Table of Contents Table of Contents... 2 RACER... 4 Home Page...5 RACER Requester... 6 Basic Information...6 Location Information...7 Change Information...8 Review and
OU Campus VERSION 10
 OU Campus VERSION 10 End User Manual Last Update: 9/8/2015 Contact Tish Sailer with comments or questions regarding this Manual. Contents INTRODUCTION...3 HELP DOCUMENTS AND SUPPORT... 3 ACCESSING PAGES
Kentico CMS User s Guide 4.1
 Kentico CMS User s Guide 4.1 2 Kentico CMS User s Guide 4.1 Table of Contents Part I Introduction 4 1 Kentico CMS overview... 4 2 Signing in... 5 3 User interface overview... 7 Part II Managing my profile
From the Insert Tab (1), highlight Picture (2) drop down and finally choose From Computer to insert a new image
, highlight Picture (2) drop down and finally choose From Computer to insert a new image") Inserting Image To make your page more striking visually you can add images. There are three ways of loading images, one from your computer as you edit the page or you can preload them in an image library
Inserting Image To make your page more striking visually you can add images. There are three ways of loading images, one from your computer as you edit the page or you can preload them in an image library
S-Drive Lightning User Guide v2.1
 S-Drive Lightning User Guide v2.1 Important Note This user guide contains detailed information about S-Drive for Salesforce Lightning usage. Refer to the S-Drive User Guide for more information about S-Drive
Getting Started with Penn State WikiSpaces
 Getting Started with Penn State WikiSpaces About Penn State WikiSpaces Penn State WikiSpaces is a platform intended to support Penn State-associated collaboration. Wikis are websites that allow for the
OU Campus VERSION 10
 OU Campus VERSION 10 End User Manual Last Update: 8/15/2017 Contact Tish Sailer with comments or questions regarding this Manual. Contents INTRODUCTION...3 HELP DOCUMENTS AND SUPPORT... 3 ACCESSING PAGES
Unit 1: Working With Tables
 Unit 1: Working With Tables Unit Overview This unit covers the basics of working with Tables and the Table wizard. It does not include working with fields, which is covered in Units 3 and 4. It is divided
Electronic Committees (ecommittees) Frequently Asked Questions v1.0
 Frequently Asked Questions v1.0") 3 Electronic Committees (ecommittees) Frequently Asked Questions v1.0 SABS 2012-12-06 Table of Contents 1 Contents 1 Login and access... 3 1.1 How to access the ecommittee workspace... 3 1.1.1 Via the
3 Electronic Committees (ecommittees) Frequently Asked Questions v1.0 SABS 2012-12-06 Table of Contents 1 Contents 1 Login and access... 3 1.1 How to access the ecommittee workspace... 3 1.1.1 Via the
NORTH CAROLINA A&T STATE UNIVERSITY CMS USER GUIDE. A Manual for the Cascade Server Content Management System (CMS)
") NORTH CAROLINA A&T STATE UNIVERSITY CMS USER GUIDE A Manual for the Cascade Server Content Management System (CMS) Table of Contents Chapter 1 - Getting Started... 3 Overview... 3 What is a Content Management
NORTH CAROLINA A&T STATE UNIVERSITY CMS USER GUIDE A Manual for the Cascade Server Content Management System (CMS) Table of Contents Chapter 1 - Getting Started... 3 Overview... 3 What is a Content Management
Overview NOTE: Listing Overview. User Profile. Language Selection. Asset(s) View. Asset(s) Details. Editing Mode
 View. Asset(s) Details. Editing Mode") Overview Listing Overview User Profile Language Selection Asset(s) View Asset(s) Details Editing Mode NOTE: Some functions may not be available to all users depending on permissions granted. Some of the
Overview Listing Overview User Profile Language Selection Asset(s) View Asset(s) Details Editing Mode NOTE: Some functions may not be available to all users depending on permissions granted. Some of the
Lucid CMS User Guide
 "We create exceptional business solutions for cash-pay healthcare professionals that enable them to realize their full potential." Lucid CMS User Guide Version 1.2 3/13/2012 1 Table of Contents Table of
Recycle Bin. Overview. Recycling Files
 Recycle Bin Overview The Recycle Bin is a tool inside OU Campus that allows users to "recycle" files on the staging server as opposed to permanently deleting them. This is helpful, as it reduces the damage
Administrative Training Mura CMS Version 5.6
 Administrative Training Mura CMS Version 5.6 Published: March 9, 2012 Table of Contents Mura CMS Overview! 6 Dashboard!... 6 Site Manager!... 6 Drafts!... 6 Components!... 6 Categories!... 6 Content Collections:
Click anywhere to continue
 The Security Manager is used to create a means of managing the permission levels for all the users that will be working with the system. These users are assigned to Roles, for which permissions are defined.
Using Sitecore 5.3.1
 Using Sitecore 5.3.1 An End-User s Guide to Using and Administrating Sitecore Author: Sitecore Corporation Date: December 12, 2007 Release: Rev. 1.0 Language: English Sitecore is a registered trademark.
Vector Issue Tracker and License Manager - Administrator s Guide. Configuring and Maintaining Vector Issue Tracker and License Manager
 Vector Issue Tracker and License Manager - Administrator s Guide Configuring and Maintaining Vector Issue Tracker and License Manager Copyright Vector Networks Limited, MetaQuest Software Inc. and NetSupport
Kurzweil 3000 User and License Management
 Kurzweil 3000 User and License Management Revised July 18, 2018 Contents Kurzweil 3000 Web License Edition customers.... 2 Kurzweil 3000 for Web Browsers.... 2 Working with User Accounts and License Allocation....
COMMUNITIES USER MANUAL. Satori Team
 COMMUNITIES USER MANUAL Satori Team Table of Contents Communities... 2 1. Introduction... 4 2. Roles and privileges.... 5 3. Process flow.... 6 4. Description... 8 a) Community page.... 9 b) Creating community
Virto SharePoint Forms Designer for Office 365. Installation and User Guide
 Virto SharePoint Forms Designer for Office 365 Installation and User Guide 2 Table of Contents KEY FEATURES... 3 SYSTEM REQUIREMENTS... 3 INSTALLING VIRTO SHAREPOINT FORMS FOR OFFICE 365...3 LICENSE ACTIVATION...4
SCHULICH MEDICINE & DENTISTRY Website Updates August 30, Administrative Web Editor Guide v6
 SCHULICH MEDICINE & DENTISTRY Website Updates August 30, 2012 Administrative Web Editor Guide v6 Table of Contents Chapter 1 Web Anatomy... 1 1.1 What You Need To Know First... 1 1.2 Anatomy of a Home
General Training Curriculum
 General Training Curriculum Table of Contents 1.0 Getting Started 1.1 What is MODX? 1.2 Browser Support 1.3 How Do I Log In? 2.0 MODX Dashboard 2.1 What is a Dashboard? 2.2 Global Top Menu Bar 2.2.0 MODX
VSkyBox User Guide. Document Revision: v1.01 April 10, VSkyBox User Portal Guide i
 VSkyBox User Guide Document Revision: v1.01 April 10, 2017 VSkyBox User Portal Guide i Table of Contents 1 Getting Started with VSkyBox... 1 1.1 Setting Up VSkyBox... 1 1.2 Opening VSkyBox... 3 1.3 Logging
Ninja Menus extension for Magento 2
 Ninja Menus extension for Magento 2 User Guide Version 1.0 0 Table of Contents Ninja Menus I) Introduction... 2 II) Menu Grid... 3 III, Add new menu... 7 1. General setting... 8 2. Advanced settings...
SPECIFICATIONS Insert Client Name
 ESSENTIAL LMS BRANDING SPECIFICATIONS Insert Client Name Creation Date: June 23, 2011 Last Updated: July 11, 2017 Version: 16.5 Page 1 Contents Branding Elements... 3 Theme Management... 3 Header Images...
Getting Started with Moodle 2.0
 Getting Started with Moodle 2.0 Note: Please use Mozilla Firefox if you are working on a Mac 1. Login to Moodle 2. How to Access a Course 3 Edit your Profile Information 4. Add a Personal photo 5. Disable
DOCUMENTUM D2. User Guide
 DOCUMENTUM D2 User Guide Contents 1. Groups... 6 2. Introduction to D2... 7 Access D2... 7 Recommended browsers... 7 Login... 7 First-time login... 7 Installing the Content Transfer Extension... 8 Logout...
HOW TO USE THE CONTENT MANAGEMENT SYSTEM (CMS) TABLE OF CONTENTS
 TABLE OF CONTENTS") HOW TO USE THE CONTENT MANAGEMENT SYSTEM (CMS) TABLE OF CONTENTS GETTING STARTED (LOGIN) 2 SITE MAP (ORGANIZE WEBPAGES) 2 CREATE NEW PAGE 3 REMOVE PAGE 6 SORT PAGES IN CHANNEL 7 MOVE PAGE 8 PAGE PROPERTIES
HOW TO USE THE CONTENT MANAGEMENT SYSTEM (CMS) TABLE OF CONTENTS GETTING STARTED (LOGIN) 2 SITE MAP (ORGANIZE WEBPAGES) 2 CREATE NEW PAGE 3 REMOVE PAGE 6 SORT PAGES IN CHANNEL 7 MOVE PAGE 8 PAGE PROPERTIES
Microsite Overview. The Basics: How to build and manage your ISA Section microsite
 Microsite Overview The Basics: How to build and manage your ISA Section microsite We are excited to work with you to build your microsites within the all-new www.isa.org. The website has state-of-the-art
Unit 2: Managing Views
 Unit 2: Managing Views 1 Questions Covered How do we define the information displayed in the table view? How do we change what information is displayed? How can we highlight the records of interest? How
User s Manual. Beacon Technologies, Inc. 164-B Thatcher Rd. Greensboro, NC beacontechnologies.com
 Beacon Technologies, Inc. 164-B Thatcher Rd. Greensboro, NC 27409 User s Manual beacontechnologies.com Grossmont-Cuyamaca Community College District Version 1.4 January 26, 2015 Table of Contents 1. THE
Office 365 Features. Click the links below for an online overview:
 Office 365 Features http://www.jeffersonstate.edu/resources-for-instructors-de/ The Microsoft Office 365 Outlook Web App (OWA) allows users to access their mailbox using a web browser from any computer
Workshare Desktop App. User Guide
 Workshare Desktop App User Guide February 2018 Workshare Desktop App User Guide Table of Contents Introducing the Workshare Desktop App...4 What is the Desktop App?... 5 Key features of the Workshare desktop
Create and Manage Partner Portals
 Create and Manage Partner Portals Salesforce, Summer 18 @salesforcedocs Last updated: June 20, 2018 Copyright 2000 2018 salesforce.com, inc. All rights reserved. Salesforce is a registered trademark of
GENERAL TEMPLATE AREAS
 1 GENERAL TEMPLATE AREAS SIU Headers SIU Headers are created and edited through the main administration of the CMS. Users do not have access edit SIU headers. Logo and Identifier Logo or the College Identifier
SFU Connect Calendar. Guide. Sharing Calendars
 SFU Connect Calendar How-To Guide Sharing Calendars Last updated: January 2009 Table of Contents Creating a Share... 3 Share Properties Menu... 3 Sharing with Internal Users or Groups... 4 Sharing with
Maximo Self Service Center
 Maximo Self Service Center Once you have received an email regarding your registration approval, go to the following web address: https://maximo.mysodexo.com Log in to the Self Service Center: Your User
Dreamweaver CS 5.5. University Information Technology Services. Training, Outreach, Learning Technologies, and Video Production
 Dreamweaver CS 5.5 Creating Web Pages with a Template University Information Technology Services Training, Outreach, Learning Technologies, and Video Production Copyright 2012 KSU Department of Information
Xtender. Browse Only Reference Guide. Page 1 18
 Xtender Browse Only Reference Guide Page 1 18 TABLE OF CONTENTS OVERVIEW... 3 HOW TO GAIN ACCESS...3 Key Terms... 4 How to Get Started... 4 Xtender Home Page... 4 Retrieve a Record in a Folder... 4 HOW
NYLearns Curriculum Administration:
 NYLearns Curriculum Administration: Creating a Curriculum Map May 2014 2 This page left intentionally blank 3 Contents Signing in to NYLearns... 4 Curriculum Mapping... 6 Creating Curriculum Maps... 7
Updated PDF Support Manual:
 Version 2.7.0 Table of Contents Installing DT Register... 4 Component Installation... 4 Install the Upcoming Events Module...4 Joom!Fish Integration...5 Configuring DT Register...6 General... 6 Display...7
Administrator Manual. Last Updated: 15 March 2012 Manual Version:
 Administrator Manual Last Updated: 15 March 2012 Manual Version: 1.6 http://www.happyfox.com Copyright Information Under the copyright laws, this manual may not be copied, in whole or in part. Your rights
LimeSurvey User Guide to Creating Surveys
 LimeSurvey User Guide to Creating Surveys Created: October 7, 2016 Last updated: March 20, 2017 Contents Gaining access to LimeSurvey... 3 Change your LimeSurvey password... 3 Importing an existing survey
Website Creating Content
 CREATING WEBSITE CONTENT As an administrator, you will need to know how to create content pages within your website. This document will help you learn how to: Create Custom Pages Edit Content Areas Creating
Migrating SharePoint From 2007 to 2010
 Migrating SharePoint From 2007 to 2010 Presented By Scott Randall srandall@advancedlegal.com (888) 221 8821 Advanced Legal Systems, Inc. CREATING TECHNOLOGICAL CALM www.advancedlegal.com Table of Contents
HVCC Appraisal Ordering Client Portal User s Guide
 Requesting a Username Visit www.hvccappraisalordering,.com and choose ID/Password located on the top right of the page. HVCC will create a username for you. This information will be sent back to the email
IPFW IBM Cognos Connection User s Guide. Cognos Version
 IPFW IBM Cognos Connection User s Guide Cognos Version 11.0.7 November 2017 Business Intelligence Competency Center References and text in this manual have been provided with permission by Purdue University,
Sponsor Documentation
 CHAPTER 17 This chapter provides user documentation for sponsor users who create guest accounts. It contains the following sections: Introduction to Cisco NAC Guest Server Connecting to the Cisco NAC Guest
How to start as registered user? How to edit a content? How to upload a document (file)?... 8
?... 8") Platform Tutorial This document provides HydroEurope participants with the basic procedures to use the platform and to update the different pages of the website with text and documents. How to start as
Platform Tutorial This document provides HydroEurope participants with the basic procedures to use the platform and to update the different pages of the website with text and documents. How to start as
Microsoft Office SharePoint Reference Guide for Site Owners
 Microsoft Office SharePoint Reference Guide for Site Owners Table of Contents INTRODUCTION...3 REQUESTING A NEW SITE...3 FOLLOWING A SITE...4 NAVIGATION...5 LISTS AND LIBRARIES...6 ADDING PEOPLE TO A SITE...6
ibase Manager Net Admin Guide 2005 ibase
 ibase Manager Net Admin Guide 1 ibase Manager Net Table of Contents Section 1 Welcome to the ibase Manager Net Admin Help 3 Section 2 Purpose 3 Section 3 Copyright 3 Section 4 Disclaimer 3 Section 5 Main
Advanced Marketing Techniques: Zach Stone, Molly McCormick, Dave Frees, Connie Gray, Karen Martin, and Mischelle Davis
 Advanced Marketing Techniques: Zach Stone, Molly McCormick, Dave Frees, Connie Gray, Karen Martin, and Mischelle Davis You have access to some incredible tools, and Zach, Connie, Molly, Karen, Dave, and
Installation & Configuration Guide Enterprise/Unlimited Edition
 Installation & Configuration Guide Enterprise/Unlimited Edition Version 2.3 Updated January 2014 Table of Contents Getting Started... 3 Introduction... 3 Requirements... 3 Support... 4 Recommended Browsers...
Perch Documentation. U of M - Department of Computer Science. Written as a COMP 3040 Assignment by Cameron McKay, Marko Kalic, Riley Draward
 Perch Documentation U of M - Department of Computer Science Written as a COMP 3040 Assignment by Cameron McKay, Marko Kalic, Riley Draward 1 TABLE OF CONTENTS Introduction to Perch History of Perch ---------------------------------------------
Oracle Beehive. Webmail Help and Release Notes Release 2 ( )
") Oracle Beehive Webmail Help and Release Notes Release 2 (2.0.1.7) E20318-01 July 2012 Document updated July 2012 Oracle Beehive Webmail is a Web-based e-mail application that provides instant anytime access
Oracle Beehive Webmail Help and Release Notes Release 2 (2.0.1.7) E20318-01 July 2012 Document updated July 2012 Oracle Beehive Webmail is a Web-based e-mail application that provides instant anytime access
Web Pro Manager: General User Guide
 Web Pro Manager: General User Guide Version 1.14 (7/2013) Web Pro Manager is an open-source website management platform that is easy to use, intuitive, and highly customizable. Web Pro Manager can be used
OU Campus Beginner s Guide
 OU Campus Beginner s Guide for web publishers at Augusta University Table of Contents Terminology... 1 Homepage, Index Page & Landing Page Website Binary Files Logging In... 2 Failed Logins & User Lockouts
Login: Quick Guide for Qualtrics May 2018 Training:
 Qualtrics Basics Creating a New Qualtrics Account Note: Anyone with a Purdue career account can create a Qualtrics account. 1. In a Web browser, navigate to purdue.qualtrics.com. 2. Enter your Purdue Career