Campus Portal for Parents and Students December 2012
|
|
|
- Claud Reynolds
- 5 years ago
- Views:
Transcription
1 Campus Portal for Parents and Students December 2012
2 This document is intended for restricted use only. Infinite Campus asserts that this document contains proprietary information that would give our competitors undue advantage should they come into possession of any part or all of it. As such, this document cannot be publicly disclosed unless so ordered by a court of competent jurisdiction Infinite Campus, Inc. All rights reserved. INFINITE CAMPUS and Transforming K12 Education are registered trademarks of Infinite Campus, Inc. The INFINITE CAMPUS logo is a trademark of Infinite Campus, Inc. This publication, or any part thereof, may not be reproduced or transmitted in any form or any means, electronic or mechanical, including photocopying, recording, storage in an information retrieval system, or otherwise, by anyone other than Infinite Campus, Inc. without written permission of Infinite Campus, Inc., th Avenue NE, Blaine, MN 55449, tel. (651) , info@infinitecampus.com.
3 1. Campus Portal for Parents and Students Student Assignment Submission (Portal) Online Registration (Custom Development) New Student Registration (Online Registration) Returning Student Registration (Online Registration) Staff Processing (Online Registration) Student Online Registration (Online Registration) Family (Portal) Messages (Portal) Household Information (Portal) Family Members (Portal) Family Calendar (Portal) Family To Do List (Portal) Food Service (Portal) Payments (Portal) Making an Online Payment Managing Payment Information Applications Forms (Portal) Meal Benefits Application (Portal) Students (Portal) Course Registration (Portal) Calendar for Students (Portal) Attendance (Portal) Behavior (Portal) etranscript (Portal) Health (Portal) Schedule (Portal) Assessment (Portal) Graduation Planner (Portal) Transportation (Portal) Fees (Portal) School Choice (Portal) To Do List for Students (Portal) Reports (Portal) Student Demographics (Portal) Grades (Portal) Student Fees (Portal) User Account (Portal) Contact Preferences (Portal) Access Log (Portal) Account Management (Portal) Student Online Assessment (Portal)
4 Campus Portal for Parents and Students Accessing the Portal Portal Areas Access to the Campus Portal Security Features Navigating the Campus Portal Other Links Portal Languages This document is written for use by parents. Districts can choose to provide this information to their parents or use it as a guide for creating district-owned documentation. PATH: Campus Portal Each district that uses Campus is provided with Portal functionality. Schools should allow the use of the Portal only after data within Campus is accurate. Campus settings should have been verified, addresses should be correct, grades entered, etc. Image 1: Campus Parent Portal Accessing the Portal The Portal can be accessed by parents of enrolled students. Parents will see all children in their household, or students that are related through the Guardian checkbox of the Relationships tool. Students can also be given access to the Portal, but they will only be able to access their own information. 4

5 Image 2: Portal Login Infinite Campus recommends that districts require all Portal users to sign an "Acceptable Use" policy before allowing Portal access. A district may also wish to require that Portal users sign a Web Access Agreement. See the Suggestions for Portal Policies Section at the end of this article for further guidance. The Portal web address is district access>/databasename/portal/<district name>.jsp. Thus, a district with a web application name of ICCampus and a district name of ICCSS would have a portal address of: < 12.state.us/campus/portal/ICCSS.jsp>. Not all options mentioned here may be available. 5
6 Portal Areas The following areas are available on the Portal. Different schools within a district can determine which areas of the Portal are available. Some of the following features may not be available in your area. Student Assignment Submission (Portal) Online Registration (Custom Development) Family (Portal) Students (Portal) User Account (Portal) Student Online Assessment (Portal) Access to the Campus Portal The district determines access to the Campus Portal. Instructions for receiving a username and password are provided by the school or district. The School or district will provide the URL for access to the Campus Portal. Visit the district's website or contact the school for more details. Accessibility to various screens described in this guide is determined by the school or district. Access for one school or building may vary from access for another school within the same district. Some tabs and features may not be available for some users. The following provides a summary of the areas that may be visible, depending on the district. Some areas may not be available. It is a district's decision to display information on the Portal. The Portal is also available as an app for Android, iphones, ipads and ipad Touch devices. Select the appropriate application button from the Portal Family Messages page to download the app and view student grades, attendance and assignments. 6

7 Image 3: Mobile Portal Download options Security Features The Campus Portal incorporates the highest level of security. Parents/guardians can see only information related to the students they are authorized to view. The use of strong passwords, forced password reset and session timeouts ensure secure access. Schools create households to which the student belongs, depending on the information provided about parent and guardian rights, living arrangements, etc. Parents and guardians will only have access to the links which they have been given permission, to ensure student privacy. Students who have access to the Portal only have access to view their own data. Campus Portal security works differently depending on whether or not the district has enabled Password Reset Functionality. The Forgot Your Password? and Forgot your username? links are available by selecting the Help icon and are only available if Password Reset functionality has been enabled. See the Recovering Usernames and Recovering Passwords sections for more information. If Password Reset Functionality is Not Enabled If Password Reset functionality is not enabled and the district has enforced strong passwords, users are required to create a password that is at least six characters long and meets three of the four qualifications listed: 7
8 A lower case letter (a, j, r, etc.) An upper case letter (A, J, R, etc.) A number (3, 7, 1, etc.) A symbol (@, %, &, etc.) In addition, the district's administrator may force users to reset their passwords from time to time. By default, a dormant session will automatically end after a set amount of time determined by the district (usually between 25 and 60 minutes). This may vary from district to district since the district can establish the duration before the session times out. Five unsuccessful login attempts will disable the portal account. In order to use the portal again, users will need to contact the school or district to have the account reactivated. If enabled by the district, additional user account settings are found in the User Account section of the navigation pane. Users are able to change their account password and see the account access log. If Password Reset Functionality is Enabled If Password Reset functionality is enabled, strong passwords are automatically enforced and users are required to create a password that is at least eight characters long and meets three of the four qualifications listed: A lower case letter (a, j, r, etc.) An upper case letter (A, J, R, etc.) A number (3, 7, 1, etc.) A symbol (@, %, &, etc.) In addition, the district's administrator may force users to reset their passwords from time to time. By default, a dormant session will automatically end after a set amount of time determined by the district (usually between 25 and 60 minutes). This may vary from district to district since the district can establish the duration before the session times out. If a user has forgotten their password they can select the Forgot Your Password? link to have a unique URL sent to their which will walk them through the password reset workflow. See the Recovering Passwords section for more information. If the user has forgotten their username they can select the Forgot Your Username? link to have an sent to them containing their username. Users can request to receive their forgotten username up to 5 times per day. On the sixth try, the user will be locked out of their account and will need to wait until the next day to try again. All usernames associated with the address entered will be listed in the . See the Recovering Usernames section for more information. Navigating the Campus Portal Once logged in, an index of accessible information for the household as a whole is listed in the navigation pane located on the left hand side of the screen. Sign Out and Home buttons appear in the top right corner of the screen, with the Name o f the individual logged into the Portal appearing next to these buttons. Clicking the Home button will take the user back to the homepage seen upon signing in. This page contains the Family and User Account sections of the navigation pane. When a user first logs in the Messages tab located in the Family section is selected. 8


9 Image 4: User Name and Home and Sign Out Buttons Use the Select Student drop down in the top left of the screen to view all of the students a user has rights to view and select a student to view Portal information for that student only. Only students with an enrollment in the current year or an enrollment next year will display in the list. Image 5: Switch Student Option Students can be enrolled in multiple calendars or schools. When this is the case, another dropdown menu will indicate which enrollment information is currently being viewed and will allow the user to view the information from other enrollments in the current year. Image 6: Switch School Option When signed in as a parent, the Family and User Account navigation panes appear on the left side of the screen. When a student is selected in the Select Student option, an information section specific to that student will appear above the Family section in the navigation pane. The tabs in the Family section apply to all students to which that user has rights. For example, when accessing the Calendar tab from the Family section, a calendar will display assignments, day events 9
10 and attendance for all of the students, whereas when accessing the Calendar tab from the student section, only information specific to that student will appear on the calendar. External links, located at the bottom of the navigation panes, often lead to school or district websites and open in a separate browser window to increase the security of the Campus Portal. Other Links Districts and schools can choose to enter a URL on the School Information and District Information tab. The URLs entered will appear as links at the bottom of the navigation pane. These links display in a separate window allowing easy access to the district and school websites. Portal Languages The Portal is available in four languages: English Spanish Simplified Chinese Traditional Chinese Users can select which option best fits their needs by clicking on the hyperlink of the preferred language on the sign-in page or at the bottom of the Campus Portal after logging in. Selecting a language will display all navigation tab labels and non-student/school specific content into the chosen language. Custom tabs are not translated. 10

11 Image 7: Campus Portal in Spanish Image 8: Language Selection at the Bottom of the Portal 11
12 Student Assignment Submission (Portal) Overview Submitting an Assignment The information in this article is specific to submitting assignments on the Portal. To see a full description of the Portal, see the Campus Portal for Parents and Students article. Overview PATH: Campus Portal > Calendar > A+ Icon > Assignment Name PATH: Campus Portal > Schedule > Course Name > Assignment Name Using the Campus Portal, students can complete and submit assignments posted there by teachers. Assignments are accessed from the Calendar tab or through the Schedule tab. The options available for assignment submission, such as Attachments or text Student Responses depend on the assignment preferences set by the teacher. Not all options shown in this article will appear for every assignment. Through the Calendar Tab In the Calendar tab, "A+" icons indicate when an assignment is due. Click the icon to view all assignments due on that day. The Description of the assignment will indicate if a response should be submitted through the Portal. Unscored activities can only be accessed through the Calendar. 12

13 Image 1: Accessing Assignments through the Calendar Through the Schedule Tab From the Schedule tab, click the Course Name next to the Notebook icon. Then click the name of the assignment. The Des cription of the assignment will indicate if a response should be submitted through the Portal. 13

14 Image 2: Accessing Assignments through the Schedule For more details on the Calendar tab or Schedule tab, see the Campus Portal for Parents and Students article. Submitting an Assignment When an assignment is enabled to be submitted via the Portal, the Assignment page is divided into sections, the Assignment Detail section and the Assignment Submissions section. Assignment Detail Section The Assignment Detail Section includes all information provided to the student by the teacher, including Due Date, Points Possible, etc. The work to be completed and returned to the teacher will be included in the Description section. Details will likely differ based on whether the teacher requires a text ( Image 3) or file ( Image 4) response. 14


15 Image 3: Assignment Detail Section - Text Submission Example Image 4: Assignment Detail Section - File Attachment Example 15

16 Assignment Submissions Section Students enter work to be submitted to the teacher in the Assignment Submissions Section. Work entered in here can be edited as long as the Status of the assignment is OPEN. The Attachments section lists any files the student has attached to the assignment. Anything written in the Student Response section will appear to the teacher just as it does in the text box. Students can enter comments regarding the assignment in the Student Comments area below the Response area. Saving a comment will not count as a submission. Teachers can view and respond to student comments before a student response is submitted. Click the Save button to save your work. The teacher will be able to view any saved material regardless of the assignment's due date. Image 5: Assignment Submission Section 16


17 If the teacher has enabled file attachments for the assignment, click Attach File to attach a file. Enter a unique name for the file and click Browse to select a file. Then click Next. In the next window, you must agree to the Terms and Conditions by clicking Agree to proceed. Campus acts as only a carrier for attached files - files are downloaded and opened in the program in which they are saved. For example, if a student attaches an Excel file, the teacher will need Excel in order to download and view the file. The appearance of the Attach File window will vary based on browser. Image 6: Attaching a File Attached files will appear in the Assignment Submissions area. Click the 'X' next to a file name to remove the attachment. If the teacher enters any feedback concerning the student's response or comments, it will appear at the top of the Assignment Submission section. Image 7: Teacher Feedback Status The assignment status will remain as OPEN until the teacher marks the assignment as Turned In, at which point the Student Response and Comments sections will be closed for editing. 17

18 Online Registration (Custom Development) Overview District Setup Online Registration The information described in the following documentation is custom development for a specific district. For more information on this tool, contact Campus Premium Sales. For other Custom Development services, contact your Client Executive or Project Manager. Overview PATH: Portal > Online Registration Online Registration allows the processing of information for new and returning students that is entered through the Campus Portal. Parents and guardians can update demographic information, contact information and certain federally reported data elements. Registration data entered by parents is submitted for review and verification by district personnel. Once verification is complete, data entered in Online Registration is added to Infinite Campus. Image 1: Portal - Online Registration This documentation provides the standard functionality of the Online Registration process. Customized functionality is available and would need to be discussed with Custom Development. District Setup The following must be done before parents/guardians can enter data using Online Registration: The Portal must be available to Parents/Guardians. 18
19 Select the Online Registration Portal Display Option. Calendars for the next school year must be created. Enrollments for the next school year must be created. For new student registration, it is up to the district to determine the process for providing the parents with the URL (by mass , link on district website, etc.). Online Registration Provide the following information to parents/guardians for Online Registration: New Student Registration Returning Student Registration Once registrations have been completed on the Portal, district staff will need to approve the application using the Staff Processing Tool. An online Registration Summary Report is available in the Student Information Online Registration tool. 19
20 New Student Registration (Online Registration) Overview Things to Know New Registration Household Information Parent Information Emergency Contact Student Entry Confirmation Done The information described in the following documentation is custom development for a specific district. For more information on this tool or other Custom Development services, contact your Client Executive or Project Manager. Overview PATH: Portal > Online Registration Online Registration is available for new families moving to the district or new students living with a family in the district. Parents/guardians can enter information about members of the household, contact information and student data. Image 1: Online Registration If you are a returning student and information needs to be reviewed, see the following: Returning Student Registration 20
21 Things to Know A parent/guardian must contact the district to receive the URL for registering through the Portal. A link will be sent to that parent/guardian with information on accessing the tool. The registration process takes minutes. Applications can be saved if more data entry is needed, and reopened at a later time. Required fields display with a red asterisk. It is not possible to move to the next panel without using the Previous and Next buttons available on each panel. A warning message displays if this is done. Image 2: Panel Navigation New Registration Click the link in the sent from the district about Online Registration. Enter the First Name, Last Name, Address and Verify Address of the person who will be entering the registration data. Enter the two words that appear in the CAPTCHA box in the provided text field. Click the Begin Registration button. 21


22 Image 3: Online Registration Name Entry A confirmation will be sent to the entered address. Click the link included in that to begin the registration process. Image 4: Online Registration - Confirmation Message When that link is selected, a language selection panel displays. All screens in the Online Registration process are available in the following languages: English French 22
23 Hmong Spanish Select the desired language and click the Submit button. A welcome panel displays. Enter your first and last name in the box. Click the Submit button. Image 5: Online Registration - Welcome Panel Household Information Household data includes the home phone number, home address and mailing address (if different than the home address). Home Phone Enter the 10-digit Home Phone Number. If there is no home phone number, enter the parent/guardian's contact phone number who is most likely to respond to calls from the school. Mark the Contact Preferences as desired. Definitions for each option are available. Click the Next button when finished. 23
24 Image 6: Household Home Phone Home Address The Home Address is considered the location of the household. In some instances, the home address is not the mailing address but only the physical location of where the family abides Enter the requested Address fields. The entry is dynamic and the information entered will display at the same time it is being typed. Definitions for these fields are available in the Address Fields table. Click the Next button to enter Mailing Address information. 24

25 Image 7: Home Address Entry 25
26 Address Fields Field Post Office Box Number Definition Indicates the address is not a physical location but a mailing location. This is available for selection on the Mailing Address panel only. House Number of the address, or Box number if the address is a P.O. Box address. In the address 7750 South Barstow Street NE, My Town MN 55555, 7750 is the number. Only enter the number of the address. Prefix Direction of the street in the address. In the address 7750 South Barstow Street NE, MyTown MN 55555, South is the prefix. Street Name of the street. In the address 7750 South Barstow Street NE, My Town MN 55555, Barstow is the street name. Enter only the name of the street. Tag Label of the entered street - Avenue, Street, Blvd., etc. In the address 7750 South Barstow Street NE, My Town MN 55555, Street is the tag. Enter only the tag in this field. Direction Direction indicating the placement of the street within the city limits. In the address 7750 South Barstow Street NE, MyTown MN 55555, NE is the direction. Enter only the direction in this field. Apt Apartment number if this address is for an apartment building location. In the address 7750 South Barstow Street NE, Apt. 101 My Town MN 55555, 101 is the Apartment number. City State Zip Code County Postal city for the address. Two-digit state code for the address. Postal zip code (plus 4 if available). County in which the address is located. 26

27 Mailing Address 1. If the Home Address is a physical location only or not the permanent address of the household, enter the Mailing Address. See the #Address Fields table for definitions of the address elements. 2. If it is the same as the Home Address, mark the The household has no separate Mailing Address checkbox. This removes the address fields from the panel. 3. Click the Save/Continue button when finished. Image 8: Mailing Address Entry At this time, household information entry is complete. Next, Parent/Guardian information is entered. Parent Information Parents and guardians are those individuals that have legal authority and make decisions on behalf of the student(s). Click the Add New Parent button to begin. 27
 Last Name Birth Date (optional) Gender If this person lives at the previously entered address, mark the Please check")
28 Demographics Enter the following information for the parent: First Name Middle Name (optional) Last Name Birth Date (optional) Gender If this person lives at the previously entered address, mark the Please check this box if this person lives at the same address as the student checkbox. Click the Next button. Image 9: Adding Parents/Guardians Contact Information Enter the following about the parent's contact information: a. Cell Phone b. Work Phone c. (if no , mark the Has No checkbox). Determine the Contact Preferences for each entered contact. Definitions are provided for each type of preference. Click the Next button. 28
29 Image 10: Parent/Guardian Contact Information Migrant Worker If the parent is a migrant worker, mark the Migrant Worker checkbox. Click the Next button. 29
30 Image 11: Parent/Guardian - Migrant Worker Impact Aid If the parent is on active duty through the US Military, mark the Parent in Military checkbox. Click the Save button. Data entry for this parent is complete. The screen will return to the first page of the Parent entry screens where additional parents/guardians can be entered. 30
31 Image 12: Parent/Guardian - Impact Aid To enter additional parents/guardians, click the Add New Parent button. Repeat the instructions in the Parent Entry for guidance. If no further parents/guardians need to be entered, click the Save/Continue button. Emergency Contact Emergency contacts are those individuals who are not parents/guardians, may be living in the same household as the student, and should be contacted in case of an emergency and the parent/guardian is not available. Click the Add New Emergency Contact button to begin. At least two Emergency Contacts need to be added. Demographics Enter the following information for the parent: First Name Middle Name (optional) Last Name Birth Date Gender If this person lives at the previously entered address, mark the Please check this box if this person lives at the same address as the student checkbox. Click the Next button. 31
32 Image 13: Emergency Contacts - Demographics Contact Information Enter the following about the parent's contact information: a. Cell Phone b. Work Phone c. (if no , mark the Has No checkbox). Click the Next button. 32
33 Image 14: Emergency Contact Information Verification Enter the Address information for the emergency contact. Click the Save icon when finished. The screen will return to the first page of the Emergency Contact entry screens where additional emergency contacts can be entered. 33
34 Image 15: Emergency Contact Demographics To enter additional emergency contacts, click the Add New Emergency Contact button. Repeat the instructions in the Em ergency Contact Entry for guidance. If no further parents/guardians need to be entered, click the Save/Continue button. Student Entry After entering Parent information and Emergency Contact information, enter the Student(s) in the household. Click the Add New Student button to begin. Demographics Enter the following about the student: First Name Middle Name (optional) Last Name Suffix (optional) Nickname (optional) Select the student's Gender from the dropdown list. Enter the student's Birth Date. Enter the date the student entered the United States. Mark the Foreign Exchange checkbox if the student is a foreign exchange student. Mark the Is the student homeless? if the student is homeless. Select the appropriate answer for Is Hispanic/Latino? Select the student's race(s)/ethnicity(ies). Click the Next button 34
35 Image 16: Student Entry - Demographics Language Information This information determines the student's knowledge of English and helps the district personnel determine if the student may need additional guidance and services in English language programs Select the Student Language from the dropdown list. This is the language the student most often speaks at home. Select the Parent Language from the dropdown list. This is the language the parent most often speaks at home. Select the First Language Spoken by the student from the dropdown list. Select the Language most often spoken at home from the dropdown list. Select the Language most often spoken by the student with friends from the dropdown list. Select Yes or No from the dropdown list if the student has ever received English as a Second Language (ESL/ELL) services. Click the Next button when finished. 35


36 Image 17: Student Entry - Language Entry Previous Schools 1. Enter the Name of the School, City, State and Country (if applicable) for the student's previous enrollments up to three years ago. 2. Click the Next button when finished. 36
37 Image 18: Student Entry - Previous Schools Tribal Entry If the student has an active enrollment within a United States Native American tribe, mark the checkbox. Click the Next b utton to continue. Image 19: Student Entry - Tribal Entry Relationships Parent/Guardians Select the Relationship option for the parent/guardian from the dropdown list. Select the Contact Preferences for this person. A Description of each type is provided on the panel. Enter the Contact Sequence for this person. If this person should not have a relationship with the student, mark the No Relationship checkbox. Click the Next button when finished. 37
38 Image 20: Student Entry - Parent/Guardian Entry Emergency Contacts Select the Relationship option for the emergency contact from the dropdown list. Select the Contact Preferences for this person. A Description of each type is provided on the panel. Enter the Contact Sequence for this person. If this person should not have a relationship with the student, mark the No Relationship checkbox. Click the Next button when finished. 38
39 Image 21: Student Entry - Emergency Contact Entry Health Services The Health Services entry is entered on several panels that include information on medications, medication conditions and doctor information. Emergency Information Enter the student' s Primary Care Provider name (clinic name or doctor's name). Enter the Phone Number for the Primary Care Provider. Click the Next button. 39
40 Image 22: Student Entry - Emergency Information Medical or Mental Health Conditions If the student does not have medical or mental health conditions, mark the No medical or mental health conditions checkbox and click the Next button. Doing this will remove the entry fields from panel. Select the Health Condition for the student from the dropdown list. Enter any Comments related to the health condition. If a second condition exists, select that Health Condition from the dropdown list. Enter any Comments related to the second health condition. Click the Next button. 40
41 Image 23: Student Entry - Medical or Mental Health Conditions Medications Medications can be listed for Daily Medications, Emergency Medication or Medication as Needed If the student does not have any medications to list, mark the No Medication checkbox. Mark the Daily Medication if the student takes a medication on a daily basis. Enter Daily Medication Instructions. Mark the Emergency Medication if the student takes a medication for emergency situations only. Enter Emergency Medication Instructions. Mark the Medication as Needed checkbox to indicate the student takes medication only when needed (not for emergency, not daily). Enter Medication as Needed Instructions. Click the Next button. 41
42 Image 24: Student Entry - Medications Release Agreement The following release agreement items are available. Media Determine if the district can use the student's photograph, voice or name in the media. This includes newspaper articles, district websites, videos promoting school projects, etc. Select the Yes or No radio buttons accordingly. Click the Next button. 42
43 Image 25: Student Entry - Media Release Agreement Field Trip 1. Determine if the student has parent permission to participate in school- or district-approved field trips. Mark the Y es or No radio buttons accordingly. 2. Click the Next button. 43
44 Image 26: Student Entry - Field Trip Technology Mark the I agree to the Technology acceptable use policy checkbox. Click the Save button. 44
45 Image 27: Student Entry - Technology Policy Student entry is now complete. Upon clicking the Save button, the Student Entry screen will display. If additional students need to be entered, repeat the previous steps. If the entered student's name appears in yellow, a required field is missing data. Clicking on the student's name will open the panel where the information is needed. If student entry is complete, click the Save/Continue button. Confirmation Review the information in the Application Summary PDF. Return to the previous areas to modify entered data or to enter missing information. After reviewing the information, click the Go to Submission Page button. 45
46 Image 28: Confirmation Summary Done Once the registration process is completed and have confirmed all entered information is accurate, click the Submit butto n. This will send a notice to the district staff that an Online Registration Application needs to be reviewed. Clicking the Submit button removes the ability to modify data in the Online Registration application. 46
47 Image 29: Done Download a copy of the entered information by clicking the Application Summary PDF. This is a receipt of data entered. No further information is needed at this time. A confirmation of processing will be sent once the district has reviewed the application. An will be sent indicating the registration was received. At this time, the school will receive an indication of a new registration being available and will process the entered data accordingly. 47
48 Returning Student Registration (Online Registration) Overview Things to Know Accessing the Returning Family Registration Household Parent Emergency Contact Student Entry Confirmation Done The information described in the following documentation is custom development for a specific district. For more information on this tool or other Custom Development services, contact your Client Executive or Project Manager. Overview PATH: Portal > Online Registration Online Registration is available for new families moving to the district or new students living with a family in the district. Parents/guardians can enter information about members of the household, contact information and student data. Image 1: Online Registration - Returning Families If you are a registering a student who has never before been enrolled in this district, see the following: New Student Registration 48
49 Things to Know A parent/guardian must contact the district to receive the URL for registering through the Portal. A link will be sent to that parent/guardian with information on accessing the tool. The registration process takes minutes. Applications can be saved if more data entry is needed, and reopened at a later time. Required fields display with a red asterisk. It is not possible to move to the next panel without using the Previous and Next buttons available on each panel. A warning message displays if this is done. Image 2: Panel Navigation Accessing the Returning Family Registration From the Online Registration page (see Image 1), select the Existing Family Registrar. A Portal Login page displays. Enter the username and password given to you previously from the district that is used to access the Portal. Expand the Inbox. A link to the Online Registration displays. Click this link. Registration may begin. 49


50 Image 3: Existing Parent - Online Registration A Welcome message displays, with a list of current students in the family. Click the Begin Registration button. Image 4: Existing Parent - Online Registration When the Begin Registration button is selected, the Online Registration panels display. Before modifying student information, select the desired language to use for all Online Registration panels. All screens in the Online Registration Progress are available in the following languages: English French Hmong 50
51 Spanish Image 5: Online Registration - Language Selection Household Household data includes the home phone number, home address and mailing address (if different than the home address. Home Phone Verify the existing 10-digit Home Phone Number. Review the selected Contact Preferences and modify as needed. Definitions for each option are available. Click the Next button when finished. 51
52 Image 6: Household Home Phone Home Address The Home Address is considered the location of the household. In some instances, the home address is not the mailing address but only the physical location of where the family abides Review the entered Address. If the home address is correct, click the Next button to enter Mailing Address information. 52

53 Image 7: Home Address Verification If the home address is incorrect: Mark the The home address listed is no longer current checkbox. An address entry area displays. Enter the date that the current address became inactive for the household. This is the date of the household's move to the new location. Enter the new address information in the appropriate fields. See the #Address Fields section for definitions of these items. Click the Next button when finished. 53

54 Image 8: New Address Entry 54
55 Address Fields Field Post Office Box Number Definition Indicates the address is not a physical location but a mailing location. This is available for selection on the Mailing Address panel only. House Number of the address, or Box number if the address is a P.O. Box address. In the address 7750 South Barstow Street NE, My Town MN 55555, 7750 is the number. Only enter the number of the address. Prefix Direction of the street in the address. In the address 7750 South Barstow Street NE, MyTown MN 55555, South is the prefix. Street Name of the street. In the address 7750 South Barstow Street NE, My Town MN 55555, Barstow is the street name. Enter only the name of the street. Tag Label of the entered street - Avenue, Street, Blvd., etc. In the address 7750 South Barstow Street NE, My Town MN 55555, Street is the tag. Enter only the tag in this field. Direction Direction indicating the placement of the street within the city limits. In the address 7750 South Barstow Street NE, MyTown MN 55555, NE is the direction. Enter only the direction in this field. Apt Apartment number if this address is for an apartment building location. In the address 7750 South Barstow Street NE, Apt. 101 My Town MN 55555, 101 is the Apartment number. City State Zip Code County Postal city for the address. Two-digit state code for the address. Postal zip code (plus 4 if available). County in which the address is located. 55
56 Mailing Address 1. If the Home Address is a physical location only or not the permanent address of the household, enter the Mailing Address. See the #Address Fields table for definitions of the address elements. 2. If it is the same as the Home Address, mark the The household has no separate Mailing Address checkbox. This removes the address fields from the panel. 3. Click the Save/Continue button when finished. At this time, household information entry is complete. Next, Parent/Guardian information is entered. Parent Displayed are the current parents/guardians associated with the household. The following can be done: Remove existing parents/guardians Make no changes to existing parents/guardians Make changes to existing parents/guardians Add new parents Making changes to parents/guardians includes changing contact information (cell phone, work phone, addresses, etc.), among other information. If any of these have been modified since the last time this data was reviewed, select the parent's/guardian's name and move through the panels to ensure the data is accurate. Image 9: Existing Parents/Guardians 56

57 Removing a Parent/Guardian Select the name of the Parent/Guardian to remove by placing the cursor in the Remove column. The row of the parent will turn red. Click the Remove X. A confirmation message will display asking to confirm the removal. Click the OK button to continue or the Cancel button to ignore the removal. Image 10: Removing Existing Parent/Guardian Making No Changes to Existing Parents/Guardians If no changes need to be made to the existing parents/guardians, click the Save/Continue button. 57

58 Image 11: No Changes Needed to Existing Parents/Guardians Adding Parents/Guardians or Making Changes to Existing Parents/Guardians To add a new Parent, click the Add New Parent button. Follow the information below for entering data. To make changes to existing parents/guardians, select the parent's name from the table and follow the information below for entering data. Demographics Enter the following information for the parent: First Name Middle Name (optional) Last Name Birth Date Gender If this person lives at the previously entered address, mark the Please check this box if this person lives at the same address listed below checkbox. Click the Next button. 58
. Determine the Contact Preferences for each entered contact. Definitions are provided for each type of preference.")
59 Image 12: Parent Demographic Data Contact Information Enter the following about the parent's contact information: a. Cell Phone b. Work Phone c. (if no , mark the Has No checkbox). Determine the Contact Preferences for each entered contact. Definitions are provided for each type of preference. Click the Next button. 59
60 Image 13: Parent/Guardian Contact Information Migrant Worker If the parent is a migrant worker, mark the Migrant Worker checkbox. Click the Next button. 60
61 Image 14: Parent/Guardian - Migrant Worker Impact Aid If the parent is on active duty through the US Military, mark the Parent in Military checkbox. Click the Save button. Data entry for this parent is complete. The screen will return to the first page of the Parent entry screens where additional parents/guardians can be entered. 61
62 Image 15: Parent/Guardian - Impact Aid Emergency Contact Displayed are the current associated with the household. The following can be done: Remove existing emergency contacts Make no changes to existing emergency contacts Make changes to existing emergency contacts Add new emergency contacts Making changes to emergency contacts includes changing contact information (cell phone, work phone, addresses, etc.), among other information. If any of these have been modified since the last time this data was reviewed, select the emergency contacts name and move through the panels to ensure the data is accurate. 62
63 Image 16: Existing Emergency Contacts Emergency contacts are those individuals who are not parents/guardians, may be living in the same household as the student, and should be contacted in case of an emergency and the parent/guardian is not available. Click the Add New Emergency Contact button to begin. At least two Emergency Contacts need to be added. Removing Existing Emergency Contacts Select the name of the Emergency Contact to remove by placing the cursor in the Remove column. The row of the emergency contact will turn red. Click the Remove X. A confirmation message will display asking to confirm the removal. Click the OK button to continue or the Cancel button to ignore the removal. 63

64 Image 17: Removing Existing Emergency Contacts Making No Changes to Existing Emergency Contacts If no changes need to be made to the existing emergency contacts, click the Save/Continue button. 64
65 Image 18: No Changes Needed to Existing Emergency Contacts Adding New Emergency Contacts or Making Changes to Existing Emergency Contacts To add a new Emergency Contact click the Add New Emergency Contact button. Follow the information below for entering data. To make changes to existing emergency contacts, select the emergency contact's name from the table and follow the information below for entering data. Demographics Enter the following information for the emergency contact: First Name Middle Name (optional) Last Name Birth Date Gender Click the Next button. Image 19: Emergency Contacts - Demographics Contact Information Enter the following about the parent's contact information: a. Cell Phone b. Work Phone c. (if no , mark the Has No checkbox). Click the Next button. 65
66 Image 20: Emergency Contact Information Verification Enter the Address information for the emergency contact. Click the Save icon when finished. The screen will return to the first page of the Emergency Contact entry screens where additional emergency contacts can be entered. 66
67 Image 21: Emergency Contact Demographics To enter additional emergency contacts, click the Add New Emergency Contact button. Repeat the instructions in the Em ergency Contact Entry for guidance. If no further parents/guardians need to be entered, click the Save/Continue button. Student Entry After entering Parent information and Emergency Contact information, enter the Student(s) in the household. Click the Add New Student button to begin. Demographics Enter the following about the student: First Name Middle Name (optional) Last Name *Suffix (*optional) Nickname (optional) Select the student's Gender from the dropdown list. Enter the student's Birth Date. Enter the date the student entered the United States. Mark the Foreign Exchange checkbox if the student is a foreign exchange student. Mark the Is the student homeless? if the student is homeless. Select the appropriate answer for Is Hispanic/Latino? Select the student's race(s)/ethnicity(ies). Click the Next button 67
68 Image 22: Student Entry - Demographics Language Information This information determines the student's knowledge of English and helps the district personnel determine if the student may need additional guidance and services in English language programs Select the Student Language from the dropdown list. This is the language the student most often speaks at home. Select the Parent Language from the dropdown list. This is the language the parent most often speaks at home. Click the Next button when finished. 68

69 Image 23: Student Entry - Language Entry Tribal Entry If the student has an active enrollment within a United States Native American tribe, mark the checkbox. Click the Next b utton to continue. 69
70 Image 24: Student Entry - Tribal Entry Relationships Parent/Guardians Select the Relationship option for the parent/guardian from the dropdown list. Select the Contact Preferences for this person. A Description of each type is provided on the panel. Enter the Contact Sequence for this person. If this person should not have a relationship with the student, mark the No Relationship checkbox. Click the Next button when finished. 70
71 Image 25: Student Entry - Parent/Guardian Entry Emergency Contacts Select the Relationship option for the emergency contact from the dropdown list. Select the Contact Preferences for this person. A Description of each type is provided on the panel. Enter the Contact Sequence for this person. If this person should not have a relationship with the student, mark the No Relationship checkbox. Click the Next button when finished. 71
72 Image 26: Student Entry - Emergency Contact Entry Health Services The Health Services entry is entered on several panels that include information on medications, medication conditions and doctor information. Emergency Information Enter the student' s Primary Care Provider name (clinic name or doctor's name). Enter the Phone Number for the Primary Care Provider. Click the Next button. 72
73 Image 27: Student Entry - Emergency Information Medical or Mental Health Conditions If the student does not have medical or mental health conditions, mark the No medical or mental health conditions checkbox and click the Next button. Doing this will remove the entry fields from panel. Select the Health Condition for the student from the dropdown list. Enter any Comments related to the health condition. If a second condition exists, select that Health Condition from the dropdown list. Enter any Comments related to the second health condition. Click the Next button. 73
74 Image 28: Student Entry - Medical or Mental Health Conditions Medications Medications can be listed for Daily Medications, Emergency Medication or Medication as Needed If the student does not have any medications to list, mark the No Medication checkbox. Mark the Daily Medication if the student takes a medication on a daily basis. Enter Daily Medication Instructions. Mark the Emergency Medication if the student takes a medication for emergency situations only. Enter Emergency Medication Instructions. Mark the Medication as Needed checkbox to indicate the student takes medication only when needed (not for emergency, not daily). Enter Medication as Needed Instructions. Click the Next button. 74
75 Image 29: Student Entry - Medications Release Agreement The following release agreement items are available. Media Determine if the district can use the student's photograph, voice or name in the media. This includes newspaper articles, district websites, videos promoting school projects, etc. Select the Yes or No radio buttons accordingly. Click the Next button. 75
76 Image 30: Student Entry - Media Release Agreement Field Trip 1. Determine if the student has parent permission to participate in school- or district-approved field trips. Mark the Y es or No radio buttons accordingly. 2. Click the Next button. 76
77 Image 31: Student Entry - Field Trip Technology Mark the I agree to the Technology acceptable use policy checkbox. Click the Save button. 77
78 Image 32: Student Entry - Technology Policy Student entry is now complete. Upon clicking the Save button, the Student Entry screen will display. If additional students need to be entered, repeat the previous steps. If the entered student's name appears in yellow, a required field is missing data. Clicking on the student's name will open the panel where the information is needed. If student entry is complete, click the Save/Continue button. Confirmation Review the information in the Application Summary PDF. Return to the previous areas to modify entered data or to enter missing information. After reviewing the information, click the Go to Submission Page button. 78
79 Image 33: Confirmation Summary Done Once the registration process is completed and have confirmed all entered information is accurate, click the Submit butto n. This will send a notice to the district staff that an Online Registration Application needs to be reviewed. Clicking the Submit button removes the ability to modify data in the Online Registration application. 79
80 Image 34: Done Download a copy of the entered information by clicking the Application Summary PDF. This is a receipt of data entered. No further information is needed at this time. A confirmation of processing will be sent once the district has reviewed the application. 80

81 Staff Processing (Online Registration) Overview Staff Processing Using the Staff Processing Tool Reviewing Applications The information described in the following documentation is custom development for a specific district. For more information on this tool or other Custom Development services, contact your Client Executive or Project Manager. Overview PATH: Census > Online Registration > Staff Processing The Online Registration Staff Processing tool provides a way for district staff to review the applications that are entered in the Online Registration tool of the Campus Portal. District staff can review applications by status or by person, or can enter an Application Number. Image 1: Staff Processing Tool Staff Processing Once a parent or guardian has entered an online registration through the Portal, the designated staff person (counselor, front office staff, etc.) can begin processing the application. Applications can be reviewed by status, by first name/last name of the person who entered the registration, application number (assigned when the application is submitted) or an address of the person who entered the registration. An Application will have one of the following statuses: Option Submitted Description Parent/guardian has entered all desired information and is done making changes. 81
82 Approved Posted Hold Denied District staff has already accepted the registration and marked the entered information as approved. Users will still need to post the application. All data has been moved from Online Registration tool into the Campus application and no further action is needed. District places the application on hold to verify the entered data. Application denied. Staff can only search for applications associated with the calendar rights assigned to them. For example, a user who has rights to the Middle School and not to the High School can only view and approve applications for students at the middle school When a staff person makes a status change, the parent/guardian will receive an . If registration is family-based, whichever school approves the application for one student, all student applications are approved. Using the Staff Processing Tool Enter one or more of the following search options: First Name Last Name Application Number Address Application Status Mark the Include unsubmitted applications checkbox to include applications that may still be in progress by the parent/guardian in the search. Click the Search Applications button. A list of applications matching the search results will appear. Select the desired application from the Online Registration Applications. The names of the students in that application will display next to the search options. Click the Review Application to verify the entered household data and to approve (or reject) the application. Applications can also be deleted from this view by searching for the applications and selecting the one that needs to be deleted, and then click the Delete Application button. Reviewing Applications After selecting the application and clicking the Review Application button, a Campus Portal window displays the application. The staff person is required to walk through the screens reviewing the data and verifying proper entry and accurate information, saving any necessary changes along the way. The following information provides guidance on staff approval of the application. Household The Household section displays three components: Home Phone Home Address 82

83 Mailing Address Home Phone This phone number is the phone number of the household and is used in many Census reports and is needed for proper sending of school and district messages. Review the phone number for accuracy of format and determine if additional Contact Preferences should be selected. Click the Next button. Image 2: Staff Processing - Home Phone Review Home Address The Home Address is the physical location of the household. This may be a different address than the mailing location of the household. Review the entered address for accuracy and click the Link Address to search Campus to find a similar address using Soundex. Click the Next button when finished. 83
84 Image 3: Staff Processing - Home Address Review Mailing Address The Mailing Address window displays a separate address if the previous Home Address is not the same as the mailing address (P.O. Boxes, etc.). Review the entered information and click the Save/Continue button. 84


85 Image 4: Staff Processing - Mailing Address Review Parent The Parent section displays the entered parents/guardians for the registering household. Review the entered information by clicking on each name listed, including existing parents/guardians. Move through the Demographics, Contact Information, Migrant Worker and Impact Aid editors using the Next and Previous buttons on the panels. When finished, click the Save button. When finished reviewing all entered parents, click the Save/Continue button. Image 5: Staff Processing - Parents 85

86 Emergency Contact There should be at least two emergency contacts per registration. Review the entered information by clicking on each name listed, including existing emergency contacts. Move through the Demographics, Contact Information, and Verific ation editors using the Next and Previous buttons on the panels. When finished, click the Save button. When finished reviewing all entered emergency contacts, click the Save/Continue button. Image 6: Staff Processing - Emergency Contacts Student The Student section lists the students who are requesting to be enrolled in the school. Review the entered information by clicking on each name listed, including existing emergency contacts. Move through the Demographics, Language Information, Previous Schools, Tribal Enrollment, Relationships, Health Services and Release Agreement editors using the Next and Previous buttons on the panels. When finished, click the Save button. When finished reviewing all students, click the Save/Continue button. Image 7: Staff Processing - Student 86

87 Staff Approval On the Staff Approval editor, select the appropriate Application Status from the dropdown list - Approved, Hold or Denied. Enter any comments related to the processing of this application - maybe who approved it and when. When the Application Status is Approved, click the Save and Post button. When the Application Status is Hold or Denied, click the Save button Click the Save button when finished. Image 8: Staff Processing - Staff Approval When the application has been marked as Approved, an Application Summary receipt link will display. Click this option to view the entered application in PDF form. At this time, enrollment records will need to be created for approved applications for new families. For existing families, no further action is needed. 87
88 Student Online Registration (Online Registration) Overview Summary Health Miscellaneous The information described in the following documentation is custom development for a specific district. For more information on this tool or other Custom Development services, contact your Client Executive or Project Manager. Overview PATH: Student Information > Online Registration The Student Online Registration tool provides school staff with the ability to review data entered for enrolled students as entered in the Online Registration toolset. The following information can be reviewed: Summary Health Miscellaneous Changes to this information cannot be made here. Summary The Summary tab lists basic information about the student as entered in the Online Registration tool in the Portal. 88

89 Image 1: Student Information Online Registration Summary Data Users can review data for the following: Person Information Home Address Home Contact Preferences Mailing Address Parent/Guardians Emergency Contacts A PDF can be generated for this Summary data by selecting the Online Registration Summary Report print icon. 89

90 Image 2: Student Information Online Registration Summary Data - PDF Health The Health tab lists entered health information from the Online Registration tool in the Portal. 90

91 Image 3: Student Information Online Registration Health Data Users can review data for the following: Primary Care Provider Primary Care Phone Health Conditions Health Condition Comments Daily Medication Daily Medication Instructions Emergency Medication Emergency Medication Instructions Medication as needed Medication as needed instruction A PDF can be generated for this Health data by selecting the Online Registration Health Summary Report print icon. 91

92 Image 4: Student Information Online Registration Health Data - PDF Miscellaneous The Miscellaneous tab lists the entered information for Release Agreements and other general data available on the Online Registration toolset. 92

93 Image 5: Student Information Online Registration Miscellaneous Users can review the following information: Media Agreement Field Trip Agreement Technology Agreement Homeless Foreign Exchange Tribal Enrollment Language, Home Language, Primary Language, Friends Language, Parent Language Previous School Information A PDF can be generated for this Health data by selecting the Online Registration Miscellaneous Report print icon. 93

94 Image 6: Student Information Online Registration Miscellaneous - PDF 94
95 Family (Portal) This document is written for use by parents. Districts can choose to provide this information to their parents or use it as a guide for creating district-owned documentation. Overview PATH: Campus Portal > Family The Family section of the Portal contains Messages for the family, Household Information, Family Member information, Calendar information for all enrolled students and a Family To Do List. Additionally, Food Service and Online Payment information is located here. Districts can control what information appears in the Campus Portal, so it is possible that not all of the following tabs will appear for all users. When a tab in the Family section is selected the user will be removed from the context of a student if one was selected in the switch student drop list. Available Tools Use the following links to find more information about each of these areas: Messages (Portal) Household Information (Portal) Family Members (Portal) Family Calendar (Portal) Family To Do List (Portal) Food Service (Portal) Payments (Portal) 95
96 Applications Forms (Portal) 96

97 Messages (Portal) Overview Messages Display This document is written for use by parents. Districts can choose to provide this information to their parents or use it as a guide for creating district-owned documentation. Overview PATH: Campus Portal > Family > Messages The Messages tab is selected by default. Its contents are divided into three sections: District Notices, School Notices and the Inbox. If a section contains no information it will be closed by default. Image 1: Messages A count of all messages is noted next to the message type. An indication of new messages since the last visit will appear in the left hand navigation pane. The new message is also noted by a NEW flag and the message toggle field lists the number of new messages in that section. Messages Display Notices are sorted by start date and display until the expiration date is reached. The Inbox displays student related messages ordered from newest to oldest. The type of messages depend on the schools' use of Campus Messenger. Possible messages include missing assignment notices, failing grade notices, attendance 97
98 notices, behavior notices, surveys and general information notices. Users can view notices at anytime by selecting the Messages tab or by clicking the Home button in the top right of the Portal. 98

99 Household Information (Portal) Overview Updating Household Information Updating Household Phone Number Updating Household Address This document is written for use by parents. Districts can choose to provide this information to their parents or use it as a guide for creating district-owned documentation. Overview PATH: Campus Portal > Family This tab lists the household phone number and all current addresses of the household. Image 1: Portal Household Information Updating Household Information Depending on district settings, parents/guardians may have the opportunity to review and request changes to household information that includes requesting a change to the household address(es) and a change to the household phone number. 99
100 Image 2: Update Household Information Options Requests to change census data will be reviewed by district personnel and approved accordingly. There may be a short lag time between the time the request for change was submitted and when changes are reflected. Updating Household Phone Number Click the Update button below the Household Phone Number field. A pop-up window will appear. Enter the updated 10-digit household number (i.e., area code plus number). Enter any Comments related to the modified information. These comments are seen by the staff person processing the request. Click the Send Update button. A confirmation message will appear indicating the request has been sent. Click OK to return to the Household Information view. Updating this phone number will update the home phone number for all members of the household. 100

101 Image 3: Update Household Phone Number Updating Household Address 1. Click the Update button next to the Address that should be changed (a household may have more than one address). A pop-up window will appear. 2. Enter the correct address information in the appropriate fields. For definitions on these fields, see the #Address Fields table following these instructions. 3. If mail should be sent to this address, mark the Send mail to this address checkbox. 4. Determine the type of change for this address and select the correct radio button. a. I am changing my address because I moved or will be moving. This selection requires the entry of an Address Effective Date, meaning the address change will not take effect until the date entered (all mail sent between now and the effective date will be sent to the existing address). A calendar pop-up will display to easily select the date the new address should take effect. b. I am correcting my address information because it was incorrect. 5. Enter any Comments related to the modified information. These comments are seen by the staff person processing the request. 6. Click the Send Update button. A confirmation message will appear indicating the request has been sent. 7. Click OK to return to the Household Information view. 101

102 Image 4: Update Household Address Request To cancel these requests, click the Cancel button. When the district approves or denies a request, a message will be visible on the Portal in the Inbox section indicating the request has been processed. 102

103 Image 5: Update Request - Process Message 103
104 Address Fields Field P.O. Box Number Definition Indicates the address is not a street address and mail is sent to the resident Post Office for collection. When a household has a P.O. box as the mailing address, a second address is often listed for transportation (bus) drop offs. House Number of the address, or Box number if the address is a P.O. Box address. In the address 7750 South Barstow Street NE, My Town MN 55555, 7750 is the number. Only enter the number of the address. Prefix Direction of the street in the address. In the address 7750 South Barstow Street NE, MyTown MN 55555, South is the prefix. Street Name of the street. In the address 7750 South Barstow Street NE, My Town MN 55555, Barstow is the street name. Enter only the name of the street. Tag Label of the entered street - Avenue, Street, Blvd., etc. In the address 7750 South Barstow Street NE, My Town MN 55555, Street is the tag. Enter only the tag in this field. Direction Direction indicating the placement of the street within the city limits. In the address 7750 South Barstow Street NE, MyTown MN 55555, NE is the direction. Enter only the direction in this field. Apt Apartment number if this address is for an apartment building location. In the address 7750 South Barstow Street NE, Apt. 101 My Town MN 55555, 101 is the Apartment number. City State Zip Code Postal city for the address. Two-digit state code for the address. Postal zip code (plus 4 if available). County County in which the address is located. 104
105 Family Members (Portal) Overview Updating Family Member Information Updating Contact Information Updating Relationship Information This document is written for use by parents. Districts can choose to provide this information to their parents or use it as a guide for creating district-owned documentation. Overview PATH: Campus Portal > Family > Family Members This tab lists demographic information for all household members. Here, parents can review each person's contact information and relationships between all household members. The school can give access rights to all parents/guardians to whom the student has a relationship or only specific rights to one parent or guardian. This authorization structure is established when the custodial parent or guardian informs the schools of the rights of each parent or guardian to this information. Updating Family Member Information Depending on district settings, parents may have the opportunity to review and request changes to Family Member data. Parents can request changes to the following fields: Contact information, including: First Name, Middle Name, Last Name, Suffix and Gender (for non-students only) Cell Phone Work Phone Other Phone Address Relationships Type of relationship Contact Order Legal Guardian Relationship 105

106 Image 1: Update Options for Family Members Requests to change census data will be reviewed by district personnel and approved accordingly. There may be a short lag time between the time the request for change was submitted and when changes are reflected. Updating Contact Information Select the appropriate family member for which to request a change in information. Click the Update button below the Work Phone field. A pop-up window will appear. Enter the updated contact information. For phone numbers, enter the 10-digit number (i.e., area code plus number); for addresses, enter the full address (i.e., name@internetprovider.com). Enter any Comments related to the requested information. These comments are seen by the staff person processing the request. Click the Send Update button. A confirmation message will appear indicating the request has been sent. Click OK to return to the Family view. 106

107 Image 2: Update Contact Information For districts using Campus HR, household and non-household members who are also staff members in the district do not have the ability to update contact information. Contact the district's Human Resources department for these changes. Updating Relationship Information Select the appropriate relationship to request a change in information. Click the Update button to the right of the person's name. A pop-up window will appear. Select the Relationship between the person's information that is currently being viewed and the chosen person. This is a required field. Enter the Contact Order for this relationship. Select whether the relationship is a Legal Guardian Relationship. Enter any Comments related to the requested change in information. These comments are seen by the staff person processing the request. Click the Send Update button. A confirmation message will appear indicating the request has been sent. Click OK to return to the Family view. 107

108 Image 3: Update Relationship Information 108

109 Family Calendar (Portal) Overview Attendance Events Assignments This document is written for use by parents. Districts can choose to provide this information to their parents or use it as a guide for creating district-owned documentation. Overview PATH: Campus Portal > Family > Calendar The Calendar tab, when accessed from the Family section displays calender events for each school in which a student is enrolled. The calendar defaults to the current month but users are able to view previous months and future months by clicking the black arrow buttons on either side of the month and year. Image 1: Family Calendar All student assignments and attendance events (such as absences and tardies) also appear on the Family Calendar. The name of the student to whom the event or assignment relates will appear over the assignment or attendance icon, which is also a link to additional content. Note the following information: Events are only displayed for the calendar structures in which a student in the family is actively enrolled. 109
110 If the enrollment ended before the current day, the event for that day does not display. Day events for future enrollments in the current school year do display on the calendar. For additional information on attendance features in the Portal, see the Attendance article. Attendance Events Clicking on an Attendance Event will produce an additional screen over the Calendar which provides the details of the attendance event, including what class periods the event affected and the status of the event. Image 2: Attendance Detail from the Family Calendar Assignments Clicking on an Assignment icon takes the user to another screen which provides details of the student assignment, including a description of the assignment and the date due. Clicking the browser back button will return the user to the calendar. 110
111 Image 3: Assignment Detail from the Family Calendar 111

112 Family To Do List (Portal) Overview To Do List Logic Family To Do List This document is written for use by parents. Districts can choose to provide this information to their parents or use it as a guide for creating district-owned documentation. Overview PATH: Portal > Family > To Do List The To Do List tab provides a summary of assignments that are due and/or late for all students in the family or for a student (To Do Lists will appear in the Family toolset and in the Student toolset). The summary includes the Student to whom the assignment was given, the Course and Assignment, the Date Assigned, Due Date and the Days Remaining or Overdue. Image 1: Family To Do List To Do List Logic Assignments with a score do not display in the To Do List. Assignments that have been turned in do not display in the To Do List. Assignments marked as missing will display in the To Do List. If there is only one student in the family, the To Do List and the Calendar are not displayed in the Family section. If the student is logged in, the To Do list and Calendar do not display in the Family section. Family To Do List The To Do List can be filtered to show All Dates or only assignments for a specific month. Clicking the Print icon will generate the list in PDF format to be printed. 112

113 Food Service (Portal) Overview Account Types Analyzing Account Information This document is written for use by parents. Districts can choose to provide this information to their parents or use it as a guide for creating district-owned documentation. Overview Some Portal users will see the Food Service link in the Portal index, as shown: Image 1: Food Service Tab The Food Service link will not appear to all users, as it depends on specific school operations and settings. Similarly, the Payments link, which allows Portal users to electronically deposit funds into food service accounts, will only be available if that feature is used by the school. The Food Service feature allows parents and students access to food service information, including: Current account balances Transactions (food item purchases, account deposits of cash, check and credit card, when enabled) Account history (historical transaction records) Account adjustments (debits/credits) Account Types Depending on school setup of food service accounts, the organization of the Food Service screen may vary. Most users will have individual accounts, where an account exists for each member of a household. Other users may have family accounts, where one account is shared by all individuals in the household. The Portal Food Service screen will change slightly, depending on account setup. 113

114 Individual Accounts When the Food Service icon is selected from the Portal index, the page will display account summary information. If the school has set up Food Service accounts for individual members of a household, the Account Name column will contain the name of each person with an account. The screen will resemble the following (two, individual student accounts within the same household): Image 2: Student Food Service Accounts Students within a household may have individual accounts. Transactions can be organized by student. Family Accounts When the Food Service icon is selected from the Portal index, the page will display account summary information. If the school has set up one Food Service account per household, the Account Name column will contain one account named as "Family Account." All members of the household will share this account. The screen will resemble the following (one, shared account representing both students in the household): 114

115 Image 3: Family Food Service Accounts Students within a household may share one family account number. Transactions can be organized by student or account. Analyzing Account Information The following features of the Food Service tool will be available to the user: 115


116 Image 4: Account Information Account Information Area The following information is available at the top of the screen: Image 5: Individual Accounts Column Description 116

117 Account Name Account Number Balance as of (Current Date) This column lists the names of household members who have individual Food Service accounts. This column indicates the number associated to the accounts established for the household. This column indicates the balance for each account, as of the current date. Transaction Detail Area The Transaction Detail area, located in the middle of the page, controls which transactions are displayed in the list at the bottom of the page. Information may be filtered based on the fields in this section: Image 6: Transaction Detail Field / Button Description Show Transactions for This dropdown field allows the user to select the person/account to be reviewed or printed. If switching between accounts, click the Go button to refresh the information in the Transaction List table. If accounts are set up as family accounts, the user can choose to view/print specific student transactions or family account transactions. Month When the Month button is selected, the user may select a month from the dropdown list that appears. After clicking the Go button, all transactions posted for that month will display. The Ending Balance to tal at the bottom of the page will be the balance as of the last day of the selected month, OR, the current date, if the selected month is the current month. Date Range When the Date Range button is selected, the user should enter a start date and an end date in the two fields that appear. After clicking the Go button, all transactions posted on and between the specified start and end dates will be displayed in the Transaction List table. Go Clicking on the button refreshes the display of the Transaction List table, based on the criteria Go currently displayed in the Transaction Detail area. 117

118 Print Clicking on the Print button will generate a PDF of transaction data, based on the criteria currently displayed in the Transaction Detail area. Transaction List Table The following types of information may appear in the table at the bottom of the screen, if the account has applicable transactions posted: Image 7: Transaction List Column Date Patron Item Description This column contains dates on which transactions occurred. The patron to whom the transaction directly relates. The transaction type - generally a deposit or (food) purchase, but may also include adjustments, voided items and starting balances. Purchases - each item and/or meal name will be indicated ( e.g., Brkfst Meal, Pizza, Milk, Ala Carte). Deposits - to the account, it will be listed as "Deposit" with a description of the payment method listed in the Comment column. Entries in gray font are posted transactions that have been successfully voided. Entries in red font represent the action of voiding the original transaction (the preceding items in gray font). 118
119 Comment Entries in this column provide additional details on the transaction listed in the Item column. These are a standard set of labels applied to the transaction. Comments on Purchases - If the transaction was a meal or food item purchase, the school's internal method of processing may be indicated (e.g., Cafeteria Serve, Class Serve). Comments on Deposits - If the transaction was a deposit, the payment method is indicated as "Cash," "Check #," "Credit Card #," "Online Checking" or "Online Savings" (the last three options are only applicable if a school allows that type of payment method). Voided Transactions - If the purchase or deposit transaction has been voided, it will be indicated. Comments on the voided transaction will display, if entered. Entries in gray font are posted transactions that have been successfully voided. Entries in red font represent the action of voiding the original transaction (the preceding items in gray font). Debit This column indicates a purchase or adjustment amount that reduced the current account balance. Credit This column indicates a deposit or adjustment amount that increased the current account balance. Below the Transaction List table are two three totals: Total Debits, Total Credits, Ending Balance as of [Date]. These totals are for the Month or Date Range currently displayed in the Transaction Detail area. 119
120 Payments (Portal) This document is written for use by parents. Districts can choose to provide this information to their parents or use it as a guide for creating district-owned documentation. Overview PATH: Portal > Payments The Payments tool provides Portal users with the ability to pay fees/services or deposit food service money online using a major credit card, checking or savings account. This tool helps eliminate the need to send cash or checks with a student to school and provides parents a simple way to stay on top of school fees and services. The following pages describe the online payment process: Managing Payment Information Making an Online Payment 120
121 Making an Online Payment Entering Fee Payments Fee Payments Food Service Transactions Viewing Family Account Details Viewi ng Individual Account Details Analyzing Account Details Printing Account Details Account Deposits This document is written for use by parents. Districts can choose to provide this information to their parents or use it as a guide for creating district-owned documentation. PATH: Portal > Family > Payments The Payments tool allows Portal users to make online payments to fees and/or food services incurred by members of a household. If this feature is used by a school, the Payments link will appear in the Portal index as shown: Image 1: Online Payments The Payments link will not appear to all Portal users, as it depends on specific school operations and settings. Similarly, the Food Service link, which allows Portal users to view Food Service account activity, will only be available if that feature is also used by the school. When both features are enabled, the Payments tool allows parents to pay incurred fees, deposit money into Food Service accounts, and generate a food service transaction report. Entering Fee Payments Unpaid fees from All Years are listed and can be selected for Payment. This does not apply for Food Service payments. To begin the online payment process for a fee, select Payments from the Index. The online payment editor will appear, displaying outstanding fees for all students within the Household. 121

122 If the ability to contribute to Food Service accounts is not allowed by the school, the Food Service payment section will not be shown. Similarly, if the students of the household do not have any pending fees, no fees will display in the Fees area. To view comprehensive detail on a student's fee payment activity, select the View All Fee Transactions link. The Fee Statement window will appear, with details on fee transactions. 122
123 Image 2: View All Transactions The columns on the Fee Statement screen can be defined as follows: Column Description Due Date Fee The date on which the fee was due. If a fee has past its due date, but has not yet been paid, the Due Date will appear in red font. The name of the fee. Type The category to which the fee is assigned ( e.g., activity, course). Debit Credit Balance The total owed for the fee. The shaded row indicates the total due for the fee. The payments that have been made toward the fee. The shaded row indicates the current total of payments made toward the fee. If partial payments have been made, they are listed on the unshaded rows below the fee to which they apply. The amount of the fee remaining to be paid. Fee Payments Fee payments allow users to pay fees for each student within a household. Users can also view the details of a fee by selecting the plus sign ( + ) next to the fee name. A fee shown in red indicates that a payment for the full amount has not been made before the due date assigned by the school. Before a user can successfully make an online payment, Payment Information must first be registered with the payment vendor. This can be done by selecting the Register your credit cards and banking information. Once a form of payment has been registered, choose the amount of the fee payment by: Entering the the fee payment amount in the Payment field, OR Clicking the Select Full Amount button to quickly auto-fill the full fee amount due. 123

124 Image 3: Making a Payment Payments made through the portal cannot be voided. If a applies, it will be shown and included in the. Click to proceed to the Payment Convenience Fee Total Continue Method screen: 124

125 Image 4: Payment Selection Select the appropriate payment method (previously registered). Click Continue to proceed to the fees Confirmation page: Image 5: Make Payment Review the payment information. If the district has ing of payment receipts enabled, the user will be notified on this screen of the address the receipt will be sent to. To modify this address, select the Change the address for the receipt hyperlink. An editor will appear, allowing users to insert a new address. 125


126 Image 6: Receipt Details Enter the correct address within the address field and select Okay when finished. The confirmation screen will now display the correct address and the payment receipt will be sent accordingly. Image 7: Final Payment Review Review the payment information again to ensure accuracy. To exit without making the transaction, click Cancel. Otherwise, click Make Payments to process the fees payment. When the transaction has been processed, the Payment Receipt screen will display: 126

127 Image 8: Payment Made To print a copy of the receipt, click Print/View in the lower right-hand side of the screen. To return to the main Payments screen, click Back To Payments. Food Service Transactions PATH: Portal > Payments The Payments tool allows deposits to be made to Food Service accounts. The Payments screen will display current account balances for each member of a Household. If the ability to contribute to Food Service accounts is not allowed by the school, the Food Service payment section will not be shown. Similarly, if the students of the household do not have any pending fees, no fees will display in the Fees area. Depending on the way a school has set up its Food Service accounts, the appearance of the Food Service transactions area will differ. Family Account Setup - If all Food Service patrons in the household share the same account number, a "Family Account" Payment field will appear, as shown: 127


128 Image 9:Food Service Family Account Users who see a Family Account shown in this area should jump to the Family Account Deposits section of this document. Individual Account Setup - When individual Food Service accounts exist, the name of each household member will be displayed, and each person will have his/her own Payment field, as shown: Image 10: Individual Food Service Accounts 128

129 Users who see the names of household members with food service accounts should jump to the Individual Account Deposits section of this document. View Details Link To view the details of the households food service activity, select the View Details link. A separate window will appear to display the account activity details, including deposits and meal item purchases. This information is also available through the Food Service tool of the Portal Index. This screen will differ depending on the type of Food Service account setup for the household ( i.e., family or individual). Viewing Family Account Details When a family account is setup, clicking the View Details link will generate the account details as shown: Image 11: Family Account Detail The Show Transactions for field allows Portal users to view the full "Family Account" details, or only view transactions attributed to a specific patron. 129
.")
130 Deposits made to a family account are equally available to all patrons of that account. However, Portal users should be aware that this screen will show deposit transactions as a credit to one patron (not each). Viewing Individual Account Details When individual accounts are setup, clicking the View Details link will generate the account details as shown: Image 12: Individual Account Detail 130

131 Analyzing Account Details The page Food Service (Portal Users) does not exist. Printing Account Details To generate a PDF of Food Service account activity, select the Print button. 131

132 Account Deposits Before a user can successfully make an online payment, his/her {*}Payment Information{*} must first be registered with the payment vendor. This can be done by selecting the *Register your credit cards and banking information* link. Once a form of payment has been registered, choose the amount of the deposit by: Entering the deposit amount in the Payment field, OR Clicking the Select Estimated Amount button to quickly auto-fill the Payment field. The Estimate total suggests a deposit amount based on a patron's transaction history. After a student has built a history of transactions, an estimated is calculated and displayed in the Estimate area. This is a feature designed for convenience. If a applies, it will be shown and included in the. Click to proceed to the Payment Convenience Fee Total Continue Method screen: 132


133 Select the appropriate payment method (previously registered). Click Continue to proceed to the deposit Confirmation page: Review the payment information. If the district has ing of payment receipts enabled, the user will be notified on this screen of the address the receipt will be sent to. To modify this address, select the Change the address for the receipt hyperlink. An editor will appear, allowing users to insert a new address. 133

134 Enter the correct address within the address field and select Okay when finished. The confirmation screen will now display the correct address and the payment receipt will be sent accordingly. Review the payment information again to ensure accuracy. To exit without making the transaction, click Cancel. Otherwise, click Make Payments to process the food service deposit. When the transaction has been processed, the Payment Receipt screen will display: 134

135 To print a copy of the receipt, click Print/View in the lower right-hand side of the screen. To return to the main Payments screen, click Back To Payments. 135
136 Managing Payment Information Overview Registering Payment Information Modifying Payment Information Deleting Payment Information Viewing Online Payment History This document is written for use by parents. Districts can choose to provide this information to their parents or use it as a guide for creating district-owned documentation. Overview Online Payment functionality allows the ability to register, modify and delete payment methods. These tools enable a transaction to occur and provide users with the ability to manage their online accounts. Image 1: Registering / Modifying / Deleting Payment Information Registering Payment Information PATH: Portal > Payments Before a user is able to make an online payment, a payment method needs to be established. Users have the option of paying by credit card, checking account or savings account. To begin registering a payment method, select the Register Your Credit Cards and Banking Information hyperlink. 136


137 Image 2: Registering a Payment Method Registering Checking Information Users have the ability to register and make payments via a checking account. To begin the registration process, select the Checking radio button. Image 3: Registering a Checking Account Payment Method Enter all required Billing Information as well as the checking account's Routing Number and Account Number. Once information has been entered, select the Save button. Users will be directed to a confirmation screen. 137


138 Image 4: Registered Payment Method Confirmation Carefully read and determine if all displayed information is correct. If so, select the Save button. The payment method is now saved within Infinite Campus and can now be used to make transactions. If information is incorrect, select the Back button. Users will be redirected back to the previous page, allowing for information to be adjusted. Registering Savings Information Users have the ability to register and make payments via a savings account. To begin the registration process, select the S avings radio button. Image 5: Registering a Savings Account Payment Method Enter all required Billing Information as well as the saving account's Routing Number and Account Number. Once information has been entered, select the Save button. Users will be directed to a confirmation screen. 138


139 Image 6: Registered Payment Method Confirmation Carefully read and determine if all displayed information is correct. If so, select the Save button. The payment method is now saved within Infinite Campus and can now be used to make transactions. If information is incorrect, select the Back button. Users will be redirected back to the previous page, allowing for information to be adjusted. Registering Credit Card Information Users have the ability to register and make payments via a major credit/debit card. To begin the registration process, select the Credit/Debit Card radio button. Image 7: Registering a Credit Card Payment Method Enter all required Billing Information as well as the Card Number, Expiration Date and Name of Cardholder. If the Card Number is incorrect, the field will highlight in red and a red exclamation point will appear. Selecting the red exclamation point will generate a separate window describing the error that has occurred. 139


140 Image 8: Incorrect Credit Card Information Once correct information has been entered, select the Save icon. The credit card is now established within Infinite Campus and may be used for transactions. Image 9: Registered Payment Method Confirmation Modifying Payment Information PATH: Portal > Payments Users have the ability to modify registered payment methods by selecting the Modify Your Credit Cards and Banking Information hyperlink. 140

141 Image 10: Modifying a Registered Payment Method Once selected, users are directed to a new screen displaying all registered payment methods. To edit a payment method, select the corresponding Edit button. Image 11: Editing a Registered Payment Method Once the Edit button is selected, users are directed to the Billing Information editor where information can be modified. 141


142 Image 12: Entering Correct Payment Method Information Once all modifications have been made, select the Save button. Users are directed to a confirmation screen. Image 13: Confirming Edited Payment Method Information Ensure all payment method information is accurate and select the Save button. Users are directed to a screen confirming the payment method update was successful. If information is incorrect, select the Back button. Users will be directed back to the Billing Information editor, allowing for information to be modified. Image 14: Confirmation of Edited Payment Method 142
143 Deleting Payment Information PATH: Portal > Payments Payment methods can be deleted by selecting the Modify Your Credit Card and Banking Information hyperlink. Image 15: Deleting Registered Payment Methods Once selected, users are directed to a screen displaying all established payment methods. Select the Cancel hyperlink for the payment method to be deleted. 143


144 Image 16: Deleting a Registered Payment Method One selected, users are directed to a confirmation screen. To permanently delete the payment method, select the Cancel b utton. To go back to the previous screen and cancel the payment method deletion, select the Back button. Image 17: Confirmation of Payment Method Deletion Once the Cancel button is selected, a screen will appear confirming the payment method has been successfully deleted. Image 18: Confirmation of a Successfully Deleted Payment Method Viewing Online Payment History PATH: Portal > Payments Users can view detailed payment history information by selecting the View Your Online Payment History hyperlink. 144

145 Image 19: Viewing Online Payment History Once selected, users are directed to a screen detailing payment transactions within the date range entered. 145
146 Image 20: Payment History Detail To generate a printable version of this information, select the Download PDF for Printing button. The Online Transaction Report will appear in a separate window in PDF format. Image 21: Online Transaction Report 146
147 Applications Forms (Portal) Overview PATH: Family > Applications/Forms The Applications/Forms tool contains all forms and applications a parent/guardian can fill out and submit electronically to their district. This tool includes the following applications/forms: Meal Benefits Application (Portal) Image 1: Applications/Forms Tool 147

148 Meal Benefits Application (Portal) Overview PATH: Family > Applications/Forms > Meal Benefits Application The Meal Benefits Application allows parents/guardians to electronically submit Meal Benefits Applications to their district. In order to complete the Meal Benefits Application, the application signer must complete the following steps: Step 1. Register PIN Number/Electronic Signature Step 2. Review the Letter to Household Step 3. Review Application Instructions Step 4. Review and Confirm Signer Step 5. Confirm Household Members Step 6. Indicate SNAP, TANF or FDPIR Benefits Step 7. Confirm Student Household Members Step 8. Indicate Foster Children Step 9. Enter Household Member Income Step 10. Review Household Information for Accuracy Step 11. Authorize Household Application Step 12. Electronically Sign the Household Application Step 13. Review and Print Submission Notice Image 1: Accessing the Meal Benefits Application 148

149 Step 1. Register PIN Number/Electronic Signature In order to submit a legally-binding application to the district, an E-Signature PIN must be established. If you already have a PIN, skip to Step 2. The E-Signature PIN allows users to submit an electronic signature along with the application which is treated the same legally as a signature made on the paper application. Image 2: Notification of No E-Signature PIN Established To create an E-Signature PIN, click the Yes button. The Create your PIN editor will appear (see Image 3). Image 3: Creating an E-Signature PIN 149

150 To create a PIN, enter the PIN, Re-enter the PIN, enter your current Campus account Password and select the Submit bu tton. Your PIN is now saved within Campus and available for use with any documents or forms which require a PIN for signature or verification. To change you PIN, go to the Account Management tool. Step 2. Review the Letter to Household The application signer must review the Letter to Household prior to beginning the application process. This letter contains important information and guidance about the online Meal Benefits Application. FRAM Administrators: Letter to Household information and instructions can be modified in the Lette r to Household template within the Online Application Editor (FRAM > Letter Editor, Online Application Editor). Image 4: Reviewing the Letter to Household Once the Letter to Household has been reviewed or printed for reference, select the Next button. To cancel the application, select the Quit button. Step 3. Review Application Instructions The application signer must also review the Application Instructions prior to beginning the application process. These instructions can also be printed and contain important information about the application process and submission. 150
. Image 5: Reviewing the Application Instructions After the Application Instructions have been reviewed or printed for reference, select the Next button.")
151 FRAM Administrators: Application Instructions information can be modified in the Application Instructions template within the Online Application Editor (FRAM > Letter Editor, Online Application Editor). Image 5: Reviewing the Application Instructions After the Application Instructions have been reviewed or printed for reference, select the Next button. To go back to the previous step, select the Previous button. Step 4. Review and Confirm Signer Once both the Letter to Household and Application Instructions have been reviewed, the person completing the online application must confirm their identity as the application signer. FRAM Administrators: Signer Confirmation instuctions can be modified in the Application Instructions template within the Online Application Editor (FRAM > Letter Editor, Online Application Editor). 151

152 Image 6: Verifying the Signer's Identity If the identity information is correct, select the Next button. To go to the previous step, select the Previous button. To quit the application, select the Quit button. If the address shown is incorrect and your district has Self Service functionality enabled, you can updated it using the Household Information tool. Step 5. Confirm Household Members The application signer must confirm all people living within their household. FRAM Administrators: Household Members information can be modified in the Application Instructions template within the Online Application Editor. 152

153 Image 7: Verifying Household Members Mark the checkbox next to the name of each person within your household. Once all members have been marked, select the Next button. If a person is listed that should not be considered a household member, do not check the checkbox next to their name. This will not remove them from the household within Campus, but will not include them as a member on the application. 153
154 Image 8: Adding Additional Household Members If a household member does not appear in the list, click the Add Household Member button. The Add Student/Non-Student Member editor will appear (see Image 9). This often occurs when someone has just moved into the household or the person filling out the application does not have access to a specific family member within Portal. The manually added student household member must exist in Campus at the time the FRAM Processor processes the application. If the manually added student member does not exist within Campus, the application cannot be processed and will need to be suspended if the district cannot confirm the validity of the student member. 154
155 Image 9: Adding a Household Member If a household member is being added, select whether the person is a or and click the button. Student Non-Student Save A Student is a household member who will be enrolled in the district during the school year. A Non-Student is any household member who will not be enrolled in the district during the school year. 155
.")
156 Image 10: Adding Information for a Student Member Enter information about the household member in all required fields and select the Save icon. Required fields are denoted with a red asterisk. Once Cancel or Save is selected, you will be redirected back to the Household Members confirmation screen (see Image 11). The School and Grade (and Student Number, if known) fields are important for application processing as the FRAM Processor will use these fields to better identify and match this student to records within Campus. 156

157 Image 11: Example of Added Household Member The added household member will appear on the Household Members screen with the words (Manual Add) appearing after the person's name. To remove the person from the household, select the black X on the far right of the screen. Once all household members have been identified, select the Next button. To go back to the previous step, select the Previ ous button. In order to complete the remaining steps of the application process, it is critical Household members are identified in Step 5. Step 6. Indicate SNAP, TANF or FDPIR Benefits Once household members have been identified, the application signer will be asked whether or not any household members receive SNAP, TANF or FDPIR benefits (see Image 12). If no household members receive benefits, skip to Step 7. FRAM Administrators: Acronyms for SNAP, TANF and FDPIR are USDA-specific and can be changed to meet state-specific needs using the FRAM Preferences tool. 157
. If a household member does receive SNAP, TANF or FDPIR benefits, select Yes.")
158 Image 12: Identifying SNAP, TANF or FDPIR Benefits If no household members receive SNAP, TANF or FDPIR benefits, select No. You will be directed to the Students screen (see Step 7). If a household member does receive SNAP, TANF or FDPIR benefits, select Yes. The screen shown below (Image 13) will appear. 158
159 Image 13: Identifying Household Members Receiving SNAP, TANF or FDPIR Benefits Select the name of the household who recieves a SNAP, TANF or FDPIR benefit, enter their benefit case number and select the Next button. Select the Previous button to go back to the previous step. It is critical household members are identified correctly as members who are not identified cannot be added to the application once it is processed. Step 7. Confirm Student Household Members Now that household members have been established, student household members must be identified. FRAM Administrators: Student Members information can be modified in the Application Instructions template within the Online Application Editor. 159

160 Image 14: Identifying Student Household Members Mark the checkbox next to the name of each student household member and select the Next button. To go back to the previous step, select the Previous button. Step 8. Indicate Foster Children Once student household members have been identified, the application signer must indicate whether or not any of the student household members are foster children. 160
 is a foster child select o and continue to Step 9.")
161 Image 15: Identifying Student Foster Children If a student household member(s) is a foster child, select Yes. If no student household member(s) is a foster child select o and continue to Step 9. N 161

162 Image 16: Selecting Foster Children Mark the checkbox next to the name of each student household member that is a foster child, enter their Monthly Income and select the Next button. To go back to the previous step, mark the Previous button. Step 9. Enter Household Member Income Now that household members have been identified, income must be entered for each member. Users will be asked to add income if they fall under one of the following scenarios: No Benefits Number was entered in Step 6 and at least one household member is considered a foster child and another member is considered migrant/homeless/runaway. No Benefits Number was entered in Step 6 and no household member is considered foster or migrant/homeless/runaway. FRAM Administrators: Household Income Instructions information can be modified in the Ap plication Instructions template within the Online Application Editor. 162
163 Image 17: Indicating Household Member Income Indicate each household member income by selecting the Add Income button and entering their income amount. Mark the No Income checkbox for each household member that has no income. 163
. Once all household member income has been entered, select the Next button. To go back to the previous step, select the P revious button.")
164 Image 18: Indicating Household Member Income In the image above (Image 18), the incomes entered are of different frequency thus, total income amounts have an annualized (1,500 Twice a Month to meet the frequency of the other two incomes which are monthly). Once all household member income has been entered, select the Next button. To go back to the previous step, select the P revious button. Step 10. Review Household Information for Accuracy Now that household members (and their benefits) have been identified, household information must be reviewed for accuracy. FRAM Administrators: Review information can be modified in the Application Instructions template within the Online Application Editor. 164

165 Image 19: Reviewing Household Information for Accuracy The Total Income column lists the total amount of money each household member makes based on the frequency noted (i.e., monthly, yearly, etc). Frequencies listed in this column are automatically annualized across all members. The Total Household Income field indicates the total amount of income the household (all members included) earns per year. The Total Household Size indicates the total amount of members within the household. Review all the information on the screen and if it is accurate, select the Next button. If this information is incorrect, select the Previous button to go back to the previous step and correct inaccurate information. Step 11. Authorize Household Application Now that all household information has been entered and confirmed as accurate, the household application must be authorized. Authorization is a four part process. FRAM Administrators: Authorization information can be modified in the Application Instructions te mplate within the Online Application Editor. 165

166 Image 20: Authorizing Sharing Information with Medicaid/SCHIP The first step in the authorization process is to indicate whether or not you give your district permission to share your Medicaid or SCHIP information with Medicaid and SCHIP. Select the Yes or No radio buttons for each question shown in the image above (Image 20). 166
.")
167 Image 21: Authorizing the Sharing of Information with Other Programs If your district has created benefit permissions, you will be asked whether or not you consent to the district sharing your child's name and meal eligibility with each benefit program. Select the Yes or No radio button for each question shown in the Sharing Information with Other Programs section (see Image 21). 167

168 Image 22: Entering Your Social Security Number In order to verify stated household income, the last 4 digits of your Social Security Number must be entered. If you do not have a Social Security Number, mark the I do not have a SSN checkbox. 168

169 Image 23: Reviewing the Authorization Statement Review the Authorization Statement. If you agree with this statement, believe all entered information is accurate and would like to complete the application process, select the Accept button. If you do not agree with the application and Authorization Statement, select the Decline button. If the Decline button is selected, a message will appear warning you the application process will be cancelled and all application information entered will be deleted. To go back to the previous step, select the Previous button. Step 12. Electronically Sign the Household Application Once you have reviewed the application and agreed to the Authorization Statement, you must review the Terms of Use. 169

170 Image 24: Terms of Use and Entering E-Signature PIN If you agree to the Terms of Use and would like to sign the document with you legally-binding E-Signature, Enter your E-Signature PIN and select Submit. If you do not want to electronically sign the application, select the Do not use E-Signature button. This action will cancel the application due to the need for the application to have a legally-binding electronic signature in order to meet state and federal guidelines If you forgotten your PIN, click the Forgot you PIN button. You will be redirected to the Reset your PIN editor where you can reset your PIN (see Image 25). 170
171 Image 25: Resetting a Forgotten PIN Step 13. Review and Print Submission Notice The application has now been submitted to the district for processing. FRAM Administrators: Submission Notice information can be modified in the Submitted template wit hin the Online Application Editor. 171
.")
172 Image 26: Application Submission Notice You may print and/or save the Confirmation Submission Notice and the Benefits Application Summary Report for your records. You may also access this information in your Process Inbox (see Image 27). 172
.")
173 Image 27: Process Inbox Message Indicating Meal Benefits Application Submission Your Process Inbox will contain a message indicating submission of the Meal Benefits Application. Select the link to review the Confirmation Submission Notice and the Application Summary Report (the same information provided in Image 26). The FRAM Processor(s) will also receive a Process Inbox notice indicating your application has been submitted. After the FRAM Processor has processed the application, you will receive a Process Inbox message indicating the application has been processed. If your district has enabled the Include Approval/Denial Letter FRAM Preference, you will receive a Process Inbox message containing a PDF copy of your Approval/Denial Letter which indicates whether or not the application was approved or denied. 173

174 Students (Portal) Overview Available Tools This document is written for use by parents. Districts can choose to provide this information to their parents or use it as a guide for creating district-owned documentation. Overview PATH: Campus Portal > Select a Student The following sections describe the Student section, which appears above the Family section in the navigation pane after selecting a student from the Switch Student drop list. The information provide in these tabs is specific to the student named in the Student section header. As with the Family section, districts can control which tabs and information are available for parents to see. Image 1: Portal Student Selection Available Tools Use the following links to find more information about each of these areas: Course Registration (Portal) Calendar for Students (Portal) Attendance (Portal) Behavior (Portal) etranscript (Portal) Health (Portal) Schedule (Portal) Assessment (Portal) 174
175 Graduation Planner (Portal) Transportation (Portal) Fees (Portal) School Choice (Portal) To Do List for Students (Portal) Reports (Portal) Student Demographics (Portal) Grades (Portal) Student Fees (Portal) 175

176 Course Registration (Portal) Overview Course Registration This document is written for use by parents. Districts can choose to provide this information to their parents or use it as a guide for creating district-owned documentation. Overview PATH: Portal > Student Selection > Course Registration Course Registration is part of the scheduling process and can be done from the Campus Portal. Before students can register, certain things need to be completed and/or checked by the school: The new school calendar must be created and students must have enrollment records for the next school year. The Portal Display Option Course Registration needs to be marked. Students should be given the portal address. Students must have portal accounts. Students must know their username and password. Image 1: Course Registration Tab for a Student 176
177 Course Registration Logging into the Portal From the portal login screen, enter the Username and Password that has been assigned. The username is the student s Student Number; the password is the student s Birth Date in mmddyy format. Click the Login button. This will bring the user to the main portal page where district and school notices will be listed. If this is the first time the portal has been accessed, it is advised that users change usernames and passwords. Use the Change Account Info in the Index and follow the instructions provided. Click the Course Registration option from the navigation pane on the left of the screen. Any required courses that have been established and already inputted by school counselors and/or administrators will be listed in the Required Courses list. Students cannot change any required courses listed for them. Students can only request Elective Courses or Alternate Courses. Requesting Courses Request the majority of units needed for the grade level. This is indicated by the Units mark. The first number ( / 21) tells how many credits the students have requested. The second number ( 21 / ) tells how many total units are needed. Click the Course Search link. A search screen will appear. Courses can be searched by the course name or by the course number. Enter either the Course Name (i.e., English) or Course Number (i.e., 2121). Click the Go button. Matching course names will appear to the right. Click on any course listed to view the course description. To request this course as part of the schedule for next year, click the Request as Elective button. Courses can also be requested as Alternates. This course would be placed on the schedule if other electives were full. When finished requesting courses, click the Print Request Summary option to print a report of the courses that were requested. To prevent other users from accessing the portal and changing requested courses, instead of just closing the browser, click the Log Off option in the Index. This will end the session and bring the user to the portal login screen. 177

178 Calendar for Students (Portal) Overview Attendance Events Assignments This document is written for use by parents. Districts can choose to provide this information to their parents or use it as a guide for creating district-owned documentation. Overview PATH: Campus Portal > Student Selection > Calendar The Calendar tab, when accessed from the Student section, displays all day events, assignments and attendance events for that student only. The calendar defaults to the current month but users are able to view previous months and future months by clicking the black arrow buttons on either side of the month and year. Image 1: Student Calendar Attendance Events Clicking on an Attendance Event will produce an additional screen over the Calendar which provides the details of the attendance event, including what class periods the event affected and the status of the event. 178
179 Image 2: Attendance Detail from the Family Calendar Assignments Clicking on an Assignment icon takes the user to another screen which provides details of the student assignment, including a description of the assignment and the date due. Clicking the browser back button will return the user to the calendar. 179
180 Image 3: Assignment Detail from the Family Calendar _ 180
181 Attendance (Portal) Overview Attendance through the Calendar Tab Attendance Tab Summary Options Detail Options This document is written for use by parents. Districts can choose to provide this information to their parents or use it as a guide for creating district-owned documentation. Overview PATH: Campus Portal > Attendance The Attendance tab of the Campus Portal allows parents to track student attendance using a variety of summary options and attendance views. 181

182 Image 1: The Attendance Tab Attendance through the Calendar Tab Attendance information can be accessed through the tab in both the and sections of the Calendar Family Student navigation pane. The tab defaults to the current month, but clicking the black arrow icons on either side of the month allows users to view previous and future months. 182

183 Image 2: Family Calendar Tab Clicking the Bell attendance icon will generate a detail window for that specific attendance event. The Description colum n indicates the type of attendance event which occurred. These descriptions are set by the district. Attendance comments will display if a district has selected this option on the Portal Options tab. 183

184 Image 3: Attendance Detail Window from the Calendar Attendance Tab The Attendance Tab can be accessed from the Student section of the navigation pane, after a specific student has been chosen from the Switch Student menu. This section provides a variety of summary and detail options for viewing attendance information. This section is updated in real time, as the teacher or attendance clerk enters daily or period attendance. Attendance Calendars The attendance calendar at the top of the attendance screen provides color-coded absence and tardy information for the selected student. The current day is outlined in blue. Clicking the black arrow icons will allow the user to view previous and future months. All instructional days can be selected. Non-instructional days are grayed out and cannot be selected. 184

185 Image 4: Attendance Calendars The attendance colors are defined as follows. These definitions can vary by district. Color Code Definition Green Excused Parents notify the school with a reason for the absence and district policy determines this it to be an excused absence, such as illness, funerals, medical appointments, etc. Red Unexcused Districts have determined that the absence is not excused. This might include truancy, suspensions, unplanned vacations, etc. Grey Exempt These are usually school-sponsored events, such as field trips, concerts or athletic activities. Yellow Unknown The reason for the absence has not been verified by school staff. Attendance taken by the teacher displays in yellow until it has been verified by school staff and an excuse type has been assigned. Clicking on an instructional day will generate a detail window including any absence or tardy information for that day. The window displays attendance information by period, including the period of the course, the name of the course and the time the course meets. Attendance Event information is found in the Description column. Depending on the district's preferences, attendance Comments may also appear. Clicking the 'X' in the top right corner of the detail window to return to the original attendance screen. 185

186 Image 5: Attendance Day Detail Summary Options Below the Calendar, four tabs allow users to view summaries of attendance information by Course, by Period, by Day an d by Term. Dates in the summary tabs can be selected to generate a detail window. Selectable links appear in blue text. Summary By Course Clicking the Course tab within the attendance section will display attendance events sorted by the courses in which a student is enrolled. Courses appear in numerical order by course number with the teacher's name following. Attendance information is summarized by event type Periods Absent, Tardy, Early Release and Present. Totals for each event type are located at the bottom of the tab. If no attendances events are recorded for Early Release and Present, these columns will be hidden from view. 186

187 Clicking the arrow next to the name of a course will expand a list of all attendance events for that course. Dates and attendance event counts will appear in blue and can be selected to display a detail window. Courses that do not have any attendance events will not display in the list. Image 6: Attendance Summary by Course Summary By Period Attendance information can also be summarized by class meeting times by selecting the Periods tab. Clicking the black arrow icons on either side of the Term name will display information for previous or future terms. The date range of the term appears below the term name. Attendance information is summarized by event type Periods Absent, Tardy, Early Release and Present. Totals for each event type are located at the bottom of the tab. If no attendances events are recorded for Early Release and Present, these columns will be hidden from view. Clicking the arrow next to the name of a period will expand a list of all attendance events for that period. Dates and attendance event counts will appear in blue and can be selected to display a detail window. 187
188 Image 7: Attendance Summary by Period Summary By Day The Day tab lists all attendance events for the school year beginning with the most recent. Each day is broken up by period. Events from different terms are divided by a gray line. Events are color-coded based on the same system as the At tendance Calendars and the following abbreviations: A: Absent T: Tardy P: Present E: Exempt Dates and period totals will appear in blue and can be selected to display a detail window. Attendance information is summarized at the bottom of the tab by Absent Totals, Tardy Totals, Early Release Totals and Present Totals. 188

189 Image 8: Attendance Summary by Day Summary By Term Clicking on the Term tab will sort attendance information by term such as quarter, trimester, or some other school-established term. The dates included in each term are listed next to the term name. Attendance information is summarized by event type Periods Absent, Tardy, Early Release and Present. Totals for each event type are located at the bottom of the tab. If no attendances events are recorded for Early Release and Present, these columns will be hidden from view. A total per term of Days Absent also appears measured in whole/half days as defined by the district. Attendance information is totaled at the bottom of the tab. Clicking the arrow next to the name of a term will expand a list of dates on which attendance events occurred for that term. Dates, attendance event counts and totals will appear in blue and can be selected to display a detail window. 189

190 Image 9: Attendance Summary by Term Detail Options At various points in the Attendance Summary tabs, dates, attendance event counts and totals will appear in blue and can be clicked to generate an additional detail window. Clicking the 'X' in the top right corner will return the user to the original attendance page. Summary-Specific Detail Where attendance events exist, totals appear for each summary type, including course, period or term. Clicking these attendance event counts will generate a detail window which displays the count by status, Excused, Unexcused, Exempt and Unknown. 190

191 Image 10: Summary Detail Window Date Detail Where attendance events exist on the Course, Period and Term summary tabs, clicking the black arrow will expand the list of dates that make up the attendance count. Next to the date itself, which is a link to a detail window, appears the day of the week, the type of attendance event (Absent, Tardy, Early Release or Present) and the status of the event (Excused, Unexcused, Exempt or Unknown). Clicking on the date will generate a detail window for that day. This window lists Period, Course and Time the event took place as well as a Description of the attendance event and any Comments. 191

192 Image 11: Date Detail Window Total Detail Where attendance events exist, the each type of attendance event (such as absence, tardy, etc.) is totaled at the bottom of the tab. Clicking these totals will generate a detail window which sorts the attendance events by status, Excused, Unexcused, Exempt and Unknown. This option is available for all summary tabs. 192

193 Image 12: Total Detail Window 193

194 Behavior (Portal) Overview Behavior This document is written for use by parents. Districts can choose to provide this information to their parents or use it as a guide for creating district-owned documentation. Overview PATH: Campus Portal > Student Selection > Behavior The Behavior tab displays records for both positive behavior events, such as a student being recognized for a special accomplishment, and negative behavior events, such as disruptive or violent behavior. The information in this tab allows parents to learn more about actions, consequences and remedial steps taken by the school. Image 1: Student Behavior Events Behavior This tab lists the following information: The Date and Time an event occurred, Whether the event was Discipline-related (negative) or Award-related (positive), What the Event was, The Role the student had in the event, The number of Demerits or Points received as a result of the incident, The steps taken to resolve the event and The Date and Time that Resolution will take place. 194

195 etranscript (Portal) Overview Requesting and Reviewing Student Transcripts Accessing Electronically Released etranscript Records Viewing Transcript Request History This document is written for use by parents. Districts can choose to provide this information to their parents or use it as a guide for creating district-owned documentation. Overview PATH: Portal > etranscript The etranscript tool allows students and parents/guardians to request release of a student's electronic transcript and track the status of the transcript request. This tool is designed to eliminate the manual process of verifying and releasing student transcripts as well as allowing schools to generate the student transcript in a widely accepted electronic format. Image 1: etranscript Portal Option Requesting and Reviewing Student Transcripts Submitting a new request for release of a student's electronic transcript allows the school to generate the transcript in a computer-readable format for submission colleges/universities and/or third party transcript vendors. 195


196 Image 2: Requesting Release of a Transcript To request release of a student's transcript, click the New Request button. Users will be directed to the etranscript Request Confirmation editor. Image 3: Authorizing Release of the Transcript Confirm authorization of the transcript release by checking the I am requesting and authorizing release of the student's etranscript checkbox and clicking the Request button. The transcript request has now been made and users will be directed back to the etranscript Center editor. When transcript request has been made, the student whose transcript was requested will appear on the etranscript editor. Users can view details about the request by clicking on the student's name under the Student column. The Released Date column will remain blank until the school releases the transcript. 196

197 Image 4: Viewing Released Transcripts Once the school has generated the XML file through the release process, the Released Date column will populate with the date it was generated. Users should use this column as confirmation that the etranscript was generated. Click the student's name under the Student column to view additional information about the etranscript record. Accessing Electronically Released etranscript Records If a student's etranscript request was electronically released, meaning it was sent to a third-party transcript vendor, the student will display a Select Destination hyperlink in the Transcript Destination field. Image 5: Accessing the etranscript Selecting the Select Destination hyperlink will redirect users to Docufide's website where the parent/guardian (if they have a registered account with Docufide) can log into their account and access the etranscript. The etranscript will be accessible in their account and awaiting further processing. 197

198 Viewing Transcript Request History Users can view details about a transcript request by selecting the student's name under the Student column. Information such as when the request was made, who made the request, when the request was released, who released the transcript and any comments about the transcript release are detailed. Image 6: Viewing Request Status Details 198
199 Health (Portal) Overview Vaccination Compliance Vaccination Print Sports Physical This document is written for use by parents. Districts can choose to provide this information to their parents or use it as a guide for creating district-owned documentation. Overview PATH: Portal > Health Every state mandates a series of vaccinations to be given to students over several academic years. In addition to vaccines and doses, the Portal will display vaccination compliance.this is required for a student to remain in school. If the student is not vaccinated, the school must have a waiver on file. Image 1: Portal - Health Vaccination Compliance Vaccinations will appear with the following statuses: Compliant Non-Compliant - displays in red text No Requirement Waiver - displays as Exempt and the reason for the exemption (Medical, Religous, Conscientious Objection or Lab Confirmation) 199


200 Image 2: Vaccination Compliance Display Certain vaccines may be grouped together, depending on state requirements, to achieve compliance. These vaccines will appear with an asterisk indicating compliance has been achieved. An example of this is the vaccine are Measles, Mumps and Rubella which will provide compliance for an individual dose of Measles and Mumps. Image 3: Grouped Vaccination - Asterisk Display 200
201 Vaccination Print To print a student's immunization from the Portal, use the browser Print icon. See Image 4 for a printed view of the student's immunizations. It is recommended that the print layout be changed to a landscape view for easier reading. Image 4: Immunization Print Sports Physical A student's health tab also shows the date of when the student last received a Sports Physical. 201

202 Image 5: Last Sports Physical 202

203 Schedule (Portal) Overview Navigating the Student's Schedule This document is written for use by parents. Districts can choose to provide this information to their parents or use it as a guide for creating district-owned documentation. Overview PATH: Campus Portal > Student Selection > Schedule The Course Schedule lists the student's classes in each period and term, along with the time and location the class meets. If a school uses a rotating day or alternating day schedule, the day the class meets will be listed. Parents can use this tool to find out the classes the student is taking along with the teacher's name and room number. Image 1: Student Schedule Navigating the Student's Schedule Clicking the teacher's name with an icon next it will generate an in the user's preferred program. A Paper icon appears under the teacher's name indicating a newsletter has been posted. Clicking the Date will open the most recent newsletter in a new tab of the browser in PDF format. This teacher newsletter provides a way for teachers to communicate with parents and eliminates the need for a teacher to print off announcements and other types of communication. A newsletter will remain available until the end date selected by the teacher. All newsletters whose end date has not been reached are available by clicking the >> or and << in the newsletter display page. 203
 and/or grading scale(s) for this class will take the user to the bottom of the screen, where the Grading Scale(s) and")
204 Clicking the Name of a course when a grade book icon appears next to it will send the user to the student's Grade book f or that course, which includes assignments and grades. Image 2: Grade Book for a Course Clicking View the scoring rubric(s) and/or grading scale(s) for this class will take the user to the bottom of the screen, where the Grading Scale(s) and Rubric(s) appear. 204

205 Image 3: Grading Scales and Rubrics From within the Grade book, clicking the name of an Assignment will open a screen which provides the details for that specific assignment. This screen including assignment detail and allows parents to see missing and late assignments. Clicking Back to the complete Grade book will return the user to the Grade book screen. 205
206 Image 4: Assignment Detail within Grade Book In some districts, posting assignments is optional for teachers, so this information may not always be available. 206

207 Assessment (Portal) Overview Assessments This document is written for use by parents. Districts can choose to provide this information to their parents or use it as a guide for creating district-owned documentation. Overview PATH: Campus Portal > Student Selection > Assessments The Assessment tab stores information regarding a student's performance on various standardized district-wide, state and federal tests and assessments. Image 1: Student Assessments Assessments Although each state or district may label these tests differently, they still serve as important benchmarks of a student's academic achievements, and can be reported to districts and state and federal governments to determine a district's success in teaching required standards. The information displayed here helps parents to be aware of assessments and knowledgeable of their student's progress in them. Assessments and the scores earned on them will appear in this tab. Not all assessments will appear on the Portal. 207

208 Graduation Planner (Portal) Graduation Planner Graduation Planner Codes This document is written for use by parents. Districts can choose to provide this information to their parents or use it as a guide for creating district-owned documentation. Graduation Planner The Graduation Planner tab can be used to track student progress towards graduation, including taking and completing required courses. This screen first shows the student's Grade Point Average (GPA) and then shows any specific Course Requirements and the student's progress towards accomplishing them. Next, the Graduation Planner lists various required Standards and the number of credits that the student has earned in each term or grade level towards meeting that standard. This information is provided by school guidance counselors, teachers and staff. Image 1: Student Graduation Planner 208
209 Graduation Planner Codes The information in the Graduation Planner is color coded as follows: Color Green Pink Yellow White Definition Requirements are met and the student is on-track for graduation. The student is missing some requirements in this area. The student has taken additional (overflow) credits in this area. These credits are not required for graduation. 209

210 Transportation (Portal) Overview Transportation This document is written for use by parents. Districts can choose to provide this information to their parents or use it as a guide for creating district-owned documentation. Overview PATH: Campus Portal > Student Selection > Transportation The Transportation tab lists the student's bus detail and/or vehicle information registered to park in the school lot. Transportation The Transportation tab stores two kinds of transportation information. First, it lists the details of the Bus(es) the student takes to and from school, including bus number, time of pickup and dropoff, location of bus stop, late bus information, if applicable, and the number of miles transported. Below the Bus Detail is the student's Parking information, if applicable. This section lists the make, model and color of the vehicle the student drives to school, as well as the license plate number and whether the student has a parking permit. Image 1: Student Transportation 210
 See the Finding the Infinite Campus Version for information on locating the correct version. This document is written for use by parents.")
211 Fees (Portal) Overview Fees Fees Filtering Navigating Fees Printing Fees Previous versions of this article exists. Fees (Portal) (.1234 and previous) See the Finding the Infinite Campus Version for information on locating the correct version. This document is written for use by parents. Districts can choose to provide this information to their parents or use it as a guide for creating district-owned documentation. Overview PATH: Campus Portal > Family > Fees The Fees tab provides a list of all fees assigned to members of the family. Fees can also be viewed for a selected student in Student Fees. Image 1: Family Fees 211

212 Fees The Family Fees tab provides a list of all fees assigned to each member of the household. These fees can include a lab fee for a science course, a fee for a field trip or the cost of an athletic activity. Both fees that are still owed and ones that have been paid appear in this list, followed by the ongoing balance for all fees. Fees only display for students where the portal user (typically, the student's guardian/parent) is assigned Portal access by the school district. Fees Filtering Fees can be filtered by a specific school year by selecting the All Years dropdown list. By leaving the option on All Years, an historical reference of all fees assigned, paid, voided, etc., can be reviewed and printed, if needed. Image 2: Family Fees - Filter by Years Fees assigned to specific members of the household can also be reviewed and printed by selecting the All Members dropdown list and choosing a household member. When a specific member is selected from this list, only fees assigned to that person are displayed. 212
 The amount of payments made against the fee")
213 Image 3: Family Fees - Filter by Members Navigating Fees The Fee Statement lists the following: The name of the fee assigned to the person ( Description) The Due Date of the fee The Person to whom the fee was assigned The Type of fee The Date the fee was assigned An indication if the person is Exempt from paying the fee The amount of the fee ( Debit) The amount of payments made against the fee ( Credit) Balance due Comments entered when the school assigned the fee or entered when a payment was made or voided are visible when hovering over a fee. 213

214 Image 4: Family Fees - Fee Comments Printing Fees Click the Print button to display a PDF version of the Fee Statement. This print view will print what is selected on the Fees page. For example, if All Members is selected, fee information for all members prints. If fees for a specific year is selected, that information prints. 214

215 Image 5: Family Fees - Printing Family Fees 215

216 School Choice (Portal) Overview School Choice Settings This document is written for use by parents. Districts can choose to provide this information to their parents or use it as a guide for creating district-owned documentation. Overview PATH: Campus Portal > Student Selection > School Choice School Choice allows students to attend a different school than the one mandated by their geographic location and its attendance school and district boundaries. Image 1: Student School Choice School Choice Settings Not all districts use this program. In area where School Choice is used, students can apply to attend a variety of participating private and public schools, usually based on a system of vouchers, tax credits and scholarships. The program is designed to give parents more input as to which primary and secondary schools their children attend. The School Choice tab allows parents to submit school choice applications and track their status towards possible admission and enrollment in the following school year. 216

217 To Do List for Students (Portal) Overview To Do List Logic Student To Do List This document is written for use by parents. Districts can choose to provide this information to their parents or use it as a guide for creating district-owned documentation. Overview PATH: Campus Portal > Student Selection > To Do List The To Do List tab provides a summary of assignments that are due and/or late for that student. The summary includes the Course and Assignment, the Date Assigned, Due Date and the Days Remaining or Overdue. Image 1: Student To Do List To Do List Logic Assignments with a score do not display in the To Do List. Assignments that have been turned in do not display in the To Do List. Assignments marked as missing will display in the To Do List. Student To Do List The To Do List can be filtered to show All Dates or only assignments for a specific month. Clicking the Print icon will generate the list in PDF format to be printed. If the student is viewing this information, the To Do List and the Calendar are not displayed in the Family section. 217
218 218

219 Reports (Portal) Reports Learning and Education Plans This document is written for use by parents. Districts can choose to provide this information to their parents or use it as a guide for creating district-owned documentation. Reports The Reports tab allows parents to generate reports of information such as missing assignments, a student's schedule, and any transcripts or report cards that are available. These reports generate in PDF format using Adobe Acrobat Reader. Image 1: Student Reports The Missing Assignments report lists any assignment that is marked as Missing in the teacher's grade book. When a student in an active course section as of the current date, the report prints all missing assignments from that section. This includes sections that span multiple terms. When a student drops a section and the drop date is prior to the current date, the report does not print those assignments. If the course section or school year ends, the student or parent/guardian is not able to see missing assignments for that section within the report being generated after the end date. The Schedule report prints the student's current class schedule. The Report Card prints the student's posted course grades. The Transcript prints the student's grade history for end of term grades. 219
220 Learning and Education Plans If applicable, a student's Personalized Learning Plan (PLP) may be listed here. A PLP helps students take responsibility for their learning by establishing academic goals, finding instructional strategies to meet those goals and viewing education in a broad and unified way. Parents can view student progress and accomplishments for each student PLP here. Also, a student's Individualized Education Plan (IEP) may be posted here. Each public school child who receives special education and related services must have an IEP. Each IEP is designed for one student only and is a personalized document. The IEP creates an opportunity for teachers, parents, school administrators, related services personnel and students (when appropriate) to work together to improve educational results for children with disabilities. 220
221 Student Demographics (Portal) Overview Updating Student Personal Information Updating Non-Household Contacts Adding a New Non-Household Contact Removing Non-Household Contacts This document is written for use by parents. Districts can choose to provide this information to their parents or use it as a guide for creating district-owned documentation. The ability to remove non-household contacts was added in the E.1206 Release Pack (February 2012) Overview PATH: Campus Portal > Student Selection > Student Demographics The Demographics tab lists the information the school district currently has for the selected student. If the district allows parents/guardians to request changes to student data, modifications can be made to personal information and non-household contact information. Non-household contacts are those people who may be related to the student or people who should be contacted in case of emergency for that student but do not live in a household with that student. 221

222 Image 1: Student Demographics Updating Student Personal Information Select the Update button on the Personal Information section. An Update Demographics window will appear. Enter the modified information. The First Name, Last Name, Gender and Date of Birth fields must be populated. Select the appropriate answer for Is the individual Hispanic/Latino? This selection may be required. Mark the appropriate Race option for the student. This selection may be required. Enter any Comments related to this change. These comments are seen by the staff person processing the request. Click the Send Update button. An indication the message has been sent will appear. Click the OK button and return to the Demographics page. 222

223 Image 2: Update Personal Information View Updating Non-Household Contacts Select the Update button underneath the contact to be edited. An Update Contact window will appear Enter the modified information. The First Name, Last Name, Gender and Relationship between the person and the Student fields must be populated. Enter any Comments related to the updates to the Contact. These comments are seen by the staff person processing the request. Click the Send Update button. An indication the message has been sent will appear. Click the OK button and return to the Demographics page. 223

224 Image 3: Update Non-Household Contact Information Adding a New Non-Household Contact Select the Add Contact button on the Non-Household Contacts section. An Add Contact window will appear. Enter the new contact information. The First Name, Last Name, Gender, Date of Birth and Relationship between this person and the Student fields must be populated. Enter any Comments related to the updates to the new Contact. These comments are seen by the staff person processing the request. Click the Send Update button. An indication the message has been sent will appear. Click the OK button to return to the Demographics page. 224

225 Image 4: New Non-Household Contact Information Removing Non-Household Contacts Locate the non-household contact to remove from the student's list of contacts. Click the Remove button. A Remove Contact information box appears. Enter the reason for the contact removal in the Comments box. Click the Send Update button. An indication that the request was sent will appear. The request will be submitted to the school for processing. 225

226 Image 5: Remove Non-Household Contacts When the school processes the request and it is approved, the user will receive a message indicating the request was approved and the contact will be removed. However, if the school processes the request on the same day it was submitted, because the Portal uses inclusive dates, the removed contact may still appear for a period of time through the end of the day (midnight of the day the request was approved). 226

227 Grades (Portal) Overview Navigating the Student Grades Tab The Student Grades tab was added in the E.1218 Release Pack (May 2012). Overview PATH: Portal > Student > Grades The Student Grades tab displays recent assignments that have been graded, a list of term grades by course, and the student's current Term GPA. Parents and students are able to see all grading tasks and grades and can easily view all assignments for a particular course. Parents and students are also able to view any newsletters the teacher has sent, and can or call the teacher for more information on the student (as long as the school has recorded that information). 227

228 Image 1: Portal Student Grades Navigating the Student Grades Tab The following lists the items available on the Student Grades tab. Recently Graded Assignment At the top of the Grades tab, a list of Recently Graded Assignments displays. This section works like a news feed, where assignments scored and saved by the teacher in the Assignments tool are instantly viewable in the Portal, noting when the score was last updated (1 second ago, 5 minutes, ago, etc.). These assignments display for 14 days and appear in Posted Date order, which is the date the teacher added the grade in his/her Grade Book. The name of the course, name of the assignment and the score the student received, total points possible and percent is also listed. Image 2: Assignment Detail 228

229 Assignments display in the Recently Graded Assignments list as follows: Assignments display in the recent assignment list for 14 days once the students score has been entered or modified. Assignment flags display to the right of the assignment name. Assignments marked as Missing or Cheated will display even when a score has not been entered. Dropped and Exempt assignments will not display in the recent assignments list. If an assignment is marked as Turned In, Incomplete or Late, it only displays in the recent assignments list when a score has been entered. Unscored activities do not display in the recent assignments list. If a teacher modifies an existing score it will display in the recent assignments list for 14 days. Additional information about the assignment is found when clicking on the name of the assignment. See the Student Schedule section for more information on this view. Grades by Course A summary of course grades can be viewed for each term schedule in the calendar. The course section grades include Final Grades (if available) and In-Progress Grades (grade the student currently has) for each grading task and standard. These courses can be collapsed to display only the available links for each section. The student's Grade Point Average displays at the bottom of this view for each term in the school year. Image 3: Grades by Course Click the Name of the Course to view details of that course. This same view is displayed when selecting the Grade Book 229

230 icon from the Schedule tab. Select the Teacher's Name to display contact information (phone number and ) in a pop-up window. The Primary Teacher of the course will display first, followed by any other teacher assigned to the course. Image 4: Teacher Contact Information Select the Newsletter link to view the newsletter the teacher created. This action displays newsletters for the selected course by date, allowing the parent or student to navigate all available newsletters and print the information as desired. If the teacher does not have any newsletters or the feature has not been turned on by the district, this option will not appear for selection. 230

231 Image 5: Teacher Newsletter Display Features on this tab require settings to be selected by the district. If you have concern about this tab, please contact your district. 231
 See the Finding the Infinite Campus Version for information on locating the correct version. This document is written for use by parents.")
232 Student Fees (Portal) Overview Fees Fees Filtering Navigating Fees Printing Fees Previous versions of this article exists. Fees (Portal) (.1234 and previous) See the Finding the Infinite Campus Version for information on locating the correct version. This document is written for use by parents. Districts can choose to provide this information to their parents or use it as a guide for creating district-owned documentation. Overview PATH: Campus Portal > Family > Fees The Fees tab provides a list of all fees assigned to the student. Fees can also be viewed for all members of the household in Family Fees. Image 1: Student Fees 232

233 Fees The Student Fees tab provides a list of all fees assigned to the selected student. These fees can include a lab fee for a science course, a fee for a field trip or the cost of an athletic activity. Both fees that are still owed and ones that have been paid appear in this list, followed by the ongoing balance for all fees. Fees only display for students where the portal user (typically, the student's guardian/parent) is assigned Portal access by the school district. Fees Filtering Fees can be filtered by a specific school year by selecting the All Years dropdown list. By leaving the option on All Years, a historical reference of all fees assigned, paid, voided, etc., can be reviewed and printed if needed. Image 2: Student Fees - Filter by Years Navigating Fees The Student Fee Statement lists the following: The name of the fee assigned to the person ( Description) The Due Date of the fee The Type of fee The Date the fee was assigned An indication if the student is Exempt from paying the fee The amount of the fee ( Debit) The amount of payments made against the fee ( Credit) Balance due 233

234 Comments entered when the school assigned the fee or entered when a payment was made or voided are visible when hovering over a fee. Image 4: Student Fees - Fee Comments Printing Fees Click the Print button to display a PDF version of the Fee Statement. This print view will print what is selected on the Fees page. For example, if fees for a specific year is selected, that information prints. 234

235 Image 5: Student Fees - Printing Fees 235
236 User Account (Portal) This document is written for use by parents. Districts can choose to provide this information to their parents or use it as a guide for creating district-owned documentation. Overview PATH: Campus Portal > User Information The third navigation pane can be used to manage account details, such as passwords and contact information. As of the E.1218 Release Pack, the Change Password tool has been replaced with the Account Management tool. The Account Management tool will function differently depending upon whether or not Password Reset functionality is enabled. Image 1: User Account Toolbar 236
237 Available Tools Use the following links to find more information about each of these areas: Contact Preferences (Portal) Access Log (Portal) Account Management (Portal) 237

238 Contact Preferences (Portal) Overview Modifying Preferred Contact Preferences -Only Preferences Phone Number Preferences This document is written for use by parents. Districts can choose to provide this information to their parents or use it as a guide for creating district-owned documentation. Overview PATH: Campus Portal > User Account > Contact Preferences It is important for users to have up-to-date contact information that can be used by Campus Messenger to distribute timely information to parents (not used by all districts). Users should verify that contact information is correct and then indicate which types of messages should be directed to each phone or address, such as high priority, attendance, behavior and general notices. Users can also use this tab to select the preferred language for messages, English or Spanish. Image 1: Contact Preferences 238
239 This Contact Preferences tool and some of the preferences listed on this page may not be available to all Portal users. Portal configuration is specific to a school and depends on administrator configuration. Phone and text messaging options may not be available if the district does not use these features. The Contact Information checkbox of the Portal Options must be marked to allow Portal Users access to the Change Contact Info tool. Modifying Preferred Contact Preferences This tool allows a Portal user to enter his/her address and specify the type(s) of messages to be received through . He/she can select the language in which messages are preferred. Preferences may be set for the following types of messages: Message Type Column Definition High Priority Attendance Behavior General Mark checkboxes in this column if the indicated and/or phone number should be contacted for high-priority messages sent by the district or school. Mark checkboxes in this column if the indicated and/or phone number should be contacted for student attendance messages. Mark checkboxes in this column if the indicated and/or phone number should be contacted for student behavior messages. Mark checkboxes in this column if the indicated and/or phone number should be contacted for general school or district messages. 239
240 Teacher Mark checkboxes in this column if the indicated and/or phone number should be contacted for teacher-created messages. For some users, the Teacher column of this screen will not allow phone number checkboxes to be marked. This means that teachers do not use phone messaging as a contact method. Administrator Note: The Allow Teacher Messaging with Phones option must be set to a value of "Yes" in the System Preferences to allow the teachers to send phone messages. Text Mark checkboxes in this column to give permission to delivery of text messages to the indicated phone number. This option may not be available to all users, depending on whether or not the school/district makes use of text messaging. -Only Preferences Before the contact preference checkboxes will appear, the user must have an address entered and saved. 240

241 Image 2: -only Message Contact Preferences Enter a valid Address, to which messages will be sent as designated for each message type. Click Save. The page will be refreshed and the contact preference checkboxes will appear. Mark the checkboxes for the types of messages that should be sent to the entered in the Address field. Select the Preferred Language to indicate the desired language for messages. Click Save. Phone Number Preferences If phone and/or text messaging is used by the school/district, a Portal user will be designate specific phone number(s) for receipt of certain message types. Administrator Note: Messenger contacts who have Portal accounts can configure their own preferences for receiving voice, and text messages, as long as the school allows them to do so. The Contact Information checkbo x must be marked on the Portal Options tool. A Portal user must have phone numbers on file with the district/school for them to appear on this screen. 241

242 Image 3: and Phone Message Contact Preferences 1. Mark the checkboxes of the types of messages that should be sent to each listed phone number. Mark as many checkboxes as desired. In the event of an emergency, a parent/guardian MUST have at least one phone number flagged for at least one phone message type to receive a message Select the Preferred Language to indicate the desired language for messages. Click Save. 242
243 Access Log (Portal) Overview This document is written for use by parents. Districts can choose to provide this information to their parents or use it as a guide for creating district-owned documentation. Overview PATH: Campus Portal > User Account > Access Log This tab lists the IP addresses from which parents access the Portal, the times it was accessed and whether the login was successful. Users do not have the ability to modify data here. This tool is used to see when logins occurred with the username and password. 243
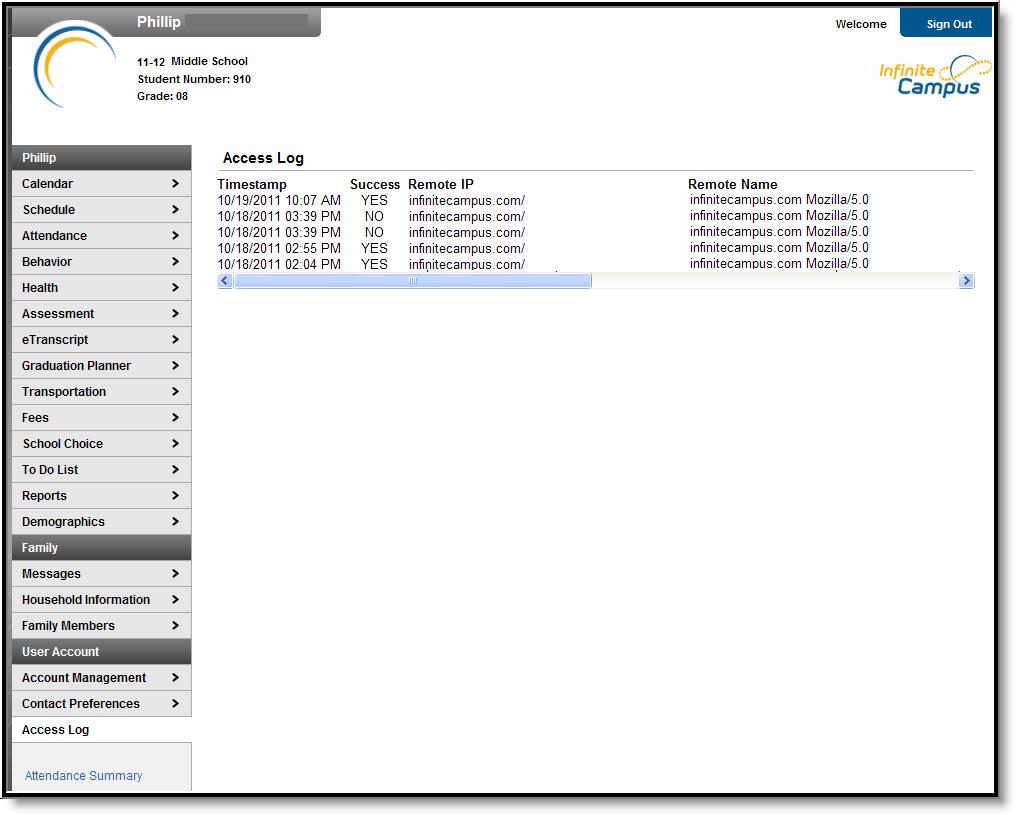
244 244
245 Account Management (Portal) Overview PATH: Portal > User Account > Account Management The Account Management tool allows Portal users to update their account security preferences. This tool functions differently depending on whether or not Password Reset functionality is enabled. See the sections below for more information about each version of this tool. This article includes the following topics: If Password Reset is Enabled If Password Reset is not Enabled If your district has not updated to at least the E.1218 Release Pack, see the Change Password (.1214 and previous) article. If Password Reset is Enabled If Password Reset functionality is enabled, the Account Management tool allows users to change their existing account password, update their account address and modify their Like and Dislike images which are used when recovering a forgotten password. 245

246 Image 1: Portal Account Management Tool (Password Reset Enabled) 246
247 Modifying Account Security Preferences (Password Reset Enabled) 1. If you would like to change your account password, enter a New Password and Verify the New Password. The box to the right of each of these fields indicates the strength of the new password. Red means weak, yellow means medium and green means strong. Users will not be allowed to save a red or yellow password. 2. To set your E-Signature PIN, enter a new E-Signature PIN. This PIN is used to electronically verify and sign Meal Benefit Applications. 3. If you would like to modify your Likes and Dislikes selections made when first setting up your account preferences, select each Like and Dislike image to be removed in the Your Selections area. You will need to replace these selections and ensure a total of 8 Likes and 8 Dislikes images populate the Your Selection area prior to saving. 4. Enter your address if the existing address on the account is incorrect. This must be a valid address. Password recovery is done through a unique URL sent to this address. Failure to provide a legitimate address means an inability to recover your password Enter your Current Password. Changes to security preferences cannot be saved unless the user's existing password is entered. Once all updates have been made, select the Save Changes button. Your account security preferences are now updated. If Password Reset is not Enabled If Password Reset functionality is not enabled, the Account Management tool allows users to change their existing Portal account password. 247
248 Image 2: Portal Account Management Tool (Password Reset Not Enabled) Modifying Account Security Preferences (Password Reset Not Enabled) If you would like to change your account password, enter a New Password and Verify the New Password. The box to the right of each of these fields indicates the strength of the new password. Red means weak, yellow means medium and green means strong. Users will not be allowed to save a red or yellow password. Enter your Current Password. Select the Save Changes button. 248

249 Student Online Assessment (Portal) Overview Online Assessment Information Viewing Scores and Teacher Feedback The information in this article is specific to submitting assignments on the Portal. To see a full description of the Portal, see the Campus Portal for Parents and Students article. Overview PATH: Campus Portal > Calendar > A+ Icon > Assignment Name PATH: Campus Portal > Schedule > Course Name > Assignment Name Using the Campus Portal, students can complete and submit online assessments posted there by teachers. Online assessments are accessed from the Calendar tab or through the Schedule tab. Online Assessments are administered through Assignments - through the Calendar and the Schedule assessments will appear the same as assignments. Through the Calendar Tab In the Calendar tab, "A+" icons indicate when an assignment is due. Click the icon to view all assignments due on that day. Click on the Name of the assignment to view assignment details. The Description of the assignment will indicate if an online assessment should be submitted through the Portal. Image 1: Accessing Assignments through the Calendar Through the Schedule Tab From the Schedule tab, click the Course Name next to the Notebook icon. Then click the name of the assignment. The Des cription of the assignment will indicate if an online assessment should be submitted through the Portal. 249

250 Image 2: Accessing Assignments through the Schedule For more details on the Calendar tab or Schedule tab, see the Campus Portal for Parents and Students article. Online Assessment Information When an assignment includes an online assessment to be completed and submitted through the Portal, the Assignment Detail will include an Online Assessment section. Assignment Detail Section The Assignment Detail Section includes all information provided to the student by the teacher, including Due Date, Points Possible and a Description of the assignment. The Online Assessment section of the Details will include the Status of the assessment (whether or not it has been started), a link to Start Assessment (or Continue Assessment) and a Max Duration (Time Limit) if one has been set by the teacher. 250

251 Image 3: Assignment Detail Section - Online Assessment Click Start Assessment or Continue Assessment to view the Assessment Detail. 251
. If a time limit has been set by the teacher, it will be shown in the Max Duration field.")
252 Assessment Detail Section Image 4: Assessment Detail The Assessment Detail screen will show the Due Date and Date Assigned as well as the Start and End Times the assessment is available ( Time Assigned and Due Time). If a time limit has been set by the teacher, it will be shown in the Max Duration field. If the student has already begun the assessment, the date the assessment was started will appear in P artial Response with the Remaining time below it. Once a timed assessment has been started, the timer cannot be paused. Click Start or Continue Assessment to open the assessment. Taking the Assessment Online assessments will appear one question at a time, beginning with the first unanswered question. There are four types of questions: Multiple Choice - One Correct Response Essay Short Answer True/False 252

253 Image 5: Taking the Assessment To answer a question, select or enter the answer and click Submit and Next. Answers can be modified after the question is answered as long as the assessment itself has not been submitted. Using the Item Navigation area at the bottom of the assessment, students can skip between questions. White numbers in solid black have been answered and submitted. Grey numbers have not been answered. The current question will be white with a black box. At any point during the assessment, students can review answers using the Item Navigation area if desired. Otherwise, click Submit Assessment. Once an assessment is submitted, it cannot be modified. If the time limit runs out while the student is taking the assessment, all entered work will be submitted, even in progress questions (such as a partially completed essay question). See the Grades article for instructions on viewing scored assignments. Viewing Scores and Teacher Feedback Once an assessment is scored, the score will appear in the Score Detail section of the assignment. Teachers also can provide feedback for an assessment as a whole or individual items. Assessment-level score and comments may be visible in the Score Detail section with item-level feedback accessed through the Online Assessment section. 253

254 Image 6: Score and Teacher Feedback If the teacher has released item feedback, click the Review Item Feedback link in the Online Assessment Detail, then the Review Item Feedback button to view answers and question-specific comments. Each question will have the correct answer indicated, as well as the score awarded. Any teacher comments will also be visible. 254

255 Image 7: Item-Level Score and Feedback 255
Campus Portal for Parents and Students February 2012
 Campus Portal for Parents and Students February 2012 This document is intended for restricted use only. Infinite Campus asserts that this document contains proprietary information that would give our competitors
Campus Portal for Parents and Students August 2011
 Campus Portal for Parents and Students August 2011 This document is intended for restricted use only. Infinite Campus asserts that this document contains proprietary information that would give our competitors
Campus Portal for Parents and Students October 2011
 Campus Portal for Parents and Students October 2011 This document is intended for restricted use only. Infinite Campus asserts that this document contains proprietary information that would give our competitors
Household Information (Portal)
") Household Information (Portal) Updating Household Information Updating Household Phone Number Updating Household Address PATH: Campus Portal > Family This tab lists the household phone number and all current
Household Information (Portal) Updating Household Information Updating Household Phone Number Updating Household Address PATH: Campus Portal > Family This tab lists the household phone number and all current
Infinite Campus Online Registration Existing Students
 INFINITE CAMPUS SYSTEMS SUPPORT TEAM USER SUPPORT SERVICES: User Guide Infinite Campus Online Registration Existing Students March 2017 TABLE OF CONTENTS ONLINE REGISTRATION Welcome to GIPS online registration.
Family (Portal) December 2012
 December 2012") Family (Portal) December 2012 This document is intended for restricted use only. Infinite Campus asserts that this document contains proprietary information that would give our competitors undue advantage
Family (Portal) December 2012 This document is intended for restricted use only. Infinite Campus asserts that this document contains proprietary information that would give our competitors undue advantage
Infinite Campus Online Registration Students New to CCSD
 USER SUPPORT SERVICES: EMPLOYEE BUSINESS TRAINING Infinite Campus Online Registration Students New to CCSD Revised: March 2017 TABLE OF CONTENTS ONLINE REGISTRATION... 3 REGISTERING AT A CCSD SCHOOL...
Rockwood School District s. Online Census Verification
 Rockwood School District s Online Census Verification Table of Contents 1. Online Enrollment 2. Accessing Online Census Verification and Adding New Students to Families with Existing Students 3. Navigating
Welcome Parents/Guardians to WCSD Online Registration for New Students Enrolling in Washoe County School District
 Welcome Parents/Guardians to WCSD Online Registration for New Students Enrolling in Washoe County School District WCSD Mission To create an education system where all students achieve academic success,
Direct Parent portal link: Infinite Campus Parent Portal
 Census Information Update Parents please review and enter changes to student, household, family and non-household emergency contact information directly in Infinite Campus. You can enter changes, add or
AASD Online Enrollment - EXISTING FAMILIES -
 A Guide to use the AASD online enrollment system. This guide is only for parents/guardians who have an existing Infinite Campus Portal username and password. If you forgot your username and password, please
Infinite Campus. Online Registration. Students Returning to CCSD USER SUPPORT SERVICES: EMPLOYEE BUSINESS TRAINING
 USER SUPPORT SERVICES: EMPLOYEE BUSINESS TRAINING Infinite Campus Online Registration Students Returning to CCSD Revised: March 2016 TABLE OF CONTENTS ONLINE REGISTRATION... 3 ACCESSING ONLINE REGISTRATION...
LCASD Online Registration System. For Summer School
 LCASD Online Registration System For Summer School WELCOME! This guide is for NEW Parents/Guardians who do not yet have an Infinite Campus Portal user account. Existing families who already have a Portal
Copying Assignments July 2015
 Copying Assignments July 2015 This document is intended for restricted use only. Infinite Campus asserts that this document contains proprietary information that would give our competitors undue advantage
Campus. Online Registration Processing. Student Information Systems
 CLARK COUNTY SCHOOL DISTRICT TECHNOLOGY & INFORMATION SYSTEMS SERVICES DIVISION EMPLOYEE BUSINESS TRAINING DEPARTMENT Student Information Systems Campus Online Registration Processing Revised: March 2017
LCASD Online Registration System. For Continuing Students
 LCASD Online Registration System For Continuing Students WELCOME! This guide is for Parents/Guardians of continuing students. You will need your Infinite Campus Portal user account to complete this process.
Campus Portal User Guide
 Campus Portal User Guide Introduction to this User Guide This user guide provides information on how parents and students can use the Campus Portal. Detailed instructions are available for logging into
IC Online Registration Parent Guide
 Step 1 IC Online Registration Parent Guide Access your Online Registration via the URL. https://sis.aps.k12.co.us/campus/onlineregloginkiosk_aurora.jsp Step 2 Note: The recommended browsers to use are
Pulaski County Special School District: New Student Online Registration Manual for Parents
 Pulaski County Special School District: New Student Online Registration Manual for Parents Welcome to the Pulaski County Special School District online registration for new students. This system should
Letter Designer July 2013
 Letter Designer July 2013 This document is intended for restricted use only. Infinite Campus asserts that this document contains proprietary information that would give our competitors undue advantage
Online Registration Detailed Instructions For Infinite Campus
 STEP DESCRIPTION 1 Login to Infinite Campus Portal Visit https://campus.elmbrookschools.org/campus /portal/elmbrook.jsp If you have a portal account, enter your username (email address) and password and
Infinite Campus Pre-Service Educator Program: Getting Started Student Guide
 Infinite Campus Pre-Service Educator Program: Getting Started Student Guide August 2015 This document is intended for restricted use only. Infinite Campus asserts that this document contains proprietary
Assignment Marks (Campus Instruction)
") Assignment Marks (Campus Instruction) September 2014 This document is intended for restricted use only. Infinite Campus asserts that this document contains proprietary information that would give our competitors
Assignment Marks (Campus Instruction) September 2014 This document is intended for restricted use only. Infinite Campus asserts that this document contains proprietary information that would give our competitors
If you haven t already created a ParentVUE account, you ll need to do so by going to https://parentvue.beaverton.k12.or.
 If you are a parent or guardian of a new student, you can enroll your child using BSD's online registration system. If you are a parent/guardian of a current BSD student, you can also use BSD's online
Behavior Letter Wizard August 2012
 Behavior Letter Wizard August 2012 This document is intended for restricted use only. Infinite Campus asserts that this document contains proprietary information that would give our competitors undue advantage
Online Census Verification Help Guide
 Online Census Verification Help Guide Online Census Verification is a feature available in Infinite Campus Parent Portal for families at Cold Spring Elementary and Central Bucks South for 2015-2016. This
How to access and navigate the Infinite Campus Portal
 Ballard County Public Schools How to access and navigate the Infinite Campus Portal This presentation is a demonstration of the Infinite Campus Portal. For a detailed description of each area of the portal,
Campus Community Guide October 2012
 Campus Community Guide October 2012 This document is intended for restricted use only. Infinite Campus asserts that this document contains proprietary information that would give our competitors undue
Online Registration Currently Enrolled Student Manual. Instructions to Turn OFF Pop Up Blockers in various browsers needed for registration
 Online Registration Currently Enrolled Student Manual This is a page by page Online Registration manual. You can print it or refer back to it if you have problems during registration. You will need to
Enroll a New Student
 The txsuite How To Guide Series Connect tx Web-based Access for Teachers, Parents, and Students How to: Enroll a New Student Developed by the T E XA S CO M P U T E R CO O P E R AT I V E Business and Student
Behavior Referral March 2013
 Behavior Referral March 2013 This document is intended for restricted use only. Infinite Campus asserts that this document contains proprietary information that would give our competitors undue advantage
Campus PORTAL INSTRUCTIONAL PACKET for FCE Leads. August 23, 2016
 Campus PORTAL INSTRUCTIONAL PACKET for FCE Leads August 23, 2016 Table of Contents Contents TABLE OF CONTENTS... 2 SECTION 1 ACCESSING INFINITE CAMPUS... 3 PARENT PORTAL LETTER... 3 ACCOUNT ACTIVATION...
Student Online Registration Version 2.0. Getting Started
 1 Getting Started Before you begin the Student Online Registration you must have an e-mail address and immediate access to read email messages from it. To use the Student Online Registration, you must
1. If you have multiple students attending SJUSD, select a student from the drop-down on the top-left of the screen
 http://go.sjusd.org/icparentportal INFINITE CAMPUS PARENT/STUDENT PORTAL 1. If you have multiple students attending SJUSD, select a student from the drop-down on the top-left of the screen 2. Calendar
esd Portal: Parent View User Guide v
 esd Portal: Parent View User Guide v. 5.9.0 Copyright 2002-2018 eschooldata, LLC All rights reserved. TABLE OF CONTENTS Overview... 3 Parent Portal Login Page... 3 Online Registration...4 Parent Portal
Campus Portal User Guide
 Campus Portal User Guide www.ccsoh.us If you have more than one child enrolled in the Columbus City Schools, there will be only one username and password for all children. Please note that assignments
esd Portal: Parent View User Guide v
 esd Portal: Parent View User Guide v. 5.0.0 Copyright 2002-2016 eschooldata, LLC All rights reserved. TABLE OF CONTENTS Overview... 3 Parent Portal Registration... 3 Logging In... 5 Getting Help... 7 Navigating
Parent Portal Account Registration and Password Reset/Account Look-up
 Introduction Parents and guardians of Miami-Dade County Public School (M-DCPS) students are encouraged to open a Parent Portal account. The Portal contains valuable student information including the Electronic
Summer Learning Registration for Parents/Guardians who have NOT been assigned a Portal Activation Key
 Log in to the Parent Portal Website: https://sis.clayton.k12.ga.us/campus/portal/clayton.jsp Select the 2 nd Click here hyperlink *If you have a Username and password, please see Instructions for parents/guardians
Pulaski County Special School District: New Student Online Registration Manual for Parents
 Pulaski County Special School District: New Student Online Registration Manual for Parents Welcome to the Pulaski County Special School District online registration for new students. This system should
Summer Learning Registration for Parents/Guardians who have been assigned a Portal Activation Key
 Log in to the Parent Portal Website: https://sis.clayton.k12.ga.us/campus/portal/clayton.jsp Enter your Parent Portal username and password: *If you do not have a Username and password, please see Instructions
Census. Adding Information to Infinite Campus. Adding People (Parent, Student, Emergency Contact)
") Adding Information to Infinite Campus Adding People (Parent, Student, Emergency Contact) 1. From the Index, click Census then click Add Person. 2. Enter the search criteria on the grey screen. When searching
Adding Information to Infinite Campus Adding People (Parent, Student, Emergency Contact) 1. From the Index, click Census then click Add Person. 2. Enter the search criteria on the grey screen. When searching
WAPS Online Registration User Guide For families NEW to WAPS
 WAPS Online Registration User Guide For families NEW to WAPS To start the WAPS Online Registration process go to the Winona Area Public Schools webpage at www.winonaschools.org and click on Enroll at the
Montclair Public Schools. STUDENT REGISTRATION PORTAL INSTRUCTIONS
 Montclair Public Schools STUDENT REGISTRATION PORTAL INSTRUCTIONS This registration portal is used to collect basic information about your child before you come to Central Office for grades K 8, or Montclair
Infinite Campus Parent Portal
 Infinite Campus Parent Portal Assignments Page 1 Calendar for Students Page 2 Schedule Page 4 Attendance Page 6 Grades Page 15 To Do List for Students Page 19 Reports Page 20 Messages Page 21 Discussions
ParentVUE for Secondary Students
 What is ParentVUE? ParentVue is a web portal that allows parents and guardians to access real-time information related to their students. Parents/guardians can view their student's calendars, attendance,
PARENT PORTAL VIEW LEARNING GUIDE
 PARENT PORTAL VIEW LEARNING GUIDE Central Susquehanna Intermediate Unit, USA TABLE OF CONTENTS Overview... 3 Account Registration... 3 Logging In... 5 Getting Help... 7 Navigating the Portal... 8 Messages...
esd Portals: Setup & Management User Guide v
 esd Portals: Setup & Management User Guide v. 5.8.1 Copyright 2002-2018 eschooldata, LLC All rights reserved. TABLE OF CONTENTS Overview... 3 Portal Setup Parameters... 3 Verification Schools...4 Verification
ACCOUNT REGISTRATION. SIS - Parent Portal Learning Guide
 ACCOUNT REGISTRATION Step 1: Parents will need to go to https://web4.schoolport.org/plexus/parentportal/ Parents will view this screen as their log on screen. If they already have accounts, parents will
PowerSchool Parent Portal User Guide. Ledyard Public Schools
 Ledyard Public Schools Contents Get Started...3 Log In to PowerSchool Single Sign On... 4 Navigation Bar... 7 Main Menu...7 Grades and Attendance... 8 Standards Grades... 9 Grades History... 9 Attendance
TxEIS txconnect Training Guide August, 2012
 August, 2012 Education Service Center 3001 North Freeway Fort Worth, Texas 76106 Contents Introduction...3 How to Display a Page in another Language..4 How to Display Help 5 How to Contact the Teacher..6
esd Portal: Parent View User Guide v
 esd Portal: Parent View User Guide v. 3.9.0 Copyright 2002-2014 eschooldata, LLC All rights reserved. TABLE OF CONTENTS Overview... 3 Account Registration... 3 Logging In... 5 Getting Help... 7 Navigating
MSAD #40 Infinite Campus Parent Portal Guide
 Accessing the Portal: Portal Access is available by clicking the Infinite Campus Portal link from the home page of each school or by typing the following into your web browser s address bar: https://maine.infinitecampus.org/campus/portal/msad40.jsp
Students. Students enrolled. with STEP A, STEP student s and parent s STEP. Student ID: contacts listed. All returning. Note: cover credentials)
") Online Registration Instructions for Returning Students Students enrolled on the last day of school in the 2017 2018 school year can be registered online to continue enrollment in BISD in the 2018 2019
Online Registration Instructions for Returning Students Students enrolled on the last day of school in the 2017 2018 school year can be registered online to continue enrollment in BISD in the 2018 2019
New Student Form Registration Online Parent Guide. McMinnville School District
 New Student Form Registration Online Parent Guide McMinnville School District 2016-17 Steps for Enrollment Online Process 1. Create an e-mail account if you do not have one. Create an e-mail account if
NCUSD 203 Campus Portal Login FAQ
 This document will provide you answers to all of your questions regarding setting up and troubleshooting issues with your Campus Portal Login Account. Please see the list of frequently questions below.
The Fairfield Schools Infinite Campus Portal: Parent Guide
 The Fairfield Schools Infinite Campus Portal: Parent Guide This is the first screen you will see. The Child s picture in this example has been redacted, but would be in this location if you have one child
McKinney ISD Home Access Center User Assistance Elementary Home Access Center User Assistance
 McKinney ISD Home Access Center User Assistance Elementary Home Access Center User Assistance Using Home Access Center Home Access Center Menu View another student Attendance Month View Page Change months
NEW FAMILY ON-LINE REGISTRATION HELP GUIDE
 NEW FAMILY ON-LINE REGISTRATION HELP GUIDE Online Registration is available for new families moving to the district, Kindergartners of existing families, or new students living with a family in the district,
How to: Enroll a New Student in the District
 The txsuite How To Guide Series txconnect Parent Web-based Access for Teachers, Parents, and Students How to: Enroll a New Student in the District Developed by the T E XA S CO M P U T E R CO O P E R AT
esd Portal: Parent View User Guide v
 esd Portal: Parent View User Guide v. 3.7.0 Copyright 2002-2013 eschooldata, LLC All rights reserved. TABLE OF CONTENTS Overview... 3 Account Registration... 3 Logging In... 5 Getting Help... 7 Navigating
Home Access Center User Assistance
 User Assistance Using Home Access Center Home Access Center Menu View another student Attendance Month View Page Change months View attendance details Subscribe to attendance email alerts Calendar Page
Community Web Portal. A Guide for Parents and Students
 Community Web Portal A Guide for Parents and Students Since 2002, Sapphire Software has provided exceptional software application solutions for school districts needs. To prepare students for success in
esd Mobile Parent User Guide v
 esd Mobile Parent User Guide v. 4.5.0 Copyright 2002-2014 eschooldata, LLC All rights reserved. TABLE OF CONTENTS Overview... 3 Logging In... 3 Navigating esd Mobile Parent... 6 Home Tab... 7 Students
Recommended Browser Settings
 Recommended Browser Settings August 2015 This document is intended for restricted use only. Infinite Campus asserts that this document contains proprietary information that would give our competitors undue
Created: 8/16/2013 North Schuylkill School District Page 1
 Parents Request Portal Accounts Step 1: Parents will need to go to https://web4.schoolport.org/plexus/parentportal/ Parents will view this screen as their log on screen. If they already have accounts,
Census/Registration Manual
 Census/Registration Manual Version 2011M.1038 This manual created by Custom Computer Specialists, Inc. 70 Suffolk Court Hauppauge, NY 11788 www.customonline.com Copyright 2006 Custom Computer Specialists,
NAVIGATING THE PARENT PORTAL
 NAVIGATING THE PARENT PORTAL Log in to the Campus Portal with your user name and password. Click the log in button. Once logged in, an index of accessible information for the household as a whole is listed
2018 Auditions 2018 Quick Start Guide
 2018 Auditions 2018 Quick Start Guide ABOUT The S4E Music Service Ensembles Portal has been created to allow parents/guardians to have on-line access to their children s ensemble information whilst they
PowerSchool User Guide For Parents
 PowerSchool User Guide For Parents https://powerschool.gpcsd.ca/public Table of Contents Understanding Power School Parent Portal... 2 Introduction... 2 Let s Get Started... 2 Creating Your PowerSchool
ACT Test Accessibility and Accommodations System (TAA) User Guide
 User Guide") ACT Test Accessibility and Accommodations System (TAA) User Guide www.act.org ACT Test Accessibility and Accommodations System (TAA) User Guide Table of Contents Overview... 2 Introduction to the Test
ACT Test Accessibility and Accommodations System (TAA) User Guide www.act.org ACT Test Accessibility and Accommodations System (TAA) User Guide Table of Contents Overview... 2 Introduction to the Test
esd Portal: Parent View User Guide v
 esd Portal: Parent View User Guide v. 3.2.0 Copyright 2002-2013 eschooldata, LLC All rights reserved. TABLE OF CONTENTS Overview... 3 Account Registration... 3 Logging In... 5 Getting Help... 6 Navigating
Using Home Access Center. Attendance Month View Page. Calendar Page. Career Plan Page. Classwork Page. Course Requests Page.
 Using Home Access Center Home Access Center Menu View another student Attendance Month View Page Change months View attendance details Subscribe to attendance email alerts Calendar Page Customize calendar
Online Student Enrollment Parent Portal (SPS Staff Only: Non-Resident Students)
") Online Student Enrollment Parent Portal (SPS Staff Only: Non-Resident Students) Below is a set of detailed instructions and the link to the District s Online Enrollment Application: Go to the District
Online Student Enrollment Parent Portal (SPS Staff Only: Non-Resident Students) Below is a set of detailed instructions and the link to the District s Online Enrollment Application: Go to the District
Lunch Application User Manual
 Lunch Application User Manual Education Management Systems, Inc. 4110 Shipyard Blvd, Wilmington, NC 28403 www.mealsplus.com or (800) 541-8999 Table of Contents 1.0 Welcome to LunchApplication.com... 1
Home Access Center User Assistance
 User Assistance Using Home Access Center Home Access Center Menu View another student Attendance Month View Page Change months View attendance details Calendar Page Customize calendar information Change
23.1. esd Parent Portal Parent/Guardian View. Chapter
 Chapter Rev 2.9 18-May-2011 23.1 Parent Portal Parent/Guardian View This chapter provides a step by step guide for Parents and Guardians to login and access student(s) information through the Parent Portal.
DRC INSIGHT Portal User Guide TerraNova Christian School Program Online Enrollment for Machine Scoring & Student File Upload
 DRC INSIGHT Portal User Guide TerraNova Christian School Program Online Enrollment for Machine Scoring & Student File Upload Data Recognition Corporation (DRC) 13490 Bass Lake Road Maple Grove, MN 55311
PowerSchool Student and Parent Portal User Guide. https://powerschool.gpcsd.ca/public
 PowerSchool Student and Parent Portal User Guide https://powerschool.gpcsd.ca/public Released June 2017 Document Owner: Documentation Services This edition applies to Release 11.x of the PowerSchool software
Logging In & Logging Out
 Logging In & Logging Out Logging In Logging into Genesis is very simple: 1. Go to the Web Access URL supplied with your district welcome packet. 2. Enter your Email Address in the Username field 3. Enter
MograSIS. Online Admission User Manual
 MograSIS Online Admission User Manual Document Properties Copyright Mograsys Pvt. Ltd. Office number 535, Amanora Office Chember, Amanora Town Park, Pune, India. Owner Lakshmi Name of the Document Online
CAMPUS PORTAL QUICK REFERENCE GUIDE: STUDENT PORTAL
 CAMPUS PORTAL QUICK REFERENCE GUIDE: STUDENT PORTAL 1 CONTENTS How to Set Up Your Portal Web Account... 3 How to Personalize Your Homepage... 4 How to View Holds Applied to Your Portal Account... 4 How
User Guide
 Online Parent Forms Cherry Creek School District Information Systems User Guide 2017-2018 This page intentionally left blank. Table of Contents Accessing Parent Forms ---------------------------------------------------------------
eschoolplus Alief Independent School Distirct ONLINE STUDENT ENROLLMENT
 ONLINE STUDENT ENROLLMENT How to Register with Enrollment Online 1. Go to https://aliefhac1.aliefisd.net/eo_parent/user/login.aspx 2. Click on Register New Account. 3. Complete the registration screen
Parent Handbook: Campus Portal Account Activation
 Parent Handbook: Campus Portal Account Activation Table of Contents Introduction... 1 FOR PARENTS... 1 Parent receives an email with a link... 2 Campus Security Features... 5 If You Forget Your Password
Using Home Access Center
 Page 1 of 27 Using Home Access Center Home Access Center (HAC) is a browser-based student information system that allows you to view student registration, report card, attendance, discipline, transcript,
Firewall and Web-Filter Rules
 Firewall and Web-Filter Rules February 2015 This document is intended for restricted use only. Infinite Campus asserts that this document contains proprietary information that would give our competitors
Parent Portal. User Manual
 Parent Portal User Manual GENESIS STUDENT INFORMATION SYSTEM PARENT PORTAL Introduction 3 Logging In & Logging Out 4 Student Summary Dashboard The Dashboard Selecting a Student Attendance Daily Attendance
Parent Portal - Create an Account And Forgot Password
 Parents and guardians of Miami-Dade County Public School (M-DCPS) students are encouraged to open a Parent Portal account. The Portal contains valuable student information including the Electronic Gradebook,
Palisades School District PowerSchool Parent Portal Guide
 Palisades School District PowerSchool Parent Portal Guide Get Started To get started, you must create a parent account in the PowerSchool Parent Portal. Create a Parent Account Use this procedure to create
Home Access Center User Assistance
 User Assistance Using Home Access Center Home Access Center Menu View another student Attendance Month View Page Change months View attendance details Calendar Page Customize calendar information Change
DRC INSIGHT Portal User Guide TerraNova Christian School Program Online Enrollment for Machine Scoring & Student File Upload
 DRC INSIGHT Portal User Guide TerraNova Christian School Program Online Enrollment for Machine Scoring & Student File Upload Data Recognition Corporation (DRC) 13490 Bass Lake Road Maple Grove, MN 55311
Patient Portal User Guide The Patient s Guide to Using the Portal
 2014 Patient Portal User Guide The Patient s Guide to Using the Portal Table of Contents: What is the Patient Portal?...3 Enrolling in the Patient Portal.......... 4-19 A. Enrollment Option #1: First-Time
I didn t receive a letter in the mail. 3. Parent Access Letters [Translated] 3
![I didn t receive a letter in the mail. 3. Parent Access Letters [Translated] 3](/thumbs/93/113162080.jpg "I didn t receive a letter in the mail. 3. Parent Access Letters [Translated] 3") How to create and use your Portal account Bradley Hills Elementary School This guide is for parents/guardians of Elementary students. Click the topic below to learn more. How do I set up my Parent Portal
How to create and use your Portal account Bradley Hills Elementary School This guide is for parents/guardians of Elementary students. Click the topic below to learn more. How do I set up my Parent Portal
PowerSchool Parent Portal User Guide. PowerSchool 7.x Student Information System
 PowerSchool 7.x Student Information System Released December 2012 Document Owner: Documentation Services This edition applies to Release 7.6 of the PowerSchool software and to all subsequent releases and
New Student Online Enrollment through txconnect
 New Student Online Enrollment through txconnect Parents with students new to the district will be able to complete basic enrollment information through the New Student Enrollment section available in txconnect
Campus Parent Portal Guide. Click on the link next to If you have been assigned a Campus Portal Activation Key.
 Please use the link below to access Infinite Campus Parent Portal. https://newmantx.infinitecampus.org/campus/portal/newman.jsp Click on the link next to If you have been assigned a Campus Portal Activation
Do NOT navigate this document by scrolling page by page. Navigate these instructions by clicking the hyperlinks.
 1 v.5-10-17 Click ONE of the four boxes below. Do NOT navigate this document by scrolling page by page. Navigate these instructions by clicking the hyperlinks. Incoming students I am a new student and
Mount Carmel On-line Portal Frequently Asked Questions
 Mount Carmel On-line Portal Frequently Asked Questions FAQ Topics: 1. General Information 2. Account Registration/Creation 3. Username and Password 4. Portal Information/Content 1. GENERAL INFORMATION:
PowerSchool Users Guide for Parents/Guardians
 PowerSchool Users Guide for Parents/Guardians Introduction PowerSchool's Parent Portal is a tool specifically developed for parents and students that integrates into the PowerSchool Student Information