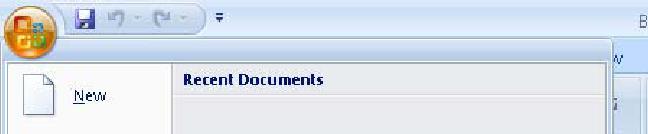
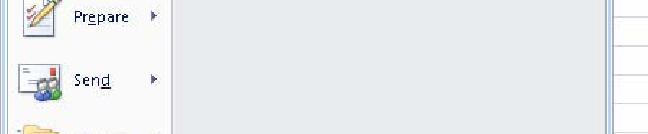
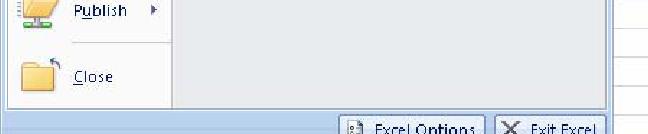
Quick Access Toolbar. You click on it to see these options: New, Open, Save, Save As, Print, Prepare, Send, Publish and Close.
|
|
|
- Laurence Roberts
- 5 years ago
- Views:
Transcription
) English. 2. Double click on the Word 2007 icon on your desktop.")
. 6.")

1 Opening Microsoft Word 2007 in the practical room UNIT-III 1 KNREDDY 1. Nyelvi beállítások az Office 2007-hez (Language settings for Office 2007 (not 2003)) English. 2. Double click on the Word 2007 icon on your desktop. 3. View / Zoom / Page width. 4. View / Show/Hide / Turn on the ruler (check the checkbox). 5. Home / Paragraph / Show paragraph marks and other hidden formatting symbols (top right icon). 6. Set the margins (you can use a real ruler). Screen Layout Quick Access Toolbar Microsoft Office button Ribbon Cursor Scroll bar View choices The Microsoft Office Button You click on it to see these options: New, Open, Save, Save As, Print, Prepare, Send, Publish and Close.
2 UNIT-III 2 KNREDDY The Ribbon The Ribbon is the panel above the document. It has seven tabs: Home, Insert, Page Layout, References, Mailings, Review, and View. Each tab is divided into groups. The groups are collections of features designed to perform functions. Commonly used features are displayed on the Ribbon, to view additional features within each group, click on the arrow at the bottom right of each group. A blue information box will pop up just below where you stop your pointer. Home: Clipboard, Fonts, Paragraph, Styles, and Editing. Insert: Pages, Tables, Illustrations, Links, Header & Footer, Text, and Symbols Page Layout: Themes, Page Setup, Page Background, Paragraph, Arrange References: Table of Contents, Footnote, Citation & Bibliography, Captions, Index, and Table of Authorities Mailings: Create, Start Mail Merge, Write & Insert Fields, Preview Results, Finish Review: Proofing, Comments, Tracking, Changes, Compare, Protect View: Document Views, Show/Hide, Zoom, Window, Macros To remove the toolbar, right click on the blue section beside the Ribbon. Choose Minimize the Ribbon. To view again, do the same. Quick Access Toolbar The quick access toolbar is a customizable toolbar that contains commands that you may want to use frequently. You can add items to it. Right click on any item in the Office Button or the Ribbon and click on Add to Quick Access Toolbar and a shortcut will be added to the Quick Access Toolbar. Moving in the text The Cursor The cursor is the short verical flashing line on your screen. The cursor shows you where you will start typing in a Word document. When you are using the Tools in Microsoft Word your cursor will change to an arrow. This is called a pointer. Scrolling Your scroll bar is at the right-hand side of your screen. Click on the up/down arrow to go up/down the page. Hold down the left mouse button to scroll up and down the screen more quickly.
3 Using the Keyboard in MS Word UNIT-III 3 KNREDDY The arrow keys on your keyboard move your cursor around. To make a letter a capital letter: Hold down the Shift and the letter key at the same time. For the signs on your keyboard: Hold down the Shift and the number key at the same time. The Shift keys are on both sides of the keyboard. The Space bar makes spaces between words when typing. Tap the bar one time to make a space. Use the Enter key to move your cursor to finish the line and make a new one. The Backspace key deletes everything to the left of the cursor. The Delete key will erase everything to the right of the cursor. To make the cursor go to the end of the line press End. To make the cursor go to the start of a line press Home. To make the cursor go to one page up/down press Page Up/Page Down. To make the cursor go to the top/end of the document press Ctrl+Home/Ctrl+End. Selecting text Put the cursor at the beginning or end of the words you want to select. Put your finger on the left mouse button. Hold down the left mouse button. Move the mouse across the words. Lift up your finger. The word will be highlighted in blue. When this is done, you can move words or change the size, the colour, and the style of the words on the computer. Alternatives To select a word, double click within the word. To select a paragraph, triple-click within the paragraph. To select the entire document: Home/Editing/Select/Select All or press Ctrl+A To Deselect Click your mouse on any WHITE part of the page to deselect.
4 Basic actions with documents UNIT-III 4 KNREDDY Create a New Document There are several ways to create new documents, open existing documents, and save documents in Word: Microsoft Office Button / New / Blank document Opening an Existing Document Microsoft Office Button -> Open -> Choose from the list Saving a Document or or Microsoft Office Button/ Save or Save as Press Ctrl+S on the keyboard, Click the File icon on the Quick Access Toolbar Working on Multiple Documents Several documents can be opened. All open documents will be listed in the View Tab of the Ribbon when you click on Switch Windows. The current document has a checkmark beside the file name. Select another open document to view it.
5 Document Views UNIT-III 5 KNREDDY Print Layout: This is a view of the document as it would appear when printed. It includes all tables, text, graphics, and images. Full Screen Reading: This is a full view length view of a document. Good for viewing two pages at a time. Web Layout: This is a view of the document as it would appear in a web browser. Outline: This is an outline form of the document in the form of bullets. Draft: This view does not display pictures or layouts, just text. To view a document in different forms, click the document views shortcuts at the bottom of the screen or: Click the View Tab on the Ribbon Click on the appropriate document view. Close a Document Microsoft Office Button / Close Editing document Clipboard Editing Inserting Additional Text: Type Text: Put your cursor where you want to add the text and begin typing Copy and Paste Text: Highlight the text you wish to copy and right click and click Copy (or Ctrl+C), put your cursor where you want the text in the document and right click and click Paste (or Ctrl+V). Cut and Paste Text: Highlight the text you wish to cut and right click and click Cut (or Ctrl+X), put your cursor INFORMATION where you want TECHNOLOGY the text in the document FOR MANAGERS and right click and click Paste (or Ctrl+V).
6 Drag Text: Highlight the text you wish to move, click on it and drag it to the place where you want the text in the document. UNIT-III 6 KNREDDY You can also use the Clipboard group on the Ribbon (Home tag). Search and Replace Text To find a particular word or phrase in a document: Editing / Find To find and replace a word or phrase in the document: Editing / Replace Undo Changes Click the Undo Button on the Quick Access Toolbar.
, colors and more.")

7 Home UNIT-III 7 KNREDDY Formatting text Font, Paragraph, Styles On the Home Tab of the Ribbon, there are several areas controlling the style of the document: Font, Paragraph, and Styles. A style is a format enhancing tool that includes font typefaces, font size, effects (bold, italics, underline, etc.), colors and more. Font and size Change Font Typeface and Size Click the arrow next to the font name and choose a font and size. You can preview how the new font will look by highlighting the text, and hovering over the new font typeface. Font Styles and Effects Font styles are predefined formatting options that are used to emphasize text: Bold, Italic, and Underline. Select the text and click the Font Styles included on the Font Group of the Ribbon, or Select the text and right click to display the font tools


8 Change the spacing between characters Selecting Expanded or Condensed alters the spacing between all selected letters by the same UNIT-III 8 KNREDDY amount. Kerning alters the spacing between particular pairs of letters. Expand or condense the space evenly between all the selected characters Select the text that you want to change. On the Home tab, click the Font Dialog Box Launcher, and then click the Character Spacing tab. In the Spacing box, click Expanded or Condensed, and then specify how much space you want in the By box. Change Text Color Select the text and click the Colors button included on the Font Group of the Ribbon, or Highlight the text and right click and choose the colors tool. Select the color by clicking the down arrow next to the font color button. Highlight Text Select the text Click the Highlight Button on the Font Group of the Ribbon, or Select the text and right click and select the highlight tool To change the color of the highlighter click on down arrow next to the highlight button. Copy Formatting If you have already formatted text the way you want it and would like another portion of the document to have the same formatting, you can copy the formatting. To copy the formatting, do the following: Select the text with the formatting you want to copy. Copy the format of the text selected by clicking the Format Painter button on the Clipboard Group of the Home Tab Apply the copied format by selecting the text and clicking on it. Clear Formatting Select the text you wish to clear the formatting. Click the Styles dialogue box on the Styles Group on the Home Tab. Click Clear All.
9 Make a Hyperlink UNIT-III Select the text you wish to by a hyperlink. 9 KNREDDY Click the Insert tab. Click on Hyperlink and OK. Insert current Date and Time Click the Insert tab. Click on Date & Time. Select the appropriate language and format. Page Layout Formatting Paragraphs Formatting paragraphs allows you to change the look of the overall document. You can access many of the tools of paragraph formatting by clicking the Page Layout Tab of the Ribbon or the Paragraph Group on the Home Tab of the Ribbon. Change Paragraph Alignment Click the Home Tab Choose the appropriate button for alignment on the Paragraph Group. o Align Left: the text is aligned with your left margin o Center: The text is centered within your margins o Align Right: Aligns text with the right margin o Justify: Aligns text to both the left and right margins. Indent Paragraphs Paragraph Indenting paragraphs allows you set text within a paragraph at different margins. There are several options for indenting: First Line: Controls the left boundary for the first line of a paragraph Hanging: Controls the left boundary of every line in a paragraph except the first one Left: Controls the INFORMATION left boundary for TECHNOLOGY every line in a FOR paragraph MANAGERS Right: Controls the right boundary for every line in a paragraph


10 To indent paragraphs, you can do the following: UNIT-III Click the Indent buttons to control the indent. 10 KNREDDY Click the Indent button repeated times to increase the size of the indent. Click the dialog box of the Paragraph Group Click the Indents and Spacing Tab Select your indents Alignment also can be changed within this Tab. Change Spacing Between Paragraphs and Lines Select the paragraph or paragraphs you wish to change. On the Home Tab, Click the Paragraph Dialog Box Click the Indents and Spacing Tab In the Spacing section, adjust your spacing accordingly Add Borders and Shading You can add borders and shading to paragraphs and entire pages. Select the area of text where you want the border or shading. Click the Borders Button on the Paragraph Group on the Home Tab Choose the Border and Shading Choose the appropriate options Drawing horzontal line Put your cursor where you want to add the horizontal line. Click the Borders Button on the Paragraph Group on the Home Tab Choose the Horizontal line Click on the line Choose the appropriate options in the pop up window.

11 Styles UNIT-IIIThe use of Styles in Word will allow you to quickly 11 format a KNREDDY document with a consistent and professional look. Styles can be saved for use in many documents. Apply Styles There are many styles that are already in Word ready for you to use. To view the available styles click the Styles dialog box on the Styles Group in the Home Tab. To apply a style: 1. Select the text 2. Click the Styles Dialog Box, or Styles Drop Down menu 3. Click the Style you choose Creating New Styles New Style Click the Styles Dialog Box Click the New Style Button Complete the New Style dialog box. At the bottom of that dialog box, you can choose to add this to the Quick Style List or to make it available only in this document. New Quick Style Insert your cursor anywhere in the text formatted as the chosen style Click the Styles dialog box Click on New style and click on Add to Quick Style list and OK. Style Inspector To determine the style of a particular section of a document: Insert cursor anywhere in the text that you want to explain the style Click the Styles Drop Down Menu Put the arrow on the bordered style. The formatting options will appear in a text box.

12 UNIT-III 12 KNREDDY Tab selector Set, edit, or clear tabs Tab View ruler button Set the tab stops With the ruler it is possible to set manual tab stops at the left side, middle, and right side of your document. Note: If you don't see the horizontal ruler that runs along the top of the document, click the View Ruler button at the top of the vertical scroll bar. It is easy to set tabs by clicking the tab selector at the left end of the ruler until it displays the type of tab that you want and then clicking the ruler at the location you want. Tab types: A Left Tab stop sets the start position of text that will then run to the right as you type. A Center Tab stop sets the position of the middle of the text. The text centers on this position as you type. A Right Tab stop sets the right end of the text. As you type, the text moves to the left. A Decimal Tab stop aligns numbers around a decimal point. Independent of the number of digits, the decimal point will be in the same position. A Bar Tab stop doesn't position text. It inserts a vertical bar at the tab position. For more precise positions, use the Tabs dialog box: double-click any tab stop on the ruler, or: On the Page Layout tab, click the Paragraph Dialog Box Launcher. At the bottom of Paragraph dialog box, click Tabs. Add leaders between tab stops You can add dot leaders between tab stops or choose other formatting options in the Tabs dialog box. Type the text that you want. On the horizontal ruler, set the tab stop that you want. On the Page Layout tab, click the Paragraph Dialog Box Launcher. In the Paragraph dialog box, click Tabs. Under Leader, click INFORMATION the leader option TECHNOLOGY that you want. FOR MANAGERS When you press ENTER to start a new line, the formatted tab stop is available on the new line.


13 Adding Tables UNIT-III 13 KNREDDY Create a Table: Place the cursor on the page where you want the new table Click the Insert Tab of the Ribbon Click the Tables Button on the Tables Group. You can create a table one of four ways: o Highlight the number of row and columns o Click Insert Table and enter the number of rows and columns o Click the Draw Table, create your table by clicking and entering the rows and columns o Click Quick Tables and choose a table Enter Data in a Table: Place the cursor in the cell where you wish to enter the information. Begin typing. Modify the Table Structure and Format a Table Click the table and notice that you have two new tabs on the Ribbon: Design and Layout. These pertain to the table design and layout. On the Design Tab, you can choose: Table Style Options Choose Table Styles Shading and Borders To format a table, click the table and then click the Layout Tab on the Ribbon. This Layout tab allows you to: View Gridlines and Properties (from the Table Group) Insert Rows and Columns (from the Rows & Columns Group) Delete the Table, Rows and/or Columns (from the Rows & Columns Group) Merge or Split Cells (from the Merge Group) Increase and Decrease INFORMATION cell Height TECHNOLOGY and Width size (Cell FOR Size MANAGERS Group) Align text within the cells and change text directions (Alignment Group)
14 Graphics UNIT-IIIYou can insert special characters, symbols, pictures, 14 illustrations, and watermarks. KNREDDY Picture Symbols and special characters Symbols and Special Characters: punctuation, spacing, or typographical Place your cursor in the document where you want the symbol Click the Insert Tab on the Ribbon Click the Symbol button on the Symbols Group Choose the appropriate symbol. Illustrations, Pictures, and SmartArt To insert illustrations: Place your cursor in the document where you want the illustration/picture Click the Insert Tab on the Ribbon Click the Clip Art/ Picture /Smart Art Button The dialog box will open on the screen and you can search for clip art / picture / smart art. Choose the illustration you wish to include To insert a picture: Place your cursor in the document where you want the illustration/picture Click the Insert Tab on the Ribbon Click the Picture Button Browse to the picture you wish to include Click the Picture Click Insert Resize Graphics All graphics can be resized by clicking the image and clicking one corner of the image and dragging the cursor to the size you want the picture.

15 UNIT-III 15 KNREDDY Page Formatting Modify Page Margins: Click the Page Layout Tab on the Ribbon On the Page Setup Group, Click Margins Click a Default Margin, or Click Custom Margins and complete the dialog box. Orientation, Size of the Page, or Columns: Click the Page Layout Tab on the Ribbon On the Page Setup Group, Click the Orientation, Size, or Columns drop down menus Click the appropriate choice Page Border and Color Click the Page Layout Tab on the Ribbon On the Page Background Group, click the Page Colors or Page Borders drop down menus Insert Common Header and Footer Information To insert Header and Footer information such as page numbers, date, or title, first, decide if you want the information in the header (at the top of the page) or in the Footer (at the bottom of the page), then: Click the Insert Tab on the Ribbon Click Header or Footer Choose a style
16 Footnotes UNIT-III 16 KNREDDY Footnotes are sometimes necessary for providing additional information in your document. They normally use a superscript number as a marker, making it easy for the reader to simply look down from the text to the notes at the bottom to gather further information. Word automatically keeps track of the numbering and placement of the footnotes for you, making this a painless task to perform when writing that thesis, book, or scientific paper. To insert footnotes into your Word document, do the following Click the place in your document that you wish to place the insertion point for the reference mark to the footnote. In the Ribbon, click the References tab. In the Footnotes section, click Insert Footnote. Word will insert the reference mark at the point you selected and then take you to the bottom of the page. Type your footnote. When you are done, right-click the footnote and select Go to Footnote to take you back to the insertion point in the main body so you can continue working on your document. Bulleted and Numbered Lists Lists allow you to format and organize text with numbers, bullets, or in an outline. Bulleted lists have bullet points, numbered lists have numbers, and outline lists combine numbers and letters depending on the organization of the list. Decrease ident Increase ident Bulleted list To create a list from an existing text: Numbered list Select the text you wish to make a list From the Paragraph Group on the Home Tab, Click the Bulleted or Numbered Lists button New list Place your cursor where you want the list in the document Click the Bulleted or Numbered Lists button Begin typing Nested Lists A nested list is list with several levels of indented text. To create a nested list: Create your list following the directions above Click the Increase or Decrease Indent button

17 Formatting Lists UNIT-III 17 KNREDDY The bullet image and numbering format can be changed by using the Bullets or Numbering dialog box. Select the entire list to change all the bullets or numbers, or Place the cursor on one line within the list to change a single bullet Right click Click the arrow next to the bulleted or numbered list and choose a bullet or numbering style.


18 UNIT-III 18 KNREDDY

19 UNIT-III 19 KNREDDY


20 UNIT-III 20 KNREDDY

21 UNIT-III 21 KNREDDY

22 UNIT-III 22 KNREDDY


23 UNIT-III 23 KNREDDY


24 UNIT-III 24 KNREDDY


25 UNIT-III 25 KNREDDY


26 UNIT-III 26 KNREDDY


27 UNIT-III 27 KNREDDY
28 UNIT-III 28 KNREDDY
29 UNIT-III 29 KNREDDY Microsoft PowerPoint 2007 (PDF Tutorial) Created by Dawn Rauscher Note on Version: This tutorial was created with Microsoft PowerPoint 2007 which could make some screens different from other versions of Microsoft PowerPoint.


30 2.0 Slide Design 4.0 Edit Slide Master 6.0 New Slide 8.0 Slide Transitions UNIT-III 30 KNREDDY 6.0 Insert Image 5.0 Insert Text 9.0 Animations Follow the steps below to create the presentation shown above. 1. Open Microsoft PowerPoint 2. Format the slide 2.1 Click Layout > Title 2.3 Click 2.2 Click The Aspect Design Template The Design Tab


31 UNIT-III 31 KNREDDY 3. Save the File 3.1 Click the save icon 3.2 Enter NativeAmericanLit for file name Note: Save your work frequently to prevent data loss. 3.3 Click Save 4.2 Click Slide Master 4. Edit the Slide Master 4.1 Click View


32 UNIT-III Click on the color Red, KNREDDY Accent, Darker 25% 4.3 Highlight the text 4.4 Click on the font color icon 4.7 Click on Clip Art 4.6 Click on the Insert tab 4.8 Enter native american under Search for 4.9 Scroll down and click thumbnail to insert image


33 UNIT-III 33 KNREDDY 4.10 Click and drag image to location 4.11 Click Close Master View 5. Enter the text 5.2 Type Native American Literature 5.1 Click and enter the title for the presentation 5.3 Click the Insert tab 5.4 Click the Text Box Icon


34 UNIT-III 34 KNREDDY 5.5 The text box will expand as you enter text 5.7 Set the font size to Click and drag to highlight the text 6. Create a New Slide 6.1 Click the New Slide icon 6.2 Click the Title and Content slide 6.3 Click and enter Fast Facts for the title of the new slide


35 UNIT-III 35 KNREDDY 6.4 To add content, click and begin typing the list 6.5 View of completed list 6.7 Click on Clip Art 6.6 Click on the Insert tab


36 UNIT-III 36 KNREDDY 6.9 Click thumbnail to insert image 6.8 Search for Myths 6.10 Resize and move image as needed 7. Additional Skills 7.1 Follow the same steps from 6.0 to create the remaining slides Search for story

37 UNIT-III 37 KNREDDY Search for mountains Search for coyote


38 UNIT-III 38 KNREDDY Search for questions 8. Slide transitions 8.1 Click the thumbnail of the first slide 8.2 Click the Animation tab 8.3 Click the fades smoothly transition. Note: For the remaining slides, you can choose other transitions. 8.4 Click Apply to All


39 UNIT-III Set the time to KNREDDY 20 seconds 8.5 Click the thumbnail of the third slide 15 seconds 25 seconds 30 seconds 8.7 Follow steps 8.5 and 8.6 to set the timing for the remaining slides 9. Animations 9.2 Click the custom animation button 9.1 Click the thumbnail of the second slide


40 9.3 Click the text UNIT-III Click the KNREDDY box to select it Add Effect button 9.6 Click on Fly In 9.5 Click on Entrance 9.7 Change direction to From Right 9.8 Change the speed to Medium 9.9 Click the thumbnail of the third slide 9.10 Click the text box. Hold down the ctrl key and click the picture


41 UNIT-III 41 KNREDDY 9.11 Click Add Effect > Entrance > Diamond 9.12 Change the Direction to out and the Speed to slow 9.13 Continue this animation scheme for the remaining slides 10. View the slide show 10.2 Click From Beginning 10.1 Click the Slide Show tab 10.3 Press the Esc key to stop the show 11. Printing 11.1 Click The Office Button


42 UNIT-III 42 KNREDDY 11.2 Use these settings to print each slide separately 11.3 Use these settings to print handouts
San Pedro Junior College. WORD PROCESSING (Microsoft Word 2016) Week 4-7
 Week 4-7") WORD PROCESSING (Microsoft Word 2016) Week 4-7 Creating a New Document In Word, there are several ways to create new document, open existing documents, and save documents: Click the File menu tab and then
WORD PROCESSING (Microsoft Word 2016) Week 4-7 Creating a New Document In Word, there are several ways to create new document, open existing documents, and save documents: Click the File menu tab and then
LESSON ONE AND TWO TOPIC: HOW TO USE MICROSOFT WORD. : Putu Putra Astawa, S.Kom.,M.Kom
 LESSON ONE AND TWO TOPIC: HOW TO USE MICROSOFT WORD Author : Putu Putra Astawa, S.Kom.,M.Kom Date : June 09, 2014 and June 16, 2014 Time : 08.30-10.45 Am. Materials Needed : Computer, Work Sheet Overview
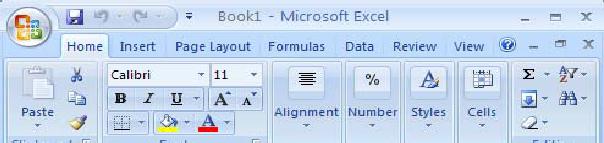
Spreadsheets Microsoft Office Button Ribbon
 Getting started with Excel 2007 you will notice that there are many similar features to previous versions. You will also notice that there are many new features that you ll be able to utilize. There are
Microsoft Word 2010 Basics
 1 Starting Word 2010 with XP Click the Start Button, All Programs, Microsoft Office, Microsoft Word 2010 Starting Word 2010 with 07 Click the Microsoft Office Button with the Windows flag logo Start Button,
Quarter II Word Processing
 Quarter II Word Processing Module III Understanding MS Word 2007 This module will walk you through the fundamentals of word processing software and prepare you to learn, perform, and make you understand
11.1 Create Speaker Notes Print a Presentation Package a Presentation PowerPoint Tips... 44
 Contents 1 Getting Started... 1 1.1 Presentations... 1 1.2 Microsoft Office Button... 1 1.3 Ribbon... 2 1.4 Mini Toolbar... 2 1.5 Navigation... 3 1.6 Slide Views... 4 2 Customize PowerPoint... 5 2.1 Popular...
PowerPoint 2010 Level 1 Computer Training Solutions Student Guide Version Revision Date Course Length
 Level 1 Computer Training Solutions Version 1.2 Revision Date Course Length 2012-Feb-16 6 hours Table of Contents Quick Reference... 3 Frequently Used Commands... 3 Manitoba ehealth Learning Management
Microsoft PowerPoint 2007 Tutorial
 Microsoft PowerPoint 2007 Tutorial Prepared By:- Mohammad Murtaza Khan I. T. Expert Sindh Judicial Academy Contents Getting Started... 5 Presentations... 5 Microsoft Office Button... 5 Ribbon... 6 Quick
MICROSOFT WORD 2010 Quick Reference Guide
 MICROSOFT WORD 2010 Quick Reference Guide Word Processing What is Word Processing? How is Word 2010 different from previous versions? Using a computer program, such as Microsoft Word, to create and edit
1 THE PNP BASIC COMPUTER ESSENTIALS e-learning (MS Powerpoint 2007)
") 1 THE PNP BASIC COMPUTER ESSENTIALS e-learning (MS Powerpoint 2007) 2 THE PNP BASIC COMPUTER ESSENTIALS e-learning (MS Powerpoint 2007) TABLE OF CONTENTS CHAPTER 1: GETTING STARTED... 4 MICROSOFT OFFICE
1 THE PNP BASIC COMPUTER ESSENTIALS e-learning (MS Powerpoint 2007) 2 THE PNP BASIC COMPUTER ESSENTIALS e-learning (MS Powerpoint 2007) TABLE OF CONTENTS CHAPTER 1: GETTING STARTED... 4 MICROSOFT OFFICE
Microsoft Word 2010 Tutorial
 1 Microsoft Word 2010 Tutorial Microsoft Word 2010 is a word-processing program, designed to help you create professional-quality documents. With the finest documentformatting tools, Word helps you organize
Introduction to Microsoft Word 2007 Prepared by:
 Introduction to Microsoft Word 2007 Prepared by: INSTITUTE for ADVANCED STUDY IAS Information Technology Group Einstein Drive, Princeton, NJ 08540 10/28/08 2 TABLE OF CONTENTS INTRODUCTION... 6 GETTING
Contents. Launching Word
 Using Microsoft Office 2007 Introduction to Word Handout INFORMATION TECHNOLOGY SERVICES California State University, Los Angeles Version 1.0 Winter 2009 Contents Launching Word 2007... 3 Working with
Introduction to Microsoft Office PowerPoint 2010
 Introduction to Microsoft Office PowerPoint 2010 TABLE OF CONTENTS Open PowerPoint 2010... 1 About the Editing Screen... 1 Create a Title Slide... 6 Save Your Presentation... 6 Create a New Slide... 7
button Double-click any tab on the Ribbon to minimize it. To expand, click the Expand the Ribbon button
 PROCEDURES LESSON 1: CREATING WD DOCUMENTS WITH HEADERS AND FOOTERS Starting Word 1 Click the Start button 2 Click All Programs 3 Click the Microsoft Office folder icon 4 Click Microsoft Word 2010 1 Click
In so many ways summary
 In so many ways summary Many of Word s functions can be activated in a variety of different ways. Often you can use the menu, a tool on the toolbar or a shortcut key to achieve the same result. Rather
MS Word 2010 An Introduction
 MS Word 2010 An Introduction Table of Contents The MS Word 2010 Environment... 1 The Word Window Frame... 1 The File Tab... 1 The Quick Access Toolbar... 4 To Customize the Quick Access Toolbar:... 4
MS Word Basics. Groups within Tabs
 MS Word Basics Instructor: Bev Alderman L e t s G e t S t a r t e d! Open and close MS Word Open Word from the desktop of your computer by Clicking on the Start>All programs>microsoft Office >Word 2010
Word Select New in the left pane. 3. Select Blank document in the Available Templates pane. 4. Click the Create button.
 Microsoft QUICK Word 2010 Source Getting Started The Word Window u v w x z Opening a Document 2. Select Open in the left pane. 3. In the Open dialog box, locate and select the file you want to open. 4.
Mi c r o s o f t Wo r d Qu i c k Re f e r e n c e Ca r d
 Tech Talk # 5 Mi c r o s o f t Wo r d Qu i c k Re f e r e n c e Ca r d Introduction by Renae Schmidt Hello! Welcome to Tech Talk #5. This week we are sharing a Microsoft Word 2010 Quick Reference Card.
PowerPoint 2016 Building a Presentation
 PowerPoint 2016 Building a Presentation What is PowerPoint? PowerPoint is presentation software that helps users quickly and efficiently create dynamic, professional-looking presentations through the use
Using Microsoft Word. Table of Contents
 Using Microsoft Word Table of Contents The Word Screen... 2 Document View Buttons... 2 Selecting Text... 3 Using the Arrow Keys... 3 Using the Mouse... 3 Line Spacing... 4 Paragraph Alignment... 4 Show/Hide
MS Word Professional Document Alignment
 MS Word Professional Document Alignment Table of Contents CHARACTER VS. PARAGRAPH FORMATTING...5 Character formatting...5 Paragraph Formatting...5 USING SHOW/HIDE TO REVEAL NON-PRINTING CHARACTERS...5
Word Getting Started The Word Window u vw. Microsoft QUICK Source. Creating a New Blank Document. Creating a New Document from a Template
 Microsoft QUICK Source Word 2007 Getting Started The Word Window u vw x y z u Quick Access Toolbar contains shortcuts for the most commonly used tools. v Microsoft Office Button contains common file and
Microsoft Word Part I Reference Manual
 Microsoft Word 2002 Part I Reference Manual Instructor: Angela Sanderson Computer Training Coordinator Updated by: Angela Sanderson January 11, 2003 Prepared by: Vi Johnson November 20, 2002 THE WORD SCREEN
Understanding Word Processing
 Understanding Word Processing 3.0 Introduction In this chapter you are going to learn how to create a simple memo or note or a complex and complicated multi column business document using word processing
Introduction to Microsoft Word 2010
 Introduction to Microsoft Word 2010 Microsoft Word is a word processing program you can use to write letters, resumes, reports, and more. Anything you can create with a typewriter, you can create with
Creating a PowerPoint Presentation
 powerpoint 1 Creating a PowerPoint Presentation Getting Started 1. Open PowerPoint from the "Start" "Programs" Microsoft Office directory. 2. When starting PowerPoint, it usually starts with a new blank
Microsoft Word 2007 on Windows
 1 Microsoft Word 2007 on Windows Word is a very popular text formatting and editing program. It is the standard for writing papers and other documents. This tutorial and quick start guide will help you
Word 2010 Beginning. Technology Integration Center
 Word 2010 Beginning File Tab... 2 Quick Access Toolbar... 2 The Ribbon... 3 Help... 3 Opening a Document... 3 Documents from Older Versions... 4 Document Views... 4 Navigating the Document... 5 Moving
PowerPoint 2016 Basics for Mac
 1 PowerPoint 2016 Basics for Mac PowerPoint 2016 Basics for Mac Training Objective To learn the tools and features to get started using PowerPoint more efficiently and effectively. What you can expect
Microsoft Office Training Skills 2010
 Microsoft Office Training Skills 2010 Lesson 5 Working with pages, Tables, Shapes and Securing Documents Adding Page color Add color to the background of one or several pages in the document. 1. Click
MICROSOFT WORD 2010 BASICS
 MICROSOFT WORD 2010 BASICS Word 2010 is a word processing program that allows you to create various types of documents such as letters, papers, flyers, and faxes. The Ribbon contains all of the commands
Microsoft Word 2010 Part 1: Introduction to Word
 CALIFORNIA STATE UNIVERSITY, LOS ANGELES INFORMATION TECHNOLOGY SERVICES Microsoft Word 2010 Part 1: Introduction to Word Summer 2011, Version 1.0 Table of Contents Introduction...3 Starting the Program...3
Word - Basics. Course Description. Getting Started. Objectives. Editing a Document. Proofing a Document. Formatting Characters. Formatting Paragraphs
 Course Description Word - Basics Word is a powerful word processing software package that will increase the productivity of any individual or corporation. It is ranked as one of the best word processors.
Quick Reference Summary
 Microsoft Word 2010 Quick Reference Summary Microsoft Word 2010 Quick Reference Summary Number Mouse Ribbon Menu AddressBlock Merge Field, Add AddressBlock Merge Field, Edit WD 349 WD 349 Address Block
Word 2013 Beginning. Technology Integration Center
 Word 2013 Beginning Getting Started... 2 Quick Access Toolbar... 3 The Ribbon... 3 Help... 4 Compatibility Mode... 4 Document Views... 4 Navigating the Document... 5 Moving Around in the Document... 5
BASIC MICROSOFT POWERPOINT
 BASIC MICROSOFT POWERPOINT PART ONE PHONE: 504-838-1144 IT Training Team Jefferson Parish Library EMAIL: jpltrain@jplibrary.net In this class you will learn to: Launch, close, and interact with Microsoft
Table of Contents. Word. Using the mouse wheel 39 Moving the insertion point using the keyboard 40 Resume reading 41
 Table of Contents iii Table of Contents Word Starting Word What is word processing? 2 Starting Word 2 Exploring the Start screen 4 Creating a blank document 4 Exploring the Word document window 5 Exploring
What can Word 2013 do?
 Mary Ann Wallner What can Word 2013 do? Provide the right tool for: Every aspect of document creation Desktop publishing Web publishing 2 Windows 7: Click Start Choose Microsoft Office > Microsoft Word
Word Tips & Tricks. Status Bar. Add item to Status Bar To add an itme to the status bar, click on the item and a checkmark will display.
 Status Bar The status bar is located on the bottom of the Microsoft Word window. The status bar displays information about the document such as the current page number, the word count in the document,
INFORMATION TECHNOLOGY
 INFORMATION TECHNOLOGY PowerPoint Presentation Section Two: Formatting, Editing & Printing Section Two: Formatting, Editing & Printing By the end of this section you will be able to: Insert, Edit and Delete
Word Tutorial 3. Creating a Multiple- Page Report COMPREHENSIVE
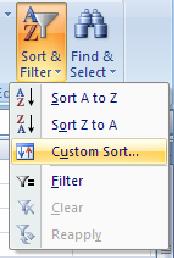
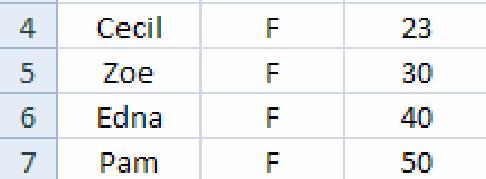
 Word Tutorial 3 Creating a Multiple- Page Report COMPREHENSIVE Objectives Format headings with Quick Styles Insert a manual page break Create and edit a table Sort rows in a table Modify a table s structure
Introduction to Microsoft Word 2010
 Introduction to Microsoft Word 2010 Microsoft Word is a word processing program you can use to write letters, resumes, reports, and more. Anything you can create with a typewriter, you can create with
GNS 312 (DIGITAL SKILL ACQUISITION) MODULE 3 OFFICE APPLICATIONS
 MODULE 3 OFFICE APPLICATIONS") GNS 312 (DIGITAL SKILL ACQUISITION) MODULE 3 OFFICE APPLICATIONS WRITTEN BY: 1 B. A. Oluwade, 1 M. A. Mabayoje, 2 A. R. Tomori, 2 M. AbdulRaheem & 1 S. A. Salihu 1 Department of Computer Science Faculty
GNS 312 (DIGITAL SKILL ACQUISITION) MODULE 3 OFFICE APPLICATIONS WRITTEN BY: 1 B. A. Oluwade, 1 M. A. Mabayoje, 2 A. R. Tomori, 2 M. AbdulRaheem & 1 S. A. Salihu 1 Department of Computer Science Faculty
Computer Nashua Public Library Introduction to Microsoft Word 2010
 Microsoft Word is a word processing program you can use to write letters, resumes, reports, and more. Anything you can create with a typewriter, you can create with Word. You can make your documents more
Using Microsoft Office 2003 Intermediate Word Handout INFORMATION TECHNOLOGY SERVICES California State University, Los Angeles Version 1.
 Using Microsoft Office 2003 Intermediate Word Handout INFORMATION TECHNOLOGY SERVICES California State University, Los Angeles Version 1.2 Summer 2010 Table of Contents Intermediate Microsoft Word 2003...
Office 2007 Overview
 Kent School District Office 2007 Overview Office Button Quick Access Toolbar The Ribbon and Tabs Mini Toolbar Other Office Applications Resources 1 P a g e Created by G. Kinkade, CTE; adapted by G. Whiteman,
Microsoft PowerPoint 2007 Beginning
 Microsoft PowerPoint 2007 Beginning Educational Technology Center PowerPoint Presentations on the Web... 2 Starting PowerPoint... 2 Opening a Presentation... 2 Microsoft Office Button... 3 Quick Access
Tips and Tricks for Microsoft Word 2010
 Tips and Tricks for Microsoft Word 2010 TABLE OF CONTENTS Shortcuts for Selecting Text... 1 Create Automatic Borders... 1 Bulleted and Numbered List Shortcuts... 1 Insert Normal Text Within a List... 2
Microsoft Word Basics. Pages 21-45
 Microsoft Word Basics Pages 21-45 1 Viewing a Document in Word Print Layout Shows how a document will look when it is printed. This view, which is the default, allows you to see headers and footers, columns,
1. The PowerPoint Window
 1. The PowerPoint Window PowerPoint is a presentation software package. With PowerPoint, you can easily create slide shows. Trainers and other presenters use slide shows to illustrate their presentations.
Introduction to Microsoft Word 2007 Quickguide
 Introduction to Microsoft Word 2007 Quickguide Opening Word -Click the Start button -Click Programs from the start menu -Select Microsoft Office -Click Microsoft Office Word 2007 -A new blank document
Getting Started with. Office 2008
 Getting Started with Office 2008 Copyright 2010 - Information Technology Services Kennesaw State University This document may be downloaded, printed, or copied, for educational use, without further permission
TABLE OF CONTENTS TABLE OF CONTENTS... 1 INTRODUCTION... 2 USING WORD S MENUS... 3 USING WORD S TOOLBARS... 5 TASK PANE... 9
 TABLE OF CONTENTS TABLE OF CONTENTS... 1 INTRODUCTION... 2 USING WORD S MENUS... 3 DEFINITIONS... 3 WHY WOULD YOU USE THIS?... 3 STEP BY STEP... 3 USING WORD S TOOLBARS... 5 DEFINITIONS... 5 WHY WOULD
Introduction to Word 2010
 Introduction to Word 2010 Screen Elements 4 1 2 3 5 10 6 7 8 9 1. File Tab: The File tab will bring you into the Backstage View. The Backstage View is where you manage your files and the data about them
LECTURE 08B: EXPLORING MS OFFICE WORD 2010
 LECTURE 08B: EXPLORING MS OFFICE WORD 2010 Insert Drop down This lecture is designed to prepare students for IC³ Certification STRUCTURED TASK 1. English Presentation Every student has Presentation to
PowerPoint Multiple OUTPUT types Paper Onscreen Web presentation 6 x 6 rule 6 points 6 words
 PowerPoint 1 PowerPoint Multiple OUTPUT types: Paper Onscreen Web presentation 6 x 6 rule no more than 6 points per slide No more than 6 words per point Placeholder area of a slide reserved for text or
Minimize Restore Close. Top Level Tabs. Quick Access Toolbar. Title Bar. Ribbon. Group. Rulers. Status Bar View Buttons.
 Microsoft Word 2013 Quick Access Toolbar Top Level Tabs Title Bar Minimize Restore Close Ribbon Group Rulers Status Bar View Buttons Zoom Control Getting to Know Word Word is word processing software.
Introduction to MS Word XP 2002: An Overview
 Introduction to MS Word XP 2002: An Overview Sources Used: http://www.fgcu.edu/support/office2000/word/files.html Florida Gulf Coast University Technology Skills Orientation Word 2000 Tutorial The Computer
European Computer Driving Licence
 European Computer Driving Licence E C D L S y l l a b u s 5. 0 Module 6 Presentation ECDL Syllabus 5 Courseware Module 6 Contents USING THE APPLICATION... 1 OPENING & CLOSING MS POWERPOINT & PRESENTATIONS...
Microsoft PowerPoint 2016 Basics Unit 9 Final Review - Student Notes Directions: Fill in the blanks.
 Directions: Fill in the blanks. 1. PowerPoint Window Layout 2. File Tab When clicked, opens - automatically opens the Info option by default Holds the following options: - Info - New - Open - Save - Save
New York City College of Technology. Microsoft Word Contact Information:
 New York City College of Technology Microsoft Word 2016 Contact Information: 718-254-8565 ITEC@citytech.cuny.edu Opening Word 2016 Begin by clicking on the bottom left corner icon on the desktop. From
PowerPoint Instructions
 PowerPoint Instructions Exercise 1: Type and Format Text and Fix a List 1. Open the PowerPoint Practice file. To add a company name to slide 1, click the slide 1 thumbnail if it's not selected. On the
Welcome. Microsoft PowerPoint 2010 Fundamentals Workshop. Faculty and Staff Development Program
 Faculty and Staff Development Program Welcome Microsoft PowerPoint 2010 Fundamentals Workshop Computing Services and Systems Development Phone: 412-624-HELP (4357) Last Updated: 04/19/13 Technology Help
Microsoft Office Word 2010
 Microsoft Office Word 2010 Content Microsoft Office... 0 A. Word Basics... 4 1.Getting Started with Word... 4 Introduction... 4 Getting to know Word 2010... 4 The Ribbon... 4 Backstage view... 7 The Quick
Microsoft Office Suite
 Module 3 MODULE OVERVIEW Part 1 Getting Familiar with Microsoft Word 2007 for Windows Part 2 Microsoft Word 2007 Basic Features Part 3 More Basic Features Microsoft Office Suite Microsoft Word 2007 Part
Excel Select a template category in the Office.com Templates section. 5. Click the Download button.
 Microsoft QUICK Excel 2010 Source Getting Started The Excel Window u v w z Creating a New Blank Workbook 2. Select New in the left pane. 3. Select the Blank workbook template in the Available Templates
Microsoft PowerPoint 2010 Beginning
 Microsoft PowerPoint 2010 Beginning PowerPoint Presentations on the Web... 2 Starting PowerPoint... 2 Opening a Presentation... 2 File Tab... 3 Quick Access Toolbar... 3 The Ribbon... 4 Keyboard Shortcuts...
Contents Microsoft PowerPoint Lesson 1: The PowerPoint Window...2 The Quick Access Toolbar...3 The Title Bar...3 Rulers...
 Contents Microsoft PowerPoint 2007...2 Lesson 1: The PowerPoint Window...2 The Quick Access Toolbar...3 The Title Bar...3 Rulers...3 Slides, Placeholders, and Notes...4 Status Bar, Tabs, View Buttons,
Microsoft PowerPoint Tutorial
 Microsoft PowerPoint Tutorial Contents Starting MS PowerPoint... 1 The MS PowerPoint Window... 2 Title Bar...2 Office Button...3 Saving Your Work... 3 For the first time... 3 While you work... 3 Backing
Chapter 4 Printing and Viewing a Presentation Using Proofing Tools I. Spell Check II. The Thesaurus... 23
 PowerPoint Level 1 Table of Contents Chapter 1 Getting Started... 7 Interacting with PowerPoint... 7 Slides... 7 I. Adding Slides... 8 II. Deleting Slides... 8 III. Cutting, Copying and Pasting Slides...
Microsoft Word 2003 for Windows, Part 2
 Microsoft Word 2003 for Windows, Part 2 In this workshop, the following Word 2003 features will be covered: Creating and using Tables Formatting text using Styles Using MailMerge Arranging text in Columns
Microsoft Word: Steps To Success (The Bare Essentials)
") Microsoft Word: Steps To Success (The Bare Essentials) Workbook by Joyce Kirst 2005 Microsoft Word: Step to Success (The Bare Essentials) Page Contents 1 Starting Word 2 Save 3 Exit 5 Toolbars, Alignment,
Microsoft Word: Steps To Success (The Bare Essentials) Workbook by Joyce Kirst 2005 Microsoft Word: Step to Success (The Bare Essentials) Page Contents 1 Starting Word 2 Save 3 Exit 5 Toolbars, Alignment,
Microsoft PowerPoint 2013 Beginning
 Microsoft PowerPoint 2013 Beginning PowerPoint Presentations on the Web... 2 Starting PowerPoint... 2 Opening a Presentation... 2 File Tab... 3 Quick Access Toolbar... 3 The Ribbon... 4 Keyboard Shortcuts...
WORD 2010 TIP SHEET GLOSSARY
 GLOSSARY Clipart this term refers to art that is actually a part of the Word package. Clipart does not usually refer to photographs. It is thematic graphic content that is used to spice up Word documents
Table of Contents. Contents
 Spring 2009 R.A. Table of Contents Contents Opening PowerPoint... 2 PowerPoint 2007 Interface... 2 PowerPoint Features... 2 Creating, Opening and Saving Presentations... 3 Creating a Presentation... 3
Correcting Grammar as You Type
 PROCEDURES LESSON 11: CHECKING SPELLING AND GRAMMAR Selecting Spelling and Grammar Options 2 Click Options 3 In the Word Options dialog box, click Proofing 4 Check options as necessary under the When correcting
Spring Semester Study Guide
 Spring Semester Study Guide 1. When you create a table in Datasheet view, Access automatically adds a field called ID as the first field in the table. 2. To undo the most recent change to a table structure,
DOING MORE WITH WORD: MICROSOFT OFFICE 2013
 DOING MORE WITH WORD: MICROSOFT OFFICE 2013 GETTING STARTED PAGE 02 Prerequisites What You Will Learn USING MICROSOFT WORD PAGE 03 Viewing Toolbars Adding and Removing Buttons MORE TASKS IN MICROSOFT WORD
MS Office Word Tabs & Tables Manual. Catraining.co.uk Tel:
 MS Office 2010 Word Tabs & Tables Manual Catraining.co.uk Tel: 020 7920 9500 Table of Contents TABS... 1 BASIC TABS WITH ALIGNMENT... 1 DEFAULT TAB STOP... 1 SET MANUAL TAB STOPS WITH RULER... 2 SET MANUAL
Introduction. Getting Started. Selecting a Template. 1 of 1
 1 of 1 Introduction Visual materials are one of the most effective means of communicating a message. They can give a presentation a professional quality. Visuals help a speaker to be well prepared, organized,
PowerPoint 2010: Basic Skills
 PowerPoint 2010: Basic Skills Application Support and Training Office of Information Technology, West Virginia University OIT Help Desk (304) 293-4444, oithelp@mail.wvu.edu oit.wvu.edu/training/classmat/ppt/
Microsoft Word Important Notice
 Microsoft Word 2013 Important Notice All candidates who follow an ICDL/ECDL course must have an official ICDL/ECDL Registration Number (which is proof of your Profile Number with ICDL/ECDL and will track
MS WORD. You can use it for writing letters, reports and so on.
 MS WORD MS WORD 2 You can use it for writing letters, reports and so on. Starting Word application 3 To start MS. Word do the following: 1. From the Start button on the taskbar, select All Programs. 2.
WORD XP/2002 USER GUIDE. Task- Formatting a Document in Word 2002
 University of Arizona Information Commons Training Page 1 of 21 WORD XP/2002 USER GUIDE Task- Formatting a Document in Word 2002 OBJECTIVES: At the end of this course students will have a basic understanding
Microsoft Word 2007 Module 1
 Microsoft Word 2007 Module 1 http://citt.hccfl.edu Microsoft Word 2007: Module 1 July, 2007 2007 Hillsborough Community College - CITT Faculty Professional Development Hillsborough Community College -
Microsoft. Computer Training Center 1515 SW 10 th Avenue Topeka KS
 Microsoft Computer Training Center 1515 SW 10 th Avenue Topeka KS 66604-1374 785.580.4606 class@tscpl.org www.tscpl.org Microsoft Word 2007 Introduction to Word Processing 1 How to Start Word is a full-featured
The first time you open Word
 Microsoft Word 2010 The first time you open Word When you open Word, you see two things, or main parts: The ribbon, which sits above the document, and includes a set of buttons and commands that you use
DOING MORE WITH WORD: MICROSOFT OFFICE 2010
 DOING MORE WITH WORD: MICROSOFT OFFICE 2010 GETTING STARTED PAGE 02 Prerequisites What You Will Learn USING MICROSOFT WORD PAGE 03 Viewing Toolbars Adding and Removing Buttons MORE TASKS IN MICROSOFT WORD
NOBLE INSTITUTE OF COMPUTER ACCOUNTANCY
 1 The ability to combine name and addressed with a standard document is called a. document formatting b. database management c. mail merge d. form letters 2. Which enables us to send the same letter to
GDC MEMORIAL COLLEGE BAHAL (BHIWANI)
") GDC MEMORIAL COLLEGE BAHAL (BHIWANI)-127028 Lab Manual MS-Power Point (B.Com(pass &Voc).;B.Sc.(cs);M.Com) Department of Computer Science The PowerPoint Window Table of Contents PowerPoint is a presentation
GDC MEMORIAL COLLEGE BAHAL (BHIWANI)-127028 Lab Manual MS-Power Point (B.Com(pass &Voc).;B.Sc.(cs);M.Com) Department of Computer Science The PowerPoint Window Table of Contents PowerPoint is a presentation
Correcting Grammar as You Type. 1. Right-click the text marked with the blue, wavy underline. 2. Click the desired option on the shortcut menu.
 PROCEDURES LESSON 11: CHECKING SPELLING AND GRAMMAR Selecting Spelling and Grammar Options 2 Click Options 3 In the Word Options dialog box, click Proofing 4 Check options as necessary under the When correcting
Quick Reference Summary
 Microsoft Word 2010 Quick Reference Summary Microsoft Word 2010 Quick Reference Summary All Caps WD 81 Change Case button (Home tab Font, UPPERCASE AutoCorrect Entry, Create WD 86 Options (File tab), Proofing
Microsoft Word 2011 Tutorial
 Microsoft Word 2011 Tutorial GETTING STARTED Microsoft Word is one of the most popular word processing programs supported by both Mac and PC platforms. Microsoft Word can be used to create documents, brochures,
DOING MORE WITH WORD: MICROSOFT OFFICE 2007
 DOING MORE WITH WORD: MICROSOFT OFFICE 2007 GETTING STARTED PAGE 02 Prerequisites What You Will Learn USING MICROSOFT WORD PAGE 03 Viewing Toolbars Adding and Removing Buttons MORE TASKS IN MICROSOFT WORD
Unit 5: Formatting Texts and Pages
 Formatting Texts and Pages Unit 5: Formatting Texts and Pages Introduction The overall effectiveness of a document is directly related to the way it looks. This unit is devoted to formatting and controlling
The American University in Cairo. Academic Computing Services. Word prepared by. Soumaia Ahmed Al Ayyat
 The American University in Cairo Academic Computing Services Word 2000 prepared by Soumaia Ahmed Al Ayyat Spring 2001 Table of Contents: Opening the Word Program Creating, Opening, and Saving Documents
Microsoft How to Series
 Microsoft How to Series Getting Started with EXCEL 2007 A B C D E F Tabs Introduction to the Excel 2007 Interface The Excel 2007 Interface is comprised of several elements, with four main parts: Office
Getting Acquainted with Office 2007 Table of Contents
 Table of Contents Using the New Interface... 1 The Office Button... 1 The Ribbon... 2 Galleries... 2 Microsoft Help with Changes... 2 Viewing Familiar Dialog Boxes... 2 Download Get Started Tabs from Microsoft...