GlobalSearch Configuration Guide
|
|
|
- Francine Jenkins
- 5 years ago
- Views:
Transcription

1 GlobalSearch Configuration Guide 127 Church Street, New Haven, CT O: (203) E: Square 9 Softworks Inc. 127 Church Street New Haven, CT (+1) education@square-9.com
2
3 Square 9 GlobalSearch Configuration Guide Version 4.4 Copyrights, Legal Notices, Trademarks, and Servicemarks Copyright 2016 Square 9 Softworks All rights reserved. No part of this work may be reproduced or transmitted in any form or by any means whatsoever, without written permission of Square 9 Softworks unless such copying is expressly permitted by Federal copyright law. For information regarding permissions, contact: Square 9 Softworks Inc., 127 Church Street, New Haven, CT 06510, USA, info@square-9.com. July, 2016 edition Publication subject to change without notice, Square 9 Softworks assumes no liability for any damages incurred directly or indirectly from errors, omissions, or discrepancies between the actual software you install and/or the contents of this publication or any other accompanying publication. GlobalSearch, GlobalForms, GlobalCapture, and GlobalAction are registered trademarks of Square 9 Softworks. All other products and devices listed in this document are trademarks or registered trademarks of their respective companies and are hereby acknowledged. Microsoft, Windows, Word, Excel, PowerPoint, SQL Server, Outlook, and Exchange are trademarks and service marks of Microsoft, Inc., registered in the United States and other countries, and are the property of Microsoft, Inc. Intuit and QuickBooks are trademarks and service marks of Intuit, Inc., registered in the United States and other countries, and are the property of Intuit, Inc. Dropbox is the trademark and service mark of Dropbox, Inc., registered in the United States and other countries, and are the property of Dropbox, Inc. The GlobalSearch Configuration Guide is not affiliated with or otherwise sponsored by Dropbox, Inc. DocuSign is the trademark and service mark of Dropbox, Inc., registered in the United States and other countries, and are the property of DocuSign, Inc. IBM Notes is the trademark and service mark of Dropbox, Inc., registered in the United States and other countries, and are the property of International Business Machines Corporation. Adobe and Acrobat are trademarks and service marks of Adobe, Inc., registered in the United States and other countries, and are the property of Adobe, Inc. Square 9 Softworks Inc. 127 Church Street New Haven, CT (+1) education@square-9.com implifying Business. Simplifying Life
4
5 Table of Contents How to Use This Guide... v Purpose... v Audience... v Organization... v Conventions... vi Getting Started with GlobalSearch... 1 Introduction to GlobalSearch... 3 Understanding the Interface... 3 Toolbar Options... 5 Navigation Panes... 7 Search Results Document List... 9 Document Viewer Application Control User Settings User Functions View Documents Open Document Viewer Document Control and Navigation View Fields View History View Thumbnails Capture and Index Documents Import to Archives Drag to Archives Scan to Archives Capture and Index ed Documents File XChange Search for Documents Run Searches Search Conditions Content-Based Searches Edit Data and Documents Edit Documents from Search Results Edit Documents from the Document Viewer Edit Data from the Document Viewer KeyFree User Settings Output Data and Documents Output from Search Results GlobalSearch Configuration Guide Table of Contents i
6 Output from the Document Viewer User Settings General User Settings Appearance Data XChange User Settings Scanner User Settings Change Language KeyFree User Settings Square 9 User Password Settings Delegation User Settings Administrator Functions Inbox Management Create Inboxes Delete Inboxes Show All Inboxes Search for Inboxes Database Management Create Databases Select Databases Rename Databases Delete Databases Field and List Management Access the Field Catalog Create, Edit, and Delete Field Lists Create, Edit, and Delete Fields Data Types Field Properties List Options Table Fields Archive Management Create Archives Edit Archives Delete Archives Show All Archives Search for Archives Set Data XChange Sources Rebuild Content Index Search Management Create Searches Edit Searches Delete Searches Search Operators Prompts ii Table of Contents GlobalSearch Configuration Guide
7 Search for Searches System Management Set Notifications Manage Stamps Registration User Management Introduction to User Management Users and Groups Security Components Appendices Appendix A Global Suite Product Matrix Appendix B Values for Formatting an Index Field Appendix C S9 Notation Appendix D Supported File Formats in the Document Viewer Set an Index Field Hyperlink GlobalSearch Configuration Guide Table of Contents iii
8
9 How to Use This Guide Purpose The GlobalSearch Configuration Guide provides instructions for using your GlobalSearch web client. It will help you understand GlobalSearch features and help you perform the following tasks: Configure security permissions and top-level settings Configure GlobalSearch user settings Use GlobalSearch for your document processing needs Audience SmartSearch users should read this guide to learn how to make the most of their Square 9 web client, called GlobalSearch. SmartSearch administrators should read this guide to understand GlobalSearch web client features they will need to configure, implement, and support GlobalSearch implementation and permissions. For details on installing SmartSearch and GlobalSearch, please consult the SmartSearch Client and Server Installation Guide. Organization This guide is organized into four sections, each with related chapters as follows: Section I: Getting Started with GlobalSearch An introduction to the Square 9 web client user interface Section II: User Functions Using the GlobalSearch document management application, including capturing, indexing, retrieving, and outputting files and setting end users preferences Section III: Administrator Functions Creating, managing, and deleting documentation, and setting user permissions Section IV: Appendices Helpful reference information GlobalSearch Configuration Guide How to Use This Guide v
10 Conventions Icons Name Icon Description Behind the Scenes Business Case CAUTION Example Note Tip Troubleshooting Highlights technical information useful to administrators and installers Calls attention to specific examples which demonstrate how features can be used to address business needs Highlights important information to know to avoid situations that could potentially cause a loss of data or configuration, or could impact performance, functionality, or successful implementation Highlights examples of settings for typical business uses Highlights information of interest or important information needed to successfully accomplish a task or understand a procedure Highlights techniques, shortcuts, or productivity tips Highlights information or references troubleshooting resources that might prove helpful in solving a problem Typographic Conventions Convention Bold Italics Underlined Blue Fixed Width Font SMALL CAPITAL LETTERS Description Highlights interface items such as menus, dialog boxes, settings, and options and highlights text that must be entered exactly as shown. Emphasizes text or indicates a placeholder variable which the user should replace with a specific word or symbol Points out URL links to external web pages or documents Used for filenames, Windows folder paths, URLs, code samples, and system text Indicates keyboard keys, such as CTRL+C, ENTER, DELETE, or TAB Writing Conventions Convention Description Angle brackets enclosing a word or phrase in italics indicates that information must be entered specific to the <Username> installation, configuration, or system. For example, <Username> means to enter a specific username in the indicated field > Indicates the need to select an item from a menu. For example, File > Save Initial Caps Indicates the item referenced is particular to SmartSearch or a Square 9 product or feature. For example, the Index Fields selected when creating an Archive Bullet A dot-shaped bullet indicates an unordered list, which in a procedure indicates either a procedure which is only one step long or a step or steps which may or may not need to be taken and in no particular order. Bullet An arrowhead bullet indicates information closely related to a step in a procedure. Help and Support Support Phone: , option 2 support@square-9.com Other Resources Forums: forums.square-9.com Square 9 classes: education@square-9.com vi How to Use This Guide GlobalSearch Configuration Guide
11 Getting Started with GlobalSearch Section I introduces the GlobalSearch user interface. As a web-based ECM application, GlobalSearch can be used with most modern browsers. Standard browser controls can be applied, such as screen resizing, zoom view, navigate back and forth, and refresh in addition to the application features. The chapter in this section includes: Introduction to GlobalSearch This chapter introduces the GlobalSearch interface and some key concepts about the document management application. GlobalSearch Configuration Guide Getting Started with GlobalSearch 1
12
13 Introduction to GlobalSearch The Square 9 Enterprise Content Management suite scales seamlessly for businesses ranging from small to enterprise. It features the SmartSearch desktop client and the GlobalSearch web client. With GlobalSearch you can enjoy untethered access to your documents no matter where you are in the world, with a secure connection to your most critical business content and language localization on demand. As a true cross platform application, GlobalSearch supports modern browsers, allowing full access from mobile devices. The GlobalSearch ECM application allows you to work with your documents much like you would with a hardcopy version. You can quickly navigate through pages, change their orientation, view and edit index data, or add an annotation. Documents can be easily printed or ed, from your computer or mobile device. Once your documents are captured into GlobalSearch you have total workflow functionality including automated routings, notifications, escalations, and much more. You can approve an invoice or review a contract even when you are away from your desk. As part of the Square 9 ECM platform, remote users on the GlobalSearch web client are bound by the same granular security model as users of the desktop application. All databases, document and feature-level security remains in force regardless of your location. System administrators can create users and set permissions from out of the office. Access GlobalSearch via the URL provided by your IT department. GlobalSearch is supported in modern desktop and mobiles web browsers. You will be prompted to select your database from the GlobalSearch home page. Once in GlobalSearch, what appears on your screen will depend upon your security permissions. Members of the ssadmin group and database administrators will see additional features. Tip: Access GlobalSearch. The URL will look similar to (or https). For setting a GlobalSearch URL, please see the SmartSearch Client and Server Installation Guide. Understanding the Interface The GlobalSearch browser-based application uses standard interface tools, such menus, scrollbars, and buttons. GlobalSearch provides tooltips and Help screens to help you use the application. As a web-based application, you can use your browser features such as the Back button, zooming the view, and resizing the window. GlobalSearch Configuration Guide Introduction to GlobalSearch 3
14 Contextual Menu Button My Queues Pane Archives Pane Options Button Searches Button GlobalSearch Toolbar Documents Toolbar Navigation Buttons Document List Scrollbar Child Archives Button User Home Page For a more technical understanding, GlobalSearch is built on HTML5 and JavaScript technology and features an ASP.Net zero-footprint viewer platform. There is nothing to install on the client when running GlobalSearch. The SmartSearch API is the foundation on which GlobalSearch is built, so it s a fully functional integration between SmartSearch and the web. The API is installed automatically with GlobalSearch on the server. GlobalSearch features a rich API with deep functionality for developers and integrators looking to integrate document management into their applications. A.NET assembly is available for traditional client/server integration or a RESTful web API can be utilized by web developers and integrators. Use the Square 9 REST API to produce your own interface pages as part of GlobalSearch. Key GlobalSearch Definitions SmartSearch The desktop client for the Square 9 document management software. GlobalSearch The web client for the Square 9 document management software which allows for access to SmartSearch from any browser or mobile device while still maintaining document security. Archive A subdivision of a database, used to group documents by department, workgroup, process, chronological schema, or categorize documents that have a similar function or similar information. Bar A rectangular navigational area in the web client which can be expanded to display related information and menu items. Database Represented by folders called Archives, an organizational structure similar to Windows Explorer, where documents are organized for searching and security. GlobalSearch uses one or more databases. Document A paper or computer file containing information about business facts in the form of text, graphics, or both. A document digitally captured into GlobalSearch becomes linked to a record of associated indexing data. Document List For Inboxes, a list of the documents in the selected Inbox. For Archives, a list of the documents and their indexing data (records) that result from a Search in the selected Archive or Archives. The List will reflect the permissions granted to the user. 4 Introduction to GlobalSearch GlobalSearch Configuration Guide
15 Document Viewer The specialized interface for viewing and editing a document and its indexing data. Whenever a document needs to be referenced, it will be opened in the Document Viewer. Index Field Part of the Archive definition, when a document is indexed to a database, the Index Fields are where the identifying information (metadata) is entered. Inbox A temporary storage location for documents before they are indexed to a database. Navigation Panes Areas of the interface from which to access Inboxes and database Archives. Record The indexing data generated to describe and classify a particular document. It is stored in the SQL Server database. S9 Notation A type-ahead tool for embedding variables into specific fields. See Appendix C for details on S9 Notation. Search A saved object used to find documents in Archives in a database. Table Field Multiple Index Fields of indexing data for a document grouped together in table form. Workflow A set of stored activities to automate the capture and/or processing of documents within an Archive. Toolbar Options Navigate GlobalSearch with simple clicks from the contextual menu choices on the toolbar. GlobalSearch User Home Page GlobalSearch Toolbar When you log into GlobalSearch, the GlobalSearch user home page appears, with the My Queues and Archives panes and a blank Search Results area. You can resize and reshape your screen using your standard web browser features. Place your mouse over an icon to see its tooltip. Use the scroll bar to view more of the interface. Administration Menu If you have administrative permissions as a member of the SSAdmin group, you will see the Administration (padlock) icon. From the Administration menu you can access the GlobalSearch Administration interface, where system administrators can create Square 9 Users and set database permissions for both Square 9 Users and Windows-based users. This vertical navigation bar can be minimized using the Minimize (arrow) button at the bottom of the bar. For details please refer to the chapters in the Administrator Functions" section of this guide. GlobalSearch Configuration Guide Introduction to GlobalSearch 5


16 Analytics Select Menu Administration Menus GlobalAnalytics adds business intelligence to Workflows by providing management reports on documentdriven processes. Users can select all Workflows or just a single Workflow to view invaluable information about their processes, including individual sub-processes or Queue status. For details please refer to the GlobalAction User and Configuration Guide. Batch Select Menu Analytics Menu To access Batch Manager, click Batch Select on the GlobalSearch toolbar and select a Batch Portal. (A default Portal is created at installation.) The Batch Manager interface for that Portal will open. Refer to the GlobalCapture Guide or the GlobalAction User and Configuration Guide for details on Batch Manager. Database Select Menu Batch Select Menu Document records are stored in one or more databases. In GlobalSearch, they are represented by folders called Archives, an organizational structure similar to Windows Explorer, where documents are organized for searching and security. You must be in a database to access any Archives or the documents in the Archives. You will only see the databases and Archives which you are allowed to view. When working with multiple databases, select Database Select ( ) to access a list of accessible databases and select a database. 6 Introduction to GlobalSearch GlobalSearch Configuration Guide


17 User Settings Database Select Menu The User Settings interface is where you can set personal preferences, such as viewing in Archives, viewing icons with or without labeling, scanner, language, and KeyFree Indexing settings. Please refer to the User Settings chapter for details. Navigation Panes My Queues Pane User Settings Icon My Queues is a pane that shows specific Searches that an administrator has marked as a Queue Search for you or for a group of which you are a member. Similar to Favorites in a web browser, you would want to see the Searches you run most often in GlobalSearch in this pane. Queue Searches run the same way as any other Search. Please refer to the Search for Documents chapter for details in running a Search. Archives Pane My Queues Pane If a database is like a filing cabinet, Archives are the drawers and folders which go inside the cabinet. Archives act as the repository for all your business records once the indexing process has been completed. They are easily customized and can be named or configured specifically for the needs of your organization, including the creation of Searches or revision-controlled environments. Each Archive has unique Index Fields to allow you to further categorize your documents so that they can be easily located. Use your mouse to scroll through the list of Archives in the pane. Click the bottom or side edge of the pane and, when the mouse pointer changes to a Move cursor, drag to resize the pane or double-click to minimize it. Use your mouse Move cursor on the border of the minimized pane and then double-click to restore the pane. If you want to move the pane, drag the pane title bar to your new location. Archives created in a database in the SmartSearch desktop client will appear in the GlobalSearch web client and vice versa. Each database of documents begins with a special default Archive known as the Root GlobalSearch Configuration Guide Introduction to GlobalSearch 7


18 Archive. All indexing fields in the database are available to the Root Archive so that any Index Field may be searched. Any Archives which are created will be a nested child Archive of the Root Archive. These Archives in turn may be parent Archives of Subarchive, much like folders nested in a directory. Unlike a Windows folder, you may or may not be able to see and access all of the documents in a specific Archive. This allows for a robust security schema. Using the Search tools, you can further refine the list to just the documents you need to view. Refer to the Capture and Index Documents chapter for further details on using Archives and the Search for Documents chapter for details on using Searches. Child Archives Button Archives Pane in Tree View The Child Archives ( ) button to the right of an Archive name indicates that the Archive has Subarchives. Click the button to expand the Archive tree and see the Subarchives. Click the Collapse (up arrow) icon to the left of the Archive name to collapse the Archive tree and hide the nested Subarchives. Options Button Nested Archives Click the Options ( ) button to display buttons and areas for actions you might choose to take in the current Archive. Choose from the following: Searches Click the Searches (magnifying glass) button to view all the Searches for the selected Archive which the user has permissions to view. Scan To Scan in documents using the internet by clicking this button to start and drive a desktop TWAIN scanner into a GlobalSearch Archive. Import File Select the Import File option to navigate your local Windows file structure to one or multiple files and import them into the selected Archive. Drop Files Here Drag a file or files to the Drop Files Here area to immediately load the dragged image file(s) into the Document Viewer for indexing. 8 Introduction to GlobalSearch GlobalSearch Configuration Guide


19 Searches Button Archives Options Searches are how the documents and their indexing data stored in Archives are accessed. By searching through an Archive folder rather than opening it and viewing a list of all of the files within, searches allow for very granular control over viewing and editing documents. Click the Searches ( ) button for an Archive to see the list of the Searches to which to which you have access within that Archive. For details in running a Search, please refer to the Search for Documents chapter. Archive Searches Search Results Document List The Search Results Document List is the list of documents and their data (records) which are the result of an Archive Search. These results can vary, depending upon the permissions granted to the user. The Document List shows the Preview thumbnail by default, and the first six Index Fields for the relevant documents. Refresh Button Search Results Archive Button Document Actions Button Preview Thumbnail Select Document Checkbox Documents Toolbar Filter Results Box Navigation Buttons Pages Button Index Fields Scrollbar Search Results Document List If no default Search is defined, nothing shows in the Document List. If you ve changed your User Settings General settings to not automatically run your assigned default Searches, nothing will show as well. The documents appear the Document List in descending order of date entered into GlobalSearch. The Index Fields for the searched Archive appear in the Search Results Document List. For performance efficiency, GlobalSearch Configuration Guide Introduction to GlobalSearch 9
20 the web browser loads only the first few documents. As you scroll down though the list of documents, more of them are rendered for viewing. Documents Toolbar When documents appear in the Search Results Documents List, the Documents toolbar features appear. Use these menu items to perform a variety of document actions, such as move, copy, export, or add to a Workflow process. Select one or more documents and choose from the following: Refresh Refresh the Search and the resulting list of documents. Archive <name> (#) Do a Search and the name of the Archive displays together with how many documents were returned by the Search. If the Archive has any Subarchives, they will appear in a drop-down list, with the amount of each document broken out by Subarchive. Document Actions (#) Show the number of documents selected and allow access to various actions that you can take on those documents, such as exporting, moving, or deleting. Click the button to see a list of the Actions and then select one of the following: Export Export documents for use with another application. Workflows Manually run applicable Workflows. Copy Copy documents using this option. Move Move documents from one Archive to another Archive. Delete Delete documents from the database. Select All Select all documents in the selected Archive. Unselect All Unselect all documents in the Archive. Pages Pages allows you to determine how many documents as a results of a Search are displayed per web page. Click this option and select the number of pages to view per web page. The default is 10 documents per page. Filter Results Enter a word or part of a word into the Filter Results search box to reduce the documents in the Search Results Pane to those you are most interested in. Only documents which match the criteria will be shown. <<#>> - If the Search results continue for more than one page, click the numbered or arrowed navigation buttons to move through the list. Document Viewer The Document Viewer screen is where you view a document, add data, modify the document, and add annotations; it is where you interact with your business information. Document Viewer will show an image of the selected document, the index data used to find and classify the document (the Index Fields) and various ways to view, edit, and output the document. For details, please refer to the View Documents chapter. To get to this interface, click on an Archive and run a Search. Then click on a document in the list. The screen you have just opened is the Document Viewer. The Document Viewer has specialized areas and menus for looking at and viewing your document. These areas include: Document View Area The area which shows in image of the document, page by page. 10 Introduction to GlobalSearch GlobalSearch Configuration Guide

21 Document Viewer Toolbar The navigation toolbar to access document viewing, editing and navigation. Index Fields Pane The area which shows the data used to index a document (the metadata). History Pane The area which shows the Workflow History of that document. Thumbnails Pane The area which shows thumbnails of the document pages. It will appear when it is selected in the Document Viewer. This is useful to have on if the document is more than a page long. Table Field Pane The area which appears at the bottom of the page for more detailed indexing information, such as what you might keep in a in a spreadsheet, if configured for the current Archive. Contextual Menu Button Document Viewer Toolbar GlobalSearch Toolbar History Tab Fields Tab Thumbnails Pane Document View Area Index Fields Pane Table Field Pane Application Control Document Viewer There are various application controls which you can access to customize and use your GlobalSearch application. Click on the Application Control ( ) button in the top left corner of the interface toolbar. From here you can access the primary user interface, the administration functions, and database selection. The Application Control button is contextual, meaning that when you click it you will access the menu specific for that window. Details on the various settings can be found throughout this guide. User Settings You can set preferences for your GlobalSearch interface, choosing settings for the interface language, forwarding their GlobalAction notifications, or tweaking OCR settings, to name a few. Please refer to the User Settings chapter and the GlobalAction User and Configuration Guide for details. GlobalSearch Configuration Guide Introduction to GlobalSearch 11
22 User Settings 12 Introduction to GlobalSearch GlobalSearch Configuration Guide
23 User Functions Section II covers the features which end users need to make the best use of GlobalSearch. User settings include capturing, finding, viewing, editing and exporting documents and document indexing data. Settings also include the user settings which they can tailor to their own preferences. The chapters in this section include: View Documents Capture and Index Documents Search for Documents Edit Data and Documents Output Data and Documents User Settings This chapter explains the main document interface for viewing and editing a document. This chapter explains how to capture documents into GlobalSearch and to index them, either manually or automatically. This chapter explains how to create and use predetermined searches to find documents and data. This chapter explains how to change documents and their indexing data, including using annotations. This chapter explains how to output documents and their indexing data via a file, printer, fax machine, or . This chapter explains how to set personal preferences for the interface, scanner settings, and OCR performance. GlobalSearch Configuration Guide User Functions 13
24
25 View Documents The Document Viewer has a number of options available for viewing, indexing, and editing a document. From the Document Viewer you can scroll through the document pages, annotate, place a note on the document, redact and stamp, if necessary. You can also issue actions such as print, , send to Dropbox or to DocuSign, export, and the ability to have version control. A unique wet signature feature comes standard with GlobalSearch, which allows the signature to be esign-compliant. Open Document Viewer 1. Use the Pages menu or button or the scrollbar to view all of the documents in the list. 2. Double-click on a document in the Search Results Document List to open it in the Document Viewer. Search Results Document List 3. To save any change to the document entry, click the Save Changes button, which appears in the upper right hand corner of the screen when changes occur. 4. Use your browser s Back button to leave the Document Viewer and return to the Search Result Documents List from which the document was opened. GlobalSearch Configuration Guide View Documents 15

26 Document Viewer The Document Viewer opens to display the first page of a document. If there are more than one page in the document, there are several ways to select and view additional pages, including scrolling through the document. For performance efficiency, the web browser loads the document pages as you scroll down. Document Control and Navigation Viewing a document in the Document View Area can be adjusted in a number of ways. Select one or more options from the Document Viewer toolbar: Document Scaling Use Zoom In and Zoom Out to resize the document image, or use the Width, Page, and Full options in the Fit menu. Document Orientation To change the orientation of the document being viewed, in the Viewer toolbar, choose Left, Right, or Flip from the Rotate menu. Document Position To change the position of the document being viewed, select Pan and drag to reposition the document. Navigating to another page in the document in the Document View can be accomplished by selecting one or more options from the Document Viewer toolbar: Next Move from one page to the next. Previous Move back a page. Thumbnail View Select a page in the Thumbnails Pane. View Fields The Fields tab shows you the Index Fields for the current document, where indexing data is entered and stored. This is displayed by default. You can type in indexing data and use your mouse pointer or keyboard TAB key to move from Field to Field. With KeyFree Indexing, you can add data with a click of your mouse button. The process of indexing data can be fully automated the Field is the collecting System data, or your document is part of a Workflow process. Refer to the Edit Data from the Document Viewer section of the Edit Data and Documents chapter for more details on indexing documents. 16 View Documents GlobalSearch Configuration Guide


27 View History If you have View History Archive permissions for the Archive in which a document is located, you may view the history of the document as it is acted upon, either manually or through a Workflow. Open the document in the Document Viewer and click the History tab. Workflow History The history of the edits and Workflow actions for the document will be reported on the History tab. If the document is currently in a Workflow (which could make it unavailable for all but viewing to the user), a Workflow progression bar will indicate that status. All users, whether they have View History permissions for the Archive or not, will still see the GlobalAction Workflow processing message. The message contains the Workflow ID, to help with tracking the document in Batch Manager. View Thumbnails GlobalAction Workflow Message Images of the document page(s) are displayed in the Thumbnails Pane, located on the left-hand side of the Document Viewer. This is particularly useful for navigation if there are more than one page to the document. Thumbnails are off by default and will always be off when you open a document to make document viewing faster. Thumbnails can be used for page navigation and for the edit method Bursting. Refer to the Burst Documents Apart section in the Edit Data and Documents chapter for details. 1. Select Toggle Thumbnails to display the Thumbnails Pane. 2. To view a page, scroll to the thumbnail of the page and select it. GlobalSearch Configuration Guide View Documents 17
28 Note: Many common file formats can be viewed within the Document Viewer (refer to Appendix D for a list of support file formats). In addition to these, you can store documents in an Archive in any file format you wish for indexing and searching and viewed them using the SmartSearch Launch feature or the GlobalSearch Export feature. 18 View Documents GlobalSearch Configuration Guide
29 Capture and Index Documents You can capture files just about any file format, such as a text or spreadsheet document, audio file, video file, CAD file, EXEs, or batch files from your computer or directly from your scanner. Once captured, you can add indexing data (metadata) to your document record to help you quickly sort and find your documents. Capturing and indexing files can be done manually, automatically, or a combination of the two methods. Please refer to the GlobalCapture Guide for details on capture workflows. Import to Archives Importing documents to an Archive is done in the same way as importing documents to an Inbox. With Archives, however, you can also add indexing data to the documents as they are being imported. (This can save a lot of time when capturing documents.) When indexing documents as part of a capture, all indexing data entered will be applied to all documents brought in at that time. This is a useful feature when there is a large batch of documents that needs to be indexed with the same information. As an example; an AP department may have a back file of invoices they wish to import. All the invoices should be indexed with a Document Type Field having a value of Invoice. The Import Documents feature is a very efficient way to perform this batch indexing function. 1. To import documents to an Archive, in the Archives Pane, select the Archive into which you wish to import one or more files and click the Options (three lines) button. 2. Click Import File. 3. To indicate the file location to be imported, in Windows dialog box which appears, either enter the file name in the File name text box or browse through in a local or network directory to the desired file or files. 4. Select a file or, using the standard CTRL or SHIFT key Windows selection methods, select multiple files and click Open. Index Documents The Index Documents interface will appear. 5. Enter in the Index Field data for the selected file, or for the first of multiple selected files. GlobalSearch Configuration Guide Capture and Index Documents 19
30 If you are importing to an Archive immediately after importing, dragging, or scanning to the same Archive, the index data from that previous import, drag, or scan operation appears in the Index Fields. By default, the document displays, in which case you can use KeyFree to populate Fields. Refer to the Edit Data and Documents chapter for details. 6. Click Hide Document if you wish to close the Document View Area. Index Documents with View Document Enabled 7. If indexing a single file, click Save to save the document with any associated index data. The document and data are saved, the indexing interface is closed, and you are returned to the Archive into which the document was indexed. 8. If indexing multiple files, select one of the following: Save and View Next Save the current document and any entered index data, then move to the next document to be indexed and repeat the process. Save (All) Save all documents with the same index data. Drag to Archives Documents can be moved to or between Archives using the drag-and-drop method. 1. To drag documents into GlobalSearch, in the Archives Pane, select the Archive into which you wish to drag files and click the Options (three lines) button. 2. In Windows Explorer, or from your desktop, select your files. 3. Drag to the files to the Drop File Here text box of the Archive s Options area. 20 Capture and Index Documents GlobalSearch Configuration Guide
31 4. The Index Documents interface appears. Enter in the Index Field data for the selected file, or for the first of multiple selected files. If you are dragging to an Archive immediately after importing, dragging, or scanning to the same Archive, the indexing data from that previous import, drag, or scan operation appears in the Index Fields. By default, the document displays, in which case you can use KeyFree Indexing to populate Fields. Refer to the Edit Data and Documents chapter for details. 5. Click Hide Document if you wish to close the Document View Area. 6. If indexing a single file, click Save to save the document with any associated index data. The document and data are saved, the indexing interface is closed, and you are returned to the Archive into which the document was indexed. 7. If indexing multiple files, select one of the following: Save and View Next Save the current document and any entered index data, then move to the next document to be indexed and repeat the process. Save (All) Save all documents with the same index data. Scan to Archives You can scan documents directly from your desktop TWAIN scanning device into GlobalSearch. Select your scanner and the scanner settings provided by the scanner manufacturer from either the GlobalSearch or GlobalCapture User Settings. Once configured, you can leave these settings until the next time you need to change either your scanner or scanner settings. If you only have one scanner, then you will only need to choose it once. If you only want to use particular scanner settings, after configuring your scanner options, chose to hide the settings while scanning. Select and Configure Desktop Scanners 1. Have a locally attached TWAIN scanning device connected and powered up, with the scanner drivers installed and functioning properly. 2. To download your scan API client: a. in the User Settings, on the Scanner tab, click the Download hyperlink. b. Follow your browser s download procedure to locate the setup.exe file. c. Right-click on the setup.exe file and select Run as administrator. d. If prompted with a user account control method, click Yes to continue. e. In the Square9ClientAPI Setup dialog box, when ready to continue, click Accept. GlobalSearch Configuration Guide Capture and Index Documents 21


32 Square 9 Client API Setup f. If prompted with a Security Warning message, click Install. The scanner API will begin to install. g. If prompted with another Security Warning message, click Run. The installation is now complete and you will have a scanner API shortcut on your Windows desktop, ready for you to scan documents into GlobalSearch. h. Confirm that the S9ScanAPI is now available in your Windows system tray. i. If it is not in the system tray, double-click the Scan API icon on your Windows desktop to start the API. Square 9 Scan API j. Close your browser and relaunch it. 3. To select your scanner, choose one of the following: From the GlobalSearch toolbar: a. In the GlobalSearch toolbar, click User Settings and select the Scanner tab. b. In the Active Scanner text box, select the appropriate driver. If you have a single TWAIN driver, the available scanner will appear in the Active Scanner box. c. Click Save Changes. From GlobalCapture, On the Workflow tab, in the Workflow Management group, click GlobalCapture. Refer to the GlobalCapture Guide for details. 4. To choose your preferred scanner settings, choose one of the following: 22 Capture and Index Documents GlobalSearch Configuration Guide
33 From the GlobalSearch toolbar: a. In the GlobalSearch toolbar, click User Settings and select the Scanner tab. b. click the Scanner Settings ( ) button found to the right of the Active Scanner text box. The dialog box which will appear is dependent upon the scanner you have selected. Refer to your scanner documentation for details on setting your particular scanner. c. If your server implementation uses SSL, enable the Use SSL checkbox. Consult your IT department for details. From GlobalCapture, On the Workflow tab, in the Workflow Management group, click GlobalCapture. Refer to the GlobalCapture Guide for details. 5. Click Save Changes. Scanner Settings Scan Documents to Archives 1. To scan directly from a locally attached TWAIN device into an Archive, load the document into your scanner feeder. 2. In the Archives Pane, select the Archive into which you wish to scan a document and click the Options (three lines) button on the Archive. 3. Click Scan To and the pages are scanned. 4. When the scanner feeder is empty you see a Continue Scanning message. Put more pages into the document feeder and click Yes to add more pages to the current document. Click No to accept the scanned pages as the complete document and move to the next step. GlobalSearch Configuration Guide Capture and Index Documents 23
34 Scan More Pages 5. When done scanning the file it is uploaded and the Index Documents interface appears. Enter in the Index Field data for the selected file. If you are scanning to an Archive immediately after importing, dragging, or scanning to the same Archive, the index data from that previous import, drag, or scan operation appears in the Index Fields. By default, the document displays, in which case you can use KeyFree to populate Fields. Refer to the Edit Data and Documents chapter for details. 6. Click Hide Document if you wish to close the Document View Area. 7. Click Save to save the document with any associated index data. The document and data are saved, the indexing interface is closed, and you are returned to the Archive into which the document was indexed. You can also use a GlobalCapture Workflow to import scanned documents into an Archive. Please refer to the GlobalCapture Guide for details. Tip: Scan at Higher Resolutions. The recommended minimum scanning resolution for optical character recognition (OCR) is 300 dpi. The clearer the initial image of the text, the better your OCR results will be. However, above about 400 dpi, the OCR improvements are negligible and create very large files. Tip: Importing Speeds. Import and indexing speeds are dependent on a variety of factors, including PC processor speed and memory, server speed, and network environment. While the import is running, a progress indicator will be displayed to track the progress of the import operation. At any time the import process may be canceled, but any documents imported prior to cancelling will remain in the Inbox and should be manually deleted, if necessary. Capture and Index ed Documents You can capture messages, or messages and their attachments, together with relevant indexing data, directly into GlobalSearch Index Fields. You can save a Microsoft Outlook MSG file or an IBM Notes EMS file out from the application and then drag or import the file into an Archive; it will both capture and index the document. You can use both Fields configured for s and ones not configured for s, so that some Fields are populated automatically while some you index manually or through other GlobalSearch utilities. 1. To import an from Outlook or the Notes to an Archive, save the (and any attachments) to your Windows desktop and then drag or import the MSG or EMS file into the Archive. 2. To edit the data being imported with the , in the Index Documents dialog box, enter indexing information into the Index Fields. 24 Capture and Index Documents GlobalSearch Configuration Guide
35 s dragged or imported to the Archive will automatically capture data from the selected properties. Index Documents from File XChange File XChange makes it easy to save PDF files, spreadsheets, or even web pages directly into GlobalSearch from your application of choice using standard Windows save and copy commands. When a GlobalSearch desktop client is installed, File XChange creates a File XChange drive on the local PC. GlobalSearch does not need to be open the time of document capture, so there no licensing required for filing your records. 1. To capture a document, select from the following: From a Windows-based application: Save Create a document within your Windows application and then select. Save As For an existing document, from within your Windows application. From a Windows directory: Click to select the file and use the standard CTRL+C copy keyboard command or right-click and select Copy. Click the file and use CTRL+X or right-click and select Cut. Click to select the file to drag to the File XChange drive. 2. Under Windows This PC, double-click on the SmartSearch File XChange icon. Depending upon how your system was set up, you will be logged in using your Windows authentication or log in at the prompt. GlobalSearch Configuration Guide Capture and Index Documents 25
36 File XChange Drive 3. From the list of databases to which you have permissions, double-click to open the selected database. You will see only the databases and the Archives which you have been given permissions to view. GlobalSearch Databases 4. Select the appropriate Archive in the database (double-click to drill down to a Subarchive): Archives If using the Save or Save As command from the application, click Save. If using the copy or cut method, press CTRL+V to paste it into the Archive folder. For the drag method, drop the file into the Archive folder. 26 Capture and Index Documents GlobalSearch Configuration Guide

37 5. In the Import Document dialog box, enter the Index Field data. It is a good idea to use standardized naming conventions to make it easy to find your archived records. 6. Click OK. Import Documents GlobalSearch Configuration Guide Capture and Index Documents 27
38
39 Search for Documents GlobalSearch Searches are like having a personal file clerk right at your desk. It is much faster and easier than thumbing through a stack of documents, especially if you know what criteria you need to search for. Documents are stored in Inboxes or Archives. Unlike Windows directories of files where you open the directory and have to sort through all of the files, you access the documents in an Archive by first running a Search. Your search results will appear, helping you to quickly locate and sort your documents. Run Searches The documents which display in the Search Results Document List are the results of a particular Search in a selected Archive. Once Searches have been created by the administrator and permissions granted to you, run a Search to quickly locate the documents you need. Searches can be accessed in several different ways. Search from My Queues Pane An administrator can assign Searches to your My Queues Pane, which list Searches you need to access quickly or often. Just select a Search from the list to open the Search. Search from Archives Pane 1. To select from the available Searches for an Archive, place your mouse pointer over the Archive name to display the Search (magnifying glass) icon for that Archive and click it. If the Archive has a Default Search and you have set Default Searches to run automatically in your User Settings, then the Search will run as soon as you click on the Archive. Refer the General section of the User Settings chapter for details. 2. Click the Searches (magnifying glass) button next to the Archive name. 3. In the Archives Searches dialog box, select a Search from the list of pre-defined Searches for that Archive. Select a Search Search from Document Viewer When you are working with a document it is common to need to reference similar or related documents. 1. From the Document Viewer toolbar, click Related Searches. 2. From the drop-down list of Searches, select a Search. GlobalSearch Configuration Guide Search for Documents 29
40 After viewing a searched document, click your web browser Back button to return to your original document in the Document Viewer. Enter Search Criteria The Search criteria you enter will yield different results in the Document List. If you click OK without entering any criteria in a Browse Search, you will see all of the documents in the Archive. A Browse Search is one type of Variable Search. For Variable Searches, enter as much or as little information as you wish; more criteria shortens the Search Results Document List, less lengthens it. If you use a Static Search, just run the Search; the Search criteria that has already been set for you. 1. Once you have accessed the <Archive Name>: Searches dialog box, if you are prompted, enter data specific to what you are looking for in one or more of the available text boxes. 2. Enter data in one Field for a broad search of the Archive, or enter data in multiple Fields to narrow the search results. If the Search has a standard Pick List Field, click on the text box to display the drop-down list and select the value you wish to use in your Search. If the Search has a type-ahead Pick List Field you do not have to enter the entire word or phrase you are looking. You can just type the first letter or so of the value in the text box, a pick list will display and you can select the value you wish or continue typing your search value. A type-ahead pick list field is particularly useful for data values which are frequently misspelled, long, complex, or otherwise time-consuming to type. Searches are likely to be run on Archive which you have selected, however Searches can be configured to search through other Archives as well. With multi-archive Searches, you do not need to know where a document is in order to search for and find it. 3. If the Search you have selected is not the one you would like to use, click the <Archive Name>: Searches Back link to return to the list of Searches. 4. Click Run Search and any documents found to match the provided data will be returned to the Search Results Document List. Keyword Search 5. Once you run a related Search, the current document is replaced with a Search Result Document List of documents. To filter the list of documents even more, enter a word or phrase in the Search Results Filter dialog box and press ENTER on your keyboard. 6. To refresh the Search from the Search Results Document List, click Refresh in the Document List toolbar or press F5 on your keyboard. 7. Click on a document in the Search Results Document List to open it in the Document Viewer. 30 Search for Documents GlobalSearch Configuration Guide
41 Example: Multi-Value Search Using Data from a Spreadsheet. If a Search has been configured as a Multi-Value Search, you can search for more than one value for the same Field. This is a useful tool for working with documents, such as a finding HR documents for two different employees or a purchase order tied to several invoices. To run a Multi-Value Search using data from a spreadsheet, you could copy invoice numbers from an Excel aged invoice report, from medical records numbers from a report of patients to be seen for the current day, or pasting exhibit numbers of evidence files to be retrieved for a legal case. This can help save time retyping data. Search Conditions GlobalSearch features different types of searching conditions which can be configured to help you narrow down your list of documents to view. If you have ever used a web search engine, you will find some of the features familiar. The Search name or the prompts in the <Archive Name>: Searches dialog box should help indicate the kind of Search which will be performed. Search Conditions Type of Search Contains Equals Does Not Equal Greater than or Equal to Less than or Equal to Is not Empty Enter at the Prompt Part or all of a word, phrase, or number Characters or numbers, can also use a wildcard asterisk ( * ) Characters or numbers which are not entered A number or date/time (not characters) A number or date/time (not characters) Any characters or numbers Search Results Includes what you have entered. For example, if you enter Square 9 to the search field, the Contains Search will find both Square 9 and Square 9 Softworks Exactly the value you have entered Vary your results with: Use * to creating a begins with, ends with, or contains search. For example, *2016 means ends with 2016, 082* means begins with 082 and *8* means contains 8 at least once anywhere in the Field If a search field prompts for a date, you can to search for documents with current date If the prompt is for the author of the data in the Field, to find the documents you have modified Everything except the search value Values greater than or equal to the numeric search value or values later than or equal to the chronologic search value Values less than or equal to the numeric search value or values earlier than or equal to the chronologic search value Searches not for specific data, but for the presence of data Is Empty Any characters or Searches for a lack of data numbers Static Just run the Search; the search has been set for you GlobalSearch Configuration Guide Search for Documents 31
42 Content-Based Searches Most Searches look for Index Field data to return results. The Content Search optional component provides a deeper level of business intelligence by looking within the text-based documents in your database for keywords or phrases. Each document found is further weighed for relevance by the number of hits located. The hits are highlighting in the Document Viewer, so that you can navigate from hit to hit in a document image. Content-based Searches are run the same as other Searches, with the addition on the Keyword text box, where you enter words or phrases to search for within the document s text. You can create simple word searches or more complex queries using tools for logical operator concatenated, phrase-based, and proximity searching. Like Multi-Field Searches, content-based Searches can use the AND or the OR logical operator. Search Options Name Character or Symbol Description Wildcard * Represents any number of characters from 0 to unlimited and can be placed anywhere within the search value. Wildcard? Represents one and only one character and can be placed anywhere within the search value. Wildcard = Represents one and only one digit and can be placed anywhere within the search value. The return will be all instances of the search value where the = is replaced by a single digit. Fuzzy % Represents Degree of wrongness and can be placed anywhere within the search value. Using the symbol that represents a fuzzy degree(s) allows you to search for up to a specified number of things wrong with a word. Example *ware, tech*, *work*, re*ability, will return all instances of the search value preceded, or followed (depending on the placement of the wildcard) by any other characters)?ean, D??n, Be?n?, will return all instances of the search value where the question mark (?) is replaced by any single character N=== will return N123 but not N1234 or Nabc %%like will return wide because there are two things different, or wrong, between wide and like.) Positioning the % as follows: li%%ke, will keep the L and the I in the same position and search for words where there are up to two things wrong after that point (e.g., line, lion, liked). The search will use only up to ½ the number of characters in the search word with a maximum of nine (10) fuzzy degrees. 32 Search for Documents GlobalSearch Configuration Guide
43 Name Character or Symbol Description Phonic # A sounds like search and can be placed at beginning of a search term. To search for words that sound like your search value, use the # sign at the beginning of your word. Stemming ~ A form of the word search must can be placed at end of a word for which you are searching. Stemming understands the meaning of the root word and returns grammatical variations. Logical AND Use operators like AND, OR, or NOT to join words and phrases. The order of operator precedence is OR, W/--, AND. logical operators are not case sensitive. Use the AND operator between two search values when you can search for both values, at the same time. Logical OR Use OR operator between two search values when you are searching for either one value or the other. Logical NOT Add NOT in front of any search expression to reverse its meaning to exclude documents from the search. Parenthetical Control ( ) Use parentheses around terms to control order of operation. Proximity w/# Use to search for a character, word, or phrase within so many words, before or after, of another. Use two words within # of each other or use between search terms. Proximity pre/# Use pre proximity searching to force an order of results. Proximity Proximity NOT w/# NOT pre/# Unlike W/, the operator NOT w/ is not symmetrical. The NOT pre/ operator forces on order of results, like pre/, and searches for results which are not the value, like NOT w/. Example #rain would find rain (or a cloud), but also rein (of a horse) and reign (of a king) apply~ will return applied, applying, applies Education AND Director will return all instances of the search value which contain both Education and Director Education OR Training will return all instances of the search value which contain either Education or Director or both apple OR NOT pear due process of law and not (equal protection or civil rights) Manage w/5 department acts as an AND that forces the terms to be within five words of each other the order doesn t matter manage pre/5 department must find manage within five words before department apple not w/20 pear searches for apple and excludes cases where apple is too close to pear, but pear not w/20 apple searches for pear and excludes cases where pear is too close to apple manage NOT pre/5 department must find values which are not manage within five words before department GlobalSearch Configuration Guide Search for Documents 33
44 Name Numeric Range Date Math Date Math Character Description or Symbol #~~# Search for a range of numbers by placing two tildes between the lower and upper boundaries of the range. The upper and lower boundaries are included in the search. This searches for a string of digits, not a value, so decimal values are not considered; they are treated as a separate string of + - # Search for documents by a range of dates, starting with today s day (@today) search for a range today s date or into the future by a specified number of days. Search for documents by a range of dates, starting with today s day (@today) search for a range today s date or into the past by a specified number of days. Phrase To search for a phrase, use quotation marks around it. Synonym & Synonym searching finds words that have a similar meaning to the search value. To search for words with similar meanings to the search term, use the ampersand (&) at the end of the search term. 1999~~2001 Example 12~~14 would find 12, 13, and 14, but would also find as the punctuation in the value breaks up the number into two strings: 14 and + 7 would find the current day plus seven days into the future. This is useful for deciding when to send a reminder for a workflow - 30 would find the current day minus 30 days into the past. This is useful for finding aging invoices due process of law fast& would find quickly, rapidly, speedily, etc.. 34 Search for Documents GlobalSearch Configuration Guide

45 Edit Data and Documents GlobalSearch allows you to quickly navigate through pages in your document, change their orientation, view and edit index data, or add an annotation. Edit Documents from Search Results Select Documents Select an Archive and run a Search. A list of the documents meeting your search criteria will appear in the Search Results Document List. From there you can choose the documents you wish to view. 1. To select documents, choose one of the following: Click on the thumbnail of the document you wish to open in the Document List. Use the navigation buttons or the scrollbars to view documents further down the list. In the Document List menu, in Document Actions, click Select All to select all documents in the list. 2. To unselect documents, choose one of the following: Uncheck the checkbox for selected documents in the Document List. Use the navigation buttons or the scrollbars to view documents further down the list. In the Search Results List menu, in Document Actions, click Unselect All to unselect all documents in the Search Results Document List. Document Selection Move Documents To move a document from one Archive to another within the current database, you must first have permission to add documents to the intended destination Archive. If you move a document or create a copy of a document from an Archive with one set of Fields to an Archive with a different set of Fields, only data in the Fields which are in both Archives will appear (however, all data is retained). You will not be prompted for indexing data at the time of the move or copy, therefore Required Fields may not be populated in the document s new location. GlobalSearch Configuration Guide Edit Data and Documents 35
46 CAUTION: If you move a document or create a copy of a document which has Annotations from an Archive where you do not have Annotation permissions to an Archive where you do have Annotation permissions, the annotations will be permanently burned in. 1. Select one or more documents from the Search Results Document List. 2. From the Document Actions drop-down list, select Move. 3. When prompted in Select Destination Archive, select the destination Archive, for which you have Move permissions. 4. To move a document to a child Archive, click the folder icon to the right of the intended destination s parent and continue to drill down until you can click the target Archive. Copy Documents As with moving a document, to copy a document from one Archive to another, you must first have permission to add documents to the intended destination Archive. 1. Select one or more documents from the Search Results Document List. 2. From the Document Actions drop-down list, select Copy. 5. In the Select Destination Archive dialog box, select the destination Archive for which you have Add permissions. 3. To copy a document to a Subarchive, click the folder icon to the right of the intended destination s parent and navigate through the tree view until you can select the destination Archive. Tip: Use the Copy Feature for Save As. Use the Copy action to version documents when Versioning or Check In/Check Out are not used. Just be sure to update one or more Index Fields in the duplicate to indicate which is the updated record and which the original. Delete Documents CAUTION: If you delete a document in GlobalSearch, it will be deleted permanently. Your original document files will be deleted, as well as all indexing data. It is a good idea to keep a backup of original document files in their native file formats and to delete documents from GlobalSearch with care. 1. Select the checkbox for the document or documents to be deleted from the Document List. 2. On the Documents toolbar, in Document Actions, select Delete. 3. Because this will permanently delete the document, at the prompt click Delete to delete the document or documents, if you have Delete permissions to the Archive. Click No to cancel the deletion. 36 Edit Data and Documents GlobalSearch Configuration Guide
47 Edit Documents from the Document Viewer Annotate Documents Annotations allow you to work with your electronic documents as you would with paper files. You can easily attach a note or highlight text, redact sensitive data, sign or stamp documents while protecting the integrity of the original record. Document can be annotated from the items in the Annotate menu in the in the Document Viewer. Annotations settings made in the Document Viewer effect only for your local settings in SmartSearch. Annotations layer in the order they are created. For example, if you create a Note, then draw a highlight, if the two overlap, the highlight will appear in front of the Note. You may customize your annotations including custom stamp creation, and color of a Note along with its font type, color and border, and set styles, if you wish. You can add annotations to any file format (except Sign, which only uses PDF or TIF), but if you send out an with annotations, the file will be convert to the PDF file format. CAUTION: If you are in an Archive where you do not have Modify Annotations permission, and you want to move a document with annotations to an Archive where you do have Modify Annotations permissions, any redactions will be burned in. This means they are permanently embedded, the source file is lost, and it is now a new PDF file with the Annotation layer flattened out. It is good practice to make sure of your permissions before moving any document. Create Annotations To create an annotation in the Document Viewer, in the Annotate menu, click one of the Annotation buttons. 1. To highlight a portion of the document page, click Highlight and then drag to select the area. 2. To add a stamped message, click Stamp and in Select a Stamp, choose a stamp. Select a Stamp GlobalSearch Configuration Guide Edit Data and Documents 37
48 3. To create a custom Stamp to use in Annotating documents: a. In the Administration menu, select System, and then click the arrow on the Manage Stamps bar. b. Click Add Stamp. c. Enter the text for the Stamp in the New Item text box. d. Optionally, insert variable data into the Stamp text using S9 Notation. Select from the Current Current user s username, without any server or domain qualification. Manager Stamps See Appendix C for details on S9 Notation. 4. To black out a particular area of a page from general view, click Redact and then use your mouse to drag around the area to be redacted. Tip: Redact Documents with Care. To permanently burn in a redaction, redact the document in an Archive where you do not have Modify Annotations permission and move it to an Archive where you do have Modify Annotations permissions. The redaction is permanently embedded, the source file is lost, and a new PDF file is created with the annotation layer flattened out. Any Annotation, including redaction, which is not burned into a PDF file can be changed by anyone with Annotation permissions to the document, so it may not be effective for blocking access to document information internally. For situations such as sensitive HR or medical records, a good solution might be to restrict access to original documents and make available only those PDF files which are correctly and permanently redacted. For security, KeyFree Indexing will not do an OCR scan under a redaction created in the desktop or web client if the you do not have Modify Annotations permission for the document s Archive. Tip: Edit with White Out. Set the redaction color to white (or whichever color the document background is) to erase parts of a document. Also, if a redaction covers a large area of the page, when printing, selecting white instead of black saves on toner. Use this with care, as some industries have specific regulations regarding redaction colors. 5. To add a Note, click Note and then drag to create the Note area. When positioned, enter your text. 6. To electronically sign a document or create a freehand notation into PDF image file or TIF documents, on the Document Viewer toolbar: 38 Edit Data and Documents GlobalSearch Configuration Guide
.")

49 a. Click Sign. b. In Please Sign Below, use the mouse pointer (using your finger, mouse, or stylus, depending upon your device) to draw a signature. c. To erase the signature and try again, click Clear. d. To add the signature to the documents, click Sign. This is a live or wet signature (not an inserted file, as in the desktop client). Each separate stroke of your pointing device is a separate graphic (a separate signature ) on the page. Edit Annotations To edit an Annotation, select the Annotation, and then make one or more of the following changes: To move an Annotation, select it and drag it to another position on the document page. To change the size or shape of an Annotation, select it and drag the sizing handles around the area. To edit a Stamp, in the Manage Stamps bar in the Administration Screen, select a Stamp, then modify the text for the Stamp. To change the style properties of an Annotation, right-click on it and click Properties. To edit a redaction, in Rectangle Annotation Properties, set the color, opacity, and outline for the redaction Annotation. Rectangle Annotation Properties To edit a Note, in Text Annotation Properties, set the color, opacity, font, font size, color, and style. Text Annotation Properties To edit a signature or other freehand image, in Freehand Annotation Properties, set the color, opacity, and outline of the freehand Annotation. GlobalSearch Configuration Guide Edit Data and Documents 39
50 Freehand Annotation Properties CAUTION: In GlobalSearch, a signature or freehand annotation is automatically burned in when you save the document. This is a permanent change to the document. It is advisable to keep an unannotated backup of the document, if a clean copy will ever be required in the future. To automatically burn the signature or freehand annotation into the document, click Save Changes. The document file format is retained (if you sign on a TIF, it stays a TIF, if you sign on a PDF it stays a PDF). Delete Annotations To delete an annotation from a document, right-click on it and select Delete. To delete a Stamp from GlobalSearch, in Manage Stamps on the Administration Screen, click the Delete (minus sign) button next to the selected Stamp. Burst Documents Apart You can quickly and easily separate a single page or multiple pages of an image-based document (such as a PDF) to create a new record. Using the Thumbnails Pane in the Document Viewer, you can view and select specific pages in the document for bursting. With permissions, you can choose to delete the burst pages automatically from the original record or retained them. 1. To view thumbnails of the open multi-page document, on the Document Viewer toolbar, click Toggle Thumbnails. 2. Click a thumbnail to select the page to be burst (or use common Windows selection methods with CTRL or SHIFT to select multiple thumbnails). 3. Right-click the thumbnails of the pages to burst and click the pop-up Burst command. 4. If there are unsaved changes in the source document, you will be notified. Click OK to continue with the Burst and lose changes. Click Cancel the Burst so changes can be saved before bursting. Annotations are not included when you burst. 5. In the Select Destination Archive dialog box: a. Select an Archive to burst the document to. You must have Move permissions to the destination Archive. b. To copy a document to a Subarchive, click the folder icon to the right of the intended destination s parent and navigate through the tree view until you can select the Subarchive. c. Leave Delete Page disabled (the default) to copy the selected page or pages from the source document. 40 Edit Data and Documents GlobalSearch Configuration Guide
51 d. Enable Delete Page to remove the selected page or pages from the source document. CAUTION: If you delete pages while you burst, the pages will be permanently deleted from the source document. It can be a good idea to keep a backup of original document files and to always delete while bursting document pages with care. 6. In the Index Documents interface, enter data in the Index Fields for the new document being created in the specified destination. Select Destination Archive 7. Click Save to complete the burst operation and return to the original document. CAUTION: The option to delete the selected thumbnails when bursting is a destructive action. If you ve chosen to enable the Delete Page checkbox, the thumbnails no longer display; the pages are removed from the source document file. If Delete Page was not enabled, the page or pages that were burst remain in the source document file. Replace Documents You can easily replace the document image in a GlobalSearch record, while keeping all of the indexing data. 1. To replace the document with different one, in the Actions menu, select Replace. 2. Navigate through your local Windows Explorer folder hierarchy to the desired file and click Open. 3. The document will be replaced in the Document Pane. 4. Make any updates to the Index Fields. 5. Click Save Changes. GlobalSearch Configuration Guide Edit Data and Documents 41

52 Edit Data from the Document Viewer Edit Index and Table Fields Like the digital equivalent of tabs on paper file folders, Index Fields gives you the ability to classify and search for documents. Unlike paper filing systems, you can quickly resort them in various ways based on individual status values and search through them using different methods. Using the Tabular Data feature, you can create Table Fields, a group of fields combined to allow for each field to support multiple entries, creating a spreadsheet-like table at the bottom of the Document Viewer. GlobalSearch supports Table Data for both line-item coding and editing. Dynamic Pick Lists can be included in the Table Field data, which is very useful for accounts payable invoice processing. You can use KeyFree Indexing to enter data into Table Fields, making it easy to input line-item data. (Note that The Tabular Data feature is included in the SmartSearch Corporate Edition, and optional in the Professional Edition.) When a Table Field has been added to an Archive, the tabular data will be presented at the bottom of the Document Viewer in a grid format consisting of columns and rows similar to a spreadsheet. Table Fields can be indexed in the Document Viewer using manual data entry or KeyFree Indexing. Edit Indexing Data Manually 1. Manually enter data into the Index Field boxes: Enter or edit data in the Field text box. Use standard Windows mouse and keyboard arrow keys to move around in a single Index Field. Some Index Field may already have data from the capture and index process or because they are System Fields. Enter one or more values in a Multi-Value Search. As you enter a value an empty text box will appear to accept another value and a scroll bar appears for navigation through your list of values. Select a value from an Index Field drop-down list. Use CTRL+A on your keyboard to select all of the data in an Index Field. 2. To move from Field to Field, use your mouse pointer or use your keyboard TAB key to go down the Fields and SHIFT+TAB to go back. 3. Click Save Changes. Index Fields in Document Viewer 42 Edit Data and Documents GlobalSearch Configuration Guide

53 Edit Indexing Data with KeyFree Indexing Use KeyFree Indexing to rapidly extract high-value data with without having to do any typing, which can take time and create opportunities for manual entry errors. Just click on any text on the document to populate your Fields. Example: When to Use KeyFree. KeyFree Indexing is especially useful in low-to-moderate volume, unstructured document environments such as for sales order processing and accounts payable applications. Use KeyFree Indexing in situations where there are: Volume of documents per day Unstructured documents Table data Typewritten data No handwriting recognition Vendor invoices, packing slips, orders, contracts (can be any format, not just scanned files) When to Use Zonal OCR. For structured, standardized documents Zonal OCR in the desktop client may offer faster results. 1. To start indexing with KeyFree, select and open a document in the Search Results Document List. 2. With the document open in the Index Documents interface or the Document Viewer, click KeyFree on the toolbar. The first text box in the Fields Pane becomes highlighted and the KeyFree icon turns yellow to indicate that it is active. Document Viewer Toolbar KeyFree Button KeyFree Tooltip Index Field in KeyFree Mode Index Fields Pane Table Fields Pane KeyFree Indexing After a brief setup cycle, when you place your mouse pointer over the image of the document, a small KeyFree tooltip appears which contains the text of the first Index Field or Table Field. 3. Place the mouse pointer over the document to highlight your selected text and KeyFree automatically adds to the tooltip. GlobalSearch Configuration Guide Edit Data and Documents 43

54 The Field in the tooltip indicates the Field highlighted in the Index Field or Table Field Pane. Select Text and Capture to Index Field or Table Field 4. Select the word or words on the document and the text will appear in the corresponding Field. Selection can be done several ways: Click on a single word. Drag the mouse pointer across multiple words to highlight and select your text. To select multiple words that are not in sequence, use the SHIFT key on your keyboard while clicking or dragging selected text. Press the ALT key on your keyboard while clicking or dragging on the text to generate an edit box, which allows you to make changes in the selection before putting into an active Field. This is useful if document quality has reduced OCR accuracy. Tip: KeyFree Indexing with Multiple Words. You can drag the mouse pointer to select data for a Table Field. For example, to capture line items on an invoice, drag the mouse pointer down a single column of data to populate a column of the Table Field, such as quantity or unit cost. The number of rows will automatically expand to accommodate the rows of data being extracted. For best results using this method, start highlighting over a clearly displayed word and end before about 200 words are selected. The selected text populates the highlighted Field and then advances, highlighting the next Field. 5. Repeat the process for selecting Index Field text on the document to fill the additional Fields. 6. In addition to automatically advancing through the Fields as KeyFree data is entered, the active Field can be selected using one of the following methods: Click to select the Field in the Index Field or Table Field Pane. Press the keyboard TAB key to move to the next Field. Press SHIFT+TAB on your keyboard to move to the previous Field. 7. Click the icon again to turn off KeyFree when done. KeyFree Indexing will turn off automatically after entering data in the last KeyFree Index Field. KeyFree User Settings Source documents can come in a variety of formats and levels of quality. KeyFree Indexing uses optical scanner recognition (OCR) technology to pull data from the document image. OCR technology is not 100% accurate and results are largely based on the quality of the scanned image. Fuzzy printing, wrinkles, or dirt may affect the results. In general, the default settings work well, but some images may benefit from customizing your OCR settings to match the document. 44 Edit Data and Documents GlobalSearch Configuration Guide
55 KeyFree Indexing settings effect only your local client workstation. Settings in the desktop and in the web client are separate and do not affect one another, so if you work in both clients, you must configure the settings in both the desktop client and in the web client. 1. To configure KeyFree settings, from the User Settings on the GlobalSearch toolbar, select the KeyFree tab. 2. To restore the KeyFree Indexing to the factory default settings: a. Click Set Defaults. b. At the OCR Settings Confirm Reset confirmation question, click Yes. Basic KeyFree Settings 1. On the KeyFree tab, select Basic to access KeyFree settings for General Text Extraction: Move the settings slider OCR Mode to the left for faster OCR scanning and to the right for slower but more accurate OCR scanning. To improve text recognition, select the text letter case typically found in the document from the Case Recognition Mode drop-down list. Select from the following choices: o Auto Case For text to retain the capitalization seen in the original document. o Small Case Enter text in lowercase letters in an Index Field. o Capital Case Enter text in uppercase letters in an Index Field. From the Text Types drop-list, select the type of text that will be recognized for OCR. You can select more than one Text Type, but for best results keep the number of types selected to a minimum. Text types include: o Normal The default selection for most serif or sans serif text from a modern printer. o Typewriter For text from a typewriter. o Matrix For text from a dot-matrix printer. o OCR_A For text set in OCR A monospaced font designed for OCR. o OCR_B For text set in OCR B monospaced font designed for OCR. o MICR_E13B When indexing a check or other banking documents which uses this MICR (Magnetic Ink Character Recognition Code) font, select this option. o MICR_CMC7 When indexing a check or other banking documents that uses this MICR barcode font. To specify whether text on an image with low resolution is recognized, enable Low Resolution Mode. This is useful when recognizing documents such as faxes or ones with poor print quality. 2. Click Save Changes. GlobalSearch Configuration Guide Edit Data and Documents 45
56 Basic KeyFree Indexing Settings Advanced KeyFree Settings 1. In the KeyFree tab, select Advanced to access more advanced KeyFree settings. 2. In the Image Detection group, select one or both checkboxes: Correct Inverted Image Select this option to invert white text on a black background to the more usual black text on a white background during the OCR process. Correct Orientation Use this option if an image has been scanned in an upside-down or sideways position to automatically reposition it. (Using the Rotate button while in KeyFree mode is not recommended.) 3. More text extraction options can be found in the Advanced Text Extraction group: Remove Garbage Removes excess dots that are smaller than a certain size from the image during objects extraction (despeckle). Remove Texture Temporarily remove the background noise during OCR which might interfere with text recognition. Detect Matrix Printer If the source document was produced on a dot-matrix printer, use this option to interpret the text more accurately. Detect Porous Text Detect regions of the document with porous text. Detect Text On Pictures If the document has text on an image or colored background, use this selection to increase the contrast between the image and the text. Enable Aggressive Text Extraction Enables the OCR engine to attempt to extract as much text on the image as possible. This is useful when the image contains some low-quality text, (although it may still require manual correction). Fast Objects Extraction When speed is required more than a high level of OCR accuracy, select this setting. Prohibit Color Image For the OCR engine to skip text laid over an image or colored background and only scan the black-and-white text. 46 Edit Data and Documents GlobalSearch Configuration Guide
57 4. To specify how to reuse the text and image layers of the source PDF file, in the PDF Layer Reuse Mode drop-down list, select one of the following: Do not use this setting if the source file contains only raster-based data, such as image-only PDF files. Auto Have the OCR engine use both text and image layers. This is useful in most cases. Do Not Reuse Do not reuse the text layer which exists in the PDF file. Content Only For the OCR engine use only text layers in the PDF file, if they exist. 5. Click Save Changes. Advanced KeyFree Indexing Settings Edit Indexing Data with Data XChange If you already have indexing information about your document in another location, such as a line-ofbusiness application, you can minimize redundant data entry by using Data XChange to import that data without having to do any typing. When you use Data XChange while viewing and/or indexing your records in the Document Viewer, the data lookups draw indexing data for editable Index Fields (not System Index Fields) from source records. 1. To execute a Data XChange lookup, enter data into at least one Index Field. 2. In the Document Viewer toolbar, click Data XChange. 3. Select the data source from the drop-down list which appears. Other Index Fields will be populated from the selected data source. If more than one matching data record is found, you will be prompted with a dialog box asking you to select the correct data record. 4. Click Save Changes. GlobalSearch Configuration Guide Edit Data and Documents 47
58
59 Output Data and Documents Documents and data can be output from GlobalSearch to printer, fax machine, , or view in another application. Documents can be easily printed or ed, even from your tablet or phone. Output from Search Results You can export documents in their original format or as PDF files. 1. In the selected Archive, choose a document or documents. 2. In the Document Actions menu, select Export. 3. Select an Index Field whose value will be used to name the exported file or files in the Select corresponding field for file name dialog box. Select Field for File Name The document or documents will be exported to your browse s default download directory in the file s original format. If more than one document is selected, a compressed ZIP file called Export.zip containing the selected files is created. You can retrieve the file, should you wish to, by clicking on the Notification menu in the toolbar and click to select the file from the list of Export files. Output from the Document Viewer Print You can print documents and document data to a printer, fax machine, or to a PDF file. The exact printer settings and behavior will depend upon your browser application and printer setup. GlobalSearch Configuration Guide Output Data and Documents 49
60 Print Documents 1. To print the document, in the Actions menu, select Print. 2. From the printer dialog box, select printer settings, click Print and then use your browser s printing feature, which may vary depending upon your browser. Print Data 1. To print the document data, select either the Fields tab or the History tab. 3. Press CTRL+P on your keyboard. 4. In the printer options, select the printer settings for your document. Print Document Data Documents You can create a PDF version of your document from the Document Viewer. This PDF file can be attached to an ed via your client. The exact PDF and settings and behavior will depend upon your browser application and client setup. 1. From the Document Viewer toolbar, in the Actions menu, select Attach the PDF version of the document to an using your client. Export Documents You can export documents in their original format or as PDF files. In the Actions menu, select Export. The document will download to your browser s default download location, in a file called Square9Export, in the file s original format. 50 Output Data and Documents GlobalSearch Configuration Guide
61 Send to Application Send to Dropbox GlobalSearch can send documents directly to your Dropbox File-hosting service. 1. Log into your Dropbox account. 2. In the Actions menu, select Send to Dropbox. The first time you attempt to do this your browser pop-up blockers might prevent the action. Change the settings to always allow pop-ups from the GlobalSearch site. 3. In the dialog box, select the Index Field whose value will be used to name the file in Dropbox. In Dropbox, an Apps folder will be created, within which a Square 9 Cloud Share folder will be created. The GlobalSearch document will be saved to the Square 9 Clouse Share folder. A Notification displays on the GlobalSearch toolbar. To jump directly to the document in Dropbox, from the Notification list, click the item notifying you to send to Dropbox. Send to DocuSign GlobalSearch can send documents directly to your DocuSign electronic signature template. 1. In the DocuSign Login, enter your DocuSign username and password and click Login. 2. In DocuSign, select the DocuSign template to associate to the current document. The DocuSign template controls who can sign, where on the document they should sign, and what other information they need to include, such as a title and a date signed. 3. Add the contact information for the signee. 4. Click Send to send the document to DocuSign and to have a notification sent to the signee. In the background, GlobalSearch is pinging the DocuSign server, monitoring for completed documents. Those completed documents are brought back into their home Archive. Enabling Versioning on the Archive from which you ll be sending documents to DocuSign will allow you to retain and view both the unsigned and signed versions of the document. Send to QuickBooks The optional QuickBooks Connections products from Square 9 integrate the power of GlobalSearch with the popular Intuit QuickBooks accounting software. You must have QuickBill and a desktop version of QuickBooks installed, and your Field Catalog configured for QuickBooks. For details, please refer to the QuickBooks Connections Guide. 1. Open a single Company in your local instance of QuickBooks and open a Transaction. 2. In GlobalSearch open a document in the Document Viewer and enter information in the Fields. In the Quickbooks Transaction Index Field, choose the Transaction appropriate for the document. (For example, if you are viewing a bill, select Bill, etc.) 3. Click Save Changes. 4. Click Actions in the toolbar and select Send to QuickBooks. GlobalSearch Configuration Guide Output Data and Documents 51
62
63 User Settings You can set preferences for your GlobalSearch interface from the User Settings tabbed dialog box, setting features such as the interface language, forwarding their notifications, or tweaking OCR settings. 1. To access User Settings, on the GlobalSearch toolbar, click the User Settings (gears) button. 2. Select the General, Appearance, Data XChange, Scanner, Language, KeyFree, or (if enabled) Delegation tab. 3. Choose the user settings (refer to the rest of this chapter for details on setting choices). 4. Click Save Changes. General User Settings Enable Automatically view document when indexing to display both the document being captured and Index Fields for the destination Archive. The setting is on by default. When off, only the Index Fields will display. Enable Automatically run default search when clicking archive to set a Default Search assigned to an Archive to run when an Archive is clicked. The setting is on by default. When off, the Default Search does not run. To see documents in that Archive, you must manually run a Search. General User Settings Appearance By default, the GlobalSearch Document Viewer toolbar displays both icons and icon labels for the various items. For cleaner document viewing on the smaller screens of mobile devices, enable the Display only icons in document viewer toolbars checkbox, which hides the icon labels. To view helpful tooltips, place the mouse pointer over the icon. Icon Label User Settings GlobalSearch Configuration Guide User Settings 53
64 Data XChange User Settings If you already have indexing information about your document in another location, such as a line-ofbusiness application, you can minimize redundant data entry by using Data XChange to import that data without having to do any typing. When you use Data XChange while viewing and/or indexing your records in the Document Viewer, the data lookups draw indexing data for editable Index Fields (not System Index Fields) from source records. If you have the proper permissions, the Data XChange user settings has the following options: Search System Fields Use to enable Data XChange to search for data in the System Fields. Overwrite System Fields Use to enable Data XChange to overwrite data in System Fields (except for Read Only Fields). Append to Multi-Values Use to enable Data XChange to append data to Multi-Value Fields. Without this option, values in a Multi-Value Field are replaced by the value from the data source. Data XChange User Settings Scanner User Settings With a SmartSearch desktop client installed, you can use your local desktop TWAIN scanner to capture documents directly into GlobalSearch. Refer to the Scan to Archives section of the Capture and Index Documents chapter for details. Scanner User Settings 54 User Settings GlobalSearch Configuration Guide
65 Change Language The web client has built-in On Demand Localization to view GlobalSearch with different languages. Use Change Language to change from the default language (English) to Dutch, French, German, Italian, Portuguese, Romanian, or Spanish. Localization can also be extended to other languages with a fully documented translation kit. Note that this will change the language of buttons and toolbar icons, but not the language in which any databases, Archives, Index Field, or documents you or your system administrator have created. They remain in the language in which they were created. Language User Settings KeyFree User Settings KeyFree Indexing allows you to enter indexing data without having to type it in. It is done using OCR (optical character recognition) technology. In order to get the best OCR results, you can finesse the settings for each document or document type. The better the OCR results, the less manual data correction you might need. For details on optimizing KeyFree OCR settings, please see the KeyFree User Settings section of the Edit Data and Documents chapter. KeyFree Indexing User Settings GlobalSearch Configuration Guide User Settings 55
66 Square 9 User Password Settings If you are logged in as a Square 9 User, you will see another tab, called User. From here you can enter and confirm a new Square 9 User password. Your password must be six to 18 characters in length. There is no forced complexity, but it is always recommended. Delegation User Settings If you are using the GlobalAction document workflow feature, and Workflow notifications are being sent to you via , you will see another tab, called Delegation. Receive Notifications Leave the checkbox in this tab is unchecked so that you may receive your notifications. Delegate Notifications to Someone Else If you will be away from your office, you may enable Delegate My s. Your Workflow notifications will go to another assigned person. If you are a GlobalAction Delegation Manager, assign delegation recipients for the users whose delegation you manage, and enable Active Delegation. Delegate s 56 User Settings GlobalSearch Configuration Guide
67 Administrator Functions Section III covers administrator functions, with a focus on creating and customizing GlobalSearch databases, Inboxes, Archives, Searches, and Workflows, and to manage user security. The chapters in this section include: Inbox Management Database Management Field and List Management Archive Management Search Management System Management User Management This chapter explains how to create, manage, and delete Inboxes for the SmartSearch desktop client. This chapter explains how to create, manage, and delete databases. This chapter explains how to create, manage, and delete Index Fields, Field Lists, and Table Fields. This chapter explains how to create, manage, and delete Archives. This chapter explains how to create, manage, and delete Searches. This chapter explains how to create, manage, and delete GlobalAction notifications and stamp annotation, and for product registration information. This chapter explains how to set permissions for users; create and manage Square 9 Users. GlobalSearch Configuration Guide Administrator Functions 57
68

69 Inbox Management Like the In box for paper on a desks, Inboxes in the desktop client provide a temporary and secure repository for capturing and viewing documents prior to being indexed into the database. You can easily drag records into the desktop client or scan documents directly to an Inbox for future archiving. While they are not used in the GlobalSearch web client, as a member of the ssadmin group or a database administrator, you can configure Inboxes for your desktop client users. Create Inboxes 1. On the GlobalSearch toolbar, in the Administration menu, select Administration. 2. In the vertical Administration menu, select Inboxes to bring up the list of Inboxes in the database. 3. Click the Add ( ) button. 4. In the New Inbox bar, enter a name in the Inbox Name text field. 5. To specify an Inbox physical file-system path other than the default server location, click Advanced, unselect Use default path, and enter a new path in the Path text box. SmartSearch with GlobalSearch was installed using either the default database locations or a customized location. Leave Use default path enabled to store your Inbox files in a subdirectory of the default path specified when the desktop client was first installed. This path is visible, but not editable. You must unselect Use default path when changing the path. If your desktop client was installed using the defaults, the default path an Inbox directory is created under c:\smartsearch\inboxes\dbname. 6. By default, a directory is created using the Inbox name. To create a unique randomly generated name, enable the Create unique folder name checkbox. When enabled, a unique directory name will be created instead of using the name specified for the interface. This can be used to make it more difficult for unauthorized users to find Inbox files on the network they should be accessing. Since no network user ever needs direct access to an Inbox folder, assuming network permissions are properly set; this option should not be required. 7. Click Save. Create Inbox GlobalSearch Configuration Guide Inbox Management 59

70 Delete Inboxes 1. To delete an Inbox and its files, click the More Options button in the selected Inbox box. 2. Click Delete. 3. Because this will permanently delete the Inbox, enter the displayed text in the Confirm Action prompt. 4. Click Delete. Show All Inboxes If Show All Inboxes is enabled, you will see all Inboxes in the desktop client Inboxes Pane, whether you have View permissions to the Inbox or not. However, if you do not have View permissions, the Inbox will appear empty when selected. 1. In the vertical Administration menu, select Inboxes. 2. On the Inboxes toolbar, click the Show All Inboxes toggle switch. The switch is green when all Inboxes are selected and white when they are not. Inboxes Settings Search for Inboxes 1. To search for Inboxes to modify or delete from the Inboxes toolbar, in the vertical Administration menu, select Inboxes. 2. On the Inboxes toolbar, click the Searches (magnifying glass) button and enter a word or part of a word into the search box. 60 Inbox Management GlobalSearch Configuration Guide
71 Database Management Databases are where documents are organized for searching and security. Only members of the ssadmin group, can create, modify, and delete databases, and assign database administers for each database. Database permissions are set for individual users or group of users by a member of the ssadmin group. Refer to the User Management chapter for details on setting database security. Tip: When to Organize with a Database. Documents can be organized into Inboxes and Archives in a database, with permissions to the Inboxes and Archive set by user or group of users. In many cases this level of document and security organization is enough and only one database is required. There are times when more than one database may be recommended: If, for security reason, a company wishes to have completely separate access for a given department of division, for example, the HR department. If, for security reasons, you wish to grant a user login permission to GlobalSearch in order to import documents in Inboxes only. However, since users must have access to a database access in order to use SmartSearch, a placeholder database may be created, without granting any viewing or editing permissions. For example, office clerks whose sole task is to scan in documents. If you have installed the default SQL Server Express database software as part of your installation and the amount of data in the database is approaching the SQL Server Express limit of 10GB. Tip: Database Access. Make sure that all database administrators have Access permissions, since the database administrator must be a database user. Also note that database access and database administration access for Square 9 Users can be granted, changed, and revoked only via the web client. With Windows authentication, you must have a login in SQL Server Management Studio to be able to create the database. If your Windows account does not have a SQL login, you must select SQL Authentication and provide SQL credentials. Databases are usually created by the user who did the installation. During the default Square 9 installation, when SQL was installed, when SQL Server Express was installed, a SQL login was created for the account during the installation. If SmartSearch was installed for an existing SQL application, the account used to install SmartSearch must have been created as a SQL login with a database creator role. See the SmartSearch Client and Server Installation Guide for details on installation. Create Databases Multi-Database Support is a feature available in the Square 9 Professional Edition as an option or as part of the core product offering in the Corporate Edition. With it you can create and run more than one GlobalSearch database repository. 1. On the GlobalSearch toolbar, in the Administration menu, select Administration. 2. In the vertical Administration menu, select Databases. A list of the GlobalSearch databases will appear. The default database is GetSmart. GlobalSearch Configuration Guide Database Management 61

72 Database Settings 3. Click the Add ( ) button to create a new database, if multi-database support is enabled. 4. Enter a name (with no spaces) for the database in the New Database bar. Tip: Consider Interoperability When Naming Databases. When naming a database, the name must have a maximum of 50 characters. Also, it is a good idea to avoid spaces, special characters (other than underscores or hyphens), or beginning the name with a numeral. By doing so, the database will better allow smooth interoperability with optional Square 9 modules such as GlobalForms, and with external systems such as line-of-business applications, should you want to implement an integration of this type. 5. For additional database settings, click Advanced. 6. To change the database location from the default SQL server set at installation, choose one of the following: Enter the database server path in the Server bar. Click the Search (magnifying glass) button and select from the list of database locations. 7. Select Windows Authentication or SQL Authentication and enter your credentials as a member of the SSAdmin group, if prompted. 8. Click Save. 62 Database Management GlobalSearch Configuration Guide
73 Database Settings Select Databases Once you have created more than one database you can elect to have only a single database or multiple databases listed, based on the individual permissions of the user. To select a database to configure in Administration Database, either select from the list of databases or click the Searches button and enter a word or part of a word into the search box. Rename Databases You can change the name of a database which users see in the interface. Renaming the database changes the display name, not the names of the SQL files. Once you rename a database, you can check which SQL database it is connected to by checking the connection strings netpub/wwwroot/getsmart/web.config file on the SQL server. The Initial Catalog entry will tell you the database Name in SQL, while the name is what it is called in GlobalSearch. 1. To rename a database, click the More Options icon in the selected database bar. 2. Click Rename. 3. The database name text becomes enabled. Enter a new name for the database. 4. Click the Save (checkmark) to save the new name. 5. Click the Cancel ( X ) to cancel the change in name. Delete Databases 1. To delete a database, confirm that all users are logged out of the database and make note of the exact database name. 2. Click the More Options icon in the selected database bar. 3. Click Delete. 4. Because this will delete the database from GlobalSearch and all of its Index Field data, enter the displayed text in the Confirm Action prompt. 5. Click Delete. GlobalSearch Configuration Guide Database Management 63
74 Tip: Backup Databases. As with any key information, always backup your SQL databases on a regular basis. Tip: Restore Databases. When deleting a database, the database itself is not deleted from SQL Server, just access to the Database through the interface is removed. Use the desktop client to create a new database with the same name as the deleted database to restore access. 64 Database Management GlobalSearch Configuration Guide
75 Field and List Management Archives are like the labeled and organized file folders and filing cabinet drawers, where the Index Fields are the document storage labels. The Field Catalog is like a library of all of the Index Fields created within a particular database. These Fields are created in the Field Catalog and then are available be used or reused in any of the Archives created in the database. Only members of the ssadmin group or a database administrator for that database can access the Field Catalog. Prior to creating the first Archive, one or more Fields must be created. There are three types of Fields available: regular Fields (to store identifying information about a document, such as vendor names); Field Lists (to quickly choose indexing information from a pre-configured list of values); and Table Fields (used to group multiple Index Fields together, effectively creating a spreadsheet-like table). Once Field are created, the Field Catalog shows the complete list of Fields available to any Archive, with the name of the Field, data type, size limit, and Field ID. The Field ID is useful when performing data updates into GlobalSearch from other data sources. Tip: Plan and Document Field Design. While you want to have as many Fields as necessary, always be sure you need a new Field before creating it; see if you can repurpose an existing Field. The most efficient way to set up Archives is to first plan all of the Fields ahead of time, create them, create Archives, and then assign Fields to the Archives. This approach allows a single Index Field to be shared across multiple Archives, simplifying the Archive creation process and reducing the chance of human error when setting up the same Field on multiple Archives. For example, do you have one Field called AP Date, and use it for AP POs, AP Invoices, and AP Packing Slips, or do you have a different date Field for each type of document? All of the Fields are available to be assigned to any Archive in the database. With planning, you can avoid conflicts and redundancies. While you can create Field Lists on the fly as you re creating an Index Field, it is more efficient and less error-prone to create Lists before creating Index Fields. Documenting your plan helps you formulate a to do list of Fields to create. It helps you clarify your Field and Archive naming conventions. Documenting is also useful for gathering user feedback before creating the Fields and finding that you have to change them later. Tip: Name Fields Thoughtfully. Consider how Field names will appear to end users. The name should clearly indicate the Field s purpose. Consider how Date could be more confusing than Document Date, Date Document Signed, or Date Received. Research shows that users prefer spaces in a name to no spaces or underscores. However, if you re going to be integrating with an external program, it might be a technically valid decision to avoid spaces. In that case, users prefer underscores rather than no spacing at all. Also, research shows that users prefer a mixture of uppercase and lowercase letters to separate words, such as using proper case, where the first letter of each word in uppercase. The Field Catalog is sorted alphabetically, which is something to keep in mind when naming a Field in order to more easily find a Field to modify, check to see if it already exists, or find it to add to an Archive. GlobalSearch Configuration Guide Field and List Management 65

76 Access the Field Catalog 1. To create, edit, or delete Fields, Table Fields, or Field Lists, access the database in which the Index Fields are to be used or deleted. 2. On the GlobalSearch toolbar, in the Administration menu, select Administration. 3. In the vertical Administration menu, select Field Catalog and select a database. Create, Edit, and Delete Field Lists Index Fields can draw their data from a pre-configured pick list of values, greatly reducing the number of keystrokes needed to index documents. Create the set of List values, then an Index Field, and then assign it an Archive. The set of List values can be typed into the List Editor or be added via assembly binding. Refer to the List Options section below for details on the List types. Create Standard Field Lists 1. On the Field Catalog toolbar, click Lists. A list of any existing Lists in the database will appear. Field Catalog Lists 2. To create a new List, click the Add ( ) button found in the bottom right corner of the screen. 3. Enter a name for the new List in the List Name box. 4. Click the Add Value button and enter a value in the New Item box. To add more values to the List, repeat step four. To delete a value, click the Delete (minus sign) button to the left of the value. 5. To draw the List data from an assembly bound list, with real time binding to a source, like vendor list in Intuit QuickBooks, do the following: a. Click the Assembly Binding button. b. Enter the local path in the Assembly Path box. c. Enter the assembly parameters in the Assembly Parameters box. d. Click Load Data to test the List. 6. Click Save. 66 Field and List Management GlobalSearch Configuration Guide
77 List Editor Tip: Arrange Values in the List with the End User in Mind. List the values in a particular order (by frequency of use, for instance) can make the List more useable. However, when using the Type Ahead feature this is not necessary. Typing a character will return values starting with that character no matter where they are located in the List. Edit Standard Field Lists 1. Click the More Options (three dots) icon in the selected List box and click Edit. 2. Make changes in the List Editor as described in the previous section. 3. Click Save. Tip: Update List Values Thoughtfully. If you edit a value on a List, any records currently using that value are not automatically updated and can no longer be found with that value. When editing a List value, it is a good idea to first add a new, updated value to the List, then find all of the documents with the incorrect value and, in the Document Viewer, replace the incorrect value with the new value. Then return to the Field Catalog and remove the incorrect value from the List. Delete Standard Field Lists CAUTION: Deleting a List removes it permanently. Click the More Options button in the selected List box and click Delete. Create, Edit, and Delete Fields Create Fields 1. On the Field Catalog toolbar, click Fields. A list of any existing Fields in the database will appear. 2. Click the Add ( ) button found in the bottom right corner of the screen. GlobalSearch Configuration Guide Field and List Management 67
78 Field Editor 3. Enter a name for the new List in the Field Name text box. 4. Select a data type from the Data Type drop-down list. Refer to the Data Types section below for details. 5. To display the Field with a certain format or layout (for example, a date with a two-digit year), enter the format type in the Format text box. The text entered is not freeform; it must adhere to one of the standard Microsoft SQL Server format patterns. Refer to Appendix B for a list of format patterns. 6. Enter the maximum number of characters in a Character Field, up to 8000 characters, into the Length text box. 7. To set a regular expression (RegEx), enter the RegEx text string into the Regular Expression text box. Please refer to the Pattern Matching using Regular Expressions section in the GlobalCapture Guide for more information on regular expressions. Tip: Use Regular Expressions with KeyFree. A regular expression, or RegEx, is a text string using special symbols that is used as a search pattern for a particular data element. (For example, you may use a RegEx to find any data that looks like a social security number.) Regular expressions are used to enable autohighlighting during KeyFree Indexing. The only Field data type which they can be used with is Character. When a RegEx is provided for a Field that is being populated through KeyFree Indexing, GlobalSearch will attempt to find any data on the page that matches the RegEx. Any matches found will be highlighted in the Document Viewer. If only a single match is found, the data will be highlighted and the mouse cursor will jump to that area of the document. This feature further improves indexing speeds by bringing the user's attention to the most likely areas where data for a particular field may be found. 68 Field and List Management GlobalSearch Configuration Guide
79 For example, the following RegEx is used to locate a zip code as 1) a five-digit string, 2) a five-digit string followed by a hyphen and a four-digit string, 3) a five-digit string followed by a four-digit string: ^\d{5}(?:[-\s]\d{4})?$ ^ = Start of the string. \d{5} = Match 5 digits (for all three sample patterns) (?: ) = Grouping [-\s] = Match a hyphen (for sample 2) or a space (for sample 3) \d{4} = Match 4 digits (for samples 2, 3)? = The grouping pattern before it is optional (for sample 1) $ = End of the string 8. To set Field Properties or system values, in the Field Properties group, enable one or more of the Required, Multi-value, or System Field checkboxes. Refer to the Field Properties section below for details. Before creating a Dynamic Pick List, create any Standard Pick Lists needed for the Dynamic Pick List. Refer to the Create, Edit, and Delete Field Lists section above for details on Field Lists. There are two level of dependency that you can specify for a Dynamic Pick List. The primary level is required and contains a list of standard Fields List values. The secondary level is optional and may have conditional Fields besides regular Field List values. Refer to the Dynamic Pick Lists section below for more information on Dynamic Pick Lists. Tip: Plan Fields and Values First. Creating Dynamic Pick Lists goes a lot faster when you plan out all of the Fields, Lists, and values ahead of time. First, you can check to see if you have noted all of the possible variables. Second, you can plan your naming conventions. The names of the Field Lists are only visible to you as an administrator. Names that are descriptive and which allow for future Lists work best. For example, instead of naming a Field List Size and then discovering that you need several different Lists for different size selections, consider using Paper Size and Hard Drive Size. 9. To assign, or create and assign, a Standard Pick List to an Index Field: a. Click List Options. b. In the List Options dialog box, add a List by changing the default of Normal Field to Standard Pick List. a. Select a List from the Select a list drop-down list. Refer to the Create Standard Field Lists section above for details on creating a List. 10. To assign, or create and assign a Dynamic Pick List to an Index Field: a. Click List Options. b. In the List Options dialog box, add a List by changing the default of Normal Field to Dynamic Pick List. c. Select a Field with a Standard Pick List from the Select a list drop-down list. For a single level of dependency, skip step d and proceed to building your List. d. To select controlling Fields for an optional second-level Dynamic Pick List, enable Secondary Dependency and select a second Field with a Standard Pick List from the Select a field list. e. To map the relationship between the List and the Field, click Build List. GlobalSearch Configuration Guide Field and List Management 69
80 f. In the Edit List Mapping dialog box, in the Select filter 1 drop-down list, select a value for the first row. g. If creating a two-level Dynamic Pick List, from the Select filter 2 drop-down list, select a value from the List associated with the dependent Field. This column will not appear in the Edit List Mapping dialog box for a single-level Dynamic Pick List. h. Select a Field List in the Select a list column for each row. i. Repeat steps f through h for each keyword associated with the dependent Field. Map all possible combination that you wish to offer so that the Dynamic List Field can be displayed correctly. You will see an error message in the Document Viewer for an unmapped combination. j. Click Save to return to the List Options dialog box. k. In the List Type group, select Drop Down or Type Ahead. Refer to the List Options section below for details on Drop-Down and Type-Ahead Lists. b. Click OK and return to the Edit dialog box 11. Click Save. List Options Edit Fields 1. To edit a Field, in the Field Catalog, click the More Options icon in the selected Field box and the click Edit. Use the Search box in the right-hand corner of the Field Catalog toolbar to search for specific Fields. 2. Make changes in the List Editor. 3. Click Save. 70 Field and List Management GlobalSearch Configuration Guide
81 Delete Fields CAUTION: Deleting a Field from the Field Catalog removes it permanently from all Archives and will result in a loss of any data in that Field. 1. To delete a Field, in the Field Catalog, click the More Options button in the selected Field box and then click Delete. 2. Because this will permanently delete the Field, enter the displayed text in the Confirm Action prompt. Behind the Scenes: On the SQL side, when you create the Field Catalog, a SQL table is created in which your documents index data is stored all document records, no matter the Archive, are all stored in that single data table. When you create an Archive and choose to include a particular Index Field, you re really just determining which Index Fields to expose in that Archive, because, in SQL, the document record will always have all Index Fields. The benefit of this is that when a record is moved from one Archive to another, the index data is retained. Some data might not display in the destination Archive if all the same Index Fields aren t exposed, but the data still exists in the SQL table. So, if you move the document back to its original Archive, all the data that was there originally is still available and displays, just as it did before you moved the document. Data Types Character The Character data type includes letters, numbers, and characters. Use this data type for alphanumeric data entry, such as names or for numbers which are a string of digits, such as a PO number or Social Security Number. You can change from any other data type to Character. You cannot change from Character to another data type. Keep in mind that changing the data type will likely affect how the data sorts. For example, numbers that use the Character data type sort differently than with a numeric sort. 1, 2, 10, 11, 12, 2, 20, 21, 22 will sort into 1, 10, 11, 12, 2, 20, 21. For a Character Field, use the pound sign ( # ) to restrict the entry to digits in the desktop client, although it does not control the number of digits entered. The length of a Character Field defaults to 50 characters. You can increase the maximum length up to 8000 characters. CAUTION: You can possibly edit a Character Field to make it shorter, but if you make the Field shorter than any current data in the Field you will risk losing data. GlobalSearch Configuration Guide Field and List Management 71
82 GlobalSearch allows you to enter in a length shorter than any current data and then when you open up existing documents with values longer than the new length it will not let you save the document with any new data until you have altered the field and made the data the minimum number of characters specified in the Index Field Length. Numeric Numeric data types can only be integers (whole numbers, no fractions). If a decimal is entered into a Field with the Numeric data type, it will be rounded up or rounded down, depending upon the value. The appearance of Numeric Fields can be controlled with the Format box. (Refer to Appendix B for details.) The Numeric data type supports values from -2^31 (-2,147,483,648) to _2^31-1 (2,147,483,647). Date Use the Date data type for date, time, or both date and time Fields. You can enter a date in many different formats, such as words (month and day spelled out), abbreviations (month and day abbreviated), one-digit or two-digit months and dates, two- or four-digit years, slashes or dashes, etc. The appearance of Date Fields can be controlled with Formats. (Refer to Appendix B for details.) Date has a precision capacity of seconds (precision set to 3). Tip: Searching Date and Time Ranges. If you create a Date/Time Field, but format it as date only, you can perform an Equals search on date. However, if you format it with date and time, you can t search for equals a date, so if formatting as date/time, your best bet is to search with Greater Than or Equal To or Less Than or Equal To. Tip: Date Field vs. Yes/No. Instead of using Yes and No in a status Field, consider use date fields set with variable. Then you would know not only that something is true (date present) or false (no date), you would know at what point it became true. For example, you can create a Search to know that an was sent (yes) or not (not), and if sent, when. Decimal The Decimal data type can only include integers or decimals. Use for this data type for Fields denoting money. This Data Type has a precision of two. The appearance of Decimal Fields can be controlled with Formats. (Refer to Appendix B for details on formatting.) You can enter as many decimal places as you like and they will be stored. However, a Format setting will control how many decimal places will display. The actual value will display rounded up or down if the Format supports fewer decimal places than the data that was entered. The Decimal data type supports values from -1.79E+308 to -2.23E-308, 0 and 2.23E-308 to 1.79E Field and List Management GlobalSearch Configuration Guide
83 Behind the Scenes: Storage Estimates. Character: It takes one byte of storage per character typed, plus two to four bytes of overhead. In SQL, this data type is a CharVar (Character Variable) field. SQL is limited to 8000 characters. Numeric: It takes four bytes of storage per integer. In SQL, this data type is an Int (Integer) field. Date: DateTime is stored as two four-byte integers. In SQL, this data type is a DateTime (Date and/or Time) field. Decimal: Decimal takes eight bytes of storage. In SQL, this data type is a Float53 field. Field Properties Required Fields With Required enabled, the record cannot be saved if there is no data in the Field, with the exception of when you drag a document from one Archive to another or from an Inbox in the desktop client to an Archive. Tip: Naming Required Fields. Required Fields are used for Fields containing critical data that is most often searched on for sorting or most often used in decision making, or for data that is used in Workflow. If you discover that a Field would be Required some of the time, but other times not (depending on the Archive it s used in), consider having two Fields, such as Status and StatusR, where the R indicating the Status Field that has the Required Property. Tip: Workflow Considerations. If you have a Workflow moving documents into an Archive that has a Required Field, that Field must be populated by a Workflow action. Otherwise, the documents will fail to complete the Workflow and will have to be manually completed and processed via Batch Manager. Multi-Value Fields A Multi-Value Field is one where a list of data values can be entered into the Field, on a separate line, allowing for an equal to search. Use this data type any time you require multiple pieces of similar data to apply to a single document. While you can use this with any data type, it cannot be used in conjunction with a Dynamic List or Table Field. You also cannot sort Search results on Multi-Value Fields. Example: Multi-Value Index Field. Create a Multi-Value Index Field for multiple checks to be paid to a single invoice, or for an employee evaluation for someone who works for multiple departments. This can eliminate the need to have multiple copies of a document, such as a copy of the invoice for each check used to pay it, or a copy of the employee evaluation for each manager evaluating the employee. System Fields System Fields are Fields whose value is entered automatically for the user. The System Fields settings are available or grayed out, depending on the data type selected. For example, a Field called Last Modified By configured with the Last Modified System Field would automatically display the username of the last person to modify the document in the Document Viewer. Choices include: User Provided The default setting, this requires a user to enter, edit, or delete the Field data. GlobalSearch Configuration Guide Field and List Management 73
84 Indexed By Captures the current user name. This is available when the Character data type is selected, this records the username or Service Logon identity that created the record (i.e., who first indexed the document to an Archive in the database). Last Modified Captures the date or the user when the record was last saved. When the Character data type is selected, this records the username or Service Logon identity for last saved changes to the document. When the Date/Time data type is selected, this records the date and/or time when the document was last changed and saved. Date Entered Records the date and/or time when the record was created in the database (i.e., when a document was first put into an Archive in the database). It is available when the Date/Time data type is selected. Page Count Records the number of pages in the document when the record was last saved. Available when the Numeric data type is selected. File Type Available when the Character data type is selected, this records the extension of the source file stored in the Archives-associated Windows folder. Consider including a File Type Field on all Archives so that you will know what functions will and won t work on a particular document. For example, you can insert a page into a TIF, but not a DOCX and you can Launch a DOCX, but not a TIF. Read Only Available for any data type, this prevents a user from entering data into the Field, or modifying existing data in the Field. The Field is therefore reserved for use by a GlobalCapture Workflow. Example: Using a System Field in a Workflow. Create a System Field which automatically captures who indexed the document. Then create a Search which that will return only documents indexed by the current user. List Options Use Field Lists ( pick lists ) to help users by grouping together multiple indexing values. There are two types; Standard, and Dynamic. Normal Field is an Index Field without a List and is the default setting. Standard Pick Lists A Standard Pick List is a list of choices for the Field where users may select a value. It can be set as either a drop-down type of list or a type-ahead type of list. A Drop Down List provides a set list of Index Field values to choose from and is indicated by a drop-down button to the right if the Index Field. Access the drop-down list by clicking the drop-down button. A Drop- Down List confines the value a user can enter to one chosen from the List. This keeps Index Field data values consistent, so that searching is more complete and accurate. A Type Ahead List provides a suggested list of values as data is typed into a particular Field. Place the mouse cursor in the Index Field, click the mouse button and begin typing the first letter or so of the desired indexing value. A type-ahead pick list field is particularly useful for data values which are frequently misspelled, long, complex, or otherwise time-consuming to type. 74 Field and List Management GlobalSearch Configuration Guide
85 Example: Drop Down Pick List Search. Drop-down pick lists are usually used when there is a finite number of values to be used for a key field. An example would be document type or department name. Type Ahead is recommended when a large number of values for a particular key field are needed. An example might be customer name. Example: Type Ahead Pick List Search. If you were to type an A, Application would appear in the box. If you typed an N the first value on the list would appear and in this case the value would be NDA. If you continue to type and added an E to make it NE, NECL would appear. (This is behavior similar to a web search engine). Dynamic Pick Lists A Dynamic Pick List is a conditional pick list, which allow you to filter drop-down fields in a pick list based on information selected in a related field. (The pick lists used to build Dynamic Pick Lists must be drop-down lists and the Dynamic Pick List cannot be a Multi-Value List.) For example, if you shop for a car on a website it does not show you all models, it shows only models based on the make of car you select. You can create the related List as you create the Dynamic Pick List, or create it first and then create the Dynamic Pick List. Generally, it is generally better to create it first. There are two levels of dependency that can be specified for a Dynamic Pick List. The primary level is required and contains a list of only regular Field List values. The secondary is optional and may have conditional Fields besides regular Field List values. The Lists and their values used can be different (like car models from different dealers) or can be reused (like the same colors for this dealer s cars and also that dealer s cars). You can use Dynamic Pick Lists in Index Fields and in Table Fields. Example: Track Documents for Sporting Goods Store. Create a Dynamic Field List with to keep track documents for your sports goods store in an Archive called Sports Equipment Stock. When you select Acme for the equipment manufacturer in one pick list, a selection of Acme equipment models will appear in a second pick list. If you select SportsStuff in the first list, then a completely different list of equipment models will appear. And again, if you select XtremeSports in the first list, a third list of equipment will appear. The products come in a choice of different colors, so create another Field called Equipment Color, with a Dynamic Pick List based off the primary value of Equipment Manufacturer and a Secondary Field Value of Sports Equipment. SportsStuff only offers their balls in regulation colors. All Fields will have the Character Data Type and are user provided. All Lists will be Drop Down. Create Field Lists: 1. From the Field Catalog menu, select Lists, and click Add. 2. In the List Editor, create the following drop-down Field Lists: List Name: Acme Models, List Values: Golf Club, Iron Set, Wood Set. List Name: SportsStuff Models, List Values: Baseball, Basketball, Football. List Name: XtremeSports Models, List Values: Hurling Stick, Knee Pads, Shin Guards. List Name: Equipment Manufacturer, List Values: Acme, SportsStuff, XtremeSports. GlobalSearch Configuration Guide Field and List Management 75
86 List Name: Acme Colors, List Values: Black, Brown, Silver. List Name: SportsStuff Colors, List Values: Official Color. List Name: XtremeSports Colors, List Values: Blue, Green, Red. Create Index Fields: 1. In the Field Catalog, select Fields tab, click Add. 2. In the Fields Editor, name the new Field Sports Equipment Manufacturer and click List Options. a. Click Standard Pick List. b. Select the List Equipment Manufacturer from the Select a list drop-down list. 3. Create another Field called Model and click List Options. a. Click Dynamic Pick List. b. Select the Sports Equipment Manufacturer Field with the Standard Pick List you have just create from the Select a field drop-down list and click Build List. c. In the Edit List Mapping dialog box, map the three rows as shown. Assign Fields to an Archive: The Select filter 1 choices are selected from the Equipment Manufacturer List values. The Select a list choices are selected from a dropdown list of all Field Lists. 4. Create another Field called Equipment Color and click List Options. a. Click Dynamic Pick List. b. Select the Sports Equipment Manufacturer Field from the Select a list drop-down list. c. Click Secondary Dependency and select the Field with a Dynamic Pick List called Model from the drop-down list, then click Build List. d. In the Edit List Mapping dialog box, map the rows as shown: Assign Fields to an Archive: Create an Archive called Sports Equipment Stock and assign the three Fields to it, in order. You will be able to open a sporting equipment document in the Document Viewer and quickly click in the Index Fields to choose first the equipment manufacturer, then the equipment model (whose values will depend on the manufacturer you have just selected, and then, for some or all of the equipment, a choice of color. This should speed up your documentation considerably. Table Fields Included with the GlobalSearch Corporate Edition, and optional in the Professional Edition, the Tabular Data feature supports multi-column, multi-row, spreadsheet-style indexing as a separate field control in the Document Viewer. Each row is an individual line of data where you can enter information manually, through dragging or import, or through KeyFree Indexing. GlobalSearch supports Tabular Data for both line-item coding and editing. Dynamic Pick Lists can be included in the Table Field data, which is very useful for 76 Field and List Management GlobalSearch Configuration Guide

87 accounts payable invoice processing. Table Field data can only be entered by opening the Document Viewer and manually entering the data, using KeyFree Indexing, or by a combination of the two methods. Example: Table Fields with KeyFree. Table Fields are useful to record data such as the line items on a PO or invoice for GL coding, or to record the information on the multiple checks used to pay an invoice. Through the combination of Tabular Data Support, KeyFree Indexing can extract high-value data without data entry and then shared with your line-of-business applications. Create Table Fields Create the component Index Fields first, then create the Table Field by selecting from the list of available Index Fields. Fields can be added to or removed from Table Fields as needed. Field Catalog Table Fields 1. To bind individual Fields to create the table, on the Field Catalog toolbar, click Table Fields. 2. Click the Add ( ) button to add a new Table Field. Add Fields to the Table 3. Enter a name for the Table Field in the Table Field Name box. 4. If not already in the Field Catalog, create the individual Fields to be used in the table. Refer to the Create Fields section above for details. GlobalSearch Configuration Guide Field and List Management 77

88 5. Click the Add button to the left of the Index Fields in the Available Fields list to add them to the Included Fields list. 6. Repeat step 8 to add additional Fields. 7. Click Save and the Table Field will be added to the Field Catalog. Tip: Table Fields for Money. If data on the document includes dollar signs, the Field in the table should be the Character data type, not Numeric or Decimal as those data types cannot address the $ when in a Table Field the way it can when it s just a regular Archive Field. Tip: Search Table Field Data. You can search for data in a Data Table as you would any other Field. Just be aware that if you have used a Character data type for a Field for numeric data, you won t want to use the Greater Than or Less Than Conditions when building Searches on this Field. (Alphabetically, 11 is less than 2, 1000 is less than 50.) Edit Table Fields 1. To edit a Table Field, on the Field Catalog toolbar, click Table Fields. 2. Click the More Options icon in the selected Table Field bar and click Edit. 3. Make changes in the <Table Field> Table Field editor. 4. Click Save. Delete Table Fields CAUTION: Deleting a Table Field from the Field Catalog removes it permanently from all Archives and will result in a loss of any data in that Field. 1. To delete a Table Field or Fields, in the Field Catalog, click the More Options button in the selected Table Field bar and then click Delete. 2. Because this will permanently delete the Table Field, enter the displayed text in the Confirm Action prompt. 78 Field and List Management GlobalSearch Configuration Guide
89 Archive Management While Inboxes can be related to the In box as a temporary place for papers on a desk, Archives are like the organized file folders and filing cabinet drawers for paper documents, where each user has access based on set permissions. Archives are used to group documents by department, workgroup, process, chronological schema, or categorize documents that have a similar function or similar information. Archive permissions are set for individual users or group of users by a member of the ssadmin group or a database administrator. Refer to the User Management chapter for details on setting Archive security. When any Archive is opened, the user is presented with the last 50 documents captured. This number may be modified on a per-user basis if required. Documents are returned in the order they were saved to an Archive, most recent first. This allows users to always view the last 50 documents indexed without the need to manually run a Search. Tip: Create Fields then Archives. It is more efficient and less error-prone to create Fields in the Field Catalog before creating Archives. This ensures all the Index Fields needed for an Archive are ready when you start creating. While you can go back and add Index Fields to Archives after the initial creation, this usually includes having to do some supplemental cleanup on the Browse Search that is created by default when an Archive is created. When you create an Archive, the Browse Search is built with a criterion for each Field. Adding an Index Field to an Archive, doesn t add a criterion for the Field to the Browse Search; you need to modify the Browse Search and manually add a criterion for the new Index Field. Tip: Use a Field to Identify Different Documents. You don t have to have separate Archives for different document types; use a Field to identify the document type and replace the need for a Folder. For example, use a single Archive for everyone s correspondences are stored, and include an Indexed By System Field to capture the username who indexed it. Then create a Search to return correspondences where Indexed By is equal and set that as the Default Search for everyone. When they click on the Correspondence Archive, they will see only the correspondences that they indexed. Tip: Name Archives Thoughtfully. Archive names are generally short descriptors of what data should be found in the Archive. GlobalSearch is extremely flexible in naming an Archive and may contain spaces and special characters. However, other applications that may connect to GlobalSearch in might not. To ensure cross-application compatibility, it is a good idea to minimize the use of special characters. Create Archives 1. To create a new Inbox, on the GlobalSearch toolbar, in the Administration menu, select Administration. 2. In the vertical Administration menu, select Archives. 3. Select a database. A list of any existing Archives in the database will appear. GlobalSearch Configuration Guide Archive Management 79
 icon in the selected database bar and select New subarchive. 5. Enter a name for the new Archive in the New Archive text box. 6.")
90 Archive Interface 4. Create a new Archive in one of two ways: Click the Add ( ) button to create a new Archive. Click the More Options (three dots) icon in the selected database bar and select New subarchive. 5. Enter a name for the new Archive in the New Archive text box. 6. Click Advanced and configure the Archive settings. Refer to the sections below for details. New Archive 7. To specify an Archive physical file-system path on the specified Inbox storage server other than the default location, unselect Default Base Path and enter a new path in the Base Path text box. If you have installed GlobalSearch using either the default database locations, leave Use Default Path enabled to store your Archive files in a sub-directory of the default path created under c:\smartsearch\archive\dbname. 8. Click Save. 80 Archive Management GlobalSearch Configuration Guide
91 Configure Archive Options Assign Fields to Archives 1. To assign the Fields which appear in an existing Archive, click Fields. The Edit Fields dialog box can also be accessed by clicking Fields from the More Options icon in a selected Archive bar. 2. In the Edit Fields box, click the Add (plus sign) button to move selected Fields to the list of Fields for that Archive. 3. Click the Delete (minus sign) button to remove Index Fields from the Archive. 4. Click Save to save changes to exit Edit Fields. Create Custom Views Edit Fields In the desktop client, you can use Views to control how Document Lists appear for a Search. You can separate Search results in an Archive based on a pre-determined Field value (for example, separate for status to provide work queues). Each Archive can only have one View and the View can be customized. You can enable or disable Views based on a Search. The tab label and Field value do not need to be the same. For example, the label might say Money to Collect while the Field value is actually Not Paid. 1. To edit Views which appear in the desktop client Search Results Document List, click Views. The Edit Views dialog box can also be accessed by clicking Views from the More Options menu in a selected Archive bar. 2. Click Enable Views. 3. Click the Status Field Expansion (triangle) icon and select a Field from the list to use to generate the separate tabs. 4. To add an Archive view, click the Add View button. 5. In the View Properties dialog box, enter the name which will appear as the tab name in the View Label box. 6. Enter the exact value found in the list that will filter the records to appear on the tab Status Value box. The tab label and Field value do not need to be the same. For example, the label might say Money to Collect while the Field value is actually Not Paid. The value is case sensitive and must be typed in exactly as entered. Tip: Create the Equivalent of an Is Empty Search. Consider a label that reads Blank and no status value to return records where the fields is empty. This is equivalent to an Is Empty Search. GlobalSearch Configuration Guide Archive Management 81
92 Tip: Use a Manageable Number of Tabs. Since each Field will generate a tab, it is a good idea to limit the number Fields to a manageable number. Field with a List associated is usually better with this option. 7. Click the Color button, select a color, and click the Close (x) icon to close the color selector. 8. Click Save to save changes and exit View Properties. 9. Click Save to save changes to exit Edit Views. Each Archive can only have one View. Edit Views Create Notifications notification is an important component of many Workflows. Use this feature to send an message to a predefined list of users whenever a document is saved within an Archive. Notification messages are configured on a per Archive basis; message properties need to be defined for each. Notification can be set for both new and existing Archives. While indicating a document s arrival in an Archive, you can customize the subject and message. The message may contain Index Field data, giving information about that specific document and you can use S9 Notation to insert variable data. See Appendix C for details on S9 Notation. Tip: Use Notification Thoughtfully. While this is an invaluable feature for lightweight Workflows, Notification is designed for lower volume environments where conditional Workflow settings are not required. Notifications on an Archive are either on or off, there are no conditional notifications. Each document indexed will send a mail message, so this feature is not intended to be used in highvolume capture scenarios where a user will be inundated with notifications. Possible Notification Applications include: Accounts Payable Notification of invoice approval pending. Accounts Payable Notice of new inbound order. Contracts Management Request for review or approval. For more tailored notifications use the GlobalAction Node to configure messages. 1. To configure an to be sent to a predefined list of addresses whenever a document is saved within an Archive, click Notifications. The Edit Notifications dialog box can also be accessed by clicking Notifications from the More Options menu. a. Enter the address of the person that the will be sending the in the From box. The from field does not have to be for an active account, as long as it looks valid, although your mail server might require that it end 82 Archive Management GlobalSearch Configuration Guide

93 b. Enter the address of the person or people that the will be sent to in the To box. The To field must be a valid address or exchange group, but not a GlobalSearch group. It can be configured to send to multiple recipients by separating the addresses with a comma or a semi-colon. The address can be to inside or outside the current domain i.e., you can configure the to send it to any address. c. Enter an subject line in the Subject box. d. Enter an message and any attachments in the message editor, with its various formatting options. e. Include Field information in the message editor by selecting from the Fields menu. f. Drag the Resize (triangle) icon to resize the message editor. g. Click Save to save changes and exit Notifications. Edit Notifications for an Archive Enable Content Searching To set the ability to search document content in text-based documents, choose one of the following: o Enable Content Search. o In a selected Archive bar, click the More Options icon and enable Content Search. Tip: Content Searching and PDF Documents. Content searching can be enabled after an Archive is created, but existing records need to be re-indexed. Click the More Options icon for the selected Archive and click Rebuild Index. It is a good idea to enable Convert Documents to PDF if you plan to use Enable Content Search, so any image documents moved into the Archive or any image pages inserted into existing documents will be converted to a searchable format. GlobalSearch Configuration Guide Archive Management 83
94 Create Browse Searches To create a Search with criteria for all Fields included in the Archive at the time the Archive is created, enable Create Browse Search. Convert Documents to PDF To convert documents in the selected Archive to the PDF file format, choose one of the following: o Enable Convert Documents to PDF. o In a selected Archive bar, click the More Options icon and enable Convert Documents to PDF. If enabled, the feature converts all of the documents in the selected Archive to the PDF file format if they are originally in an image file format. It does not convert documents that already texted-based, such as the DOCX file format. Revision Control Revision control is used in the desktop client to keep track of the current and past versions of documents. This is useful if documents may be edited by more than one user or if a revision audit trail is required. The Versioning and Check In/Check Out features are available in the desktop client, but can be configured from the GlobalSearch web client. You can enable neither or one of the choices, but not both. Versioning or Check In/Check Out must be enabled when an Archive is created; they cannot be enable when modifying an Archive. To ensure that version history of documents is maintained and secure, of the documents in the Archive, Versioning and Check In/Check Out and cannot be turned off once an Archive is created and cannot be enabled for an existing Archive. For the same reason, documents within a Revision Controlled Archive may not be moved to another location within the system where the revision history might be modified. Enable Versioning The Versioning feature in the desktop client Document Viewer can be set on a per document basis and will automatically preserve previous versions of a document when edits are made. Changes can be made locally in their native application or made in the desktop client Document Viewer. Every time you save the document in a Versioning Archive it generates a new version of the document with a new data record. If the new Archive has Versioning enabled, a Versioning Archive is automatically created to store all previous versions of the document. 1. To set the documents in the Archive with Versioning, in the Revision Control group, select Enable Revision Control. 2. Select Versioning. Revision Control 84 Archive Management GlobalSearch Configuration Guide

95 Enable Check In/Check Out With the Check In/Check Out feature to the desktop client, every time you check out a document a new revision is created. Once a document is checked out, another user cannot check that revision out as well. This prevents conflicts between simultaneous edits of the same documents. You cannot use this feature in the web client, but you can configure an Archive for use in the desktop client. 1. To set the documents in the Archive with Check In/Check Out, in the Revision Control group, select Enable Revision Control. 2. Select Check-in/Check-out. Archive with Versioning Versioning versus Check In/Check Out Versioning Implicit each save generates a new version New version = new document and new SQL record With Permissions, view other versions from Content Management tab in the desktop client Document Viewer User sees most recent version in Search result Previous versions records saved in Versioning Archive which is auto-created when a versioned Archive is created Documents being edited are not locked, others can open and edit; the last save is the one that is retained Check In/Check Out Explicit new revision created by checking out New revision = new document With Permissions, view other revisions by right-clicking a document in a desktop client Document List User sees Published version in Search Result; Published revision isn t necessarily the most recent Documents in a Check In/Check Out Archive can t be part of a Workflow; Workflows can t check out a document Documents in a Check In/Check Out Archive can t be edited via GlobalSearch; there s no way to check out or in Documents can t be moved out of a Check In/Check Out Archive Documents are locked when checked out, published version seen by users in Search result is read-only Edit Archives Once created the Fields, Archive name, notifications, Views, and Archive path in an Archive can be modified. Some options such as Versioning and Check In/Check Out cannot be modified once an Archive is created. For instance, a Browse Search cannot be created after the Archive is created. You can, however, edit a Browse Search later if you add Fields to the Archive and want to add a criterion for that Field into the Search. 1. On the GlobalSearch toolbar, in the Administration menu, select Administration. GlobalSearch Configuration Guide Archive Management 85
 icon to view any Subarchives for the Archive. 4. Click the More Options icon for the selected Archive.")
96 2. In the vertical Administration menu, select Archives. A list of the Archives will appear. Hover over the Archive ( ) icon to view the Archive ID number. 3. Click the Expansion (triangle) icon to view any Subarchives for the Archive. 4. Click the More Options icon for the selected Archive. Refer to the previous Create Archives section for details on the following choices: To create a new child Archive nested under the selected Archive, select New sub-archive. To rename the Archive, click Rename, enter the new name, and click the Save (checkmark) icon to save the new name. Changing the Archive name changes the name as shown in the interface. It does not change the name of the associated Archive storage location. To relocate the Archive path, in the Relocate dialog box, enter a new path in the Base Path box and click Save. To edit Fields in the Archive, click Fields, add, delete, and/or reorder the Fields and click Save. To edit Views in the desktop client Search Results list, click Views, modify the settings and click Save. To edit notifications for the Archive Notifications, modify the settings and click Save. To allow the contents of text-based documents to be included in a Search, enable the Content Search checkbox. Behind the Scenes: Each Archive stores files in its own specific location. Changing the path to the Archive files changes where new files will write in the future. This does not move already existing files. It creates a new directory structure to match the default base path, or the unique base path, if that is how the Archive was originally configured. Using the Update Archive feature can be useful if, for example, you have run out of room on the original server and plan to continue to index new documents onto a new server. If you would like old and new files both to reside in a new location, use the Update Archive tool to direct where new files go, move existing files to that new location, then, using SQL Management Studio, modify the pointers for existing documents to indicate their new location. Consult our Support team for details on updating document pointers in our SQL databases. Delete Archives CAUTION: Deleting an Archive also deletes all of its documents and data and is a permanent change to the database. In the Index Documents interface, enter data in the Index Fields for the new document being 1. To delete an Archive, click the More Options button in the selected Archive box. 2. Click Delete. 3. Because this will permanently delete the Archive and all of its Index Field data, enter the displayed text in the Verification box. 4. Click Delete. 86 Archive Management GlobalSearch Configuration Guide
97 Show All Archives If Show All Archives is selected, all the Archives in the Archives navigation pane will show whether they have View permissions to the Archive or not. However, if a user does not have permission to see the documents within, the Archive will appear empty when selected. If the box is cleared, users who are not administrators will only see the Archives in which they have the permission to see in the Archives Pane. 1. In the vertical Administration menu, select Archives. 2. On the Inboxes toolbar, click the Show All Archives toggle switch. The switch is green when all Archives are selected and white when they are not. Troubleshooting: Check Permissions on both Parent and Child Archives. If a user has security permissions to a child Archive but no permissions to its parent Archive and you disable Show all Archives, then the user will not be able to see their child Archive because they can no longer see the parent Archive. Search for Archives You can search for Archives to modify or delete from the Archives toolbar. 1. In the vertical Administration menu, select Archives. 2. On the Archives toolbar, click the Searches (magnifying glass) button and enter a word or part of a word into the search box. Set Data XChange Sources With Data XChange, you can index documents based on document data that has previously been entered into SmartSearch. It can also be configured to look up data from any ODBC- (Open Database Connectivity) or OLEDB- (Object Linking and Embedding, Database) compliant data source. Data XChange can dramatically reduce data entry by requiring the manual typing of only a single data element. Example: Data XChange used in Accounts Payable. Prior to receiving an invoice for services rendered, a purchase order is generated. If the PO has been scanned and indexed into GlobalSearch, when the invoice arrives it can be scanned and indexed only by PO Number. All other information can be pulled automatically from the PO Document that has already been indexed. 1. To set Data XChange sources, on the GlobalSearch toolbar, in the Administration menu, select Administration. 2. In the vertical Administration menu, select Archives. A list of the Archives will appear. 3. Click the More Options icon in the selected Archive bar. 4. Click Data XChange. 5. In the Data XChange Source dialog box, click New. GlobalSearch Configuration Guide Archive Management 87
98 Data XChange Source 6. Enter the name of the source in the Source Name text box. Use a short but descriptive name to indicate to users what Data XChange source is being used for updating. Example: Data XChange Source Name. For example, when updating from a CSV output from an AS/400 system, the Source Name might be AS/400. Example: Data XChange Connection String. The Connection String provides instructions on how the SmartSearch server talks to the external data source. In this case, you need the connection string to link to a CSV file on drive C of the SmartSearch server and the CSV file has column headers. The connection string should look like this example: Provider=Microsoft.Jet.OLEDB.4.0;Data Source=c:\data\updatefiles;Extended Properties="text;HDR=Yes;";Persist Security Info=False 7. Enter the connection string in the Connection String text box. The data source can be in a file format where a connection string can be created, such as CSV file, a SQL table, or an Access database. 8. Click the Go icon. 9. Click the Select a data source Expansion (triangle) icon. 10. In the Mapped Fields group, select one or more of the Archive Index Fields to map to from the list of available Fields. 11. Click Save. 12. Click Close to close Data XChange Sources. 88 Archive Management GlobalSearch Configuration Guide
99 Rebuild Content Index Content searching can be enabled after an Archive is created, but existing records need to be re-indexed. Rebuilding the Index may not be needed as part of regular maintenance, but is recommended if you notice that performance is slowing. The rebuilding process should take less than a minute to complete. Everyone should be logged out of the database during the rebuilding process. 1. To rebuild the Index, in the Administration menu, select Administration. 2. In the vertical Administration menu, select Archives. A list of the Archives will appear. 3. Click the More Options (three dots) icon in the selected Archive bar. 4. Click Rebuild Index. GlobalSearch Configuration Guide Archive Management 89
100

101 Search Management Searches are the method used to access documents in Archives to view in the Document Viewer or to begin a GlobalAction Workflow. They are created and managed by members of the SSAdmin group and/or database administrators with administration rights to the selected database. Search security is set on a per Archive basis to configure the permissions each user or group of users is allowed for different documents. The most common Search which a user runs for an Archive can be designated as the default Search and can be set to run automatically when the Archive is selected. Search permissions are set for individual users or group of users. Refer to the User Management chapter for details on setting Search security. Create and Manage Searches Create Searches 1. To create a Search, on the GlobalSearch toolbar, in the Administration menu, select Administration. 2. In the vertical Administration menu, select Searches. 3. Click the Database Select menu located below the GlobalSearch toolbar and select a database. 4. Choose one of the following: a. Click the More Options (three dots) icon for the Archive you wish to search and click New Search. b. Click the Add (plus sign) button to assign a Search to the root Archive. 5. Enter a name for the Search in the Search Name text box. GlobalSearch Configuration Guide Search Management 91
102 Tip: Name Searches Thoughtfully. Search names should clearly indicate the Search s purpose in a way that makes sense to end users, using their terminology. Use Search names to: Indicate Searches designed for GlobalAction by adding GA (such as, GA AP Approval ). It is helpful to quickly identify those Searches when designing Workflows. Indicate if the Search uses OR concatenation. For example, East Coast or West Coast Vendors. 6. In the Search Conditions group, select an Index Field from the Select a field list. When you select an Archive for a new Search, all of the Fields assigned to that Archive are available in the list. Since the Root Archive has all of the Fields in the database available to it, every Field is available in a Root Archive Search list. 7. Select the operator from the Contains menu. Refer to the Search Operators section for details. 8. Use the default or enter a prompt in the Prompt text box. Refer to the Prompts section for details. 9. Click Save at this point to create a simple Search for a data from a single Field. 10. To add another condition, click Add Condition and repeat steps five through seven until you have all of the Fields for your Search. 11. To delete a condition, click the Delete (minus sign) button next to the condition that you wish to delete. 12. For additional options, click Advanced to expand the Search dialog box and access the enhanced Searched features, then enter data into Advanced Groupings or select one or more of the checkboxes. Refer to the next section for details. 13. Click Save. Tip: Search with Multiple Criteria. If all your Searches are simple Searches with a single criterion, you end up with a great number of Searches! If a user searches with one Search and doesn t find what they expect, they need to run a different Search. But, if you have complex Searches with multiple criteria, if running the Search one way doesn t produce the expected results, you can just press F5 to refresh the Search and enter more or different search values. Tip: Plan Criteria Order. When possible, consider building the multiple criteria in the order that the user is accustomed to seeing the Fields. Then when indexing or viewing a document in the Document Viewer, the consistency builds user comfort more quickly. Advanced Search Options GlobalSearch provides enhanced Search features to preconfigure simple or complex search conditions, using multiple fields, multiple indexing data, and if/then conditions. Advanced Grouping While Searches with multiple criterion default to concatenating with the AND logical operator and the order of criterion applies, you can use Advanced Grouping to change that. Set any combination of AND (both must be true) or of OR (either or both must be true) concatenation between the criteria. Use parenthesis to group three or more criteria and control the order in which the search process will proceed. The grouping works like a basic algebra expression, following the same mathematical rules. 92 Search Management GlobalSearch Configuration Guide
103 Example: In an invoice approval process, an Accounts Payable clerk needed to flag any invoices that are above a dollar threshold for a given cost center. Create a Search called Invoice Approval which should return any Sales invoice > $5,000 or any IT invoice > $2,500. This Search would be impossible with the standard query logic. By default, the Search will be an AND based search (1 and 2 and 3 and 4 and 5). To enable OR-based searching, change the settings in the Advanced Grouping text box using a combination of parenthesis as well as OR statements to ((1 and 2) or ((3 and 4)) and 5. Search Properties By default, a Search looks at the documents in the selected Archive. To search more than one Archive, select one or more additional Archives in the Search Properties list to create a multi-archive Search. While you can add Archives to search, you can only search on Fields that are part of the initial Archive. This is important if you re creating a multi-archive Search on a parent Archive and want to search all the children child Fields need to be part of parent Archives. Configure the Fields for the Archives and then create Searches. Tip: Search All Fields in the Database. All Fields in all Archives are available if building a Search on the Root Archive, so creating a Browse Root Archive can be a good way to search for documents across many classifications for testing purposes. Search All Fields in an Archive. In order to browse through a list of all of the documents in an Archive, create a Search which would return all of the documents in the search results. A simple example is, for an accounts payable Archive with an Index Field for vendor names, create a Search where one condition is Vendor Name is Empty and a second is Vendor Name is Not Empty. Enable advanced grouping and set it to 1 or 2. The Search will produce all documents in the Archive whether a vendor name has been entered or not. Enable Image XChange Searches The Image XChange optional module is a universal, rapidly deployed integration engine that allows you to search and retrieve documents without leaving your line-of-business application. By placing your mouse cursor over a piece of key data and hold down CTRL while clicking the right mouse button in the desktop client, SmartSearch extracts the data from the screen and runs a user-defined search to retrieve and display matching documents that you have security to. Select Image XChange Search Enabled on the Search Advanced Options settings to make the Search accessible to Image XChange. Enable Multi Value Searches A multi-value Search in the desktop client is used when working with documents that share a many-to-one relationship, such as a bill which covers multiple invoices. Enable the Multi Value Search feature to search for more than one value for the same Index Field. For example, if you are not sure how a customer s name GlobalSearch Configuration Guide Search Management 93
104 had been entered into a Field, you can type in two or more versions of the customer names, which would appear as a drop-down list. With a Multi Value Search you can even paste values from your spreadsheet application into a Search. The Search values must be concatenated with the OR operator. 1. Configure a Multi-Value Field in the Field Catalog. Multi-Value Fields cannot be configured as the parent level of a Dynamic Pick List. Multi-Value Fields display in the order entered, not sorted in any way. 2. Assigned the Field to the selected Archive. 3. Create a Search for the Archive, click Advanced, and in the Options group, enable Multi Value Search. 4. Click Save. This Field will now display with multi-value properties in the Document Viewer for all document in the Archive. Users can enter multiple values into the single Field when indexing a document. Because of the nature of the Field, Multi-Value Fields will not sort in the Search Results Document list. Example: Create a Search for the Accounts Payable department, where a single purchase order may be tied to several invoices representing multiple shipments. Enable Multi-Value Field support for the desktop client, so that the AP clerk can now run a search against the Invoice Number Index Field using any one of the invoice values represented. Enable Content Searches By default, a Search is run on one or more Index Fields for a document. Select Content Search Enabled to do full text searching of document content, based on an OCR scan of the document. There are three steps to successfully configuring search document contents: first the Archive selected must be a Content- Searchable Archive; next the documents searched must have text-based content; and finally the Search must be Content Search Enabled. When the Search is run, there will be a text box to enter keywords. Content Search enables keyword, fuzzy, stemming, phrase, and wildcard searching within the contents of an electronic document and highlights any matching instances. With Hit Highlighting, you can navigate from hit to hit in document image in the Document Viewer. Refer to the Search Options table in the Search for Documents chapter for further details. Content Search Options If Content Search Enabled is selected, in the Content Search Options group, you can optionally select one or more of the following: Phonics Use for phonic ( sounds like ) searching. Fuzziness Use for the percentage degree of wrongness allowed for search results. Stemming Use for word-stem * ( form of the word ) searching. Display Archive View Tabs If Views have been created on an Archive and the Display Archive View Tabs checkbox in the Search Advanced options settings is enabled, then in the desktop client Search Results Area, the View tabs would be displayed when the Search was run, even if no documents were found in that Archive during the search. If you enable this checkbox and View was not enabled for the Archive, the tabs will not appear in the 94 Search Management GlobalSearch Configuration Guide
105 desktop client Search Results. Refer to the Create Custom Views section in the Archive Management chapter for further details. Advanced Search Options Edit Searches 1. To edit a Search, in the Administration menu, select Administration. 2. In the vertical Administration menu, select Searches. 3. In the Database Select menu, select a database. 4. Click the More Options icon for your selected Archive and click Edit. 5. Make changes in the Search dialog box. 6. Click Save. Delete Searches CAUTION: Deleting a Search removes it permanently. 1. To delete a Search, in the Administration menu, select Administration. GlobalSearch Configuration Guide Search Management 95
106 2. In the vertical Administration menu, select Searches. 3. In the Database Select menu, select a database. 4. Click the More Options icon for your selected Archive and click Delete. Search Operators Search operators are the choices used in the Contains list when creating or modifying a Search. Use them to modify search results, such as to look for what is not available (for example, all invoices which are not marked paid ) or to restrict results (such as only bills over thirty days and over $100). Contains Use a Contains operator in s Search to find results in the searched Field which at least partially match the query. This is the default operator for Fields which have been assigned the Character, Numeric, or Decimal data type. It allows you to search for a known part of a value, such as one word in a phrase, without having to provide the entire value. For example, if you type in Square 9 the Contains Search will find both Square 9 and Square 9 Softworks. Tip: Use Contains. If you have a Field with a Character data type with no Field List associated, you re most likely to be using a Contains condition, as these Fields are frequently difficult to match. For example, a first name might be entered as Elizabeth, Beth, or Lizzie. An address might be Church Street or Church St. While you can assign Contains search conditions on Numeric or Decimal, using Equals or Greater Than/Less Than operators yields more useful results. Equals To create precise searches, use an Equals operator to find results entered into the searched Field which exactly match the search value. The Equals operator can be use with Fields with any data type. Equals is useful for specific names, numbers, or date/time ranges where exact search results are required. Use Equals with a wildcard asterisk ( * ) to create a begins with, ends with, or contains search. Does Not Equal Use a Does Not Equal operator in a Search for the opposite effect of Equals; to find results whose value is everything except the search value. This operator can be use with Fields with any data type. It is often combined with other criteria to narrow the everything else returned by the Does Not Equal operator. Greater Than or Equal To Use a Greater than or Equal to operator to find numeric results which return a value greater than or equal to the search value. The operator can be used with Fields which have been assigned the Numeric, Date/Time, or Decimal data type. 96 Search Management GlobalSearch Configuration Guide
107 Less Than or Equal To Use Less than or Equal to Searches to find numeric results which return a value less than or equal to the search value. The operator can be used with Fields with the Numeric, Date/Time, or Decimal data type. Is Not Empty Use Is Not Empty Searches not to find specific results, but for the presence of any data in the Field. This operator can be use with Fields with any data type. Is Empty Use Is Empty to find not specific results, but for the lack of data in the Field. This operator can be use with Fields with any data type. This condition is often used to begin a process. For example, if the Approval Status is empty, then the invoice hasn t begun making its way through the approval process yet. Prompts The prompt for a Search value should indicate the type of data to enter, such as a date range. If the Search value does not match the Field data type, there will be an error message instead of search results, so prompts should be specific. The Prompt default is the name of the Field selected for the condition. You can use the default, although it is better to create a prompt to indicate which search queries are most likely to return good results. Tip: Make Prompts Completely Obvious. By default, the prompt is simply the name of the Field the criterion is searching, such as Vendor Name, or PO Number. Consider adding more information, such as: Put Enter a, Enter an, or Enter the at the beginning of the Prompt. For example, Enter the Vendor Name, or Enter a PO. Similarly, if a Field List is associated with the Field, add Select a, Select an, or Select the. If using an Equals condition, consider putting Equals at the end of the prompt, such as PO Number Equals. If using a Contains condition, consider putting Contains at the end of the prompt, such as Vendor Name Contains. If you have two criteria in order to specify a date or numeric range, include those indicators in the prompt, such as Earliest PO Date and Latest PO Date, or Smallest PO Amount and Greatest PO Amount. For Pick List, indicate that the user is to select rather than enter the Field data. Multi-Field Searches In addition to searching for documents based on a single Index Field, such as a vendor name (or the lack of the vendor name), you can also search more than one Field in the same Search for a single keyword or phrase. This can save a lot of time finding documents such as all the purchase orders from Acme Inc. produced in the last thirty days. With a Multi-Field Search, you can search multiple Index Fields for a single piece of data by configuring the Search so that more than one criterion has exactly the same prompt value. When you run the Search you see one prompt whose input value feeds all of the assigned criteria. When GlobalSearch Configuration Guide Search Management 97
108 configuring a Multi-Field Search, you must use the Advanced Grouping settings to concatenated the values with the OR logical operator. Example: Create a Search called Insurance Policy with multiple fields for a social security number (SSN) where one SSN is entered into each Field. A user performing a search does not know which Field might contain the SSN and does not want to run the Search multiple times or key the SSN into multiple Search prompts. By configuring the Search for multi-field searching, this problem is easily solved. When this Search is executed, the user will be prompted to enter only a single social security number, but the Search will look in all the Indexed Fields defined in the Search with that prompt value for the data. Static Searches Use a static Search to incorporate the search value is into the criteria, hard-coding the search values into the Search, with no user input necessary except to run the Search. When you replace the default prompt with a static search value enclosed in braces ( { } ) and then select the Search, you will not see a search prompt for a static value; instead the Search will run automatically. There are three useful variables when creating a static For the current For the current user s Fully Qualified Domain Name (FQDN) or Fully Qualified Server Name (FQSN), as recorded in a system field such as Indexed By, or Last Modified For the current user s username, without any server or domain qualification, as might be shown in an Assembly Bound Field List imported from Active Directory. Examples: Search Greater Than a Dollar Amount. Create a static Search for all purchase orders of more than $20,000 to search for POs where the Amount Field has a value greater than or equal to the static value of $20,000. Note the braces surrounding the search value. Search for a Commonly Used Character. Create a Search where the vendor name equals {Brew Shop}. Then, whenever that Search is selected the results would be all documents where Brew Shop was found in the vendor name, without having to type Brew Shop every time to into the search field. Search using the Current Date. Create a Search by building a Search for Due Date to find documents with a due date equal to the current date, and when you run the Search tomorrow, it will find the documents that are due on that date. Search by Document Modifier. Create a Search for Last Modified By to find documents last modified by the user currently logged in. When the same Search is run by a different user, GlobalSearch will return the documents last modified by that person. 98 Search Management GlobalSearch Configuration Guide
109 Search by Document Author. Create a Field called Author that allows you to indicate who in your organization has authored a document, and create with it an associated Field List populated with usernames from your Active Directory. Then build a Search for Author to find documents authored by the current users. When the same Search is run by a different user, GlobalSearch will return the documents authored by that person. Use Date Math to Find Documents in a Date Range. Create a Search to find the PO date, which is between today s date and seven days into the future, using date math to configure like this: Field Condition Prompt/Value PODate Less Than or Equal To {@today+7} PODate Greater Than or Equal To {@today} Variable Searches Use a variable Search when the results should be based on user input. Some or all search values are provided by the user in response to a prompt presented by the Search, allowing for infinite flexibility. As you create a new Search, that search will, by default, begin as a variable Search. Example: The Browse Search. The Browse Search that is usually created when an Archive is created is a great example of a variable Search. The user sees prompts for each Index Field that existed in the Archive when the Archive and Browse were created and can then enter a Search value for one or more Index Fields. A Browse Search is created when you create an Archive, if the Create a Browse Search checkbox is selected. Just remember that the Fields included in the Browse Search are those which exist at the time the Archive is created. If you add Fields to the Archive, criteria for those Fields are not automatically added to the Browse Search; you must edit the Browse to add the new Fields. By default, the Browse Search uses the Equals Condition on all criteria for number and date fields, and the Contains condition on all criteria for character fields. Also by default, the Browse Search uses AND to concatenate all the criteria. You can change conditions and Advanced Grouping, add or delete criteria from the Browse Search. Although you can modify a Browse Search, best practice is to leave it as is. If you want a different Search, create a new Search instead. A mixed Search can use both variable and static criteria. Tip: Use Both Static and Variable Criteria. Using variable criteria is win-win for users and administrators. Users get to search for what they want to, and administrators need to create fewer Searches. However, using static criteria is critical to controlling which documents users can and cannot see. Using both types of criteria in a mixed Search keeps the Search flexible for the user as well as controlled for security. For example, create a Search called Vendor Name which contains the prompts Vendor Name Contains AND Indexed By Equals {@fulluser}. This allows the user to put in all or part of a vendor name, and GlobalSearch will return records that match that condition, but only the ones that were indexed by the current user. GlobalSearch Configuration Guide Search Management 99
110 Search for Searches You can find Searches to modify or delete from the Searches toolbar. 1. In the vertical Administration menu, select Searches. 2. On the Searches toolbar, click the Search (magnifying glass) button on the top right hand corner of your Administration screen and enter a word or part of a word into the search text box. 100 Search Management GlobalSearch Configuration Guide

111 System Management Use the System Management interface to manage database SMTP outbound server configurations, stamp annotation, and for product registration information. System Settings Set Notifications notifications are used to alert a user that an update has been made to an Archive and Workflow. To receive notifications, users must be either Windows Active Directory (AD) users with addresses attached to their usernames in the domain or Square 9 Users with address attached. Create Entries 1. To configure a SMTP outbound server, from the GlobalSearch toolbar, in the Administration menu, select Administration. 2. In the vertical Administration menu, select System. 3. Click the Database toolbar and select a database from the drop-down list. 4. Click the Expand (down arrow) icon on the Notification Settings bar. 5. Enter a server path in the Server text box. This information is required. 6. Enter a port number in the Port settings, or use the default of port Enter a username user with the ability to send from this SMTP server in the Username text box. 8. Enter the password for the specified user in the Password text box. 9. Click Save. GlobalSearch Configuration Guide System Management 101
112 Modify SMTP Server Settings Notification Settings 1. To edit an SMTP configuration, in the Notification Settings bar, modify the information in the Server, Port, Username, and/or Password text boxes. 2. Click Save. Delete SMTP Server Settings 1. To delete an SMTP configuration, in the Notification Settings bar, delete the information in the Server, Port, Username, and/or Password text boxes. 2. Click Save. Behind the Scenes: The configured SMTP server is database specific, affecting only the selected database. SSL (Secure Socket Layer) and TLS (Transport Layer Security) are not supported. Manage Stamps Individual users have the ability to create custom stamps for themselves in the SmartSearch desktop client. Administrators have the ability to create stamps globally for all users in the desktop and the GlobalSearch web client. The process to create, edit or delete custom stamps is identical whether acting as a local user or as an administrator. Create Stamps 1. To create a Stamp available for all users, in the Administration menu, select Administration. 2. In the vertical Administration menu, select System. 3. Click the Database toolbar and select a database from the drop-down list. 4. Click the Expand (down arrow) icon on the Manage Stamps bar. Refer to the Annotate Documents section of the Edit Data and Documents chapter for details on creating, modifying, and deleting Stamps in the Manage Stamps dialog box. The procedure is the same, except that from the Document Viewer, it only effects the user s local settings. 102 System Management GlobalSearch Configuration Guide
113 Select a Stamp Behind the Scenes: You can add annotations to any file format, but if you send out an with annotations, the file will be convert to the PDF file format. Annotations are actually saved in an SSA file in the document s Archive location, with the same name as the stored document. Registration If you wish to upgrade your GlobalSearch with optional modules or upgrade your demonstration version to a current-licensed version of GlobalSearch, you can do so easily using the Customer Serial Number sent to you from Square 9 Fulfillment after you have made your purchase. 1. To configure registration settings, in the Administration menu, select Administration. 2. In the vertical Administration menu, select System. 3. Click the Expand (down arrow) icon on the Registration bar. Registration GlobalSearch Configuration Guide System Management 103
114 4. To register online, enter the required registration serial number in the Serial Number text box. 5. If you did not have an internet connection to perform the web registration or if requested by Support, click Manual Registration and enter the number provided by Square To see a list of the Square 9 features enabled by your license, click Features. 7. Click the Close Features (X) icon to hide the Features list. 8. Click View License Agreement to go to the End User License Agreement (EULA) page on the square-9.com website to review the license agreement. 9. Click Activate. For more details on registering your Square 9 software, please contact info@square-9.com or call Please have your Customer Serial Number and Unique Identifier Number available. Continuing without Registration will allow only limited functionality in the use of this product. 104 System Management GlobalSearch Configuration Guide

115 User Management The User & Group Administration interface is where permissions are set for users and groups or users by members of the ssadmin group. The interface allows you to select single or multiple users and/or groups of users, and to select single or multiple security components. Use the User & Groups panel to select one or more users and to create new Square 9 Users. Use the Security Components panel in the center to select the objects to which permissions will be granted for the selected users and groups. The selected objects could be individual or multiple Databases, Archives, or Searches. Use the Object Permissions panel, on the right, to set the permissions on the objects selected from the Security Components panel for the users and groups selected in the Users & Groups panel. The panels are context-sensitive, varying as selections are made from panels to the left of the panel. Finally, use the Confirm Changes button to apply your settings for the select user or users. User & Groups Panel Archive Button Security Components Panel Security Components Tabs Secured Users & Groups Group User Icon Group Icon Unsecured Users & Groups Group Windows User Icon Square 9 User Icon Archive Permissions Panel Bar Help Icon Confirm Changes Panel Square 9 User Administration Group User & Group Administration Interface Introduction to User Management User Admiration Tour If you are not familiar with the User & Group Administration interface you can take a guided tour. The first time the GlobalSearch User & Group Administration screen is accessed, a tour of the interface automatically launches. GlobalSearch Configuration Guide User Management 105
116 1. To assess the User & Group Administration interface, from the GlobalSearch toolbar, select Administration, and then do one of the following: Select Users Management. In the vertical Administration menu, select Users & Security. 2. To launch a guided tour of the features, do one of the following: Launch User & Group Administration in GlobalSearch for the first time and the tour automatically begins. Click the Information ( I ) icon, which appears on the GlobalSearch toolbar when in User & Group Administration. 3. Click Next at each screen to continue the tour. 4. To skip the tour, click Skip. User & Group Administration Help Each pane in the User & Group Administration screen includes helpful information about that panel. Click the Help (? ) icon for the selected panel. Users and Groups Secured Users and Groups The Secured Users and Groups panel displays a list of all Windows users and groups and all Square 9 Users who have been granted access to one or more databases. The icon to the left indicates either a User ( ) or a Group of users ( ). The icon to the right indicates either a Windows user ( ) or a Square 9 User ( ). 1. To secure a user or group, from the GlobalSearch toolbar, go to the User & Group Administration interface using one of the following methods: In the Administration menu, select User Management. In the Administration menu, in the vertical Administration menu, select Users & Security. 2. Select one or more user or group from the list in the Unsecured Users and Groups section. 3. Enable or disable permissions as necessary (see steps below for details). 4. In the Confirm Changes panel, click Apply Security. The selected user or group will be moved to the list in the Secured Users and Groups section. Unsecured Users and Groups Unsecured Users and Groups displays a list of all Windows users and groups and all Square 9 Users that are available to grant access to one or more databases. 1. To return a secured user or group permissions to unsecured, in the Administration menu, select User Management. 2. Select one or more user or group from the list in the Secured Users and Groups group. 3. Disable all permissions. 4. In the Confirm Changes panel, click Apply Security. 5. To add new users or groups to the list, add the user or users to the Windows authentication pool or create Square 9 Users. 106 User Management GlobalSearch Configuration Guide
117 Square 9 User Administration In addition to Windows Active Directory users and groups, in GlobalSearch you can create users which are local to the application, requiring no Windows credentials or Windows authentication. This allows you to grant external users with no server or Active Directory account, such as vendors or customers, access to the web and/or desktop client. Through GlobalSearch User & Group Administration, Square 9 Users can be added, modified, or deleted by a member of the ssadmin group. Once a Square 9 User is created in the web client, settings can be configured in either the web or desktop client. Note: Square 9 Users must be created, modified, or deleted in the GlobalSearch User Interface in the web client; there s no interface to create them in the desktop client. Once a Square 9 User is created in GlobalSearch, you can manage the user s security from the desktop client. Square 9 Users can have access to Inboxes, databases, Archives, and Search security like Windows users. Unlike users with Windows authentication, Square 9 Users are always individual users and cannot be members of a group. Create Square 9 Users 1. To create a Square 9 User, in the Users & Groups panel, in the Square 9 User Administration section, click the Add (plus sign) button. 2. Enter a username. 3. Enter a password and then confirm the password. The Square 9 User password must be six to 18 characters in length. There is no forced complexity, but it is always recommended. For security control, Square 9 User usernames cannot be changes once created. 4. Click Save. Square 9 User Administration Modify Square 9 Users 1. To change a Square 9 User s password, select a user from the Secured Users & Groups list, and in the Square 9 Users Administration section, enter the new password and then confirm it. 2. To add or modify a user address, enter the address in the Update text box. GlobalSearch Configuration Guide User Management 107
118 Add an address to a Square 9 User in order for them to utilize the GlobalAction Allow Delegation feature. Refer to the GlobalAction Guide for details on setting notifications in GlobalAction. 3. Click Save. Square 9 User Modification or Deletion Delete Square 9 Users CAUTION: Deleting a Square 9 User removes the user permanently. 1. To delete a Square 9 User, the user must first be unsecured from all databases. Remove permissions and move the user from Secured Users & Groups list, if necessary. 2. Click to select a user or users from the Unsecured Users & Groups list, and in the Square 9 Users Administration section, click Delete Users. 3. Click OK to confirm the deletion. Security Components Use the Security Components panel to set permissions for GlobalSearch components. You can select a single component. When it is selected it turns grey and a checkmark appears to indicate selection. To launch GlobalSearch, users must have database access permissions to at least one database, even if they will never be working in a database. Users must also be assigned as a secured user or as a member of at least one secured group. Any user or group with security to any database displays in the Secured Users & Groups list. 108 User Management GlobalSearch Configuration Guide
119 Permissions Status Indicators Permissions for a user may be set by individual or group member. At times the permissions settings may conflict, such as for two or more individual who are part of a group. The User & Group Administration interface indicates the level of permissions set for the user on particular components: Check Mark Indicates that all selected users/group have the same permission set on all selected components. Blank Indicates that all selected users or groups have no permission on any selected components. Dash Indicates that selected users or groups have differing permissions, with permissions in conflict, where it impossible to indicate a consistent state. If you click Apply Security for a permission which is an inconsistent state, permission will be removed. Resolve the conflicted settings and then apply security changes again. Reasons include: A selected user has different permissions on the multiple selected components. Multiple selected users have different permissions on a selected component. Multiple selected users have different permissions on multiple selected components. Tip: Set Security by Group. Set security by user or by group, but by group is strongly recommend. This makes security maintenance easier. For example, if you set permissions for Bette Smith based on her job as AP Division Manager, what happens when she gets promoted to Vice President? If you had created a group called AP Division Manager you could start with one group member (Bette) and when she goes to a different position, just replace Bette with Juan as the group member, without having to reconfigure all of the security settings. Tip: Placeholder Database. If your implementation has the ability to support multiple databases, consider having one database be the SmartSearch Access database, to be assigned for users that will not be working within a real database. For example, if someone will be scanning to Inboxes in SmartSearch and have no need to work within a database in which documents are stored, you would grant them access to the Software Access Database. This database would have no documents, not even any Archives, so users that have no need for database access other than to get into the software, granting access to this placeholder databased does the trick. Set Database Security 1. To set database permissions, from the list in the Users & Groups panel, select users and/or groups. 2. In the Security Components panel, click Databases. 3. Select one or more databases from the list. 4. In the Database Permissions panel, enable Database Access to allow user-level access to the selected database. 5. Optionally, enable one or more other permissions: Select Database Admin to allow the user or group selected administrator-level access. Select Allow Delegation to allow an individual user the ability to delegate his or her own GlobalAction Workflow notifications. In the Manager text box, enter the username of the Delegation Manager who will be required to choose where the user s GlobalAction s will be forwarded to if the user enables delegation. If the Delegation Manager does not select a user to delegate the to, then Allow Delegation will not work. GlobalSearch Configuration Guide User Management 109
120 Note: Database Access. Make sure that Access is enabled, since the database administrator must be a database user. Also note that database access and database administration access for Square 9 Users can be granted, changed, and revoked only via the GlobalSearch web client. Note: Delegation for GlobalAction. Make sure that for Windows Active Directory or Square 9 User users there s an address associated with any username assigned delegation permissions. Refer to the Modify Square 9 Users section above for details. Refer to the GlobalAction User and Configuration Guide for details about the Allow Delegation and Manager settings. 6. To quickly enable all database permissions, click Select All. 7. To disable all database permissions, click Select None. 8. From the License Type list, choose the type of Square 9 license that the user or group will be granted. Select from the choices: Full License Grant the user or group access to the database via the desktop client or the web client, and the ability to perform any action to which they have permission. Web-Only Full License The user or group can access the database only through the GlobalSearch web client and can perform any action to which they have permission. Web-Only Read Only License The user or group can only view the documents returned by Searches to which they have access on the databases which they have access. Access is only through the web client and the user or group cannot add or modify documents, even if they have been given permissions. Of the Export (output) permissions they might have, they may or print. Tip: Check Available Licenses. The License Type drop-down list displays all possible license types, even if no seats are available for that type. Be certain that type of Square 9 license selected in actually available before assigning it. Select Licenses to Fit Business Needs. Database permissions require that a license type be selected. Keep in mind not only data security but also how many users may wish to access the desktop or web client at the same time, since licensing is concurrent. Licensing needs may change over time as personnel and business processes change. 9. Click Apply Security to save the setup for each single user or group. Click Apply Security for one user or group before selecting another user or group or the changes will not be saved. Only then select another member to configure permissions. 110 User Management GlobalSearch Configuration Guide
 icon for one or more databases to display the Archives which are available for that database. 4.")
121 Databases Security Components Set Archive Security 1. To set Archive permissions, from the Secured Users & Groups list, click to select one or more users and/or groups. 2. In the Security Components panel, click Archives. 3. Click on the Database ( ) icon for one or more databases to display the Archives which are available for that database. 4. To see if an Archive has any Subarchives, click on its Archive ( ) icon. If the Archive has any Subarchives, the component tree expands to display its child Archives and the icon changes to the image of an open folder. 5. To assign security permissions for an Archive, click on its Archive. Parent and child Archives can be selected individually and more than one Archive can be selected. 6. In the Archive Permissions panel, click one of the tabs and then select the appropriate permissions individually or by clicking Select All. The choices include Folder, Document, and Export. See the next three sections below for details. Click the Help (?) icon for details on Archive permissions choices. If you click Select All in Archive Permissions, it selects all permissions on all three, not just on the one currently selected. 7. Click Apply Security to save the setup for each user or group. Set Folder-Level Security In this dialog box Folder refers to an Archive. You can secure documents in an Archive at different levels: View The user or group may see the selected Archive in the Archives Pane, even if Show All Archives is disabled, as long as they have View rights to all Archives in the hierarchical branch. If this is the only permission, users do not yet have enough permissions to see documents in the Archive, as they need to be able to run a Search to see documents and they don t yet have access to any Searches. Since a user or group must be able to see documents, View must be enabled when any other Archives permissions are enabled. Add The user or group may put documents into the Archive, but once added no changes may be made. Adding includes not just by capturing (like scan, import, import data and document, or dragand-drop) but also with Burst, Merge, and Move. Delete The user or group may remove documents from the Archive. GlobalSearch Configuration Guide User Management 111
122 Move The user or group may move a document from one Archive to another. Moving documents from Archives to Inboxes will permanently delete your indexing data. View Revisions The user or group may view all the versions of a revision-controlled document. Users without this option will only be able to see the final version of the document. On a Versioned Archive, the user or group of users may see previous versions of the document returned by the Search (use the Content Management ribbon in the Document Viewer). View History The user or group may view the Audit Log of documents. Delete Errored Batches A legacy setting which allows the user or group to remove errored Workflow Batches from the Batch Manager Batch List any Batches that have errored. Full API Access This API-only security setting allows the user or group to bypass Search security, via the API, on the current Archive. Intended for use the GlobalAction and custom programs, since our API respects Search Security, rather than having to grant Search Access for each individual Search to the account running GlobalAction or a custom program, grant that account API Full Access so they will have access to all current and future Searches residing in the Archive. Set Document-Level Security In addition to Archive-level permissions, you can control what functions a user or group can perform on documents in the selected Archive. Choices include: Modify Document The user or group may rotate, copy/paste, insert, append, and reorder pages of documents. Modify Pages The user or group may enhance, cut, replace, and delete pages of documents. Modify Data The user or group may modify index data in any non-system Field for documents. Modify Annotations The user or group may create, modify, and delete annotations on documents. Publish Revisions For use with a Check In/Check Out Archive, the user or group may set the Publish and Unpublish status for documents. Set Export Security Documents and data can be output from GlobalSearch to print, , or view in another application. To export, choose one or more of the following: Print The user or group may use the Print functions from the Document Viewer. The user or group may documents from the Document Viewer (or from the Document List in the desktop client). The user must have a local client in order to take advantage of this permission. Export Document The user or group may export documents in their original format from the Document Viewer or from the Document List. Export Data Allows the user or group to export the data to a CSV file from the Document List in the desktop client. View in Acrobat Allows the user or group to view documents within the native PDF file viewer from the desktop client Document List. If the PDF viewer has editing capability, the user can make changes, but those changes do not carry into SmartSearch; this situation would be similar to using Launch Copy on a PDF document. Launch Allows the user or group to use the Launch Document feature in the desktop client Document Viewer. 112 User Management GlobalSearch Configuration Guide


123 Launch Copy The user or group may open a copy of any viewable documents into the default PDF viewer in the desktop client Document Viewer. Archive Permissions Set Search Security To set Searches permissions, from the list in the Users & Groups section, click to select one or more users and/or groups. Configure Security Components 1. In the Security Components panel, click Searches. 2. Click on the Database icon for one or more databases to display any Archives which as available for that database. 3. To see if an Archive has any Subarchives, click on its Archive (closed folder) icon. If the Archive has any Subarchives, the component tree expands to display child Archives and the icon changes to the image of an open folder. 4. To assign security permissions for Searches, open the Archive or Subarchive and click on its Search. More than one Search and more than one Archive can be selected. 5. Select one or more Searches. 6. In Search Permissions, enable View to allow the selected users or groups to see the selected Searches and their results. 7. Click Apply Security for each user or group. Searches Permissions GlobalSearch Configuration Guide User Management 113

124 Configure Security Components Once permissions are set on a Search, in the Security Components panel, right-click the Search to select one or more options: 1. To assign the Search as the default Search for the Archive, click Set as Default Search. A gold star icon will appear to the right of the Search name to indicate that it is a Default Search. Only one Search per Archive can be set as a Default Search for that user or group. The Search will automatically run if the Archive is clicked by users who have enabled the feature. If you enable a Search as a Default Search, users are automatically granted access to that Search in the Permissions pane. If access to a Default Search is revoked in the Permissions pane, it is disabled as a Default Search. 2. To add a Search to a user s My Queue list, click Set as Queue Search. A chain-link icon will appear to the right of the Search name to indicate that it is a Queue Search. More than one Search can be added to the Queue, which provides quick access to the most commonly used Searches. If you enable a Search as a Queue Search, the user or group of users is automatically granted access to that Search in the Permissions pane. If access to a Queue Search is revoked in the Permissions pane, it is disabled as a Queue Search. 3. To assign the Search as the approved for direct URL access for the Archive, click Set as Direct Search. A bullseye icon will appear to the right of the Search name to indicate that it is a Direct Search (referred to as a Direct Access Search in the desktop client). Direct Search grants access to documents for which a link has been included in a Workflow-generated . If the user clicks the link in the they receive from a Workflow, and the document pointed to by the link wouldn t be returned by the Direct Search, then the user won t be able to access the document pointed to by the link. 4. Click Apply Security. Search Security Menu Set Inbox Security Inbox security is specific to that Inbox. It can be set by user or by group of users. 1. To set Inboxes permissions, from the Secured Users & Groups list, click to select one or more users and/or groups. 114 User Management GlobalSearch Configuration Guide
125 The Windows Active Directory users and user groups that have been granted access to this database will be displayed in the Unsecured Users and Groups list. Database administrators are not exempt from Inbox security. 2. In the Security Components panel, click Inboxes. 3. Select one or more Inboxes. 4. In the Inbox Permissions panel, click one of the tabs and then select the appropriate permissions individually or by clicking Select All. The choices include Folder, Document, and Export. See the next three sections below for details. Click the Help (?) icon for details on Archive permissions choices. If you click Select All in Inbox Permissions, it selects all permissions on all three, not just on the one currently selected. 5. Click Apply Security to save the setup for each user or group. Set Folder-Level Security In this dialog box Folder refers to an Inbox. Select from the choice of document security in an Inbox: View The user or group will see the selected Inbox in the Inboxes Pane. Since a user or group must be able to see documents, View must be enabled when any other Inbox permissions are enabled. Add The user or group may put documents into the Inbox by using the import, drag, Burst, Merge, and in the desktop client. If only this choice is selected, once a document is added no changes may be made. Delete The user or group may remove documents from the Inbox, including delete after import when using the Append feature. Move The user or group may move a document from one Inbox to another, or to an Archive. Set Document-Level Security In addition to Inbox-level permissions, you can control what functions a user or group can perform on documents in the selected Inbox. Choices include: Modify Document The user or group can rotate, copy/paste, insert, append, and reorder pages of documents. Modify Pages The user or group may enhance, cut (but not paste), replace, and delete pages of documents. Modify Annotations The user or group may create, modify, and delete annotations on documents. Set Export Security Documents can be output from GlobalSearch to print or . To export, choose one or more of the following: Print The user or group may use the Print functions from the Document Viewer (or from the Search Results list in the desktop client). The user or group may documents from the Document Viewer (or from the Search Results list in the desktop client). The user must have either Microsoft Outlook or IBM Notes. GlobalSearch Configuration Guide User Management 115


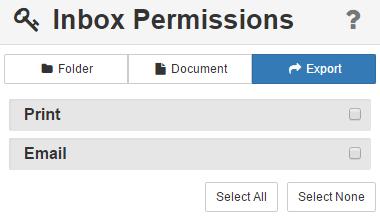
126 Inboxes Permissions 116 User Management GlobalSearch Configuration Guide

127 Appendices Section IV includes helpful supplemental information. The appendices in this section include: Appendix A Appendix B Appendix C This appendix exhibits the Square 9 Product Matrix. This appendix lists the values for formatting an Index Field. This appendix provides supplemental information, such as the supported operating systems and how to create an Index Field hyperlink. GlobalSearch Configuration Guide Appendices 117
GlobalSearch. Desktop Client User Guide. 127 Church Street, New Haven, CT O: (203) E:
 E:") GlobalSearch Desktop Client User Guide 127 Church Street, New Haven, CT 06510 O: (203) 789-0889 E: education@square-9.com www.square-9.com Square 9 Softworks Inc. 127 Church Street New Haven, CT 06510
GlobalSearch Desktop Client User Guide 127 Church Street, New Haven, CT 06510 O: (203) 789-0889 E: education@square-9.com www.square-9.com Square 9 Softworks Inc. 127 Church Street New Haven, CT 06510
GlobalSearch. Server Migration Guide. 127 Church Street, New Haven, CT O: (203) E:
 E:") GlobalSearch Server Migration Guide 127 Church Street, New Haven, CT 06510 O: (203) 789-0889 E: education@square-9.com Square 9 Softworks Inc. 127 Church Street New Haven, CT 06510 www.square-9.com (+1)
GlobalSearch Server Migration Guide 127 Church Street, New Haven, CT 06510 O: (203) 789-0889 E: education@square-9.com Square 9 Softworks Inc. 127 Church Street New Haven, CT 06510 www.square-9.com (+1)
GlobalSearch. Installation Guide v Church Street, New Haven, CT O: (203) E:
 E:") GlobalSearch Installation Guide v4.4.1.0 127 Church Street, New Haven, CT 06510 O: (203) 789-0889 E: education@square-9.com Square 9 Softworks Inc. 127 Church Street New Haven, CT 06510 www.square-9.com
GlobalSearch Installation Guide v4.4.1.0 127 Church Street, New Haven, CT 06510 O: (203) 789-0889 E: education@square-9.com Square 9 Softworks Inc. 127 Church Street New Haven, CT 06510 www.square-9.com
GlobalSearch. Server Migration Guide. 127 Church Street, New Haven, CT O: (203) E:
 E:") GlobalSearch Server Migration Guide 127 Church Street, New Haven, CT 06510 O: (203) 789-0889 E: education@square-9.com Square 9 Softworks Inc. 127 Church Street New Haven, CT 06510 www.square-9.com (+1)
GlobalSearch Server Migration Guide 127 Church Street, New Haven, CT 06510 O: (203) 789-0889 E: education@square-9.com Square 9 Softworks Inc. 127 Church Street New Haven, CT 06510 www.square-9.com (+1)
GlobalCapture. Guide. 127 Church Street, New Haven, CT O: (203) E:
 E:") GlobalCapture Guide 127 Church Street, New Haven, CT 06510 O: (203) 789-0889 E: education@square-9.com Square 9 Softworks Inc. 127 Church Street New Haven, CT 06510 www.square-9.com (+1) 203-789-0889 email:
GlobalCapture Guide 127 Church Street, New Haven, CT 06510 O: (203) 789-0889 E: education@square-9.com Square 9 Softworks Inc. 127 Church Street New Haven, CT 06510 www.square-9.com (+1) 203-789-0889 email:
GlobalCapture Quick Start Guide
 GlobalCapture Quick Start Guide 127 Church Street, New Haven, CT 06510 O: (203) 789-0889 E: education@square-9.com www.square-9.com Square 9 GlobalCapture GlobalCapture Quick Start Guide Version 2.0.2
QuickBooks Connections
 Connections Guide v4.4 127 Church Street, New Haven, CT 06510 O: (203) 789-0889 E: education@square-9.com Square 9 Softworks Inc. 127 Church Street New Haven, CT 06510 www.square-9.com (+1) 203-789-0889
GlobalCapture. Guide. 127 Church Street, New Haven, CT O: (203) E:
 E:") GlobalCapture Guide 127 Church Street, New Haven, CT 06510 O: (203) 789-0889 E: education@square-9.com Square 9 Softworks Inc. 127 Church Street New Haven, CT 06510 www.square-9.com (+1) 203-789-0889 email:
GlobalCapture Guide 127 Church Street, New Haven, CT 06510 O: (203) 789-0889 E: education@square-9.com Square 9 Softworks Inc. 127 Church Street New Haven, CT 06510 www.square-9.com (+1) 203-789-0889 email:
GlobalCapture OSA with QuickSearch Guide
 GlobalCapture OSA with QuickSearch Guide Sharp Equipment Integration 127 Church Street, New Haven, CT 06510 O: (203) 789-0889 E: education@square-9.com www.square-9.com Square 9 Softworks Inc. 127 Church
GlobalCapture EIP with QuickSearch Guide
 GlobalCapture EIP with QuickSearch Guide Xerox Equipment Integration 127 Church Street, New Haven, CT 06510 O: (203) 789-0889 E: education@square-9.com Square 9 Softworks Inc. 127 Church Street New Haven,
GlobalSearch. Backup Procedures. 127 Church Street, New Haven, CT O: (203) E:
 E:") GlobalSearch Backup Procedures 127 Church Street, New Haven, CT 06510 O: (203) 789-0889 E: education@square-9.com www.square-9.com Square 9 Softworks Inc. 127 Church Street New Haven, CT 06510 (+1) 203-789-0889
GlobalSearch Backup Procedures 127 Church Street, New Haven, CT 06510 O: (203) 789-0889 E: education@square-9.com www.square-9.com Square 9 Softworks Inc. 127 Church Street New Haven, CT 06510 (+1) 203-789-0889
127 Church Street, New Haven, CT O: (203) E: GlobalSearch ECM User Guide
 E: GlobalSearch ECM User Guide") 127 Church Street, New Haven, CT 06510 O: (203) 789-0889 E: sales@square-9.com www.square-9.com GlobalSearch Table of Contents GlobalSearch ECM... 3 GlobalSearch Security... 3 GlobalSearch Licensing Model...
127 Church Street, New Haven, CT 06510 O: (203) 789-0889 E: sales@square-9.com www.square-9.com GlobalSearch Table of Contents GlobalSearch ECM... 3 GlobalSearch Security... 3 GlobalSearch Licensing Model...
GlobalConnections for Microsoft SharePoint and OneDrive Guide
 GlobalConnections for Microsoft SharePoint and OneDrive Guide 127 Church Street, New Haven, CT 06510 O: (203) 789-0889 E: education@square-9.com Square 9 Softworks Inc. 127 Church Street New Haven, CT
GlobalSearch Service Pack 1. What s New Guide
 GlobalSearch Service Pack 1 What s New Guide GlobalSearch v4.4.1.0 What s New Guide Copyrights, Legal Notices, Trademarks, and Servicemarks Copyright 2016 Square 9 Softworks All rights reserved. No part
10 Minute Demonstration Script
 10 Minute Demonstration Script Table of Contents The Demo... 3 The Interface... 3 Demo Flow... 3 Capture and Indexing... 4 Searches... 6 Integration and Workflow... 8 2 P a g e The Demo Most demonstrations
Creating Interactive PDF Forms
 Creating Interactive PDF Forms Using Adobe Acrobat X Pro for the Mac University Information Technology Services Training, Outreach, Learning Technologies and Video Production Copyright 2012 KSU Department
Working with PDF s. To open a recent file on the Start screen, double click on the file name.
 Working with PDF s Acrobat DC Start Screen (Home Tab) When Acrobat opens, the Acrobat Start screen (Home Tab) populates displaying a list of recently opened files. The search feature on the top of the
A Guide to Quark Author Web Edition 2015
 A Guide to Quark Author Web Edition 2015 CONTENTS Contents Getting Started...4 About Quark Author - Web Edition...4 Smart documents...4 Introduction to the Quark Author - Web Edition User Guide...4 Quark
Adobe Acrobat DC for Legal Professionals - Quick Reference Guide
 Adobe Acrobat DC for Legal Professionals - Quick Reference Guide Adobe Acrobat is an important tool in the legal field giving you the ability to create, view, and edit PDF (portable document format) documents.
Calendar & Buttons Dashboard Menu Features My Profile My Favorites Watch List Adding a New Request...
 remitview User Guide 1 TABLE OF CONTENTS INTRODUCTION... 3 Calendar & Buttons... 3 GETTING STARTED.... 5 Dashboard.... 7 Menu Features... 8 PROFILE.... 10 My Profile... 10 My Favorites... 12 Watch List...
User Guide 701P Wide Format Solution Wide Format Scan Service
 User Guide 701P44865 6204 Wide Format Solution Wide Format Scan Service Xerox Corporation Global Knowledge & Language Services 800 Phillips Road Bldg. 845-17S Webster, NY 14580 Copyright 2006 Xerox Corporation.
Widgets for SAP BusinessObjects Business Intelligence Platform User Guide SAP BusinessObjects Business Intelligence platform 4.1 Support Package 2
 Widgets for SAP BusinessObjects Business Intelligence Platform User Guide SAP BusinessObjects Business Intelligence platform 4.1 Support Package 2 Copyright 2013 SAP AG or an SAP affiliate company. All
Managing Your Website with Convert Community. My MU Health and My MU Health Nursing
 Managing Your Website with Convert Community My MU Health and My MU Health Nursing Managing Your Website with Convert Community LOGGING IN... 4 LOG IN TO CONVERT COMMUNITY... 4 LOG OFF CORRECTLY... 4 GETTING
Guide to User Interface 4.3
 Datatel Colleague Guide to User Interface 4.3 Release 18 June 24, 2011 For corrections and clarifications to this manual, see AnswerNet page 1926.37. Guide to User Interface 4.3 All Rights Reserved The
User Guide. Product: GreenFolders. Version: 3.8
 User Guide Product: GreenFolders Version: 3.8 Release Date: October 2014 GreenFolders 3.8 User Guide Introduction Table of Contents 1 Introduction... 6 2 General Information... 7 2.1 Login Procedure...
End User Guide. 2.1 Getting Started Toolbar Right-click Contextual Menu Navigation Panels... 2
 TABLE OF CONTENTS 1 OVERVIEW...1 2 WEB VIEWER DEMO ON DESKTOP...1 2.1 Getting Started... 1 2.1.1 Toolbar... 1 2.1.2 Right-click Contextual Menu... 2 2.1.3 Navigation Panels... 2 2.1.4 Floating Toolbar...
TREENO ELECTRONIC DOCUMENT MANAGEMENT
 TREENO ELECTRONIC DOCUMENT MANAGEMENT User Guide February 2012 Contents Introduction... 5 About This Guide... 5 About Treeno... 6 Navigating Treeno EDM... 7 Logging in to Treeno EDM... 7 Changing Your
BDM s Annotation User Guide
 ETS :Foothill De Anza CC District April 17, 2014 1 BDM s Annotation User Guide Users with Read/Write access can annotate (markup) documents if they retrieve the document using Microsoft s Internet Explorer
Scan November 30, 2011
 Scan November 30, 2011 2170 Georgina Avenue Santa Monica, CA 90402 800-972-3027 www.rco.com Table of Contents 1 Introduction... 1 2 Document History... 2 3 Install and Uninstall... 3 4 Understanding the
SAP BusinessObjects Live Office User Guide SAP BusinessObjects Business Intelligence platform 4.1 Support Package 2
 SAP BusinessObjects Live Office User Guide SAP BusinessObjects Business Intelligence platform 4.1 Support Package 2 Copyright 2013 SAP AG or an SAP affiliate company. All rights reserved. No part of this
GlobalSearch Security Definition Guide
 Prepared by: Marketing Square 9 Softworks 203-361-3471 127 Church Street, New Haven, CT 06510 O: (203) 789-0889 E: sales@square-9.com www.square-9.com Table of Contents GLOBALSEARCH SECURITY METHODS...
KMnet Viewer. User Guide
 KMnet Viewer User Guide Legal Notes Unauthorized reproduction of all or part of this guide is prohibited. The information in this guide is subject to change for improvement without notice. We cannot be
NETWORK PRINT MONITOR User Guide
 NETWORK PRINT MONITOR User Guide Legal Notes Unauthorized reproduction of all or part of this guide is prohibited. The information in this guide is subject to change for improvement without notice. We
Transform AP for EnterpriseOne User's Guide
 Transform AP for EnterpriseOne User's Guide Transform AP for EnterpriseOne User s Guide Version 1.0 Copyright 2008 Bottomline Technologies, Inc. All rights reserved. Information in this document is subject
Business Intelligence Launch Pad User Guide SAP BusinessObjects Business Intelligence Platform 4.1 Support Package 1
 Business Intelligence Launch Pad User Guide SAP BusinessObjects Business Intelligence Platform 4.1 Support Package 1 Copyright 2013 SAP AG or an SAP affiliate company. All rights reserved. No part of this
Bombardier Business Aircraft Customer Services. Technical Publications. SmartPubs Viewer 3.0 User Guide. Updated January 2013 [2013]
![Bombardier Business Aircraft Customer Services. Technical Publications. SmartPubs Viewer 3.0 User Guide. Updated January 2013 [2013]](/thumbs/90/103657167.jpg "Bombardier Business Aircraft Customer Services. Technical Publications. SmartPubs Viewer 3.0 User Guide. Updated January 2013 [2013]") Bombardier Business Aircraft Customer Services Technical Publications SmartPubs Viewer 3.0 User Guide Updated January 2013 [2013] Table of Contents Application Views... 5 Collection View... 5 Manual View...
Bombardier Business Aircraft Customer Services Technical Publications SmartPubs Viewer 3.0 User Guide Updated January 2013 [2013] Table of Contents Application Views... 5 Collection View... 5 Manual View...
SIRE Solution Suite. WebCenter User Manual. A Publication Of
 SIRE Solution Suite An Official Manual of SIRE Technologies Document and Legislative Management Software Version 6.0 A Publication Of 2 2000-2011 SIRE Technologies Incorporated and its licensors. All rights
Info Input Express Limited Edition
 Info Input Express Limited Edition User s Guide A-61891 Table of Contents Using Info Input Express to Create and Retrieve Documents... 7 Compatibility... 7 Contents of this Guide... 7 Terminology... 9
OrgPlus 6 Plug-in User Guide Version 6.0.3
 OrgPlus 6 Plug-in User Guide Version 6.0.3 The material presented in this publication is copyright-protected 2000-2006 by HumanConcepts and may not be reproduced in any form, by any method for any purpose
Acrobat X Professional
 Acrobat X Professional Toolbar Well Page Navigations/Page Indicator Buttons for paging through document Scroll Bar/box page indicator appears when using the scroll button to navigate. When you release
IBM Notes Client V9.0.1 Reference Guide
 IBM Notes Client V9.0.1 Reference Guide Revised 05/20/2016 1 Accessing the IBM Notes Client IBM Notes Client V9.0.1 Reference Guide From your desktop, double-click the IBM Notes icon. Logging in to the
Business Insight Authoring
 Business Insight Authoring Getting Started Guide ImageNow Version: 6.7.x Written by: Product Documentation, R&D Date: August 2016 2014 Perceptive Software. All rights reserved CaptureNow, ImageNow, Interact,
User Documentation. Administrator Manual.
 User Documentation Administrator Manual Proposal Software 1140 US Highway 287, Suite 400-102 Broomfield, CO 80020 USA Tel: 203.604.6597 www.proposalsoftware.com Table of Contents Open the WebPro Viewer...
New Mexico State University. Financial Systems Administration - RMR BDMS Scan/Load and Indexing
 New Mexico State University Financial Systems Administration - RMR BDMS Scan/Load and Indexing November 11, 2016 Blank Page Table of Contents Business Rules... 1 Terminology... 2 Synchronizing Banner Security
The PeopleSoft Financials System
 The PeopleSoft Financials System 2 Introduction...................... 14 Signing In and Out.................... 14 Signing In to the System.............. 14 Signing Out................... 17 Navigation
Workflow and Approvals Guide. For Document Manager Enterprise Edition
 Workflow and Approvals Guide For Document Manager Enterprise Edition 16 July 2013 Trademarks Document Manager and Document Manager Administration are trademarks of Document Logistix Ltd. TokOpen, TokAdmin,
Wholesale Lockbox User Guide
 Wholesale Lockbox User Guide August 2017 Copyright 2017 City National Bank City National Bank Member FDIC For Client Use Only Table of Contents Introduction... 3 Getting Started... 4 System Requirements...
Introduction to Microsoft Office PowerPoint 2010
 Introduction to Microsoft Office PowerPoint 2010 TABLE OF CONTENTS Open PowerPoint 2010... 1 About the Editing Screen... 1 Create a Title Slide... 6 Save Your Presentation... 6 Create a New Slide... 7
SharePoint: Fundamentals
 SharePoint: Fundamentals This class will introduce you to SharePoint and cover components available to end users in a typical SharePoint site. To access SharePoint, you will need to log into Office 365.
Funasset Limited Foundry House Foundry Road Taunton Somerset TA1 1JJ. Tel: +44 (0) Fax: +44 (0) mailmarkup.com funasset.
 Fax: +44 (0) mailmarkup.com funasset.") Funasset Limited Foundry House Foundry Road Taunton Somerset TA1 1JJ Tel: +44 (0)1823 365864 Fax: +44 (0)1823 277266 mailmarkup.com funasset.com Copyright 2012 Funasset Limited. All rights reserved. Products
Funasset Limited Foundry House Foundry Road Taunton Somerset TA1 1JJ Tel: +44 (0)1823 365864 Fax: +44 (0)1823 277266 mailmarkup.com funasset.com Copyright 2012 Funasset Limited. All rights reserved. Products
New User Orientation PARTICIPANT WORKBOOK
 New User Orientation PARTICIPANT WORKBOOK INTEGRATED SOFTWARE SERIES New User Orientation PARTICIPANT WORKBOOK Version 2.0 Copyright 2005 2009. Interactive Financial Solutions, Inc. All Rights Reserved.
Ringtail Basics. Quick Start Guide
 Ringtail Basics Quick Start Guide Ringtail 8 brings a new level of simplicity, ease of use, and efficiency to document review. The following pages walk through scenarios, based on common tasks, to show
What will I learn today?
 What will I learn today? What s New My Old Adobe did it this way Navigation Pane Tools Pane Comments Pane Share Pane Using Action Wizard Comparing PDF Documents Insert Pages Delete Pages Replace Pages
Horizon Launcher Configuration Guide
 Horizon Launcher Configuration Guide Windows NT and Windows 2000 are registered trademarks of Microsoft Corporation. All other product or company names are trademarks or registered trademarks of their
File Magic 5 Series. The power to share information PRODUCT OVERVIEW. Revised June 2003
 File Magic 5 Series The power to share information PRODUCT OVERVIEW Revised June 2003 Copyrights, Legal Notices, Trademarks and Servicemarks Copyright 2003 Westbrook Technologies Incorporated. All rights
Colligo Engage Outlook App 7.1. Connected Mode - User Guide
 7.1 Connected Mode - User Guide Contents Colligo Engage Outlook App 1 Benefits 1 Key Features 1 Platforms Supported 1 Installing and Activating Colligo Engage Outlook App 2 Checking for Updates 3 Updating
SharePoint: Fundamentals
 SharePoint: Fundamentals This class will introduce you to SharePoint and cover components available to end users in a typical SharePoint site. To access SharePoint, you will need to log into Office 365.
ScanSoft, Inc. 9 Centennial Drive Peabody, Massachusetts 01960
 C O P Y R I G H T S Copyright 1999 2003 by ScanSoft, Inc. All rights reserved. No part of this publication may be transmitted, transcribed, reproduced, stored in any retrieval system or translated into
User Guide. FTR Reporter For more information, visit
 FTR Reporter 5.7.1 For more information, visit www.fortherecord.com TABLE OF CONTENTS INTRODUCTION... 5 Overview... 5 About This Document... 5 GETTING STARTED... 6 Installation... 6 Starting Reporter...
Understanding Acrobat Form Tools
 CHAPTER Understanding Acrobat Form Tools A Adobe Acrobat X PDF Bible PDF Forms Using Adobe Acrobat and LiveCycle Designer Bible Adobe Acrobat X PDF Bible PDF Forms Using Adobe Acrobat and LiveCycle Designer
Getting Started The Outlook Web Access Window
 QUICK Source Microsoft Outlook Web Access in Exchange Server 2003 Getting Started The Outlook Web Access Window ❶ ❷ ❸ ❹ ❺ ❻ ❼ ❽ Using the Reading Pane The Reading Pane allows you to view your e-mail messages
User Guide. BlackBerry Workspaces for Windows. Version 5.5
 User Guide BlackBerry Workspaces for Windows Version 5.5 Published: 2017-03-30 SWD-20170330110027321 Contents Introducing BlackBerry Workspaces for Windows... 6 Getting Started... 7 Setting up and installing
WebStudio User Guide. OpenL Tablets BRMS Release 5.18
 WebStudio User Guide OpenL Tablets BRMS Release 5.18 Document number: TP_OpenL_WS_UG_3.2_LSh Revised: 07-12-2017 OpenL Tablets Documentation is licensed under a Creative Commons Attribution 3.0 United
What is OU Campus? Log into OU Campus
 OU Campus v10 Content Providers User Guide This document is designed to provide (level 5) Content Providers with basic information needed to do most tasks. Those needing additional information are encouraged
Legal Notes. Regarding Trademarks KYOCERA MITA Corporation
 Legal Notes Unauthorized reproduction of all or part of this guide is prohibited. The information in this guide is subject to change without notice. We cannot be held liable for any problems arising from
Colleague UI4.3 Documentation
 Colleague UI4.3 Documentation Table of Contents Getting Started... 2 Add the Shortcuts to your Desktop... 2 Searching for and Using Forms... 3 Begin Your Form Search... 3 Form Search Results... 3 The Navigation
Introduction to Personal Computing
 Introduction to Personal Computing Academic Computing Services www.ku.edu/acs Abstract: This document explains the basics of the Microsoft Windows operating system. It is intended for users who are either
SIEMENS. Teamcenter Rapid Start Introducing Rapid Start RS
 SIEMENS Teamcenter Rapid Start 11.6 Introducing Rapid Start RS002 11.6 Contents Rapid Start overview................................................... 1-1 Rapid Start User Interfaces..............................................
ECR Vault User Guide. An ImageDirector product from Milner Technologies, Inc. ECR Vault Version 8.0
 ECR Vault User Guide An ImageDirector product from Milner Technologies, Inc. ECR Vault Version 8.0 COPYRIGHT Copyright 1995-2015 Milner Technologies, Inc. This manual and the software described in it are
DOCUMENT IMAGING REFERENCE GUIDE
 January 25, 2017 DOCUMENT IMAGING REFERENCE GUIDE AppXtender Web Access version 7 Kent State University Division of Information Services AppXtender Web Access Help: For questions regarding AppXtender Web
Colligo Manager 5.4 SP3. User Guide
 5.4 SP3 User Guide Contents Enterprise Email Management for SharePoint 2010 1 Benefits 1 Key Features 1 Platforms Supported 1 Installing and Activating Colligo Email Manager 2 Checking for Updates 4 Updating
ABBYY FineReader 14. User s Guide ABBYY Production LLC. All rights reserved.
 ABBYY FineReader 14 User s Guide 2017 ABBYY Production LLC All rights reserved Information in this document is subject to change without notice and does not bear any commitment on the part of ABBYY The
ACTIVE Net Insights user guide. (v5.4)
") ACTIVE Net Insights user guide (v5.4) Version Date 5.4 January 23, 2018 5.3 November 28, 2017 5.2 October 24, 2017 5.1 September 26, 2017 ACTIVE Network, LLC 2017 Active Network, LLC, and/or its affiliates
ACTIVE Net Insights user guide (v5.4) Version Date 5.4 January 23, 2018 5.3 November 28, 2017 5.2 October 24, 2017 5.1 September 26, 2017 ACTIVE Network, LLC 2017 Active Network, LLC, and/or its affiliates
Upside Approvers Job Aid
 Upside Approvers Job Aid Approving Contract Documents a. In the Toolbar, click on the Print Preview icon. The Print Preview dialog box opens. b. Click the Prepare Document button. Before you approve a
PowerPoint 2010 Level 1 Computer Training Solutions Student Guide Version Revision Date Course Length
 Level 1 Computer Training Solutions Version 1.2 Revision Date Course Length 2012-Feb-16 6 hours Table of Contents Quick Reference... 3 Frequently Used Commands... 3 Manitoba ehealth Learning Management
IBM Rational Rhapsody Gateway Add On. User Guide
 User Guide Rhapsody IBM Rational Rhapsody Gateway Add On User Guide License Agreement No part of this publication may be reproduced, transmitted, stored in a retrieval system, nor translated into any
DOCUWARE REFERENCE MANUAL
 DOCUWARE REFERENCE MANUAL Sierra Lands, Inc 2013 LOGGING INTO DOCUWARE Open a web browser and navigate to: https://docs.cariberoyale.com/dwwebclient. DocuWare will automatically log you in based on your
OU EDUCATE TRAINING MANUAL
 OU EDUCATE TRAINING MANUAL OmniUpdate Web Content Management System El Camino College Staff Development 310-660-3868 Course Topics: Section 1: OU Educate Overview and Login Section 2: The OmniUpdate Interface
UR Docs Indexer And Assessor
 UR Docs Indexer And Assessor 2013, University of Regina. All rights reserved. Page 2 UR Docs Table of Contents SECTION 1 NAVIGATION... 4 A. Background... 4 B. Logging In... 4 C. Logging Out... 5 D. Nolij
File Cabinet Manager
 Tool Box File Cabinet Manager Java File Cabinet Manager Password Protection Website Statistics Image Tool Image Tool - Resize Image Tool - Crop Image Tool - Transparent Form Processor Manager Form Processor
Table of Contents. Part I How do I... Part II Zetafax Client. Foreword. 3 Advanced tasks. 1 Menu options. Annotate a fax? View a text message?
 I Table of Contents Foreword 0 1 Part I How do I... 1 Zetafax Client... actions 2 Send a fax?... Specify options... when sending a fax? View a fax?... Annotate a fax?... Print a fax?... Preview a message...
Version 1.4. FaxCore User Manual
 Version 1.4 FaxCore User Manual Table of Contents Introduction... 1 Contacting FaxCore... 1 Getting Started... 2 Understanding FaxCore s User Interface... 4 Settings: Your User Profile... 4 Personal Information
EMC Documentum My Documentum Desktop (Windows)
") EMC Documentum My Documentum Desktop (Windows) Version 7.2 User Guide EMC Corporation Corporate Headquarters: Hopkinton, MA 017489103 15084351000 www.emc.com Legal Notice Copyright 2003 2015 EMC Corporation.
EMC Documentum My Documentum Desktop (Windows) Version 7.2 User Guide EMC Corporation Corporate Headquarters: Hopkinton, MA 017489103 15084351000 www.emc.com Legal Notice Copyright 2003 2015 EMC Corporation.
User Help. Fabasoft Cloud
 User Help Fabasoft Cloud Copyright Fabasoft R&D GmbH, Linz, Austria, 2019. All rights reserved. All hardware and software names used are registered trade names and/or registered trademarks of the respective
Info Input Express Network Edition
 Info Input Express Network Edition Administrator s Guide A-61892 Table of Contents Using Info Input Express to Create and Retrieve Documents... 9 Compatibility... 9 Contents of this Guide... 9 Terminology...
WinView. Getting Started Guide
 WinView Getting Started Guide Version 4.3.12 June 2006 Copyright 2006 Mincom Limited All rights reserved. No part of this document may be reproduced, transferred, sold or otherwise disposed of without
Colleague by Ellucian Guide to User Interface 4.4 and 4.4.1
 Colleague by Ellucian Guide to User Interface 4.4 and 4.4.1 Colleague Release 18, UI 4.4 and 4.4.1 May 2, 2013 For corrections and clarifications to this manual, see AnswerNet page 1926.37 Banner, Colleague,
Adobe Acrobat Pro DC for Windows
 Adobe Acrobat Pro DC for Windows Creating Interactive PDF Forms University Information Technology Services Learning Technologies, Training & Audiovisual Outreach Copyright 2017 KSU Division of University
Microsoft Outlook 2010 Hands On Guided Tour. Level 1
 Microsoft Outlook 2010 Hands On Guided Tour Level 1 Outlook 2010 Window Anatomy Level 1/Guide A, p.1 Welcome to Outlook 2010 at UMHS. This guide gives you a quick visual tour of the Outlook 2010 window.
BaanERP 5.0c. User's Guide for Worktop 2.1
 BaanERP 5.0c A publication of: Baan Development B.V. P.O.Box 143 3770 AC Barneveld The Netherlands Printed in the Netherlands Baan Development B.V. 2001. All rights reserved. The information in this document
Xtender. Browse Only Reference Guide. Page 1 18
 Xtender Browse Only Reference Guide Page 1 18 TABLE OF CONTENTS OVERVIEW... 3 HOW TO GAIN ACCESS...3 Key Terms... 4 How to Get Started... 4 Xtender Home Page... 4 Retrieve a Record in a Folder... 4 HOW
Lava New Media s CMS. Documentation Page 1
 Lava New Media s CMS Documentation 5.12.2010 Page 1 Table of Contents Logging On to the Content Management System 3 Introduction to the CMS 3 What is the page tree? 4 Editing Web Pages 5 How to use the
User Guide Ahmad Bilal [Type the company name] 1/1/2009
![User Guide Ahmad Bilal [Type the company name] 1/1/2009](/thumbs/92/109182878.jpg "User Guide Ahmad Bilal [Type the company name] 1/1/2009") User Guide Ahmad Bilal [Type the company name] 1/1/2009 Contents 1 LOGGING IN... 1 1.1 REMEMBER ME... 1 1.2 FORGOT PASSWORD... 2 2 HOME PAGE... 3 2.1 CABINETS... 4 2.2 SEARCH HISTORY... 5 2.2.1 Recent
User Guide Ahmad Bilal [Type the company name] 1/1/2009 Contents 1 LOGGING IN... 1 1.1 REMEMBER ME... 1 1.2 FORGOT PASSWORD... 2 2 HOME PAGE... 3 2.1 CABINETS... 4 2.2 SEARCH HISTORY... 5 2.2.1 Recent
KYOCERA Net Viewer 5.3 User Guide
 KYOCERA Net Viewer. User Guide Legal Notes Unauthorized reproduction of all or part of this guide is prohibited. The information in this guide is subject to change without notice. We cannot be held liable
Discovering Computers & Microsoft Office Office 2010 and Windows 7: Essential Concepts and Skills
 Discovering Computers & Microsoft Office 2010 Office 2010 and Windows 7: Essential Concepts and Skills Objectives Perform basic mouse operations Start Windows and log on to the computer Identify the objects
KYOCERA Net Viewer User Guide
 KYOCERA Net Viewer User Guide Legal Notes Unauthorized reproduction of all or part of this guide is prohibited. The information in this guide is subject to change without notice. We cannot be held liable
PaperClip32. Revision 2.0
 PaperClip32 Quick Start Guide Revision 2.0 Copyright Information Copyright 2003, PaperClip Software, Inc. The PaperClip32 product name and PaperClip Logo are registered trademarks of PaperClip Software,
Visitor Management Host User Guide
 Visitor Management Host User Guide PERPETUAL INNOVATION Lenel OnGuard 2010 Visitor Management Host User Guide, product version 6.4 This guide is item number DOC-802, revision 1.038, April 2010 Copyright
Contents. Common Site Operations. Home actions. Using SharePoint
 This is a companion document to About Share-Point. That document describes the features of a SharePoint website in as much detail as possible with an emphasis on the relationships between features. This
JobSite OnLine User s Guide Table of Contents
 JobSite OnLine User s Guide Table of Contents For the Beginner: 2 Preparing and Logging In to Run JobSite OnLine...2 How Drawings and Specs are Organized - Ease of Use...3 Searching for Files or Containers...4