2016 TRTA Content Managers Resource Guide How to update and edit your local unit website. Roy Varney, TRTA Multimedia Specialist
|
|
|
- Nickolas Oliver
- 5 years ago
- Views:
Transcription

1 2016 TRTA Content Managers Resource Guide How to update and edit your local unit website. Roy Varney, TRTA Multimedia Specialist
2
3 Table of Contents Introduction... 1 Basic information How to log in The Dashboard The site manager button The modules button The users button User activity, popular content and top searches Navigating to home page How to edit pages Copying text Formatting text Hyperlinking Adding images How to publish your changes... 7 Intermediate information Understanding the parent- child relationship Site structure Columns in Site Manager Setting page order Previous versions Content types How to add pages Page layout One, two and three column layouts Default layout settings Selecting page layout from Site Manager Content objects Expert information Front- end editing The other page editing tabs Mobile SEO Tags Related content Publishing The other content types Folder content Calendar content Adding an event Image galleries Uploading multiple images i
4 - Creating forms Placing your form on your home page Congratulations Helpful Resource Videos ii

5 Introduction Welcome to the TRTA Content Managers Resource Guide. This guide will instruct you on the use of the Mura Content Management System. Mura CMS is one of the most powerful Content Management Systems in the World, but it was chosen as the platform for TRTA s local unit websites due to its ease of use. This guide is split into four sections, each of which features information with different levels of difficulty. While it is not necessary to master all of the information provided in this guide, it is advisable to be aware of what is possible in Mura, as well as what information is available to use in managing your local unit s website. The purpose of this guide is to teach you how to edit and update your local unit s website in an easy, efficient manner. In addition to this guide, there are a variety of useful resources available on the TRTA Content Manager s website, which is located at The guide is divided into three primary sections: basic information, intermediate information and expert information. The difficulty of these sections is based on my sense of the difficulty of the content. Thus, they are subjective measures by which your ability as a content manager should not be judged. For instance, you may be able to complete a task listed in the expert section but not in the basic section. This does not mean you lack basic understanding, but means my sense of what is basic may not apply to you. I hope you find this guide useful and if you have any questions, please feel free to contact me at roy@trta.org. Basic information Logging in 1) Go to 2) Type in your username and password into the Login screen (see figure to the right). 3) Click Login. 1

6 The Dashboard Once logged in to the Site Administrator, you will see the Dashboard. The Dashboard provides you a bird s eye view of your site activity, including current users, popular content and searches from your users and site stats. You can also search for keywords in your site so that you can quickly find the page to edit it. Also, you can click on the pages you have recently updated in the Recent Content section. From the header, you can access your website at any time to see how it looks from the public s perspective by clicking on the red Current Site button. Site Manager This tab is where you will spend most of your time editing and updating the pages of the site. Modules Modules will allow you to add content that you may wish to reuse on more than one page. Many areas in the Modules section will be covered later in the advanced information. 2

7 Users The Users tab allows you to view other content managers for your site. User Activity, Popular Content and Top Searches On the Dashboard (screen print above) are several helpful widgets. For example, User Activity gives you an idea of the number of visitors to your site. Now that we have an understanding of what s on the screen, let s start editing! Navigating through your home page 1) Navigate to your Site Manager, and click on your Home Page: 2) When you do, along the left side are eight tabs, the first being the Basic Tab. Here is where you will manage the Title and Content of your page: 3
 Title: Also known as the \"Long Title\" or \"Page Title.\" Text entered here is displayed above the main content of each page.")
8 3) Listed below are some brief explanations of each field in this tab: Type: This is the content type (e.g., Page, Folder, Calendar, Gallery, etc.) Title: Also known as the "Long Title" or "Page Title." Text entered here is displayed above the main content of each page. Associated Image: You can upload a primary associated image for this content. A thumbnail of this image appears on Folders and as well as on the page itself. Summary: This is a brief summary of the content on the page. If you are creating a page within a Folder, this summary may be displayed along with other pieces of information. Content: Aside from the Title, this is the most important field on the basic tab. This is where you edit the body of your page. Mura has a visual "WYSIWYG (What you see is what you get)" editor to help you style and format content for your page. How to Edit Pages 4

9 When it comes time to add content to the page, there are many, many functions available to you. Copying Text from Microsoft Word Sometimes you may receive a Microsoft Word document containing images, hyperlinks, pictures and other special formatting, and you ve been asked to place the text on the website. 1) To copy text, highlight the text and on your keyboard press CTRL + C (for PC) or Command + C (for Mac). 2) To paste text, click in the area where you would like to see the text and on your keyboard press CTRL + V (for PC) or Command + V (for Mac). Formatting Text If you copy and paste the text and images from Word, Mura strips out most of the formatting that will cause problems with the rendering of your site. Fortunately, many formatting options are available to you in Mura CMS. 1) Highlight the text you would like to format. 2) In the bottom row of formatting icons, the second icon says Format. Choose normal for normal text or heading 1 for a headline. Hyperlinking Text Let s say you have the following text that you want to link to an Click here to send me an . For this to work, we have to make that text a hyperlink. 1) Highlight the text you wish to make a hyperlink. 2) Click on the chain icon. It is on the second row of icons and is the third from the last on the right. 5

 Click ok. Adding Images 1) Place your cursor in the location that you would like for the image to be located.")
10 3) A new window will appear. Type in or paste the address you wish the link to take the user. If you wish the link to open in a new window, click Target and select New Window. If your hyperlink is not another web page, but rather an address, choose E- mail from the Link Type, and then enter your address: 4) Click ok. Adding Images 1) Place your cursor in the location that you would like for the image to be located. 2) Click on the Image button, which is the first icon on the third row. The Image Properties window opens. 6
 Once the image is uploaded, you can select it by double-clicking on it.")

11 3) Click Browse Server. If your image has not yet been uploaded, you can upload images here by clicking the Upload button. This will bring up another window that will allow you to locate pictures on your computer to upload to your site. 4) Once the image is uploaded, you can select it by double-clicking on it. The images should appear in the preview window, as shown below. 5) You are now able to change the properties of your image, including the size, border, and alignment of your image. 6) Click ok. Tips: I suggest clicking the lock icon to lock the proportions of your image. Additionally, I suggest adding HSPACE and VSPACE of 5 to your images. This will put space around the image. I also suggest aligning images right. To do this click on the image then choose the Align Right icon from the middle of the second row. How to Publish Your Changes 7

12 There are a few page- publishing options that you have. First, you can click Publish button at the bottom of an edited page, and you will be publishing your content immediately. Second, Saving as a Draft and Saving Draft and Preview allow you to save a temporary, non-published version of content for later editing or approval. Save Draft & Preview allows you to view your changes in a modal popup window with a preview of the content in draft form. I highly suggest using Save Draft and Preview to view your changes before you publish. Saving to Change Set allows you to Publish several pages all at once. Intermediate information Understanding the Parent- Child Relationship A parent-child relationship refers to the hierarchy of pages in your website. Below you will find an example of how a parent-child relationship is organized. Items at the top and left are parents, and items below and right are children. Building Your Site Structure Arguably, the first step to building your local unit website in Mura CMS is to set up 8


13 the site structure. Organizing parent-child page relationships is important fore readability and intuitive understanding when viewing the structure later. To view how your site is structured, click on the Site Manager button. The following screen print shows you how it might look. Columns in Site Manager Here s a description of the columns in your Site Manager: The leftmost column shows a plus sign for each page shown. Hover over that plus sign to add content, copy the page so that you can create one just like it, or zoom in to the page. The Title shows you the title of the link for the page found in the web site s Menu. 9
14 The Objects column lets the user know what types of objects are on that page. A down arrow indicates that objects that are on that page cascade to those below it. A dot indicates that that page inherits the objects from above it. For example, your Local Unit Officers are set up for your site on your home page by default by using a Content Object we created for you. By default, all pages inherit the Local Unit Officer Content Object. Your Display options are threefold. You can display a page, hide a page, or display a page per start and stop dates. This is very useful for pages that announce events. If you want that page to automatically disappear after the event ends, you can do that. The Template column indicates whether or not a template has been explicitly assigned to a specific page. For example, you can choose whether a page has three columns, two columns, or one column. The Nav column indicates whether a page is included in the site navigation, and the Updated column shows you the last time the page was updated. The buttons in the last column are Edit, View, Version History, Permissions, and Delete. The Edit button does the same thing as clicking on the name of the page it allows you to edit the contents of the page. The view button allows you to view the content node. Version History allows you to view all of your past versions of the page, keeping you from having to worry about ever overwriting something good, and losing it forever. Permissions allows you to restrict or grant access by groups of people. This is handy if you want to create an extranet of users, preventing others from seeing certain pages. Delete allows you to delete a page. However, if you ever delete a page and later regret it, contact me at roy@trta.org and I can probably restore it for you. Setting Page Order By default, newest pages you add go on top of the site structure. Dragging and dropping pages will allow you to reorder. To reorder, hold down the mouse button over the page you want to change the order of, and drop it into the desired position in the list. Click the Update button. 10


 next to any row from the Site Manager to reveal a menu of links to add new content to the")
15 Previous Versions All old versions of pages are archived and added to a Version History page. Accessing Version History can be done on the Site Manager page: You can look at each version of page, and even restore it over the existing version of the page if need be. If you do that, the existing version will then become the second row in the Version History list. Content Types When it is time to add a page (or any other type of content), hover over the Add Content Icon (the plus sign) next to any row from the Site Manager to reveal a menu of links to add new content to the site. Click Add Content to reveal a Select Content Type Dialog Window: 11

16 Determining Content Type Before adding content, it is best to be familiar with the different types of content you can add. Each type has a unique function that can meet your needs. Type Description Example Page Page content types are the website Your home page. pages of your site. They are the most commonly used content types containing text, images and links. File File content types are files that have been uploaded to and managed from File Manager. File icons denote common file types such as PDF, Word, Excel, Zip and others. Folder Folder content types allow you to combine related content into a defined group. It s content includes the summary of the content within it, along with a link to that content. Newsletters stored as PDF files. Typed meeting minutes, a blog or news releases. 12

17 Calendar Gallery Calendar content types allow you to display scheduled content in a traditional calendar format using start/stop dates display the content. Gallery content types are collections of images. They allow you to aggregate and display images as galleries. Local unit calendar. Convention pictures! How to add pages To add pages follow these steps: 1) From the Site Manager, mouse over the plus sign next to Home. 2) Click Add Content, then select Add Page. 3) Enter the Title of the page in the page title field (e.g., Our History). 4) Publish the page. 5) Repeat this step for each of the following pages: About Us, Our History, ect. Page Layout The layout tab (located on the left side of a page when editing) determines how the page is structured. There are several layouts you can choose from for your page. Below you will find examples of a three- column layout, a two- column layout and a one- column layout. 13
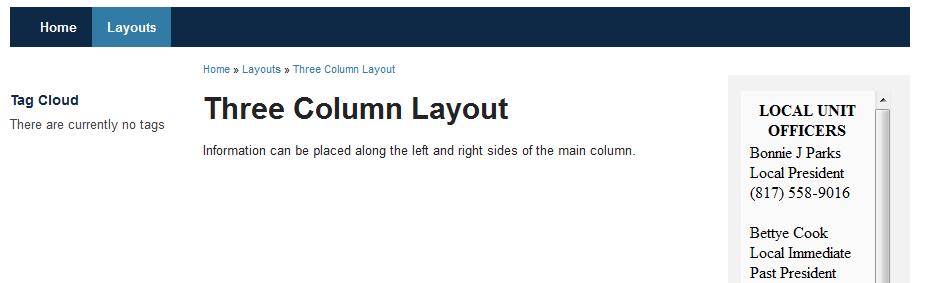

18 14
.")

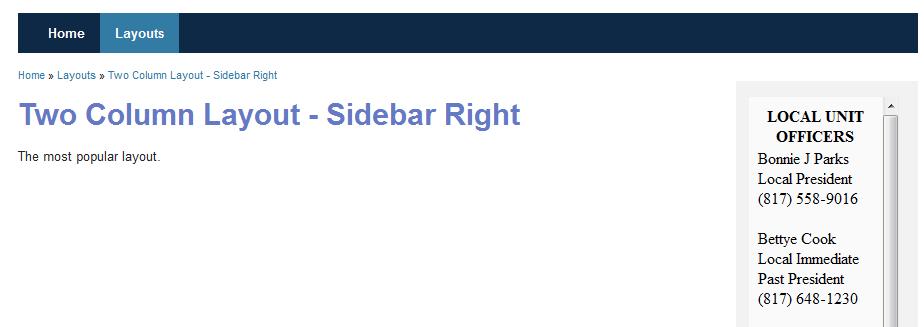
19 Default Layout Settings Unless you specify otherwise, any new page you add will inherit the layout of its parent: In another example, the page shown below uses the Two Colum n Layout, with the Sidebar on the Right (two_column_sr.cfm). All pages below it use the same template, because none is selected as the Alternate Child Layout Template: Selecting Page Layout from Site Manager Your layout selections can be chosen in the Site Manager. You can update the Layout Template by clicking on the Template column icon to reveal a Layout Template popup form. Once the popup form opens, choose from the One Column, Two Column (with sidebar on right), Two Column (with sidebar on left) and Three Column Templates. Note: Local Unit Pages typically use all three types depending on different scenarios. Feel free to experiment! 15


20 Content Objects Content Objects, sometimes referred to as Display Objects, are reusable pieces of content that you can place in either side bar (as well as the main section) to enhance the page information or add functionality. Content Objects allow you to add certain features to your columns. (Such as a list of your local unit officers.) In the figure above, you can see that there is a Content Objects section. Over to the right hand corner of the page, we see three rectangles: Left Column Content Objects, Main Content Content Objects, and Right Column Content Objects. Placing Content Objects into these sections will display those objects them on the page. Your local unit officials are being added to your site using a Content Object provided by the TRTA: 16


21 Expert Information Front- end editing You can edit pages from the front end if you are logged in. While logged in, you should have the Front End Navigation Bar. From here, if you hover over the Edit button, Full Edit and Quick Edit options are available. Full Edit will take you to the Edit Content screen in modal view (like a popup window) found in the administrator area. The Quick Edit will allow you to edit the text directly on the page. Click in to the text, and the buttons will appear, along with a Save button at the top of the page: The other page editing tabs In addition to the Basic and Layout & Objects tabs, page editing offers a variety of other options. This section will focus on those options. SEO Tab 17
22 Search Engine Optimization (SEO) contains some of the core information in your site coming up under search engines like Google. The Navigation Title is the name on the hyperlink to that page. It is, by default, the same as the Page Title, which is the heading at the top of your page. If you wish to change the name of the link of the page to something different than the Page Title, then you may do so here in the SEO tab. SEO here stands for Search Engine Optimization. The remainder of these fields pertain to making sure your page ranks as high as possible in search engines. Tags Tab You can add tags to each of your pages as well. Tags are a list of words that identify what that page is about. Then, if you have a bunch of pages in a folder, and each of those pages has tags, you can add a Tag Cloud component that will show the user how much each tag word is used. 18

23 Related Content Tab If the page you are working on has a relationship with another page on your site, say for example you re writing a page about the Springtime Social and an image gallery, you can associate that image gallery with the page by adding it as related content. Now, by adding the Related Content Content Object, your users can access all the Springtime information all on one page, even if the information is scattered throughout your site. Publishing Tab 19
24 The publishing tab allows you to set specific options on how your pages will be published. For instance, you can Restrict Access to Specific Group(s), but you first have to set up that group. If you wish for your page to be available in a direct link, but not in site navigation, you may uncheck the Include in Site Navigation box. You can also have this page Open in New Browser Window, and you can choose the size of that window if you wish. You can also exclude the page from site searches for any reason. If you would like to release the content at a later date, choose that date in the 20
25 Content Release Date field. If you would like the page to display only for a certain time period, such as an upcoming event, select Per Start/Stop Dates to schedule when your content appears and is removed from your site. If you would like to move your page underneath a different section in your site, such as moving a picture gallery underneath a Pictures Folder, click Select New Parent under Content Parent. If your content expires, you can choose to be notified if you Assign Content Expiration Notifications. If you select your page as Featured Content, you can set up a Local Content Index that you can then feature your Featured Content pages in. If you would like to send this page to someone else on your CMS team for review, then check the Notify For Review, and select the user s name and add a note if you wish. The other content types Folder content Throughout the Internet, it is not uncommon to see a web page that contains a listing of content that is located beneath it. In Mura CMS, there is a special content type called Folder that does exactly that. For instance, you could create a Local Unit Officers page set up as a collection of Officer Pages that displays a thumbnail image, name, title and summary of each officer (if they so choose). This content type should be set up as a Folder rather than a Page in order to pull in the officer s summary information within this section. Calendar content Adding a Calendar is a very useful tool to give your users a visual of what is happening in the life of your local unit. You could easily create a simple page to list out your events in a bulleted list, but you could also take advantage of some of Mura s advanced features, such as Event Reminders. To create a calendar, follow these instructions. 21
 Click Calendar from the Select Content Type dialog window that opens: 3) Enter the name of your Calendar, such as Events Calendar.")
26 1) From Site Manager, hover over the plus sign next to home, and choose Add Content. 2) Click Calendar from the Select Content Type dialog window that opens: 3) Enter the name of your Calendar, such as Events Calendar. 4) Include a short description of the calendar in the Summary section, if you like. 5) In the Layout and Objects tab, we are going to add Sub Navigation and Event Reminders. Click on the Layout and Objects tab. Click the Start New Cascade radio button to clear out any Content Objects from the page above your calendar. 6) Select Sub Navigation from the Select Object Type drop down, and choose Navigation. Highlight Sub Navigation over and arrow it over to the right column. Select System and arrow Event Reminder Form over the Right Column. 22
 To add an event, hover over the Calendar you just created and choose Add Content. Select add page from the Select Content Type box that opens. 2) Add a Title and some Content.")
27 7) Scroll down and click Publish. Your calendar has now been created! Now your calendar has been created. Let s add an event! Adding an event 1) To add an event, hover over the Calendar you just created and choose Add Content. Select add page from the Select Content Type box that opens. 2) Add a Title and some Content. 3) Click on the Publishing tab, and choose your start and end dates for the event. In the example below, the content is going to be shown for three days from April 10 th to April 12 th. 23

28 4) Click Publish. Your Events Calendar now has clickable events for the duration given. Clicking on TRTA Convention on the 10th gives you details on the event that you added in the Content. To the right is an event reminder form that the user can use to be reminded prior to the event. This is an Event Reminder Content Object added to the right hand column of this page. 24


29 Image gallery content Image galleries are a great way to display your pictures. Once you upload each picture, Mura CMS will resize them for you. The Gallery navigation is set in such a way that the user has Previous and Back buttons, making it easy to scroll through the pictures one at a time. Now we will learn how to add an Image Gallery to your site, as well as images to that gallery. When we re done, our site manager will look something like this: Here are the steps to add an Image Gallery. Let s create a gallery of pictures of flowers. 1) Hover over the plus sign next to home, and choose Add Content. 2) Choose Gallery from the Content Dialog Window that opens up. 3) Enter a Title, such as Springtime Flower Gallery, a one sentence Summary, and a paragraph in the Content section describing your gallery. 4) Click Publish. Now it is time to upload images to the Gallery. 5) In Site Manager hover over the plus sign next to the Gallery you just created. 25

 Instead of going back to the Site Manager, a different window pops up, showing you the three sizes Mura created out of the one picture you uploaded.")
30 6) Choose Add Content. 7) A Select Content Type dialog window opens up with an unfamiliar set of options. Choose Gallery Item. 8) The page to add a Gallery Item opens up. Give your item a name, a description, and then Browse to find the image on your computer. 9) Once you double click the image, the window into your files should close, and you should see text next to the Browse button: 10) Publish your page. 11) Instead of going back to the Site Manager, a different window pops up, showing you the three sizes Mura created out of the one picture you uploaded. Now, Mura gives you powerful cropping features in the event you want to remove some of the background from the picture. You can see in the image here, I am cropping the picture so that only the one flower shows in the picture. 12) Select the Re- Crop button. 13) In the window that opens, drag your mouse from the upper left to the lower 26
 Select your photo gallery to return to the Gallery you re working on. Now let s try to add multiple images at once. Ready?")
")

31 right of the part of the image you want to keep. (You can only draw the square dimension circles or squares will not work) 14) Click Apply Cropping. Your newly cropped image replaces your old one. You are done cropping your image. 15) Select your photo gallery to return to the Gallery you re working on. Now let s try to add multiple images at once. Ready? Adding Multiple Images at Once 16) Hover over your gallery again, choose Add Content, and this time, choose Quick Upload. 17) This part is tricky (but hey, we re in the expert section now!). Reduce the window size of Mura to about half your total screen, and in the area that s now available for a second window to be open, open File Manager, find your folder where you ve stored your pictures. To select multiple files at once, hold down the CTRL (Command on Macs) key and click each picture you want in your gallery. When ready, drag them all into the area in Mura where the background color is blue. Release your mouse button. Your pictures will appear below that blue section, but you re not done! 18) Click the Start Upload button just below the blue area, and watch the file transfer process take place. Once done, click back on the name of your Gallery. 19) One thing you will need to remember is that even though you may have saved 27

32 time with the multiple uploads, you now have to click on the name of each one if you want to give it a name different than it s file name. For example, if the name of your picture was _x.jpg, that is what your users will see on your website. So, you will have to change that name to something more descriptive. Click on the name in the File Manager, and change the Title of the picture. Then, click on the SEO tab, and change the Navigational Title. 19) Click Publish. One thing that may make the multiple file uploads easier is to place the images that you want to upload onto your desktop. Then, when you reduce the size of your browser window that shows Mura, you will see the desktop and the icons representing the images there. Instead of opening File Manager, you can just drag the files from your desktop! Creating Forms: Contact Us Of course, you can always add your address to a form, but a lot of times, spam bots can capture your address, and the next thing you know, you are receiving a lot of spam mail. For that reason and others, you can create a form that will capture the information for you and it to you as well. 1) From the Modules link at the top, click on forms. 28


33 2. Next, choose Add Form with Form Builder, as shown above. 3. Give your form a Title of Contact Us! 4. Below that, click on the button that looks like a rectangle with the letters ABC in them. Next, click on that same rectangle. Finally, click on the button to the right of that which shows what looks like a pencil writing on a pad of paper. Three Fields will be automatically added for you: A Text Field to collect the user s name, a Text Field to collect the user s address, and a Text Area to collect the user s message, as showing in the following screen print: 29
 Click on the second New Text Field. In the Basic Tab, type in Email Address, and in the Validation tab, click required. In the Validate Message, type Please enter a valid email address.")
34 5) Click on the first New Text Field. In the Basic Tab to the right, type Your Name in the label. 6) In the Validation Tab, click on Required. This will require the field to have something in it. 7) Click on the second New Text Field. In the Basic Tab, type in Address, and in the Validation tab, click required. In the Validate Message, type Please enter a valid address. 8) Scroll down to the Form Presentation section. In the Confirmation Message, type in Thank you so much for your message! and enter your address in the next line. Click Publish. Placing your Form on your Home Page To place your form on the home page, please do the following: 9) Visit the Home Page from the Site Manager. 10) Click on the Layout & Objects tab. Choose Forms from the drop down, as 30


35 shown in the following screen print. Once you Publish your page, Go to your site by clicking on your Current Site button at the top. You should see your Contact Us form on your home page! Once you fill out your form and click Submit, you will receive the confirmation message. In addition, the message will be ed to you (if you entered a correct address and Mura is set up with the correct mail server settings roy@trta.org if you have any questions). In addition, if you go to your Dashboard, you will see all of your Form Activity. 31
36 Congratulations! You finished the Content Manager Resource Guide! You are now an expert Mura user. Of course, there is always more to learn. If there was something we didn t cover or you have a question about, be sure to check out localunits.org/help or contact Roy Varney at roy@trta.org! Helpful resource videos Welcome video Maintaining your local unit officer list video Adding a YouTube video to your site video Building out a multiple page website in Mura video Ordering your pages video How to change the name of your web page video How to insert a picture into your website video 32
Administrative Training Mura CMS Version 5.6
 Administrative Training Mura CMS Version 5.6 Published: March 9, 2012 Table of Contents Mura CMS Overview! 6 Dashboard!... 6 Site Manager!... 6 Drafts!... 6 Components!... 6 Categories!... 6 Content Collections:
In the fourth unit you will learn how to upload and add images and PDF files.
 Introduction Here at SUNY New Paltz, we use the Terminal Four (T4) web content management system (CMS). This puts the power of editing content on our college s webpage in the hands of our authorized users.
Training Manual and Help File
 Training Manual and Help File 30.06.2011 Update Manage Grow Welcome to your new Juniper Website Management System with CMS Introduction The Juniper Website Management System with CMS (Website Content Management
End-User Reference Guide Troy University OU Campus Version 10
 End-User Reference Guide Troy University OU Campus Version 10 omniupdate.com Table of Contents Table of Contents... 2 Introduction... 3 Logging In... 4 Navigating in OU Campus... 6 Dashboard... 6 Content...
New Website User Manual
 New Website User Manual General Notes 3 How To Login To Your Website And Access Admin Dashboard 4 Adding / Editing Sliders 5 Home Slider 5 School Slider (Same steps for ALL school pages) - Add a Slide
Wordpress Training Manual
 The Dashboard... 2 If this is your first time logging in:... 2 How do I change my password or email address?... 3 Search Engine Optimization (SEO)... 4 SEO for Pages... 4 SEO for Images... 5 Managing Pages...
WordPress Manual For Massachusetts Academy of Math and Science
 WordPress Manual For Massachusetts Academy of Math and Science September 19, 2017 Table of Contents Who should use this manual... 4 Signing into WordPress... 4 The WordPress Dashboard and Left-Hand Navigation
End-User Reference Guide El Camino College Compton Center
 End-User Reference Guide El Camino College Compton Center OU Campus Version 10 OmniUpdate, Inc. 1320 Flynn Road, Suite 100 Camarillo, CA 93012 OmniUpdate, Inc. 1320 Flynn Road, Suite 100 Camarillo, CA
Web Page Basics. FRSD Elementary Technology Workshop. February Presented by Lisa Stewart, Tammy Gianvito, and Diane Kaufmann
 Web Page Basics FRSD Elementary Technology Workshop February 2014 Presented by Lisa Stewart, Tammy Gianvito, and Diane Kaufmann Please save this booklet for future reference. 2 P a g e Notes and Questions
Classroom Blogging. Training wiki:
 Classroom Blogging Training wiki: http://technologyintegrationshthornt.pbworks.com/create-a-blog 1. Create a Google Account Navigate to http://www.google.com and sign up for a Google account. o Use your
Cascade User Guide. Introduction. Key System Features. User Interface
 Cascade User Guide Introduction Key System Features User Interface Menus and Moving Through the System Files and Pages Working with Existing Pages File Action Menu Version Control Deleting files Restoring
OU Campus VERSION 10
 OU Campus VERSION 10 End User Manual Last Update: 8/15/2017 Contact Tish Sailer with comments or questions regarding this Manual. Contents INTRODUCTION...3 HELP DOCUMENTS AND SUPPORT... 3 ACCESSING PAGES
UTAS CMS. Easy Edit Suite Workshop V3 UNIVERSITY OF TASMANIA. Web Services Service Delivery & Support
 Web Services Service Delivery & Support UNIVERSITY OF TASMANIA UTAS CMS Easy Edit Suite Workshop V3 Web Service, Service Delivery & Support UWCMS Easy Edit Suite Workshop: v3 Contents What is Easy Edit
GENERAL TEMPLATE AREAS
 1 GENERAL TEMPLATE AREAS SIU Headers SIU Headers are created and edited through the main administration of the CMS. Users do not have access edit SIU headers. Logo and Identifier Logo or the College Identifier
WEBSITE USER GUIDE V.4
 WEBSITE USER GUIDE V.4 SEC. 01 SEC. 02 SEC. 03 SEC. 04 SEC. 05 SEC. 06 CASCADE INTERFACE OVERVIEW LOGIN PAGE USER DASHBOARD SITE DIRECTORY EDITING PAGES PAGE EDITOR OVERVIEW STANDARD ROW COMPONENTS EDITING
Logging Into Your Site
 This training document is meant as a step-by-step guide to creating and delivering a UW-Madison site in the current UW-Madison theme. In this training class, you will learn how to log in to access your
AGENT123. Full Q&A and Tutorials Table of Contents. Website IDX Agent Gallery Step-by-Step Tutorials
 AGENT123 Full Q&A and Tutorials Table of Contents Website IDX Agent Gallery Step-by-Step Tutorials WEBSITE General 1. How do I log into my website? 2. How do I change the Meta Tags on my website? 3. How
Ektron Advanced. Learning Objectives. Getting Started
 Ektron Advanced 1 Learning Objectives This workshop introduces you beyond the basics of Ektron, the USF web content management system that is being used to modify department web pages. This workshop focuses
C1 CMS User Guide Orckestra, Europe Nygårdsvej 16 DK-2100 Copenhagen Phone
 2017-02-13 Orckestra, Europe Nygårdsvej 16 DK-2100 Copenhagen Phone +45 3915 7600 www.orckestra.com Content 1 INTRODUCTION... 4 1.1 Page-based systems versus item-based systems 4 1.2 Browser support 5
Confluence User Training Guide
 Confluence User Training Guide Below is a short overview of wikis and Confluence and a basic user training guide for completing common tasks in Confluence. This document outlines the basic features that
HOW TO USE THE CONTENT MANAGEMENT SYSTEM (CMS) TABLE OF CONTENTS
 TABLE OF CONTENTS") HOW TO USE THE CONTENT MANAGEMENT SYSTEM (CMS) TABLE OF CONTENTS GETTING STARTED (LOGIN) 2 SITE MAP (ORGANIZE WEBPAGES) 2 CREATE NEW PAGE 3 REMOVE PAGE 6 SORT PAGES IN CHANNEL 7 MOVE PAGE 8 PAGE PROPERTIES
HOW TO USE THE CONTENT MANAGEMENT SYSTEM (CMS) TABLE OF CONTENTS GETTING STARTED (LOGIN) 2 SITE MAP (ORGANIZE WEBPAGES) 2 CREATE NEW PAGE 3 REMOVE PAGE 6 SORT PAGES IN CHANNEL 7 MOVE PAGE 8 PAGE PROPERTIES
NETZONE CMS User Guide Copyright Tomahawk
 NETZONE CMS User Guide Copyright 2015. Tomahawk 1 Phone: + 64 9 522 2333 Email: getintouch@tomahawk.co.nz Tomahawk 2015 www.tomahawk.co.nz 2 NETZONE CMS USER GUIDE WHAT YOU LL FIND INSIDE LOGGING IN 4
OU Campus VERSION 10
 OU Campus VERSION 10 End User Manual Last Update: 9/8/2015 Contact Tish Sailer with comments or questions regarding this Manual. Contents INTRODUCTION...3 HELP DOCUMENTS AND SUPPORT... 3 ACCESSING PAGES
Creating and updating content on your WordPress content management system (CMS)
") Creating and updating content on your WordPress content management system (CMS) Posts vs pages WordPress comes with two content types: Posts and pages. Posts are content entries listed in reverse chronological
Creating and updating content on your WordPress content management system (CMS) Posts vs pages WordPress comes with two content types: Posts and pages. Posts are content entries listed in reverse chronological
While editing a page, a menu bar will appear at the top with the following options:
 Page Editor ===> Page Editor How Can I Use the Page Editor? The Page Editor will be your primary way of editing your website. Page Editor Basics While editing a page, you will see that hovering your mouse
USER MANUAL. WeConnect
 USER MANUAL WeConnect Welcome to WeConnect, a user-friendly website builder for your church or organization. WeConnect lets anyone easily create a beautiful, professional website with no programming experience
DOING MORE WITH WORD: MICROSOFT OFFICE 2010
 DOING MORE WITH WORD: MICROSOFT OFFICE 2010 GETTING STARTED PAGE 02 Prerequisites What You Will Learn USING MICROSOFT WORD PAGE 03 Viewing Toolbars Adding and Removing Buttons MORE TASKS IN MICROSOFT WORD
User Guide. Chapter 6. Teacher Pages
 User Guide Chapter 6 s Table of Contents Introduction... 5 Tips for s... 6 Pitfalls... 7 Key Information... 8 I. How to add a... 8 II. How to Edit... 10 SharpSchool s WYSIWYG Editor... 11 Publish a...
UW Oshkosh WordPress Training Manual. June 2015 Integrated Marketing Communications *Updated January 2016
 UW Oshkosh WordPress Training Manual June 2015 Integrated Marketing Communications *Updated January 2016 Table of Contents What is WordPress...3 WordPress Resources...3 Website Best Practices...4 How to
Beginner Workshop Activity Guide 2012 User Conference
 Beginner Workshop Activity Guide 2012 User Conference TUESDAY, MARCH 6 2:00PM 5:00 PM Beginner Training Workshop Attendees will learn the end user functions of OU Campus TM. They will learn how to log
Web Site Documentation Eugene School District 4J
 Eugene School District 4J Using this Documentation Revision 1.3 1. Instruction step-by-step. The left column contains the simple how-to steps. Over here on the right is the color commentary offered to
Lucid CMS User Guide
 "We create exceptional business solutions for cash-pay healthcare professionals that enable them to realize their full potential." Lucid CMS User Guide Version 1.2 3/13/2012 1 Table of Contents Table of
Logging in to the management system.
 Welcome to your new site! The Wordpress publishing platform is a robust tool that helps you publish your content to the web without getting too involved with the code. This guide is designed to help you
Evoq 9 Content Managers Training Manual
 Evoq 9 Content Managers Training Manual Table of Contents Chapter 1: User Login... 2 User Login...2 User Login Screen...2 User Logout...2 Chapter 2: Navigating within Evoq 9...3 Editing Bar...3 Dashboard...4
DOING MORE WITH WORD: MICROSOFT OFFICE 2013
 DOING MORE WITH WORD: MICROSOFT OFFICE 2013 GETTING STARTED PAGE 02 Prerequisites What You Will Learn USING MICROSOFT WORD PAGE 03 Viewing Toolbars Adding and Removing Buttons MORE TASKS IN MICROSOFT WORD
WORDPRESS TRAINING MANUAL LAST UPDATED ON FEBRUARY 26TH, 2016
 WORDPRESS TRAINING MANUAL LAST UPDATED ON FEBRUARY 26TH, 2016 LOG INTO WORDPRESS Visit the Login page http://intermountaineyecare.net/wp-admin/ Enter your Username and Password NOTE: Additional usernames
DOING MORE WITH WORD: MICROSOFT OFFICE 2007
 DOING MORE WITH WORD: MICROSOFT OFFICE 2007 GETTING STARTED PAGE 02 Prerequisites What You Will Learn USING MICROSOFT WORD PAGE 03 Viewing Toolbars Adding and Removing Buttons MORE TASKS IN MICROSOFT WORD
Kona ALL ABOUT FILES
 Kona ALL ABOUT FILES February 20, 2014 Contents Overview... 4 Add a File/Link... 5 Add a file via the Files tab... 5 Add a file via a conversation, task, or event... 6 Add a file via a comment... 7 Add
Centricity 2.0 Section Editor Help Card
 Centricity 2.0 Section Editor Help Card Accessing Section Workspace In order to edit your section, you must first be assigned Section Editor privileges. This is done by the Director of your Site, Subsite,
*monthly; log in to your wordpress dashboard and update plugins which are showing prompts to do so.
 *monthly; log in to your wordpress dashboard and update plugins which are showing prompts to do so. TRNA WORDPRESS LOGIN AND EDITING INSTRUCTIONS; 10/17/18 (see end of this document for web developer-level
page 1 OU Campus User Guide
 page 1 OU Campus User Guide Logging Into OU Campus page page 2 1. Navigate to a page on your site that you wish to edit. 2. Scroll down to the footer and click the symbol. 3. Enter your OU Campus username
How to use WordPress to create a website STEP-BY-STEP INSTRUCTIONS
 How to use WordPress to create a website STEP-BY-STEP INSTRUCTIONS STEP 1:Preparing your WordPress site Go to the Dashboard for your new site Select Appearance > Themes. Make sure you have Activated the
Creating Teacher Webpages on the New APS WordPress Site
 Creating Teacher Webpages on the New APS WordPress Site TABLE OF CONTENTS INTRODUCTION 3 THE EDITING DASHBOARD 4 CREATING A NEW PAGE 5 EDITING YOUR PAGE 6 1. Page Title 7 2. Toolbar/ toolbar icons 7 3.
BHM Website Teacher User Guide
 BHM Website Teacher User Guide How to Login 1. Go to HUhttp://bhmschools.org/userUH 2. Enter your username and password and click Log in How to Change Your Password 1. Go to My Account in your Nav bar
CUPA-HR Chapters: WordPress Reference Guide
 CUPA-HR Chapters: WordPress Reference Guide Table of Contents How to Log In to WordPress... 1 How to Create a Page in WordPress... 2 Editing a Page in WordPress... 5 Adding Links in WordPress... 6 Adding
Creating a Website Using Weebly.com (July 2012 Update)
") Creating a Website Using Weebly.com (July 2012 Update) Weebly.com is a website where anyone with basic word processing skills can create a website at no cost. No special software is required and there
Creating a Website Using Weebly.com (July 2012 Update) Weebly.com is a website where anyone with basic word processing skills can create a website at no cost. No special software is required and there
Basic CMS User Guide
 "We create exceptional business solutions for cash-pay healthcare professionals that enable them to realize their full potential." Basic CMS User Guide Version 1.2 3/28/2012 1 Table of Contents Table of
Cascade V8.4 Website Content Management for the Site Manager UMSL
 Cascade V8.4 Website Content Management for the Site Manager UMSL Contents Purpose & How to Use This Guide... 5 Getting Started and Logging In... 5 Login... 5 Dashboard... 5 Notifications... 5 Setting
ADOBE DREAMWEAVER CS4 BASICS
 ADOBE DREAMWEAVER CS4 BASICS Dreamweaver CS4 2 This tutorial focuses on the basic steps involved in creating an attractive, functional website. In using this tutorial you will learn to design a site layout,
A Quick-Reference Guide. To access reddot: https://cms.hampshire.edu/cms
 Using RedDot A Quick-Reference Guide To access reddot: https://cms.hampshire.edu/cms For help: email reddot@hampshire.edu or visit http://www.hampshire.edu/computing/6433.htm Where is... Page 6 Page 8
BE Share. Microsoft Office SharePoint Server 2010 Basic Training Guide
 BE Share Microsoft Office SharePoint Server 2010 Basic Training Guide Site Contributor Table of Contents Table of Contents Connecting From Home... 2 Introduction to BE Share Sites... 3 Navigating SharePoint
Creating an with Constant Contact. A step-by-step guide
 Creating an Email with Constant Contact A step-by-step guide About this Manual Once your Constant Contact account is established, use this manual as a guide to help you create your email campaign Here
Starting Your SD41 Wordpress Blog blogs.sd41.bc.ca
 Starting Your SD41 Wordpress Blog blogs.sd41.bc.ca The web address to your blog starts with blogs.sd41.bc.ca/lastnamefirstinitial (eg. John Smith s blog is blogs.sd41.bc.ca/smithj) All work is done in
Website Creating Content
 CREATING WEBSITE CONTENT As an administrator, you will need to know how to create content pages within your website. This document will help you learn how to: Create Custom Pages Edit Content Areas Creating
WPI Project Center WordPress Manual For Editors
 WPI Project Center WordPress Manual For Editors April 17, 2015 Table of Contents Who should use this manual... 3 Signing into WordPress... 3 The WordPress Dashboard and Left-Hand Navigation Menu... 4 Adding
CMS (Content Management System) for Beginners A Step by Step Approach
 for Beginners A Step by Step Approach") CMS (Content Management System) for Beginners A Step by Step Approach Table of Contents List of Topics Page No. Section 1: Getting Started....2 Section 2: Adding an Event to the Chapter Web Page. 4 Section
CMS (Content Management System) for Beginners A Step by Step Approach Table of Contents List of Topics Page No. Section 1: Getting Started....2 Section 2: Adding an Event to the Chapter Web Page. 4 Section
PBwiki Basics Website:
 Website: http://etc.usf.edu/te/ A wiki is a website that allows visitors to edit or add their own content to the pages on the site. The word wiki is Hawaiian for fast and this refers to how easy it is
SCHULICH MEDICINE & DENTISTRY Website Updates August 30, Administrative Web Editor Guide v6
 SCHULICH MEDICINE & DENTISTRY Website Updates August 30, 2012 Administrative Web Editor Guide v6 Table of Contents Chapter 1 Web Anatomy... 1 1.1 What You Need To Know First... 1 1.2 Anatomy of a Home
EKTRON 101: THE BASICS
 EKTRON 101: THE BASICS Table of Contents INTRODUCTION... 2 TERMINOLOGY... 2 WHY DO SOME PAGES LOOK DIFFERENT THAN OTHERS?... 5 LOGGING IN... 8 Choosing an edit mode... 10 Edit in context mode (easy editing)...
WCCUSD Website. Centricity 2 Tutorial Guide. Site Manager Workspace.
 WCCUSD Website Centricity 2 Tutorial Guide Site Manager Workspace webmaster@wccusd.net Contents To Sign onto the WCCUSD website:... 2 Site Workspace Home Page Editors... 4 Site Workspace Sub Site Director/Individual
Website Training Manual
 Website Training Manual Version 1.0 9/11/13 Section 1: Manage Users... 3 Adding Users... 3 Managing Users... 3 Section 2: Manage Content... 4 Section 3: Create Content... 5 Featured Slider... 5 Governance...
Imagery International website manual
 Imagery International website manual Prepared for: Imagery International Prepared by: Jenn de la Fuente Rosebud Designs http://www.jrosebud.com/designs designs@jrosebud.com 916.538.2133 A brief introduction
Digication eportfolio Student s Guide (Last update: 8/2017)
") Digication eportfolio Student s Guide (Last update: 8/2017) 2 Table of Contents Introduction... 1 Creating Your eportfolio... 3 Editing Your eportfolio... 4 Area 1: Top Menu Bar... 6 Area 2: The Main Tabs...
Digication eportfolio Student s Guide (Last update: 8/2017) 2 Table of Contents Introduction... 1 Creating Your eportfolio... 3 Editing Your eportfolio... 4 Area 1: Top Menu Bar... 6 Area 2: The Main Tabs...
Useful Google Apps for Teaching and Learning
 Useful Google Apps for Teaching and Learning Centre for Development of Teaching and Learning (CDTL) National University of Singapore email: edtech@groups.nus.edu.sg Table of Contents About the Workshop...
A PRACTICAL GUIDE TO USING WIX TO BUILD A WEBSITE
 A PRACTICAL GUIDE TO USING WIX TO BUILD A WEBSITE AN AID TO ENABLE STUDENTS TO UNDERSTAND THE FUNDAMENTELS OF WEBSITE DESIGN WITHIN THE FRAMEWORK OF A WEBSITE PROJECT USING WEB DESIGN TOOLS YANNIS STEPHANOU
SoftChalk 10. Level 1. University Information Technology Services. Learning Technologies, Training, Audiovisual, and Outreach
 SoftChalk 10 Level 1 University Information Technology Services Learning Technologies, Training, Audiovisual, and Outreach Copyright 2018 KSU Division of University Information Technology Services This
SharePoint 2010 Tutorial
 SharePoint 2010 Tutorial TABLE OF CONTENTS Introduction... 1 Basic Navigation... 2 Navigation Buttons & Bars... 3 Ribbon... 4 Library Ribbon... 6 Recycle Bin... 7 Permission Levels & Groups... 8 Create
What is OU Campus? Log into OU Campus
 OU Campus v10 Content Providers User Guide This document is designed to provide (level 5) Content Providers with basic information needed to do most tasks. Those needing additional information are encouraged
How to Edit Your Website
 How to Edit Your Website A guide to using your Content Management System Overview 2 Accessing the CMS 2 Choosing Your Language 2 Resetting Your Password 3 Sites 4 Favorites 4 Pages 5 Creating Pages 5 Managing
Clients Continued... & Letters. Campaigns Continued To create a Custom Campaign you must first name the campaign and select
 Clients Continued... Campaigns Continued To create a Custom Campaign you must first name the campaign and select what type of campaign it will be. Next you will add letters to your campaign from your letter
Learn how to login to Sitefinity and what possible errors you can get if you do not have proper permissions.
 USER GUIDE This guide is intended for users of all levels of expertise. The guide describes in detail Sitefinity user interface - from logging to completing a project. Use it to learn how to create pages
Managing Your Website with Convert Community. My MU Health and My MU Health Nursing
 Managing Your Website with Convert Community My MU Health and My MU Health Nursing Managing Your Website with Convert Community LOGGING IN... 4 LOG IN TO CONVERT COMMUNITY... 4 LOG OFF CORRECTLY... 4 GETTING
How to Edit Your Website
 How to Edit Your Website A guide to using your Content Management System Overview 2 Accessing the CMS 2 Choosing Your Language 2 Resetting Your Password 3 Sites 4 Favorites 4 Pages 5 Creating Pages 5 Managing
CMS Training Reference Guide
 CMS Training Reference Guide Your training session may have been conducted on one of your sites Dev or Staging or Live To login, type your web address domain into a web browser and add (/admin) o Example:
Site Owners: Cascade Basics. May 2017
 Site Owners: Cascade Basics May 2017 Page 2 Logging In & Your Site Logging In Open a browser and enter the following URL (or click this link): http://mordac.itcs.northwestern.edu/ OR http://www.northwestern.edu/cms/
Websites. Version 1.7
 Websites Version 1.7 Last edited 15 Contents MyNetball Information...3 Websites...4 Web packages...4 Setting up the layout...5 Uploading files and images...6 Using Dropbox to Increase your Website Data...7
Sitefinity Manual. Webmasters. University of Vermont College of Medicine. Medical Communications
 Sitefinity Manual Webmasters University of Vermont College of Medicine Medical Communications Table of Contents Basics... 2 Navigating to the Website... 3 Actions.. 4 Titles & Properties. 5 Creating a
Lava New Media s CMS. Documentation Page 1
 Lava New Media s CMS Documentation 5.12.2010 Page 1 Table of Contents Logging On to the Content Management System 3 Introduction to the CMS 3 What is the page tree? 4 Editing Web Pages 5 How to use the
A Guide to Using WordPress + RAVEN5. v 1.4 Updated May 25, 2018
 + v 1.4 Updated May 25, 2018 Table of Contents 1. Introduction...................................................................................3 2. Logging In.....................................................................................4
CMS Workbook Rev May 2016
 CMS Workbook Rev. 2.9.1 May 2016 Table of Contents Getting Started 3 Finding Your Website in the Content Explorer... 3 Logging In... 3 Changing Communities... 4 Logging Out... 4 Quick References 5 Learning
Who should use this manual. Signing into WordPress
 WordPress Manual Table of Contents Who should use this manual... 3 Signing into WordPress... 3 The WordPress Dashboard and Left-Hand Navigation Menu... 4 Pages vs. Posts... 5 Adding & Editing Your Web
Web Manager 2.0 User s Manual Table of Contents
 Web Manager 2.0 User s Manual Table of Contents Table of Contents... 1 Web Manager 2.0 Introduction... 2 Rights and Permissions... 2 User Access Levels... 2 Normal Access... 2 Publisher Access... 2 WM2
Introduction to Microsoft Publisher
 Class Description This is an introduction to Microsoft Publisher, with a focus on choosing a template and modifying it to meet your needs. Class Length One and one half (1½) hours Introduction to Microsoft
GREENHOUSE CMS. Content Management System User Guide. Version 9.0. Greenhouse School Websites 2016 Page 1 of 47
 GREENHOUSE CMS Content Management System User Guide Version 9.0 Greenhouse School Websites 2016 Page 1 of 47 Table of Contents Contentor... 1 Content Management System User Guide... 1 Version 9.0Table
Center for Faculty Development and Support Making Documents Accessible
 Center for Faculty Development and Support Making Documents Accessible in Word 2007 Tutorial CONTENTS Create a New Document and Set Up a Document Map... 3 Apply Styles... 4 Modify Styles... 5 Use Table
Course Exercises for the Content Management System. Grazyna Whalley, Laurence Cornford June 2014 AP-CMS2.0. University of Sheffield
 Course Exercises for the Content Management System. Grazyna Whalley, Laurence Cornford June 2014 AP-CMS2.0 University of Sheffield PART 1 1.1 Getting Started 1. Log on to the computer with your usual username
Working with Images 1 / 12
 V2 APRIL 2017 1 / 12 To brighten up your website it is often nice to have images inserted onto various pages of your website. We have an easy option to size these photos on your page, as well as aligning
Advanced Marketing Techniques: Zach Stone, Molly McCormick, Dave Frees, Connie Gray, Karen Martin, and Mischelle Davis
 Advanced Marketing Techniques: Zach Stone, Molly McCormick, Dave Frees, Connie Gray, Karen Martin, and Mischelle Davis You have access to some incredible tools, and Zach, Connie, Molly, Karen, Dave, and
Google Chrome 4.0. AccuCMS
 Google Chrome 4.0 AccuCMS Outline Contents Google Chrome 4.0... 4 Thank you for choosing Blue Archer... 4 As an AccuCMS user you can:... 4 Getting Started... 4 AccuCMS allows you to:... 4 Logging in to
File Cabinet Manager
 Tool Box File Cabinet Manager Java File Cabinet Manager Password Protection Website Statistics Image Tool Image Tool - Resize Image Tool - Crop Image Tool - Transparent Form Processor Manager Form Processor
NORTH CAROLINA A&T STATE UNIVERSITY CMS USER GUIDE. A Manual for the Cascade Server Content Management System (CMS)
") NORTH CAROLINA A&T STATE UNIVERSITY CMS USER GUIDE A Manual for the Cascade Server Content Management System (CMS) Table of Contents Chapter 1 - Getting Started... 3 Overview... 3 What is a Content Management
NORTH CAROLINA A&T STATE UNIVERSITY CMS USER GUIDE A Manual for the Cascade Server Content Management System (CMS) Table of Contents Chapter 1 - Getting Started... 3 Overview... 3 What is a Content Management
A new clients guide to: Activating a new Studio 3.0 Account Creating a Photo Album Starting a Project Submitting a Project Publishing Tips
 Getting Started With Heritage Makers A Guide to the Heritage Studio 3.0 Drag and Drop Publishing System presented by Heritage Makers A new clients guide to: Activating a new Studio 3.0 Account Creating
Content Publisher User Guide
 Content Publisher User Guide Overview 1 Overview of the Content Management System 1 Table of Contents What's New in the Content Management System? 2 Anatomy of a Portal Page 3 Toggling Edit Controls 5
Joomla! 2.5.x Training Manual
 Joomla! 2.5.x Training Manual 1 Joomla is an online content management system that keeps track of all content on your website including text, images, links, and documents. This manual includes several
AGLOWNET WORDPRESS HOW-TO
 AGLOWNET WORDPRESS HOW-TO WORDPRESS RESOURCES PAGES New Page WordPress Forums - http://wordpress.org/support/ WordPress Lessons - http://codex.wordpress.org/wordpress_lessons In the Dashboard menu choose
Administrator Quick Guide
 1 Administrator Quick Guide Login Screen The first page employees will see when visiting their training site is the login screen. This is where employees must enter their username and password to access
Managing your Website s Content in WordPress
 Managing your Website s Content in WordPress Prepared for Westmont Aged Care Services Ltd 1 December 2016 For further support please contact: Annie O Shea M: 0412 169 664 E: annie@webstrategies.net.au
ScholarBlogs Basics (WordPress)
") Emory Center for Digital Scholarship Library and Information Technology Services ScholarBlogs Basics (WordPress) Table of Contents (click on the headings below to go directly to the section) Use of ScholarBlogs
Emory Center for Digital Scholarship Library and Information Technology Services ScholarBlogs Basics (WordPress) Table of Contents (click on the headings below to go directly to the section) Use of ScholarBlogs
Creating a Website with Wordpress
 Creating a Website with Wordpress Wordpress Fundamentals Version 1.6 Fayette County Public Schools June 28, 2013 Sow-Foong Hedman Technology Web Team Contents What is Wordpress?... 4 Overview... 4 Key
Table Basics. The structure of an table
 TABLE -FRAMESET Table Basics A table is a grid of rows and columns that intersect to form cells. Two different types of cells exist: Table cell that contains data, is created with the A cell that