Table of Contents. Introduction 1. Software installation 2. Remote control and video transmission 3. Navigation 4. FAQ 5.
|
|
|
- Maximilian Daniel
- 5 years ago
- Views:
Transcription
1
2 Table of Contents Introduction 1. Software installation 2. Remote control and video transmission 3. Navigation 4. FAQ 5. Maintenance
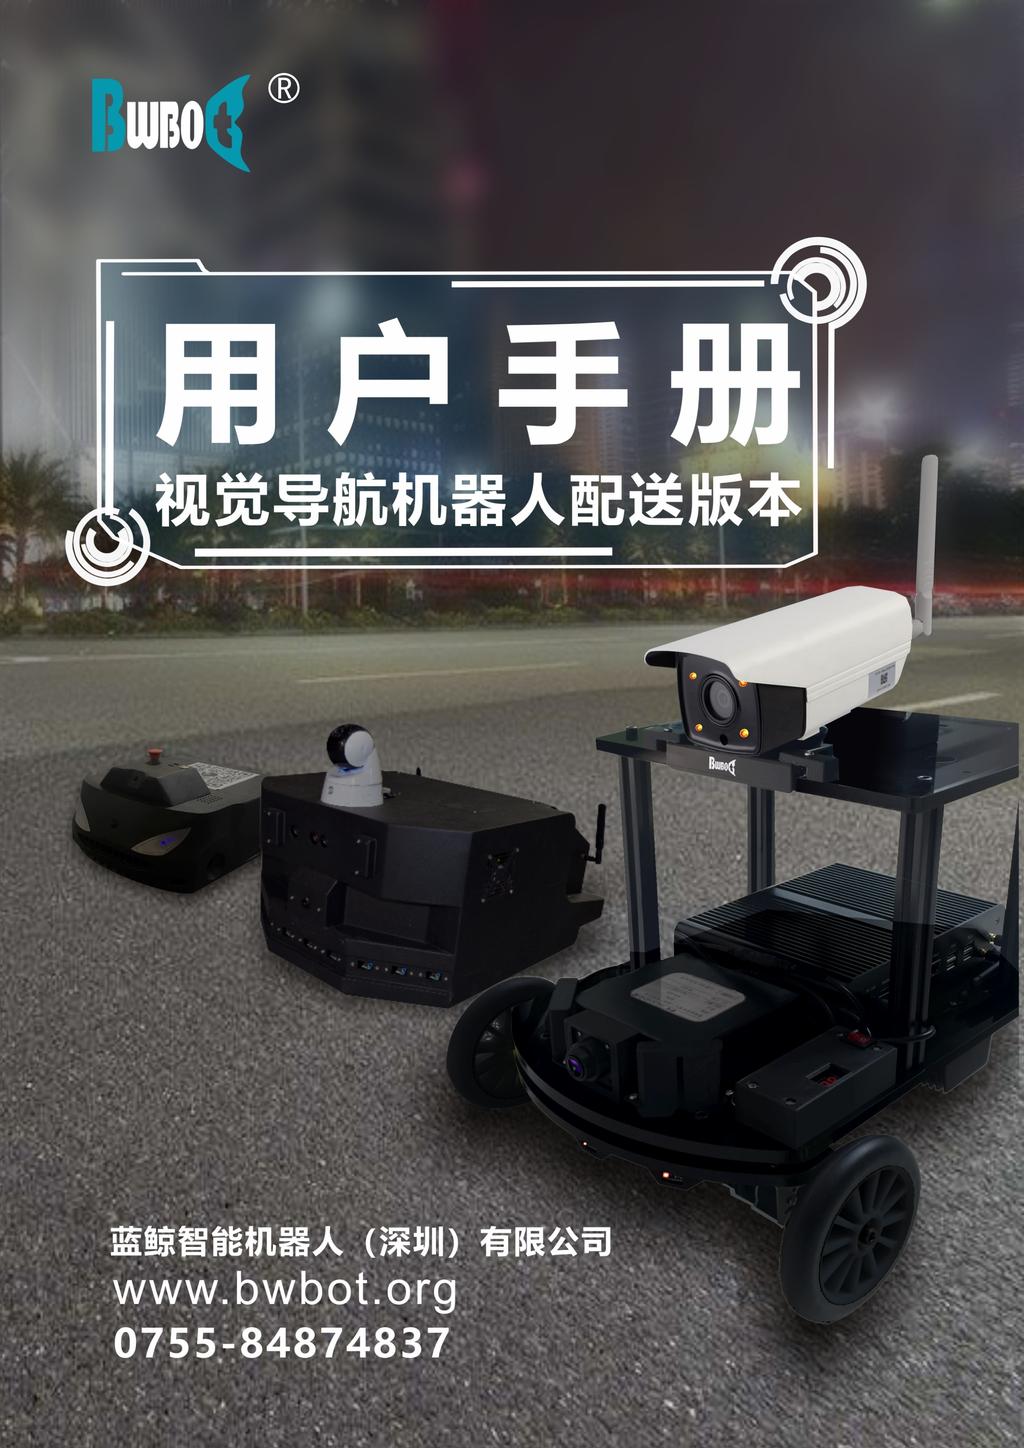
3 Introduction Introduction Introduction The Galileo visual navigation system is a robot positioning and motion control system which integrates multiple sensors and is led by visual navigation. It is suitable for indoor and open outdoor environments. Galileo system has different methods of use according to different application scenarios. This manual describes how to use the Galileo navigation system in the delivery robot. 3

4 1. Software installation Chapter 1, Control Software Installation and Trolley Assembly 1.1 Software installation steps 1.2 Trolley assembly steps Chapter 1, Control Software Installation and Trolley Assembly 1.1 Software installation steps a. Dwonload client from here,and install. b. After installation, the control software shortcuts will be created on the desktop which is shown in the figure below. Double-click the icon to open the control software. c. The control software is developed based on.net technology, so it requires NET Framework 4.5. Please install the NET Framework 4.5 except The WIN10 operating system. 1.2 Trolley assembly steps The main part of Xiaoqiang is shown in the figure below 4

5 1. Software installation Place the battery flat on the empty area in front of the host (the battery is blocked by two small black blocks), connect the chassis power wire according to the prompt of line mark, install the wifi antenna of host computer, connect the camera and the underlying USB connection module to the host's USB interface. 5

6 2. Remote control and video transmission Chapter 2, Remote Control Image Transmission 2.1 Configuration of robotic vehicle computer network 2.2 Control terminal PC accesses the working network 2.3 Operation of control terminal software 2.3.a The opening of remote control image transmission 2.2.b The closing of remote control video transmission Chapter 2, Remote Control Image Transmission 2.1 Configuration of robotic vehicle computer network Place the battery flat on the empty area in front of the host (the battery is blocked by the camera bracket), connect the chassis power wire according to the prompt of line mark, install the wifi antenna of host computer, insert the u turn string module into the computer usb port, and plug in the camera and kinect. Press the chassis red switch and the host computer switch simultaneously, use the hdmi we give to vga plug, connect the monitor, keyboard and mouse to the robot host and then boot, enter the user password and access to the host ubuntu system. System password is xiaoqiang. Click on the location shown below to select the wireless network which you want to access to. 6

7 2. Remote control and video transmission When there are many wifi hotspots around the use environment, 5G networks is recommended. This is because 5G network has less electromagnetic interference, more stable transmission and more effective coverage. If the network coverage of a route is too small, multiple 5G routing wireless bridges can be connected into the same wireless network. The robot access to the large-scale network can expand the ranger of remote control image transmission. 2.2 Control terminal PC accesses the working network The control terminal PC needs to be on the same wireless network as the trolley host. Please refer to Chapter 1 for the installation of control software. 7

8 2. Remote control and video transmission 2.3 Operation of control terminal software After opening control software, the initial interface is shown in the figure below. Put mouse pointer in any area, the corresponding function prompt will appear. Please try to understand the entire interface as you want. 8
9 2. Remote control and video transmission 2.3.a The opening of remote control image transmission First of all, make sure that the onboard computer and the chassis are powered on. The power button is on the left side of the host. Led lights in the front of the kinect will blink after the host computer is turned on. The chassis switch is next to the digital tube. The digital tube will display the battery voltage after the chassis is powered on. Please charge the battery When its voltage is lower than 9.8V. Click the button "Not Connected" on the main interface to establish the communication link between the remote control and the chassis. It will pop up the following warning on the firewall when in the first operation. Please select "Allow access". 9

10 2. Remote control and video transmission After the connection is successful, the main interface becomes as shown in the figure below. Now you can start the remote control chassis movement. 10


11 2. Remote control and video transmission Chassis motion control supports keyboard manipulation. The operation style is similar to the game Need for Speed. Right-click in the picture transferring area to open the menu, as is shown in the figure below. Select "Original Image", now you can see the first view of the robot and picture transferring has already been opened. 11

12 2. Remote control and video transmission Select "Close" in the right-click menu to end the picture transferring. 2.2.b The closing of remote control video transmission Close the software directly. If you need to turn off the power of the device, please click the button Shutdown on the main interface to turn off the vehicle host firstly, then turn off the switch next to the digital tube of trolley chassis. Ensure that the host computer is turned off (kienct stops blinking), unplug the wire between battery and trolley chassis. Demonstration video of this chapter: Operation of Remote control video transmission Please manually press the red switch on the trolley plate to stop the car in case of emergency. 12
13 3. Navigation Chapter 3, Navigation 3.1 System introduction 3.2 The creation of map 3.3 The drawing of inspection trajectory and site 3.3.a Drawing the inspection trajectory 3.3.b Set target point 3.3.c Save the trajectory and upload 3.4 Openning and closing of autonomous inspection 3.5 Map Management and Updates Update map Delete map Chapter 3, Navigation 3.1 System introduction The vehicle host computer is equipped with a visual navigation system. The robot trolley can move and inspect autonomously with the system, When encountering obstacles, the trolley will also autonomously dodges and bypass. Navigation system workflow:: (1) In the mode of remote control image transmission, the operator controls the device remotely to surround the motion area for twice to establish a visual map that the robot can understand. (2) Draw the inspection trajectory of robot and set the target point manually on the visual navigation map created in step 1 using the control software. (3)Start the inspection after the path and target point are set. Selecting the target point, then the robot will move utonomously to the target point along the trajectory planned in step The creation of map Opening the remote control image transmission according to the operation in Chapter 2, set the speed of chassis movement as about 20%. Click the button Start Drawing on the main interface and wait 10 seconds. 13


14 3. Navigation Open the visual system output image. Telerobot moves straight forward until the vision system initializes successfully. 14
.")
15 3. Navigation Now starting of the vision system has been finished, the telerobot begins to moving in the movement area. Try to avoid pure rotation in the process of remote control (just pressing the key turn left or right wil cause the lost of vision system for targets easily). Please press the key forward and turn left or right simultaneously so as to turn the robot along the large radius trajectory. During remote control, please make sure that the visual indication status in the main interface is "Tracking". Once it becomes red "lost", please retreat the telerobot to the normal state of previous period. You must use the back button to finish the retreating process, at the same time, keep the orientation and perspective of the robot unchanged. Please do not operate the robot temporarily if "Closed loop optimization" appears in the Visual indication status during remote control. When the path that the robot walks forms a circle, the robot will automatically optimize the map established previously, which will greatly improve the quality of the map. Therefore, in order to establish a more accurate map, you can remotely control the robot to walk multiplely along closed paths in the process of establishing a map. Importantly, the quality of the map will greatly influence the effect of navigation later. When the robot has browsed the entire motion area, stop moving, click the button "Save Map" on the main interface, and wait for the save dialog to pop up. Enter the name of map in the dialog and click "OK ". Wait for the map to finish loading. 15


16 3. Navigation After the map is loaded, you can see the approximate effect of the map which you just established. If you feel more satisfied, you can click the button " Finish Map ". Then the section about establishment of map is finished. The demo video of this section: The process of Visual map creation. In case of emergency, please press the red switch manually on the trolley to stop it. 3.3 The drawing of inspection trajectory and site Warning: Because planning trajectory need to download and render the visual map, the client exchange large amounts of data with the trolley host, the whole process takes a long time. So for the execution of the following steps, please waiting for the update of the client software interface patiently. Open the control software, click the button "Unconnected" to connect with the chassis, click on the button" draw navigation map" to open the editing interface of inspection path on the main interface. After loading, the software interface is similar to the figure below. 16
17 3. Navigation 3.3.a Drawing the inspection trajectory The inspection trajectory is the path you want the robot to walk on. After clicking the button "Start Navigation" on the main interface, the robot will move according to the path you have drawn. Here, we will introduce how to use the path drawing tool. 1. Basic operation Basic operations contain pan and zoom. Panning of the map is achieved by draging the map with the left mouse button. Zoom of the map is achieved by scrolling he mouse forward and backward. This is very useful for drawing paths. For more detailed requirements about movement, you can enlarge it before drawing. 2. Pencil tool Click the pencil icon in the left toolbar. This is a straight line tool. Click on any point with left mouse botton on the graph, then move the mouse, there will appear a red straight line. Move the mouse to the end position you want and click the left mouse button, a straight line is drawn. If you click the left button once again, then click right mouse button to cancel this drawing. 3. Eraser tool Click the Eraser tool on the left toolbar, then click the left mouse button and drag to erase the points drawn previously. 4. Curve tool 17

18 3. Navigation Click the curve tool on the left toolbar, click the left mouse button at the beginning of the curve, and then click it in the middle of the curvea and the endpoint of the curve respectively. Such a curve is drawn. 5. Remove tool If you want to delete the points you drawn previously in a wide range, you can use this removal tool. Click on the delete tool on the left toolbar, and then put left mouse click on the starting point of the deletion, at this moment, you can see a rectangle always moves with the mouse. Click the left mouse button again to delete the area selected by rectangle. Right click to cancel the selection. You can draw the inspection trajectory of the robot with those tools. It should be noted that you draw the line (blue dot) along the original trajectory as much as possible to ensure that the path is smooth during the movement. You can see the terrain roughly from the green point on the map, and then draw the points allowed by the range of motion based on this information. For service robot, mode trajectory is connected. 3.3.b Set target point With respect to the application scenarios of service robot, the robot needs to move back and forth between several fixed positions. For example, from the kitchen to the first table, then back to the kitchen to the second table and so on. The following work is to mark the location of each target point on the route map drawn above. We can send the corresponding target point to the robot, and then let the robot go to the target point automatically. 18

19 3. Navigation Click on to activate the inspection site insertion tool, and click on the inspection trajectory in order to insert inspection sites. Inspection sites can be deleted by erasing and deleting tools. Enter the corresponding target point number in the currently selected navigation point below, and the corresponding target point will be displayed in green in the figure. We can know the serial number of each target point in this way. 19

20 3. Navigation 3.3.c Save the trajectory and upload 20
21 3. Navigation Click the button "Save Path" on the interface, enter the file name, and click "Save". The full demo video about this sector: Draw the planning path and target point 3.4 Openning and closing of autonomous inspection Open the control terminal software and click the button "Not Connected" to connect with the chassis. Waiting for the map download to complete, the client loads a few sections drawn navigation map and path site automatically. 21


22 3. Navigation 22

23 3. Navigation Control the robot remotelyled to the position where it can be tracked. Of course, the robot must be in the inspection path and its facing orientation should be the same as the map you have created. Click the button "Start navigation" to start the automatic inspection, wait 30 seconds or so for the robot to start to move autonomously, and the blue blocks that indicate the location of the robot in the interface begin to be updated synchronously. 23

24 3. Navigation 24

25 3. Navigation If you want to stop the inspection, click on the button "Stop Service". If the robot suddenly stops moving during the autonomous inspection process, and the visual status becomes lost, which means that the vision system loses the targets. The reasons for that may be the following: (1) The initial movement direction of the robot is opposite to the movement direction when the map is established; (2) the light intensity or the environment has changed tremendously. For reason (1), please restart the robot after turn it around. For reason (2), you need to re-esablish the map and planning path. The full demo video of this section: Openning and closing of autonomous inspection In case of emergency, please press the red switch manually on the trolley to stop it. 3.5 Map Management and Updates In the map management control panel,we provide map management functions which include map deletion, update and save as. 25
26 3. Navigation Update map In actual use, the environment may change a lot, which results in the map established previously can no longer be tracked. In this moment, you can use the function of updating map. First select the map to be updated in the left menu, then click the button Update Map. 26
27 3. Navigation 27
28 3. Navigation The robot may not be able to trace after turning on the updating function. At this time, you can remotely control the robot to a place where environment changes a little, then the robot can track the environment. The subsequent operation is the same as the process of establishing a map. When the map updating is completed, please click the button Save As firstly. Then you need to enter the name of the new map and wait for the save to complete. If you feel that the new map is of good quality, you can click the button End Update to end the map update process. The newly updated map can be seen in the map drop-down menu. After that, you can use the new map to navigate Delete map Select the name of map in the first drop-down menu. Click the button delete on the right to delete the map. Robot map management 28
29 4. FAQ Common Problems and Solutions 4.1 do not work suddenly during remote controlling 4.2 Video transferring in a slow speed or delay 4.3 Visual status display "lost" in the picture establishing process, and there are no emerald green points appearing in the black and white screen of picture transferring 4.4 The connection has established and the remote control image transmission is normal, but the client does not display the map and inspection path. 4.5 The autonomous inspection has been started, the visual status always shows "Lost" and the robot swings in place 4.6 Cannot close the navigation service 4.7 When planning paths and trajectories, the loaded map shows a lot of messy and blue-colored points or the blue trajectory points of robot are obviously different from the path of remote control when the map is been created 4.8 The robot cannot avoid obstacles autonomously 4.9 Client cannot connect to robot Common Problems and Solutions 4.1 do not work suddenly during remote controlling It may be that the infrared obstacle avoidance module of chassis is activated. Please check whether there is an obstacle around the robot, if so, removing the obstacle, and then wait 5 seconds before try to control remotely again. 4.2 Video transferring in a slow speed or delay Please right-click to close the picture transferring then reopen it. If it does not work, you should not try again until the robot leaves the signal blocked area. 4.3 Visual status display "lost" in the picture establishing process, and there are no emerald green points appearing in the black and white screen of picture transferring There are two situations: a. There is no tracking in the visual state after the vision is opened. b. There is a tracking in the visual state after it is opened, but It suddenly becomes lost in the picture establishing process. 29
30 4. FAQ Solutions: a. Try to ensure that the robot moves in a straight line, and moving forward for a while then back for a while, repeating it until the visual status becomes tracking. b. Retreat the tolley to nearest position where the visual status appears "tracking" to make the robot vision system relock, in this process, you must keeping the orientation and perspective of the robot unchanged. c. If both of the two methods are tried several times, it still shows "lost". Please close the vision system and re-open it to start to scan and establish picture from the beginning. 4.4 The connection has established and the remote control image transmission is normal, but the client does not display the map and inspection path. The loading time of the map and inspection path is very long. Please wait for 5 minutes or so. If it still does not appear, please close the client software and reopen it to try again. 4.5 The autonomous inspection has been started, the visual status always shows "Lost" and the robot swings in place It shows that the robot can not identify the current position. There are two possibilities: a. The current position has not been recorded in the process of scanning and picture establishing. b. The light intensity of current position or distribution of the things has changed a lot. For the first case, please control the robot remotely to the location where the picture establishing has scanned, be sure that the orientation of the robot is the same as picture establishing, and reopen the autonomous inspection again. For the second case, there is a need to rescan the environment and reestablish the picture, and the inspection path and site are also need to be redrawn. 4.6 Cannot close the navigation service Try to click several times, if it still can not be closed, please close the power switch on the robot chassis manually, and then shut down the trolley host through the client software. 4.7 When planning paths and trajectories, the loaded map shows a lot of messy and blue-colored points or the blue trajectory points of robot are obviously different from the path of remote control when the map is been created 30
31 4. FAQ This showed that the establishment of visual map failed. Please rescan and reestablish the map and try again. 4.8 The robot cannot avoid obstacles autonomously Check the kienct indicator light is normal or not, whether the power cable providing of kienct is connected properly. Turned off the vehicle host, then restart to test after reopen it again. 4.9 Client cannot connect to robot Please log in to the management interface of LAN routing, then check that if both the client PC and the robot host are connected to the network. Refer to Chapter 2 Networking Operations to reset the two networks. 31
32 5. Maintenance Chapter 5 Maintenance 5.1 Hardware system overview 5.2 Charging 5.3 Wheel loosening or skidding Chapter 5 Maintenance 5.1 Hardware system overview 32

33 5. Maintenance 5.2 Charging After disconnecting the battery from the trolley chassis, charge it with the dedicated battery charger delivered by our company. It takes about 5 hours to fully charge the battery. 33

34 5. Maintenance The two output wires of the battery are connected in parallel, so both heads of it can be used for charging and discharging. The battery supports simultaneous charge and discharge. 5.3 Wheel loosening or skidding Solution :Re-tighten the screws in the figure above 34
SLAMWARE. RoboStudio. User Manual. Shanghai Slamtec.Co.,Ltd rev.1.1
 www.slamtec.com 2017-11-06 rev.1.1 SLAMWARE RoboStudio User Manual Shanghai Slamtec.Co.,Ltd Contents CONTENTS... 1 INTRODUCTION... 3 USER GUIDE... 4 OFFLINE/ONLINE MODE... 4 CONNECT/DISCONNECT ROBOT...
Homework 13: User Manual
 Homework 13: User Manual Team Code Name: Autonomous Targeting Vehicle Group No. 3 User Manual Outline: Brief (marketing-style) product description Product illustration annotated with callouts for each
1. Establishing a WiFi Connection
 1. Establishing a WiFi Connection WiFi carries out video transmission between the WICA Training Assistant and the mobile terminal, so there needs to be an established WiFi connection before proper use.
XPEL DAP SUPPORT. DAP Tool List & Overview DESCRIPTION ICON/TOOL (SHORTCUT)
") Pointer (S) Left-click on individual entities to add them to the current selection (selected entities will turn red). If the entity selected is a member of a group, the entire group will be added to the
Pointer (S) Left-click on individual entities to add them to the current selection (selected entities will turn red). If the entity selected is a member of a group, the entire group will be added to the
User s Guide. Valvova Oy
 User s Guide Valvova Oy June 21, 2017 CONTENTS Contents 1 Timeline 2 1.1 Program startup......................................... 3 1.2 Calendar............................................. 3 1.3 Go to
HOW TO. In this section, you will find. miscellaneous handouts that explain. HOW TO do various things.
 In this section, you will find miscellaneous handouts that explain do various things. 140 SAVING Introduction Every time you do something, you should save it on the DESKTOP. Click Save and then click on
TEEAL. TEEAL Configuration and Setup. Configuration & network setup for new TEEAL machines. Written By: The TEEAL Team
 TEEAL TEEAL Configuration and Setup Configuration & network setup for new TEEAL machines Written By: The TEEAL Team INTRODUCTION This guide will walk you through the steps to configure TEEAL. Before proceeding
FAQ for KULT Basic. Connections. Settings. Calls. Apps. Media
 FAQ for KULT Basic 1. What do the Icons mean that can be found in notifications bar at the top of my screen? 2. How can I move an item on the home screen? 3. How can I switch between home screens? 4. How
Battery Charging The tablet has a built-in rechargeable Li-polymer battery.
 Attention: This handbook contains important security measures and the correct use of the product information, in order to avoid accidents. Pls make sure to reading the manual carefully before use the device.
Plug & Play WiFi IP Kit
 Page: 1 Plug & Play WiFi IP Kit IP cameras and NVR WiFi Installation manual How to install the system How networking How to insert an additional camera Page: 2 Contents of this handbook The WiFi kit RKK
NovoConnect B360. Wireless Presentation & Collaboration System. User Manual Version 0.98
 NovoConnect B360 Wireless Presentation & Collaboration System User Manual Version 0.98 Copyright 2013 DELTA Electronics, Inc. All rights reserved. Page 1 Table of Contents TABLE OF CONTENTS... 2 1. GETTING
Using AORUS Notebook for the First Time
 Congratulations on your purchase of the AORUS Notebook! This Manual will help you to get started with setting up your notebook. For more detailed information, please visit our website at http://www.aorus.com.
Multi-Car Line OEM Laptop Basics
 Multi-Car Line OEM Laptop Basics All information and images are the property of Euro Techtronix Inc and Euro Car Logic Inc.The information cannot be duplicated or distributed without prior written consent.
Full Search Map Tab. This map is the result of selecting the Map tab within Full Search.
 Full Search Map Tab This map is the result of selecting the Map tab within Full Search. This map can be used when defining your parameters starting from a Full Search. Once you have entered your desired
MDVR 800 QUICK START GUIDE
 MDVR 800 QUICK START GUIDE Introduction & Warnings Before installing please read the following warnings carefully. Stortech CCTV strongly recommends that all connections and installations are carried out
1. Introduction P Package Contents 1.
 1 Contents 1. Introduction ------------------------------------------------------------------------------- P. 3-5 1.1 Package Contents 1.2 Tablet Overview 2. Using the Tablet for the first time ---------------------------------------------------
SURVEILLANCE KIT USER MANUAL. All in One Series
 SURVEILLANCE KIT USER MANUAL All in One Series Contents Part one Basic Operation 1 1. Basic Installation 1 1. Hard Disk Installation 1 2. Mouse Connection 1 2. Starting 1 3. Turn Off 1 4. Login 2 5. Preview
1 Introduction. 2 Mounting the RP3 USB interface
 1 Introduction The new ROWPERFECT3 Rowing Simulator is equipped with the, also new, RP3 USB Interface. Using this interface and the accompanying software, one can record training sessions and store over
Panasonic VRF Software. New features of VRF software
 Panasonic VRF Software New features of VRF software April 2013 1 Contents: Mounting scheme... 5 1. Import building scheme into software... 5 1.1. Export building scheme as DXF from AutoCAD... 5 1.2. Export
User Operating Manual
 User Operating Manual Contents 1 Introduction... 1 1.1 Acknowledgements... 1 1.2 Safety Notice... 1 1.3 Abbreviation/term... 2 2 Brief Product Introduction... 3 2.1 Diagram for TABLET... 3 2.2 Introduction
REVCONNECT. 1. Software Introduction Installation Description Usage Introduction User Guide... 6
 REVCONNECT 1. Software Introduction... 1 2. Installation Description... 1 3. Usage Introduction... 6 3.1 User Guide... 6 3.2 Mobile App Operation... 8 3.2.1 Starting and Logging In to the Mobile App...
WiFi Video Doorbell. User Manual
 WiFi Video Doorbell User Manual Introduction Content With Hisilicon Hi3518E processor and H.264 compression technology, this Wifi video intercom provides smooth realtime video transmission while keeps
Copyright White Box Robotics Inc. and Frontline Robotics Inc
 Disclaimer Working with electronics and installing the plastics will require care and patience. PROPER GROUNDING PROCEDURES before handling the electronics. Touching the robot chassis (which is common
This guide will help you with many of the basics of operation for your Epson 485wi BrightLink Projector with interactive functionality.
 This guide will help you with many of the basics of operation for your Epson 485wi BrightLink Projector with interactive functionality. If you need further assistance with questions, you can refer to the
This handbook contains important security measures and product information, to help avoid accidents. Please
 MANUAL Attention: This handbook contains important security measures and product information, to help avoid accidents. Please make sure to read the manual carefully before using the device. Do not store
AWS DeepRacer Getting Started Guide
 AWS DeepRacer Getting Started Guide 1 Getting Started Guide Contents What s in the box Assemble your car Get connected Test drive Autonomous model management 2 What s in the box 1 2 6 8 9 5 11 10 4 7 3
Intelligent Security & Fire Ltd
 Copyright 2007-2009 Cortex Global Table of contents: Introduction... 3 1. Login... 3 1.1 Advanced login options... 4 2. Preview... 5 2.1 Main menu... 6 2.2 Camera list... 6 2.3 Main display... 6 2.4 Maps...
Trident Z Royal. Royal Lighting Control Software Guide
 Trident Z Royal Royal Lighting Control Software Guide Introduction 1 2 3 About This Guide This guide will help you understand and navigate the Royal Lighting Control software, which is designed to control
Lenovo IdeaPad Flex 10
 Lenovo IdeaPad Flex 10 User Guide Read the safety notices and important tips in the included manuals before using your computer. Notes Before using the product, be sure to read Lenovo Safety and General
HIP2P Network Video Camera Client Terminal User Manual
 HIP2P Network Video Camera Client Terminal User Manual Document version:5.1 Page 1 of 34 } Preface Thank you for using our company's products. The network video camera client terminal is used to implement
Tablet PC User Manual
 Tablet PC User Manual Please read all instructions carefully before use to get the most out of your Time2Touch Tablet PC. The design and features are subject to change without notice. Contents Important
Safety Instructions. Product information
 Safety Instructions Do not disassemble, or drop the camera from high altitude. Do not expose the camera to high temperatures and avoid contact with water and other liquid substances. After long time using,
VEGA. Operation Manual T A B L E T P C. advent vega operation manaul_new.indd 1
 VEGA T A B L E T P C Operation Manual advent vega operation manaul_new.indd 1 advent vega operation manaul_new.indd 2 CONTENTS SETTING UP YOUR TABLET FOR THE FIRST TIME... 4 USING THE DEVICE S BUTTONS
Contents. Introduction
 Page 1 of 15 Contents Introduction Getting Started Your Device at a Glance Charging Assembling the Power Adapter Turning On/Off, Unlocking Setting to Sleep and Waking Up Inserting and Removing a microsd
User Manual. pdoc Pro Client for Windows. Version 2.1. Last Update: March 20, Copyright 2018 Topaz Systems Inc. All rights reserved.
 User Manual pdoc Pro Client for Windows Version 2.1 Last Update: March 20, 2018 Copyright 2018 Topaz Systems Inc. All rights reserved. For Topaz Systems, Inc. trademarks and patents, visit www.topazsystems.com/legal.
Smart Pen User Manual
 Smart Pen User Manual Model: XN690 Accessories Receiver Mini USB Cable Smart Pen Ink Refill Refill Extractor User Manual Receiver Overview of Receiver 1 5 2 3 4 1. Reset hole- Reset and shut off the device
Autodesk Inventor Design Exercise 2: F1 Team Challenge Car Developed by Tim Varner Synergis Technologies
 Autodesk Inventor Design Exercise 2: F1 Team Challenge Car Developed by Tim Varner Synergis Technologies Tim Varner - 2004 The Inventor User Interface Command Panel Lists the commands that are currently
Contents Using the 4SK909 Twister
 Contents About this manual... 1 Notices for use... 1 Know the product... 2 Using the 4SK909 Twister... 3 Charging... 3 Inserting the TF memory card... 4 Powering ON/OFF the Dash Cam... 4 Installing in-vehicle
Yale Smart WIFI CCTV FAQs
 Can I setup e-mail alerts? Yale Smart WIFI CCTV FAQs Yes, you can get email alerts. Go to main menu, select network, and then the email tab. tick enable box, set the receiver mail and the subject. Test
1 Introduction to AutoCAD
 1 Introduction to AutoCAD The term CAD (Computer Aided Design) applies to a wide range of programs that allow th user to created drawings, plans, and designs electronically. AutoCAD is one such program
TxEIS on Internet Explorer 8
 TxEIS on Internet Explorer 8 General Set Up Recommendations: Several modifications will need to be made to the computer settings in Internet Explorer to ensure TxEIS runs smoothly, reports pop up as desired,
CCTV Menu Operations Manual
 CCTV Menu Operations Manual SV-C-2ABFX / SV-8C-ABFX SV-C-2DBMX Disclaimer! This Manual will guide you through the standard settings and operations for normal Residential CCTV usage. The system is based
CLEAR TOOL... 7 BASIC NAVIGATION... 7 PAGE SORTER... 7
 Interwrite Workspace WHAT IS WORKSPACE?...2 INSTALLATION...2 SETUP...2 CONNECTING DEVICES... 2 NAMING DEVICES... 3 CALIBRATING DEVICES... 3 THE PEN...3 INTERACTIVE MODE...4 THE TOOLBAR...4 MOVING THE TOOLBAR...
OpenForms360 Validation User Guide Notable Solutions Inc.
 OpenForms360 Validation User Guide 2011 Notable Solutions Inc. 1 T A B L E O F C O N T EN T S Introduction...5 What is OpenForms360 Validation?... 5 Using OpenForms360 Validation... 5 Features at a glance...
Help Guide Rev
 Help Guide Rev. 1.0 07152014 Home Page The home page displays your vehicle(s) on a satellite map. The information box, showing vehicle information will already be opened. The information box displays your
Acrobat X Professional
 Acrobat X Professional Toolbar Well Page Navigations/Page Indicator Buttons for paging through document Scroll Bar/box page indicator appears when using the scroll button to navigate. When you release
SILVACO. An Intuitive Front-End to Effective and Efficient Schematic Capture Design INSIDE. Introduction. Concepts of Scholar Schematic Capture
 TCAD Driven CAD A Journal for CAD/CAE Engineers Introduction In our previous publication ("Scholar: An Enhanced Multi-Platform Schematic Capture", Simulation Standard, Vol.10, Number 9, September 1999)
SensorWATCH Basic RH - Wireless Setup Users Help Guide Part Number: A Revision: 1.1.0
 SensorWATCH Basic RH - Wireless Setup Users Help Guide Part Number: A53-7974-13-001 Revision: 1.1.0 Page 1 SensorWATCH Basic RH - Wireless SetupUsers Help Guide 1.1.0 Table of Contents 1.0 - Quick Setup
Digital City: Introduction to 3D modeling
 Digital City: Introduction to 3D modeling Weixuan Li, 2017 PART I: Install SketchUp and Introduction 1. Download SketchUp Download SketchUp from their official website: https://www.sketchup.com Go to the
1. Introduction P Package Contents 1.
 1 Contents 1. Introduction ------------------------------------------------------------------------------- P. 3-5 1.1 Package Contents 1.2 Tablet Overview 2. Using the Tablet for the first time ---------------------------------------------------
CONTACT PLUS. Window Programs. User Manual.
 CONTACT PLUS Window Programs User Manual www.selvashealthcare.com CONTENTS Contents Contents 2 Installation 3 1. System environment required for installing and operating the software 3 2. Installing CONTACT
TA0139 USER MANUAL ARDUINO 2 WHEEL DRIVE WIRELESS BLUETOOTH ROBOT KIT
 TA0139 USER MANUAL ARDUINO 2 WHEEL DRIVE WIRELESS BLUETOOTH ROBOT KIT I Contents Overview TA0139... 1 Getting started: Arduino 2 Wheel Drive Wireless Bluetooth Robot Kit using Arduino UNO... 1 2.1. What
Smart Wireless WIFI Camera Instructions
 Smart Wireless WIFI Camera Instructions Dear users, Thanks for using this product. Please read the users' manual carefully and keep it for future reference. Thank you. 1 Content 1, How to download the
epos Touchkit Manual (for Windows XP)
") epos Touchkit Manual (for Windows XP) 1. Touchkit Devices in Windows Device Manager After driver installation completed, all of Touchkit touchscreen controller devices will be list in the Mice and other
epos Touchkit Manual (for Windows XP) 1. Touchkit Devices in Windows Device Manager After driver installation completed, all of Touchkit touchscreen controller devices will be list in the Mice and other
Full Search Map Tab Overview
 FlexMLS Map Server Full Search Map Tab Overview The Full Search Map tab is a need to know module. It is accessible when you use Full Search under Search in the Main Menu tree of FlexMLS. This map can
Mini Mini GlobiLab Software Quick Start Guide
 Mini Mini GlobiLab Software Quick Start Guide This Guide is intended to help you get your Mini up and running quickly. For more detailed instructions, please see the Getting to Know Your Mini document
Contents. Introduction. Getting Started. Navigating your Device. Customizing the Panels. Pure Android Audio. E-Books
 Contents Introduction Getting Started Your Device at a Glance Charging Assembling the Power Adapter Turning On/Off, Unlocking Setting to Sleep and Waking Up Inserting and Removing a microsd Card Connecting
Mobile Recorder User Manual
 Mobile Recorder User Manual Ver. Q4 2009 Revised 3/05/2010 COBAN Technologies Inc. 12503 Exchange Drive, Suite 536 Stafford, Texas 77477 Tel: 1-281-277-8288 Fax: 1-281-277-8256 http://www.cobantech.com
I. Getting Started. 1.1 Structure
 I. Getting Started 1.1 Structure 1 8 2 9 19 14 10 11 12 13 3 4 5 6 7 16 17 18 15 1. Laser light 2. Infrared Night Vision 3. PTT 4. Video Recording 5. Power 6. Voice Recording 7. Taking Camera/White Light
Streaming Smart Stick. Quick Start Guide
 Streaming Smart Stick Quick Start Guide GETTING STARTED 1.1 Inside the Box 1 1.2 Equiso Streaming Smart Stick 2 1.3 Equiso Remote 3 1.4 Using Your Equiso Remote 4 1.5 What You Need 5 1.6 Charging the Remote
Contents. Introduction. Getting Started. Navigating your Device. Customizing the Panels. Pure Android Audio. E-Books. Browsing the Internet
 Contents Introduction Getting Started Your Device at a Glance Charging Assembling the Power Adapter Turning On/Off, Unlocking Setting to Sleep and Waking Up Connecting to a Computer Navigating your Device
OPERATION MANUAL. IWB Setup Software/EyeRIS NEC edition
 IWB Setup Software/EyeRIS NEC edition OPERATION MANUAL This manual describes installation and operation procedures of the driver / the calibration software. For Interactive Whiteboard Kit, projectors and
The Fundamentals. Document Basics
 3 The Fundamentals Opening a Program... 3 Similarities in All Programs... 3 It's On Now What?...4 Making things easier to see.. 4 Adjusting Text Size.....4 My Computer. 4 Control Panel... 5 Accessibility
Bombardier Business Aircraft Customer Services. Technical Publications. SmartPubs Viewer 3.0 User Guide. Updated January 2013 [2013]
![Bombardier Business Aircraft Customer Services. Technical Publications. SmartPubs Viewer 3.0 User Guide. Updated January 2013 [2013]](/thumbs/90/103657167.jpg "Bombardier Business Aircraft Customer Services. Technical Publications. SmartPubs Viewer 3.0 User Guide. Updated January 2013 [2013]") Bombardier Business Aircraft Customer Services Technical Publications SmartPubs Viewer 3.0 User Guide Updated January 2013 [2013] Table of Contents Application Views... 5 Collection View... 5 Manual View...
Bombardier Business Aircraft Customer Services Technical Publications SmartPubs Viewer 3.0 User Guide Updated January 2013 [2013] Table of Contents Application Views... 5 Collection View... 5 Manual View...
Using AORUS Notebook for the First Time
 Congratulations on your purchase of the AORUS Notebook! This Manual will help you to get started with setting up your notebook. For more detailed information, please visit our website at http://www.aorus.com.
ViZion DR + Wireless Install Guide
 1 ViZion DR + Wireless Install Guide 1. Open the DR panel box. 2. Put aside the three cables from the top layer of Styrofoam for storage. These cables are only required for potential troubleshooting scenarios.
MicroBot Push User Guide
 MicroBot Push User Guide Troubleshooting 24 My Microbot App does not detect my MicroBot Push 24 MicroBot Push keeps disconnecting 25 MicroBot Push is not updating 25 Getting Started 2 Meet MicroBot Push
DrQuickLook MAZI PDA. User Guide
 DrQuickLook MAZI PDA User Guide 0 Table of Contents About the DrQuickLook PDA... 1-3 What Comes With the DrQuickLook PDA...1 Microsoft Surface 3 Tablet and DrQuickLook Custom Surround Diagram...2 Tablet
HD HOME SECURITY AND DVR SYSTEM. Quick Start Guide. What s inside. For the complete user guide...
 HD HOME SECURITY AND DVR SYSTEM Quick Start Guide What s inside Getting started... 2 Step 1: Unpack... 2 Step 2: Mount the cameras... 3 Step 3: Connect cameras to the DVR... 4 Step 4: Connect the DVR to
VIMED JWEB Manual. Victorian Stroke Telemedicine. Version: 1.0. Created by: Grant Stephens. Page 1 of 17
 VIMED JWEB Manual Victorian Stroke Telemedicine Version: 1.0 Created by: Grant Stephens Page 1 of 17 1 Table of Contents 1 Table of Contents... 2 2 What is JWEB?... 4 3 Accessing JWEB... 4 3.1 For Mac
Instructions for Installing FlashUpdate and Downloading Updates for Super Buddy Satellite Meter
 Instructions for Installing FlashUpdate and Downloading Updates for Super Buddy Satellite Meter Updates to the Field Guide and to the instrument firmware are available from the Applied Instruments website.
Do not place or mount Ocli 1 in an area where it will be exposed to water. Ocli 1 is designed for indoor use.
 1 Manual: Ocli 1 with Observeye Viewer App for Android Setting Up Ocli 1 Live Viewing with Ocli 1 Recording Video and Taking Snapshots Using Advanced Features Setting Up Ocli 1 Place or Mount the Camera
Publication Number spse01695
 XpresRoute (tubing) Publication Number spse01695 XpresRoute (tubing) Publication Number spse01695 Proprietary and restricted rights notice This software and related documentation are proprietary to Siemens
Contents. Setting the EMP NS Connection Operation. Connecting with EMP NS Connection. Using a Computer to Set Up, Monitor and Control Projectors
 Operation Guide 1 Contents 2 EasyMP Summary...4 Installing the Software...5 Software Supplied...5 Installing...5 Connecting with EMP NS Connection Overview of EMP NS Connection...8 Two Connection Modes
DVR-535. User Manual
 DVR-535 User Manual Product Description Product structure Description of function keys: 1) Select button up Standby or short video process click here the key to digital narrow regulation; Down regulate
DVR-100. User Manual
 DVR-100 User Manual 1 Product structure 2 1.Power button 2.OK button 3.Mode 4.Up button 5.Down button 6.Parking monitoring button 7.Lock button 8.Len 9.Night lights 10.USB 11.AV-OUT 12.HDMI OUT 13.Mic
Specifications. What s Inside The box
 Tablet of Contents Specifications.1 What s inside the box 1 Tablet Parts 2 Getting started...2 Connecting to the Internet..6 Task Bar..8 Install and Uninstall 9 Camera.10 HDMI.11 Trouble Shooting 11 Warranty..13
Getting Started with ShowcaseChapter1:
 Chapter 1 Getting Started with ShowcaseChapter1: In this chapter, you learn the purpose of Autodesk Showcase, about its interface, and how to import geometry and adjust imported geometry. Objectives After
Autodesk Fusion 360 Training: The Future of Making Things Attendee Guide
 Autodesk Fusion 360 Training: The Future of Making Things Attendee Guide Abstract After completing this workshop, you will have a basic understanding of editing 3D models using Autodesk Fusion 360 TM to
Discover Robotics & Programming CURRICULUM SAMPLE
 OOUTLINE 5 POINTS FOR EDP Yellow Level Overview Robotics incorporates mechanical engineering, electrical engineering and computer science - all of which deal with the design, construction, operation and
ROBOTSTUDIO LECTURES. Introduction to RobotStudio. What is RobotStudio? How to start it up Structured walk-through
 ROBOTSTUDIO LECTURES Introduction to RobotStudio What is RobotStudio? How to start it up Structured walk-through What is RobotStudio? RobotStudio is ABB's simulation and offline programming software It
Error! Bookmark not defined.
 HD-NVR user manual Directory Part one Basic Operation... 3 1. Basic Installation... 3 1.1 Hard Disk Installation... 3 1.2 Mouse Connection... 3 2. Starting... 3 3.Turn Off... 3 4.Login... 4 5.Preview...
Minimizer Kiosk Instructions Pi 3 Model
 Minimizer Kiosk Instructions Pi 3 Model 1 This guide will help you set up a Minimizer Kiosk and connect it to the Internet. For assembly, make sure you have the correct tools and items. The Minimizer Kiosk
Outdoor User Manual. ios Application Android Application PC Setup
 Outdoor User Manual ios Application Android Application PC Setup Please read all instructions carefully before use to get the most out of your Outdoor Wireless Surveillance Camera. The design and features
Profile Modeler Profile Modeler ( A SuperControl Product )
") Profile Modeler ( A SuperControl Product ) - 1 - Index Overview... 3 Terminology... 3 Launching the Application... 4 File Menu... 4 Loading a File:... 4 To Load Multiple Files:... 4 Clearing Loaded Files:...
Profile Modeler ( A SuperControl Product ) - 1 - Index Overview... 3 Terminology... 3 Launching the Application... 4 File Menu... 4 Loading a File:... 4 To Load Multiple Files:... 4 Clearing Loaded Files:...
EASE Vehicle Interface Setup Instructions
 USB Interface Setup Note: These directions should be followed only after the EASE Scan Tool has been installed. Note: Visit www.fixcarsfaster.com for video setup instructions to supplement these instructions.
COMPUTER DESCRIPTION...
 Conventions used in this document: Keyboard keys that must be pressed will be shown as Enter or Ctrl. Controls to be activated with the mouse will be shown as Start button > Settings > System > About.
This is the opening view of blender.
 This is the opening view of blender. Note that interacting with Blender is a little different from other programs that you may be used to. For example, left clicking won t select objects on the scene,
Adobe Acrobat 5.0. Overview. Internet & Technology Training Services Miami Dade County Public Schools
 Adobe Acrobat 5.0 Overview Internet & Technology Training Services Miami Dade County Public Schools Preparing Microsoft Office Documents in.pdf Format Converting Documents to.pdf Format Using the Tool
INSTALLING THE PS3 XBOX READY SOFTWARE:
 INSTALLING THE PS3 XBOX READY SOFTWARE: 1. Insert the Installation CD to CD-ROM drive and execute Ready_Setup.exe NOTE: If it is the first time for the target USB disk using under this software, the software
Dreamer Series User Manual
 Dreamer Series User Manual Welcome to the world of the Dreamer. To ensure that you have the best possible user experience, it s important that you follow this user manual. Let s get started! In Parts I
Zpen User s Guide. Version 4.0
 1 Version 4.0 Table of Contents 2 Table of Contents Table of Contents...2 Preface...4 Chapter 1... 5 Introduction to the Zpen...5 Digital Pen...6 Receiver...6 Zpen capabilities and features...7 System
XnView Image Viewer. a ZOOMERS guide
 XnView Image Viewer a ZOOMERS guide Introduction...2 Browser Mode... 5 Image View Mode...14 Printing... 22 Image Editing...26 Configuration... 34 Note that this guide is for XnView version 1.8. The current
Lenovo Miix User Guide. Read the safety notices and important tips in the included manuals before using your computer.
 Lenovo Miix 2 11 User Guide Read the safety notices and important tips in the included manuals before using your computer. Notes Before using the product, be sure to read Lenovo Safety and General Information
AI3100 Portable Reader User Manual
 AI3100 Portable Reader User Manual June 21, 2013 Copyright 2013 Softrail All rights reserved Softrail 1098 Venetia Road Eighty-Four, PA 15330 Tel. 888 872-4612 (toll free US and Canada only) Tel. 724 942-1473
Premiere Pro Desktop Layout (NeaseTV 2015 Layout)
") Premiere Pro 2015 1. Contextually Sensitive Windows - Must be on the correct window in order to do some tasks 2. Contextually Sensitive Menus 3. 1 zillion ways to do something. No 2 people will do everything
Premiere Pro 2015 1. Contextually Sensitive Windows - Must be on the correct window in order to do some tasks 2. Contextually Sensitive Menus 3. 1 zillion ways to do something. No 2 people will do everything
Digifort Explorer Manual Surveillance Client Version Rev. A
 Digifort Explorer Manual Surveillance Client Version 6.4.0.0 Rev. A 2 Surveillance Client - Version 6.4.0.0 Índice Part I Welcome to Digifort Explorer Manual 5 1 Screen... Shots 5 2 For whom... this manual
About this manual. Notices for use
 4SK606 Contents About this manual...1 Notices for use...1 Know the product...2 Using the Original Dash Cam 2...3 Charging...3 Inserting the microsd card...4 Powering ON/OFF the Dash Cam...4 Installing
HSIP2 User Manual. ios Application Android Application PC Setup
 HSIP2 User Manual ios Application Android Application PC Setup Please read all instructions carefully before use to get the most out of your HSIP2 Wireless Surveillance Camera. The design and features
TruVision DVR 60 Quick Start Guide
 Content Package contents 1 Installation environment 1 Setting up the TVR 60 1 Connecting the devices 2 Turning on and off the TVR 60 2 Operating the TVR 60 3 DDNS settings 5 Live mode 5 Quick Archive 5