Starting with Bold for Delphi/Bold for C++ Part 2: Extending Models. By Anthony Richardson 31 October 2001 Revision 1.0
|
|
|
- Martina Taylor
- 6 years ago
- Views:
Transcription
1 Starting with Bold for Delphi/Bold for C++ By Anthony Richardson 31 October 2001 Revision 1.0
2 Contents OVERVIEW... 3 Introduction... 3 About the Author... 3 Acknowledgments... 3 Credits GETTING STARTED... 4 Example Application... 4 Build Basic Project... 5 Build the Model... 6 Generating Pascal Code Adding a User Interface Running The Application USING CODE IN BOLD APPLICATIONS Enhancing the application with code INTRODUCTION TO OBJECT LIFECYCLES Using Delphi Code Model driven object life management DERIVED & REVERSE DERIVED ATTRIBUTES Adding the new attributes Reversed Derived Derived Attributes with OCL OPERATIONS Adding an Operation DERIVED RELATIONSHIPS Adding the Managed By relationship Adding the Workforce relationship ONE-WAY RELATIONSHIPS CONSTRAINTS: A PARTING NOTE SUMMARY Page 2 of 42
3 Overview Introduction Starting with Bold for Delphi/Bold for C++ is a series of articles design to provide an introduction to the Bold for Delphi/Bold for C++ product and effective techniques for applying the Bold framework in the development of real world applications. These articles are designed as an introduction. The Bold for Delphi/Bold for C++ product contains many components and is comprised of over 1000 classes spread across over 350 units. The product contains many sub frameworks within these classes to support advanced development techniques and the application of industry best practices in the form of patterns, interfaces and modeling. The design of Bold for Delphi/Bold for C++ is carefully layered to enable rapid adoption of core techniques with the gradual adoption of the more complex or sophisticated methods as required. These articles are designed to facilitate the transition from traditional programming to the core Bold for Delphi/Bold for C++ techniques. About the Author Anthony Richardson is a software developer based in Adelaide, Australia. Anthony is contactable via at anthony@viewpointsa.com. More information about Viewpoint (SA) Pty Ltd is available on the Internet at Acknowledgments I would like to acknowledge the assistance of BoldSoft MDE AB in the creation of these articles. Especially the assistance Jesper Hogstrom and Dan Nygren, without their support this project would not have been possible. Credits All trademarks are properties of their respective holders. All intellectual property claims are respected. The publication is copyright 2001 by Anthony Richardson. Anthony Richardson grants BoldSoft MDE AB a royalty-free nonexclusive license to distribute this publication worldwide. In the first article of this series the Bold model editor was introduced and basic modeling concepts explained. However, there is a lot that can be achieved within the Bold Model editor and the purpose of this article is to explorer the concepts of: - Operations: Add business logic to our classes. - Derived Attributes: Calculating attribute values on the fly. - Reverse Derived Attributes: Using code to both compose and decompose derived values within your class. - Derived Relationships: Resolving relationships on the fly. Page 3 of 42
4 Getting Started Example Application To the journey into more advanced modeling techniques we will start with a model for a basic Human Resource Management Application. Figure 1: Basic Class Model The first article in this series covered the construction of a basic model. The concept of classes, attributes and relationships was discussed. In Figure 1 no new concepts are introduced and the following basic business rules are enforced: We have Company and Departments, which are types of Workplace. We have Employees, which can work for a department Companies can contain Departments. A Department can have one manager, which is an Employee. An Employee can manage multiple departments We will step through the creation of this with a basic GUI quickly so we can get to the real interesting modeling concepts sooner. Page 4 of 42

5 Build Basic Project Groundwork To get started we need to setup a basic Delphi project with a data module. 1. Select File New Application from the Delphi menu. 2. Save the Form unit as MainForm.pas and the project as HRManager.dpr 3. Add a new Data Module by selecting File/New and selecting Data Module from the New Items Dialog. 4. Set the Data Modules name to BusinessModule. 5. Save the DataModule as BusinessLayer.pas. Models, Handles and Persistence To prepare the application to accept a model, do the following: 1. From the Bold Handles component tab add a BoldModel, BoldSystemTypeInfoHandle and BoldSystemHandle to the Data Module. 2. Link the BoldModel property from BoldSystemTypeInfoHandle1 to BoldModel1. 3. Link the BoldSystemTypeInfoHandle property from BoldSystemHandle1 to BoldSystemTypeInfoHandle1. 4. From the Bold Persistence component tab add a BoldPersistenceHandleFileXML component to the data module. 5. Link the BoldModel property to the BoldModel component. 6. Link the PersistenceHandle property of BoldSystemHandle to the BoldPersistenceHandleFileXML component. Basic configuration Changes Initially in this example application we will use the following property values, set these in the Delphi property editor: Component: BoldSystemTypeInfoHandle1 Property: UseGeneratedCode Value: True This allows us to work directly with the model using Object Pascal. Page 5 of 42

; BoldSystemHandle1.System.UpdateDatabase; This ensures that any information entered at runtime will be saved to the XML file.")

6 Component: Property: Value: BoldPersistenceHandleFileXML1 FileName C:\HRData.XML Component: BoldSystemHandle1 Property: AutoActive Value: True This property results in the BoldSystemHandle1 opening the XML file and being ready for immediate use on application startup. Add the following event handler for the data module s OnDestroy event: procedure TBusinessModule.DataModuleDestroy(Sender: TObject); BoldSystemHandle1.System.UpdateDatabase; This ensures that any information entered at runtime will be saved to the XML file. Build the Model Double click the BoldModel component to open the Bold Model Editor. Set the model name to HRClasses as per Figure 2. Change models Unit name to HRClasses and Model root class value to HRClassesRoot. Change the BusinessClassesRoot classes name to HRClassesRoot. Default Model Figure 2: Model Properties Changing the models default values above should become a habit. Leaving the default names may cause problems in future projects. When generating Page 6 of 42

7 source code Bold for Delphi/Bold for C++ will search the current project directory, directories of other files in the project and the Delphi search path for files matching Unit name. If the file is found it will be overwritten. This is the desired behavior if the file is for the current project but can cause problems if working with multiple models in related projects. For the reason given above it is also a good idea to ensure the project is saved to a directory before generating code from your model. Construct the classes and set the properties as indicated: Figure 3: Basic Classes Page 7 of 42


8 And the attributes: Figure 4: Basic Attributes Page 8 of 42


9 And the associations: Figure 5: Basic Associations Page 9 of 42

10 Generating Pascal Code In the Bold Model Editor select Generate Code from the Tools menu. You will be prompted to confirm or change the default include file created to hold class definitions. Accept the default, HRClasses_Interface.inc name. You will then be prompted with a name for the unit to store class information, again accept the default. The generated code files will be loaded into the Delphi code editor as in Figure 6. The use of include files in the Bold framework is to ensure that code completion works correctly. The generated code files (*.pas & *_Interface.inc) should not be altered, as they will be overwritten on next code generation. Other generated code files (*.inc, excluding *_Interface.inc) will only be appended to; these are generated when using operations or derived attributes/relationships. Figure 6: Generated Code Page 10 of 42
11 It is interesting to have a look at the generated classes. Typed Lists Generated in HRClasses.pas Business Classes Figure 7: Class Hierarchy Figure 7 shows the class hierarchy for the project. The classes marked in a blue outline are the auto-generated classes in HRClasses.pas. You will notice for each class created that the Bold framework automatically creates a matching typed list. This allows for clean code when working with lists of objects and multi-relations, the full benefit of compiler type checking is available to your code. Bold for Delphi/Bold for C++ also maintains the model hierarchy allowing for normal Delphi/C++ class comparisons when working with objects in code. Adding a User Interface Simple Main Form To get the application up and running as soon as possible we will build a simple main form allowing us to edit the business objects. This will allow for testing of the design and a demonstration of a few Bold for Delphi/Bold for C++ features. To the MainForm.pas unit add BoldAFPDefault and BusinessLayer to the uses clause. The BoldAFPDefault unit allows Bold for Delphi/Bold for C++ to Page 11 of 42
12 automatically generate editor forms for the business objects that can be launched automatically from Bold-aware controls. The BusinessLayer unit allows the Bold Controls to see the model on the data module. From the Bold Handles component palette add 4 BoldListHandle components to the form. From the Bold Controls component palette add 4 BoldNavigator components and 4 BoldGrid components. Also add 4 standard Delphi Label & Bevel components to help keep everything in order. Use the following layout to position the controls. The caption of each label has been set to describe the control: BoldListHandle Label BoldNavigator BoldGrid Bevel For each group of controls set the following properties: Companies BoldListHandle Name: RootHandle: Expression: Enabled: BoldNavigator Name: BoldHandle: DeleteQuestion: Enabled: CompanyList BusinessModule.BoldSystemHandle1 Company.allInstances True CompanyNavigator CompanyList Delete Company? True Page 12 of 42
13 BoldGrid Name: CompanyGrid BoldHandle: CompanyList After setting the BoldHandle property, right-click on the grid and select Create Default Columns from the context menu. Departments BoldListHandle Name: DepartmentList RootHandle: CompanyList Expression: departments Enabled: True Using the CompanyList handle as the root handle allows the DepartmentList handle to create a master detail relationship. The expression department means that this list will automatically contain all departments linked to the currently selected company. BoldNavigator Name: BoldHandle: DeleteQuestion: Enabled: DepartmentNavigator DepartmentList Delete Department? True BoldGrid Name: DepartmentGrid BoldHandle: DepartmentList After setting the BoldHandle property, right-click on the grid and select Create Default Columns from the context menu. Employees BoldListHandle Name: EmployeeList RootHandle: DepartmentList Expression: employs Enabled: True Using the DepartmentList handle as the root handle allows the EmployeeList handle to create a master detail relationship. The expression employs means that this list will automatically contain all employees employed by the currently selected department. BoldNavigator Name: BoldHandle: DeleteQuestion: Enabled: BoldGrid Name: BoldHandle: EmployeeNavigator EmployeeList Delete Employee? True EmployeeGrid EmployeeList Page 13 of 42
14 After setting the BoldHandle property, right-click on the grid and select Create Default Columns from the context menu. All Objects BoldListHandle Name: RootHandle: Expression: Enabled: BoldNavigator Name: BoldHandle: DeleteQuestion: Enabled: ObjectList BusinessModule.BoldSystemHandle1 HRClassesRoot.allInstances True ObjectNavigator ObjectList Delete Object? True BoldGrid Name: ObjectGrid BoldHandle: ObjectList After setting the BoldHandle property, right-click on the grid and select Create Default Columns from the context menu. Page 14 of 42

15 Running The Application When you run the application add some entries for Company, Department and Employees. The main form will look similar to Figure 8. Default String Representation Deletes relationship only Figure 8: Basic Application at Runtime When you add a new department, using the BoldNavigator, Bold for Delphi/Bold for C++ will automatically establish the relationship with the company, likewise adding employees adds the relationship to departments. When you delete from the Company grid or the All Objects grid the object is deleted. When you delete from the Department or Employee grid the object is not deleted, but the relationship is unlinked. This change in behavior is the default when you cascade list handles. This can be changed by altering the BoldDeleteMode property of the TboldNavigator. It is possible to set this to dmunlinkallanddelete to force the actual deletion of the object. Double clicking a row will open the default editor for that object and allow drag and drop relationship linking. The all objects grid is interesting; here the Bold framework has created a column to display the type of the object and a column to display the object AsString. The AsString column is the string representation of the object. In the example the Bold framework has automatically used the lastname of employees to represent them but has created a mangled string for both Page 15 of 42


16 companies and departments. The reason for this is both the company and department classes don t have any attributes (they rely on inheritance). Since this is confusing we can tell Bold for Delphi/Bold for C++ how to represent the objects in a more human readable way. Default String Representation Figure 9 shows the settings for each class. By using an OCL expression a human readable identifier can be created for each class. For the Company class we simply use the company name as inherited from the Workplace class. For Department we grab the name of the company associated with the department, add a hyphen and append the department name. For the Employee class the aggregation of the firstname and lastname are used. Figure 9: Setting Default String Representation Page 16 of 42
 Before we move into write Pascal code let s add a new column to the department grid and display the manager for the")
17 This results in a much more readable display as shown in Figure 10. Figure 10: Application at Runtime (with readable object string representation) Before we move into write Pascal code let s add a new column to the department grid and display the manager for the department. 1. Right-click the DepartmentGrid and select Edit Columns. 2. Add a new column in the column editor 3. Set the BoldProperties.Expression parameter to manager (without the quotes). Now when you assign a manager to the department the employee will be displayed in the grid. Because the result of the expression manager actually returns an employee object, the Bold Grid will actually use the employee classes Default String Representation set earlier. This results in the employee s full name being displayed in the grid. (Hint: Use the default forms and drag and drop to set the manager for a department) Page 17 of 42
18 Using Code in Bold Applications Yet another powerful aspect of Bold for Delphi/Bold for C++ is the ability to use native Pascal objects for your business objects. When using traditional database programming the data has no type within the code you are writing (except for basic types like string or integer). When using the Generate Code functionality of Bold for Delphi/Bold for C++ you can use native Delphi classes that wrap the Bold Classes you have create in the Bold Modeler. The benefits of being able to do this are enormous in terms of: - Code readability. - Code maintainability. - Code accuracy. - Development speed. When coding with Bold for Delphi/Bold for C++ you inherently gain the benefit of Delphi s strong type-checking compiler. Delphi s integrated code editor prompts you with all your classes information via code completion. You code reads closer to the level of intent of what you are trying to achieve, that means code is a lot closer to becoming self documenting. Enhancing the application with code We are going to add a pop-up menu to the employee grid and add the ability to delete, add new and promote an employee to manager. 1) Add HRClasses to the MainForm s unit uses clause. This is required to allow using the Bold classes in the main form. 2) Add a TPopupMenu component to the form and set it s name to EmployeePopupMenu. 3) Set the EmployeeGrid s PopupMenu property to this new popup menu. 4) Add a menu item to the popup menu with the caption Make Manager. This sets up the basic framework for adding our code. Begin by setting the EmployeeGrid s OnContextPopup event with the following code: procedure TForm1.EmployeeGridContextPopup(Sender: TObject; MousePos: TPoint; var Handled: Boolean); // Enable/Disable Menu items depending if an Employee is // selected. MakeManager1.Enabled := Assigned(EmployeeGrid.CurrentBoldElement); This code controls the availability of the popup menu item depending on if an object is available in the appropriate grid. If no object is selected in a grid the grid s CurrentBoldElement property will return nil. If an object is selected this property will return that item as a TBoldElement, this is a base class for all classes created from the model, and all lists of classes as well. (Refer Figure 7 from earlier in this article). Page 18 of 42
19 Add an OnClick event handler for the Make Manager menu item. procedure TForm1.MakeManager1Click(Sender: TObject); var CurrentEmployee: TEmployee; // Check that the object is an Employee object and // assigned it to our local variable if EmployeeGrid.CurrentBoldElement is TEmployee then CurrentEmployee := TEmployee(EmployeeGrid.CurrentBoldElement); // Check if the employee works for a department and set the // employee as the manager if assigned(currentemployee.worksfor) then CurrentEmployee.worksFor.manager := CurrentEmployee; The comments in the code should be almost unnecessary. The power of working with native Pascal code is evident. Even the mundane task of validating the selection is simplified using the Delphi is operator and a typecast to a local variable. The shear simplicity of using a statement like CurrentEmployee.worksFor.manager := CurrentEmployee in terms of maintainability and readability is incredible. This can be read as For the current employee, set the manager of the department for which they work to that employee. It would be good object orientated design to move this code into the Employee class as an operation call Promote. Then any error checking would be encapsulated in one location and any business rules about managing the promotion process is abstracted from the presentation layer. Page 19 of 42
20 Introduction to Object lifecycles Many Bold controls support the creation and deletion of objects, for example the BoldNavigator used in the example application. Other methods exist to work with object creation and deletion as well. By using Delphi Code you can add special creation code to class operations or derived attributes, make use of the code in general GUI code, like buttons OnClick events. Bold for Delphi/Bold for C++ also support options within the model itself to help manage an objects lifecycle. Using Delphi Code Add two more menu items to the employee grid s popup menu with the captions Add New Employee and Delete Employee. Enhance the previously created Context Popup event of the Employee grid to include the following: procedure TForm1.EmployeeGridContextPopup(Sender: TObject; MousePos: TPoint; var Handled: Boolean); // Enable/Disable Menu items depending if an Employee is // selected. MakeManager1.Enabled := Assigned(EmployeeGrid.CurrentBoldElement); DeleteEmployee1.Enabled := Assigned(EmployeeGrid.CurrentBoldElement); // Enable/Disable Menu items depending if a department is selected. AddNewEmployee1.Enabled := Assigned(DepartmentGrid.CurrentBoldElement); Add on OnClick event handler for the Add New Employee menu item: procedure TForm1.AddNewEmployee1Click(Sender: TObject); var NewEmployee: TEmployee; CurrentDepartment: TDepartment; // Check that the object is a Department object and // assigned it to our local variable if DepartmentGrid.CurrentBoldElement is TDepartment then CurrentDepartment := TDepartment(DepartmentGrid.CurrentBoldElement); // Create a new Employee object in the default model (we are // only working with one model) NewEmployee := TEmployee.Create(CurrentDepartment.BoldSystem); // Set the department of the new employee to the current // department NewEmployee.worksFor := CurrentDepartment; Page 20 of 42
21 The key concept from this code is the ease of creating a new object; just create an instance of the class like any other Delphi object. Of course then you can proceed to use that object however you like. Deleting an object is just as easy; add the following code to the OnClick event of the Delete Employee menu item: procedure TForm1.DeleteEmployee1Click(Sender: TObject); var CurrentEmployee: TEmployee; // Check that the object is an Employee object and // Delete it if EmployeeGrid.CurrentBoldElement is TEmployee then TEmployee(EmployeeGrid.CurrentBoldElement).Delete; Model driven object life management Some common operations in Bold for Delphi/Bold for C++ support automatic maintenance of an objects existence. One of the properties of an association s role is Delete Action. This allows Bold to control how objects in the relationship are handled when the object is deleted. The following options are available: Allow: The object can be removed. In this case the links will be severed. Prohibit: TBoldObject.CanDelete will return false. An attempt to delete the object anyway will raise an exception. Cascade: The related objects will be deleted as well. <Default>: See below The default depends on the value of the Aggregation property: none: Allow aggregate: Prohibit composite: Cascade We will now enhance our model to allow Departments to delete all Employees it has, when it is deleted. Likewise a Company will delete all Departments when it is deleted. Change the Delete Action property for the Business Unit, departments role and the Employment, employs role to Cascade. Page 21 of 42


22 Figure 11: Business Unit, departments role Figure 12: Employment, employs role Now the model will automatically cleanup the designated objects. Run the application and checkout the change. Previously when deleting a department, the employees would still remain (visible in the All Object grid). Now they are correctly cleaned up. Page 22 of 42
23 Derived & Reverse Derived Attributes So far we have only use simple attributes within our application. Each attribute has been a basic type (string & currency) and saved/restored from the database. Similar to calculated fields in a traditional Delphi database application, in Bold for Delphi/Bold for C++ it is possible to calculate the value of an attribute on the fly. I say similar because Bold for Delphi/Bold for C++ extends the calculate field concept far beyond the capabilities of traditional Delphi database applications. The most significant difference is the ability to make a derived attribute writeable. This is called reverse derived. The process of enabling this functionality is simple in a Bold application. Adding the new attributes The new model will include a derived attribute on the Workplace class and a reverse-derived attribute on the Employee class. The Workplace class now includes the monthlycost attribute, which is then inherited and overridden, in both the Company and Department classes. The Employee class now includes the attribute fullname which, when changed, can make the appropriate changes to the firstname and lastname attributes. Figure 13 shows the updated UML model. Figure 13: UML Model including new attributes Page 23 of 42


24 Figure 14 shows the new attributes in the Bold Model editor. Figure 14: Adding the new attributes After adding the new attributes it is important to use the Generate Code menu option from the Bold Editor to ensure the correct procedure stubs are generated. After generating the code a new HRClasses.inc file is created and loaded in the IDE editor. The following method stubs are created for deriving and reverse deriving the employee s fullname: procedure TEmployee._fullName_DeriveAndSubscribe(DerivedObject: TObject; Subscriber: TBoldSubscriber); procedure TEmployee._fullName_ReverseDerive(DerivedObject: TObject); Methods are not created for the derived monthlycost attribute because we supplied an OCL expression. The expression returns a default value of zero; this will be overridden in each descendant class later. Page 24 of 42
25 Reversed Derived Add the following code for the employee s fullname attribute: procedure TEmployee._fullName_DeriveAndSubscribe(DerivedObject: TObject; Subscriber: TBoldSubscriber); // Set the fullname M_FullName.AsString := firstname + ' ' + lastname; // subscribe to notifications of either the first // or last name changing M_FirstName.DefaultSubscribe(subscriber); M_LastName.DefaultSubscribe(subscriber); procedure TEmployee._fullName_ReverseDerive(DerivedObject: TObject); var afullname: String; p: integer; // strip away leading and trailing spaces afullname := trim(fullname); // Check if a space was found p := pos( ' ', afullname ); if p <> 0 then // the first name is everything up to the first space // the last name is the rest firstname := copy( afullname, 1, p-1 ); lastname := trim(copy(afullname, p+1, maxint )); end else // No space found, the first name is everything, // the last name is set blank firstname := afullname; lastname := ; To understand what these methods are doing it is helpful to have a look at the declaration for the TEmployee class. The following has been stripped down to include on properties and methods important to the description of the above methods. TEmployee = class(thrclassesroot) protected procedure _fullname_deriveandsubscribe(derivedobject: TObject; Subscriber: TBoldSubscriber); virtual; procedure _fullname_reversederive(derivedobject: TObject); virtual; public property M_firstName: TBAString read _Get_M_firstName; property M_lastName: TBAString read _Get_M_lastName; property M_fullName: TBAString read _Get_M_fullName; property firstname: String read _GetfirstName write _SetfirstName; property lastname: String read _GetlastName write _SetlastName; property fullname: String read _GetfullName write _SetfullName; Page 25 of 42
26 From this you can clearly see the methods we have just entered (in the protected section). However, it s interesting to see that we seem to have a double up of properties for each attribute. For each property the Bold framework creates, it also creates the same property with a M_ prefix. This second property returns a special Bold object. This object is used to represent the base type of the property, as an object. The reasons Bold for Delphi/Bold for C++ creates these runtime information classes are many: - Allow for subscriptions to allow notifications when the value changes. - Cache old value so changes can be discarded without refreshing from the database. - Allow for fine-grained control of persistence at the attribute level. If first we look at the method declaration: procedure TEmployee._fullName_DeriveAndSubscribe(DerivedObject: TObject; Subscriber: TBoldSubscriber); Here we have to parameters, DerivedObject and Subscriber. The DerivedObject in this case is the internal TBAString object used to represent the fullname attribute. This is the same object return form the M_FullName property. In the code we have directly access the M_FullName as this is more readable, we could have typecast the DerivedObject object as a TBAString and worked with that if we chose. The Subscriber is the internal subscription object for this property, it is our responsibility to use this object to subscribe to any other object attributes that we need to know have changed. This subscription allows for the fullname property to respond to the change of firstname or lastname and correctly show the updated value. Setting the property value: M_FullName.AsString := firstname + ' ' + lastname; The employee s full name is simply the first name and last name separated with a space. M_FirstName.DefaultSubscribe(subscriber); M_LastName.DefaultSubscribe(subscriber); Here the subscriber for the fullname attribute attaches itself to the subscription mechanism for each of the other name attributes. If you run the application and use the default object form, you can see the read/write behavior of the new fullname attribute in action. Page 26 of 42

27 Derived Attributes with OCL In the decendant class of Workplace we can override the OCL for the monthlycost attribute. This allows for the full used of polymorphism by changing the behavior of the attribute for each descendant class. To override OCL derived attributes in Bold for Delphi/Bold for C++ place an entry in the Derived Expressions property of the class. This is shown in Figure 15. monthlycost=employs.monthlysalary->sum monthlycost=departments.monthlycost->sum Figure 15: Overriding derived OCL expressions The Derivation Expressions property of the class contains a string list of all the overridden derived OCL expressions. The format of each line is: <inherited attribute name>=<new OCL expression> Page 27 of 42

28 In the example above the Department class now calculates the monthlycost value as being the sum of all employee s salaries for that department. The Company class calculates the monthlycost value as being the sum of all monthly costs for each department. For both the Company and the Department grid we can add a new column and set the OCL expression to monthlycost. At runtime the screen will look similar to Figure 16. Figure 16: Derived Attributes at Runtime Page 28 of 42
29 Operations So far we have discussed attributes and relationships, another very important part of Bold for Delphi/Bold for C++ is Operations. Operations allow you to add behavior to your classes and are vital to allowing you to implement all the required business rules for an application. Operations are implemented using standard Delphi Object Pascal. They are the equivalent to methods in standard Delphi classes. Operations are used to implement tasks within your classes, like LightBulb.change. Adding an Operation Add the adjustsalary operation shown in the updated UML model in Figure 17. Figure 17: Adding an Operation The adjustsalary operation doesn t need to do anything in the base Workplace class. In both the Company and Department classes it will be overridden to supply different behavior for each class. Page 29 of 42
; procedure TCompany.adjustSalary(Percent: Integer); inherited; procedure TDepartment.")
; var counter: Integer; inherited; // Loop thru all departments and call // adjustsalary for each one for Counter := 0 to departments.")
30 Figure 18: Adding the adjustsalary Operation After adding the operation you will need to use Generate Code from the Tools menu. The following method stubs are added to HRClasses.inc. procedure TWorkplace.adjustSalary(Percent: Integer); procedure TCompany.adjustSalary(Percent: Integer); inherited; procedure TDepartment.adjustSalary(Percent: Integer); inherited; No behavior is required in the Workplace class so we will only add code to the Company and Department implementations. procedure TCompany.adjustSalary(Percent: Integer); var counter: Integer; inherited; // Loop thru all departments and call // adjustsalary for each one for Counter := 0 to departments.count -1 do departments[counter].adjustsalary(percent); Page 30 of 42
31 procedure TDepartment.adjustSalary(Percent: Integer); var counter: Integer; SalaryChange: Currency; inherited; // Loop thru all employee's and adjust their // salary for Counter := 0 to employs.count -1 do SalaryChange := employs[counter].monthlysalary * (Percent / 100); employs[counter].monthlysalary := employs[counter].monthlysalary + SalaryChange; To show the effect of this new operation we will add a pop-up menu to both grids and allow the user to adjust salaries. Add a new TpopupMenu to the form and call it SalaryPopupMenu. Set both the CompanyGrid and the DepartmentGrid to use this new poupmenu by setting the PopupMenu parameter of each grid. Add a private field to the form s class declaration: type TForm1 = class(tform) private { Private declarations } FCurrentWorkplace: TWorkplace; public { Public declarations } Add the following code to the OnContextPopup event of the DepartmentGrid: procedure TForm1.DepartmentGridContextPopup(Sender: TObject; MousePos: TPoint; var Handled: Boolean); // Initialize menu item and form private field AdjustSalary1.Enabled := False; FCurrentWorkplace := nil; // Check that the object is a Workplace object and // assigned it to our local variable if DepartmentGrid.CurrentBoldElement is TWorkplace then AdjustSalary1.Enabled := True; FCurrentWorkplace := TWorkplace(DepartmentGrid.CurrentBoldElement); Add the following code to the OnContextPopup event of the CompanyGrid: Page 31 of 42
32 procedure TForm1.CompanyGridContextPopup(Sender: TObject; MousePos: TPoint; var Handled: Boolean); // Initialize menu item and form private field AdjustSalary1.Enabled := False; FCurrentWorkplace := nil; // Check that the object is a Workplace object and // assigned it to our local variable if CompanyGrid.CurrentBoldElement is TWorkplace then AdjustSalary1.Enabled := True; FCurrentWorkplace := TWorkplace(CompanyGrid.CurrentBoldElement); Both of these events are very similar. They check that a valid Workplace is selected in the grid and assign it to the local form s private field FcurrentWorkplace. The popup menu can then use this. Add a menu item to the popup menu with the caption Adjust Salary. In the menu items OnClick event add the following code: procedure TForm1.AdjustSalary1Click(Sender: TObject); var PercentStr: String; PercentInt: Integer; // Ensure that the local form field is assigned // an object if assigned(fcurrentworkplace) then // Display a pop-up requesting the percent to // adjust the salaries by PercentStr := '10'; if InputQuery('Salary Adjustment', 'Enter adjustment percentage', PercentStr) then try // call the adjustsalaries method of with the supplied percent PercentInt := StrToInt(PercentStr); FCurrentWorkplace.adjustSalary(PercentInt); except on EConvertError do MessageDlg('Invalid Percent entered!', mterror, [mbok], 0); The above code works for both grids because we use the base class of the objects making the code type compatible. This is an enormous benefit in reducing redundant code and helps ensure code re-use. The method simply prompts for an adjustment percentage and calls the adjustsalary method of the object. If the object is a Company then the adjustsalary method of that class is used, if the object is a Department then that version of the method is used. Fortunately that fact doesn t need to be known by the popup code above, Object Pascal or C++ and the Bold framework take care of this for us. Page 32 of 42
33 Derived Relationships With the power of derived, reverse derived attributes and operations it is easy to see how extending a Bold for Delphi/Bold for C++ application to truly integrate business rules into the model is easy. Bold for Delphi/Bold for C++ can extend this even further by deriving relationships on the fly. The advantage of this is, as previously discussed, is reduced complexity, centralized business rules, ease of maintenance. This also reduces redundancy of data, sometime when implementing a database the rules of normalization are broken to accommodate reports or programming requirements. Data that can be easily derived from existing information is instead duplicated in one or more tables. This can result in problems as the application evolves or problems during normal operation ensuring the data is kept synchronized. By using derived relationships, the benefit of having the information readily available and without redundant data can help ease the application development and maintenance. Figure 19 shows two new relationships in our model, Workforce and Managed By. Figure 19: Derived Relationships Page 33 of 42


34 The Managed By relationship represents the manager for that employee; this is simply whoever is managing the department the employee works for. The Workforce relationship represents the employer of the employee; this is the company that owns the department that the employee works for. Adding the Managed By relationship Add the Managed By relationship as per Figure 20: Figure 20: Derived Relationship Managed By The OCL expression worksfor.manager will return the employee who manages the department the current employee works for. The OCL expression manages.employs will return a list of employees. This list is the combination of all employees that work for all the departments that the current employee manages. Page 34 of 42


35 This behavior can be observed at runtime using the Bold for Delphi/Bold for C++ object forms. Open an employee and drag a few departments into the manages tab. The employees tab now lists all employees for the departments managed by that employee. Adding the Workforce relationship Add the Workforce relationship as per Figure 21: Figure 21: Derived Relationship Workforce The behavior can easily be shown by using the default Bold for Delphi/Bold for C++ object forms at runtime. The new employee tab for the Company class shows all employees for all departments. The Employer field for the Employee class now shows the employer. Page 35 of 42
36 One-way Relationships We will now take a look at a one-way relationship, although not too different from what we have already done, it will give us an opportunity to explore some more of the options available with relationships. In the UML model in Figure 22 the relationship Top Salaries has been added. This provided an association from Workplace to Employee identifying highlypaidemployees. To help facilitate the use of this new relationship the attribute highsalarythreshold has been added to the Department class. Figure 22: One-way Relationship Page 36 of 42
 The role highlypaidemployees uses the OCL expression Employee.emptyList. This expression results in an empty list of type Employee objects.")


37 This is implemented in the Bold Model Editor as follows: Figure 23: Implementing Top Salaries The interesting items when implementing this association are: 1) The role highlypaidemployees uses the OCL expression Employee.emptyList. This expression results in an empty list of type Employee objects. The reason we use this expression is because the Class of the association is Employee. Even though Workplace is an abstract class, all descendant classes will inherit this association It is important that it returns a valid result if called. If the OCL expression were blank Bold for Delphi/Bold for C++ would create a method stub to allow you to create your own result in code. Because we will be overriding the result using OCL in descendants the expression above was required. 2) The role highpayingempoyer is not required in a business sense, indeed deriving a result really adds no value to the model at all. Having the role here is important because assigning the Class property to Workplace gives us the context for the other role. The trick to removing this otherwise useless role from appearing in the Employee class and generated code is to mark it as not Navigable. This was done by unchecking the Navigable checkbox. Page 37 of 42

38 At the moment the association offers no value, as it will always return an empty list. By overriding the OCL expression in descendant classes we can generate a list of Employee s. Add the following attribute to the Department class: Figure 24: Attribute highsalarythreshold This attribute will be used to determine which employees in a department are considered as having a high salary. This means we need to now override the implementation of highlypaidemployees in both the Company and Department classes. This is done by adding another entry to the Derivation Expression property of the two classes. Page 38 of 42

39 MonthlyCost=employs.monthlySalary->sum highlypaidemployees=employs->select(monthlysalary > self.highsalarythreshold) MonthlyCost=departments.monthlyCost->sum highlypaidemployees=departments.highlypaidemployees Figure 25: Derivation Expressions The OCL expression used for the Department class uses the highsalarythreshold attribute to determine which employees are considered as being highly paid. The Company class simply aggregates all the highly paid employees of it departments to provide a consolidated list. The behavior can be investigated using the Bold for Delphi/Bold for C++ object forms at runtime, however let s add a few more controls to give us a result on our main form. Figure 26 shows the enhanced main form at design time. Page 39 of 42


40 BoldTrackBar Figure 26: Enhancing the GUI From the Bold Handles component palette add a BoldListHandle component to the form. From the Bold Controls component palette add a BoldTackBar and a BoldGrid components. Also add a standard Delphi Label and a couple Bevel components to help keep everything in order. BoldListHandle Name: RootHandle: Expression: Enabled: HighlyPaidEmployeesList DepartmentList highlypaidemployees True Page 40 of 42
41 BoldTrackBar Name: BoldHandle: BoldProperties.Expression: BoldProperties.ApplyPolicy: Min: 0 Max: 5000 Frequency: 500 Enabled: True SalaryThresholdTrackBar DepartmentList highsalarythreshold bapchange BoldGrid Name: HighlyPaidEmployeesGrid BoldHandle: HighlyPaidEmployeesList After setting the BoldHandle property, right-click on the grid and select Create Default Columns from the context menu. Run the application. Choose a department and add several employees with a spread of monthly salaries between 0 and Now slide the trackbar, the Bold framework dynamically responds with the correct result in the grid. If you open the default editor for the Company and select the highlypaidemployees tab, you will see the highly paid employees for all departments. The beauty of the Bold framework is this list also dynamically updates as you move the slider. The synchronization methods of Bold for Delphi/Bold for C++ are extremely powerful and make creating loosely coupled forms easy. Page 41 of 42
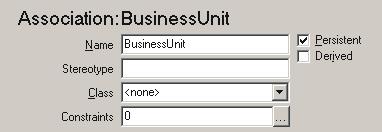
42 Constraints: A parting note An important aspect of Bold for Delphi/Bold for C++ is constraints. These are used to validate objects. Constraints can be specifically entered or implicit based on a relationship role. For example the role Company as part of the BusinessUnit association has a multiplicity of 1 specified. This means that every department must have a relationship with a company. However, as you can quickly check by running the application (prior to adding the cascade delete) that it is certainly possible to do so. It would be to limiting or impractical for the Bold framework to try and enforce this constraint automatically as almost certainly the resulting behavior won t suit your particular scenario. Bold for Delphi/Bold for C++ however provides the ability to test the constraints, even as part of the delete verification process for your objects. This is mentioned only because you may have been aware that certain aspects of the model were not being enforced in this way. However the Bold for Delphi/Bold for C++ constraint mechanism is powerful and fully assessable at runtime via code and Bold components. The subject of constraints will be addressed in a future article. Summary A lot of information has been presented in this article. The power of moving information about the application from the GUI and source into the model allows for a more precise definition of business rules. The centralized containment of business rule is a good way to ensure they are implemented in the application. Designing an application with the knowledge everything modeled can actually be implemented, without worrying about technical details such as DB schema, linked lists, updating queries and moving data from the GUI into the logic layer allows focus to stay on the domain problem at hand. Keeping focus on the domain problems, rather than implementation problems ensures energy is spent on the right issues. Bold for Delphi/Bold for C++ offers the most powerful assurance ever produced that your application is actually based on the model, and that the model will always accurately reflect the true implementation. Page 42 of 42
Starting with Bold for Delphi/Bold for C++ Part 1: Introducing the basics. By Anthony Richardson 31 October 2001 Revision 1.0
 Starting with Bold for Delphi/Bold for C++ By Anthony Richardson 31 October 2001 Revision 1.0 Contents OVERVIEW... 3 Introduction... 3 About the Author... 3 Acknowledgments... 3 Credits... 3... 3 GETTING
Workflow Templates in Compliance 360 Version 2018
 Workflow Templates in Compliance 360 Version 2018 Workflow Templates 5 Workflow Elements 6 Workflow Teams 6 Workflow Template Changes 6 Create or Edit a Workflow Template 8 Import and Export Workflow Templates
Getting started with Lazarus
 Getting started with Lazarus Michaël Van Canneyt March 4, 2006 Abstract Lazarus is a cross-platform 2-way RAD tool which can be used to develop almost any kind of program for Windows, Linux, Solaris or
Function. Description
 Function Check In Get / Checkout Description Checking in a file uploads the file from the user s hard drive into the vault and creates a new file version with any changes to the file that have been saved.
SSJS Server-Side JavaScript WAF Wakanda Ajax Framework
 1 28/06/2012 13:45 What You Will Find in those Examples In the Quick Start, you discovered the basic principles of Wakanda programming: you built a typical employees/companies application by creating the
A demo Wakanda solution (containing a project) is provided with each chapter. To run a demo:
 is provided with each chapter. To run a demo:") How Do I About these examples In the Quick Start, you discovered the basic principles of Wakanda programming: you built a typical employees/companies application by creating the datastore model with its
How Do I About these examples In the Quick Start, you discovered the basic principles of Wakanda programming: you built a typical employees/companies application by creating the datastore model with its
Premium POS Pizza Order Entry Module. Introduction and Tutorial
 Premium POS Pizza Order Entry Module Introduction and Tutorial Overview The premium POS Pizza module is a replacement for the standard order-entry module. The standard module will still continue to be
Analytics: Server Architect (Siebel 7.7)
") Analytics: Server Architect (Siebel 7.7) Student Guide June 2005 Part # 10PO2-ASAS-07710 D44608GC10 Edition 1.0 D44917 Copyright 2005, 2006, Oracle. All rights reserved. Disclaimer This document contains
Analytics: Server Architect (Siebel 7.7) Student Guide June 2005 Part # 10PO2-ASAS-07710 D44608GC10 Edition 1.0 D44917 Copyright 2005, 2006, Oracle. All rights reserved. Disclaimer This document contains
Lesson 1: Creating and formatting an Answers analysis
 Lesson 1: Creating and formatting an Answers analysis Answers is the ad-hoc query environment in the OBIEE suite. It is in Answers that you create and format analyses to help analyze business results.
Access Intermediate
 Access 2013 - Intermediate 103-134 Advanced Queries Quick Links Overview Pages AC124 AC125 Selecting Fields Pages AC125 AC128 AC129 AC131 AC238 Sorting Results Pages AC131 AC136 Specifying Criteria Pages
The Connector. Version 1.2 Microsoft Project to Atlassian JIRA Connectivity. User Manual
 The Connector Version 1.2 Microsoft Project to Atlassian JIRA Connectivity User Manual Ecliptic Technologies, Inc. Copyright 2008 www.the-connector.com Page 1 of 86 Copyright and Disclaimer All rights
Expense Management Asset Management
 Expense Management Asset Management User Guide NEC NEC Corporation November 2010 NDA-31136, Revision 1 Liability Disclaimer NEC Corporation reserves the right to change the specifications, functions, or
AADL Graphical Editor Design
 AADL Graphical Editor Design Peter Feiler Software Engineering Institute phf@sei.cmu.edu Introduction An AADL specification is a set of component type and implementation declarations. They are organized
Mobile Computing Professor Pushpedra Singh Indraprasth Institute of Information Technology Delhi Andriod Development Lecture 09
 Mobile Computing Professor Pushpedra Singh Indraprasth Institute of Information Technology Delhi Andriod Development Lecture 09 Hello, today we will create another application called a math quiz. This
Follow these steps to get started: o Launch MS Access from your start menu. The MS Access startup panel is displayed:
 Forms-based Database Queries The topic presents a summary of Chapter 3 in the textbook, which covers using Microsoft Access to manage and query an Access database. The screenshots in this topic are from
Xton Access Manager GETTING STARTED GUIDE
 Xton Access Manager GETTING STARTED GUIDE XTON TECHNOLOGIES, LLC PHILADELPHIA Copyright 2017. Xton Technologies LLC. Contents Introduction... 2 Technical Support... 2 What is Xton Access Manager?... 3
Exploring Microsoft Office Access Chapter 2: Relational Databases and Multi-Table Queries
 Exploring Microsoft Office Access 2010 Chapter 2: Relational Databases and Multi-Table Queries 1 Objectives Design data Create tables Understand table relationships Share data with Excel Establish table
Links to Activities ACTIVITY 4.1. Links to Activities Links to Activities
 ACCESS SUMMARIZING DATA AND CALCULATING IN FORMS AND REPORTS Section 4 Skills Use functions in a query to calculate statistics Summarize data in a crosstab query Summarize data in a PivotTable Summarize
HarePoint HelpDesk for SharePoint. User Guide
 HarePoint HelpDesk for SharePoint For SharePoint Server 2016, SharePoint Server 2013, SharePoint Foundation 2013, SharePoint Server 2010, SharePoint Foundation 2010 User Guide Product version: 16.2.0.0
Administrator's Guide
 Administrator's Guide EPMWARE Version 1.0 EPMWARE, Inc. Published: July, 2015 Information in this document, including URL and other Internet Web site references, is subject to change without notice. Unless
User Scripting April 14, 2018
 April 14, 2018 Copyright 2013, 2018, Oracle and/or its affiliates. All rights reserved. This software and related documentation are provided under a license agreement containing restrictions on use and
The Connector Version 2.0 Microsoft Project to Atlassian JIRA Connectivity
 The Connector Version 2.0 Microsoft Project to Atlassian JIRA Connectivity User Manual Ecliptic Technologies, Inc. Copyright 2011 Page 1 of 99 What is The Connector? The Connector is a Microsoft Project
This document is intended for Multilizer users that have been localizing software using component localization.
 Migration Tutorial Tutorial for migration of Delphi/C++Builder localization projects to Multilizer 6.0. Background This document is intended for Multilizer users that have been localizing software using
Aware IM Version 8.2 Aware IM for Mobile Devices
 Aware IM Version 8.2 Copyright 2002-2018 Awaresoft Pty Ltd CONTENTS Introduction... 3 General Approach... 3 Login... 4 Using Visual Perspectives... 4 Startup Perspective... 4 Application Menu... 5 Using
DSS User Guide. End User Guide. - i -
 DSS User Guide End User Guide - i - DSS User Guide Table of Contents End User Guide... 1 Table of Contents... 2 Part 1: Getting Started... 1 How to Log in to the Web Portal... 1 How to Manage Account Settings...
BE Share. Microsoft Office SharePoint Server 2010 Basic Training Guide
 BE Share Microsoft Office SharePoint Server 2010 Basic Training Guide Site Contributor Table of Contents Table of Contents Connecting From Home... 2 Introduction to BE Share Sites... 3 Navigating SharePoint
Access Intermediate
 Access 2010 - Intermediate 103-134 Advanced Queries Quick Links Overview Pages AC116 AC117 Selecting Fields Pages AC118 AC119 AC122 Sorting Results Pages AC125 AC126 Specifying Criteria Pages AC132 AC134
Presto 2.0. Using Presto Rules
 Presto 2.0 Using Presto Rules Table of Contents So, I Installed Presto. Now What? 3 Default Rules 3 What does this rule do? 5 Maxims 6 Scenario 1: Different Printers for Different Groups of Users 7 Tags
Teiid Designer User Guide 7.5.0
 Teiid Designer User Guide 1 7.5.0 1. Introduction... 1 1.1. What is Teiid Designer?... 1 1.2. Why Use Teiid Designer?... 2 1.3. Metadata Overview... 2 1.3.1. What is Metadata... 2 1.3.2. Editing Metadata
Contents. What's New. Version released. Newsletter #31 (May 24, 2008) What's New New version released, version 4.3.3
 What's New New version released, version 4.3.3") Campground Master Newsletter #31 (May 24, 2008) 1 Newsletter #31 (May 24, 2008) Contents What's New New version released, version 4.3.3 Q & A Retrieving credit card information Guarantee Info missing the
Campground Master Newsletter #31 (May 24, 2008) 1 Newsletter #31 (May 24, 2008) Contents What's New New version released, version 4.3.3 Q & A Retrieving credit card information Guarantee Info missing the
User Guide. Master Covers. Version Revision 1
 User Guide Master Covers Version 2.2.2 Revision 1 Table of Contents Bridge User Guide - Table of Contents 1 TABLE OF CONTENTS... 1 INTRODUCTION... 4 Guide... 4 MANAGING MASTER COVERS... 5 Guide... 5 Creating
Designing the staging area contents
 We are going to design and build our very first ETL mapping in OWB, but where do we get started? We know we have to pull data from the acme_pos transactional database as we saw back in topic 2. The source
M I C R O S O F T A C C E S S : P A R T 2 G E T T I N G I N F O R M A T I O N O U T O F Y O U R D A T A
 M I C R O S O F T A C C E S S 2 0 1 3 : P A R T 2 G E T T I N G I N F O R M A T I O N O U T O F Y O U R D A T A Michael J. Walk ALC Instructor michael@jwalkonline.org www.jwalkonline.org/main @MichaelJWalk
OneStop Reporting OSR Budgeting 4.5 User Guide
 OneStop Reporting OSR Budgeting 4.5 User Guide Doc. Version 1.3 Updated: 19-Dec-14 Copyright OneStop Reporting AS Contents Introduction... 1 Two Different Setup Strategies and Use of OSR Budgeting...
Importing source database objects from a database
 Importing source database objects from a database We are now at the point where we can finally import our source database objects, source database objects. We ll walk through the process of importing from
GOOGLE APPS. If you have difficulty using this program, please contact IT Personnel by phone at
 : GOOGLE APPS Application: Usage: Program Link: Contact: is an electronic collaboration tool. As needed by any staff member http://www.google.com or http://drive.google.com If you have difficulty using
User's Guide c-treeace SQL Explorer
 User's Guide c-treeace SQL Explorer Contents 1. c-treeace SQL Explorer... 4 1.1 Database Operations... 5 Add Existing Database... 6 Change Database... 7 Create User... 7 New Database... 8 Refresh... 8
MAPLOGIC CORPORATION. GIS Software Solutions. Getting Started. With MapLogic Layout Manager
 MAPLOGIC CORPORATION GIS Software Solutions Getting Started With MapLogic Layout Manager Getting Started with MapLogic Layout Manager 2008 MapLogic Corporation All Rights Reserved 330 West Canton Ave.,
Handbook: Carbonite Safe
 1 Important Things to Know... 4 Carbonite Features... 5 Setting Up and Installing... 6 Starting a Trial... 7 Installing Carbonite for the First Time... 7 Buying a Subscription... 8 Subscription Pricing...
EPM Live 2.2 Configuration and Administration Guide v.os1
 Installation Configuration Guide EPM Live v2.2 Version.01 April 30, 2009 EPM Live 2.2 Configuration and Administration Guide v.os1 Table of Contents 1 Getting Started... 5 1.1 Document Overview... 5 1.2
Excel Basics Rice Digital Media Commons Guide Written for Microsoft Excel 2010 Windows Edition by Eric Miller
 Excel Basics Rice Digital Media Commons Guide Written for Microsoft Excel 2010 Windows Edition by Eric Miller Table of Contents Introduction!... 1 Part 1: Entering Data!... 2 1.a: Typing!... 2 1.b: Editing
BASIC USER TRAINING PROGRAM Module 5: Test Case Development
 BASIC USER TRAINING PROGRAM Module 5: Test Case Development Objective Student will have an understanding of how to create, edit and execute a Test Case from Develop a Test Case Activity Page. Student will
ROCK-POND REPORTING 2.1
 ROCK-POND REPORTING 2.1 Installation and Setup Guide Revised on 09/25/2014 TABLE OF CONTENTS ROCK-POND REPORTING 2.1... 1 SUPPORT FROM ROCK-POND SOLUTIONS... 2 ROCK-POND REPORTING OVERVIEW... 2 INFRASTRUCTURE
Adobe Document Cloud esign Services. for Salesforce Version 17 Installation and Customization Guide
 Adobe Document Cloud esign Services for Salesforce Version 17 Installation and Customization Guide 2015 Adobe Systems Incorporated. All rights reserved. Last Updated: August 28, 2015 Table of Contents
Chapter 5 Object-Oriented Programming
 Chapter 5 Object-Oriented Programming Develop code that implements tight encapsulation, loose coupling, and high cohesion Develop code that demonstrates the use of polymorphism Develop code that declares
MAPLOGIC CORPORATION. GIS Software Solutions. Getting Started. With MapLogic Layout Manager
 MAPLOGIC CORPORATION GIS Software Solutions Getting Started With MapLogic Layout Manager Getting Started with MapLogic Layout Manager 2011 MapLogic Corporation All Rights Reserved 330 West Canton Ave.,
Ticketing Table of Contents:
 Table of Contents: Manage Tickets Configure 362 Chapter 8 - Sadjadi et al. Introduction While deployed agents provide extremely useful information regarding the state of all managed machine, facilitating
Logic Pro 7.1 Personal Manual by Edgar Rothermich <http://homepage.mac.com/edgarrothermich>
 Logic Pro 7.1 File Management (2005-0904) 1 of 9 File Management Logic Pro 7.1 Personal Manual by Edgar Rothermich EdgarRothermich@mac.com File Type Logic uses
Chapter 2 The Design Window
 Chapter 2 Objectives Chapter 2 The Design Window Learn about Crystal sections Move objects Use Toolbars, Icons, and Menus Format fields Add Special Fields Change a Group Use the Crystal Field Explorer
Working with Analytical Objects. Version: 16.0
 Working with Analytical Objects Version: 16.0 Copyright 2017 Intellicus Technologies This document and its content is copyrighted material of Intellicus Technologies. The content may not be copied or derived
Workspace Administrator Help File
 Workspace Administrator Help File Table of Contents HotDocs Workspace Help File... 1 Getting Started with Workspace... 3 What is HotDocs Workspace?... 3 Getting Started with Workspace... 3 To access Workspace...
Oracle is a registered trademark of Oracle Corporation and/or its affiliates. Other names may be trademarks of their respective owners.
 Primavera Portfolio Management 9.0 What s New Copyright 1999-2011, Oracle and/or its affiliates. The Programs (which include both the software and documentation) contain proprietary information; they are
Fast Track Model Based Design and Development with Oracle9i Designer. An Oracle White Paper August 2002
 Fast Track Model Based Design and Development with Oracle9i Designer An Oracle White Paper August 2002 Fast Track Model Based Design and Development with Oracle9i Designer Executive Overivew... 3 Introduction...
Visual Workflow Implementation Guide
 Version 30.0: Spring 14 Visual Workflow Implementation Guide Note: Any unreleased services or features referenced in this or other press releases or public statements are not currently available and may
Salesforce Lead Management Implementation Guide
 Salesforce Lead Management Implementation Guide Salesforce, Winter 16 @salesforcedocs Last updated: October 1, 2015 Copyright 2000 2015 salesforce.com, inc. All rights reserved. Salesforce is a registered
Extreme Installers: Slash The.NET Runtime Size in Half, Register Users Online
 Extreme Installers: Slash The.NET Runtime Size in Half, Register Users Online [reprint of article that appeared on the October 2005 issue of MSDN Magazine Europe] This article uses the following technologies:
Content Sharing and Reuse in PTC Integrity Lifecycle Manager
 Content Sharing and Reuse in PTC Integrity Lifecycle Manager Author: Scott Milton 1 P age Table of Contents 1. Abstract... 3 2. Introduction... 4 3. Document Model... 5 3.1. Reference Modes... 6 4. Reusing
Microsoft Excel Level 2
 Microsoft Excel Level 2 Table of Contents Chapter 1 Working with Excel Templates... 5 What is a Template?... 5 I. Opening a Template... 5 II. Using a Template... 5 III. Creating a Template... 6 Chapter
Enterprise Architect. User Guide Series. Time Aware Models. Author: Sparx Systems. Date: 30/06/2017. Version: 1.0 CREATED WITH
 Enterprise Architect User Guide Series Time Aware Models Author: Sparx Systems Date: 30/06/2017 Version: 1.0 CREATED WITH Table of Contents Time Aware Models 3 Clone Structure as New Version 5 Clone Diagram
Bean Wizard. User Manual. version UNIS, spol. s r.o. ALL RIGHTS RESERVED - 1 -
 Bean Wizard User Manual version 1.47 2005 UNIS, spol. s r.o. ALL RIGHTS RESERVED - 1 - CONTENTS 1. Introduction 4 2. Basic Terms 5 2.1. Inheritance 7 2.1.1. Inheritance scheme 8 2.1.2. Options of Methods
System Tools Manual. 10th November 2015
 vcomp Pty Ltd (ABN 39 103 040 311) PO Box 7356 Cloisters Square Perth WA 6850 Australia Manual 10th November 2015 Overview is collection of visual editors that allow the everyday Surpac user to leverage
Part II: Creating Visio Drawings
 128 Part II: Creating Visio Drawings Figure 5-3: Use any of five alignment styles where appropriate. Figure 5-4: Vertical alignment places your text at the top, bottom, or middle of a text block. You could
Table of Contents. Table of Contents
 Powered by 1 Table of Contents Table of Contents Dashboard for Windows... 4 Dashboard Designer... 5 Creating Dashboards... 5 Printing and Exporting... 5 Dashboard Items... 5 UI Elements... 5 Providing
Scorebook Navigator. Stage 1 Independent Review User Manual Version
 Scorebook Navigator Stage 1 Independent Review User Manual Version 11.2013 TABLE OF CONTENTS Getting Started... 1 Browser Requirements... 1 Scorebook Navigator Browser Compatability... 1 Logging in...
Bridge. Master Covers Guide. Version
 Bridge Master Covers Guide Version 2.5.103 Table of Contents Page i Table of Contents Table Of Contents I Introduction 1 Managing Master Covers 2 Creating a New Master Cover 2 Viewing and Modifying a Master
ORACLE USER PRODUCTIVITY KIT USAGE TRACKING ADMINISTRATION & REPORTING RELEASE SERVICE PACK 1 PART NO. E
 ORACLE USER PRODUCTIVITY KIT USAGE TRACKING ADMINISTRATION & REPORTING RELEASE 3.6.1 SERVICE PACK 1 PART NO. E17383-01 MARCH 2010 COPYRIGHT Copyright 1998, 2010, Oracle and/or its affiliates. All rights
Intraweb versus Morfik
 Intraweb versus Morfik Michaël Van Canneyt August 2, 2009 Abstract Intraweb - Currently at version 10 - has been around for quite some time. It is a mature technology, and as such can be expected to have
Logi Ad Hoc Reporting System Administration Guide
 Logi Ad Hoc Reporting System Administration Guide Version 12 July 2016 Page 2 Table of Contents INTRODUCTION... 4 APPLICATION ARCHITECTURE... 5 DOCUMENT OVERVIEW... 6 GENERAL USER INTERFACE... 7 CONTROLS...
Unit 3: Local Fields
 Unit 3: Local Fields Text Fields Questions Covered What are fields and how do we define them? How can we change the kinds of data we are collecting? What are the different data types available and how
VISUAL GUIDE to. RX Scripting. for Roulette Xtreme - System Designer 2.0. L J Howell UX Software Ver. 1.0
 VISUAL GUIDE to RX Scripting for Roulette Xtreme - System Designer 2.0 L J Howell UX Software 2009 Ver. 1.0 TABLE OF CONTENTS INTRODUCTION...ii What is this book about?... iii How to use this book... iii
Report Generation WorkFlow. Test-Cycle for Individual Instructors. BLUE Course Evaluation System. Hossein Hakimzadeh 5/12/2016
 Report Generation WorkFlow Test-Cycle for Individual Instructors BLUE Course Evaluation System By Hossein Hakimzadeh 5/12/2016 Modified 6/29/2016 (Making sure the minimum threshold is set to 3) Modified
OFSAA Extension Guidelines Model. January 2018
 OFSAA Extension Guidelines Model January 2018 Table of Contents TABLE OF CONTENTS 1 OBJECTIVE... 3 2 OVERVIEW OF OFSAA DATA MODEL... 4 3 STRUCTURE OF OFSAA DATA MODEL... 5 3.1 Common Staging Area... 5
12/05/2017. Geneva ServiceNow Security Management
 12/05/2017 Security Management Contents... 3 Security Incident Response...3 Security Incident Response overview... 3 Get started with Security Incident Response... 6 Security incident creation... 40 Security
Creating Icons for Leopard Buttons
 Creating Icons for Leopard Buttons Introduction Among the new features that C-Max 2.0 brings to the Ocelot and Leopard controllers, one of the more sophisticated ones allows the user to create icons that
Form into function. Getting prepared. Tutorial. Paul Jasper
 Tutorial Paul Jasper TABLE OF CONTENTS 1 Getting prepared 2 Adding a button to the form design 2 Making the button add tasks 3 Sending the XML data 4 Tidying up 5 Next time In the first episode, I showed
Microsoft Access XP (2002) - Advanced Queries
 - Advanced Queries") Microsoft Access XP (2002) - Advanced Queries Group/Summary Operations Change Join Properties Not Equal Query Parameter Queries Working with Text IIF Queries Expression Builder Backing up Tables Action
Microsoft Access XP (2002) - Advanced Queries Group/Summary Operations Change Join Properties Not Equal Query Parameter Queries Working with Text IIF Queries Expression Builder Backing up Tables Action
DREAMFACTORY SOFTWARE INC. Snapshot User Guide. Product Usage and Best Practices Guide. By Sathyamoorthy Sridhar June 25, 2012
 DREAMFACTORY SOFTWARE INC Snapshot User Guide Product Usage and Best Practices Guide By Sathyamoorthy Sridhar June 25, 2012 This document describes Snapshot s features and provides the reader with notes
SharePoint AD Administration Tutorial for SharePoint 2007
 SharePoint AD Administration Tutorial for SharePoint 2007 1. General Note Please note that AD Administration has to be activated before it can be used. For further reference, please see our Product Installation
Word 2016 Advanced. North American Edition SAMPLE
 Word 2016 Advanced Word 2016 Advanced North American Edition WORD 2016 ADVANCED Page 2 2015 Cheltenham Group Pty. Ltd. All trademarks acknowledged. E&OE. No part of this document may be copied without
Simple sets of data can be expressed in a simple table, much like a
 Chapter 1: Building Master and Detail Pages In This Chapter Developing master and detail pages at the same time Building your master and detail pages separately Putting together master and detail pages
Learn how to login to Sitefinity and what possible errors you can get if you do not have proper permissions.
 USER GUIDE This guide is intended for users of all levels of expertise. The guide describes in detail Sitefinity user interface - from logging to completing a project. Use it to learn how to create pages
PracticeMaster Report Writer Guide
 Copyright 2014-2015 Software Technology, Inc. 1621 Cushman Drive Lincoln, NE 68512 (402) 423-1440 Tabs3.com Tabs3, PracticeMaster, and the "pinwheel" symbol ( ) are registered trademarks of Software Technology,
Microsoft Dynamics GP. This paper provides guidance for ISV products that integrate with Inventory transaction posting.
 INTEGRATE Microsoft Dynamics GP Integrating with the Historical Inventory Trial Balance White Paper This paper provides guidance for ISV products that integrate with Inventory transaction posting. Date:
OBIEE. Oracle Business Intelligence Enterprise Edition. Rensselaer Business Intelligence Finance Author Training
 OBIEE Oracle Business Intelligence Enterprise Edition Rensselaer Business Intelligence Finance Author Training TABLE OF CONTENTS INTRODUCTION... 1 USER INTERFACE... 1 HOW TO LAUNCH OBIEE... 1 TERMINOLOGY...
Object Persistence Design Guidelines
 Object Persistence Design Guidelines Motivation Design guideline supports architects and developers in design and development issues of binding object-oriented applications to data sources The major task
Eclipse Plug-in for AccuRev User s Guide Version April 2012
 Eclipse Plug-in for AccuRev User s Guide Version 2012.1 April 2012 Revised 4/16/12 Copyright AccuRev, Inc. 1995 2012 ALL RIGHTS RESERVED This product incorporates technology that may be covered by one
The undo stack and reusing the memento pattern
 The undo stack and reusing the memento pattern Michaël Van Canneyt March 31, 2009 Abstract In a previous contribution, the memento pattern was introduced. In this article, the memento pattern is used in
Table of Contents. Introduction. Section 1
 Table of Contents Introduction... 1 Section 1... 1 Goals... 2 Integration... 2 Debug Data Types... 3 User Defined Port... 3 Progress... 3 Integration... 3 Debug Data Types... 4 Issues... 4 Section 2...
Oracle Communications Session Delivery Manager
 Oracle Communications Session Delivery Manager Administration Guide Release 7.3 Formerly Net-Net Central December 2013 Copyright 2013, 2012 Oracle and/or its affiliates. All rights reserved. This software
InsightUnlimited Upgrades Best Practices. July 2014
 InsightUnlimited Upgrades Best Practices July 2014 InsightUnlimited Version: 2012.2 and above Document Version: 1.1 Last Updated: July 29, 2014 Table of Contents Introduction... 4 Overview... 4 Audience...
GGR 375 QGIS Tutorial
 GGR 375 QGIS Tutorial With text taken from: Sherman, Gary E. Shuffling Quantum GIS into the Open Source GIS Stack. Free and Open Source Software for Geospatial (FOSS4G) Conference. 2007. Available online
As your databases continue to evolve, you will need to incorporate advanced queries and reports. This chapter addresses how to create and use action
 As your databases continue to evolve, you will need to incorporate advanced queries and reports. This chapter addresses how to create and use action queries and how to create queries that perform more
Table Basics. The structure of an table
 TABLE -FRAMESET Table Basics A table is a grid of rows and columns that intersect to form cells. Two different types of cells exist: Table cell that contains data, is created with the A cell that
System Architect Essentials I. EXERCISE GUIDE (v. 7.1)
") System Architect Essentials I EXERCISE GUIDE (v. 7.1) Copyright 2015 Pegasystems Inc., Cambridge, MA All rights reserved. This document describes products and services of Pegasystems Inc. It may contain
System Architect Essentials I EXERCISE GUIDE (v. 7.1) Copyright 2015 Pegasystems Inc., Cambridge, MA All rights reserved. This document describes products and services of Pegasystems Inc. It may contain
EDAConnect-Dashboard User s Guide Version 3.4.0
 EDAConnect-Dashboard User s Guide Version 3.4.0 Oracle Part Number: E61758-02 Perception Software Company Confidential Copyright 2015 Perception Software All Rights Reserved This document contains information
Instructions for Using the Databases
 Appendix D Instructions for Using the Databases Two sets of databases have been created for you if you choose to use the Documenting Our Work forms. One set is in Access and one set is in Excel. They are
Simple Factory Pattern
 Simple Factory Pattern Graeme Geldenhuys 2008-08-02 In this article I am going to discuss one of three Factory design patterns. The Factory patterns are actually subtle variations of each other and all
Identity Manager 4 Package Manager Lab
 Identity Manager 4 Package Manager Lab NIQ16 Novell Training Services ATT LIVE 2012 LAS VEGAS www.novell.com Legal Notices Novell, Inc., makes no representations or warranties with respect to the contents
Inheritance and Polymorphism
 Object Oriented Programming Designed and Presented by Dr. Ayman Elshenawy Elsefy Dept. of Systems & Computer Eng.. Al-Azhar University Website: eaymanelshenawy.wordpress.com Email : eaymanelshenawy@azhar.edu.eg
Moover Salesforce CPQ Reference Data Deployment Guide
 Moover Reference Data Deployment Guide Copyright 2018 Prodly, Inc. All rights reserved. Prodly and Moover are trademarks of Prodly, Inc., as are other names and marks. and other names are trademarks of