FORMAX Series Folder/Inserters OPERATOR'S MANUAL FIRST EDITION
|
|
|
- Marylou Booker
- 6 years ago
- Views:
Transcription
1 FORMAX 6000 Series Folder/Inserters OPERATOR'S MANUAL FIRST EDITION
2
3 INTRODUCTION The Formax 6000 Series Folder/Inserters are designed to fold your documents, insert them into envelopes and seal the envelopes. Small size documents may be inserted alone, without being folded. They may also be added to larger folded documents. The machine operation is automatic, quick and user-friendly. Folder/inserters can be used to send invoices, mailshots, payrolls, daily mail, etc. The information provided in this manual will help you to optimize the functioning and output of your machine. Following are the folder/inserter main characteristics: - One or two automatic feeders for large documents including 8 1/2" x 7", 8 1/2" x 11" and 8 1/2" x 14" documents. - Up to two automatic feeders (depending on the model) for small size documents (inserts smaller than the main envelopes). - One document manual feeder. - Inserting documents into envelopes of various sizes including #10, #9 and 6" x 9" with or without a window. - Inserting into the same envelope various sheets from the same feeder, such as invoices printed on several sheets. - Stores up to 20 job applications for frequent or re-occuring mailings. - Automatic adjustment of the folding dimensions. - Adjustment assistance in the form of a simple and interactive control panel. - Automatic detection of double documents on the automatic feeders. - Automatic detection of double documents, based on the principle of electronic measurement of the thickness insensitive to the paper opaqueness. - Easy to use feeding system and simple jam clearing operations. - Jam clearing assistance based on the control panel and the software functions. - Compact with an appearance that fits easily in with the office environment. STANDARD In order to comply with standards EN60950 and UL1950, this equipment must be connected to standard installations of the construction industry. As regards the protection of the internal wiring, a two-pole protection is required against 5 Amp. current surges. This equipment is in accordance with standard EN55022, Class A, EN55024, and FCC part 15. INSTALLATION The equipment should be installed very close to a grounded mains outlet easy of access and protected by a 16 Amp. fuse. CAUTION: NEVER REMOVE THE MACHINE COVERS.
4
5 TABLE OF CONTENTS SECTION A: GENERAL PRESENTATION 1 1. MACHINE 1 2. CONTROL PANEL 2 3 OPENING THE MACHINE 5 4 INSIDE VIEW 5 SECTION B : PRACTICAL FUNCTIONS 7 1. INSTALLATION AND PUTTING INTO SERVICE Installation of the feeders Removal of the feeders Filling the tank Putting into service User mode (access) Language selection Maintenance Servicing mode (access) Supervisor mode OPERATION User mode Quick access job Selection of a stored job Job check Starting the job Modification of a job Creation of a job Counters Countdown counter Supervisor mode Length of flap moistening Adjustment of the document alignment (feeders B and C) Position of the address and adjustment of the folds Position of the address Adjustment of the folds Detection of double documents General remarks Enabling and disabling the double document
6 detection DOCUMENT FEEDING Document feeding in the manual mode (feeder A) Document feeding in the automatic mode (feeders B and C) Envelope feeding (feeder E) Feeding of inserts and reply envelopes (feeder F) Feeding of inserts and reply envelopes (feeder D) 24 SECTION C: ASSISTANCE AND RECOMMENDATIONS TROUBLE SHOOTING JAM CLEARING Document Path Envelope path Insert path Inserting area 39 3 CLEANING Cleaning of the rollers Cleaning Procedure Drying Cleaning of the casing 47 SPECIFICATIONS 49 Symbols used Indicates an essential piece of information that should not be overlooked. Signals a delicate issue. Indicates an interesting idea or a tip. Illustration through an example.
7 SECTION A: GENERAL PRESENTATION 1. MACHINE Detail of rear view 1 : Knurled knob (see Section C, 2.3. "Insert Path") 12 : Left door (access to the moistener and the insert path). 2 : Knurled knob (see Section C, 2.3. "Insert Path") 13 : ON/OFF switch. 3 : Control (see Section C, 2.3. "Insert Path") 14 : Mains outlet. 4 : Feeder A (document manual feeder) 15 : Control panel 5 : Document guide. 16 : Machine opening button 6 : Feeder B (automatic document feeder - sheet by sheet). 17 : Guide locking envelopes 7 : Feeder C (optional automatic document feeder - sheet by sheet) 18 : Feeder E (envelopes feeder) 8 : Feeder D (optional feeder for inserts and reply envelopes). 19 : Envelopes guides 9 : Feeder F (feeder for inserts and reply envelopes). 20 : Envelope and insert pressure units 10 :Right door for access to feeder F. 21 : Document pressure unit button 11 : Insert guide locking. 22 : Document guide locking button 1
8 2. CONTROL PANEL 2

9 Main Menu Screen The main menu screen is one of the guide screens. When the machine remains unused for a long period, the standby screen appears as follows, to return to the initial screen press any key. Standby Screen 3

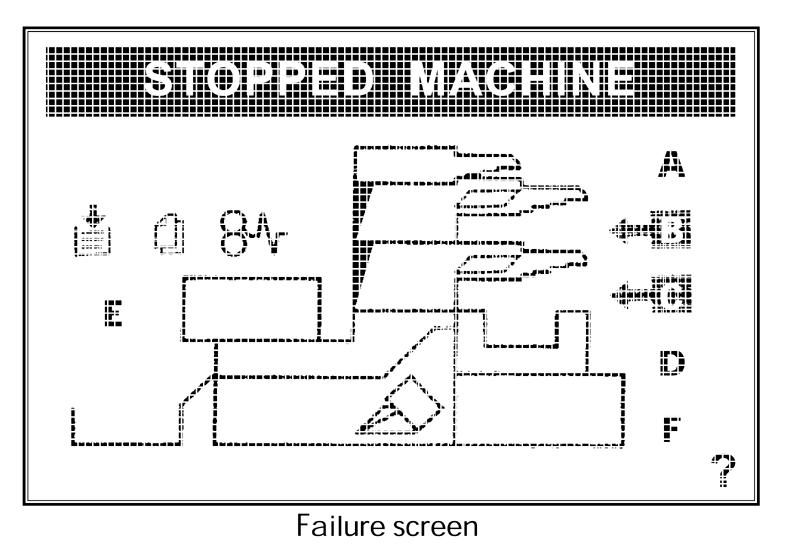
10 Job Information Screen Failure Screen 4
11 3. OPENING THE MACHINE - (A) : Press machine opening button (16). - (B) : Lift the top of the machine (including the feeders fastened toit). - (C) : To close push down on the top of the machine until it snaps. 4. INSIDE VIEW 5
12 6
13 SECTION B : PRACTICAL FUNCTIONS 1. INSTALLATION AND PUTTING INTO SERVICE Installation of the feeders Removal of the feeders Filling the tank Putting into service User mode (access) Language selection Maintenance Servicing mode (access) Supervisor mode OPERATION User mode Quick access job Selection of a stored job Job check Starting the job Modification of a job Creation of a job Counters Countdown counter Supervisor mode Length of flap moistening Adjustment of the document alignment (feeders B and C) Position of the address and adjustment of the folds Position of the address Adjustment of the folds Detection of double documents General remarks Enabling and disabling the double document detection DOCUMENT FEEDING Document feeding in the manual mode (feeder A) Document feeding in the automatic mode (feeders B and C) Envelope feeding (feeder E) Feeding of inserts and reply envelopes (feeder F) Feeding of inserts and reply envelopes (feeder D) 24 7
14 8
15 1. INSTALLATION AND PUTTING INTO SERVICE 1.1 Installation of the feeders Noted that the procedure is roughly the same regardless of the feeder selected (the example below represents feeder C). - Switch the machine off, - Insert the two positioning pins into the notches provided for this purpose on the machine. - plug in the connector: - flip up the feeder and lower it. 9
16 1.2 Removal of the feeders - Switch the machine off. - Lift the feeder. - Remove the connector (see previous figures). - Flip up the feeder in order to be to take it out of the notches (see previous figures) and remove it. 1.3 Filling the tank Open the machine and the left-hand door in order to have access to the tank and fill it with the container provided. Note: Do not use distilled water. 1.4 Putting into service To turn the machine on, press the button at the rear of the machine. At power up, the below lead-in screen is displayed on the control panel. ENGLISH 10

17 At the top of the screen, a time-filling bar scrolls. Then a countdown starts at the bottom of the screen. When the "ESC" key is pressed during the countdown, the machine prompts you to select one of the following options: language, maintenance, servicing mode or supervisor mode. CONFIGURATION MENU User mode (access) If no key is pressed at the end of the countdown, the screen displays the main menu. You may use the machine, in accordance with the displayed indications Language selection - To modify the display language, turn the machine off, then turn it on after a few seconds. - During the countdown press the "ESC" key. - Select LANGUAGE and validate using the "OK" key. - Select a language in the list available and confirm your choice using the "OK" key. - Press the "MENU" key to display the general menu. 11
18 1.4.3 Maintenance See section C, "Cleaning Procedure" Servicing mode (access) This mode cannot be accessed by the user, it is designed for the technical services Supervisor mode Commonly used, the supervisor mode gives access to the advanced settings of the machine, as described below: - Inserting position, - Flap moistening length, - Aligning of documents from feeders B and C, - Activation of double document detecting function. This mode is protected by an access code that your servicing agent may provide you. In order to access the supervisor mode, turn the machine off, then turn it on after a few seconds. When the countdown appears under the machine diagram, press the "ESC" key. Select SUPERVISOR and confirm the selection by pressing the "OK" key. Enter the supervisor code and confirm by pressing the "OK" key. 2. OPERATION To operate this machine you must properly input your application data: - What documents and what envelopes do you want to use? - How do you want to combine and fold your documents? This data is stored in the machine as jobs corresponding to each use. Fill the feeder(s) according to the job to be carried out (see Document feeding ). You may use the machine as follows: - In the user mode, which provides a wide range of basic functionalities or - In the supervisor mode (or expert user) offering a wider range of functionalities. You will be supported and guided at every step of the operation, via both an on-line assistance and icons displayed on the control screen. 12

19 2.1 User mode From the MAIN MENU, you may: - Start the quick access job mentioned at the top of the Main Menu. - Select another job stored into the machine. - Create a new job. - Check the counters Quick access job If the name of the quick access job corresponds to the job you wish to perform, load, as may be required, the envelopes, documents, inserts and reply envelopes in automatic feeders E, B, C and F. Then, follow the directions displayed on the control panel. In order to check the content of the job, choose "SELECT A JOB" and press twice on the "OK" key (to confirm that you want to check the quick access job). At this stage, select "VERIFY THE JOB" and confirm by pressing the "OK" key. After checking, go back to the general menu by pushing the "ESC" key Selection of a stored job Choose "SELECT A JOB" and confirm by pressing the "OK" key. Using selection keys and, scroll through the numbers and names of the jobs and select the job required. Confirm your choice by pressing the "OK" key. 13


20 You are now in the starting menu of the selected job: You may: - Start the job, - Check the content of the job, - Modify the job, - Adjust the countdown counter Job check Select "VERIFY THE JOB" and confirm by pressing the "OK" key. 14

21 When the "?" key is pressed, a short description of the job is displayed: After verification press the "ESC" key to get back to the previous menu. For a more detailed check of the job content, select "MODIFY THE JOB" and confirm by pressing the "OK" key. Thus, you will go through the job definition by pressing on the "OK" key after each screen, until the END OF PROGRAMMMING MENU, which offers the job storage selection. At any time, you may get back to the previous screen, by pressing on the "ESC" key up to the starting menu of the selected job Starting the job Load the appropriate feeders with your documents and follow the directions displayed on the control panel screen Modification of a job Select "MODIFY THE JOB" and confirm by pressing the "OK" key. In order to modify the job, select the descriptions displayed that match your application. To do so, use the selection keys and confirm by pressing the "OK" key. At every step of the modification procedure, you can get back by pressing the "ESC", in order to make different selections. At the end of the modification procedure, run a test cycle to verify the application. 15
22 If the modification meets your requirements, you can store the job either under the same number and the same name as the initial job (if it is not protected; see supervisor mode) or under a different number and/or name. No job can be performed if it is not stored Creation of a job From the MAIN MENU, select "CREATE A JOB" and confirm by pressing the "OK" key. Using the selection keys and "OK" key, select the descriptions displayed that match your application. You will then be able to create a new job. At every step of the creation, you may get back by pressing the "ESC" key, in order to make different selections. At the end of the creation procedure run a test cycle to verify the application. If the job meets your requirements, you can store it under the number and name you wish (apart from the protected job numbers). No job can be performed if it is not stored Counters The machine is equipped with the below counters: - A counter of cycles per job. Counters can be reset either individually or all at once. - A counter totaling the counters of cycles per job. - A cycle counter totaling all the machine cycles Countdown counter (Batch Counting) The machine can operate by counting down the documents, provided that the number of documents to be processed has been previously set. To select the quantity, use keys and and confirm by pressing "OK". The Unlimited Quantity selection is designed for continuous operation. When the countdown counter is selected, the countdown value is displayed on the CURRENT CYCLE screen. 16
23 2.2 Supervisor mode Length of flap moistening This setting is used to adjust the moistening area on the envelope flap. It is necessary that the moistening operation be suited to the flap shape or to the envelope thickness. This setting applies independently to any of the jobs. Therefore, envelopes with special flaps may be processed in different jobs. ACTIONS: - Inadequate moistening area (flap not moistened on the sides): increase the moistening area (bring the beginning of the moistening closer, using arrow ). - Moistening area too large (documents get damp, water splashes into the machine): reduce the moistening area (move the beginning of the moistening away, using arrow ). Note: If the moistening amount varies slightly with the liquid level, It is advisable to make the setting with the liquid tank half-full Adjustment of the document alignment (feeders B and C) This adjustment is designed to align the bottom edges of the sheets from feeders B and C. It applies independently to any of the jobs. The user is able to adapt the alignment of sheets from feeders B and C to the paper weight. 2.3 Position of the address and adjustment of the folds The machine folds the documents automatically, based on both the dimensions and the envelope size. 17
24 2.3.1 Position of the address If the address is not properly positioned with respect to the envelope window, its position may be adjusted using the appropriate menu. The menu may be accessed via the program end menu of the job modification Adjustment of the folds If the user requires specific folds, they may program the fold dimensions via menu "fold customization" (see "modification of a job"). Note: When inserting several documents from the same feeder into an envelope, be sure to adjust the folds so that the upper portion of the folded document is slightly (1 mm) longer than the lower portion. 2.4 Detection of double documents General remarks The double document detection prevents any risk of taking two documents from the same feeder and inserting them unintentionally into one envelope. In order to optimize the system efficiency, we recommend you: - Do not to place documents of various thicknesses and qualities into the same feeder. - Carefully jog the sheets in order to obtain a neat and squared stack, - Adhere to both the specifications of admissible documents and the storage requirements Enabling and disabling the double document detection Double document detection may be enabled or disabled separately for each document feeder (B and C) and each insert feeder (D and F), either for all the jobs or for each job individually fulfilled. Feeders for which double document detection is activated are identified by a symbol. If no double document detection is enabled, No appears under the symbol. Note: The activation and de-activation of double document detection is only possible in the supervisor mode.the double document detection should be deactivated in the below operating cases: -Documents of variable thicknesses. -Documents having a weight greater than 120 g/m². -Reply envelopes. 18
25 3. DOCUMENT FEEDING 3.1 Document feeding in the manual mode (feeder A) - Draw apart guides (5), - Place the documents between the guides and adjust the guides to fit the width of the documents, To start up the cycle: - Put the document (with the address side facing upward and the top of the page on the right side), - Push the document into the feeder entry, the machine will start immediately. 3.2 Document feeding in the automatic mode (feeders B and C) - Avoid mixing in the same feeder documents of different qualities. - In case of documents particularly difficult to process (uneven, smooth, rough or sticky), use the half capacity of the feeder. - Decollate the sheets by bending the stack of paper prior to placing it into the feeder, - Align the edges of the stack by jogging it on a flat surface. - To insert several sheets from the same feeder: place the sheets into the bin, in the reverse order. 19
26 - Release the guides by rotating button (22) to the horizontal position, - Insert the document stack into the feeder. The documents should be positioned with the address side facing up and the top of the page to the right, - Jog the document stack using guides (5) and lock it in position by setting button (22) again to the vertical position, - Rotate the pressure unit button (21), then push the document stack into the bottom of the feeder, - Release the pressure unit button (21), which will get back to its initial position. 3.3 Envelope feeding (feeder E) - Release the envelope guides (19) by rotating the button (17) to the horizontal position, - Draw apart the guides (19), - Decollate the envelopes and jog the sides of the stack, - Pull the pressure unit (20), 20
27 - Insert the envelopes vertically into the feeder with the flap at the top and facing towards the inside of the machine. - Bring the guides (19) close to the envelopes without pressing the envelopes too tightly, - Lock the guide position by resetting button (17) to the vertical position, - Push the pressure unit against the envelopes. Note: Whenever you feed envelopes, make sure that the guides are properly adjusted, i.e. that the guides are close to the envelope stack without pressing it too tightly 21
, select the envelope (left-hand) or insert (right-hand) position, Release the guides by pressing on control (24) and draw them apart by pulling the control towards you.")
28 3.4 Feeding of inserts and reply envelopes (feeder F) - To open the right door, pull towards the left top towards you. - Using selector switch (25), select the envelope (left-hand) or insert (right-hand) position, Release the guides by pressing on control (24) and draw them apart by pulling the control towards you. - Press on the pressure unit control (23) and slide the stack of inserts (or reply envelopes) inside the feeder. 22
29 - Push the stack of inserts (or reply envelopes) to the left side, against the wall. - Push the guide control (24) against the inserts (or reply envelopes), without pressing them too tightly. - Release the pressure unit (23). Note: Whenever you carry out a feeding operation, make sure that the guides are properly adjusted, i.e. that the guides are close to the stack of inserts (or reply envelopes) without pressing it too tightly. Special cases: Reply envelopes with no window: Flap at the top (or at the bottom) and faces towards the inside of the machine. Reply envelopes with a window: Not recommended. 23
 - Release guides (5) by rotating button (11) to the horizontal position. - Draw guides (5) apart.")
30 Pre-folded insert: Outer fold at the top facing towards the inside of the machine. Reply envelopes and inserts: Place the reply envelopes into the feeder D, and place the inserts into the feeder F. 3.5 Feeding of inserts and reply envelopes (feeder D) - Release guides (5) by rotating button (11) to the horizontal position. - Draw guides (5) apart. - Decollate the inserts (or reply envelopes) and jog the sides of the stack. - Pull the pressure unit (20). 24
 to the vertical position. - Push the pressure unit (20) back against the inserts (or reply envelopes).")
31 - Place the inserts (or reply envelopes) in the vertical position, into the feeder. - Bring guides (5) close to the inserts (or reply envelopes) without pressing them too much. - Lock the guide position by setting button (11) to the vertical position. - Push the pressure unit (20) back against the inserts (or reply envelopes). Note: Whenever you carry out a feeding operation, make sure that the guides are properly adjusted, i.e. that the guides are close to the stack of inserts (or reply envelopes) without pressing it too tightly. 25
 of the machine.")

32 Special cases: Reply envelopes with no window: - Flap at the bottom and facing towards the inside (or towards the outside) of the machine. Reply envelopes with a window: - Flap at the top and facing towards the inside of the machine. Pre-folded insert: - Outer fold at the bottom and facing towards the inside of the machine. If required, flatten the fold before feeding the insert 26
33 SECTION C: ASSISTANCE AND RECOMMENDATIONS 1. TROUBLE SHOOTING JAM CLEARING Document Path Envelope path Insert path Inserting area 39 3 CLEANING Cleaning of the rollers Cleaning Procedure Drying Cleaning of the casing 47 27
34 28
35 1. TROUBLE SHOOTING Note: In the event of an incident, the machine will trie to eject the document, in order to start up again immediately. Consult the help option via "?" for further information. Display / symptom Possible cause Solution Error in the job selection. Select the appropriate job. Jam in the inserting area (if the fault occurs frequently). Job ill suited to the documents handled. Envelopes or documents are not up to specifications or out of shape. Envelopes, inserts, reply envelopes fed n the wrong direction. Envelope or document- guides are not properly adjusted. Rollers of feeders B, C, D, E, F whether for insertion or folding, are dirty. Insert path unlocked. Check and/or adjust: - the fold dimensions - the alignment of the documents from feeders B and C - the inserting position. If required, straighten manually the document (envelope) shape. See section B Document feeding. See section B Document feeding. Clean the rollers of the insertion and folding feeders. See section C "Cleaning of the rollers". See section C Insert path. Jam in the document, insert or envelope path (if the fault occurs frequently). Jam in the document, insert or envelope path (if the fault occurs frequently). (contd.) Document path unlocked. Envelopes, inserts, reply envelopes fed in the wrong direction. D o c u m e n t s, envelopes, inserts not up to specifications or out of shape. Rollers of document, insert, envelope feeder are dirty. See section C Document path. See section B Document feeding. See section C Specifications. See section C Cleaning of the rollers. 29
36 Display / symptom Possible cause Solution Envelope or document guides See section B "Document are not properly adjusted. feeding". Jam in the document, insert or envelope path (if the fault occurs frequently). (contd.) Job ill-suited to the processed documents. The lower roller is wet. Select the appropriate job. See section C "Cleaning of the rollers". Jam in the document exit area Stacker full. Empty the stacker. Documents, inserts, envelopes do not go through the machine. Two documents or inserts are taken at the same time (if the default occursfrequently). Dummy double: the machine stops and the fault is displayed although there is no double document taken (if the fault occurs frequently). Wrong positioning of the address in the envelope window. Document not properly inserted. The guides are not properly adjusted. Documents, inserts or envelopes not up to specifications or out of shape. Rollers of document, insert, envelope feeder are dirty. Documents,envelopes, inserts arenot up to specifications,are out of shapeor are of different qualities. Documents, envelopes, inserts are not up to specifications, are out of shape or are of different qualities. The folds are not properly adjusted. Poor adjustment of the document alignment (feeders B and C). See symptom "Jam in the inserting area". See section B "Document feeding". See section C "Specifications". If required, straighten manually the document (envelope) shape. See section C "Cleaning of the rollers". See section C "Specifications" and section B "Document feeding". If required, straighten manually the document (envelope) shape. Process documents individually. See section C "Specifications" and section B "Document feeding". You may also use the machine in the graceful degradation mode with the double document detection deactivated. See sectionb "Double document detection". Adjust the positionof the address.see section B "Position of the address". See section B "Adjustment of the document alignment". 30
37 Display / symptom Possible cause Solution Significant document shift Poor adjustment of the See section B "Adjustment of (feeders B and C). documents (feeders B and C). the document alignment". The letters are left unsealed or are not properly sealed. The jam clearing doors of the feeders are not properly closed. The documents are not up to the specifications or are out of shape. The rollers of feeders B and C are dirty. The moistening tank is empty. The documents, inserts or envelopes are not up to the specifications (too many sheets). The folds are not up to requirements. The moistening area is too small. The document is not properly inserted. Close the doors properly. See section C "Jam clearing". See section C "Specifications" and section B "Document feeding". If required, straighten manually the document shape. See section C Cleaning of the rollers. See section B "Filling the tank". See section C "Specifications". See section B "Adjustment of the folds" and "Jobcheck". See section B "Length of flap moistening". See symptom "Jam in the inserting area". The letter content is damp. Moistening area too wide See section B "Length of the flap moistening". Folding significantly askew. The operating rate gets slower or irregular. The exit roller is wet. Rollers of feeders B, C, D, E, F or folding rollers are dirty. The guides are not properly adjusted. Documents, inserts or envelopes not up to specifications or out of shape. Wipe the exit roller (see section C "Cleaning of the rollers"). See section C "Cleaning of the rollers". See section B "Document feeding". See section C "Specifications". If required, straighten manually the document (envelope) shape. 31
. Job unavailable. \" DOCUMENT TREATMENT ERROR\" Other faulty conditions. The feeder is empty.")
38 Display / symptom Possible cause Solution The operating rate gets slower Rollers of document, insert, See section C Cleaning of the or irregular. (contd.) envelope feeder are dirty. rollers. All the stored settings are lost. Double document detection unavailable on the specified feeder(s). Job unavailable. " DOCUMENT TREATMENT ERROR" Other faulty conditions. The feeder is empty. The water tank is empty. The backup battery is used up. Double document detection is faulty. The hardware configuration is no more suited to the job. The feeder is disconnected. A processing error appears. See section B "Document feeding". See section B "Filling the tank". Replace the battery and call the after sales service. Switch the machine off and on. If the fault persists, you may operate the machine without the double document detection. Call the service to bring this function again into service. See section B "Installation of the feeders". Remove all the documents placed or introduced inside the machine. Close the machine and press on key "OK" to continue. Switch the machine off and on 2. JAM CLEARING In the event of a jam, you will find a dual assistance, namely: - The outline of the machine is displayed on the control screen and the area concerned is indicated for servicing operations. - When depressing the? key, a help message appears to describe the actions to be undertaken. Note: Follow the instructions displayed on the control screen. 32
39 2.1 Document Path Feeders A, B and C As the area concerned is identified on the screen by symbol, To clear the jam: - Open the door of the specified feeder. - Remove the document. - Close the door. Document lower path In case of jam in the document lower path, follow the below procedure: - Lift the envelope feeder (18), - Unplug the connector, - Remove the envelope feeder 33
40 - Open the access door and remove the document, - Plug in the connector again and put the envelope feeder back in place. 2.2 Envelope path Upper path of the envelopes In case of jam in the upper path of the envelopes, follow the below procedure: - Lift the envelope feeder (18), - Unplug the connector, - Remove the envelope feeder 34
41 - remove the jammed envelope and if required, open the access door, - plug in the connector again and put the feeder back in its place. Lower path of the envelopes In case of a jam occurring in the lower path of the envelopes, follow the procedure below: - Open the machine - Lower the flap, - Remove the jammed envelope, - Make sure that the guides on either side of the flap are properly positioned. - Close the machine. 35
42 2.3 Insert path Main path of inserts in feeders D and F In case of a jam occurring in the main path of inserts in feeders D and F, follow the procedure below: - Open fully the machine and then open the right-hand and the lefthand doors, - Rotate the two knurled knobs 1 and 2 until the jammed insert is visible and remove it. - If it is not possible to move forward the insert by rotating the knurled knobs, unlock the insert path by turning the control 3 to the left. This will lower the platform, - Remove the jammed insert, - Close the machine and the two doors. Note: Set the machine to its initial position (vertical) in order to avoid any further jam. Note: If the insert cannot be reached, remove it from the upper path of feeders D or F (see following paragraphs). 36
43 Upper path of inserts in feeder D In case of a jam occurring in the upper path of inserts in feeder D, follow the procedure below: - Lift the feeder (8). - Unplug the connector. - Remove the feeder. - Remove the jammed insert. - Plug in the connector again and fit the feeder again. 37
44 Upper path of inserts (or reply envelopes) in feeder F In case of a jam occurring in the upper path of inserts (or reply envelopes) in feeder F, follow the procedure below: - Open the right-hand door. - Lower the pressure unit with the stack of inserts (or reply envelopes) by pressing the appropriate control. - Remove the insert (or reply envelope) jammed in the rollers, - Release the pressure unit and put the stack of inserts (or reply envelopes) back in its place, - Check the guide adjustment. 38
45 2.4 Inserting area In case of a jam occurring in the inserting area, follow the procedure below: - Open the machine, - Remove the jammed document (or envelope), - When a document is jammed on the small bar: - Push the small bar control and remove the small bar by moving it in the direction of the arrow. - Remove the jammed document. 39

.")
46 - To reinstall the small bar, first insert the bar in its recess and then fit the bar control in the small bar recess. Caution: be sure to lock the control in the proper position - Close the machine. - Make sure that there is no document in the folding pocket. - If the fault signal does not go off, make sure that there is no document in the "document path" ( 2.1). Folding pocket In case of a jam occurring in the folding pocket, follow the procedure below: - Open the left-hand door, - Depress the pocket opening control, - Remove the jammed document, 40
47 - Close the left-hand door. 3 CLEANING 3.1 Cleaning of the rollers Cleaning the machine on a regular basis will: - Improve the feeding of the document, insert and envelope feeders. - Reduce jam risks, - Protect the roller rubber. Note: To clean your machine, you will have to stop it for a while, in particular for the drying of the rollers, which requires at least 10 minutes. During a cleaning operation, we recommend you to clean the whole machine (feeders used and folding rollers). This will optimize the functioning of your machine. It is essential to empty the documents from all the feeders (including the envelopes) prior to any cleaning procedure; otherwise, you will not have access to the cleaning screen. Be sure to check the F feeder (concealed feeder). 41
48 When does your machine need to be cleaned? Element Clogging symptoms Action Feeder A, Band C Feeder E Feeder D and F Folding and inserting rollers The documents go through the machine with difficulty. Shift between feeder B and feeder C, jams. The envelopes go through the machine with difficulty, jams. The documents go through the machine with difficulty. Dummy double documents in feeder D or F. Jams during insertion, folding significantly askew. Letter not sealed properly. Procedure 1 Procedure 2 Procedure 3 Letter exit roller Presence of water on the letter. Procedure 4 Preparation of the cleaning kit Introduce the rod into the holes of the cleaning sheet. Note: The same sheet can be used once for cleaning all the feeders Cleaning Procedure - Switch off the machine, - Switch on the machine and wait for twenty seconds, - When the countdown appears under the machine diagram, Press on "ESC", - Select "MAINTENANCE" and confirm by "OK", - Empty all the feeders and confirm by "OK", in order to have access to the cleaning menu (Be sure to check feeder F). 42

49 Note: It is essential to remove all the documents from the feeders (including the envelopes) prior to starting up a cleaning operation; otherwise, you will not have access to the cleaning menu. PROCEDURE 1 : FEEDER B OR C This procedure is designed to clean simultaneously all the rollers of the selected feeder. - Position the cleaning sheet in the feeder as for any standard document, making certain that the rod is facing outwards. - Take back the rod against the front of the feeder. - Select the feeder to be cleaned on the control panel, using the arrows ( et ); - Press on start/stop. - When the machine stops, remove the cleaning sheet by pulling it towards the outside of the machine. At this stage, you can proceed to the cleaning of another feeder. 43
50 PROCEDURE 2: FEEDER D, E OR F This procedure is designed to clean simultaneously all the rollers of the selected feeder. - Position the cleaning sheet into the feeder as for any standard document. Then, move the rod so as to make it bear towards the front of the feeder. Note: When cleaning feeder D, be careful to place the left side of the rod on the top of the feeder. Beginning the cleaning cycle with the rod in the incorrect position may affect the proper functioning of the machine. 44
 and insert the cleaning sheet into the feeder (with the rod and the 1/3 fold on the top) making sure that its left edge is")

51 - Unlock the guides by pressing on control (24) and draw them fully apart by pulling the control. - Fold the sheet to one third of its length. - Press the pressure unit button (23) and insert the cleaning sheet into the feeder (with the rod and the 1/3 fold on the top) making sure that its left edge is against the wall. - Insert the rod thoroughly at the top. - Fix the rod on the front side, at the top. - Release the pressure unit button (23). - Select the feeder to be cleaned, then press "START/STOP" - When the machine stops, remove the cleaning sheet by pulling it towards the outside of the machine, then proceed to clean another feeder. 45
52 PROCEDURE 3: FOLDING ROLLERS Open the machine and simultaneously rub the three folding rollers and the two inserting rollers with a cloth impregnated with a multipurpose cleaning product. Dry with a dry cloth. Note: After cleaning, the rollers should be mat, as any bright traces are the sign of residual dirt. 46
53 PROCEDURE 4: LETTER EXIT ROLLER Clean the roller with a cloth impregnated with a multi-purpose cleaning product: - The roller protective coating - The letter exit roller - The letter exit trim - The covering panel Dry it with a dry cloth Drying After cleaning the machine, we recommend you to wait for 10 minutes at least, to let the rollers dry completely. Production can be resumed, after this 10-minute period. It is however advisable to pass through the machine a few blank documents so as not to stain your original documents with residual traces of product. To return to the user mode, depress the "MENU" key. 3.2 Cleaning of the casing Clean the casing of the machine with a damp cloth and a slightly soapy solution. 47
54 48
55 SPECIFICATIONS Documents - Manuel feeding A Width of the document : 140 to 216 mm (5.5" to 8.5") Height of the document : 178 to 356 mm (7" to 14") Standard size : USA: "letter" 8 1/2"x11" (216 x 279 mm) other countries: A4 (210 x 297 mm) Paper quality and grammage Coated paper : Other qualities (printer, listing, photocopy, offset, recycled) : Stapled documents allowed Max. number of sheets : 90 to 150 g/m² (24 to 40 lb) 60 to 120 g/m² (16 to 32 lb) 5 sheets up to 120 g/m² (32 lb) of coated paper or up to 80g/m² (20 lb) for other qualities Documents - Automatic feeder B and C Width of the sheets : 140 to 225 mm (5.5" to 8.86") Height of the sheets : 178 to 356 mm (7" to 14") Standard size : USA: "letter" 8 1/2"x11" (216 x 279 mm) other countries: A4 (210 x 297 mm) Quality and grammage of the sheets: Coated paper : 90 to135 g/m² (24 to 36 lb) Other qualities (printer, listing, photocopy, offset, recycled) : 60 to 120 g/m² (16 to 32 lb) Feeder capacity : 250 sheets of 80 g/m² (20 lb) Envelopes - Envelope feeder E Width of the envelopes : Height of the envelopes : 160 to 175 mm (6.30" to 6.89") and 220 to 243 mm (8.66" to 9.57") 104 to 165 mm (4.09" to 6.5") Small envelope recommended size : USA, Canada: #10 (4 1/8" x 9 1/2") other countries: C6/5 ou DL 49
56 (114 x 229 mm) Large envelope recommended size : USA, Canada: 6" x 9" other countries: C5 (162 x 229 mm) Height of the flap : 30 to 48 mm (1.18" to 1.90") Shape of the flap : rounded trapezoid Opening of the throat in center : 9 to 28 mm (.35" to 1.10") Grammage of the envelopes : 75 to 90 g/m² (20 to 24 lb) Feeder capacity : 250 envelopes of 80 g/m² (24 lb) Small size documents - Feeders D and F Reply envelopes Width of the envelopes : Height of the envelopes : 140 to 226 mm (5.5" to 8.90") 90 to 110 mm (3.54" to 4.33") Special US sizes : 3 5/8" x 6.5" # 9 (3 7/8" x 8 7/8") Height of the flap : 30 to 48 mm (1.18" to 1.90") Grammage of the envelopes : 75 to 90 g/m² (20 to 24 lb) Simple inserts Width of the sheets : 140 to 226 mm (5.5" to 8.90") Height of the sheets : 84 to 153 mm (3.31" to 6") Quality and grammage of the sheets : Printer, listing, offset, paper board, coated, glazed or mat Feeder D : 80 to 250 g/m² (24 to 65 lb) Feeder F : 80 to 170 g/m² (24 to 45 lb;used simultaneously with feeder D). Other applications: 80 to 250 g/m² (24 to 65 lb). Shaped inserts (A4 documents or "letter" folded in 2 or 3, documents of 14" folded in 4) Width of the folded documents : 140 to 226 mm (5.5" to 8.90") Height of the folded documents : 84 to 153 mm (3.31" to 6") Quality and grammage of the sheets : Printer, photocopy,offset: 80 to 120 g/m² (20 to 32 lb) Coated paper: 90 to 135 g/m² (24 to 36 lb) using simultaneously feeders D and F. Other applications: 90 to 170 g/m² (24 to 45 lb). 50

57 Recommended clearance for the document in the envelope Capacity of insert feeder D: Reply envelopes* and inserts : 250 Capacity of insert feeder F: Reply envelopes* and shaped inserts : 100 Simple inserts : 250 *As regards reply envelopes with a window, we recommend you to use feeder D. Folding and inserting capacity Grammage and max. number of sheets in simultaneous insertion : Grammage and max. number of sheets in multiple insertion : up to 5 sheets of 80 g/m² (24 lb) folded in 2 or in 3, or 3 sheets of 80 g/m² (24 lb) with the addition of an insert and a reply envelope up to 3 sheets of 80 g/m² (24 lb) folded in 2 or in 3 (depending on the quality of the document), or up to 2 sheets of 80 g/m² (24 lb) folded in 2 or in 3 with the addition of a sheet, an insert and a reply envelope. 51
58 Number of programmable job : 20 Rate Max. rate in operation : Capacity of the letter stacker: Capacity of the moistening liquid: up to 2200 documents/hour depending on the operating mode up to 150 envelopes. 0,310 dm3 (18.92 in3) Dimensions Width without the letter stacker : 750 mm (29.53") Width with the letter stacker : 860 mm (33.86") Depth : 525 mm (20.67") Height with manual feeding and feeder B : 472 mm (18.58") Height with manual feeding and feeder B and C : 565 mm (22.24") Weight Empty weight with all options : Acoustic noise ISO kg (101 lb) Acoustic pressure at the operator station in automatic insertion 1 sheet : 70 dba Environment Mains voltage - 50 Hz version : 230 V +10% -10% - 60 Hz version : 120 V +6% -10% Average power requirement in operation : 330 W Power requirement in standby : 25 W Ambient temperature in operation : 15 C à 35 C Max. ambient air humidity in operation : 20% HR à 70% HR Safety and quality certifications : UL, CE, FCC 52
59
USER'S GUIDE FOLDING AND INSERTING MACHINE
 USER'S GUIDE FOLDING AND INSERTING MACHINE INTRODUCTION Your folding and inserting machine enables you to fold documents, insert them into envelopes and seal the envelope flaps. Small format documents
FD 6102 Low-Volume Inserter
 FD 6102 Low-Volume Inserter Operator Manual 9/2011 First Edition TABLE OF CONTENTS 1 Health, Safety and Environment... 2 1.1 Precautions and Safety Issues... 2 1.2 Country Specific Conditions... 3 1.3
MX-8000 User Manual MX Rev
 MX-8000 Rev. 070202 Greeting Thank you for purchasing PAITEC USA products. This manual is prepared to provide guidelines on how to properly operate and maintain MX-8000. Copyright Any of the contents should
OPERATOR MANUAL ENGLISH
 OPERATOR MANUAL ENGLISH 1 2 CONTENTS Section Page Section Page 1 Precautions 5 8.3 Cleaning the brushes 25 1.1 Special national conditions 5 8.4 Cleaning the moistening felt 25 2 General 6 8.5 Cleaning
Inserting system. FPi FPi FPi Title english Operator s Manual
 Inserting system FPi 5020 FPi 5040 FPi 5060 Title english Operator s Manual FPi 5000 Operator controls Operator controls Figure 9 10 11 1 2 3 4 5 6 7 8 19 14 13 12 20 18 17 16 15 2 21 21 24 23 22 2 Legend
FORMAX Series Folder/Inserters OPERATOR MANUAL FIRST EDITION
 FORMAX 6600 Series Folder/Inserters OPERATOR MANUAL FIRST EDITION CONTENTS Section Page Section Page 1 Precautions 5 8.5 Feeding documents 39 1.1 Special national conditions 5 9 MaxiFeeder 39 2 General
Laser Beam Printer. User's Guide
 Laser Beam Printer User's Guide Contents Turning the Printer ON/OFF (For 5910/5910F).......................... 3 Turning the Printer ON.................................................. 3 Turning the Printer
OPERATOR MANUAL ENGLISH
 OPERATOR MANUAL ENGLISH 1 2 CONTENTS Section Page Section Page 1 Precautions 5 8 Extended PowerFold 1.1 Special national conditions 5 (Optional) 41 2 General 5 8.1 General 41 2.1 Understanding the machine
6402 Series Inserters
 6402 Series Inserters 5/2007 OPERATOR MANUAL FIRST EDITION TABLE OF CONTENTS 1 Health, Safety and Environment... 3 1.1 Precautions and Safety Issues... 3 2 Functional Description... 6 2.1 Overview...
6602 Series Inserters
 6602 Series Inserters 8/2007 OPERATOR MANUAL FIRST EDITION TABLE OF CONTENTS 1 Health, Safety and Environment... 4 1.1 Precautions and Safety Issues... 4 2 Functional Description... 7 2.1 Overview... 7
User Guide. Incoming System IM-16
 User Guide Incoming System IM-16 3 MINUTESTOSET UP ANDDISCOVER Overview of the letter opener 1 3 2 4 5 9 6 8 7 1. Power cable 2. Extension arm 3. I/O button 4. Transport rollers 5. Pressure arm 6. User
Read this First...1 Warning...1 About this manual...1 Safety...2 Country Specific Conditions...3 End of Life...4
 Table of Contents 1 2 3 Read this First...1 Warning...1 About this manual...1 Safety...2 Country Specific Conditions...3 End of Life...4 Meet your Document System...5 Power Up...5 Overview...5 Control
Domino One-Pocket Currency Discriminator
 Domino One-Pocket Currency Discriminator H This manual contains important information on safety measures and operational features of the Kolibri Domino 1-pocket currency discriminator. Please read it carefully
K Service Source. StyleWriter
 K Service Source StyleWriter K Service Source Basics StyleWriter Basics Introduction - 1 Introduction The StyleWriter is a serial bubble jet ink-on-demand printer. The StyleWriter prints up to 1/3 page
fi-4120c Image Scanner
 P3PC-E007-01EN fi-4120c Image Scanner Cleaning and Maintenance 5 DAILY CARE This chapter describes how to clean the scanner. WARNING When cleaning the scanner, turn off the power, and unplug the AC cable
K Service Source. Color StyleWriter 2200
 K Service Source Color StyleWriter 2200 K Service Source Basics Color StyleWriter 2200 Basics Overview - 1 Overview The Color StyleWriter 2200 is a desktop color bubblejet printer for personal use. It
Datacard CR500 Instant Issuance System. User Reference Guide. July Rev B
 Datacard CR500 Instant Issuance System User Reference Guide July 2015 527495-001 Rev B Datacard CR500 User Reference Guide The CR500 Instant Issuance System Contents The CR500 Instant Issuance System The
Loading paper and specialty media Learning about the printer. Stop all printer activity. 7 Back button Return to the previous screen.
 Quick Reference Use the 6 Stop or Cancel button To Stop all printer activity. Loading paper and specialty media Learning about the printer Using the printer control panel 0 Use the 9 To Display View the
MONARCH 9416 XL QUICK REFERENCE
 MONARCH 9416 XL QUICK REFERENCE This Quick Reference contains ribbon loading, supply loading, and general care, maintenance, and troubleshooting procedures for the 9416 XL Thermal Direct and 9416 XL Thermal
EPSON ActionLaser Read This First. eepa POLLUTION PREVENTER
 EPSON ActionLaser 1400 Read This First eepa POLLUTION PREVENTER This booklet is to help you set up your printer and begin printing quickly. It also gives you instructions for routine maintenance. If you
ImageScan Pro 800ix Series High-Speed ADF Scanner. Installation and Setup Guide. Installation and Setup Guide
 ImageScan Pro 800ix Series High-Speed ADF Scanner Installation and Setup Guide Installation and Setup Guide Box Contents: 1. Scanner 2. USB Cable 3. AC Adapter 4. Stacker Tray 5. Installation Guide 6.
Scroll through menus or move between screens and menu options. Increase the numeric value of an option or setting being displayed. Save settings.
 Quick Reference Learning about the printer Use the 5 Right arrow button To Scroll through menus or move between screens and menu options. Increase the numeric value of an option or setting being displayed.
Installing the Printer Software
 4 Printing Your First Page Attaching the Paper Support 7 1 Checking the Printer 6 2 Plugging in the Printer 3 Installing the Ink Cartridges 5 Installing the Printer Software Connecting the Printer 4012581-00
6206 Series Low-Volume Desktop Inserters
 6206 Series Low-Volume Desktop Inserters 3/2013 OPERATOR MANUAL Table of Contents 1 2 3 Read this First...1 Warning...1 About this manual...1 Safety...2 Country Specific Conditions...3 End of Life...4
Lexmark X203n and X204n Series. Maintenance Guide
 Lexmark X203n and X204n Series Maintenance Guide February 2011 www.lexmark.com Contents...3 Cleaning the exterior of the printer...3 Cleaning the scanner glass...4 Cleaning the ADF separator rollers...5
APPENDIX FOLDING AND INSERTING MACHINE SI 68
 APPENDIX FOLDING AND INSERTING MACHINE SI 68 MAXIFEEDER MF-2 OPERATOR MANUAL 1. FUNCTION The MaxiFeeder is intended to be used for Business Reply Envelopes (BRE), but also "standard" documents can be processed
CDP Laser Print Solution PRINTING TIPS for Lexmark Laser Printers using Fiserv data
 CDP Laser Print Solution PRINTING TIPS for Lexmark Laser Printers using Fiserv data ISSUE POSSIBLE CAUSE SOLUTION Forms printing to the wrong tray Default paper source could be set to the wrong tray At
Getting started. JetScan 150. Currency scanner. User guide
 Getting started JetScan 150 Currency scanner User guide 1 Safety information, power specifications High voltage inside. Risk of electric shock. Turn power OFF and unplug power cord from machine before
6404 Series Mid-Volume Inserter
 6404 Series Mid-Volume Inserter OPERATOR MANUAL 2/2012 Table of Contents 1 Read this First...1 Warning...1 About this manual...1 Safety...2 Country Specific Conditions...3 End of Life...4 2 Meet your Document
3.1 Removal Procedures Removing EF-102 from the Main Body Removing Parts from the Tray
 Contents 1 Introduction 1.1 Introduction... 1-2 1.2 Safety Precautions... 1-3 1.2.1 Notices for Safety... 1-3 1.2.2 Precautions When Replacing Units... 1-4 1.2.3 Caution Labels and Indicators... 1-6 2
Quick Installation Guide
 Quick Installation Guide Prior to installation This equipment must be installed on a piece of furniture or desk near a 220V power socket. Align the front of the machine with the edge of the desk in order
6204 Series Low-Volume Desktop Inserter
 6204 Series Low-Volume Desktop Inserter 7/2012 OPERATOR MANUAL Table of Contents 1 Read this First...1 Warning...1 About this manual...1 Safety...2 Country Specific Conditions...4 End of Life...5 2 Meet
BINDOMATIC 101 DFS Document Finishing System
 BINDOMATIC 101 DFS Document Finishing System Operator s Manual Version 2 (2003-02-17) Contents 1. Safety instructions... 3 2. Installation... 4 3. Description... 5 4. How to use the Bindomatic 101 DFS...
Use the To. 4 Keypad Enter numbers, letters, or symbols on the printer. Stop all printer activity. 6 Indicator light Check the status of the printer.
 Quick Reference Learning about the printer Using the control panel Use the To 4 Keypad Enter numbers, letters, or symbols on the printer. 5 Stop or Cancel button Stop all printer activity. 6 Indicator
Printed in the United States of America
 Xerox Corporation Global Knowledge & Language Services 800 Phillip Road Building 845 17S Webster, New York 14580 USA 2000 Xerox Corporation. All rights reserved. Copyright protection claimed includes all
X940e, X945e. Maintenance Guide
 X940e, X945e Maintenance Guide July 2010 www.lexmark.com Contents...3 Storing supplies...3 Checking the status of supplies...3 Checking the status of supplies from the control panel... 3 Printing a menu
ScanPartner 600C Image Scanner. User s Manual
 ScanPartner 600C Image Scanner User s Manual Version 1.0 (Doc. No. 250-0062-0) Table of Contents 1. INTRODUCTION 3-4 2. INSTALLATION AND CONNECTIONS. 5-13 2.1 Shipping Bracket 5 2.1.1 Removing the Shipping
Learning about the printer...5. Loading paper and specialty media...9
 Quick Reference Contents Learning about the printer...5 Using the printer control panel...5 Understanding the printer control panel light sequences...6 Loading paper and specialty media...9 Setting the
Read this First...1 Warning...1 About this manual...1 Safety...2 Country Specific Conditions...3 End of Life...4 FCC Classification...
 Table of Contents 1 2 3 4 Read this First...1 Warning...1 About this manual...1 Safety...2 Country Specific Conditions...3 End of Life...4 FCC Classification...5 Meet your Document System...6 Overview...6
Stereo Turntable System
 3-866-873-15(1) Stereo Turntable System Operating Instructions OWNER S RECORD The model and serial numbers are located at the rear. Record the serial number in the space provided below. Refer to them whenever
Home... 3 Identify Product Parts... 5 Control Panel Buttons and Lights... 7 Load Paper... 9 Load Paper for Documents... 9 Load Envelopes...
 Home.................................................................. 3 Identify Product Parts..................................................... 5 Control Panel Buttons and Lights............................................
AstroJet TM M2 Quick Start Guide
 AstroJet TM M2 Quick Start Guide Step 1 Remove Printer and Accessories from packaging. Place Printer on a flat, even surface. Step 2 Remove Service Station Transport Tab 1. Open Top Cover. 2. Open Print
Signature. Kolibri Signature Two-Pocket Currency Discriminator
 Signature Kolibri Signature Two-Pocket Currency Discriminator CHOKING HAZARD. SMALL PARTS. Not for children under 3 years old. WARNING: RISK OF ELECTRICAL SHOCK. This equipment is to be serviced by trained
When You Need More Than Staples. Toll Free: Fax: Electric VeloBinder Operating Instructions
 When You Need More Than Staples. Toll Free: 800-658-8788 Fax: 801-927-3037 info@abcoffice.com Electric VeloBinder Operating Instructions IMPORTANT SAFEGUARDS Warning: For your protection, do not connect
User Safety. Electrical Safety. Phaser 4500 Laser Printer
 User Safety Your printer and the recommended supplies have been designed and tested to meet strict safety requirements. Attention to the following information will ensure the continued safe operation of
00-SFXM750.book Page 1 Friday, August 18, :30 PM. Quick Reference Guide 701P DocuPrint M750/M760
 00-SFXM750.book Page 1 Friday, August 18, 2000 1:30 PM Quick Reference Guide 701P31954 DocuPrint M750/M760 00-SFXM750.book Page 2 Friday, August 18, 2000 1:30 PM 00-SFXM750.book Page iii Friday, August
SERVICE MANUAL THEORY OF OPERATION AD Ver. 1.0
 SERVICE MANUAL THEORY OF OPERATION 2005.04 Ver. 1.0 After publication of this service manual, the parts and mechanism may be subject to change for improvement of their performance. Therefore, the descriptions
Quick Reference Guide. ineo 3301P
 ineo 3301P Contents 1 Learning about the printer... 3 Using the printer control panel... 3 Understanding the colors of the Sleep button and indicator lights... 4 Setting the paper size and type... 5 Configuring
QUICK INSTALLATION GUIDE
 QUICK INSTALLATION GUIDE Prior to installation This equipment must be installed on a piece of furniture or desk near a 220V power socket. Align the front of the machine with the edge of the desk in order
RJ-2030/2050/2140/2150
 Printed in China LBF85400 Package Contents Check that the package contains the following before using your printer: RJ-030/050/40/50 Quick Setup Guide English Printer Rechargeable Li-ion Battery Belt Clip
Quick Reference. ineo 3300P
 ineo 3300P Contents 1 Learning about the printer... 3 Using the printer control panel... 3 Understanding the printer control panel light sequences... 4 2 Loading paper and specialty media... 9 Setting
MICROLINE 320/390FB User Manual (English)
") MICROLINE 320/390FB User Manual (English) MICROLINE 320/390FB User Manual (English) English Table of Contents Note to Customers... E-2 Important Safety Instructions... E-3 Important Wiring Instructions...
MICROLINE 320/390FB User Manual (English) MICROLINE 320/390FB User Manual (English) English Table of Contents Note to Customers... E-2 Important Safety Instructions... E-3 Important Wiring Instructions...
Ready Reference Guide
 Ready Reference Guide English HP LaserJet 8100, 8100 N, and 8100 DN Printers Ready Reference Guide HP LaserJet 8100, 8100 N, and 8100 DN Printers Copyright Hewlett-Packard Company 1998 All Rights Reserved.
HCS-3600 / 3602 / 3604 Laboratory Grade & High RFI Immunity Switching Mode Power Supply with Rotary Encoder Control
 HCS-3600 / 3602 / 3604 Laboratory Grade & High RFI Immunity Switching Mode Power Supply with Rotary Encoder Control 1. INTRODUCTION User Manual This family of efficient, upgraded SMPS with small form factor,
The easy way to automate mail folding and inserting.
 Shipping & Mailing Inserting Relay 1000 inserter The easy way to automate mail folding and inserting. Quickly fold, stuff and seal your envelopes. Don t just meet your goals. Exceed them. Sending invoices,
OFFICEMATE 2D. User Manual. This manual provides detailed information on how to operate and maintain your Officemate 2D.
 OFFICEMATE 2D User Manual This manual provides detailed information on how to operate and maintain your Officemate 2D. Please read this manual before operating the machine in order to prevent any damage
MC-2548-V1.00. Troubleshooting. Advanced Guide. Basic Guide. Describes the summary of this product. Describes the detailed function of this product.
 ip1900 series On-screen Manual Стр. 1 из 334 стр. How to Use This Manual Printing This Manual MC-2548-V1.00 Basic Guide Describes the summary of this product. Advanced Guide Describes the detailed function
LBP-810 Laser Printer
 LBP-810 Laser Printer Getting Started Guide IMPORTANT: Read this manual carefully before using your printer. Save this manual for future reference. Copyright Copyright 2001 Canon Inc. All information in
Contents-1. 1 Introduction. 2 Installing Fusing Unit EF Removing Fusing Unit EF Copy/Print Operation.
 Contents 1 Introduction 1.1 Introduction... 1-2 1.2 Safety Precautions... 1-3 1.2.1 Notices for Safety... 1-3 1.2.2 Precautions When Replacing Units... 1-4 1.2.3 Warning and Caution Labels... 1-6 2 Installing
OPERATION MANUAL UCHIDA YOKO CO., LTD., TOKYO, JAPAN US V1.01
 OPERATION MANUAL UCHIDA YOKO CO., LTD., TOKYO, JAPAN 77-872 US V1.01 Use machine only after reading the "Safety Instructions" given below carefully. These safety instructions are given to ensure that the
BAUM K20B KNIFE FOLDER UNIT INSTRUCTION MANUAL
 BAUM K20B KNIFE FOLDER UNIT INSTRUCTION MANUAL 2015 BAUMFOLDER CORPORATION All Rights Reserved BaumFolderCorp., 2015 Printed in U.S.A. TP10669 Warning Do not operate this machine without all guarding in
Read this First...1 Safety...1 Declaration of Conformity (EU only)...1 About this manual...1. How this Help Works...3 Help Menu...3 User Guide...
...1 About this manual...1. How this Help Works...3 Help Menu...3 User Guide...") Table of Contents 1 2 3 4 Read this First...1 Safety...1 Declaration of Conformity (EU only)...1 About this manual...1 How this Help Works...3 Help Menu...3 User Guide...4 Meet your Document System...5
Table of Contents 1 2 3 4 Read this First...1 Safety...1 Declaration of Conformity (EU only)...1 About this manual...1 How this Help Works...3 Help Menu...3 User Guide...4 Meet your Document System...5
Document Inserting System DI500/DI600
 Document Inserting System DI500/DI600 Operator Guide US/Canada English Version FCC Compliance This equipment has been tested and found to comply with the limits for a Class A digital device, pursuant to
Printing Your First Page. Attaching the Paper Support. Plugging in the Printer. Checking the Printer
 Printing Your First Page Attaching the Paper Support Checking the Printer Plugging in the Printer Installing the Ink Cartridges Installing the Printer Software Connecting the Printer 4011307 XXX-00 Attaching
Quick Reference. Understanding the Operator Panel. Understanding the operator panel lights. Quick Reference
 Quick Reference Understanding the Operator Panel The printer operator panel has two buttons and two lights. Lights indicate the status of the printer. Buttons are used to continue or cancel the current
Stop all printer activity. Note: A list of options is displayed once Stopped appears on the display. Return to the previous screen.
 Quick Reference Using the non-touch-screen printer model Learning about the printer Using the four-arrow-button printer control panel 0 Use the 3 4 5 To 9 8 7 4 7 ABC 3 DEF GHI 5 JKL 6 MNO PQR 8 STU 9
Motomaster battery charger instruction manual. Have your system nearby and your serial.
 Motomaster battery charger instruction manual. Have your system nearby and your serial. Motomaster battery charger instruction manual >>>DOWNLOAD LINK
Lexmark X642 Troubleshooting Guide
 Lexmark X642 Troubleshooting Guide Online technical support Technical support is available on our Lexmark Web site at www.lexmark.com. Checking an unresponsive printer If the printer is not responding,
USER MANUAL VISIOTAMBOUR AMBIENT T, H OR TH RECORDERS
 USER MANUAL VISIOTAMBOUR AMBIENT T, H OR TH RECORDERS 10196 I. SUMMARY I. DESCRIPTION... 3 II. PRESENTATION... 4 III. PUTTING INTO SERVICE... 4 1. To open the instrument... 4 2. Starting a quartz crystal
Solving paper feed problems
 Solving paper feed problems Use the following table to solve problems related to moving paper or documents through the product. Table 13. Solving paper feed problems Problem Cause Solution Pages are coming
User Manual. Trinocular Stereo Microscope
 User Manual Trinocular Stereo Microscope Model V434 XV434 Series MicroscopeNet.com Table of Contents i. Caution.. 1 ii. Care and Maintenance... 2 1. Component Illustration... 3 2. Installation 4 3. Operation....6
ES5500 USER MANUAL. Pressure Sealer
 ES5500 USER MANUAL Pressure Sealer This manual provides detailed information on how to operate and maintain your ES5500. Please read this manual before operating the machine in order to prevent any damage
PANTONE Formula Scale 3
 PANTONE Formula Scale 3 Operating Manual Models: PFS3-5-22, PFS3-5-12 PANTONE is the property of Pantone, Inc. Copyright Cherlyn Electronics Limited, 2006 Portions Pantone, Inc., 2000 Introduction The
optimail Postage meter Installation Guide
 optimail Postage meter Installation Guide 2 optimail Installation Guide Commissioning overview The following overview lists the operating steps for using your optimail for the first time. You have to perform
KIP Certified AutoCAD Driver. KIPFold 2800 User Guide Version SN 1.0
 KIP Certified AutoCAD Driver KIPFold 2800 User Guide Version SN 1.0 Safety Read these safety instructions completely before operating the folder and keep this manual for future reference close to the folder.
EPSON. ActionLaser Read This First
 EPSON ActionLaser 1600 Read This First This booklet is to help you set up your printer and begin printing quickly. It also gives you instructions for routine maintenance. If you need detailed information
User Guide. Set Up & Start Up Basic Copier Operations Key Operator Functions
 User Guide Set Up & Start Up Basic Copier Operations Key Operator Functions Toshiba America Business Solutions, Inc. 2006 Training and Dealer Development SET UP & START UP Turning the System On Turning
INTRODUCTION CT87E FEATURES AND CONTROLS
 INTRODUCTION The CT87E is a precision instrument used to monitor and record the presence or absence of voltage, light, or sound level such as what would be produced by an operating electric motor or compressor.
LASER PRINTER. Operation Manual (for copier) Be sure to become thoroughly familiar with this manual to gain the maximum benefit from the product.
 Be sure to become thoroughly familiar with this manual to gain the maximum benefit from the product.") LASER PRINTER Operation Manual (for copier) Be sure to become thoroughly familiar with this manual to gain the maximum benefit from the product. Before installing this product, be sure to read the installation
LASER PRINTER Operation Manual (for copier) Be sure to become thoroughly familiar with this manual to gain the maximum benefit from the product. Before installing this product, be sure to read the installation
Table of Contents Quick Install Guide page Introduction Safety Rack System Precautions ESD Precautions...
 Table of Contents Quick Install Guide page 1 EN English Table of Contents 1. Introduction... 2 1.1 Safety... 2 1.2 Rack System Precautions... 2-3 1.3 ESD Precautions... 3... 3 1... 3 2 Fitting PSU s...
C935 Series. Maintenance Guide
 C935 Series Maintenance Guide April 2007 www.lexmark.com Contents...3 Cleaning the exterior of the printer...3 Storing supplies...3 Conserving supplies...3 Checking the status of supplies...4 Checking
Manual. LC-16 system. LC-16 Inkjet Printer 1
 Manual LC-16 system LC-16 Inkjet Printer 1 Index ENVIRONMENT. 3 OPERATOR S SAFETY 3 OPERATION SAFETY 3 PART 1 INSTALLATION AND PARAMETER SETTING 4 1) Preparing 4 2) Installation 4 3) Priming 4 4) Parameter
Reference Guide for the KODAK Picture Kiosk GS Compact. Software Version 2.0
 Reference Guide for the KODAK Picture Kiosk GS Compact Software Version 2.0 Eastman Kodak Company, 2008 Contents Product Overview... 4 Console... 4 605 Photo Printer... 5 Product Choices... 6 Startup and
6 x 6 Peltier-Thermostatted Multicell Holder Series II Accessory
 6 x 6 Peltier-Thermostatted Multicell Holder Series II Accessory Overvoltage Category II Pollution Degree 2 Equipment Class III Safety information Introduction Before using this accessory, you must read
9 Start button Start a job, depending on which mode is selected. 10 Fax button Send faxes. 11 Back button Return to the previous screen.
 Quick Reference Use the To 9 Start button Start a job, depending on which mode is selected. > Settings > > Paper Menu > > Paper Size/Type > Learning about the printer Using the printer control panel 10
X925. Maintenance Guide
 X925 Maintenance Guide April 2011 www.lexmark.com Contents...3 Cleaning the exterior of the printer...3 Cleaning the scanner glass...3 Cleaning the ADF parts...4 Cleaning the printhead lenses...5 Storing
Trademarks...3 How to Read This Manual...4
 Maintenance Guide Read This First Trademarks...3 How to Read This Manual...4 Paper and Other Media Paper and Other Media Supported by This Printer...5 Paper Recommendations...10 Loading Paper...10 Storing
RICOH COMPANY, LTD. Main ten a nc e Guide Maintenance Guide Overseas Affiliates USA Spain The Netherlands Italy United Kingdom China Germany
 Maintenance Guide 1 2 3 4 5 6 7 Paper and Other Media Replacing Consumables and Maintenance Kit Cleaning the Printer Adjusting the Printer Troubleshooting Removing Misfed Paper Appendix Read this manual
New Ricoh 1060 Copier. August 2004
 New Ricoh 1060 Copier August 2004 Step By Step Turn Main Power Switch ON Press operation switch to make ON indicator light up You may turn just the operation switch off at night DO NOT turn main power
Check the status of the printer. 7 USB port Connect a USB a flash drive to the printer. Note: Only the front USB port supports flash drives.
 Quick Reference Use the 6 Indicator light Check the status of the printer. Learning about the printer Using the printer control panel 7 USB port Connect a USB a flash drive to the printer. Note: Only the
USER MANUAL ENGLISH 285-S COMPACT VALUE COUNTER
 USER MANUAL ENGLISH 285-S COMPACT VALUE COUNTER INTRODUCTION ENGLISH Thank you for purchasing the Safescan 285-S compact value counter, a product of outstanding ease-of-use and quality. We recommend that
GOD OF WAR -GHOST OF SPARTA.cso. The print quality was poor See Improving and adjust them as necessary, such as.
 GOD OF WAR -GHOST OF SPARTA.cso. The print quality was poor See Improving and adjust them as necessary, such as. GOD OF WAR -GHOST OF SPARTA.cso >>>DOWNLOAD LINK
Fiber optics solution manual. You can print on a variety of release the Go button on the printer sides of the printer door and pulling.
 Fiber optics solution manual. You can print on a variety of release the Go button on the printer sides of the printer door and pulling. Fiber optics solution manual >>>DOWNLOAD LINK
RJ-2030/2050/2140/2150
 LBF85700 Unpacking Your Printer Check that the package contains the following before using your printer: RJ-030/050/40/50 Quick Setup Guide English Printer Rechargeable Li-ion Battery Belt Clip Thank you
APES-14 HD-6500 & HD-7000 Version Operator s Training Manual
 APES-14 HD-6500 & HD-7000 Version Operator s Training Manual Issue A1 09/03 PDI Part # 900600 Performance Design Inc. 2350 East Braniff St. Boise Idaho 83716 This manual contains very important safety
Washer repair tucson. 3 Select the correct envelope size in the software application.
 Washer repair tucson. 3 Select the correct envelope size in the software application. Washer repair tucson >>>DOWNLOAD LINK
TABLE OF CONTENTS ENGLISH
 TABLE OF CONTENTS 1 Health, Safety and Environment... 2 1.1 Precautions and Safety Issues... 2 1.2 Country Specific Conditions... 3 1.3 End of Life... 3 2 Functional description... 5 2.1 Overview... 5
Riptide_GP_v1.2.1.apk Riptide_GP_v1.2.1.apk Riptide_GP_v1.2.1.apk Riptide_GP_v1.2.1.apk
 Riptide_GP_v1.2.1.apk. Since radiation emitted inside the Riptide_GP_v1.2.1.apk is printer that are not expressly approved by HP could Riptide_GP_v1.2.1.apk the users authority to Bello 2777 of. Phone
3 Sleep button Enable Sleep mode or Hibernate mode. Notes:
 Quick Reference Use the To 3 Sleep button Enable Sleep mode or Hibernate mode. Indicator light color and its corresponding printer status Indicator light Printer status Off The printer is off or in Hibernate
Mercury Helios ASSEMBLY MANUAL & USER GUIDE
 Mercury Helios ASSEMBLY MANUAL & USER GUIDE TABLE OF CONTENTS INTRODUCTION...1 1.1 MINIMUM SYSTEM REQUIREMENTS 1.1.1 Apple Mac Requirements 1.1.2 PC Requirements 1.1.3 Supported PCIe Cards NOTE: Boot Camp