ClickTracks User Manual ClickTracks
|
|
|
- Rebecca Glenn
- 6 years ago
- Views:
Transcription

1 ClickTracks User Manual
2 ClickTracks Web Analytics Done Right ClickTracks is the culmination of extensive research and development in the areas of website and user behavior analysis. Our goal in creating ClickTracks has been to provide complex data in a simple way, and to display that data in context. We have tried to keep the software simple to use and the results easy to understand at a glance. This manual will help you get the most from ClickTracks, and by extension will help you better meet the needs of your website visitors.
3 Contents I Table of Contents Foreword 1 Getting Started 3 System Requirements... 4 Server Licensing... 5 Architecture... of Version 6 5 Architecture... of Version 5.x 7 Upgrading... from 5.x to 6 10 Processing... Engine Administrator QuickStart 16 Comparison... to Analyzer and Optimizer 19 Cookie Handling Browser Based Reporting Site Archiving Sites That Span Multiple... Domains 20 Services and Processes 22 The ClickTracks... Service 22 Starting and Stopping... the Service 23 Server User Account Processing... Engine Service 27 Reporting... Engine Service 27 Processing Engine Administrator 30 Datasets Processing Logfiles Analyze On Server... Processing 31 Configure Client... - Analyze On Server Datasets 32 Analyze on Server... Conversion Issues 33 Reading Logfiles Logfile Processing: How... it works 36 What Do I Enter For Username... & Password? 36 Which Files to Download Importing local /... LAN files 37 Reprocess Logs... Now 38 Delete A Dataset,... Domain, Web Server 38 Enable / Disable... Dataset 39 Web Server Log... Formats 39 Compressed / Rotated... Log Files 39 Virtual Servers /... Multi-domain Logfiles 40 What If There Are... No Logfiles? 40 Troubleshooting... & Help 40 Additional Server... Setup 41 Multi Domain Logfiles Wizards New Dataset Wizard I
4 II ClickTracks Server New JDC Dataset... Wizard 44 New Hosted Dataset... Wizard 45 New Domain Wizard New Multi-Domain... Wizard 49 New Web Server... Wizard 51 Properties Dataset Properties Dataset General Mirroring Data To Another... Server 54 Cookie Tracking URL Pruning Domain Properties Domain General - Case... Sensitivity - Server Scripting 59 Case Sensitive Server... Files 60 Alternate Domain Names Domain Advanced File / Domain Inclusions File / Domain Exclusions URL Parameters Web Server Properties FTP Logfile Retrieval File System Logfile Retrieval Advanced Web Server... Properties 69 Server Logging FTP Logging Show Session Record History Errors NLF Files Reporting Engine 85 Reporting... Engine Service 85 Reporting... Engine Administrator 85 Initial Setup User Accounts User Groups Site Archiver Server Configuration Mail Server Configuration Scheduled Task Configuration Configuration Client Advanced Topics How ClickTracks... Uses Cookies 100 Using Persistent... Cookies To Improve Campaign Tracking 104 Configuring... Web Servers 105 Internet Information... Server (IIS) 105 Apache File Extensions... To Ignore 106
5 Contents III User Agents... To Ignore 107 Search Engine... Parameters & Keywords 107 Distinguishing... Duplicated Links 108 The Way... Content Help 108 Troubleshooting 111 Logfile Import... Warning 112 Terminology 114 FAQ 116 Acknowledgements 120 Index 121 III
6 1 Foreword Foreword ClickTracks is a completely unique way of understanding website visitor behavior. We hope you find the software powerful and easy to use. We constantly strive to perfect our products. If you have feedback or comments I would like to hear from you. My address is jmarshall@clicktracks.com. Sincerely John Marshall CEO
7 Getting Started
8 3 1 ClickTracks Server Getting Started The ClickTracks Professional Processor is a powerful, back-end set of applications that does the heavy lifting of processing, analyzing, rendering, and distributing reports so that the end user has the simplest yet most customizable experience possible. The Professional Processor can generate reports in HTML format for the user to view reports instantly; it can also distribute complete datasets so that users on a ClickTracks Client application can perform their own custom analysis. The system consists of services that process and serve data to end users, as well as administrative interfaces to manage those services and the datasets themselves. The various components of the Professional Processor are typically installed and configured by the IT department, though marketing or analytics staff could have input in this process. The ongoing administration of the components might also require involvement from both types of staff, as some aspects of the functionality are technical in nature while others involve website design and marketing objectives. The installer for ClickTracks Professional Processor installs five separate executable programs, each of which performs a specific function in the system. These programs are associated with the three main components of the system. Component Name Processing Engine Executable File CT_Scheduler ClickTracksServer Reporting Engine CT_ReportingEngine CT_ReportProcessor Configuration Client CT_DatasetProcessor Function Service runs in the background performing low-level tasks of acquiring and processing logfiles User interface to set up datasets and control the Processing Engine Service to serve datasets and reports to client apps, browsers and , and do site archiving Converts reports into various portable formats for viewing in web browsers or Client app used to adjust global settings of the datasets for end users The following diagram shows the basic outline of how the various components fit into the whole system:
9 Getting Started Raw data in the form of logfiles or datasets created on a JDC is aquired and processed on a scheduled basis by the ClickTracks Service, (aka Processing Engine). The schedule for the service, the location of the raw data, and the other definitions of the datasets are established in the Server Administrator interface. Once a dataset has been created through the Server Administrator and processed by the service, it can be further configured by the Configuration Client. All datasets created by the Processing Engine are available to the Reporting Engine, which is administered through a web-based interface The Reporting Engine can send data to the ClickTracks Pro Server or send finished reports via a web browser or . System Requirements The ClickTracks server can be installed on a standard Windows desktop server computer. Installation Requirements The user performing the ClickTracks Server installation will need to be logged into the server computer on an account with administrator privileges when installing the ClickTracks Server. Hardware Requirements CPU: Pentium 4 1Ghz or faster
10 5 ClickTracks Server ClickTracks server places a much lower CPU processing overhead than most other logfile analyzers. It will coexist with many other tasks and can run on the web server machine or elsewhere on the network. A Pentium 4 processor or better will provide sufficient processing power for most sites. RAM: 1GB or more ClickTracks does not run as a multi-threaded application, so a 2 GB dual processor, which splits memory up into four-512mb threads, will result in only 512MB of memory available for ClickTracks. A dual processor is fine, but each thread must have at least 1 GB to accommodate ClickTracks, as it will only run on one thread at a time. Disk Space: Allow disk space of approximately 10% the size of the originating logfiles. The original logfiles are not kept on the ClickTracks server. Depending on how many hits your website receives, the ClickTracks server may need to read multiple gigabytes of logfile data. A faster CPU and more RAM will make a big difference to performance. Software Requirements: Supported Operating Systems: Windows 2000 Windows 2000 Server Windows XP Home / Professional Windows Server 2003 Note that Windows NT 4 is not supported for server use. Also note that Windows 2000 Server may require special configuration in order to enable the ClickTracks Reporting Engine. Network: ClickTracks Processing Engine reads logfiles from a web server either by downloading over FTP or through Windows file sharing / LAN and places the resulting data store in a folder where they can be served via the HTTP protocol. The Processing Engine must have an FTP login account with read access to the web server(s). The computer must have an open port to the web (usually port 80) through which ClickTracks Client apps and web browsers can download data. This may require making adjustments to firewall settings. 1.2 Server Licensing If you encounter an error message about exceeding the maximum license and you need to add additional web servers, please contact ClickTracks Sales, sales@clicktracks.com You are permitted to add additional web servers to the configuration, provided they are from the same IP address. 1.3 Architecture of Version 6 There has been a major architecture change between version 5.x and version 6. The following diagram illustrates the various components of the ClickTracks Professional Processor and how they all fit into the overall architecture of ClickTracks 6:
, depending on the products owned.")
11 Getting Started 6 1. Data is acquired by the Pro Processor by way of the Processing Engine, a service that runs in the background. Data can be gathered from the logfiles of web servers or from the ClickTracks JavaScript Data Collector (JDC), depending on the products owned. The service is designed to periodically connect to the web servers, pull in the latest logfile data, and process it. Once configured, the server runs unattended. 2. The Processing Engine Administrator is the user interface through which datasets are created and managed. Once a dataset has been established through the Server Administrator, the ClickTracks service will continue to gather data from its raw data source and process that data on a scheduled basis. 3. The Configuration Client is launched from within the Processing Engine Administrator. This is essentially the same application as the Pro Client Application used by end users. The Configuration Client allows the administrator to adjust settings, create labels, load campaigns, and make various other changes to datasets at the global level. These changes will then be incorporated into data sent to the Pro Client application or into reports served to web browsers or sent via The Reporting Engine is a service running in the background that distributes reports and datasets, as well as archives websites for analysis of past versions. The Reporting Engine is managed through a web-based interface called the Reporting Engine Administrator, which is also launched from within the Processing Engine Administrator. 5. The Reporting Engine serves data to the end users in various ways. End users on the ClickTracks Client application can receive either finished Instant Reports or full datasets upon which to perform custom analysis. Users can also view HTML reports in a web browser's Mail Server Configuration or receive those reports via .
12 7 1.4 ClickTracks Server Architecture of Version 5.x The ClickTracks Server component is a Windows service that runs on a machine dedicated to retrieving/downloading logfiles from one or more web servers. The usual method for this retrieval is FTP; however, the software also supports reading physical files from the file system over the network or locally on the same machine. The software uses a schedule to determine when to make a connection and begin the process of downloading and processing the remote logfiles. After each file is downloaded and processed, the result is a normalized.nlf logfile, which is then written to the dataset folder. The dataset folders can be located either on the same machine or elsewhere on your network. The dataset folder is where the ClickTracks Professional client will access data. In a typical case, the dataset folder is located on a shared network drive, making easy access for ClickTracks Professional clients running on other computers. Other data access methods are direct HTTP or HTTPS from the same machine, or data can be mirrored to another server, typically a remote web server, again for clients to access. (See Mirroring.) [AU: Which section is this referring to? There is no one section specifically titled Mirroring. OK?] Analyze on Server (v5.1) The concept of Analyze on Server was introduced with the ClickTracks Server (v5.1). It was designed to take the burden of the log data Analyze phase off the client and put it onto the server. This option can only be enabled or disabled at the server. You can select Analyze on Server when creating a new dataset, in the New Dataset Wizard, or later when setting the properties of an existing dataset. After the ClickTracks service has completed processing the logfiles and created.nlf files, a second phase of analysis and visitor counting (auto-analyze) will take place. This phase, which is started by the server, processes the dataset's existing and new.nlf files and generates.bin files ("refined" data files) per day of data. The Pro Client can then use these files directly for further analysis and reporting. (See Analyze on Server Processing.) The server administrator can then configure this dataset (by clicking on the green icon next to the dataset) for all clients to receive global labels, import campaigns, and configure revenue. (See Configure Client - Analyze on Server Datasets.) JDC Dataset Support (v5.1) As of version 5.1, the Pro Server can handle JDC datasets from the ClickTracks Hosted service. A configuration can be created to retrieve the JDC dataset from the hosted machine and make this data available to desktop client machines, just as is done with any other server dataset. (See New JDC Dataset Wizard.) System Overview Diagram The ClickTracks Server can read logfiles from multiple web sites, load balanced servers and multiple
13 Getting Started 8 subdomains. The major user configurable components of the Server UI are: Datasets Datasets represent the top level configuration layer of the ClickTracks server. A dataset will be configured to define the base properties for the server which include a descriptive dataset name, the local location of the stored data, the server polling frequency, and scheduled start time. A dataset can contain 1, or more, domains, which define the properties of the web site. Additional dataset properties are: Dataset Mirroring The ClickTracks server can replicate the current dataset to a remote FTP server for access by other ClickTracks Professional Client applications that may not be able to access the dataset via a file system, or network share. The ClickTracks Professional Client will use FTP, or HTTP/HTTPS protocol to access this mirrored dataset. Cookie Tracking The special cookie tracking option should only be enabled when your site is using persistent cookies, and you wish to analyze data for ad campaigns. When this option is enabled, the ClickTracks server generates additional data files used by the client software. It also takes additional time and memory for the server to process the logfiles. Url Pruning (v5.1) URL Pruning is a way to have the ClickTracks Server delete a portion of a URL which you don't want to analyze. This feature can be useful to normalize various URLs in your logfiles. It can delete a fixed string or a regular expression portion of a URL Domains Domains represent the secondary level of configuration of the ClickTracks server. A domain will be created under a named dataset and will define the properties of the web site. Depending on the structure and function of your web site, 1 or more domains can be defined under a dataset. In turn, domains can contain multiple web servers. The Domain properties are: General Properties Case Sensitivity This property tells the server if the files on the web server are case sensitive or not. UNIX web servers are case sensitive so the page index.html and INDEX.HTML are different. Windows web servers are not case sensitive and treat all pages without regard to case. Server Scripting This property tells the server what server-side scripting technology the web server is using.
14 9 ClickTracks Server Advanced Properties File Inclusions: Include only certain directories when processing logfiles. File Exclusions: Exclude certain directories from the Included directories. Host Exclusions: Host IP addresses can be excluded from the logfile processing. URL parameters are case-sensitive This property will inform the server to treat URL parameters with case-sensitivity to differentiate between them. URL parameter used to distinguish between links on the same page: This property defines a particular parameter that can be used to differentiate between multiple links to the same page so that a user can see the differences in clicks to the links. Default pages This is the list of pages to treat as a default loading page when a web browser opens up a directory name. Web Servers Web server represents the lowest level of configuration of the ClickTracks server. The web server configuration will tell the server how to retrieve logs, and which logfiles to process. One, or more, web server configurations can be defined under a domain. Logfile Retrieval Method - Logfiles can be retrieved by either the FTP protocol, or from a local file system, or network share. FTP Logfiles are downloaded via the FTP protocol from the remote server. A valid set of FTP login parameters are required to use this method. File System Logfiles are retrieved from a local file system, or network share directory for processing. Logfile Settings Logfile directory The directory name on the FTP, or file system where the logfiles reside. File exclude mask Use this file mask pattern to exclude files from being processed by the server. File include mask
15 Getting Started 10 Use this file mask pattern to include only the logfiles specified to be processed by the server. Logfile index of Server IP: New Dataset Wizard 1.5 Upgrading from 5.x to 6 ClickTracks 6 can be installed on top of 5.x. It is not necessary to uninstall 5.x first. However, because of the architectural differences between versions 5.x and 6, there are some specific steps to be taken in the upgrade process. There are three different components of the application: 1) the Processing Engine, 2) the Reporting Engine, and 3) the Pro Client. This document will cover the upgrade process as it applies to each of these components. Processing Engine Important Notes: ClickTracks 6 does not support dataset mirroring. If you have datasets configured to mirror data to a server, you need to turn it off first, which will cause each dataset to be reanalyzed. This could take some time, depending on how large your datasets are. To turn mirroring off in version 5.6: Click on the icon next to the dataset name. Click on the Dataset Mirroring tab and un-check the "Enable mirroring for this dataset" checkbox. The dataset will now be reanalyzed. Do not attempt to run both versions 5.6 and 6 on the same machine. They share registry settings that require different settings, and it will not work. When you first launch the ClickTracks 6 Pro Processor after installing it on top of version 5.x, you will initially see a "Dataset Upgrade Wizard" to facilitate the upgrade process. Step through this process.

16 11 ClickTracks Server The first step is to determine which datasets you want to upgrade to version 6. Once a dataset has been upgraded to version 6, it is no longer compatible with earlier versions. So if you think you'll want to keep a dataset at an earlier version you should not convert it in this upgrade wizard. A dataset can always be upgraded at a later time. Select all datasets that you want to upgrade from the left column and click on the >> button to set them up for upgrade, then click the Next button.


17 Getting Started 12 You can upgrade the datasets immediately or the next time the schedule runs. Upgrading involves reanalyzing the dataset; so, if your datasets are very large, use the schedule. If your datasets are small, you can choose to upgrade immediately. Make your selection and click Next. Click Finish to initiate the upgrade process. If you selected Upgrade Immediately, the analysis of datasets will begin. If you selected Upgrade on Schedule, each dataset will be upgraded at its next scheduled run, as defined in the dataset properties.
18 13 ClickTracks Server Reporting Engine The Reporting Engine is a new component with version 6, so there is no upgrade to perform. However you will probably want to access the Reporting Engine and do some initial setup during the upgrade process. See the Reporting Engine Administrator -> Initial Setup section for details on this process. Pro Clients Install the version 6 Pro Client on your various end-user machines. These can also be installed on top of version 5.6. Create new datasets on your clients via the New Dataset Wizard to take advantage of the Browser Based Reporting. Start the New Dataset Wizard in the Client Application by going to File -> New Dataset in the main menu. You will be presented with a screen to access the dataset from the Reporting Engine. If the Reporting Engine is running on the same computer as the client, enter the Reporting Engine URL (either localhost or If the Reporting Engine is running on your local area network, this address will be its network address (e.g., If the Reporting Engine is running outside your local area network, the host name will be a fully qualified URL (e.g., Enter a user name and password of a user who has been set up on the Reporting Engine and who has ownership of the dataset you are trying to create. (See Reporting Engine > User Accounts). Click the "Select" button. You will be presented with a list of datasets for which the user you just specified has ownership. Select the specific dataset you want to create on the client and click the "Next" button.
.")
19 Getting Started 14 Once you've selected the dataset, you will be prompted to specify the location where client dataset data will be stored. (Similar to the method in version 5.x). Click the "Finish" button.

20 15 ClickTracks Server Important Note: Do not save your client dataset to the same folder where the corresponding dataset for the Pro Processor has been saved. You must be particularly careful about this if the Pro Processor is running on the same computer as the Pro Client, or if you are saving your datasets to a network drive. After completing the New Dataset Wizard on the Client, you will see reports in Instant Reports Mode by default. In this mode, pre-analyzed reports are delivered in HTML format directly from the Reporting Engine to the Pro Client. No analysis of data is required, or possible, in this mode. When you shift to Custom Analysis mode you will be prompted to initiate the synchronization with the dataset on the Pro Processor.
 can be done on the Pro Client. 1.")
21 Getting Started 16 Clicking the "OK" button will begin the synchronization process, during which the entire dataset is downloaded from the Reporting Engine to the Pro Client. Once the dataset has been synchronized, custom analysis of the data (creating labels, parameter masking, changing options, etc.) can be done on the Pro Client. 1.6 Processing Engine Administrator QuickStart ClickTracks Processing Engine Administrator presents the user interface for configuring and adding datasets, domains and web servers, viewing server diagnostic information, accessing the Configuration Client, and controlling the Reporting Engine service. The Processing Engine Administrator UI is opened only when changes to the configuration are needed. To start the ClickTracks Processing Engine Administrator: Windows Start Menu All Programs ClickTracks ClickTracks Pro Server OR Double-click on the ClickTracks Server Administrator icon on the desktop. Server Administrator User Interface:
22 17 ClickTracks Server General User Interface Use the mouse to activate various UI elements: Select a dataset name to show related domains. Select a domain to show related web servers. Context Menus

.")
23 Getting Started Dataset - Right-Click on a dataset name. Domain - Right-Click on a domain name. 18 Web ServerRight-Click on a web server name. Learning More About The ClickTracks Server Operation Starting and Stopping the Server - Run The ClickTracks Server Service to process logfiles. Dataset Wizards - Create configuration files by the use of step by step wizard panels asking for the specified information at each step. Server Configuration Properties: Dataset Properties Domain Properties New Multi-Domain Wizard Web Server Properties Analyze On Server Processing - Learn more about Analyze On Server processing (v5.1). Configure Client - Analyze On Server Datasets datasets (v5.1). Learn more about configuring Analyze on Server Analyze on Server Conversion Issues - Learn more about converting existing server dataset to Analyze on Server processing (v5.1). New JDC Dataset Wizard - Learn more about creating a JDC dataset (v5.1) Server Logging - Learn more about the server diagnostic messages. The Way - Receive additional tips from The ClickTracks Way. Processing Logfiles - Learn more about how The ClickTracks Server processes logfiles. Terminology - Learn more about the key terms of The ClickTracks Server. FAQ - Find the answers to Frequently Asked Questions.
24 ClickTracks Server Comparison to Analyzer and Optimizer ClickTracks Professional contains a number of enhancements over Analyzer and Optimizer such as additional reports. In addition Pro works in a significantly different way with regard to logfile processing and cookie handling. Convenience Features Ability to list multiple pages in a single PDF or Excel export Multiple user access with each user able to create and manipulate their own reporting Hassle free logfile processing Most processing takes place on a server, with the powerful iterative analysis taking place on the client. Logs are downloaded and processed on a nightly or hourly schedule. The ClickTracks Server connects automatically and intelligently decides which logs are new and must be downloaded and processed, greatly reducing the hassle of log processing. Built for large sites The server side processing of ClickTracks Pro includes support for sites that span multiple domains and sites deployed on load balanced servers. See Sites That Span Multiple Domains Under-the-hood enhancements Persistent cookie database to track unique visitors and campaign conversion metrics across long periods of time. See Cookie Handling Cookie Handling ClickTracks Professional Server can be configured to use a specific session cookie to improve the accuracy of following visitors through the site, especially if your site has many visitors from AOL. Professional Server also uses a powerful database to store data about visitors and to lookup that data when a visitor comes back to the site. The database stores the persistent ID, the landing page, referrer, time of last visit, time of first visit. Using this data ClickTracks can calculate simple data like the number of unique visitors, and can map conversion events back to the original campaign and search engine/keyword. The following applies to ClickTracks Pro when using logfiles. ClickTracks Pro Hosted (using JavaScript) automatically sets suitable cookies and requires no configuration. Configuring session cookies A session cookie goes away when the user closes the browser window. It's the opposite of a persistent cookie. Many dynamic site generation tools like PHP and ASP contain easy session cookie management. ClickTracks (both Analyzer and Pro) contains support for these standard session cookies. ClickTracks Pro can be configured to use any custom session cookie. If your site uses a custom cookie, simply define this inside the ClickTracks Pro Server. Persistent cookie tracking for better campaign accuracy. See Using Persistent Cookies To Improve Campaign Tracking Browser Based Reporting The Reporting Engine component of the Pro Processor allows you to generate pre-analyzed reports in HTML format. These reports can then be viewed in a web browser, in an application, or within the Pro Client in the form of Instant Reports.
25 Getting Started Site Archiving The Reporting Engine can create archives of websites, thus allowing analysis of historical data against the website that existed when the visitor data was gathered. This makes it possible to show comparisons of two different versions of the same website page side by side, with the statistics for each version applied appropriately Sites That Span Multiple Domains Larger sites are often built with multiple subdomains like: secure.bobsfruitsite.com ClickTracks Professional uses a more sophisticated session tracking algorithm that accounts for visitors moving across the multiple domains. Pro maintains a relationship between the page /index.html and the domain within which it occurs. (Analyzer cannot distinguish between /index.html across two domains and treats them as the same page). Pro also maintains several techniques for tracking users when their session cookies disappear as they move from domain to domain.
26 Services and Processes
27 Services and Processes 2 22 Services and Processes It is important to understand that the Pro Processor includes services that run in the background, carrying out the low-level tasks required to process and serve files. These services can be controlled through the administrative interfaces, but the simple Start Stop functionality in the controls do not fully reflect the significance of these services. There are two main services: ClickTracks Server - Responsible for gathering and processing logfiles or datasets from the JavaScript Data Collector(JDC) ClickTracks Reporting Engine - Responsible for serving reports and datasets to client apps, web browsers, and These services can be seen in the Windows Services, under Administrative Tools. 2.1 The ClickTracks Service The ClickTracks Service is installed into the services manager and perform the low level tasks of gathering and processing logfiles. Learn more about the ClickTracks Server: Server User Account - Configure the ClickTracks Server service user account. Starting and Stopping the Server - Run The ClickTracks Server Service to process logfiles. Dataset Wizards - Create configuration files by the use of step by step wizard panels asking for the specified information at each step. Server Configuration Properties: Dataset Properties Domain Properties New Multi-Domain Wizard Web Server Properties Processing Logfiles - Learn more about how The ClickTracks Server processes logfiles. Analyze On Server Processing - Learn more about Analyze On Server processing (v5.1). Configure Client - Analyze On Server Datasets - Learn more about configuring Analyze on Server datasets (v5.1).
28 23 ClickTracks Server Server Logging - Learn more about the server diagnostic messages Starting and Stopping the Service After installation the server process is set to 'not running' state. Once the initial setup is complete you will need to start the server so it can begin processing logfiles. You can do this from the Server Administrator on the File menu: Menu File Start Service OR Menu File Stop Service Alternately, you can click on the green/red button in the Server Status panel on the upper-right side of the Server UI window. The Server Status panel will display the current server statuses of the following: Service Stopped (button status green) Starting Service Service Running (button status red) Stopping Service In addition, you can start, stop, pause, or restart the ClickTracks Server from the Service Manager in the Administrative Tools section of the Control Panel. The Service Manager can also set startup to automatic, manual, or disabled and establish which user account the service should run under. For further information, see topic Server User Account. After Server is started Depending on how many logfiles exist on the server, the initial transfer can take from a few minutes to several hours. The next session will be shorter, as it will only download appended or new logfiles. After the server has been running for a period of time, you will see files in the NLF Files tab on the lower panel of the Server Administrator window. This verifies that the system is up and running; you can now access the files from the client software. If no files are listed on the NLF File tab, then there is no data for the client software to synchronize with. Directory and File Layout When you create a dataset for a website, the server software creates a set of folders. The root folder (which is in the directory you specified when running the New Dataset Wizard) has the name of the dataset. For instance, for a dataset named ClickTracks, if you chose a destination directory named C:\SiteData, you would find a resulting directory called C:\SiteData\ClickTracks. Inside the root folder, you will find a configuration file named ClickTracks_Config.XML and a folder named normal. This is the root folder the client software will access to synchronize with. The normal folder contains the set of folders for each domain. There might be one or multiple domain folders corresponding to your configuration. The domain folder includes a list of web server folders (named by the web server name in the Server UI), with the informal server name you entered when you created the server dataset. Held within the web server folder are any normalized (.NLF) logfiles processed by the server. Server Directory Layout

29 Services and Processes Server User Account The ClickTracks Server service will need to run on the installed machine with the proper login account. If you use the File System, as opposed to FTP, when processing logfiles, some security issues need to be considered. If the ClickTracks Server is accessing logfiles on another machine located on a local area network, you need to ensure that the service has permission to access the remote file system. This is true both when the logfiles are being read from a remote network drive and when you are storing the resulting.nlf files on a remote network drive. To Change the Server User Account: Windows Start Menu Control Panel Administrative Tools Services Select the ClickTracks Server service Make sure that the ClickTracks Server service is currently stopped Double-click on the ClickTracks Server Service in the Services Manager. Click on the Log On tab of the ClickTracks Server Properties
30 25 ClickTracks Server Select the proper account type: A) Local System Account Use this type of account when: Accessing logfiles via the FTP protocol on remote computers. Accessing logfiles on the local computer when the Web server and the ClickTracks Server are on the same machine. B) A Specific Local Account Change the selection to "This account". Enter a local machine username and password combination that ensures correct permissions to access the remote drive(s). Click the Apply button, and RESTART the service. Use this type of account when: Accessing logfiles via the FTP protocol on remote computers. Accessing logfiles on the local computer when the Web server and the ClickTracks Server are on the same machine.
31 Services and Processes 26 C) A Domain Account Change the selection to "This account". Enter a domain username and password combination that ensures correct permissions to access the remote drive(s). Click the Apply button, and RESTART the service. Use this type of account when: Accessing logfiles via the FTP protocol on remote computers. Accessing logfiles on a network shared drive. Domain Account Requires Permissions: Read List Folder Contents

32 ClickTracks Server Processing Engine Service The Processing Engine service in version 6 is essentially the equivalent of the ClickTracks service in version 5.x. This service acquires logfiles or datasets and processes this data on a scheduled basis. 2.3 Reporting Engine Service The Reporting Engine has its own service that runs in the background. This service is the web server that actually serves the HTML reports and the complete datasets to the client application. The service can be seen and controlled in the Windows Operating System under Administrative Tools Services.

33 Services and Processes 28 The Reporting Engine service can also be controlled through the Processing Engine Administrator. In the main menu, simply select Reporting Engine Start to start the service and Reporting Engine Stop to stop it. Until the service has started, the administration interface will not be accessible, because it is the service itself that serves that web-based interface. The Reporting Engine must be the only web server running on the computer. If other web servers are installed on the server, they will compete for the ability to serve pages.
34 Processing Engine Administrator

35 Processing Engine Administrator 3 30 Processing Engine Administrator The Processing Engine Administrator provides the interface for several important components of the Pro Processor It is the interface through which Datasets are created and edited It is the access point for the Configuration Client It provides a button to start and stop the ClickTracks service It provides controls to start and stop the Reporting Engine service It provides a control to launch the Reporting Engine Administrator It displays logging information about the activity of the ClickTracks service, including errors, as well as a control to access more in-depth diagnostic data It is provides help files via The Way panel and serves as an entry point to the entire help system. Datasets A central concept within ClickTracks is the dataset. A dataset is analogous to a file in other programs, such as Microsoft Word. Just as a Word file contains text relating to a single project, book, article, and so forth, a dataset contains all the information ClickTracks needs to analyze a single website. The term dataset is used because it's actually a collection of files serving different purposes, not a single file as it would be in Word.
36 31 ClickTracks Server Each website you analyze will have its own dataset, which will serve to: Keep data for each website separated from data for other websites. Make imported logfiles part of the dataset so old logs never need to be imported. Retain a complete historical record for the website, permitting analysis of any period of time. Automatically save all your settings and analysis parameters so when you quit ClickTracks and later reopen, you'll be exactly where you left off. When you start the ClickTracks Server for the first time, the New Dataset Wizard will guide you through the process of creating a dataset, followed by creating a domain and finally a web server. If you're a consultant, you will create many different datasets, one for each client website. You can launch the New Dataset Wizard from the Server UI or the File menu at any time. All server configuration information is saved in ClickTracksScheduler.xml, which resides in the ClickTracks Server directory. Create a new dataset with the New Dataset Wizard. Create a new domain with the New Domain Wizard. Create a new web server with the New Web Server Wizard. Advanced Topics Analyze On Server Processing (v5.1) Configure Client - Analyze On Server Datasets (v5.1) Processing Logfiles Processing logfiles is the single most difficult problem you will encounter in setting up the ClickTracks Server. We strive to make the process as easy as possible, but there are always some problems we can't anticipate. The most common difficulty is simply logging in to the correct server and account/password. There is no common standard among ISPs for how this works, but the following tips might be of help. If you login over FTP to a server, this server name is usually the same as the domain name for your website. If it's not then your ISP should have given you a different FTP servername for uploading web pages. The FTP server for logfiles is almost certainly the same. The username and password are usually the same as those for uploading web pages or your admin account. You might need to enable passive (firewall) mode depending on your network configuration. If you can't find the logfiles contact your ISP and ask them for access to the raw web server logs for your site Analyze On Server Processing The new ClickTracks server (v5.1) takes the burden of the log data 'analyze' phase off the client and onto the server. This option can be enabled or disabled at the server only. Think Globally (Analyze on server) can be selected when creating a new dataset, in the New Dataset Wizard, or later, when setting the properties of an existing dataset. After the ClickTracks Service has completed processing the logfiles and created.nlf files, a second phase of analysis and visitor counting will take place, auto-analyze. The auto-analyze process will be started by the server and process the datasets' existing and new.nlf file and generate.bin file which are "refined" data files, per day of data, which the Pro Client can use directly for further analysis and reporting. You may also create/define global labels on the server, and import Campaign and define Revenue data, which then will show up on the client dataset after synchronizing to the server.
37 Processing Engine Administrator 32 When Should Analyze on Server be Used? Large & Complex Datasets High Traffic Websites Why Should Analyze on Server be Used? Centralized control at the server over: Global Labels on the dataset Campaign Data Revenue Data Client reports and analysis will be faster. See section: Configure Client - Analyze On Server Datasets Configure Client - Analyze On Server Datasets After selecting Think Globally ('Analyze on Server') for a dataset, you must then start the service and allow it to cycle and complete the analysis of the dataset before you can configure it. You can monitor the analysis progress by viewing the Server Administrator status window. Right-click on the dataset you want to configure on the main Server Administrator window, select "View/Configure Dataset Analysis". Alternatively, you can just click the icon. A warning message will appear alerting you that auto-analyze will be blocked for the server until you finish configuration. This is to protect the integrity of the files, since both auto-analyze (which is performed by the Windows service process) and Configure Client both share the same files. Only Think Globally Analyze on Server datasets can be configured from the server. If the View/Configure Dataset Analysis menu item on the Server Administrator is disabled, then the dataset has not been initially analyzed, is in the process of being analyzed, or is not an Analyze on Server dataset. This first auto-analysis step is necessary for the software to calculate all web pages, referrers, and so forth used during configuration. Once you have started Configure Client, you can create one or more labels, import campaigns, and configure revenue, all on the server. If the software asks you to reanalyze, you can choose to wait until all configurations have been completed. However, be sure to perform the analysis before exiting the Configure Client session. Remember to close the Configure Client session so that server-scheduled auto-analyze sessions can take place. Creating Global Labels A set of global labels can be defined on the server during the Configure Client session. Create labels using the Label Wizard or the Advanced Labeling Wizard. After labels have been defined and the dataset analyzed, the labels will be synchronized to the desktop clients during the next Synchronize with Server operation. Note: Global labels will only flow downstream to the client datasets. Users can define their own local labels in addition to the global labels. Global labels can be hidden from view on the local client so their values will not appear in reports. Locally defined labels will not be synchronized back to the server dataset. Global and Local Label Behavior:
38 33 ClickTracks Server Operation Global Label Created on Server Yes Synchronize to Client? Updated Label definition on Server Yes Global Label Deleted on Server No - Label will be removed from local dataset on next synch. Local Label Created on Client No - Label stays in local dataset only. Dataset will count locally now. Importing Campaign Data Campaign data can be imported from Google, Overture, or other format from.csv files. The Other Campaign tab can also be configured by manually entering the campaign name, type, landing page, and cost. Select Menu Tools Configure Ad Campaign, or click the Configure Campaign link on the Campaign Report. The Campaign data will be synchronized to the client dataset during the next Synchronize with Server operation. Configuring Revenue Revenue data can be configured by selecting either a logfile parameter or a goal page and fixed monetary amount. Select Menu Tools Configure Revenue Options, or click the Revenue Tracking link on the Campaign Report. Campaign Report. The Revenue data will be synchronized to the client dataset upon the next Synchronize with Server operation. Configure Frames Web Sites If the website you have configured for Analyze on Server contains frames, one additional configuration step must be taken. On the Frames dataset, open the Navigation Report during the Configure Client session. The Configuration Client session must navigate through each frameset page and establish which page is the primary one for the frameset. This configuration will exclude the navigation, header, and footer pages. This page exclusion information will be synched to the client machines; otherwise, each client will have to perform this configuration step. This Frame Page Exclusion data will be synchronized to the client dataset during the next Synchronize with Server operation. Configure Dynamic Page Parameters Select Menu Tools Dynamic Page Parameters to mask any URL parameters so that the base URL is normalized to a common value. The Page Parameter Masking will be synchronized to the client dataset during the next Synchronize with Server operation. You are now ready to proceed to the client and synchronize data Analyze on Server Conversion Issues Existing ClickTracks Server datasets can be converted to the new Think Globally (Analyze on Server) processing scheme to take advantage of the speed benefits of this new feature. The dataset conversion can only take place in the Think Locally (Analyze on Client PC) (legacy datasets) to the new Think Globally (Analyze on Server) direction.
39 Processing Engine Administrator 34 Converting Existing Server Datasets to Think Globally (Analyze on Server) Existing server datasets can be converted to the new Think Globally (Analyze on Server) scheme by editing the dataset properties. Check the "Analyze on Server" checkbox. Click Apply and then OK to save your property changes. The server dataset will be converted to Think Globally (Analyze on Server) processing on the next scheduled processing of this dataset. To process the dataset immediately, select the dataset name, right-click, and select Run Schedule Now. Impact on Client Datasets Existing client datasets (legacy datasets) can still synchronize to existing server datasets after converting to version 5.1. The software on the server and client will function as in prior versions. If a server dataset is converted to Think Globally (Analyze on Server), existing client datasets will still be able to synchronize data from the server, but the client dataset will still be in Think Locally (Analyze on Client PC), and it will not take advantage of the available speed enhancements. Important! It is recommended that a new client dataset be created on any dataset that is converted to Think Globally (Analyze on Server) processing. Use the New Dataset Wizard to create a new client dataset in the Pro Client software on the desktop machines Reading Logfiles For each web server ClickTracks must read and process the logfiles. This dialog defines the parameters for each web server:
 retrieval of the logfiles.")
40 35 ClickTracks Server Name of this server: A unique name that will identify this server in the UI. The name is actually a nickname. It does not need to correspond to the actual server domain name. Log Retrieval Method: Specify either FTP or file system (including LAN) retrieval of the logfiles. When using LAN access to the files you should understand that the service runs under a certain user account, and the LAN access will be performed using this same account with the same permissions. You can change the account under which the service runs using the Service Manager. FTP only Domain name for FTP login: The domain name that ClickTracks will use to read the logfiles. In many cases this will be the same as the web server domain name. Passive mode: Some firewall configurations need this setting. User name: The user name for FTP login. This account must have read access to the logfiles. Password: Corresponding password for login Test FTP connection: Click this to test the above parameters and make sure they are correct. Logfile Directory: Location on the server where logfiles are located. File Exclude mask: : In the logfile directory, it is possible to have many different files in addition to the web server logfiles. For example, a Cobalt RaQ server has logfiles from the mail server and the FTP server, as well as from the web server. To prevent the ClickTracks Server from reading these files by mistake, specify a list of
41 Processing Engine Administrator 36 partial file names that will be excluded from download and processing. For example, setting this entry to mail;ftp means that files containing either "mail" or "ftp" in the name are never downloaded. File Include mask: Only files matching part of the name listed here are downloaded. Logfile index of Server IP: Logfile Processing: How it works Logfile Processing: How it works The ClickTracks Server periodically connects to the web server and determines whether new logfile data is available. Many web servers generate a new logfile each day, perhaps using a unique name each time or rotating the names through a fixed set. ClickTracks Server maintains a detailed database of state information for each file. This enables it to track cases when the file is new, modified since last processing interval, and so on. By maintaining this information ClickTracks Server always downloads the minimum possible information from the logfile. Even in the case of a single large logfile that grows each day, ClickTracks will download only the new portion of the file. The benefits of this system are as follows: Minimal processing time and consumption of network bandwidth Logfiles are not stored on the ClickTracks server. After processing the local copy of the file is deleted. Transparently handles all logfile generation and rotation schemes used on the server. Important: the server goes to great lengths to process only new data. It scans the logfiles to determine whether new data has been appended to an existing file, or if a file is completely new What Do I Enter For Username & Password? Look for logfiles on your web server Different ISPs have different ways of granting access to the logfiles. Although there's no standard, the most common is FTP using the same server name/login/password that are used for uploading web pages. Ask your ISP 'How do I get access to my raw logfiles' Server refers to the domain name of the server containing logfiles. This is often the same as the domain name for your web server eg but it's sometimes a generic name such as ftp.hostingcompany.net The username and password are usually the same for administering the site or uploading pages. Your ISP should have given you this administrative account when you signed up. See also Which Files to Download, Troubleshooting & Help and What If You Have No Logfiles? Which Files to Download When you first view the directory in the FTP window, you might see a set of files named "Stats" or similar. Often these files will have extensions like.bin and a group of.html files. It's important to realize that such files are not the logfiles ClickTracks needs to read but are, in fact, output files from some other stats program, such as Analog or WUseage, running on your server. ClickTracks needs access to the raw logfiles. Examples of the files you should download: IIS on Windows ex log or ex log.gz The name indicates the date range in YYMMDD format, and the file typically spans one day. The above example

42 37 ClickTracks Server would contain all transactions for June 26, Download whichever dates you want to analyze. Apache on Linux access access.1.gz them. access.2.gz... <--- This is the current logfile. Download it. <--- These are older rotated logfiles. Depending on the rotation schedule, you might not want It's safest to grab them all and let ClickTracks work out the dates. Cobalt RaQ web.cache web.cache.new web.log web.stats preinstalled on a RaQ. <--- Download this file <--- NOT this file, which contains internal data used by the stats package that ships See Also Compressed / Rotated logfiles Importing local / LAN files You can also import logfiles from a local hard drive or network share. A network share is most common for IIS users. By default, IIS logfiles are stored in the c:\winnt\system32\logfiles\w3svc1 directory. These files have the naming convention ex*.log Example directory of IIS logfiles: The name indicates the range of dates contained in YYMMDD format. The top file in the above example contains data for February 4th, Your LAN administrator can give you direct access to this directory so you can read the files. In some instances (typically a small intranet) you may even have the files on your own machine. File System method: When File System retrieval radio button is selected, the FTP login section will be grayed out. In the edit box for Logfile Directory, enter the fully qualified path to the logfiles. If the files are located on a
43 Processing Engine Administrator 38 network share, use a UNC network path. Example: \\Host\D-Drive\Files\SolidWorks. If you have a mapped drive to a network share, you may enter the map drive letter and path. (The mapped drive path will be converted to UNC path when you finish) Reprocess Logs Now If the need arises that a dataset needs to have the logfiles processed immediately, the Server UI will allow the polling schedule to be over-ridden. In addition, a complete dataset can be reprocessed if configuration property changes (file include/exclude masks and others) require a major change in the manner that the logfiles are processed. To Process logfiles Now: Select a dataset by clicking on the dataset name in the Server UI window. Right-click on the dataset name. Select Menu Run schedule now. To Reprocess All logfiles for this dataset : Select a dataset by clicking on the dataset name in the Server UI window. Right-click on the dataset name. Select Menu Reprocess All logfiles for this dataset. The selected dataset will be processed as soon as possible by the ClickTracks Server. This operation may be delayed if the server is currently processing another dataset Delete A Dataset, Domain, Web Server A dataset, domain, or web server can be deleted if it is no longer needed. To Delete a Dataset: Select a dataset by clicking the mouse on the dataset name in the Server UI window. Right-click on the dataset name. Select Menu Delete. A confirmation dialog will be displayed. If you want to permanently delete the dataset, click Yes. Otherwise, click No and your dataset will remain in the server processing list. To Delete a Domain: Select a dataset by clicking the mouse on the dataset name in the Server UI window. Select the specific domain name. Right-click on the domain name. Select Menu Delete. A confirmation dialog will be displayed. If you want to permanently delete the domain, click Yes. Otherwise, click No and your domain will remain in the server processing list. To Delete a Web Server: Select a dataset by clicking the mouse on the dataset name in the Server UI window. Select the specific domain name. Select the specific web server name. Right-click on the web server name. Select Menu Delete.
44 39 ClickTracks Server A confirmation dialog will be displayed. If you want to permanently delete the web server, click Yes. Otherwise, click No and your web server will remain in the server processing list. Enable / Disable Dataset A dataset can be disabled if there is a need to temporarily stop processing the logfiles associated with this dataset. To Disable a Dataset: Select a dataset by clicking the mouse on the dataset name in the Server UI window. Right-click on the dataset name. Select Menu Disable. The dataset will now have a red icon schedule is executed. in front of it and this dataset will be skipped when the server poll To Enable a Disabled Dataset: Select a disabled dataset by clicking the mouse on the dataset name in the Server UI window. Right-click on the dataset name. Select Menu Enable. The dataset will now be enabled and will be processed during the next server poll schedule Web Server Log Formats The ClickTracks Server can read logfiles generated from the following web servers: Microsoft IIS 3.0 through 6.0 (W3C extended format) * Apache Netscape / iplanet * the convlog command line utility supplied by Microsoft can be used to convert the older proprietary IIS 3 and 4 log format to W3 extended, which can then be imported into ClickTracks. The ClickTracks Server will automatically configure itself according to the logfile format. There is no need to specify this format or the fields. If you'd like to know which fields ClickTracks requires or if you are considering adjusting the server configuration, please see Configuring Web Servers Compressed / Rotated Log Files As the web server writes transactions to the logfile, it will grow, potentially becoming unmanageably large over time. Many web servers are configured to periodically rotate the logfile to keep the size manageable while avoiding the loss of any data. The server typically does this once per month for smaller sites and weekly or daily for higher traffic websites. A typical web server writes to a logfile named access.log or similar. When the logfile is rotated, it is given a name that reflects the period of time it spans, such as access_april.log. After renaming the file, the server creates a new file under the access.logfile name and starts writing the latest data to it (in this example, data for May). Thus, the older data is rotated into archive files. The directory containing the logfiles on the server might have several older files with names indicating the periods they span, as well as a file containing data for the current period, which is updated with each client request as it's received. In addition, the web server often compresses the older data as it is rotated into archive. On UNIX systems, the format most often used is.gz (GNU Zip). Compressing the data is very efficient because logfiles contain much repetitive data, resulting in files that are 10% of the original size.
45 Processing Engine Administrator 40 Thus, a very common scenario is to have the following files on the web server: access.log april_2001.gz march_2001.gz february_2001.gz Access.log contains all web requests from May 1 onward. The other three files contain data for each month, as indicated by the names. When you use ClickTracks, you do not need to worry about reading the same data twice. If you import a logfile that ClickTracks has read part of before, it will simply ignore the lines it has previously read. Virtual Servers / Multiple Domain Logfiles Virtual Servers / Multi-domain Logfiles A single web server is often used to host many individual websites through a process known as virtual servers. An ISP will almost always divide the resulting entries in the main logfile into individual logfiles for each distinct website, so each customer's logfile contains only requests for its website. If you host your own servers, you might generate a logfile that contains requests for all the subdomains of different sites, and you want to see these distinctly from each other. Your logfile contains a field that specifies the domain name of the site to which the request was directed. Logfiles in this format are known as multidomain or multi-home. If this field is present, ClickTracks will compare the value against the site names specified in the New Dataset Wizard. The comparison matches, in turn, the domain names from the wizard, both the main site name and the alternate names. Lines from the log are discarded if they originated from a server not listed. If the logfile is multi-domain and does not contain the virtual server name field then ClickTracks has no way to determine in which domain the request belongs. For Apache this field is the virtual server name or %v in the log directive line; for IIS it's cs-host. See Configuring Web Servers. If your site has a number of subdomains that you'd like to analyze separately, make a new dataset for each and set the alternate server names such that only the matching names are included. Then import the same single logfile into each dataset What If There Are No Logfiles? Some ISPs simply don't provide logfiles, for example Yahoo Stores. In this case you can signup for ClickTracks Hosted. a special script you place on each page will gather the data, and you'll use that instead of logfiles to get the same great analytics tools and reporting Troubleshooting & Help Tip: After clicking Connect you'll see a hyperlink in The ClickTracks Way that will let you View FTP Diagnostics. You will see the actual communications commands from the FTP dialog to the FTP server, including error messages returned from the remote server. Can't find server: Change the firewall setting in advanced options. Some firewalls actually work correctly if the setting is inverted from what you would expect. Can't connect to server: The server name is probably your website domain name or a generic name like ftp.hostingco.net, or sometimes an IP address. If you upload pages to your web server using FTP then try that server name and login here. Ask you hosting company for FTP access to your raw logfiles.
46 41 ClickTracks Server Incorrect username / password: These are almost certainly the same as your user name and password for uploading pages or administering the site. Can't find logfiles: Try clicking Up Dir and/or looking inside other directories. See Which Files to Download Wrong format: The most common cause of this error is that the file is not actually a logfile. Sometimes the server has directories of files named stats or similar but these are not actually logfiles that ClickTracks can read. Instead, They are typically HTML output files from an old stats program running on your server. Missing fields: ClickTracks requires a certain minimum number of fields present in the logfile. See Configuring Web Servers No logfiles? Some hosting companies simply don't provide logfiles. In this case you can signup for ClickTracks Hosted. You'll get the same great reports and analysis and the data is gathered through a JavaScript object placed in each page of your site Additional Server Setup The main screen of ClickTracks Server Administrator shows the hierarchy of Datasets, Domains and Web Servers: For each web server defined in the above hierarchy you will define the parameters for reading the logfile. Starting and Stopping the Service
47 Processing Engine Administrator Multi Domain Logfiles Some web servers generate a single logfile containing data for all the hosted websites. Each line in the file specifies the virtual host name the file was served from. A special configuration option permits the ClickTracks Server to process such logfiles efficiently: 1. Define all the virtual servers as distinct domains, as if they each had individual logfiles, but don't actually define a Web Server / FTP logfile processor for any of them. Use the New Domain Wizard to do this. For Example: Define a new Domain, using the New Domain Wizard, for each of the virtual servers in your logfile. Be sure to add each domain under the same dataset name: Logfile contains entries for the following virtual servers: Datasets Domains MultiDomain Dataset Web Servers Define the Multi-domain entry: Right-Click on the dataset name that contains the virtual server entered above and select Add multidomain logfile. Input the required data as prompted by the Multi-domain Wizard. This will create a single Web Server entry. Example: LogFiles Datasets Domains MultiDomain Dataset Web Servers [Multi-domain] LogFiles As the server processes logfile lines it will place the virtual servers into the appropriate domain on-the-fly Wizards The ClickTracks Server user interface assists the user in creating all the necessary configuration files via stepby-step wizards, which ask for specified information at each step. There are five wizards available from the server UI: New Dataset Wizard New Domain Wizard New Multi-Domain Wizard New Web Server Wizard New JDC Dataset Wizard
48 ClickTracks Server New Dataset Wizard When you start the ClickTracks Server for the first time, the New Dataset Wizard appears to guide you through the process of creating a dataset. You are then prompted to create a domain and finally a web server. Page 1 - Name The Dataset Enter a descriptive name for the dataset. Page 2 - Specify Data Location Enter the local disk location where the dataset will be saved. This data location can be on the same computer that is running the ClickTracks Server software or on a network shared drive. Important: This is the file system location where ClickTracks Server will save the configuration files and the normalized logfiles that are read by the client machines. This location must be a network share that is readable from the client machines. The default location will almost certainly need to be changed. Use the Browse button to navigate to long path locations. Page 3 - Configure Schedule In the drop-down menu under Schedule Frequency, choose how often you want to update the log data. For low- to moderate-traffic websites, the interval should be longer than those sites that have a high volume of traffic. Keep in mind that when the service is actively running a retrieval session, your CPU load will increase, so schedule according to your own preferences. You can set the start date manually to delay when the software does its first retrieval. Normally you can leave the default start date (current day). Start time sets the time the software will begin the first session. Set the polling frequency of the ClickTracks server to one of these values: 15 Minutes 30 Minutes Hourly 12 Hours Daily Weekly Monthly Set the polling frequency cautiously to avoid excessive network traffic. Page 4 - Analysis Location (v5.1) This page allows you to choose where your dataset will be analyzed. If you choose 'Think Globally (analyze on server),' your data will be analyzed by the ClickTracks Server after the logfiles are normalized. The analyzed data can then be synchronized with a client, and further operations performed. If you choose 'Think Locally (analyze on client),' you will have to synchronize the NLFs with your client, and perform the analysis and visitor counting there. See Topic: Analyze On Server Processing, Analyze on Server Conversion Issues Reading Logfiles See Also: New Domain Wizard, New Multi-Domain Wizard, New Web Server Wizard
49 Processing Engine Administrator New JDC Dataset Wizard The ClickTracks Server (v5.1) can now retrieve data from JDC datasets (ClickTracks Hosted) for analysis by the desktop client. This wizard will create a special configuration in which the properties will be read-only after the initial dataset creation. This wizard is available only from Menu File JDC Dataset Page 1 - Name The Dataset Enter a descriptive name for the dataset. Page 2 - Specify Data Location Enter the local disk location where the dataset will be saved. This data location can be on the same computer that is running the ClickTracks Server software or on a network shared drive. Important: This is the file system location where ClickTracks Server will save the configuration files and the normalized logfiles that are read by the client machines. This location must be a network share that is readable from the client machines. The default location will almost certainly need to be changed. Use the Browse button to navigate to long path locations. Page 3 - Dataset Retrieval Select the retrieval method for your JDC dataset configuration file: HTTP FTP Page 4 - HTTP Dataset Retrieval Enter the following information: URL of config file - The location of the ClickTracks_Config.xml Username - The account name Password - The password for the account OR Page 4 - FTP Dataset Retrieval Enter the following information: FTP Server - The address of domain name for the FTP server. Username - The account name Password - The password for the account Config file location - The location of the ClickTracks_Config.xml on the FTP server. Use the Browse button to navigate to long path locations. Use passive (firewall) mode - Select this checkbox if your site needs to use passive FTP mode. OR Page 4 - Local File System Dataset Retrieval
50 45 ClickTracks Server Enter the following information: Location - The location of the ClickTracks_Config.xml on the local file system. Use the Browse button to navigate to long path locations. Page 5 - Configure Schedule In the drop-down under Schedule Frequency, choose how often you want to update the log data. For low to moderate traffic websites, the interval should be longer than those sites that have a high volume of traffic. Keep in mind that when the service is actively running a retrieval session, your CPU load will go up so schedule according to your own preferences. You can delay when the software does its first retrieval by setting the Start Date. Normally you can leave it with default (current day). Start time sets the time the software will begin the first session. Set the polling frequency of the ClickTracks server to one of these values: 15 Minutes 30 Minutes Hourly 12 Hours Daily Weekly Monthly Set the polling frequency cautiously to avoid excessive network traffic. NOTE: All JDC Dataset are Think Globally (analyze on server) by default and cannot be changed. Also, Cookie Tracking and URL Pruning are NOT available for JDC Datasets. After the New JDC Dataset Wizard finishes, a domain and web server entry will be created automatically for you. The resulting server configuration is read-only. You will not be able to alter these settings New Hosted Dataset Wizard The ClickTracks Server (v5.6) also allows you to create a dataset directly from a hosted account. Like the JDC Dataset, this wizard will create a special configuration in which the properties will be read-only after the initial dataset creation. This feature is primarily intended for the ClickTracks Agency Program, (CAP) and is integrally linked with both the Agency program and the ClickTracks Hosted Service. This wizard is available only from Menu File Hosted Dataset Page 1 - Name The Dataset Enter a descriptive name for the dataset. Page 2 - Specify Data Location Enter the local disk location where the dataset will be saved. This data location can be on the same computer that is running the ClickTracks server software, or on a network shared drive. Important: This is the file system location where ClickTracks server will save the configuration files and normalized logfiles that are read by the client machines. This location must be a network share that is readable from the client machines. The default location will almost certainly need to be changed. Use the Browse button to navigate to long path locations.
.")
51 Processing Engine Administrator 46 Page 3 - Hosted account login Enter the login information for the hosted account for which you want to create a dataset. You can click the Test Login button to confirm you have the right login, (although this isn't necessary). Page 4 - Select the dataset to analyze All the datasets under this hosted account will appear in a drop-down menu. Select the dataset you wish to process with the Pro Server. If there are multiple domains under this dataset, you can narrow it to a single domain.

52 47 ClickTracks Server Page 5 - Configure Schedule In the drop-down menu under Schedule Frequency, choose how often you want to update the log data. For low- to moderate-traffic websites, the interval should be longer than those sites that have a high volume of traffic. Keep in mind that when the service is actively running a retrieval session, your CPU load will increase, so schedule according to your own preferences. You can set the start date manually to delay when the software does its first retrieval. Normally you can leave the default start date (current day). Start time sets the time the software will begin the first session. Set the polling frequency of the ClickTracks server to one of these values: 15 Minutes 30 Minutes Hourly 12 Hours Daily Weekly Monthly Set the polling frequency cautiously to avoid excessive network traffic. NOTE: All Hosted Dataset are Think Globally (analyze on server) by default and cannot be changed. Also, Cookie Tracking and URL Pruning are NOT available for Hosted Datasets. After the New Hosted Dataset Wizard finishes, a domain and web server entry will be created automatically for you. The resulting server configuration is read-only. You will not be able to alter these settings. Dataset Mirroring If the hosted account was set to Analyzed within the Agency Program account setup, this dataset will automatically be configured to mirror data to the hosted service, where it can be downloaded by the OEM Viewer.

53 Processing Engine Administrator New Domain Wizard The New Domain Wizard guides you through the creation of a domain associated with a dataset. Page 1 - Name the Domain The domain name is usually the externally published name of the server. Examples: ClickTracks Bobs Fruit Site Page 2 - Enter the URL Enter the top-level URL of the website to be analyzed. Click the Go button to see a preview of the site to confirm that the URL is correct.
54 49 ClickTracks Server Page 3 - Specify Aliases for the Web Site The New Domain Wizard will try to find as many default site aliases as it can and will present them to you in the text area. Enter any other names or IP addresses by which this same site is accessible to users. Edit this list to ensure all variants of the domain name are set up. For example, if you entered into the first page, you would enter bobsfruitsite.com and the IP address. Do not list subdomains or other websites here. The ClickTracks Server uses these aliases to differentiate between internal and external web links for the analyzed website. Notes for sites with HTTPS protocol: If your site serves the same pages in the same domain for both HTTP and HTTPS, list both as aliases of the domain. Create two separate domains (for each HTTP and HTTPS URLs) if they have different content and are served by different web servers under the current dataset. This allows for proper analysis of these HTTPS pages, as well as of the HTTP pages in your dataset. Page 4 - Case Sensitivity Choose the case sensitivity of the web server machine being analyzed. Specify whether this web site is running on a Windows (not case sensitive) or UNIX/Linux (case sensitive) server. Page 5 - Server Scripting Specify the server-side scripting used on the web server being analyzed. The default value is chosen by the New Domain Wizard and will most likely be correct. If the default selection is incorrect, override the value by selecting another choice. See Also: New Dataset Wizard, New Multi-Domain Wizard, New Web Server Wizard New Multi-Domain Wizard The New Multi-Domain Wizard will guide you through the creation of a Multi-Domain logfile associated with a dataset. This wizard is a slight variation of the New Web Server Wizard, but it will create a special [Multidomain] domain entry and a new Web Server entry. Before setting up the Multi-domain entry, it is generally a good practice to define all of the Domain entries prior to running this wizard. For a Multi-domain planning example, see section: Multi Domain Logfiles To start the Multi-domain Wizard, a dataset name must be selected first: 1. Select a dataset by clicking the mouse on the dataset name Right-Click on the dataset name. Select Menu Add multi-domain logfile OR 3. Menu: File Add Multi-domain logfile The properties of the logfiles to be analyzed will be presented here.
55 Processing Engine Administrator 50 Page 1 - Name The Web Server Enter the external name of the web server. Examples: www store secure Page 2 - Logfile Retrieval Method Select the logfile retrieval method: FTP transfer - Use this method when the logfiles are on a remote computer running an FTP server. Enter the FTP Login values of Server, Username, Password. Click the Test Connection button to verify that the login parameters are correct for the connection. Logfile Location - Enter the directory path to the logfiles from the web server. Use the Browse button to connect to the FTP server and navigate to the proper logfile directory. File System - Use this method when the logfiles are on a local, or shared network drive. Enter the Driver letter and full path to location of the logfiles. Use the Browse button to navigate to long path locations. Page 3 - Include / Exclude Choose which files to include and exclude from analysis. Separate each file mask with a semi-colon. Example: Exclude: mail;old;ftp Include:.log;.zip;.gz Carefully choose the Include and Exclude file masks to narrow down the logfile lists to be processed by the server. Pay attention to logfile rotation schemes used by the web server. For example: Today's logfile - text format Today -1 day logfile -.gz binary format Today -2 days logfile -.gz binary format A proper include file mask for this file rotation would be: This file mask would allow the current logfile and all rotated logfiles to be accessed and processed by the server. For example, setting the file Exclusion entry to mail;old;ftp will mean files containing the pattern of 'mail', 'old', or 'ftp' in the name are never downloaded. See also Compressed / Rotated logfiles
56 51 ClickTracks Server The results of the Multi-domain Wizard will be a new, special domain entry, [Multi-domain], and a new, usernamed web server entry. To add additional Web Servers to this special [Multi-domain] entry: Select the domain entry, [Multi-domain], by clicking the domain entry under a specific dataset. Right-click on the [Multi-domain] entry. Select Menu Add web server Continue to respond to the questions until complete. See Also: New Dataset Wizard, New Domain Wizard, New Web Server Wizard New Web Server Wizard The New Web Server Wizard guides you through the creation of a web server associated with a domain. The properties of the logfiles to be analyzed will be presented here. Page 1 - Name The Web Server Enter the external name of the web server. Examples: www store secure Page 2 - Logfile Retrieval Method Select the logfile retrieval method: FTP transfer - Use this method when the logfiles are on a remote computer running an FTP server. Enter the FTP Login values for server, usern ame, and password. Click the Test Connection button to verify that the login parameters are correct for the connection. Logfile Location - Enter the directory path to the logfiles from the web server. Use the Browse button to connect to the FTP server and navigate to the proper logfile directory. File System - Use this method when the logfiles are on a local, or shared network drive. Enter the Driver letter and full path to location of the logfiles. Use the Browse button to navigate to long path locations. The user account on the machine running the ClickTracks server will need to have ample permissions to logfile data location. Page 3 - Include / Exclude Choose which files to include and exclude from analysis. Separate each file mask with a semi-colon. Example: Exclude: mail;old;ftp Include:.log;.zip;.gz
57 Processing Engine Administrator 52 Carefully choose the Include and Exclude file masks to narrow down the logfile lists to be processed by the server. Pay attention to logfile rotation schemes used by the web server. For example: Today's logfile - text format Today -1 day logfile -.gz binary format Today -2 days logfile -.gz binary format A proper include file mask for this file rotation would be: This file mask would allow the current logfile and all rotated logfiles to be accessed and processed by the server. For example, setting the file Exclusion entry to mail;old;ftp will mean files containing the pattern of 'mail', 'old', or 'ftp' in the name are never downloaded. See Also Compressed / Rotated logfiles Properties All ClickTracks server configuration information is saved in the file, ClickTracksScheduler.xml, that resides in the ClickTracks Server directory. The configuration properties are divided into the following categories: Dataset Properties Domain Properties Web Server Properties Dataset Properties Datasets represent the top-level configuration layer of the ClickTracks Server. A dataset will be configured to define the server's base properties, including a descriptive dataset name, the local location of the stored data, the server polling frequency, and the scheduled start time. A dataset can contain one or more domains, which define the website's properties. Further properties of a dataset are: Dataset General - Descriptive Name, Location on disk, Polling Schedule and Start Time. Dataset Mirroring - FTP login parameters to copy a ClickTracks dataset to an alternate server for access by the ClickTracks Professional Client. Cookie Tracking - The special cookie tracking option should only be enabled when your site is using persistent cookies and advanced ad campaign tracking is necessary. URL Pruning - Configure the way certain URLs are processed. To Add Additional Domains or Multi-domain Entries to an Existing Dataset Entry: Select the dataset entry by clicking the dataset name. Right-click on the dataset name. Select Menu Add domain OR Add multi-domain logfile. Continue to respond to the questions throughout the Domain or Web Server Wizard until complete.
 Location: The drive and path location where the ClickTracks Server will save the configuration files and the normalized logfiles. Entered at creation time.")
58 53 ClickTracks Server Dataset General Dataset General Properties: General Tab Name: A descriptive name given to the dataset. Entered at creation time. (read-only) Location: The drive and path location where the ClickTracks Server will save the configuration files and the normalized logfiles. Entered at creation time. (read-only) Schedule: The polling schedule for the ClickTracks Server service. In the drop-down menu under Schedule Frequency, choose how often you want to update the log data. For low- to moderate-traffic websites, the interval should be longer than those sites that have a high volume of traffic. Keep in mind that when the service is actively running a retrieval session, your CPU load will increase, so schedule according to your own preferences. You can set the start date manually to delay when the software does its first retrieval. Normally you can leave the default start date (current day). Start time sets the time the software will begin the first session. Set the polling frequency of the ClickTracks Server to one of these values:
59 Processing Engine Administrator minutes 30 minutes Hourly 12 hours Daily Weekly Monthly Set the polling frequency cautiously to avoid excessive network traffic. Start time: The starting time for the ClickTracks Server service. Analyze on server: The new ClickTracks Server (v5.1) takes the burden of the log data Analyze phase off the client and onto the server. You can select this option when creating a new dataset, in the New Dataset Wizard, or later when updating the properties of an existing dataset. This option can only be enabled or disabled on the server. See Topic: Analyze On Server Processing Mirroring Data To Another Server The term dataset mirroring refers to copying a fully processed dataset to another server via FTP. The mirroring process is continuously updated as the server processes logfiles. This is useful when you process logfiles from the web server and then need to push the results to a server with a public IP address so that other people without LAN access can view the data with the ClickTracks Professional Client via FTP, HTTP, or HTTPS, rather than a local network file system. Open the Properties dialog of the dataset to be mirrored, select the dataset mirroring tab, and specify an FTP upload location where the data will be stored. The Dataset Mirroring dialog below appears:

60 55 ClickTracks Server To Enable Dataset Mirroring: Check the "Enable mirroring for this dataset" at the top of the dialog. This will enable the fields below. Enter the FTP host address, username and password. The FTP login must have sufficient rights to read, write, update, and create directories on the remote FTP server. Consult with your network administrator for further account related information. Click on Passive Mode (firewall) mode, if necessary for your site. Click on the Browse... button. This will login to the remote FTP server, and an FTP browser window appears and will allow you to browse to the root directory where the data should be stored. To verify that the directory is valid, you must select and enter the directory (by double-clicking) rather than just selecting it in the browser dialog. Click the OK when you are at the final data location. The selected root path is then automatically inserted into the "Initial Directory" field (which is a read-only field). Then in the "New directory" field (which can be left blank) enter a subdirectory to store the clicktracks data. This directory will be created the first time the server uploads the data files. The resulting combined path is displayed in the "Dataset will be mirrored at" information. NOTE: If you are mirroring your dataset to another computer where the resulting dataset will be accessed from a ClickTracks Pro client via the HTTP protocol, the web server on this machine will need to be configured to handle the retrieval of the.nlf and other ClickTracks specific files. The web server will need to have the MIME type added for the file type.nlf. Consult your web server documentation for details on adding a MIME type.

61 Processing Engine Administrator 56 MIME Type:.NLF application/octet-stream.tcs application/octet-stream.ini text/plain Cookie Tracking When tracking Ad Campaigns using persistent cookies or to specify session cookies, first select the dataset you want to modify. Click on the property icon for the selected dataset and then click the Cookie Tracking tab. The Cookie Tracking dialog will appear: Insert one or more persistent cookie identifiers (if applicable to your website). The cookie identifier should be entered as used on the website. Case-sensitivity considerations should be used. (For example, SessionID= and SESSIONID= will yield different results.) Use Ctrl-Enter to advance the cursor to the next line when entering multiple cookie identifiers. On the panel below, select a subdomain and add the session cookie identifier. If you have more than one subdomain, select each in turn, insert the session cookie ID, and click Apply before moving on to the next one in the list. For nameless cookies, check "Use only unnamed cookies," and leave the other fields blank. (The fields will become disabled when this option is selected).

62 57 ClickTracks Server Click OK to save changes and close the dialog. Note: The special cookie tracking option should only be enabled when your site is using persistent cookies and you wish to analyze data for ad campaigns. When this option is enabled, the ClickTracks Server generates additional data files used by the client software. It also takes additional time and memory for the server to process the logfiles URL Pruning URL Pruning is a way to have the ClickTracks Server delete a portion of a URL which you don't want to analyze. This feature can be useful to normalize various URLs in your logfiles. It can delete a fixed string or a regular expression portion of a URL There are two main uses for URL pruning: Remove a Portion of a URL: In some logfiles, the URL /file.html and /sitename/file.html are the same file. You can use this feature to delete "/sitename" from all URLs that are in this form. Remove a Session ID: When a session ID (a dynamic string) gets into the URL, you can delete it with this feature.
63 Processing Engine Administrator 58 Examples: Remove a fixed URL portion: In a logfile, perhaps there was an old portion of the URL from a prior version of the website: /megasite/old/customer.html /megasite/old/areacode.html (old version of URL)... /megasite/customer.html /megasite/areacode.html (new version of URL) In the URL Pruning dialog, enter: /OLD Save and (re)process your logfiles. This will normalize your URLs to only contain only the values: /megasite/customer.html /megasite/areacode.html URLs can be pruned using a more advanced regular expression (regexps) syntax. Regular expressions are often know as regexps and are familiar to web developers through programming languages such as Perl and PHP. Regular expressions are useful if you want to remove a variable string, such as a session ID, from your URLs. Suppose your URLs look like where the last part is a session ID that you want to remove. Then you could specify the regular expression /[0-9]{3}-[0-9]{7}-[0-9]{7}$ to remove the session ID from the end. More information on regular expressions and syntax can be found through Google. A good primer is at Domain Properties Domains represent the secondary level of configuration of the ClickTracks server. A domain will be created under a named dataset and will define the properties of the web site. Depending on the structure and function of your website, one or more domains can be defined under a dataset. In turn, domains can contain multiple web servers. Further properties of a domain are: Domain General - Server Case-Sensitivity, Server Scripting. Domain Advanced - File Inclusion / Exclusions, Host exclusions, URL parameters, Default pages. To add additional Web Servers to an existing Domain entry: 1. Select the domain entry by clicking the domain name under a specific dataset.

64 59 ClickTracks Server Right-Click on the domain name. Select Menu Add web server Continue to respond to the questions throughout the Web Server Wizard until complete Domain General - Case Sensitivity - Server Scripting - The Domain properties General tab dialog is displayed below: Case Sensitivity Select either the UNIX (case sensitive), or Windows (not case sensitive) setting to correctly identify how the web server handles file names. See Case Sensitive Server Files. Server Scripting Use the scripting language selection to set a range of default options. For example choosing PHP will cause ClickTracks to use session cookies within the logfile named 'PHPSESSID' and to chose index.php as the default page name. ASP causes 'ASPxxx' cookies to be used, and default.asp for the default page name. The static option cannot use a session cookie; only standard session cookies from the shown scripting systems are supported in ClickTracks Analyzer. ClickTracks Pro permits any cookie to be used. Select the correct server side scripting technology that is being used by the domain. Possible values are: ASP ASP.NET ColdFusion PHP JSP None
65 Processing Engine Administrator 60 Click the button, Auto-detect Server Settings, to automatically find the server side scripting technology that is being used on this domain. DNS Lookup Helper Use the DNS Lookup Helper to add additional alias names for your website as needed. Enter each alias name on a separate line. See Alternate Domain Names See Also: Domain Advanced Properties Case Sensitive Server Files A URL's path name component is sometimes case sensitive, depending on the web server's operating system. Although the domain name component is never case sensitive, the path name can be. For example, if the website is hosted on a Windows server: and are the same page, whereas on a UNIX server, they would be different pages. A website built on a Windows server can therefore have URLs in both uppercase and lowercase, or a combination thereof, that refer to the same file presented to the browser. The web designer might not intentionally create links in mixed case, but the fact that a Windows web server permits these links without error means they inevitably happen. Conversely, on UNIX servers, the above pages would be different. A mistake made by the web designer is not hidden; the page named with the wrong case would result in a 404 not found error. At logfile processing time, ClickTracks needs to gather data for all unique pages. On a Windows server, the above requests are for the same page, so ClickTracks needs to know that the web server is not case sensitive. Usually the case sensitivity of a web server is determined by the server's operating system. Windows and MacOS pre-osx are not case sensitive. UNIX (including MacOSX and Linux) is case sensitive. The one exception to this rule concerns Apache, which can be configured with non-case-sensitive page names, even on a UNIX system. This situation is rare, however. Unsure? Choose Not Case Sensitive Not case sensitive is a safe choice because a site is very unlikely to contain both Index.html and index.html in the same directory. The effect of this setting is to convert all page file names to lowercase when "Not case sensitive" is chosen and to leave them as is for when "Case sensitive" is chosen. A Windows web server sees requests for Index.html and index.html as the same page, and yet they are recorded in the logfile as distinct pages. In this situation, ClickTracks needs to convert entries in the logfile into a single form, which it does by making everything lowercase. Case is preserved for UNIX servers because the page requested and the page logged are always the same, and Index.html might be a different page than index.html Alternate Domain Names The list of alternate domain names is fundamentally important to the way ClickTracks determines the visitor session. In general, the correct behavior is for ClickTracks to start a new session (and therefore count a new visitor) whenever the referrer is coming from an external website. Using the example of visitors coming from Google, it's certainly correct that each time someone clicks from Google to the target site, a new session should be started; otherwise, those clicks will not match the pay-per-click (PPC) campaign clicks.
66 61 ClickTracks Server A problem arises when the site is known by several different domain names (e.g., both and The second domain must be listed as an alternate; otherwise, every page clicked in will result in a new session and an additional visitor session. The New Dataset Wizard attempts to find cases like this based on examining the website's IP and DNS entries. A related problem is having pages on an external site, such as a newsletter sign-up. ClickTracks Analyzer cannot track users across these different domains (only Professional can do this). Howver, it is possible to use a goal page that lives on the main site, and the visitor would see this page after completing the process on the external server. In this case, the external domain should be listed as an alternate. RULES: Alternate domains should include any domain that is inside the website as your visitors perceive it. Visitors coming from any domain not listed will, by default, be coming from outside and will count as an additional new visit. Separate domains in the list with a semicolon. If alternate domain names are added, altered, or removed after the server dataset has been created, the server logs must be reprocessed for the changes to take place. In ServerAdmin, select the dataset name, right-click, and select Reprocess All Logs for This Dataset. If your site has HTTPS and those pages are the same as under HTTP, you must specify as a domain alias of HTTP equivalent. If your site has HTTPS and the pages are in a different domain, you must create a separate domain for them Domain Advanced The Domain properties Advanced tab dialog is displayed below: File Inclusions / Exclusions
67 Processing Engine Administrator 62 Inclusions Exclusions Host Exclusions Exclude hosts Options URL parameters are case sensitive - Set this checkbox for the ClickTracks Server to differentiate between the case of URL parameters. URL parameter used to distinguish between links to the same page - If your site is set up to distinguish duplicated hyperlinks, enter the parameter name here. Default pages - lists pages to treat as a default landing page when a web browser opens a directory name. Note: If you need to modify data in this section, it is necessary to reimport all your logfiles in order to apply these filters. See Topic: Reprocess Logs Now File / Domain Inclusions Sometimes it is necessary to have the ClickTracks server ignore certain requests for documents or directories, or requests from certain IPs. File Inclusions: Enter a top-level URL path of which section to include.
68 63 ClickTracks Server For instance Include: /web/foo* In this example, the software will only import entries in the logfile that are within web/foo, so a logfile entry in web/other will be skipped. The include/exclude field uses wildcards! If no wildcard (*) is specified then an exact match is performed. Note: If you need to modify data in this section, it is necessary to reimport all your logfiles in order to apply these filters. See Reprocess Logs Now See Also File / Domain Exclusions File / Domain Exclusions Sometimes it may be necessary to have the ClickTracks server ignore certain requests for documents or directories, or requests from certain IPs. File Exclusions: The software applies the file inclusions first. Enter any files or directories that should be excluded. For instance Include: Exclude: /web/foo* /web/foo/ignore* In this example, all log entries in /web/foo are imported, except for those in /web/foo/ignore. The include/exclude field uses wildcards! If no wildcard (*) is specified then an exact match is performed.
 Range on octet Range & wildcard Subnet mask 208.64.72.")
69 Processing Engine Administrator 64 Host Exclusions: Enter a semi-colon delimited list of hosts to filter, again, within the inclusion filter. For example: Exclude hosts: ; Single IP Wildcard on octet(s) Range on octet Range & wildcard Subnet mask * * /23 Note: If you need to modify data in this section, it is necessary to reimport all your logfiles in order to apply these filters See Reprocess Logs Now URL Parameters The URL settings on the Domain Advanced tab effect the way the ClickTracks Server handles various URLs. URL parameters are case sensitive Set this checkbox for the ClickTracks Server to differentiate between the case of URL parameters. Turning on this setting will result in a more accurate and precise site analysis. For example, with "URL parameters are case sensitive" selected, would be a completely different URL from
70 65 ClickTracks Server URL parameter used to distinguish between links on the same page A page that links to another often does so from several different hyperlinks. The most common example is a home page with a navigation bar at the top and text-only links at the bottom. Because both hyperlinks point to the same URL, the request is identical, regardless of whether the user clicks the top link or the bottom. See Topic: Distinguishing Duplicated Links Note: If you need to modify data in this section, it is necessary to reimport all your logfiles in order to apply these filters See Reprocess Logs Now Web Server Properties The web server properties represent the lowest level of configuration of the ClickTracks Server. The web server configuration tells the ClickTracks Server how to retrieve data and which logfiles to process. One or more web server configuration can be defined under a domain. Each web server definition will use one of the following properties to retrieve the web server logfiles: FTP logfile Retrieval File System logfile Retrieval Advanced Web Server Properties See Also: Processing Logfiles FTP Logfile Retrieval The Web Server FTP Property dialog is shown below:

71 Processing Engine Administrator 66 The FTP login account must have at least read privileges for the logfile directory. See your network administrator for further information on the privileges of the FTP login account being used. FTP Login Parameters FTP Server: The domain name that the ClickTracks Server will use to read the logfiles. In many cases, this will be the same as the web server domain name. User Name: The user name for FTP login. This account must have read access to the logfiles. Password: Corresponding password for login. Passive Mode: Some firewall configurations require this setting. Secure Mode: As of version 5.6.0, ClickTracks will support Secure FTP. Simply check the box to make the data download secure. Test Connection Button: Click this button to verify that the FTP parameters entered will successfully log you into the FTP server. If the connection fails, check your login parameters or contact your network administrator for additional help.
72 67 ClickTracks Server Logfile Settings Logfile Directory: The path to the location of the logfiles on the FTP server Browse: Click this button to log in to the FTP server and browse the directories to the location of the logfiles. Select the directory name from the dialog box and click OK. The directory value will be placed into the Logfile Directory field. File Exclude Mask: Exclude this file pattern mask to limit the logfiles selected for processing. Separate each file mask with a semicolon. File Include Mask: Use this file pattern mask to select only the files to be processed. Separate each file mask with a semicolon. Typical file masks are.log;.zip;.gz. Advanced Settings Under the Advanced Settings tab, additional settings allow you to control the FTP download and provide more information about the nature of your logfiles. Delay time between connections: This is set to no delay by default. It is only necessary if the program is having difficulty connecting. Assume Microsoft IIS: If ClickTracks knows that the logfile is rotated in the typical fashion of IIS, then it can inspect which files to download much more quickly. Customize Apache logfile format: Because Apache logfiles do not include a header, it is possible that the logfile might not be clear as to which field is which. This dialog allows you to manually specify which fields contain which data in the logfile.

73 Processing Engine Administrator See Which Files to Download File System Logfile Retrieval The Web Server File System Property dialog is shown below: 68

74 69 ClickTracks Server File System Parameters: Logfile Settings: Logfile directory: The drive letter and path to the location of the logfiles on the local file system, or network share. Browse button: Click this button to browse the local directories, or network share to the location of the logfiles. Select the directory name from the dialog box and click OK. The directory value will be placed into the Logfile directory field. File Exclude Mask: Exclude this file pattern mask to limit the logfiles selected for processing. File include Mask: Use this file pattern mask to select only the files to be processed. Separate each file mask with a semi-colon. Typical file masks are:.log;.zip;.gz See Topics: Which Files to Download, Importing Local / LAN files Advanced Web Server Properties The Advanced Web Server Properties dialog will assist you in setting precise values to retrieve the logfiles for your dataset. Under normal conditions, these settings should not be changed.

75 Processing Engine Administrator 70 FTP Options If you experience problems in logfile retrieval, such as multiple FTP errors, setting these options could correct the situation. Delay time between connections: TThis value sets the seconds to delay between successive FTP login attempts to retrieve logfiles and is useful when connecting to FTP servers that have a restriction on successive or multiple logins. This will effectively throttle the FTP login process back, resulting in slightly slower retrieval times for multiple logfiles. To set the delay time: Uncheck the "No delay" checkbox. Set the delay time in seconds by typing in the digits into the text box, or use the spin control. Try setting the delay time in 10- to 15-second increments and run the server once again to see if the FTP errors are corrected. To remove the delay time: Check the "No delay" checkbox. Logfile Options Assume Microsoft IIS style logfile rotation logfile format is automatically detected by the server process. If your server processing results are not generating.nlf files, and you are using a version of the Microsoft IIS web server, set this checkbox to checked option to force the server into IIS logfile mode. Customize apache logfile format It may be necessary to specify exactly which logfile fields contain which data for Apache logfiles. This is because Apache does not include header data. ClickTracks determines which fields are which by parsing the first 100 requests in a logfile and assigning the type based on the format of the data found. Sometimes, that data does not correspond to expected formats. This could be caused by a preponderance of spiders crawling the site, or a multi-domain logfile that contains a very large number of domains. Whatever the reason, the solutions is to click the "Customize apache logfile format" button and specify specifally which type of data is in which field.
76 71 ClickTracks Server Logfile index of Server IP (Apache only) Version 5.1 In versions earlier than 5.1, a less capable method of establishing the format of Apache logs was used. If you are experiencing problems with the processing of multi-domain web sites on Apache server due to the Server IP field not being recognized and detected, use this setting to specify which column in the logfile contains the Server IP value. To set the Server IP value - Uncheck the Use default checkbox. Set the Server IP column by selecting the number from the dropdown list that corresponds to the column that contains the Server IP.


77 Processing Engine Administrator Server Logging Once the ClickTracks Server has been started, all processing events from all datasets will be logged to the History, or Errors tab listed in chronological order. The server events will be continuously updated while the Server UI program is running. If the UI is closed historical data can be viewed with Show Session Record. The event information that is logged: Date and Time Message from the Server Dataset name causing the event Domain name causing the event Web server name causing the event See Also: FTP Logging
78 73 ClickTracks Server Show Session Record History Errors NLF Files FTP Logging Additional FTP logging information can be sent to the History tab by enabling FTP logging. To Enable FTP Logging: 1. Select Menu Options Enable FTP Logging To Disable FTP Logging: 1. Select Menu Options Disable FTP Logging

79 Processing Engine Administrator Show Session Record Use the Show Session Record menu choice to view all server events for all datasets. The output of the log events will be sent to a text file with the server events listed in chronological order. The Session Record text file will also be opened with the associated program for text (.TXT) files. To show the Session Record for ALL datasets: 1. Select Menu Options View Session Record
80 75 ClickTracks Server To Clear the Session Record: The server process MUST NOT be running. The menu choice "Clear Session Record" will not be available (will be grayed out) until the server has stopped. Select Menu Options Clear Session Record The Global Session Record log will now be reset to an empty state. To show the Session Record for a specific dataset: Click on the specific dataset name to be shown with the mouse. Right-Click on the dataset name. Select Menu View Session Record A text file will be generated in the Session Record directory with only events from the selected dataset. This text file will also be opened with the associated program for text files.


81 Processing Engine Administrator Example Session Record file: 76
82 ClickTracks Server History The History tab will display all events for all datasets in chronological order. The server events will be continuously updated while the Server UI program is running. The History tab will contain up to 2 weeks of server events before current logfile, ServerState.bin, will be rotated out and renamed as ServerState.old. You can filter the History events of a single dataset to isolate the events for viewing. To show the specific History events of a single dataset: Select a specific dataset by clicking on it with the mouse. Right-Click on the dataset name. Select Menu choice: Show History (right-click to close) New History Tab filtered for the specific dataset displayed:

83 Processing Engine Administrator 78 To Close the filtered history tab: Right-Click on the History (dataset name) tab. Select Close The History tab will be closed Errors When an error occurs on a specific dataset, a caution icon Example Error condition on a dataset:, will be display in front of the dataset name.
84 79 ClickTracks Server To see ALL error messages for ALL of the datasets: 1. Click on the Errors tab Review the error messages given by the server and take corrective actions to fix the problem. To see ALL error messages for a specific dataset: Select a dataset with the mouse. Right-Click on the dataset name. Menu: Show Errors (right-click to close) Click on the tab, Errors (dataset name)
85 Processing Engine Administrator 80 To Clear the error status from on a specific dataset: Once you have addressed an error condition reported by the server and would like to clear / reset the Server UI: Select the dataset in error by clicking the mouse on the dataset name. Right-Click on the dataset name. Select menu choice: Clear Error Status. To clear the additional error information from the ClickTracks Way panel: 1. Click the [close] link on The Way content panel.
 to select it.")
86 81 ClickTracks Server To Close the specific Errors (dataset name) tab: Click the tab, Errors (dataset name) to select it. Right-Click on the Errors (dataset name) Select Menu Close The Errors (dataset name) tab will be closed.
87 Processing Engine Administrator NLF Files Normalized Logfiles (.NLF) are the end results of processing your web server logfiles. You can review the created NLF files associated with a specific web server. To see all of the Normalized Logfiles for a specific dataset domain web server : Select the specific dataset with the mouse. This will reveal the domains associated with this dataset. Select the specific domain with the mouse. This will reveal the web servers associated with this domain. Select the specific web server with the mouse. A new tab, NLF Files, will be displayed and contain the following information: File Name - The actual file name of the.nlf file giving the date range of the data stored in that file. Size - The file size of the.nlf file in kilobytes. Created - The date and time that the.nlf file was created. Example NLF tab:
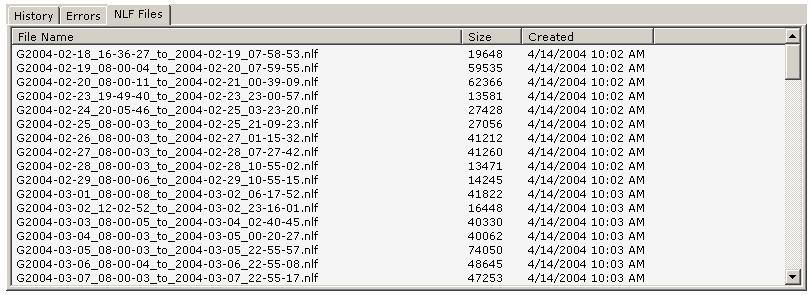
88 83 ClickTracks Server
89 Reporting Engine
90 85 4 ClickTracks Server Reporting Engine The Reporting Engine is a core component of the ClickTracks 6 architecture. It is integrally linked to the Processing Engine and has access to any datasets that have been set up there. The Reporting Engine has two primary functions: It manages the distribution of reports and datasets generated by the Processing Engine It controls the archiving of websites for use in the various reports The Reporting Engine has a service that carries out its routine tasks in the background. It also has an administrator user interface through which its functions are controlled. The Reporting Engine Administrator is a web-based interface. Once set up, it is typically managed by marketing personnel, whereas the Processing Engine Administrator is typically accessed primarily by IT personnel. Serving Data to Clients Among other things, the Reporting Engine is a web server. As such, it is capable of serving reports in the form of HTML documents to web browsers, as well as complete datasets to ClickTracks Client applications via HTTP. Thus, via the Reporting Engine, users can view reports through various methods that suit their needs: They can view pre-analyzed reports anytime, anywhere through a standard web browser They can receive HTML documents via They can view pre-analyzed "Instant Reports" through the ClickTracks Client They can do custom analysis of the complete dataset on the ClickTracks Client. Site Archiving The other primary function of the Reporting Engine is to archive websites. This function will archive the pages of a given website that is part of an existing dataset. Once a site has been archived, this version of the site can be accessed in the Navigation Report of the ClickTracks Pro Client. When looking at past data, a user can see how this data applied to the site as the site actually appeared at a corresponding point in the past. Archives can be done routinely or whenever significant changes are made on the website. 4.1 Reporting Engine Service The Reporting Engine has its own service that runs in the background. This service is the web server that actually serves the HTML reports and the complete datasets to the client application. The service can be seen and controlled in the Windows Operating System under Administrative Tools Services. The Reporting Engine service can also be controlled through the Processing Engine Administrator. In the main menu, simply select Reporting Engine Start to start the service and Reporting Engine Stop to stop it. Until the service has started, the administration interface will not be accessible, because it is the service itself that serves that web-based interface. 4.2 Reporting Engine Administrator

91 Reporting Engine Initial Setup The first step in setting up the Reporting Engine is to ensure that the Reporting Engine service is running, as shown in the previous section. Furthermore, the Reporting Engine service must be the only web server running on the computer. If any other web servers are running on the server, they will compete for ownership of the localhost status and of Port 80, through which files are served to the web. To determine whether any other web servers are running, go to Control Panel Administrative Tools Services and look for services that appear to be web servers. It is easy to tell when you have all other servers disabled. In the Processing Engine Administrator, go to Reporting Engine Show. A web browser will be launched. If a web page is displayed, then the Reporting Engine server is the localhost (IP address ). If the page cannot be displayed, chances are that another server is running on that box and is the localhost. Keep looking until you find the other server and then turn it off. Once the Reporting Engine is running as the localhost, you will see a login page in the web browser when you click on Reporting Engine Show, as described above. Log in to this form with the user name admin and the password none. These are the default settings. (You should change the admin login information immediately upon entering the admin site.)

92 87 ClickTracks Server Click on the Administrator icon to access the main administration console. Click the User Accounts section in the left menu and select "admin." In the form on the right, change the user name and password to something easy to remember but difficult for others to guess. Click Update. You are now ready to begin managing your Reporting Engine User Accounts Through the User Administration form you can set up and manage an unlimited number of individual user accounts. These are the users who will be able to access ClickTracks reports and/or administer the Reporting Engine itself. By default, the User List has two users: user and admin. Adding a New User
93 Reporting Engine 88 To add a new user, simply provide a user name and password and specify whether the user is an administrator (has access to the Reporting Engine interface). Select a group to which the user will belong. A user can only belong to one group; however, it is not necessary for a user to belong to any group. (See User Groups.) Select any datasets to which you want this user to have access. Hold down the CTRL key and click on any of the datasets in the Available Datasets column (right column) and then click the top arrow (<) to add those datasets to the user. Click Update to add the user. Editing an Existing User To edit a user, simply click on that user in the User List and then edit the information as desired. To make a dataset that is currently available to a user unavailable, click on the dataset in the User's Datasets column and click on the right arrow (>). The dataset will be moved to the Available Datasets column, and the user will no longer have access to it. Removing a User To remove a user, click on that user in the User List and then click Remove at the bottom of the page User Groups User Groups allow you to create different groups with access to different datasets, as well as to reports within that dataset. For example, one group could be for web developers with access to the Site Overview, What's New, and Funnel reports, and another group could be for marketing staff with access to the Search, Site Overview, Robot, and Campaign reports. Or you could set up different groups responsible for different websites,
94 89 ClickTracks Server so each group is only allowed access to datasets within its scope of responsibility. Adding a New Group To add a new group, click the New Group link just above the Group List. Assign a name to the group (spaces are not allowed in the name). Check the specific reports this group should have access to. Select any datasets to which you want this group to have access. Hold down the CTRL key and click on any of the datasets in the Available Datasets column (right column) and then click the top arrow (<) to add those datasets to the user. Click Update to add the group. Editing an Existing Group To edit a group, simply click on that group in the Group List and then edit the information as desired. To make a dataset that is currently available to a group unavailable, click on the dataset in the User's Datasets[AU: should this be Group Datasets?] column and click on the right arrow (>). The dataset will be moved to the Available Datasets column, and the group will no longer have access to it. Removing a Group To remove a group, click on that group in the Group List and then click Remove at the bottom of the page. Note: User settings will override group settings when determining what reports the user will receive. If a user has rights to all datasets but a group only has rights to a few, that user will be able to receive all datasets.

95 Reporting Engine Site Archiver The Site Archiver is a fundamental component of the version 6 architecture. It underlies many of the features in the Pro Client application, such as the ability to view time splits in the Navigation Report. By archiving your website at a given time, you can view your web statistics in the Navigation Report with the version of the site that actually existed at that time. How Does It Work? When it is started, the Site Archiver acts as a web browser to pull in the pages of your site. It does not actually crawl your site by following links; rather it goes through the list of previously analyzed pages and looks up each one it finds. The Site Archiver captures the HTML document along with any embedded images, JavaScript files (.JS), stylesheets (.CSS), and Flash files (.SWF). All of these files are stored in a compressed archive that the Pro Client can access at any time. To archive your website one time, simply go to the Site Archiver section of the Reporting Engine Administrator, select the dataset you want to archive, and click Start. You will see thumbnail images and the URLs of your website displayed as the Site Archiver loads the files. In fact, you might even hear Flash animations begin to play as they are loaded by the archiver! You can stop the Site Archiver at any point in the process by clicking the Stop button. When you click Start, the archiver will pick up where it left off. Scheduled Archiving To Schedule Regular Archives of Your Website: Choose Scheduled Task Manager from the Reporting Engine Administrator menu Select Current Tasks New Archive Task. Give the archive a meaningful name, such as the name of the dataset followed by the date of the archive.[au: okay to change to "date of the archive"?] Select a dataset to be archived. Choose a frequency: daily, weekly, or monthly. Select the time of day to perform the archive. Select the day of the week (for weekly archives) or the date of the month (for monthly archives). Click Submit. The archive will run on the next scheduled date.
96 ClickTracks Server Server Configuration In ClickTracks 6, datasets and fully rendered reports are served to the Pro Client, as well as to web browsers, by a built-in web server over the HTTP protocol. The server configuration settings specify the location on the Internet for this web server.

97 Reporting Engine 92 Serving Files to the Local Machine By default, the IP address is set to This IP address represents the localhost on the computer and allows the server to serve files to applications running on the same computer as the server. Before the server can display anything, it must be started. To start the Reporting Engine, go to the Processing Engine Administrator and click Start under Reporting Engine in the main menu. If you are able to view the Reporting Engine Administrator in a web browser, the Reporting Engine must be running already. If you are not able to view the Reporting Engine Administrator, then chances are it has not been started. Serving Files to Other Network Computers Assuming that you want to serve files to applications running on other computers on the network, the server settings will need to be changed accordingly. Each computer on a network has an assigned IP address. To find out the IP address of a computer: Click on the Start button. Click on Run. Type "cmd" into the Open field and click OK. This will open a command line screen At the command line, type "ipconfig." The number you need is the IP Address (see image below). Enter the IP address of the computer (in the above example, ) into the IP address field in place of Any computer on your network can now access reports in a web browser by entering that IP address in the location field. Any computer can also access reports and datasets by entering that IP address into the Pro Client's Dataset Setup Wizard. Serving Files Over the Internet You can also serve reports and datasets to computers anywhere on the Internet by making your server location publicly accessible. To do this, you need to make adjustments on your network router, as follows Port 80 will need to be opened up for serving pages. Any firewall settings restricting the serving of files through this port should be disabled. Port 8080 will also need to be opened up for serving pages. This is the port through which the Site Archiver serves archived sites. Both ports need to point to the IP address of the computer where the Reporting Engine is running (as described above). With these settings in place, a user anywhere on the Internet can enter the IP address or domain name of your network into a Web Browser Wizard or New Dataset Wizard of the Pro Client to receive data files directly form the Reporting Engine. Troubleshooting Note: Firewalls installed on the computer where the Reporting Engine is running or on the router can interfere with file serving. If you are having problems receiving files from the Reporting Engine, check
98 93 ClickTracks Server with your IT department to ensure that firewalls are not restricting the serving of files. Changing Port Numbers The default port setting for HTTP documents is 80. This will rarely be changed. If it is necessary to change this setting for some reason, perform the the following steps: The port specified for serving HTTP docs must be changed at the router. The port number is changed in the Reporting Engine Server Configuration field to match the port number on the router. In the web browser or Pro Client Dataset Wizard, the URL will need to specify the port number (e.g., stats.bobsfruitsite.com:888). In this example, this URL would be used if the port setting had been changed to 888 at both the router and the Reporting Engine. The Site Archiver port has been set to This is the port where the ClickTracks Client will look for archive files from the Reporting Engine. Again, there will rarely be a need to change this setting from the default. If you need to change this port number, follow the steps above Mail Server Configuration The Mail Server Configuration form allows you to establish a mail server to handle the sending of reports via . Any mail server can be used for distribution. The mail server does not need to be running on the same computer as the Reporting Engine. Server Name: This is the SMTP address of the mail server (e.g., mail.yourdomain.com, smtp.yourdomain.com, etc.). Server Port: The default port for SMTP servers is 25. Unless you know that the port of this SMTP server is different, leave this at 25. AutoMail This is the FROM and Return address for the header, indicating who the s will appear to be from. AutoMail User Name: This is the user account. It must correspond to a valid account on the server. AutoMail Password: This is the password for the above address. Subject: This is the text that will appear in the subject line of all s sent as scheduled tasks. Once you have established your settings, click the Test button. If you have used valid data in the settings, you will receive a success message. If you have entered invalid data (e.g., incorrect mail server, nonexistent account, wrong password, etc.), then you will receive an error message stating "The connection failed to send the test ."
99 Reporting Engine Scheduled Task Configuration Scheduled Task Configuration is used to set up schedules for distributing reports via , as well as for site archiving. To schedule tasks, click Scheduled Task Configuration in the left menu of the Reporting Engine Administrator. Scheduled Tasks To Create a New Scheduled Task: The New Task form is displayed in this section by default. If it is not already displayed, click on New Task under Current Tasks. Give the task a meaningful name. (The Task Type is based on the type of task selected and is not editable.) Select a user who will receive the . Type in the user's address Specify the frequency of distribution: daily, weekly, or monthly. Specify the day or date (depending on the selection in step 5). Specify a time of day for the task to run. Select a dataset. Select a specific report to be sent. Each task can only send one report. Otherwise, s would become far too large, risking blockage by filters or excessive download times. Thus, you might need to set up multiple tasks for each individual user. When the form has been completed, click Submit to save it. The Task Name, along with the type of task, will appear in the list on the left under Current Tasks.

100 95 ClickTracks Server To Edit an Existing Task: To edit an existing task, click on the task under Current Tasks to populate the form with the current settings. Change any fields as desired, and click Submit. To delete an existing task, click on the task and then click Remove. Scheduled Archive Tasks You can also schedule the Reporting Engine to archive your website on a daily, weekly, or monthly basis. To create a scheduled archive: Click on New Archive Task under Current Tasks. Give the task a meaningful name. Select a dataset to archive. Select whether to archive daily, weekly, or monthly. Specify a day of the week or date of month, depending on your selection in step 4. Specify a time of day to perform the archive. Click Submit to save the changes. The task will now appear under Current Tasks. To edit the task, simply select the task from Current Tasks and make any desired changes. To delete the task, select the task and then click Remove.
101 Reporting Engine 96
102 Configuration Client

103 Configuration Client 5 98 Configuration Client The Configuration Client allows an administrator to make global changes to a dataset. These changes are then passed along to the end users, either through the downloaded dataset or via the rendered reports. The Configuration Client is essentially the same application as a Pro Client, although it does have some significant differences. It does not include the ability to create a dataset, as it always uses the dataset that was clicked in the Processing Engine Administrator to launch the application. Likewise, it has no ability to synchronize with the server. It does not include the option to switch from Instant Reports to Custom Analysis; rather, it is always in Custom Analysis mode, because that is the essential purpose of the application. Otherwise, the application is the same as the standard Pro Client. For additional help on using the Configuration Client go to
104 Advanced Topics
105 Advanced Topics Advanced Topics Strip Out File Types Robots & Spiders Search Engine Parameters & Keywords 6.1 How ClickTracks Uses Cookies To use cookies within ClickTracks you must both set the cookie within your website code and record the cookie within the logfile. If the site sets a persistent cookie then simple new-versus-returning comparisons of visitors can be made. Analysis of visitors with specific cookie values is also possible. ClickTracks Professional Client Custom session cookies are supported. Persistent cookie database tracks unique visitors and extends campaign and conversion tracking to work across long periods of time (latent conversions). See Cookie Tracking What is a cookie? A cookie is a piece of information that gets sent to a user's browser by a website. Cookies are typically used to store user information like name, address, online buying patterns, login details, and so on. The website can then use this information to provide useful information as the user surfs through the websites. Typically a session cookie is used only throughout the duration of the user's visit (or session) on the website and is removed when the user leaves. However, there is a second variety of cookie, called a persistent cookie. A persistent cookie is similar to a session cookie except a physical text file is written to the user's machine and stays there for a website-defined amount of time. This is quite useful: Now the same information that was stored before can be accessed every time the user comes back to the website for multiple visits. How do cookies work with ClickTracks? Cookies can be very useful in helping you get the most out of your ClickTracks analysis. Two applications of cookies are calculating unique visitors and tracking delayed conversions. The first application for cookies is calculating unique visitors. By default, ClickTracks deals in visits when running its analysis. This means that the same visitor can come to a website multiple times and will be tracked as a separate visitor each time. Often it is important to see how many distinct (unique) visitors are coming to your website. The only way to know if a visitor has come to your site before (and therefore if the visitor is unique) is to set a cookie for each visitor who comes to your site. The second application of cookies is tracking delayed conversions. A typical scenario in web marketing is to find out how many visitors who come to your website as a result of pay-per-click (PPC) actually convert into a sale. If a visitor who clicks on a PPC ad that leads to your site purchases within the same visitor session, ClickTracks will log the visitor as a conversion and calculate the numbers with no problem. However, the reality is that many times a visitor will reach your site as a result of a PPC ad, leave your site, think about it for a while, and then come back some days later to purchase. Because the click on the PPC ad and the purchase happened across two visitor sessions, there is no way to tie these two operations together and log a conversion in ClickTracks. The only way to accurately tie these two sessions together is to set a cookie for the visitor. Thus, every time the visitor comes to your site, ClickTracks will treat him or her as a unique visitor and will log the conversion, because it's almost as if the PPC ad click and the purchase happened in the same session, even though this session lasted many days.
106 101 ClickTracks Server How Do I Set Cookies for My Website Visitors? IFor ClickTracks to track cookies, we require that you set a persistent cookie for all your visitors. When you set this cookie, you should set its expiry date to never expire. Cookies are set using either your server technology (PHP, ASP, etc.) or your client-side technology (JavaScript, VBScript, etc.). Cookies are usually set using the following name/value scheme: Name = value Each cookie that you set must be unique for every visitor. You can come up with any kind of convention that you like. One example is to use a Timestamp followed by a random string. So, for example: MYCOOKIE= ABCD This is a sufficient example of a unique value because it is almost impossible to have two requests logged at the same time. Even if this does happens, adding another random string to the end of the value further ensures its uniqueness. The code that you write on your website would do the following: When the visitor first comes to your website, a persistent cookie is set on the visitor's machine. This cookie need only be set once. As long as the cookie's expiry date is set to never expire, this cookie will stay with the visitor's machine forever. When a visitor returns to your site, your code should check the visitor's machine for the presence of your cookie and should not set another one if a cookie already exists. The cookie should never be set twice for any given visitor. You must make sure that this cookie is also getting logged in your web server logs. Please see the help documents in the ClickTracks application on how to configure your web server to log the proper logfile format. How Do I Implement Cookies? There are a variety of ways to implement cookies on your website. It all depends on the website technology you are using. The following are some sample implementations using ASP, PHP, and JavaScript: ASP (Active Server Pages) - Sample Code If(Response.Cookies(strCookieName) = "") Response.Cookies(strCookieName) = strcookievalue ' This will make the cookie expire in days Response.Cookies(strCookieName).Expires = Date() PHP - Sample Code // Cookie is Valid for days. 3rd value in function is the time expiration in seconds seconds = 1 hour if(!isset($http_cookie_vars["clicktracksid"])) setcookie ("CLICKTRACKSID", "MYVALUE", time() ); JavaScript - Sample Code The following is a standard cookie library to save in a.js file and include on your website. For example: <script language="javascript" src="cookie.js"></script>
107 Advanced Topics 102 Inside cookie.js, you should paste the following: // // Cookie Functions - Second Helping (21-Jan-96) // Written by: Bill Dortch, hidaho Design <BDORTCH@NETW.COM> // The following functions are released to the public domain. // // The Second Helping version of the cookie functions dispenses with // my encode and decode functions, in favor of JavaScript's new built-in // escape and unescape functions, which do more complete encoding, and // which are probably much faster. // // The new version also extends the SetCookie function, though in // a backward-compatible manner, so if you used the First Helping of // cookie functions as they were written, you will not need to change any // code, unless you want to take advantage of the new capabilities. // // The following changes were made to SetCookie: // // 1. The expires parameter is now optional - that is, you can omit // it instead of passing it null to expire the cookie at the end // of the current session. // // 2. An optional path parameter has been added. // // 3. An optional domain parameter has been added. // // 4. An optional secure parameter has been added. // // For information on the significance of these parameters, and // and on cookies in general, please refer to the official cookie // spec, at: // // // // // "Internal" function to return the decoded value of a cookie // function getcookieval (offset) { var endstr = document.cookie.indexof (";", offset); if (endstr == -1) endstr = document.cookie.length; return unescape(document.cookie.substring(offset, endstr)); } // // // // // // Function to return the value of the cookie specified by "name". name - String object containing the cookie name. returns - String object containing the cookie value, or null if the cookie does not exist. function GetCookie (name) { var arg = name + "="; var alen = arg.length; var clen = document.cookie.length; var i = 0; while (i < clen) { var j = i + alen;
108 103 ClickTracks Server if (document.cookie.substring(i, j) == arg) return getcookieval (j); i = document.cookie.indexof(" ", i) + 1; if (i == 0) break; } return null; } // // Function to create or update a cookie. // name - String object object containing the cookie name. // value - String object containing the cookie value. May contain // any valid string characters. // [expires] - Date object containing the expiration data of the cookie. If // omitted or null, expires the cookie at the end of the current session. // [path] - String object indicating the path for which the cookie is valid. // If omitted or null, uses the path of the calling document. // [domain] - String object indicating the domain for which the cookie is // valid. If omitted or null, uses the domain of the calling document. // [secure] - Boolean (true/false) value indicating whether cookie transmission // requires a secure channel (HTTPS). // // The first two parameters are required. The others, if supplied, must // be passed in the order listed above. To omit an unused optional field, // use null as a place holder. For example, to call SetCookie using name, // value and path, you would code: // // SetCookie ("mycookiename", "mycookievalue", null, "/"); // // Note that trailing omitted parameters do not require a placeholder. // // To set a secure cookie for path "/mypath", that expires after the // current session, you might code: // // SetCookie (mycookievar, cookievaluevar, null, "/mypath", null, true); // function SetCookie (name, value) { var argv = SetCookie.arguments; var argc = SetCookie.arguments.length; var expires = (argc > 2)? argv[2] : null; var path = (argc > 3)? argv[3] : null; var domain = (argc > 4)? argv[4] : null; var secure = (argc > 5)? argv[5] : false; document.cookie = name + "=" + escape (value) + ((expires == null)? "" : ("; expires=" + expires.togmtstring())) + ((path == null)? "" : ("; path=" + path)) + ((domain == null)? "" : ("; domain=" + domain)) + ((secure == true)? "; secure" : ""); } // Function to delete a cookie. (Sets expiration date to current date/time)
109 Advanced Topics // // 104 name - String object containing the cookie name function DeleteCookie (name) { var exp = new Date(); exp.settime (exp.gettime() - 1); // This cookie is history var cval = GetCookie (name); document.cookie = name + "=" + cval + "; expires=" + exp.togmtstring(); } // Once you have this setup, you can use this JavaScript cookie library by executing the following code: SetCookie( "CLICKTRACKSID", "MYVALUE", expdate); How Does ClickTracks Start Tracking Cookies? In the ClickTracks ServerAdmin, find the dataset you want to work with. Click (or double-click) on the Dataset Properties icon. Select on the Cookie Tracking tab. Check the "Enable cookie tracking" checkbox. In the text field for entering persistent cookie names, enter the name of the persistent cookie you are setting on your website, as follows: CLICKTRACKSID= Then click OK and close the dialog box. Once you have cookie tracking set up, you will need to reimport your logfiles (if you have already imported your logfiles). This is because cookies in your logfiles must be processed as they are getting imported. It is too late to process cookies once the logfiles are loaded. 6.2 Using Persistent Cookies To Improve Campaign Tracking Campaign tracking relies on tying a conversion event back to a campaign or search engine keyword that generated the lead. The complication for web analytics tools is that the clickthrough and conversion often occur hours, days, or even weeks apart. Because the user's IP address and other data are almost sure to change across such a long period of time, a unique and persistent cookie is the only reliable method for tracking. It cannot be overstated that good campaign data depends on setting a unique persistent cookie. Configuring Persistent Cookies Cookies are a part of the HTTP protocol and are exchanged between browser and server during the time the browser requests pages. They are then logged in the logfile. It's important to understand that ClickTracks cannot set any cookies. Only the website can do this. It's in the interest of the website owner to set and manage the cookies as this provides the best possible long-term solution. Even though writing website code to handle the cookies seems complex and time consuming, you should do it. It's too important to ignore. The persistent cookie you use can have any name, and the contents are unimportant as long as they are unique and won't be changed later. To meet these requirements, you must: 1. Create a unique value for the cookie. The system time (epoch time) with a random number appended is good enough.
110 105 ClickTracks Server 2. Set the cookie with an expiry many weeks or months in the future. 3. Never reset the value of the cookie (in other words, if it exists, don't replace it). Setting the cookie will probably require some small custom development within the website. You'll then configure the ClickTracks Server to use this cookie name, and that's it. ClickTracks will take care of all the rest automatically. Apache mod_usertrack For users of Apache, there is a very convenient way to handle both session and persistent cookies without changing any code in the website. Install mod_usertrack, configure cookies to be logged within the logfile, and set up the ClickTracks Server to "Use Only Unnamed Cookies." (Cookies set by mod_usertracks are strange in that they have no name, only a value.) 6.3 Configuring Web Servers ClickTracks requires certain fields to be present in the logfile. If possible, check the sever configuration to confirm the fields are present. If your website is hosted by your ISP, you might have little choice over the logfile fields present. The ISP should be able to confirm the settings or make any changes needed. ClickTracks requires these fields: Date and Time Client IP Address HTTP Method Requested file and Query string User Agent Referrer Status code Cookie (preferable, but not required) Virtual server name (required only for multi-domain logs) The referrer and user agent fields are essential for ClickTracks to generate reliable reports. Internet Information Server (IIS), Apache Internet Information Server (IIS) The default installation of Microsoft IIS writes minimal information to the logfile. Most websites have changed the IIS configuration to write more detailed information. ClickTracks requires: W3C Extended Logfile Format Date Time Client IP Address Method URI Stem URI Query User Agent sc-status Cookie (preferable, but not required) Referrer cs-host (only required for multi-domain logfiles) Other fields can be logged and will be safely ignored by ClickTracks.
111 Advanced Topics Open Control Panels from the system Start menu. Open Administrative Tools. Open 'Computer Management'. Expand 'Services and Applications'. Now expand 'Internet Information Services' Right click on 'Default Web Site'. Logfile settings are contained in the 'Web Site' tab, at the bottom. Click 'Properties' then 'Extended Properties' to verify the settings above. Apache Apache is configured through a text file that contains many other settings that are beyond the scope of this document. The settings relating to logfiles are: LogFormat "%v %h %l %u %t \"%r\" %>s %b \"%{Referer}i\" \"%{User-Agent}i\"" combined CustomLog /var/log/httpd/access combined The first line defines a log format named 'combined' containing the fields in the order specified. The second line ties the named format to the actual file name to be used when writing the information. Other fields can be present in the logfile, and the order of fields is not critical. Most Apache installations are similar to the above and require no further modification. Logging cookies If your site is setting cookies either through the built-in session cookie of a scripting language like PHP, or your own custom cookie, you'll get better results through ClickTracks if the cookies are present in the log. Modify your logformat line as follows: LogFormat "%v %h %l %u %t \"%r\" %>s %b \"%{Referer}i\" \"%{User-Agent}i\" \"%{cookie}i\"" combined For more information see How ClickTracks Uses Cookies 6.4 File Extensions To Ignore A typical web page is made up of many individual files. Beyond the HTML page itself, each graphic element is a separate.gif,.png, or.jpg file. As the browser requests these elements, the web server will record them in the logfile. Most of these requests can be ignored by ClickTracks because the containing HTML page request is all that is required to determine visitor behavior patterns. Stripping the requests has two benefits: Increased performance because much data from the original logfile is not analyzed Better visitor behavior data because reports show the actions initiated by visitors and are not clouded by requests made by the browser for components within the page. Files are ignored based on file name extension, ie.gif. This process takes place within ClickTracks as part of two separate phases: logfile Importing When you import the logfiles they are stored in an internal format known as the normalized format. During importing each request from the log is compared to a list of extensions contained in a file named 'FileExtensionsToIgnore.txt'. Although you can edit this file (it's inside the 'data' folder in the same location as the ClickTracks_Server.exe program) you should be aware that any file extensions ignored during importing are permanently removed from the dataset. Although you could re-import the logfiles this is usually a tedious process and should be avoided. It is therefore wise to list files inside 'FileExtensionsToIgnore.txt' only when you are certain they will never be required for analysis or used for labeling visitors.
112 107 ClickTracks Server The file extensions listed in FileExtensionsToIgnore.txt by default are:.jpg.jpeg.gif.png.ico.css.js.jar.exe.mid.ida.class.bmp.vbs See also: Ignore Filenames That Contain 6.5 User Agents To Ignore Many of the requests to your web server are from robots or spiders. These programs automatically browse the web, for example to compile indexes for search engines. Although these requests are important for your site's visibility on search engines, they're not relevant for visitor behavior analysis. Therefore ClickTracks automatically removes sessions that appear to be generated from robots and spiders. It does this in three ways: 6.6 If the session begins by requesting 'robots.txt' this and all subsequent pages from this session are ignored. If the user agent contains any string in the Data directory from the file 'UserAgentsToIgnore.txt' (using partial matching) the session is ignored. Finally a visitor session that repeatedly requests the same pattern of pages is ignored. Search Engine Parameters & Keywords Several components of ClickTracks require a definition of search engines and the names of the parameters passed in with the referring URL. When ClickTracks shows a list of top search terms it has extracted this by examining each URL and determining if it comes from a 'known' search engine, and if so the name of the parameter that contains the original search terms / keywords. The search engines are defined in the file 'SearchEngines.txt', in the Data directory. You can edit this file to add your own specific search engines if you wish. The syntax is a tab separated list of parameters: Domain name, partial match OK Display name shown in reports Search parameter. If more than one separated by commas. This is the parameter picked up in the referrer that contains the keywords, e.g. 'q' for Google Home page of engine Search page of engine. ClickTracks will visit this URL with the search parameter set to a string if the user clicks this option in the UI. All parameters are tab delimited, with a carriage-return at end of line. Sample Data:
113 Advanced Topics 108 google Google q,aq,as_q,query,p googlesyndication Google content targeted q,p Distinguishing Duplicated Links A page that links to another often does so from several different hyperlinks. The most common example is a home page with a navigation bar at the top and another bar at the bottom with text-only links. Because both hyperlinks point to the same URL, the request is identical, regardless of whether the user clicks the top link or the bottom. Marketers sometimes need to know which link is really being used more, since this can heavily influence site design decisions. ClickTracks is able to distinguish these links if a parameter is added to them within the HTML. Each time the link is used on a given page, a parameter with a different value should be added, so the links can be distinguished when ClickTracks reads the logfile. Because this requires a modification to the site, you should plan carefully and thoroughly understand what needs to be done Decide on a single parameter that will be easy to distinguish and that has an easy-to-recognize name like 'from' or similar. Decide on a consistent set of values, for example, from=topnav and from=bottomnav, or linkid=1 and linkid=2. The value needs to be unique within a page for a given link, but it does not have to be unique for every single link and page. For example, although the links news.php?from=topnav and product.php?from=topnav have the same distinguishing parameter, this is OK, because they're referencing different pages. The parameter must appear as the last one on each link (e.g., news.php?catalogid=5&from=topnav). Once the site is modified to include the parameter on each page, you'll need to set the date range in ClickTracks to include only the dates after this. Be aware of possible side effects in search engine optimization. Adding this parameter to each link could affect the ability of search engine spiders to crawl and index your site. This depends on the particular search engine, and the technology it currently employs. Consult a specialist search engine consultant and have them evaluate this for you. Once the parameter is setup on your site you simply need to configure the ClickTracks server to use it. Select the Domain Properties Advanced Options and enter the parameter name from the text box. 6.8 The Way Content Help The ClickTracks Way is a dynamic, context-sensitive help system that will display useful information in a panel on the right side of the screen. The Way Content will also be displayed during the various data wizards, with additional tips to assist in the configuration decisions. The Way Content is useful when you are first learning how to work with the ClickTracks Server. Once you have mastered most of the routine tasks, it might be useful to turn off The Way Content. To Turn Off The Way Content: Menu: Help Hide the ClickTracks Way The Way content panel will be removed from the Server window and data wizards. To Turn On The Way Content:
114 109 ClickTracks Server Menu: Help Show the ClickTracks Way The Way content panel will be displayed in the Server window and data wizards.
115 Troubleshooting
116 111 7 ClickTracks Server Troubleshooting
117 Troubleshooting Logfile Import Warning When importing a logfile ClickTracks performs a basic check to make sure the log is for the specified domains within the dataset. Most logfiles do not specify the domain to which they belong, so ClickTracks examines the referrer field. Most referrer entries will be the domain being analyzed, with a few from Google and other external sources of traffic. If the majority of referrers are not within the domain or domain aliases, an error is generated. The error most commonly indicates that the logfile is from a different domain and should not be imported. Make sure the FTP login and directory are set up for the correct server and domain. If you're sure the logfile is part of the website being analyzed and should be included in the dataset, you might need to add the domain for this logfile to the list of domain aliases inside the options dialog.
118 Terminology
119 Terminology Terminology ClickTracksScheduler.xml: All server configuration information is saved in this file which resides in the ClickTracks Server directory. Dataset: A unique website. It could consist of multiple sub-domains or load balanced servers. Domain: A logical group of web servers (could be just one) that is part of the makeup of the overall website. This also includes load balanced servers. Normalized logfile: A file with the extension.nlf that resides in special folders to be accessed by the client software. The.NLF file, created by the ClickTracks service, is a preprocessed, compressed file that contains web logfile data that is stripped down to contain only relevant data used by the ClickTracks Client software. Server: A physical computer running a website.
120 FAQ
121 FAQ FAQ Frequently Asked Questions. Licensing Issues Q: My server license has expired. What can I do? A: Contact ClickTrack Sales (sales@clicktracks.com) to purchase a permanent license. Once you have purchased the licenses, activate them via the Server UI - Menu Help Activate License. Q: I have exceeded my server license number of servers. How do I get more server licenses? A: Contact ClickTracks Sales (sales@clicktracks.com) to purchase additional server licenses. Once you have purchased the licenses, activate them via the Server UI - Menu Help Activate Upgrades. Errors and Logs Q: How many days of server logs are kept by the ClickTracks Server? A: The ClickTracks Server keeps 14 days of server logs in the file..\clicktracks Server\SessionRecord\ServerState.bin Q: A server error condition happened while the Server UI was not running. How can I find what the error was? A: Start the Server UI. Select Menu Options Show Session Record to see a full listing of all server events. A: If you know the specific dataset that caused the error, select the dataset. Right-Click Show Session Record to see a full server log of that specific dataset. See Topic: Show Session Record User Accounts and Permissions (This applies only to version 5.x, NOT 6) Q: What account permissions are needed for the ClickTracks Professional Client to download a dataset by Local File System, FTP, HTTP, or HTTPS? A: The account permissions required are: File Share: READ FTP: READ HTTP / HTTPS: READ Server Operation Q: I just changed my server scheduler settings but they aren't taking effect. What do I do? A: The scheduler information is stored in the ClicktracksScheduler.xml file and is also copied into a.bin file. This ensures that there aren't any file-locking issues when the UI and the service need to access this information at the same time. Anytime the scheduler is updated, it is stored in the ClickTracksScheduler.xml and then
122 117 ClickTracks Server copied to the.bin file. Sometimes there is a problem, and the scheduler doesn't read the newly updated schedule. If this occurs, go to your /Program Files/Clicktracks/ClickTracks Server/Archive directory, where you will find.bin files. Delete these files so the system will be forced to read the ClickTracksScheduler.xml and then recreate the.bin file. Q: I looked in the "normal" folder and noticed some.nl_ files. Is this right? Can I delete these files? A: Do not delete these files. They are created during the stage when the.ctc files are created (for cookie tracking). When cookie tracking is turned on, the order of events occurs as follows: files All the logfiles are converted into.nlf. Once all the files are normalized, the server temporarily renames the.nlf containing cookies into.nl_ The corresponding.ctc (cookie tracking) files are created Once the.ctc files are done, the server renames the.nl_ files back to.nlf If you delete the.nl_ files or stop the service in the middle of this process, the server is left in limbo, and the whole process will need to start again. This can potentially be a problem if you have a lot of logfiles with a lot of cookie data. Q: I have set up the server and no files are showing up. What's wrong? A: There could be many of reasons for this: Check that your File Include specs are correct. Are you using any odd extensions other than the standard.log,.gz, etc.? Are you not using an extension at all? This information can be found in the web server settings dialog. Does your windows user login have administrator privileges to write to your machine's disk? Without this,.nlfs cannot be created, and an error will be logged in the session record. Do you have permission to access the logfile source directory (place you are pulling files from)? Does the ClickTracks Admin service have logon permissions? Check to see if this is the case in Control Panel Admin Tools Services. Right-click on the ClickTracks Server in the list and go to properties. You will see a Log On tab that contains these permissions. Did you check your Session Records for any error messages that may help? In the Server UI, go to the Options menu and select View Session Record. The session record is a kind of log created and maintained by the server admin software. All the major tasks that the software performs are logged in this file, along with errors. Most of the output statements in here are for IT use, but some errors can be obvious indicators that something is wrong. This could point you in the right direction. One such error is "Import error." Are your logfiles in the correct format that ClickTracks requires (W3C Extended)? See the online help for logfile formats (both IIS and Apache). Q: I maintain multiple websites and have created a dataset for each, but when I load up the data in the Professional Client, all the numbers appear to be the same. There's no way that all my websites have the same amount of traffic. What's up? Do you have a multi-domain logfile? The definition of a multi-domain logfile is when the request data for many different websites is logged in one logfile. The result is that you will have to load the same logfile for every dataset. This is fine, but you will need to configure a multi-domained web server log source for your datasets. Also, keep in mind the server aliases. You must have the correct server aliases entered for each domain. If you accidentally enter a domain that is outside the domain for which you are currently creating a dataset, you will get data leakage. Check this by right-clicking on the domain level in the Server UI and click Properties. In the Properties dialog, you will see an input box for DNS Lookup Helper. Verify that these names are correct for each
123 FAQ 118 domain. Q: Can I track clicks for data files like.exe's, Word Docs, etc.? A: Absolutely! ClickTracks will track any file that gets logged in your logfiles. However, by default, we do exclude some historically not-so-useful requests. These file types are kept in a text file located at \Program Files\ClickTracks Server\data\FileExtensionsToIgnore.txt. Open this file in Notepad or any other text editor to see if the file extension you are trying to track is in there. If it is, carefully remove that entry, save the file, and rerun ClickTracks. The logfiles from the site need to be reprocessed. Q: Why can't my Pro Client download any data files from a mirrored dataset via the HTTP protocol? A: The web server serving up the data will need to be configured to handle the retrieval of the.nlf and other ClickTracks files used for dataset mirroring. The web server will need to have the following MIME types added for the file types. MIME Type:.NLF application/octet-stream.tcs application/octet-stream.ini text/plain See your server documentation for details on adding a MIME type.

124 Acknowledgements
ClickTracks User Manual ClickTracks
 ClickTracks User Manual ClickTracks Web Analytics Done Right ClickTracks is the culmination of extensive research and development in the areas of website and user behavior analysis. Our goal in creating
Cloud Help for Community Managers...3. Release Notes System Requirements Administering Jive for Office... 6
 for Office Contents 2 Contents Cloud Help for Community Managers...3 Release Notes... 4 System Requirements... 5 Administering Jive for Office... 6 Getting Set Up...6 Installing the Extended API JAR File...6
8.0 Help for Community Managers Release Notes System Requirements Administering Jive for Office... 6
 for Office Contents 2 Contents 8.0 Help for Community Managers... 3 Release Notes... 4 System Requirements... 5 Administering Jive for Office... 6 Getting Set Up...6 Installing the Extended API JAR File...6
Upgrading from Call Center Reporting to Reporting for Call Center
 Upgrading from Call Center Reporting to Reporting for Call Center www.nortelnetworks.com 2003 Nortel Networks i Table of Contents Table of Contents Change History...1 How to use this guide...2 Introduction...
NetExtender for SSL-VPN
 NetExtender for SSL-VPN Document Scope This document describes how to plan, design, implement, and manage the NetExtender feature in a SonicWALL SSL-VPN Environment. This document contains the following
AT&T Core Mobility Integrated Dispatch Console User Guide. Installation Guide. AT&T Integrated Dispatch Console 3.0
 Installation Guide AT&T Integrated Dispatch Console 3.0 October 2016 Table of Content 1. Introduction... 3 1.1. Purpose and Scope... 3 1.2. Terms and Definitions... 3 1.3. About this Manual... 5 1.4. What
Connectware Manager Getting Started Guide
 Connectware Manager Getting Started Guide 90000699_B 2004, 2005 Digi International Inc. Digi, Digi International, the Digi logo, the Digi Connectware log, the Making Device Networking Easy logo, Digi
Workstation Configuration Guide
 Workstation Configuration Guide August 13, 2018 Version 9.6.134.78 For the most recent version of this document, visit our documentation website. Table of Contents 1 Workstation configuration 4 1.1 Considerations
CUSTOMER CONTROL PANEL... 2 DASHBOARD... 3 HOSTING &
 Table of Contents CUSTOMER CONTROL PANEL... 2 LOGGING IN... 2 RESET YOUR PASSWORD... 2 DASHBOARD... 3 HOSTING & EMAIL... 4 WEB FORWARDING... 4 WEBSITE... 5 Usage... 5 Subdomains... 5 SSH Access... 6 File
docalpha Installation Guide
 ARTSYL DOCALPHA INSTALLATION GUIDE 1. docalpha Architecture Overview... 2 1.1. docalpha Server Components... 4 1.2. docalpha Production Environment Stations Overview... 4 1.3. docalpha Setup & Administration
Upgrading from Call Center Reporting to
 Upgrading from Call Center Reporting to Reporting for Call Center Upgrade Document Reporting for Call Center Release 2.2.1xx Document Number: 200-0400-110 Document Status: Standard Document Version: 3.02
Installation Guide. Contents. Overview. Dell SonicWALL Advanced Reporting Installation Guide. Secure Remote Access. SonicOS
 Secure Remote Access SonicOS Contents Overview...1 Server Requirements...2 Licensing and Activation...2 Installing and Upgrading...4 Collecting Dell SonicWALL Aventail Access Logs...8 Initial Setup of
Virtual Recovery Assistant user s guide
 Virtual Recovery Assistant user s guide Part number: T2558-96323 Second edition: March 2009 Copyright 2009 Hewlett-Packard Development Company, L.P. Hewlett-Packard Company makes no warranty of any kind
Workspace Administrator Help File
 Workspace Administrator Help File Table of Contents HotDocs Workspace Help File... 1 Getting Started with Workspace... 3 What is HotDocs Workspace?... 3 Getting Started with Workspace... 3 To access Workspace...
CaliberRDM. Installation Guide
 CaliberRDM Installation Guide Borland Software Corporation 4 Hutton Centre Dr., Suite 900 Santa Ana, CA 92707 Copyright 2010 Micro Focus (IP) Limited. All Rights Reserved. CaliberRDM contains derivative
ROCK-POND REPORTING 2.1
 ROCK-POND REPORTING 2.1 Installation and Setup Guide Revised on 09/25/2014 TABLE OF CONTENTS ROCK-POND REPORTING 2.1... 1 SUPPORT FROM ROCK-POND SOLUTIONS... 2 ROCK-POND REPORTING OVERVIEW... 2 INFRASTRUCTURE
LifeSize Control Installation Guide
 LifeSize Control Installation Guide January 2009 Copyright Notice 2005-2009 LifeSize Communications Inc, and its licensors. All rights reserved. LifeSize Communications has made every effort to ensure
NTP Software Defendex (formerly known as NTP Software File Auditor) for NetApp
 for NetApp") NTP Software Defendex (formerly known as NTP Software File Auditor) for NetApp Installation Guide This guide provides a short introduction to the installation and initial configuration of NTP Software
NTP Software Defendex (formerly known as NTP Software File Auditor) for NetApp Installation Guide This guide provides a short introduction to the installation and initial configuration of NTP Software
WebAnalyzer Plus Getting Started Guide
 WebAnalyzer Plus Getting Started Guide www.manageengine.com/web-analytics Contents 1 Introduction 4 2 3 4 5 WebAnalyzer Plus Overview Getting Started System Requirements Installation Starting and Accessing
Exchange Pro 4.4. User Guide. March 2017
 Exchange Pro 4.4 User Guide March 2017 Table of Contents 1. Introduction to Exchange Pro... 5 About this Document... 5 Supported Mailbox Migration Paths... 6 Supported Public Folders Migration Paths...
Danfoss Remote Management Tool RMT Version 4.x
 User Guide Danfoss Remote Management Tool RMT Version 4.x ADAP-KOOL Refrigeration Control System Document history Document USCO.PI.R1.D1.02 Notes First document release (based on version 3.0 RMT) USCO.PI.R1.D3.02
FieldView. Management Suite
 FieldView The FieldView Management Suite (FMS) system allows administrators to view the status of remote FieldView System endpoints, create and apply system configurations, and manage and apply remote
Desktop & Laptop Edition
 Desktop & Laptop Edition USER MANUAL For Mac OS X Copyright Notice & Proprietary Information Redstor Limited, 2016. All rights reserved. Trademarks - Mac, Leopard, Snow Leopard, Lion and Mountain Lion
Reporting for Contact Center Setup and Operations Guide. BCM Contact Center
 Reporting for Contact Center Setup and Operations Guide BCM Contact Center Document Number: Document Status: Standard Document Version: 05.01 Date: September 2006 Copyright 2005 2006 Nortel Networks, All
Copyright and Legal Disclaimers
 Copyright and Legal Disclaimers User Manual for DiConnect Lite Copyright 2012 by DiCentral Corporation All rights reserved. This document and all content that is contained, embedded and linked to this
Automation Anywhere Enterprise 10 LTS
 Automation Anywhere Enterprise 10 LTS Document Version: 1.3 Installation Guide Date of Publication: 15 th November, 2016 Update(s) to this document edition: Table of Contents 1. Client Prerequisites Processor
Getting Started Guide. Version 4.4
 C i s co EnergyWise Management Getting Started Guide Version 4.4 Contents Introduction to Cisco EnergyWise Management...4 Setup & Installation...5 System Requirements (Single Server Installation)...5 Installation...6
Lesson 1: Preparing for Installation
 2-2 Chapter 2 Installing Windows XP Professional Lesson 1: Preparing for Installation When you install Windows XP Professional, the Windows XP Professional Setup program allows you to specify how to install
Workstation Configuration
 Workstation Configuration December 15, 2017 - Version 9.3 - - - - - - - - - - - - - - - - - - - - - - - - - - - - - - - - - - - - - - - - - - - - - - - - - - - - - - - - - - - - - - - - - - - - - - - -
Workstation Configuration
 Workstation Configuration December 12, 2017 - Version 9.4 - - - - - - - - - - - - - - - - - - - - - - - - - - - - - - - - - - - - - - - - - - - - - - - - - - - - - - - - - - - - - - - - - - - - - - - -
Mailbox Manager Getting Started Guide. Licensing Installation Options System Requirements Installation Instructions
 Mailbox Manager Getting Started Guide Licensing Installation Options System Requirements Installation Instructions Mailbox Manager Release 5.4 December 2006 Table of Contents Introduction... 1 Licenses...
Silk Performance Manager Installation and Setup Help
 Silk Performance Manager 18.5 Installation and Setup Help Micro Focus The Lawn 22-30 Old Bath Road Newbury, Berkshire RG14 1QN UK http://www.microfocus.com Copyright 2004-2017 Micro Focus. All rights reserved.
DefendX Software Control-Audit for Hitachi Installation Guide
 DefendX Software Control-Audit for Hitachi Installation Guide Version 4.1 This guide details the method for the installation and initial configuration of DefendX Software Control-Audit for NAS, Hitachi
Top Producer 7i Remote
 Top Producer 7i Remote Quick Setup Top Producer Systems Phone number: 1-800-830-8300 Email: support@topproducer.com www.topproducer.com Fax: 604.270.6365 Top Producer 7i Remote Quick Setup Trademarks Information
INSTALL GUIDE. Basics. Contents. Evaluation and licensing
 INSTALL GUIDE Contents Basics... 1 Server Install... 3 Workstation Install... 8 Workstation Offline Install... 10 Appendix: Installing Runtime SQL Server 2008 R2... 12 Who should use this Guide: Firms
FileMaker. Mobile 7. User s Guide. For Windows, Mac, Palm OS, and Pocket PC. Companion for Palm OS and Pocket PC
 For Windows, Mac, Palm OS, and Pocket PC FileMaker Mobile 7 Companion for Palm OS and Pocket PC User s Guide 2000-2004 FileMaker, Inc. All Rights Reserved. FileMaker, Inc. 5201 Patrick Henry Drive Santa
FinalCode Viewer User Manual
 FinalCode Viewer User Manual Edition 2.3 Target: FinalCode Viewer Ver.4.30 January 7th, 2015 1 Introduction Thank you for choosing FinalCode. This manual describes how to install, and operate FinalCode
Top Producer for Palm Handhelds
 Top Producer for Palm Handhelds Quick Setup Top Producer Systems Phone number: 1-800-830-8300 Email: support@topproducer.com www.topproducer.com Fax: 604.270.6365 Top Producer for Palm handhelds Quick
1. Introduction Features Operating Environment Machine Data...6
 1 Table of Contents 1. Introduction...3 1.1 Features... 4 1.2 Operating Environment... 5 2. Machine Data...6 2.1 Fetching New Machines... 8 2.2 Adding New Machines... 10 2.3 Updating Scan Data... 12 2.4
Introduction. Paradigm Publishing. SNAP for Microsoft Office SNAP for Our Digital World. System Requirements
 Introduction Paradigm Publishing Paradigm understands the needs of today s educators and exceeds the demand by offering the latest technological advancements for coursework settings. With the success of
Version 2.3 User Guide
 V Mware vcloud Usage Meter Version 2.3 User Guide 2012 VMware, Inc. All rights reserved. This product is protected by U.S. and international copyright and intellectual property laws. This product is covered
NTP Software File Auditor for Windows Edition
 NTP Software File Auditor for Windows Edition An NTP Software Installation Guide Abstract This guide provides a short introduction to installation and initial configuration of NTP Software File Auditor
Mascot Insight Installation and setup guide
 Mascot Insight Installation and setup guide System requirements These are the system requirements for a Mascot Insight server. On the client side, Mascot Insight can be accessed from most web browsers.
VI. Corente Services Client
 VI. Corente Services Client Corente Release 9.1 Manual 9.1.1 Copyright 2014, Oracle and/or its affiliates. All rights reserved. Table of Contents Preface... 5 I. Introduction... 6 II. Corente Client Configuration...
DIGIOP ELEMENTS V8.7 NVR Software-only Installation Guide
 DIGIOP ELEMENTS V8.7 NVR Software-only Installation Guide About this installation guide Use this document as a guide to install your DIGIOP ELEMENTS NVR software system. It includes procedures to install
2016. All rights reserved. ecconnect V.11 User Guide
 2016. All rights reserved. ecconnect V.11 User Guide Copyright and trademarks ecconnect User Guide Copyright and trademarks The information in this document is subject to change without notice. This document
ViewNow X Server Setup Guide
 ViewNow X Server 9.6.4 Setup Guide Micro Focus The Lawn 22-30 Old Bath Road Newbury, Berkshire RG14 1QN UK http://www.microfocus.com Copyright Micro Focus 1984-2014. All rights reserved. MICRO FOCUS, the
Troubleshooting. Participants List Displays Multiple Entries for the Same User
 Participants List Displays Multiple Entries for the Same User, page 1 Internet Explorer Browser Not Supported, page 2 404 Page Not Found Error Encountered, page 2 Cannot Start or Join Meeting, page 2 SSO
NTP Software File Auditor for Hitachi
 NTP Software File Auditor for Hitachi Installation Guide Version 3.3 This guide details the method for the installation and initial configuration of NTP Software File Auditor for NAS, Hitachi Edition,
Password Memory 7 User s Guide
 C O D E : A E R O T E C H N O L O G I E S Password Memory 7 User s Guide 2007-2018 by code:aero technologies Phone: +1 (321) 285.7447 E-mail: info@codeaero.com Table of Contents How secure is Password
Install and upgrade Qlik Sense. Qlik Sense 3.0 Copyright QlikTech International AB. All rights reserved.
 Install and upgrade Qlik Sense Qlik Sense 3.0 Copyright 1993-2016 QlikTech International AB. All rights reserved. Copyright 1993-2016 QlikTech International AB. All rights reserved. Qlik, QlikTech, Qlik
Workstation Configuration
 Workstation Configuration September 22, 2015 - Version 9 & 9.1 - - - - - - - - - - - - - - - - - - - - - - - - - - - - - - - - - - - - - - - - - - - - - - - - - - - - - - - - - - - - - - - - - - - - -
Administrator s Guide
 Administrator s Guide 1995 2011 Open Systems Holdings Corp. All rights reserved. No part of this manual may be reproduced by any means without the written permission of Open Systems, Inc. OPEN SYSTEMS
Cisco Unified Serviceability
 Cisco Unified Serviceability Introduction, page 1 Installation, page 5 Introduction This document uses the following abbreviations to identify administration differences for these Cisco products: Unified
Installation Manual. Fleet Maintenance Software. Version 6.4
 Fleet Maintenance Software Installation Manual Version 6.4 6 Terri Lane, Suite 700 Burlington, NJ 08016 (609) 747-8800 Fax (609) 747-8801 Dossier@dossiersystemsinc.com www.dossiersystemsinc.com Copyright
Assistant User Guide
 mydatavo Assistant User Guide 1 2 3 4 5 6 7 8 9 10 11 12 13 14 15 16 17 18 19 20 21 22 Table Of Contents Features...ii Introduction...1 1. Installing mydatavo Assistant...1 1 System Requirements... 1 1.2
Enterprise Vault.cloud CloudLink Google Account Synchronization Guide. CloudLink to 4.0.3
 Enterprise Vault.cloud CloudLink Google Account Synchronization Guide CloudLink 4.0.1 to 4.0.3 Enterprise Vault.cloud: CloudLink Google Account Synchronization Guide Last updated: 2018-06-08. Legal Notice
Deployment Guide. 3.1 For Windows For Linux Docker image Windows Installation Installation...
 TABLE OF CONTENTS 1 About Guide...1 2 System Requirements...2 3 Package...3 3.1 For Windows... 3 3.2 For Linux... 3 3.3 Docker image... 4 4 Windows Installation...5 4.1 Installation... 5 4.1.1 Install
Jonas Activity Management Technical Deployment Guide
 Jonas Activity Management Technical Deployment Guide [] Software for Life Jonas Activity Management Technical Deployment Guide, Jonas, Jonas Software, Software for Life, and Gary Jonas Computing are registered
ARTSYL DOCALPHA INSTALLATION GUIDE
 ARTSYL DOCALPHA INSTALLATION GUIDE 1. docalpha Architecture Overview... 2 1.1. docalpha Server Components... 4 1.2. docalpha Production Environment Stations Overview... 4 1.3. docalpha Setup & Administration
Desktop and Professional Editions
 YOUR AUTOMATED EMPLOYEE Foxtrot Deployment Guide Desktop and Professional Editions Introduction This Deployment Guide is intended for administrators in charge of planning, implementing and maintaining
EventSentry Quickstart Guide
 Contents I Part I About This Guide 2 Part II Overview 3 Part III Installing EventSentry 6 1 Installation with... Setup 7 2 Management Application... 8 3 Configuration... 9 4 Remote Update... 12 5 Heartbeat
INTEGRATION TO MICROSOFT EXCHANGE Installation Guide
 INTEGRATION TO MICROSOFT EXCHANGE Installation Guide V44.1 Last Updated: March 5, 2018 EMS Software emssoftware.com/help 800.440.3994 2018 EMS Software, LLC. All Rights Reserved. Table of Contents CHAPTER
Client Installation and User's Guide
 IBM Tivoli Storage Manager FastBack for Workstations Version 7.1.1 Client Installation and User's Guide SC27-2809-04 IBM Tivoli Storage Manager FastBack for Workstations Version 7.1.1 Client Installation
CommPortal Communicator Desktop End User Guide 19 Feb 2014
 End User Guide 19 Feb 2014 Integra Hosted Voice Service PC Communicator Desktop End User Guide 19 Feb 2014 21 Feb 20134 End User Guide Contents 1 Introduction... 1-1 1.1 Using this End User Guide... 1-2
Agent and Agent Browser. Updated Friday, January 26, Autotask Corporation
 Agent and Agent Browser Updated Friday, January 26, 2018 2018 Autotask Corporation Table of Contents Table of Contents 2 The AEM Agent and Agent Browser 3 AEM Agent 5 Privacy Mode 9 Agent Browser 11 Agent
Installing and Configuring Worldox/Web Mobile
 Installing and Configuring Worldox/Web Mobile SETUP GUIDE v 1.1 Revised 6/16/2009 REVISION HISTORY Version Date Author Description 1.0 10/20/2008 Michael Devito Revised and expanded original draft document.
Diagnostic Manager Advanced Installation Guide
 Diagnostic Manager Publication Date: May 03, 2017 All Rights Reserved. This software is protected by copyright law and international treaties. Unauthorized reproduction or distribution of this software,
cc: On-Demand Install and User Guide, Version 4.5 R2
 cc: On-Demand Install and User Guide, Version 4.5 R2 March 2012 Reference Guide www.callcopy.com Security Classification: CallCopy Confidential Distribution: Approved internal CallCopy staff only and licensed
HP QuickTest Professional
 HP QuickTest Professional Software Version: 10.00 Installation Guide Manufacturing Part Number: T6513-90038 Document Release Date: January 2009 Software Release Date: January 2009 Legal Notices Warranty
Configuration of trace and Log Central in RTMT
 About Trace Collection, page 1 Preparation for trace collection, page 2 Types of trace support, page 4 Configuration of trace collection, page 5 Collect audit logs, page 19 View Collected Trace Files with
Multi-NVR Manager. Quick Start Configuration Usage
 Multi-NVR Manager Quick Start Configuration Usage 2014. All rights are reserved. No portion of this document may be reproduced without permission. All trademarks and brand names mentioned in this publication
9581SST CONFIGURE OPERATION MANUAL
 9581SST CONFIGURE OPERATION MANUAL Company Profile Trilithic, Inc. was founded in 1986 as an engineering and assembly company providing customized communications and routing systems for business and government
Legacy Client Chart (LCC) Installation Guide for Purkinje System
 Installation Guide for Purkinje System") Legacy Client Chart (LCC) Installation Guide for Purkinje System A Guide to Run and Configure the Legacy Client Chart (LCC) Solution For questions about using this guide please contact IMS@aohc.org Table
Legacy Client Chart (LCC) Installation Guide for Purkinje System A Guide to Run and Configure the Legacy Client Chart (LCC) Solution For questions about using this guide please contact IMS@aohc.org Table
DesktopPlayer for Mac
 DesktopPlayer for Mac Getting Started Version 2.6.0 November 2017 Table of Contents About this release... 3 About the Citrix DesktopPlayer for Mac solution... 3 About system memory usage... 3 DesktopPlayer
Troubleshooting. Cisco WebEx Meetings Server User Guide Release 2.7 1
 Participants List Displays Multiple Entries for the Same User, page 2 Internet Explorer Browser Not Supported, page 2 404 Page Not Found Error Encountered, page 2 Cannot Start or Join Meeting, page 3 SSO
Roxen Content Provider
 Roxen Content Provider Generation 3 Templates Purpose This workbook is designed to provide a training and reference tool for placing University of Alaska information on the World Wide Web (WWW) using the
Launcher DXLab Launcher 2.1.1
 Launcher 2.1.1 Overview...2 DXLab Prerequisites...3 Download and Installation...4 Configuration... 10 Controlling Applications... 14 Installing, Upgrading, and Restoring DXLab Applications... 17 Using
Business Insights Dashboard
 Business Insights Dashboard Sage 500 ERP 2000-2013 Sage Software, Inc. All rights reserved. Sage, the Sage logos, and the Sage product and service names mentioned herein are registered trademarks or trademarks
Parallels Remote Application Server
 Parallels Remote Application Server Parallels Client for Windows User's Guide v15.5 Parallels International GmbH Vordergasse 59 8200 Schaffhausen Switzerland Tel: + 41 52 672 20 30 www.parallels.com Copyright
EMCO Ping Monitor Enterprise 6. Copyright EMCO. All rights reserved.
 Copyright 2001-2017 EMCO. All rights reserved. Company web site: emcosoftware.com Support e-mail: support@emcosoftware.com Table of Contents Chapter... 1: Introduction 4 Chapter... 2: Getting Started 6
Ocularis. Installation & Licensing Guide
 Ocularis Installation & Licensing Guide On-Net Surveillance Systems, Inc. One Blue Hill Plaza, 7 th Floor, PO Box 1555 Pearl River, NY 10965 Phone: (845) 732-7900 Fax: (845) 732-7999 Web: www.onssi.com
REVISED 1 AUGUST REVIEWER'S GUIDE FOR VMWARE APP VOLUMES VMware App Volumes and later
 REVISED 1 AUGUST 2018 REVIEWER'S GUIDE FOR VMWARE APP VOLUMES VMware App Volumes 2.13.1 and later Table of Contents Introduction Audience What You Will Learn Navigating This Document for App Volumes Use
Juris Suite Citrix Installation Guide
 Juris Suite Citrix Installation Guide Table of Contents Introduction... 2 Planning and Preparation... 2 Installation... 2 Hardware and Software Requirements... 3 Backup Existing Juris Databases... 5 Server
TABLE OF CONTENTS. Page 1 of 59
 Page 1 of 59 TABLE OF CONTENTS Introduction... 3 Features... 4 General Features... 4 IBackup Professional lets you view the log files of backup, restore, scheduled backup and the details of files and folders
VI-CENTER EXTENDED ENTERPRISE EDITION GETTING STARTED GUIDE. Version: 4.5
 VI-CENTER EXTENDED ENTERPRISE EDITION GETTING STARTED GUIDE This manual provides a quick introduction to Virtual Iron software, and explains how to use Virtual Iron VI-Center to configure and manage virtual
WA2592 Applied Data Science and Big Data Analytics. Classroom Setup Guide. Web Age Solutions Inc. Copyright Web Age Solutions Inc.
 WA2592 Applied Data Science and Big Data Analytics Classroom Setup Guide Web Age Solutions Inc. Copyright Web Age Solutions Inc. 1 Table of Contents Part 1 - Class Setup...3 Part 2 - Minimum Software Requirements
Troubleshooting the Installation
 APPENDIX A Troubleshooting the Installation This appendix provides troubleshooting information for Essentials installation and setup, and contains the following sections: If the Installer Window Does Not
This FAQ is only applicable for hostings ordered after 23/6/2010
 Webhosting FAQ This FAQ is only applicable for hostings ordered after 23/6/2010 1. How do I access my Webhosting control panel?... 1 2. On which server is my hosting set up (IP)?... 4 3. How do I install
Server Edition USER MANUAL. For Mac OS X
 Server Edition USER MANUAL For Mac OS X Copyright Notice & Proprietary Information Redstor Limited, 2016. All rights reserved. Trademarks - Mac, Leopard, Snow Leopard, Lion and Mountain Lion are registered
User Manual. Page-Turning ebook software for Mac and Windows platforms
 User Manual Page-Turning ebook software for Mac and Windows platforms 3D Issue is a digital publishing software solution that converts your pdfs into online or offline digital, page-turning editions. Getting
HORTICOPIA Professional
 HORTICOPIA Professional Networking User Guide Horticopia, Inc. www.horticopia.com October 2017 Table of Contents I. Quick Start 2 II. System Requirements 3 III. Installing HORTICOPIA Professional 4 1.
Cisco Unified CME Telephony Service Provider 2.1 Setup Guide
 Cisco Unified CME Telephony Service Provider 2.1 Setup Guide Revised: January 12, 2007 Introduction Cisco Unified Communications Manager Express (Cisco Unified CME, formerly known as Cisco Unified CallManager
CHAPTER 7 ADVANCED ADMINISTRATION PC
 ii Table of Contents CHAPTER 1 INTRODUCTION... 1 Broadband ADSL Router Features... 1 Package Contents... 3 Physical Details... 4 CHAPTER 2 INSTALLATION... 6 Requirements... 6 Procedure... 6 CHAPTER 3 SETUP...
CaseWare Working Papers. How to download install and register CaseWare from the cloud installer
 CaseWare Working Papers How to download install and register CaseWare from the cloud installer Index 1. Introduction... 3 2. Watch this quick video on how to install CaseWare Working Papers... 3 3. Prerequisites...
Network Management Utility
 4343-7705-02 Network Management Utility Foreword Welcome Network Management Utility is utility software that provides central control over printers, copiers, and other devices on a network. With Network
FinalCode Viewer User Manual
 FinalCode Viewer User Manual Edition 2.32 Target: FinalCode Viewer Ver.4.32 June 24th, 2015 1 Introduction Thank you for choosing FinalCode. This manual describes how to install, and operate FinalCode
BACKUP APP V7 CLOUUD FILE BACKUP & RESTORE GUIDE FOR WINDOWS
 V7 CLOUUD FILE BACKUP & RESTORE GUIDE FOR WINDOWS Table of Contents 1 Overview... 1 1.1 About This Document... 7 2 Preparing for Backup and Restore... 8 2.1 Hardware Requirement... 8 2.2 Software Requirement...
License Server
 License Server 11.13.0.2 Installation Guide Isograph Copyright 2015 Isograph Limited. All rights reserved. This document and the associated software contains proprietary information which is protected
Getting Started With the Cisco PAM Desktop Software
 CHAPTER 3 Getting Started With the Cisco PAM Desktop Software This chapter describes how to install the Cisco PAM desktop client software, log on to Cisco PAM, and begin configuring access control features