Table of contents 2 / 165
|
|
|
- Richard Ball
- 6 years ago
- Views:
Transcription
1
2 Table of contents Getting Started... 7 Importing Contacts... 7 Add/Edit Services... 9 Add Services... 9 Social Social Media Publishing Services Streams Social Streams Photos Photo and File Sharing Services Blogs Blog Publishing Monitoring Brand Monitoring RSS RSS Import and Automation Services Bookmarking Link Sharing and Bookmarking Services Import Services Autoresponders SMS SMS Auto Responder Group SMS Import CSV Importers Social Media Importers Automation Automation Services Latest Add-ons Extras & Add-ons My Services Editing or Deleting Services My Profile My Details Account Details Change my password Contact Details Picture/Logo Time Settings Preferences URL Shortening Images Location Message Box Selecting Services Compose Compose an Saving contacts after sending an / 165
3 Compose an SMS Saving contacts after sending an SMS Compose a Social Network Message Compose a Group Message Compose a post to Wordpress Compose a post to Blogspot Add Social Network Functions Subject or Title URL Attach Shrink and Insert Shrink Insert Load Images from URL Photo or File Past Files Tags Templates Merge Tags ecard Scheduling Rich Text Editor Sending Options Notify Me When Sent Enable SMS Replies Inbox Streams Comments/Likes/Share Starring a post Adding a new stream Positive or Negative Sentiment Responding to an SMS Responding from your Inbox Responding from your account Responding to a message Filtering messages in your Inbox Scheduled Drafts Monitoring Sharing a mention Responding to a mention Feeds Sharing feeds Search Sent Bounced Calendar My Contacts Groups Widget Step Step / 165
4 Creating custom fields Step Step Previewing Widget Get Widget Code Add Autoresponder Import Importing Contacts My Groups Setting up a group Favoriting a group Sending a group message My Reports General Sent Messages Pending Messages Message Effectiveness Profiles Messages Message Analytics Recipients Responses Daily Statistics Message Statistics Click Analysis Recipient Analysis What does the yellow star mean? Clicks Clicks Over Time Referring Sites What does the yellow star mean? Mentions Buzz Over Time Buzz By Source Top Users Site Analytics Site Usage Traffic Sources Content Overview Map Overlay Reports Message Reports Profile Reports Contact Reports Mention Reports Add/Edit Services Services Social Status Updates and Microblogging Streams Social Streams Blogs Blogs / 165
5 Photos Photo and File Sharing Services Monitoring Brand Monitoring Bookmarking Link Sharing and Bookmarking Services RSS RSS Import and Automation Services Services Autoresponder SMS SMS Auto Responder Group SMS Import CSV Importers Social Media Importers Automation Twitter Automation Services Latest Adding services My Services Editing and deleting services How to's How to add a Facebook Fan Page Add Settings for Facebook Fan Page Geotargeting Facebook Fans What is Geotargeting? Targeting specific fans using Facebook Targeting Specific Fans using EzeeSocial How to grow your Twitter follower-base with EzeeSocial How to add Twitter Auto Follower How to setup an autoresponder How to post links to Facebook Fan Pages How to send an newsletter How to track localized social media mentions and engagement How to read and respond to social media messages How to send your first message How to send an SMS How to send an How to import and send message to LinkedIn contacts How to create an opt-in form How to create SMS group via EzeeSocial's Group SMS FAQ's What Social Media services do you support? Social Streams Photos Blogs Monitoring RSS Bookmarking / 165
6 SMS Import Automation Latest Do recurring messages count towards my messaging limit? My Facebook posts are not going through. What must I do? My Tweets are not going through to Twitter. What must I do? My messages aren't going out immediately or at the scheduled time. What must I do? What networks and countries do you support for SMS? Does EzeeSocial allow me to receive MMS messages? How do I upload images to a newsletter? How do I replace an image in a newsletter? My Facebook posts have stopped posting. How do I fix this? Why does my Inbox have green and red dots? What is a Facebook Wall Post? What does the yellow star mean? I can't post to facebook fan page, it keeps getting bounced Why are Bulk Facebook Wall Posts only reaching about 20 contacts? Why are my posts being sent early? What are the image sizes for newsletter template #9? If I send a group to 1,000 people does is count as 1 message credit or 1,000?161 How do I add a post to Wordpress? How do I add a post to Blogspot? Getting an error on Twitter: The remote server returned an error: (403) Forbidden What do the "star" and points mean in the reporting analytics? Contact Us / 165
7 Getting Started EzeeSocial lets you send just about any kind of message from one place, including Marketing s, Blog Posts, Facebook Fan Page updates and Tweets. EzeeSocial also provides reports and analytics on every message you send. To get started, visit Add/Edit Services to set up accounts for all the services you use and to import your contacts. Importing Contacts EzeeSocial allows you to import contacts from your Social Networks and public accounts. After importing your contacts you will be able to reach these contacts across multiple platforms from your Message Box. To import your contacts follow the steps below. In this example you will be shown how to import LinkedIn contacts: 1. Click on My Contacts and Import 2. Select LinkedIn 3. Log in with your LinkedIn address and password and click Ok, I'll Allow It. 7 / 165
8 4. You will then be asked to choose your contacts, select Fetch Contacts. 5. You will then be able to select your contacts by checking the box on the left of their names. 6. You can select which group your imported contacts should be added to. See My Groups for more information. 8 / 165
9 7. Once imported, you'll be able to reach these contacts by sending them a message from your Message Box. Add/Edit Services EzeeSocial allows you to integrate your account with various social media services. By clicking on the Add/Edit Services tab, you can setup the services you would like to integrate your EzeeSocial account with. You can add each service multiple times and for different accounts by clicking the Add button next to each service. You'll then be able to utilize them using your EzeeSocial account. EzeeSocial will also load Profile Reports for each social media service that you have added. Add Services Add/Edit Service categories include: 9 / 165
10 Social Streams Photos Blogs Monitoring RSS Bookmarking Import Automation Latest Branded Posts You can add multiple accounts for each service by clicking the Add button and filling in the details for each one. Social Social includes all the social media publishing services. See Social Media Publishing Services for more information. Social Media Publishing Services Social Media Publishing Services allows you to add services which enable you to post status updates to services such as Twitter, Facebook and LinkedIn. For a list of the social media services supported by EzeeSocial, see What Social Media services do you support? 10 / 165
11 Streams Streams allows you to read and respond to posts from various streams in real-time e.g. Facebook, LinkedIn and Twitter. Once added, these streams will appear in your Inbox in the Message Box. See Social Streams for more information. Social Streams Social Streams include Facebook, LinkedIn and Twitter streams. For a list of the social media services supported by EzeeSocial, see What Social Media services do you support? Photos Photo Sharing allows you to add services which enable you to post photos using services such as Facebook Photo Album and Flickr. See Photo and File Sharing Services for more information Photo and File Sharing Services Photo Sharing allows you to add services which enable you to post photos using services such as Facebook Photo Album and Flickr. 11 / 165
12 For a list of the social media services supported by EzeeSocial, see What Social Media services do you support? Blogs Blogs allows you to post updates to your blogs using services such as Blogspot, Tumblr and Wordpress. See Blog Publishing for more information. Blog Publishing Blogs allows you to add services which enable you to create and post updates to your blogs using services such as Blogspot and Wordpress. For a list of the social media services supported by EzeeSocial, see What Social Media services do you support? Monitoring EzeeSocial allows you to monitor what's being said about your brand online, e.g. in blogs, microblogs and 12 / 165
13 social networks. You can also read reviews about your brands using services like Yelp, CitySearch and Tripadvisor. Once added, EzeeSocial will start monitoring the brands you've added and results will be displayed in the Mentions section of the Message Box. See Brand Monitoring for more information. Brand Monitoring Brand Monitoring allows you to add services which enable you to monitor what's being said about your brand and competitors through Brand and Keyword Monitoring and Reviews. For a list of the social media services supported by EzeeSocial, see What Social Media services do you support? RSS OPML Importer and RSS Auto Poster are the services for importing and automatically distributing contents from RSS feeds. See RSS Import and Automation Services for more information RSS Import and Automation Services OPML Importer allows you to import RSS Feeds from an XML file that has been exported from a third-party RSS Reader, such as Google Reader. RSS Auto Poster allows you to setup EzeeSocial to automatically post to your social networks and/or contacts. 13 / 165
14 For a list of the social media services supported by EzeeSocial, see What Social Media services do you support? Bookmarking Link Sharing and Bookmarking allows you to add services which enable you to share links using services such as Delicious and Diigo. See Link Sharing and Bookmarking Services for more information. Link Sharing and Bookmarking Services Link Sharing and Bookmarking allows you to add services which enable you to share links using services such as Delicious and Diigo. For a list of the social media services supported by EzeeSocial, see What Social Media services do you support? EzeeSocial allows you to import your contacts from services like Gmail, Hotmail, AOL and Yahoo Mail. See Import Services for more information. 14 / 165
15 Import Services Services allows you to import your contacts from public services such as Gmail and Hotmail. For a list of the social media services supported by EzeeSocial, see What Social Media services do you support? Autoresponders Build and pre-schedule a series of automated s for birthdays or event alerts that are triggered as soon as your customers subscribe to a list. For a list of the social media services supported by EzeeSocial, see What Social Media services do you support? SMS EzeeSocial allows you to build and pre-schedule automated SMS texts. This can be useful for birthdays and other events. See SMS Auto Responder for more information. You can also create SMS keywords and receive text messages from customers. See Group SMS for more information. SMS Auto Responder EzeeSocial's SMS Autoresponder allows you to build and pre-schedule automated SMS texts. This can be useful for birthdays, SMS opt-in and other events. 15 / 165

16 For a list of the social media services supported by EzeeSocial, see What Social Media services do you support? Group SMS EzeeSocial's SMS Autoresponder allows you to build and pre-schedule automated SMS texts. This can be useful for birthdays and other events. For a list of the social media services supported by EzeeSocial, see What Social Media services do you support? Import Import allows you to import your contacts from CSV files. This is useful when importing a large number of contacts. See CSV Importers for more information. CSV Importers CSV Importers allows you to add services which enable you to bulk import your contacts or messages from a CSV file. 16 / 165
17 For a list of the social media services supported by EzeeSocial, see What Social Media services do you support? Social Media Importers Social Media Importers allows you to import your social network contacts and post social media messages/ photos using services such as Facebook Wall Post and LinkedIn. For a list of the social media services supported by EzeeSocial, see What Social Media services do you support? Automation Automation allows you to automate posting of messages. See Automation Services for more information. Automation Services Twitter Auto Follower allows you to automatically follow people on Twitter. 17 / 165

18 For a list of the social media services supported by EzeeSocial, see What Social Media services do you support? Latest Latest displays EzeeSocial's new services. This list changes all the time as new services are added. For a list of the social media services supported by EzeeSocial, see What Social Media services do you support? Add-ons By default, posts to Facebook and Twitter will have a "via EzeeSocial" tagline below each post. Extras & Add-ons Once we've setup the rebranding for you, you'll be able to add the custom services from within this section. 18 / 165

19 My Services By clicking on My Services you can edit or delete any of the services you've already added to your EzeeSocial account. See Editing and Deleting Services for more information. Editing or Deleting Services To edit or delete a service from My Services, click on the service and select Edit to update your service settings or Delete to remove the service. 19 / 165
20 After selecting Edit you will be taken to a page as shown below: 20 / 165
21 My Profile After selecting My Profile, you will be able to update your profile and edit general preferences on the EzeeSocial platform. My Details From within the My Details tab, you can update your EzeeSocial username, update your time zone and set various other preferences such as link shortening services and your location. Once you have updated your personal details, click Save at the bottom right. Account Details Account Details allows you to update your username, address and select whether you would like to subscribe to feature updates. Selecting Subscribe to Feature Updates, will allow EzeeSocial to send you newsletters. 21 / 165


22 Change my password 1. Click Change my password. 2. Type in your new password and confirm this password. 3. Select Save Changes Contact Details Contact Details allows you to update your personal contact information. 22 / 165


23 Picture/Logo Picture/Logo allows you to add a picture or a logo to your EzeeSocial account details. This picture is displayed on your public EzeeSocial page and may be used when posting to certain social networks. Time Settings Time Settings allows you to select your timezone. By selecting Automatically detect timezone, your timezone will be automatically updated when you login. To make sure that your settings aren't overridden, be sure to uncheck this option. Preferences Depending on what type of user you are, you have the option to edit your preferences. This will determine how certain things are displayed in EzeeSocial. 23 / 165

24 Messaging Preference Messaging Preference allows you to set your preference in order for EzeeSocial to customize your Message Box according to your messaging needs. Service Selector Service Selector allows you to select your preferred format for the service selector: Toggle View or List View. Inline Help/Tips This selection allows you to choose whether you would prefer to have inline help or not. Inline help is displayed when you hover over certain items in the Message Box. Pause my scheduled messages This provides you with the option to pause your scheduled messages if for example, you are going away and don't want them going off over that period. Privacy Privacy provides you with the option to keep your profile and social media posts private or show social media posts on my public page. When you profile is set to private, your social media posts won't be indexable by search engines. URL Shortening The url shortening section allows you to select your preferred url shortener. You can also use your own bit.ly settings so that if you wish, you can view statistics in your bit.ly account. EzeeSocial also supports bit.ly Pro, which allows you to use your own domain for url shortening. 24 / 165


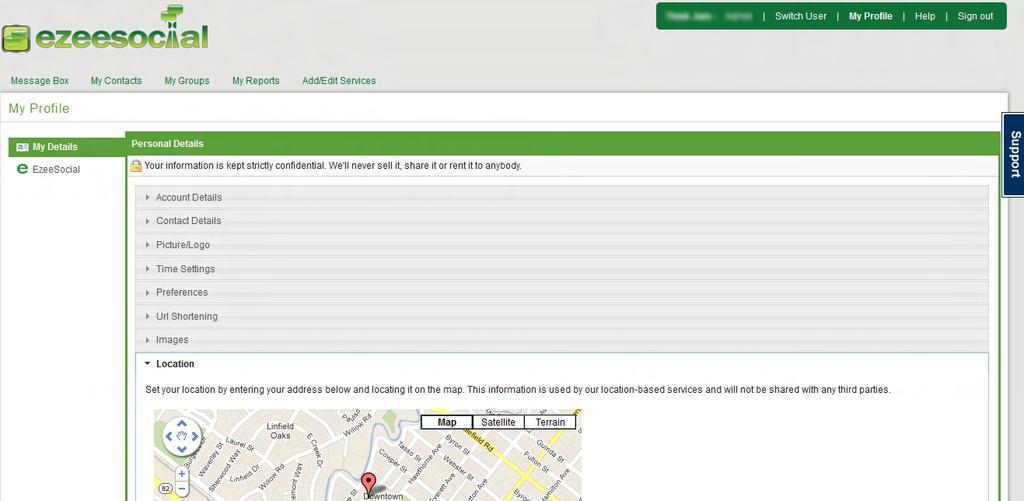
25 Images When posting to services like Twitter, EzeeSocial will automatically generate an image URL for you. Here, you can choose which image shortening service to use. Location Location allows you to set your location by entering your address and locating it on the map. You can search for your location by typing it into the box and selecting Find. These settings are used by EzeeSocial when posting or reading from location-based services such as Foursquare. 25 / 165
26 26 / 165
27 Message Box The Message Box enables you to send different types of messages as well as manage your existing ones. Selecting Services This screenshot is an example of a user's populated services in their Message Box. Additional services can be added from the Add/Edit Services screen. Social Media Posts To update the social networks and blogs you've configured in Add/Edit Services, select the type of message you'd like to send by toggling the service you wish to post to. Multiple services can be selected simultaneously, you also have the option to filter your services. Your selection can be remembered between posts by selecting the Lock Selection option. For information on how to compose specific types of messages, see: Compose an Compose an SMS Compose a Social Network Message Compose a Group Message Add Social Network Compose Compose allows you to create a message by selecting one or more services you wish to utilize. Your message can be posted to multiple services simultaneously by selecting recipients from the services list. 27 / 165
28 For information on how to compose specific types of messages, see: Compose an Compose an SMS Compose a Social Network Message Compose a Group Message Add Social Network Compose an By selecting , you are able to compose and send messages. To compose an , follow the steps below: 1. Go into Message Box and select 2. You will then be asked to type in the address. 3. If you know the recipient's address, you can simply type it in the box or click on Add Contacts/ Services to find a list of your imported contacts. For information on how to import contacts, see Importing Contacts. 4. Multiple s must be separated with commas. 28 / 165

29 1. You are then able to compose your using the message editor. To make your look more professional, you can select one of our templates. 2. Once your is complete, select Send if you are ready to send, Save Draft if you would like to resume working on the at a later stage, Save Template if you would like to save your message as an template or Discard if you no longer wish to send your EzeeSocial also allows you to receive a notification when your is sent. See Sending Options for more information. Saving contacts after sending an Once an has been sent, you have the option to add the recipient's contact details to your Add Contacts/Services if these details have not been added. After clicking Send, you will be asked if you wish to save the contact details. Add the recipient's First name and Last name and select Add. 29 / 165
30 You will then see that your recipient's details have been added. Compose an SMS SMS Text allows you to send SMS messages using your EzeeSocial Tokens. To compose an SMS, follow the steps below: 1. Go into Message Box and select SMS Text 2. You will then be asked to type in the cellphone number 3. If you know the recipient's cellphone number, you can simply type it in the box or click on Add Contacts/Services to find a list of your contacts. Please remember to include the country code. 30 / 165
31 4. Multiple cellphone numbers must be separated with commas. 5. You are then able to compose your SMS message. Please keep an eye on the character counter on the bottom left as the standard SMS length in 160 characters. 6. Once your SMS is complete, select Send if you are ready to send, Save Draft if you would like to resume working on the SMS at a later stage, Save Template if you would like to save your message as a message template or Discard if you no longer wish to send your SMS. 7. EzeeSocial also allows you to receive a notification when your SMS is sent and enable SMS replies. See Sending Options for more information. Saving contacts after sending an SMS Once an SMS has been sent, you have the option to add the recipient's contact details to your Add Contacts/Services if these details have not been added. After clicking Send, you will be asked if you wish to save the contact details. Add the recipient's First name and Last name and select Add. 31 / 165
32 You will then see that your recipient's details have been added. Compose a Social Network Message Social Network Message allows you to send messages to your social network contacts. This can be used when you want to send a message to a friend's Facebook wall or a LinkedIn message etc. These messages can be in the form of written messages or even ecards for birthdays, good luck etc. To compose a Social Network Message, follow the steps below: 1. Go into Message Box and select Message. 32 / 165

33 2. You will then be asked to type in the recipient's information. 3. Click on Add Contacts/Services to find a list of your contacts. 4. Multiple contacts must be separated with commas. 1. You are then able to compose your Social Network Message. Please note Social Network Messages should be in plain text format and should not contain any embedded HTML. Your post will be sent to multiple Social Networking services simultaneously. 2. Once your message is complete, select Send if you are ready to send, Save Draft if you would like to resume working on the message at a later stage, Save Template if you would like to save your message as an template or Discard if you no longer wish to send your message. 3. EzeeSocial also allows you to receive a notification when your Social Network Message is sent. See Sending Options for more information. Compose a Group Message Group Message allows you to send messages to your Interlinked Media groups. Group Message can be selected when you wish to send a message to a group of contacts from your Add Contacts/Services, for example your customers or colleagues. To compose a Group Message, follow the steps below: 1. Go into Message Box and select Group Message. 2. You will then be asked to type in the name of the group. 3. If you know this, type it into the box or click on Add Contacts/Services to find a list of your groups. 4. Multiple groups must be separated with commas. 5. Groups with a yellow star have been favorited, this can be seen in the 'Colleagues' group in the example below. For more information about favoriting groups, select My Groups. 33 / 165
34 1. You are then able to compose your Group message. 2. Once your message is complete, select Send if you are ready to send, Save Draft if you would like to resume working on the message at a later stage, Save Template if you would like to save your message as an template or Discard if you no longer wish to send your message. 3. EzeeSocial also allows you to receive a notification when your Social Network Message is sent. See Sending Options for more information. Compose a post to Wordpress 1. Go to Add/Edit Services and find Wordpress under Blogs. 2. Click Add. 3. Enter your settings for Wordpress, this can be seen in the example below. 34 / 165

35 4. Select Save 5. Go to the Message Box and toggle Wordpress. 6. Type your blog post in the box. In this example a template was used, for more information on how to use a template, see Templates. 7. Once your blog post is complete, select Send if you are ready to send, Save Draft if you would like to resume working on the post at a later stage, Save Template if you would like to save your post as a template or Discard if you no longer wish to send your post. Having problems? To ensure you can post to your self-hosted Wordpress blog, you need to ensure that XML RPC is enabled. To enable XML-RPC, see this post: 35 / 165

36 wordpress-site/. Compose a post to Blogspot 1. Go to Add/Edit Services and find Blogspot under Blogs. 2. Click Add. 3. Enter your settings for Blogspot, this can be seen in the example below. 4. Select Save Settings 5. Go to the Message Box and toggle Blogspot. 6. Type your blog post in the box. In this example a template was used, for more information on how to use a template, see Templates. 36 / 165
37 7. Once your blog post is complete, select Send if you are ready to send, Save Draft if you would like to resume working on the post at a later stage, Save Template if you would like to save your post as a template or Discard if you no longer wish to send your post. Having problems? Sign into your Blogspot account at Edit the settings for the particular blog that's failing. Click Site Feed and make sure that the Post Feed Redirect URL is empty. If this is set to point to Feedburner, then you will need to remove this setting to be able to post from third party applications like EzeeSocial. Save Settings. Try posting again from EzeeSocial. You can repost the failed item from within the Bounced tab in the Message Box. Add Social Network By selecting Add Social Network you are able to add more social network services to your EzeeSocial account. You will then be taken to the Add/Edit Services screen. 37 / 165
38 Functions EzeeSocial provides you with the option to add functions or features to your message. Functions or features include: Subject or Title URL Photo or File Past Files Tags Templates Merge Tags ecard Scheduling Subject or Title Subject or Title allows you to enter a subject or title for your message. Some services will ignore the subject but others will use the title where appropriate, for example, in blog posts and s. URL 38 / 165

39 EzeeSocial allows you to insert and track URL's in various ways: Attach Shrink and Insert Shrink Insert Load Images from URL Attach Attach allows you to attach a link to your post with an image preview. To attach a link: Select URL and type in your website address in the URL box Select Attach You will then be shown an image as shown in the example below. You can select a thumbnail by clicking the right or left arrows under the image. Select Attach Link Preview if you wish to insert the link into your post, see example below: 39 / 165

40 Select Insert URL Only if you do not wish to have a link preview but would like to insert the URL. Shrink and Insert To shrink a URL, add your URL into the specified box as shown below then select Shrink and Insert. Your URL will now be shortened and clicks will be tracked using Bit.ly. This can be seen below. 40 / 165

41 By shortening a link, EzeeSocial will automatically track clicks and referers. Shrink Shrink allows you to convert the URL into bit.ly which can be used for tracking. Insert You have the ability to add your URL without shrinking it. You can add it by inserting it into the URL box and clicking Insert. Load Images from URL You can use the Load Images from URL button to fetch all images found on a web page so that you can attach them to your post. After selecting the required images, you then have the option to Attach to message or Embed in Message. Embed in Message should only be used in s and blog posts. 41 / 165

42 Photo or File By clicking Photo or File, you can browse for a photo or a file on your computer and attach it to your message. This will appear in your message below. If you wish to remove the image, click on the red cross in the right corner. To add text to your message, simply type in the box below the image. To embed the photo into an or blog post, click the icon on the left of the red cross. 42 / 165
43 Past Files Past Files allows you to browse for files and pictures that have been previously used. This tab allows you to reuse them and access them quickly. After clicking on Past File, you can locate your file by typing in the file name and clicking Search. You also have the option to filter your documents by Photos or Files. After selecting your Past File, you can Attach to message or Embed in Message. Embed in Message should only be used for s and blog posts. Tags Certain services, such as blog posts, allow you to tag your message. To add tags to your post, enter the list of tags separated by commas. Templates When creating an newsletter, you can select a message template. Templates can be selected from a variety of options. You can also filter the templates by featured templates, pro templates, free templates 43 / 165


44 and my templates - these are your previously uploaded templates. Once you have chosen your template, you can then add your own information. This can be seen in the example below: 44 / 165

45 Once you've composed your message, select Send if you are ready to send, Save Draft if you would like to resume working on the message at a later stage, Save Template if you would like to save your message as an template or Discard if you no longer wish to send your message. There is also the option to preview your newsletter by clicking the preview button Merge Tags Merge tags are place holders that will be replaced with actual values at the time the message is sent. For example, you may wish to send an to a group of contacts and have each contact's name inserted when the message is sent. After clicking the Merge Tags link, you'll be able to select one or more tags to insert into your message. 45 / 165
46 ecard ecards allows you to add an electronic greeting card or flash file to your post. After clicking on ecard, you can select an ecard and click Embed in or Attach to Post. 46 / 165

47 ecards can also be used when posting to Facebook and will be embedded in Facebook's native format. You can filter the ecards by Birthdays, Congratulations, Get Well Soon etc. You also have the ability to submit your own ecard, which allows you to upload a flash file. Scheduling Scheduling allows you to send your message at a predetermined time in the future. You can choose to send your message at a time suggested by EzeeSocial or by setting your own time. By clicking Send at a specific time in the drop down box next to Send, you can specify a time you wish your message to be 47 / 165

48 sent. You can also choose to schedule the message on a recurring basis. You can then specify when you would like the message to stop recurring. If you've selected a scheduled time, EzeeSocial will only send the message at the time specified when you click Send. Your scheduled messages can then be seen by clicking on the Pending tab on the left as well as in your Calendar. The scheduled message (above) can be seen in orange. Rich Text Editor The Rich Text Editor is where you type the content of your message or post. It supports rich text so that you can format your s and blog posts. When posting to services such as Facebook and Twitter the text formatting is removed and just the plain text is posted. There is a character counter just below the text editor that acts as a guide for posting to services with character limits, such as Twitter. This is purely a guide and can be ignored for message types without limits. 48 / 165

49 The functions supported by the Rich Text Editor are described below: Bold By pressing this button, you can make your wording more prominent, for example EzeeSocial. Italics Italics is a type of cursive typeface that resembles handwriting, for example EzeeSocial. Underline This button enables you to underline certain keywords, for example EzeeSocial. Strikethrough This button produces a line through your text, for example EzeeSocial. Font Family and Font Size By clicking on arrows you are able to change the font and the font size. These can be altered throughout your message if you wish. Colors By clicking on the arrow, you can change the color you wish to use in your message. There is also the option to select More Colors, by clicking on this you can see a range of colors in different formats: Picker, Palette or Named. 49 / 165
50 Highlight This button enables you to highlight specific words in your message. By clicking on the arrow you can select your desired colors. There is also the option to select More Colors, by clicking on this you can see a range of colors in different formats: Picker, Palette or Named. HTML HTML allows you to edit the HTML code used in the post. This is useful when sending a formatted or posting to your blog. Bullets By selecting this button, you can make lists using bullets, for example: Review Friday's meeting Discuss Tuesday's meeting Ordered list By selecting this button, you can make lists using numbers, for example: 1. Review Friday's meeting 2. Discuss Tuesday's meeting Indent These buttons enable you to indent (move) your text to the right or the left of the message. If the blue arrow is pointing to the right, it indents to the right and if it is pointing to the left, it indents to the left. Blockquote Blockquote applies formatting to any quotes mentioned in your message. Undo and Redo The arrow pointing to the left enables you to undo your typing or editing. You would use this if you made a mistake. Redo enables you to go back to your original editing ie: the way it was before you selected Undo. 50 / 165
 and title. Unlink This button enables you to remove the link from your message.")
51 Insert Link This button enables you to insert a link into your message. After clicking Insert Link, a box will appear asking you to Insert/Edit Link. You can then provide the URL, the target (open in same or new window) and title. Unlink This button enables you to remove the link from your message. Insert/Edit Image By selecting this button, you can insert an image into your message. You can enter the URL to the image you wish to embed and also specify the image size. Left, center and right align These buttons allow you to align your text to the left, to the center and to the right. Remove Formatting This button allows you to remove formatting from your message. Preview 51 / 165
52 This button enables you to preview your message. Sending Options There are two Sending Options which are Notify me when sent and Enable SMS replies. Notify Me When Sent By checking this, EzeeSocial will send you an when your message has been sent. This is particularly useful when scheduling messages. Enable SMS Replies By checking this, EzeeSocial will allow you to receive SMS replies to your messages. Please ensure to test this functionality first as it is only available in certain countries. SMS replies will be sent to you via and will also appear in your EzeeSocial Inbox. Once your reply has been received, you can reply to the SMS by clicking on the message in the Inbox or in your . See Responding to an SMS for more information. Inbox EzeeSocial allows you to manage multiple streams from your social inbox. The Priority Inbox highlights the messages you should be responding to. The Priority Inbox displays responses to messages that you have posted from EzeeSocial, for example Facebook comments, Twitter mentions and retweets, SMS replies etc. You have the option to search through your Priority Inbox by typing keywords into the search box and clicking Search. 52 / 165
53 Streams EzeeSocial allows you to view your social media streams in your EzeeSocial Inbox. By selecting a stream, you can view and respond to messages in your social stream. The example below shows Twitter Streams. Comments/Likes/Share From your Inbox you are able to like, comment and share Facebook, Twitter and LinkedIn posts. Like This image shows that 3 people have 'liked' the post. Select this icon if you wish to 'like' the post. Comment This image shows that 5 people have commented on the post. Select this icon if you wish to comment on the post. This can be seen in the example below: 53 / 165
54 Share This image enables you to share the post with others. By Selecting this icon, you will be taken to the Message Box where you will be able to select various services and recipients to send the post to. View Profile This image allows you to view the user's profile. An example can be seen below: Refresh This images allows you to refresh and see the latest likes/comments from a specific post. 54 / 165
55 Starring a post By clicking the star icon, you are choosing the post as a favorite. Starred posts can be found easily by filtering your posts by Starred. Adding a new stream To add a new stream, select the Add A New Stream button and you will be taken to the Add/Edit Services page. See Streams for more information. Positive or Negative Sentiment EzeeSocial will indicate to you whether a post that appears in your Inbox is a positive or negative sentiment. A positive sentiment is indicated by a green dot. A negative sentiment is indicated by a red dot. A neutral sentiment is indicated by a grey dot. Responding to an SMS Your SMS will appear in your EzeeSocial Inbox as well as in your account which is registered with EzeeSocial. See Responding from your EzeeSocial Inbox and Responding from your account for more information. Responding from your Inbox The SMS will appear in your EzeeSocial Inbox. 55 / 165
56 To reply to the SMS from your EzeeSocial Inbox: 1. Select the message you wish to reply to. 2. Type your message in the message entry field. 3. Click Reply to send your message. For information about the sending options - Notify me when sent and Enable SMS replies. Responding from your account The SMS will appear in your . To reply to the SMS from your inbox: 1. Select the message you wish to reply to. 2. Click Reply. 3. Type your message in the message entry field. 4. Click Send to send your message. For information about the sending options - Notify me when sent and Enable SMS replies. Responding to a message To reply to a message from your Inbox: 1. Select the message you wish to reply to. 2. Type your message in the message entry field. 3. Click Reply to send your message. 56 / 165

57 Filtering messages in your Inbox You have the option to search through your Inbox by typing keywords into the search box and clicking Search. In the example below, the keywords 'Social Media' were typed and the messages below the search box contain the words 'Social Media' in the message. You also have the option to filter messages by checking the box on the right of the service you wish to view. In the example below the Twitter Page 'City Deals London' was checked. This means that only messages relating to this will be viewed. 57 / 165


58 Scheduled The Scheduled sub-tab shows you all your messages that have been scheduled and are in the queue to be sent. You have the option to search through your pending messages by typing keywords into the search box and clicking Search. Drafts The Draft folder is where you can store your messages that are incomplete and not yet ready to be sent. These messages can be sorted by recipient, oldest and newest first. 58 / 165

59 You have the option to search through your draft messages by typing keywords into the search box and clicking Search. Monitoring Mentions allows you to read and respond to what's been said about your brand or various keywords on the social web. You can set up EzeeSocial to monitor mentions of keywords across the social web by clicking the New Keyword button. You will then be taken to the brand monitoring settings page, where you will be able to add a description and a brand name or term. See Responding to a mention for more information. Sharing a mention If you wish to share a mention, you can click on the item in the mentions list. You will then be able to send it as an SMS, Facebook post, message etc. Responding to a mention To respond to your mentions, click on the mention you wish to respond to. You will then be taken to the Compose section of the Message Box where you will be able to share it. By clicking on the mention link, you will be able to read the full article. 59 / 165


60 From the article, you will be able to respond from the site. Feeds EzeeSocial allows you to add your own feeds by clicking on the RSS symbol with the "+" and remove your feeds by clicking the RSS symbol with the "-". EzeeSocial will automatically pull in your Twitter feeds, allowing you to share the feed content with a single click by clicking on the item. 60 / 165


61 Sharing feeds If you find a feed you wish to share with others, you can click on it and share the post with others, thereby sending it as an SMS, Facebook post, message etc. The link will automatically be converted into a Bit.ly URL. Search Search allows you to search for interesting content to share from Google News, Blogs, Flickr, Twitter and others. 61 / 165

62 You can share the content by clicking on the item and you'll be taken to the Compose section with the message prepopulated. Sent Sent displays your messages that have already been delivered. You can access these in order to view and forward them. These messages can be sorted by recipient, first sent and last sent. You have the option to search through your sent messages by typing keywords into the search box and clicking Search. Bounced Bounced is where EzeeSocial will store any messages that were unable to be sent. You have the option to search through your bounced messages by typing keywords into the search box and clicking Search. 62 / 165

63 You can view the error message and resend them from the Bounced tab. Calendar Calendar allows you to manage and view your scheduled messages. By clicking on each message, you can edit and forward the message. You can also drag the messages to be sent at a different time. If you'd like to create a new scheduled message from the calendar, click on the time you would like it to be sent in the future. 63 / 165

64 My Contacts My Contacts is where your contacts will be displayed. You can easily filter your contacts using the Search block. There is also the option to filter your contacts by information you have about them, for example mobile numbers for SMS, addresses or Facebook details. To send a new message to one of your contacts, click the Send Message link and you will be taken to the Message Box where you will be able to compose your message. For information on how to delete and edit contacts, see Deleting or Editing Contacts. Groups Contacts can be grouped together making it easy to send messages to multiple recipients at once. 64 / 165
65 You can group any type of contact including addresses and social media accounts. Grouping contacts allows you to post to multiple contacts and services at once. EzeeSocial will also automatically generate a unique address for each group. By sending an to the unique address, EzeeSocial will distribute your message to the relevant group members. Groups can be favorited by clicking the star icon at the top right of the group. When a group is favorited, it is added to your services list in the Message Box, enabling quick access. For more information, see Favoriting a group. See My Groups for more information. Widget EzeeSocial allows you to add a piece of code to your website so that visitors to your site can opt in to your marketing materials and can be contacted via and/or SMS. Users who sign up on your site will be automatically added to your EzeeSocial contacts and will be added to the group you have specified before generating the widget code. Step 1 Select standard fields to capture Step 1 allows you to select the standard fields that you would like to appear on your capture form. To make your selection, check the boxes on the right. 65 / 165
66 Step 2 Add custom capture fields Step 2 allows you to create and select your own custom fields that will appear on your capture form. By checking the box next to each field, you will be able to define which fields appear on the form. To create your own custom fields, see Creating custom fields. Creating custom fields To create a custom field, select New Field and enter the relevant information. 66 / 165
67 Field Title - Create a title for the field, in this example the field title is ID Number. Field Title - Provide the field with a unique code. Mandatory - By checking this field, the user will be forced to provide a value when completing the form. Field Type - This allows you to choose between text, text area, password, list, date, time, url or numeric. Field Options - When selecting the 'list' field type, this box allows you to define which fields will appear in the drop-down list. Each list item should be on a new line. Order - This allows you to specify the order in which this field will appear on the form. By checking the box at the bottom you allow your created custom field to be available to all users/clients. When you are finished, select Save. Step 3 Customization and process flow EzeeSocial allows you to define where to direct users after they have signed up. You can direct users to a page on your site. You can also define which text will appear on the sign-up button. 67 / 165


68 Button Text - This is the text that will appear on the sign-up button. Redirect here after sign-up - This is where users will be directed to once they have completed your form. This can be a page on your website. Redirect here if sign-up fails - If the sign-up fails, you can specify where users should be directed to. Notify the following group after sign-up - This allows you to add a group that contains contacts that should be notified as soon as a contact signs up from your form. Notification message - This is the message that is sent to contacts in the group when a user signs up. You can use the Insert Merge Tags link to specify which contact data should be included in the message. Step 4 Select a contact group Step 4 allows you to specify which contact group contacts that sign up through your form are added to. An autoresponder can be set up to send a customized message to the contact when he/she signs up. See Autoresponders for more information. 68 / 165
69 Previewing Widget Once you have completed the 4 steps, select Preview Widget and you will be able to preview your widget. Below is an example of a widget generated by EzeeSocial. Get Widget Code EzeeSocial allows you to copy the Widget Code and paste it onto a webpage or blog. To copy the code select Get Widget Code, select the text and copy and paste it. Below is an example of Widget Code that can be copied and pasted. 69 / 165
70 Add Autoresponder By selecting Add Autoresponder you will be able to add an autoresponder. An autoresponder allows you to configure EzeeSocial to send the new contact an when they sign up to your form. You will then be able to add settings to your autoresponder. This can be seen in the example below: Import Import allows you to import contacts from your Social Networks, public accounts and via CSV. 70 / 165
71 Once imported, you'll be able to reach these contacts by sending them a message from your Message Box. See Importing Contacts for more information. Importing Contacts EzeeSocial allows you to import contacts from your Social Networks and public accounts. After importing your contacts you will be able to reach these contacts across multiple platforms from your Message Box. To import your contacts follow the steps below. In this example you will be shown how to import LinkedIn contacts: 1. Click on My Contacts and Import 2. Select LinkedIn 3. Log in with your LinkedIn address and password and click Ok, I'll Allow It. 71 / 165
72 4. You will then be asked to choose your contacts, select Fetch Contacts. 5. You will then be able to select your contacts by checking the box on the left of their names. 6. You can select which group your imported contacts should be added to. See My Groups for more information. 72 / 165
73 7. Once imported, you'll be able to reach these contacts by sending them a message from your Message Box. 73 / 165


74 My Groups You can use groups to send to multiple contacts or social media accounts at once. You can group any type of contact including addresses and social media services. Grouping contacts allows you to post to multiple contacts and services at once. EzeeSocial will also automatically generate a unique address for each group. By sending an to the unique address, EzeeSocial will distribute your message to the relevant group members. See Favoriting a Group for more information. Setting up a group 1. Click on My Groups. 2. Click New Group. 3. You will be asked to give your group a name. 4. Next to your group name is a yellow star, if you want your group favorited keep this yellow, if you would not like it to be favorited, deselect it so that it is displayed as grey. See Favoriting a group for more information. 5. Click Create 6. To add contacts to your group, click Add Contacts/Services 74 / 165
75 7. Add your contacts by checking the box on the right of their names 8. If you have a number of contacts using different services, the Filter box can help filter through the services. Favoriting a group Groups can be favorited by clicking the star icon at the top right of the group. When a group is favorited, it is added to your services list in the Message Box, enabling quick access. Sending a group message 1. If your groups have been favorited, (see Favoriting a group for more information), your groups will appear in the box on the Message Box page and you can select the group you wish to send the group message to. 2. After clicking on the name of the group, you can type your post in the box and click Send. 75 / 165

76 My Reports My Reports allows you track various statistics from your social media profiles, messages and also s. You can also track social media mentions in this section and export your data to Excel. For more information, see: General Profiles Messages Clicks Mentions Site Analytics Reports General The General reports tab shows you general statistics about all of your previously sent or pending messages. You can use the drop-down list to select different reports. For more information, see Sent Messages Pending Messages Message Effectiveness Sent Messages The sent messages report shows you a chart of your sent messages over time. 76 / 165

77 Pending Messages The pending messages report shows you how many messages are queued to be sent out. Message Effectiveness The message effectiveness reports show you how well your messages have done over time. The message effectiveness takes into account statistics across all sent messages. You can use the statistics type drop-down list to narrow down the results. Profiles The Profiles tab display information about the social media services you've set up in Add/Edit Services. EzeeSocial will import various statistics from each of your social media profiles and display them visually. You can select a profile from the list to view more detailed statistics about a specific social media service. After selecting a service, you'll be able to drill down into more specific details about the profile. 77 / 165
78 You can also view a printer-friendly version of the reports by clicking the Printer icon. Messages The Messages tab shows you detailed statistics about any of the messages you've sent. You can select a message from the list to view detailed statistics about any particular message.the success of a message is depicted by the number of points that it has received. The higher the score, the more clicks/views/shares/ comments etc. Message Analytics After clicking the message, the detailed report will load. The message section shows you the original message that was sent. 78 / 165

79 Recipients Recipients displays the list of services or recipients that received this particular message. Responses The responses section shows you any comments or responses to the message. Responses include 79 / 165

80 Facebook comments, retweets etc. Daily Statistics Daily statistics shows you message statistics that have been tracked about this particular message over time. This section can be made up of various metrics measured over time including views, comments, likes, shares, opens, views etc. 80 / 165


81 EzeeSocial will track statistics for a period of up to 4 days. Message Statistics The Message Statistics section displays a bar chart of the various statistics that have been measured. 81 / 165


82 Click Analysis This section allows you drill down into the message clicks and allows you to track the number of Clicks Over Time and the Referring Sites. EzeeSocial reports on statistics about any links you've sent out in your message. Recipient Analysis The Recipient Analysis section shows you a break-down of each services or recipient. You can drill down and see exactly which recipient generated the most views, clicks or opens. The reports can be exported to Excel or HTML. 82 / 165
83 What does the yellow star mean? For each message, we allocate points as a measure of success. Points are based on metrics such as number of clicks, retweets, comments, likes, shares etc. We allocate a star to a message that has above average points so that you can immediately see which messages were the most successful. Clicks The clicks tab shows you statistics for any of the links you've sent out in your messages. This allows you to measure how many clicks your marketing efforts have generated. You can also keep track of which sites have generated the most clicks. Use the drop-down list to select Clicks Over Time or Referring Sites. Clicks Over Time This chart shows the cumulative number of clicks over time. 83 / 165


84 Referring Sites The Referring Sites pie chart gives you a breakdown of which sites have lead to the most clicks on the link you sent out. What does the yellow star mean? For each message, we allocate points as a measure of success. Points are based on metrics such as number of clicks, retweets, comments, likes, shares etc. We allocate a star to a message that has above average points so that you can immediately see which messages were the most successful. 84 / 165
85 Mentions The Mentions tab allows you to understand how much buzz the keywords and brands you're monitoring has generated. You can configure which keywords you'd like to monitor from within Add/Edit Services under the Brand Monitoring category. Buzz Over Time The Buzz Over Time report shows you how many times your brand or keyword has been mentioned over time. You can filter your search results by mention type. You can also view mentions over a specific period of time by adjusting the from and to date. Buzz By Source The Buzz By Source report shows you a pie chart of which sites/sources have generated the most buzz about your brand or keyword. 85 / 165

86 Top Users The top users report shows a list of the users that have mentioned your brand or keyword the most times. You can click on their username to be taken to the user's profile page. Site Analytics The site analytics tab allows you to integrate with your Google Analytics reports. By integrating with Google Analytics, you can keep track of how your and social media campaigns are affecting overall traffic to your websites. To link up your Google Analytics account to EzeeSocial, simply do the following: Click on My Reports. Click on the Site Analytics sub-tab and you'll be prompted to connect to Google Analytics. Click Connect to Google Analytics and Grant Access 86 / 165

87 After connecting, you'll be returned to the My Reports tab go back to Site Analytics and start monitoring your site stats. You can view web site statistics over period of 1 week, 1 month or 3 months. You can also filter results by source, medium and campaign which uses Google Analytics standard tracking parameters to filter results. Site Usage The site usage reports shows the number of visits, new visit and page views over time in relation to messages you've sent from EzeeSocial. Other metrics shown are: Visits: The number of unique visits over the selected period. Page Views: The total number of page views on your site. Pages per visit: The number of pages a user visits on average on your site. Bounce Rate: The rate at which new users immediately leave your site. Average Time on Site: The amount of time a visitor spends on your site on average. New Visits Percentage: The percentage of users that are visiting your site for the first time. Traffic Sources This report shows a pie chart of the referring sites that have generated visits to your site. 87 / 165


88 Content Overview The content overview reports shows the most popular pages on your site over the period selected. Map Overlay The map overlay shows a breakdown of the number of visits by location. 88 / 165


89 Reports The reports tab allows you to export your EzeeSocial data in Excel/CSV or HTML format. Message Reports In this section you can export various types of message data, including Sent Messages, Pending Messages, Drafts, Received Messages and Clicked Links. You can choose to export data over a specific period. Profile Reports 89 / 165

90 The profile reports section allows you to export report information about specific social network accounts. Contact Reports You can export your contacts to CSV or HTML from the contact reports section. Mention Reports Mention reports allow you to export mentions to HTML or CSV for a given period. 90 / 165
91 91 / 165
92 Add/Edit Services EzeeSocial allows you to integrate your account with various social media services. By clicking on the Add/Edit Services tab, you can setup the services you would like to integrate your EzeeSocial account with. You can add each service multiple times and for different accounts by clicking the Add button next to each service. You'll then be able to utilize them using your EzeeSocial account. EzeeSocial will also load Profile Reports for each social media service that you have added. Social Services in this category are for posting updates, photos, link sharing, location-based services and social media messaging. Services include Bebo, Brightkite, Facebook, Friendfeed, Buzz, Twitter, Foursquare etc. See Social for more information. Streams Streams allows you to read and respond to posts from various streams e.g. Facebook, LinkedIn and Twitter. See Streams for more information. Blogs This category allows you to update your blogs directly from EzeeSocial. See Blogs for more information. 92 / 165
93 Monitoring Monitor what's being said about your brand on blogs, microblogs, social networks and in comments. See Monitoring for more information. RSS RSS Auto Poster allows you to automatically post to your social networks and contacts. See RSS for more information. EzeeSocial allows you to import your contacts from services like Gmail, Hotmail, AOL and Yahoo Mail. See for more information. SMS EzeeSocial allows you to build and pre-schedule automated SMS texts. This can be useful for birthdays and other events. See SMS for more information. Import Import allows you to import your contacts from CSV files. This is useful when importing a large number of contacts. See Import for more information. Other Twitter Auto Follower allows you to automatically follow people on Twitter. The Auto Follower allows you to extend your fan base and follow people with common interests. See Other for more information. Services Service categories include: Social Streams Blog Photos Monitoring Bookmarking RSS 93 / 165
94 SMS Import Automation Other Latest You can add multiple accounts for each service by clicking the Add button and filling in the details for each one. Social Social includes all the social media publishing services. See Social Media Publishing Services for more information. Status Updates and Microblogging Status Updates and Microblogging allows you to add services which enable you to post status updates to services such as Twitter, Facebook and LinkedIn. For a list of the social media services supported by EzeeSocial, see What Social Media services do you support? Streams Streams allows you to read and respond to posts from various streams in real-time e.g. Facebook, LinkedIn and Twitter. Once added, these streams will appear in your Inbox in the Message Box. See Social Streams for more information. Social Streams Social Streams include Facebook, LinkedIn and Twitter streams. 94 / 165
95 For a list of the social media services supported by EzeeSocial, see What Social Media services do you support? Blogs Blogs allows you to post updates to your blogs using services such as Blogspot, Tumblr and Wordpress. See Blogs for more information. Blogs Blogs allows you to add services which enable you to create and post updates to your blogs using services such as Blogspot and Wordpress. For a list of the social media services supported by EzeeSocial, see What Social Media services do you support? 95 / 165
96 Photos Photo Sharing allows you to add services which enable you to post photos using services such as Facebook Photo Album and Flickr. See Photo and File Sharing Services for more information Photo and File Sharing Services Photo Sharing allows you to add services which enable you to post photos using services such as Facebook Photo Album and Flickr. For a list of the social media services supported by EzeeSocial, see What Social Media services do you support? Monitoring EzeeSocial allows you to monitor what's being said about your brand online, e.g. in blogs, microblogs and social networks. You can also read reviews about your brands using services like Yelp, CitySearch and Tripadvisor. Once added, EzeeSocial will start monitoring the brands you've added and results will be displayed in the Mentions section of the Message Box. See Brand Monitoring for more information. Brand Monitoring Brand Monitoring allows you to add services which enable you to monitor what's being said about your brand and competitors through Brand and Keyword Monitoring and Reviews. 96 / 165
97 For a list of the social media services supported by EzeeSocial, see What Social Media services do you support? Bookmarking Link Sharing and Bookmarking allows you to add services which enable you to share links using services such as Delicious and Diigo. See Link Sharing and Bookmarking Services for more information. Link Sharing and Bookmarking Services Link Sharing and Bookmarking allows you to add services which enable you to share links using services such as Delicious and Diigo. For a list of the social media services supported by EzeeSocial, see What Social Media services do you support? RSS OPML Importer and RSS Auto Poster are the services for importing and automatically distributing contents from RSS feeds. See RSS Import and Automation Services for more information RSS Import and Automation Services 97 / 165
98 OPML Importer allows you to import RSS Feeds from an XML file that has been exported from a third-party RSS Reader, such as Google Reader. RSS Auto Poster allows you to setup EzeeSocial to automatically post to your social networks and/or contacts. For a list of the social media services supported by EzeeSocial, see What Social Media services do you support? EzeeSocial allows you to import your contacts from services like Gmail, Hotmail, AOL and Yahoo Mail. See Services for more information. Services Services allows you to import your contacts from public services such as Gmail and Hotmail. For a list of the social media services supported by EzeeSocial, see What Social Media services do you support? Autoresponder Build and pre-schedule a series of automated s for birthdays or event alerts that are triggered as soon 98 / 165
99 as your customers subscribe to a list. For a list of the social media services supported by EzeeSocial, see What Social Media services do you support? SMS EzeeSocial allows you to build and pre-schedule automated SMS texts. This can be useful for birthdays and other events. See SMS Auto Responder for more information. You can also create SMS keywords and receive text messages from customers. See Group SMS for more information. SMS Auto Responder EzeeSocial's SMS Autoresponder allows you to build and pre-schedule automated SMS texts. This can be useful for birthdays and other events. For a list of the social media services supported by EzeeSocial, see What Social Media services do you support? Group SMS EzeeSocial's SMS Autoresponder allows you to build and pre-schedule automated SMS texts. This can be useful for birthdays and other events. 99 / 165
100 For a list of the social media services supported by EzeeSocial, see What Social Media services do you support? Import Import allows you to import your contacts from CSV files. This is useful when importing a large number of contacts. See CSV Importers for more information. CSV Importers CSV Importers allows you to add services which enable you to bulk import your contacts or messages from a CSV file. For a list of the social media services supported by EzeeSocial, see What Social Media services do you support? Social Media Importers Social Media Importers allows you to import your social network contacts and post social media messages/ photos using services such as Facebook Wall Post and LinkedIn. 100 / 165
101 For a list of the social media services supported by EzeeSocial, see What Social Media services do you support? Automation Automation allows you to automate posting of messages. See Twitter Automation Services for more information. Twitter Automation Services Twitter Auto Follower allows you to automatically follow people on Twitter. For a list of the social media services supported by EzeeSocial, see What Social Media services do you support? Latest Latest displays EzeeSocial's new services. This list changes all the time as new services are added. 101 / 165
102 For a list of the social media services supported by EzeeSocial, see What Social Media services do you support? Adding services To add a service: 1. Go to Add/Edit Services 2. Search for the service you wish to add. For a list of the social media services supported by EzeeSocial, see What Social Media services do you support? 3. Find the service you wish to add and click Add 4. Sign in to the service with your username etc 102 / 165
103 5. When prompted, grant EzeeSocial permission to link with the service 6. You will then see the service in your list of services in the Message Box 7. Type your post and click Send See How to add a Facebook Fan Page for an example of adding a service My Services By clicking on My Services you can edit or delete any of the services you've already added to your EzeeSocial account. See Editing and Deleting Services for more information. Editing and deleting services To edit or delete a service from My Services, click on the service and select Edit to update your service settings or Delete to remove the service. 103 / 165
104 For more information on how to edit and delete services, see Editing and Deleting Services 104 / 165
105 How to's... Below are a list of How to's... If you have a question that is not listed here and you think it should be, please hello@ezeesocial.com Visit our Facebook fan page at and follow our twitter to keep up-to-date on EzeeSocial news. How to add a Facebook Fan Page 1. Go to Add/Edit Services. 2. Select Facebook Fan Page under Status Updates and Microblogging. 3. Click Add. 4. Connect to your Facebook account when prompted. 5. If prompted, grant EzeeSocial permission to access your Facebook account by selecting Allow. 105 / 165
106 6. Enter a description for this service, this is for your own reference. 7. Select your Facebook Fan Page from the list. 8. Click Save Settings to link your account. 9. You can repeat the process to add more Facebook Fan Pages. For more information on geotargeting, see Geotargeting Facebook Fans. Add Settings for Facebook Fan Page 106 / 165
107 Using EzeeSocial, you can add a Facebook Fan Page by selecting Add/Edit Services, choosing Facebook Fan Page and clicking Add. For more information see How to Add a Facebook Fan Page. EzeeSocial allows you to define exactly which fans your post will target. After clicking Add, you will be able to fill in your Facebook Fan Page settings. Description - this is for your own reference when using EzeeSocial. Username or - this will be automatically populated with your Facebook profile information. Facebook Page - these are the Facebook Fan Pages that you manage. Automatically generate link previews - by selecting Yes, EzeeSocial will automatically extract the first link that it finds in your post and a link preview will be generated with a image, caption and description. Attach an attribution link - by selecting Yes, you can add a link that will appear below each Facebook post. What my posts will look like - this shows you a sample of what your post will look like. Geotargeting - this is where you can choose who your post will target. See below for more information After adding your settings, click Save Settings. Geotargeting Facebook Fans EzeeSocial has a powerful piece of functionality. What is Geotargeting? Geotargeting in geomarketing and internet marketing is the method of determining the geolocation (the physical location) of a website visitor and delivering different content to that visitor based on his or her 107 / 165
108 location, such as country, region/state, city, metro code/zip code, organization etc. Targeting specific fans using Facebook In Facebook, users disclose a lot of relevant information about themselves for example their age, gender, location, work history, language etc. As a Facebook Page administrator, you have the ability to deliver content that's only relevant to specific fans. For example, you may be promoting an event in Los Angeles and only want your promotion to be visible to your fans located near LA who speak a specific language. An example of a targeted message could be: Free comedy tonight at the Spanish Comedy Club in downtown LA. And you could target this directly to all fans who are most likely to be engaged by it. For example all people in Los Angeles who speak Spanish. How do I do this in Facebook? In Facebook, you would select the customize option just before you post your update to your fans. Here you can decide exactly which fans your post will be visible to. Targeting Specific Fans using EzeeSocial To target specific fans select Edit next to Geotargeting. This will allow you to select fans according to regions. 108 / 165
109 You will then be able to select who your posts will be visible to. Countries - select a country from the drop-down list Regions - select regions from within that country Languages - select the languages of fans you wish you target. Once you have made your choices, select Add and you will be able to view your selected criteria in the box on the right. You can remove any of your selected criteria by selecting it and clicking Remove. Once you have made your selections, click Ok. You will be able to view your targeted fans on the Add Settings page, example below 109 / 165
110 To post to different fans, you can add the same Facebook Fan Page multiple times and just change the geotargeting options each time. How to grow your Twitter follower-base with EzeeSocial EzeeSocial allows you to grow your Twitter audience with minimal effort. The service works by automatically following people on Twitter who mention terms that you specify in the hope that these Twitter users will follow you back. How to add Twitter Auto Follower 1. Go to Add/Edit Services and under Add Services select Automation 2. Select Twitter Auto Follower and click Add. 3. On the settings screen, complete the required fields. 4. You can configure EzeeSocial to notify you via whenever it follows new users. 5. Click Save Settings to add the service How to setup an autoresponder EzeeSocial allows you to build and pre-schedule a series of automated messages, birthday greetings or event alerts that are triggered as soon as a new customer adds themselves to your contacts. EzeeSocial's autoresponders allow you to configure and send automatic messages via , Facebook, LinkedIn and SMS that are triggered by a date or an event. Steps required to setup an autoresponder: 1. If you haven't already done so, you should use EzeeSocial's capture widget on your website to start capturing new and SMS contacts. You can set this up under the Widget section in My Contacts. 2. New users will be added to a group you define in My Groups. 3. Using EzeeSocial's autoresponder, you can trigger automatic s to users in this group. 4. From Add/Edit Services, select Autoresponder under the category. Click Add. 5. Fill in the details on the Autoresponder settings screen, and be sure to select the group that you set up to store new contacts on the Capture widget in Step / 165
111 6. You can define how soon after or before an event your should be sent, using the Send settings. 7. Enter a subject and a message that will be sent to the contact that triggers the event in your group. You can use our merge tags to ensure that appropriate values are replaced at the time the message is sent. You can also use an template to give your s a professional look. A template can be seen in the screenshot above. 8. Click Save Settings so that your changes take effect. EzeeSocial will now monitor the group you chose for contacts who match the criteria of the event you specified. i.e. users with a matching birthday or users who added themselves to your contacts. 111 / 165
112 You can check which s EzeeSocial has sent out from within the Sent tab in Message Box. How to post links to Facebook Fan Pages EzeeSocial allows you to post an update to Facebook with the title, caption and image in Facebook's native format 1. After adding the Facebook Page service from Add/Edit Services, return to the Message Box. For more information on adding a Facebook Fan Page, see How to add a Facebook Fan Page. 2. Select the Facebook Page you'd like to post to. 3. Click URL and enter the URL of the link you'll be posting to Facebook. 4. Click Load Images from URL to find a suitable image on the page to act as your link preview and click Attach to message. 5. Click Shrink and Insert to insert a trackable link into your message. 6. You can type any text you like, as long as your message contains a link. EzeeSocial will extract the link for you automatically and post it to Facebook in its native format with the attached image acting as 112 / 165
113 the link preview. How to send an newsletter EzeeSocial allows you to send out an campaign in a single click and will automatically track your campaign and manage unsubscribes for you. 1. Import your contacts into a group If you haven't already done so, import your contacts by clicking on the Import section within My Contacts. From here, you can import your contacts from just about any service or via a CSV file. During the import process, you'll be able to select or create a group that the contacts should be added to. This acts like a mailing list and EzeeSocial will automatically remove any addresses from this group if anyone unsubscribes. When creating a group, be sure to toggle the star icon so that it is added to your favorites and appears in the services section of your Message Box. 113 / 165
114 2. Choose or create an template Once your contacts have been imported, you can return to the Message Box and select one of EzeeSocial's standard templates. To select a template, click Templates and select a template from one of the options. After selecting a template and editing the content, you can click Save Template to save your template for future use. 3. Upload and embed images into your You can upload and embed images into your by clicking the Photo or File link. After uploading your photo, you'll be able to embed it into your by clicking the embed icon at the top right of the image. 4. Insert merge tags Merge tags are placeholders that can be inserted into your and replaced with actual values at the time of sending. For example, you could insert merge tags to be replaced with a recipient's first name when the is sent. To insert a merge tag, click the Merge Tags link and insert the ones you require into your / 165
115 How to track localized social media mentions and engagement EzeeSocial has implemented our own social media monitoring functionality that delivers localized, more relevant results than our competitors. Here are the steps you can take to set up a keyword for social media monitoring: 1. From within Message Box, click on the Mentions sub-tab. 2. Click the New Keyword button. 3. Fill in the details on the settings page you can optionally select a country and location to localize results. 115 / 165

116 4. You can also decide whether EzeeSocial should notify you or any of your team members via when new mentions are discovered. 5. After saving your settings, EzeeSocial will start to retrieve mentions for you. You can keep track of the latest mentions about your keyword or brand from the mentions tab within Message Box. EzeeSocial will automatically analyse your mentions and highlight posts with both negative and positive sentiment so that you can easily locate the most meaningful posts and respond immediately. 116 / 165
117 6. To respond to a mention, you can just click the item in the list and respond directly from EzeeSocial. How to read and respond to social media messages EzeeSocial's unified social media Inbox allows you to read and respond to social media messages all from one place. For almost every social media account you set up in Add/Edit Services, EzeeSocial regularly checks your profile for new posts and updates your Inbox. To respond to a post that EzeeSocial pulls into your inbox, you can just click the message, type a response and click the Reply button. How to send your first message Sending your first message has been explained in points below. 1. Start by integrating your services using the Add/Edit Services tab 2. Select the Message Box tab 117 / 165
118 3. Select the services you wish to utilize 4. Type your message in the box below 5. Select Send to send your message Note: There is a character counter just below the text editor that acts as a guide for posting to services with character limits. This is purely a guide and can be ignored for message types without limits. How to send an SMS SMS Text allows you to send SMS messages using your EzeeSocial Tokens. To compose an SMS, follow the steps below: 1. Go into Message Box and select SMS Text 2. You will then be asked to type in the mobile number 3. If you know the recipient's cellphone number, you can simply type it in the box or click on Add Contacts/Services to find a list of your contacts. Please remember to include the country code. 4. Multiple mobile numbers must be separated with commas. 5. You are then able to compose and send SMS messages. 6. Once your SMS is complete, select Send if you are ready to send, Save Draft if you would like to continue working on the SMS, Save Template if you would like to continue working on your template or Discard if you no longer wish to send your SMS. 7. EzeeSocial also allows you to receive a notification when your SMS is sent and enable SMS replies. See Sending Options for more information. How to send an By selecting , you are able to compose and send messages. 118 / 165
119 To compose an , follow the steps below: 1. Go into Message Box and select 2. You will then be asked to type in the address 3. If you know the recipient's address, you can simply type it in the box or click on Add Contacts/ Services to find a list of your contacts. 4. Multiple s must be separated with commas. 5. You are then able to compose and send messages. 6. Once your is complete, select Send if you are ready to send, Save Draft if you would like to continue working on the , Save Template if you would like to continue working on your template or Discard if you no longer wish to send your EzeeSocial also allows you to receive a notification when your is sent and enable SMS replies. See Sending Options for more information. How to import and send message to LinkedIn contacts 1. Go to Add/Edit Services 2. Under Social and Social Media Messaging find LinkedIn 3. Click Add 4. Log in with your LinkedIn details 5. Grant EzeeSocial permission to link to your LinkedIn Account 6. Select Save Settings 5. You will then be able to send LinkedIn Status updates by going to Message Box and toggling LinkedIn Status 6. Type your post (with LinkedIn Status selected) and click Send How to create an opt-in form A great way to grow your mailing list is through EzeeSocial's opt-in widget. Our opt-in widget allows users on your website, blog or even Facebook Page to add themselves directly to your contacts and can be setup in 4 easy steps: 1. Go to My Contacts and select the Widget section. 2. Click Get Started and select the standard fields that you would like to appear on your capture form. 3. Go to Step 2 and click New Field to create any additional custom fields you would like your customers/contacts to fill in. 4. After creating any additional fields, proceed to Step 3. Here you can customize the button text and the page to direct users to after signing up. You can also create/select a group of contacts that can be notified whenever a new customer signs up. 5. Finally, go to Step 4, where you can select the EzeeSocial group (mailing list) that all new contacts 119 / 165
120 are added to. You can click the Preview button to preview and test the widget. When you're ready, click Get Widget Code. This is the code that you'll need to copy and paste onto your website or blog to have the capture form appear. 120 / 165
121 How to create SMS group via EzeeSocial's Group SMS EzeeSocial's Group SMS feature allows contacts to opt-in via an SMS keyword and join your group. SMS credits are required to send and receive text messages. To setup an opt-in number to be able to send and receive SMS texts, follow the steps below: 1) Go to Add/Edit Services > SMS. 2) Locate the Group SMS service and click Add. 3) Enter the SMS keyword. This is a unique keyword that will be used by contacts be able to opt-in via SMS. 4) Pick a number from the available numbers in the dropdown list. This is the number that new and existing customers will be able to use to reach you. 5) Select the group to add the new contact to once they've opted in. You'll be able to send bulk SMS messages to this group of contacts at any time from within the Message Box. 6) Enter an automatic response. This automatic response is what will be sent to anyone that opts in for the first time via your SMS keyword. 7) Click Save Settings. 8) Now you can advertise your selected number and keyword so that new and existing contacts can opt in to receive SMS texts from your company. 121 / 165

122 9) When a new customer opts in or sends you a text message, EzeeSocial will notify you via and all incoming text messages will be available within the Priority Inbox under Message Box. 122 / 165
QUICK START GUIDE. +1(877) Getting Started with Zapp! Digital Media. Management Dashboard
 Getting Started with Zapp! Digital Media. Management Dashboard") QUICK START GUIDE +1(877) 404.1989 Getting Started with Zapp! Digital Media Management Dashboard Quick Start Guide WELCOME TO THE ZAPP! DASHBOARD, THIS GUIDE WILL HELP YOU GET STARTED WITH USING OUR PLATFORM.
QUICK START GUIDE +1(877) 404.1989 Getting Started with Zapp! Digital Media Management Dashboard Quick Start Guide WELCOME TO THE ZAPP! DASHBOARD, THIS GUIDE WILL HELP YOU GET STARTED WITH USING OUR PLATFORM.
Contents. Announcer Pro Version 4.6 Page 2 of 35 Version V4.6
 User Guide Contents 1. Introduction... 3 1.1. Getting Started... 3 1.2. Navigation... 4 2. Create a Newsletter... 6 2.1. Confirm Company Details... 6 2.2. Choose Template... 8 2.3. Edit Newsletter... 8
This document contains information that will help you to create and send graphically-rich and compelling HTML s through the Create Wizard.
 This document contains information that will help you to create and send graphically-rich and compelling HTML emails through the Create Email Wizard. or warranty by AT&T and is subject to change. 1 Contents
Creating an with Constant Contact. A step-by-step guide
 Creating an Email with Constant Contact A step-by-step guide About this Manual Once your Constant Contact account is established, use this manual as a guide to help you create your email campaign Here
Creating an with Constant Contact. A step-by-step guide
 Creating an Email with Constant Contact A step-by-step guide About this Manual Once your Constant Contact account is established, use this manual as a guide to help you create your email campaign Here
Swiiit User Guide 09/11/2016
 Swiiit User Guide 09/11/2016 Contents Getting Started... 4 Overview of Main Tools... 5 Webpages... 6 Main pages (Sections)... 6 Rearrange Sections... 6 Subpages... 7 Change the Title of a Webpage... 8
Classroom Blogging. Training wiki:
 Classroom Blogging Training wiki: http://technologyintegrationshthornt.pbworks.com/create-a-blog 1. Create a Google Account Navigate to http://www.google.com and sign up for a Google account. o Use your
Netvibes A field guide for missions, posts and IRCs
 Netvibes A field guide for missions, posts and IRCs 7/2/2012 U.S. Department of State International Information Programs Office of Innovative Engagement Table of Contents Introduction... 3 Setting up your
Webmail 7.0 is an online client which runs in your web browser. Webmail 7.0 allows you to access your , contact list, and calendar from
 Webmail 7.0 is an online email client which runs in your web browser. Webmail 7.0 allows you to access your email, contact list, and calendar from any computer with an internet connection and a web browser.
Getting Started with Social Media
 Getting Started with Social Media Step 1: Go to www.facebook.com Step 2: Fill out the Sign Up form located on the homepage, including full name, e-mail address, a password and birthday, to start a free
While editing a page, a menu bar will appear at the top with the following options:
 Page Editor ===> Page Editor How Can I Use the Page Editor? The Page Editor will be your primary way of editing your website. Page Editor Basics While editing a page, you will see that hovering your mouse
Swiiit User Guide 03/09/2015
 Swiiit User Guide 03/09/2015 Contents Getting Started... 4 Overview of Main Tools... 5 Webpages... 6 Main pages (Sections)... 6 Rearrange Sections... 6 Subpages... 7 Change the Title of a Webpage... 8
Social Marketing User Guide
 Social Marketing User Guide 1 Table of Contents 3 4 8 10 11 12 13 Settings Creating a New Post My Posts Customer Posts Leads Content Analytics 2 Settings The first time you log in, navigate to the left
Making online easy. Cube Reviews User Guide
 Making online easy Cube Reviews User Guide Introduction page Funnel How to Link Your Review Sites page How to Customise Funnel Content page How to Customise Funnel Set-Up page 7 Widgets page 8 Invites
Creating Teacher Webpages on the New APS WordPress Site
 Creating Teacher Webpages on the New APS WordPress Site TABLE OF CONTENTS INTRODUCTION 3 THE EDITING DASHBOARD 4 CREATING A NEW PAGE 5 EDITING YOUR PAGE 6 1. Page Title 7 2. Toolbar/ toolbar icons 7 3.
Zimbra User Guide Rev
 Zimbra User Guide Rev. 2.12.2013 Using Zimbra Email To access Zimbra email, go to: https://email.outlookmail.com and enter your current network username and password. Supported browsers include: Windows
Setting up your Netvibes Dashboard Adding a Blog to your Dashboard
 Cr e a t i ngali s t e ni ngda s hboa r d wi t hne t vi be s Ne t v i be s Table of Contents Introduction... 1 Setting up your Netvibes Dashboard... 2 Adding a Blog to your Dashboard... 2 Adding Twitter
Publish Content & Measure Success 1
 Publish Content & Measure Success 1 Publish Content & Measure Success Meltwater Engage gives businesses scalability and control over content publishing across all of their social channels. The built- in
WELCOME TO MYNEWSDESK!
 WELCOME TO MYNEWSDESK! We want to make you an expert user of Mynewsdesk in the shortest possible time, and make it easy for you to see the positive results you can achieve from effective and well thought
Beginners Guide to Snippet Master PRO
 Beginners Guide to Snippet Master PRO This document assumes that Snippet Master has been installed on your site. If not please contact the Bakas IT web team at webreg@bakasit.com.au. Initial Login Screen...
ADRION PROJECT WEBSITES USER S MANUAL
 ADRION PROJECT WEBSITES USER S MANUAL September 2018 Summary 1. The ADRION Project Website... 3 2. Content instructions... 3 3. Contacts for technical assistance... 3 4. Login... 3 5. Editable contents...
NETZONE CMS User Guide Copyright Tomahawk
 NETZONE CMS User Guide Copyright 2015. Tomahawk 1 Phone: + 64 9 522 2333 Email: getintouch@tomahawk.co.nz Tomahawk 2015 www.tomahawk.co.nz 2 NETZONE CMS USER GUIDE WHAT YOU LL FIND INSIDE LOGGING IN 4
A Quick Introduction to the Genesis Framework for WordPress. How to Install the Genesis Framework (and a Child Theme)
") Table of Contents A Quick Introduction to the Genesis Framework for WordPress Introduction to the Genesis Framework... 5 1.1 What's a Framework?... 5 1.2 What's a Child Theme?... 5 1.3 Theme Files... 5
Table of Contents A Quick Introduction to the Genesis Framework for WordPress Introduction to the Genesis Framework... 5 1.1 What's a Framework?... 5 1.2 What's a Child Theme?... 5 1.3 Theme Files... 5
CRM Insights. User s Guide
 CRM Insights User s Guide Copyright This document is provided "as-is". Information and views expressed in this document, including URL and other Internet Web site references, may change without notice.
Creating Digital Coupons for Your SMS Campaigns
 Coupons Creating Digital Coupons for Your SMS Campaigns Your system's Coupons section allows you to create digital coupons that you can use in your SMS campaigns. This is a very powerful feature which
WordPress A Reference Guide for TU Students Version:
 WordPress A Reference Guide for TU Students Version: 2017.11.17 Adapted from OTS Training s Reference Guide for Faculty/Staff by OTS Student Computing Services scs@towson.edu 410-704-5151 www.towson.edu/scs
Startup Guide. Version 2.3.7
 Startup Guide Version 2.3.7 Installation and initial setup Your welcome email included a link to download the ORBTR plugin. Save the software to your hard drive and log into the admin panel of your WordPress
Passwords. Twitter UN: IDANRV Twitter PW: idanrv1. Thank You
 Passwords Twitter UN: IDANRV Twitter PW: idanrv1 Thank You USER'S MANUAL TABLE OF CONTENTS Page # 1.1 SYSTEM OVERVIEW... 4 1.2 DEFINITIONS & ACRONYMS... 4 1.3 REFERENCES... 4 2.0 INSTALLATION... 5 2.1
Grande Prairie, Alberta. LibraryAware Manual. Samantha Mercer, Digital Learning & Outreach Librarian
 Grande Prairie, Alberta www.peacelibrarysystem.ab.ca LibraryAware Manual Samantha Mercer, Digital Learning & Outreach Librarian November 2017 Table of Contents Login Access 1 How to Login... 4 2 Forgot
TEACHER PAGES USER MANUAL CHAPTER 6 SHARPSCHOOL. For more information, please visit: Chapter 6 Teacher Pages
 SHARPSCHOOL USER MANUAL CHAPTER 6 TEACHER PAGES For more information, please visit: www.customernet.sharpschool.com 0 TABLE OF CONTENTS 1. 2. 3. 4. 5. 6. 7. 8. 9. 10. 11. INTRODUCTION... 1 I. TEACHER PAGE
A Guide to Blogging on Wordpress
 A Guide to Blogging on Wordpress Below is a written guide with pictures for using the WordPress blogging platform. If you re more of a visual person, there are videos here: http://wordpress.tv/category/howto/
Organizing Your Network with Netvibes 2009
 Creating a Netvibes Account 1. If you closed your Internet browser from the last exercise, open it and navigate to: htt://www.netvibes.com. 2. Click Sign In in the upper right corner of the screen. 3.
CANVAS OBSERVER GUIDE
 CANVAS OBSERVER GUIDE This work is licensed under a Creative Commons Attribution-NonCommercial-ShareAlike License Table of Contents Introduction...3 What is the Observer role?...4 How can I use Canvas
Lava New Media s CMS. Documentation Page 1
 Lava New Media s CMS Documentation 5.12.2010 Page 1 Table of Contents Logging On to the Content Management System 3 Introduction to the CMS 3 What is the page tree? 4 Editing Web Pages 5 How to use the
Create an Account... 2 Setting up your account... 2 Send a Tweet... 4 Add Link... 4 Add Photo... 5 Delete a Tweet...
 Twitter is a social networking site allowing users to post thoughts and ideas in 140 characters or less. http://www.twitter.com Create an Account... 2 Setting up your account... 2 Send a Tweet... 4 Add
2018 ANNUAL CAMPAIGN GETTING STARTED GUIDE YMCA OF GREATER HOUSTON
 2018 ANNUAL CAMPAIGN GETTING STARTED GUIDE YMCA OF GREATER HOUSTON Link: http://donate.ymcahouston.org This guide will help you get started and learn more about the tools and features you can use to be
APPLICATION USER GUIDE. Application: EasySiteWizard PRO Version: 8.7
 APPLICATION USER GUIDE Application: EasySiteWizard PRO Version: 8.7 EasySiteWizard Professional allows you to create a completely customized website in a few simple steps. There are several creative and
How to Use Google Alerts
 How to Use Google Alerts Google Alerts is a service that generates search engine results, based on criteria provided by you, and delivers the results to your e mail account. This service is useful for
PBwiki Basics Website:
 Website: http://etc.usf.edu/te/ A wiki is a website that allows visitors to edit or add their own content to the pages on the site. The word wiki is Hawaiian for fast and this refers to how easy it is
bla bla Groupware Compact Guide
 bla bla Groupware Compact Guide Groupware Groupware: Compact Guide Publication date Friday, 01. June 2018 Version 7.10.0 Copyright 2016-2018 This document is the intellectual property of OX Software GmbH
DotNetNuke 5.1 Superuser Manual
 DotNetNuke 5.1 Superuser Manual Administration DotNetNuke Corporation 1825 S. Grant St. Suite 240 San Mateo, CA 94402 www.dotnetnuke.com 650.288.3150 Copyright 2009, DotNetNuke Corporation. All Rights
2 Document Manager Lite v5.2 User Guide
 This document was produced by Voloper Creations Inc. 2000 2009 Voloper Creations Inc. All Rights Reserved Brands or product names are trademarks or registered trademarks of their respective holders. The
User Manual Contents
 User Manual Contents Accessing MyPortfolio... 2 New Users - Creating an Account... 3 Returning Users - Logging in to Your Account... 5 Resetting Your Password... 6 Updating Your Account/Profile Information...
WELCOME TO MYNEWSDESK!
 WELCOME TO MYNEWSDESK! We want to make you an expert user of Mynewsdesk in the shortest possible time, and make it easy for you to see the positive results you can achieve from effective and well thought
Unified Classroom: Class Pages
 Unified Classroom: Class Pages Unified Classroom April 2018 Release Unified Classroom: Class Pages Basics Contents Unified Classroom: Class Pages Basics... 3 Building Class Pages... 3 Access Class Pages...
Administrative Training Mura CMS Version 5.6
 Administrative Training Mura CMS Version 5.6 Published: March 9, 2012 Table of Contents Mura CMS Overview! 6 Dashboard!... 6 Site Manager!... 6 Drafts!... 6 Components!... 6 Categories!... 6 Content Collections:
American Public Health Association s Affiliate Online Community User s Guide. October 2015 edition
 American Public Health Association s Affiliate Online Community User s Guide October 2015 edition TABLE OF CONTENTS Getting Started- Creating Your Account.3 Getting Started- Tips and Suggestions.4 Getting
Getting Started Guide. Getting Started With Quick Blogcast. Setting up and configuring your blogcast site.
 Getting Started Guide Getting Started With Quick Blogcast Setting up and configuring your blogcast site. Getting Started with Quick Blogcast Version 2.0.1 (07.01.08) Copyright 2007. All rights reserved.
Wordpress Editor Guide. How to Log in to Wordpress. Depending on the location of the page you want to edit, go to either:
 Wordpress Editor Guide How to Log in to Wordpress Depending on the location of the page you want to edit, go to either: http://www.necc.mass.edu/wp- admin (for the main website) Or http://facstaff.necc.mass.edu/wp-
CONTENT CALENDAR USER GUIDE SOCIAL MEDIA TABLE OF CONTENTS. Introduction pg. 3
 TABLE OF CONTENTS SOCIAL MEDIA Introduction pg. 3 CONTENT 1 Chapter 1: What Is Historical Optimization? pg. 4 2 CALENDAR Chapter 2: Why Historical Optimization Is More Important Now Than Ever Before pg.
e-portfolios Benefits of an e-portfolio Showcase your best works Progress assessment Job search; present to employers Share with family and friends
 1 e-portfolios Digication training objective The objective is to learn the tools and features of Digication and gain the essential skills to use Digication to develop an electronic portfolio. What you
Table of Contents Create an account... 1 Create a tutorial Create a tutorial series Menu bar... 15
 Table of Contents Create an account... 1 Create a tutorial... 11 Create a tutorial series... 13 Menu bar... 15 AREA content writing best practice... 16 *If you already have an Autodesk account you can
CUSTOMER PORTAL USER MANUAL. Marketing
 CUSTOMER PORTAL USER MANUAL Marketing 1 The marketing tab contains five different areas (depending on level); these are accessible by clicking the relevant option from the left-hand side. COMMUNICATIONS
Website Publishing Tool Manual
 Customer Support Website Publishing Tool Manual This is a designed as a definitive guide to all the features and tools available within Website Publishing Tool. Contents Introduction... 4 Adding Content...
User Guide. Chapter 6. Teacher Pages
 User Guide Chapter 6 s Table of Contents Introduction... 5 Tips for s... 6 Pitfalls... 7 Key Information... 8 I. How to add a... 8 II. How to Edit... 10 SharpSchool s WYSIWYG Editor... 11 Publish a...
Basic CMS User Guide
 "We create exceptional business solutions for cash-pay healthcare professionals that enable them to realize their full potential." Basic CMS User Guide Version 1.2 3/28/2012 1 Table of Contents Table of
Ning Frequently Asked Questions
 Ning Frequently Asked Questions Ning is a Web tool that allows anyone to create a customizable social network, allowing users to share pictures and videos, maintain blogs, communicate in chat and discussion
bla bla OX App Suite User Guide
 bla bla OX App Suite User Guide OX App Suite OX App Suite: User Guide Publication date Wednesday, 10. April 2013 Version 7.0.1 Copyright 2006-2013 OPEN-XCHANGE Inc., This document is the intellectual property
USER MANUAL. WeConnect
 USER MANUAL WeConnect Welcome to WeConnect, a user-friendly website builder for your church or organization. WeConnect lets anyone easily create a beautiful, professional website with no programming experience
Esri Story Maps let you combine authoritative maps with narrative text, images, and multimedia
 Geoinformation and Sectoral Statistics Section (GiSS) Story Maps Esri Story Maps let you combine authoritative maps with narrative text, images, and multimedia content. They make it easy to harness the
IBM emessage Version 9 Release 1 February 13, User's Guide
 IBM emessage Version 9 Release 1 February 13, 2015 User's Guide Note Before using this information and the product it supports, read the information in Notices on page 471. This edition applies to version
CommzGate Cloud SMS User Guide
 CommzGate Cloud SMS User Guide 2014 Welcome! This User Guide takes a visual approach to introducing you to the features found on the CommzGate Cloud SMS Web Portal. Each major part of the User Interface
Google Sites 101. Mrs. Wilson
 Google Sites 101 Mrs. Wilson Google Sites 101 Create a site 1. Go to http://sites.google.com/ 2. Login with your Google Account [or Google Apps account] email address and password You can create a Google
EFM Community 3.1 Portal Administration Guide
 EFM Community 3.1 Portal Administration Guide WHITE PAPER For technical support please call: 1-800-787-8755 Or visit: Hwww.Vovici.comH Please contact Vovici technical support if you believe any of the
Edmodo for Teachers Guide (Taken directly from Edmodo s site.)
") Edmodo for Teachers Guide (Taken directly from Edmodo s site.) Table of Contents: 1. Teacher Sign Up 2. Create a Group 3. Manage Your Groups 4. Small Group 5. Co-Teaching 6. Student Sign up 7. Post a Message
Edmodo for Teachers Guide (Taken directly from Edmodo s site.) Table of Contents: 1. Teacher Sign Up 2. Create a Group 3. Manage Your Groups 4. Small Group 5. Co-Teaching 6. Student Sign up 7. Post a Message
Training Manual and Help File
 Training Manual and Help File 30.06.2011 Update Manage Grow Welcome to your new Juniper Website Management System with CMS Introduction The Juniper Website Management System with CMS (Website Content Management
Login: Quick Guide for Qualtrics May 2018 Training:
 Qualtrics Basics Creating a New Qualtrics Account Note: Anyone with a Purdue career account can create a Qualtrics account. 1. In a Web browser, navigate to purdue.qualtrics.com. 2. Enter your Purdue Career
RELAY FOR LIFE ONLINE EVENT MANAGEMENT GUIDE
 RELAY FOR LIFE ONLINE EVENT MANAGEMENT GUIDE This Guide is broken out into two main parts: 1. The Participant Experience (signing up and using the dashboard) 2. The Event Manager Experience (working within
A Guide to Understand, Install and Use Pie Register WordPress Registration Plugin
 A Guide to Understand, Install and Use Pie Register WordPress Registration Plugin 1 P a g e Contents 1. Introduction... 5 2. Who is it for?... 6 3. Community v/s PRO Version... 7 3.1. Which version is
Table of Contents. Page 2 of 72. High Impact 4.0 User Manual
 Table of Contents Introduction 5 Installing High Impact email 6 Installation Location 6 Select Mail Client 6 Create a ReadyShare Account 6 Create a Default Profile 6 Outlook Configuration Message 6 Complete
Pennsbury G-Mail Composing and Sending Messages Compose
 Pennsbury G-Mail Composing and Sending Messages From the main screen, click on the Compose button to begin drafting a new message: The new message window will appear. Enter the subject of the email on
How to Edit Your Website
 How to Edit Your Website A guide to using your Content Management System Overview 2 Accessing the CMS 2 Choosing Your Language 2 Resetting Your Password 3 Sites 4 Favorites 4 Pages 5 Creating Pages 5 Managing
WPM for Departments Using WPM to Edit Your Department s Website
 Overview Web Profile Manager allows Ithaca College community members to easily edit department sites. All of the specialty language and code has been omitted to provide a consistent format and to make
2013 edition (version 1.1)
") 2013 edition (version 1.1) Contents 1 Introduction... 3 2 Signing in to your Office 365 account... 3 2.1 Acceptable Use Policy and Terms of Use... 4 3 Setting your profile and options... 4 3.1 Settings:
2013 edition (version 1.1) Contents 1 Introduction... 3 2 Signing in to your Office 365 account... 3 2.1 Acceptable Use Policy and Terms of Use... 4 3 Setting your profile and options... 4 3.1 Settings:
Subscription Item Administrator s Guide
 Table of Contents Introduction... 2 What is GovDelivery?... 2 What is Email Subscription?... 2 How Does It Work?... 2 What is an Item Administrator?... 2 Logging into GovDelivery... 3 Logging Out of GovDelivery...
UNIVERSITY OF WOLLONGONG MICROSOFT OUTLOOK
 UNIVERSITY OF WOLLONGONG MICROSOFT OUTLOOK 2007 EMAIL Table of Contents INTRODUCTION... 2 WHAT S NEW... 2 MOBILE DEVICES... 2 OVERVIEW OF OUTLOOK... 3 NAVIGATION PANE... 3 VIEWING MAIL... 4 READING PANE...
Vetstreet Web Builder Editor Tool User Guide v2.1. Web Builder. User Guide v2.1
 Web Builder User Guide v2.1 Contact your Account Manager at (888) 799-8387 or email support@vetstreet.com with questions. Page 1 Index... 1 The Editor Tool... 7 Forgot Your Username or Password?... 7 How
Editor Guide. There are three ways to create, edit and delete an article within SOCS. They are Central Services, SOCS Wiki s and Easy Edit.
 Editor Guide There are three ways to create, edit and delete an article within SOCS. They are Central Services, SOCS Wiki s and Easy Edit. Central Services Select Editor from left-hand side navigation
1. Login to https://marketplace.singtel.com/ and enter your login ID and password.
 Web Builder User Guide Launching Web Builder Understanding the Basics Getting Started Creating Content Adding Subpages Moving a Webpage Design Templates Webpage Layout Uploading Files Inserting Files Deleting
Creating a Website with Wordpress
 Creating a Website with Wordpress Wordpress Fundamentals Version 1.6 Fayette County Public Schools June 28, 2013 Sow-Foong Hedman Technology Web Team Contents What is Wordpress?... 4 Overview... 4 Key
1.0 Overview For content management, Joomla divides into some basic components: the Article
 Joomla! 3.4.x Training Manual Joomla is an online content management system that keeps track of all content on your website including text, images, links, and documents. This manual includes several tutorials
Introduction to 9.0. Introduction to 9.0. Getting Started Guide. Powering collaborative online communities.
 Introduction to 9.0 Introduction to 9.0 Getting Started Guide Powering collaborative online communities. TABLE OF CONTENTS About FirstClass...3 Connecting to your FirstClass server...3 FirstClass window
TinyMCE Users Guide. This user manual will show you all the basics of the TinyMCE editor.
 Introduction TinyMCE is a platform independent web based Javascript HTML WYSIWYG editor. What this means is that it will let you create html content on your web site. TinyMCE supports a lot of Operation
Marist Mail Reference Guide
 Marist Mail Reference Guide Accessing Marist Mail 1. In your browsers address box, type the url: Mari.st/mmail Logging in 2. On the Marist Login screen, type your Marist Account as First.Last and your
A User Guide. Besides, this Getting Started guide, you ll find the Zoho Campaigns User Guide and many other additional resources at zoho.com.
 A User Guide Welcome to Zoho Campaigns! This guide will help you create and send your first email campaign. In addition to sending an email campaign, you ll learn how to create your first mailing list,
Findmyshift - Getting started with Findmyshift
 Findmyshift - Getting started with Findmyshift Managers Creating your first roster Adding staff to your team Inviting your staff to log in Choosing your settings Entering shifts Publishing shifts Handling
Joomla! 2.5.x Training Manual
 Joomla! 2.5.x Training Manual 1 Joomla is an online content management system that keeps track of all content on your website including text, images, links, and documents. This manual includes several
Martindale-Hubbell Lawyer Web Sites User Guide
 Martindale-Hubbell Lawyer Web Sites User Guide Downloaded on 03-10-2018 Copyright 2018 LexisNexis, a division of Reed Elsevier Inc. All rights reserved. Contents Using the tools on the Home page...1 Overview
CHAPTER 1: INTRODUCTION TO GOOGLE APPS
 CHAPTER 1: INTRODUCTION TO GOOGLE APPS 1.1 What is Google Apps Google Apps is a collection of advance Gmail which is the premier email solution which bundle up with few more online collaborative applications
Useful Google Apps for Teaching and Learning
 Useful Google Apps for Teaching and Learning Centre for Development of Teaching and Learning (CDTL) National University of Singapore email: edtech@groups.nus.edu.sg Table of Contents About the Workshop...
Table of content. Creating signup form Associating automation tools to signup form Signup form reports...42
 A User Guide Signup forms are the most popular tools for building a subscriber database. They let your website visitors become subscribers by entering basic details such as name and email address. The
Getting Around. Welcome Quest. My Fundraising Tools
 As a registered participant of this event, you have a variety of tools at your fingertips to help you reach your goals! Your fundraising center will be the hub for managing your involvement and fundraising
Launch and Use SocialMiner
 To launch SocialMiner, use a web browser to access the root of the web server (for information on supported browsers, see SocialMiner Browsers). Enter http:// where is the name
OUTLOOK HOW DO I? 2013
 OUTLOOK HOW DO I? Click on a Link to take you to that Section OUTLOOK - GENERAL... 2 GENERAL How Do I Navigate the 2010 Outlook Screen?... 2 GENERAL: How Do I Change the Reading Pane View?... 7 GENERAL:
Log into your Account on Website then back to Home page.
 Log into your Account on Website then back to Home page. To get to the team roster first go to > Team Directory. After you find the team you re looking for click on Team Home. This will take you to that
Drupal 7 guide CONTENTS. p. 2 Logging In
 Drupal 7 guide Drupal is a widely used, open-source, free platform that has an easy-to-use content management system for updating websites. This guide was created by the Health Communication Core (www.healthcommcore.org)
Mail Merge for Gmail v2.0
 The Mail Merge with HTML Mail program will help you send personalized email messages in bulk using your Gmail account. What can Mail Merge for Gmail do? You can send messages in rich HTML, the message
ProSystem fx Site Builder. enewsletters
 ProSystem fx Site Builder enewsletters December 2011 Copyright 2010-2011, CCH INCORPORATED. A Wolters Kluwer business. All Rights Reserved. Material in this publication may not be reproduced or transmitted,
Gmail: Sending, replying, attachments, and printing
 Gmail: Sending, replying, attachments, and printing Welcome to Gmail. This document will give you a quick overview of how Gmail works with you to make your life easier. Let s get started! Your Inbox When
EPiServer Content Editor s Guide
 EPiServer Content Editor s Guide Contents Getting Started with EPiServer... 19 Logging In... 19 Navigating from the Global Menu... 19 Generic Functions, Toolbar and Panes... 20 Generic Functions... 20