Department of Education Consultant Selection Process User Guide for Consultant Submittal Process
|
|
|
- Osborne Page
- 6 years ago
- Views:
Transcription

1 Department of Education Consultant Selection Process User Guide for Consultant Submittal Process Version Edit Date Edited By /07/2017 Brett Kimura /02/2017 Austin Haruki /05/2018 Michele Shimoda
2 Table of Contents 1.0 User Guide Creating and Verifying User Account : Create Account : Confirm your Account Signing In and Creating the Company : Sign In : Register Company Consultant Submittal Dashboard Navigating the Dashboard Company Information Discipline Information : Adding Disciplines : Editing Disciplines : Deleting Disciplines Branch Information : Editing Branches and Completing Main Office Information : Adding Branches : Deleting Branches Employee Information : Adding Employees : Editing Employees : Deleting Employees Project Information : Adding Projects : Editing Projects : Deleting Projects Submitting Qualifications Account Actions Evaluations... 30

3 1.0 User Guide To start the test process, navigate to the Consultant Selection Portal website, which can be accessed at The homepage [Figure 1] should look like this: Figure 1: Department of Education Consultant Selection Portal landing page.

4 1.1 Creating and Verifying User Account Before any portion of the submittal can occur, consultants must create an account and confirm the address associated with the account so FDB can confirm that the consultant can receive messages from FDB as the associated address : Create Account New users fill out the user registration form [Figure 1] on the homepage. Account creation is contingent on user agreeing to the Terms and Conditions of the website, which can be viewed through the link. User must complete Google recaptcha test to confirm they are not a robot. Click Create Account to submit information and complete account registration. After successfully submitting the form, the user will be shown a Registration Confirmation screen [Figure 2], instructing them to check their for account verification. Figure 2: Registration confirmation page shown after user has successfully submitted their account information through the Create Account form.
5 1.1.2: Confirm your Account To confirm the account, complete the following steps: Check the entered at registration and look for a message with the subject Confirm you State of Hawaii DOE FDB Consultant Portal Account [Figure 3]. Figure 3: containing link to verify user . Click on the Verify link to verify the associated with the account. Once verified, user will be taken to the CSP site displaying the Confirmed page [Figure 4]. This link is valid for 24 hours from the time it was sent. If the link is expired, use the credentials created at registration to sign in and the will be resent. 1.2 Signing In and Creating the Company 1.2.1: Sign In To sign in: Click on the Click here to log in link on the Confirmation screen [Figure 4] or the Sign In button in the top right of the homepage [Figure 1]. Enter your username and password in the login pop-up displayed [Figure 5]. Click Log In once the proper credentials are entered. New users or users not associated with a company will be directed to the create company screen [Figure 6]. Users registered with a company or invited users will be directed to the Consultant Submittal Dashboard [Figure 8].

6 Figure 4: Sign in using the pop up modal : Register Company If this is the user s first time logging in after registration or the user is not yet associated with a company, they will be prompted to register their company to the system. To initialize the company creation process, the proper FEIN or SSN must be entered (whichever is the appropriate identifier for the company) [Figure 6]. Figure 5: Registering a company requires entry of a unique and proper FEIN or SSN.
7 After a proper and unique FEIN or SSN is entered, the remaining company creation fields will be displayed and users will be asked to fill in their company s name and company type [Figure 7]. Figure 6: Enter the company name and company type to complete the initial company registration After all information is completed, click Create. The company registration is now complete, and users will be taken to the Consultant Qualifications Submittal Dashboard. Once a company is registered, the FEIN or SSN entered at this step cannot be altered. If the incorrect number was used, users will need to delete the company and complete the company registration step again. 1.3 Consultant Submittal Dashboard After a user account is associated with a company, signing in will direct the user to the Consultant Submittal Dashboard [Figure 8]. Once on the Consultant Submittal Dashboard, the following can be completed: Edit Company Information and upload company documents Edit, Add, or Delete a Branch Edit, Add, or Delete Employees Edit, Add, or Delete Disciplines Submit Qualifications


8 Figure 7: Company dashboard 1.4 Navigating the Dashboard To navigate between the sections in the dashboard, users can scroll through the sections or use the left-hand navigation to easily select the section you wish to view or modify. Clicking on the arrow icons will expand and reveal the subsections [Figure 9, 10]. Figure 8: Navigation using the side menu

9 Figure 9: Clicking on the arrow icons toggles the sections open and closed 1.5 Company Information To view the company information section, either click on the Company Information link in the left navigation [Figure 9] or expand the Company Information section on the main dashboard [Figure 10, 11]. While viewing company information, users may edit any field within the form expect for Company EIN/SSN. The EIN/SSN is the company s unique identifier and should never need to be changed. To edit: Select any field and make the appropriate changes. To save, click the Save button. To cancel edits, click the Cancel button. Company Information has been divided up into 3 sections: General Information: General information about the company, such as address and person in charge. Insurance Information: Insurance and legal related information related to the company, such as litigation history. Different documents may be required depending on selections. o Company Types (located in General Information) other than Individual require: Certificate of Good standing OR
10 Certificate of Vendor Compliance o Checking Company has E&O Insurance requires: Proof of Insurance document Amount of coverage Amount of deductible When all required fields are filled in with valid data and company information is saved, the save confirmation modal will be displayed and the Company Information Status will change from incomplete to complete. Figure 10: Company information sections marked as incomplete 1.6 Discipline Information In the Discipline Information screen consultants are required to select all the disciplines to which they are applying and provide any supplemental information related to the firm s work in each discipline being applied for : Adding Disciplines To Add a Discipline: Click the Add Discipline Button in the Disciplines section [Figure 12]. The new Discipline form should be displayed [Figure 13]. The Add Discipline form is broken up into three parts: o Part 1: Select a discipline. o Part 2 (optional): Add associated individuals or firms that are usually employed that pertain to the discipline being applied for. For each associated firm or individual, add a new associate. o Part 3 (optional): Additional supplemental files. Consultants can upload other PDF with support materials as deemed necessary. File(s) must be in PDF format, and less than 10MB. The minimum information required to save a new discipline is the discipline type. Click Save to save the Discipline, or Cancel to remove the Discipline and any changes made to it.
, click the remove button (trash can icon) next to the file to be removed.")
11 Figure 12: Empty disciplines section. Click the Add Discipline button to start adding disciplines. Figure 13: Add discipline form 1.6.2: Editing Disciplines To Edit a Discipline: Locate and open the Discipline to edit. To remove or replace additional file(s), click the remove button (trash can icon) next to the file to be removed. Then, choose a new file to include (if applicable) [Figure 14]. When completed, click Save. Users cannot change the type of discipline that was selected after it has been saved. If the incorrect discipline type was saved, it must be deleted.
12 Figure 14: Editing an existing discipline; selected discipline cannot be modified 1.6.3: Deleting Disciplines To delete a Discipline: Locate the Discipline to be deleted. Click the delete button to the far right of the discipline name. This button only shows for disciplines that have been previously saved [Figure 14]. A confirmation modal will be displayed, prompting the user to confirm that they wish to delete that discipline. Click Delete for yes, or Cancel for no [Figure 15]. The message in the modal will then reflect whether the deletion was successful [Figure 16].


13 Figure 15: Delete confirmation modal for disciplines Figure 16: Modal showing the status of the delete action 1.7 Branch Information The Main Office Branch will be created automatically and represents the main office of the company. Data from the Company Information section will be reflected here. The Main Branch will require additional information to be filled out by the user to be considered complete. Additional branches can be added, and existing branches can be edited or deleted.
14 4.7.1: Editing Branches and Completing Main Office Information To navigate to the branch you wish to edit, click on the Branch name in the left side navigation [Figure 9] or expand the brand in the main branch view [Figure 10]. To complete Main Office information: Select the Main Office branch in the Branches section [Figure 7]. Add the missing information to required fields When done editing, click Save. Once all required information has been entered and saved, the main office status will be marked as Complete. Additional branches can be edited in the same manner once they ve been added and saved. Figure 7: Main Office section
![4.7.2: Adding Branches To add a new Branch: Click the Add Branch Button in the Branches section [Figure 7]. The Create New Branch form should be displayed [Figure 8].](/docs-images/79/80123642/images/15-0.jpg "Like the Main Office input, complete the data entry for the next branch To save a new branch, you must at least enter a branch name.")
15 4.7.2: Adding Branches To add a new Branch: Click the Add Branch Button in the Branches section [Figure 7]. The Create New Branch form should be displayed [Figure 8]. Like the Main Office input, complete the data entry for the next branch To save a new branch, you must at least enter a branch name. Click Save to save the new branch or click Cancel to remove the New Branch form and any changes made to it. Upon successful save, the new branch should be added to the list of branches. The minimum information input required to save a new branch is the Branch Name. Figure 8: Form for adding a new branch : Deleting Branches To delete a branch: Locate the branch you wish to delete on the dashboard.
16 Click the delete icon located to the far right of the branch name. This button only shows for branches that have been previously saved [Figure 9]. A confirmation pop-up will be displayed asking if the user is sure they want to delete that branch. Click Delete for yes, or Cancel for no [Figure 10]. The Main Office branch cannot be deleted, as it is based off the Company Information section. The message in the modal will then reflect whether the deletion was successful [Figure 11]. Figure 9: The delete icon is a red trash can on the far right of the branch name

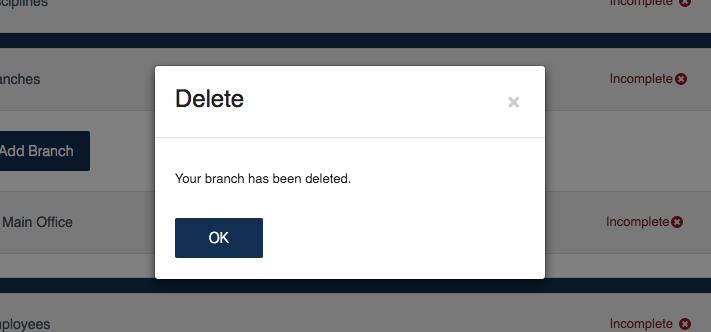
17 Figure 10: Delete confirmation modal Figure 11: Delete confirmation modal

18 1.8 Employee Information In the Employees section, consultants are to enter all the principal, associate, and technical employees to their Consultant Qualification submittal. Within this section, consultants can add, delete, and edit an Employee : Adding Employees To Add an Employee: Click the Add Employee Button in the Employee section [Figure 12]. A new Employee form should be displayed [Figure 13]. Complete the data entry for each Employee. Education, Registration, and Memberships are not required but helpful in qualifying each employee. o To add education, registration, and/or memberships, click the corresponding add button within the section. o The fields for the associated section will display. All fields are required to add each respective education, registration, or membership. o For employees of type Principal, Employment History is also available. All fields in this section must be filled out to save each individual employment history record. The minimum information required to save an employee are the employee s first and last name. Click Save to save the employee, or Cancel remove the new employee. If all information is filled in properly, that employee s status should be marked as completed upon saving. Once all employees have been marked as complete, the entire section will be marked as completed. Figure 12: An empty employees section. Click the Add Employee button to add an employee.

19 Figure 13: Form for adding a new employee of Principal level. Different fields will be shown for different employee levels.
20 1.8.2: Editing Employees To edit an Employee: Open the section of the employee you wish to edit. Edit the information on the corresponding form [Figure 14]. When completed, click Save. To remove a previously saved education, registration, or membership, click on the delete (trash can) icon to the right of the subsection you would like to delete. This will remove the information from that employee, clicking save will not be necessary. Figure 14: Editing an employee


21 1.8.3: Deleting Employees To delete an Employee: Locate the employee you wish to delete on the dashboard. Click the delete button to the far right of the employee name. This button only shows for employees that have been previously saved [Figure 14]. o The functionality is similar for education, registration, or licenses, for each employee, as noted in the previous step. A confirmation modal will be displayed asking if you are sure you want to delete that employee. Click Delete for yes, or Cancel for no. [Figure 15]. The message in the modal will then reflect whether the deletion was successful [Figure 16]. Figure 15: Delete confirmation modal for employees. A similar modal will be shown for deleting employee education, memberships, and registrations. Figure 16: Modal showing the status of the delete action.

22 1.9 Project Information In the Project Information section, consultants are to enter up to 10 present or completed projects for which they are the prime consultant, and up to 10 present or completed projects for which they were associated by others. Consultants are to select projects that reflect the company s ability to provide quality work for the disciplines/project types being applied for. Figure 17: An empty project history section. Click the Add Project button to add a project : Adding Projects To add a Project: Click the Add Project Button in the Project section [Figure 17]. A new Project form should be displayed [Figure 18]. The minimum information required to save a project are: o Project Year o Project Name o Name of Lead Designer o Project Owner Name Click Save to save the project, or Cancel to remove the new project. If all information is filled in properly, that project s status should be marked as completed upon saving. Once all project have been marked as complete, the entire section will be marked as completed.

23 Figure 18: Form for adding a new project 1.9.2: Editing Projects To edit an existing Project: Open the section of the employee you wish to edit. Edit the information on the corresponding form [Figure 14]. When completed, click Save. To undo changes, click Cancel.
24 Figure 19: Editing a project 1.8.3: Deleting Projects To delete a Project: Locate the project you wish to delete on the dashboard. Click the trash can icon to the far right of the project name. This button only shows for projects that have been previously saved [Figure 19]. A confirmation modal will be displayed asking if you are sure you want to delete that employee. Click Delete for yes, or Cancel for no. [Figure 20].
![The message in the modal will then reflect whether the deletion was successful [Figure 21]. Figure 20: Delete confirmation modal for projects Figure 21: Modal showing the status of the delete action.](/docs-images/79/80123642/images/25-0.jpg "1.10 Submitting Qualifications Once the five sections (Company Information, Disciplines, Branches, Employees, and Projects) have all been marked as being complete, the consultant can submit their")
25 The message in the modal will then reflect whether the deletion was successful [Figure 21]. Figure 20: Delete confirmation modal for projects Figure 21: Modal showing the status of the delete action Submitting Qualifications Once the five sections (Company Information, Disciplines, Branches, Employees, and Projects) have all been marked as being complete, the consultant can submit their company s qualifications [Figure 27]. To submit qualifications, click the Submit Qualifications button on the left side navigation.
![A pop-up will then be shown [Figure 28] asking the user to certify that they are authorized to make the submittal on behalf of their company.](/docs-images/79/80123642/images/26-1.jpg "The user must enter their job title and click the checkbox to continue. Once this is done, click Submit.")
26 A pop-up will then be shown [Figure 28] asking the user to certify that they are authorized to make the submittal on behalf of their company. The user must enter their job title and click the checkbox to continue. Once this is done, click Submit. Figure 27: All sections have been marked complete, and the Submit Qualifications button is enabled. Figure 28: Submission modal. Employee submitting must confirm they are authorized to submit on behalf of their company.
![1.11 Account Actions Clicking the user s name in the top left corner will display a menu that allows users to view and manage various account settings [Figure 29].](/docs-images/79/80123642/images/27-0.jpg "Figure 29: Account settings dropdown menu is displayed when the user s name is clicked. The options available are as follows: Profile Settings Users can edit their name and phone number [Figure 30].")
27 1.11 Account Actions Clicking the user s name in the top left corner will display a menu that allows users to view and manage various account settings [Figure 29]. Figure 29: Account settings dropdown menu is displayed when the user s name is clicked. The options available are as follows: Profile Settings Users can edit their name and phone number [Figure 30]. User cannot be changed. Figure 30: Edit user profile information.
![Change Password Users can change their account password [Figure 31]. Figure 31: Enter current and new password.](/docs-images/79/80123642/images/28-1.jpg "Delete Account Leads to a confirmation screen allowing users to delete their account [Figure 32].")
28 Change Password Users can change their account password [Figure 31]. Figure 31: Enter current and new password. Delete Account Leads to a confirmation screen allowing users to delete their account [Figure 32]. Users can delete their account under the following conditions: o User is not the only company administrator associated with their company. o User is not a company administrator. o User is not associated with a company. Company administrators can delete their company or can remove users from being associated with their company. Figure 32: Delete account confirmation screen.
![User Management Leads to user management page, only available to Company Administrators [Figure 33].](/docs-images/79/80123642/images/29-0.jpg "The following actions can be done from the user management page: o Change user roles: Clicking on Change Roles allows an admin user to select what permissions a user in that company has by modifying")
29 User Management Leads to user management page, only available to Company Administrators [Figure 33]. The following actions can be done from the user management page: o Change user roles: Clicking on Change Roles allows an admin user to select what permissions a user in that company has by modifying their role. Company Administrators can delete the company and remove users, while Employees can only modify information on the dashboard. o Invite users: Invite users to join the company by entering their [Figure 34]. Invited users will be sent an and must login or register using the link in the . Existing users associated with a company will be asked if they would like to join the new company or remain with their existing. New users must create an account. o View user details: View a specific user s address and role(s). o Remove: Remove a user from the company. This will not delete their account, but they will no longer be associated with the company they ve been removed from. Figure 33: See all users in the company from the User Management page. Figure 34: Enter the address of the person to invite. Delete Company Deletes the company from the system. Users can only delete the company if the user is the only company administrator [Figure 35].
30 Figure 35: Delete the company Sign out Signs user out of their account. Automatic logout will occur if user is inactive on the site for 30 minutes. User will be redirected to the landing page Evaluations Consultants that have been selected to perform work for the FDB may receive evaluation(s) for the job after the project has been completed. Company administrators will receive an informing them that the company received an evaluation [Figure 36]. Figure 36: Evaluation notification

![Available evaluations will be displayed by the fiscal year in which the evaluation was uploaded [Figure 38], with the current](/docs-images/79/80123642/images/31-1.jpg "fiscal year as the default. To search for an evaluation by job name/number/school, use the search bar.")
31 To view the evaluation, consultants can log in to the portal and click on the Evaluations tab located on the left side navigation [Figure 37]. Available evaluations will be displayed by the fiscal year in which the evaluation was uploaded [Figure 38], with the current fiscal year as the default. To search for an evaluation by job name/number/school, use the search bar. To view an evaluation, simply click on the evaluation and it will automatically download. Figure 37: Evaluations tab Figure 38: Viewing evaluations
Online CDC service. HowTo guide for applicants
 Online CDC service HowTo guide for applicants Disclaimer While every reasonable effort has been made to ensure that this document is correct at the time of printing, the State of NSW, its agents and employees,
Table of Contents 1. ABOUT THE GIS PANGEA SYSTEM 5 2. HOME DASHBOARD OVERVIEW MANAGER DASHBOARD OVERVIEW 66
 Table of Contents 1. ABOUT THE GIS PANGEA SYSTEM 5 PANGEA SYSTEM REQUIREMENTS 5 PANGEA MOBILE COMPATIBILITY 6 LOGGING IN TO PANGEA 6 MANAGING USER ACCOUNT SECURITY AND DELEGATE INFORMATION 13 ABOUT SESSION
Agency User Manual. Version 2.0
 Agency User Manual Version 2.0 October 2015 Copyright Information 2015 by. All rights reserved. This document is the copyrighted property of the. It should not be duplicated, used, or disclosed in whole
Special Purpose User Guide
 Special Purpose User Guide Table of Contents 1 Instructions for Logging in... 3 1.1 Link to the EYCC Funds Management System... 3 1.2 Logging In... 3 2 Transformation Application... 4 2.1 Project Details...
IMPORTANT INFORMATION
 1 2 IMPORTANT INFORMATION Follow these simple steps to apply for a job with the Person County Government. You must have a valid personal email account BEFORE you begin. This guide may be used by new applicants
Meritain Connect User Manual. for Employees. 1 Meritain Connect User Guide for Employees
 Meritain Connect User Manual for Employees 1 Meritain Connect User Guide for Employees Contents Introduction... 4 Accessing Meritain Connect... 5 Logging In... 5 Forgot Password... 6 Registration Process...
Specialty Contractor User Manual. Table of Contents. Specialty Contractor User Manual Version 1 11/16/15
 Specialty Contractor User Manual Welcome to the C3 Training Database for Construction Career Collaborative! This software is where you keep track of your employees' training and safety credentials, project
Employee User Guide What Employees Need to Know About Using the Burnham & Flower Wealthcare
 Employee User Guide What Employees Need to Know About Using the Burnham & Flower Wealthcare Table of Contents Getting started...2 My accounts...3 My expenses...13 Communications...15 Enrollment...17 Resources...21
From the Online Tools list, scroll down to SBS Connect, and click on the Register for SBS Connect link. The SBS Connect login screen loads.
 SBS EXTERNAL HEALTHCARE REVIEW USER GUIDE Create New Account Register an Entity View Attachment Upload Attachment SBS CONNECT CREATE NEW ACCOUNT Before using SBS Connect for the first time, 1) create an
ACT Test Accessibility and Accommodations System (TAA) User Guide
 User Guide") ACT Test Accessibility and Accommodations System (TAA) User Guide www.act.org ACT Test Accessibility and Accommodations System (TAA) User Guide Table of Contents Overview... 2 Introduction to the Test
ACT Test Accessibility and Accommodations System (TAA) User Guide www.act.org ACT Test Accessibility and Accommodations System (TAA) User Guide Table of Contents Overview... 2 Introduction to the Test
Development Application Online. HowTo guide for applicants
 Development Application Online HowTo guide for applicants Disclaimer While every reasonable effort has been made to ensure that this document is correct at the time of printing, the State of NSW, its agents
CSU Talent Management User Guide Search Committee Member How to Log In and View Applications
 CSU Talent Management User Guide Search Committee Member How to Log In and View Applications Last Updated: 8/30/2017 my HR Working together. Search Committee Member E-mail Notification 1. The Search Committee
Register by completing the form, or connecting via your GitHub or Google account.
 SDL Developer Portal Registration Guide In order to register an application on the SDL developer portal, you must first create both a developer and company profile. Developer Profile Registration To create
GETTING STARTED WITH AAA/HIRERIGHT EXTENDED WORKFORCE SCREENING
 GETTING STARTED WITH AAA/HIRERIGHT EXTENDED WORKFORCE SCREENING A How-To Guide for AAA Service Providers In this Guide: 1. Account Registration 2. Order a Background Screening Request 3. Review the Background
COVERED CALIFORNIA ENROLLMENT ASSISTANCE PROGRAM
 This document outlines all features and functions available to Entity Business Contacts in the Certification Portal. It details the functions that you as an Entity User have including the account registration
Tenant Coordination Website User Guide For Tenants
 Tenant Coordination Website User Guide For Tenants Contents Log In 1 Download Documents 3 Upload Documents 6 Progress Bar 16 View Criteria Manuals 17 Help 19 FAQ 20 Log Out 21 Log in You have been given
How to Navigate the AHIP Medicare Course
 How to Navigate the AHIP Medicare Course This document is for reference only. It is a guide provided to help answer any questions you may have about the AHIP site and its coursework. It is provided as
Printed Materials Invitation to Qualify (ITQ) How to Submit an ITQ Proposal
 How to Submit an ITQ Proposal") Printed Materials Invitation to Qualify (ITQ) How to Submit an ITQ Proposal To submit a proposal for the Printed Materials ITQ Contract, 4400015989, a supplier must be registered with the Commonwealth
Printed Materials Invitation to Qualify (ITQ) How to Submit an ITQ Proposal To submit a proposal for the Printed Materials ITQ Contract, 4400015989, a supplier must be registered with the Commonwealth
User Guide for the New Kofax Partner Portal
 User Guide for the New Kofax Partner Portal The purpose of this document is to better acquaint you with the basic features of the new Kofax Partner Portal being released in August 2012. Please note that
How to Navigate the AHIP Medicare Course. Subject Page #
 How to Navigate the AHIP Medicare Course Table of Contents Subject Page # Introduction 2 AHIP Registration Process 3 AHIP Login Process 8 Course Parts 14 Final Exam 17 Certificate and Transmit Score to
Supplier Reference Guide (QRG) Table of Contents
 Table of Contents") Supplier Onboarding Supplier Reference Guide (QRG) Table of Contents Supplier Checklist... 2 New Supplier Onboarding Steps... 3 Introduction... 4 Registration... 6 Certification... 16 Acceptance... 35
Supplier Onboarding Supplier Reference Guide (QRG) Table of Contents Supplier Checklist... 2 New Supplier Onboarding Steps... 3 Introduction... 4 Registration... 6 Certification... 16 Acceptance... 35
Trustedchoice.com Agency Profile User Manual
 Trustedchoice.com Agency Profile User Manual User Manual Page 1 1. Getting started 1.1 Accessing the website Step Action 1 Open the internet browser on your computer. 2 Type http://www.projectcapmarketing.com
How to Navigate the AHIP Medicare Course
 How to Navigate the AHIP Medicare Course This document is for reference only. It is a guide provided to help answer any questions you may have about the AHIP site and its coursework. It is provided as
Legal Kiosk TM v3.0. Internal User Guide
 Legal Kiosk TM v3.0 Internal User Guide Table of Contents Overview... 2 Legal Kiosk Admin Management... 3 User Access Section... 3 Adding A New User... 3 Adding a New Contact... 6 Granting Access to Files
ipad ereader User s Guide
 ipad ereader User s Guide MAY 2014 Table of Contents General information... 1 About Professional ebook... 1 About this Guide... 1 How does the Professional ebook System work?... 1 Where can I learn more
REGULATORY DIVISION BOURSE DE MONTRÉAL INC.
 REGULATORY DIVISION BOURSE DE MONTRÉAL INC. Date of Issue: January 7, 2019 Table of contents Introduction... 1 Overview... 1 Background... 1 Definitions... 1 Getting Started... 1 Account Enabling... 1
NSW Planning Portal. HowTo register for an account
 NSW Planning Portal HowTo register for an account Disclaimer While every reasonable effort has been made to ensure that this document is correct at the time of printing, the State of NSW, its agents and
erequest How to apply guide
 Overview is an application that assists UCB in request life cycle management. UCB has clear guidance in place on what they can support or sponsor. Online requests will go through an internal review and
Google Classroom User Manual
 Google Classroom User Manual Table of Contents Table of Contents 1 Google Classroom on a Computer 3 1: Making an Account 3 2: Change Your Profile Photo 5 3: Customize your Notifications 7 4: Join a Class
SEARCH & APPLY FOR TEMPORARY HIRE APPLICANT POOL
 SEARCH & APPLY FOR TEMPORARY HIRE APPLICANT POOL Overview This step-by-step guide demonstrates how to apply for the Temporary Hire Applicant Pool as an external applicant. External Applicants are individuals
Register in the Broker Portal. Table of Contents
 Register in the Broker Portal This guide is intended to show you how to register and prepare your broker profile in the Broker Portal. Table of Contents Register in the Broker Portal... 1 Personal Information...
Welcome to the QParents Portal... 2
 Table of contents Welcome to the QParents Portal... 2 Introduction: about the QParents Portal... 2 Online security... 2 About this guide... 3 How to provide feedback in QParents... 4 Help and support...
Figure 1 - Create New EDS Process Flow
 Introduction This tutorial will cover instructions on how. How to create a new EDS document in the Online EDS system. How to save data entry work into an EDS document to prevent data loss. How to access
Manual: Create a Faculty Search Posting Manager/Supervisor
 Manual: Create a Faculty Search Posting Manager/Supervisor Revised: 7-11-2017 Introduction The University of Georgia has implemented a new online faculty applicant tracking system, FacultyJobs@UGA. The
Instructions for Contractors: Bid Pre-Qualification
 Instructions for Contractors: Bid Pre-Qualification Quality Bidders is an online pre-qualification service for California school districts that allows contractors to submit applications to become a pre-qualified
Online CDC service. HowTo guide for certifying organisations
 Online CDC service HowTo guide for certifying organisations Disclaimer While every reasonable effort has been made to ensure that this document is correct at the time of printing, the State of NSW, its
Manual: Create a Staff Posting Initiator
 Manual: Create a Staff Posting Initiator Revised: 11-27-17 Introduction The University of Georgia has implemented a new version of its applicant tracking system, ipaws. The objective of ipaws is to streamline
Tenant Coordination Website User Guide For Mall Management
 Tenant Coordination Website User Guide For Mall Management Website s Testing address: http://www.ninthdegree.com/westfield/ Contents View Specific Deal 1 Upload the Complete Design Criteria Package 5 View
HOW TO APPLY FOR A JOB AT NIC Returning applicants only
 HOW TO APPLY FOR A JOB AT NIC Returning applicants only This guide is only for those applicants who have applied to this system in the past and who have an applicant account already set up. Questions about
August August 21, FADV.com. First Advantage 2013
 August 2014 August 21, 2014 First Advantage 2013 FADV.com Emails sent to Candidate Username (Log in ID) & Password Once an order is placed, the Candidate will be sent two emails (with Username and subsequently
Medication Training Instructions
 Medication Training Instructions Task A: Create an Account (If you already have an account, skip to Task B). 1. Using Internet Explorer 8 or higher, go to https://ky.train.org (or click on this link).
Introduction. Welcome to PeopleAdmin 7, the new and improved Online Employment System. This system allows applicants to:
 Table of Contents 1. Introduction 3 2. Navigation and Security 4 3. Employment Opportunities 5 4. Homepage 6 5. Viewing and Searching Available Positions 7-9 6. Viewing a Posting 10 7. Information to Gather
Gradintelligence student support FAQs
 Gradintelligence student support FAQs Account activation issues... 2 I have not received my activation link / I cannot find it / it has expired. Please can you send me a new one?... 2 My account is showing
The EEC Single Sign-In Users Guides
 The EEC Single Sign-In Users Guides EEC created User Guides to assist you with the new Single Sign-In process. There are three guides. Each one provides step-by-step instructions with graphic examples.
Extractive Sector Transparency Measures Act. NRCan eservices Portal User Guide
 Extractive Sector Transparency Measures Act NRCan eservices Portal User Guide 2 Contents Introduction... 4 Accessing the eservices Portal with a Sign-in Partner... 5 Accessing the eservices Portal with
OSLA (Office of Staff Legal Assistance) User Manual. Created Date: 09 th December, 2016 Version: 2.0
 User Manual. Created Date: 09 th December, 2016 Version: 2.0") OSLA (Office of Staff Legal Assistance) User Manual Created Date: 09 th December, 2016 Version: 2.0 Table of Contents (Re-generate the TOC after modifications to the document) Contents Table of Contents
OSLA (Office of Staff Legal Assistance) User Manual Created Date: 09 th December, 2016 Version: 2.0 Table of Contents (Re-generate the TOC after modifications to the document) Contents Table of Contents
Frequently Asked Questions
 Frequently Asked Questions Contents Registration and Login... 2 How do I register if I am an external applicant?... 2 Do I have to register in order to apply for a job?... 2 What should I do if I have
Using Stripe to Accept Payments on Your Website
 Using Stripe to Accept Payments on Your Website Business Model Copyright 2016 Rootworks Overview This document is designed to provide the steps of setting up a Stripe account for your firm, and getting
Tenant Coordination Website User Guide For Tenant Coordinators
 Tenant Coordination Website User Guide For Tenant Coordinators Website s Testing address: http://www.ninthdegree.com/westfield/ Contents View Specific Deal 1 Download Documents 4 Upload Documents 7 Post
CalHEERS Enroller Portal Job Aid Certified Enrollment Partners
 Overview CalHEERS Enroller Portal Job Aid (Certified Enrollment and Application Counselors) act in an operational role for their Entity. Partners must ensure they complete the necessary steps and trainings
(The mandatory fields are marked with an * asterix)
") Welcome, You have received a link so you can register on The Finning Supplier Portal. This link will take you straight to the first step of the pre-qualification questionnaire page. There are 4 steps in
Welcome, You have received a link so you can register on The Finning Supplier Portal. This link will take you straight to the first step of the pre-qualification questionnaire page. There are 4 steps in
Table of Contents. CPS Supplier Portal 05 - Self-Service "Admin"
 Table of Contents Introduction... 2 Prerequisites... 2 General... 3 Company Profile - Organization... 4 Contact Directory... 5 Create a New Contact... 6 Update a Contact... 8 Inactivate a Contact... 10
AvePoint Online Services for Partners 2
 AvePoint Online Services for Partners 2 User Guide Service Pack 1 Issued June 2017 Table of Contents What s New in this Guide...4 About...5 Submitting Documentation Feedback to AvePoint...6 Browser Support
Certification Candidate Handbook
 Certification Candidate Handbook The Certification Candidate Management System (CCMS) User Guide details the process from beginning to end, program requirements, what to expect at the testing center, how
Table of Contents. I. How do I register for a new account? II. How do I log in? (I already have a MyJohnDeere.com account.)
") Quick Start Guide If you are an App Developer, you can get started by adding a new app and configuring it to consume Deere APIs on developer.deere.com. Use this Quick Start Guide to find and try our APIs.
Quick Start Guide If you are an App Developer, you can get started by adding a new app and configuring it to consume Deere APIs on developer.deere.com. Use this Quick Start Guide to find and try our APIs.
Assessment Data Online: Admin Guide
 Assessment Data Online: Admin Guide Welcome to Assessment Data Online. This Admin Guide is intended to help you understand the functionality of the website with respect to administrative privileges. It
Personal Online Banking Quick Start Guide
 Personal Online Banking Quick Start Guide Step 1 Visit AmericanBank.com and locate the Personal Login ID box in the top right corner of the homepage. TIP: There are now two different online banking systems
mycoresource.com Member User Guide
 mycoresource.com Member User Guide January 2017 i Table of Contents Portal Overview... 1 Create Account - Member... 2 Sign In... 8 Forgot Password or Username... 10 Home Page... 13 View My Expenses...
imaconnect: Guide to the system
 imaconnect: Guide to the system This Guide is intended to assist you navigate through the imaconnect System. You may refer to the links provided in the next slide, to navigate quickly to your area of Guidance
Electronic Submission System User procedures document MAY 2018
 Electronic Submission System User procedures document MAY 2018 Electronic Submission System User Guide 1 What s new? This user guide was updated in May 2018 to include recent changes to the Electronic
This chapter provides an overview of user access management and Segment Management pods in the SNTC portal.
 SNTC Administration This chapter provides an overview of user access management and Segment Management pods in the SNTC portal. Overview The Administration tab in the SNTC portal allows the customer administrator
Compliance Document Manager User Guide
 Compliance Document Manager User Guide Contents OVERVIEW... 3 SYSTEM REQUIREMENTS... 3 VENDORMATE PASSWORD REQUIREMENTS... 3 LOGIN... 4 THE HOME SCREEN... 5 BA Screening... 5 BA Oversight... 5 My Screening
NQF ONLINE MEASURE SUBMISSION FORM USERS GUIDE
 NQF ONLINE MEASURE SUBMISSION FORM USERS GUIDE VERSION 1.1 Guide Version 1.0 01/11 TABLE OF CONTENTS PART 1: TECHNICAL SUPPORT FOR SUBMISSION FORM TABLE OF CONTENTS... CREATING AN INDIVIDUAL ACCOUNT...
TeamUSA Portal Games Delegation Management Instructions
 This document includes the instructions to use TeamUSA Portal for Games Delegation Management. Updates to the system include: Managing your Assignments (all staff who may attend the Games & will need USOC
User Guide for the Online Application. OCC Front Office Portal G3 Front Office2.5
 User Guide for the Online Application OCC Front Office Portal G3 Front Office2.5 0 TABLE OF CONTENTS ONLINE APPLICATION PROCESS o How Do I Apply For Export Market Access? 2 COMPETING THE APPLICATION FORM
P.E.O. STAR Scholarship Online Recommendation Instructions
 P.E.O. STAR Scholarship Online Recommendation Instructions The P.E.O. STAR Scholarship Recommendation Form for the chapter is available from September 1 through November 1. Starting September 1: As a chapter
DTrade Frequently Asked Questions (FAQs)
") DTrade Frequently Asked Questions (FAQs) BASIC USE Q: I m new to DTrade. Where can I find information on how to start using DTrade? A: The DTrade Information Center web page is accessible via the DDTC
DTrade Frequently Asked Questions (FAQs) BASIC USE Q: I m new to DTrade. Where can I find information on how to start using DTrade? A: The DTrade Information Center web page is accessible via the DDTC
Shared CROMERR Services (SCS) Advanced Services Help Desk User Guide
 Advanced Services Help Desk User Guide") Shared CROMERR Services (SCS) Advanced Services Help Desk User Guide Table of Contents Table of Contents... i List of Exhibits... ii 1 Introduction... 1 1.1 Document Purpose... 1 1.2 Topics Covered...
Shared CROMERR Services (SCS) Advanced Services Help Desk User Guide Table of Contents Table of Contents... i List of Exhibits... ii 1 Introduction... 1 1.1 Document Purpose... 1 1.2 Topics Covered...
Welcome to the C3 Training Database, brought to you by the Construction Career Collaborative!
 C3 Training Database How-To Guide Participating on a Project Specialty Contractor 12/06/2017 Welcome to the C3 Training Database, brought to you by the Construction Career Collaborative! The training database
Client Portal Training Manual
 Nexsure Training Manual Client Portal Training Manual Version 2.1.3 Page Nexsure Training Manual 2011 XDimensional Technologies, Inc. All rights reserved. No part of this documentation shall be reproduced,
Welcome to the C3 Training Database, brought to you by the Construction Career Collaborative!
 C3 Training Database Contractor User Manual 12/06/2017 Welcome to the C3 Training Database, brought to you by the Construction Career Collaborative! The training database will help you keep track of your
COMPANY (MU1) FORM FILING - EXTENDED
 FORM FILING - EXTENDED") COMPANY (MU1) FORM FILING - EXTENDED Updated: 3/31/2014 Copyright 2008 State Regulatory Registry LLC Table of Contents General Overview 3 How to Submit the Company (MU1) Filing 4 Initial Account Login
COMPANY (MU1) FORM FILING - EXTENDED Updated: 3/31/2014 Copyright 2008 State Regulatory Registry LLC Table of Contents General Overview 3 How to Submit the Company (MU1) Filing 4 Initial Account Login
User Guide. Creating and Varying Sessional Schedule (Course Convenors, School Admin/Secretaries)
") User Guide Creating and Varying Sessional Schedule (Course Convenors, School Admin/Secretaries) Brief Document Description Overview Sessional staff are required to submit their agreed Work Schedule for
User Guide Creating and Varying Sessional Schedule (Course Convenors, School Admin/Secretaries) Brief Document Description Overview Sessional staff are required to submit their agreed Work Schedule for
Western Water Online User Guide
 Western Water Online User Guide Western Water December 2017 About Western Water Online Western Water Online is a self-service portal for plumbers, builders and developers. With the portal, you can apply
Customer Portal Step-by-Step: Create your MyActon Customer Portal Account
 How do I create a Customer Portal account? If you don t have a Customer Portal account, you can create one in a few steps: 1. Go to http://portal.actonmobile.com. Note: You can also access the portal by
CITY OF RICHMOND JOB APPLICATION GUIDE
 CITY OF RICHMOND JOB APPLICATION GUIDE 5055481 This application guide will provide you with all the necessary information to create a profile within our job application system and to apply for a position
How to Apply for a Teaching Position as an Internal Applicant
 How to Apply for a Teaching Position as an Internal Applicant I. Website Navigation Internal applicants include all GCSD employees who currently hold a position for which certification/licensure is required.
hondadreamfactory User Guide
 hondadreamfactory User Guide Contents 1. Preparatory Steps 3 System Requirements 3 Accessing hondadreamfactory 4 Navigating the Portal 5 2. Training Courses 6 Accessing an online training course 8 Exiting
Enhanced new user experience with simple to use navigation and better buying experience. Trade accounts will see current order status, and history
 NEW FEATURES AT ATLANTIC.REXEL.CA What s New? Enhanced new user experience with simple to use navigation and better buying experience Updated search functionality Trade accounts will see current order
Greenshades Employee Portal. Overview and Guidelines for Use
 Greenshades Employee Portal Overview and Guidelines for Use Table of Contents Contents Login and Navigation... 3 Logging in to GreenEmployee.com... 3 Your first visit to GreenEmployee.com... 4 Your GreenEmployee.com
Open Enrollment Guide UAW Local 2110 Administrative Staff
 Health & Welfare employees and regular part-time employees are eligible for a variety of health & welfare benefits options. To review and enroll in Barnard benefits, login to Employee Self Service (ESS).
Administrator s Guide
 i Administrator s Guide Table of Contents Introduction... 3 Key Terms... 3 Global Navigation Bar... 3 Dock... 3 Guided Workflows... 3 Stack... 3 Activity... 4 Logging Into QQCatalyst... 4 Part 1 Setting
Business Instructions
 Business Instructions MRSC Rosters is a convenient place for businesses to register with Washington public agency Small Public Works, Consultant, and Vendor Rosters to become eligible to receive notifications
PeopleAdmin Quick Reference Guide Form I-9 Processing in I-9Advantage/E-Verify Logging In, Navigation, Actions & Status Updates
 If you have been designated as an i9advantage/e-verify User, you may receive an email from the i9advantage team to reset your password. This would be used for actions that need to take place on their platform
Customer User Guide Commercial Online Access
 Customer User Guide Commercial Online Access Getting Started To access the customer portal, enter the following URL: nationwide.com/agclient Once you access this site, save it as a Favorite on your computer
Volunteer Management Information System. AVCC User Guide
 Volunteer Management Information System AVCC User Guide Contents 1.0 - Welcome to VMIS... 4 Glossary... 4 VMIS Registration... 5 Army Family Web Portal (AFWP) & AFWP Accounts... 5 Single Sign-On (SSO)...
InfoReady Review User Guide
 InfoReady Review User Guide Table of Contents Homepage...2 Registration & Login...2 Viewing Opportunities...3 Submitting Applications & Saving Drafts...3 Application History...6 Progress Reports...6 Reviewing
P3 USER GUIDE FOR MARKET ACTORS COMMERCIAL STANDARD OFFER PROGRAM
 P3 USER GUIDE FOR MARKET ACTORS COMMERCIAL STANDARD OFFER PROGRAM Updated March 2016 TABLE OF CONTENTS P3 INTRODUCTION... 1 P3 REGISTRATION PROCESS... 2 P3 MARKET ACTOR PROFILE... 4 Create New Market Actor
CJA evoucher. Attorney User Manual Release 5.2 October 2018
 CJA evoucher Attorney User Manual Release 5. October 08 CJA evoucher for Attorneys i Contents Nota Bene: Edit before using!... Introduction... Panel Management... Voucher & Authorization Request Submission...
MAXIMUS Provider Billing Application v.3 Attendance Entry
 MAXIMUS Provider Billing Application v.3 Attendance Entry The following training documentation contains detailed step-by-step instructions and may be used as reference in understanding the Attendance Entry
Grant Lifecycle Manager Learning Lab Applicant Tutorial
 VIDEO 1: Site Access & Account Creation You will access the system via the log on page. The Foundation may have provided you with a link to this page, or it may be hyperlinked on their Foundation website.
1. IMPORTANT...KEEP YOUR COMPANY INFORMATION CURRENT This will ensure that your GC's have all the information they need to invite you to bid. a.
 1. IMPORTANT...KEEP YOUR COMPANY INFORMATION CURRENT This will ensure that your GC's have all the information they need to invite you to bid. a. On the bottom right of your dashboard, you will see Company
Production Assistance for Cellular Therapies (PACT) PACT Application System User s Guide
 PACT Application System User s Guide") Production Assistance for Cellular Therapies (PACT) PACT Application System User s Guide Version 1.0 February 9, 2017 Version 1.0 TABLE OF CONTENTS 1.0 Getting Started... 1 1.1 Access to the Internet...
Production Assistance for Cellular Therapies (PACT) PACT Application System User s Guide Version 1.0 February 9, 2017 Version 1.0 TABLE OF CONTENTS 1.0 Getting Started... 1 1.1 Access to the Internet...
Compliance Desktop Technology Platform Admin User Guide
 Compliance Desktop Technology Platform Admin User Guide Table of Contents 1. Logging into ComplianceDesktop... 4 1.1 ComplianceDesktop Landing Page... 4 1.2 Requesting a New Password... 4 1.3 Requesting
Secure Data Portal Users Guide
 Secure Data Portal Users Guide Updated: Table of Contents Introduction... 1 System Requirements... 1 Technical Assistance... 1 Initial Login... 2 Setting Up User Accounts... 3 Data Submission... 5 Patient
VISIONTRACKER FREQUENTLY ASKED QUESTIONS FAQ
 VISIONTRACKER FREQUENTLY ASKED QUESTIONS FAQ 1. FREQUENTLY ASKED QUESTIONS 1.1. TABLE OF CONTENTS 1. Frequently Asked Questions... 1 1.1. Table of Contents... 1 1.2. How to Open or Search for a Saved Application...
Partner Side SMART Guide
 Partner Side SMART Guide Table of Contents 1. Introduction... 3 2. Partner Registration Process... 3 3. Additional Form... 12 4. Scorecard... 13 5. View Buyer Profile... 14 Partner Side User Manual 31
iportal user guide for assessors
 iportal user guide for assessors April 2017 Contents About the Careerforce iportal... 3 Help & General Administration... 4 How to Register... 5 Terminology Changes... 5 Navigation on the iportal... 6 Assessor
An Introduction to Box.com
 An Introduction to Box.com Box is an online file sharing and cloud content management service and it provides features such as: Security controls Space Mobility Online collaboration Mobile access Version
AP Digital Portfolio: Student User Guide for AP Computer Science Principles. Fall 2017
 AP Digital Portfolio: Student User Guide for AP Computer Science Principles Welcome... 1 Digital Portfolio Access and Class Enrollment... 1 Log in Using Your College Board Username and Password...1 Enrolling