ConvertXtoDVD 3 Manual
|
|
|
- Buddy Thomas
- 5 years ago
- Views:
Transcription

1 Introduction Top Next This manual is best viewed maximized. ConvertXtoDVD 3 Manual ConvertXtoDVD is an all-in-one, high-quality and fast video conversion and burning software, capable of converting most popular video, audio and subtitle formats to DVD-5/9. For a list of supported formats, see Key features Note: This guide has been written by hansk, assisted by toaddub, official beta testers for VSO products, and has been validated by VSO. v h (rev. 8) ConvertXtoDVD Copyright VSO Software SARL, France. All rights reserved. All trademarks, logos, brand names, pictures etc. are the rightful properties of their respective owners.
2 Key features Previous Top Next Here is a list of some of ConvertXtoDVD's key features: Supported video formats: AVI, DivX, XviD, MOV, MKV, FLV, MPEG-1, MPEG2-, MPEG-4, NSV, DVR-MS, TS, IFO, VOB, ASF, WMV, RealMedia, RM, RMVB, OGM, existing files from digital camcorders, TV/Sat, capture cards, etc. No external codecs required. Supported audio formats (internal and external): AC3, DTS, PCM, OGG, MP3, WMA and more... Automatically or manually select audio output format. Supported subtitle files (internal and external): SRT,.SUB (Opensubtitles),.SUB/IDX,.SSA with color and font selection, and supports tags like italic, bold. For a list of all currently supported formats, see this link: DVD output in NTSC or PAL, selection of Aspect ratio (Widescreen 16:9, Fullscreen 4:3), and DVD resolution (Full D1, Broadcast D1, Half D1, SIF), or choose automatic for all choices listed above. Convert video from NTSC to PAL, or PAL to NTSC. Have DVD menus with different (pre-defined) templates available, with options to add background video, image and/or audio, have chapter and audio/subtitle menus, and customize various DVD playback options. Conversion quality indicator, indicating the resulting quality of the conversion vs. amount of data to be converted. Fast and quality encoder, typically less than 1 hour for converting a movie, and support for multi-core processors! Include burning engine with burn speed control, choice of SAO or packet writing methods, and output to DVD5 (single) and DVD9 (double layer) formats as well as ISO format. Custom and/or automatic chapter creation with markers in preview window. Multiple file merging abilities. Video pre-processing settings like video resize (pad/crop) and de-interlacing options. Multilingual User Interface in available languages. Optimized for Windows 2000 / XP / Vista 32-bit and 64bits (No known problems when using emulation software under systems lik e Linux, MAC, etc.)
3 Requrements Previous Top Next The following are the minimum system requirements to run ConvertXtoDVD. We do not recommend running the software on a computer not meeting these requirements, as the performance will be very poor. Processor: Intel Pentium III or AMD Athlon XP (2000+) Memory: Graphics: Screen resolution: Sound: Hard drive: Burner: Operating System: using convertxtodvd 512 MB RAM (running Windows 2000/XP) 1 GB RAM (running Windows Vista) AGP/PCI video card with DirectX 9.0c support (or DirectX 10 for Vista) 1024 x 768, 96 dpi PCI 16 bit sound card Hard Disc drive with at least 4.3 GB space free DVD burner with latest firmware released by the manufacturer Windows 2000 SP4 Windows XP SP2 Windows Vista. Its highly recommended that Vista users use and admin account when


4 Installation of program Previous Top Next The first step during the installation process is to select the language you want to use during this process: The setup wizard announces the version you are about to install and any suggestions you should follow during installation. Select the folder where you would like ConvertXtoDVD to be installed. We recommend installing to the default folder proposed. Next, you have to select the video standard you would like ConvertXtoDVD to use for output. Select the region where you live. Some DVD players are able to read/play both formats but not all. READ the manual of your DVD player for proper setting. Select the folder where you would like the Start Menu folder to be created:
: In order to improve the quality of our software, and to establish a chart of good media based on the end user's experience, we are collecting media and hardware information.")

5 Select the folder where you would like the Start Menu folder to be created: Check the options you would like to be set up during installation: Some additional information about media statistics (last option): In order to improve the quality of our software, and to establish a chart of good media based on the end user's experience, we are collecting media and hardware information. Each time a burn process has been finished, information about the process (software version, used writer and media, success/failure) is submitted to our server. As an internet connection is required, you should only activate this feature if you have a permanent connection. NOTE: We do not collect any information that may help to identify a given computer or person! A summary of what will be done during installation:

6 A summary of what will be done during installation: Shows the version history of ConvertXtoDVD, i.e. a list of bugs fixed and features added: Can also later be viewed at C:\Program Files\VSO\ConvertX\3 (default installation folder) or at your chosen installation folder, and select file History.txt When the installation is finished, you can choose to launch ConvertXtoDVD immediately:

7
 that will be displayed when watching the DVD stating a trial version was used for the conversion. 2.")
8 Software Registration Previous Top Next When opening ConvertXtoDVD for the first time, you will see the above trial window giving you 3 choices: 1. Click Try to try the software. Any file converted will contain a watermark (message place on video) that will be displayed when watching the DVD stating a trial version was used for the conversion. 2. Click Buy to buy a license key by connecting via the internet to the shop page. 3. Enter your personal license key, if you already have one, into the license entry box and click Activate to verify registration. Note: If you own a license to the precedent version, you will need a new license key. Just click the blue link "Click here if you have an old key" and follow the instructions on the website. If your address has changed since your first purchase you will need to write to VSO Software using their contact form and provide them with your old and new address in order to be recognized in their database. After the trial window, the next thing to appear is the update prompt. It allows you to decide if ConvertXtoDVD should check for update on the internet. We recommend using the latest version available in order to take advantage of the latest added features and bug corrections. If you do not want to be prompt for updates, check Do not ask again to save your choice and bypass the prompt in the future. Please allow ConvertXtoDVD access to the internet in your firewall settings if required.

9 Note: You can also check for updates manually via Help Check update from the main window.
10

11 Uninstallation of program Previous Top Next To fully uninstall the software and remove any trace of the program, use cleanvso.exe. Here's a direct download link for cleanvso.exe: Or you can download the program in this thread: Note: cleanvso is a general tool that removes all traces of selected VSO software, that is both the installation folder and registry keys. Using cleanvso is needed sometimes when some keys get corrupted and cause issues. How to uninstall completely: 1. Start the application cleanvso.exe. Select the program you want to un-install. 2. Check [x] Uninstall and [x] Delete settings. This will delete the installed program folder and all relevant registry keys, including your license key. 3. Click Close when uninstallation process is complete.

12 3. Click Close when uninstallation process is complete. 4. Reboot your PC.
13 Contacting Us Previous Top Next To contact us, visit our website at: On the top navigation bar click on the Support section. Here you will find a couple of sections that may already provide you with a solution for your problem or question. For all any unanswered questions, suggestions, or bug reports please use the technical support form listed on this page. Technical support When contacting the technical support you actually download a small file called vsorep.exe. Save this file and double click on "vsorep.exe" to start filling out the form (name, , and mini description of the problem). If you have any live chat tools like Windows Live Messenger / Yahoo / Skype you use, provide this contact information in the message as you could also be contacted this way by VSO software in order to trouble shoot your problems or for you to elaborate more on your problem. The VSORep tool automatically collects and sends the following information to a VSO Software technician along with your message with the sole purpose of understanding the context and settings you are using in the software in order to solve problems faster: The operating system, CPU DirectX installation List of drives The registry keys related to only our software VSO software log files and crash files The free space available on your hard drive, and the RAM List of codecs installed and DirectShow Filters List of potential incompatible applications General Inquiry You may also contact us by sending in a general inquiry by filling out the contact form hosted on the VSO webpage. Link: If your questions are regarding the experience you had with the software we will ask you to use the VSORep Tool or to manually send in your log file if you had difficulties using the VSORep tool. Check out the VSO Forums to ask your problem or research your situation. The forum is a place where users of a wide variety of levels share their experiences, solutions and work-arounds for using our software. Office hours We are located in France (UTC/GMT +1 hour) Office opened Mon-Fri 9:30 am - 5:30 PM (for phone support) + other technical support demands maybe treated on the weekend.. do not wait to send questions only during office hours. License key retrieval, updates+upgrades, downloads, and registration information can be sent automatically 24H/7days a week using this - click to Get Lost keys + downloads - click to Check for upgrades + upgrade offers
14 How To Buy the software Previous Top Next You can purchase ConvertXtoDVD online at with the following link: License keys are sent by immediately after the payment is received. Each license allows one year of free upgrades beginning from the date of purchase. If you would like to upgrade your license key status after 1 year is up enter your address on the following link to be presented with a special upgrade offer: Of course you can continue to use the last working version of your product without paying any additional cost. The version does not expire after one year. I.e. you can continue using an old version after a year if you do not want to pay for an upgrade. Note: ConvertXtoDVD is not available in retail stores.
 2] Vertical toolbar (2) 3] Tree view window (3) 4] Video preview window (4) 5] Log window (5) Resize")
15 Main Window view Previous Top Next The Main Window has five major components. Click on the link to see the details: 1] Menu bar (1) 2] Vertical toolbar (2) 3] Tree view window (3) 4] Video preview window (4) 5] Log window (5) Resize sub-windows You can resize the sub-windows using the mouse indicator at the red lines.
16 Total time / Minimal used space on disc Once you have added a file, the bottom line shows you the project time and the minimal amount of needed space on a disc.
17 Menu bar Previous Top Next The menu bar provides quick access to the program's top-level functions and settings. Each menu has several sub-menus and is explained separately. File Action Settings Window Help
: Load a saved project that you previously worked on.")
18 File menu Previous Top Next Project: With these functions you can quickly restart an already created project. New Project (Ctrl + N): Start a new project from scratch. A new project is automatically created with saved settings preloaded when ConvertXtoDVD is first started. Load Project (Ctrl + O): Load a saved project that you previously worked on. This will allow you to continue where you left off without restarting from the beginning and without setting up all the options you may have already configured. Do not change the location of the source file(s); otherwise, loading of project will be unsuccessful. The project saves only the file location, not the file itself. The project file name is saved with file extension.xtodvd. Note: When you load a saved project into a actual created project, everything is replaced by the settings and content of this previous saved project. Save Project (Ctrl + S): Save an existing project with all the source file locations and customized settings. The project file name is saved with file extension.xtodvd. Add video file(s) (Ins): Select the video file you want to convert and it will be added to the Tree View window. It will be shown as Titleset #1, followed by estimated time duration and file name. Every additional file added will have the next titleset number incremented, e.g. Titleset #2, #3, etc. -For quick access, this function is also available in the Vertical Toolbar. -You can also use the drag and drop function to add a file into Tree View window -Use the Windows behaviour of the Shift / Ctrl button together with left-click mouse, when multiple files need to be added. -Do not add files directly from a DVD into a project because that can give errors, but copy them first to the hard disc. Hint: If the file does not show up in new opened window, use the all files option (all extensions). There is a possibility that it will add but this will not mean that it will convert. You can try. Note: DVD specification allows only a maximum of 99 titlesets to be added. Merge more files to this titleset (Ctrl + A): Join several files together so they will play seamlessly as one titleset. More details are further explained in Merge window editing topic. Once a video file is added, select it (highlight the Titleset #) and click on this function to merge another file to it.
19 For quick access, this function is also available in the Vertical Toolbar and via context menu by rightclicking on the Titleset # node. Remove selected titleset (Del): Remove the selected titleset in the Tree View window from the current project. The original file still exists on your hard drive. For quick access, this function is also available in the Vertical Toolbar and via context menu by rightclicking on the Titleset # node. Exit: Close/shut down the ConvertXtoDVD program.


20 Action menu Previous Top Next Convert / Cancel: Start / Stop the conversion of your created project. Same function as the button in the middle of the Main menu window. Pause conversion: Pause the conversion at any time during the conversion process. Note: Enables only when there's a conversion. Conversion priority: Set how much of CPU resources for ConvertXtoDVD to perform its task compared to other processes running on your computer. The higher the conversion priority level, the quicker the task will be done but the slower the response for other processes. Note: Enables only when there's a conversion. Shutdown PC when finished: Check this option if you want ConvertXtoDVD to shutdown your computer automatically when the conversion has finished. Close program when finished: Check this option if you want ConvertXtoDVD to close itself when the conversion has finished. Minimize to tray icon:
21 Hide the actual display of the program and show only as a icon in the tray bar. Move selected titleset up one position (Ctrl + Up): Move a selected titleset up one position in the Tree View window. The titleset number will be decremented by one. e.g. Titleset #2 now becomes Titleset #1. Note: Enables only when 1) Titleset #2 and above is selected and there are at least 2 titlesets in the project, or 2) conversion has not started. This function is also available via context menu by right-clicking on the Titleset # node and in the Vertical Toolbar. Move this titleset down one position (Ctrl + Down): Move a selected titleset down one position in the Tree View window. The titleset number will be incremented by one. e.g. Titleset #1 now becomes Titleset #2. Note: Enables only when 1) the next-to-last titleset is selected and there are at least 2 titlesets in the project, or 2) conversion has not started. This function is also available via context menu by right-clicking on the Titleset # node and in the Vertical Toolbar. Burn an already converted project (burn a ready DVD video structure): Select an already converted project (VIDEO_TS stored in the working folder that is set in General tab at Settings) and burn it directly to DVD media. This option can also burn any valid DVD video folder (VIDEO_TS=IFO, BUP, VOB) or ISO file that are not created by ConvertXtoDVD. You can only select one(1) VIDEO_TS folder as that is what the standard DVD video disc specifications allows.(the fully finished result is inside this folder) Note: ISO file burning with the following limitation: The user still select a folder, and if this folder contain an ISO file, it'll be used in priority. If the folder contains several ISO files, the first one will be used. Note: Disables only when there's a conversion.

22 Settings menu Previous Top Next The options in the Settings menu are the basic settings that are pre-loaded at the start of the application. You can also access the Settings menu in the Vertical Toolbar section of the Main Window. Each of these options are further explained in the Settings menu topics.
23 Window menu Previous Top Next Video Preview: Check this option to enable the Video Preview window on the right side of the Main Window. Log: Check this option to enable the Log window on the bottom of the Main Window.
24 Help menu Previous Top Next Online Help: This will direct you into the VSO website where you find several options. An internet connection is required. Open log file: Will open a text document (usually opened with the standard Windows application Notepad) containing all the log files of your conversions). The most recent conversion is found at the top of the file. A full conversion log with burning is shown between ********** Log session stop :48: PID **************** (info) ********** Log session start :53: PID **************** In case of problems, this information is first needed together with a good description of your problem. Both the description and log file information can be posted on the VSO forum / sent to VSO Support team by either copy and pasting into message window or by attaching as a separate document. Examples of the generated conversion logs can be found at Log Files view. Note: All log files are automatically saved by the software. I.E. you do not need to do a new conversion to create and save a log file. All conversions are recorded, saved, and stored for you by the software. Check for update: Manually check if a new version is available at the VSO website. An internet connection is required. If a new version is available click on the download link on the VSO website. You do not need to uninstall the software before installing a newer version, but you do need to close ConvertXtoDVD on your computer if it is open before installing the latest version. Enter license key: See topic Registration. Buy program: Bring you directly to the VSO Shopping page where you can buy a license key. Entering a license key unblocks the software by removing the watermark that is on the trial version. License keys are sent by immediately after the payment is received. An internet connection is required. About: Provide information about - the program, drivers and its version number used in the program - whether the software is registered or a trial version

25
 (Ins): Select the video file you want to convert and it will be added to the Tree View window. It will be shown as Titleset #1, followed by estimated time duration and file name.")
26 Vertical Toolbar Previous Top Next The vertical toolbar is located on the right side of the Tree View window. This is meant for quick and easy access to most commonly used functions. Add video file(s) (Ins): Select the video file you want to convert and it will be added to the Tree View window. It will be shown as Titleset #1, followed by estimated time duration and file name. Every additional file added will have the next titleset number incremented, e.g. Titleset #2, #3, etc. Note: DVD specification allows only a maximum of 99 titlesets to be added. Note: Disables when there's a conversion. Merge more files to this titleset (Ctrl + A): Join several files together so they will play seamlessly as one titleset. More details are further explained in Merge window editing topic. Once a video file is added, select it (highlight the Titleset #) and click on this function to merge another file to it. This function is also available via context menu by right-clicking on the Titleset # node and in the File menu. Note: Disables when there's a conversion. Remove selected titleset (Del): Remove the selected titleset in the Tree View window from the current project. The original file still exists on your hard drive. This function is also available via context menu by right-clicking on the Titleset # node and in the File menu. Note: Disables when there's a conversion. Expand/collapse the first branch in the tree view: Expand or collapse the first (top level) branch/node in the the tree view. This function is also available via context menu by right-clicking on the Titleset # node. Move this titleset up one position (Ctrl + Up): Move a selected titleset up one position in the Tree View window. The titleset number will be decremented by one. e.g. Titleset #2 now becomes Titleset #1. Note: Enables only when 1) Titleset #2 and above is selected and there are at least 2 titlesets in the project, or 2) conversion has not started. This function is also available via context menu by right-clicking on the Titleset # node and in the Action menu.
27 Move this titleset down one position (Ctrl + Down): Move a selected titleset down one position in the Tree View window. The titleset number will be incremented by one. e.g. Titleset #1 now becomes Titleset #2. Note: Enables only when 1) the next-to-last titleset and above is selected and there are at least 2 titlesets in the project, or 2) conversion has not started. This function is also available via context menu by right-clicking on the Titleset # node and in the Action menu. Settings: Bring up the Settings menu for project-wide customizations. Note: Disables when there's a conversion. Preview on / off: Toggle the Video preview window on the right side of Main window. This allows you to quickly screen the source video and to preview what the menu looks like, if a menu template is chosen. Recommend to close the Video preview window when the conversion starts so as to speed up the whole conversion process.

28 Tree view window Previous Top Next Uncheck both selection options to have only Tree View window displayed.

29 Video Preview window Previous Top Next Check the Video Preview option to have the Video Preview window shown together with the Tree View window. Note: When you disable this window during conversion, it will increase the conversion speed a little bit. Then ConvertXtoDVD does not have to spend time updating the video status in the Video Preview window. You should have DirectX 9.0c in order for the preview window to function correctly.

30 Log window Previous Top Next Check the Log option to have the Log window shown below the Tree View window.

31 Detach preview / log window Previous Top Next Highlighted below are the ways in which you can move and resize each window. How to move (detach) a window. -Resize ConvertXtoDVD main window with Windows minimize function. - Grab the title bar (boxed in red) and drag (hold down the mouse button) and drop (release mouse button) it outside the ConvertXtoDVD Main Window at the position you want. You can also have all windows opened at once (detached) or within the main frame window of ConvertXtoDVD: View of all windows within ConvertXtoDVD main frame. View of all ConvertXtoDVD windows detached.

32 View of all ConvertXtoDVD windows detached. Resize window The double arrow cursor (boxed in green) appears when you place your mouse between two touching windows. You can change their size by holding down the mouse button and moving. See also Main Window view Note: In case of problems try to roll it back with the ConvertXtoDVD main window at minimized size. The smaller window, not as icon at task bar. If that even does not work, do a cleanvso uninstall.
33 Create / customize / convert and burn Guides Previous Top Next The create / customize / convert and burn Guides are designed as quick references in helping you complete a project, from creating to burning a DVD. Detailed steps are also provided should you need them. Each topic is explained in the following sections: Step-by-step Guides Burn an already converted project
34 Step-by-step Guides Previous Top Next If you are new to ConvertXtoDVD and need to complete a project but don't know where and how to start, this section is the right place for your help and brings you up to speed. Some terminologies will be used and linked for easy reference. 1) Start the program. Set (default) Settings 2) Set all your default startup settings at the Settings menu. This step needs to be done only once after a fresh install. Skip otherwise. If you go in here during customizing your project, it might overwrite all your modified/customized project settings done in the Tree View. These default startup settings are loaded every time you start the program. Work your way through each tab, starting from General tab and ending with Sound events tab. Select project "type" 3) Listed below are the different "type" options for your project. Click on the link below to get started. A] One video file on a DVD - displaying only one video title in the main menu B] Multiple video files on a DVD - each with its own video title entry in the main menu C] Multiple video files on a DVD - but with only one video title in the main menu (For example: Merge/join Movie CD1.avi with Movie CD2.avi etc) D] Combine these two options (B and C) together for your project.
35 1 video file converted to 1 title in the menu (basic) 1. A minimal setting step-by-step procedure to generate a "default settings" DVD. Previous Top Next Create project Loading video file 1) Click on Add video file. Select the desired file, at the pop-up window, and click open or simply double-click on the video file. Check if your project length meet this rules of thumb values(for a average movie, DVD-5, Full D1) for Encoding quality: High for up to 100 minutes project length. Medium for up to 200 minutes project length. Low for longer as 200 minutes project length. If you think you have set everything properly at Settings, just continue with step 2) on this page to generate a DVD with ConvertXtoDVD's default settings. OR If you prefer, you can click on this link for a detailed step by step procedure for all possible editable settings, to generate a customized DVD. (start at step 2) at the detailed page). Convert and burn project 2) Insert a blank DVD+/-R/RW in DVD writer if you want to burn the project directly after conversion. Hint: If you prefer not to start burning automatically after conversion, because you like to check converted file with a software player like VLC (freeware), PowerDVD (shareware) or others, uncheck Burn result to DVD or don't insert a disc. If the conversion comes out as you wanted, with default settings respected and menu displays as anticipated, then you can always later Burn an already converted project. This avoids any disappointment you may have if you are not sure, for example, how the menus will turn out, how the subtitles are displayed, or if the audio and video will be out of sync or not. If you need a burned disc for testing purposes, always use a DVD RW disc. 3) Click Convert to start conversion followed by burning. 4) Wait for and click OK to finish. This will take 10 to?? minutes, depending on the performance of your PC, for a project of average length and quality.
36 1 video file converted to 1 title in the menu (detailed) A all possible settings step-by-step procedure, to generate a customized DVD. Previous Top Next Create project Loading video file 1) Click on Add video file. Select the desired file, at the pop-up window, and click open or simply double-click on the video file. 2) Check if your project length meet this rules of thumb values(for a average movie, DVD-5, Full D1) for Encoding quality: High for up to 100 minutes project length. Medium for up to 200 minutes project length. Low for longer as 200 minutes project length. Modification of this setting (and the other, not at Tree View "listed", editable (global) Settings) later while customizing project, will cause that if next described customizing points were already be done, to be RESET TO DEFAULT and (your customized settings/data) get lost (waste of time). DVD options settings Customize project Note: Red numbers refer to "image of Tree View" and section in the manual 3) Open the DVD options by clicking on + sign just before the displayed text at Tree View window. 4) Check if you are satisfied with the chosen Template (2]). 5) Check if you are satisfied with the DVD play options (3] - 8]). DVD Title Menu settings 6) Open Title Menu parameters by clicking on the + sign. To see in Video Preview window how the Title menu will show up on the resulting DVD, click on Title text Title menu (except when at DVD play options "Don't create title menu for single video" is checked.) Edit it here if you want to change the displayed Title text Title menu (9]), background video/picture (10]) (only static images are previewed displayed, video can only be seen when conversion has taken place) and background audio(11]) for the Title menu. 7) Check if you are satisfied with the Disc name settings (12]). 8) Close the DVD options by clicking on - sign just before the displayed text at Tree View window. Titleset Menu settings 9) Start with open Titleset #1 by clicking on + sign just before the displayed text at Tree View window. If you do not want the text name of your video file, you can Edit titleset name (14]), so that the name appears differently in the menu at title menu. 10) Open In Title menu by clicking on + sign just before the displayed text at Tree View window. You can edit here the button text (15]) and thumbnail (16]) for the selected titleset. 11) Open Titleset Menu parameters by clicking on + sign just before the displayed text at Tree View window. The text at Tree View for the points 20] - 24], 51], 52] are normally unchanged when DVD menu labels settings were properly done.
37 12) Click on Title text for Root menu (18]), to see in Video Preview window how the Root menu will show up on the resulting DVD. Edit at Tree View if you want to change the displayed menu title text. Less important Tree View points (indented). 13) Click on Title text for Chapter menu (17]), to see in Video Preview window how the Chapter menu will show up on the resulting DVD. Edit at Tree View if you want to change the displayed menu title text. Note: Only first page is shown of the chapter menu. The others, when more chapters are there as will fit on first page, have the same layout. 14) Click on Title text for Audio/Subtitle menu (19]), to see in Video Preview window how the Audio / Subtitle menu will show up on the resulting DVD. Edit at Tree View if you want to change the displayed menu title text. Note: Only first page is shown of the audio / subtitle menu. The others, when more audio / subtitle streams are there as will fit on first page, have the same layout. 15) Click on Background video/image menu (25] - 27]), to see in Video Preview window how the belonging menu show up on the resulting/playing DVD. Only static images are previewed displayed, video can only be seen when conversion has taken place. Edit at Tree View if you want to change the displayed background. 16) Click on Background audio menu (28] - 30]) and select the audio stream what will be played when belonging menu show up on the resulting/playing DVD. Result can only be heared when conversion has taken place. Edit at Tree View if you want to change the played audio. 17) Open Audio (31], 32]) node by clicking on + sign just before the displayed text at Tree View window. Edit at Tree View if you want to change the displayed menu button text, set as default option, set language identifier, output format, audio level and add more audio files. 18) Open Subtitle (33], 34]) node by clicking on + sign just before the displayed text at Tree View window. Edit at Tree View if you want to change the displayed menu text, set as default option, set language identifier and add more subtitle files. 19) Open Chapters (35] - 37]) node by clicking on + sign just before the displayed text at Tree View window. Edit at Tree View if you want to change the displayed menu text, time and add or remove chapters. 20) Video result can be edited/changed at Video (result) (38] - 45]). This is more for the advanced user and there is no need to go in here when you have properly set up your (default) Settings. 21) When you have multiple video / audio streams, you can tick/un-tick each included stream at Source file info otherwise skip. How to check see File Video / Audio (46] - 48]) 22) When you have multiple subtitle streams, you can tick/un-tick each included stream at Source file info otherwise skip. You can edit here each srt stream using the SRT Subtitle text style editor. How to check see File Subtitle (49] - 51]). 23) Save the created project. Save your project in case you accidentally closed the program, causing loss of actual project settings, and when the result was not as how you wanted it, the project settings can quickly loaded again for editing. Convert (and burn) project 24) Insert a blank DVD+/-R/RW in DVD writer if you want to burn the project directly after conversion. Hint: If you prefer not to start burning automatically after conversion, because you like to check converted file with a software player like VLC (freeware), PowerDVD (shareware) or others, uncheck Burn result to DVD or don't insert a disc. If the conversion comes out as you wanted, with default settings respected and menu displays as anticipated, then you can always later Burn an already converted project. This avoids any disappointment you may have if you are not sure, for example, how the menus will turn
38 out, how the subtitles are displayed, or if the audio and video will be out of sync or not. If you need a burned disc for testing purposes, always use a DVD RW disc. 25) Click Convert to start conversion (followed by burning). 26) Wait for and click OK to finish. This will take 10 to?? minutes, depending on the performance of your PC, for a project of average length and quality.
39 Multi video files to multi titles (basic) A minimal setting step-by-step procedure, to generate a "default settings" DVD. Previous Top Next Create project Loading video files 1) Click on Add video file. Select the desired file, at the pop-up window, and click open or simply double-click on the video file. Repeat this step to add more video files. Hint: We advice if you have approx. 10 or more files added into a project, Save the created project. If the result is not as desired, the project can quick ly be reloaded for editing. If the titlesets are not in the correct sequence, use the tool move selected titleset up / down. Check if your project length meet this rules of thumb values(for a average movie, DVD-5, Full D1) for Encoding quality: High for up to 100 minutes project length. Medium for up to 200 minutes project length. Low for longer as 200 minutes project length. If you think you have set everything properly at Settings, just continue with step 2) on this page to generate a DVD with ConvertXtoDVD's default settings. OR If you prefer, you can click on this link for a detailed step by step procedure for all possible editable settings, to generate a customized DVD. (start at step 2) at the detailed page). Convert and burn project 2) Insert a blank DVD+/-R in DVD writer if you want to burn the project directly after conversion. Hint: If you prefer not to start burning automatically after conversion, because you like to check converted file with a software player like VLC (freeware), PowerDVD (shareware) or others, uncheck Burn result to DVD or don't insert a disc. If the conversion comes out as you wanted, with default settings respected and menu displays as anticipated, then you can always later Burn an already converted project. This avoids any disappointment you may have if you are not sure, for example, how the menus will turn out, how the subtitles are displayed, or if the audio and video will be out of sync or not. If you need a burned disc for testing purposes, always use a DVD RW disc. 3) Click Convert to start conversion followed by burning. 4) Wait for and click OK to finish. This will take 10 to?? minutes, depending on the performance of your PC, for a project of average length and quality.
40 Multi video files to multi titles (detailed) A all possible settings step-by-step procedure, to generate a customized DVD. Previous Top Next Create project Loading video files 1) Click on Add video file. Select the desired file, at the pop-up window, and click open or simply double-click on the video file. Repeat this step to add more video files. 2) Check if your project length meet this rules of thumb values(for a average movie, DVD-5, Full D1) for Encoding quality: High for up to 100 minutes project length. Medium for up to 200 minutes project length. Low for longer as 200 minutes project length. Modification of this setting (and the other, not at Tree View "listed", editable (global) Settings) later while customizing project, will cause that if next described customizing points were already be done, to be RESET TO DEFAULT and (your customized settings/data) get lost (waste of time). Hint: We advice if you have approx. 10 or more files added into a project, Save the created project. If the result is not as desired, the project can quick ly be reloaded for editing. If the titlesets are not in the correct sequence, use the tool move selected titleset up / down. DVD options settings Customize project Note: Red numbers refer to "image of Tree View" and section in the manual 3) Open the DVD options by clicking on + sign just before the displayed text at Tree View window. 4) Check if you are satisfied with the chosen Template (2]). 5) Check if you are satisfied with the DVD play options (3] - 8]). DVD Title Menu settings 6) Open Title Menu parameters by clicking on the + sign. To see in Video Preview window how the Title menu will show up on the resulting DVD, click on Title text Title menu. Edit it here if you want to change the displayed Title text Title menu (9]), background video/picture (10]) (only static images are previewed displayed, video can only be seen when conversion has taken place) and background audio(11]) for the Title menu. 7) Check if you are satisfied with the Disc name settings (12]). 8) Close the DVD options by clicking on - sign just before the displayed text at Tree View window. Titleset Menu settings (repeated steps) 9a) Start with open Titleset #1 by clicking on + sign just before the displayed text at Tree View window. If you do not want the text name of your video file, you can Edit titleset name (14]), so that the name appears differently in the menu at title menu.
41 Resume from here when you reached step 24) for Titleset #1. 9b) Start with open Titleset #2/next number by clicking on + sign just before the displayed text at Tree View window. If you do not want the text name of your video file, you can Edit titleset name (14]), so that the name appears differently in the menu at title menu. 10) Open In Title menu by clicking on + sign just before the displayed text at Tree View window. You can edit here the button text (15]) and thumbnail (16]) for the selected titleset. 11) Open Titleset Menu parameters by clicking on + sign just before the displayed text at Tree View window. The text at Tree View for the points 20] - 24], 51], 52] are normally unchanged when DVD menu labels settings were properly done. 12) Click on Title text for Root menu (18]), to see in Video Preview window how the Root menu will show up on the resulting DVD. Edit at Tree View if you want to change the displayed menu title text. Less important Tree View points (indented). 13) Click on Title text for Chapter menu (17]), to see in Video Preview window how the Chapter menu will show up on the resulting DVD. Edit at Tree View if you want to change the displayed menu title text. Note: Only first page is shown of the chapter menu. The others, when more chapters are there as will fit on first page, have the same layout. 14) Click on Title text for Audio/Subtitle menu (19]), to see in Video Preview window how the Audio / Subtitle menu will show up on the resulting DVD. Edit at Tree View if you want to change the displayed menu title text. Note: Only first page is shown of the audio / subtitle menu. The others, when more audio / subtitle streams are there as will fit on first page, have the same layout. 15) Click on Background video/image menu (25] - 27]), to see in Video Preview window how the belonging menu show up on the resulting/playing DVD. Only static images are previewed displayed, video can only be seen when conversion has taken place. Edit at Tree View if you want to change the displayed background. 16) Click on Background audio menu (28] - 30]) and select the audio stream what will be played when belonging menu show up on the resulting/playing DVD. Result can only be heared when conversion has taken place. Edit at Tree View if you want to change the played audio. 17) Open Audio (31], 32]) node by clicking on + sign just before the displayed text at Tree View window. Edit at Tree View if you want to change the displayed menu button text, set as default option, set language identifier, output format, audio level and add more audio files. 18) Open Subtitle (33], 34]) node by clicking on + sign just before the displayed text at Tree View window. Edit at Tree View if you want to change the displayed menu text, set as default option, set language identifier and add more subtitle files. 19) Open Chapters (35] - 37]) node by clicking on + sign just before the displayed text at Tree View window. Edit at Tree View if you want to change the displayed menu text, time and add or remove chapters. 20) Video result can be edited/changed at Video (result) (38] - 45]). This is more for the advanced user and there is no need to go in here when you have properly set up your (default) Settings. 21) When you have multiple video / audio streams, you can tick/un-tick each included stream at Source file info otherwise skip. How to check see File Video / Audio (46] - 48]) 22) When you have multiple subtitle streams, you can tick/un-tick each included stream at Source file info otherwise skip. You can edit here each srt stream using the SRT Subtitle text style editor. How to check see File Subtitle (49] - 51]).
42 23) Save the created project. Save your project in case you accidentally closed the program, causing loss of actual project settings, or if the result was not as how you wanted it, the project settings can quickly loaded again for continuing / editing. 24) Repeat step 9b) to 23) until you have done all Titlesets and proceed then with step 25). Convert (and burn) project 25) Insert a blank DVD+/-R in DVD writer if you want to burn the project directly after conversion. Hint: If you prefer not to start burning automatically after conversion, because you like to check converted file with a software player like VLC (freeware), PowerDVD (shareware) or others, uncheck Burn result to DVD or don't insert a disc. If the conversion comes out as you wanted, with default settings respected and menu displays as anticipated, then you can always later Burn an already converted project. This avoids any disappointment you may have if you are not sure, for example, how the menus will turn out, how the subtitles are displayed, or if the audio and video will be out of sync or not. If you need a burned disc for testing purposes, always use a DVD RW disc. 26) Click Convert to start conversion (followed by burning). 27) Wait for and click OK to finish. This will take 10 to?? minutes, depending on the performance of your PC, for a project of average length and quality.
43 Multi video files to 1 title (basic) A minimal setting step-by-step procedure, to generate a "default settings" DVD. Previous Top Next Create project Loading video files 1) Click on Add video file. Select the desired file, at the pop-up window, and click open or simply double-click on the video file. 2) Merge more files to this titleset. Add the file(s) what need to be merged / joined together with the at step 1) added file. Hint: we advice if you have approx. 10 or more files added into a project, Save the created project. If the result is not as desired, the project can quick ly be reloaded for editing. Check if your project length meet this rules of thumb values(for a average movie, DVD-5, Full D1) for Encoding quality: High for up to 100 minutes project length. Medium for up to 200 minutes project length. Low for longer as 200 minutes project length. If you think you have set everything properly at Settings, just continue with step 3) on this page to generate a DVD with ConvertXtoDVD's default settings. OR If you prefer, you can click on this link for a detailed step by step procedure for all possible editable settings, to generate a customized DVD. (start at step 3) at the detailed page). Convert and burn project 3) Insert a blank DVD+/-R in DVD writer if you want to burn the project direct after conversion. Hint: If you prefer not to start burning automatically after conversion, because you like to check converted file with a software player like VLC (freeware), PowerDVD (shareware) or others, uncheck Burn result to DVD or don't insert a disc. If the conversion comes out as you wanted, with default settings respected and menu displays as anticipated, then you can always later Burn an already converted project. This avoids any disappointment you may have if you are not sure, for example, how the menus will turn out, how the subtitles are displayed, or if the audio and video will be out of sync or not. If you need a burned disc for testing purposes, always use a DVD RW disc. 4) Click Convert to start conversion followed by burning. 5) Wait for and click OK to finish. This will take 10 to?? minutes, depending on the performance of your PC, for a project of average length and quality.
44 Multi video files to 1 title (detailed) A all possible settings step-by-step procedure, to generate a customized DVD. Previous Top Next Create project Loading video files 1) Click on Add video file. Select the desired file, at the pop-up window, and click open or simply double-click on the video file. 2) Merge more files to this titleset. Add the file(s) what need to be merged / joined together with the at step 1) added file. 3) Check if your project length meet this rules of thumb values(for a average movie, DVD-5, Full D1) for Encoding quality: High for up to 100 minutes project length. Medium for up to 200 minutes project length. Low for longer as 200 minutes project length. Modification of this setting (and the other, not at Tree View "listed", editable (global) Settings) later while customizing project, will cause that if next described customizing points were already be done, to be RESET TO DEFAULT and (your customized settings/data) get lost (waste of time). Hint: we advice if you have approx. 10 or more files added into a project, Save the created project. If the result is not as desired, the project can quick ly be reloaded for editing. DVD options settings Customize project Note: Red numbers refer to "image of Tree View" and section in the manual 4) Open the DVD options by clicking on + sign just before the displayed text at Tree View window. 5) Check if you are satisfied with the chosen Template (2]). 6) Check if you are satisfied with the DVD play options (3] - 8]). DVD Title Menu settings 7) Open Title Menu parameters by clicking on the + sign. To see in Video Preview window how the Title menu will show up on the resulting DVD, click on Title text Title menu (except when at DVD play options "Don't create title menu for single video" is checked.) Edit it here if you want to change the displayed Title text Title menu (9]), background video/picture (10]) (only static images are previewed displayed, video can only be seen when conversion has taken place) and background audio(11]) for the Title menu. 8) Check if you are satisfied with the Disc name settings (12]). 9) Close the DVD options by clicking on - sign just before the displayed text at Tree View window. Titleset Menu settings 10) Open Titleset #1 by clicking on + sign just before the displayed text at Tree View window. If you do not want the text name of your video file, you can Edit titleset name (14]), so that the name appears differently in the menu at title menu.
45 11) Open In Title menu by clicking on + sign just before the displayed text at Tree View window. You can edit here the button text (15]) and thumbnail (16]) for the selected titleset. 12) Open Titleset Menu parameters by clicking on + sign just before the displayed text at Tree View window. The text at Tree View for the points 20] - 24], 51], 52] are normally unchanged when DVD menu labels settings were properly done. 13) Click on Title text for Root menu (18]), to see in Video Preview window how the Root menu will show up on the resulting DVD. Edit at Tree View if you want to change the displayed menu title text. Less important Tree View points (indented). 14) Click on Title text for Chapter menu (17]), to see in Video Preview window how the Chapter menu will show up on the resulting DVD. Edit at Tree View if you want to change the displayed menu title text. Note: Only first page is shown of the chapter menu. The others, when more chapters are there as will fit on first page, have the same layout. 15) Click on Title text for Audio/Subtitle menu (19]), to see in Video Preview window how the Audio / Subtitle menu will show up on the resulting DVD. Edit at Tree View if you want to change the displayed menu title text. Note: Only first page is shown of the audio / subtitle menu. The others, when more audio / subtitle streams are there as will fit on first page, have the same layout. 16) Click on Background video/image menu (25] - 27]), to see in Video Preview window how the belonging menu show up on the resulting/playing DVD. Only static images are previewed displayed, video can only be seen when conversion has taken place. Edit at Tree View if you want to change the displayed background. 17) Click on Background audio menu (28] - 30]) and select the audio stream what will be played when belonging menu show up on the resulting/playing DVD. Result can only be heared when conversion has taken place. Edit at Tree View if you want to change the played audio. 18) Open Audio (31], 32]) node by clicking on + sign just before the displayed text at Tree View window. Edit at Tree View if you want to change the displayed menu button text, set as default option, set language identifier, output format, audio level and add more audio files. 19) Open Subtitle (33], 34]) node by clicking on + sign just before the displayed text at Tree View window. Edit at Tree View if you want to change the displayed menu text, set as default option, set language identifier and add more subtitle files. 20) Open Chapters (35] - 37]) node by clicking on + sign just before the displayed text at Tree View window. Edit at Tree View if you want to change the displayed menu text, time and add or remove chapters. 21) Video result can be edited/changed at Video (result) (38] - 45]). This is more for the advanced user and there is no need to go in here when you have properly set up your (default) Settings. 22) When you have multiple video / audio streams, you can tick/un-tick each included stream at Source file info otherwise skip. How to check see File Video / Audio (46] - 48]) 23) When you have multiple subtitle streams, you can tick/un-tick each included stream at Source file info otherwise skip. You can edit here each srt stream using the SRT Subtitle text style editor. How to check see File Subtitle (49] - 51]). 24) Save the created project. Save your project in case you accidentally closed the program, causing loss of actual project settings, or if the result was not as how you wanted it, the project settings can quickly loaded again for continuing / editing. Convert (and burn) project
46 25) Insert a blank DVD+/-R in DVD writer if you want to burn the project direct after conversion. Hint: If you prefer not to start burning automatically after conversion, because you like to check converted file with a software player like VLC (freeware), PowerDVD (shareware) or others, uncheck Burn result to DVD or don't insert a disc. If the conversion comes out as you wanted, with default settings respected and menu displays as anticipated, then you can always later Burn an already converted project. This avoids any disappointment you may have if you are not sure, for example, how the menus will turn out, how the subtitles are displayed, or if the audio and video will be out of sync or not. If you need a burned disc for testing purposes, always use a DVD RW disc. 26) Click Convert to start conversion (followed by burning). 27) Wait for and click OK to finish. This will take 10 to?? minutes, depending on the performance of your PC, for a project of average length and quality.
47 Combined (basic) A minimal setting step-by-step procedure, to generate a "default settings" DVD. Previous Top Next Create project Loading video files (1 file to 1 titleset) 1) Click on Add video file. Select the desired file, at the pop-up window, and click open or simply double-click on the video file. Repeat this step 1) for each of the to be added video files that should appear as a single title.. and Loading video files (multi files to 1 titleset = merging/joining) 2) Click on Add video file. Select the desired file, at the pop-up window, and click open or simply double-click on the video file. 3) Merge more files to this titleset. Add the file(s) what need to be merged / joined together with the at step 2) added file. Repeat step 2) and 3) for each of the to be Add + Merge(d) video file(s) that should appear as a single title. Hint: We advice if you have approx. 10 or more files added into a project, Save the created project. If the result is not as desired, the project can quick ly be reloaded for editing. If the titlesets are not in the correct sequence, use the tool move selected titleset up / down. Check if your project length meet this rules of thumb values(for a average movie, DVD-5, Full D1) for Encoding quality: High for up to 100 minutes project length. Medium for up to 200 minutes project length. Low for longer as 200 minutes project length. If you think you have set everything properly at Settings, just continue with step 4) on this page to generate a DVD with ConvertXtoDVD's default settings. OR If you prefer, you can click on this link for a detailed step by step procedure for all possible editable settings, to generate a customized DVD. (start at step 4) at the detailed page). Convert and burn project 4) Insert a blank DVD+/-R in DVD writer if you want to burn the project direct after conversion. Hint: If you prefer not to start burning automatically after conversion, because you like to check converted file with a software player like VLC (freeware), PowerDVD (shareware) or others, uncheck Burn result to DVD or don't insert a disc. If the conversion comes out as you wanted, with default settings respected and menu displays as anticipated, then you can always later Burn an already converted project. This avoids any disappointment you may have if you are not sure, for example, how the menus will turn out, how the subtitles are displayed, or if the audio and video will be out of sync or not. If you need a burned disc for testing purposes, always use a DVD RW disc. 5) Click Convert to start conversion followed by burning. 6) Wait for
48 and click OK to finish. This will take 10 to?? minutes, depending on the performance of your PC, for a project of average length and quality.
49 Combined (detailed) A all possible settings step-by-step procedure, to generate a customized DVD. Previous Top Next Create project Loading video files (1 file to 1 titleset) 1) Click on Add video file. Select the desired file, at the pop-up window, and click open or simply double-click on the video file. Repeat this step 1) for each of the to be added video files that should appear as a single title.. and Loading video files (multi files to 1 titleset = merging/joining) 2) Click on Add video file. Select the desired file, at the pop-up window, and click open or simply double-click on the video file. 3) Merge more files to this titleset. Add the file(s) what need to be merged / joined together with the at step 2) added file. Repeat step 2) and 3) for each of the to be Add + Merge(d) video file(s) that should appear as a single title. 4) Check if your project length meet this rules of thumb values(for a average movie, DVD-5, Full D1) for Encoding quality: High for up to 100 minutes project length. Medium for up to 200 minutes project length. Low for longer as 200 minutes project length. Modification of this setting (and the other, not at Tree View "listed", editable (global) Settings) later while customizing project, will cause that if next described customizing points were already be done, to be RESET TO DEFAULT and (your customized settings/data) get lost (waste of time). Hint: We advice if you have approx. 10 or more files added into a project, Save the created project. If the result is not as desired, the project can quick ly be reloaded for editing. If the titlesets are not in the correct sequence, use the tool move selected titleset up / down. DVD options settings Customize project Note: Red numbers refer to "image of Tree View" and section in the manual 5) Open the DVD options by clicking on + sign just before the displayed text at Tree View window. 6) Check if you are satisfied with the chosen Template (2]). 7) Check if you are satisfied with the DVD play options (3] - 8]). DVD Title Menu settings 8) Open Title Menu parameters by clicking on the + sign. To see in Video Preview window how the Title menu will show up on the resulting DVD, click on Title text Title menu. Edit it here if you want to change the displayed Title text Title menu (9]), background video/picture (10]) (only static images are previewed displayed, video can only be seen when conversion has taken place) and background audio(11]) for the Title menu.
50 for the Title menu. 9) Check if you are satisfied with the Disc name settings (12]). 10) Close the DVD options by clicking on - sign just before the displayed text at Tree View window. Titleset Menu settings (repeated steps) 11a) Start with open Titleset #1 by clicking on + sign just before the displayed text at Tree View window. If you do not want the text name of your video file, you can Edit titleset name (14]), so that the name appears differently in the menu at title menu. Resume from here when you reached step 26) for Titleset #1. 11b) Start with open Titleset #2/next number by clicking on + sign just before the displayed text at Tree View window. If you do not want the text name of your video file, you can Edit titleset name (14]), so that the name appears differently in the menu at title menu. 12) Open In Title menu by clicking on + sign just before the displayed text at Tree View window. You can edit here the button text (15]) and thumbnail (16]) for the selected titleset. 13) Open Titleset Menu parameters by clicking on + sign just before the displayed text at Tree View window. The text at Tree View for the points 20] - 24], 51], 52] are normally unchanged when DVD menu labels settings were properly done. 14) Click on Title text for Root menu (18]), to see in Video Preview window how the Root menu will show up on the resulting DVD. Edit at Tree View if you want to change the displayed menu title text. Less important Tree View points (indented). 15) Click on Title text for Chapter menu (17]), to see in Video Preview window how the Chapter menu will show up on the resulting DVD. Edit at Tree View if you want to change the displayed menu title text. Note: Only first page is shown of the chapter menu. The others, when more chapters are there as will fit on first page, have the same layout. 16) Click on Title text for Audio/Subtitle menu (19]), to see in Video Preview window how the Audio / Subtitle menu will show up on the resulting DVD. Edit at Tree View if you want to change the displayed menu title text. Note: Only first page is shown of the audio / subtitle menu. The others, when more audio / subtitle streams are there as will fit on first page, have the same layout. 17) Click on Background video/image menu (25] - 27]), to see in Video Preview window how the belonging menu show up on the resulting/playing DVD. Only static images are previewed displayed, video can only be seen when conversion has taken place. Edit at Tree View if you want to change the displayed background. 18) Click on Background audio menu (28] - 30]) and select the audio stream what will be played when belonging menu show up on the resulting/playing DVD. Result can only be heared when conversion has taken place. Edit at Tree View if you want to change the played audio. 19) Open Audio (31], 32]) node by clicking on + sign just before the displayed text at Tree View window. Edit at Tree View if you want to change the displayed menu button text, set as default option, set language identifier, output format, audio level and add more audio files. 20) Open Subtitle (33], 34]) node by clicking on + sign just before the displayed text at Tree View window. Edit at Tree View if you want to change the displayed menu text, set as default option, set language identifier and add more subtitle files. 21) Open Chapters (35] - 37]) node by clicking on + sign just before the displayed text at Tree View window. Edit at Tree View if you want to change the displayed menu text, time and add or remove chapters. 22) Video result can be edited/changed at Video (result) (38] - 45]).
51 This is more for the advanced user and there is no need to go in here when you have properly set up your (default) Settings. 23) When you have multiple video / audio streams, you can tick/un-tick each included stream at Source file info otherwise skip. How to check see File Video / Audio (46] - 48]) 24) When you have multiple subtitle streams, you can tick/un-tick each included stream at Source file info otherwise skip. You can edit here each srt stream using the SRT Subtitle text style editor. How to check see File Subtitle (49] - 51]). 25) Save the created project. Save your project in case you accidentally closed the program, causing loss of actual project settings, or if the result was not as how you wanted it, the project settings can quickly loaded again for continuing / editing. 26) Repeat step 11b) to 25) until you have done all Titlesets and proceed then with step 27). Convert (and burn) project 27) Insert a blank DVD+/-R in DVD writer if you want to burn the project direct after conversion. Hint: If you prefer not to start burning automatically after conversion, because you like to check converted file with a software player like VLC (freeware), PowerDVD (shareware) or others, uncheck Burn result to DVD or don't insert a disc. If the conversion comes out as you wanted, with default settings respected and menu displays as anticipated, then you can always later Burn an already converted project. This avoids any disappointment you may have if you are not sure, for example, how the menus will turn out, how the subtitles are displayed, or if the audio and video will be out of sync or not. If you need a burned disc for testing purposes, always use a DVD RW disc. 28) Click Convert to start conversion (followed by burning). 29) Wait for and click OK to finish. This will take 10 to?? minutes, depending on the performance of your PC, for a project of average length and quality.

52 Burn an already converted project Previous Top Next 1) To burn multiple copies of a converted DVD project, make sure you have unchecked the option "Delete folder after successful burn". Otherwise, the DVD folder will be deleted after burning is complete. Select your preferred burner and burning speed. It is recommended to select half the speed of the rated media, provided the burner's firmware can support that speed, and always use Verbatim and Taiyo Yuden media to ensure burn quality and reliablity. 2) To burn an already converted project, select at menu bar Action -> Burn an already converted project. 3) Go to the Working folder and select the created DVD folder, containing AUDIO_TS and VIDEO_TS folders.


53 4) Click OK and the following Burn DVD dialog appears. If you have not inserted the writable media into the selected burner yet, the dialog will ask you to do so. Note that the two checkbox options, "Delete DVD folder after successful burn" and "Don't eject disc at completion" are copied from the Settings -> Burning tab. The selected DVD folder is automatically copied into the Volume Name entry for your convenience. 5) Once the media has been inserted, you are given a few seconds to make last minute changes before the burn process automatically starts, or you can just hit the Burn button to burn immediately.

54 And you're done!
55 Settings menu Previous Top Next Here you enter the basic (startup) settings, which are loaded each time you start the application (ConvertXtoDVD). This menu has 11 Tabs for the moment. Each tab is explained separately. General Language Chapters DVD menus DVD specification Burning Subtitles Audio Encoding Video processing Sound events
 at least 4.3 Gb (DVD-5) or 8.")
56 General Here you enter the basic settings, which are loaded at the start of the application (ConvertXtoDVD). Previous Top Next Working Folder: Where ConvertXtoDVD will store your converted DVD files. Change the working folder path to your desired location. Click on the Browse button to bring up the Select folder dialog. Note: Have in this directory (here E:\) at least 4.3 Gb (DVD-5) or 8.5 GB (DVD-9) space free, so that the conversion can be stored here, before burning. The program checks before every conversion if this "reserved" space is available in case that the conversion would end up with a 100% (full) disc AND that the newly to be created "result" folder does not exist here (has same name as first added file). Default installation location for XP: "C:\Documents and Settings\"your user name"\my Documents\ConvertXtoDVD". Default installation location for Vista: "C:\...\..Documents\ConvertXtoDVD". In the working folder, you will find a created folder with the same name as from the first added file, containing 2 sub-folders, named VIDEO_TS and AUDIO_TS. VIDEO_TS contains all "data" and AUDIO_TS is always empty and is required by some old DVD players to play. Note: If you have 2 (or more) hard discs in/at your PC, use one for the Source file(s) and the other to store the converted DVD files. This will optimize the read / write of the files. Remember last opened folder If checked, the dialog for adding files will start from last opened folder, else from defined working folder. Flip preview If the preview appears upside down in the interface check this box, close ConvertXtoDVD and open it again. The preview will now be right side up.
57 Check internet for updates regularly Will check for version update periodically as long as ConvertXtoDVD is running. Do not prompt for updates If checked, ConvertXtoDVD will not ask for permission before checking for an update. Theme Change appearance of the user interface by clicking on the various themes in the list. Note: Important for all Settings Tabs! Buttons At the bottom of the window you have 3 buttons. -Reset to VSO defaults: This will set all settings for ALL TABS to the original (VSO) settings, looks like you did a first/clean install of the program. There is no way to restore the values/settings to your preferences other then entering them manually again. -OK: Will apply all settings, modified or not, to the project (if started) at Tree View window. Read the pop-up/tooltip boxes thoroughly before deciding! -Cancel: will cancel/not apply any modifications. The behaviour of the 3 buttons is the same for all 11 tabs in Settings sub-window.

58 Language Here you select your language to be shown in ConvertXtoDVD windows, which is loaded at the Previous Top Next start of the application Allows you to select the language you want ConvertXtoDVD to appear in. For all languages you must first select the language, and then restart the application for all the changes to take effect. Once you have done this, you don't have to do this again. Note: Important for all Settings Tabs! Buttons At the bottom of the window you have 3 buttons. -Reset to VSO defaults: This will set all settings for ALL TABS to the original (VSO) settings, looks like you did a first/clean install of the program. There is no way to restore the values/settings to your preferences other then entering them manually again. -OK: Will apply all settings, modified or not, to the project (if started) at Tree View window. Read the pop-up/tooltip boxes thoroughly before deciding! -Cancel: will cancel/not apply any modifications. The behaviour of the 3 buttons is the same for all 11 tabs at Settings sub-window.

59 Chapters Here you enter the basic settings, which are loaded at the start of the application (ConvertXtoDVD) Previous Top Next A chapter is an invisible mark in the video that helps you navigate through the film as you are watching it. Instead of fast-forwarding to a specific point you can jump at intervals, these intervals are chapter points that you can determine here. Note: A maximum of 99 chapters points can be created. Create Chapter every Allow you to automatically insert a chapter every X minutes or seconds. M = minutes, S = seconds If unchecked, no chapters will be added automatically. Always a chapter point will be created at start of file. You can not delete this first one!! In the main interface (Tree View) you can later manually add more chapters at specific places. For titleset longer than Inserts a chapter at the value indicated above only if the video is longer than the specified duration (default set value is 15 minutes). Always a chapter point will be created at start of file. You can not delete this first one!! For example this means that no additional chapters will be added if you would add a video that is only 10 minutes long, e.g. suitable for music video clips. Both settings unchecked A] If you uncheck both settings and use the Add function to make 1 or more Titleset(s), you will end up with a DVD with one or more Title(s) and only a chapter point at start of each Title B] If you uncheck both settings and use the Merge function to make 1(one) Titleset, you will end up with a DVD with a single Title and a chapter point at start of each merged file, were you can jump to, when playing Title, with using next (chapter) button on your remote. You may also set up chapters manually in your project. See More chapter actions topic. For how the DVD should act when played in a stand-alone player, see DVD play options 3] - 8]. Automatic chapter button text naming

60 Here you find how the text will appear for the chapter buttons. With these settings <c> it will show in button: Chapter # 1 The text "Chapter" is modified in this section or at the Tab DVD menus section DVD menu labels. The used variable can be changed as in the list shown. Change the variable between brackets < >. The brackets< and > are not shown in the button. some examples: -Chapter # <c> --> Chapter # 1 -Chapter # <c> of <cc> --> Chapter # 1 of 4 (value of 4 depends on the amount of created chapters) -Whatever <c> --> Whatever 1 You can combine variables in a text line. Note: Important for all Settings Tabs! Buttons At the bottom of the window you have 3 buttons. -Reset to VSO defaults: This will set all settings for ALL TABS to the original (VSO) settings, looks like you did a first/clean install of the program. There is no way to restore the values/settings to your preferences other then entering them manually again. -OK: Will apply all settings, modified or not, to the project (if started) at Tree View window. Read the pop-up/tooltip boxes thoroughly before deciding! -Cancel: will cancel/not apply any modifications. The behaviour of the 3 buttons is the same for all 11 tabs at Settings sub-window.

 leave them all empty (at Settings menu) and set the required option(s) for each project at Tree View.")
61 DVD menus Here you enter the basic settings, which are loaded at the start of the application (ConvertXtoDVD) Previous Top Next On this tab you can specify DVD menu start-up settings for new projects. You will be able to customize the DVD menu options within each project individually as well (see chapter Tree View). I (hansk) leave them all empty (at Settings menu) and set the required option(s) for each project at Tree View. Default template 2] Select here the default template to be used at start-up / for new projects.
 Specify default texts for certain Titles/buttons that may appear in the menu.")

62 If a text label is too large in the menu, then Select how text should be dealt with that is too long to fit into the dedicated area. Possible choices are: DVD menu labels (button text) Specify default texts for certain Titles/buttons that may appear in the menu. Which buttons will actually appear depends on the template used for a project. See Template options. Double-click on the second column to edit the default text to your preference. Click on <Reset to defaults> if the default text is not shown in your language. This button will load the Default text of your language translation file DVD Options (check boxes) Auto-start playback 3] When DVD is inserted, Title menu is skipped and the first title on the DVD is played immediately. If no other options have been set, when finished playing, it returns to the Title menu. Loop playback 4] When the last title of the Title menu listing finishes playing, the first title in the listing will be selected and will play again. In case of more then one title on the DVD and want to have a continues play, you need also to set 5] Play titles one after the other 5] Play the videos titles one after the other (sequentially) without going back to the Title menu. The next title in the Title menu listing is automatically selected and started, when playing of actual selected title has finished. Skip root menu initially 6] When a title is selected from the Title (main) menu, the root menu will be skipped and the title played directly after pressing play / OK on remote.
63 Return to title menu after title playback 7] When a title finishes playing, you are returned to the Title (main) menu instead of the root menu. This option is ignored if there is no Title menu generated (8]). Don t create title menu for single video 8] If there is only one titleset, the title menu will not be generated. This means that the DVD is played immediately after inserted in DVD player. Note: Important for all Settings Tabs! Buttons At the bottom of the window you have 3 buttons. -Reset to VSO defaults: This will set all settings for ALL TABS to the original (VSO) settings, looks like you did a first/clean install of the program. There is no way to restore the values/settings to your preferences other then entering them manually again. -OK: Will apply all settings, modified or not, to the project (if started) at Tree View window. Read the pop-up/tooltip boxes thoroughly before deciding! -Cancel: will cancel/not apply any modifications. The behaviour of the 3 buttons is the same for all 11 tabs at Settings sub-window.
.")
![Format (your local Video Standard) 40] Select your DVD output format here. Not all DVD players can read /play both formats (PAL / NTSC). If you are unsure, select the region you live in.](/docs-images/83/88800886/images/64-1.jpg "Select Automatic to let ConvertXtoDVD use the video standard of the source file. There is a possibility that you can not play the DVD because of wrong Format.")
64 DVD specification Here you enter the basic settings, which are loaded at the start of the application (ConvertXtoDVD) Previous Top Next On this tab you can specify DVD format defaults that will be used for new projects. You will be able to customize video format options within each project individually as well (see chapter Tree view). Format (your local Video Standard) 40] Select your DVD output format here. Not all DVD players can read /play both formats (PAL / NTSC). If you are unsure, select the region you live in. Select Automatic to let ConvertXtoDVD use the video standard of the source file. There is a possibility that you can not play the DVD because of wrong Format. This happens mostly for users in a NTSC region and converting a PAL source file. DVD Resolution (rescale source file to... pixels) 39] This is the converted picture / movie file resolution into it gets "transformed", as pre-selected at Format. Default is Full D1 resolution; you may however change this to a lower resolution to fit more videos onto one disc (will reduce image quality). For example: Left half is Full D1 resolution, right half is SIF resolution.
 41] Allows you to select whether you want the converted video file Aspect ratio to be set automatically or either be full screen (Aspect ratio 4:3) or widescreen format(aspect ratio 16:9).")

65 Select Automatic to let ConvertXtoDVD decide the resolution based on the resolution of the source file. Aspect ratio (make result as..."size") 41] Allows you to select whether you want the converted video file Aspect ratio to be set automatically or either be full screen (Aspect ratio 4:3) or widescreen format(aspect ratio 16:9). Normally, this should be left to Automatic. If Automatic has been selected, the switching point between 4:3 and 16:9 is around a source file aspect ratio of 1.55 Note: Important for all Settings Tabs! Buttons At the bottom of the window you have 3 buttons. -Reset to VSO defaults: This will set all settings for ALL TABS to the original (VSO) settings, looks like you did a first/clean install of the program. There is no way to restore the values/settings to your preferences other then entering them manually again. -OK: Will apply all settings, modified or not, to the project (if started) at Tree View window. Read the pop-up/tooltip boxes thoroughly before deciding! -Cancel: will cancel/not apply any modifications. The behaviour of buttons is the same for all 11 tabs at Settings sub-window.
.")
66 Burning Here you enter the basic settings, which are loaded at the start of the application (ConvertXtoDVD) Previous Top Next Burn result to DVD / as ISO file in working folder If checked, program will burn DVD folder files to DVD after conversion has finished (when a blank DVD has been placed in burner and this type can hold the amount of created "data"). If not checked, the files will be saved in the working folder on your computer. Also you can select between an ISO image or your default burner. You must set ISO image before you start add video file(s) in a new project. Note: The ISO image is not saved as default setting. After you did a conversion to ISO, it will automatic return to your default burner.(vso decision) Set also your burning speed at this section. Recommended speed for Single Layer (DVD-5) is 4x, but do not go faster than half of the rated speed of disc. For Dual Layer (DVD-9) we recommend 2x. Default DVD Label Default text to be used for menu title and name of the disc. Leave empty to use the name of the first video file. Add original files to DVD (if possible) If there is enough free space left on the DVD after conversion, the original container files (avi, mkv) will be added and burned on the disc. A 3rd sub-folder named ORIGINAL is added to the created main folder what already contains AUDIO_TS

67 and VIDEO_TS. External file(s) like.srt and additional audio are not automatically included. Add/copy them manual into the ORIGINAL sub-folder. Only useful if someone else needs to edit the result again. IMO: - Not useful for backup. When this created disk is destroyed / lost, the backup has also gone. - It takes space away for the to be converted movie what will result in a worse quality. Delete folder after successful burn Once the burn is successful, the working DVD folder will be deleted to save hard drive space. Source file (s) is/are not deleted. Note: If you want to burn multiple DVDs from this project, uncheck this option before you begin the conversion. Send burn statistics to VSO online database Will send burn statistics to VSO, requires an internet connection (for more information see installation topic) Do not eject disc nor open explorer at the end of conversion The disc will not be ejected NOR the DVD folder or ISO file will not be opened in your explorer when the conversion is completed. Always erase rewritable disc without warning Always erase an inserted rewritable disc without confirmation warning. SAO options on DVD-R Specifies the burn method for DVD-R media used by ConvertXtoDVD. This should be left to Automatic, unless you have problems burning to DVD-R media. Possible choices are: Note: Important for all Settings Tabs! Buttons At the bottom of the window you have 3 buttons. -Reset to VSO defaults: This will set all settings for ALL TABS to the original (VSO) settings, looks like you did a first/clean install of the program. There is no way to restore the values/settings to your preferences other then entering them manually again. -OK: Will apply all settings, modified or not, to the project (if started) at Tree View window. Read the pop-up/tooltip boxes thoroughly before deciding! -Cancel: will cancel/not apply any modifications. The behaviour of the 3 buttons is the same for all 11 tabs at Settings sub-window.
.")
 when you select")
68 Subtitles Here you enter the basic settings, which are loaded at the start of the application (ConvertXtoDVD) Previous Top Next In this tab you can specify subtitle default settings that will be used at start-up / for new projects. You will be able to customize subtitle options within each project individually as well (at Tree View). Default Subtitle language (identifier) This is the setting for the default language identifier which is assumed for all added subtitle files. For example, if a subtitle file is added it will be tagged with what ever language you select here, meaning you DVD player will display this language abbreviation (identifier) when you select subtitles to play. Text subtitles rendering settings This button opens up the Subtitle Style Editor, proposing advanced subtitle editing possibilities.
69 This screen is explained at Text style Editors chapter, topic Subtitle text editor. Note: Important for all Settings Tabs! Buttons At the bottom of the window you have 3 buttons. -Reset to VSO defaults: This will set all settings for ALL TABS to the original (VSO) settings, looks like you did a first/clean install of the program. There is no way to restore the values/settings to your preferences other then entering them manually again. -OK: Will apply all settings, modified or not, to the project (if started) at Tree View window. Read the pop-up/tooltip boxes thoroughly before deciding! -Cancel: will cancel/not apply any modifications. The behavior of the 3 buttons is the same for all 11 tabs at Settings sub-window.
.")

70 Audio Here you enter the basic settings, which are loaded at the start of the application (convertxtodvd) Previous Top Next On this tab you can specify audio defaults that will be used at start-up / for new projects. You will be able to customize some audio options within each project individually as well (Tree view). Default audio language (identifier) This is the setting for the default language identifier which is assumed for all added audio files. For example, if a audio file is added it will be tagged with what ever language you select here, meaning you DVD player will display this language abbreviation (identifier) when you select audio to play. Convert Audio to format:

71 - Automatic: The automatic setting keeps the same number of channels, and if the source is a stream compatible with DVD, then it is simply copied without any modification (unless there is a sound treatment required, such as audio normalization, Convert DTS to AC-3,...) Automatic will always output a supported DVD formats (PCM, MPEG, AC-3 and DTS), with the same number of channels if it is possible - AC-3, 5.1: Converts audio source stream to AC-3, 5.1 channels even if source contains less or more than 6 channels. When selected, it'll be matrixed and down/up mixed to the 6 channels. - AC-3, 2.0: Converts audio source stream to AC-3, 2 channels. When selected, it'll be matrixed and down/up mixed to the 2 channels. - MPEG: Converts audio source stream to MPEG format, with an output of 1 or 2 channels. If necessary it will be down mixed. Note: To keep DTS(whatever) audio stream, select: Convert audio to format: Automatic Convert DTS to AC-3: Unchecked Audio level: Keep source level(0) Convert DTS to AC-3 In Automatic mode, check this box to convert a DTS (5.1) audio stream to AC-3 which more players can play/support. Otherwise if the source is DTS, you might not be able to hear any sound. Note: To keep DTS audio stream, select: Convert audio to format: Automatic Convert DTS to AC-3: Unchecked Audio level: Keep source level(0) Audio level - normalization Here you select the audio volume level. 4 pre-defined levels and 1 fully customized value. It is recommended to leave this setting as is. If a converted file has low sound then you might want to convert it again selecting a higher level setting. 1 - Selecting [Keep source level(0)] will do a raw copy of the source audio. 2 - Selecting [Soft (Level at 45%)] will give a audio output level of 45% on a scale of Selecting [Soft (Level at 67%)] will give a audio output level of 67% on a scale of Selecting [Soft (Level at 89%)] will give a audio output level of 89% on a scale of Selecting [Custom value ( %)] will give a audio output level of the entered value on a scale of When selecting this, a box will open where you can enter a value between The scale represents this perception:
72 100% means that the sound cannot be louder.(max.) 1% means the sound is almost inperceptible.(min.) 20% is the loudness of elevator music 50% is the loudness of a person's speaking 70% is the loudness of a crowd 90% is the loudness of pop or dance music FM radio and 0% is a reserved value to say that we don't apply any sound level modification.(raw copy) Further technical explanation: The new sound boosting scheme is in fact a function that may both amplify or attenuate the sound. It's more complex than a simple sound normalization or amplification, but the result is way much better. The sound level is constantly adjusted to reflect the human perception of how loud or soft is a sound. So it gives an output sound pressure (target audio level) ranging from -30 to -3 db. If the input sound is louder than the the target sound it is attenuated; if it's softer it is amplified. Note: To keep DTS(whatever) audio stream, select: Convert audio to format: Automatic Convert DTS to AC-3: Unchecked Audio level: Keep source level(0) Do not fix audio discontinuities Normally, ConvertXtoDVD will try to fix discrepancies in the audio stream automatically, in order to avoid video and audio being out of sync. Check this option to disable this automatic fix for new projects. Note: Important for all Settings Tabs! Buttons At the bottom of the window you have 3 buttons. -Reset to VSO defaults: This will set all settings for ALL TABS to the original (VSO) settings, looks like you did a first/clean install of the program. There is no way to restore the values/settings to your preferences other then entering them manually again. -OK: Will apply all settings, modified or not, to the project (if started) at Tree View window. Read the pop-up/tooltip boxes thoroughly before deciding! -Cancel: will cancel/not apply any modifications. The behaviour of the 3 buttons is the same for all 11 tabs at Settings sub-window.
. Regular log files will always be generated whether this option is checked or not.")
73 Encoding Here you enter the basic settings, which are loaded at the start of the application (ConvertXtoDVD) Previous Top Next Log engine messages If checked, allows very technical messages about the engine behavior to appear in log file (for diagnostic purposes). Regular log files will always be generated whether this option is checked or not. Encoding quality/speed If you choose high quality this will take up more space; the encoding process will also take a bit longer. The output quality can be of nearly equal quality as the input but NEVER better than the original AND at max. 720 x 576/480 pixels (make sure to have good sources if you are looking for a good quality displayed image). It is recommended to leave this setting at Medium quality. Most common situation for 1 movie on 1 DVD. For further explanations check out the forum. Target size

74 You can choose your target size DVD-5 (Single Layer, 4.7 GB), DVD-9 (Double Layer, 8.5 GB), or a custom value (in MB). The program will make sure during conversion that the output file size is small enough to fit on the type of target size you selected. On average, about 4 hours of normal compressed video file can be converted and burned on to a DVD-5 without losing significant amount of quality thus keeping Encoding quality at either medium or high. It depends on the source file if the DVD will be fully filled. See message in log file : Video bitrate has been set to maximum possible value for DVD specifications. Target size may not be reached. Note: If you have unchecked the option [ ] Burn result to DVD, and used the target size DVD-9, you can check by looking in the log file if your conversion will even fit on a DVD-5 (cheaper) disc. The storage industry standard is to display capacity in decimal. Even though in binary you have more bytes, the decimal representation of a gigabyte shows greater capacity. In order to accurately understand the true capacity of the medium, you have to know which base unit of measure (binary or decimal) is being used to represent capacity. For DVD has decided to use the Binary Value to tell the capacity of the disc. Two Different Measurements Systems Name Abbreviation Binary Binary Value Decimal Decimal power (represented in power (equivalent) Decimal) kilobyte KB 2exp10 1,024 10exp3 1,000 megabyte MB 2exp20 1,048,576 10exp6 1,000,000 gigabyte GB 2exp30 1,073,741,824 10exp9 1,000,000,000 terabyte TB 2exp40 1,099,511,627,776 10exp12 1,000,000,000,000 As that we can only enter a decimal value, you have to multiply this entered value with the Binary Value Max. capacity: 4380 * 1,073,741,824=4702 MB = 4.7 GB VSO advise: 4300 * 1,073,741,824=4617 MB With this value, the program is sure it can burn a converted project, even if it has gone a little bit over target size (100%+) in case of "wrong" assumption. Conversion priority If you are doing other tasks at the same time on your computer you can set the priority level in which your computer will treat the conversion in order to not slow down your other tasks or to prioritize the conversion instead. Generally, it is best to run ConvertXtoDVD without any background tasks going on. Note: Important for all Settings Tabs! Buttons At the bottom of the window you have 3 buttons. -Reset to VSO defaults: This will set all settings for ALL TABS to the original (VSO) settings, looks like you did a first/clean install of the program. There is no way to restore the values/settings to your preferences other then entering them manually again. -OK: Will apply all settings, modified or not, to the project (if started) at Tree View window. Read the pop-up/tooltip boxes thoroughly before deciding! -Cancel: will cancel/not apply any modifications. The behaviour of the 3 buttons is the same for all 11 tabs at Settings sub-window.
75

![De-interlacing 43] In the case that your original file is interlaced we suggest you check the Deinterlace option in ConvertXtoDVD to have a better result.](/docs-images/83/88800886/images/76-1.jpg "Files coming from TV or DV camcoders may need this process. Video resize method 42] Select how videos will be resized to fill / fit the screen by default.")
76 Video processing Here you enter the basic settings, which are loaded at the start of the application (ConvertXtoDVD) Previous Top Next On this tab you can specify video processing defaults that will be used for new projects. You will be able to customize video options within each project individually as well. De-interlacing 43] In the case that your original file is interlaced we suggest you check the Deinterlace option in ConvertXtoDVD to have a better result. Files coming from TV or DV camcoders may need this process. Video resize method 42] Select how videos will be resized to fill / fit the screen by default. If you don't know what will happen, see link for source file AR 4:3 or source file AR 16:9 what the program will create.
77 will create. Note: Important for all Settings Tabs! Buttons At the bottom of the window you have 3 buttons. -Reset to VSO defaults: This will set all settings for ALL TABS to the original (VSO) settings, looks like you did a first/clean install of the program. There is no way to restore the values/settings to your preferences other then entering them manually again. -OK: Will apply all settings, modified or not, to the project (if started) at Tree View window. Read the pop-up/tooltip boxes thoroughly before deciding! -Cancel: will cancel/not apply any modifications. The behaviour of the 3 buttons is the same for all 11 tabs at Settings sub-window.
.")
78 Sound events Here you enter the basic settings, which are loaded at the start of the application (ConvertXtoDVD) Previous Top Next On this tab you can specify audio files to be played once a specific event has occurred. Play Sound Events Uncheck this option if you do not want to be notified using sound events. Process Completed Is played whenever an operation has been finished (i.e. conversion or burning process is done). Question Is played when the application needs you to make a selection in order to continue. Writable DVD Required Is played when you need to insert a media to burn. Problem Detected Is played when an error or other problem has occurred. Update Available Is played when a newer version is found online. Customize the Sound events You can customize the played events by adding more audio files to the folder. The folder to add to is at: C:\ program files \ VSO \ Common \ Sounds. (XP)
79 Note: Important for all Settings Tabs! Buttons At the bottom of the window you have 3 buttons. -Reset to VSO defaults: This will set all settings for ALL TABS to the original (VSO) settings, looks like you did a first/clean install of the program. There is no way to restore the values/settings to your preferences other then entering them manually again. -OK: Will apply all settings, modified or not, to the project (if started) at Tree View window. Read the pop-up/tooltip boxes thoroughly before deciding! -Cancel: will cancel/not apply any modifications. The behaviour the 3 buttons is the same for all 11 tabs at Settings sub-window.
80
81 Tree View Previous Top Next List of sections in the Tree View. Each section has several sub-menus and are explained separately. DVD options Titleset # Note: Changing settings at Tree View window If you want them always have them as default at starting program, set it at Menu bar, Settings and in the appropriate tab. If you set/change at Tree View, they are only changed for the duration of this actual project. As soon as you close the program, and you start it again, it will load the settings Each red numbered item in the images below is explained in this manual (xx]). Look at the number that interests you and navigate to that section. Check the title of the section in grey bar at top of pages to verify the number that interests you is displayed there. Also move mouse over the items, a tooltip box can appear with some more explicit information for quick reference. Note: Read carefully the text in Tree View (screen) for the item you are looking for. Screen display and picture here might not fully correspond in the logical following.
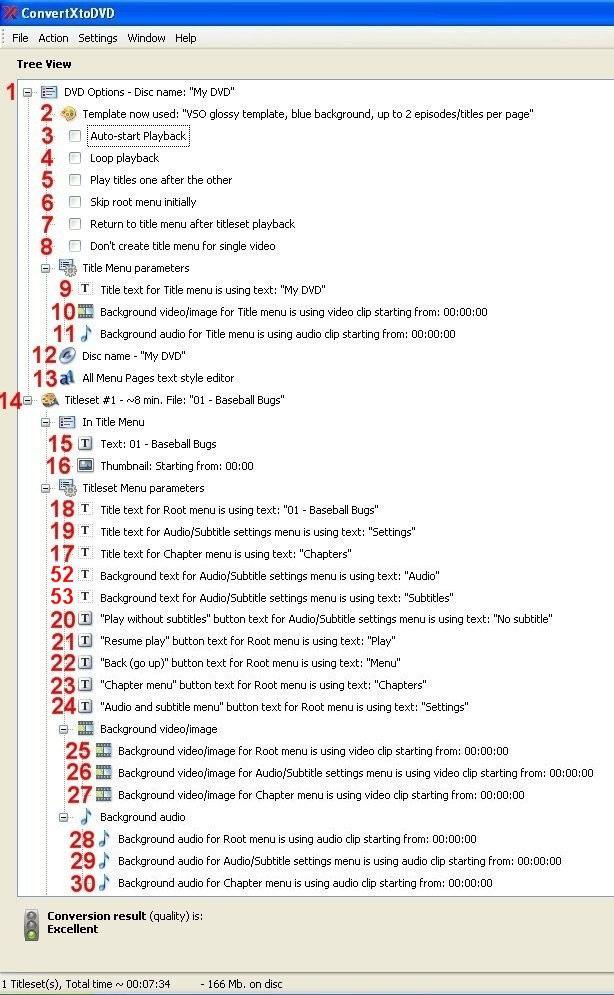
82
83
84 DVD options (1-13) Previous Top Next List of topics in the DVD options section. Each topic is explained separately. DVD options Template now used DVD play options Title text Title menu Title menu Background Video / Image Title menu Background Audio Disc name All Menu Page text style editor
85 1 - DVD options - Disc name -... Changes done at Tree View apply to this whole project. Previous Top Next 1] Here is shown the name of the Disc presented when a DVD is placed in a PC drive. You can edit the disk name by clicking on it. The Disc name (12]) will change accordingly.
![2 - Template now used Changes done at Tree View apply to this whole project. Previous Top Next 2] Here you can change the template used for your project.](/docs-images/83/88800886/images/86-1.jpg "The template selected will be used for all Titleset(s) in this project. You can scroll through the list of available templates.")
86 2 - Template now used Changes done at Tree View apply to this whole project. Previous Top Next 2] Here you can change the template used for your project. The template selected will be used for all Titleset(s) in this project. You can scroll through the list of available templates. Click on the green check-box to apply the template selected to your project. To see more specific the look of each menu for each template, see section Templates with some example views. The look and applied text will be displayed at Video preview window when selecting the belonging (if available for this template) item at Tree View.

87 3-8 - DVD play options - Here you can select how the DVD should behave. Changes done at Tree View apply to this whole project. Previous Top Next 3] Auto-start playback When DVD is inserted, Title menu is skipped and the first title on the DVD is played immediately. If no other options have been set, when finished playing, it returns to the Title menu. 4] Loop playback When the last title of the Title menu listing finishes playing, the first title in the listing will be selected and will play again. In case of more then one title on the DVD and want to have a continues play, you need also to set 5] 5] Play titles one after the other Play the videos titles one after the other (sequentially) without going back to the Title menu. The next title in the Title menu listing is automatically selected and started, when playing of actual selected title has finished. 6] Skip root menu initially When a title is selected from the Title (main) menu, the root menu will be skipped and the title played directly after pressing play / OK on remote. 7] Return to Title menu after titleset playback When a title finishes playing, you are returned to the Title (main) menu instead of the root menu. This option is ignored if there is no Title menu generated (8]). 8] Don t create Title menu for single video If there is only one titleset, the title menu will not be generated. This means that the DVD is played immediately after inserted in DVD player.
88 Title Menu parameters (9-11) Previous Top Next List of topics in the Title Menu parameters section. Each topic is explained separately. Title text in Title menu Title menu Background Video / image Title menu background Audio
89 9 - Title text at title menu Changes done at Tree View apply to this whole project. Previous Top Next 9] Title text for Title menu is using text:... Click to edit the text which will be shown at top of the title menu: 1) Enter the desired title text here 2) Shows if the title text will fit into the assigned text area/field (green = ok, red = text is too long/ large font size) If not changed, it will follow the rules set at DVD menus See example below
90 See example below 3) Text style (pre-defined) to be used for this text / select other text style (down arrow) 4) Click this icon/button to edit text styles (will open the Title / Button text style editor, described in separately topic All Menu Page text style editor 5) Click here to apply your changes. You should see then these changes in the preview window.
91 10 - Title menu background video / image Changes done at Tree View apply to this whole project. Previous Top Next 10] Background video / image for Title menu Click (at Tree View) to edit the background video / image to be used for the title menu (may not be available for all templates): 1) Possible choices: Use a custom file allows selecting a video/image file to be used as background. If you use a image, it should have a size of 720*540 pixels / aspect ratio 4:3, to have no distorted picture.(see menu result at bottom of this page). Remove no background video/image will be used Do not change will use the default setting as defined in the menu template 2) If a video has been selected as background, specify the starting time code to use from the video. Up to 30 seconds(depending on chosen template) of the video will play in loop here as the background from the starting time you indicated. 3) Click here to apply your changes once you are done. You should see then these changes in the preview window. 4) Displays the path/name of the selected video/image file (only if Use a custom file is selected) 5) Specify the opacity for the background video/image (0 = transparent, 100 = opaque)
 Image Source Aspect Ratio: 0.")
92 6) Click this icon/button to browse for an video/image file (only if Use a custom file is selected) Result Resulting Background video / image for Title menu (always 4:3 AR) Image Source Aspect Ratio: 0.75 (portrait) Source Menu background picture
93 Source Menu background picture Image Source Aspect Ratio: 1.0 Source Menu background picture Image Source Aspect Ratio: 1.33 (landscape) Source Menu background picture Image Source Aspect Ratio: 1.78 Source Menu background picture
 to edit the background audio to be used for the title menu (may not be available for all templates): 1) Possible choices:")
94 11 - Title menu background audio Changes done at Tree View apply to this whole project. Previous Top Next 11] Background audio for Title menu Click (at Tree View) to edit the background audio to be used for the title menu (may not be available for all templates): 1) Possible choices: Use a custom file allows selecting an audio file to be used as background audio Remove no background audio will be used Do not change will use the default setting as defined in the menu template 2) If an audio has been selected as background audio, specify the starting time code to use from the audio file. Up to 30 seconds(depending on chosen template) of the audio will play in loop here as audio from the starting time you indicated. See Template options for playing times. 3) Click here to apply your changes once you are done 4) Displays the path/name of the selected audio file (only if Use a custom file is selected) 5) Specify the volume for the audio (0 = minimum, 100 = maximum), playing when this menu is selected
95 6) Click this icon/button to browse for an audio file (only if Use a custom file is selected)
96 12 - Disc name - which disc name should appear when placed in a PC Changes done at Tree View apply to this whole project. Previous Top Next 12] You can select this item to edit. It is there for giving a DVD disc a name when inserted for instance in a DVD drive in your PC. If no name was entered, you would have to guess what is in there. No name would have been shown. By default it is set to "My DVD" (English language selected) Edit the name and confirm. This has only a function when a disc directly afterwards automatically is burned. Option [X] Burn result to DVD must be checked. The entered text will also show up at item 1] at tree View
97 13 - All Menu Page text style editor Changes done at Tree View apply to this whole project. Previous Top Next 13] Here you can set your preferred Menu text style settings for the whole project, which are pre-loaded at start of program. You can edit each item later at Tree View window (if available for the selected template) If you are not satisfied with the chosen selection by VSO, you can edit it. Double-click to open the text style editor for menu items. A sub-window, as shown below, will appear. The green picture at preview depends on the selected Test background. The number of pre-defined styles is determined by the template you have chosen (list of styles is located in drop down box on the top of this image). At most, you can have 5 pre-defined styles those being: title (used for menu titles by default), caption (used for buttons by default), small caption (used for content in the sub menus, i.e. names of subtitles and audio streams available), "settings titles", and "settings caption". For a detailed description of the style editor, please refer to section All Menu Page text editor at Text Style Editors topics. Save settings After each menu text editing, to your preferences, you must save the settings.
98 See section Save settings Menu text at Text Style Editors topics.
99 Titleset # (14-53) Previous Top Next List of topics in the Titleset # menu section. Each topic is explained separately. Edit Titleset name Merge window In Title menu Button text Thumbnail Titleset menu parameters Text Background Video / Image Background Audio Audio Subtitle Chapters Audio settings More Audio actions Subtitle settings More Subtitle actions More chapter actions Chapter text Chapter thumbnail Video (result) Window Video resize method Resolution Format Aspect ratio Video resize method De-interlace Source file info File Video / Audio Video file Audio file File Subtitle
100 In Title menu (15-16) Previous Top Next List of topics in the In Title menu section. Each topic is explained separately. Button text Thumbnail
101 15 - Button Text in Title menu Changes done for this item at Tree View apply only to this Titleset. Previous Top Next 15] Text in Title select button Double-click to specify the text which will be shown in the Title select button in the DVD title menu: 1) Enter the title button name desired here. 2) Shows if the title button name will fit the assigned text area/field for the Title menu with the selected text style chosen at 3 (green = ok, red = too long). If not changed, it will follow the rules set at DVD menus 3) Text style to be used for this displayed item. 4) Click this button to enter All Menu Page text style editor to edit/add text styles. 5) Click here to apply your changes. You should see then these changes in the preview window.
102 16 - Thumbnail (video / image) in Title menu Changes done for this item at Tree View apply only to this Titleset. Previous Top Next 16] Thumbnail video/image at Title select button Edit-click to specify the thumbnail video/image to be used at the title select button for the title menu (may not be available for all templates). The displayed thumbnail in the preview window is just a generic one, the real one will be generated during conversion: 1) Possible choices: Use a custom file allows selecting an video/image file to be used as thumbnail Remove no video/image will be used Use template settings will use the default settings as defined in the menu template 2) If a video has been selected as thumbnail, specify the starting time code to use from the video. Up to 30 seconds of the video will play in loop here as thumbnail from the starting time you indicated. 3) Click here to apply your changes once you are done. You should see then these changes in the preview window. 4) Displays the selected video/image file (only if Use a custom file is selected) 5) Specify the opacity for thumbnail video/image (0 = transparent, 100 = opaque) 6) Click this icon/button to browse for an video/image file (only if Use a custom file is selected)
103 Titleset Menu parameters (17-30, 51, 52) Previous Top Next List of topics in the Titleset Menu parameters section. Each topic is explained separately. Text Background Video / Image Background Audio
104 17-24, 52, 53 - Text - what text appears where Changes done for this item at Tree View apply only to this Titleset. Previous Top Next 17-24] Note: Depending on the template used, some items might not been editable and therefore greyed out. 17] Title text in Chapter menu First select (at Tree View), then click to specify the text which will be shown at top of the Chapter menu: 1) Enter the desired title namehere. 2) Shows if the title name will fit the assigned text area/field for the menu with the selected text style chosen at 3) (green = ok, red = too long) If not changed, it will follow the rules set at DVD menus 3) Text style to be used for this displayed item. 4) Click this button to enter text style editor to edit text styles. 5) Click here to apply your changes. You should see then these changes in the preview window. 25]
105 Explained at Background video/image 28] Explained at Background audio 18] Title text in Root menu First select (at Tree View), then click to specify the text which will be shown at top of the Root menu: 1) Enter the desired title name here. 2) Shows if the title name will fit the assigned text area/field for the menu with the selected text style chosen at 3) (green = ok, red = too long). If not changed, it will follow the rules set at DVD menus 3) Text style to be used for this displayed item. 4) Click this button to enter text style editor to edit text styles. 5) Click here to apply your changes. You should see then these changes in the preview window. 23] Chapter menu button text for Root menu First select (at Tree View), then click to specify the text which will be shown in the button of this menu:
106 1) Enter the desired title name here. 2) Shows if the title name will fit the assigned text area/field for the menu with the selected text style chosen at 3) (green = ok, red = too long). If not changed, it will follow the rules set at DVD menus 3) Text style to be used for this displayed item. 4) Click this button to enter text style editor to edit text styles. 5) Click here to apply your changes. You should see then these changes in the preview window. 24] Audio / Subtitle menu button text for Root menu First select (at Tree View), then click to specify the text which will be shown in the button of this menu: 1) Enter the desired title name here. 2) Shows if the title name will fit the assigned text area/field for the menu with the selected text style chosen at 3) (green = ok, red = too long). If not changed, it will follow the rules set at DVD menus 3) Text style to be used for this displayed item. 4) Click this button to enter text style editor to edit text styles. 5) Click here to apply your changes. You should see then these changes in the preview window. 21] Resume play button text for Root menu First select (at Tree View), then click to specify the text which will be shown in the button of this menu: 1) Enter the desired title name here. 2) Shows if the title name will fit the assigned text area/field for the menu with the selected text style chosen at 3) (green = ok, red = too long). If not changed, it will follow the rules set at DVD menus 3) Text style to be used for this displayed item. 4) Click this button to enter text style editor to edit text styles. 5) Click here to apply your changes. You should see then these changes in the preview window. 22] Back (go up) button text for Root menu First select (at Tree View), then click to specify the text which will be shown in the button of this menu: 1) Enter the desired title name here. 2) Shows if the title name will fit the assigned text area/field for the menu with the selected text style chosen at 3) (green = ok, red = too long). If not changed, it will follow the rules set at DVD menus 3) Text style to be used for this displayed item. 4) Click this button to enter text style editor to edit text styles. 5) Click here to apply your changes. You should see then these changes in the preview window. 26] Explained at Background video/image 29]
107 Explained at Background audio 19] Title text in Audio / Subtitle menu First select (at Tree View), then click to specify the text which will be shown at top of the Audio / Subtitle selection menu: 1) Enter the desired title name here. 2) Shows if the title name will fit the assigned text area/field for the menu with the selected text style chosen at 3) (green = ok, red = too long). If not changed, it will follow the rules set at DVD menus 3) Text style to be used for this displayed item. 4) Click this button to enter text style editor to edit text styles. 5) Click here to apply your changes. You should see then these changes in the preview window. 32] Explained at Audio settings 20] Play without subtitles button text for Audio/Subtitle menu First select (at Tree View), then click to specify the text which will be shown in the button of this menu:
 Text style to be used for this displayed item. 4) Click this button to enter text style editor to edit text styles.")
108 1) Enter the desired title name here. 2) Shows if the title name will fit the assigned text area/field for the menu with the selected text style chosen at 3) (green = ok, red = too long). If not changed, it will follow the rules set at DVD menus 3) Text style to be used for this displayed item. 4) Click this button to enter text style editor to edit text styles. 5) Click here to apply your changes. You should see then these changes in the preview window. 34] Explained at Subtitle settings 27] Explained at Background video/image 30] Explained at Background audio 52, 53] Text in Settings menu for Audio / Subtitle First select (at Tree View), then click to specify the text which will be shown in the Settings menu for Audio / Subtitle:
109 1) Enter the desired title name here. 2) Shows if the title name will fit the assigned text area/field for the menu with the selected text style chosen at 3) (green = ok, red = too long). If not changed, it will follow the rules set at DVD menus 3) Text style to be used for this displayed item. 4) Click this button to enter text style editor to edit text styles. 5) Click here to apply your changes. You should see then these changes in the preview window.
110 25, 26, 27 - Background video / image Changes done for this item at Tree View apply only to this Titleset. Previous Top Next 25] Background video/image for Chapter menu Double-click (at Tree View) to specify the background video/image to be used for the chapter menu (may not be available for all templates): 1) Possible choices: Use a custom file allows selecting an video or image file to be used as background. If you use a image, it should have a size of 720*540 pixels / aspect ratio 4:3, to have no distorted picture.(see menu result at bottom of this page) Remove no background will be used Do not change will use the default setting as defined in the menu template 2) If a video has been selected as background, specify the starting time code to use from the video. Up to 30 seconds(depending on chosen template) of the video will play in loop here as the background from the starting
111 time you indicated. 3) Click here to apply your changes once you are done. You should see these changes in the preview window. 4) Displays the path/name of the selected video/image file (only if Use a custom file is selected) 5) Specify the opacity for the background video or image (0 = transparent, 100 = opaque) 6) Click this button to browse for an video or image file (only if Use a custom file is selected) 26] Background video/image for Root menu Double-click (at Tree View) to specify the background video/image to be used for the Root menu (may not be available for all templates): See above how to edit 27] Background video/image for Audio/Subtitle menu Double-click (at Tree View) to specify the background video/image to be used for the Audio/Subtitle menu (may not be available for all templates):
 Source Menu background picture Image Source Aspect Ratio: 1.")
112 not be available for all templates): See above how to edit Resulting Background video / image for the above menus (always 4:3 AR) Image Source Aspect Ratio: 0.75 (portrait) Source Menu background picture Image Source Aspect Ratio: 1.0 Source Menu background picture
 78 Source Menu background picture")
113 Source Menu background picture Image Source Aspect Ratio: 1.33 (landscape) Source Menu background picture Image Source Aspect Ratio: 1.78 Source Menu background picture
114 28, 29, 30 - Background audio Changes done for this item at Tree View apply only to this Titleset. Previous Top Next 28] Background audio for Chapter menu Double-click (at Tree View) to specify the background audio to be used for the Chapter menu (may not be available for all templates): 1) Possible choices: Use a custom file allows selecting an audio file to be used as background music Remove no background will be used Do not change will use the default setting as defined in the menu template 2) If a audio has been selected as background, specify the starting time code to use from the audio. Up to 30 seconds(depending on chosen template) of the audio will play in loop here as music from the starting time you indicated. 3) Click here to apply your changes once you are done ) Displays the path/name of the selected audio file (only if Use a custom file is selected)
115 4) Displays the path/name of the selected audio file (only if Use a custom file is selected) 5) Specify the volume for the audio (0 = minimum, 100 = maximum) 6) Click this button to browse for an audio file (only if Use a custom file is selected) 29] Background audio for Root menu Double-click (at Tree View) to specify the background audio to be used for the Root menu (may not be available for all templates): See above how to edit 30] Background audio for Audio/Subtitle settings menu Double-click (at Tree View) to specify the background audio to be used for the Audio/Subtitle settings menu (may not be available for all templates):
116 See above how to edit
117 Audio (31-32) Previous Top Next List of topics in the Audio menu section. Each topic is explained separately. Audio settings More Audio actions
![31, 32 - Audio settings Changes done for this item at Tree View apply only to this Titleset. Previous Top Next 31] Audio streams contained (max. 8 streams) in your video file/project are listed here.](/docs-images/83/88800886/images/118-0.jpg "How to know what stream is what language file If you move your mousepointer over the audio stream(s), a tooltip box appears where the file name of this stream is displayed.")
118 31, 32 - Audio settings Changes done for this item at Tree View apply only to this Titleset. Previous Top Next 31] Audio streams contained (max. 8 streams) in your video file/project are listed here. How to know what stream is what language file If you move your mousepointer over the audio stream(s), a tooltip box appears where the file name of this stream is displayed. Setting language identifier and default playing stream Expand the Audio node. ConvertXtoDVD assumes the language identifier to be the one set in the Settings menu -> Audio tab, but you can change this in case it is not correct. Use the language identifier to define how the audio will be labeled in the menu and/or when jumping from one audio file to another by pressing the "audio" button on your DVD remote control. You will see the language identifier text you indicate (in these settings below) on your Television screen. By checking box [ ]Set as default (4) for this stream, in case of more then one stream, will be used for playing at start DVD. Note: If you have only one stream, you do not need to check(tick) the box. If you have more streams, only one(1) can be checked. The text [Default] will appear in front for the selected audio stream.
 Edit here if you want to change the audio output, generated by ConvertXtoDVD. See at Settings, tab Audio for full explanation.")
119 Select/set the language identifier of the stream (use down arrow to open) (1) See at Settings, tab Audio for full explanation. Audio conversion Source --> (2) Edit here if you want to change the audio output, generated by ConvertXtoDVD. See at Settings, tab Audio for full explanation. Audio level - Normalization (3) Edit here if you want to change the audio level, generated by ConvertXtoDVD. Here you select the audio volume level. 4 pre-defined levels and 1 fully customized value. It is recommended to leave this setting as is. If a converted file has low sound then you might want to convert it again selecting a higher level setting. Selecting [Keep source level(0)] will do a raw copy of the source audio. See at Settings, tab Audio for full explanation. 32] You can also change how the audio stream will be labeled in the audio/subtitle settings menu.
120 You can also change how the audio stream will be labeled in the audio/subtitle settings menu. To do so, double-click the stream: Edit the text how you would like it to show up in the menu button 32. Reset to default, will bring it back to original text. If you have a audio file for your video and it does not appear here, you can add it manually, see topic More audio actions.

![Previous Top Next 31] If you right-click on this item, you can add or remove](/docs-images/83/88800886/images/121-1.jpg "a audio stream at this titleset.")

121 31 - More audio settings Changes done for this item at Tree View apply only to this Titleset. Previous Top Next 31] If you right-click on this item, you can add or remove a audio stream at this titleset. You can have maximal 8 Audio streams on a DVD-5 / DVD-9 If you expand this node, then right-click, you can additional edit properties and play audio stream. If you move the mouse on the selected stream, you will see in the pop-up box the name of the audio stream.
122 Subtitle (33-34) Previous Top Next List of topics in the Subtitle menu section. Each topic is explained separately. Subtitle settings More Subtitle actions
 or have been found in external files/project are listed here. (max.")

![Check [ ] Set as default box (2), in case of more then one stream, to use this subtitle stream as default subtitle (DVD player selects automatically this stream for displaying) As the same as](/docs-images/83/88800886/images/123-2.jpg "for audio streams, you can change the language identifier and how the subtitle will be labeled in the menu.")
123 33, 34 - Subtitle settings Changes done for this item at Tree View apply only to this Titleset. Previous Top Next 33] Subtitle streams contained in your video file (internal subtitles) or have been found in external files/project are listed here. (max. 32 streams) How to know what stream is what language file If you move your mousepointer over the subtitle stream(s), a tooltip box appears where the file name of this stream is displayed. Setting language identifier and default playing stream Expand the Subtitle node. Check [ ] Set as default box (2), in case of more then one stream, to use this subtitle stream as default subtitle (DVD player selects automatically this stream for displaying) As the same as for audio streams, you can change the language identifier and how the subtitle will be labeled in the menu. It will also help to navigate your DVD when jumping from one subtitle file to another by pressing the "subtitle" button on your DVD remote control. You will see the language identifier text you indicate (in these settings below) on your Television screen. Select/set the language identifier of the stream (use down arrow to open) (1)
![1 34] You can also change how the subtitle stream will be labeled in the audio/subtitle settings menu.](/docs-images/83/88800886/images/124-0.jpg "To do so, double-click the stream: Edit the text how you would like it to show up in the menu button.")
124 1 34] You can also change how the subtitle stream will be labeled in the audio/subtitle settings menu. To do so, double-click the stream: Edit the text how you would like it to show up in the menu button. Reset to default, will bring it back to original text.
125 If you have a subtitle for your video and it does not appear here, you can add it manually, see More subtitle actions. How does a srt subtitle File look when opened with Notepad Example: 1 00:00:00,000 --> 00:00:00, English, length 31 Arial :00:01,000 --> 00:00:01, English, length 32 Arial :00:02,000 --> 00:00:02, English, length 33 Arial 20
![33 - More subtitle actions Changes done for this item at Tree View apply only to this Titleset. Previous Top Next 33] If you right-click on this selected item, you can add (max.](/docs-images/83/88800886/images/126-0.jpg "32 streams) additional subtitle stream(s) to this titleset or remove the additional added ones. A subtitle stream what comes within a container (avi, mkv), can not be deleted.")
126 33 - More subtitle actions Changes done for this item at Tree View apply only to this Titleset. Previous Top Next 33] If you right-click on this selected item, you can add (max. 32 streams) additional subtitle stream(s) to this titleset or remove the additional added ones. A subtitle stream what comes within a container (avi, mkv), can not be deleted. It can only disabled by unchecking stream(s) at Source file info. Note: Be sure that the subtitle framerate matches with your loaded video file, otherwise you end up with a subtitle what out of sync is. If you have a PAL (25 Fps) video, have a subtitle what has the same framerate. NTSC (29.97 Fps) video needs a subtitle file with Fps. If you want to load automatic a subtitle when adding a video file see topic Automatic load Subtitle
127 Chapters (35-37) Previous Top Next List of topics in the Chapter menu section. Each topic is explained separately. More chapter actions Chapter text Chapter thumbnail

128 35 - More chapter actions Changes done for this item at Tree View apply only to this Titleset. Previous Top Next 35] First method to add chapters To add more chapters, select, right-click on selected item and select Add Chapter. Then enter the start time of the chapter. The new chapter will added at its appropriate place. Remove Select the chapter to remove, right-click and click Remove Chapter. Note: The first chapter can never be removed Note: A maximum of 99 chapter points can be created Note: Depending on the used template, some items might not been editable and therefore greyed out. 35] Second method to add chapters You can add chapters at the Video Preview window as well. Click on "Titleset 1...", your video will appear in the preview window (Move slider from most left position to get always a picture)

129 Use the slider to navigate through the video, and right-click on the cursor to add or remove a chapter. The individual chapters are displayed as little pins ( ) on the timeline. To move the chapter: Hold down the left mouse button on a chapter pin and drag it to move it along the timeline. To add a chapter: Place the cursor where you want to insert the chapter, then click right Note: The first pin (blank) can not be moved or deleted Note: A maximum of 99 chapters points can be created Note: Depending on the used template, some items might not been editable and therefore greyed out.
130 36 - Chapter text Changes done for this item at Tree View apply only to this Titleset. Previous Top Next 36] This section lists the chapters for this titleset that have been created automatically by ConvertXtoDVD based on the Chapters settings. Below is a typical view. The button text is displayed at 36 in below picture. To change Chapter button text in the menu, expand it and double-click the text (blue highlighted). Then it opens the editor.
131 1) Enter the desired Chapter button text here. 2) Shows if the text will fit the assigned text area/field for the menu with the selected text style chosen at 3) (green = ok, red = too long). If not changed, it will follow the rules set at DVD menus 3) Text style to be used for this displayed item. 4) Click this button to enter menu text style editor to edit text styles. 5) Click here to apply your changes. You should see then these changes in the preview window. Note: Depending on the template used, some items might not been editable and therefore greyed out. Note: The maximum amount of chapters is limited to 99

132 37 - Chapter thumbnail Changes done for this item at Tree View apply only to this Titleset. Previous Top Next 37] To change thumbnail display in the menu, expand chapter node and double-click on the thumbnail line. Thumbnail video/image at Title select button Edit-click to specify the thumbnail video/image to be used at the title select button for the title menu (may not be available for all templates). Shown thumbnail is just a generic one, the real one will be generated during conversion:
133 1) Possible choices: Use a custom file allows selecting an video/image file to be used as thumbnail Remove no video/image will be used Use template settings will use the default settings as defined in the menu template 2) If a video has been selected as thumbnail, specify the starting time code to use from the video. Up to 30 seconds of the video will play in loop here as thumbnail from the starting time you indicated. 3) Click here to apply your changes once you are done 4) Displays the selected video/image file (only if Use a custom file is selected) 5) Specify the opacity for thumbnail video/image (0 = transparent, 100 = opaque) 6) Click this icon/button to browse for an video/image file (only if Use a custom file is selected) Note: Depending on the template used, some items might not been editable and therefore greyed out. Note: The maximum amount of chapters is limited to 99
134 Video (result) (38-45) Previous Top Next List of topics in the Video (result) section. Each topic is explained separately. Window Video resize method Resolution Format Aspect ratio Video resize method De-interlace
135 38 - Video resize method Previous Top Next 38] Image resizing and processing options To check and adjust how your video will be displayed on screen, expand a titleset by clicking on the Video and select Choose video resize method. symbol in front of Titleset [Number], and then right-click on The following sub-window will appear: This will be explained at Video resize method.

136 39 - Resolution Changes done for this item at Tree View apply only to this Titleset. Previous Top Next 39] Resolution This is the converted picture / movie file resolution before it gets transformed to the selected Format. Double-click to choose the resolution this title(set) should be converted to. Here is the list of the possible resolutions you can select from. More pixels mean that it has a better "sharpnes"s on display. This also means a bigger file, so less "movie" length will fit on a DVD without decreasing picture quality. Select Automatic to let ConvertXtoDVD decide the resolution based on the resolution of the source file. Selecting Half D1 can be interesting for files originally coming from VHS cassettes.
 You can select out of these 2 options: Select the principle format")
137 40 - Format Changes done for this item at Tree View apply only to this Titleset. Previous Top Next 40] Format Double-click to choose the output Format for your DVD (PAL or NTSC) You can select out of these 2 options: Select the principle format used in your region. Check the manual of your DVD player for the supported format(s).

138 41 - Aspect Ratio Changes done for this item at Tree View apply only to this Titleset. Previous Top Next 41] Aspect ratio Double-click to choose the Aspect ratio for this titleset Select one of the 2 options. Select the desired aspect ratio (AR) for the titleset If you don't know what will happen, see link for 4:3 source file Aspect ratio or 16:9 source file Aspect ratio for examples of what the program will create. Information about your source file can be found at Source file info Video file topic. Click the button to open Video resize method sub-window. Click to find out more information on the Video resize method sub-window

139 42, 43 - Video resize method - Only accessible when a titleset exists Changes done for this item at Tree View apply only to this Titleset. Previous Top Next 42], 43] You can select the video resize method from the drop-down box. It is recommended to leave this setting to Letterbox. If you do need some visual aid / support, select then the TV icon. A sub-window opens. Set video resize method

140 You can resize this sub-window so, that the displayed "movie" will 100% fill the preview area (enable box Show safe area) If you select at Aspect ratio the size/type your TV set has, it will give you the view what will be on the DVD "burned" and seen when playing on a stand-alone DVD player attached to this TV set. Aspect ratio This is how the movie will be "stored/saved/burned on the DVD. Some visuals you will find for 4:3 at Aspect ratio 4:3 versus resize or for 16:9 at Aspect ratio 16:9 versus resize For example: If you have a true 4:3 source file and you select Aspect ratio 4:3, there are no black bars added and so not "burned" within the conversion. The same for source 16:9, selected Aspect ratio 16:9 If you have a true 4:3 source file and you select Aspect ratio 16:9, the left and right added black bars are "burned" within the conversion. If you have a true 2.39:1 source file and you select Aspect ratio 16:9, the top and bottom added black bars are "burned" within the conversion. See DVD specification tab where you can set it as start-up default setting, every time you start a new project/convertxtodvd. Resize method If you click between the different Resize methods (except User-defined) and look in the picture window,you will see what is going to happen with your result (Aspect ratio). Some visuals you will find for 4:3 at Aspect ratio 4:3 versus resize or for 16:9 at Aspect ratio 16:9 versus resize See Video processing tab where you can set it as start-up default setting, every time you start a new project/convertxtodvd. User-Defined resize
 to modify. The same you can do for left and right. Also you can crop the movie by using the crop settings.")
 were it might not be safe to have \"data\" displayed in. Reason: Overscan by CRT TV.")
, selected Aspect ratio and Resize method are applied to this Titleset (also the merged file(s)) or applied to all Titlesets if more than one is added")
141 If you select the User-defined resize, you can set it to whatever size. In this example was pad at top and bottom applied to the video file, a.k.a black bars. Enter a value or use the slider (click blue down arrow to open) to modify. The same you can do for left and right. Also you can crop the movie by using the crop settings.. Symmetric Pad/Crop checked, will link opposite side with the same amount Be aware you might loose the Aspect ratio of the "movie". Safe area If this box checked, will show at preview window, a white "frame" (shade) were it might not be safe to have "data" displayed in. Reason: Overscan by CRT TV. In all cases, if the picture is within the "frame", you are on the safe side, you do not loose anything of the "movie".. Apply settings Depending on the checked box(es), selected Aspect ratio and Resize method are applied to this Titleset (also the merged file(s)) or applied to all Titlesets if more than one is added to your project Move through the selected Titleset 1)You can "scan " through the created titleset by using the time slider. 2) The position of the created chapter points. 3) Source file info (source file picture size - Aspect ratio) 4) The actual time in movie (picture display moment) is shown 5) The actual file name at slider position.in case of merged files, the file name changes to the corresponding file.
142
.")
143 44, 45 - De-interlace Changes done for this item at Tree View apply only to this Titleset. Previous Top Next 44, 45] De-interlace Check this option if the source video is in interlaced format (often applies to TV or camcorder recordings). If you have converted a project and find that the result appears choppy or horizontal movement is distorted like in the image below, convert again with this option enabled. Example of an interlaced file Example of a De-interlaced file See also topic Pulldown for more technical explanation.
144 Source file info (46-51) Previous Top Next List of topics in the Source file info section. Each topic is explained separately. File Video / Audio Video file Audio file File Subtitle
145 File Video / Audio (46-48) Previous Top Next List of topics in the File Video / Audio section. Each topic is explained separately. Video file Audio file
146 47 - Video Source file information Changes done for this item at Tree View apply only to this Titleset. Previous Top Next 47] This section (46])lists all files that belong to this titleset. Expand individual files to display some information about them. The following image shows a video file s information: 47] Most of these are just for informational purposes and cannot be changed. You can change the offset of audio (48]) or video (47]) streams though. This might be required if you converted a project and find that the audio is not in sync with the picture. In such
147 a case you can adjust the audio offset (48]) by selecting the audio stream here, and then click it once again. Use a positive value if audio comes too early or a negative one if it comes too late. The value can be entered by using blue up/down arrow (in steps of 100 ms) or by entering the value in milliseconds (resolution = 1 ms) through the numeric keyboard. If you don't want to include this stream to the conversion, uncheck box in front of stream.
148 48 - Audio Source file information Changes done for this item at Tree View apply only to this Titleset. Previous Top Next 48] This section (46])lists all files that belong to this titleset. Expand individual files to display some information about them. The following image shows a video file s information:
149 Offset Most of these are just for informational purposes and cannot be changed. You can change the offset of audio (48]) or video (47]) streams though. This might be required if you converted a project and find that the audio is not in sync with the picture. In such a case you can adjust the audio offset (48]) by selecting the audio stream here, and then click it once again. Use a positive value if audio comes too early or a negative one if it comes too late. The value can be entered by using blue up/down arrow (in steps of 100 ms) or by entering the value in milliseconds (resolution = 1 ms) through the numeric keyboard. If you don't want to include this stream to the conversion, uncheck box in front of stream. Play Audio If you select the audio stream and right-click, you will be able to play the audio stream and listen if it is there / recognized.
150 49, 50, 51 - Subtitle Source file information Changes done for this item at Tree View apply only to this Titleset. Previous Top Next 49] This section (49]) lists information that belong to this subtitle. Expand individual files to display some information about them. The following image shows a subtitle file's information: Most of these are just for informational purposes and cannot be changed. 50] For.srt subtitle files, you can click on Srt Subtitle text style editor to change the appearance of this subtitle. 51]
151 You can change the offset of.srt subtitle streams though. This might be required if you converted a project and find that the subtitle is not in sync with the video/audio. In such a case you can adjust the subtitle offset by selecting the subtitle stream here, and then click it once again. Use a positive value if subtitle comes too early or a negative one if it comes too late. The value can be entered by using blue up/down arrow (in steps of 100 ms) or by entering the value in milliseconds (resolution = 1 ms) through the numeric keyboard. If you don't want to include this stream to the conversion, uncheck box in front of stream.
152 Templates Basic look of the templates Previous Top Next These listed pages contain a picture / pictures how the lay-out of the official VSO template menus are. Additional you will find an overview of all possible options for each template listed. Black Mirror Champestre Classic CX2 Default Film Image Wall Minimal No Menu Thriller VSO Glossy Xmas Template options and timing
")
 Settings menu (for each Titleset) Black Mirror with Video")
")
153 Black Mirror / Black Mirror with Video See Template options for the supported functions Previous Top Next Black Mirror look (link to available Template options) Title menu (with all Titleset(s) on DVD) Root menu (for each Titleset) Chapters menu (for each Titleset) Settings menu (for each Titleset) Black Mirror with Video look (link to available Template options) Title menu (with all Titleset(s) on DVD) Root menu (for each Titleset) Chapters menu (for each Titleset) Settings menu (for each Titleset)
 Title menu (with all Titleset(s) on DVD) Root menu (for each Titleset)")
 look")
154 Chapters menu (for each Titleset) Settings menu (for each Titleset) Black Mirror (with Chapter text) look (link to available Template options) Title menu (with all Titleset(s) on DVD) Root menu (for each Titleset) Chapters menu (for each Titleset) Settings menu (for each Titleset) Black Mirror with Video (no Chapter text) look (link to available Template options) Title menu (with all Titleset(s) on DVD) Root menu (for each Titleset)
155 Chapters menu (for each Titleset) Settings menu (for each Titleset)
 on DVD) Root menu (for each Titleset) Chapters menu (for each Titleset) Settings menu (for each")
156 Champestre See Template options for the supported functions Previous Top Next Champestre look (link to available Template options) Title menu (with all Titleset(s) on DVD) Root menu (for each Titleset) Chapters menu (for each Titleset) Settings menu (for each Titleset)
 Title menu (with all Titleset(s) on DVD)")
157 Classic See Template options for the supported functions Previous Top Next Classic look (link to available Template options) Title menu (with all Titleset(s) on DVD)
 Title menu (with all Titleset(s) on")
158 CX2 See Template options for the supported functions Previous Top Next CX2 look (link to available Template options) Title menu (with all Titleset(s) on DVD)

 Title menu (with all Titleset(s)")
 Settings")
159 Default See Template options for the supported functions Previous Top Next Default look (link to available Template options) Title menu (with all Titleset(s) on DVD) Root menu (for each Titleset) Chapters menu (for each Titleset) Settings menu (for each Titleset)
 Title")
 Settings menu (for each")
160 Film See Template options for the supported functions Previous Top Next Film look (link to available Template options) Title menu (with all Titleset(s) on DVD) Root menu (for each Titleset) Chapters menu (for each Titleset) Settings menu (for each Titleset)
 Title menu (with all Titleset(s) on")
161 Image Wall See Template options for the supported functions Previous Top Next Image Wall look (link to available Template options) Title menu (with all Titleset(s) on DVD)
 Title menu (with all Titleset(s) on DVD)")
162 Minimal See Template options for the supported functions Previous Top Next Minimal look (link to available Template options) Title menu (with all Titleset(s) on DVD)
163 No Menu See Template options for the supported functions Previous Top Next As what the title says, there is no menu. Set first DVD options 3] - 8] before selecting the No Menu template

 Title menu (with all Titleset(s) on")
 Settings menu (for")
164 Thriller See Template options for the supported functions Previous Top Next Thriller look (link to available Template options) Title menu (with all Titleset(s) on DVD) Root menu (for each Titleset) Chapters menu (for each Titleset) Settings menu (for each Titleset)
 Chapters menu (for each Titleset) Settings menu (for each Titleset) VSO Glossy 3 look (link to available Template options) Title menu (with all Titleset(s) on DVD) Root menu (for each")
165 VSO Glossy See Template options for the supported functions Previous Top Next VSO Glossy 2 look (link to available Template options) Title menu (with all Titleset(s) on DVD) Root menu (for each Titleset) Chapters menu (for each Titleset) Settings menu (for each Titleset) VSO Glossy 3 look (link to available Template options) Title menu (with all Titleset(s) on DVD) Root menu (for each Titleset) Chapters menu (for each Titleset) Settings menu (for each Titleset)
166 Chapters menu (for each Titleset) Settings menu (for each Titleset) VSO Glossy 4 look (link to available Template options) Title menu (with all Titleset(s) on DVD) Root menu (for each Titleset) Chapters menu (for each Titleset) Settings menu (for each Titleset) VSO Glossy 6 look (link to available Template options) Title menu (with all Titleset(s) on DVD) Root menu (for each Titleset)
167 Title menu (with all Titleset(s) on DVD) Root menu (for each Titleset) Chapters menu (for each Titleset) Settings menu (for each Titleset) VSO Glossy 10 look (link to available Template options) Title menu (with all Titleset(s) on DVD) Root menu (for each Titleset) Chapters menu (for each Titleset) Settings menu (for each Titleset)
168 Chapters menu (for each Titleset) Settings menu (for each Titleset)
 Title menu (with all Titleset(s) on DVD) Root menu (for each Titleset) Chapters menu (for each")
")
169 Xmas See Template options for the supported functions Previous Top Next Xmas 2 look (link to available Template options) Title menu (with all Titleset(s) on DVD) Root menu (for each Titleset) Chapters menu (for each Titleset) Settings menu (for each Titleset) Xmas 3 look (link to available Template options) Title menu (with all Titleset(s) on DVD) Root menu (for each Titleset) Chapters menu (for each Titleset) Settings menu (for each Titleset)
 Xmas 4 look (link to available Template options)")
 Titleset)")
170 Chapters menu (for each Titleset) Settings menu (for each Titleset) Xmas 4 look (link to available Template options) Title menu (with all Titleset(s) on DVD) Root menu (for each Titleset) Chapters menu (for each Titleset) Settings menu (for each Titleset)

171 Template options Options available for each VSO supplied template (unmodified) Previous Top Next These pictures can also be found at forum with latest updates. Overview of available template options

172
173

174 Duration of video and/or audio at menus

175
176
177 Text style Editors Previous Top Next List of topics in the Text style Editor section. Each topic is explained separately. All Menu Page text style editor Save settings Menu text style editor Srt Subtitle text style editor Save settings Subtitle text style editor Set Subtitle text position
.")
178 All Menu Page text style editor Previous Top Next Note: The modified settings are only stored in a save(d) project (xxx.xtodvd). Every time you start the program, it will load the default settings for the choosen template at DVD menus, from the template folder (xxx.ini). As long as you do not exit/close the program, it will use these settings for the Title menu. The number of pre-defined styles is determined by the template you have chosen (list of styles is located in drop down box on the top of this image). At most, you can have 5 pre-defined styles those being: title (used for menu titles by default), caption (used for buttons by default), small caption (used for content in the sub menus, i.e. names of subtitles and audio streams available), "settings titles", and "settings caption". The "green" background picture represents here the pre-defined/designated area(box) were the text can be placed. Every text has his own pre-defined/designated area(box) at the menu See example below for at Title menu VSO Glossy 2 template. The white boxes (9. 15)are the approx. area for this template. They vary in size and place depending on the used template.
179 You can edit the text for each area to what you prefer. The number in red refers to the Tree View position Possible "options" for each menu text area: Current Style You can save the default style with the setting you prefer and create additional styles for your subtitles and save them each with a new name. To create a new style, click on the plus button. You will see Copy of default appear on the left, modify this name by clicking on it and entering in the name you would like to call this style. Click on the settings you want to apply to this style. The little arrow button resets all values to their defaults. Font

180 Select the font and font size. If you click on the button Font... you have the option to specify a color in HTML code. For a more complete definition of this please see In this section you can also change the code page. For more information on what Code page is please see The default code page (ANSI Latin 1) is the character set for Western European spoken languages. If you are not sure what Code Page to use please consult this page which identifies different code pages: Colors - "Contrast" Define the color of the text, outline(also called emphasis 1), shadow(also called emphasis 2), and the background for your texts. In the boxes beneath each of these you can modify the transparency of the color applied (0-100: 0 = transparent, 100 = opaque). Color palette for characters Text rendering Define if and how menu text should be wrapped: Evenly distributed text, Top line wider, End of line, No word wrapping, or Bottom line wider. Define character and line spacing, and maximum number of characters to be displayed per line. Text Align Select how to align text in the pre-defined box/area.

181 You must select one of the 9 possibilities. Margin Define left, right, and top/bottom margin on screen (0 being the edge of screen and 535 being to the center of the screen) Shadow directions

182 Define the shadow direction used on text. Select your desired direction by clicking on box. Offset lets you define the space between the characters (black) and the shadow (blue). Use up / down arrows to change value. Watch text on screen what happens. Radius Use up / down arrows to change value. Watch text on screen what happens. Spread Use up / down arrows to change value. Watch text on screen what happens. Opaque box Check Opaque box and a box (somewhat transparent) will be placed around your text. Some prefer this for better readability. Outline Define the thickness of the outline desired. You can check Square outline or not (see difference in images below). Square outline fills more pixels when outlining your text. What is considered the most clear each varies from person to person. Square outline disabled Square outline enabled
183 Misc. formatting Angle You can rotate the text by an angle See text example below for Title #1 button text (15]) Anti-Aliasing Description will later added Multi-line text test zone (1) Space provided for you to type your own text as an example what will show up directly in the preview window. Background (2) Add a Test background image from your hard drive to preview, or change the background color (using arrow).
184 Save settings All Menu Pages text style editor settings Previous Top Next The modified settings are only stored in a save(d) project (xxx.xtodvd). Every time you start the program, it will load the default settings for the selected template at DVD menus, from the template folder (xxx.ini). As long as you do not exit/close the program, it will use these settings for the Title menu. At the moment, there does not exist a function to save the preferred settings in the template.ini. I created a small workaround so you can "easily" use saved pre-settings. Prepare your default settings project(s) Load the DummyProject.XtoDVD from the [All test file] File / folder, found in the created test project subfolder. Customize this DummyProject fully to your preferences (start with 2, then follow project "type" A and then the link to the detailed step-by-step guide, start at section Customize project (step 2)) Save new created project with a by you desired name. Load, customize and convert your created project Load your newly created project. Add the file(s) to the project what you want to be included in the conversion. Delete (the Dummy file) Titleset (#1). Edit the project / text (words) where necessary for the added file(s). The template and text styles used are the ones you did set in this above newly created project. Convert.

185 Subtitle text style editor for SRT subtitles Previous Top Next! Once you have set the preferred settings for this Subtitle stream, you MUST save them!! If you are using SRT subtitles you can modify the following settings to change the appearance of your subtitles. Other subtitle formats already have their styles pre-defined and therefore will not take into account whatever content in this window. Also if you subtitles are in Greek or Thai or in some other character formatting that does not use ANSI-latin 1, make sure to change the code page so that your subtitles are displayed correctly on the converted result. How does a srt subtitle File look when opened with Notepad Example: 1 00:00:00,000 --> 00:00:00, English, length 31 Arial :00:01,000 --> 00:00:01, English, length 32 Arial 20
186 3 00:00:02,000 --> 00:00:02, English, length 33 Arial 20 Current Style You can save the default style with the setting you prefer and create additional styles for your subtitles and save them each with a new name. To create a new style, click on the plus button. You will see Copy of default appear on the left, modify this name by clicking on it and entering in the name you would like to call this style. Click on the settings you want to apply to this style. The little arrow button resets all values to their defaults. Font Arial 20 is used, because this allows to display text lengths of 55 characters per line. A normal created srt subtitle file has 50 characters per line defined. Changing the font / size will result in a different amount of characters what will fit in one line. The amount of characters what will fit in one line is also affected by values set at section Margin.
 is the character set for Western European spoken languages.")
. Use browser for external font (red box). If you click on the button Font... you have the option to specify a color in HTML code.")
187 Select the font and font size (system Font). In this section you can also change the code page. For more information on what Code page is please see The default code page (ANSI Latin 1) is the character set for Western European spoken languages. If you are not sure what Code Page to use please consult this page which identifies different code pages: Use this sub-window to use a "external" font.(non system Font). Use browser for external font (red box). If you click on the button Font... you have the option to specify a color in HTML code. For a more complete definition of this please see Colors - "Contrast" Define the color of the text, outline(emphasis 1), shadow(emphasis 2), and the background for your subtitles. In the boxes beneath each of these you can modify the transparency of the color applied (0-100: 0 = transparent, 100 = opaque). Color palette for characters

 Use the values")

188 Text rendering Define if and how subtitle text should be wrapped: Evenly distributed text, Top line wider, End of line, No word wrapping, or Bottom line wider. Define character and line spacing, and maximum number of characters to be displayed per line. Text Align Select how to align text in the pre-defined box/area for the used template. You must select one of the 9 possibilities. Margin Define left, right, and top/bottom margin on screen (0 being the edge of screen and 535 being to the center of the screen) Use the values determined by the visibility test (1 / 1001) to set the limits for these. A value what is set larger as what can be displayed, will result in additional lines. How to find the line length limit: Go to Font section, click on font size and select the wanted font size(read first the value, normally 20), and see the value recommended in tooltip box. Shadow directions
189 Define the shadow direction used on text. Offset lets you define the space between the characters (black) and the shadow (blue). Use up / down arrows to change value. Watch text on screen what happens. Opaque box Check Opaque box and a box (somewhat transparent) will be placed around your text. Some prefer this for better readability. Outline Size=1(pixel) Size=3(pixels)
190 Size=3(pixels) Define the thickness of the outline desired. You can check Square outline or not (see difference in images below). Square outline fills more pixels when outlining your subtitles. What is considered the most clear each varies from person to person. Square outline disabled Square outline enabled! Once you have set the preferred settings for this Subtitle stream, you MUST save them!! Click on Save settings Subtitle text to see how to save it. Multi-line subtitle test zone (1) Space provided for you to type your own text as an example and see the result directly happening at "preview window". Test Background (2) Add a Test Background image from your hard drive, a supplied Test Background picture from the [All test file] folder or change the background color (via arrow) to preview. If a Test Background picture from the [All test file] folder is choosen, select the picture what matches with the value shown at Tree View, Video -> aspect ratio. 4:3 (off) / 16:9 (on) (3) If checked, preview will be displayed as video would be in widescreen format. Select the value what matches with the value shown at Tree View, Video -> aspect ratio. Safe view (4) Display a frame that shows you the parts of the screen which may not be shown, depending on the amount of overscan done by your TV. For more information, please see Note: If you are having a hard time seeing what each adjustment does, set font of text to 72, and enlarge the preview window. How to save these modified settings, click on Save settings Subtitle text style editor Additional information on subtitles DVD Standard allows only 4 colors for subtitles (and the number 4 includes the background color, so the real amount is 3). What this means is depending on the number of colors you will use in your subtitles you border and shadow may or may not show:
191 Number of colors used in subtitles Border Shadow List of SRT Tags supported The rest of the tags work in pairs with a beginning and an end: Example: Here is <i>text with applied tag</i>text without applied tag Tags are invisible when correctly applied in subtitles. <I> Italic </I> <B> Bold <B/> <U> Underline </U> <S> Strikethrough </S> <Font size = xx > Font Size </font> (replace xx with desired font size) <Font color = xxx > Font color </Font> (Font color is a number in html color code. For a more complete definition of this please see Multiple tags can be applied at once: Type your <u><font color = "#FF0000"><i>text </i></font>here</u> When using these tags, make sure to nest them properly. If you open Tag A then Tag B, you must first close B then A, you cannot close A before B. List of SSA tags supported 1= apply 0 = don t apply {\b1} Bold {\i1} Italic {\u1} Underline {\s1} Strikethrough {\fn} Font name (ex {\fnarial} ) {\fs} Font size (ex {\fs33} ) Multiple tags can be applied at once: {\fs33}type {\u1}{\i1} your subs {\u0} here{\i0} and more
 Start ConvertXtoDVD 3 2) Click [Settings] 3) Click [Subtitle] 4) Click [Subtitle text rendering settings] From here in all cases.")
192 Save SRT subtitle text style editor settings Previous Top Next Procedure how to save my preferred Subtitle style settings for SRT files. Without a file added start here: 1) Start ConvertXtoDVD 3 2) Click [Settings] 3) Click [Subtitle] 4) Click [Subtitle text rendering settings] From here in all cases. 5) Change the settings to your preferences. Do NOT change the current style name. Leave it as [vso default].(all in small characters!!!) Now the "trick" on how to save it: 6) Move mouse-pointer on the text [vso default]. 7) RIGHT-Click on it. A "box" [set as default] appears 8) LEFT-Click in the appearing dropdown "box" [set as default]. THIS IS actually a BUTTON what SETS the "VALUES" AS DEFAULT. It is an weird function. It looks like you must select something BUT it acts as a button. 9) Click [OK] (subtitle editor window) 10) Click [OK] (settings window) 11) Now the settings are saved and the next time you start a new project, it will automatic use these settings (with style name vso default) So, close the program and restart it again if you want these settings applied to the to be created project.. OR click convert to start converting when you entered this editor via Source file info -> Subtitle file -> editor
193
194 Set subtitle text position Previous Top Next When you want a more precise positioning regarding "safe area", use the Test background and the value's retrieved from visibility test. When using Test Background... for set the margins for Subtitle text (srt). For the supplied Test Background picture, see the [All test files] folder found at C:\All test files\test Backgrounds Determination of which picture should be selected. A] Look at 45] what the real Aspect ratio of the Source file is. See at Tree View, Source file info -> Aspect ratio Smaller as 1.55 take value 43. Between 1.55 and 2.1 take value 169. Larger then 2.1 take value 239 B] Depending on the Source file Aspect ratio and your preferred Aspect ratio setting (DVD specification), the program "tells" you what it will use for this project conversion. See 41] Tree View, Video -> aspect ratio. With these 2 values from A and B you can select the corresponding Test Background picture. A B Test Background <1,55 4:3 1_TestBackground... 1,55-2,1 4:3 2_TestBackground... >2,1 4:3 3_TestBackground... <1,55 16:9 4_TestBackground... 1,55-2,1 16:9 5_TestBackground... >2,1 16:9 6_TestBackground... When this is used, set also the Safe area 4:3 (off) / 16:9 (on) accordingly the value from B]. Once done you can adjust the size (horizontal) of the window of the Subtitle text editor till the Test Background picture fills the whole preview window. You can enter some text at Multi-line subtitle test zone to see where it will be placed at the screen with a static background picture matching your source file Aspect ratio. See also settings for Margin. Create test DVD You can make a project / conversion by using a avi sample from what matches as close as possible to your source file Aspect ratio or use a prepared project file. Make your own -Load a file from the below location (C:\All test files\avi files['your Format"] \ Add file(s)) -Load also the belonging Subtitle files. The result will give you a good indication where the text will be aligned on your screen.
195 Log Files view Previous Top Next "Lay-out" / view of a generated Log File. Each view is showed separately. Convert only log Full (conversion + burn) log Convert an already converted project log
196 Convert only log Previous Top Next A typical [Convert without burning] log. The log will always be saved in the English language for standardization / VSO support department :53: ******************** Log session stop :53: PID ******************** :52: ***************** Encoding end ********************** :52:29 Info Total size 492 Mb., Target size DVD Mb., Occupation 11,46% :52:29 Info Conversion completed in 00:06: :52:29 Info Rendering rate: 1,25 x Realtime :52:29 Info DVD duration (incl. menus) 00:08:26 (~ 506 sec.) - rendering time 00:06: :52:14 Info Generated duration 489,24 sec., expected 486,77 sec :51:43 Info P-SDT buffer Underflow 1 times, 443 bytes peak :51:43 Info 2258 frames dropped :49:39 Info Chapter #2 start at 5: :45:43 Info Audio settings: Automatic With DTS -> AC-3 conversion :45:43 Info Output Stream #2 (AUDIO) - ac3, Hz, stereo, s16, 192 kb/s :45:43 Info Output Stream #1 (VIDEO) - mpeg2video, yuv420p, 720x576 [PAR 16:15 DAR 4:3], q=1-31, 9127 kb/s, frame compensation: 29,969 -> 25,00 Fps :45:43 Info Video processing: Fast bilinear resampler (640*464)->(720*556) :45:43 Info Video processing: Pad (Left:0 - Top:10 - Right:0 - Bottom:10) :45:43 Info Chapter sequences require 37,8 Mb. temp space :45: ************ Source file #1 END DETAILS ************ :45:43 Info AUDIO Stream #2 : Audio: mp3, Hz, stereo, s16, 128 kb/s :45:43 Info VIDEO Stream #1 : Video: mpeg4, yuv420p, 640x464 [PAR 1:1 DAR 40:29], 29,97 FPS :45:43 Info Audio/Video file w ith 2 stream(s) - Playback order:1 - Queue: :45:43 Info D:\Films\01 - Baseball Bugs\01 - Baseball Bugs.avi :45: *********** Source file #1 BEGIN DETAILS *********** :45:43 Info Video bitrate has been set to maximum possible value for DVD specifications. Target size may not be reached :45:43 Info Video bitrate 0/9127/9608 Kbps (min/avg/max) :45:43 Info OUTPUT ==> Resolution: FULL D1 [720*576], Format: PAL, Aspect ratio: 4: :45: * :45: ======================= TITLESET #1 ======================= :45: * :45:43 Info 2 Stream(s) found - est. duration 00:07:34.770, reference 00:07: :45:43 Info Opening file "D:\Films\01 - Baseball Bugs\01 - Baseball Bugs.avi" :45:43 Info [ ] Enable multiprocessor support for image resizing :45:43 Info Project size 4,17 Gb. (10,6 Mb. audio - 4,15 Gb. video) :45:43 Info [ ] Don't fix audio gaps :45:43 Info [ ] Engine Log :45:43 Info Encoding quality: High :45: ****************** Encoding begin ******************* :45: **************** Menu settings end ****************** :45:43 Info [ ] Don't create title menu for single video :45:43 Info [ ] Return to title menu after titleset playback :45:43 Info [ ] Skip root menu initially :45:43 Info [ ] Play titles one after the other :45:43 Info [ ] Loop playback :45:43 Info [ ] Auto-start playback :45:43 Info Template: Black Mirror, contains 4 page(s), 18 customizable element(s) :45: *************** Menu settings begin ***************** :45: **************** Burn settings end ****************** :45:43 Info Default speed selected: 4x :45:43 Info BURN: Compatible media types : DVD-R, DVD-RW Seq., DVD-RW RO, DVDRAM, DVD+R, DVD+RW, CD-R, CD-RW, DL DVD+R, DL DVD-R :45:43 Info BURN: Drive has IDE-ATAPI physical interface :45:43 Info BURN: New Drive selected : 1:0:0 - ASUS DRW-1608P3S 1.24 [L] (Ide) :45:43 Info [ ] Delete DVD folder after burn complete :45:43 Info [x] Don't eject disc or open DVD folder in explorer, after burn complete :45:43 Info SAO setting: Automatic :45:43 Info [ ] Add original files to DVD (if possible) :45:43 Info [ ] Burn result to DVD :45: **************** Burn settings begin **************** :45:24 Info 34 Menu templates loaded :45:22 Info BURN: 1 w riter(s) found :45:22 Info BURN: Loaded DLL "C:\Program Files\VSO\ConvertX\3\vso_hw e.dll" [ ] :45:22 Info BURN: Compatible media types : DVD-R, DVD-RW Seq., DVD-RW RO, DVDRAM, DVD+R, DVD+RW, CD-R, CD-RW, DL DVD+R, DL DVD-R :45:22 Info BURN: Drive has IDE-ATAPI physical interface :45:22 Info BURN: New Drive selected : 1:0:0 - ASUS DRW-1608P3S 1.24 [L] (Ide) :45:22 Info BURN: Using Patin-Couffin driver Version 1.37, Internal revision 37 Async. Access mode :45:22 Info Supported instruction set: sse :45:22 Info Tuning Performances for Intel(R) Pentium(R) 4 CPU 3.00GHz w ith 2 logical core(s) :45:22 Info System default language : Nederlands (Nederland)
197 :45:22 Info User default language : Nederlands (Nederland) :45:22 Info Version : :45:22 Info ExeName : C:\Program Files\VSO\ConvertX\3\ConvertXtoDvd.exe :45:22 Info OS : Microsoft Window s XP Professional (build 2600) w ith Service Pack :45: ******************** Log session start :45: PID ********************
198 Full (conversion + burning) log Previous Top Next A typical [Convert with burning] log. The log will always be saved in the English language for standardization / VSO support department :33: ******************** Log session stop :33: PID ******************** :33:38 Info BURN: WRITE SUCCESS: Disc w ritten :33:38 Info BURN: Finalization Time 00:00:25 - Total completion time 00:01: :33:13 Info BURN: Write finished in 00:01:33 - Finalization start here. Avg. burn rate 4, :31:40 Info BURN: Lead-in burning time (ms) :31:39 Info BURN: Write started sectors to w rite :31:39 Info BURN: Init success: DVD+RW :31:39 Info BURN: Writing speed requested x4.0, effective x :31:39 Info BURN: Format completed :31:16 Info BURN: Format start :31:16 Info BURN: Available w rite speed: 4x, 2.4x, :31:16 Info BURN: Media ID: INFODISC-A :31:16 Info BURN: Media type: DVD+RW :31:16 Info BURN: Ultra DMA mode 4 (ATA66) :31:13 Info BURN: Scanned files #7, folder #2 - total size b. (493 Mb.) :31:13 Info BURN: Inserted media type : DVD+RW :31:13 Info BURN: Write started :31: ***************** Encoding end ********************** :31:12 Info Disc name: "My DVD" :31:12 Info Burned folder: "C:\Documents and Settings\Mijn documenten\convertxtodvd\01 - Baseball Bugs\" :30:58 Info BURN: New media (DVD+RW) inserted. Burning layer is ready to w rite :30:56 Info BURN: Compatible media types : DVD-R, DVD-RW Seq., DVD-RW RO, DVDRAM, DVD+R, DVD+RW, CD-R, CD-RW, DL DVD+R, DL DVD-R :30:56 Info BURN: Drive has IDE-ATAPI physical interface :30:55 Info BURN: New Drive selected : 1:0:0 - ASUS DRW-1608P3S 1.24 [L] (Ide) :30:55 Info Total size 492 Mb., Target size DVD Mb., Occupation 11,46% :30:55 Info Conversion completed in 00:06: :30:55 Info Rendering rate: 1,22 x Realtime :30:55 Info DVD duration (incl. menus) 00:08:26 (~ 506 sec.) - rendering time 00:06: :30:40 Info Generated duration 489,24 sec., expected 486,77 sec :30:07 Info P-SDT buffer Underflow 1 times, 443 bytes peak :30:07 Info 2258 frames dropped :28:00 Info Chapter #2 start at 5: :24:01 Info Audio settings: Automatic With DTS -> AC-3 conversion :24:01 Info Output Stream #2 (AUDIO) - ac3, Hz, stereo, s16, 192 kb/s :24:01 Info Output Stream #1 (VIDEO) - mpeg2video, yuv420p, 720x576 [PAR 16:15 DAR 4:3], q=1-31, 9127 kb/s, frame compensation: 29,969 -> 25,00 Fps :24:01 Info Video processing: Fast bilinear resampler (640*464)->(720*556) :24:01 Info Video processing: Pad (Left:0 - Top:10 - Right:0 - Bottom:10) :24:01 Info Chapter sequences require 37,8 Mb. temp space :24: ************ Source file #1 END DETAILS ************ :24:01 Info AUDIO Stream #2 : Audio: mp3, Hz, stereo, s16, 128 kb/s :24:01 Info VIDEO Stream #1 : Video: mpeg4, yuv420p, 640x464 [PAR 1:1 DAR 40:29], 29,97 FPS :24:01 Info Audio/Video file w ith 2 stream(s) - Playback order:1 - Queue: :24:01 Info D:\Films\01 - Baseball Bugs\01 - Baseball Bugs.avi :24: *********** Source file #1 BEGIN DETAILS *********** :24:01 Info Video bitrate has been set to maximum possible value for DVD specifications. Target size may not be reached :24:01 Info Video bitrate 0/9127/9608 Kbps (min/avg/max) :24:01 Info OUTPUT ==> Resolution: FULL D1 [720*576], Format: PAL, Aspect ratio: 4: :24: * :24: ======================= TITLESET #1 ======================= :24: * :24:01 Info 2 Stream(s) found - est. duration 00:07:34.770, reference 00:07: :24:01 Info Opening file "D:\Films\01 - Baseball Bugs\01 - Baseball Bugs.avi" :24:01 Info [ ] Enable multiprocessor support for image resizing :24:01 Info Project size 4,17 Gb. (10,6 Mb. audio - 4,15 Gb. video) :23:59 Info [ ] Don't fix audio gaps :23:59 Info [ ] Engine Log :23:59 Info Encoding quality: High :23: ****************** Encoding begin ******************* :23: **************** Menu settings end ****************** :23:59 Info [ ] Don't create title menu for single video :23:59 Info [ ] Return to title menu after titleset playback :23:59 Info [ ] Skip root menu initially :23:59 Info [ ] Play titles one after the other :23:59 Info [ ] Loop playback :23:59 Info [ ] Auto-start playback :23:59 Info Template: Black Mirror, contains 4 page(s), 21 customizable element(s) :23: *************** Menu settings begin *****************
199 :23: **************** Burn settings end ****************** :23:59 Info Default speed selected: 4x :23:59 Info BURN: Compatible media types : DVD-R, DVD-RW Seq., DVD-RW RO, DVDRAM, DVD+R, DVD+RW, CD-R, CD-RW, DL DVD+R, DL DVD-R :23:59 Info BURN: Drive has IDE-ATAPI physical interface :23:59 Info BURN: New Drive selected : 1:0:0 - ASUS DRW-1608P3S 1.24 [L] (Ide) :23:59 Info [ ] Delete DVD folder after burn complete :23:59 Info [x] Don't eject disc or open DVD folder in explorer, after burn complete :23:59 Info SAO setting: Automatic :23:59 Info [ ] Add original files to DVD (if possible) :23:59 Info [x] Burn result to DVD :23: **************** Burn settings begin **************** :03:30 Info BURN: Media removed. Burning layer not ready to w rite :03:30 Info BURN: New media (DVD+RW) inserted. Burning layer is ready to w rite :03:23 Info 34 Menu templates loaded :03:20 Info BURN: 1 w riter(s) found :03:20 Info BURN: Loaded DLL "C:\Program Files\VSO\ConvertX\3\vso_hw e.dll" [ ] :03:20 Info BURN: Compatible media types : DVD-R, DVD-RW Seq., DVD-RW RO, DVDRAM, DVD+R, DVD+RW, CD-R, CD-RW, DL DVD+R, DL DVD-R :03:20 Info BURN: Drive has IDE-ATAPI physical interface :03:20 Info BURN: New Drive selected : 1:0:0 - ASUS DRW-1608P3S 1.24 [L] (Ide) :03:20 Info BURN: Using Patin-Couffin driver Version 1.37, Internal revision 37 Async. Access mode :03:20 Info Supported instruction set: sse :03:20 Info Tuning Performances for Intel(R) Pentium(R) 4 CPU 3.00GHz w ith 2 logical core(s) :03:20 Info System default language : Nederlands (Nederland) :03:20 Info User default language : Nederlands (Nederland) :03:20 Info Version : :03:20 Info ExeName : C:\Program Files\VSO\ConvertX\3\ConvertXtoDvd.exe :03:20 Info OS : Microsoft Window s XP Professional (build 2600) w ith Service Pack :03: ******************** Log session start :03: PID ********************
200 Burn an already converted project log Previous Top Next A typical [Burn an already converted project] log The log will always be saved in the English language for standardization / VSO support department :03: ******************** Log session stop :03: PID ******************** :02:47 Info BURN: WRITE SUCCESS: Disc w ritten :02:47 Info BURN: Finalization Time 00:00:25 - Total completion time 00:01: :02:21 Info BURN: Write finished in 00:01:33 - Finalization start here. Avg. burn rate 4, :00:48 Info BURN: Lead-in burning time (ms) :00:48 Info BURN: Write started sectors to w rite :00:48 Info BURN: Init success: DVD+RW :00:48 Info BURN: Writing speed requested x4.0, effective x :00:48 Info BURN: Format completed :00:26 Info BURN: Format start :00:26 Info BURN: Available w rite speed: 4x, 2.4x, :00:26 Info BURN: Media ID: INFODISC-A :00:26 Info BURN: Media type: DVD+RW :00:26 Info BURN: Ultra DMA mode 4 (ATA66) :00:23 Info BURN: Scanned files #7, folder #2 - total size b. (493 Mb.) :00:23 Info BURN: Inserted media type : DVD+RW :00:23 Info BURN: Write started :00:22 Info Disc name: "01 - Baseball Bugs" :00:22 Info Burned folder: "C:\Documents and Settings\Mijn documenten\convertxtodvd\01 - Baseball Bugs" :00:17 Info BURN: New media (DVD+RW) inserted. Burning layer is ready to w rite :59:18 Info BURN: Compatible media types : DVD-R, DVD-RW Seq., DVD-RW RO, DVDRAM, DVD+R, DVD+RW, CD-R, CD-RW, DL DVD+R, DL DVD-R :59:18 Info BURN: Drive has IDE-ATAPI physical interface :59:18 Info BURN: New Drive selected : 1:0:0 - ASUS DRW-1608P3S 1.24 [L] (Ide) :53:20 Info 34 Menu templates loaded :53:17 Info BURN: 1 w riter(s) found :53:17 Info BURN: Loaded DLL "C:\Program Files\VSO\ConvertX\3\vso_hw e.dll" [ ] :53:17 Info BURN: Compatible media types : DVD-R, DVD-RW Seq., DVD-RW RO, DVDRAM, DVD+R, DVD+RW, CD-R, CD-RW, DL DVD+R, DL DVD-R :53:17 Info BURN: Drive has IDE-ATAPI physical interface :53:17 Info BURN: New Drive selected : 1:0:0 - ASUS DRW-1608P3S 1.24 [L] (Ide) :53:17 Info BURN: Using Patin-Couffin driver Version 1.37, Internal revision 37 Async. Access mode :53:17 Info Supported instruction set: sse :53:17 Info Tuning Performances for Intel(R) Pentium(R) 4 CPU 3.00GHz w ith 2 logical core(s) :53:17 Info System default language : Nederlands (Nederland) :53:17 Info User default language : Nederlands (Nederland) :53:17 Info Version : :53:17 Info ExeName : C:\Program Files\VSO\ConvertX\3\ConvertXtoDvd.exe :53:17 Info OS : Microsoft Window s XP Professional (build 2600) w ith Service Pack :53: ******************** Log session start :53: PID ********************
201 Command line Previous Top Next Command line options: /fl --> "path of a filelist to convert" /file --> "path to a single file to convert" /auto=true // start the conversion /close or -close // Close the application when conversion is complete /shutdown or -shutdown : Shutdown the computer when conversion is complete /overwrite=true // Will automaticly start the conversion, and overwrite the destination folder if it already exists /Priority=[Value] // If you wish to change the conversion priority, and overwrite your default setting /Priority=1 (Idle) /Priority=2 (Lowest) /Priority=3 (Lower) /Priority=4 (Normal) /Priority=5 (Higher) /Priority=6 (Highest) /Priority=7 (TimeCritical) "C:\PATH-TO-CONVERTXTODVD\ConvertXtoDvd.exe" Project_Name.xToDVD // load a project ( xml format ) this format allows to define any settings ( custom menu etc... ) RUNME.BAT: (Convert multiple saved Projects, close after each conversion, shutdown the PC after the last one) "C:\PATH-TO-CONVERTXTODVD\ConvertXtoDvd.exe" C:\Work\project1.xToDVD /auto=true /Priority=2 /close "C:\PATH-TO-CONVERTXTODVD\ConvertXtoDvd.exe" C:\Work\project2.xToDVD /auto=true /overwrite=true /close "C:\PATH-TO-CONVERTXTODVD\ConvertXtoDvd.exe" C:\Work\project3.xToDVD /auto=true /shutdown --> Of course, every projects has to be prepared in advance <-- RUNME.BAT: (Convert 1 file) "C:\PATH-TO-CONVERTXTODVD\ConvertXtoDvd.exe" /file "C:\Work\filename1.avi" /auto=true /close "C:\PATH-TO-CONVERTXTODVD\ConvertXtoDvd.exe" /file "C:\Work\filename2.avi" /auto=true /close filename1.avi will be converted, and will generate 1 output (AUDIO_TS & VIDEO_TS) filename2.avi will be converted, and will generate a new and different output (AUDIO_TS & VIDEO_TS) than the one above. There will be no menus, no extras since it was not converted using a Project. RUNME.BAT: (Convert 1 filelist / more than 1 file into 1 output) "C:\PATH-TO-CONVERTXTODVD\ConvertXtoDvd.exe" /fl "C:\Work\filelist01.txt" /auto=true /close filelist01.txt D:\Videos\File01.avi D:\Videos\File02.wmv D:\Videos\File03.mkv D:\Videos\File04.mov
202 This will convert all of those files in 1 (one) output (AUDIO_TS & VIDEO_TS) There will be no menus, no extras since it was not converted using a Project. START "C:\PATH-TO-CONVERTXTODVD\ConvertXtoDvd.exe" C:\Work\project1.xToDVD /auto=true /close START "C:\PATH-TO-CONVERTXTODVD\ConvertXtoDvd.exe" C:\Work\project2.xToDVD /auto=true /close will start both at the same time, since it will START 2 instances of ConvertXtoDVD instead of 1 after the other in the above batch files. VT Software wrote an interface, to help you do conversion in batch mode, it's called XtoDVDbot UPDATE: When ConvertXtoDVD v3.00 is released, those new Batch /Commands will be available: /quality=low or /quality=3 // Low Encoding Quality /quality=medium or /quality=2 // Medium Encoding Quality /quality=high or /quality=1 // High Encoding Quality /targetsize=dvd9 - size of a DVD-9 /targetsize=dvd5 - size of a DVD-5 /targetsize=xxxx - size in MB, from 330 to 8500 /preview=true or /preview=1 // Force display of the preview window /preview=false or /preview=0 // Force hide of the preview window /menu="c:\path-to-menu\menu_file.ini" // Use a menu template for conversion /burn=false or /burn=0 - Do not burn the result on DVD /burn=true or /burn=1 - Force burn of the result on DVD /text_resize=[value] // if a text resize is necessary in the menus, how it should be handled /text_resize=prompt or /text_resize=0 - Prompt how the text should be resized (waiting user input) - this is the default /text_resize=reduce or /text_resize=1 - Overflowing text size is reduced automatically (no user input) /text_resize=truncated or /text_resize=2 - Overflowing text is truncated automatically (no user input) /text_resize=ignore or /text_resize=3 - Overflowing text is left as is and may not appear in full (no user input) /text_resize=fail or /text_resize=4 - the encoding is failed (no user input) UPDATE: New command line with v & Above /writer=['a'..'z'] example: /writer=f will preselect the F:\ Writer UPDATE: New command line with v & Above Modified switch
203 example: /writer=iso or set ISO image creation mode The fully qualified ISO image path is also available as soon as it has been computed in the registry, read the STRING value of "HKEY_CURRENT_USER\SOFTWARE\VSO\ConvertXtoDVD\Iso_Image_Path"
204 FAQ Previous Top Next Frequently Asked Questions Q: What does audio discrepancy mean? A: This may appear in the log file during conversion. It is simply a note that the encoding engine makes to itself so that it can treat the file appropriately. It does not me that you with have audio synchronization problems. Let the conversion finish and watch it on your computer before burning if you want to be sure the file is fine before burning it to DVD. Q: How come I do not see my subtitles? A: When watching your DVD on your living room DVD player hit the subtitle button on your remote control for your subtitles to appear. Q: What does unsupported encoder for output stream mean? A: It means that in this version there is no support for the file format that you have added. Future versions of ConvertXtoDVD may support that file format. Check regularly for version updates or contact VSO to inquire about the file format. Q: Can my computer be shutdown automatically after the conversion has finished? A: Yes, open ConvertXtoDVD go to main menu: Action and check Shutdown when finished. Q; Why does nothing show up in the preview window? A: If the preview window is not functioning properly, make sure you have the latest version of Microsoft DirectX installed on your computer. Run Windows Update to obtain latest version of DirectX. Also, if you have 2 versions of ConvertXtoDVD installed you may need to uninstall both of them, reboot, and then just install the one you prefer. Q: How do I burn several copies of the same project? A: First, go into Settings à Burning and disable Delete folder after successful burn. This will leave your converted project files on your hard disk so you can burn additional copies. Please refer to page Burn an already converted project to learn more. Q: I want to add more videos to my project. How do I make them fit? A: Normally, ConvertXtoDVD uses the best quality to encode your videos. To fit more content on a disc, you can lower the encoding resolution for titles in your project. See Settings view section encoding if you want to change the resolution in general. Q: Why does my burned disc not work in my DVD player? A: Please make sure your DVD player is able to read the used disc format (+R, -R, +RW, -RW), not all players are able to read all formats. Try if the burned disc works in your computer. Sometimes changing the recordable brand and/or disc format helps. Q: How do I remove the trial watermark once I bought a license? A: The watermark inserted by the trial version cannot be removed from the DVD. To have your DVD without the watermark, you need to convert your project again, so do not delete your source files once converted by the trial! Q: Why is my system crashing/freezing during conversion? A: The conversion is a very CPU intensive process. If not sufficiently cooled, the processor can overheat, which makes the computer crash. If you experience crashes regularly when converting with ConvertXtoDVD, please check the insides of your computer and remove any dust or dirt that may impede proper cooling. or A:You have not used the default installation directory. You think,you are cleverer. Windows makes only swap files by default at C:\ So once I went into the Control Panel/System section and increased the swap file on C:\ and added another one on the drive I use convertx on which for me was F:\ it works like a charm. No freezing. Q: I have a question not answered here. Where do I get help? A: First, please visit our forum community, where others share their knowledge and tips. Often you will be able to find your answer there quickly:
205 If you could not get help from the forums, or need to contact us directly, please visit the support section of our website:
206 Appendix Previous Top Next List of topics in the Appendix section. Each topic is explained separately. True source file Aspect ratio 4:3 versus resize method True source file Aspect ratio 16:9 versus resize method Full overview of possible conversions Automatic loading of Subtitle What is Pulldown What is Frames dropped & added List of errors Opacity

207 Aspect ratio 4:3 (Result size) with different resize methods applied using 3 common movie sizes (original Aspect ratios) Demonstrates what result will be on final DVD. This could be different as what you might see on your TV. (Depend on DVD player and TV settings) Previous Top Next 4:3 Aspect ratio output selected The images below are have been specially created to demonstrate what parts of the image (of your video file) will be lost or changed (stretched/cropped) depending on the settings applied in the video resize window. The changes are all related to the original aspect ratio of your video file (before conversion). Note: You can find the Aspect ratio of your original added file under the Source file info topic. Case 1: Source file with true Aspect ratio 4:3 Resulting in a compliant DVD video folder (VIDEO_TS) with this "data" in it. (within blue box) Resize: Automatic, Stretch, Letterbox and Pan-scan (It makes no difference what resize method you use.) Picture: Nothing lost, Aspect ratio ok. Full overview. Resize: User-defined
208 Can be any size, good looking or not. YOUR decision. Case 2: Source file with true Aspect ratio 16:9 Resulting in a compliant DVD video folder (VIDEO_TS) with this "data" in it. (within blue box) Resize: Automatic Picture: "Blown up", Aspect ratio ok (not squeezed or stretched), padded and cropped("data" loss) i.e. black bars added on top and bottom to preserve Aspect ratio. Full overview. Resize: Stretch

209 Resize: Stretch Picture: Full screen filled, distorted (Aspect ratio), no "data" loss, image stretched towards top and bottom in order to fill what would have been otherwise black bars. Full overview. Resize: Letterbox Picture: Aspect ratio ok, no "data" loss, only padded black bars at top and bottom of image in order to prevent image distortion, i.e. preserve original aspect ratio. Full overview. Resize: Pan-Scan
210 Resize: Pan-Scan Picture: "Blown up", Aspect ratio ok, cropped.left and right ("data" loss). Full overview. Resize: User-defined Can be any size, good looking or not. YOUR decision. Case 3: Source file with true Aspect ratio 2.39:1 Resulting in a compliant DVD video folder (VIDEO_TS) with this "data" in it. (within blue box) Resize: Automatic Picture: "Blown up", Aspect ratio ok, padded on top and bottom by black bars and cropped on left and right ("data" loss). Full overview.

211 Resize: Stretch Picture: Full screen filled, distorted (Aspect ratio), no "data" loss. Full overview. Resize: Letterbox Picture: Aspect ratio ok, no "data" loss, only padded top and bottom. Full overview. Resize: Pan-Scan
212 Resize: Pan-Scan Picture: "Blown up", Aspect ratio ok, cropped left and right ("data" loss). Full overview. Resize: User-defined Can be any size, good looking or not. YOUR decision. Note: Your television and DVD player can have their own aspect ratio settings and they will override the settings on your burnt DVD. Watch your DVD on your computer to see what the real settings were that were applied to your DVD, if the same DVD is displayed differently on your living room player, then check to change your television and DVD player settings.

213 Aspect ratio 16:9 (Result size) with different resize methods applied using 3 common movie sizes (original Aspect ratios) Demonstrates what result will be on final DVD. This could be different as what you might see on your TV. (Depend on DVD player and TV settings) Previous Top Next 16:9 Aspect ratio output selected The images below are have been specially created to demonstrate what parts of the image (of your video file) will be lost or changed (stretched/cropped) depending on the settings applied in the video resize window. The changes are all related to the original aspect ratio of your video file (before conversion) Note: You can find the Aspect ratio of your original added file under the Source file info topic. Case 1: Source file with true Aspect ratio 4:3 Resulting in a compliant DVD video folder (VIDEO_TS) with this "data" in it. (within blue box) Resize: Automatic Picture: "Blown up", Aspect ratio ok, padded on left and right sides and cropped on top and bottom ("data loss)". Full overview. Resize: Stretch

214 Resize: Stretch Picture: Full screen filled, distorted (Aspect ratio) / image squeezed, no "data" loss. Full overview. Resize: Letterbox Picture: Aspect ratio ok, no "data" loss, only padded on left and right sides. Full overview. Resize: Pan-Scan
215 Picture: "Blown up", Aspect ratio ok, "data" loss, cropped on top and bottom. Full overview. Resize: User-defined Can be any size, good looking or not. YOUR decision. Case 2: Source file with true Aspect ratio 16:9 Resulting in a compliant DVD video folder (VIDEO_TS) with this "data" in it. (within blue box) Resize: ALL It makes no difference what resize method you use. Picture: Nothing lost, Aspect ratio ok. Full overview. Resize: User-defined Can be any size, good looking or not. YOUR decision. Case 3: Source file with true Aspect ratio 2.39:1
 Resize: Automatic Picture: \"Blown up\", Aspect ratio ok, padded on top and bottom and cropped on left and right (\"data\" loss). Full overview.")
216 Resulting in a compliant DVD video folder (VIDEO_TS) with this "data" in it.(within blue box) Resize: Automatic Picture: "Blown up", Aspect ratio ok, padded on top and bottom and cropped on left and right ("data" loss). Full overview. Resize: Stretch Picture: Full screen filled, distorted (Aspect ratio) / image squeezed, no "data" loss. Full overview. Resize: Letterbox
217 Resize: Letterbox Picture: Aspect ratio ok, no "data" loss, only padded on top and bottom. Full overview. Resize: Pan-Scan Picture: "blown up", Aspect ratio ok, "data" loss, cropped left and right. Full overview. Resize: User-defined Can be any size, good looking or not. YOUR decision. Note: Your television and DVD player can have their own aspect ratio settings and they will override the settings on your burnt DVD. Watch your DVD on your computer to see what the real settings were that were applied to your DVD, if the same DVD is displayed differently on your living room player, then check to change your television and DVD player settings.


 How to interpret the pictures Each resize method column")


 The arrow points (triangles) indicate where the borders are")

218 Various resulting conversions from selected Resize method and Aspect ratio. Previous Top Next The following groups of pictures show you the resulting conversion from a certain Video Source Aspect Ratio file, using one of the various resize methods and a DVD specification, Aspect Ratio set to 4:3 or 16:9. Depending on the conversion settings, the picture can become distorted, padded or cropped. Please note that the picture may display slightly different based on the settings of your standalone DVD player and TV. (The below pictures show, what "data" will be available on the disc) How to interpret the pictures Each resize method column shows how the picture looks like. Only the Letterbox column shows the original picture size (without blue bars) of the Video Source Aspect Ratio. Blue bars indicate padded black bars. (Blue is used here for better visibility.) The arrow points (triangles) indicate where the borders are and what part is cropped. The circle indicates the distortion intensity, skewing the original aspect ratio. User defined AR is not shown because it can be any size. Video Source Aspect Ratio: 1.0 DVD AR Letterbox Automatic Pan-Scan Stretch 4:3 16:9 Video Source Aspect Ratio: 1.1 DVD AR Letterbox Automatic Pan-Scan Stretch 4:3


219 16:9 Video Source Aspect Ratio: 1.2 DVD AR Letterbox Automatic Pan-Scan Stretch 4:3 16:9 Video Source Aspect Ratio: 4:3 (1.33) DVD AR Letterbox Automatic Pan-Scan Stretch Display test 4:3 avi 4:3


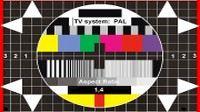


220 16:9 Video Source Aspect Ratio: 1.4 DVD AR Letterbox Automatic Pan-Scan Stretch 4:3 16:9 Video Source Aspect Ratio: 1.5 DVD AR Letterbox Automatic Pan-Scan Stretch 4:3 16:9 Video Source Aspect Ratio: 1.6


")
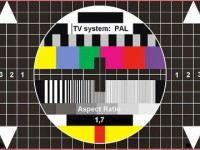


221 DVD AR Letterbox Automatic Pan-Scan Stretch 4:3 16:9 Video Source Aspect Ratio: 1.7 DVD AR Letterbox Automatic Pan-Scan Stretch 4:3 16:9 Video Source Aspect Ratio: 16:9 (1.78) DVD AR Letterbox Automatic Pan-Scan Stretch 4:3


222 16:9 Display test 16:9 avi Video Source Aspect Ratio: 1.9 DVD AR Letterbox Automatic Pan-Scan Stretch 4:3 16:9 Video Source Aspect Ratio: 2.0 DVD AR Letterbox Automatic Pan-Scan Stretch 4:3


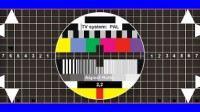
223 16:9 Video Source Aspect Ratio: 2.1 DVD AR Letterbox Automatic Pan-Scan Stretch 4:3 16:9 Video Source Aspect Ratio: 2.2 DVD AR Letterbox Automatic Pan-Scan Stretch 4:3 16:9 Video Source Aspect Ratio: 2.3


224 DVD AR Letterbox Automatic Pan-Scan Stretch 4:3 16:9 Video Source Aspect Ratio: 2.39 DVD AR Letterbox Automatic Pan-Scan Stretch 4:3 16:9
225 Automatic load Subtitle Previous Top Next Automatic loading of subtitle file(s) It is possible to automatically load additional subtitle file(s) (max. 32 streams) when adding video file(s). To get this feature working, the names of the additional files should meet the listed specifications below: For example: Name video: Name subtitle1: Name subtitle2: Name subtitle3: MyMovie.avi MyMovieFR.srt ENGmymovie.srt MyMovie.srt -The bold text, in this case Mymovie, should appear in the to be added file(s). It is not case sensitive. Do not have extra spaces. -It may start or end with it See some examples. You will understand why, when you work with/edit the Subtitle at Tree View. -The files must be located in the same folder as the movie file. Note: Be sure that the subtitle framerate matches with your loaded video file, otherwise you end up with a subtitle what out of sync is. If you have a PAL (25 Fps) video, have a subtitle what has the same framerate. NTSC (29.97 Fps) video needs a subtitle file with Fps.
226 Scanning methods interlace + progressive, Framerate, and Pulldown Previous Top Next Definitions and Explanation of various video concepts From the book How Video Works. by: Marcus Weise Diana Weynand Quote: Progressively Segmented Frames HDTV standards can use either of the two scanning modes, interlace or progressive. When a high def standard uses an interlace mode, the odd fields are transmitted first, followed by the even fields, just as they are in SDTV. In progressive scanning, the entire image is scanned as one complete frame. This data may then be transmitted as a complete frame and received as a complete frame. If there is insufficient bandwidth to transmit the complete frame, the data may be segmented and transmitted in two parts. Because progressively scanned images are complete frames of video, they require more bandwidth to transmit than may be available. To transmit these images within an interlace environment using narrower bandwidths, a process of segmenting progressively scanned frames was developed. To do this, the image is divided into two fields by scanning every other line as in interlace scanning. The difference is that in the interlace scanning process, the two fields are from different instances in time. When a progressively scanned image is segmented, the two fields are from the same instance in time. When the separate fields are recombined, the result is a complete progressively scanned frame (Figure 13.3). This process accommodates the need to segment the data without compromising the quality of the image. Images that are progressively scanned and then transmitted as segmented frames are referred to as PsF, for Progressively segmented Frames."

227 Interlace and Progressive Scan Modes Interlace scanning is the process of splitting a frame of video into two fields. One field of video contains the odd lines of information while the other contains the even lines of the scanned image. When played back, the two fields are interlaced together to form one complete frame of video. Where television uses an interlace scanning process, the computer uses a non-interlaced or progressive scanning technique. Computer image screens can be refreshed as rapidly as 72 times a second. Because this rate is faster than the persistence of vision, the problem of flicker is eliminated. Therefore, there is no need to split the frame into two fields. Instead, the image is scanned from top to bottom, line by line, without using an interlacing process. The complete frame is captured or reproduced with each scan of the image (Figure 12.3). Progressively scanned images have about 50% greater apparent clarity of detail than an equivalent interlaced image. The progressively scanned image holds a complete frame of video, whereas an interlaced frame contains images from two moments in time, each at half the resolution of the full frame. The computer industry has always insisted on a far more detailed and higher quality image than has been used in the television industry. Computer images usually require very fine detail and often include a great deal of text that would be unreadable on a standard television screen. Present television images do not require the same degree of detail as computer information. In a digital environment,

228 the limiting factor is enough bandwidth to transmit the information. Interlace scanning allows more information to be transmitted in the limited spectrum of space allotted for signal transmission. When listing the criteria for a particular standard, the indication of whether the scanning mode is interlaced or progressive appears as an "i" or "p" following the line count, such as 480p, 720p, 1080i, and so on. Frame Rate Within the HDTV set of standards, there are numerous frame rates. The frame rates are part of a set of criteria that defines a particular HDTV standard. Each set of criteria was defined because of specific requirements within an existing physical environment. For example, North American electrical systems use 60-cycle alternating current, while European electrical systems use 50-cycle alternating current. In addition, one of the major forms of image creation has been film. Film runs at 24 fps in North America and 25 fps in Europe. To minimize the difficulty in incorporating film into HDTV, a set of criteria was developed to accommodate the film frame rate. A different HDTV standard was created with a specific set of criteria based on the ease with which the new standard would interface with an existing system. Therefore, two of the many HDTV standards include 24fps and 25fps. Film-to-Tape Conversion
229 There are many situations when film is transferred to HDTV, or HDTV to film. Film is often used as an archival medium because the film standard has not changed in generations. When film is used as the originating medium but the delivery requirement is video, film must go through a conversion process. Converting film to an electronic form is often referred to as telecine, which can also refer to the machine used in the conversion process. In PAL systems, the existing video frame rate matches the 25 fps film rate, and the conversion process is simply a matter of converting from one medium to the other. However, in the NTSC system, where the video frame rate of 30 fps does not match the film rate of 24 fps, a different conversion process must take place. Converting Different Frame Rate Sources Whether the need for conversion is from film to video or video to video, the HDTV 24 fps standard makes video and film more compatible with each other, especially in the United States where film is shot at 24 fps. However, to create 30 images per second in video from a source producing 24 images per second, additional video fields are added. This is done by duplicating images from the 24 fps source. The process of adding additional fields to create additional frames is known as a 2:3 pulldown system or sometimes as a 3:2 pulldown system. The 2:3 or 3:2 pulldown process is used when 24 frames per second progressive scan video, used in image capture, must be converted to 30 fps for either editing or transmission. It is also used when transferring 24 fps film to 30 fps video. When transferring 24 frame per second film or video into a 30 frame per second video system, it is essential to decide which sequence will be used, 2:3 or 3:2, and then maintain that sequence. Using 2:3 and 3:2 Pulldown Sequences When transferring 24 frames per second in a 2:3 sequence, the system will map four frames from the original source to every five frames, or ten fields, to the transfer source. The first frame that is transferred is referred to as the A frame. It is transferred, or pulled down, to two video fields. The second frame is referred to as the B frame and is transferred to the next three consecutive video fields. The third film frame, the C frame, is transferred to the next two consecutive video frames. And the fourth frame, the D frame, is transferred to the next three consecutive video frames (Figure 13.4). The resulting transfer process yields five video frames for every four original 24 fps source frames. Video frame 1 and video frame

230 2 are each derived from two separate film frames, A and B. Video frame 3, however, is a composite of one field from film frame B and one field from film frame C. Video frame 4 is also a composite composed of one field from film frame C and one field from film frame D. Video frame 5 is composed of two fields, both from film frame D. When scanning through video images that have been transferred using this process, the video frames that contain two different frames will appear as a double image. When these frames are viewed in motion, however, the double image is not discernable. When editing video that has been transferred from film using this pulldown process, the sequence of frames must be maintained. If the sequence of video frames is broken, for example by editing two combination frames consecutively, the resulting conflict of images will be discernable when displayed in motion. When the pulldown sequence is changed to 3:2, the resulting frames yield a different result. The five video frames would be AA AB BC CC DD (Figure 13.5). Here the second and third frames are composite, rather than the third and fourth. In the 3:2 sequence there is one clean frame followed by two composite frames followed

231 by two clean frames. Therefore when converting 24 fps to 30 fps, it is essential that one of these processes is applied consistently so the order of clean and composite frames will be maintained. Maintaining Consistency in Pulldown Sequences Just as the pulldown sequence must remain constant, so should the transfer process. Once the transfer of a scene or section has begun, it is essential the transfer be completed without stopping. If the transfer is stopped and then restarted in a single scene or sequence, the system will assume the first frame again is an A frame and begin the sequence from there. Later, when attempting to edit this sequence together in video, it is very possible that the frame sequence will have been broken and the edited version will contain overlapped images from incompatible frames. The result could be a stutter or jump in the images. Quote end. During the film or video transfer process, as the footage is digitized into the video system, a computer file can be created that will indicate where the associated composite frames are for each section. The added fields can also be seen and identified by scrolling through the video a field at a time. With a correctly compiled computer file, it is possible for a video system to extract and recombine the overlapping fields to create a clean 24 fps sequence from the 30 fps 2:3 or 3:2 pulldown sequence created in the video transfer. The process will discard the redundant fields used to create the 30 fps video from the original 24 fps material. This process is referred to as inverse telecine. Recreating the original material is complex and can only be done in an uncompressed video stream. Source info: How Video Works Second edition by: Marcus Weise Diana Weynand Publisher: Elsevier, 2007
232 Frames dropped & added (timecode) Previous Top Next Frames dropped / added From the book How Video Works. Quote: Non-Drop-Frame and Drop-Frame Timecode When timecode was created, video was still monochromatic and ran at an exact 30 fps. With the advent of color in analog video, the scanning frequency slowed video to fps. In other words, it takes more than 1 second to scan a full 30 frames. In fact, it takes 1.03 seconds to scan 30 frames of color video. The original timecode labeling system still applied, but because of the slower rate of color video, there was a difference between actual clock time and the timecode reference of time. If every color video frame was numbered sequentially with the original 30 fps timecode, at the end of an hour the timecode would read 59 minutes, 56 seconds, and 12 frames, or 3 seconds and 18 frames short of an hour, even though the program ran a full hour. There are fewer frames per second and thus fewer frames in an hour. Broadcast programs have to be an exact length of time in order to maintain a universal schedule. In order to allow timecode to be used as a reference to clock time for color video, SMPTE created a new method of timecoding that made up for the 3 seconds and 18 frames, or 108-frame difference. It was determined that numbers should be dropped from the continuous code by advancing the clock at regular intervals. By doing this, there would be an hour's duration in timecode numbers at the end of an hour's worth of time. The specific formula SMPTE created began by advancing the clock by two frames of timecode numbers each minute, except every tenth minute (10, 20, 30, and so on). By advancing 2 frames on every minute, a total of 120 frames, or 12 more than the 108 frames needed, would be dropped. But 2 frames dropped from every minute except the tens of minutes would be 54 minutes 2 frames per minute, which equals 108 frames, accounting for the necessary amount of frames to identify a true clock time period. SMPTE named the new alternative method of time coding color video drop-frame timecode in reference to its process. Drop-frame timecode is sometimes referred to as time of day or TOD, timecode. The original 30 fps continuous code was subsequently termed non-drop-frame timecode (Figure 18.2). In drop-frame timecode, the timecode is always advanced by skipping the first two frame numbers of each minute except every tenth minute. For example, the numbering sequence would go from 1:06:59:29 on one frame to 1:07:00:02 on the very next frame (see Figure 18.2). The two frame numbers that are skipped are 1:07:00:00 and 1:07:00:01. At the tenth minute, no numbers are skipped. The numbering sequence at each tenth minute would go from, for example, 1:29:59:29 on one frame to 1:30:00:00 on the next.
233 A convention is followed when working with timecode numbers that helps to identify whether they represent drop-frame or nondrop-frame timecode. If the punctuation before the frames value is a semi-colon, such as 1:07:00;00, it is drop-frame timecode. If there is a colon dividing the frames, such as 1:07:00:00, it is nondrop-frame timecode. Like non-drop-frame timecode, drop-frame timecode leaves no frames of video unlabeled, and no frames of picture information are deleted. The numbers that are skipped do not upset the ascending order that is necessary for some editing systems to read and cue to the timecode. At the end of an hour's worth of material, there will be an hour's duration reflected in the timecode number as well. Drop-frame timecode has been adopted for longer format programs where it is necessary to account for a specific amount of time. Many shorter programs and commercials use non-drop frame timecode because the difference in the frame count is insignificant. For example, a 1-minute commercial will show a 2-frame difference between its actual length and the timecode numbers, if it is using non-drop frame timecode. A 10-minute program will show an 18-frame difference, or a little over a half second. However, the 3:18 frame difference in a 1-hour program would be too big a discrepancy to be tolerated within a broadcast environment. Timecode at 24 Frames Per Second While the terms 24 fps and 30 fps are used for convenience, the true frame rates that most systems use are fps and fps respectively. SMPTE timecode for video runs at the same frame rate the video does, fps in drop-frame timecode mode. Timecode used in the 24 fps video system runs at fps, also referred to as There are no drop-frame or non-drop-frame modes in a 24 fps system because there are no conflicting monochrome versus color frames rates as there were in the original video systems developed by the NTSC. As a single frame rate is decided upon and the synchronization is fixed, a timecode system is developed to keep clock accurate time. Had the original NTSC system started with color, the timecode system developed simultaneously would have eliminated the need for more than one type of timecode. This alteration in the frame rate from 24 fps to fps was necessary to simplify the 24 fps to 30 fps conversion. Without it, converting true 24 fps images and timecode to the existing frame rate in video would be much more complex. When converting 24 fps film or HD to 30 fps video, the additional timecode numbers are added as the additional frames are added. When transferring the other way, from 30 fps to 24 fps, the additional numbers are deleted and the timecode is resequenced as the additional fields and frames are deleted.
234 Quote end. Source info: How Video Works Second edition by: Marcus Weise Diana Weynand Publisher: Elsevier, 2007

.")
235 How a CD / DVD works Previous Top Next How CD Burners Work (a DVD works the same but with smaller "tracks") by Tom Harris The information below is copied and pasted from the link above: CD Basics: The Bumps A CD has a long, spiraled data track. If you were to unwind this track, it would extend out 3.5 miles (5 km). If you've read How CDs Work, you understand the basic idea of CD technology. CDs store music and other files in digital form -- that is, the information on the disc is represented by a series of 1s and 0s (see How Analog and Digital Recording Works for more information). In conventional CDs, these 1s and 0s are represented by millions of tiny bumps and flat areas on the disc's reflective surface. The bumps and flats are arranged in a continuous track that measures about 0.5 microns (millionths of a meter) across and 3.5 miles (5 km) long. To read this information, the CD player passes a laser beam over the track. When the laser passes over a flat area in the track, the beam is reflected directly to an optical sensor on the laser assembly. The CD player interprets this as a 1. Reflected When the beam passes over a bump, the light is bounced away from the optical sensor. The CD player recognizes this as a 0. Deflected / Bounced away A CD player guides a small laser along the CD's data track. In conventional CDs, the flat areas, or lands, reflect the light back to the laser assembly; the bumps deflect the light so it does not bounce back. Understanding the CD: Bumps
 Looking through the polycarbonate layer at the bumps, they look something like this: You will often read about \"pits\" on a CD instead of bumps.")
 long!")
236 The elongated bumps that make up the track are each 0.5 microns wide, a minimum of 0.83 microns long and 125 nanometers high. (A nanometer is a billionth of a meter.) Looking through the polycarbonate layer at the bumps, they look something like this: You will often read about "pits" on a CD instead of bumps. They appear as pits on the aluminum side, but on the side the laser reads from, they are bumps. The incredibly small dimensions of the bumps make the spiral track on a CD extremely long. If you could lift the data track off a CD and stretch it out into a straight line, it would be 0.5 microns wide and almost 3.5 miles (5 km) long! Reading CDs In the last section, we saw that conventional CDs store digital data as a pattern of bumps and flat areas, arranged in a long spiral track. The CD fabrication machine uses a high-powered laser to etch the bump pattern into photoresist material coated onto a glass plate. Through an elaborate imprinting process, this pattern is pressed onto acrylic discs. The discs are then coated with aluminum (or another metal) to create the readable reflective surface. Finally, the disc is coated with a transparent plastic layer that protects the reflective metal from nicks, scratches and debris. The different layers of a conventional CD As you can see, this is a fairly complex, delicate operation, involving many steps and several different materials. Like most complex manufacturing processes (from newspaper printing to television assembly), conventional CD manufacturing isn't practical for home use. It's only feasible for manufacturers who produce hundreds, thousands or millions of CD copies. Consequently, conventional CDs have remained a "read only" storage medium for the average consumer, like LPs or conventional DVDs. To audiophiles accustomed to recordable cassettes, as well as computer users who were fed up with the limited memory capacity of floppy disks, this limitation seemed like a major drawback of CD technology. In the early '90s, more and more consumers and professionals were looking for a way to make their own CD-quality digital recordings. Writing CDs In response to this demand, electronics manufacturers introduced an alternative sort of CD that could be encoded in a few easy steps. CD-recordable discs, or CD-Rs, don't have any bumps or flat areas at all. Instead, they have a smooth reflective metal layer, which rests on top of a layer of photosensitive dye. When the disc is blank, the dye is translucent: Light can shine through and reflect off the metal surface. But when you heat the dye layer with concentrated light of a particular frequency and intensity, the dye turns opaque: It darkens to the point that light can't pass through.

237 A CD-R doesn't have the same bumps and lands as a conventional CD. Instead, the disc has a dye layer underneath a smooth, reflective surface. On a blank CD-R disc, the dye layer is completely translucent, so all light reflects. The write laser darkens the spots where the bumps would be in a conventional CD, forming non-reflecting areas. By selectively darkening particular points along the CD track, and leaving other areas of dye translucent, you can create a digital pattern that a standard CD player can read. The light from the player's laser beam will only bounce back to the sensor when the dye is left translucent, in the same way that it will only bounce back from the flat areas of a conventional CD. So, even though the CD-R disc doesn't have any bumps pressed into it at all, it behaves just like a standard disc. A CD burner's job, of course, is to "burn" the digital pattern onto a blank CD. In the next section, we'll look inside a burner to see how it accomplishes this task. Erasing CDs In the last section, we looked at the most prevalent writable CD technology, CD-R. CD-R discs hold a lot of data, work with most CD players and are fairly inexpensive. But unlike tapes, floppy disks and many other data-storage mediums, you cannot re-record on CD-R disc once you've filled it up. CD-RW discs have taken the idea of writable CDs a step further, building in an erase function so you can record over old data you don't need anymore. These discs are based on phase-change technology. In CD-RW discs, the phase-change element is a chemical compound of silver, antimony, tellurium and indium. As with any physical material, you can change this compound's form by heating it to certain temperatures. When the compound is heated above its melting temperature (around 600 degrees Celsius), it becomes a liquid; at its crystallization temperature (around 200 degrees Celsius), it turns into a solid. In a CD-RW disc, the reflecting lands and non-reflecting bumps of a conventional CD are represented by phase shifts in a special compound. When the compound is in a crystalline state, it is translucent, so light can shine through to the metal layer above and reflect back to the laser assembly. When the compound is melted into an amorphous state, it becomes opaque, making the area non-reflective.
238 Phase-change Compounds In phase-change compounds, these shifts in form can be "locked into place": They persist even after the material cools down again. If you heat the compound in CD-RW discs to the melting temperature and let it cool rapidly, it will remain in a fluid, amorphous state, even though it is below the crystallization temperature. In order to crystallize the compound, you have to keep it at the crystallization temperature for a certain length of time so that it turns into a solid before it cools down again. In the compound used in CD-RW discs, the crystalline form is translucent while the amorphous fluid form will absorb most light. On a new, blank CD, all of the material in the writable area is in the crystalline form, so light will shine through this layer to the reflective metal above and bounce back to the light sensor. To encode information on the disc, the CD burner uses its write laser, which is powerful enough to heat the compound to its melting temperature. These "melted" spots serve the same purpose as the bumps on a conventional CD and the opaque spots on a CD-R: They block the "read" laser so it won't reflect off the metal layer. Each non-reflective area indicates a 0 in the digital code. Every spot that remains crystalline is still reflective, indicating a 1. The Erase Laser As with CD-Rs, the read laser does not have enough power to change the state of the material in the recording layer -- it's a lot weaker than the write laser. The erase laser falls somewhere in between: While it isn't strong enough to melt the material, it does have the necessary intensity to heat the material to the crystallization point. By holding the material at this temperature, the erase laser restores the compound to its crystalline state, effectively erasing the encoded 0. This clears the disc so new data can be encoded. CD-RW discs do not reflect as much light as older CD formats, so they cannot be read by most older CD players and CD-ROM drives. Some newer drives and players, including all CD-RW writers, can adjust the read laser to work with different CD formats. But since CD-RWs will not work on many CD players, these are not a good choice for music CDs. For the most part, they are used as back-up storage devices for computer files. As we've seen, the reflective and non-reflective patterns on a CD are incredibly small, and they are burned and read very quickly with a speeding laser beam. In this system, the chances of a data error are fairly high. In the next section, we'll look at some of the ways that CD burners compensate for various encoding problems. DVD Disks DVD Fact The first DVD player hit the market in March A DVD is very similar to a CD, but it has a much larger data capacity. A standard DVD holds about seven times more data than a CD does. This huge capacity means that a DVD has enough room to store a full-length, MPEG-2-encoded movie, as well as a lot of other information. Here are the typical contents of a DVD movie: * Up to 133 minutes of high-resolution video, in letterbox or pan-and-scan format, with 720 dots of horizontal resolution (The video compression ratio is typically 40:1 using MPEG-2 compression.) * Soundtrack presented in up to eight languages using 5.1 channel Dolby digital surround sound * Subtitles in up to 32 languages DVD can also be used to store almost eight hours of CD-quality music per side. The format offers many advantages over VHS tapes: * DVD picture quality is better, and many DVDs have Dolby Digital or DTS sound, which is much closer to the sound you experience in a movie theater. * Many DVD movies have an on-screen index, where the creator of the DVD has labeled many of the significant parts of the movie, sometimes with a picture. With your remote, if you select the part of the movie you want to view, the DVD player will take you right to that part, with no need to rewind or fast-forward. * DVD players are compatible with audio CDs. * Some DVD movies have both the letterbox format, which fits wide-screen TVs, and the standard TV size format, so you can choose which way you want to watch the movie. * DVD movies may have several soundtracks on them, and they may provide subtitles in different languages. Foreign movies may give you the choice between the version dubbed into your language, or the original soundtrack with subtitles in your language.


239 DVD Layers DVDs are of the same diameter and thickness as CDs, and they are made using some of the same materials and manufacturing methods. Like a CD, the data on a DVD is encoded in the form of small pits and bumps in the track of the disc. A DVD is composed of several layers of plastic, totaling about 1.2 millimeters thick. Each layer is created by injection molding polycarbonate plastic. This process forms a disc that has microscopic bumps arranged as a single, continuous and extremely long spiral track of data. More on the bumps later. Once the clear pieces of polycarbonate are formed, a thin reflective layer is sputtered onto the disc, covering the bumps. Aluminum is used behind the inner layers, but a semi-reflective gold layer is used for the outer layers, allowing the laser to focus through the outer and onto the inner layers. After all of the layers are made, each one is coated with lacquer, squeezed together and cured under infrared light. For single-sided discs, the label is silk-screened onto the nonreadable side. Double-sided discs are printed only on the nonreadable area near the hole in the middle. Cross sections of the various types of completed DVDs (not to scale) look like this: DVD formats Data tracks on a DVD Each writable layer of a DVD has a spiral track of data. On single-layer DVDs, the track always circles from the inside of the disc to the outside. That the spiral track starts at the center means that a single-layer DVD can be smaller than 12 centimeters if desired. What the image to the right cannot impress upon you is how incredibly tiny the data track is -- just 740 nanometers separate one track from the next (a nanometer is a billionth of a meter). And the elongated bumps that make up the track are each 320 nanometers wide, a minimum of 400 nanometers long and 120 nanometers high. The following figure illustrates looking through the polycarbonate layer at the bumps. DVD pit layout You will often read about "pits" on a DVD instead of bumps. They appear as pits on the aluminum side, but on the side that the laser reads from, they are bumps.


240 The microscopic dimensions of the bumps make the spiral track on a DVD extremely long. If you could lift the data track off a single layer of a DVD, and stretch it out into a straight line, it would be almost 7.5 miles long! That means that a double-sided, double-layer DVD would have 30 miles (48 km) of data! To read bumps this small you need an incredibly precise disc-reading mechanism. DVD Storage Capacity DVDs can store more data than CDs for a few reasons: * Higher-density data storage * Less overhead, more area * Multi-layer storage Higher Density Data Storage Single-sided, single-layer DVDs can store about seven times more data than CDs. A large part of this increase comes from the pits and tracks being smaller on DVDs. Let's try to get an idea of how much more data can be stored due to the physically tighter spacing of pits on a DVD. The track pitch on a DVD is 2.16 times smaller, and the minimum pit length for a single-layer DVD is 2.08 times smaller than on a CD. By multiplying these two numbers, we find that there is room for about 4.5 times as many pits on a DVD. So where does the rest of the increase come from? Less Overhead, More Area On a CD, there is a lot of extra information encoded on the disc to allow for error correction -- this information is really just a repetition of information that is already on the disc. The error correction scheme that a CD uses is quite old and inefficient compared to the method used on DVDs. The DVD format doesn't waste as much space on error correction, enabling it to store much more real information. Another way that DVDs achieve higher capacity is by encoding data onto a slightly larger area of the disc than is done on a CD. Multi-Layer Storage To increase the storage capacity even more, a DVD can have up to four layers, two on each side. The laser that reads the disc can actually focus on the second layer through the first layer. Here is a list of the capacities of different forms of DVDs: You may be wondering why the capacity of a DVD doesn't double when you add a whole second layer to the disc. This is because when a disc is made with two layers, the pits have to be a little longer, on both layers, than when a single layer is used. This helps to avoid interference between the layers, which would cause errors when the disc is played. DVD Video DVD Fact If an average DVD movie were uncompressed, it would take at least a year to download it over a normal phone line. Even though its storage capacity is huge, the uncompressed video data of a full-length movie would never fit on a DVD. In order to fit a movie on a DVD, you need video compression. A group called the Moving Picture Experts Group (MPEG) establishes the
241 standards for compressing moving pictures. When movies are put onto DVDs, they are encoded in MPEG-2 format and then stored on the disc. This compression format is a widely accepted international standard. Your DVD player contains an MPEG-2 decoder, which can uncompress this data as quickly as you can watch it. The MPEG-2 Format and Data Size Reduction A movie is usually filmed at a rate of 24 frames per second. This means that every second, there are 24 complete images displayed on the movie screen. American and Japanese television use a format called NTSC, which displays a total of 30 frames per second; but it does this in a sequence of 60 fields, each of which contains alternating lines of the picture. Other countries use PAL format, which displays at 50 fields per second, but at a higher resolution (see How Video Formatting Works for details on these formats). Because of the differences in frame rate and resolution, an MPEG movie needs to be formatted for either the NTSC or the PAL system. The MPEG encoder that creates the compressed movie file analyzes each frame and decides how to encode it. The compression uses some of the same technology as still image compression does to eliminate redundant or irrelevant data. It also uses information from other frames to reduce the overall size of the file. Each frame can be encoded in one of three ways: * As an intraframe - An intraframe contains the complete image data for that frame. This method of encoding provides the least compression. * As a predicted frame - A predicted frame contains just enough information to tell the DVD player how to display the frame based on the most recently displayed intraframe or predicted frame. This means that the frame contains only the data that relates to how the picture has changed from the previous frame. * As a bidirectional frame - In order to display this type of frame, the player must have the information from the surrounding intraframe or predicted frames. Using data from the closest surrounding frames, it uses interpolation (something like averaging) to calculate the position and color of each pixel. Depending on the type of scene being converted, the encoder will decide which types of frames to use. If a newscast were being converted, a lot more predicted frames could be used, because most of the scene is unaltered from one frame to the next. On the other hand, if a very fast action scene were being converted, in which things changed very quickly from one frame to the next, more intraframes would have to be encoded. The newscast would compress to a much smaller size than the action sequence. If all of this sounds complicated, then you are starting to get a feeling for how much work your DVD player does to decode an MPEG-2 movie. A lot of processing power is required; even some computers with DVD players can't keep up with the processing required to play a DVD movie.
242 List of errors Previous Top Next Burning errors reference:
243 How much fits on a DVD? Here is a very detailed topic Previous Top Next A excellent explanation by forum members ckhouston and JoeB. Full link to this topic: and more here:
.")

244 Opacity Previous Top Next What means opacity and how it looks. The value for opacity tells how much of the background is let through the chosen menu template.(transparency of menu "picture"). You can imagine this as a cloth material held in front of the background image or video file. The opacity would be how thin or thick this cloth material is making the video or image file more or less visible. A chosen value of 0(zero) shows nothing of the added background. A chosen value of 50 shows a little bit of the added background. A chosen value of 75 shows more of the added background.

245 A chosen value of 100 shows maximum of the added background.
246 All test files folder Previous Top Next This will be always a section [All test files] File / folder A separately downloadable File is available with pre-defined projects and its belonging files. Download File from this forum sub-page: It is in the topic: Download link where to get the [All test files] File The files in the File are in PAL and NTSC Format. This File will extract itself in C:\ Do not change this location because when you receive a project file [file name].xtodvd, it will not work when not installed at this default place. This place is found on every Windows system PC, independent of installed Windows version (W200, XP, Vista). The test project numbers 1 to 999 are for PAL Format The test project numbers 1001 to 1999 are for NTSC Format Test projects Visibility test Subtitle test Title and Chapter menu test Dummy file project
247 Visibility test In this section you will find a description what can be "done" with each project. Previous Top Next 1 - Visibility Test PAL / Visibility Test NTSC Burn this project on a DVD R disc. You can use it at your frieds DVD player / TV to check their settings. Title(set) #1 What part do i see when Display Test for 4:3 AR TV is played. If you play this title at your stand-alone DVD player, you can determine how much of the source data is "lost" because of: - Overscan - "Wrong" setting stand-alone DVD player - TV setting (if available) This is what is on DVD and what can be seen at maximum. Resize method: Letterbox. No "data" loss, Aspect ratio ok. If you do not see the whole picture, write down till where you can see the picture (left, right, top and bottom). Values could be useful when using user-defined resize method and Subtitle settings. Values are in pixels. Title(set) #2 Sample of source file with AR 4:3 to 4:3 Aspect ratio (Full screen) This is a test "movie" with a true source file aspect ratio of 4:3 and converted to Aspect ratio 4:3. (Full screen) If you play this title at your stand-alone DVD player, you can determine how much of the source data is "lost" because of: - Overscan - "Wrong" setting stand-alone DVD player - TV setting (if available) This is what is on DVD and what can be seen at maximum. Resize method: Letterbox. No "data" loss, Aspect ratio ok. Title(set) #3 Sample of source file with AR 16:9 to 4:3 Aspect ratio (Full screen) This is a test "movie" with a true source file aspect ratio of 16:9 and converted to Aspect ratio 4:3. (Full screen)
 This is what is on DVD and what can be seen at maximum. Resize method: Letterbox. No \"data\" loss, Aspect ratio ok. Title(set) #4 Sample of source file with AR 2.")
 available) This is what is on DVD and what can be seen at maximum. Resize method: Letterbox. No \"data\" loss, Aspect ratio ok.")
248 If you play this title at your stand-alone DVD player, you can determine how much of the source data is "lost" because of: - Overscan - "Wrong" setting stand-alone DVD player - TV setting (if available) This is what is on DVD and what can be seen at maximum. Resize method: Letterbox. No "data" loss, Aspect ratio ok. Title(set) #4 Sample of source file with AR 2.39:1 to 4:3 Aspect ratio (Full screen) This is a test "movie" with a true source file aspect ratio of 2.39:1 and converted to Aspect ratio 4:3. (Full screen) If you play this title at your stand-alone DVD player, you can determine how much of the source data is "lost" because of: - Overscan - "Wrong" setting stand-alone DVD player - TV setting (if available) This is what is on DVD and what can be seen at maximum. Resize method: Letterbox. No "data" loss, Aspect ratio ok. Title(set) #5 What part do i see when Display Test for 16:9 AR TV is played. If you play this title at your stand-alone DVD player, you can determine how much of the source data is "lost" because of: - Overscan - "Wrong" setting stand-alone DVD player - TV setting (if available) This is what is on DVD and what can be seen at maximum.
. Values could be useful when using user-defined resize method and Subtitle settings.")
 #6 Sample of source file with AR 4:3 to 16:9 Aspect ratio (Widescreen) This is a test \"movie\" with a true source file aspect ratio of 4:3 and converted to Aspect ratio 16:9.")
249 This is what is on DVD and what can be seen at maximum. Resize method: Letterbox. No "data" loss, Aspect ratio ok. If you do not see the whole picture, write down till where you can see the picture (left, right, top and bottom). Values could be useful when using user-defined resize method and Subtitle settings. Values are in pixels. Title(set) #6 Sample of source file with AR 4:3 to 16:9 Aspect ratio (Widescreen) This is a test "movie" with a true source file aspect ratio of 4:3 and converted to Aspect ratio 16:9. (Widescreen) If you play this title at your stand-alone DVD player, you can determine how much of the source data is "lost" because of: - Overscan - "Wrong" setting stand-alone DVD player - TV setting (if available) This is what is on DVD and what can be seen at maximum. Resize method: Letterbox. No "data" loss, Aspect ratio ok. Title(set) #7 Sample of source file with AR 16:9 to 16:9 Aspect ratio (Widescreen) This is a test "movie" with a true source file aspect ratio of 16:9 and converted to Aspect ratio 16:9. (Widescreen) If you play this title at your stand-alone DVD player, you can determine how much of the source data is "lost" because of: - Overscan - "Wrong" setting stand-alone DVD player - TV setting (if available) This is what is on DVD and what can be seen at maximum.
 This is a test \"movie\" with a true source file aspect ratio of 2.39:1 and converted to Aspect ratio 16:9.")
250 This is what is on DVD and what can be seen at maximum. Resize method: Letterbox. No "data" loss, Aspect ratio ok. Title(set) #8 Sample of source file with AR 2.39:1 to 16:9 Aspect ratio (Widescreen) This is a test "movie" with a true source file aspect ratio of 2.39:1 and converted to Aspect ratio 16:9. (Widescreen) If you play this title at your stand-alone DVD player, you can determine how much of the source data is "lost" because of: - Overscan - "Wrong" setting stand-alone DVD player - TV setting (if available) This is what is on DVD and what can be seen at maximum. Resize method: Letterbox. No "data" loss, Aspect ratio ok.
 What does Subtitle test project contain? - It is a single Title(set) project.")
251 Subtitle test (2, 3, 1002 and 1003) In this section you will find a description what can be "done" with each project. Previous Top Next Subtitle test (2, 3, 1002 and 1003) What does Subtitle test project contain? - It is a single Title(set) project. - It has one stream of 15 merged avi's and every avi file has 7 subtitle streams. - The Chapter menu has 15 chapters. - The avi's are in true aspect ratio and start at 1:1 up to 2.39:1, stepping up at a 0.1 increase of aspect ratio on each avi file. - The subtitles have a first line of "Text" what starts with 30 characters. Every second that the Title plays, "Text" will increase with one(1) character. - Stream 1 has language identifier German (de). "Text" in Red color. - Stream 2 has language identifier English (en) and set as default. "Text" in white color, Arial 20 - Stream 3 has language identifier Spanish (es) "Text" in white color, Arial Narrow 20 - Stream 4 has language identifier French (fr) "Text" in white color, Arial 24 - Stream 5 has language identifier Dutch (nl) No feature added at the moment. -Stream 6 has language identifier Portugese (pt) No feature added at the moment. -Stream 7 has language identifier Greek (el) Different Code Page (1253) for an example/check. What can i see/do with this project? 1] Burn a DVD RW for testing on your stand-alone player. 2] Edit settings in the project and save it under a different name. 3] You have a colored stream of "Text". 4] You can see the difference when using different Font types (Arial and Arial Narrow). Could be useful when having a widescreen television. Arial Narrow gives the better look that "Text" is not stretched horizontal. 5] What the program does when "Text" is too long at a line. -With this feature you can see when the characters "fall off" the screen. Use pause button on remote to freeze playing when it gets close to the point of "falling off". 6] What the program does when font size is too big. 7] Get the subtitle "aligned" to the source file aspect ratio. What test file do i use? 2 - Subtitle test file if you live in a country what has PAL as Format and you have a 4:3 Aspect ratio movie Subtitle test file if you live in a country what has NTSC as Format and you have a 4:3 Aspect ratio movie.
252 3 - Subtitle test file if you live in a country what has PAL as Format and you have a 16:9 Aspect ratio movie Subtitle test file if you live in a country what has NTSC as Format and you have a 16:9 Aspect ratio movie. This is the true source character style in the Subtitle text overlay when DVD specificatoin is: Full D1 and Aspect ratio 4:3 and source file is 4:3 Aspect ratio. and - the result when played at a 4:3 TV system. - the result when same subtitle is played at a 16:9 TV system and source file is 16:9 Aspect ratio. The Subpicture overlay is horizontally stretched. If you use the Arial Narrow font with the settings of Arial, you will end up with a more normal looking character.
253 Title and Chapter menu test (4, 5, 1004, 1005) Previous Top Next 4, 5, 1004 and Title and Chapter menu test This test was originally designed to test the navigation and correct displaying of title and chapter at their position at template menu. Can be used for making a test DVD with using a different template for to see how it looks when played at a DVD player. These are short files, so you have in no time the look of the several menus for a certain template generated and burned on DVD (use a RW disc). Title(set) 1 15 merged files for checking Chapter menu generation/ chapter points. Title(set) added files for checking Title menu generation.
254 History manual Previous Top History : Initial release v (rev. 1) : release v3.5.1.(rev. 2) -Text added at: Subtitle text editor regarding Test background/margin -New topic at Text Style Editors -New test file added -Visual aids added at several places for better clarification -Save settings Menu text corrected. -Re-arrange of topics : release v3.5.2.(rev. 3) - Fixed 2 hyperlinks Basic conversion > basic page - Edit Tree View, Audio settings. Numbers added to picture and in text. - Edited 11 Settings menus. Bullets and indents - Corrected text in General, working folder. Under what name saved + added note. - Edit Tree View, Subtitle settings. Numbers added to picture and in text. - Added text at Test files, Subtitle test 2, 3, 1002, Text added at Burning tab, Add original file to dvd - Hint added at Add file(s) - Added subject total time/ minimal used disc space at Main Window view. - Added Play Audio at Tree View, Audio file (47) - Added topic How much fit on a DVD, Appendix. - Added topic Detach Video preview / Log window at Main Window view - Changed version number at front page to actual public downloadable version - Added info about validity of the key to the license / buy topic : release v3.5.3 (rev. 4) - Modified Basic conversion topic to Create / customize / convert and burn Guides - Removed Basic conversion topic (obsolete after new step-by-step guides) - Add note to Load project (File menu) - Added How to know language stream at audio(31) and subtitle(33) - Added note at Settings, Burning tab, ISO image - Added note to detach window topic. - Removed TIVO file support - Added max. amount of chapters created - Added text at Settings menu, Audio, convert Audio to format: - Added screen resolution at Requirements - Minor text tunes : release v3.6.2.(rev. 5) - Added note at tab General, Working folder about amount free space. - Added topic Full overview for better clarification of Aspect ratio 4:3 and 16:9 topic - Edited Save settings Menu text for even better guiding. (minor text change and links added) - Test files topic, added links to projects. - Text added above each template look. - Added topic: How cd /dvd works. - Fixed hidden topics to be found by browsing. - Added resulting Menu background pictures to topics Tree View 10 and : release v (rev. 6) - Added recomendation when using Vista that they should be logged in as Administrator at Requirements. - Added some missed texts above several templates (Template topic) - Added text about ISO burning at Menu bar, Action menu, Burnan already converted project.(new feature in ConvertXtoDVD v and newer) - Fixed numbering mismatch Tree View <-> topic text (44-52) - Added text at "Burn an already converted project" (Action menu) : release v b.(rev. 7) - Added step in step-by-step Guides (check Encoding quality setting)
255 - Fixed numbering mismatch Tree View <-> step-by-step guide text (44-52) : release v h.(rev. 8) - Added some text above all menu templates
![14 - How to enter the merge window Previous Top Next 14] The titleset content editor helps you manage all the files that are used to build a title (video, audio, and subtitle files).](/docs-images/83/88800886/images/256-0.jpg "Use it to merge/joine several videos into one title, or add more audio and subtitle tracks.")
256 14 - How to enter the merge window Previous Top Next 14] The titleset content editor helps you manage all the files that are used to build a title (video, audio, and subtitle files). Use it to merge/joine several videos into one title, or add more audio and subtitle tracks. Access the editor by selecting a Titleset at the Tree View, then click the button on the right (see mouse pointer at the right side of the window) OR right-click on the selected Titleset and select [Merge more files to this titleset] OR click File --> click [Merge more files to this titleset]
 that the selected titleset is composed of.")
257 14 - Merge window content editor Changes done for this item at Tree View apply only to this Titleset. Previous Top Next 14] In the Titleset content editor window, you will see the individual files (video, audio, and subtitles) that the selected titleset is composed of. At the moment this is only one video file: Clicking on the + sign in the Queue list column will expand the file into its separate contents. By ticking the check box(es) you can select what stream(s) will be included in this titleset. The different icons represent the types of streams that can be added at this place:
.")
258 Video files (can contain video, audio and subtitle stream(s)) Audio files (can only contain audio stream) Subtitle files (can only contain subtitle stream) Merge several video files to one titleset Sometimes it is required to put more than one video file into one titleset, for example if you have a movie that consists of two or more files (e.g. My Movie CD1, My Movie CD2 ). To achieve this, add the first file to your project normally. Next click on the icon in the very right column (at pointer) to select a video file to be added/joined or drag and drop the video file to the corresponding place. It is also possible to add more than one file at a time.(ms windows rules) Note: Do not use the icon at the bottom, because this will only add the audio and/or subtitle stream to the already loaded file in the queue list(vertical): The added video file will now appear in the queue list as #2, right next to the first file #1, in the chronological order in which they will play.
 ConvertXtoDVD tries to detect additional streams for a video file (like subtitles) automatically.")
259 Click OK (right bottom) once you re done, this window closes, and the added file(s) will appear under Source file (s) info in your project. Add subtitle stream(s) ConvertXtoDVD tries to detect additional streams for a video file (like subtitles) automatically. This only works for subtitles that are named accordingly to the video files they belong to ( My Movie CD1.avi, My Movie CD1.srt ). However, audio and/or subtitle streams can be added to a titleset manually. Click one of the add icons below to the video file (at pointer) to select a audio/subtitle file to be added or drag and drop the file to the
260 corresponding place. In this example we go to add a subtitle stream. Select the subtitle track to be added and repeat for additional video parts if necessary. The added streams will appear in the queue list, below (vertical) the video track: Before clicking OK, you have to check that you have not forgotten to fill all positions. No red positions should be shown. This will otherwise cause an errror and won't allow you to go further. (see example picture below)
261

262
263 Merge window (14) Previous Top Next List of topics in the Merge window section. Each topic is explained separately. How to enter merge window Merge window editing
, next to Titleset # To edit: First select, then")
264 14 - Edit titleset name Changes done for this item at Tree View apply only to this Titleset. Previous Top Next 14] Once video files have been added to the project, the file name is placed in this field ("01 - Baseball Bugs" in this case), next to Titleset # To edit: First select, then left-click to enter editor and enter new name (in this example we will change original title '01- Baseball Bugs' to Best ball game) or first select, then F2 to enter the editor and enter new name.. original The newly entered name (for this example Best ball game) will also show up in: - In Title menu - Text(button) and - Title for Root menu after edit
Version , March 28th, 2008
 Complete Manual Version 3.0.0.5, March 28th, 2008 Table of Contents Key Features 3 System Requirements 3 Installation 4 First Run 8 Interface setup 10 Basic Conversion 12 Customizing your Project 14 DVD
ConvertXtoDVD version 6 Complete guide
 ConvertXtoDVD version 6 Complete guide ConvertXtoHD 2 Edited Feb 2016 Based Based on version version Version 2 6.0.0.27 2. Basics Basic Conversion.....2 Main menu...... 3 General Settings.........7 Menu
litecam HD GUIDE For litecam HD Version 5.0 Contents
 1 litecam HD GUIDE For litecam HD Version 5.0 Contents 2 TABLE OF CONTENTS SYSTEM REQUIREMENTS 4 LITECAM HD INSTALLATION GUIDE 5 litecam HD installation Procedure... 5 - Installation... 5 - Activation...
USER GUIDE. For litecam HD Version 4.8. November 5 th, 2013.
 1 USER GUIDE For litecam HD Version 4.8 November 5 th, 2013. 2 Contents TABLE OF CONTENTS SYSTEM REQUIREMENTS 4 GUIDE TIP 5 LITECAM HD INSTALLATION GUIDE 9 litecam HD installation Procedure... 9 - Installation...
 S4B Split Movie Soft4Boost Help S4B Split Movie www.sorentioapps.com Sorentio Systems, Ltd. All rights reserved Contact Us If you have any comments, suggestions or questions regarding S4B Split Movie or
DVD Ripper Premium. Document No.: DVD Ripper Premium Help Document. MicroVideo Software Corp Page 1
 Introduction Document No.: DVD Ripper Premium Help Document DVD Ripper Premium MicroVideo Software Corp Page 1 Introduction Pages Order: Introduction...Pages 3-4 Purchase DVD Ripper Premium...Pages 5 How
Movavi Video Converter 14. User guide
 Movavi Video Converter 14 User guide Table of Contents Movavi Video Converter 14... 3 Overview... 4 System Requirements... 5 Supported Formats... 6 Program Settings... 7 Hardware Acceleration... 11 Activating
User Guide for Leawo Video Converter Ultimate
 User Guide for Leawo Video Converter Ultimate - How to Use Leawo Video Converter Ultimate Here is a user guide that shows you how to properly use Leawo Video Converter Ultimate. The guide presented here
Ultimate Video Capture v1.8 User Manual
 Ultimate Video Capture v1.8 User Manual Minimum Requirements: Processor: Intel or AMD CPU (1.0Ghz) PC, Laptop or Tabloid PC Memory: 256 Mb of RAM HD: 100 Mb of free space for basic recording and installation
 Register your product and get support at www.philips.com/welcome HMP3000 EN User manual Contents 1 Trademark notice 5 English 2 Connect and play 7 3 Control and play 11 4 Options 13 Video options 13 Audio
ClimaxDigital USB 2.0 Video Capture
 ClimaxDigital USB 2.0 Video Capture Model: VCAP301/VCAP302/VCAP303 Thank you for purchasing ClimaxDigital USB 2.0 Video Capture. Should you need any assistance in using this product, please do contact
Magic Burning Studio
 Magic Burning Studio Help Document Magic Burning Studio Magic Video Software http://www.magic-video-software.com/ Page 1 Pages Order Understanding Magic Burning Studio...Pages 3-5 Purchase...Pages 6 Getting
MagicInfo VideoWall Author
 MagicInfo VideoWall Author MagicInfo VideoWall Author User Guide MagicInfo VideoWall Author is a program designed to construct a VideoWall layout and create VideoWall content by adding various elements
About Xlinksoft ipod Video Converter
 About Xlinksoft ipod Video Converter Xlinksoft ipod Video Converter is an outstanding ipod Video Converter that can convert videos to ipod Video and the latest ipod Nano, ipod Touch and ipod Classic. The
PHOTO DVD MAKER USER MANUAL
 Photo DVD Maker User Manual 1 PHOTO DVD MAKER USER MANUAL Version 7.04 http://www.photo-dvd-maker.com Photo DVD Maker User Manual 2 0.1 WELCOME TO PHOTO DVD MAKER...4 0.2 GETTING HELP...5 1. GETTING STARTED...6
Gecata by Movavi 5. Recording desktop. Recording with webcam Capture videos of the games you play. Record video of your full desktop.
 Gecata by Movavi 5 Don't know where to start? Read these tutorials: Recording gameplay Recording desktop Recording with webcam Capture videos of the games you play. Record video of your full desktop. Add
Overview. Features. anytime.
 Overview ZC DVD to BlackBerry Converter is not noly a fast and easy-to-use DVD Ripper program, but also a DVD Player, DVD Recorder, Audio Ripper program, which can play dvd, record the DVD movie you are
Nero Recode Manual. Nero AG
 Nero Recode Manual Nero AG Copyright and Trademark Information The Nero Recode manual and all its contents are protected by copyright and are the property of Nero AG. All rights reserved. This manual contains
Tech Day Camtasia. What is Camtasia Studio?
 Tech Day 2008 Camtasia What is Camtasia Studio? Camtasia Studio is a video-based screen capturing software program. It is analogous to using a video camera to record your screen. However, unlike using
Quicktime Player Error Codec For Avi Per
 Quicktime Player Error Codec For Avi Per Oct 2, 2014. a movie and its.avi and i am getting an error post "converting" where it says. QuickTime player can't open Try another video player, such as VLC. Quicktime
PIVOT CMS CLIENT SOFTWARE USER MANUAL
 PIVOT CMS CLIENT SOFTWARE USER MANUAL 1 CMS USER GUIDE 1.1 PC REQUIREMENT Recommended PC Requirement OS CPU VGA RAM HDD Graphics Card OS CPU VGA RAM HDD Windows Vista, 7 or higher Intel Core2Quad Q9400
Overview ZC Video Converter ZC Video Converter ZC Video Converter Features
 Overview ZC Video Converter is the best choice for portable media device(ipod, iphone, Mobile phone, Pocket PC, Sony PSP, Microsoft Zune, Apple TV ect) holder. You don't know any basic knowledge on media
How to convert dvd pal ntsc
 How to convert dvd pal ntsc DVD Burning Xpress is an integrated tool used to convert home video DV tape to MPEG-2 and burn to DVD disc directly. It features simple user interface, with only 3 clicks, the
Overview. Features. Please visit for more information. Copyright ZC Software. All Rights Reserved
 Overview ZC DVD Ripper Platinum is a super DVD backup and convert tool software, which is a DVD Player firstly, and it can not only record any DVDs' audio and video you can playback on your computer, but
DVD D-5/D-9, AVI, MPEG, WMV,
 Overview ZC Blu-ray DVD Ripper is an easy-to-use blu-ray DVD movie copier, which converts blu-ray and high definition movie (m2ts, mts) to all popular movie formats, it extracts audio tracks and encodes
Movavi PDF Editor User Guide. Quick start guide Opening files Editing documents Saving files
 Movavi PDF Editor User Guide Quick start guide Opening files Editing documents Saving files Table of Contents Quick start guide...2 Removing trial restrictions...3 Getting an activation key...4 Activating
IT Essentials v6.0 Windows 10 Software Labs
 IT Essentials v6.0 Windows 10 Software Labs 5.2.1.7 Install Windows 10... 1 5.2.1.10 Check for Updates in Windows 10... 10 5.2.4.7 Create a Partition in Windows 10... 16 6.1.1.5 Task Manager in Windows
AVer MediaCenter User Manual
 AVer MediaCenter User Manual DISCLAIMER All the screen shots in this documentation are only example images. The images may vary depending on the product and software version. Information presented in this
About Xlinksoft Video Converter
 About Xlinksoft Video Converter Welcome to use the Xlinksoft Video Converter. Xlinksoft Video Converter developed by the Xlinksoft Corporation, is a multi-media file conversion software based on the brand-new
MICRO 2+ USER MANUAL
 MICRO2+ USER MANUAL Wintal MICRO2+ USER MANUAL Contents BRIEF INTRODUCTION... 1 FEATURE... 1 BASIC PERFORMANCE... 1 PRODUCT DETAILS... 2 PACKING LIST... 2 FRONT VIEW... 2 BACK VIEW... 3 REMOTE CONTROL...
Just follow this guide to burn MP4 videos with Windows DVD Maker MP4 for playing to burn your MP4 video by using this MP4 to DVD Windows DVD Maker.
 Instructions For Use Windows Dvd Maker To Burn Mp4 Video You might count on HandBrake to convert MP4 to DVD for free. but sometimes HandBrake gets some errors like HandBrake audio and video out of sync,
VI ViewerPlus Copyright 2018 Panasonic System Solutions Company of North America Version Last updated:
 VI ViewerPlus Copyright 2018 Version 7.3.0 Last updated: 11.15.2018 Panasonic VI ViewerPlus TABLE OF CONTENTS TABLE OF CONTENTS... 0 OVERVIEW... 1 USER INTERFACE... 1 WORKSPACE... 2 LAYOUTS... 2 Setting
Operating Instructions
 Operating Instructions Image management/dvd production software VideoCam Suite 2.0 Thank you for using VideoCam Suite. Before use, please read these instructions completely. Panasonic Corporation 2008
CHAIRSIDE 2009 USER MANUAL
 INSTALLATION TECHNICAL SUPPORT For technical assistance, please contact DHC Software at Local : (416) 429-7003 Toll free in North America 1-800-519-6569 Don t forget to check in with our website regularly
User Manual. Nero Recode 2.
 User Manual Nero Recode 2 www.nero.com Copyright and Trademark Information The Nero Recode 2 User Manual and the Nero Recode 2 Software are copyrighted and the property of Nero AG, Im Stoeckmaedle 18,
WINDOWS HOST GUIDE. Remote Support & Management PC Mac Tablet Smartphone Embedded device. WiseMo Host module on your PC or Server
 WINDOWS HOST GUIDE Remote Support & Management PC Mac Tablet Smartphone Embedded device WiseMo Guest module for example on your Windows PC WiseMo Host module on your PC or Server WiseMo develops software
Ambush Client Software User Guide For use with the full Range of Ambush DVRs Version 1.2
 Ambush Client Software User Guide For use with the full Range of Ambush DVRs Version 1.2 Overview This user guide will take you through the process of obtaining and archiving footage from the Ambush Technologies
Manual Version: V1.15. Video Management Software Guard Station User Manual
 Manual Version: V1.15 Video Management Software Guard Station User Manual Thank you for purchasing our product. If there are any questions, or requests, please do not hesitate to contact the dealer. Disclaimer
Apple idvd 11 Tutorial
 Apple idvd 11 Tutorial GETTING STARTED idvd is a program that allows you to create a DVD with menus and graphics of a professionally made commercial disc to play on your home DVD player. To Begin your
Sidify Music Converter for Spotify (Mac) User Manual
 User Manual") Sidify Music Converter for Spotify (Mac) User Manual Overview Introduction Key Features System Requirement Tutorials Import Spotify Music Delete Spotify Music Adjust Output Settings Convert Spotify Music
Sidify Music Converter for Spotify (Mac) User Manual Overview Introduction Key Features System Requirement Tutorials Import Spotify Music Delete Spotify Music Adjust Output Settings Convert Spotify Music
Convert VHS to Digital or DVD using Roxio Video Capture
 Convert VHS to Digital or DVD using Roxio Video Capture 1. Plug in USB to VHS Convert. in the patch panel. 2. On the computer, click the Roxio Video Capture icon This window will appear: 3. Press the Power
BOGART 10 FOR WINDOWS RELEASE NOTES
 BOGART 10 FOR WINDOWS RELEASE NOTES The following information is meant to make the installation of Bogart 10 for Windows on your PC easier, and the setup of Bogart 10 successful. Please read these carefully
Creating DVDs and CDs. With Your DVD Writer/CD Writer Drive
 Creating DVDs and CDs With Your DVD Writer/CD Writer Drive The information in this document is subject to change without notice. Hewlett-Packard Company makes no warranty of any kind with regard to this
Desktop Client USER GUIDE. Version 2. Strategic Vision, Inc.
 Desktop Client USER GUIDE Version 2 Strategic Vision, Inc. Table of Contents Welcome Desktop Client Interface................... Audio and Webcam Settings................. Tool Overview........................
Owner s Manual. for Mac OS/X. Version March 2009 Copyright 2009, Minnetonka Audio Software. All rights reserved.
 Owner s Manual for Mac OS/X Version 1.0.2 March 2009 Copyright 2009, Minnetonka Audio Software. All rights reserved. discwelder BRONZE 1000 is a trademark of Minnetonka Audio Software, Inc. 1 Introduction
Note, if you're seeing the "You need to upgrade your Adobe Flash Player to watch this video" error, you've come to the right place.
 NO COMPUTER CLUB MEETING THIS FRIDAY, 5/ 24/12 due to the holiday. ****************************************************************** ******************************** YouTube videos won't play? Videos
TF5800PVR recording to DVD using ProjectX and Nero
 TF5800PVR recording to DVD using ProjectX and Nero Summary How to burn Topfield recordings,.rec files, to DVD using ProjectX, PVAStrumento and Nero on a Windows PC. Author Issue: Date: Malcolm Reeves (mreeves@fullcircuit.com)
Camtasia Studio 5.0 PART I. The Basics
 Camtasia Studio 5.0 Techsmith s Camtasia Studio software is a video screenshot creation utility that makes it easy to create video tutorials of an on screen action. This handout is designed to get you
User Guide for Leawo Video Converter
 User Guide for Leawo Video Converter - How to Use Leawo Video Converter Here is a user guide that shows you how to properly use Leawo Video Converter. The guide presented here is thorough enough for users
Q u i c k S ta r t G u i d e
 Quick Start Guide GETTING STARTED The first time you run Trust ID, you will be presented with an option to enable security accounts. Enabling this feature will require knowledge of the username and password
Media player for windows 10 free download
 Media player for windows 10 free download Update to the latest version of Internet Explorer. You need to update your browser to use the site. PROS: High-quality playback, Wide range of formats, Fast and
BOGART WINDOWS 9 (v9.2a) RELEASE NOTES
 RELEASE NOTES") BOGART WINDOWS 9 (v9.2a) RELEASE NOTES The following information is meant to be a guide of release notes to go with your purchase of Bogart Windows 9. Please read these carefully before starting to work
BOGART WINDOWS 9 (v9.2a) RELEASE NOTES The following information is meant to be a guide of release notes to go with your purchase of Bogart Windows 9. Please read these carefully before starting to work
DVD next COPY next Tech User s Guide January 2010
 DVD next COPY next Tech User s Guide January 2010 Table of Contents 1.0 Introduction...3 1.1 Helpful Tips...4 1.2 Limitations...4 1.3 Support...4 2.0 Installation & Activation...5 2.1 Download & Installation...5
DVD next COPY DVD X Maker User s Guide
 DVD next COPY DVD X Maker User s Guide Table of Contents 1.0 Introduction... 3 1.1 Helpful Tips... 4 1.2 Limitations... 4 1.3 Support... 4 2.0 Installation & Activation... 5 2.1 Download & Installation...
Contents V1.0. ONE Introduction TWO Installation and Instructions...06 THREE FAQ...14
 Contents V1.0 ONE Introduction...02 1.1 Features...02 1.2 Specification...03 1.3 Package Contents...03 1.4 Remote Control Guide...04 1.5 Connection Chart...05 TWO Installation and Instructions...06 2.1
Software User Guide. DB-VRC Series 4K Video Wall Controller 11-AUG
 Software User Guide DB-VRC Series 4K Video Wall Controller 11-AUG-2016 www.digibirdtech.com 1 Introduction... 6 1.1 About this Guide... 6 1.2 About the DB-VRC SERIES Video Wall Controller... 6 1.3 Key
Dimo FLV Video Converter for Mac is an all-in-one Mac FLV conversion software. It can help convert FLV files to almost all video and
 Introduce o Brief Introduction Convert o Convert FLV video Burn o Create ISO GIF o Make GIF Download o Download online movies Play o Play FLV Video Edit o Cut FLV video length by trimming o Get FLV video
Register your product and get support at HMP3008. EN User manual 7 ZH-CN 9
 Register your product and get support at www.philips.com/welcome HMP3008 EN User manual 7 ZH-CN 9 EN Please refer to the safety information before using the product. ZH-CN Trademark notice HDMI, the HDMI
Stellar Phoenix Photo Recovery 8.0. Installation Guide
 Stellar Phoenix Photo Recovery 8.0 Installation Guide Overview Digital multimedia files may accidentally get deleted while deleting files, or formatting storage device. Files may also get lost due to the
Share Content. Share Content
 , page 1 Quick reference tasks: share content, page 2 Share a file, page 4 Share an application, page 11 About sharing a remote computer, page 14 Take a Poll, page 17 Transfer and Download Files During
CyberLink. Power2Go. User s Guide
 CyberLink Power2Go User s Guide Copyright and Disclaimer All rights reserved. No part of this publication may be reproduced, stored in a retrieval system, or transmitted in any form or by any means electronic,
Tutorial Windows Media Player 11 Codec For Xp Avi Files
 Tutorial Windows Media Player 11 Codec For Xp Avi Files Brands, Shopping, Tutorials, Other sites. Tom's Guide Last response: July 11, 2014 10:54 PM in Windows 7. Share Reason one: Windows Media Player
Network Camera Recording and Monitoring System. Network Video Recorder. VK-64/ VK-16 v1.1. User s Manual. Ver. 1.1
 Network Camera Recording and Monitoring System Network Video Recorder VK-64/ VK-16 v1.1 Storage Server & Viewer User s Manual Ver. 1.1 Introduction Thank you for purchasing Network Video Recorder VK-64
Getting Help with Tutu ipod Touch Video Converter
 Getting Help with Tutu ipod Touch Video Converter We have a variety of services available to help you with questions regarding our software. E-mail support is available free of charge for 90 days from
To burn MP4 videos on Windows platform, you can use Windows DVD Maker MP4 codec. Here I would like to introduce you to an easy-to-use iskysoft DVD.
 Instructions For Use Windows Dvd Maker To Burn Mp4 Here are top 15 free MP4 to DVD converter for Mac, Windows and Linux. However, many of them provide a limited access period and for further use, the Sothink
Manual v2.1 July 2017
 VC-HD6 Manual v2.1 July 2017 Contents Contents... 3 1. What is the VC-HD?... 4 2. Supported Media Formats... 4 3. In the Box... 5 4. Setup Instructions... 6 5. Remote Control... 9 6. Settings Options...
Discount AnyMP4 DVD Ripper latest pc software downloads ]
![Discount AnyMP4 DVD Ripper latest pc software downloads ]](/thumbs/88/117458481.jpg "Discount AnyMP4 DVD Ripper latest pc software downloads ]") Discount AnyMP4 DVD Ripper latest pc software downloads ] Description: AnyMP4 DVD Ripper, the most powerful and easy-to-use DVD Ripper, can assist you to rip any DVD movie to most popular video and audio
Discount AnyMP4 DVD Ripper latest pc software downloads ] Description: AnyMP4 DVD Ripper, the most powerful and easy-to-use DVD Ripper, can assist you to rip any DVD movie to most popular video and audio
SDA Application Software
 SDA Application Software a viewer software for Scalar's Digital/Analog Microscope SDA-1 USERS MANUAL Table of Contents [English Manual] Chapter 1 Introduction.. 3 1-1 About This Manual 3 1-2 Operating
Cinegy Air 11 Quick Start Guide. Cinegy GmbH. Document version: a8e6e50
 Cinegy Air 11 Quick Start Guide Cinegy GmbH Document version: a8e6e50 Table of Contents Overview.......................................................................................... 1 1. Prerequisites...................................................................................
Movavi Split Movie for Mac User manual
 Movavi Split Movie for Mac User manual Table of Contents Quick start guide...2 Activating Split Movie...4 Getting an activation key...5 Activating without Internet...5 Opening files...8 Playback...9 Cutting
Overview. Features. Create your own favorite DVD Movie and enjoy it on your car or home DVD player!
 Overview Create your own favorite DVD Movie and enjoy it on your car or home DVD player! ZC DVD Creator Platinum is a simple DVD creator software package that can convert almost any video source to burn
User s Manual. Table of Contents. 1. Use of the Webcam... 2
 User s Manual UVC 2MP Webcam Table of Contents 1. Use of the Webcam... 2 1.1 Getting Started... 2 1.2 Install UVC Advanced Driver... 3 1.3 Special Effects and Face Tracking... 4 1.4 Anti-Flicker Setting...
Central Management Software for NVR-915 / NVR-1615 CV5-M256
 Central Management Software for NVR-915 / NVR-1615 Table of Contents Chapter 1. Main Console... 4 1.1 Tool Bar... 4 1.2 NVR List... 5 1.3 Division List... 7 1.4 Group List... 9 1.5 PTZ Panel...11 1.6 Operation
Sidify Music Converter for Spotify (Windows) User Manual
 User Manual") Sidify Music Converter for Spotify (Windows) User Manual Overview Converting Interface Introduction Key Features System Requirement Tutorials Import Spotify Music Delete Spotify Files Purchase & Registration
Sidify Music Converter for Spotify (Windows) User Manual Overview Converting Interface Introduction Key Features System Requirement Tutorials Import Spotify Music Delete Spotify Files Purchase & Registration
Movavi Video Converter 18
 Movavi Video Converter 18 Don't know where to start? Converting videos Change the video format Read these tutorials: Converting for devices Watch videos on your phone or tablet More questions? Converting
Chapter 3 Operating instructions
 Chapter 3 Operating instructions Summary This chapter describes the how to control and navigate through the TVR 30 s menus and options. Content Control interfaces 10 Controlling the TVR 30 10 Front panel
VSPlayer Software User Manual
 VSPlayer Software User Manual UD.6L0202D1505A01 Thank you for purchasing our product. This manual applies to VSPlayer software, please read it carefully for the better use of this software. This manual
SeeSnake HQ User Guide
 SeeSnake HQ User Guide SeeSnake HQ Version 1.53.85.1426 23 May 2010 About SeeSnake HQ 3 Digital Technology 3 Installation and Updates 5 Windows XP 5 Windows Vista 5 Windows 7 5 The Home Window 6 Home Toolbar
Video Modeling & Video Self-Modeling: Research to Practice
 Video Modeling & Video Self-Modeling: Research to Practice It s Showtime with ShowBiz Presented by the Virginia Department of Education s Autism Priority Project Developed by Teresa Lyons, T-TAC/VT How
VC-HD8 Manual v2 July 2016
 VC-HD8 Manual v2 July 2016 Contents 1. What is the VC-HD8?... 4 2. Supported Media Formats... 4 3. In the Box... 5 4. Setup Instructions... 6 5. Remote Control... 8 6. Settings Options... 9 7. Additional
User Manual Any company, product or service names found in this document may be the trademarks or registered trademarks of their respective companies.
 User Manual Any company, product or service names found in this document may be the trademarks or registered trademarks of their respective companies. Action! Gameplay and screen recorder Thank you for
Multi-NVR Manager. Quick Start Configuration Usage
 Multi-NVR Manager Quick Start Configuration Usage 2014. All rights are reserved. No portion of this document may be reproduced without permission. All trademarks and brand names mentioned in this publication
Any DVD Cloner Platinum Manual
 About Us DVDSmith Inc. is a multimedia software company that develops and markets DVD copy, DVD ripper, blu-ray copy and blu-ray ripper programs for both Windows and Mac platforms. DVDSmith products will
User Guide. FTR Player For more information visit
 FTR Player 5.7.1 TABLE OF CONTENTS INTRODUCTION... 4 Overview... 4 About This Document... 4 GETTING STARTED... 6 Installation... 6 Starting FTR Player... 6 To start Player in Windows 7 or Windows 10 6
Table of Content. Nero Recode Manual
 Table of Content 1. Start Successfully... 4 1.1. About Nero Recode... 4 1.2. Versions of Nero Recode... 4 1.3. Working with Nero Recode... 5 1.4. Starting Nero Recode... 6 2. Main Screen... 8 3. Recode
VideOh! PCI AVC Getting Started
 R VideOh! PCI AVC-2010 Getting Started DISCLAIMER: This product may be designed to assist you in reproducing materials. In doing so, you must have permission from the copyright owner of the materials to
Main function 4.3 TFT Screen, Resolution 480*272
 Main function 4.3 TFT Screen, Resolution 480*272 Support APE, FLAC, MP3, WMA, OGG, WAV etc. music play. Support TF card, capacity support 128MB~8GB Support MPEG-4(AVI), RM, RMVB, FLV, 3GP, MPG, VOB, MP4,
GOM Cam User Guide. Please visit our website (cam.gomlab.com) regularly to check out our. latest update.
 regularly to check out our. latest update.") GOM Cam User Guide Please visit our website (cam.gomlab.com) regularly to check out our latest update. From screen recording to webcam video and gameplay recording GOM Cam allows you to record anything
GOM Cam User Guide Please visit our website (cam.gomlab.com) regularly to check out our latest update. From screen recording to webcam video and gameplay recording GOM Cam allows you to record anything
The Saviour Photo Recovery 5.0 Installation Guide
 The Saviour Photo Recovery 5.0 Installation Guide 1 Overview Digital multimedia files may accidentally get deleted while deleting files, or formatting storage device. Files may also get lost due to corruption
Ocularis. Installation & Licensing Guide
 Ocularis Installation & Licensing Guide On-Net Surveillance Systems, Inc. One Blue Hill Plaza, 7 th Floor, PO Box 1555 Pearl River, NY 10965 Phone: (845) 732-7900 Fax: (845) 732-7999 Web: www.onssi.com
Part 1: Understanding Windows XP Basics
 542362 Ch01.qxd 9/18/03 9:54 PM Page 1 Part 1: Understanding Windows XP Basics 1: Starting Up and Logging In 2: Logging Off and Shutting Down 3: Activating Windows 4: Enabling Fast Switching between Users
User Guide for Leawo Prof. Media - How to Use Leawo Prof. Media
 User Guide for Leawo Prof. Media - How to Use Leawo Prof. Media Leawo Prof. Media is an all-in-one total video converter solution. This total media converter suite could do various things for you: convert
Document No.: CD Duplicate Master. CD Duplicate Master. Jam Video Software Solution Inc. Page 1
 Document No.: CD Duplicate Master CD Duplicate Master Jam Video Software Solution Inc. http://www.jamvideosoftware.com Page 1 Pages Order Introduction...Pages 3 How to buy...pages 4 How to use...pages
HyperMedia User Manual
 HyperMedia User Manual Contents V3.0 Chapter 1 : HyperMedia Software Functions... 3 1.1 HyperMedia Introduction... 3 1.2 Main Panel... 4 1.2.1 Information Window... 4 1.2.2 Keypad... 4 1.2.3 Channel Index...
ivcd Reviewer s Guide
 ivcd Reviewer s Guide www.mireth.com support@mireth.com Table of Contents The Right Software For The Job Product highlights...2 Getting started...4 System Requirements...4 Other Requirements for running
DRAFT. Table of Contents About this manual... ix About CuteSITE Builder... ix. Getting Started... 1
 DRAFT Table of Contents About this manual... ix About CuteSITE Builder... ix Getting Started... 1 Setting up... 1 System Requirements... 1 To install CuteSITE Builder... 1 To register CuteSITE Builder...
USB 2.0 All-in-One Cable
 USB 2.0 All-in-One Cable 13335 Overview Congratulations on your purchase of the 133355, a USB file transfer cable. Nowadays, more and more people own more than two computers. Due to space limitations,
Scouting Assistant v1.x Release Notes
 Scouting Assistant Build 1.6.0.1 January 3, 2014 Implemented a new feature for the Professional edition for Stamping Photos using Date/Time, Moon Phase, Custom Caption, and Custom Logo. There is a new
Easy School Net Evolution Specifications
 Easy School Net Evolution Specifications Version 14 (FEB-2012) INDEX 1. System Connection Diagram 2. Easy School Net Evolution Management Console 3. Easy School Net Evolution Digital Video Recorder (Option)
Libraries. Multi-Touch. Aero Peek. Sema Foundation 10 Classes 2 nd Exam Review ICT Department 5/22/ Lesson - 15
 10 Classes 2 nd Exam Review Lesson - 15 Introduction Windows 7, previous version of the latest version (Windows 8.1) of Microsoft Windows, was produced for use on personal computers, including home and