What's New in Silhouette 4
|
|
|
- Christina Walsh
- 6 years ago
- Views:
Transcription
1 3 C H A P T E R 1 What's New in Silhouette 4 What's New in Version October 2007 There have been many changes and improvements in Version 4.5 of Silhouette 4 but the four major changes are: 1. Automatic Class Folder Backups When backups are enabled in Utilities, every time you exit a class folder or a student file on the Student Reports screen, the class folder is copied, compressed and stored in the S4BAK folder in your Silhouette 4 folder. (Note: Backups will NOT be created is you are working on a floppy disk - the delay would be too much because of long write times to floppy disks.) You manage the backup files through the Folders Utilities button on the Student Reports screen, where you can restore any of the last 15 backups to the Student Reports screen - without affecting the current version of your class folder. Turn Automatic backups on and off in Utilities. Manage class folder backups in Classes Utilities. 2. The Schoolwide data file: no More Need For ClassList Printer - bypass the middleman Until Version 4.5 of Silhouette 4, ClassList Printer was required as an intermediate step in order to get classlist files to create your class folder in Silhouette 4. Version 4.5 of Silhouette 4 will now read the Turbo.dat file that ClassList Printer used to create the classlist files. You will have access to ALL your school's divisions and, if needed, will be able to create classes made up of a collection of students from across the grades. See Appendix O: Setting up the Schoolwide data file. You are still able to create your class folders using the previous method, using classlist files produced by ClassListPrinter. The choice is yours. 3. Windows Vista Support Silhouette 4 Version 4.5 will work on Windows Vista computers. The UAC (User Account Control) will appear each time to start up Silhouette 4 (just click on Allow) but, other than that, everything works the same as you would expect on a Windows 2000 or Windows XP computer. See Appendix P: Windows Vista support for further information.

2 4 Silhouette4UsersGuide 4. On-Line Updates On-line Updates are now available from the front screen on Silhouette 4.

3 5 C H A P T E R 2 Chapter One: Getting Started Getting Started Silhouette 4 is a tool that allows teachers to easily create student report cards. Comments are stored in topic areas which form comment bases. Multiple comment bases are possible. Reports are created by selecting appropriate comments for each student. All comments are fully editable, and space is provided for paragraphs as well as bulleted comments. The Report Overview helps teachers write term overviews which can easily be integrated into the term report. Silhouette 4 is recommended for use with a laser or inkjet printer and will install on a network. See Appendix E for special networking information. Hardware and System Requirements Windows version: Silhouette 4 requires a minimum Pentium III 256 MB RAM, and Windows Vista, XP, 2000.
4 6 Silhouette4UsersGuide Silhouette 4 has four main components Utilities: This is where you set your printer fonts and margins, select a floppy drive for imports and exports, set the network drive (Windows only), and set the Silhouette 4 password. Overviews: This is where you write an overview for the term's work. Overviews are written separately for each topic area and can be included as part of your report if you wish. Comment Base: This is where you create, delete, edit or print your comment bases. Multiple comment bases are permitted, so that each teacher can have a separate comment base if they are sharing a computer, or an individual teacher may keep more than one comment base for different grades or abilities. Comment bases can also be imported or exported to floppy disks. The comments in a comment base become the basis for student reports, but it is important to remember that in the student report any comment can be further edited for use with a particular student. Student Reports: This is where you create, rename, and delete class folders and student files as well as edit, view, and print student reports. School information such as name, teacher, grade and division are also set here, for inclusion on Silhouette 4 custom reports. Tip: Pressing the Escape key will always activate the current Exit, Cancel, or Done button. Silhouette 4 Passwords Silhouette has two levels of password protection. A general password can be set to control entry to all parts of Silhouette 4. This password must be set in the Utilities section of Silhouette 4. Once set, all users must enter the password before entering the Overview, Comment Base, Student Reports, or Utilities Section. This password can be changed from within the Utilities Section. A second level of password protection can be set from within each class in the Student Report Section. Once set, this class password prevents any unauthorized users from editing or viewing an individual set of class reports. The class password is set from within the Student Reports Section for each class. Note: These passwords prevent unauthorized entry via the Silhouette 4 program. However, it is still possible for a user to view the student report files using a word processor, the Explorer, or other file management program.
5 Chapter 2 Chapter One: Getting Started 7 Using Silhouette 4 with Floppy Disks Silhouette 4 can export comment base, student reports, and overview files to a floppy disk. This is useful for both backing up data and transferring files between computers. You may, however, prefer to save all your data to a floppy disk without having to export files at a later time. To do this, select the a:\silhouette4 path using the drop-down list box in the top left of either the Comment Base, Student Report, or Overview screen. Once this path is selected, certain import/export options become redundant and will not be available for use. The a:\silhouette4 path will remain in effect until the c:\ path is selected, the a:\silhouette4 path is cancelled (i.e. the disk is removed and a Disk Not Available message is cancelled), or the next time Silhouette 4 is run. Silhouette 4 can read any data files from any version of Silhouette 4 (Windows or MacOS) as long as they are on a disk that can be read. For most users, this means a PC/Dos formatted disk. Silhouette 4 can read comment base files from Silhouette3 and Sil folders.
6
7 9 C H A P T E R 3 Chapter Two: Silhouette 4 Utilities Edit Report Printer Settings These settings are only used for reports that do not use the custom format. Custom format reports use their own settings as required by the school district. See Appendix M: Edit Report Printer Settings for further information about Report Printer Settings.
8 10 Silhouette4UsersGuide Silhouette Password Use this option to create or change a Silhouette 4 general password. To remove a password, click on Accept with no password entered. Note: Silhouette 4 passwords are case-sensitive. That is, upper case letters are different than lower case letters. ('CAT' is not 'cat'). Only alphanumeric characters may be used in a Silhouette 4 password. Alternate Report Print Method With Windows 2000 and Windows XP, there have arisen peculiar problems with some printers and printer configurations. Quirks in the printer drivers may be the problem. For example, Windows 2000 and Windows XP printing to some Lexmark and Samsung printers created unexpected results with bolding topic headings and comments. These problems were overcome with a revised method of sending information to the printer. However, this revised method became a problem with some Windows 98 printer drivers. For example, printing to a shared HP 2100 printer over a peer-to-per network has resulted in random empty lines. Recommendation: If your student reports printing results contain unusual errors, try checking Use Alternate Report Print Method. Then print the student report again. Spell Checker Autocorrect When editing comments in the Comment Base or in the Student Reports as well as in many of the edit windows in Silhouette you may choose to have the spell checker autocorrect mode on or off. With AutoCorrect ON, the spellchecker will underline words not in its dictionaries, and may suggest alternate spelling. Some find this very useful, but some find it an annoyance, preferring to do a spellcheck after they have finished typing. Printer Line Width Corrector On some printers, the grid lines are printed very faint. If this is the case with your printer, check Enable Printer Line Width Corrector. Note that if this is checked, then when previewing your reports, the grid line will appear and disappear as you zoom in and out of the document. However, the print-out will contain much better-looking grid lines.
9 Chapter 3 Chapter Two: Silhouette 4 Utilities 11 Network Shared Folder Add this folder to dropdowns: This is the only network setting that is accessible through Silhouette4 Utilities. When checked, the Network Shared Folder location will appear on the path dropdowns on, for example, the main Comment Base window and the Student Reports window. While most teachers may not use this feature, a secretary who is printing reports, or an administrator who is reviewing reports may find it very useful. Method Use the default Winsock method unless you are using First Class software to manage your . Silhouette Help Style Only HTMLHelp files are supplied with the Silhouette4 installations, and HTMLHelp files are supported by the Help Updates feature. The WinHelp format is available for nework installations where HTMLHelp is disabled. Backup Folder Settings If you do not want Silhouette4 to automatically create backups of your class folders, uncheck this box. Check for On-Line Help Updates If the computer you are using has an internet connection, you can check for help file updates from within Silhouette 4 using the Check on Duet Software Website for Help file updates.
10

11 13 C H A P T E R 4 Chapter Three: Overviews Silhouette 4's Overview Section is designed to serve two purposes. Initially, it allows teachers to write and print an overview for the term's work. Typically, this will be done early in the term and will include references to the criteria which will be used as part of the evaluation process. At report time, these overviews can easily be incorporated as part of the Silhouette 4 student report, or printed as a separate document. Silhouette 4 overviews are created by writing separate topic overviews and saving them as individual files. Any or all of these separate topic overviews may then be included in the report overview. Create an Overview Folder Enter the name of the new overview folder into the white box. Any existing folders are displayed in the list, but are not accessible at this point. If necessary, a slider will appear in the list box to allow you to scroll down to view the rest of the list. After entering the new name, click on Create Overview Folder, or select Cancel if you wish to cancel this operation.
12 14 Silhouette4UsersGuide Import an Overview Folder Use this option to import one or more overview folders from a floppy disk, or Using the Select Source button, from another location.silhouette will display a list of folders available for importing. Click on the name of the folder(s) you wish to import, then click on Import Overview folder(s): If an overview folder with the same name as the one you choose to export already exists on your hard drive, Silhouette 4 will notify you and present two options: Enter a new overview folder name, then click OK, or Overwrite the existing overview folder. Export an Overview Folder Use this option to export an overview folder to a floppy disk, or, using the Select Destination button, to another location. Silhouette will display a list of folders available for exporting. Click on the name of the folder you wish to export, then click on Export Overview folder: Note: If an overview folder with the same name as the one you choose to export already exists on the floppy disk you will be warned. You can Continue and overwrite the file, or Cancel. Hide/Show Overview Folders Use this option when you find that you have accumulated many overview folders which you want to keep, but do not wish to view them at this time. See Appendix B for details on hiding or showing files. Note: To temporarily view all folders, including any hidden ones, select the Show Hidden Overview Folders check box. Overview Heading Use this option to create or edit the heading for this overview. Heading font sizes can be set from within the Report Overview part of Silhouette 4. Silhouette 4 will permit two font sizes within the heading, so that the top line can be set larger than the body of the heading. Use the Check Spelling button to access Silhouette 4's spellchecker. Click OK to save your heading, or select Cancel to exit without saving. Note: It is not necessary to create an overview heading. If your overviews will be included in the body of the student reports, the overview heading will not be accessed. This heading will be used only if the overviews are printed using Report Overview.

13 Chapter 4 Chapter Three: Overviews 15 Overview Topics Silhouette 4 is designed to allow for the inclusion of topic overviews in the student report. To accomplish this, each subject overview must be saved separately. To begin a new overview topic, click on Create a New Topic and click on OK. To edit an existing overview topic, just click on its name. Type the topic overview into the large box. Click OK to save your overview, or select Cancel to cancel any changes made. Use the Check Spelling button to access Silhouette 4's spellchecker. The Delete This Topic and Rename This Topic buttons affect this topic only. Use the Get Other File button to load files from elsewhere on your hard drive or floppy drive. There are two types of files that may be loaded into this topic: Overview files (*.sov) are created by Silhouette 4. The window that you view after clicking on Get Other Files allows you to select from all the Silhouette 4 overview files on your hard drive and floppy drive. Text files (*.txt) are files that are typically created with a text editor (e.g. Notepad) but may also be created and saved with any word processor. Click on Get Other File and then on Get Text File Instead. You will then be working with a standard Windows file requester.
14 16 Silhouette4UsersGuide Report Overview The report overview is created by selecting the appropriate topic overview paragraphs in the order they should appear. Select Include Overview Heading if you wish to have the heading information displayed at the top of the overview. Add blank line between Topic Overviews: This option adds a blank line between each of the topic overview sections. By default it is selected. Click in the check box to turn this option off and save space on your overview page. Add Topic Overview: Click the topic overview titles in this box to include them as part of the report overview. The topic overviews will appear in the print preview window to the right in the order in which you selected them. Click on the + or - button to adjust the zoom level of the preview. Click on Save Overview to save this report overview, or on Get Overview to load a previously saved overview. Click on Print Report Overview or Print Current Page to print the overview. Click on Printer Settings to set the font or size of the heading and overview text, as well as the paper size and margins. Note: Only the font name and size will be used by Silhouette 4. Style settings (i.e. bold, italic) will be ignored. The right side of the Report Overview screen displays a print preview of the overview as it is created. Click on < or > to turn the page and + or - to adjust the magnification of the preview. Tip: When the print preview is magnified so that the page is bigger than the window, use the scroll bars to scroll the display or drag the page around the display area by clicking and holding the mouse.

15 17 C H A P T E R 5 Chapter Four: Comment Bases Comment Base Utilities Create a New Comment Base Click on Create a New Comment Base. Then enter the name of the new comment base into the white box. Any existing bases are displayed in the list, but are not accessible at this point. If necessary, a slider will appear in the list box to allow you to scroll down to view the rest of the list. After entering the new name, click on Create New Base, or select Cancel if you wish to cancel this operation. Delete a Comment Base Click on the name of the base you wish to delete. After selecting a base, click on Confirm to Delete, or select Exit if you wish to cancel this operation.
16 18 Silhouette4UsersGuide Rename a Comment Base Click on the name of the base you wish to rename. After selecting a base, click on Confirm to Rename, or select Exit if you wish to cancel this operation. Note: If you rename a comment base, all student reports using that comment base will be unusable. However, if you rename the comment base back to its original name, the student reports will once again be usable. Clone a Comment Base Click on the name of the comment base you wish to clone. The name will be printed into the edit box below the list. Alter this to make it the name of the new cloned comment base. Notice that the Clone... to... button becomes active and shows the name of the original and the cloned comment bases. Click on this button. Hide/Show Comment Base Folders Use this option when you find that you have accumulated many comment base folders which you want to keep, but do not wish to view them at this time. See Appendix B: Silhouette 4 Tips for details on hiding or showing files. Get ed Comment Base Using the function within Silhouette 4 should provide a fast and safe way of transferring student reports to teaching partners, to the school secretary and administration, and even to yourself as you work at home and at school. From within Silhouette 4, you may class folders and comment bases to colleagues. These s contain attached files that are to be saved to the computer desktop from within your usual software. Then use Get ed Comment Base to locate and add the comment base to your comment base folder. If a comment base by the same name already exists, you will be given the option of overwriting the existing Comment Base, or providing a different name for the Comment Base to be saved as.

17 Chapter 5 Chapter Four: Comment Bases 19 Import/Export Comment Bases Note: To temporarily view all folders, including any hidden ones, select the Show hidden Comment Base folders check box. Still Using Floppy Disks? For years, the floppy disk has been the least expensive and most efficient vehicle for transferring data. Unfortunately, floppy disks are also very susceptible to damage in transit. However, we now have other options including networking, ing and portable USB drives. Silhouette 4 will permit exporting and importing comment bases to and from locations other than the floppy disk. The Select Source and Select Destination buttons will allow you to specify the location for your import or export if you do not use a floppy disk. Note that from within each comment base there is the option to the Comment Base, another way to export your data. Export a Comment Base Use this feature to copy an entire comment base to a floppy disk, or, using the Select Destination option, any Silhouette4 folder within reach of your computer. This will enable you to transfer your comment bases between computers. Note that the exported comment base can be imported into either a Windows or MacOS version of Silhouette 4 on a PC formatted disk or USB drive. Select the name of the base you wish to export, then click on Export Comment Base, or select Exit to cancel this operation. Note: If a comment base with the same name as the one you choose to export already exists in the destination folder, you will be warned. You can Continue and overwrite the file, or Cancel the export.

18 20 Silhouette4UsersGuide Network Shared Folder: If your computer is on a network that has been set up to provide a Network Shared Folder, the Network Shared Folder button will appear on the Export Comment Base and Import Comment windows. You could access the Special Network Folder by using the Select Other Destination option, but clicking on this button is a fast and convenient way to get to a folder that is shared with all other teachers on the network. Import a Comment Base Import one or more comment bases from a floppy, or, using the Select Other Source option, any Silhouette4, Silhouette3, or Sil folder within reach of your computer. Silhouette 4 will display a list of comment bases that are accessible. Select one or more comment bases, then click on Import, or select Exit to cancel this operation. If a comment base with the same name as the one you choose to import already exists on your hard drive, Silhouette 4 will notify you and present two options: Enter a new comment base name, then click OK, or Overwrite the existing comment base. Make the appropriate selection to begin the import process. Note: Editing a comment base after some reports have been created using that comment base may result in a conflict between the original version which the student file expects to use and the edited version you have created. Such a conflict will be reported to you when you select the student file. Silhouette 4 uses version numbers (displayed at the top right of the screen) to check for such conflicts.
19 Chapter 5 Chapter Four: Comment Bases 21 Import Comment Bases from c:\program Files\Silhouette3 Silhouette 4 will automatically look for a Silhouette3 folder in the Program Files folder on your C drive (this is the default installation path for Silhouette3). If you want to copy comment bases into Silhouette 4, just check of what you want copied over and click on Import.

20 22 Silhouette4UsersGuide Edit a Comment Base Note: Editing a comment base after some reports have been created using that comment base may result in a conflict between the original version which the student file expects to use and the edited version you have created. Such a conflict will be reported to you when you select the student file. Silhouette 4 uses version numbers (displayed at the top right of the screen) to check for such conflicts. Select the comment base you wish to edit or print. Silhouette 4 will now display the topic areas which make up the comment base. Create a New Topic Click Create a New Topic, then enter its name. The new area will be added to the bottom of the list of topic areas. Set Order of Topics Use this option to rearrange the order in which the topics appear and will be printed on the report. Select the topics from the window on the left side of the screen in the order you wish to see them. They will be copied into the right window in order as you select them.

21 Chapter 5 Chapter Four: Comment Bases 23 Import a Topic Use this option to get all or part of a single topic area from another comment base into the currently selected one. It may be from another comment base on your own computer, or one that is part of a different comment base which may have been exported onto a floppy disk or USB drive from another computer. To import a Topic Area from another comment base into this comment base: 1 Choose the comment base you wish to import from. Silhouette 4 will display the available comment bases on the selected drive in the left window. If necessary, use the From Path dropdown or Select Other Source option to locate the comment base. 2 Choose the Topic Area you wish to import into this comment base. Silhouette 4 will display the available Topic Areas in the right window. 3 Check to see that the imported topic has a unique name. In the bottom window, Silhouette 4 will display the selected topic as well as all the topic names in the current comment base. If the new topic has a name that matches one in the current comment base, Silhouette 4 will display a reminder (in red) that you must enter a new topic name. 4 Click on Continue. Then check the comments that you wish to be included. When done, click on the bottom button confirming that you wish to import this topic.
 to re-order the list of topics.")

22 24 Silhouette4UsersGuide Note: The new topic area (and the selected comments) will be added to the end of the list of topics in the current comment base. You may wish to use Set Order of Topics (see above) to re-order the list of topics. this Comment Base Folder See also Appendix N: Setting Up Silhouette 4 . From within Silhouette 4, you may class folders and comment bases to colleagues. These s contain attached files that are to be saved to the computer desktop from within your usual software.

23 Chapter 5 Chapter Four: Comment Bases 25 When you click on this Comment Base Folder, the comment base is automatically compressed into one file and readied to be sent as an attachment. Select or type in a destination address, perhaps add a personal note to the instructions box and Send . The person who receives the will save it to their desktop. Then they will use Get ed Comment Base to locate and add the comment base to their comment base folder.

24 26 Silhouette4UsersGuide The Edit Topic Window To edit a topic area, click on its name. Silhouette 4 will display the comments in a highlighted text box. If there are more comments than will fit, you can use the slider ot the arrow keys to scroll up and down the list of comments. Editing may only be done in the editbox under the list. You will mostly be working in two areas of the Edit Topic Window, the comments listbox and the comment editbox. Notice that the active element is highlighted, standing our from the other elements in the window. Switch (or toggle) between these areas using the Tab key or the F4 and F9 keys. Notice, too, that the F5, F7 and F8 keys now have special functions. Include Topic Title: By default, the Include Topic Title on report printouts checkbox is selected. If you remove this check, then Silhouette will not print the topic title on the student report, even if comments are checked for inclusion on the report.
25 Chapter 5 Chapter Four: Comment Bases 27 Editing Comments in Silhouette 4: Keyboard and Mouse Options Listbox focus: When the listbox is highlighted, you may: 1 use the left mouse button to select a comment. The comment will appear in the editbox below. 2 use the right mouse button to select a comment. The comment will appear in the editbox below and the focus will switch to the editbox so that you are ready to edit that comment. 3 use the mouse scrollwheel to scroll up and down the list 4 use the left mouse button on the slider to scroll up and down the list 5 use the up and down arrow keys on the keyboard to scroll up and down the list 6 pressing F5 will delete the current comment 7 pressing F7 will insert a new comment at the bottom of the list 8 pressing F8 will insert a new comment line above the current comment 9 press the F4 or F9 or Tab keys to switch focus to the editbox Editbox focus: When the Editbox is highlighted, you may: 1 edit the comment. Notice that comment text in the listbox changes as you change the editbox text. 2 use the left, right, up and down keys on the keyboard to navigate in the editbox 3 press Enter to move to the next comment in the listbox an be ready to edit it 4 press Shift-Enter to move to the previous comment in the listbox and be ready to edit it 5 pressing F5 will delete the current comment 6 pressing F7 will insert a new comment at the bottom of the list 7 pressing F8 will insert a new comment line above the current comment 8 press the F4 or F9 or Tab keys to switch focus to the editbox

26 28 Silhouette4UsersGuide Bulleted vs Paragraph-style Comments: Silhouette 4 presumes that you will most often wish to enter bulleted comments. Commenting in this style helps to keep your comments concise and focussed. A disadvantage to bulleted comments, though, is that there is often a lot of unused space on a report. You may wish sometimes to delete the bullets and write in full sentences instead. In this case, be aware that in the student reports section of Silhouette 4, you can mark checked comments to be appended to the end of a previously checked comment. This would look silly with bulleted comments, but works well with sentence comments, resulting in a paragraph-style look. See Appendix F: Bulleted vs Paragraph-style Comments for suggestions and examples. Special Text Inserts Click on Special Text Inserts for a list of commands that can be included in a comment. Click on the appropriate command to insert it into the current comment. These commands will be interpreted appropriately on each student's report. They can be added to a comment by clicking on the Special buttons (shown below), or by typing them in as shown below: [name]: In each student report, Silhouette 4 will insert the student's common name wherever this appears. Gender sensitive pronouns: In each student report, Silhouette will select the appropriate form of these pronouns:
27 Chapter 5 Chapter Four: Comment Bases 29 he/she His/Her him/her his/her himself/herself He/She boy/girl [i]: When printing, Silhouette 4 will italicize this line (must be positioned at the beginning of a line) [b]: When printing, Silhouette 4 will boldface this line (must be positioned at the beginning of a line) [bi]: When printing, Silhouette 4 will boldface and italicize this line (must be positioned at the beginning of a line) bullet: Silhouette 4 will insert a bullet character and a space ( To manually type a bullet, check that the Num Lock is on. Then hold the Alt key and type 0183 on the number pad.) To close the Special Text Inserts window, click on the Special Text Inserts check box. Notes: 1. Notice that if your cursor is in the text of the last comment of the topic, you can press Enter to create a new bulleted comment below. 2. Comments can be as long as you wish. The comment box will scroll right as you type longer comments. 3. The gender pronoun his/hers is not automatically screened for gender. 4. Silhouette 4 always prints selected comments in the order that they appear in the comment list. Therefore, you may wish to pay attention to the order in which they are entered. 5. There is an additional special command, [x]. This command should be used as the first comment in a topic. Its function is to force a topic title to appear if there are no selected comments in that topic. The [x] command does not appear in the special commands window and must be typed in. See Appendix B. 6. When editing comments, you can use the mouse to highlight words and cut and paste using Ctrl-C for cut and Ctrl-V for paste. 7. See Appendix D for useful keyboard shortcuts Tips: 1. It is a good idea to include a few blank comments so that extra comments can be added for individual students as the reports are written. 2. Blank comment lines can be used to provide blank lines before or after sections of comments. They must be selected in the student report in order to appear.

28 30 Silhouette4UsersGuide 3. A comment base topic could contain a sub-heading (e.g. Strengths:). In this case, delete the bullet so that the sub-heading will be left-justified. If you intend to use a comment as a sub-heading, leave a blank comment directly above it. Then, by checking the blank line you can skip a space before the sub-heading. Multi Delete Mode An alternate method to using the F8 key to delete comments, check Multi Delete Mode, then check the comments you wish to delete. When done, click on the Delete These Comments button at the top of the window. Notice that when Multi Delete Mode is on, the listbox automatically expands, covering the edit box, to show a greater number of comments at once. Multi-Move Mode: Moving/Re-ordering Comments To move a block of comments, or re-order them: 1 Click on Multi Move Mode. Follow the red on-screen instructions. 2 Select up to 25 comments you wish to move, in the order you want them to appear. Silhouette 4 will remember the order in which you click them. 3 Click on Selections Done. 4 Silhouette will display each of the selected comments, in the order they were clicked, and ask which comment number it should be inserted before. Click the comment number and the moved comment will appear there immediately. 5 If all the comments are to be moved as a block, hold the SHIFT key while clicking the comment number referred to in step 4 above. Silhouette 4 will then move all the selected comments, in the order they were selected, to the new location. Notes: Silhouette 4 always prints selected comments in the order that they appear in the comment list. Therefore, you may wish to pay attention to the order in which they are entered, and use the Multi Move mode to ensure that they will print out in a logical order.
29 Chapter 5 Chapter Four: Comment Bases 31 Warning! Clicking on Exit Without Saving or pressing the Esc key will exit the topic, discarding any changes since the last save. 1. Click on Save Changes or Save Changes, then Exit to save your topic area comments. Your edited comments for this topic area will be saved. 2. If you enter Multi Move mode, then decide to cancel the operation, Silhouette 4 will exit right out of the topic area. It is always wise to use the Save Changes button to save your topic area before attempting to use Multi Move Mode. Check Spelling Use this option to access the Silhouette 4 spellchecker and check the spelling of all the comments in this topic area. See Appendix A: The SpellChecker and Thesaurus for further information. Thesaurus (Windows version only) The Silhouette thesaurus is available in the Comment Base only. To use the Silhouette thesaurus: 1 first highlight a word in the comment base. You can do this by double-clicking a word or by dragging to highlight the word or partial word. 2 click on the Thesaurus button. If the selected word is in the thesaurus, up to ten related words will be shown. To replace the selected word, click on a word from the list and then click on Replace, or just double-click on the word from the list.

30 32 Silhouette4UsersGuide Comment Base - Topic Utilities Rename this Topic Enter the new name for this topic. Note: You must click on Save Changes, then Exit after you rename a topic. Delete this Topic This option will permanently and completely delete the topic area. Click on Yes to confirm. Print this Topic Silhouette 4 will show current printer settings and paper size. These can be changed by clicking on Select Font or selecting a different paper size. Note: Only the font name and size will be used by Silhouette 4. Style settings (i.e. bold, italic) will be ignored. Click on Save These Settings as Default if you wish to use them again.
31 Chapter 5 Chapter Four: Comment Bases 33 Click on Print to print all comments in the current topic area. They will be printed out in the order in which they appear. Make sure your printer is connected and on-line. Click on Exit to return to the comment editor. The right side of the Print Comment Base screen displays a print preview of the overview as it is created. Click on < or > to turn the page and + or - to adjust the magnification of the preview. Clone this Topic Inside this Comment Base Use this option to create a copy of this topic area, within this comment base. This is helpful if you wish to have a new topic area for second term which contains many of the first term comments. Enter the name for the cloned topic area, then click OK or Cancel. Note: If you wish the copy of this topic to be created in a different comment base, you must enter that comment base and use the Import Topic option. Append Comments from Text File Use this option to import comments that have been previously typed and saved on a word processor. The comments must be saved as a text (.txt) file before this feature will work. The following steps outline the process: 1 With your word processor, save the old comments file as a text (.txt) file. Save it on a floppy disk if you use Silhouette 4 on a different computer. 2 Run Silhouette. Select the comment base and topic area you wish to add the comments to. 3 Click on Topic Utilities, then Append Comments from Text File. 4 Click on Get Text File and open the text file from step 1 above. 5 Check the comments you wish to import. 6 Click on Add Bullets to add a bullet before each comment. 7 Click on Append Checked Comments to the Topic Area to add the selected comments to the end of the current topic area. 8 Save the topic area.
32 34 Silhouette4UsersGuide Append Comments from Another Comment Base Use this option to import comments from topics in other comment bases. The following steps outline the process: 1 In Silhouette, select the comment base and topic area you wish to add the comments to. 2 Click on Topic Utilities, then Append Comments from Another Comment Base. 3 Locate the Comment Base and Topic from which you wish to import comments. Then click on Continue. 4 Check the comments you wish to import. 5 Click on Append These Comments to add the selected comments to the end of the current topic area. 6 Save the topic.

33 35 C H A P T E R 6 Chapter Five: Student Reports The Student Reports screen contains many options, but most often the teacher will use it to access the individual student report files in the large window on the right side of the screen. Note: By default, Silhouette 4 will read student files from the Silhouette4 directory on your hard drive. However you may wish to read files from a floppy disk. To do so, select a:\silhouette4\classes from the path to drop down menu. To read from other locations, click on Select Path to locate any Silhouette4 folder within reach of your computer. New Class Folder Note: Each term, a new class must be created (or cloned). In many schools, the class folder may be shared with colleagues, secretarial staff, and administrator. It is a good idea to carefully consider the name you give to the class folder Up to 30 characters may be used, for example, the name, Div 12 Term Jones indicates the Division number, term, school year and teacher s surname

34 36 Silhouette4UsersGuide 1. Click on New Class Folder. There will be four options but unless there is a Schoolwide data file present in your Silhouette4 folder, only the top two will be enabled. The Schoolwide data file is the same Turbo.dat or Master.dat file that ClassList Printer has used to create classlist files. Now this file containing information about every student in the school may be used by Silhouette 4 enabling you to bypass the ClassList Printer stage. However, classlist files created by ClassList Printer may still be used as in previous versions of Silhouette. If there is no Schoolwide data file present, you can import one into your Silhouette 4 folder via Classes Utilities.

35 Chapter 6 Chapter Five: Student Reports Select one of the four new class options and click on Proceed: Create an empty class folder: use this if you are going to enter student names individually or wish to make a template, then create student files from the template. Create a new class folder using a class list file: use this if you have already got a class list (perhaps from a Turbo-School export). If you select this option, you will be asked to locate the class list file before continuing. Silhouette will list all the students in the selected class list so that you can choose which students to include in the new class. (By default, all students names will be checked, so you will have to un-check the students you do not want to include.) The resulting new class will have all student files already created. If the classlist file is not in your default CList folder, you can use Select Other Source to locate another Silhouette4 or even Sil or Silhouette3 folder where that classlist might be located. You can even click on the Locate a classlist file on my computer button and search out the file yourself (This may be useful for Delta teachers who will be able to fetch a classlist file with FirstClass and save it to their desktop.) Using a Schoolwide data file, create a class folder of student files from a single division
.")
36 38 Silhouette4UsersGuide Using a Schoolwide data file, create a class folder of student files from more than one division With this option, you are able to select from all the students in the school to create your class folder. This may be very handy for Resource teachers. 3. Enter the new class name (max. 30 chars). If you are creating the new class from a class list file, you will have to choose a comment base for each student. You can either select one comment base for the whole class, or elect to choose a comment base for each student individually.

37 Chapter 6 Chapter Five: Student Reports Click OK (or Proceed) to continue or Exit to cancel this operation. Export Class Folder Silhouette 4 will permit exporting to a location other than the floppy disk. The Select Destination button will allow you to specify the location for your export if you do not use a floppy disk. Use this option to copy a class folder onto a floppy disk or other location. 1. (Optional) Insert a formatted disk in the floppy drive and click on Export Class Folder. If there is a floppy disk already inserted into the floppy drive, Silhouette 4 will immediately go to that drive. Otherwise, you must use the Select Destination button to locate the Silhouette4 folder to which you want to export. 2. Follow the on-screen instructions to select the class and export the files. Silhouette 4 will export the student reports and, optionally, all comment bases which are linked to them. (Note for class folders created that do not use the School District Custom Format. You will be notified if the settings on your computer indicate that printouts of this class should include a graphic. However, you will have to transfer that graphic file using Explorer or other file utility.) Special Network Folder: If your computer is on a network that has been set up to provide a Special Network Folder, the Special Network Folder button will appear on the Export Class and Import Class windows. You could access the Special Network Folder by using the Select Other Destination option, but clicking on this button is a fast and convenient way to get to a folder that is shared with all other teachers on the network.
38 40 Silhouette4UsersGuide Import Class Folder Silhouette 4 will permit importing classes from a location other than the floppy disk. The Select Source button will allow you to specify the source for your import if you do not use a floppy disk. Use this option to copy a class folder onto the hard drive. As an alternative you may wish to simply read the files from your floppy disk without copying them. (see Student Reports, above) 1. Click on Import Class Folder. If there is a floppy disk already inserted into the floppy drive, Silhouette 4 will immediately go to that drive. Otherwise, you must use the Select Source button to locate the Silhouette4 folder from which you want to import. 2. Follow the on-screen instructions to select the class and import the files. 3. Click on Import, or Exit to escape without exporting. Note: Any Silhouette 4 comment bases that exist in the selected folder will also be displayed on this screen. To import these comment bases, you must go to the Comment Base section of Silhouette 4 and select the Import Comment Base button. Get ed Class Using the function within Silhouette 4 should provide a fast and safe way of transferring student reports to teaching partners, to the school secretary and administration, and even to yourself as you work at home and at school. From within Silhouette 4, you may class folders and comment bases to colleagues. These s contain attached files that are to be saved to the computer desktop from within your usual software. Then use Get ed Class to locate and add the class folder to your student report folder. If a class by the same name already exists, you will be given the option of overwriting the existing class, or providing a different name for the class to be saved as.

39 Chapter 6 Chapter Five: Student Reports 41 Classes Utilities Classes Utilities enables you to accomplish a variety of tasks. Hide/Show Class Folders Use this option when you find that you have accumulated many class folders which you want to keep, but do not wish to view them at this time. See Appendix B: Silhouette 4 Tips for details on hiding or showing files. To temporarily view all folders, including any hidden ones, select the Show hidden class folders check box Delete Class List File(s) Use this option to delete class lists. Note: When you delete a class folder, the class list file is not automatically deleted. The Delete Class List File option allows you to clear out unwanted files. These files are created and updated on your hard drive when you are creating and working with the student files in each class folder. Get ed ClassList File

40 42 Silhouette4UsersGuide If, for example, your school secretary has ed a classlist file to you, you will have saved it to your desktop. Next, click on this button, locate the file and it will be brought into the Silhouette4 folder. Then you can go back to the Student Reports screen, click on New Class Folder and use that classlist file to create your new class. Manage Backup Folders Here is where you view the backup folders in your SilhouetteCE folder, and delete them or restore them. When you click on Manage Backup Folders you will see a list of class folders that have been backed up. Each named class folder in the left window may contain up to 15 dated backups. In the case below there are four backups for the D5 T J Brady class, all created (untypically) in a few minutes: You can delete unwanted collections of backups by Shift-clicking on the folder name on the left window:
 a schoolwide data file. Locate the file (The file exported from Turbo-School must be called either Turbo.da or Master.dat.) Silhouette4 will copy the schoolwide data file into the Silhouette4 folder, ready for use.")
41 Chapter 6 Chapter Five: Student Reports 43 Schoolwide Data File Utilities: See Appendix O: Seting up the Schoolwide data file for further information Get Schoolwide Data File Use this option to get (or update) a schoolwide data file. Locate the file (The file exported from Turbo-School must be called either Turbo.da or Master.dat.) Silhouette4 will copy the schoolwide data file into the Silhouette4 folder, ready for use. Only one schoolwide data file can exist on in the Silhouette4 folder at a time. The file contains data for the entire school, so that you can create class folders of any division. If two teachers from different schools attempt to import their school's schoolwide data file, the second file will overwrite the first. Export Schoolwide Data File You may use this method, for example, to copy the schoolwide data file on your computer onto a floppy disk or USB drive so that it may be given to another teacher who wants to copy it onto her computer. Get ed Schoolwide Data File If you receive an with a schoolwide data file (named Master.SCE4) as an attachment, you will have saved it to your desktop. Next, click on the Get ed Schoolwide Data file, locate and click on Master.SCE4. the schoolwide data file will be copied to yoru SilhoueteCE folder ready for use.
42 44 Silhouette4UsersGuide Schoolwide Data File Use this to the schoolwide data file in your Silhouette4 folder to a colleague. Attendance File Utilities: Get Attendance File Use this option to get (or update) an Attendance File. Locate the attendance export file (The file exported from Turbo-School must be called AttLabel.dat; the Delta attendance file is named attendance.csv) and open it. Silhouette 4 will copy the attendance data into the Silhouette 4 folder, ready for use. Notes: 1. This procedure must be repeated each term to ensure that the report includes up to date data. 2. Only one attendance file can exist on a computer at a time. The file contains data for the entire school, so that all classes can use it, but there cannot be attendance data from two schools at once. If two teachers from different schools attempt to import attendance data, the second file will overwrite the first. In this case, incorrect attendance data will be printed if the two schools have students with the same student number (quite likely). Silhouette will find what appears to be a correct student number and attendance for the report being printed, but it will actually be data from the other school. See Appendix L: Including Attendance.
 onto your desktop. Then, click on Get Emailed Attendance File, locate the SilAttend.")
43 Chapter 6 Chapter Five: Student Reports 45 Get ed Attendance File Just as you can and receive class folders and comment bases, you can also and receive a school attendance file. When you receive the attendance file via your regular service, save the attached file (SilAttend.SCE4) onto your desktop. Then, click on Get ed Attendance File, locate the SilAttend.SCE4 file and open it. It will be copied into your Silhouette4 folder and deleted from your desktop. Attendance File See Appendix N: Setting Up Silhouette 4 . When you click on Attendance File, Silhouette 4 finds and prepares the attendance file on your computer to be sent as an attachment. Be sure that your smtp address is correct (not needed if First Class option is selected in Utilities), enter to select the destination address, perhaps add a personal note to the message box and Send .

44 46 Silhouette4UsersGuide Get ed Classlist File Just as you can and receive class folders and comment bases, you can also and receive a classlist file. When you receive the classlist file via your regular service, save the attached file onto your desktop. Then, click on Get ed ClassLIst File, locate the file and open it. It will be copied into your Silhouette4\Clist folder and deleted from your desktop. Student Files Utilities When you click on a class, the student files are listed on the right and the Student Files Utilities are enabled. These options apply to the selected class folder: New Student Click on the class name and then on New Student(s). Silhouette will present three choices:
 Click the Male or Female box.")
45 Chapter 6 Chapter Five: Student Reports Create Individual Student Files Manually: a) Enter the new student's last name and first name into the boxes provided. b) Click into the Name Used box. Silhouette will automatically copy the student s first name into this box. If this is not correct, edit it to the name the student is known by. c) Click the Male or Female box. Silhouette must have this information to make its comments gender specific. d) Enter the student s grade in the grade box. e) Enter the student ID number. It is recommended that the school s student number (Turbo-School) be used here, but any number will do as long as each student in the class has a unique ID number. However, if you plan to include attendance or export PSR data at year end, these numbers must match the Turbo-School student numbers. f) (Optional) Enter the student s Provincial Education Number (PEN). This is included because some school districts include the PEN number on the student report. If not, leave this box empty. g) Select a comment base for this student. h) Click on SAVE New Student File or Cancel


46 48 Silhouette4UsersGuide Note: Silhouette allows for different comment bases within a class. There is no need to select the same comment base for each class member. 2. Create New Student from Schoolwide data file: Silhouette will display the Schoolwide data file. Select the Comment Base first and then check off the students to be aded to your class.
47 Chapter 6 Chapter Five: Student Reports Create new Student from a classlist file: Silhouette will ask you to select a classlist file to use and then show a list of the students in that classlist file. You must select a comment base, then you can check the students you wish to add to your own class. Click on Proceed to finish the operation. New Template A report template may be used if many student reports are to contain certain pieces of identical information. For example, if overviews are to be contained within the text of the student report, using a template will save a lot of time. Then, the new students can be added, and each report will include the data specified in the template. Important: The template must be created before the individual student files are created. Therefore, you should be working in an empty class folder when you begin this process. Multiple templates are allowed. 1 After you have created your new class folder, having selected the Template Option, click on New Template. 2 Select the comment base which the template will use, then click on SAVE Template. 3 Silhouette will return to the Student Report screen and display the name " Template" as one of the students in the class list. Click on Template to work on the report template. 4 Add any opening or closing comments just as you would on a normal student report. You may also choose a topic area and select comments which will be common to all students, or add introductory and closing comments within the topic. A common use within a template is to import topic overview information within each of the topic areas. When selecting comments, the Special Text Commands (i.e. [name], he/she, etc.) will not be interpreted by Silhouette 4. Instead they will be interpreted later for each student. Comments can be edited now, for the template, or later, for individual students. 5 After adding all the template data, click on Save Template. (Or use Save Template, then Exit if you do not wish to create any students at this time.) 6 Click on Create New Student Files from This Template. 7 Select one of the two methods of creating student files from the Template: a) Create Student Files Individually - Enter the full name, first name, and gender of the student whose report will use this template. Click on Save File to create this student's report. Repeat this procedure for each student. Click on Done to return to the Template screen. b) Use Class List File with this Template - This option will only work with a Silhouette class list file. c) Select the path (e.g. a:\ or c:\) where the class list file is located. Silhouette will display a list of classes available. Select the class to be used for this template.
48 50 Silhouette4UsersGuide d) Click on Save Whole Class to create new reports for the whole class, using this template. Alternately, you may click on individual student names then click on Save [name] to build a list of students who will use this template. Click on Done when the list is complete. 8 After creating files with the template, new student reports will be added to the class folder. Each new report will contain all the comments that were part of the template file, and can be further edited for individual comments. If necessary, additional templates ("Template2, etc.) can be created and saved. Batch Importing Topic Comments Batch Import: Getting Ready Use this option to merge a set of Silhouette report comments to your existing student reports. If, for example, your music teacher has prepared music reports for your class using Silhouette, this option will allow you to add the music comments to each student's report. Note: In order to use the Batch Import option, these steps must be taken: 1. The other teacher (music, art, etc.) must prepare Silhouette 4 reports for the class. The StudentID numbers must be identical and student names must be spelled exactly the same as they appear on your Silhouette 4 class list. (You may wish to use the Export Class List option to create a class list for the other teacher who is providing you with these comments.) 2. The other teacher must export the students reports and their comment base(s) to a floppy disk, or a USB drive, or, if you are working on a network, the other teacher may be able to export to a shared network folder, or the other teacher may the class and comment base to you. 3. In Comment Bases, you must import the other teachers' topic area so that it becomes part of the comment base that your students' reports refer to. See Import a Topic, in Chapter Four: Comment Bases.

49 Chapter 6 Chapter Five: Student Reports 51 Once these conditions have been met, you can click on Batch Import Topic Comments to merge the other teacher's reports with your existing reports. Using the Batch Import: Topic Comments To import the report comments, follow the numbered steps on-screen. 1. Select source path using Select Other Source, or choose from the dropdown. Silhouette 4 will display all available classes in the window below. 2. Source Class: Select the class reports you wish to import. These will be the ones that were created by the other teacher. 3. Select Source Comment Base. If the source class students do not all use the same comment base, you must batch import them in groups, according to the comment base they use. Select one of the listed comment bases and Silhouette will display the names of students using that comment base in the centre window. If all students in the source class use the same comment base, this step is not necessary 4. Select Source Topic. Select the topic area which you wish to append to the listed students' reports. 5. Click on Batch Import Topic Comments and the comments will be added. (Silhouette will notify you if the source topic area is not part of the comment base which your class uses or if the topic areas appear to be different. You will be instructed to import the topic area into your comment base before continuing.)
50 52 Silhouette4UsersGuide When the batch import is complete, Silhouette will display a summary of the import, indicating what was appended for each student and any students who were not included. Note that it is all right if there are additional students on either of the two class lists. Silhouette will import comments only for the names and StudentIDs that match identically and will notify you of any students who were not included. Silhouette will also put an asterisk beside the student names at the bottom of the screen to indicate the successful import. Using the Batch Import: Grades For intermediate classes, you can also import the grades from another class folder. For example, in the first term if another teacher teaches Science to your class, that teacher will create a class folder with just Science comments and Science grades. After you have imported the Science comments (as above), you are ready to import the Science grades. Notice that when you enter Batch Import: Grades, the grades for student in your class are on the right side of the window. You may click on the < and > buttons to flip through them. As with the import of comments, first locate the correct class folder. Silhouette will read in the grades for the whole class and display them on the left. You may click on the < and > buttons to flip through them. On the left, click on the radio buttons to highlight the Term and Subject that you wish to copy (in the Science example, you would select Term 1 and Science.) Then on your grades list on the right, again select the Term and Subject to which the grade should be copied. Note that it does not matter which student grades are being displayed on either side; when you copy the grades, all students grade will be copied correctly. Also it does not matter if the Subject names are exactly the same or if they are on the same line. Theoretically, you could copy the Term 1 Science grades into Term 2 Mathematics, but that probably is not going to be something you are going to want to do. When you are satisfied that you have selected the source and destinations correctly, click on the Copy Grades button. As with the Batch Import: Topic Comments above, when the copy is complete, Silhouette will display a summary Note that it is all right if there are additional students on either of the two class lists. Silhouette will copy grade only for the names and StudentIDs that match and will notify you of any students who were not included.

51 Chapter 6 Chapter Five: Student Reports 53 Edit Report Heading Text Note: Edit Report Heading Text is only available if Use Custom Format is not selected. Use this option to create a heading that will appear at the top of each report. The heading can be centred, or left or right justified. Click on Clear All to clear the heading and Centre Text or Right Align Text to change the justification of the header lines. Click on Check Spelling to access the Silhouette spellchecker. Click on OK to save the heading or Cancel to exit without saving. Notes: 1. Whenever the report heading contains any text, the Edit Report Heading Text button will be marked with an asterisk. 2. The report heading font can be set in the Edit Report Printer Settings section in Silhouette Utilities and does not have to be the same font or size as the rest of the report. The heading itself can have two fonts - one for the first line and one for the remaining lines. 3. If a heading is present, it will automatically be included on each report. To remove the heading, delete the text from this area. 4. The heading is not used in the Silhouette custom report format. If the Use Custom Format box is checked then this button will read Edit Custom Report Data, not Edit Report Heading Text.
52 54 Silhouette4UsersGuide Edit Custom Report Data This option is only available when the Use Custom Format box has been checked. The data entered here must be completed and is necessary to produce custom reports format. 1 Select either Primary or Intermediate. If your program is special, you can check French Immersion, or enter a program name in the empty box and check it. 2 Enter school and class information. 3 Enter subject names (intermediate only). In some districts, some or all of these are not editable. 4 Edit Grades for Students in [class]: This option allows you to enter or edit subject grades for the students in this class. It is not necessary to do it at this time, since the grades can be entered from the student s report later.
53 Chapter 6 Chapter Five: Student Reports 55 5 Copy Other Grades file into [class]: This option allows you to find the grades file from another class folder and copy it into this class folder. Normally, it should not be necessary to do this, providing you use the New Term button to create a new class folder for each term. Batch Printing: Reports Batch Printing: Reports enables you to print some or all of the reports from the selected class. There is the option to print the selected reports all at once or to preview each selected report before printing. This second option is recommended. Follow this procedure to batch print the student reports: 1. On the student list, select the students whose reports are to be printed. 2. If you are not using a Custom Report Format, Select the Report Format and decide whether to include the report Graphic.) 3. Select Preview each report if you want to see each report before printing. (To check number of pages, etc.)
54 56 Silhouette4UsersGuide 4. Choose whether to Remove blank lines in Topic Areas. Select this option to remove the blank lines that are automatically added between a topic's selected comments and its introductory or closing comments. This may be used to save space on the page. The print preview will show the change as soon as it is selected. Once selected, this option will remain in effect until it is deselected, or the next time Silhouette is run. 5. Click on Print Checked Reports. If Preview each report has been selected, the three previously disabled buttons, Print this report, Skip this report and Cancel printing will become active.

55 Chapter 6 Chapter Five: Student Reports 57 Note: During a print job, if Preview Each Report is checked, you may choose to Print Current Page, choose a different Print Format, font, or even Edit Printer Settings. Important Note: When teachers create their reports, they may enter the Print/View section and create custom settings for that student - the Remove blank lines setting, and the font and. Theoretically then, every student could have a different font name and/or font size that is saved along with the reports. If someone else at another computer is then printing out the reports, their computer will try to comply with these custom settings. All may be well, but, remember, all computers do not have identical fonts, and, as well, different printers will print slightly differently. Thus, if you are printing someone else s reports, be sure to check that all is going well. Have Preview each report checked on so that you can avoid wasting time and paper because of font and printer differences. You may wish to check the Ignore Custom Fonts and Remove Settings so that you have complete control of the look of the printed report. Batch Printing: Single Topics In Batch Printing: Single Topics, you are able to print out the comments for a particular subject for all or some of the students in your class. Export PSR Data This feature is only available in term three. For schools using TurboSchool, it will export files to a floppy disk in a format that can be imported into Turbo-School for year-end PSR Data entry.
56 58 Silhouette4UsersGuide Select the students whose data is to be exported and click on Process PSR Data. Silhouette will first display the data to be exported. Users should always check this display carefully to ensure that the data being exported is accurate. Then click the Save PSR Data button to complete the export. If a PSR export already exists on the disk, you will be asked if it should be overwritten or whether this data should be appended to the file on the disk. (For example, secretaries exporting data for a number of classes would choose to append, saving them from having to switched back and forth from Silhouette 4 to TurboSchool or from having to use multiple disks.) Note: The Delta version does not permit individual selection of student data to be exported. A single file for the whole class will be saved in a folder called PSRDataFiles inside your Silhouette folder. Before exporting, you must select the appropriate school code from the list provided. See also: Appendix K: Exporting PSR Data.

57 Chapter 6 Chapter Five: Student Reports 59 Class Folder Utilities When you click on a class name, the Class Folders Utilities options appear. These options apply to the selected class: Rename Enter the new name for the class folder, then click OK, or Cancel to exit. Delete Click Yes to delete the entire class folder, or No to cancel this operation. Export Class List Use this option to export a class list (for use on another computer) to a floppy disk or other location. This class list will contain all the student information needed to create a new class folder. This can be used to create a new class using Silhouettes 4's New Class Folder option or the Use Class List with this Template option. Select the correct destination path, then click on Export Class List Only to begin the export. Note: These class list files are automatically created and updated on your hard drive when you are creating and working with the student files in each class folder. Classlist You may the classlist file for the currently selected class to another teacher who may need to create a class folder for your class, for example, a colleague who teaches Music to your class.

58 60 Silhouette4UsersGuide Print Class List Use this option to print out a checklist of students in your class. The checklist can have up to 17 columns and be sorted in a variety of ways and can include letter grades. See Appendix G: Printing Class Lists. Create New Term Folder This option should always be used to begin a new term. It will create a new class folder and copy over any school/class information and student grades from the previous term. You will be given the option of creating the student files now or leaving them until after you have created a template. Select the class you wish to begin a new term for. 1 Click on Create New Term Folder.

59 Chapter 6 Chapter Five: Student Reports 61 2 Select either The Template Option or The Clone Option. This will determine whether the student files are created now or after you have made a template. Then click on Proceed. 3 If you have selected The Clone Option, Silhouette will display a list of the students in the class so that you can select which students to include. (By default, all students will be checked.) Enter a new name for the copy of the selected class. 4 Select one of the three cloning options: a) Keep source student file Comment Base matches: This option will create a new class and all students will use the same comment base as in the original file. (i.e. same students, same comment bases) b) Choose new Comment Base for whole class: This option will allow you to select a new comment base which will be used for the whole class. (i.e. same students, everyone gets the same new comment base) c) Select Comment Base for each student: This option will allow you to individually select a new comment base for each student. (i.e. same class, individual new comment bases) d) Click Proceed to continue or Exit to cancel this operation.

 Use Custom Format This box must be checked if you are using a Silhouette custom report format. The custom format will print your district s entire report onto a blank page.")
60 62 Silhouette4UsersGuide 5 Once you class has been created, you will be reminded to Enter the Custom Report Data such as school name, teacher name and division number. Password Use this option to create or change a Silhouette 4 password for this class only. To remove a password, click on Accept with no password entered. Note: Silhouette 4 passwords are case-sensitive. That is, upper case letters are different than lower case letters. ('CAT' is not 'cat') Use Custom Format This box must be checked if you are using a Silhouette custom report format. The custom format will print your district s entire report onto a blank page. When this box is unchecked Silhouette 4 can be used to complete preprinted report forms or to produce alternate reports. See also Appendix J: Using a Custom Report Format. this Class Folder

61 Chapter 6 Chapter Five: Student Reports 63 See also Appendix N: Setting Up Silhouette 4 . From within Silhouette 4, you may class folders and comment bases to colleagues. These s contain attached files that are to be saved to the computer desktop from within your usual software. When you click on this Class Folder, the class folder is automatically compressed into one file and readied to be sent as an attachment. Select or type in a destination address, perhaps add a personal note to the instructions box and Send . The person who receives the will save it to their desktop. Then they will use Get ed Class to locate and add the class to their list of class folders.


62 64 Silhouette4UsersGuide Student Report Screen Silhouette 4 will display all the available topic areas. Any areas that have had comments selected for use in this report will show an asterisk beside them. From this screen you can also rename or delete this student's file. "Comment has been changed" Notification
63 Chapter 6 Chapter Five: Student Reports 65 If you have inserted or moved comments in your comment base (since the time this student's report was last saved) you will find that any checked comments remain as they were last while the unchecked comments are as you moved them. Student Utilities Rename Student Use this option to change the name, sex, grade, StudentID, or PEN of an existing student. Please note that a correct StudentID number is vital, especially if you are exporting PSR data or having attendance printed directly on the reports. Delete Student Use this option to delete a student's file. You will be given a warning and asked to confirm this action. Grades This option is only available when using a custom report format for an intermediate class. Use it to enter subject and work habits mark for this student. For more information and a full description of keyboard commands when entering grades, see Appendix J: Using a Custom Report Format. Edit Report Opening Comments Use this option to enter opening comments at the beginning of the report. Enter the comments into the white text box, then click OK or Cancel. These comments are in Rich Text Format. Use the toolbar above the textbox to use Bold, Italics and Underline. As well you can change the justification if you wish. Click on Save RTF to save this opening comment as a Rich Text File for later use. Click on Load RTF to load a Rich Text File that has been saved. Click on Check Spelling to access the Silhouette spellchecker.
![66 Silhouette4UsersGuide Note: These comments can contain any of the gender sensitive words or the [name] command listed in Chapter 4.](/docs-images/76/73831966/images/64-0.jpg "These are useful if you wish to save the opening comment and use it as the basis for another student's comment. Simply create the comment using [name] and gender sensitive words, then save it.")
64 66 Silhouette4UsersGuide Note: These comments can contain any of the gender sensitive words or the [name] command listed in Chapter 4. These are useful if you wish to save the opening comment and use it as the basis for another student's comment. Simply create the comment using [name] and gender sensitive words, then save it. Then, for each student load the text file and it will appear with all the appropriate words in place. Get Text From A Comment Base: Using this feature, you are able to go to any topic of any comment base within reach of your computer and select a comment that will then be appended to your text. If paragraph style is selected, the comments will be added directly at the end to the text; if point form is selected, a new line will be created and the new comment will added there. Add Selected Text to a Comment Base: Use this feature to add a section of text to any topic of any comment base within reach of your computer. First, use your mouse to highlight the text that you wish to add to a comment base topic. Then click on Add Selected Text to a Comment Base. Then locate the comment base and topic. Finally, click on Add Comment. Edit Report Closing Comments This option is identical to Edit Report Opening Comments, except that it will appear at the end of the student report.

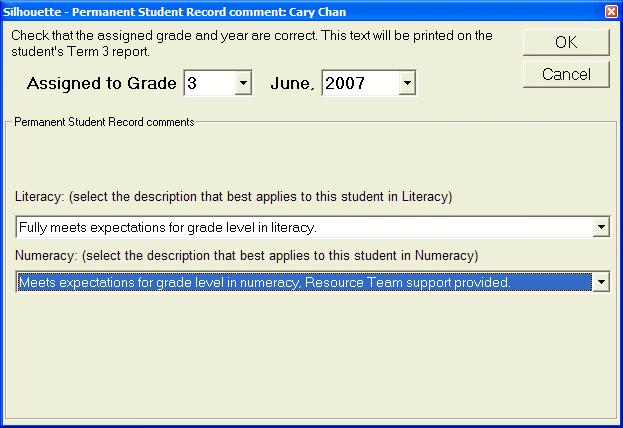
65 Chapter 6 Chapter Five: Student Reports 67 Grade Assignment- PSR Comments Grade Assignment - Term 3 (Intermediate) PSR Comment and Grade Assignment - Term 3 (Primary) These features are only available for Term 3 classes. They should be used to enter the year end data that will appear on the report card. This is also the data that will be exported for the students PSR Cards. Intermediate Classes: Most often, the information shown will be correct and all that is necessary is to select OK to include the data as part of the student s report. If the student is not being promoted to the next grade as usual, be sure that the grade assigned is correct. Primary Classes: In addition to the data shown above (for intermediate classes), primary teachers must select from the PSR comments to include them on the report (Note: some district formats do not include the PSR comments on the report) and in the PSR Data Export.

66 68 Silhouette4UsersGuide Vancouver version Delta version

67 Chapter 6 Chapter Five: Student Reports 69 Reporting Within a Topic Area 1 Select the topic area you wish to use. Silhouette will display the available comments in a listbox that will be highlighted. Any comments that had previously been checked will appear checked and the text will be bolded. 2 Navigation in this area is similar to the Comment Base topics:
68 70 Silhouette4UsersGuide Listbox focus: When the listbox is highlighted, you may: use the left mouse button to click on the text of a comment. The comment will appear in the editbox below, but the checkbox will not be checked. use the left mouse button to click checkbox to the left of the comment. The comment is black bolded and the text is copied into the editbox below. To edit the comment, press F4, F9 or click into the editbox. Note: click again to uncheck the comment. use the right mouse button to click on the text of a comment or on the checkbox before a comment. The comment is blue bolded and the text is copied into the editbox below. To edit the comment, press F4, F9 or click into the editbox. Note: click again to uncheck the comment. use the mouse scrollwheel to scroll up and down the list use the left mouse button on the slider to scroll up and down the list use the up and down arrow keys on the keyboard to scroll up and down the list press the F4 or F9 or Tab keys to switch focus to the editbox Editbox focus: When the Editbox is highlighted, you may: edit the comment. Notice that comment text in the listbox changes as you change the editbox text. use the left, right, up and down keys on the keyboard to navigate in the editbox press Enter to move to the next comment in the listbox an be ready to edit it press Shift-Enter to move to the previous comment in the listbox and be ready to edit it Pressing F2 acts to left-check that comment in the listbox Pressing F3 acts to right-check that comment in the listbox press the F4 or F9 or Tab keys to switch focus to the editbox 3. Select comments to be included in the student report. Bulleted vs Paragraph-style Comments: Silhouette 4 presumes that you will most often wish to enter bulleted comments. Commenting in this style helps to keep your comments concise and focussed. A disadvantage to bulleted comments, though, is that there is often a lot of unused space on a report. You may wish sometimes to delete the bullets and write in full sentences instead.

69 Chapter 6 Chapter Five: Student Reports 71 In the student reports section of Silhouette 4, you can mark checked comments to be appended to the end of a previously checked comment. The blue bolded comments created by right-clicking the comment line indicate that the comment will be appended to the previous checked comment. To quickly check on the look of you checked comments, click on View this Topic button at the bottom right of the window. The paragraph style would look silly with bulleted comments, but works very well with sentence comments. See Appendix F: Bulleted vs Paragraph-style Comments for suggestions and examples. Notes: 1. If there are unused or empty comment boxes in the list, they can be used by clicking into the line. Then switch to the editbox and type a comment. 2. Silhouette always prints selected comments in the order that they appear in the comment list. Therefore, you may wish to pay attention to the order in which they are entered, and use the Multi Move Mode (in the Comment Base Editor) to ensure that they will print out in a logical order. 3. When editing comments, you can use the mouse to highlight words and cut and paste using Ctrl-C to copy, Ctrl-X to cut and Ctrl-V to paste. 4. To add a bullet that has been accidentally removed, with the Num Lock on, hold the Alt key and enter 0183 on the number pad. Always add a space after inserting a bullet character, or else the next word (beginning with a bullet) will be skipped by the Silhouette spellchecker. 5. There is a limit of 75 checked comments per topic.
70 72 Silhouette4UsersGuide Introductory and Closing Comments These options allow for additional lines of text to be added at the beginning or end of this topic area on this student's report. This text is not in Rich Text Format like the report opening and closing comments. When in the Introductory Comments, you may also click on Import Topic Overview to include all or part of your topic overview in this section. View This Topic This option will show you all the comments selected for this comment area only, as they will appear on the report. Click Exit to return to the comment area. Clear All Checks This option will clear all check marks from the comment area. Refresh CBase This option will restore unchecked comments in this topic area to the way they appear in the comment base, clearing any edits that have been entered for this student. Checked comments will remain as edited. Check Spelling of Selected Comments Use this option to access the Silhouette spellchecker to check only those comments which have been selected. A window will open at the top of the screen to display any misspelled words as they are found. Click OK to return to the Edit Student Report screen. See Appendix A: The SpellChecker and Thesaurus for further information. Note: The student report is not saved until you click Save Student Report on the Student Report screen. It is wise to save the report before selecting another comment area.

71 Chapter 6 Chapter Five: Student Reports 73 Print/View Viewing the Report When this option is selected, Silhouette create a print preview of the student report. The preview is shown on the right side of the screen, while the left side shows printer options and information. The Silhouette print preview will show you the entire report for this student, as it would be printed. Click the < and > arrows to turn pages, and + and - to adjust the magnification of the preview. Use the scroll bars to slide the report in the window, or drag the report over by holding the mouse button down on the preview and moving the mouse. Remove blank lines in Topic Areas a Saved Setting: Select this option to remove the blank lines that are automatically added between a topic's selected comments and its introductory or closing comments. This will save space on the page. The print preview will show the change as soon as it is selected. Once selected, this option will remain in effect until it is deselected, or the next time Silhouette is run. This setting will also be remembered for this student s report. This means you can set Remove Blanks for some of your student reports and later, when you want to print, this setting will be remembered. Other settings you can set to be remembered are the Font and Fontsize for each student s report.
72 74 Silhouette4UsersGuide Notes: 1. Click the Set button to set the current magnification as the default value. 2. The print preview cannot be edited. Return to the Student Report section to make any changes. 3. If you find that a new page begins at an undesirable point in the student's report, use the Force pagebreak at... dropdown menu at the bottom of the screen. Get Default Font/Size You may have been experimenting with different fonts and fontsizes for your report. Click this button to retrieve the Default Font and Fontsize. When Silhouette 4 was installed on your computer, the Default was Times New Roman 10, but you may have changed the default (either accidentally or on purpose) since then. Set Default Font/Size Here you may set the current font and fontsize and the new default for student reports viewed or printed at your computer. This does not override custom font and fontsize settings that may have been set previously with other students. Select the Report Format (not available in Use Custom Format) The six report formats and graphic settings are not available if you have checked the Use Custom Format box for this class. See Appendix J: Using a Custom Report Format. Select one of the six available formats. These formats can be edited to your own preferences. Printer Information This area contains information about your document according to the format (printer fonts and margins) that have been selected.
73 Chapter 6 Chapter Five: Student Reports 75 Adding a Graphic to the Report Heading (not available in Use Custom Format) Silhouette can include a graphic image as part of its heading at the top of the first report page. The image must be in bitmap (.bmp) and should be a two-colour image for best results. It can be any size. To set up the graphic for inclusion, click on Graphic Settings. Then select Get Graphic and use the Windows file requester to locate the graphic (.bmp) file to be included. Finally, select the placement (left, right, or centre) and height of the graphic, then Save Settings. The graphic will appear in the page view display whenever the Include Graphic button is checked. Edit Printer Settings (not available in Use Custom Format) Silhouette stores settings for up to six report formats. Each format should have its own name. These names, as well as the fonts, sizes, and margins, can be edited to your own preferences. The six formats are identified by their names beside the six buttons at the top of this window. Select any of the formats to edit it. See Appendix M: Edit Report Printer Settings. Notes: 1. If your selected format utilizes fonts that are not available on your system, you will see a notice instructing you to set your printer fonts correctly. Before printing you will need to edit the printer fonts (in the Utilities section) to select fonts that are available for your printer. 2. Silhouette stores settings for six report formats. By default these are labelled primary and intermediate. However, these labels as well as the fonts, sizes, and margins, can be edited to your own preferences.
74

75 77 C H A P T E R 7 Appendix A:The Silhouette Spellchecker and Thesaurus The Silhouette Spellchecker The Silhouette Spellchecker is available throughout Silhouette wherever you are editing text. This spellchecker functions like many typical spellcheckers. Click on the Check Spelling button: misspelled words are displayed in the top window Silhouette will check its dictionary and display words with similar spellings Click on Ignore to skip this occurrence of the misspelled word, or Ignore All to skip all occurrences of the word. click on Add to add this word to the Silhouette custom dictionary. Use this feature to build up a custom dictionary of Canadian spellings and educational terms.

76 78 Silhouette4UsersGuide To correct a misspelled word, enter the proper spelling beside the words "Change To:" or select a replacement from the list of suggestions. Then click Change to correct this misspelling or Change All to correct all misspellings of this word. Notes: 1. When checking spelling in Student Reports, Silhouette only checks those comments which have been selected for inclusion on the report. 2. Silhouette does not check the spelling of any word containing a non-alphabetic character (e.g. postal code, numeric data, etc.) Spellcheck: Autocorrect ON In Silhouette Utilities (accessed on the front screen), you can turn Autocorrect on or off. When ON, as soon as you have typed a word, the spellchecker will compare try to find it in its dictionary and custom dictionary. If the word is not found, then the spellchecker may simply underline it if it finds no alternate spellings. It may also display a dropdown list of up to five alternates. The Silhouette Thesaurus The Silhouette Thesaurus is available in the Comment Base only. To use the Silhouette Thesaurus: 1. First highlight a word in the comment base. You can do this by double-clicking a word or by dragging to highlight the word or partial word. 2. Click on the Thesaurus button. If the selected word is in the thesaurus, up to ten related words will be shown. To replace the selected word, click on a word from the list and then click on Replace, or just double-click on the word from the list.
. Instead of giving up, highlight the root word only, prompt.")
77 Chapter 7 Chapter Five: Student Reports 79 Tip: If, for example, you double-click on the word prompting, the thesaurus will reply that it has (No Suggestions). Instead of giving up, highlight the root word only, prompt. The thesaurus will display a full set of ten synonyms.
78
79 81 C H A P T E R 8 Appendix B: Silhouette 4 Tips The Escape Key In most Silhouette windows, pressing the Escape (Esc) key will activate the current Cancel, Exit or Done button. Renaming and deleting text files When loading or saving plain text files in Silhouette (for example, Report Opening and Closing comments, and Get Other File in Overview Topics and Introductory Comments) Silhouette will display the standard Windows requester. Within that requester, you can click a filename with the right mouse button and rename or delete the file if necessary. Adding extra comment lines When creating comments, it may be helpful to add a few blank lines at the end of each Topic Area. This will enable you to type in extra comments for any student who needs them without permanently entering them in the comment base. If your Comment Base topic has many comments, you may find it confusing as you navigate back and forth. Use blank lines to mark off different sections. Type in labels that will help you to identify the sections even if you would never include them in a student s report. Make it easy on yourself. Adding bullets and special characters Always put a space after bullets and special characters to separate them from the following word. This will ensure that the Silhouette spellchecker can distinguish the word from the special character. (Note: Hold Alt and type 0183 on the number pad to type a bullet manually, but make sure that the NumLock key is on) Backing Up Silhouette 4 Data
80 82 Silhouette4UsersGuide It is always wise to backup your data. You could export to a floppy disk (the least safe method), or export to another hard drive on your computer, to a network folder on your network, or the data to a friend or to yourself at school or at home. Whatever method you choose, you will know that if something untoward happens, you have a backup available. Note: When exporting a class, the associated comment base files can be exported at the same time, so it is not necessary to export them separately. Including Topic Overviews in a Report Once you have created topic overviews, you may wish to include them in the introductory comments within a Topic Area of your Student Reports. This can be accomplished in the following way: 1. Select the student report you wish you edit. 2. Select the Topic Area which is to contain a Topic Overview. 3. Click on Introductory Comments 4. Click on Import Topic Overview 5. Select the folder containing the Overview files you need. 6. Select the desired Topic Overview file. The Topic Overview will appear as the Introductory Comment of the selected Topic Area. It can be edited or added to as necessary. 7. Note: If this procedure is done as part of a report template, each new student report will automatically contain the Topic Overview(s).
81 Chapter 8 Chapter Five: Student Reports 83 Setting up your Comment Base Before beginning your comment base you should plan its layout. Some teachers prefer larger topic areas containing sub-topics, others prefer a number of smaller topic areas. Also, some teachers prefer to include several versions of a single comment while others include just one version and edit it for each student. Some teachers prefer to build one comment base that will be used all year, while others prefer to use a new comment base each term, perhaps importing or cloning some of the previous term's comments. Silhouette is extremely versatile and can be set up to meet each teacher's needs. Using sub-topics and blank lines within a Topic Area If you prefer to use sub-topics within a larger topic area, it may be wise to leave a blank comment line, then enter the sub-topic title as a comment (perhaps italicized). Then, in the student report, check both the blank comment and the sub-topic title and the sub-topic will be nicely spaced. Also, it may help to include a comment line of dashes (------) above or below the sub-topic to separate it visually from the other sub-topics. This line of dashes would not be checked at report time but would make it possible to quickly spot the new sub-topic when the topic area is printed out or when looking through the topic area on screen. What if I ignore the "Comment Base has been changed" warning? Silhouette will warn you if there have been any changes to a comment base since the time the student report was created or last saved. It is always advisable to do all comment base editing before creating the student files. This warning can be safely ignored if the changes made to the comment base were limited to re-wording and adding comments to the end of the comment list. However, if comments in a topic area have been inserted, moved, or deleted, the student file (i.e. the affected topic area) should be cleared and comments re-checked. If the warning is ignored and comments have been inserted, moved, or deleted then the student report will not display the comment base properly. Any comments that were previously checked will overwrite the new or moved comments that should be in their place. For example: Suppose that Student A's report was created and comments 2 and 6 in the first topic area were selected for inclusion. Later, the comment base was edited and comments in the first topic area were moved (or inserted or deleted). When the teacher returns to Student A's report (and ignores the warning) the comments in the first topic area will not display properly. Instead, the previously selected comments 2 and 6 will appear in the second and sixth positions instead of the new comments that were there after the comment base was edited.
82 84 Silhouette4UsersGuide It is always advisable to use the Print Preview and View This Topic options to be sure that the student report is accurately and properly presented. Moving/re-ordering comments in the Comment Base You may find that you wish to re-order your comments within a topic area. To move a block of comments, or re-order them: 1. Click on Multi Move Mode. Follow the red on-screen instructions. 2. Select up to 25 comments you wish to move, in the order you want them to appear. Silhouette will remember the order in which you click them. 3. Click on Selections Done. 4. Silhouette will display each of the selected comments, in the order they were clicked, and ask which comment number it should be inserted before. Click the comment number and the moved comment will appear immediately before it. 5. If all the comments are to be moved as a block, hold the SHIFT key while clicking the comment number referred to in step 4 above. Silhouette will then move all the selected comments, in the order they were selected to the new location.
83 Chapter 8 Chapter Five: Student Reports 85 Warning: If you enter Multi Move Mode, then find you must cancel the operation, Silhouette will exit right out of the topic area. It is recommended that you use the Save Changes button to save the topic area before entering Multi Move Mode. Hiding and showing files After using Silhouette for a number of reporting periods, you may find that you have Overview, Class, or Comment Base Folders which you want to keep but don't need to see in the file list. These files can be hidden by clicking on the Hide/Show button, then selecting the folders you wish to hide. Including a Topic Title with no comments There is an additional special command, [x]. This command should be used as the first comment in a topic. Its function is to force a topic title to appear if there are no selected comments in that topic. The [x] command does not appear in the special commands window and must be typed in. To force a topic title to display without selected comments, enter [x] as the first comment and select it in the student report. The title will display and none of the comments (even if they are checked) will be shown. If your comment base is not present There have been occasions when a teacher has needed to view or print student reports but the comment base is not available. This could happen if the teacher neglected to export the comment base to floppy disk before bringing the reports to school, or forgot to import it after importing the class folder. In such an emergency, Silhouette will allow you to view or print your reports. Simply hold the control key while you click on a student name. This will tell Silhouette to go directly to the print/view screen and allow printing of the report. For batch printing in this situation, click on Batch Print Reports, select the students to be printed, then hold the control key while clicking on Print Checked Reports. Note: In order to show student reports in the absence of the comment base, Silhouette must rely on the information as is it stored in the student report file. Generally, this is adequate. However, if you have made changes to your comment base since the student file was last saved, these changes will not be reflected in the student report. This is particularly important if you have changed the order of your topics. The student report will still show the old order unless it was re-saved after the comment base was changed. It is always recommended that you export your comment base with your class folder.
84 86 Silhouette4UsersGuide Other Silhouette 4 applications Silhouette 4 is not limited to the creation of term reports. It can be a valuable criterion referenced evaluation tool for a variety of class assignments. After determining appropriate criteria with your students, you may wish to set up topic areas for individual book reports, projects, units, etc. For each of these assignments a mini-report can easily be prepared, clearly and effectively communicating the degree to which each student has met the required criteria. Eventually these topic areas can become the basis for the term end report.
85 87 C H A P T E R 9 Appendix C:Windows/MacOS Compatibility Silhouette 4 for MacOS comment bases and student reports are completely compatible with Silhouette 4 for Windows. Thus, these files can be transferred and used between both versions. Disk formats: Windows or MacOS? In order to share files between the Windows and MacOS versions of Silhouette, you must be able to read the same floppy disk in both computers. Since Windows cannot read a MacOS disk, you must use a Windows formatted disk in the MacOS computer. Reading a Windows formatted disk with MacOS MacOS computers running System 7.5 or later have the PC Exchange extension included as part of the System software. Make sure the extension is turned on and the MacOS computer will recognize a Windows disk when it is inserted. Problems with Windows disks Sometimes a MacOS computer will be unable to read a Windows formatted disk. This can occur if the disk was formatted with no label and used with Windows. It appears that Windows 95/98 will overwrite the portion of the disk that should contain the disk label, so that the MacOS computer will display an incorrect disk label even though Windows will still consider the disk unlabeled. Typically, the MacOS computer will think the disk is labelled "ASil" or "ASi" or contain an unknown character. It is recommended always to format your disks with labels if you may wish to transfer the files between the different versions of Silhouette. Silhouette 4 for Windows will automatically relabel your floppy disk before exporting any files to it. Often reformatting the Windows disk, or trying a different disk, will solve the problem. What if Silhouette 4 will not import from a PC disk? There may be disks that PC Exchange can read, but still are unreadable to Silhouette 4. If this occurs, simply open the Sil folder from the floppy and drag its contents into your Silhouette 4 folder on your MacOS hard drive.
86 88 Silhouette4UsersGuide MacOS system files The MacOS operating system automatically writes files onto any disk that is used in a MacOS computer. Therefore, after a Windows formatted disk has been read by MacOS, there will be some MacOS files on it (e.g. desktop, finder.dat, resource.frk, etc.). This is normal, and these files should be ignored. They will not interfere with Silhouette 4 for Windows or MacOS.
87 89 C H A P T E R 1 0 Appendix D: Keyboard and Mouse Shortcuts Esc The Esc key is always linked to the Cancel and Exit buttons in Silhouette 4. Using this option will save a lot of time as you navigate through the screens. Comment Base topics: Listbox highlighted F4 and F9 Left click comment Right click comment Scrollwheel F7 Up/down arrow keys Press the F4 or F9 keys to switch focus to the editbox Use the left mouse button to select a comment. The comment will appear in the editbox below. Use the right mouse button to select a comment. The comment will appear in the editbox below and the focus will switch to the editbox so that you are ready to edit that comment. Use the mouse scrollwheel to scroll up and down the list. Pressing F7 will insert a new comment at the bottom of the list Use the up and down arrow keys on the keyboard to scroll up and down the list Comment Base topics: Editbox highlighted F4 and F9 and Tab Arrow keys Enter key Shift-Enter F7 Press the F4 or F9 or Tab keys to switch focus to the listbox Use the left, right, up and down keys on the keyboard to navigate in the editbox Press Enter to move to the next comment in the listbox an be ready to edit it Press Shift-Enter to move to the previous comment in the listbox and be ready to edit it Pressing F7 will insert a new comment at the bottom of the list Student Reports topics: Listbox highlighted
88 90 Silhouette4UsersGuide F4 and F9 and Tab Left click comment Left click checkbox Right-click comment Scrollwheel Up/Down arrow keys Press the F4 or F9 or Tab keys to switch focus to the editbox Left-click on the text of a comment. The comment will appear in the editbox below, but the checkbox will not be checked. Left-click checkbox to the left of the comment. The comment is black bolded and the text is copied into the editbox below. To edit the comment, press F4, F9 or click into the editbox. Note: click again to uncheck the comment. Right-click on the text of a comment or on the checkbox before a comment. The comment is blue bolded and the text is copied into the editbox below. To edit the comment, press F4, F9 or click into the editbox. Note: click again to uncheck the comment Use the mouse scrollwheel to scroll up and down the list Use the up and down arrow keys on the keyboard to scroll up and down the list Student Reports topics: Editbox highlighted F4 and F9 and Tab Arrow keys Enter key Shift-Enter F2 F3 Alt-0183 (Windows) Press the F4 or F9 and Tab keys to switch focus to the listbox Use the left, right, up and down keys on the keyboard to navigate in the editbox Press Enter to move to the next comment in the listbox an be ready to edit it Press Shift-Enter to move to the previous comment in the listbox and be ready to edit it Pressing F2 acts to left-check that comment in the listbox Pressing F3 acts to right-check that comment in the listbox Windows: To insert a bullet in any text area in Silhouette, hold the Alt key and type the numbers 0183 on the number keypad. Check the Num Lock is ON. Keyboard Shortcuts Ctrl-X Ctrl-C Use the mouse to highlight a section of text. Hold the Ctrl key and press the X key to cut the text and place it into the computer clipboard. Use the mouse to highlight a section of text. Hold the Ctrl key and press the C key to copy the text and place it into the computer clipboard.
89 Chapter 10 Chapter Five: Student Reports 91 Ctrl-V You can paste the text that was cut or copied into the computer clipboard. Click the mouse into the place where you would like to have the text placed. Hold the Ctrl key and press the V key to paste the text. Preview Screens + and - keys < and > keys These keys are linked to the + and - buttons below the print previews seen when you are preparing to print a Comment Base topic, a Report Overview, a Single Student Report or Batch Printing student reports. These keys are linked to the < and > buttons below the print previews seen when you are preparing to print a Comment Base topic, a Report Overview, a Single Student Report or Batch Printing student reports. Grades Entry Table Page Up Page Down Tab Enter These keys are linked to the forward and back arrows and will advanced or back to the next student. Moves down the column of marks. Moves the cursor to the next mark to be entered for this student, either work habits or grade. Direct Print/View (when comment base is not present) If you hold the CTRL key while clicking on a student name on the Student Reports screen, you will go directly to the Print/View screen for that student s report. This feature is useful if the comment base for that student is not available. CTRL click on student name Similarly, in the Batch Print screen, if you hold CTRL as you click on Print Reports, Silhouette 4 will not require the comment base to be present.
90

91 93 C H A P T E R 1 1 Appendix E: Network Options Network Features For schools on Novell and Windows Server 2003 networks, Silhouette4 has features that allow for easy updating and sharing. All but two of these setting are made by editing the Sil.ini file. In most case this would be done by the district or school technology staff rather than by a classroom teacher. NetworkExe: If True, then the Silhouette4.exe in the folder will serve as a Network Exe. (All computers on the network would run from this folder.) This folder containing the Silhouette4.exe also contains all the Silhouette related files including all the dependencies (e.g. ocx's, dll's, custom fonts). All computers on the network would run from this folder. Home drive: On the network, each teacher's home drive, though labelled h:\, is distinct. When NetworkExe=True (see above), all work is directed to the Home Drive. In this way, each teacher's settings, classes and comment bases will be separate from everyone else's. Network Shared Folder: This Silhouette4 folder (Note: it must be a Silhouette4 folder) is designated as a folder that each teacher can save to, when, for example, she want to send a class folder to be printed, or she is sharing a comment base. There are special buttons on the Export and Import Comment Base and Class Folder windows which allow for instant access to the Special Network Folder. SNFDropdown: This is one of only two settings that are accessible through Silhouette4 Utilities. When checked, the Special Network Folder location will appear on the path dropdowns on, for example, the main Comment Base window and the Student Reports window. While most teachers may not use this feature, a secretary who is printing reports, or an administrator who is reviewing reports may find it very useful. PreventUpdates and RegControls: These two settings are intended to be used by network administrators only as particular network conditions warrant.

92 94 Silhouette4UsersGuide
93 95 C H A P T E R 1 2 Appendix F: Bulleted vs Paragraph-style Comments Silhouette 4 presumes that you will most often wish to enter bulleted comments. Commenting in this style helps to keep your comments concise and focussed. A disadvantage to bulleted comments, though, is that there may be a lot of unused space on a report. This can be an important issue in some reporting formats. As well, some teachers may wish to write full sentences instead of bulleted comments as a matter of personal preference. Bulleted-style comments Notice that the checked bulleted comments below are easy to read in the printout, but there is wasted white space. Paragraph-style comments In a paragraph style, the same comments may not be as easy to read, but space is used much more economically. In the examples above, there are only two lines saved by changing to a paragraph-style. Greater savings would be made when the comments are short or just long enough to require a second line. Left click / right click In the Student Reports section of Silhouette 4, you can mark checked comments to be appended to the end of a previously checked comment. This would look silly with bulleted comments, but works very well with sentence comments. Left Mouse Check: Select comments to be included in the student report by left-button clicking in the check boxes next to them. A check mark will appear, and the comment will be bolded. Left click again to de-select comments. If you are working in the Editbox, you can press F2 to left-check the comment in the listbox.
94 96 Silhouette4UsersGuide Right Mouse: If you right click in an unchecked check box, the box will be checked and it will be indented immediately. This indicates that this comment will not be printed on a separate line; rather, a space and then the comment will be appended to the end of the previously checked comment. Right-click again to de-select comments. If you are working in the Editbox, you can press F3 to right-check the comment in the listbox.

95 97 C H A P T E R 1 3 Appendix G: Printing Class Lists Silhouette 4 has a built-in utility to print class checklists. Many teachers have found the Silhouette checklists to be a very handy classroom management tool. The Print Class List feature in Silhouette 4 is a customized and limited version of ClassList Printer, the software made freely available to schools that own a licence to Silhouette 4 or SilhouetteCE. In Print Class List, you are able to print whole or partial class lists. You are able to customize the look of the printout in many ways. There are three or four frames on the main screen (below) that allow you to customize the printout: Data to appear on Class List printout, Sort by, Settings, and, if the class is a multi-grade class, Multi-Grade Settings. With you class folder selected, click on Print Class List. Class list printing options Data to Appear on Class List Printout: Enter school and class information here to appear at the top of the class list.
96 98 Silhouette4UsersGuide If your class is using the Custom Report Format and you have entered the custom report data, then this information will automatically appear in many of the fields in this section. Otherwise, you will have to enter the data you wish to appear on a printout. The data will not be saved for future printings. Indent Female names: Select this option if you want the girls names to be indented a few spaces. Sort by: You may choose to sort by first or last name, or to show first name only. Choose Print Mode: Select Print Class with Grid to create an empty checklist, or Print Class with Grades or ID to print a hard copy of the grades you entered or a list of student ID numbers. Settings: With these settings you are able to customize class list printouts to a great extent. The default setting (as above) will appear every time you enter the Print Class List section of Silhouette4, Your altered settings will be maintained for only as long as you work in this section. Select the number of columns and height of rows for this printout. You may also choose to add up to 5 blank rows at the bottom of the list. Be warned that if you choose a large font size, part of some students names and other information may be truncated. Note also that the student name is printed along the bottom of the rectangle that encloses it. Paper Size: Choose letter or legal. Include top/bottom columns: Checking either or both of these will add a tall extension to the top or bottom of the checklist which will be a place for writing column headings. Printout Font: click on Change to select a new font or size. MultiGrade Class Settings: These options will only appear if the class has more than one grade represented. You can choose to sort by grades and to show the grades alongside the student names. Once you have selected the printing options, select the names of the students you wish to be included on the class list (you do not have to print the whole class) and click on Show. Silhouette 4 will display a preview of the list. Click on Back to change any of the settings, or Print to print the list. The minus (-) and plus (+) buttons are for zooming in and out.
 you wish to have printed out and whether or not to Include Effort Marks (check box).")
97 Chapter 13 Chapter Five: Student Reports 99 Printing a Grades List If you have selected Print Class with Grades or ID, a drop down menu and a list of subjects will appear. Use the drop down menu to select Term 1, 2, 3, or Final. Then select the subject(s) you wish to have printed out and whether or not to Include Effort Marks (check box). Then click on Show/Print to view and print the list. One further option is to select Student ID Numbers from the drop down menu. In this case, the subjects will disappear and the list will only contain the student names and ID numbers. ClassList Printer offers additional options The separate software, ClassList Printer, offers options to create, print and save as Silhouette files any particular grouping of students at your school. Thereby, you may create and print a list of sports team, drama club or band members. See the ClassList Printer manual for details.
98
99 101 C H A P T E R 1 4 Appendix H: Creating classes from the school attendance program Silhouette 4's companion utility, ClassList Printer can create Silhouette class lists using a master file exported from TurboSchool or other school attendance programs. The master file exported from the attendance program must be a text file and must contain the information described below. Master file format In order for Classlist Printer to create Silhouette 4 class list files, you must have a master file containing the names of all the students in the school. The file must be a text file with one line for each student containing the following information: Division Last Name First name Used Sex Grade Student Number Provincial Education Number (PEN) Teacher Room
100 102 Silhouette4UsersGuide Each item above must be enclosed in quotation marks in the line for one student. Here is a sample of the data needed: "1","Barker","Sandra","Sandra","F","7","4194"," ","Mr M Post","201" "1","Chan","Edward","Edward","M","7","4321"," ","Mr M Post","201" It is not essential that each item be included, but any excluded items must still be represented by a comma and a pair of quotation marks ( ). It is essential that each student have a unique student number and that the first six items are accurate. See ClassList Printer and your TurboSchool manual for instructions on how to export this file.
101 103 C H A P T E R 1 5 Appendix I: Starting a New Term Moving from one term to the next is not difficult, but requires several steps. First consider whether you need to edit your comment base, or perhaps, create a new comment base for the new term. Then use the New Term function to create your new term class folder. A. The Comment Base As always, your comment base is the first thing to prepare. To begin a new term, you have three choices: Continue to use your term 1 comment base. If you decide to do this, you should go ahead and add any term 2 comments to your existing comment base. The advantage of this is that it makes all your first term comments available for use in second term if you wish. The disadvantage is that the comment base may get large and you may have to do more hunting to find the comments you want. Create a new comment base for term 2. If you choose this, then you should click on Create a New Comment Base, then enter the topic names again before adding in the comments that will be used in this term. The advantage of this is that the comment base is specific to this term, so reports will be easier to make. The disadvantage is that you won t have access to term 1 comments, unless you re-enter them in this comment base. Make a copy of the term 1 comment base, then revise it. If you decide to do this, you should click on Clone a Comment Base, then select the term 1 comment base and give it a new name. You can then add new comments and remove any comments that are specific to just the old term. The advantage of this is that you do not have to re-enter comments but still end up with a term 2 specific comment base. In the end, the decision you must make is this: Do you want one big comment base with all three terms comments in it OR do you want a separate comment base for each term. It really doesn't matter - either way will work fine. B. The term 2 class folder Once you have your comment base in order, you need to make a copy of your class list and tell Silhouette which comment base you will use for this term: 1. In the Student Reports section, click on your Term 1 class
102 104 Silhouette4UsersGuide 2. Click on New Term. Silhouette will offer two options - the Template Option or the Clone option. Select the Clone option, unless you plan to use a Template to begin the new term s reports. Click on Proceed. 3. Enter a new name for your term 2 class (max. 8 chars) 4. Choose one of the three comment base options. Keep Source Student File... is for people who want to use the same comment base as term1. Choose New... is for people who have a different comment base for this term. The third option is for those who want to select different comment bases for individual students. (If you choose the second or third choice, you must select a comment base from the box that will appear in the top right corner.) 5. Click on Proceed and your new class folder will be created, containing your student names, grades and school/class information - ready for use. Note: If you selected the Template option, you will not see all of the above steps. After entering a new class folder name, Silhouette 4 will create the folder and copy over the necessary files - but no student files will be created. You will select your comment base when you create the template and create the student files after you have created the template.

103 105 C H A P T E R 1 6 Appendix J: Using the Custom Report Format Silhouette 4 contains a Custom Report Format that will allow you to print your entire report on a blank page. This format is set by your district and cannot be edited. However, the process of creating a comment base and student reports is no different. The points noted here are in addition to the usual Silhouette steps. Entering Custom Report Data If you are planning to use the custom report format, make sure that you check the box that says Use Custom Format after you create your class folder. When this box is checked, the button that usually says Edit the Report Heading Text will say Edit Custom Report Data and will allow you to enter the information that is needed for your custom report format. 1. Click once on your class name to open the folder. 2. Select the Use Custom Format box.
104 106 Silhouette4UsersGuide 3. Click on Edit Custom Report Data. 4. Choose the report format - Primary or Intermediate. If you teach French Immersion, check the French Immersion box. If you teach another program (e.g. L.A.C. or E.S.L.) You may want to enter the program name in the box below French Immersion and click its checkbox. If either of these checkboxes is selected, the appropriate program name will be included on the report underneath either Primary or Intermediate Report. 5. Enter School and Class Data. Any information entered here will be printed exactly as it appears, so be sure to use the format (e.g. date format) that you want on the report. 6. If you have an intermediate class, enter the subject names. For some custom report formats, some or all of these cannot be edited and will be greyed out. However, if there are empty spaces or the subject titles are on a white background, you can enter the subject names you need. 7. Edit Grades for Students in [class]: This button will allow you to enter subject grades for your students right away. Typically, this will not be needed and you will enter the grades portion of Silhouette 4 from the student reports. 8. Copy Other Grades File into [class]: This button will allow you to locate a grades file in another class folder and copy it into this class folder. This would ensure that term one marks are included in the term two folder but is not necessary if you use the New Term button to create your term two class. 9. Click on Save, then Exit to save this custom report data. Notes: 1. This custom report data will be automatically copied to your term two folder when you use the New Term button to create a term two class folder, so it is not necessary to enter it a second time. 2. IMPORTANT: For Grade 3/4 Classes: Teachers of grade 3/4 classes must note that a class must be either primary or intermediate if you are using the custom report format. If you have a grade 3/4 class you will need to treat it as two classes. The grade three students must be in one class folder and the grade four students in another. When you create class folders for each grade from the classlist, you will need to uncheck the student in the other grade before continuing.

105 Chapter 16 Chapter Five: Student Reports 107 Entering student grades If you use a custom report format for an intermediate class, you will need to enter the student grades for each term. Silhouette will store and print the student grades as part of the report. When a new term created using the New Term button, the previous terms marks will automatically be copied over. You can enter the student grades portion of Silhouette 4 in two ways: Either click on Grades on any student report, or click on Edit Grades for Students in [class] from the Edit Custom Data part of Silhouette 4. In either case, once you are entering grades for one student, you can move ahead or back to enter grades for other students.
106 108 Silhouette4UsersGuide If the Grades button does not appear on the student report screen then either the Use Custom Format box is not checked or Intermediate has not been selected in the Edit Custom Report Data part of Silhouette 4. Keyboard shortcuts When entering grades, the following keyboard shortcuts may help: Enter - move to next mark, either Grade or work Habits Tab - move down the current column Page Down - next student in class list Page up - previous student in class list As well, the < and > buttons will move to the previous or next student and the << and >> buttons will move to the first and last students in the class. Student Grades are automatically saved upon exiting the grades screen.
.")
107 109 C H A P T E R 1 7 Appendix K: Exporting PSR Data Silhouette 4 will store and then export PSR grades and comments in a format that can be read by Turbo-School. These features are only available when you are using the Custom Report Format and are working on a term 3 class (the term is set in Edit Custom Report Data). Important Note: The Delta Schools version does not permit individual selection of student data to be exported. A single file for the whole class will be saved in a folder called PSRDataFiles inside your Silhouette4 folder. Before exporting, you must select the appropriate school code from the list provided. Grade Assignment - Term 3 (Intermediate) PSR Comment and Grade Assignment - Term 3 (Primary) This feature should be used to enter the year end data that will appear on the report card. This is also the data that will be exported for the students PSR card. It is important to remember to do this for each student in a term 3 class.

108 110 Silhouette4UsersGuide For intermediate students, the year end data is just the grade assignment. This will be printed on the final report (... assigned to grade...) automatically. For primary students, the year end data are the grade assignment and the two PSR Comments. Check to make sure the grade assignment is correct, then select the appropriate comments to be included on the report and PSR card. Note: If the student works on an IEP, select the IEP comment for literacy and no further PSR comment is necessary. Exporting PSR Data This feature will export files to a floppy disk in a format that can be imported into Turbo-School for year end PSR Data entry. Insert a floppy disk in drive a:. Select students and click on Process PSR Data. Delta teachers must also select their two digit school code from a drop down menu. Silhouette 4 will create the necessary files for Turbo-School to import the data using its Orbiter Options and display the data on screen. Be sure to examine this data carefully to ensure that it is correct. Then click on Save PSR Data to write the file to a floppy disk.
109 Chapter 17 Chapter Five: Student Reports 111 Overwrite or Append: Turbo School export option If there is already a PSR Data file on the disk, you will be given the option of overwriting the file or appending to it.. (For example, secretaries exporting data for a number of classes would choose to append, saving them from having to switched back and forth from Silhouette 4 to TurboSchool or from having to use multiple disks.) IMPORTANT: Special Education classes in Vancouver and Sooke should not use the PSR Export option unless their students grade level is identified as EU. Silhouette 4 can make this conversion for you.
110
111 113 C H A P T E R 1 8 Appendix L: Including Attendance Silhouette 4 will print student attendance data onto each report card. In order to do this, you will need an attendance file exported from your office or district computer. Once this file has been imported into your Silhouette 4 folder, the attendance option will be available on the Print/View Reports screen. Turbo-School Note: Schools using Turbo-School (v8.09 or better) can get an attendance export by going to Utilities > Export Data. Select the Export by Division option and all the default settings. Select Format 5 - Attendance Export. Export the file to a floppy disk and it will be ready for use in Silhouette. Importing Attendance data: From the Silhouette 4 title screen, click on Student Reports. Click on Classes Utilities. Click on Get Attendance File. Locate the attendance export file (The file exported from Turbo-School is called AttLabel.dat. The attendance file in Delta Schools is named attendance.csv) and open it. Silhouette 4 will copy the attendance data into the Silhouette4 folder, ready for use. Notes: 1. This procedure must be repeated each term to ensure that the report includes up to date data. 2. Only one attendance file can exist in a Silhouette4 folder at a time. The file contains data for the entire school, so that all classes can use it, but there cannot be attendance data from two schools at once. If two teachers from different schools attempt to import attendance data, the second file will overwrite the first. In this case, incorrect attendance data will be printed if the two schools have students with the same student number (quite likely). Silhouette will find what appears to be a correct student number and attendance for the report being printed, but it will actually be data from the other school. Including Attendance Data on Student Reports
112 114 Silhouette4UsersGuide Once the attendance file has been imported, Silhouette will automatically check the file for attendance data for the student whose report is being printed by checking for the appropriate student number. If no such student number is found, Silhouette will report that attendance data could not be found and no attendance grid will appear on the report. If Silhouette finds attendance data the attendance grid will be included automatically. However, it can be removed by clearing the Print Attendance check box on the View/Print Reports screen. Note: Silhouette will report the number of absences and lates for each month that school has been in session. If a student was registered late, the months prior to registration will be represented with dashes ( ). Out-of-Date Attendance Files When you enter Student Reports and click on a class folder that uses a custom report format, Silhouette 4 will automatically check the date of creation of any attendance file it finds in the Silhouette4 folder. If this file is older than one month, you will be advised that "It is probably an old attendance file that should be deleted and replaced with an up-to-date attendance file before you print these reports." Notes: From Classes Utilities on the Student Reports window: 1. using Get Attendance File, you can copy an attendance file from, for example, a USB drive 2. using Get ed Attendance, you can move an attendance file (that you have saved to your desktop upon receiving it by ) into your Silhouette4 folder 3. using Export Attendance File, you can copy the attendance file in your Silhouette4 folder onto, for example, a USB drive, so that someone else can copy it into their Silhouette4 folder. 4. using Attendance File, you can an attendance file to someone who need it.

113 115 C H A P T E R 1 9 Appendix M: Edit Report Printer Settings These settings are only used for reports that do not use the custom format. Custom format reports use their own settings as required by the school district. For non-custom Format reports, Silhouette 4 stores settings for up to six report formats. Each format should have its own name. These names, as well as the fonts, sizes, and margins, can be edited to your own preferences. The six formats are identified by their names beside the six buttons at the top of this window. Select any of the formats to edit it. A group of six settings can be saved using the Save Settings AS button. The saved settings can be retrieved using the Load Other Settings Button. This is useful if you use Silhouette for non-report card assessment and need different formats. Format Name: Enter a name for this format. Default Print Format: Check this box if you want this format to be the default setting. Silhouette 4 will automatically print using the default format unless another is selected. This box will automatically be unchecked if another format is selected as default. Margins: Settings are measured in centimetres. Notice that there are separate settings for page one and page two. The page two settings will be used for subsequent pages also. Paper size: Select either letter or legal for this format.
114 116 Silhouette4UsersGuide Page Border Options: Use these settings to print a border around your printout. The choices are: None, Box, Top line only, Bottom line only, Top and Bottom lines. The border line can range in thickness from 1 (thin) to 5 (thick). Note: The Page Border options are only available when your page one and page two margins are identical to each other. If they should differ, the Page Border Options will be ghosted out. Format Description: Use this area to note any information about this format. It is for your reference only. Font settings: Select the font and size for each of these items. Silhouette will not permit printing or viewing if any of the fonts of the selected format are not properly set. Note: Only the font name and size will be used by Silhouette. Style settings (i.e. bold, italic) will be ignored. Topic Titles Bold: Select this box if you wish to have the topic areas identified in bold print (recommended). Page 2: Select this box if you wish to feed second pages manually. This is necessary if the second and subsequent pages have a different format than the first. Click on Save Settings to save printer settings, or Cancel to abort this operation. Tip: Many Silhouette users prefer to set up one report format with a small font and one with a larger font. This way, longer reports can be printed with one format while shorter ones could be printed with another format.
115 117 C H A P T E R 2 0 Appendix N: Setting up Silhouette 4 In the Silhouette 4 Utilities, you must choose between two methods of from within Silhouette 4. Most teachers will select the Winsock method. First Class Method Delta teachers who have First Class as their default client should select the FirstClass method. No further setup should be necessary. Winsock Method IMPORTANT NOTE: Vancouver teachers - the SMTP address for all non-administration computers in Vancouver schools is stargate.vsb.bc.ca. At Vancouver schools you will not need (or be able) to use the method below.

 2. Next, double-click on your account in the list 3.")
116 118 Silhouette4UsersGuide OUTLOOK EXPRESS: To set up your settings in Silhouette 4 at home when you are using the winsock method: 1. First, find your SMTP address: In Outlook Express click on Tools/Accounts (for Mozilla Thunderbird see below) 2. Next, double-click on your account in the list 3. Select the Servers tab and note the Outgoing Mail (SMTP) address. You will enter this address into Silhouette 4.
 and your email address (Sender s Email Address) (Note: these will be automatically saved so you won t have to enter them again.) 7.")
117 Chapter 20 Chapter Five: Student Reports Close Outlook Express and run Silhouette On the Student Reports screen, select any class and then click on This Class Folder. 6. Enter your SMTP address, your name (Sender s Name) and your address (Sender s Address) (Note: these will be automatically saved so you won t have to enter them again.) 7. To check that all is working well, the class to yourself. Notice that you can add a personal note in the editbox at the bottom. MOZILLA THUNDERBIRD: The procedure is very similar to that with Outlook Express 1. Select Tools/Accounts from the top menu

118 120 Silhouette4UsersGuide 2. Select Outgoing server. Note the Server Name. You will enter this address into Silhouette Close Thunderbird and continue with the instructions 5 to 7 above.
119 Chapter 20 Chapter Five: Student Reports 121 Appendix O: Setting up the Schoolwide data file (from TurboSchool) Note: this section is applicable only if student information is transferred inot Silhouette via TurboSchool. The schoolwide date file for use in SilhouetteCE and Silhouette4 is the same Turbo.dat file that ClassList Printer has used to create classlist files to be transferred to the reporting software. With Version 1.5 of SilhouetteCE and Version 4.5 or Silhouette4, the intermediate step that is ClassList Printer is no longer necessary. Either the Turbo.dat file from TurboSchool or the Master.dat file that is inside the ClassList Printer folder may be copied into the SilhouetteCE or Silhouette4 folders and will function as the schoolwide data file. A. Setting up the Turbo.dat file: this will be done only once. TurboSchool will save these settings. Reminder: The Turbo.dat file described below is used by SilhouetteCE, Silhouette4 and ClassList Printer 1. In Turbo School, go to Utilities and select 2. Export Data. 2. Select E. Edit the Format: Select a blank format and enter the following elements to export (some element numbers may differ): 6 Division 1 Last Name 2 Given Name 3 Name Used 4 Sex 5 Grade 43 Com# 74 PEN 46 Teacher 47 Room Once the above ten fields have been entered, you may add any number of extra fields. These will be made available for printout in ClassList Printer (Note: these extra fields are ignored by SilhouetteCE and Silhouette4). Be sure that there are no commas in these additional fields. 3. Cursor up to change the following: Drive --> A (the letter of your floppy drive) or C, whichever you prefer Filename --> Turbo.dat (actually any file name will do. Turbo School saves its files with the suffix.dat)
120 122 Silhouette4UsersGuide Title--> ClassListPrinter (this is the title for this save format) 4. Press <F2> to save this export format. B. Exporting the Turbo.dat file (schoolwide data file): 1. Exit to Utilities, and again select Export Data and then select 3. By Division. Most of the defaults that follow should be accepted:: Starting Division: 1 Ending Division: (your school's last division number) Split the Grades? Y Split the Sexes? N Include withdrawals? N Date for determining enrollment? (current date) 2. Select the format of the destination: select 4. Database (commas and quotes) 3. Select form to export: select the ClassList form you saved in #4 above 4. When Turbo School asks for a drive letter, enter the drive you may wish to save the Turbo.dat and Common.vec files onto, for example, your C: drive. Change the target drive as desired. Turbo will then save the file. C. Getting the (Turbo.dat) schoolwide data file into SilhouetteCE or Silhouette4 1. Exit Turbo School, enter SilhouetteCE or Silhouette4. 2. Enter Student Reports and click on Classes Utilitites. 3. Click on Get Schoolwide data file. Locate the Turbo.dat file you just saved and click on Open. The file will be copied into your Silhouette folder and be available as the schoolwide data file.
121 Chapter 20 Chapter Five: Student Reports 123 Appendix P: Windows Vista support Silhouette 4 (as of Version 4.5) supports Windows Vista and behaves in identical fashion to other Windows editions except in one way, the UAC (see below). It will install by default in the c:\program Files folder just as it always has for previous versions of Windows. A manifest file included with the upgrade and install for Silhouette 4 elevates Silhouette 4 to administrator status so that it is able to save comments and student reports into the Program Files\Silhouette4 folder successfully. with this manifest file in place, when you run Silhouette4, Vista brings up the UAC window for tyou to confrirm that this elevation is okay. UAC (User Account Control) UAC stands for User Account Control, and is a new security feature of Windows Vista. Instead of forcing us to create separate administrator and standard user accounts to helps keep our system secure against virus and malware threats, UAC lets us use just one user account, but play two different roles with it: the role of a standard user for the day-to-day tasks, and the role of the administrator for system maintenance, when needed. When you use the computer for the regular tasks (like checking or editing documents), the standard user identity is used. Only when you attempt to do a system maintenance task (like installing new software, or changing settings that affect other users) or run software that requires access to areas that Vista considers sensitive, then UAC temporarily puts the administrator's hat on you and (with your permission) allows you to perform the task. When the task is finished, UAC returns to using your standard user identity. That's what all those elevation prompts are about: they ask you to confirm that you are about to perform a task that requires elevated (administrative) access to your computer. Silhouette4 requires elevation to administrator status because it saves data into the Program Files folder. This is what you see the UAC advisor each time you run Silhouette 4.

122 124 Silhouette4UsersGuide Credit: some of the above text are paraphrases of text from where you can get TweakUAC, free software that allows you to run UAC in 'silent mode'.
Microsoft Office Word. Part1
 Microsoft Office 2010 - Word Part1 1 Table of Contents What is Microsoft Word?... 4 Creating a document... 5 Toolbar... 6 Typing in MS Word Text Area... 7 Cut, Copy and Paste Text... 9 Paste Preview...
Microsoft Word: Steps To Success (The Bare Essentials)
") Microsoft Word: Steps To Success (The Bare Essentials) Workbook by Joyce Kirst 2005 Microsoft Word: Step to Success (The Bare Essentials) Page Contents 1 Starting Word 2 Save 3 Exit 5 Toolbars, Alignment,
Microsoft Word: Steps To Success (The Bare Essentials) Workbook by Joyce Kirst 2005 Microsoft Word: Step to Success (The Bare Essentials) Page Contents 1 Starting Word 2 Save 3 Exit 5 Toolbars, Alignment,
Included with the system is a high quality speech synthesizer, which is installed automatically during the SymWord setup procedure.
 Introduction to SymWord SymWord is a simple to use, talking, symbol-word processor. It has the basic functionality of a word processor. SymWord can also be configured to produce speech and/or display text
Word Processing 1. Using a computer for Writing. Spreadsheets
 Word Processing 1 Using a computer for Writing Spreadsheets Microsoft Office 2016 Microsoft Word 2016 Table of Contents Table of Contents... 2 When/if things go wrong... 3 To delete a wrongly entered character:...
Microsoft Office Word. Help. Opening a Document. Converting from Older Versions
 Microsoft Office 2007 - Word Help Click on the Microsoft Office Word Help button in the top right corner. Type the desired word in the search box and then press the Enter key. Choose the desired topic
OU EDUCATE TRAINING MANUAL
 OU EDUCATE TRAINING MANUAL OmniUpdate Web Content Management System El Camino College Staff Development 310-660-3868 Course Topics: Section 1: OU Educate Overview and Login Section 2: The OmniUpdate Interface
Word 2013 Beginning. Technology Integration Center
 Word 2013 Beginning Getting Started... 2 Quick Access Toolbar... 3 The Ribbon... 3 Help... 4 Compatibility Mode... 4 Document Views... 4 Navigating the Document... 5 Moving Around in the Document... 5
Word 2010 Beginning. Technology Integration Center
 Word 2010 Beginning File Tab... 2 Quick Access Toolbar... 2 The Ribbon... 3 Help... 3 Opening a Document... 3 Documents from Older Versions... 4 Document Views... 4 Navigating the Document... 5 Moving
Windows Computer A to Z Shortcut Key list with PDF
 Windows Computer A to Z Shortcut Key list with PDF In the Computer world, a keyboard shortcut is a combination of one or more command to execute a particular action. These shortcuts are really helpful
Introduction to MS Word XP 2002: An Overview
 Introduction to MS Word XP 2002: An Overview Sources Used: http://www.fgcu.edu/support/office2000/word/files.html Florida Gulf Coast University Technology Skills Orientation Word 2000 Tutorial The Computer
Microsoft Word Intermediate March 25, Exercise 1: Open Word Click on Word. OR Click Start. Click All Programs. Click Microsoft Office.
 Microsoft Word Intermediate March 25, 2014 Exercise 1: Open Word Click on Word. OR Click Start. Click All Programs. Click Microsoft Office. Exercise 2: Create a new document Click File Tab. Select New.
Introduction to Microsoft Office 2016: Word
 Introduction to Microsoft Office 2016: Word Last Updated: September 2018 Cost: $2.00 Microsoft Word is a word processing software. You can use it to type letters, reports, and other documents. This class
Each time you start PastPerfect you will be presented with the main menu.
 2 THE BASICS This chapter will teach you how to use the most common functions of PastPerfect. Detailed instructions for specific sections of the program will be given in later chapters. STARTING PASTPERFECT
Microsoft Word Part I Reference Manual
 Microsoft Word 2002 Part I Reference Manual Instructor: Angela Sanderson Computer Training Coordinator Updated by: Angela Sanderson January 11, 2003 Prepared by: Vi Johnson November 20, 2002 THE WORD SCREEN
User Guide. Chapter 6. Teacher Pages
 User Guide Chapter 6 s Table of Contents Introduction... 5 Tips for s... 6 Pitfalls... 7 Key Information... 8 I. How to add a... 8 II. How to Edit... 10 SharpSchool s WYSIWYG Editor... 11 Publish a...
Hidden Gems for Avatar Champions May 15, Title. Subtitle
 Hidden Gems for Avatar Champions May 15, 2017 Title Subtitle 1 Purpose As a token of our appreciation for your participation as an Avatar Champion, we are pleased to share with you hidden gems, helpful
Introduction to Microsoft Word 2010
 Introduction to Microsoft Word 2010 THE BASICS PAGE 02! What is Microsoft Word?! Opening Microsoft Word! The Title Bar! Page View and Zoom MENUS...PAGE 03! Quick Access Toolbar! The Ribbon! File Tab! Home
Writing Practice Tool Guide
 Writing Practice Tool Guide Virginia Standards of Learning Grades 5, 8, & End-of-Course (EOC) Writing February, 2013 Pearson 1 Revised February 14, 2013 Table of Contents OVERVIEW... 3 SYSTEM REQUIREMENTS
Computer Nashua Public Library Introduction to Microsoft Word 2010
 Microsoft Word is a word processing program you can use to write letters, resumes, reports, and more. Anything you can create with a typewriter, you can create with Word. You can make your documents more
Maplewood ConnectEd User Guide For AMDSB Elementary Teachers Grades 1 to 8
 Maplewood ConnectEd User Guide For AMDSB Elementary Teachers Grades 1 to 8 Table of Contents Login Information. Page 3 Pop-Up Blockers Page 4 Internet Browsers... Page 4 Main Menu. Page 5 Student Menu.
Word - Basics. Course Description. Getting Started. Objectives. Editing a Document. Proofing a Document. Formatting Characters. Formatting Paragraphs
 Course Description Word - Basics Word is a powerful word processing software package that will increase the productivity of any individual or corporation. It is ranked as one of the best word processors.
DRAFT. Table of Contents About this manual... ix About CuteSITE Builder... ix. Getting Started... 1
 DRAFT Table of Contents About this manual... ix About CuteSITE Builder... ix Getting Started... 1 Setting up... 1 System Requirements... 1 To install CuteSITE Builder... 1 To register CuteSITE Builder...
Windows XP. A Quick Tour of Windows XP Features
 Windows XP A Quick Tour of Windows XP Features Windows XP Windows XP is an operating system, which comes in several versions: Home, Media, Professional. The Windows XP computer uses a graphics-based operating
Microsoft Office Word 2013
 Microsoft Office Word 2013 Accessibility University Information Technology Services Training, Outreach, Learning Technologies & Video Production Copyright 2016 KSU Division of University Information Technology
Contents. Launching Word
 Using Microsoft Office 2007 Introduction to Word Handout INFORMATION TECHNOLOGY SERVICES California State University, Los Angeles Version 1.0 Winter 2009 Contents Launching Word 2007... 3 Working with
With ClaroIdeas you can quickly and easily create idea maps using a combination of words, symbols and pictures.
 Welcome to ClaroIdeas ClaroIdeas is a fresh tool to support the creation and editing of concept maps or idea maps using visual and audio components. It has been specifically developed to support people
Lesson 4 - Creating a Text Document Using WordPad
 Lesson 4 - Creating a Text Document Using WordPad OBJECTIVES: To learn the basics of word processing programs and to create a document in WordPad from Microsoft Windows. A word processing program is the
Maplewood ConnectEd Teacher s Manual For Secondary School
 Maplewood ConnectEd Teacher s Manual For Secondary School TABLE OF CONTENTS LOGGING IN 1 MAIN MENU 3 STUDENT RECORDS 4 ATTENDANCE AND SEATING PLAN 5 ENTERING ACHIEVEMENT (MARKS) 7 CLASS ACHIEVEMENT 8 INDIVIDUAL
2 Frequently Asked... Questions. 4 How Do I... 1 Working within... Entries
 Contents I Table of Contents Part I Welcome 6 1 Welcome... 6 2 Frequently Asked... Questions 6 Part II Getting Started 6 1 Getting Started... 6 2... 7 Create a New Database... 7 Open an Existing... Database
Section 1 Microsoft Excel Overview
 Course Topics: I. MS Excel Overview II. Review of Pasting and Editing Formulas III. Formatting Worksheets and Cells IV. Creating Templates V. Moving and Navigating Worksheets VI. Protecting Sheets VII.
Introduction to Microsoft Word 2007 Prepared by:
 Introduction to Microsoft Word 2007 Prepared by: INSTITUTE for ADVANCED STUDY IAS Information Technology Group Einstein Drive, Princeton, NJ 08540 10/28/08 2 TABLE OF CONTENTS INTRODUCTION... 6 GETTING
KEYBOARD SHORTCUTS AND HOT KEYS
 KEYBOARD SHORTCUTS AND HOT KEYS Page 1 This document is devoted to using the keyboard instead of the mouse to perform tasks within applications. This list is by no means the "be all and end all". There
Microsoft PowerPoint 2007 Beginning
 Microsoft PowerPoint 2007 Beginning Educational Technology Center PowerPoint Presentations on the Web... 2 Starting PowerPoint... 2 Opening a Presentation... 2 Microsoft Office Button... 3 Quick Access
Introduction to Microsoft Word 2010
 Introduction to Microsoft Word 2010 Microsoft Word is a word processing program you can use to write letters, resumes, reports, and more. Anything you can create with a typewriter, you can create with
TEACHER PAGES USER MANUAL CHAPTER 6 SHARPSCHOOL. For more information, please visit: Chapter 6 Teacher Pages
 SHARPSCHOOL USER MANUAL CHAPTER 6 TEACHER PAGES For more information, please visit: www.customernet.sharpschool.com 0 TABLE OF CONTENTS 1. 2. 3. 4. 5. 6. 7. 8. 9. 10. 11. INTRODUCTION... 1 I. TEACHER PAGE
Table of Contents Lesson 1: Introduction to the New Interface... 2 Lesson 2: Prepare to Work with Office
 Table of Contents Lesson 1: Introduction to the New Interface... 2 Exercise 1: The New Elements... 3 Exercise 2: Use the Office Button and Quick Access Toolbar... 4 The Office Button... 4 The Quick Access
MICROSOFT WORD 2010 BASICS
 MICROSOFT WORD 2010 BASICS Word 2010 is a word processing program that allows you to create various types of documents such as letters, papers, flyers, and faxes. The Ribbon contains all of the commands
ADRION PROJECT WEBSITES USER S MANUAL
 ADRION PROJECT WEBSITES USER S MANUAL September 2018 Summary 1. The ADRION Project Website... 3 2. Content instructions... 3 3. Contacts for technical assistance... 3 4. Login... 3 5. Editable contents...
IBM Notes Client V9.0.1 Reference Guide
 IBM Notes Client V9.0.1 Reference Guide Revised 05/20/2016 1 Accessing the IBM Notes Client IBM Notes Client V9.0.1 Reference Guide From your desktop, double-click the IBM Notes icon. Logging in to the
Open Book Format.docx. Headers and Footers. Microsoft Word Part 3 Office 2016
 Microsoft Word Part 3 Office 2016 Open Book Format.docx Headers and Footers If your document has a page number, you already have a header or footer (and can double click on it to open it). If you did not
Microsoft Word 2010 Part 1: Introduction to Word
 CALIFORNIA STATE UNIVERSITY, LOS ANGELES INFORMATION TECHNOLOGY SERVICES Microsoft Word 2010 Part 1: Introduction to Word Summer 2011, Version 1.0 Table of Contents Introduction...3 Starting the Program...3
MS WORD. You can use it for writing letters, reports and so on.
 MS WORD MS WORD 2 You can use it for writing letters, reports and so on. Starting Word application 3 To start MS. Word do the following: 1. From the Start button on the taskbar, select All Programs. 2.
Word Select New in the left pane. 3. Select Blank document in the Available Templates pane. 4. Click the Create button.
 Microsoft QUICK Word 2010 Source Getting Started The Word Window u v w x z Opening a Document 2. Select Open in the left pane. 3. In the Open dialog box, locate and select the file you want to open. 4.
Word 2007/10/13 1 Introduction
 Objectives Word 2007/10/13 1 Introduction Understand the new Word 2007 Interface Navigate the Office button Learn about the Quick Access menu Navigate the Ribbon menu interface Understand the I-beam Learn
Requirements Document
 GROUP 9 Requirements Document Create-A-Page Matthew Currier, John Campbell, and Dan Martin 5/1/2009 This document is an outline of what was originally desired in the application in the Project Abstract,
Microsoft Word 2011 Tutorial
 Microsoft Word 2011 Tutorial GETTING STARTED Microsoft Word is one of the most popular word processing programs supported by both Mac and PC platforms. Microsoft Word can be used to create documents, brochures,
Coach s Office Playbook Tutorial Playbook i
 Playbook i The Playbook... 1 Overview... 1 Open the Playbook... 1 The Playbook Window... 2 Name the Chapter... 2 Insert the First Page... 3 Page Templates... 3 Define the Template Boxes... 4 Text on the
Low Vision Technology
 Low Vision Technology Student Name: Directions: 1. If this assessment is appropriate for this student, use it for planning programming and reporting student performance at least four times. 2. Date the
Read:OutLoud Bookshare Edition
 Read:OutLoud Bookshare Edition User Guide Copyright 2010 Don Johnston Incorporated www.donjohnston.com To use this guide, click a topic in the Contents to get help. To return to the Contents, click the
PowerPoint 2010 Level 1 Computer Training Solutions Student Guide Version Revision Date Course Length
 Level 1 Computer Training Solutions Version 1.2 Revision Date Course Length 2012-Feb-16 6 hours Table of Contents Quick Reference... 3 Frequently Used Commands... 3 Manitoba ehealth Learning Management
Microsoft Word and Basics of Word processing
 Microsoft Word and Basics of Word Processing Unit 3: Microsoft Word and Basics of Word processing Introduction A word processor is a software package that turns your personal computer into a machine that
SKILL AREA 210: USE A WORD PROCESSING SOFTWARE. Lesson 1: Getting Familiar with Microsoft Word 2007 for Windows...5
 Contents Microsoft Word 2007...5 Lesson 1: Getting Familiar with Microsoft Word 2007 for Windows...5 The Microsoft Office Button...6 The Quick Access Toolbar...6 The Title Bar...6 The Ribbon...6 The Ruler...6
Microsoft Word Training
 Microsoft Word Training Objectives: Become familiar with the Word Window, toolbars, and menus Learn to Save and Print Learn how to create tables, forms and templates Opening Word / Menus / Toolbars Click
WORD XP/2002 USER GUIDE. Task- Formatting a Document in Word 2002
 University of Arizona Information Commons Training Page 1 of 21 WORD XP/2002 USER GUIDE Task- Formatting a Document in Word 2002 OBJECTIVES: At the end of this course students will have a basic understanding
Microsoft Word 2010 Basics
 1 Starting Word 2010 with XP Click the Start Button, All Programs, Microsoft Office, Microsoft Word 2010 Starting Word 2010 with 07 Click the Microsoft Office Button with the Windows flag logo Start Button,
Microsoft Word (97, 98, 2000) Word Processing Instructions
 Word Processing Instructions") Microsoft Word (97, 98, 2000) Word Processing Instructions Managing Toolbars Click on View. Select Toolbars. Click to select Standard, Formatting, and Drawing. Formatting Text 1. Once text is typed in,
Microsoft Word (97, 98, 2000) Word Processing Instructions Managing Toolbars Click on View. Select Toolbars. Click to select Standard, Formatting, and Drawing. Formatting Text 1. Once text is typed in,
Microsoft Word Introduction
 Academic Computing Services www.ku.edu/acs Abstract: This document introduces users to basic Microsoft Word 2000 tasks, such as creating a new document, formatting that document, using the toolbars, setting
Microsoft PowerPoint 2010 Beginning
 Microsoft PowerPoint 2010 Beginning PowerPoint Presentations on the Web... 2 Starting PowerPoint... 2 Opening a Presentation... 2 File Tab... 3 Quick Access Toolbar... 3 The Ribbon... 4 Keyboard Shortcuts...
jraven Quick Start Guide
 jraven Quick Start Guide Version 1.0 9/15/2010 Overview, Install, Starting the Application and Setup... 3 Overview:... 3 INSTALL / SETUP... 3 How to install jraven... 4 Migrating Data - jraven MIGRATION
Table of Contents COURSE OVERVIEW... 3 LESSON 1: OUTLOOK 2010 CALENDAR INTERFACE... 5
 Table of Contents COURSE OVERVIEW... 3 LESSON 1: OUTLOOK 2010 CALENDAR INTERFACE... 5 OPEN OUTLOOK CALENDAR... 5 Ribbon... 6 Navigation Pane... 6 Appointment Area... 6 Task Pane... 6 To-Do Bar... 6 THE
Introduction to Microsoft Word 2010
 Introduction to Microsoft Word 2010 Microsoft Word is a word processing program you can use to write letters, resumes, reports, and more. Anything you can create with a typewriter, you can create with
Fusion. CBR Fusion MLS Level 1 Core Functions. Class Handout
 Fusion 1 CBR Fusion MLS Level 1 Core Functions Class Handout GETTING STARTED IN FUSION Logging On and Off To log on to Fusion MLS: 1. Type your user name in the User ID box. 2. Type your password in the
Impress Guide Chapter 1 Introducing Impress
 Impress Guide Chapter 1 Introducing Impress This PDF is designed to be read onscreen, two pages at a time. If you want to print a copy, your PDF viewer should have an option for printing two pages on one
Indispensable tips for Word users
 Indispensable tips for Word users No matter how long you've been using Microsoft Word, you can always learn new techniques to help you work faster and smarter. Here are some of TechRepublic's favorite
What can Word 2013 do?
 Mary Ann Wallner What can Word 2013 do? Provide the right tool for: Every aspect of document creation Desktop publishing Web publishing 2 Windows 7: Click Start Choose Microsoft Office > Microsoft Word
Introduction to Personal Computing
 Introduction to Personal Computing Academic Computing Services www.ku.edu/acs Abstract: This document explains the basics of the Microsoft Windows operating system. It is intended for users who are either
Introduction to Excel 2007
 Introduction to Excel 2007 These documents are based on and developed from information published in the LTS Online Help Collection (www.uwec.edu/help) developed by the University of Wisconsin Eau Claire
Computer Shortcuts. Files menu options in current program. Edits options in current program Universal Help in almost every Windows program.
 www.bankjobszone.com Computer Shortcuts Shortcut keys Concept: Shortcuts keys help provide an easier and usually quicker method of navigating and using computer software programs. Shortcut keys are commonly
Working with Pages... 9 Edit a Page... 9 Add a Page... 9 Delete a Page Approve a Page... 10
 Land Information Access Association Community Center Software Community Center Editor Manual May 10, 2007 - DRAFT This document describes a series of procedures that you will typically use as an Editor
LONG TERM CARE HOSPITAL ASSESSMENT SUBMISSION ENTRY & REPORTING TOOL (LASER) USER GUIDE IN SUPPORT OF VERSION (APRIL 2017)
 USER GUIDE IN SUPPORT OF VERSION (APRIL 2017)") LONG TERM CARE HOSPITAL ASSESSMENT SUBMISSION ENTRY & REPORTING TOOL (LASER) USER GUIDE IN SUPPORT OF VERSION 1.3.0 (APRIL 2017) Updated 3/2017 TABLE OF CONTENT INTRODUCTION... 4 INSTALLATION... 4 Installers
LONG TERM CARE HOSPITAL ASSESSMENT SUBMISSION ENTRY & REPORTING TOOL (LASER) USER GUIDE IN SUPPORT OF VERSION 1.3.0 (APRIL 2017) Updated 3/2017 TABLE OF CONTENT INTRODUCTION... 4 INSTALLATION... 4 Installers
Figure 1.1 GENESIS Log In Page
 TEACHERVUE User Guide Chapter One OVERVIEW OF THE TEACHERVUE SOFTWARE The TEACHERVUE software, frequently abbreviated TXP and also known as Teacher Experience, provides districts with an easy method to
Reference Services Division Presents WORD Introductory Class
 Reference Services Division Presents WORD 2010 Introductory Class CLASS OBJECTIVES: Navigate comfortably on a Word page Learn how to use the Ribbon tabs and issue commands Format a simple document Edit,
Word 97: Increasing Efficiency
 Windows 95 Word 97: Increasing Efficiency Increasing Your Efficiency Word for Windows has a number of features that can help you perform word processing tasks more quickly or to increase efficiency by
Introduction to Microsoft Office PowerPoint 2010
 Introduction to Microsoft Office PowerPoint 2010 TABLE OF CONTENTS Open PowerPoint 2010... 1 About the Editing Screen... 1 Create a Title Slide... 6 Save Your Presentation... 6 Create a New Slide... 7
4D Write. User Reference Mac OS and Windows Versions. 4D Write D SA/4D, Inc. All Rights reserved.
 4D Write User Reference Mac OS and Windows Versions 4D Write 1999-2002 4D SA/4D, Inc. All Rights reserved. 4D Write User Reference Version 6.8 for Mac OS and Windows Copyright 1999 2002 4D SA/4D, Inc.
MICROSOFT WORD. Table of Contents. What is MSWord? Features LINC TWO
 Table of Contents What is MSWord? MS Word is a word-processing program that allows users to create, edit, and enhance text in a variety of formats. Word is a powerful word-processor with sophisticated
MCDOUGAL LITTELL EASYPLANNER USER S GUIDE
 MCDOUGAL LITTELL EASYPLANNER USER S GUIDE 1 Introduction The McDougal Littell EasyPlanner allows you to quickly and easily access Resource materials such as tests, quizzes, books, and other supporting
MS Word Professional Document Alignment
 MS Word Professional Document Alignment Table of Contents CHARACTER VS. PARAGRAPH FORMATTING...5 Character formatting...5 Paragraph Formatting...5 USING SHOW/HIDE TO REVEAL NON-PRINTING CHARACTERS...5
JMWeb Online Help
 Table Of Contents Contents Welcome to Jabber Messenger for the Web... 3 What do you want to do?... 3 Adding Contacts... 4 Chatting with Contacts... 5 What is Presence?... 7 Presence types... 7 Your presence...
Excel 2003 Tutorial II
 This tutorial was adapted from a tutorial by see its complete version at http://www.fgcu.edu/support/office2000/excel/index.html Excel 2003 Tutorial II Charts Chart Wizard Chart toolbar Resizing a chart
MS Word Basics. Groups within Tabs
 MS Word Basics Instructor: Bev Alderman L e t s G e t S t a r t e d! Open and close MS Word Open Word from the desktop of your computer by Clicking on the Start>All programs>microsoft Office >Word 2010
Intro to Microsoft Word
 Intro to Microsoft Word A word processor is a computer program used to create and print text documents that might otherwise be prepared on a typewriter. The key advantage of a word processor is its ability
User Guide. Rev Dot Origin Ltd.
 User Guide Introduction to the EasyTac File Explorer...1 Using EasyTac to read drivers' cards with a card reader...2 Using EasyTac to read VU files from a download device...3 Using EasyTac to download
Switched-On Schoolhouse 2014 User Guide Reports & Application Functions
 Switched-On Schoolhouse 2014 User Guide Reports & Application Functions MMVI Alpha Omega Publications, Inc. Switched-On Schoolhouse 2014, Switched-On Schoolhouse. Switched-On, and their logos are registered
The first time you open Word
 Microsoft Word 2010 The first time you open Word When you open Word, you see two things, or main parts: The ribbon, which sits above the document, and includes a set of buttons and commands that you use
Beginning a presentation
 L E S S O N 2 Beginning a presentation Suggested teaching time 40-50 minutes Lesson objectives To learn how to create and edit title and bullet slides, you will: a b c d Select slide types by using the
PUREEDGE VIEWER User s Manual v6.5
 PUREEDGE VIEWER User s Manual v6.5 Revision 3, October 7, 2005. Copyright 2005 IBM Corporation. All rights reserved. U.S. Government Restricted Rights. The Product is provided with RESTRICTED RIGHTS. Use,
ECDL Module 6 REFERENCE MANUAL
 ECDL Module 6 REFERENCE MANUAL Presentation Microsoft PowerPoint XP Edition for ECDL Syllabus Four PAGE 2 - ECDL MODULE 6 (USING POWERPOINT XP) - MANUAL 6.1 GETTING STARTED... 4 6.1.1 FIRST STEPS WITH
Standard Windows Keyboard Layout & Keyboard Shortcuts
 Standard Windows Keyboard Layout & Keyboard Shortcuts Desktop keyboard Laptop keyboard Explanation of the Keys on a Windows QWERTY Keyboard Q W E R T Y "The name "QWERTY" for our computer keyboard comes
Microsoft PowerPoint 2013 Beginning
 Microsoft PowerPoint 2013 Beginning PowerPoint Presentations on the Web... 2 Starting PowerPoint... 2 Opening a Presentation... 2 File Tab... 3 Quick Access Toolbar... 3 The Ribbon... 4 Keyboard Shortcuts...
Understanding Word Processing
 Understanding Word Processing 3.0 Introduction In this chapter you are going to learn how to create a simple memo or note or a complex and complicated multi column business document using word processing
Opening Microsoft Word. 1. Double click the Word 2016 icon on the desktop to launch word.
 Intro to Microsoft Word 2016 Class Description: This class will provide an introduction to the word processing program Microsoft Word 2016. Learn how to create a simple document, edit and format text,
Outlook: Web Access. Outlook: Web Access AIS Vienna
 Outlook: Web Access AIS Vienna Table of Contents Introduction to OWA...1 Log On... 1 OWA Workspace... 2 Hiding/Displaying the Reading Pane... 3 Collapsing/Expanding the Outlook Bar... 4 Log Off... 5 Sending
HOSPICE ABSTRACTION REPORTING TOOL (HART) USER GUIDE
 USER GUIDE") HOSPICE ABSTRACTION REPORTING TOOL (HART) USER GUIDE IN SUPPORT OF VERSION 1.5.0 (APRIL 2019) Page 1 of 60 TABLE OF CONTENT TABLE OF CONTENT... 2 INTRODUCTION... 4 INSTALLATION... 4 Installers Access Rights...
HOSPICE ABSTRACTION REPORTING TOOL (HART) USER GUIDE IN SUPPORT OF VERSION 1.5.0 (APRIL 2019) Page 1 of 60 TABLE OF CONTENT TABLE OF CONTENT... 2 INTRODUCTION... 4 INSTALLATION... 4 Installers Access Rights...
Word Introduction SBCUSD IT Training Program. Word Introduction. Page Setup, Paragraph Attributes, Printing and More.
 SBCUSD IT Training Program Word Introduction Page Setup, Paragraph Attributes, Printing and More Revised 2/15/2018 SBCUSD IT Training Page 1 CONTENTS Cursor Movement... 4 Selecting Text... 5 Font/Typeset
Impress Guide. Chapter 1 Introducing Impress
 Impress Guide Chapter 1 Introducing Impress Copyright This document is Copyright 2005 2009 by its contributors as listed in the section titled Authors. You may distribute it and/or modify it under the
Preview tab. The Preview tab is the default tab displayed when the pdffactory dialog box first appears. From here, you can:
 Getting Started pdffactory is a printer driver. This means you must print to it from your application, just as you would with any other printer. Most applications have a Print dialog box command available
Get to know Word 2007 I: Create your first document Quick Reference Card
 Get to know Word 2007 I: Create your first document Quick Reference Card Get Help To find out how to do something, click the Microsoft Office Word Help button in the upper-right corner of the window. Then
Introduction to Personal Computers Using Windows 10 and Microsoft Office 2016
 Watsonia Publishing 47 Greenaway Street Bulleen VIC 3105 Australia www.watsoniapublishing.com info@watsoniapublishing.com Introduction to Personal Computers Using Windows 10 and Microsoft Office 2016 Quick
NOBLE INSTITUTE OF COMPUTER ACCOUNTANCY
 1 The ability to combine name and addressed with a standard document is called a. document formatting b. database management c. mail merge d. form letters 2. Which enables us to send the same letter to