Altaro Hyper-V Backup User Guide
|
|
|
- Aubrey Dawson
- 6 years ago
- Views:
Transcription
1 Altaro Hyper-V Backup User Guide 1 / 144
2 Table of contents Introducing Altaro Hyper-V Backup... 4 Different Editions... 5 Getting Started... 6 System requirements... 6 Supported Backup Destinations... 6 Contacting Technical Support... 6 Installing & Uninstalling... 7 Installing Altaro Hyper-V Backup... 7 Entering the License Key Checking which version is installed Upgrading to a new build Uninstalling Altaro Hyper-V Backup Restart Backup From Scratch Configuration - Quick Start Opening the Management Console Choosing VMs to back up Selecting Backup Drive Scheduling VM Backups Enabling Notifications Notifications Event Log Notifications Configuring a VM's Backup Settings Backup for Cluster Environments The Master Controller Node vs. Background Agents Configuring for a Hyper-V Cluster Environment Dashboard Cluster Status Tab Selecting VMs for backup (Cluster Environment) Selecting a Backup Drive (Cluster Environment) Configuring the Altaro Agent upon a Node Other considerations when using Altaro Agents Altaro Agent User Interface Promoting an Altaro Agent as the Master Controller Firewall Rules / Communication between Nodes Understanding Altaro Hyper-V Backup Management Console Workspace System Tray Icon Service Controller Error Reporter Dashboard Charts & Statistics List of Latest Backups List of Latest Restores List of Errors since Last Backup Cluster Node Status Tab Backup & Restore Backup Settings Backing up Hyper-V Guest VMs Scheduled Backups Manual Backups VM Live Backups / 144
3 Requirements for Live Backups Live Backups for non-vss aware VMs ISO Backups Restoring Hyper-V Guest VMs Restore Overwrite Restore Clone Restore to different Hyper-V server Fire Drill File Level Restore File Level Restore for AVHD Files / Older Backup Versions Microsoft VSS (Shadow Copy) MS Hyper-V VSS Writer ReverseDelta Version Maintenance Cluster Support Reports Backup History Restore History Errors since the last Backup Managing Backup Drives Supported Backup Destinations Configuring Backup Destinations Configuring your backup destination Selecting a Backup Drive using the "Backup Drive Selector" Selecting a Network Path using the "Backup Drive Selector" Changing your Primary Backup Drive Selection Multiple Primary Backup Drive Swapping Drive swap using RDX Cartridges Configuring a Mirror Backup Drive Switching to the Mirror Backup Drive Backup Drives in a Hyper-V Cluster Environment Managing Backup Space Limiting the age / size of Older Versions (Automatic Maintenance) Manually deleting older versions in the backup set (Manual Maintenance) Delete Backups of VMs that have been removed from your Backup Plan / 144
4 Introducing Altaro Hyper-V Backup Main features in Altaro Hyper-V Backup: Hot Backups - MS VSS Integration Back up live VMs with zero downtime by leveraging the Microsoft VSS Hyper-V Writer. Restore Clones Restore VMs to the same Hyper-V Host but with a different name. Restore to different Hyper-V host Restore an individual or a group of VMs to a different Hyper-V Host. ReverseDelta Incremental Backup Incremental Backup Technology for hyper-speed efficiency. File Level Restore Mount backed up VHDs and restore files without having to restore a whole Virtual Machine. Backs up Hyper-V clusters Cluster support for larger installations. Backup schedules 4 / 144
5 Set different backup schedules for different VMs. Restore different versions Restore from multiple points in time rather than 'the most recent backup' Supports Microsoft Hyper-V Server (Core) Works with the free Microsoft S Hyper-V Server (Core). FireDrill Restore Tests Build a plan to make sure that in case of disaster you're fully covered. Backs up Hyper-V Snapshots If your VMs have snapshots than you can back up the snapshots as well. Different Editions Free Edition Back up 2 Hyper-V Guest VMs per Hyper-V Host Store up to 4 weeks of old versions Restore as clone. Restore backups from different hosts File Level Restore Backs up VMs on Hyper-V Cluster (Full CSV Support) Yes Yes No No No No Standard Edition Back up 5 Hyper-V Guest VMs per Hyper-V Host No limit on number of old versions stored Restore as clone Restore backups from different hosts File Level Restore Backs up VMs on Hyper-V Cluster (Full CSV Support) Yes Yes Yes Yes Yes No Unlimited Edition Back up unlimited Hyper-V Guest VMs per Hyper-V Host No limit on number of old versions stored Restore as clone Restore backups from different hosts File Level Restore Backs up VMs on Hyper-V Cluster (Full CSV Support) 5 / 144 Yes Yes Yes Yes Yes Yes
6 Getting Started System Requirements Supported Backup Destinations Contacting Technical Support System requirements Supported Host Operating Systems: Windows 2008 R2 (all editions) Windows 2008 R2 SP1 Windows Hyper-V Server R2 (core installation) Please note that Altaro Hyper-V Backup needs to be installed on the Hyper-V Host (not within the guest). Required Specifications: 128 MB RAM 100 MB Hard Disk Space (for Altaro Hyper-V Backup Program and Settings files) MS.NET Framework 2.0 Supported Backup Destinations Altaro Hyper-V Backup supports backing up to: USB External Drives esata External Drives USB Flash Drives Fileserver Network Shares using UNC Paths NAS devices (Network Attached Storage) using UNC Paths PC Internal Hard Drives (recommended only for evaluation purposes) RDX Cartridges Contacting Technical Support Support Contact us via - we will reply within 24 hours (business hours and weekdays).. You can contact us via on support@altaro.com. Check our Online Community Forum Find answers to most common questions, suggest new feature ideas and see how other users are making use of our software. Access the Online Community Forum here: 6 / 144
7 Installing & Uninstalling Installing Altaro Hyper-V Backup Entering the License Key Checking which version is installed Upgrading to a new build Uninstalling Altaro Hyper-V Backup Installing Altaro Hyper-V Backup If you do not have a copy of the installer for Altaro Hyper-V Backup please obtain a copy from com before following this tutorial. 1. Launch the downloaded file: altarohypervbackupsetup.exe. On certain Operating Systems you may receive a warning informing you that certain downloads may be unsafe. Altaro Hyper-V Backup is signed using Altaro's digital signature and therefore this warning can be ignored. 2. Next you will be presented with the welcome screen of the installer. Simply click [Next]. 3. You will now see the End User License Agreement into which you will enter with Altaro Ltd. Please read through the agreement and check the I Accept... checkbox. Once you have agreed to the terms and conditions in the EULA you can press [NEXT]. 7 / 144


8 4. At this point you will be prompted for the Destination Folder of the installation. In most normal cases you should leave the installation path as default. Altaro Hyper-V Backup will be installed within your Program Files folder. 8 / 144
![5. Next you will see a screen asking you for confirmation to install. Please press [Install]. 6. At this point the installation will begin.](/docs-images/74/70767706/images/9-0.jpg "You will be presented with a progress bar updating you with the progress of the installation. Installation should only take a few seconds.")
9 5. Next you will see a screen asking you for confirmation to install. Please press [Install]. 6. At this point the installation will begin. You will be presented with a progress bar updating you with the progress of the installation. Installation should only take a few seconds. Please note that if you have UAC enabled on the Server then a UAC prompt may be displayed. Please click allow for the installation to complete. UAC is required for the following reasons: Files are being copied to the Program Files Folder. A Windows Service is being installed. 7. Once the installation is done you will be presented with the successful installation screen. A checkbox is displayed and checked by default indicating whether the Management Console should be launched automatically. 9 / 144

10 Should a screen informing you that the installation has failed appear please contact support. 8. Finally the Altaro Hyper-V Backup Management Console will appear. Please click here for a tutorial on configuring your Backup Profile. Entering the License Key Once you order Altaro Hyper-V Backup you will receive an containing your unique License Key. The License Key is a block of letters. To enter your license key please follow these steps: 1. Launch the Altaro Hyper-V Backup Management Console. 2. Click 'Enter your License Key...' from the bottom menu: OR you may click on 'Click here to get License Key' from the dashboard screen. 10 / 144


11 3. Next the license key window will appear as shown below. 4. Now open the that contains your License Key. Once you select the License Key, right-click on it and select Copy. 5. Go back to the License Key window, right-click on the white text box and select Paste. 6. Click the button [Verify License Key] to verify your License Key. Once verified the window will change to confirm that the License Key was accepted by thanking you for purchasing the product. 11 / 144
12 Additional Steps when running under a Hyper-V Cluster Environment: If a Cluster Environment is detected, then in the steps above, instead of the [Verify License Key] button you will see a [Choose Nodes...] button. This button will bring up the following Window which facilitates the licensing of each Node in the cluster. Simply use the checkboxes in the list to identify which Nodes you would like to license. The number of Nodes allowed is dependent on the number of activations allowed by the License Key. Checking which version is installed Checking which version of Altaro Hyper-V Backup is installed is easy. Simply launch the Management Console by clicking on the Altaro Hyper-V Backup Start Menu item and check for the version number at the bottom right hand side of the Window. 12 / 144

13 In the example above version is installed. Upgrading to a new build To upgrade Altaro Hyper-V Backup please follow the following three steps: 1. Exit the Altaro Hyper-V Backup Management Console from the top right control box. 2. Download the latest version of Altaro Hyper-V Backup from You can download the evaluation version and your license key information will be transferred to the new version. 3. Launch the installer and follow the Installing Altaro Hyper-V Backup. Your old backup settings, backup history and license key information will be migrated to the new version. Important Note: The only difference between a first time installation and an upgrade is that the management console must be closed before attempting to upgrade. If the installer detects that the management console is running then you will be prompted to close it with the following dialog box. 13 / 144
14 Uninstalling Altaro Hyper-V Backup Important Note: Uninstalling Altaro Hyper-V Backup will only remove the software from your Server. Any backup data and settings created during usage of the application will be left on the Server and Backup Drive. This is important in case you need to restore data in the future. Method 1: Using the Uninstall a program feature under the Windows Control Panel 1. Click Start, then on Settings, then click Control Panel. 2. In Control Panel select [Uninstall a program]. 3. Once the window opens up you'll see a listing of the programs you have installed on your computer. 4. Highlight Altaro Hyper-V Backup and click [Remove] or [Uninstall]. 5. The program will begin to uninstall and will ask you for confirmation. 6. When the uninstall is completed you'll notice that it is no longer visible in the program list. 7. Close the dialog, and close the Control Panel. Method 2: Using the original Altaro Hyper-V Backup installer 1. Launch the original installer: altarohypervbackupsetup.exe. On certain Operating Systems you may receive a warning informing you that certain downloads may be unsafe. Our software is signed using Altaro's digital signature and therefore this warning can be ignored. 2. Next you will be presented with the welcome screen of the installer. Simply click [Next]. 14 / 144
![3. You will now see a screen with three options. At this point please choose the [Remove] option. 4.](/docs-images/74/70767706/images/15-1.jpg "You will now be prompted with a confirmation to remove Altaro Hyper-V Backup. Please choose 15 / 144")
15 3. You will now see a screen with three options. At this point please choose the [Remove] option. 4. You will now be prompted with a confirmation to remove Altaro Hyper-V Backup. Please choose 15 / 144
![[Remove] again. 5.](/docs-images/74/70767706/images/16-0.jpg "If the Hyper-V Backup Management Console is running you will be")
16 [Remove] again. 5. If the Hyper-V Backup Management Console is running you will be prompted to close it. Please close it and proceed. 16 / 144

17 6. The uninstall progress will be displayed now. This should only take a few seconds. 7. Once Hyper-V Backup has been removed completely from your Server you will be presented with 17 / 144
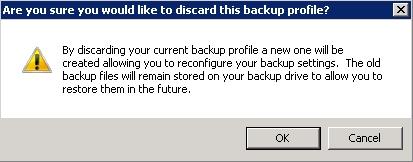
18 the following screen. Should a screen informing you that the changes have failed appear please contact support. Restart Backup From Scratch To start backing up again from scratch you can simply use the "Discard Current Backup Profile" feature in the Altaro Hyper-V Backup Service Controller. You can learn how to access the service controller here. Discard Current Backup Profile: This tab allows the user to discard the current backup profile and start a new one. Once the old backup profile is discarded, Hyper-V Backup can be reconfigured using the Management Console as described here. 18 / 144
19 19 / 144

20 Configuration - Quick Start Installing Altaro Hyper-V Backup in a Cluster CSV Environment Instructions for setting up Altaro Hyper-V Backup within a Cluster Environment Altaro Hyper-V Backup First Run On first launch the Altaro Hyper-V Backup Evaluation mode will be enabled and you will be presented with the following dialog: At any point during the evaluation you will be able to enter a License Key to activate a Hyper-V Backup Edition. If you choose not to purchase the software then you can activate the free Express Edition at the end of the Evaluation period. Read instructions on entering your license key here. The first time that you run Altaro Hyper-V Backup the Management Console will launch into a special configuration mode. This will help you to: 1. Select which Hyper-V Guest VMs you would like to backup. Read instructions here. 2. Select which Backup Drive to backup to. Read instructions here. 3. Enable and disable backup and restore notifications. Read instructions here. 20 / 144

21 Opening the Management Console The Management Console is opened automatically after you first install Altaro Hyper-V Backup. After this you can launch it easily using one of the following methods: Clicking on the Altaro Hyper-V Backup item within the "Start Menu > All Programs > Altaro" group. Launching "Altaro Hyper-V Backup.exe" application from the install location. By default this is "C: \Program Files\Altaro\Altaro Hyper-V Backup". Enter the command STARTALTARO into a command prompt window. This may not work immediately after first install until you log out and in to the Server due to the Environment Variables not being refreshed. If the Management Console is already running in the background simply double click on the Altaro Hyper-V Backup System Tray icon. Choosing VMs to back up To select which Hyper-V Guest VMs to backup simply open the Management Console and select the option [Select Hyper-V Guest VMs] from the left hand side main menu. Read instructions on how to open the Management Console here. 21 / 144

22 1. Once you select "Step 1" you will be presented with the following panel: 22 / 144
23 2. Simply use the checkboxes to select which Hyper-V Guest VMs you would like to add to your backup plan. You can return to this screen at any time to add / remove Hyper-V Guest VMs. The selected VMs will not be backed up automatically until you setup a backup schedule or take a manual backup. Hyper-V Guests that have been deleted from the Hyper-V Host but have already been backed up will continue to show up in this list. 3. Once the selections have been made simply click on [Save Changes] to update your backup plan. Selecting VMs on another Node within the Cluster: If you wish to select VMs for backup which are currently hosted upon another Node within the cluster, you simply select them using the same steps above. The user interface will be a bit different within a cluster environment and you can read further instructions here. You must have first configured Altaro Hyper-V correctly for Cluster Support as explained here. Selecting Backup Drive To select a drive or network path as your backup destination, open the Management Console and select the option [Select a Backup Drive] from the left hand side menu. Read instructions on how to open the Management Console here. 23 / 144
24 Once you select "Step 2" you will be presented with the following panel: 24 / 144
25 2. Simply use the [Select Backup Drive...] and [Select Mirror Backup Drive...] buttons to select your backup drives. - For instructions on configuring a backup drive click here. For instructions on configuring a mirror backup drive click here. For instructions on backing up to UNC network paths click here. 3. Once the selections have been made there is no need to click save as changes are saved automatically. Selecting a Backup Drive within a Cluster Environment: An additional step is required to share the backup drive with any Altaro Agents upon other nodes as explained here. Scheduling VM Backups To schedule automatic backups for the selected VMs you need to create a number of Schedule Groups and add the VMs to them. To do this simply open the Management Console and select the option [Setup a Backup Schedule] from the left hand side main menu. Read instructions on how to open the Management Console here. 25 / 144

 from the left hand side panel to the right hand side panel to add")

26 Default Backup Schedule Groups If you have not yet created any backup schedule groups then two default groups will be created for you. These default groups can be used as they are, edited or deleted. In any case when the default groups are created you will be notified by the following Dialog prompt. Adding a VM to a Schedule Group Simply drag a VM (or multiple VMs) from the left hand side panel to the right hand side panel to add it to a Schedule Group. Once the VM is added it will be listed within the Schedule Group panel to indicate that it has been added successfully. A single VM can be added to multiple schedule groups and a single schedule group can contain multiple VMs. You must press [Save Changes] at the bottom of the screen to commit changes. Removing a VM from a Schedule Group 26 / 144

27 To remove a VM from a schedule group simply right-click on the VM in the group's VM list and choose "Remove VM from this Schedule Group". The VM can be re-added at any time in the future. You must press [Save Changes] at the bottom of the screen to commit changes. Editing / deleting / disabling Schedule Groups At the top left of each schedule group are three buttons: - Edit - change the schedule group backup schedule. - Delete - discard the schedule group. Any VMs belonging to it will be unassigned from it first. - Enabled [y/n] - choose whether the group is active or has been disabled. Backups will not take place for disabled schedule groups. You must press [Save Changes] at the bottom of the screen to commit changes. Create a Schedule Group To create a new schedule group click on the "Add New Schedule Group" button. You will be presented by a Window which will prompt you for the schedule group settings. Group Label: a name given to the group to help you to identify it. This name is simply used for the user to identify the group easily. Recurrence Pattern: whether you would like to configure a weekly or monthly reccurrence. Backup Times / Options: settings to specify the backup times / days 27 / 144
28 Weekly Recurrence 1. Select the weekly radio button. 2. Click "Add Backup Time" to add a new backup time entry to the list. 3. Configure multiple backup times. eg. 10am on Mon, Tue and Friday. 4. These backup times will be repeated on a weekly basis. 28 / 144

29 Monthly Recurrence 1. Select the monthly radio button. 2. Choose whether you wish the backup to take place on the: - Xth day of every month. eg: 10th day of every month. - The Xth day of week of every month. eg: 2nd Wed of every month. Run the Backup Schedule Calculator before saving changes You can verify the above settings by simulating the next 25 backup times. To do this click on [Run Backup Schedule Calculator] and you will see a list of the next 25 backup times. 29 / 144

30 Conclusion Once the Backup Schedule has been set you will notice that the schedule label in the Backup / Restore screen has changed. In the case of a VM with no backup schedule set you will see: In the case of a VM where a backup schedule has been configured you will see: Enabling Notifications To select which notifications to receive simply open the Management Console and select the option [Setup Notifications] from the left hand side main menu. Read instructions on how to open the Management Console here. 30 / 144
31 1. Once you select "Setup Notifications" you will be presented with the following panel: 2. Simply use the checkboxes to select which notifications you would like to receive To learn how to configure Event Log notifications click here. To learn how to configure notifications click here. Once the selections have been made simply click on [Save Changes] to update your backup plan. Notifications Notifications allow users to receive Backup / Restore Reports by . These reports indicate: Backup Reports The status of each backup and the Hyper-V Guest VM that was backed up. The date and time of each backup. The amount of data backed up. The number of changed files. The number of skipped files. 31 / 144

32 The duration of the backup. Restore Reports The status of each restore operation and the Hyper-V Guest VM that was restored. The date and time of each restore operation. The duration of the restore operation. Here is an example of a Backup Report: Here is an example of a Restore Report: 32 / 144

33 Configuring Notifications in order to receive Backup Reports: Navigate to the Setup Notifications screen as shown here. Once within the Setup Notifications screen simply select the [ Notification Settings] tab. 33 / 144
34 Use the checkboxes to specify which notifications you would like to receive by - You can choose to receive notifications for: successful backups, backups in which one or more file was skipped, failed backups and completed restore operations. - If you choose to receive notifications for failed backups you will also be alerted when a backup is skipped because your backup drive is not connected. Next specify the frequency of your notifications. There are two options: - Immediately after the operation has completed. ( s will be sent a minimum of 5 minutes apart and multiple notifications may be grouped into one ). - As a daily digest at a specified time each day. Finally configure your SMTP mail server settings and the recipients. The [Send Test ] button can be used to test the SMTP settings. Once you've finished configuring the notifications click on the [Save Changes] button at the bottom of the screen. Event Log Notifications 34 / 144
35 Event Log Notifications can be viewed within the Event Viewer console on Windows Server. These are ideal for monitoring the backup and restore operations remotely from another server. These log entries indicate the following information: Backup Reports The status of each backup and the Hyper-V Guest VM that was backed up. The date and time of each backup. The amount of data backed up. The number of changed files. The number of skipped files. The duration of the backup. Restore Reports The status of each restore operation and the Hyper-V Guest VM that was restored. The date and time of each restore operation. The duration of the restore operation. Configuring Event Log Notifications in order to receive Backup Reports: Navigate to the Setup Notifications screen as shown here. Once within the Setup Notifications screen simply select the [Event Log Notifications] tab. 35 / 144
36 Use the checkboxes to specify which notifications you would like to log: - You can choose to receive notifications for: successful backups, backups in which one or more file was skipped, failed backups and completed restore operations. - If you choose to receive notifications for failed backups you will also be alerted when a backup is skipped because your backup drive is not connected. Once you've finished configuring the Event Log notifications click on the [Save Changes] button at the bottom of the screen. Configuring a VM's Backup Settings The final step in configuring Altaro Hyper-V Backup is to configure an actual Backup Plan for each selected Guest VM. This is simple and can be achieved by navigating to the "Advanced Settings" window of each Guest VM. This can be achieved by following these steps: 1. Open the Management Console as described here. 2. Navigate to the "Backup / Restore Hyper-V Guest VMs" screen. 36 / 144

37 3. You will be presented with the following screen. Please note the "Spanner and Wrench" icons to the right hand side of each VM. 37 / 144
38 4. Clicking on a "Spanner and Wrench" icon will display the "Advanced Settings" window for the VM in question. 38 / 144
39 5. From the advanced settings Window you can do the following: - Enable / Disable Reverse Delta. Click here fore more details. - Choose how many versions to keep of the VM and choose a schedule for deleting old versions. Click here fore more details. - Choose whether to backup ISO files which are attached to the VM. Click here fore more details. - Choose whether to enable Live Backups for Non-VSS Aware Guests (Crash-Consistent Backups). Click here fore more details. 39 / 144
 Selecting a backup drive (Cluster Environment) Configuring")
40 Backup for Cluster Environments The Master Controller Node vs. Background Agents Configuring for a Hyper-V Cluster Environment Dashboard Cluster Status Tab Selecting VMs for backup (Cluster Environment) Selecting a backup drive (Cluster Environment) Configuring the Altaro Agent upon a remote Node Other considerations when using Altaro Agents Firewall Rules / Communication between nodes The Master Controller Node vs. Background Agents The Master Controller Node The Master Controller node configures and controls all the Altaro Background Agents on the cluster. The Management Console User Interface must be run on the Master Controller. Select which VMs to backup across the Cluster Select / Manage Backup Drive Configure Backup Schedules Initiate Manual Backup / Restore Operations Altaro Background Agent Nodes Run in the background and accept backup and restore requests from the Master Controller node for any Guest VMs running on that particular Node. 40 / 144

41 Configuring for a Hyper-V Cluster Environment When installing for the first time within a Hyper-V Cluster Environment a Setup Wizard will be displayed. 1. Choose which node will be the Master Controller Node and which nodes will be installed as Background Agents. It is recommended that the node upon which you are running the setup wizard is configured as the Master Controller Node. 41 / 144


42 Any node which has not yet been configured can be chosen as a Master Controller Node. 2. Review the configuration settings and click on "Install and Configure Agents". 42 / 144

43 3. You will now be presented with a progress bar. If you have many nodes then this may take a few minutes. Once the installation is complete you will see a summary of the installation results as shown below. If any of the nodes fail to install press [BACK] and try again. Otherwise press [NEXT]. Note: If you chose to configure the current Node as a Background Agent then you must switch to the Master Controller Node to launch the Management Console. 4. The Management Console will now be launched automatically if the current node was configured as the Master Controller. You will be then be taken to the Hyper-V Guest Selection Screen. Next Steps: 43 / 144

44 Choosing which Guest VMs to backup within a Hyper-V Cluster Environment Configuring a Backup Drive in a Hyper-V Cluster Environment Dashboard Cluster Status Tab When running Altaro Hyper-V Backup in a Cluster Environment a new tab will appear within the Dasboard Screen. Cluster Status Tab The Cluster Status Tab will show a list of nodes on the cluster. The cluster status is refreshed every 5 minutes automatically, but a refresh can be forced by clicking on the "Refresh node status node" button. The following information is shown alongside each node: - The Name of the node - The Status of the Altaro Agent on that node: - Altaro Agent not detected. - Altaro Agent detected but must be upgraded to a newer version. - Altaro Agent detected and active. - Altaro Agent detected but is running as a Master Controller. This means that it cannot be configured from the current node. Click here to learn more. - The Evaluation Details of the Altaro Agent on that node: (if the agent is currently within Evaluation mode) - Number of days left for evaluation. - Whether the evaluation period has expired or not. 44 / 144

45 - Whether the selected license key includes support for Cluster Environments. - A "Configure Button": - Can be used to configure / update / install / uninstall the Altaro Agent upon that node. - Can be used to license the Altaro Agent upon that node. Click here to read more about configuring agents. Selecting VMs for backup (Cluster Environment) When selecting which Hyper-V Guests to add to your backup plan within a Hyper-V Cluster Environment an additional panel is displayed. This panel displays a list of nodes on the cluster and indicates the status of the Altaro Background Agent on each node. The Hyper-V Guest VM list will now show all VMs available on the Cluster (including those that are not on the current node). An additional column will appear to show which node the VM is currently running upon. You can add any VM from any Node on the Cluster to your backup plan. Before proceeding read the chapter on Choosing which VMs to backup. If a Background Agent on a specific node is not configured correctly then you will be unable to choose VMs from that node for backup. To configure the node correctly click on the button "Click here to configure correctly...". 45 / 144

46 Selecting a Backup Drive (Cluster Environment) To see how to select a backup drive please read this chapter. This article will describe an additional step which is required when selecting a backup drive in a Cluster Environment. Also please note that special considerations must be taken when selecting a backup drive in a Cluster Environment. Configuring the Altaro Agent upon a Node At any point you may choose to confugure an Altaro Agent upon a specific node. Configuration options include: - Update / install / uninstall the Altaro Agent upon that node. - Switch a node from a Master Controller to background agent. - License the Altaro Agent upon that node. To access the conifguration panel simply use the Dashboard Cluster Tab and click on "Click here to configure..." besides the required Node. Tab 1: Configure Agent Three buttons are present at the bottom of the tab page: - Install Agent: installs the Altaro Agent on the Node and configures it correctly. - Configure Agent: switches a node from a Master Controller to background agent Node. - Uninstall Agent: removes the Altaro Agent from the Node. - Update Agent: Updates the Altaro Agent on the Node to the current Master Controller Version. 46 / 144
47 Tab 2: Licensing This tab allows you to push a license key to the selected Node. Just click on the [Enter / View License Key] button and the following Window will appear which facilitates the licensing of each Node in the cluster. Simply use the checkboxes in the list to identify which Nodes you would like to license. The number of Nodes allowed is dependent on the number of activations allowed by the License Key. 47 / 144
48 Tab 3: Promote Agent to Master This tab simply provides instructions on how to promote the selected Agent as a Master Controller. Click here for instructions on how to do this. 48 / 144
49 Other considerations when using Altaro Agents Altaro Agent User Interface Promoting an Altaro Agent as the Master Controller Altaro Agent User Interface As discussed earlier in this section the Management Console can only be accessed from the Master Controller Node. Attempting to launch the Management Console from other nodes will only launch a simple Status Console as shown below. To launch the Agent Console please use one of the following methods: Clicking on the Altaro Hyper-V Backup item within the "Start Menu > All Programs > Altaro" group. Launching "Altaro Hyper-V Backup.exe" application from the install location. By default this is "C: \Program Files\Altaro\Altaro Hyper-V Backup". Enter the command STARTALTARO into a command prompt window. This may not work immediately after first install until you log out and in to the Server due to the Environment Variables not being refreshed. 49 / 144
50 This console mainly provides status information but allows for the following: - Entering a License Key. - Checking for Sofware Updates. - Accessing the User Guide. - Stopping / Starting the Agent Windows Service. - Promoting the Agent as the new Master Controller. Promoting an Altaro Agent as the Master Controller Please Note: Before reading this article it is important to understand the difference between a Master Controller Node and a Background Altaro Agent. Click here to read more on this topic. If you wish to promote a node to the Master Controller you must open the Agent Console using one of the following methods: Clicking on the Altaro Hyper-V Backup item within the "Start Menu > All Programs > Altaro" group. Launching "Altaro Hyper-V Backup.exe" application from the install location. By default this is "C: \Program Files\Altaro\Altaro Hyper-V Backup". Enter the command STARTALTARO into a command prompt window. This may not work immediately after first install until you log out and in to the Server due to the Environment Variables not being refreshed. Once launched you will see the following screen: 50 / 144
51 1. Click on "Promote Agent as Master Controller" to begin. The first screen that will appear is simply an information screen explaining what a Master Controller node does. Promoting an agent will demote the previous Master Controller. 51 / 144

52 2. The next step is to select the backup folder currently being backed up to by the old Master Controller. - Only backup folders of the same Cluster will be displayed. - You may choose to attach to a UNC Path. - You may choose to connect the backup drive directly to the new node. - If you do not find the backup folder, click on "Specify a subfolder..." to choose the parent folder of the AltaroHyperVBackup folder which contains the backup files. - You can check the "Last Backup Time" to ensure that you are attaching to the correct folder. 52 / 144

53 3. Confirm that you would like to promote the agent as Master Controller. Once again please note that the previous Master Controller will be demoted to a background Altaro Agent. If the old Master Controller node is currently offline / unavailable then it will be demoted the next time it starts or connects to the backup drive. 53 / 144


54 4. The operation will begin and a progress bar will show the current action. This may take a few minutes. 5. Once the promotion is completed the progress bar will be replaced by a message. It can either be successful as displayed in the example below or an error could be listed. In the case of an error please refer to the error message, resolve the issue and try again. An example of an error is that the current Master Controller node is currently busy taking a backup - in that case promotion of other nodes is not allowed. 54 / 144


55 6. Finally if the promotion was successful the the Managment Console will be launched. It is possible that the Management Console will not start automatically. If not please launch it manually from the Start Menu. Firewall Rules / Communication between Nodes It is important to note that Altaro Hyper-V Backup performs the following IPC and TCP communication: 1. Within the same Node - Between the Management Console and the "Altaro Hyper-V Backup" Windows Service. IPC Ports used 2. Between Nodes on the same Cluster - Between the local Management Console and the "Altaro Hyper-V Backup" Windows Service on the remote node. TCP Port: Between the "Altaro Hyper-V Backup" Windows Service and the "Altaro Hyper-V Backup" Windows Service on the remote node. TCP Port: To facilate this communication the Altaro Hyper-V Backup Windows Installer create the Windows Firewall rules below which allow communication between the following processes: - Altaro Hyper-V Backup.exe - Altaro.HyperV.ServiceEngine.exe 55 / 144
56 Understanding Altaro Hyper-V Backup The Altaro Hyper-V Backup program is made up of four main components: The Altaro Hyper-V Backup Management Console - User interface for users to interact with Altaro Hyper-V Backup. - Read more here. The Altaro Hyper-V Backup Service - a Windows Service that runs in the background and is responsible for backup, restore and maintenance operations. - Read more here. The Altaro Hyper-V Backup Service Controller Console - User interface for users to stop and start the service and to discard and restart their backup plan. - Read more here. The Altaro Hyper-V Backup Error Reporter - User interface for users to build an error report which automatically collects all necessary logs and configuration files. The user can then send the error report by . - Read more here. In this section a brief overview of each component will be given. The overview will focus on the user interface layout of each one. More details of their features will be given in upcoming sections. Management Console Workspace To learn how to access the Management Console please read this tutorial. 56 / 144
57 The Manager window has the following layout: Top Banner: The top banner simply displays the product logo. Top Status Bar: This bar is divided into two sections: o Section 1: The primary and secondary backup drive status is shown here. The primary backup drive is also displayed as connected or disconnected. o Section 2: Here the last backup status is shown. If you have configured a secondary backup drive then the time stamp of the last synchronization between backup drives is shown too. Finally the number of pending changes for backup and the estimated time to the next backup is shown. Left Hand Side Menu: This menu allows users to Navigate to each section of the Management Console. Upon clicking on a section it will be displayed in the main panel at the center of the Manager screen. The available sections are: o Dashboard: This panel is selected by default and presents backup statistics and logs. These include the status of the latest backups, a restore history, current backup size etc. A more detailed explanation of the dashboard can be found here. o Configure: From this panel the user can change settings related to the backup such as which VM's to backup, which drive to backup to and what notifications to receive. 57 / 144

58 More information related to configuration can be found here. o Backup and Restore: The main backup and restore operations can be managed from here: - Backup / Restore Hyper-V Guest VMs - take manual backups, restore and configure backup settings for each VM. More information can be found here. o Advanced Restore Options: All backup and restore operations can be managed from here: - File Level Restore - restore individual files or folders from a VM Backup. - Import Backup from another Host - have access to the backup drive of another Hyper-V Host? You this feature to import a VM backup from another host. - Fire Drill - verify your VM Backups. More information can be found here. o Reports: Three detailed reports can be found in this section. These are made up of: - Backup History a list of all backups including their status and the files that were changed during each backup. The amount of data transferred during each backup and the duration of the backup is also listed here. - Restore History a list of all restore operations including their status. The duration of the operation is also listed here. - Errors Since The Last Successful Backup - errors which occurred during the last failed backup are listed here. Once the VM is successfully backed up then the error list for that folder is cleared. More information can be found here. System Tray Icon The System Tray icon and Context menu When the Management Console is running in the background you will notice that an icon has appeared within your Windows Server system tray. Icon States: 58 / 144

59 Rotating: operation. Alert Icon: This indicates that an unresolved error has occurred since the last successful backup. Standard: This indicates that Altaro Hyper-V Backup is idle. At this point it is simply monitoring file changes and waiting for the next scheduled backup. This indicates that Altaro Hyper-V Backup is busy performing a backup or restore Right-Clicking on the system tray icon will bring up the following context menu: The context menu provides the following options: Manage: This option will bring up the Management Console window. Backup a Hyper-V Guest VM: This option will take you to the Backup / Restore screen of the Management Console. Restore a Hyper-V Guest VM: This option will take you to the Backup / Restore screen of the Management Console. Disable / Enable Backup Schedules: This option will disable / enable the backup schedule for all VMs. Enter your License Key: A window will appear to allow you to paste your license key which you received upon purchase of the software. Check For Online Updates: This option will connect to the Altaro software update server and check whether any newer critical updates are available. It is important to note that newer versions may be available from the Altaro website even if this option indicates that there are no newer versions. Other Settings: Here additional settings can be configures without having to open the Manager 59 / 144
60 window. Close Management Console: Closing the management console will simply exit the user interface and remove the system tray icon. The Altaro Hyper-V backup service will continue to run in the background and any scheduled backups will continue to take place. Double-Clicking on the system tray icon will bring up the Management Console. This will be described in more detail in the next section. Service Controller In Altaro Hyper-V Backup the user interface runs separately from the Backup Engine. The Backup Engine is deployed as a Windows Service and runs in the background. The Backup Engine Service performs the following operations: Backup schedules Backup operations Restore operations Scanning of backup folders for file changes Synchronization of the primary and secondary backup drives Sending of backup reports and event log notifications Maintenance of old versions. Should the user require stopping or starting the backup engine the service controller should be used. application can be found within the Altaro Start Menu folder. This The interface of the service controller is made up of three tabs: Start / Stop Backup Service: This tab contains three buttons. o Refresh: updates the status of the backup engine. o Stop: stops the windows service from running. The service will start again when Windows is restarted. o Start: starts the windows service. 60 / 144


61 Discard Current Backup Profile: This tab allows the user to discard the current backup profile and start a new one. Once the old backup profile is discarded, Hyper-V Backup can be reconfigured using the Management Console as described here. Switch to secondary backup drive: This tab allows the user to switch to secondary backup drive as described here. Error Reporter The Error Reporter can be found in the Start Menu > All Programs > Altaro program group. 61 / 144

62 Once opened simply enter the error details, check the disclaimer check box and press generate. Next simply the generated error report to Altaro. 62 / 144

63 Dashboard You can view the dashboard by opening the Management Console. Read here for instructions on how to do this. Charts & Statistics Backup History Restore History Errors since the last backup Cluster Status Tab Charts & Statistics 63 / 144

64 The top half of the dashboard displays a number of charts and statistics. The following charts are available: Backup Drive Status: o A pie chart displaying space used by your backup, other files and the remaining free space. o A pie chart displaying percentage of space allocated to each backup folder selected. Click on [Show backup Size/VM] to toggle this chart. Backup Trends: By default the graph displays the trend for all VMs, but a drop down list is available to view the trend for each VM separately. o A line chart displaying the total backup size / day. o A bar graph displaying the average backup duration / day. o A bar graph displaying the total data transferred / day. o A line chart displaying the total number of backups / day. List of Latest Backups In the bottom half of the Dashboard you will find a tab control with three reports. The first tab displays a list of the latest backups. The following information is displayed: The VM name that was backed up. Date and time of the backup. The backup status indicating whether the backup succeeded, succeeded with skipped files, or failed. 64 / 144
65 The number of files backed up. The total size of the data that was backed up. The duration of the Backup. View List of Skipped Files Double-clicking on a backup which has a warning icon or error icon will bring up a list of files that were skipped during that backup. A reason why the file was skipped is also given. View List of Backed up Files Double-clicking on a successful backup will bring up a list of files that were backed up during that backup. Information on whether the file was created, changed, renamed or deleted is also given. Alternatively you may right-click on a backup to bring up a context menu with all options. View a Report of all older backups This list will only display the most recent backups. At the bottom of the list you will find a link to view the complete backup history report. List of Latest Restores In the bottom half of the Dashboard you will find a tab control with three reports. The second tab displays a list of the latest restore operations. The following information is displayed: The VM name that was restored. Date and time of the restore operation. The restore status indicating whether the restore operation succeeded or failed. The duration of the restore operation.. 65 / 144
66 View a Report of all older restore operations This list will only display the most recent restore operations. At the bottom of the list you will find a link to view the complete restore history report. List of Errors since Last Backup The third tab displays a list of any errors that have occurred since the last successful backup. The following information is displayed: Date and time of the error. A description of the error. The error code. This list will be cleared once the VM causing the error is backed up successfully. Cluster Node Status Tab Click here to read more about the Dashboard Cluster Node Tab. 66 / 144
67 Backup & Restore Access to the Backup & Restore section of the Management Console can be achieved as follows: This can be achieved by following these steps: 1. Open the Management Console as described here. 2. Navigate to the "Backup and Restore" menu item at the left hand side of the screen. Backup Settings Modifying Backup Settings for a VM is simple and can be achieved by navigating to the "Advanced Settings" window of each Guest VM. This can be achieved by following these steps: 1. Open the Management Console as described here. 2. Navigate to the "Backup / Restore Hyper-V Guest VMs" screen. 67 / 144
68 3. You will be presented with the following screen. Please note the "Spanner and Wrench" icons to the right hand side of each VM. 68 / 144
69 4. Clicking on a "Spanner and Wrench" icon will display the "Advanced Settings" window for the VM in question. 69 / 144
70 5. From the advanced settings Window you can do the following: - Enable / Disable Reverse Delta. Click here fore more details. - Choose how many versions to keep of the VM and choose a schedule for deleting old versions. Click here fore more details. - Choose whether to backup ISO files which are attached to the VM. Click here fore more details. - Choose whether to enable Live Backups for Non-VSS Aware Guests (Crash-Consistent Backups). Click here fore more details. Backing up Hyper-V Guest VMs Scheduled Backups Manual Backups VM Live Backups Requirements for Live Backup ISO Backups Scheduled Backups 70 / 144

71 To configure automatic scheduled backups please setup schedule groups as explained here. Manual Backups To take a manual backup first navigate to the Backup / Restore Hyper-V Guest VM screen as explained here. You will now be presented by this screen: 1. Select the VMs which you wish to backup now using the checkboxes to the left. 2. Click on the [Backup] button at the top of the panel and the selected VMs will be backed up. 3. You will know that a backup is taking place because the progress bar at the top right of the Management Console will be active. VM Live Backups Before a backup is started, Altaro Hyper-V Backup creates a Volume Shadow Copy on the host machine. During this stage, Altaro Hyper-V Backup integrates with the Microsoft Hyper-V VSS writer in order to 71 / 144
72 specify to the latter which virtual machines are about to be backed up. In many cases, instead of saving the child VM while the shadow copy is being prepared, Hyper-V may use the VSS inside the child VM. This is called cascading the shadow copy or performing a "Child VM Snapshot". The advantage of this method is that VSS aware applications running within the child VM, such as databases etc., may also flush their data to the VHD into a consistent state before the backup is taken, and this may be done without stopping the child VM or any of its running services. For this method to be supported, all of the following conditions must be met: Backup (volume snapshot) Integration Service is installed and running in the child VM. The service name is "Hyper-V Volume Shadow Copy Requestor". Windows 2000: Backup Integration Service is not supported. The child VM must be in the running state. The Snapshot File Location for the VM is set to be the same volume in the host operating system as the VHD files for the VM. All volumes in the child VM are basic disks and there are no dynamic disks. All disks in the child VM must use a file system that supports snapshots (for example, NTFS). The following screenshot shows the settings of a VM within the Hyper-V management window. For child VM snapshots to be enabled, the Integration services option Backup (volume snapshot) must be enabled: 72 / 144

73 Requirements for Live Backups Backup (volume snapshot) Integration Service is installed and running in the child VM. The service name is "Hyper-V Volume Shadow Copy Requestor". Windows 2000: Backup Integration Service is not supported. The child VM must be in the running state. The Snapshot File Location for the VM is set to be the same volume in the host operating system as the VHD files for the VM. All volumes in the child VM are basic disks and there are no dynamic disks. All disks in the child VM must use a file system that supports snapshots (for example, NTFS). Live Backups for non-vss aware VMs Some VMs may not have the option to cascade a Shadow Copy from the host in order to render any data transactionally consistent on the VHDs for that VM. The reasons for this may be due to the fact that the OS does not support VSS shadow copies, for example Windows XP (pre-sp2), Windows 2000 or Linux VMs. 73 / 144

74 If these VMs are running at the time of a backup, the standard behavior of the Microsoft Hyper-V VSS Writer in this case is to save the VMs while the Shadow Copy is being taken on the host, and then restore the VMs to the running state once the Shadow Copy on the host is completed. This ensures that the data on the VHDs for these VMs is in a consistent state during the backup. Although this process rarely takes longer than a few seconds, this may not necessarily be the desired effect, since saving the VMs implies that the VMs will be taken offline for a specific time interval. You may bypass this standard behavior by selecting a checkbox as follows: 1) Click on the Backup/Restore Guest VMs option in the main panel to the left of the Management Console window. 2) Click on the Settings icon for the VM or VMs in question. 3) Click on the Advanced tab in the window that appears. 4) Click on Additional Settings for Non-VSS Aware VMs button. 5) Select the Enable Hot Backups checkbox. 6) Click OK. Note: Enabling this setting may lead to inconsistent data on the backup drive, so please read the warning carefully and make sure all the criteria are met before enabling this setting. It is recommended to leave this setting switched off unless you are sure of the implications of enabling this option. If in doubt, please do not hesitate to contact support@altaro.com 74 / 144
75 ISO Backups Altaro Hyper-V Backup offers the possibility to back up any ISO files that are attached to any child VMs as CD or DVD image files. These many times are installation media, and do not need to be backed up (this is the default setting). However, the image files could potentially contain data that should be backed up, and the ISO Setnin g tat b nt he e n et nin ng e n thb n thns nnac b to, as shown in the following image: Clicking the second radio button option will cause ISO files to be included in the backup. If a machine was backed up with this setting enabled, and is then restored, the ISO file is also restored along with the VM. In the sane nt a Rentn e Ove w bteg, the VM is not overwritten but a separate file is created in case the ISO file is in use by any other VM. This setting may be enabled and disabled at will. If a previous version of a VM is restored from a backup time when this setting was enabled, then the ISO files are restored, even if the setting may have been disabled for subsequent backups. 75 / 144
76 An extra setting at the bottom of the window enables you to specify if the backups should continue or fail if any ISO files referenced in the configuration are not found. In both cases, a notification is sent to warn about the missing file. Restoring Hyper-V Guest VMs There are five options when it comes to restoring a Hyper-V Guest VM: 1. Restore Overwrite The Hyper-V Guest VM backup will be restored back to its original location and will retain the same name. If the original Hyper-V guest is still hosted by the Hyper-V server then it will be overwritten. Read more here. 2. Restore as Clone The Hyper-V Guest VM backup will be restored to a new location and will be given a new name. The original Hyper-V guest will not be overwritten and you will end up with the cloned VM running side by side with the original VM. Read more here. 3. Restore to a different Hyper-V Server A Hyper-V Guest VM backup which was taken by Hyper-V host A can be restored to Hyper-V host B. The VM will be restored to a new location on the new host and will be given a new name. Read more here. 4. Fire Drill This feature allows you to perform test restores of your backed up Hyper-V Guest VMs. Read more here. 5. File Level Restore This feature allows you to restore individual files and folders from any Guest VM backup. Read more here. Restore Overwrite To Restore Overwrite a VM backup first navigate to the Backup / Restore Hyper-V Guest VM screen as explained here. You will now be presented by this screen: 76 / 144
77 1. Select the VMs which you wish to restore now using the checkboxes to the left. 2. Click on the [Restore / Restore As] button at the top of the panel. 3. You will now be presented with the Restore Console as shown below: 77 / 144
78 5. Ensure that the "Restore to original location" radio button is checked for each VM that you wish to restore overwrite. 4. You can use the backup time combobox to choose to restore a previous version of the VM. 5. Click on the [Restore Selected] button to begin the restore operation. 6. You will be presented with a dialog notifying that the "Virtual Machine Management Service" will be restarted during the restore operation. This is normal and you should press OK. 78 / 144
79 7. Once the restore begins you will notified by the following dialog. 8. You will know that a restore is taking place because the progress bar at the top right of the Management Console will be active. 9. Finally you will be notified that the restore is completed by a popup dialog, and event log notifications if they are enabled. 79 / 144
80 Restore Clone To Restore as Clone a VM backup first navigate to the Backup / Restore Hyper-V Guest VM screen as explained here. You will now be presented by this screen: 1. Select the VMs which you wish to restore as clones using the checkboxes to the left. 2. Click on the [Restore / Restore As] button at the top of the panel. 3. You will now be presented with the Restore Console as shown below: 80 / 144
81 5. Ensure that the "Restore as clone to a different location" radio button is checked for each VM that you wish to restore as a clone. 4. You can use the backup time combobox to choose to restore a previous version of the VM. You will also be prompted to enter a new name for the Cloned VM as well as the restore location for the configuration files and the VHD, AVHD files. Both locations can be pointing to the same folder. By default the network card of the new cloned VM will be disabled so as to prevent IP Conflicts. You can choose not to disable the network card by unchecking the checkbox "Disabled Network Card". 81 / 144
82 5. Click on the [Restore Selected] button to begin the restore operation. 6. You will be presented with a dialog notifying that the "Virtual Machine Management Service" will be restarted during the restore operation. This is normal and you should press OK. 7. Once the restore begins you will notified by the following dialog. 8. You will know that a restore is taking place because the progress bar at the top right of the Management Console will be active. 82 / 144
83 9. Finally you will be notified that the restore is completed by a popup dialog, and event log notifications if they are enabled. Restore to different Hyper-V server To import a backup from another Hyper-V guest and restore it you should use the Restore Import Wizard. This can be accessed as follows: 1. Open the Management Console as described here. 2. Navigate to the "Advanced Restore Options" menu at the left hand side of the screen and click on the [Import Backup from another Host] sub-menu item. 83 / 144

84 Using the Restore Import Wizard: 84 / 144
85 1. When viewing the welcome screen click on [Next] You will now be presented with a screen where you can choose a backup drive which contains the backup that you wish to import. 85 / 144
![2. Select the Backup Folder containing the required backup and press [Next].](/docs-images/74/70767706/images/86-0.jpg "Please note that you can use the label buttons at the top of the screen to: - Choose a UNC network path upon which the required backup is stored.")
86 2. Select the Backup Folder containing the required backup and press [Next]. Please note that you can use the label buttons at the top of the screen to: - Choose a UNC network path upon which the required backup is stored. - Specify a subfolder within the backup drive or UNC Path which contains the backup folder if it is not stored in the root folder. 3. Next you will be presented with a list of VMs which have been backed up within the selected backup folder. 86 / 144

87 4. Now select the VM or VMs which you wish to restore to the current Host and press [NEXT]. 5. You will now be presented with a Restore Console as shown below: 87 / 144

88 6. You can use the backup time combobox to choose to restore a previous version of the VM. You will also be prompted to enter a new name for the Cloned VM as well as the restore location for the configuration files and the VHD, AVHD files. Both locations can be pointing to the same folder. By default the network card of the new cloned VM will be disabled so as to prevent IP Conflicts. You can choose not to disable the network card by unchecking the checkbox "Disabled Network Card". 6. Click on the [Restore] button to begin the restore operation. 7. You will be presented with a dialog notifying that the "Virtual Machine Management Service" will be restarted during the restore operation. This is normal and you should press OK. 88 / 144
89 7. Once the restore begins you will notified by the following dialog. 8. You will know that a restore is taking place because the progress bar at the top right of the Management Console will be active. 9. Finally you will be notified that the restore is completed by a popup dialog, and event log notifications if they are enabled. 89 / 144

90 Fire Drill The Fire Drill feature allows you to plan and execute test restores at a scheduled time. That way you can easily verify that your VMs are being backed up correctly. Before starting a Fire Drill Restore please ensure that at least one successful backup has been taken for the VM in question. To begin open the Management Console as described here and select the Fire Drill Screen from the left hand side menu. Configuring Fire Drill Settings Before performing a Fire Drill you must first specify a default location where to store temporary restored files. 90 / 144

91 This location must have enough free space to hold any VMs which are temporarily restored to it. Should you which to receive Fire Drill reminders and notifications then it is important to configure your SMTP Settings as explained here. Fire drill notifications are sent for the following events: An automatic Fire Drill will begin in 1 hour. A reminder for a Fire Drill has been scheduled. A Fire Drill restore has completed. Performing a manual Fire Drill By performing a manual Fire Drill you will perform a test restore on one or more VMs. These VMs will be restored as clones to a new location and will be attached to Hyper-V. The names of the test VMs will contain the text "Fire Drill" and a timestamp of the backup version restored. 1. To perform a manual Fire Drill simply click on the button "Perform a Fire Drill Now". 2. Select which VM backups and which backup versions you would like to include in the Fire Drill. 91 / 144


92 3. Click on "Perform Fire Drill Restore". 4. Confirm that you would like to proceed and you will see that the Fire Drill restore has begun from the top right progress bar. 5. Once the restore has completed then you will be notified on whether it was successful or not. If it was successful you will find that the new test VM has been attached to Hyper-V and can be used to verify that it 92 / 144
93 has been restored correctly. Please note that to avoid conflicts the Network Card is disabled for VMs which are restored using Fire Drill. Configuring automatic scheduled Fire Drill Restores / Reminders A great feature of Fire Drill is that users are able to schedule routine Fire Drill Restore operations or reminders. Scheduled Fire Drill Restore Operation At the scheduled time the VM in question will be restored as a clone and attached to Hyper-V. One hour before the fire drill restore begins, users will receive an notification followed by a second once the restore is completed. ( s will only be received if the Mail Notifications are configured correctly.) Scheduled Fire Drill Reminders In this case at the scheduled time - instead of restoring the VM - a simple reminder will be sent to remind the user to perform a Fire Drill restore. ( s will only be received if the Mail Notifications are configured correctly.) To configure schedule restores / reminders you must use the "Fire Drills" Tab. 1. To add a new Fire Drill schedule simply click on the "Add New Drill" toolstrip button. Any you will be presented with the following dialog. 93 / 144

94 2. Select a VM upon which you wish to schedule a Fire Drill restore or Reminder. This can be done by clicking on "Choose a Guest VM". 3. Add a number of date / time rows to the Fire Drill Schedule panel. You can choose a combination of schedules such as "Mondays at 6pm and Saturdays at 10am and 10pm". 4. Choose whether you would like a Fire Drill restore to begin automatically. This can be done by checking or unchecking the "Perform Test Restore on Schedule". If you leave this option unchecked then you will simply receive an reminder. Please note that to avoid conflicts the Network Card is disabled for VMs which are restored using Fire Drill. 5. You may also add some comments to document the Fire Drill schedule. 6. Finally click "Save Changes" and your new Fire Drill schedule will be enabled. If you wish to edit or delete existing Fire Drill schedules simply use the toolstrip buttons at the top of the tab. 94 / 144
95 Fire Drill History / Deleting Temporary Restored VMs Finally the "Fire Drill History" tab will provide users with a history of any Fire Drill restores which have been performed. Each time a Fire Drill is performed an entry is made in the Fire Drill History list. A status column also indicates whether the restored VM is still attached to Hyper-V. Should you wish to delete any temporarily restored VMs simply select them from the list and click on "Delete Selected Fire Drill VM(s)". At this point they will be detached from Hyper-V and deleted from the temporary restore location. Once deleted the entry will still appear in the History list, but the status column will indicate that the VM has been deleted from Hyper-V. File Level Restore The File Level Restore feature allows you to explore the contents of the VHD / AVHD files of a VM backup. That way you can easily restore specific files and folders from a VM backup without having to restore and attach the entire VM. Please note that: - if you wish to perform a File Level Restore for a VM which contains AVHD snapshots then you will need to follow an alternative procedure. - if you wish to perform a File Level Restore an older backup version of a VM then you will need to follow an alternative procedure. 95 / 144
96 Before starting a File Level Restore please ensure that at least one successful backup has been taken for the VM in question. 1. Open the Management Console as described here and select the File Level Restore Screen from the left hand side menu. 2. If this is the first time that you are using this feature then you must setup the temporary restore location by using the settings tab. The temporary restore location will contain any temporarily restored VHD / AVHD files. These can then be deleted automatically once you are done from the File Level Restore. 3. Once the temporary folder has been chosen you can simply click on "Start File Level Restore..." to begin. You will then be presented with a list of VM Backups available for File Level Restore. 96 / 144

97 Please note that: - if you wish to perform a File Level Restore for a VM which contains AVHD snapshots then you will need to follow an alternative procedure. - if you wish to perform a File Level Restore an older backup version of a VM then you will need to follow an alternative procedure. Simply select which VM backups you wish to load for File Level Restore using the checkboxes in the list. The VHD files of the selected disks will be mounted directly from the backup drive. A particular method is used here to ensure that the original VHD files are not modfied in any way. 4. Once you have selected the required VMs click on "Mount Selected for File Level Restore" and click OK when you are prompted to confirm. 97 / 144

98 5. Once you confirm the above step you will see a progress bar for a few seconds and assuming that all is successful the relevent Virtual Disks (VHDs) will be mounted and a Windows Explorer window will appear for each drive letter. It is possible that a drive letter is not automatically assigned by Windows when the disks are mounted. If this happens then you must use the Disk Management utility in the Windows Server Manager console to assign drive letters. Once you do you can then manually browse the mounted disks using My Computer. 6. Finally you will see that the VHD disks belonging to the VMs selected above are now listed in the File Level Restore screen. Right-clicking on a VHD / AVHD entry in the list will bring up a context menu with the following options: - Unmount - Browse using Windows Explorer Unmounting a Virtual Disk which was mounted directly from the backup drive will automatically remove the entry from the list and delete any temporary files. Important Points: - Backups will be disabled for any VM which currently has one of more VHDs mounted. backups for this VM then simply unmount the VHDs from the File Level Restore screen. To resume File Level Restore for AVHD Files / Older Backup Versions When performing File Level Restore for a VM which contains snapshots (AVHDs) or from a older delta backup then the virtual disks first need to be restored to a local temporary folder. They are then mounted from this temporary folder instead of being mounted directly from the backup drive. Therefore there are a few extra / different steps required as listed below. Please Note: If you simply want to perform a File Level Restore from the latest backup of a VM (VHD files only) then follow this procedure. Virtual Disks do not need to be restored first and are mounted instantly. 98 / 144
99 Before starting a File Level Restore please ensure that at least one successful backup has been taken for the VM in question. 1. Open the Management Console as described here and select the File Level Restore Screen from the left hand side menu. 2. If this is the first time that you are using this feature then you must setup the temporary restore location by using the settings tab. The temporary restore location will contain any temporarily restored VHD / AVHD files. These can then be deleted automatically once you are done from the File Level Restore. 3. Once the temporary folder has been chosen you can simply click on "Start File Level Restore..." to begin. You will then be presented with a list of VM Backups available for File Level Restore. Since we are not restoring the latest backup in the case we need to click of one of the following options: (highlighted in the screenshot below) 99 / 144
 you would like to prepare for File Level Restore. You will also be asked to choose which backup version you would like to restore from.")
100 - "Click here to perform a File Level Restore from an older backup version..." - "Click here to perform a File Level Restore for VMs which contain Snapshots (AVHD Files)..." 4. You will then be prompted to choose which VM (or VMs) you would like to prepare for File Level Restore. You will also be asked to choose which backup version you would like to restore from. Simply select and click on "Prepare Selected for File Level Restore". 100 / 144

101 5. You will be prompted to confirm your selection. Simply click OK. 6. You will now notice that the progress bar at the top of the Management Console has been updated to show the progress of the restore operation. This simply indicates the progress of copying all required virtual disks to the the temporary restore folder. 101 / 144

102 7. Once the temporary files are restored you will be presented with the following dialog. 8. The next step is to view the File Level Restore screen once again. One or more VHD / AVHD files should now be listed in the list of virtual disks available for File Level Restore. 7. Selecting Mount will attach VHD / AVHD disk and assign a drive letter to each of it's partitions. The partitions will then be opened automatically in Windows Explorer allowing you to browse their contents and copy any files that you wish to restore. The partitions are mounted in Read Only mode. If for some reason the disks are mounted but no drive letters are assigned - then it simply means that the drives were not yet ready. Unmount them and try and mount them again. 102 / 144


103 11. Finally you may optionally choose to delete the temporarily restored VHD / AVHD files and remove them from the list. This can simply be achieved by choosing "Delete temporary VHD / AVHD Files and Remove from list" from the context menu. If this option does not appear then you should unmount the disks first. You will be presented with the following dialog - simply click OK and the temporary files will be deleted for you. 103 / 144

104 Microsoft VSS (Shadow Copy) The Microsoft Volume Shadow Service (VSS) is Microsoft technology that forms part of Windows Server 2008 R2. This component allows applications to access a "point in time" snapshot of a logical drive on the host machine, including any VHD and related virtual machine files on that drive. This enables these files to be accessed even if they are in use or locked. It also ensured that the VHD and related files are in a consistent state and all data has been flushed to disk before they are accessed for backup purposes. Altaro Hyper-V Backup comes with its own VSS Requester and communicates with the Microsoft Volume Shadow Copy Service in order to trigger off and release shadow copies on the host machine. Important facts and FAQs: The Volume Shadow Copy service is a part of the Windows operating system and any malfunctions in this component are outside of the control of Altaro Hyper-V Backup, which acts only as a shadow copy "requester" and does not possess any shadow copy functionality per se. Shadow copies are done on a Volume basis, and cannot be done on a particular folder set only. A shadow copy operation does not result in all the data on a volume being copied over to a shadow copy, but rather a point in time is set and any changes (writes) to the volume contents from that point on are kept in a "changes" area. In that way a shadow copy can be completed in a matter of seconds. The shadow copy requested by Altaro Hyper-V backup is non-persistent and is disposed after a particular backup operation completes. The overall process may be visualized in the following diagram, which is a considerably simplified version of what actually happens, but offers a good birds-eye view: 104 / 144

105 Altaro Hyper-V Backup first requests a list of VSS writers from the VSS service and then requests that all the writers affected start preparing for the shadow copy by making their data consistent on the disk. Once this is done, the VSS communicates with the VSS provider which actually executes the point in time snapshot. The VSS service then informs Altaro Hyper-V Backup about the details of the newly created shadow copy. After the backup completes, Altaro Hyper-V Backup instructs the VSS service to release the shadow copy. MS Hyper-V VSS Writer One of the writers on a 2008 R2 system is called the Hyper-V VSS Writer, and this writer manages the shadow Copy of all files related to the virtual machines running on the host machine, such as the VHD files. When Altaro Hyper-V Backup triggers off a shadow copy (just before a backup starts), it integrates with the Hyper-V VSS writer and passes on information to this writer about which virtual machines are about to be backed up. In turn, Hyper-V uses one of two mechanisms to prepare each VM for backup. The default backup mechanism is called the "Saved State" method, where the VM is put into a saved state during the processing of the shadow copy, snapshots are taken of the appropriate volumes, and the VM is returned to the previous state after the shadow copy. The other backup mechanism is called the "Child VM Snapshot" method, which will be discussed here. ReverseDelta RD Version 2 is now available with Altaro Hyper-V Backup version 3.0 Definition of Reverse Delta Reverse Delta Version 2 offers two advantages: 1. It is a space-saving technology developed by Altaro Software that enables Altaro Hyper-V Backup to keep only the changes between each version of a changed VHD (or VHDX) file and another, rather than storing the version of a file as a whole file every time it is changed. This means that keeping multiple backup versions will require less space on your backup drive. In other terms, chunks of a VHD file that are unchanged from one version of that file to the next are only stored once on the backup disk. This is called data deduplication. 105 / 144
106 2. It also enables Altaro Hyper-V Backup to transfer only the changed blocks in a VHD file when there is already a full backup available on the backup location, making incremental backups much faster than the first backup. Notwithstanding this, the latest version of a VHD file is always stored as a full file on the backup location. What distinguishes Reverse Delta from other deduplication technologies? The main concern about delta files is usually that in the event of heavy data loss, the version of a file you are most likely to need is the latest one. Many users are apprehensive if this version may need to be rebuilt from an older version and one or more delta files. With Reverse Delta, the latest version of a file is always made available in its entirety and not as a delta file. This means that if you require the latest version of a file, it is possible to access it directly from your backup drive without having to rebuild the file from delta files. The delta files are only used if you want to build a previous version of the file, building one delta file at a time for each version as you travel back in time in the reverse direction. Periodically keeping full versions of the files In the Advanced Settings window in Altaro Hyper-V Backup, there is an option to keep a full copy of a file every X versions as shown in the screenshot below: 106 / 144
107 Let's say we have a large file, say a 100GB VHD file, which is constantly changing and needs to be backed up every hour. The first backup is for example at 9:00am. When you back up that file the first time, it is simply copied over to the destination. At 10:00am, it is copied over again, and at 11:00pm again and so on. Without Reverse Delta, at this point we have 3 full versions on the backup drive: 9:00am, 10:00am, and 11:00am. That would mean 300GB are required on the backup drive in three hours, which is rather excessive. Altaro Hyper-V Backup however creates delta files of the older files (9:00am and 10:00am) so that our latest file (11:00am) is available as a full file. The delta file is usually much smaller than the full file, and will typically be less than 10% of the size original file. Number of delta files to keep by example: If we choose "keep full file every 30 versions", this means that every 30 backups, the delta file is not taken, so that you never have more than 30 delta files to rebuild if you need to restore a file. Let's say you set this setting to "5". The picture would look like this: 107 / 144
108 Full file 10:00pm (Latest, 100GB) delta 9:00pm delta 8:00pm delta 7:00pm delta 6:00pm Full file 5:00pm (100GB) delta 4:00pm delta 3:00pm delta 2:00pm delta 1:00pm Full file 12:00pm (100GB) etc.. etc. If you need to restore the 2:00pm file, then Altaro Hyper-V Backup starts from the 5pm full file, adds on the 4:00pm delta, 3:00 pm delta and finally, the 2:00pm delta. These steps take some time, so this setting ensures that you are never too far away from a full file. This of course happens in the background and is totally abstracted from the user. With Version 3.0 of Altaro Hyper-V Backup, the recommended value for this setting is around 30. Visual representation of the Reverse Delta process: The following image shows the way the process works in 5 steps. Step 6 shows a restoration procedure. 108 / 144
109 Display of Backup Progress with Reverse Delta 109 / 144

110 With Reverse Delta Version 2 (available in Altaro Hyper-V Backup version 3.0), the progress bar during a backup now shows further details about the current activity. The main progress bar will show the current progress of the backup as in previous versions of Altaro Hyper-V Backup. However, when the software is creating a delta file, the main progress bar is paused, and the current fine grain progress showing the deduplication (or delta file creation). Once the deduplication progress is complete, the next file is started and the main progress bar will resume. This is shown in the image below: Version Maintenance Version Maintenance can be configured using the VM Backup Settings screen as explained here. 110 / 144
111 Once within the the VM Backup Settings screen select the "Version Maintenance" tab and you can choose to limit which old versions to keep by version age. Don't forget to set a version maintenance schedule otherwise maintenance will not run. You can learn more on how version maintenance works here. You can also learn on how to manually delete old versions here. Cluster Support Altaro Hyper-V Backup supports backing up virtual machines that are running on a failover cluster node, both if they are using cluster shared volumes (CSVs) or not. Cluster Shared Volumes Cluster Shared Volumes or CSVs are shared storage devices, usually on SANs and similar hardware, which are accessible from all nodes in a failover cluster. Altaro Hyper-V Backup supports backing up VMs that have data stored on CSVs. This is done by indicating to the Shadow Copy component that a backup of a VM on the failover cluster is about to begin. The node on which Altaro Hyper-V Backup is installed temporarily takes ownership of the CSV and enables redirected I/O. This enables the node to perform a shadow copy operation on the CSV. Once the backup is completed, redirected I/O is 111 / 144
112 once again disabled. Read this chapter for details on how to configure Altaro Hyper-V Backup in a Cluster Environment. 112 / 144
113 Reports To view reports simply open the Management Console and select the option [Reports] from the left hand side main menu. Read instructions on how to open the Management Console here. Three Reports are Available: Backup History Report Restore History Report Errors since the last backup Report Backup History The Backup History report displays the following information: The VM name that was backed up. Date and time of the backup. The backup status indicating whether the backup succeeded, succeeded with skipped files, or failed. The number of files backed up. The total size of the data that was backed up. 113 / 144
114 The duration of the Backup. View List of Skipped Files Double-clicking on a backup which has a warning icon or error icon will bring up a list of files that were skipped during that backup. A reason why the file was skipped is also given. View List of Backed up Files Double-clicking on a successful backup will bring up a list of files that were backed up during that backup. Information on whether the file was created, changed, renamed or deleted is also given. Alternatively you may right-click on a backup to bring up a context menu with all options. Restore History The Restore History report displays the following information: The VM name that was restored. Date and time of the restore operation. The restore status indicating whether the restore operation succeeded or failed. The duration of the restore operation. Errors since the last Backup The Errors report lists any errors that have occurred since the last successful backup. The following information is displayed: Date and time of the error. A description of the error. The error code. This list will be cleared once the VM causing the error is backed up successfully. 114 / 144
115 Managing Backup Drives Supported Backup Destinations Configuring Backup Destinations Managing Backup Space Supported Backup Destinations The supported Backup Destinations are listed here. Configuring Backup Destinations Configuring your backup destination Selecting a Backup Drive using the "Backup Drive Selector" Selecting a Network Path using the "Backup Drive Selector" Changing your Primary Backup Drive Selection Multiple Primary Backup Drive Swapping Drive Swap using RDX Cartridges Configuring a Mirror Backup Drive Switching to the Mirror Backup Drive Backup Drives in a Hyper-V Cluster Environment Configuring your backup destination To select a drive or network path as your backup destination, open the Management Console and select the option [Select a Backup Drive] from the left hand side menu. Read instructions on how to open the Management Console here. 115 / 144
116 Once you select "Select a Backup Drive" you will be presented with the following panel: 116 / 144
117 The next step is to click on the Select Backup Drive button, before configuring any of the other options. This will bring up the Backup Drive Selector window described here. Important Terminology Please read! There are various ways the backup locations can be configured. Please read these definitions that are used throughout the rest of this document. Setting up the different configurations will be explained in more detail in the following sections of this document. Primary drive: A primary drive is a backup location to which the virtual machine files are copied directly from the host (via a shadow copy of the VM files). Multiple primary drives may be configured, as long as none of them are on a network path. If you specify a primary drive on a network path, then it must be the only configured primary drive. Drive swapping: If the primary drive selected is a locally connected drive (USB, esata or similar), then you may specify other locally connected drives as primary drives. Backing up different VMs to different primary drives is not supported, and all primary drives will contain backups for the same VMs. Only one primary drive can be active at any one time. If more than one primary drive is connected at the same time, the active primary drive will be selected according to a user-assigned priority. Mirror drive: If only one primary drive is selected (and this is a requirement if the primary drive is on a network path), then you may specify a mirror drive which is a redundant copy of the primary drive. Backup data is always synchronized from the primary drive to the mirror drive, and backup data is never copied to the mirror drive directly from the source files on the host. If the primary drive is not connected, no data can be synchronized to the mirror drive. RDX cartridges: 117 / 144
118 A different way of drive swapping, instead of choosing multiple drives and assigning different priorities to them, is by selecting an RDX cartridge enclosure. Any cartridge inserted in the designated RDX enclosure will be used as a primary backup drive. In summary, these are the possible configuration options available in Altaro Hyper-V Backup: 1) Primary backup location is a network path (for example \\Backup-Server\backups ): - Drive swapping not supported. - Mirror drive is supported. 2) Primary backup location is a locally attached drive: - Addition of other locally attached primary drives for swapping is enabled. - Mirror drive: o Only one primary drive selected: Mirror drive is available for configuration. o More than one primary drive selected: Mirror drive is disabled. 3) Primary backup location is an RDX enclosure: - - Drive swapping is supported in two ways: o Addition of any locally attached drives including non-rdx drives, but each RDX cartridge must be inserted selected and added independently (as above). o RDX drive rotation only: no other primary drives can be added, but any cartridge inserted in the enclosure will be used as a backup drive without any prior configuration or selection of the cartridge. Mirror drive is not supported. Selecting a Backup Drive using the "Backup Drive Selector" The Backup Drive Selector will show after clicking the Select Backup Drive button here. However, this window is also used in other areas related to the backup storage options, and other sections further below will refer to this section when required. This section will describe locally attached storage. For backup locations on a network path, see this article. This is an example of a typical Backup Drive Selector view: 118 / 144
119 Removable Disks, which are usually recommended for this purpose over fixed local disks will be grouped together and shown at the top of the window. Local Disks, although not recommended for backup storage, will still be shown under the heading Local Disks and will also be available for selection. The right hand column will show the free space for each drive, and also the format of the drive, which for the purpose of Altaro Hyper-V Backup is recommended to be NTFS formatted. Once you select a drive by clicking on the checkbox to the left of the drive icon, you will see the amount of space on the drive to be used at the top of the window as shown in the example for Drive G: below: 119 / 144
120 Using the same drive letter in the example above, the destination folder will by default be chosen as G: \AltaroHyperVBackup. This may be automatically changed to G:\AltaroSharedFolder\AltaroHyperVBackup in case the backup location may need to be shared with other nodes on a cluster as described here. You can change the default backup folder by clicking on the Choose with folder to backup to link at the bottom of the window as shown in the image below. Your backup location will be updated in the bold text below the link: 120 / 144
121 Once you are done, click on the Select Backup Drive button at the bottom right of the window. You will be returned to the main drive configuration panel, now showing the drive selected as shown below: 121 / 144

122 If you have a Hyper-V cluster set up, configuring a locally attached backup location may require an extra step as described here. Selecting a Network Path using the "Backup Drive Selector" Selecting a UNC Path as your backup drive is very easy with Altaro Hyper-V Backup. Simply follow the instructions on selecting a backup drive here but click on the [Backup up to a Network Path (UNC Path)...] button when presented with the drive list. This will bring up the following network path selection window: 122 / 144

123 Enter the network path in the topmost field. The supported formats here are: o \\IP Address\Share, for example \\ \Backups o \\ServerName\Share, for example \\BackupServer\Backups o Both of the above with one or more extra folders, for example \\ \Backup\Altaro Entering a server name or IP address alone, for example \\ , alone with no share name, is not supported. In the three lower fields, you must enter the domain name, or else the IP Address, with no slashes, of the backup destination, the username to be used to authenticate to the path, and the password. The password is never stored as plain text in the Altaro Hyper-V Backup configuration files. An IP address is usually used instead of the domain name when the backup destination is not running Windows or is not part of the domain, for example a NAS drive enclosure or similar. Once you are done, click on the Test Credentials to make sure the authentication works and then click Add Network Location. This will add the network path as an option in the drive selector window alongside the other detected drives: 123 / 144

124 You can also select any further subfolders to use for the backup location by clicking on Choose with folder to backup to link, as described here. Once you are sure of your selection, click on Select Backup Drive at the bottom of the window as described here. Changing your Primary Backup Drive Selection If you are using a network path as your primary drive, or you have decided not to use the drive swap feature as described here and use only one primary drive, you may want to change the drive to another primary drive. If you are using the drive swapping feature, you may also want to change the currently connected drive to a new location, with the option of migrating all the data as described further below. To do this, click on the Change Selected Drive button shown in the image below: 124 / 144
 Migrate all backup data and old versions to the")
125 Clicking the button will display the Drive Selector window, and you can choose an alternative primary drive location, locally attached or on a network path, as described here and here respectively. Once you have chosen the new primary backup drive, you will be prompted with three options as shown below: The three options are explained below: 1) Migrate all backup data and old versions to the new drive. This option is available when the previously selected primary drive is still available. If you choose this option, all data will be copied over to the new backup location, and the new backup drive will resume 125 / 144

126 incremental backups seamlessly from the time of the last backup to the previously selected drive. Please note that the migration procedure may take several hours depending on the amount of data that needs to be transferred. Once the migration is complete, you will be shown the following alert, and from that point on the backups may resume to the newly selected drive: 2) Continue backing up to an existing backup folder This option is enabled if the software detects that the newly selected primary drive was already used with the same backup configuration. You may choose this option if you would like to resume incremental backups on the newly selected drive, automatically linking to the previous backup available on that drive. This option is useful when you want to move the location of the primary drive. For example if you have performed the first backup on a drive connected via USB, and then connected that same drive on a shared network path on another computer, you may re-map to the same backup drive using this option. 3) Restart backup from scratch Choose this option when you do not want to copy any backup data from the previously connected drive (if available) and start the backups on the newly selected drive from scratch. Multiple Primary Backup Drive Swapping As described in more detail here: If the primary drive selected is a locally connected drive (USB, esata or similar), then you may specify other locally connected drives as primary drives. Backing up different VMs to different primary drives is not supported, and all primary drives will contain backups for the same VMs. Only one primary drive can be active at any one time. If more than one primary drive is connected at the 126 / 144
127 same time, the active primary drive will be selected according to a user-assigned priority. To enable multiple primary drive swapping, first click on the Enable Multiple Backup Drive Swapping checkbox. If you have already selected a network path as your primary drive, this checkbox will not be enabled. If you have already selected a locally connected drive as your primary drive, the checkbox will be enabled, and a list of drives will appear below the checkbox, showing the primary drive that has already been selected: To add another primary backup drive, please click on the Add Backup Drive button as shown below. 127 / 144
128 Clicking on the Add Backup Drive button, will bring up the Drive Selector Window. Please follow the procedure described here in order to choose another primary drive. Please note that selecting a network path will be disabled in this case. You may repeat this procedure multiple times in order to add any number of primary drives. You may also add and remove primary drives at a later stage. Only one primary backup drive may be active at any one time, so once the other primary drives have been selected, you must specify which drives will be activated if more than one primary drive is simultaneously connected. This is done by moving the drives' position up or down in the list in order to change their priority. A drive with a lower number in the priority column will be preferred over a simultaneously connected drive with a higher number in the column. In other words, the drive with Priority 1 will have a higher priority over any other selected primary drives. To change the relative priority of the drives, click on any one of the drives in the list and then click on the Move Up and Move Down buttons at the top of the list as shown in the image below: 128 / 144
129 The currently active drive is switched to another drive in two cases: 1) A drive with a higher assigned priority is connected. 2) The currently connected drive is disconnected and a drive with a lower priority is available. If one of the above occurs, you will see the following alert appear if the Management Console is open: 129 / 144

130 After a few seconds, the Management Console (if open) will automatically close in order for the new drive details to be loaded. In the current version, the Management Console will not reopen automatically, and must be launched again by the user if required. Once you reopen the Management Console, you will only see the backup history of the newly activated drive. Please keep in mind that each independent primary backup drive will contain backup versions corresponding to different times, and no two primary drives will contain the same backup versions. The backup history in the Management Console will change according to the active primary drive, and whilst a drive is active, the backup versions that are available for restore will only be for those backups that were done on the when the currently active drive. Drive swap using RDX Cartridges A different way of drive swapping is by using an RDX drive enclosure. If the first primary drive you choose is an drive within an RDX enclosure, this feature is automatically enabled. RDX enclosures are distinguished by the RDX logo beside the drive letter in the Drive Selector window as shown below: 130 / 144
131 If drive swapping is not enabled, then the RDX drive rotation feature becomes active and any cartridge inserted into that enclosure is used as a primary backup location without explicitly selecting each drive independently as with the standard drive swapping feature. When the feature is enabled, the Enatced D bve Swappbnig shesktnx and the b n D bve teath e are automatically disabled. You will see the RDX logo in the drive configuration panel as shown below: As with the standard drive swapping feature, please keep in mind that each independent RDX cartridge will contain backup versions corresponding to different times, and no two cartridges will contain the same backup versions. The backup history in the Management Console will change according to the active cartridge, and whilst a cartridge is active, the backup versions that are available for restore will only be for those backups that were done on the when the currently active cartridge. 131 / 144
132 Note: In order to revert to standard drive swapping, you will need to select the first primary drive as a non-rdx drive (as described here). Once drive swapping is enabled, you can then re-add the RDX enclosure as one of the primary backup drives, but only the currently inserted cartridge will be added to the list of multiple drives. You can add multiple RDX cartridges to the list by inserting them, selecting them and assigning their priority in turn. If an RDX Cartridge is rotated while the Altaro Hyper-V Backup Management Console is open then the console must restart itself in order to attach to the new cartridge. In this case the user will temporarily see the following loading screen. This should only take a few seconds. Configuring a Mirror Backup Drive If you are using a network path as your primary drive, or you have decided not to use the drive swap feature and use only one primary drive, then you have the option of assigning another drive as a mirror drive. As described in here, a mirror drive is a redundant copy of the primary drive. Backup data is always synchronized from the primary drive to the mirror drive, and backup data is never copied to the mirror drive directly from the source files on the host. If the primary drive is not connected, no data can be synchronized to the mirror drive. To select a mirror drive, follow the following steps: 1) Click on the Backup Drive Mirroring tab at the top of the drive configuration panel 2) Click on the Select Mirror Backup Drive button. Then follow the Drive Selector procedure as described in here and here to choose a locally attached or network mirror drive respectively. 3) You can then set a time (once per day) at which the drive synchronization from the primary backup drive to the secondary backup drive will take place automatically. Please note that until the synchronization is ready, no backups will take place. The synchronization will only start if the primary drive is connected. The three steps above are shown in the image below: 132 / 144
133 You may start the synchronization manually at any time by clicking on the Sychronize your Backup to the Mirror Drive button in the image above. Switching to the Mirror Backup Drive To switch to the Mirror Backup Drive simply use the "Switch to Mirror Backup Drive" tab in the Altaro Hyper-V Backup Service Controller. You can learn how to access the service controller here. Switch to Mirror Backup Drive: This tab allows the user to discard the current backup profile and import the backup profile saved on the Mirror backup drive. Once the backup profile is switched Hyper-V Backup will treat the Mirror backup drive as the primary backup drive. 133 / 144

134 Once the "Switch to Mirror backup drive" button is clicked then the user will be prompted to confirm. Once the switch is performed successfully then the user will be notified. Important Note: Should the switch fail then you will find a backup of the old profile folder as follows: C:\ProgramData\Altaro\AltaroHyperVBackupProfile_BACKUP_TimeStamp Simply rename this backup to: 134 / 144

135 C:\ProgramData\Altaro\AltaroHyperVBackupProfile You may need to stop the service first as explained here. Backup Drives in a Hyper-V Cluster Environment If you have a Hyper-V cluster set up, Altaro Hyper-V Backup will communicate with other cluster nodes and instruct them to back up any selected VMs to the same backup location. If your primary drive is a network location, the network path credentials are securely communicated to the other cluster nodes so that they can authenticate to and access the backup location. If on the other hand, your primary drive or drives are locally attached drives such as USB drives etc., then the backup folder on those drives are automatically shared using Windows file sharing, so that the other cluster nodes will have access to the backup location. When this setup is detected, an extra configuration window is shown after selecting the drive from the Drive Selector window. A tncde sacced Acta nsha edfncde g bn ahtnma sac co s eat ed at the tnpmn n t cev ec nt the nec es ted backup location, and this folder is shared using standard Windows File Sharing. You will be prompted with the following window: 135 / 144
136 At the bottom, the e bn a nes nn tced Spes b t o a ane Ass nhnt g. This refers to the Active Directory Domain User that will have access (both Share access and NTFS security permissions) to the newly created share. As shown in the image above, you can simply leave it in the hands of Altaro Hyper-V Backup to create a special Active Directory Domain User for this purpose (Altaro in the example above). The created share will be accessible only by this user, and the randomly generated credentials will be securely communicated to the other Hyper-V nodes when backup is required on another node. The newly created share will only be accessible by the newly created user. If you prefer to specify an already existing user, onh mao scbsk the Chnnne a ane Assnhntg adbn button and specify the credentials as shown in the image below: Other settis s ep e cieti g recerr er d : With Hyper-V cluster setups, the cluster nodes may be connected to a Gigabit or faster network, typically fibre channel, on which the Cluster Shared Volumes are set up. This is usually independent of the standard domain network (the management network), which may not reach the same speeds. 136 / 144

137 What this means is that a remote cluster node may reach the shared backup drive using one of two networks, one possibly being much faster than the other. If you would like to specify which IP the remote cluster node should use in order to access the locally connected backup drive, you may select the checkbox shown in the image below and specify the required IP. If you do not specify this setting, the IP address of the current node (on which the backup drive is shared) will be resolved using the node name on the remote cluster node. Managing Backup Space Limiting the age of older versions (Automatic Version Maintenance) Manually deleting older versions (Manual Version Maintenance) Delete Backups of VMs that have been removed from your Backup Plan 137 / 144
138 Limiting the age / size of Older Versions (Automatic Maintenance) During each backup Altaro Hyper-V Backup stores the latest version of all files as a complete mirror copy. In fact, the backup destination may be accessed simply through Windows explorer and the latest backup may be browsed manually. Whenever a file changes (or is deleted) from the source data, the older version (or deleted file) is then moved to the "old versions" repository. Over time this "old versions" repository will continue to grow as files keep on changing and more versions are stored. Altaro's ReverseDelta technology compresses older files to reflect only changes between one version and another, while still leaving the latest version as a full copy. This ensures that minimal space is required for the "old versions' repository. (See the section about ReverseDelta in this manual). As shown in the image below, the Restore Console shows the backup history allowing you to choose which version to restore: Altaro Hyper-V Backup gives you the possibility of restoring a Hyper-V Guest VM to the exact state it was at the specified timestamp. Each version contributes to the size of the total backup set on the backup drive. This increase in size is dependent on the nature of the changes that occurred between that backup and the previous one. The way Altaro Hyper-V Backup controls the increase in size is by referencing unchanged files across snapshots to the same data on the disk, and also by making use of delta technology in order to store only the changes within a file from one backup to the next. Old versions may be deleted from the backup set, with the limitation that versions can only be deleted contiguously starting from the oldest available version. Some users may want to perform periodic maintenance their "old versions" repository to ensure that it does not exceed a certain size limit or contain old and obsolete versions. There is one ways to limit the backup size in Altaro Hyper-V Backup: - Limit the age of the oldest file versions that are stored on the backup drive. This can be taken care of automatically by setting a Maintenance Schedule. You can learn on how to do this by reading this section. The Version Maintenance tab shows a checkbox and also a schedule manager below it. The checkbox enabled or disables maintaining your versions by age. For maintenance to work in the background you need to specify scheduled Maintenance Times. Click on the Add Maintenance Time at the bottom of the window and specify any number of times per day you want the maintenance to be performed. Each specified time may be scheduled to run on any number of days of the week as shown in the image below, for example a 17:00 maintenance schedule from Monday to Friday following and a 12:00 schedule on weekends: 138 / 144
139 You may click on the red X next to any scheduled time entry to remove that entry. Please remember to click Save at the bottom of the window each time you make changes to the Advanced Settings. Maintenance by Age: Select the checkbox During Maintenance Purge versions older than... and choose a time span from the dropdown list. As an example, let's assume today's date is the 15th January 2010 and I set my age limit to 2 months. This would mean that any backups older than the 15th November 2009 will be deleted from the backup drive. This does not happen immediately, but will be done by a maintenance routine within Altaro Hyper-V Backup according to the maintenance schedule you specify (see above). The latest version of each file will never be deleted even if the size limit remains exceeded after all the older versions are deleted. The latest backup must perfectly mirror the source data, and deleting any files from the latest backup would of course result in an incomplete backup. It is up to the user to select a backup destination that can hold at least one version of each VM. 139 / 144

140 Common Questions: Will maintenance ever delete all versions of a backed up file? The maintenance operations will never delete all versions of a file, unless a file had been deleted from your Server for a period longer than the maintenance period set. Therefore using the same example, you have chosen to delete all versions older than two months and a particular file was deleted from your Server say three months ago. Since that file was not present at any of the points in time displayed on the timeline then the file can no longer be restored by Altaro Hyper-V Backup from the Restore Console. What is the end result of maintenance being activated? The result of all of the above is that, assuming that the changes to your data are more or less similar between one backup and another, this will result in the backup size levelling off as shown in the image below. This is because as one backup is added to the stack on the timeline, an older one is deleted, so your backup window is always the same age or size, moving forwards one day at a time. This levelling off is of course only seen when the oldest backup hits the limit set by the maintenance schedule. Please note that if you have no Maintenance Schedule for quite a while, and then set the cut-off point to a point in time that is considerably "younger" than your oldest backup, you will see a dip in the size as shown in the graph below, as several backups in the timeline are purged simultaneously. You should then start seeing some levelling off in size thereafter. 140 / 144

141 Remember that the levelling off assumes that daily changes are fairly similar. If you add substantial amounts of data then you will still see an increase in the size of the graph. With regards to the renaming of folders, deleting of files etc. the files will remain in the backup history until they are flushed out by the maintenance schedule. How do I find the right setting for my Maintenance Schedule? Sometimes, trial and error is required to find the right balance between available disk space and age of versions to keep. Here at Altaro, we recommend that if drive space on your backup drive becomes an issue, start with a high setting, which is just below the age of your oldest backup. For example, if you have versions going back 3 months set the setting at 2 months. Next wait until your backup size is maintained and you see a dip in size in the graph. If after a few days you realize that drive space is still an issue, set the Maintenance Schedule to a shorter time-window, and keep going until you achieve the desired balance. Manually deleting older versions in the backup set (Manual Maintenance) The Altaro Hyper-V Backup Drive space manager is a simple utility that can be used to clear out old versions from your backup drive. This utility will free up disk space and will also be presented to the user in the case that their backup drive is full or will soon be full. To access the utility: 1. Open the Altaro Backup Hyper-V Management Console. (Instructions here) 2. Click on the Reports Tab on the left hand side of the screen. 3. Choose the "Backup History" report. 4. Click on "Delete old backups..." from the top right of the report. 141 / 144


142 You will now be presented with the following screen: To delete old versions: 1. Choose the checkboxes to indicate on which VMs you would like to perform version maintenance. 2. From the drop down lists select a "delete if older than" date, which may be independent for each VM. Versions which were created at a time which is older than the selected date will be marked for deletion. 142 / 144

143 3. Click on "Delete Old Versions". 4. You will now be presented with a progress bar which will indicate when the selected old versions have been deleted. Please keep in mind that the graphs show the maximum size that existed on any one particular day, so the change in size may not be visible immediately on the dashboard. Delete Backups of VMs that have been removed from your Backup Plan When you remove a VM from your Backup Plan (using the VM Browser as explained here) the backup folder containing that VMs backup files is not deleted. This is intentional to allow users to reselect the VM and restore previous versions at a later date. There may be cases where the user is no longer interested in keeping the old backup folders and would like to free up space on the backup drive. This utility will facilitate deletion of old backup folder. Please note that once a backup folder is deleted then you will not be able to restore that VM until it is backed up again. 1. You can access this feature from the VM Browser and the Backup History Report as shown in the next screenshot. 2. Once launched the utility will list all VMs for which a backup folder exists on the backup drive, but the VM is no longer being backed up. 143 / 144


144 3. You may use the check boxes to select one or more backup folders to delete. Once the selections are made then you can simply click on "Delete Selected Backup Folders". You will be prompted for confirmation before the deletion starts. 4. Once deletion is complete you will be notified and the list of VM Backups pending deletion will be updated. 144 / 144
User Guide. Version R95. English
 Cloud Backup User Guide Version R95 English September 11, 2017 Copyright Agreement The purchase and use of all Software and Services is subject to the Agreement as defined in Kaseya s Click-Accept EULATOS
User Guide. Version 2.1
 Kaseya Backup and Disaster Recovery User Guide Version 2.1 August 11, 2008 About Kaseya Kaseya is a global provider of IT automation software for IT Solution Providers and Public and Private Sector IT
USER GUIDE. CTERA Agent for Windows. June 2016 Version 5.5
 USER GUIDE CTERA Agent for Windows June 2016 Version 5.5 Copyright 2009-2016 CTERA Networks Ltd. All rights reserved. No part of this document may be reproduced in any form or by any means without written
Introduction. How Does it Work with Autodesk Vault? What is Microsoft Data Protection Manager (DPM)? autodesk vault
? autodesk vault") Introduction What is Microsoft Data Protection Manager (DPM)? The Microsoft Data Protection Manager is a member of the Microsoft System Center family of management products. DPM provides continuous data
Introduction What is Microsoft Data Protection Manager (DPM)? The Microsoft Data Protection Manager is a member of the Microsoft System Center family of management products. DPM provides continuous data
Backup Tab. User Guide
 Backup Tab User Guide Contents 1. Introduction... 2 Documentation... 2 Licensing... 2 Overview... 2 2. Create a New Backup... 3 3. Manage backup jobs... 4 Using the Edit menu... 5 Overview... 5 Destination...
Server Edition USER MANUAL. For Microsoft Windows
 Server Edition USER MANUAL For Microsoft Windows Copyright Notice & Proprietary Information Redstor Limited, 2016. All rights reserved. Trademarks - Microsoft, Windows, Microsoft Windows, Microsoft Windows
Version 11. NOVASTOR CORPORATION NovaBACKUP
 NOVASTOR CORPORATION NovaBACKUP Version 11 2009 NovaStor, all rights reserved. All trademarks are the property of their respective owners. Features and specifications are subject to change without notice.
Backup Tab User Guide
 Backup Tab User Guide Contents 1. Introduction... 2 Documentation... 2 Licensing... 2 Overview... 2 2. Create a New Backup... 3 3. Manage backup jobs... 4 Using the Edit menu... 5 Overview... 5 Destination...
Server Edition. V8 Peregrine User Manual. for Microsoft Windows
 Server Edition V8 Peregrine User Manual for Microsoft Windows Copyright Notice and Proprietary Information All rights reserved. Attix5, 2015 Trademarks - Microsoft, Windows, Microsoft Windows, Microsoft
Table of Contents. Introduction to PerfectStorage... 1
 Table of Contents Introduction to PerfectStorage... 1 Introduction to PerfectStorage... 1 The PerfectStorage Solution to Reclaiming Thin Provisioned Disk Space... 1 PerfectStorage Features... 1 Installing
Exchange Protection Whitepaper
 Whitepaper Contents 1. 2. 3. 4. 5. 6. 7. 8. 9. 10. Introduction... 2 Documentation... 2 Licensing... 2 Exchange Server Protection overview... 3 Supported platforms... 3 Requirements by platform... 3 Remote
KYOCERA Net Admin User Guide
 KYOCERA Net Admin User Guide Legal Notes Unauthorized reproduction of all or part of this guide is prohibited. The information in this guide is subject to change without notice. We cannot be held liable
Veritas System Recovery 18 Management Solution Administrator's Guide
 Veritas System Recovery 18 Management Solution Administrator's Guide Documentation version: 18 Legal Notice Copyright 2018 Veritas Technologies LLC. All rights reserved. Veritas and the Veritas Logo are
PROMISE ARRAY MANAGEMENT ( PAM) USER MANUAL
 USER MANUAL") PROMISE ARRAY MANAGEMENT ( PAM) USER MANUAL Copyright 2002, Promise Technology, Inc. Copyright by Promise Technology, Inc. (Promise Technology). No part of this manual may be reproduced or transmitted
PROMISE ARRAY MANAGEMENT ( PAM) USER MANUAL Copyright 2002, Promise Technology, Inc. Copyright by Promise Technology, Inc. (Promise Technology). No part of this manual may be reproduced or transmitted
Quick Start Guide. Version R94. English
 Backup Quick Start Guide Version R94 English December 12, 2016 Copyright Agreement The purchase and use of all Software and Services is subject to the Agreement as defined in Kaseya s Click-Accept EULATOS
C A S P E R USER GUIDE V ERSION 10
 TM C A S P E R TM USER GUIDE V ERSION 10 Copyright and Trademark Information Information in this document is subject to change without notice. Federal law prohibits unauthorized use, duplication, and distribution
File Protection Whitepaper
 Whitepaper Contents 1. Introduction... 2 Documentation... 2 Licensing... 2 Modes of operation... 2 Single-instance store... 3 Advantages of over traditional file copy methods... 3 2. Backup considerations...
Full User Manual and Quick Start Guide
 Full User Manual and Quick Start Guide 2 W hile every precaution has been taken in the preparation of this manual, we assume no responsibility for errors or omissions. Neither, is any liability assumed
DSS User Guide. End User Guide. - i -
 DSS User Guide End User Guide - i - DSS User Guide Table of Contents End User Guide... 1 Table of Contents... 2 Part 1: Getting Started... 1 How to Log in to the Web Portal... 1 How to Manage Account Settings...
CityVault Client Manual
 CityVault Client Manual Contents Preface: Preface...4 Chapter 1: Overview...5 Chapter 2: Installing CityVault...6 Downloading the CityVault Client...6 Installing the CityVault Client...6 Configuring CityVault...8
K2 ServerSave Installation and User Guide
 K2 ServerSave Installation and User Guide Chapter 1: Introduction 1.1 What is K2 ServerSave? Welcome to the K2 ServerSave Server Edition User Guide. This guide briefly describes the K2 ServerSave Application
Online Help StruxureWare Data Center Expert
 Online Help StruxureWare Data Center Expert Version 7.2.7 What's New in StruxureWare Data Center Expert 7.2.x Learn more about the new features available in the StruxureWare Data Center Expert 7.2.x release.
Enterprise Server Edition
 Enterprise Server Edition V8 Peregrine User Manual for Microsoft Windows Copyright Notice and Proprietary Information All rights reserved. Attix5, 2015 Trademarks - Microsoft, Windows, Microsoft Windows,
User Guide. Version R94. English
 Cloud Backup User Guide Version R94 English March 30, 2017 Copyright Agreement The purchase and use of all Software and Services is subject to the Agreement as defined in Kaseya s Click-Accept EULATOS
Quick Start - Virtual Server idataagent (Microsoft/Hyper-V)
") Page 1 of 19 Quick Start - Virtual Server idataagent (Microsoft/Hyper-V) TABLE OF CONTENTS OVERVIEW Introduction Key Features Complete Virtual Machine Protection Granular Recovery of Virtual Machine Data
Page 1 of 19 Quick Start - Virtual Server idataagent (Microsoft/Hyper-V) TABLE OF CONTENTS OVERVIEW Introduction Key Features Complete Virtual Machine Protection Granular Recovery of Virtual Machine Data
1. Overview... 2 Documentation... 2 Licensing... 2 File Archiving requirements... 2
 User Guide BackupAssist User Guides explain how to create and modify backup jobs, create backups and perform restores. These steps are explained in more detail in a guide s respective whitepaper. Whitepapers
BackupVault Desktop & Laptop Edition. USER MANUAL For Microsoft Windows
 BackupVault Desktop & Laptop Edition USER MANUAL For Microsoft Windows Copyright Notice & Proprietary Information Blueraq Networks Ltd, 2017. All rights reserved. Trademarks - Microsoft, Windows, Microsoft
Legal Notes. Regarding Trademarks KYOCERA MITA Corporation
 Legal Notes Unauthorized reproduction of all or part of this guide is prohibited. The information in this guide is subject to change without notice. We cannot be held liable for any problems arising from
File Protection Whitepaper
 File Protection Contents 1. Introduction... 2 Documentation... 2 Licensing... 2 Modes of operation... 2 Single-instance store... 3 Advantages of File Protection over traditional file copy methods... 3
Kaseya 2. User Guide. Version 6.5 and 1.1
 Kaseya 2 System Backup and Recovery User Guide Version 6.5 and 1.1 December 18, 2014 Agreement The purchase and use of all Software and Services is subject to the Agreement as defined in Kaseya s Click-Accept
User Guide. Version R95. English
 Software Management User Guide Version R95 English September 22, 2017 Copyright Agreement The purchase and use of all Software and Services is subject to the Agreement as defined in Kaseya s Click-Accept
End User Manual. December 2014 V1.0
 End User Manual December 2014 V1.0 Contents Getting Started... 4 How to Log into the Web Portal... 5 How to Manage Account Settings... 6 The Web Portal... 8 How to Upload Files in the Web Portal... 9 How
BounceBack 18. User Manual
 BounceBack 18 User Manual 2016 CMS Products, all rights reserved. All trademarks are the property of their respective owners. Features and specifications are subject to change without notice. The information
File Archiving Whitepaper
 Whitepaper Contents 1. Introduction... 2 Documentation... 2 Licensing... 2 requirements... 2 2. product overview... 3 features... 3 Advantages of BackupAssist... 4 limitations... 4 3. Backup considerations...
Attix5 Pro Storage Platform Console
 Attix5 Pro Storage Platform Console V7.0.1 User Manual for Microsoft Windows Your guide to managing the Attix5 Pro backup environment using the Storage Platform Console. 0 Copyright notice and proprietary
Quick Start Guide. Kaseya 2009
 Agent Configuration and Deployment Quick Start Guide Kaseya 2009 February 13, 2010 About Kaseya Kaseya is a global provider of IT automation software for IT Solution Providers and Public and Private Sector
File Protection. Whitepaper
 Whitepaper Contents 1. Introduction... 2 Documentation... 2 Licensing... 2 Modes of operation... 2 Single-instance store... 3 Advantages of... 3 2. Backup considerations... 4 Exchange VM support... 4 Restore
DOWNLOAD PDF SQL SERVER 2012 STEP BY STEP
 Chapter 1 : Microsoft SQL Server Step by Step - PDF Free Download - Fox ebook Your hands-on, step-by-step guide to building applications with Microsoft SQL Server Teach yourself the programming fundamentals
Backup Table of Contents:
 Table of Contents: Manage Tickets Configure Ticketing 362 Chapter 10 - Sadjadi et al. Introduction The need for an accurate, easy to use and secure backup and recovery system is well recognized. The success
Kaseya 2. User Guide. Version 7.0. English
 Kaseya 2 Desktop Management User Guide Version 7.0 English September 3, 2014 Agreement The purchase and use of all Software and Services is subject to the Agreement as defined in Kaseya s Click-Accept
StarWind iscsi Target for Microsoft Windows: Using StarWind iscsi Target and VMware Workstation Virtual Machines
 Using StarWind iscsi Target and VMware Workstation Virtual Machines May 1, 2007 Rocket Division Software www.rocketdivision.com Copyright Rocket Division Software 2001-2007. All rights reserved. Page 1
Veritas Storage Foundation and High Availability Solutions Quick Recovery Solutions Guide for Microsoft SQL 2008
 Veritas Storage Foundation and High Availability Solutions Quick Recovery Solutions Guide for Microsoft SQL 2008 Windows Server 2003, Windows Server 2008 5.1 Application Pack 1 Veritas Storage Foundation
HC3 Move Powered by Carbonite
 HC3 Move Powered by Carbonite Quickstart Guide Document Version 1.2: 07/2018 Scale Computing 2018 1 Table of Contents Introduction 6 Terminology 6 Requirements 7 Carbonite Move 7 Scale Computing HC3 7
SnapCenter Software 4.1. Administration Guide. December _C0 Updated for 4.1.1
 SnapCenter Software 4.1 Administration Guide December 2018 215-13391_C0 doccomments@netapp.com Updated for 4.1.1 Table of Contents 3 Contents Deciding whether to read the SnapCenter Administration information...
Sage 300 Construction and Real Estate (formerly Sage Timberline Office)
") Sage 300 Construction and Real Estate (formerly Sage Timberline Office) Version 16.1 User's Guide This is a publication of Sage Software, Inc. 2017 The Sage Group plc or its licensors. All rights reserved.
Sage 300 Construction and Real Estate (formerly Sage Timberline Office) Version 16.1 User's Guide This is a publication of Sage Software, Inc. 2017 The Sage Group plc or its licensors. All rights reserved.
Chapter Title. Time Warner Cable Business Class Online Backup. Windows User Guide. Version 2.6
 Chapter Title Time Warner Cable Business Class Online Backup Windows User Guide Version 2.6 Table of Contents Table of Contents... 2 Chapter 1: About This Guide... 3 Chapter 2: Getting Started...4 Installing
LexisNexis PCLaw Installation & Upgrade Guide
 LexisNexis PCLaw Version 16 2017 LexisNexis All rights reserved. Copyright 2017 LexisNexis. All rights reserved. No part of this work may be reproduced or transmitted in any form or by any means, electronic
Data Protection Guide
 SnapCenter Software 4.0 Data Protection Guide For Microsoft Exchange Server March 2018 215-12936_C0 doccomments@netapp.com Table of Contents 3 Contents Deciding whether to read the SnapCenter Data Protection
This Quick Start describes how to use Bocconi Cloud Service, called Filr in the rest of the document, from your Windows desktop.
 Quick Start Bocconi Cloud Service, based on Novell Filr, allows you to easily access all your files and folders from your desktop, browser, or a mobile device. In addition, you can promote collaboration
Veritas System Recovery 16 Management Solution Administrator's Guide
 Veritas System Recovery 16 Management Solution Administrator's Guide Documentation version: 2017 Legal Notice Copyright 2017 Veritas Technologies LLC. All rights reserved. Veritas and the Veritas Logo
Configuring ApplicationHA in VMware SRM 5.1 environment
 Configuring ApplicationHA in VMware SRM 5.1 environment Windows Server 2003 and 2003 R2, Windows Server 2008 and 2008 R2 6.0 September 2013 Contents Chapter 1 About the ApplicationHA support for VMware
Sage 300 Construction and Real Estate (formerly Sage Timberline Office)
") Sage 300 Construction and Real Estate (formerly Sage Timberline Office) Version 17.1 User's Guide This is a publication of Sage Software, Inc. 2017 The Sage Group plc or its licensors. All rights reserved.
Sage 300 Construction and Real Estate (formerly Sage Timberline Office) Version 17.1 User's Guide This is a publication of Sage Software, Inc. 2017 The Sage Group plc or its licensors. All rights reserved.
DISK DEFRAG Professional
 auslogics DISK DEFRAG Professional Help Manual www.auslogics.com / Contents Introduction... 5 Installing the Program... 7 System Requirements... 7 Installation... 7 Registering the Program... 9 Uninstalling
Quick Start Guide TABLE OF CONTENTS COMMCELL ARCHITECTURE OVERVIEW COMMCELL SOFTWARE DEPLOYMENT INSTALL THE COMMSERVE SOFTWARE
 Page 1 of 35 Quick Start Guide TABLE OF CONTENTS This Quick Start Guide is designed to help you install and use a CommCell configuration to which you can later add other components. COMMCELL ARCHITECTURE
NovaBACKUP Virtual Dashboard
 June 2016 NovaBACKUP Virtual Dashboard User Manual Features and specifications are subject to change without notice. The information provided herein is provided for informational and planning purposes
What's Different in Backup Exec 2012
 What's Different in Backup Exec 2012 What's different in Backup Exec 2012 This document includes the following topics: Changes to the user interface for Backup Exec 2012 Changes to terminology for Backup
DocAve for Salesforce 2.1
 DocAve for Salesforce 2.1 This document is intended for anyone wishing to familiarize themselves with the user interface and basic functionality of AvePoint s DocAve for Salesforce tool. System Requirements
Lasso Continuous Data Protection Lasso CDP Client Guide August 2005, Version Lasso CDP Client Guide Page 1 of All Rights Reserved.
 Lasso CDP Client Guide August 2005, Version 1.6.8 Lasso CDP Client Guide Page 1 of 32 Copyright Copyright 2005 Lasso Logic, LLC. All Rights Reserved. No part of this publication may be reproduced, stored
Instruction manual. Swap-Automate. Oracle Cloud Backup and Restore Manager. This instruction manual describes how to use
 Instruction manual Swap-Automate Oracle Cloud Backup and Restore Manager This instruction manual describes how to use the Swap-Automate Oracle Cloud Backup and Restore manager application. Version 1.1
DISCLAIMER Whilst every effort has been made
 PUBLISHED BY Gallagher Group Limited Kahikatea Drive, Private Bag 3026 Hamilton, New Zealand www.gallagherams.com Copyright Gallagher Group Limited 2011. All rights reserved. Patents Pending. MyScale Pro
Mozy User Guide Document Revision Date: Sept. 18, 2013
 Mozy User Guide Document Revision Date: Sept. 18, 2013 Mozy User Guide i Contents Overview... 1 Installing Mozy... 2 Using the Settings Window... 3 Select Files to Back Up with the File System Tab... 10
Apptix Online Backup by Mozy User Guide
 Apptix Online Backup by Mozy User Guide 1.10.1.2 Contents Chapter 1: Overview...5 Chapter 2: Installing Apptix Online Backup by Mozy...7 Downloading the Apptix Online Backup by Mozy Client...7 Installing
INSTALLATION AND SET UP GUIDE
 INSTALLATION AND SET UP GUIDE This guide will help IT administrators to install and set up NVivo Server. It provides step by step instructions for installing the software, configuring user permissions
Step by Step SQL Server Alerts and Operator Notifications
 Step by Step SQL Server Alerts and Email Operator Notifications Hussain Shakir LinkedIn: https://www.linkedin.com/in/mrhussain Twitter: https://twitter.com/hshakir_ms Blog: http://mstechguru.blogspot.ae/
Kaseya 2. User Guide. Version R8. English
 Kaseya 2 Backup User Guide Version R8 English September 19, 2014 Agreement The purchase and use of all Software and Services is subject to the Agreement as defined in Kaseya s Click-Accept EULATOS as updated
1. Initial Setting and Installation of ActiveVisor... 1
 ActiveVisor Startup Guide 1 st Edition August, 2018 Contents 1. Initial Setting and Installation of ActiveVisor... 1 1.1 System Requirements... 1 1.2 Installation of ActiveVisor... 2 1.3 Initial Settings
Veritas Storage Foundation and High Availability Solutions Release Notes
 Veritas Storage Foundation and High Availability Solutions Release Notes Windows Server 2003, Windows Server 2008 5.1 Application Pack 1 Veritas Storage Foundation and High Availability Solutions Release
Sage 300 Construction and Real Estate (formerly Sage Timberline Office)
") Sage 300 Construction and Real Estate (formerly Sage Timberline Office) Version 18 User's Guide This is a publication of Sage Software, Inc. 2018 The Sage Group plc or its licensors. All rights reserved.
Sage 300 Construction and Real Estate (formerly Sage Timberline Office) Version 18 User's Guide This is a publication of Sage Software, Inc. 2018 The Sage Group plc or its licensors. All rights reserved.
Backup Exec 12 Icons Glossary
 Backup Exec 12 Icons Glossary Action icons Alert icons Backup Exec Service Manager icons DB2 backup and restore icons DPM restore icons Exchange backup and restore icons Install icons Job List icons Lotus
Veriato Recon / 360. Version 9.0.3
 Veriato Recon / 360 Version 9.0.3 1/3/2018 Upgrade Guide January 3, 2018 Table of Contents Before You Begin... 1 What's New... 1 How the System Works... 1 Upgrade Support... 6 Update Antivirus Exclusions...
StarWind Virtual SAN. HyperConverged 2-Node Scenario with Hyper-V Cluster on Windows Server 2012R2. One Stop Virtualization Shop MARCH 2018
 One Stop Virtualization Shop StarWind Virtual SAN HyperConverged 2-Node Scenario with Hyper-V Cluster on Windows Server 2012R2 MARCH 2018 TECHNICAL PAPER Trademarks StarWind, StarWind Software and the
User Manual. Active Directory Change Tracker
 User Manual Active Directory Change Tracker Last Updated: March 2018 Copyright 2018 Vyapin Software Systems Private Ltd. All rights reserved. This document is being furnished by Vyapin Software Systems
Therefore, before you can use the Microlog Inspector application for the first time, you must perform the following steps:
 SKF Microlog Inspector Setup Guide Microlog Inspector setup overview The new Microlog Inspector application uses a different, much easier communication method than previous MARLIN versions. With the new
Sun VirtualBox Installation Tutorial
 Sun VirtualBox Installation Tutorial Installing Linux Mint 5 LTS Guest OS By Dennis Berry Welcome to the world of virtualization and Linux. This tutorial is intended to help users who are new to the world
File Archiving. Whitepaper
 Whitepaper Contents 1. Introduction... 2 Documentation... 2 Licensing... 2 requirements... 2 2. product overview... 3 features... 3 Advantages of BackupAssist... 4 limitations... 4 3. Backup considerations...
Lesson Objectives. Benefits of Using DPM. After completing this lesson, you will be able to:
 Protecting Virtualization Infrastructure by Using DPM Building a robust protection solution for your virtualization infrastructure is as import ant as building the solution itself. This lesson provides
Dell SupportAssist Version 1.0 For Microsoft System Center Operations Manager User's Guide
 Dell SupportAssist Version 1.0 For Microsoft System Center Operations Manager User's Guide Notes, Cautions, and Warnings NOTE: A NOTE indicates important information that helps you make better use of your
Upgrade Instructions. Note
 Upgrade Instructions Prior to upgrading, please review the following: Before running an upgrade, make sure to back up your existing installation using the Backup option on the Tools menu. If you are upgrading
CASPER SECURE DRIVE BACKUP
 TM CASPER SECURE DRIVE BACKUP FOR PGP WHOLE DISK ENCRYPTION USER GUIDE V3.0 TM Copyright and Trademark Information Information in this document is subject to change without notice. Federal law prohibits
Features - Microsoft Data Protection Manager
 Page 1 of 36 Features - Microsoft Data Protection Manager TABLE OF CONTENTS OVERVIEW NEW FEATURES SYSTEM REQUIREMENTS SUPPORTED FEATURES GETTING STARTED - DATA PROTECTION MANAGER DEPLOYMENT GETTING STARTED
PROMISE ARRAY MANAGEMENT ( PAM) FOR FastTrak S150 TX2plus, S150 TX4 and TX4000. User Manual. Version 1.3
 FOR FastTrak S150 TX2plus, S150 TX4 and TX4000. User Manual. Version 1.3") PROMISE ARRAY MANAGEMENT ( PAM) FOR FastTrak S150 TX2plus, S150 TX4 and TX4000 User Manual Version 1.3 Promise Array Management Copyright 2003 Promise Technology, Inc. All Rights Reserved. Copyright by
PROMISE ARRAY MANAGEMENT ( PAM) FOR FastTrak S150 TX2plus, S150 TX4 and TX4000 User Manual Version 1.3 Promise Array Management Copyright 2003 Promise Technology, Inc. All Rights Reserved. Copyright by
Dell Flexible Computing Solutions: Deploying On-Demand Desktop Streaming
 Dell Flexible Computing Solutions: Deploying On-Demand Desktop Streaming Product Group November 2007 Dell White Paper November 2007 Contents Introduction... 3 Overview... 4 Planning the Deployment... 5
Protecting Virtual Environments with System Center Data Protection Manager 2010
 Protecting Virtual Environments with System Center Data Protection Manager 2010 Published: February 2010 For the latest information, please see www.microsoft.com/dpm/virtualization Executive Summary: Microsoft
SIMATIC Automation License Manager Manual 02/2008 A5E
 s Contents SIMATIC Automation License Manager Product Overview 1 Installation 2 Working with the Automation License Manager 3 Glossar Index Manual 02/2008 A5E02128430-01 Safety Guidelines This manual contains
Danfoss Remote Management Tool RMT Version 4.x
 User Guide Danfoss Remote Management Tool RMT Version 4.x ADAP-KOOL Refrigeration Control System Document history Document USCO.PI.R1.D1.02 Notes First document release (based on version 3.0 RMT) USCO.PI.R1.D3.02
Veritas Storage Foundation and High Availability Solutions Quick Recovery and Microsoft Clustering Solutions Guide for Microsoft Exchange
 Veritas Storage Foundation and High Availability Solutions Quick Recovery and Microsoft Clustering Solutions Guide for Microsoft Exchange Windows Server 2003 Windows Server 2008 5.1 Veritas Storage Foundation
Vyapin Virtualization Management Suite
 Vyapin Virtualization Management Suite Last Updated: June 2016 Copyright 2016 Vyapin Software Systems Private Limited. All rights reserved. This document is being furnished by Vyapin Software Systems Private
File Protection using rsync. User guide
 File Protection using rsync User guide Contents 1. Introduction... 2 Documentation... 2 Licensing... 2 Overview... 2 2. Rsync considerations... 3 3. Creating a File Protection backup using rsync... 4 4.
Drake Hosted User Guide
 Drake Hosted User Guide Last Revision Date: 1/2/2017 Support.DrakeSoftware.com (828) 524-8020 Drake Hosted User Guide Copyright The Drake Hosted User Guide, Drake Tax Software, and any other related materials
Edit contains commands for adding, deleting, and changing configurations. The functions listed are dependent on what is highlighted in the tree.
 7 Menu Items 7.1 Edit Edit contains commands for adding, deleting, and changing configurations. The functions listed are dependent on what is highlighted in the tree. 7.1.1 Add Terminal Edit > Add Terminal
Version 4.1 June Xerox Device Agent (XDA) Lite User Guide
 Lite User Guide") Version 4.1 June 2013 Xerox Device Agent (XDA) Lite User Guide 2008-2013 Xerox Corporation. All rights reserved. Xerox and Xerox and Design are trademarks of Xerox Corporation in the US and/or other countries.
Version 4.1 June 2013 Xerox Device Agent (XDA) Lite User Guide 2008-2013 Xerox Corporation. All rights reserved. Xerox and Xerox and Design are trademarks of Xerox Corporation in the US and/or other countries.
NovaBACKUP. User Manual. NovaStor / May 2014
 NovaBACKUP User Manual NovaStor / May 2014 2014 NovaStor, all rights reserved. All trademarks are the property of their respective owners. Features and specifications are subject to change without notice.
Data Protection Guide
 SnapCenter Software 2.0 Data Protection Guide For Windows File Systems January 2017 215-11356_A0 doccomments@netapp.com Table of Contents 3 Contents Deciding whether to read this information... 5 SnapCenter
Configuring the SMA 500v Virtual Appliance
 Using the SMA 500v Virtual Appliance Configuring the SMA 500v Virtual Appliance Registering Your Appliance Using the 30-day Trial Version Upgrading Your Appliance Configuring the SMA 500v Virtual Appliance
VMware vrealize Operations for Horizon Administration. Modified on 3 JUL 2018 VMware vrealize Operations for Horizon 6.4
 VMware vrealize Operations for Horizon Administration Modified on 3 JUL 2018 VMware vrealize Operations for Horizon 6.4 You can find the most up-to-date technical documentation on the VMware website at:
Repstor affinity. Installation and Configuration Guide(Generic)
") Repstor affinity Installation and Configuration Guide(Generic) Document Version 3.7 April 2018 Contents 1. INTRODUCTION TO REPSTOR AFFINITY 3 ADVANTAGES OF REPSTOR AFFINITY... 3 2. REPSTOR AFFINITY INSTALLATION
Repstor affinity Installation and Configuration Guide(Generic) Document Version 3.7 April 2018 Contents 1. INTRODUCTION TO REPSTOR AFFINITY 3 ADVANTAGES OF REPSTOR AFFINITY... 3 2. REPSTOR AFFINITY INSTALLATION
Colligo Engage Outlook App 7.1. Offline Mode - User Guide
 Colligo Engage Outlook App 7.1 Offline Mode - User Guide Contents Colligo Engage Outlook App 1 Benefits 1 Key Features 1 Platforms Supported 1 Installing and Activating Colligo Engage Outlook App 3 Checking
Vendor: Symantec. Exam Code: Exam Name: Administration of Symantec Backup Exec Version: Demo
 Vendor: Symantec Exam Code: 250-316 Exam Name: Administration of Symantec Backup Exec 2012 Version: Demo QUESTION 1 Which Symantec Backup Exec 2012 troubleshooting tool should an end user use before contacting
StarWind Virtual SAN Installation and Configuration of HyperConverged 2 Nodes with Hyper-V Cluster
 #1 HyperConverged Appliance for SMB and ROBO StarWind Virtual SAN of HyperConverged 2 Nodes with Hyper-V Cluster AUGUST 2016 TECHNICAL PAPER Trademarks StarWind, StarWind Software and the StarWind and
Filr 3.3 Desktop Application Guide for Linux. December 2017
 Filr 3.3 Desktop Application Guide for Linux December 2017 Legal Notice For information about legal notices, trademarks, disclaimers, warranties, export and other use restrictions, U.S. Government rights,