Series Operator s Guide Rev.:
|
|
|
- Annabella Wilkinson
- 6 years ago
- Views:
Transcription


1 Series Operator s Guide Rev.:
2 Copyright Notice Copyright by MF DIGITAL. All rights reserved. This manual and the accompanying illustrations may not be copied, reproduced, electronically transmitted, or translated into another language, in whole, or in part, without the written consent of MF DIGITAL MF DIGITAL, - Scribe, -SA, Baxter, Director, and 5906-Live are trademarks of MF DIGITAL Other trademarks referred to are the property of their respective trademark or registered trademark holders. Warranty MF DIGITAL warrants to the original purchaser that the equipment that you have purchased is free from defects in materials and workmanship, for a period of time as follows: Duplicator Electronics & Mechanical Parts Recorders (warranty by drive manufacturer) Prism Plus Thermal Printer PicoJet Inkjet CD/DVD Printer 1 year 1 year 6 Months 1 year limited warranty This warranty is applicable when the warranty registration has been completed and returned to MF DIGITAL within a reasonable period of time following the purchase and the warranty is NOT transferable. This warranty does not apply to malfunctions caused by misuse, negligence, accident, or alteration, nor is MF DIGITAL responsible for consequential damages related to the use of this equipment. This warranty is made in lieu of any other warranty expressed or implied. Recorder Warranty Policy Individual recorders manufacturers are responsible for the products they produce. As a convenience, MF DIGITAL will honor any service issue related to a defective recorder or printer while under its respective manufacturer s warranty providing that the recorder has been purchased from MF DIGITAL either directly or indirectly. MF DIGITAL has no responsibility for products NOT purchased through MF DIGITAL Piracy The copying of audio, video, or software without the permission of the copyright holder is illegal. MF DIGITAL accepts no responsibility for the copyright use or misuse of this equipment. It is the sole responsibility of the user to ensure that the legal rights of copyright in duplicating and printing are respected. 121 Carolyn Blvd. Farmingdale, NY Tel.: (001) Fax.: (001) info@mfdigita.com Page 1
3 Table of Contents ABOUT MF DIGITAL...5 WHAT TO EXPECT FROM YOUR MF DIGITAL CD DUPLICATION SYSTEM...5 ABOUT THIS MANUAL...5 FEATURES OF THE SCRIBE...5 INSTALLING THE SCRIBE...6 WHAT S IN THE BOX...6 WHAT YOU WILL ALSO NEED:...6 OPTIONS...6 PACKING MATERIALS...7 THE BEST PLACE TO PUT THE SCRIBE...7 SAFETY PRECAUTIONS...7 REMOVING PACKING RESTRAINTS...8 INPUT AND OUTPUT SPINDLES...8 MAKING THE CONNECTION...8 STARTING UP...9 INSTALLING THE SCRIBE SOFTWARE...10 QUICK START, MAKING COPIES...14 STARTING THE SCRIBE APPLICATION...14 A note about Ignore Low Ink Level...16 THE SCRIBE APPLICATION...17 STARTING THE APPLICATION...17 Selecting STANDARD or ADVANCED mode...17 SCRIBE APPLICATION LAYOUT...19 Reviewing and changing the settings...19 Settings Editor...20 Application Temp Folder...21 CD / DVD IMAGES DEFAULT FOLDER...21 CD LABELS DEFAULT FOLDER...21 PRINTER DRIVER...21 SPINDLE SELECT...21 SHAKE DISC...22 DATA IMAGE EDITOR...23 CREATING A DATA DISC IMAGE...23 IMAGE TOOLBAR...24 SELECTING CD CAPACITY...25 ADDING FILES AND FOLDERS...25 CREATING, RENAMING, AND REMOVING FOLDERS...25 STATIC AND DYNAMIC CONTENT...26 SAVING THE CURRENT DISC IMAGE FILE...27 Editing Image properties...27 To create a physical disc image file:...29 Page 2
4 LOADING AN EXISTING SCRIPT FILE...29 AUDIO IMAGE EDITOR...30 AUDIO IMAGE EDITOR TOOLBAR...31 ADDING TRACKS...32 REMOVING TRACKS...32 CHANGING A UPC CODE...33 CHANGING ISRC CODES AND COPY PROHIBIT FLAGS...33 INSERTING, EDITING AND REMOVING SILENCE...35 INSERTING, EDITING AND REMOVING SUBINDEXES...36 SAVING THE CURRENT AUDIO DISC IMAGE...37 To create a physical audio disc image file (.IMG):...37 LOADING AN EXISTING SCRIPT FILE...38 JOB MANAGER TAB...39 THE PRODUCTION PROCESS...40 CREATING A JOB...40 ARCHIVE ONLY READING IN A MASTER DISC...42 COPY AND / OR VERIFY...44 RELAY MODE JOB...46 PRINT ONLY JOB...48 MULTI-DISC ARCHIVE READING IN SEVERAL MASTERS AT A TIME...49 DATA IMPORT RIPPING DATA CDS OR DVDS...51 LOG FILES...53 JOB.LOG...53 JOB.LOG.CSV...53 NETWORK CLIENT SOFTWARE...55 CLIENT PC MINIMUM REQUIREMENTS:...55 INSTALLING THE CLIENT SOFTWARE...55 USING THE CLIENT SOFTWARE...56 APPENDIX A: CREATING.PRN FILES (PRISM PLUS)...58 PRINTER DRIVER SETUP...58 MAKING A.PRN LABEL FILE...58 APPENDIX B: CREATING.PRN FILES (PICOJET)...60 PRINTER DRIVER SETUP...60 MAKING A.PRN LABEL FILE...61 APPENDIX C: CREATING & USING ADOBE ACROBAT PDF FILES...64 APPENDIX D...66 HOW TO SETUP SURETHING CD LABELER TO MERGE WITH A CSV DOCUMENT...66 CREATING YOUR DATA MERGE FILE (CSV)...67 USING HEADERS IN YOUR CSV DOCUMENT...71 CLIENT AND STD FILES WITH MERGE...73 SERIALIZATION...74 APPENDIX E: PREMIUM UTILITIES...75 RIPTASTIC FOR MF DIGITAL...75 BACK-UP PLATINUM FOR MF DIGITAL...76 Page 3
5 ORDERING PREMIUM UTILITIES...76 INSTALLING ADD-ON APPLICATIONS...76 BECOMING AN ADD-ON DEVELOPER APPENDIX F: SCRIBE ALIGNMENT UTILITY...77 Page 4
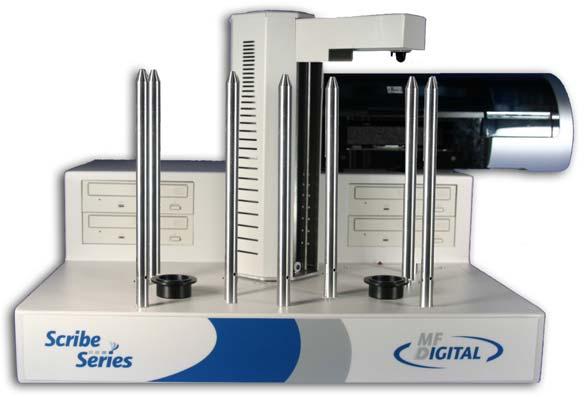
6 About MF DIGITAL Thank you for purchasing MF Digital s autoloading duplication and printing system. MF DIGITAL manufactures a wide variety of software and audio duplication and production equipment, including manual and fully automatic CD and DVD duplicators and printers. We hope you will consider us for all of your production needs. What To Expect From Your MF DIGITAL CD Duplication System Your MF DIGITAL Scribe duplication system is professionally designed and manufactured to give you years of trouble free operation. To avoid accidental damage to your new duplication system, please read and understand this manual thoroughly before operating the unit. About This Manual This manual is written for both novice and experienced users. Please read through this Operator s Guide from beginning to end before using the unit. Once having read the manual, follow along chapter by chapter. This will provide the necessary understanding of your new Scribe duplication system. Features of the Scribe The Scribe Series of copiers is the most advanced series of copiers available today. Features Include: Networkable: Ethernet onboard, comes complete with unlimited seat Windows Network Client. Heavy-duty robotics, as well as the fastest robotics, makes for the ideal copier for those mission critical applications. Copies virtually any CD or DVD. PC Built-in: No need to buy an additional PC, or the need to open up your existing PC to install cards and tackle compatibility issues. Unlimited queue: Queue up as many jobs as you like; copy, copy & print, print only, or even data-import jobs. Pre-master from files or batch read: Read in one master or many at a time to image files. Use these image files for later copying. Spindle select: load with both CDs and DVDs and the unit will pick the appropriate disc. Data-import: In addition to image file creation, you can copy the contents of multiple Windows readable CDs or DVDs as files and folders to a user defined local or network location. Flexible printing: Support for both thermal, and ink jet printing. No need to make hardware dedicated PRNs like competitive copiers. Use Adobe PDF, SureThing STD, or PRN files for your print source. Print unique content: Use merge field in your SureThing (included) STD file to print serial numbers, unique text like customers names on each disc. Relay mode: Make multiple copies of multiple masters including print. Page 5
7 Installing The Scribe Carefully remove the Scribe duplication system from the shipping container. Inspect the contents and verify them against the packing slip. Report any errors in shipping as soon as possible. The Scribe is available as a copy only system, or both a copy and print system. What s In The Box Your Scribe CD / DVD duplication system has a PC onboard, so there is no need to buy or dedicate a PC to operate it. The package includes: Scribe duplication system Power cord Scribe Software / Manual CD What you will also need: PC compatible VGA Monitor (if LCD, use an analog one) PC Mouse (P/S2 Style recommended) PC Keyboard (P/S2 Style recommended) Options Disc label printers: Supported models include the MF Digital PicoJet thermal inkjet printer, and the Prism Plus Thermal Printer. MP3 / WMA audio CD batch ripping software Hard disk back-up software 80mm and BizCDs autoloader and printer adapters. Page 6
8 Packing Materials Please retain the original box and packaging in the event that the unit requires future servicing. This will help to reduce the possibility of damage occurring in transit. In the event that the system is shipped back to MF DIGITAL without the original box and packaging, customers will be charged for new box and packaging. The Best Place To Put The Scribe The best operating location for the Scribe duplication system is in a climate controlled area, free of dirt, dust, humidity, excessive heat, and electronic or electromagnetic interference. Room temperature should be between 65 and 75 degrees Fahrenheit, or between 18 and 23 degrees Celsius. Place the Scribe on a solid, steady work surface and allow sufficient room for all incidental work materials. Provide at least six inches of clearance on all sides of the unit for ventilation. Like all automated copiers, the uses photo sensors that can be adversely affected by direct light sources. Avoid placing the system in direct sunlight, under halogen or mercury vapor lights, or other close and very bright light sources. If your is behaving erratically, and it is in close proximity to bright light, or focused lighting such as spot lights, try moving it to an area with more subdued lighting. If the unit operates normally, then you may need to remove or adjust the light source, or relocate the to a different spot. Safety Precautions The system is shipped with a three-prong power connector and must be used with a properly grounded AC receptacle. DO NOT try to defeat the third ground prong. All computer peripherals must be properly grounded and the Scribe is no exception. The use of a power conditioner such as an Uninterruptible Power Supply (UPS), or a surge protector is highly recommended. The minimum required size is 400VA. Repairs or alterations should only be attempted by authorized factory trained technicians. MF DIGITAL reserves the right to void the warranty if unauthorized service is performed. Page 7

9 Removing Packing Restraints The Scribe ships with a picker arm restraint to reduce the possibility of damage in transit. This restraint must be removed before operation or power-on. Remove the foam block above the transfer arm. Save the foam block, as you will need to return it to its place when transporting the unit in the future. Input And Output Spindles The input areas and output spindle serve as the containers to store the blank and recorded discs. Spindle capacity ranges from 250 discs to 600 discs depending on model and setup. Making the connection The Scribe requires a Monitor, Keyboard, and mouse to use it properly. While these items are not included, they are readily available and standard PC components. Make sure the Scribe power switch is set to the off position. Please connect you monitor, keyboard, and mouse now, then connect the AC power cord in to the receptacle at the rear of the unit, and the other end into the wall or UPS power outlet. CAUTION Always use properly grounded receptacles, or severe damage to your system may result. The use of a surge protector or Uninterruptible Power Supply (UPS) is highly recommended. Page 8
10 Starting Up If equipped, switch on the power to the printer With PicoJet let print cartridges park. Switch the Scribe power switch to on position. Note: The Scribe uses Microsoft s Windows XP operating system. To get the most out of the Scribe it is recommended that users supplement this manual with an operating system guide. Page 9

 where D represents the letter of the drive you have placed the disc in.")
11 Installing the Scribe Software YOU LIKELY CAN SKIP THIS STEP Your Scribe 910x came pre-loaded with the software already installed. If for any reason you wish to re-install, it is recommended you remove the old version first. To install the Scribe software: Insert the Scribe software CD into one of the drives on the Scribe drive tower. Click on Start/Run. In the Open text box, type D:\_EC_setup.exe (D=Disc Drive) where D represents the letter of the drive you have placed the disc in. Then, click on OK and the installer screen will appear: Page 10


12 Click NEXT to continue If you accept the terms of the license agreement, select I accept then click NEXT to continue. Page 11

13 Click NEXT to continue, or CHANGE to install to a location other than the default. Click INSTALL to continue. Page 12


14 Please wait while the Scribe software is copied to your hard drive. Installation is complete. Click FINISH. Page 13
15 Quick Start, Making Copies Starting the Scribe Application To start the Scribe application the steps are as follows: From the desktop of the computer, click the MF Digital Scribe Icon The Scribe application screen will now be displayed: Place some blank CDs or DVDs into the input hopper followed by the master CD or DVD you wish to copy. If the master is a DVD you must use DVD blanks. If the master is a CD, you must use CD blanks. The Scribe will not convert between types. Click the NEW button to start a new job. The following dialog box to the right will be displayed: Page 14
16 Select Copy and/or verify and then click NEXT. You will now be prompted: Enter the desired number of copies in the Quantity box. If you system is equipped with a printer, you may also check Print. If you do so, be sure you have prepared a PRN file as detailed in the section entitled Creating.PRN Files. Optionally, you may use a SureThing.STD file (See appendix on SureThing Files and merge fields), or an Adobe Acrobat PDF files. Adobe PDF files should be made as ded in Creating & Using Adobe Acrobat PDF Files. Also, be sure your printer is attached as ded in the manual that accompanied your printer, and is selected on the Settings TAB. When you satisfied with your selections, click NEXT. If you selected PRINT, the following dialog will appear: Page 15
 and / or Ignore low ink level.")

17 Click on browse and locate the PRN, STD, or PDF file to be used. Enter the desire number of copies and optionally select Print before copying / verifying (for use when using BizCDs and BizCD adapter) and / or Ignore low ink level. A note about Ignore Low Ink Level Competitive systems continue to attempt to print even when cartridges have run out, resulting in ruined discs. PicoJet equipped Scribe systems will stop at 4% remaining ensuring you will not waste discs. Optionally you can choose to ignore this safeguard to glean the last few discs out of a cartridge. When you re satisfied with your choices, click on Next to continue: Use the default Job Name or enter your own such as a work order number. Click FINISH when you are ready. The Jobs in Progress section of the Job Manager TAB will now show the status of the job you just started. The will now load the master disc into the drive. Once read-in successfully, it will accept the master disc to the output hopper and then load the first blank disc to begin duplication. Page 16
18 The Scribe Application The Scribe is a state-of-the-art CD / DVD duplicating system. It is designed to create, duplicate and verify most standard disc formats. This startup section will guide you through starting and configuring the Scribe application. Starting the Scribe Application To start the Scribe application the steps are as follows: From the desktop of the computer, click the MF Digital Scribe Icon The Scribe application screen will now be displayed: Selecting STANDARD or ADVANCED mode When first started, you are in standard. Standard mode is best suited for those who do duplication only and are not pre-mastering from files. The Scribe can pre-master audio CDs from WAV, or MP3, data DVDs and CDs from local files and network files, as well as DVD Video discs from previously authored VIDEO_TS folders. If you wish to pre-master any of these types of discs, you will need to Scribe s Advanced Authoring Tools. To do so: Page 17

19 Click on the Settings TAB now: Click on and three new TABs will be revealed: You may toggle between these modes, simply by enabling and disabling the Advanced Authoring Tools. Page 18
20 Scribe Application Layout The Scribe application is organized into either two or five cards, depending on if Advance Authoring Tools enabled. These cards, referred to as TABs, are accessible by clicking on the desired TAB on the top of the screen. Tabs include Job Manager, Data Image Editor, Audio Image Editor, Settings, and Premium Utilities. By completing the information on these cards, you control the actions of the Scribe to create, duplicate and verify CDs as well as print disc labels. Tabs: Job Manager Data Image Editor* Audio Image Editor* Settings Premium Utilities* This is where jobs are started. The status of all jobs pending, in progress, and completed are displayed here. On this TAB you can pre-master a data CD or DVD as well as a DVD Video disc from a pre-existing VIDEO_TS folder. This TAB allows you to pre-master an audio CD from WAV or MP3 files. Defines settings and default file locations. add-in plug-ins can be found here. They include batch audio CD ripping to MP3, WMA, FLAC, AIF, or WAV, and hard disk back-up software. *Accessible only when Advanced Authoring Tools are enabled on the Settings TAB. Reviewing and changing the settings Before we get started, it is best to visit the Settings TAB to ensure your system is setup correctly. If you purchased your unit and printer at the same time, then you should already be set-up correctly as we pre-configure units at the factory. If the printer was bought later, or separately for some reason, then you will need to select the installed printer. The Settings TAB allows you to do this. Click the Settings tab Page 19


21 The Settings tab is divided into four areas: Version Information, Default folders, Printer, and Communication Ports. The field closest to the top of the tab is the Scribe s version information. This lets you know what version of Scribe you are currently running. The settings below the version information may be customized. The following section illustrates this procedure. Settings Editor From the Settings tab, click the Change Settings button and the following screen will be displayed. Page 20
22 Application Temp Folder To choose an application temp folder, click the Browse button to the right of the Application TEMP folder field. This folder is a temporary location for your CD image to reside before and during duplication. After job completion, the image is removed. Note: You should have 10GB of free space on your hard drive specifically for this folder. The folder should always reside on a drive formatted NTFS and never FAT32 or FAT16. CD / DVD Images Default Folder To choose a default folder for your CD and DVD images, click the Browse button to the right. When creating a new job, this will be the default folder that the Scribe opens to browse for an image file path. CD Labels Default Folder To choose a default folder for your CD labels, click the Browse button to the right of the CD labels default folder field. When creating a new job, this will be the default folder that the Scribe opens to browse for a label file path. Printer Driver The PRINTER DRIVER pull-down is used to indicate to the Scribe the type of printer that is installed. Click the PRINTER DRIVER pull down and select the type of printer being used. Spindle Select When enabled, SPINDLE SELECT allows you to assign one input spindle for DVD-R and one for CD-R. This is useful when submitting multiple jobs or when the Scribe is being shared amongst network users. When a job requiring CD blanks is started, the Scribe will know from which spindle to Page 21
23 draw blank CD-R media. Likewise, when a job requiring DVD blanks is submitted, the Scribe will know to which spindle contains DVD-R/+R media. Be sure to fill input spindles only half full, as the first input cannot double as both an input and output spindle an output spindle Check the box to enable Spindle Select mode. Note: Capacity is halved in this mode. Fill input spindles only half full. Since the first input spindle cannot double for output as it would when Spindle Select mode is disabled. The output will overflow if you fail to do so. Shake Disc When enabled, SHAKE DISC will perform a slight shaking motion with each pick of disc from an input hopper. If the discs are somewhat sticky, this can help in separating them. Only enable this in the event you have sticky media. Check the box to enable SHAKE DISC Note: When loading blank CDs or DVDs, it is a good idea to fan out the discs. If discs are excessively sticky, it is best to source a different brand or part number. Media made with proper lacquer curing times will minimize this effect. Page 22

24 Data image editor The first step in constructing a CD or DVD is to create an image file. Image files may be made by reading in a physical master, or by pre-mastering the disc in the Data or Audio Imager Editors. The Scribe creates industry standard data (Mode 1 ISO 9660 level 2 with Joliet extensions) and audio (Red Book) CDs from scratch as well as duplicates of existing CDs authored in most formats. Creating a data disc image To create a data disc image: Click the Data Image Editor tab. The screen will now read: The Data Image Editor tab is divided into four panes. The top left pane lists all of the names and icons of the resources (drives, files and folders) available to the computer. The top right pane displays the contents of any item you click on in the top left pane along with its icon. The bottom left pane lists all the names and icons of files and folders on the disc that is being created. The bottom right pane displays the contents of any item you click on in the bottom left pane, along with its icon. Page 23
25 Image Toolbar Horizontally along the top of the screen is an area which contains ten buttons, from left to right the buttons are: New CD layout, Load CD layout [*.ISC], Save CD layout [*.ISC], CD Image properties, Create CD image [*.ISO], Record CD, Enable inserting entire contents of folder [*.*], Large Icons, Small Icons, List, and Details. Image Toolbar: New CD layout Load CD layout Save CD layout CD Image properties Create CD image [*.ISO] Record CD Enable inserting entire contents of folder Views Starts a new CD or DVD Project. Any current layout is abandoned. Loads an existing CD or DVD disc image script file (*.ISC). Saves CD or DVD layout to a disc image script file (*.ISC). ISC files are virtual images containing only a list of the contents to be written to the disc. As such, these files are very small but are not self contained like the.iso,.udf, and.img real image files. Allows you change some of the disc properties such as volume label, publisher, data preparer, as well as the desired file system. Creates a real disc image file (.ISO for CD or.udf for DVD). Real image files are self contained and the original source files are not needed once made. These files are large, about the size of the CD or DVD. Click here to burn a disc of this content right away. It is a good idea to save your image file first. Jobs may also be launched at any time from any image file from the STATUS TABs NEW job button. Specifies the folder as having static or dynamic content. A Dynamic folder s content can change without having to edit the.isc file. Static content must exist when the image file is used or the job will fail. Allows you change view displayed in the top right pane to small or large icons, list, or detail view. Page 24
 and hold down the mouse button.")
 The files in the lower right pane represent the contents of the CD being created (fig. 2).")
26 Selecting CD Capacity Along the bottom of the lower panes is a series of radio button options that are used to select the capacity of the disc you are creating Click the radio button corresponding to the capacity of the discs loaded into the Scribe. Adding Files and Folders Click the desired file or folder in the top left or right pane (source) and hold down the mouse button. Drag the file or folder over the CD icon in the lower left pane (fig. 1) and release the mouse button. (fig. 1) (fig. 2) The files in the lower right pane represent the contents of the CD being created (fig. 2). Creating, renaming, and removing Folders In the bottom left pane, first click at the point you wish to insert a folder, or on the folder to be renamed or removed, then Right-Click on it and select the desired operation. You can also delete content by: Page 25

27 Click the desired file or folder in the bottom left or right pane and drag the item to the recycle bin in the lower right hand corner. This does not delete the actual file, but rather exclude it from the CD or DVD layout. Static and Dynamic Content The Scribe allows discs to be created from both static and dynamic content. A finished CD or DVD created from static content will contain the exact files and folders that are specified when the disc image is created. A finished CD created from dynamic content will contain the files and folders that exist in specified locations at the time the job is submitted for recording (rather than when the disc image is created). For example, specifying dynamic content when creating a CD or DVD layout would allow a job to be run every week that records the contents of a specific folder onto a CD without having to create a new disc image every time. In this case the contents of the folder (not the folder itself) can change. To specify a file or folder on a disc image as containing dynamic content: Click in the *.* check box so that the red X disappears. Disabled Enabled Page 26
 or physical image files (with an.iso extension for CD or a.udf for DVD).")
28 Saving The Current Disc Image File Once a data disc image has been created, it must be saved before it can be used by the Scribe as a data source for recording. Disc images can either be saved as script files (with an ISC extension) or physical image files (with an.iso extension for CD or a.udf for DVD). A script file (ISC) contains pointers to the source data files and is used as a guide at the time of recording the disc. Since a script file does not include the source data it is best used when producing unique or projects with dynamic content and when the source data will always be available to the Scribe. A physical image file (ISO for CD, UDF for DVD) is an exact replica of the final disc and contains all of the source data. It is therefore best used when producing static projects that are recorded on a regular basis and when source data will not always be available to the Scribe. Please note that depending upon the amount of data to be recorded, a physical image file can occupy as much as 700 MB (CD) or 4.7 GB (DVD) of hard disk space. Before saving your image, you may wish to view the properties Editing Image properties Click the CD Image Properties button on the toolbar. The screen will now read: Page 27
29 The CD IMAGE PROPERTIES dialog box contains a series of radio buttons as well as a number of information boxes. Click the radio button corresponding to the logical file system to be used on the CD (ISO 9660, Joliet, or UDF 1.02 for DVD). Optionally complete the volume properties information boxes: Volume Properties Volume Label Optionally enter the name you want to call the CD / DVD. Publisher Optionally enter the name of the publisher. Data Preparer Optionally enter the name of the person who prepared the disc. Copyright File Optionally enter the file name that provides copyright information about the CD. Abstract File Optionally enter the file name that des the contents of the CD. Bibliographic File Optionally enter the file name that provides bibliographic information about the CD. Click the OK button. Click the Save CD layout button on the toolbar. The screen will now read: Select the volume and directory where you want to save the script file. Enter the name for the script file and click the Save button. Page 28
30 To create a physical disc image file: Click the now read: Create CD Image button on the toolbar. The screen will Or CD Image File DVD Image File Select the volume and directory where you want to save the physical image file. Enter the name for the physical image file and click the Save button. Loading An Existing Script File Once a data disc image script file has been saved it can be modified at a later date. To load an existing script file: Click the Load CD layout [*.ISC] button on the toolbar. The screen will now read: Select the desired file and click the Open button. Page 29
31 Audio Image Editor The Scribe creates industry standard audio (Red Book) CDs from scratch that can be played on any home, car or portable compact disc audio player or computer CD or DVD-ROM drive. Audio tracks are created using any combination of 44.1 khz, 16 bit stereo WAV or MP3 files. To create an audio disc image: Click the Audio Image Editor tab. The screen will now read: The Audio Image Editor tab is divided into four panes. The top left pane lists all the names and icons of the disk drives available to the Scribe, as well as files and folders on the currently selected disk drive (source). The top right pane displays the contents of any item you click on in the top left pane along with its icon. The bottom left pane lists the names of audio files on the CD which is being created (disc image) as well as their type (WAV or MP3), start position and length, copy prohibit status and ISRC code. The bottom right pane displays the subindexes of any file you click on in the bottom left pane. Page 30
32 Audio Image Editor Toolbar Horizontally along the top of the screen is an area which contains ten buttons, from left to right the buttons are: New CD layout, Load CD layout [*.ISC], Save CD layout [*.ISC], CD Image properties, Create CD image [*.IMG], Record CD, Large Icons, Small Icons, List, Details. Image Toolbar: New CD layout Load CD layout Save CD layout CD Image properties Create CD image Record CD Views Starts a new Audio CD project. Any current layout is abandoned. Loads an existing Audio CD disc image script file (*.ISC). Saves the current Audio CD layout to a disc image script file (*.ISC). Unlike with data discs, the properties button audio discs allows you to optionally change only the disc s UPC code. Creates a real disc image file (.IMG. Real image files are self contained and the original source files are not needed once made. These files are large, about the size of the finished CD. Click here to burn a disc of this content right away. It is a good idea to save your image file first. Jobs may also be launched at any time from any image file from the STATUS TABs NEW job button. Allows you change view displayed in the top right pane to small or large icons, list, or detail view. Page 31

33 Adding Tracks As depicted below, drag one or more WAV / MP3 files onto the text "The end" as it appears in the top left corner of the bottom pane. Multiple files may be selected by pressing and holding down the SHIFT or CTRL key while clicking on the tracks. SHIFT allows you to select a range of contiguous tracks, while CTRL allows you to selectively pick multiple tracks. As additional tracks are added, drag and drop them in at the desired insertion point. Removing Tracks Click the desired audio track in the bottom left pane and hold down the mouse button. Drag the audio track over the trashcan in the bottom right of the Audio tab and release the mouse button, or right click on the track and click delete. Click the Yes button. Page 32

34 Changing A UPC Code The UNIFORM PRODUCT CODE (UPC) is an optional 13-digit descriptor that can be written into an audio CD. To change the UPC code: Click the CD Image Properties button on the Image toolbar. The screen will now read: Enter the numeric code and click the OK button. Changing ISRC Codes And Copy Prohibit Flags The INTERNATIONAL STANDARD RECORDING CODE (ISRC) is an optional 12-character descriptor that identifies a specific track on an audio CD. Each track can have its own unique ISRC consisting of 2 alphanumeric characters (country), 3 alphanumeric characters (owner), 2 digits (year of recording) and 5 digits (serial number). For more information on ISRC codes, you can visit: The Copy Prohibit flag is a setting in each track on an audio CD, indicating whether or not that track can be copied by a digital recorder. Page 33


35 To change an ISRC code: Right click the desired audio track in the lower left pane, and select Edit. The screen will now read: Enter the code in the ISRC line and click the OK button. Valid codes start with two-letter country code, followed by ten digits. To change a Copy Prohibit flag: Right click the desired audio track in the lower left pane, and select Edit The screen will now read: To enable Copy Prohibit bit select the Copy Prohibit box so that it is checked, or uncheck the box to disable Copy Prohibit bit. Page 34

36 Inserting, Editing And Removing Silence When assembling an audio CD disc image the Scribe application does not insert silences (gaps) between tracks. To insert silence between tracks: Right click on an audio track. Select Insert silence. To edit the amount of silence between tracks: Right click the silence indicator you wish to edit in the lower left pane, and select Edit. Click the up and down indicators to increase or decrease the duration of the silence (minutes, seconds, frames). Click the OK button. To remove silence between tracks: Click the silence indicator you wish to remove in the lower left pane and hold down the mouse button. Drag the silence indicator over the trashcan in the bottom right of the Audio tab and release the mouse button. Click the Yes button. or Right click the silence indicator, and select Delete. Page 35

37 Inserting, Editing And Removing Subindexes Subindexes are markers used by CD audio players to locate specific points inside an audio track. Subindex 0 indicates the start of any silence before the beginning of a track and subindex 1 indicates the beginning of a track s audio material. Other subindexes can also be assigned to allow some audio players to locate specified material within a track itself. To insert subindexes in a track: Click on the desired track to highlight it, then right click subindex 01 in the subindex column and then click the Insert button. The screen will now read: Click the up and down indicators to specify the location of the subindex (minutes, seconds, frames). Click the OK button. To edit subindexes: Right click the subindex you wish to edit in the lower right. Click the edit button. Click the up and down indicators to specify the new location of the subindex (minutes, seconds, frames). Click the OK button. To remove subindexes: Right click the subindex you wish to remove in the lower right pane. Page 36

38 Select Delete or Drag the subindex over the trashcan in the bottom right of the Audio tab and release the mouse button. Click the Yes button. Saving The Current Audio Disc Image Once an audio disc image has been created it must be saved before it can be used by the Scribe as an audio source for recording. Disc images are saved as script files (with an ISC extension).image Scripts may be easily edited later while physical images cannot and must be regenerated.. To save an audio disc image script file: Click the Save button on the toolbar. The screen will now read: Select the volume and directory where you want to save the script file. Enter the name for the audio disc script file and click the Save button. To create a physical audio disc image file (.IMG): Click the now read: Create CD Image button on the toolbar. The screen will Page 37
39 Select the volume and directory where you want to save the physical image file. Enter the name for the physical image file and click the Save button. Loading An Existing Script File Once a data disc image script file has been saved it can be modified at a later date. To load an existing script file: Click the Load CD layout [*.ISC] button on the toolbar. The screen will now read: Select the desired file and click the Open button. Page 38

40 Job Manager Tab A job is any production run whether it be reading-in a master (archive), copying an existing disc, copying and printing, or printing only. In addition to showing you the status of jobs, the job manager is where you will go start new jobs. Click the Job Manager tab. The screen will now show the Job manager tab where the progress of jobs submitted for production can be easily monitored. The Status tab is divided into three panes. The top pane is the JOB QUEUE window which lists all of the jobs waiting to be processed by displaying their assigned Job name, type of job, image path, total number of requested CDs, their assigned priority, as well as the names of their associated disc image and label files. The middle pane is the ACTIVE JOBS window that lists all the jobs currently being recorded or printed by the Scribe. Information displayed for each job includes its assigned Job name, type of job, total number of requested CDs, the number of successful CDs produced, the number of failed CDs produced, the immediate status of the job (copying images, loading discs, copying discs, unloading discs, etc.) and the progress. The lower pane is the finished jobs window that lists all the jobs completed by the Scribe. Information displayed for each job includes its assigned Job name, type of job, image path, the total number of requested CDs, the number of successful CDs produced, the number of failed CDs produced, and the status. Page 39

41 The Production Process During production the blank discs will be loaded one at a time from the input spindle into the recorders and/or printer. Upon successful completion the discs will be unloaded onto the output spindle if the print general option is not selected. If selected, the discs will go to the printer before being placed on the output spindle. This process will continue until the job is complete and the Scribe will then advance to produce the next job in the queue according to its priority. However, if the input spindle empties before the job is complete, the screen will read: To continue producing the job, place additional blank discs onto the input spindle and click the Yes button. To stop the job click the No button and the remainder of the job will be aborted. The Scribe will then advance to produce the next job in the queue according to its priority. Note: Any discs dropped in the reject area have failed to record properly and should not be used. Be sure to remove rejected discs periodically during operation. Creating a job In order to produce copies you must create a job. Think of a job as your workorder. It tells the Scribe what to do, and how many to do. Click the New button to the right of the Queued jobs area ON THE Job Manager tab. This brings up the Creating new job New Job wizard. Page 40
42 The Creating new job New Job wizard offers six options. Rev Type of Jobs: Archive only (Read-in) Copy Verify Relay Mode Print only Multi-disc archive (batch read-in) Data import This option allows you to read in the top most disc in the input bin. The disc is saved to the hard drive as an image file. This file can serve as a master for future copy and/or verify jobs. This option allows you to start a copy, or copy & print job from an existing image or from a new master disc. This option allows you to start a verify / compare job from an existing image or from a master disc. This option is good for checking previously made copy to ensure they are the same as the master. This option allows you to make copies, as well as print the copies, of multiple master discs. Rather than launching several jobs from various image files, with relay Mode you can simply load up the input bin(s) with several blanks (same type as master), then a master disc (CD or DVD). Repeat this for each master you wish to copy in this batch mode. Each time a disc with data is encountered, it will be read-in and copying will then continue until the next disc with data is reached. This option allows you to start a print only job. You must have already made a print image file as detailed in the appendixes of this manual. File types include; PRN files - made for the attached printer, Adobe PDF files, or SureThing STD files. Similar to Archive, this option allows you to batch read several masters. Unlike ARCHIVE, or reading-in a master to an image file, Data-import allows you to copy the contents of the CD or DVD as files and folders to a user defined local or network location. You can even set up multiple batches with one batch writing to one location, and the other writing to their own user defined paths Page 41
43 Archive only reading in a master disc An Archive job allows you to read-in an existing master to create a disc image file. DVDs will be saved as.udf files and CDs to.img files. These files may be used later when starting a COPY job. If you will not need to copy this master again, you can read & copy in one step by starting a COPY job, and selecting MASTER DISC as ded in the next section. 1. Select the Archive only button as seen in (fig. 1). (fig. 1) 2. Click browse and select the Image file path for the file that you would like to archive. This lets the Scribe know where to place your file and what name to give your file. (fig. 2) 3. The file path that you choose will show in the window as seen in (fig. 3). Click Next. Page 42

44 (fig. 3) 4. The Job parameters will then be displayed. Give your job a name and select a priority. 5. Click Finish and the Scribe will run the job. (fig. 4) Page 43
45 Copy and / or Verify This allows you to start copying or verifying from an image file, or a new master disc. 1. Select the Copy and/or Verify button as seen in (fig. 1). 2. Click Next. 3. Select the Image source for your job. This can be an ISC, IMG, UDF or a master disc that you place on top of the blank discs. The Scribe will archive (read-in) the contents of the master and copy the contents to as many discs as are indicated in the quantity box. If the Scribe detects another master during the copy process, the Scribe will reject the additional master. You may also select browse and choose an existing disc image. 4. You will then want to choose the Operations and Options for your job: Copy, Test, Writing speed, Verify, and Print. (fig. 1) (fig. 2) Operations and Options: Copy When checked, the discs in the submitted job will be recorded using the disc image file selected in the IMAGE field. Verify When checked, the discs in the submitted job will automatically be compared against the source files after recording is completed. Print When checked, the discs will be printed with the disc label selected in the LABEL FILE field. Page 44
46 Test Speed Print first When checked the CDs in the submitted job will not be recorded. The recording speed pull-down allows you to set the recording speed as determined by the capabilities of the recorders installed in the Scribe. When checked, Scribe will print the disc before copying. This is require when printing to BizCDs. 5. You will then enter the quantity of discs toward the bottom of the screen, then click the Next button. 6. If you choose Print, you will b prompted to select a label file (fig. 3). Click on browse and locate the PRN, STD, or PDF file to be used (Seethe appendices of this manual for tips on making these files). Enter the desire number of copies and optionally select Print before copying / verifying (for use when using BizCDs and BizCD adapter) and / or Ignore low ink level. A note about Ignore Low Ink Level Competitive systems continue to attempt to print even when cartridges have run out, resulting in ruined discs. PicoJet equipped Scribe systems will stop at 4% remaining ensuring you will not waste discs. Optionally you can choose to ignore this safeguard to glean the last few discs out of a cartridge. 7. When you are satisfied with your selections, click the Next button. The job confirmation dialog will be displayed (fig 3). 8. Click on the Finish button to launch your job. (fig. 3) (fig. 4) Page 45

. 1.")
 5.")
47 Relay mode job Relay mode allows you to make multiple copies of multiple masters. Simply load the unit with the desired number of blank discs, then the master such that the master sits on top of the blanks. Then load in more blanks followed by the next master and so on. The end result will be copies of each master placed in to the input bin(s). 1. Select the Relay-mode job button as seen in (fig. 1). 2. Click Next. 3. Select the Operations and options for the relay mode job. 4. Click Next. (fig. 1) 5. If you checked the Print option on the previous screen, you will be presented with List of Label files screen (fig. 3). Here you will create a list of printer label files (PRN) Click add to select the desired file. (fig. 2) (fig. 3) Page 46
. (fig. 4) If needed, you can move files up and down in the list until the order of PRN files matches the order in which your masters were loaded (fig.4). 6.")
48 Add as many PRN files as masters loaded and in the same order (fig. 4). (fig. 4) If needed, you can move files up and down in the list until the order of PRN files matches the order in which your masters were loaded (fig.4). 6. The Job parameters will then be displayed. Give your job a name and select a priority. 7. Click Finish and the Scribe will run the job. (fig. 4) 7. The Job parameters will then be displayed. Give your job a name and select a priority. 8. Click Finish and the Scribe will run the job. Page 47
. 2. Click Next. 3. Click Browse and locate the label file that you would like to use, either a.prn, an Adobe Acrobat.PDF, or SureThing.STD file.")

49 Print only job Print only job allows you print discs without first duplicating them. 1. On the Job Manager TAB, click the New button to the right of the Queued jobs area to start a new job. Select the Print only button as seen in (fig. 1). 2. Click Next. 3. Click Browse and locate the label file that you would like to use, either a.prn, an Adobe Acrobat.PDF, or SureThing.STD file. See the appendices of this manual for tips on working with these files. 4. Enter a quantity of discs for the job. Optionally you may choose to ignore low ink level A note about Ignore Low Ink Level Competitive systems continue to attempt to print even when cartridges have run out, resulting in ruined discs. PicoJet equipped Scribe systems will stop at 4% remaining ensuring you will not waste discs. Optionally you can choose to ignore this safeguard to glean the last few discs out of a cartridge. 9. When you are satisfied with your selections, click the Next button. The job confirmation dialog will be displayed (fig 3). 10. Click on the Finish button to launch your job. (fig. 1) (fig. 2) (fig 3) Page 48

50 Multi-disc Archive reading in several masters at a time Similar to an archive job, used to read-in an existing master disc to create an image file, multi-disc archive lets you read in several masters in batch. DVDs will be saved as.udf files and CDs to.img files. These files may be used later when starting a COPY job. 1. On the Job Manager TAB, click the New button to the right of the Queued jobs area to start a new job. Select the Multi-disc archive button as seen in (fig. 1). 2. Click Next. 3. Click on the up and down arrows to set the desired number of discs to be read-in. In the example to the right (fig 2), we have set the number to 5. By default, the files will be named sequentially, and stored to the default image folder. (fig. 1) To change the desired filename(s), rightclick the master you wish to edit, and select Rename (fig 3). Similarly, you can choose Move up and Move down to change the order of masters. (fig. 2) (fig. 3) Page 49
51 select the desired destination folder, if other than the default, then enter the desire filename and click the Save button when you are happy with your entry. Be sure to always leave the.img filename extension (fig 4). 4. Click NEXT, and the confirmation screen depicted in fig. 5 will be displayed. Load the masters into the input bin. The top-most disc will be assigned the first image filename on the list, so be sure you the discs loaded in the correct order. (fig. 4) (fig. 5) 5. Click the Finish' to launch the batch readin job. Page 50

52 Data Import Ripping data CDs or DVDs While the Archive, or multi-disc Archive job options allow you read in a CD or DVD to create a single file image of that disc, a Data import job allows you to copy the director structure of a CD or DVD to local or network storage location. You can even set up multiple batches with one batch writing to one location, and the other writing to their own user defined paths. This makes for the perfect tool to automate the ripping of Windows readable data CDs or DVDs. Simply stack up your data CDs or DVDs in the input hopper and will copy the contents one by one into user definable locations. This is a great way to migrate data from disc and old jukebox devices to newer high capacity storage platforms such as high-density optical disc, storage area networks, or other network attached storage devices. 1. On the Job Manager TAB, click the New button to the right of the Queued jobs area to start a new job. Select the Data import button as seen in (fig. 1). 2. Click Next. 3. Click on the up and down arrows to set the desired number of discs to be ripped. In the example to the right (fig 2), we have set the number to 25. Click on the Browse button if you wish to select a destination folder other than the default image folder for this batch. Choose the desired sub-folder naming option, either based on the CD or DVDs volume name or customized names. Option 1 Based on Volume Name Each disc in the batch will copied a folder name based on the volume name of the CD or DVD to the main destination folder. Click on the Next button if you wish to (fig. 1) (fig. 2) Page 51
. If you wish to modify this, double click on the entry you wish to change (fig 4).")
53 use this method, or Option 2 Customized Customized allows you to choose the sub-folder name of each disc in the batch to rip. This sub folder will be created within the main destination folder. By default, the first disc will be copied to a sub-folder called Disc1, the second to Disc2, and so on (fig 3). If you wish to modify this, double click on the entry you wish to change (fig 4). Select the desired destination folder, if other than the default, then enter the desired subfolder name in the file name text box then click save. You will be returned to the folder list dialog (fig 3). 4. Click NEXT, and the confirmation screen depicted in fig. 5 will be displayed. (fig. 3) (fig. 4) 5. Click the Finish' to launch the data import job. (fig. 5) Page 52
54 Log Files The Scribe maintains two log files; JOB.LOG and JOB.LOG.CSV. These files are written to the folder defined on the settings TAB. JOB.LOG This is a simple text file that can be viewed using Notepad, Wordpad, Word, or any other word processor that supports ASCI TEXT files. It is formatted so that it is easily readable by the user. Job name: New Job Start time: 11/16/06 19:17:38 Completion time: 11/16/06 19:20:24 Status: Aborted by user (Input hopper empty). Job type: Data import Main destination folder: J:\Temp Customized subfolders for contents of each disc: YES Quantity: 25 Done: 1 Rejected: 0 ============================================================ Job name: New Job Start time: 11/16/06 19:21:13 Completion time: 11/16/06 19:22:39 Status: Finished without errors Job type: Data import Main destination folder: J:\Temp Customized subfolders for contents of each disc: NO Quantity: 1 Done: 1 Rejected: 0 ============================================================ JOB.LOG.CSV This is also simple text file, and it contains the same data as the JOB.LOG file, but it is in CSV, or Comma Separated Values format. CSV files re best opened with Excel, or imported into a database or spreadsheet. Page 53

55 Page 54 Rev

56 Network Client Software The Scribe comes with 100-base-T Ethernet. Gigabit Ethernet is also available at a slight premium. This allows you to connect the Scribe as you would any Microsoft Windows XP Scribe on your network. In doing so, you can share the Scribe with other users on your network allowing them to submit jobs remotely. Client Scribe minimum requirements: Client Scribe s should meet or exceed these minimum requirements: Pentium 4 or better processor 512 MB of RAM Windows XP or Windows GB of free NTFS formatted hard disk space. If you use firewall software, be sure not to block the port(s) used by the Scribe client software (virtual port 12345) 100 Base-T network supporting Microsoft TCP/IP protocol. Installing the client software The network client, a file named Client.exe, was copied to your hard drive during installation. The client software is a single.exe file and simply needs to be copied to the desired location You can do either by copying the file to a server, a share on the Scribe you wish to give client privileges too, or use the Scribe and write the file to disc. Here we will show you how to install and run from the desktop of the Windows 2000 / XP client Scribe. On your Scribe, right click on Start and select Explore. Use Windows Explorer to browse your Scribe s hard drive. If you have the default factory installation, locate the "C:\Program Files\MF Digital\\ folder. Right click on client.exe and select COPY. Page 55

57 Again using Windows Explorer. browse to the location where you would like to place the client software, right click and select PASTE. I suggest copying to your remote s PC s desktop, or to a network a share from which you can copy CLient.exe file to each client PC s desktop. Using the client software The network client, is virtually identical to the Scribe software itself. It allows you to remotely do almost most everything you can on the Scribe copier itself. This does NOT include the premium utilities as detailed in Appendix C. Before running the client.exe client application, be sure the Scribe copier is powered on and available on the network. The client software will NOT work unless the P Scribe is running as it functions as job server. Normally you can launch the client as is. In some cases, like large corporate domains where network scanning time can be slow, it may be best to use the command line switches below. These can mitigate the time it takes the client to poll the network looking for hosts. Optional command line switches for Client.exe: /uid username Specifies the username which has to be at least 6 chars long and contain only small or capital letters (a-z, A-Z), digits (0-9), and underscore sign (_). /sid servername1,2 Specifies the server name(s), separated by commas or spaces. If you copied the client software to your desktop, click on the client.exe icon: You will be prompted for a User Id (fig.) Enter a unique name in the User ID. User IDs are for the sole purpose of distinguishing one user from another when shared amongst multiple users. It does not serve the purpose of granting or not granting access to the device. Click on Connect. Select Hosts will be (fig 1.) Page 56

58 displayed (fig. 2) Left click on the appropriate Scribe. This list displays computers by their network name. Then click OK. The familiar Scribe application will open up. Its use is the same as the Scribe, so please refer to previous pages on how to use the software. (Fig.2) Page 57


59 Appendix A: Creating.PRN Files (Prism Plus) Printer Driver setup Before you create your first print label, you must first set a couple of printer defaults. Once you have done this, you need not repeat this step again unless you reinstall the printer driver. Double-click MY COMPUTER on the desktop, then click on CONROL PANEL. From the control panel, click on PRINTERS AND FAXES. Rightclick on RIMAGE PERFECT IMAGE PRINTER PF and select properties. Click on the ADVANCED TAB, and set the PRINT DIRECTLY TO PRINTER option as seen in Fig A. Your printer shipped with a monochrome back ribbon. You need to tell the printer that this ribbon is installed. As depicted in Fig B., click on the DEVICE SETTINGS tab, and click on the INSTALLED RIBBON pull down and select Monocolor. Click OK (Fig A.) Making a.prn label file (Fig B.) Page 58

. To create a.")
60 Next, we will create a.prn file by printing the document to a file instead of routing it directly to a printer. You will be prompted to specify the filename and location. This puts the document in a format that the Scribe can use for printing. Follow the instructions below to create a.prn. Use the CD Designer that was included with your Prism Plus software to create label. When a label file is saved in CD Designer it is given a.btw extension. This format is not usable by the Scribe program. You will however want to save your label as a.btw for future editing (Fig. C). To create a.prn you must use the Print feature after you have created your label. Click on File-Print. In the NAME text box, be sure the RIMAGE PERFECT and Select the Print to file option (Fig D.). Click on Print and give your file a name (Fig. E.). It is a good idea to Click on BROWSE and choose the labels folder defined on the settings TAB of the Scribe software. Click on PRINT when you are satisfied and the PRN file will be created. This file may now be used in the Scribe software. (Fig C) (Fig D) (Fig E.) Note:. A.prn file cannot be edited. It contains information to create the image, and the settings of the particular printer. If any of the settings of the printer are changed, a new.prn file must be generated. Page 59

61 Appendix B: Creating.PRN Files (PicoJet) If you have not already read the manual that accompanied your PicoJet printer, now would b a good time. Here is a recap on h0w to make.prn files for use with your PicoJet CD / DVD printer and {C copier. Printer Driver setup Before you create your first print label, you must first set a couple of printer defaults. Once you have done this, you need not repeat this step again unless you reinstall the printer driver. If you purchased your printer and copier at the same time, this was preconfigured at the factory Double-click MY COMPUTER on the desktop, then click on CONROL PANEL. From the control panel, click on PRINTERS AND FAXES. Rightclick on PICOJET 6000 and select properties. Click on the ADVANCED TAB, and set the PRINT DIRECTLY TO PRINTER option. Click on OK. Start the SureThing software and complete the initialization screens if prompted. If you have not familiarized yourself with the software yet, it would be a good time to go through the start-up tutorials. If prompted: Page 60


62 Making a.prn label file Select the MF Digital PicoJet 600 and click Finish. Design your CD / DVD label. Page 61


63 If you plan to edit this file later, it is best to save it now. Click on FILE-SAVE Enter a filename to save your label to a SureThing.STD file. To create the compatible file, a PRN file, click on FILE-PRINT: Be sure to leave No. of Labels set to 1. Under Additional Options at the bottom of this dialog box, click on Advanced and check off Print to File. Page 62

64 Click on OK and then you will be returned to the print main dialog box. Click OK again and the Print-to-File dialog box will open: Type in the path and desired filename, but be sure to retain the.prn file extension. In the example above, we will be creating 1.PRN in the labels folder. Folder will not automatically be created. Folders in the path MUST already exist. It is a good idea choose the labels folder defined on the settings TAB of the Scribe software. You have usefully created a PRN file! Note:. A.prn file cannot be edited. It contains information to create the image, and the settings of the particular printer. If any of the settings of the printer are changed, a new.prn file must be generated. Page 63


65 Appendix C: Creating & Using Adobe Acrobat PDF Files It may be more convenient for you to use Adobe Acrobat.PDF files rather than.prn files. This can be the case when you prefer to use an application such as Adobe Photoshop, which we will use in our example below. MF Digital Duplication systems allow you to create your disc labels using the popular Adobe Acrobat File.PDF file format for printing. To make this process simple, MF Digital has created PDF templates for you to design your artwork on. These templates are located on our tech support page at: To use these templates, please follow the instructions below. In this example, we will use Adobe Photoshop but the process is similar for other graphics applications. Open Adobe Photoshop. From the File Menu, choose Open. Browse to find the PDF template that you downloaded and choose that file, click the open button. You will be alerted with an IMPORT PDF dialog window as seen in Fig. A Click the OK button. The template will open in Adobe Photoshop. If you select the IMAGE menu, then choose Image Size, the image size dialog will appear, verify the Document Size, Height & Width reads the correct size for the template you are working with. For this example, the document size should read mm x mm as depicted in Fig. B When laying out text in Photoshop, Photoshop automatically creates a new layer, one for each piece of text you add. Should you need to insert a graphic, from the Layer Menu, choose LAYER->NEW LAYER. Photoshop will insert a new layer for Page 64 Fig. A Fig. B Fig. C
 After you lay out your design, the template layer needs to be turned off. This is done by using the layers palette (red square, Fig. D). You will notice that to the left of each layer is an eye.")
. From the File Menu, choose Print.")

66 you. You can then add the graphic onto this layer.(yellow Square) as per Fig. C. (Note: For our purposes, this is NOT a tutorial on the use of Photoshop. You should already be familiar with its use.) After you lay out your design, the template layer needs to be turned off. This is done by using the layers palette (red square, Fig. D). You will notice that to the left of each layer is an eye. Clicking the eye will turn that layer off. Notice the template now disappears. Fig. E You will now need to convert your design into a PDF file, to do this, make sure you have Adobe Acrobat installed (Full version not simply the Reader). From the File Menu, choose Print. Under the Printer section of the Print Dialog, change the Printer name to the PDF Printer (acrobat versions vary in names). Fig. F Click the OK button. You will be prompted to give a name to the PDF file. Enter the desired filename - Fig. G Fig. D Fig. E CAUTION When submitting the PDF file to print, please make sure the target printer is not the default printer. (If printing to PicoJet PicoJet cannot be the default printer) If needed, add a dummy printer to printers and faxes directory. Note: When submitting PDF files for printing via the network client. The drivers for the printer attached to the Scribe, must also be loaded on the Scribe running the client software. Fig. F Fig. G Page 65


67 Appendix D How to setup SureThing CD Labeler to Merge with a CSV document. Your Scribe Series software now allows you to print using the SureThing Document file, STD for short. Using this file type gives you the flexibility to print unique information on your discs. To take advantage of this feature. Please follow the steps below. Step 1: Launch the SureThing CD Labeler and choose the correct template for your Printer. For this example we will set this up using the Prism Plus Printer. Step #2: If you have any text or images that will remain static for your label, this would be the best time to add those in. In the example on the right, we ve added a logo and a line of text. Page 66
68 Note: Up to now, you could print this label and it would remain constant for each disc you planned to print. But we want to print some information that is unique for each disc. To do this, a merge field must be added and we have to tell SureThing where to get this data from so it can print it. Creating your data merge file (CSV) A very simple CSV can be created in Notepad, an application that is apart of the Windows Operating System. You can also use Microsoft Excel and simply export to a CSV format. A CSV format is information that is separated by commas, hence the name, Comma Separated Value. Using Notepad: In this example, we have created a simple list of names. This example demonstrates a single field. Each name represents a record. There are 4 records in this example. Page 67


69 Using Excel: This example shows how to create a CSV using Microsoft Excel. The screenshot has been blown up to make viewing easier. As shown, each name is put on a separate line. Each line represents a record. This example has 1 field with 4 records. To export the Excel spreadsheet as a CSV, do the following. 1. Click the File Menu. 2. Choose Save As 3. Change the Save As Type drop down menu to CSV. 4. Name your CSV file 5. Select a location, and choose Save Page 68

70 Step 3: Now that we have our CSV file all set, lets Merge it with our STD File. In SureThing, click the Insert Menu, and choose Insert Merge Field. The Insert Field Dialog appears. Step 4: Now click the Set Merge File button. Now the Set Merge File Dialog appears. Locate your CSV File and select it. Once selected, click the Set button on the right. Page 69
71 You ll notice the window in the center of Insert Field Dialog has now changed. It now contains the name of Field 1. This is the Field that we are going to use. Select it and Press the Insert button. The field will be inserted behind this dialog. If there are no more fields that you wish to insert it will be necessary to press the Close button. SureThing has now inserted the Field, giving it the name of that field s place holder, Field 1. In the example to the right, we have moved the Field to the print on the right side of the disc. Page 70

72 Step 5: From the File Menu, choose Save, choose a location, give the STD a filename, and click Save. Using Headers in your CSV Document If you would like your CSV Document to contain headers., this option is supported and can be easily be implemented. Headers are the names of each of the fields. Each header or field name must be separated by a comma. When using Headers, you can tell SureThing that the first record contains field names and SureThing will utilize those field names in the Insert Field Dialog, Field names are not printed. Page 71
73 Shown in the example to the right, the first line contains a field name, entitle Names. In this example, please note the option, use first record for field names is checked which is indicated by the red box. Selecting this option tells SureThing that your CSV contains Headers and the first record contains field names. Page 72


74 In this example, when you insert a field, you can see the field name Names has appeared in the Insert Field Dialog Box rather then the generic Field 1 name. At this point you can click the Insert Button and the field will be inserted into your design. As you can see the field has been inserted but with the name of the field, Names. Now you can save the document. Client and STD Files with Merge Although Client supports the printing of STD files, it DOES NOT support STD files with merge. If you wish to print STD Files with Merge you can take advantage of the UNC Method. The Universal Naming Convention (UNC) is a way to identify a shared file in a computer without having to specify (or know) the storage device it is on. In Windows operating systems, Novell NetWare, and possibly other operating systems, the UNC can be used instead of the local naming system (such as the DOS naming system in Windows). In Windows operating systems, the UNC name format is: \\servername\sharename\path\filename Page 73
75 NOTE: If you are using this method, make sure your STD and CSV are not linked. If so, you must clear the link which can be done in SureThing on the Set Merge File Dialog. Click the check box labeled Clear Merge File and then click Set. The link will now by broken. To implement this method utilizing UNC, following the steps below. 1. On the Local Machine, create a shared folder, for example, name the folder MERGE 2. Now copy your STD and CSV File to the Shared Folder. 3. Perform the steps as outline above to merge the CSV with your STD file. 4. DO NOT copy these files back to your local machine, leave them in the Shared Folder you created. 5. Submit the STD File to your via Client. You will see the information being printed uniquely on your discs. Serialization Note: Scribe only supports Merge Fields; therefore the field type, Serial Number under the Special Fields Tab is not supported. You can still serialize discs as follows: To serialize your disc, create a CSV that contains a list of numbers as demonstrated in the picture to the right. A header, as shown in the picture, is optional but makes this process easier when inserting the merge field into SureThing CD Labeler (see the section, Using Headers in your CSV Document). Now link the CSV with your STD and you can print unique serial numbers on your disc. Page 74

76 Appendix E: Premium Utilities The Premium utilities tab is the launch pad for MF Digital s Scribe add-on applications. These applications serve unique purposes and automate many everyday tasks. While they do not come with your unit, they may be purchased at any time. Add-ons include: Riptastic for MF Digital CD Ripper Platinum Backup for MF Digital Riptastic for MF Digital Load the Scribe with your audio CDs and quickly and easily rip your entire collection of CDs with this screaming fast and easy-to-use MP3 and WMA CD ripper. Batch Rip CDs to MP3, WMA, WMA lossless, WAV, or AIFF. Supports a wide variety constant bit rates as well variable bit rates. Automatically get CD title, artist, and track names from the Internet. Store CD title, artist, track names, and more in ID3 Tags. Fine-tune ripping with advanced Audio Processing features such as Normalization, Amplification and Attenuation, Silence Trimming, Digital Resampling, and Channel Merging. Page 75
D CLIENT for DIRECTOR/DIRECTOR PRO Series Publishing System Operator s Guide
 D CLIENT for DIRECTOR/DIRECTOR PRO Series Publishing System Operator s Guide The DIRECTOR/DIRECTOR PRO is a state-of-the-art CD/DVD publishing system and duplicator. It is designed to create, duplicate
Series Operator s Guide
 EC Series Operator s Guide Copyright Notice Copyright 1996-2003 by MF DIGITAL. All rights reserved. This manual and the accompanying illustrations may not be copied, reproduced, electronically transmitted,
PicoJet 6000 CD / DVD Printer User s Guide
 PicoJet 6000 CD / DVD Printer User s Guide Table of Contents WELCOME TO THE PJ-6000 PICOJET CD / DVD PRINTER...2 COPYRIGHT NOTICE...2 WARRANTY...2 PIRACY...3 ABOUT MF DIGITAL...4 WHAT TO EXPECT FROM YOUR
Director Series Director PRO Series Duplication Publishing System Operator s Guide
 Director Series Director PRO Series Duplication Publishing System Operator s Guide This Page Left Blank Page 1 Table of Contents WELCOME TO THE DIRECTOR... 5 COPYRIGHT NOTICE... 5 RECORDER WARRANTY POLICY...
DIRECTOR/DIRECTOR PRO Series Disc Publishing System User Manual
 DIRECTOR/DIRECTOR PRO Series Disc Publishing System User Manual Welcome to the Director/Director Pro System Copyright Notice Copyright 2003, 2004, 2005, 2006 & 2010 by MF DIGITAL (All rights reserved)
DIRECTOR/DIRECTOR PRO Series Publishing System Operator s Guide
 DIRECTOR/DIRECTOR PRO Series Publishing System Operator s Guide Welcome to the Director/Director Pro System Copyright Notice Copyright 2003, 2004, 2005, 2006 by MF DIGITAL. All rights reserved. This manual
Cougar 6600 Asynchronous Duplicator Operator s Guide
 Cougar 6600 Asynchronous Duplicator Operator s Guide (With CougarNET Command Module Client Application) Formats Unlimited, Inc. 155 Sherwood Avenue Farmingdale, NY 11735 Tel: 001 631 249 9393 Email: support@mfdigital.com
For Microsoft Windows Vista and XP Users Manual
 With For Microsoft Windows Vista and XP Users Manual Microboards Technology LLC Version 1.02 2 MICROBOARDS TECHNOLOGY, LLC PrintWrite TABLE OF CONTENTS INTRODUCTION...5 WHAT IS VIDEOWRITE?...5 GX-2 DISC
PRINTER INSTALLATION GUIDE
 with OptiEC PRO PRINTER INSTALLATION GUIDE www.mfdigital.com Table Of Contents Subject Page Minimum System Requirements..3 Installing the Firewire Adapter & Software Identifiers...4 Installing the Driver
Standalone (built-in PC), fully automated asynchronous CD/DVD Duplication System User Manual
, fully automated asynchronous CD/DVD Duplication System User Manual") Standalone (built-in PC), fully automated asynchronous CD/DVD Duplication System User Manual 1351 East Black Street Rock Hill, SC 29730 Tel: 803-980-4141 Fax: 803-980-4145 www.allprosolutions.com Olympus
Standalone (built-in PC), fully automated asynchronous CD/DVD Duplication System User Manual 1351 East Black Street Rock Hill, SC 29730 Tel: 803-980-4141 Fax: 803-980-4145 www.allprosolutions.com Olympus
ReflexMax1 User Guide. Version 2.1
 T ReflexMax1 User Guide Version 2.1 1-888-800-4041 www.discmakers.com T COPYRIGHT Copyright 2005 by Disc Makers. All rights reserved. This item and the information contained herein are the property of
SCRIBE EC NO PRINTER QUICK INSTALLATION GUIDE.
 EC SCRIBE EC NO PRINTER QUICK INSTALLATION GUIDE www.mfdigital.com 222 Table Of Contents Subject Page Minimum System Requirements..3 Installing the Firewire Adapter Card...4 Installing the Drive Bay...
DIRECTOR EC OFFICE PUBLISHER WITH Prism PLUS PRINTER INSTALLATION GUIDE
 Document Revision: 2/10/2005 DIRECTOR EC OFFICE PUBLISHER WITH Prism PLUS PRINTER INSTALLATION GUIDE DIRECTOR EC OFFICE PUBLISHER -- PC MINIMUM REQUIREMENTS A Pentium 4 or compatible personal computer
Pico Getting Started Guide
 Pico Getting Started Guide Instructions to get your Pico duplicator set up, powered, and running with a Mac Setting up the equipment The Disc Makers Pico duplicator is both Mac and PC compatible, engineered
Quick Setup & Getting Started
 Quick Setup & Getting Started HP Compaq Business PC Copyright 2007 Hewlett-Packard Development Company, L.P. The information contained herein is subject to change without notice. Microsoft, Windows, and
SCRIBE EC NO PRINTER QUICK INSTALLATION GUIDE
 EC SCRIBE EC NO PRINTER QUICK INSTALLATION GUIDE 222 Minimum System Requirements Print Station & 1-Drive Models Minimum System Requirements: Minimum Pentium III or compatible personal computer @ 800 MHz
For Mac OSX Users Manual
 For Mac OSX Users Manual Microboards Technology LLC Version 1.01 2 MICROBOARDS TECHNOLOGY, LLC PrintWrite for Mac TABLE OF CONTENTS Introduction...5 GX-2 Disc Publisher... 5 MX Series Disc Publishers...
Creating DVDs and CDs. With Your DVD Writer/CD Writer Drive
 Creating DVDs and CDs With Your DVD Writer/CD Writer Drive The information in this document is subject to change without notice. Hewlett-Packard Company makes no warranty of any kind with regard to this
Model #: Apus EZ PLUS 5910D Automatic DVD Duplicator Serial Number: (Serial number is labeled on the rear panel of your device.)
") Model #: Apus EZ PLUS 5910D Automatic DVD Duplicator Serial Number: (Serial number is labeled on the rear panel of your device.) Preface C ongratulations! You have just purchased the one of our most innovative
Model #: Apus EZ PLUS 5910D Automatic DVD Duplicator Serial Number: (Serial number is labeled on the rear panel of your device.) Preface C ongratulations! You have just purchased the one of our most innovative
USB 3.0 Universal Dual Video Docking Station Installation Guide
 Introduction USB 3.0 Universal Dual Video Docking Station Installation Guide The USB 3.0 Universal Dual Video Docking Station is designed for a computer that has multiple connectivity demands. Features
NETWORK PRINT MONITOR User Guide
 NETWORK PRINT MONITOR User Guide Legal Notes Unauthorized reproduction of all or part of this guide is prohibited. The information in this guide is subject to change for improvement without notice. We
Windows XP Installation Guide
 E3484 Windows XP Installation Guide November 2007 15G06Q009000 Copyright Information No part of this manual, including the products and software described in it, may be reproduced, transmitted, transcribed,
G-RAID 2 Installation Guide
 G-RAID 2 Installation Guide TABLE OF CONTENTS 1. INTRODUCTION 2. SAFETY PRECAUTIONS 3. SYSTEM REQUIREMENTS 4. WHAT S IN THE BOX 5. G-RAID2 OVERVIEW 6. INSTALLING G-RAID2 7. INITIALIZING G-RAID2 7.1 Mac
Quick Reference Manual
 Quick Reference Manual 100-100578 Trademarks XANTÉ is a registered trademark of XANTÉ CORPORATION. Adobe ; Adobe PageMaker ; Adobe PostScript, the PostScript, and Adobe logos are registered trademarks
Administrator s Guide
 Administrator s Guide 1995 2011 Open Systems Holdings Corp. All rights reserved. No part of this manual may be reproduced by any means without the written permission of Open Systems, Inc. OPEN SYSTEMS
Copyright, Trademark and Service Mark Acknowledgment
 FOREWORD It is illegal to duplicate copyrighted discs for any reason other than personal use, unless you happen to be the copyright owner. The MacElite recording unit is intended for use only by those
Mirasys N series. Network Video Recorder Quick Guide
 Mirasys N series Network Video Recorder Quick Guide 2006-2007 Mirasys Ltd. All rights reserved. No part of this document may be reproduced for any purpose, even in part. TRADEMARKS Mirasys and Mirasys
First Edition. seyaro The Learning Centre for Development. SCoPA SCoPA SCoPA. SCoPA. Robert YAWE S.
 SCoPA SCoPA SCoPA seyaro The Learning Centre for Development First Edition SCoPA Robert YAWE S. Simplified computer programming And Application seyaro.com Experience with Hands-on Chapter Three First Edition
QUICK START GUIDE. Aleratec RoboJet Disc Autoloader. Part No
 QUICK START GUIDE Aleratec RoboJet Disc Autoloader Part No. 360104 Welcome! Congratulations on your purchase of an Aleratec RoboJet Disc Autoloader. The entire Aleratec team is committed to providing you
LBP-810 Laser Printer
 LBP-810 Laser Printer Getting Started Guide IMPORTANT: Read this manual carefully before using your printer. Save this manual for future reference. Copyright Copyright 2001 Canon Inc. All information in
XS/SC26-2 Safety Controller. Quick Start Guide
 XS/SC26-2 Safety Controller Quick Start Guide Original Instructions 174869 Rev. C 16 January 2015 1 THIS PAGE IS INTENTIONALLY LEFT BLANK ABOUT THIS GUIDE This guide is designed to help you create a sample
PhotoKeeper User s Manual
 PhotoKeeper User s Manual 20071226 20080404 Table of Contents CONGRATULATIONS on your purchase of a Polaroid PhotoKeeper. Please read carefully and follow all instructions in the manual and those marked
Creating Interactive PDF Forms
 Creating Interactive PDF Forms Using Adobe Acrobat X Pro for the Mac University Information Technology Services Training, Outreach, Learning Technologies and Video Production Copyright 2012 KSU Department
Printer Driver. User Guide. Macintosh
 Card Photo Printer CP-100/CP-10 Printer Driver User Guide Macintosh 1 Contents Safety Precautions...4 Read This First...5 About the Manuals...5 Printing Flow Diagram...6 About the Connection Cable...7
MyGenie TM 32 Thermal Block
 User s Guide MyGenie TM 32 Thermal Block A-2030-4 MyGenie TM 32 Thermal Block User s Guide Version No.: 1.1 (2013-05) Please read all the information in booklet before using the instrument Bioneer 8-11,
Getting Started. HP Business PCs
 Getting Started HP Business PCs Copyright 2010, 2012-2014, 2016 HP Development Company, L.P. Windows is a registered trademark or trademark of Microsoft Corporation in the United States and/or other countries.
Standalone, fully automated CD/DVD Duplication System User Manual
 Standalone, fully automated CD/DVD Duplication System User Manual 5542 Brisa Street, Suite F Livermore, CA 94550 Tel: 925-447-8484 Fax: 925-447-8811 www.all-pro-sol.com Table Of Contents Introduction...
USER MANUAL TOUGH DRIVE EXTERNAL MOBILE HARD DRIVE / 2.5" / USB 2.0. Rev. 848
 USER MANUAL TOUGH DRIVE EXTERNAL MOBILE HARD DRIVE / 2.5" / USB 2.0 Win & Mac Rev. 848 Freecom ToughDrive Dear user! Thank you for choosing the Freecom ToughDrive as an external hard drive. For optimal
Indicates a caution you must observe when operating the product. Shows the number of the page that has related contents.
 Installation Guide This manual contains detailed instructions and notes on the operation and use of this product. For your safety and benefit, read this manual carefully before using the product. Notice
Getting Started. HP Business PCs
 Getting Started HP Business PCs Copyright 2010 Hewlett-Packard Development Company, L.P. The information contained herein is subject to change without notice. Microsoft, Windows, Windows Vista, and Windows
KMnet Viewer. User Guide
 KMnet Viewer User Guide Legal Notes Unauthorized reproduction of all or part of this guide is prohibited. The information in this guide is subject to change for improvement without notice. We cannot be
AFP Digital
 Installation Guide AFP Digital Installation Guide Page 2 Contents Overview...... 3 System Requirements... 5 Installing the EVA Hardware Driver... 6 AFP Digital Installation... 14 Installing AFP Digital
READ FIRST! Bluetooth USB Adapter 2.0 Manual. Included in This Package Bluetooth USB Adapter CD-ROM with Bluetooth software and manual
 33348_BlueToothUSB.qxd 7/21/05 6:57 PM Page 1 Bluetooth USB Adapter 2.0 Manual Included in This Package Bluetooth USB Adapter CD-ROM with Bluetooth software and manual System Requirements Hardware Requirements
LabelWriter. Print Server. User Guide
 LabelWriter Print Server User Guide Copyright 2011 Sanford, L.P. All rights reserved. 04/11 No part of this document or the software may be reproduced or transmitted in any form or by any means or translated
KIMOTO K I M O S E T T E R R I P. Kimosetter RIP User Guide 1. Revised: February 2015 U SER GUID E (FOR W INDOWS 7 )
") KIMOTO K I M O S E T T E R R I P U SER GUID E (FOR W INDOWS 7 ) Revised: February 2015 Kimosetter RIP User Guide 1 COPYRIGHT AND TRADEMARKS Kimosetter RIP User Guide Copyright Notices for the Software
KIMOTO K I M O S E T T E R R I P U SER GUID E (FOR W INDOWS 7 ) Revised: February 2015 Kimosetter RIP User Guide 1 COPYRIGHT AND TRADEMARKS Kimosetter RIP User Guide Copyright Notices for the Software
Manual for MantraJet 1100 CD/DVD auto-printer
 Manual for MantraJet 1100 CD/DVD auto-printer Rev 1.03 September 7, 2010 Table of contents Specifications...3 Unpacking MantraJet 1100...4 Quick installation reference MantraJet 1100...7 Installation of
OPERATING MANUAL. WINDOWS Temperature Controller. Digi -Sense
 OPERATING MANUAL WINDOWS Temperature Controller Digi -Sense WinTC warranty information and licensing agreement The software and its accompanying documentation and instructions are provided AS IS without
Getting Started. HP Business PCs
 Getting Started HP Business PCs Copyright 2013 Hewlett-Packard Development Company, L.P. The information contained herein is subject to change without notice. Windows is a U.S. registered trademark of
OPERATIONAL MANUAL. Operation Manual
 OPERATIONAL MANUAL Operation Manual Xymba Automated Disc Publisher Model #: XB47/57 (LightScribe, PC-Connected) Serial Number: (The serial number is labeled on the rear panel of the device.) Operation
XS/SC26-2 Safety Controller Quick Start Guide
 XS/SC26-2 Safety Controller Quick Start Guide About this Guide This guide is designed to help you create a sample configuration for the XS/SC26-2 Safety Controller using the XS26-2 Expandable Safety Controller
Report Viewer Version 8.1 Getting Started Guide
 Report Viewer Version 8.1 Getting Started Guide Entire Contents Copyright 1988-2017, CyberMetrics Corporation All Rights Reserved Worldwide. GTLRV8.1-11292017 U.S. GOVERNMENT RESTRICTED RIGHTS This software
Legal Notes. Regarding Trademarks KYOCERA MITA Corporation
 Legal Notes Unauthorized reproduction of all or part of this guide is prohibited. The information in this guide is subject to change without notice. We cannot be held liable for any problems arising from
PC and Windows Installation 32 and 64 bit Operating Systems
 SUDAAN Installation Guide PC and Windows Installation 32 and 64 bit Operating Systems Release 11.0.1 Copyright 2013 by RTI International P.O. Box 12194 Research Triangle Park, NC 27709 All rights reserved.
Basic Concepts. Launching MultiAd Creator. To Create an Alias. file://c:\documents and Settings\Gary Horrie\Local Settings\Temp\~hh81F9.
 Page 1 of 71 This section describes several common tasks that you'll need to know in order to use Creator successfully. Examples include launching Creator and opening, saving and closing Creator documents.
OPERATIONAL MANUAL. Operation Manual
 OPERATIONAL MANUAL Operation Manual Xymba Automated Disc Publisher Model #: XB43/53 Series (PC-Connected) Serial Number: (The serial number is labeled on the rear panel of the device.) Operation Manual,
USB 3.0 to DisplayPort Adapter. Model #: U DP. USB 3.0 to DVI Adapter. Model #: U R. USB 3.0 to HDMI Adapter. Model #: U HDMI-R
 Warranty Registration: register online today for a chance to win a FREE Tripp Lite product www.tripplite.com/warranty Owner s Manual USB 3.0 to DisplayPort Adapter Model #: U344-001-DP USB 3.0 to DVI Adapter
User s Guide. Creative Desktop Wireless 9000 Pro
 User s Guide Creative Desktop Wireless 9000 Pro Information in this document is subject to change without notice and does not represent a commitment on the part of Creative Technology Ltd. No part of this
TD Bridge Technical Reference Guide
 TD Bridge Technical Reference Guide TD Bridge Overview Install Setting Development Guide for a Cooperative Application Appendix M00009311 Rev.L Cautions No part of this document may be reproduced, stored
Quick Start Manual. Color Image Scanner
 Color Image Scanner EN All rights reserved. No part of this publication may be reproduced, stored in a retrieval system, or transmitted in any form or by any means, electronic, mechanical, photocopying,
Working with Mailbox Manager
 Working with Mailbox Manager A user guide for Mailbox Manager supporting the Message Storage Server component of the Avaya S3400 Message Server Mailbox Manager Version 5.0 February 2003 Copyright 2003
PHOTO DVD MAKER USER MANUAL
 Photo DVD Maker User Manual 1 PHOTO DVD MAKER USER MANUAL Version 7.04 http://www.photo-dvd-maker.com Photo DVD Maker User Manual 2 0.1 WELCOME TO PHOTO DVD MAKER...4 0.2 GETTING HELP...5 1. GETTING STARTED...6
USB to VGA/DVI Adapter. Model #: U R. USB to VGA Adapter. Model #: U VGA-R. USB to HDMI Adapter. Model #: U HDMI-R
 Warranty Registration: register online today for a chance to win a FREE Tripp Lite product www.tripplite.com/warranty Owner s Manual USB to VGA/DVI Adapter Model #: U244-001-R USB to VGA Adapter Model
T-Invoicer User Guide
 - 1 - T-Invoicer User Guide Introduction T-Invoicer is an entry level invoicing system designed for small & startup business's who need to invoice customers quickly & easily. T-Invoicer has all the basic
Installation. Installation 1
 Installation 1 Installation The SP35 printer is easy to install and use. It is also flexible; you can connect and use it in many different ways. Most often, one printer is connected to one PC. However,
Full User Manual and Quick Start Guide
 Full User Manual and Quick Start Guide 2 W hile every precaution has been taken in the preparation of this manual, we assume no responsibility for errors or omissions. Neither, is any liability assumed
USER MANUAL MOBILE HARD DRIVES DESKTOP HARD DRIVES. Rev. 103
 USER MANUAL MOBILE HARD DRIVES DESKTOP HARD DRIVES Rev. 103 Dear user! Thank you for selecting the Freecom Mobile Hard Drive / Desktop Hard Drive as your external data storage device. For optimal use and
ClickFORMS Quickstart Tutorial
 ClickFORMS Quickstart Tutorial A ClickFORMS Tutorial 2003 by Bradford Technologies. All Rights Reserved. No part of this document may be reproduced in any form or by any means without the written permission
MCDOUGAL LITTELL EASYPLANNER USER S GUIDE
 MCDOUGAL LITTELL EASYPLANNER USER S GUIDE 1 Introduction The McDougal Littell EasyPlanner allows you to quickly and easily access Resource materials such as tests, quizzes, books, and other supporting
Owner s Manual USB 3.1 Gen 1 (5 Gbps) Display Adapters
 Display Adapters") Owner s Manual USB 3.1 Gen 1 (5 Gbps) Display Adapters Models #: U444-06N-HD, U444-06N-VGA PROTECT YOUR INVESTMENT! Register your product for quicker service and ultimate peace of mind. You could also
Owner s Manual USB 3.1 Gen 1 (5 Gbps) Display Adapters Models #: U444-06N-HD, U444-06N-VGA PROTECT YOUR INVESTMENT! Register your product for quicker service and ultimate peace of mind. You could also
USER GUIDE. USB 2.0 CD-ROM Slim External Drive
 USB 2.0 CD-ROM Slim External Drive USER GUIDE Visit our Website at www.targus.com Features and specifications subject to change without notice. 2007 Targus Group International, Inc. and Targus, Inc. LISTED
Model #: DupliQ DQ-5610x Automatic CD/DVD Recorder Serial Number: (Serial number is labeled on the rear panel of your device.)
") Model #: DupliQ DQ-5610x Automatic CD/DVD Recorder Serial Number: (Serial number is labeled on the rear panel of your device.) Preface C ongratulations! You have just purchased DupliQ DQ-5610, the world
Model #: DupliQ DQ-5610x Automatic CD/DVD Recorder Serial Number: (Serial number is labeled on the rear panel of your device.) Preface C ongratulations! You have just purchased DupliQ DQ-5610, the world
Wireless USB to HDMI with Audio Kit Installation Guide
 Wireless USB to HDMI with Audio Kit Installation Guide Introduction The Wireless USB to HDMI with Audio Kit adds an HDMI port to your USB enabled system. Key Features and Benefits Up to 10 meters wireless
DataPort 350 & 525 USB 2.0 and FireWire Enclosure User s Guide (800)
") DataPort 350 & 525 USB 2.0 and FireWire Enclosure User s Guide WWW.CRUINC.COM (800) 260-9800 TABLE OF CONTENTS PAGE Package Contents 1 Features and Requirements 2 Installation 6 Trouble Shooting 16 Technical
DataPort 350 & 525 USB 2.0 and FireWire Enclosure User s Guide WWW.CRUINC.COM (800) 260-9800 TABLE OF CONTENTS PAGE Package Contents 1 Features and Requirements 2 Installation 6 Trouble Shooting 16 Technical
Introduction to Personal Computing
 Introduction to Personal Computing Academic Computing Services www.ku.edu/acs Abstract: This document explains the basics of the Microsoft Windows operating system. It is intended for users who are either
Get Started. Document Management 9.7.1
 Get Started Document Management 9.7.1 NOTICE This document and the Sage Timberline Office software may be used only in accordance with the accompanying Sage Timberline Office End User License Agreement.
Impossible Solutions, Inc. JDF Ticket Creator & DP2 to Indigo scripts Reference Manual Rev
 Impossible Solutions, Inc. JDF Ticket Creator & DP2 to Indigo scripts Reference Manual Rev. 06.29.09 Overview: This reference manual will cover two separate applications that work together to produce a
Owner s Manual. USB 2.0 to VGA Adapter
 Owner s Manual USB 2.0 to VGA Adapter Model: U244-001-VGA PROTECT YOUR INVESTMENT! Register your product for quicker service and ultimate peace of mind. You could also win an ISOBAR6ULTRA surge protector
Quick Start Guide. USB 2.0 Portable Laptop Crash Cart KVM Adapter Model: B032-VU1
 Quick Start Guide USB 2.0 Portable Laptop Crash Cart KVM Adapter Model: B032-VU1 The complete Owner s Manual is available on Tripp Lite s website: www.tripplite.com/support El manual completo esta disponible
Digital MP3 & Video Player
 Models 215/415/418/818 Digital MP3 & Video Player Table of Contents: Product Overview... 2 Features & Notes... 2 Charging...2 Button Overview.. 3 Button Descriptions....3 Mini SD Card...3 Loading music,
USER GUIDE. Aleratec RoboJet Disc Autoloader. Part No EU
 USER GUIDE Aleratec RoboJet Disc Autoloader Part No. 360104EU Copyright/Model Identification The content of this manual is for informational purposes only and is subject to change without notice. This
Windows XP. A Quick Tour of Windows XP Features
 Windows XP A Quick Tour of Windows XP Features Windows XP Windows XP is an operating system, which comes in several versions: Home, Media, Professional. The Windows XP computer uses a graphics-based operating
Owner s Manual. for Mac OS/X. Version March 2009 Copyright 2009, Minnetonka Audio Software. All rights reserved.
 Owner s Manual for Mac OS/X Version 1.0.2 March 2009 Copyright 2009, Minnetonka Audio Software. All rights reserved. discwelder BRONZE 1000 is a trademark of Minnetonka Audio Software, Inc. 1 Introduction
SUMIMARK IV Set-Up & Software Installation Guide
 SUMIMARK IV Set-Up & Software Installation Guide 915 Armorlite Drive, San Marcos, CA 92069-1440 www.seipusa.com Revision B 3/2010 i LIMITED WARRANTY Sumitomo Electric Interconnect Products, Inc. warrants
Easy Windows Working with Disks, Folders, - and Files
 Easy Windows 98-3 - Working with Disks, Folders, - and Files Page 1 of 11 Easy Windows 98-3 - Working with Disks, Folders, - and Files Task 1: Opening Folders Folders contain files, programs, or other
Digital Display Wall Application Management Software
 VWAS6.0 日常使用手册 Digital Display Wall Application Management Software VWAS6.0/VCMS/VEMS User Manual Copyright Statement This manual is the copyright property of VTRON. Without prior written approval from
Contents Targus External PC Card DVD-ROM...1 Introduction... 1 System Requirements... 2 Media Formats... 3
 Regulatory Compliance This device complies with Part 15 of the FCC Rules. Operation is subject to the following two conditions: (1) This device may not cause harmful interference, and (2) This device must
User Guide. FTR Manager For more information visit
 FTR Manager 5.7.1 TABLE OF CONTENTS INTRODUCTION... 4 Overview... 4 About This Document... 4 GETTING STARTED... 5 Installation... 5 Starting FTR Manager... 5 To start Manager in Windows 7 or Windows 10
GXLink MultiChannel Wave Inserter Model SP-631
 800173-0A Digital High Speed GXLink MultiChannel Wave Inserter Model SP-631 User Manual Copyright 2009 It is prohibited to copy, reproduce or distribute this information in whole or in part without the
DataPort 250 USB 2.0 Enclosure User s Guide (800)
") DataPort 250 USB 2.0 Enclosure User s Guide WWW.CRU-DATAPORT.COM (800) 260-9800 TABLE OF CONTENTS PAGE Package Contents 1 Features and Requirements 2 Installation 4 Trouble Shooting 13 Technical Support
DataPort 250 USB 2.0 Enclosure User s Guide WWW.CRU-DATAPORT.COM (800) 260-9800 TABLE OF CONTENTS PAGE Package Contents 1 Features and Requirements 2 Installation 4 Trouble Shooting 13 Technical Support
QUICK START GUIDE. Aleratec 1:15 DVD/CD Tower Publisher SLS. Part No
 QUICK START GUIDE Aleratec 1:15 DVD/CD Tower Publisher SLS Part No. 260178 Welcome! Congratulations on your purchase of an Aleratec 1:15 DVD/CD Tower Publisher SLS, considered by industry experts to be
BoxWriter Automated Disc Duplicator Model #: BW7220 (Standalone) Serial Number: (The serial number is labeled on the rear panel of the device.
 Serial Number: (The serial number is labeled on the rear panel of the device.") Operation Manual BoxWriter Automated Disc Duplicator Model #: BW7220 (Standalone) Serial Number: (The serial number is labeled on the rear panel of the device.) Operation Manual, BoxWriter BW7220 V106
Operation Manual BoxWriter Automated Disc Duplicator Model #: BW7220 (Standalone) Serial Number: (The serial number is labeled on the rear panel of the device.) Operation Manual, BoxWriter BW7220 V106
Hi-Speed USB 2.0 DVD Creator Capture video from your camcorder, PC camera, and VCRs
 Belkin Corporation 501 West Walnut Street Compton CA 90220 USA Tel: 310.898.1100 Fax: 310.898.1111 Hi-Speed USB 2.0 DVD Creator Capture video from your camcorder, PC camera, and VCRs Belkin Components,
SATA Hard Drive Enclosure
 SATA Hard Drive Enclosure 3.5" USB 2.0 SATA HDD Enclosure with One Button Backup SAT3510U2B Instruction Manual Actual product may vary from photo FCC Compliance Statement This equipment has been tested
USER MANUAL. DV-HAS HDMI Audio Separator LIT Bergen Boulevard, Woodland Park, NJ Tel FAX Web:
 USER MANUAL DV-HAS HDMI Audio Separator 244 Bergen Boulevard, Woodland Park, NJ 07424 Tel 973-785-4347 FAX 973-785-3318 Web: www.fsrinc.com LIT1460 Proprietary Information All information in this manual
USB 2.0 DVD/CD-RW Slim External Drive USER GUIDE
 USB 2.0 DVD/CD-RW Slim External Drive USER GUIDE Visit our Website at www.targus.com Features and specifications subject to change without notice. 2007 Targus Group International, Inc. and Targus, Inc.
Batch Watermark Creator Software
 PhotoX Batch Watermark Creator Software PhotoX helps you to add watermark stamp to your photos in a batch. The watermark can be generated from text or from an image. PhotoX also provides other tools likes
FAXLAN CLIENT v3.0 USER GUIDE
 FAXLAN CLIENT v3.0 USER GUIDE Draft Version 1.2 May 15 th, 2003 2 TABLE OF CONTENTS 1. FAXLAN CLIENT OVERVIEW... 3 1.1 FAXLAN CLIENT V3.0 FEATURES... 3 1.2 FAXLAN CLIENT V3.0 SYSTEM REQUIREMENTS... 3 2.
Adobe Acrobat Pro DC for Windows
 Adobe Acrobat Pro DC for Windows Creating Interactive PDF Forms University Information Technology Services Learning Technologies, Training & Audiovisual Outreach Copyright 2017 KSU Division of University
Start Here. All-in-One Printer. Print Copy Scan
 Start Here All-in-One Printer Print Copy Scan Note: A USB 2.0 cable is required to connect your Kodak All-in-One printer to your Windows or Macintosh OS computer. Available in the Kodak online store or
OS Installer. Installation Instructions
 OS Installer These instructions are only relative to Digital X Bus X.200 owners needing to completely clean out their internal hard drive and re-install the entire operating system and the latest Digital