Uživatelský manuál. Stand- alone DVR Klientský Software. Anglická verze
|
|
|
- Alexander Simpson
- 6 years ago
- Views:
Transcription

1 Stand- alone DVR Klientský Software Uživatelský manuál Anglická verze DOVOZCE a DISTRIBUTOR do eské Republiky VIAKOM s.r.o., Slovenská 891/5, Praha Peklad: Aleš Mrkáek, Alena Hellerová
2 CAPTER 1 :INTRODUCTION... 3 CAPTER 2 :SYSTEM INSTALLATION Installation Requirement Installation steps... 3 CAPATER 3 :VIDEO AREA OPERATION Function introduction Remote monitoring startup Remote monitoring control Stop remote monitoring Record search Playback control bar Stop remote playback Remote Frame play startup Stop remote Frame play CAPTER 4 :SYSTEM CONTROL AND MANAGEMENT AREA OPERATION Introduction Administrator login/logout Remote parameter setting remote system upgrade remote system reset Network playback PC setting Local Playback on PC USB Network backup Electronic map Circular monitoring CAPTER 5 :SPLITTING CONTROL OPERATION CAPTER 6 :VIDEO CHANNEL SELECTION AREA OPERATION CAPTER 7 :INFORMATION AREA OPERATION CAPTER 8 :LOCAL PLAYBACK Local Player startup Local Playback on PC Recording search CAPTER 9 :USB CLIENT Backup records playback CAPTER 10 :REMOTE BIDIRECTIONAL TALKING
3 10.1 Remote bidirectional Talking Operation CAPTER 11 :ALARM CENTER configuration of alarm center starting alarm center setup port of alarm center check alarm center information CAPTER 12 : SYNCRONIZATION OF DVRS TIME
4 Capter 1 :Introduction This client software V2.0 is exclusively adapted to DV series 2/4/8/16-channel MPEG4 DVRs.Operation through network is achieved via this client software, which is installed on your PC, performing functions of remote browsing and management. The main functions are listed below: remote monitor play remote record file remote host management play local record file remote bidirectional talking USB client network backup of recorded files electronic map management, remote alarm local action linkage, circular monitoring. Capter 2 :System Installation 2.1 Installation Requirement Minimum hardware requirement: CPU Intel pentium4 2.40GHz at least RAM Memory Display Card Network card DDR 512MB at least Display memory 64MB at least 100M Software requirement: Microsoft Windows2000/WindowsXP 2.2 Installation steps 1. Client Software Installation Run the program-setup.exe in the root directory of the provided disc, and install the software according to the cue of the system. 3

5 4

6 2. System initialization Run the DVR system program-net Client in the startup menu with progress of: Start Program DVR MONITOR SYSTEM The user interface looks like this: Video area Time & Data Information Area Splitting Control Video Channel System Control & Exit Area Selection Management The main interface is separated into 5 areas: Video area Splitting control area, Video channel selection area, System control and management area and Information area. Time of DVR includes Year, Month, Day, Hour, Minute, Second and Week. Click Exit to stop all the current operations and quit the system. Configuration initialization on computer is necessary if this client software is running for the first time. Please refer to section 4.7 Local configuration to setup the whole monitoring system. The setup sequence is as following: host, co-activation setup, disconnection interval, circular monitoring setup, electronic map setup and 5


7 OSD information setup. Capater 3 :Video area operation 3.1 Function introduction The video frequency area consists of 8 video channels, displaying monitoring video and remote playback video information. It is unable to perform the functions of monitoring and playback when all the channels are not in vacancy. 3.2 Remote monitoring startup Click the right key of mouse on idle video channel to pop up the menu. Starting the remote monitoring is also available in the electric map, please refer to the section of system control and management. Click on Connect monitoring channel term, then pops up a dialogue box. Select the recorder and channel you wanted and click connect. The system will show the progress of connection. 6

8 Click on Cancel to quit. The monitor signal will be shown on the video channel after the successful connecting. 3.3 Remote monitoring control Double-click the Video channel area, then Monitoring control bar jumps out as follow. The Monitoring control bar provides functions of save record, capture picture, mute, full screen, PTZ/lens/Iris control. Aperture+ Control PT Up Record Full Screen Control PT Left Lens+ Save Control PT Right Close Bar Capture Picture Mute Lens - Control PT Down Aperture- 7
9 Save record: Icon indicates inactive recording and icon indicates active recording. The record will automatically be saved in the folder- Software Installation Directory\Mpeg. Saving record on the DVR is recommended when emergency happens during your remote monitoring. Capture picture: Single-click to create a bmp file, which will be automatically saved in the folder- Software Installation Directory\Picture, making your further careful view possible. Mute: indicates activating audio signals indicates deactivating. PTZ/Lens/Iris Control: Two operations are available, single-click for gentle adjustment and long-time press for important adjustment, which are used to control your remote monitoring equipment. (Only operation from administrator is accessible to this function) Full screen: When already in full screen state press again to return original state. Please return to the original state when the menu for monitor and playback is required, which is not available in the full screen state. 3.4 Stop remote monitoring Single-click the video channel wanted, and the menu will jumps out. Select the item of Disconnect Current Monitor to stop the monitoring at the current channel. Note Remote monitor, remote channel control and stop monitoring can be used without administrator login. 3.5 Record search The successful login of administrator is a pre-requisite to perform this function. Please refer to section 4.2 administrator login. Method one: 8

10 Click the right key of mouse on vacant video channel, then pops up the menu. Method two:press Remote play/frame play button,then pops up the menu and select Remote play. Click on Search, and recording search dialogue box will jump out. After inputting the recording start/end time and channel number, the result of search will be displayed in the dialog box. No selection of the channel number indicates searching record of any channel is acceptable. Record search is also achievable in the system control and management area, please refer to the section of System control and management area for detail. 9

11 of mouse. Click on Play to play the record selected. Playing records one by one is optional by pressing Ctrl+ left key 10
12 3.6 Playback control bar The record player can be used to control the operation of the record s playback. Double-click the Video channel area, then Monitoring control bar jumps out as following. The Monitoring control bar provides functions of recording, capture picture, mute, full screen, continue/pause/stop playback, previous/next, speed shift. Click the left key of mouse on the schedule bar of specific place can control the speed of playing. Playback Previous Continue Pause Stop Next Save Record Close Bar Capture Picture Mute Speed Shift Full Screen Record save same as Monitor Record. While remote playback happens, users can save important video into local files for later analysis. Single picture same as Monitor Single Frame Capture. Mute deactivate or activate audio signals in recorded remote files. Full Screen same as Monitor Full Screen Switch. Playback Continue when playback pauses, press this button to continue playing; when playback stops, press it to repeat; when playback ends, press it to repeat. Playback Pause press it to pause play. Playback Stop press it to stop play. Previous when playing more than one recordings, press it to go to the previous recording. Next when playing more than one recordings, press it to go to the next recording. Speed Shift different playing speeds are available, including X1, X2, X4, X1/2, and X1/4. When the mouse points to the Shift button, playing speed is displayed. 11

13 Progress control the progress bar in the lower part of the video channel zone indicates the progress of playing, which can be changed by sliding the bar.click the left key of mouse can change the play location. 3.7 Stop remote playback When playback happens or ends, right-click video channel. Then, a menu pops up. Choose End Playback to end the current playing and then Video Channel becomes available again. 3.8 Remote Frame play startup Press Remote play/frame play button and select Frame play. Pop up frame play search dialogue box. Select the channels required frame play.press Ok then startup frame play. Figure is as following. 12

14 format. When Frame paly works, click the right key of mouse can display the following memu to change the display Frame play works according to I-Frame interval setup. With large value of I-Frame interval, the interval of Frame play is longer, and the bitstream is smaller. 3.9 Stop remote Frame play Click on the top right corner of the Frameplay screen or click the right key of mouse to pop up the following menu and select StopFramePlay, then Frame play is stopped. 13

15 Capter 4 :System control and management area operation 4.1 Introduction This management controls all operations on DVR and computer. There are 12 functions available including Administrator login/logout, remote parameter setting, upgrade remote system, reset remote system, Network playback, local system setting, USB backup, Network backup, Electronic map, circular monitoring and Remote bidirectional talking. Management bar jumps up as following: Administrator Login/logout Network Upgrade Network Play/Frameplay Local Playbac Network Backup Circular Monitoring Network Parameter Network Reset PC Setting USB Client Electronic Map Remote talk 4.2 Administrator login/logout After you log in as Administrator, effective management and control of DVR is available. The control includes: remote parameter setting, Electronic map, System log information, remote system upgrade, remote system reset, remote playback, Network backup, remote bidirectional talking and dvr information report. Before administrator login, click on the icon to jump out the following dialogue box. 14

16 Input the password at administrator level, and click Login, then the login status bar will pops up as following. Click on connection cancel to quit.the icon indicates successful login. Click on to log out the recorder. 4.3 Remote parameter setting Remote parameter setting includes: Recorder parameter setting, Recording parameter setting, system log query and Version query. Click on to jump out the selection box for your choice Recorder parameter setting This includes setting on the parameters of DVR system: network parameter setup, PTZ parameter setup, password setup, Video Parameter setup, user s authority level setup, port setup,system Parameter setup, video channel setup and audio recording setup. All settings via computer are in accordance with those on the recorder. Please refer to the DVR User s Manual. 15


17 Click on Apply term after modification remote recording parameter setting This setting includes: timing-record parameter setup, alarm-record parameter setup, motion detection parameter setup and record segment interval setup. All settings via computer are in accordance with those on the recorder. Please refer to the DVR User s Manuel. 16

18 4.3.3 System log information You may know the latest information about system operation and alarming. Including: Operation log and Alarm log. Operation log: All the operations done by users of different control right are recorded into the operation log. The log supports maximum 100 pieces of record. Alarm log: Recording into the alarm log would be started automatically when there is alarm input. The log supports maximum 100 pieces of record. Click on icon, and a dialogue box jumps up as following DVR Version Inquiring about the DVR version information. 17


19 4.4 remote system upgrade It is able to upgrade the system software program by transmitting the program through network to the recorder and also activate the program by PC. Click on and jumps out a dialogue box for upgrading. Jumps out the following selection box after you click on File folder selection for your choice, on which displays the information about the file you selected. Click on Upgrade to perform, result of which could not become effective before you do the operation of network remote system reset. 4.5 remote system reset Remote system reset will re-start the remote recorder. During the progress, all the connection between recorder and computer would be cut off. Please wait for 15 seconds before your re-connection. Click on icon, and a selection box flicks up. Select OK to re-start the recorder for reset. 18

20 4.6 Network playback Click on the icon to pop up a dialogue box for your playback. Please refer to section 3.5 Record search to continue your operation. 4.7 PC setting The PC setting includes: Local data configuration local system log and local language setting. Local data configuration is used for the following purposes: After software installation, the initialization configuration on PC is required. All parameter needs to be configured are included in the local data setting, involving the settings of recorder and alarm co-action with alarm output equipment, length of disconnect interval, circular monitoring setup, electronic map setup and OSD information setup. Local system log is for recording of local operation of remote parameter modification and remote alarm information on the recorder. Local language setting:provide the select of local language,include Chinese BIG Chinese GB and English. Click on icon to flick up the menu for setting PC/alarm co-action with alarm output PC/alarm co-action with alarm output dialogue box consists of connection menu tree on left and system information, DVR information, and channel information on right. 19

21 Connection Menue Connection menu tree: This menu tree shows the connection condition of all recorders and channels. Click one node on the menu tree, and then the relative information will be displayed on the right part of the dialogue box. Icon indicates boot node, icon indicates connection of recorders and computer, and icon indicates channel can be connected, icon indicates connecting failure. System information The system information is used to modify the title of monitoring system. 20

22 DVR information The relative information of recorder you selected will be displayed, including DVR IP, DVR ID, connection port, password for monitor, password at administrator level, and number of channels. Functions provided includes add, modify and delete. Select the related point on the menu tree. Add: when users want to add in more DVR. Click on Add term, inputting the right parameter for setting. DVR IP: Each DVR has only one IP address, please refer to the section of Network parameter for IP address. DVR ID: Each recorder has only one ID, which should be set up during the system programming and keeps correspondence with IP address of your computer. Connection port: Appoint the ports on PC and DVR, which should be kept in consistency with each other. Please refer to the Network parameter. Password for monitor:different password gives you different control power to operation. Password at operator or browser level provides you the control power only to monitor while pan and other remote equipments can not be controled. Password at administrator level offers you the control power available to monitor and operate monitoring equipment, e.g. pan/tile. You can not monitor if the password is wrong. Password at administrator lever:password for administrator to log in DVR. Time of DVRs are not synchronized if password is not consistent with remote host. DVR channel: please make a correct selection according to the channel numbers of recorder. 21

23 Modify: to modify the information of DVR connected. The number of channel is not modifiable. Click on Confirm term after modification. Delete: Please delete the connection with DVR on time, when the connection between DVR and PC are unsuccessful. Click on Delete term, after which the system will give you clue, and select Confirm to delete the connection. Channel information This function is to display the channel ID, connection state, co-activation recording length and startup setup. Modification to the above-mentioned information is also available. Select the channel also selects its recorder. After successful addition of a recorder, the system automatically creates all the channels information in accordance with its number. Modification on these information is available. Channel ID: The initial title of channel is set as Channel X, representing the total number of channel. Pay attention to the fact that the channels connecting to DVR should have their own different ID. Circular monitoring setup: Defaut value is yes.please select yes or no about circular monitoring according to actual condition. Icon indicates circular monitoring allowed, and icon indicates circular monitoring forbidden. Length of alarm co-action recording: Start from 100 sec. Alarm co-action recording indicates that after successful login into the recorder, auto recording and alarming start when the alarm is triggered. The length indicates the length of the auto recording and alarming. Alarm co-action recording can be manually stopped. Startup of alarm co-action recording: Start form Channel 1. Select the channel and click on Modify term and then on Setup term, then flicks up the dialogue box for 22


24 setting, after which re-select the channel and click on Confirm term to finish this operation. Auto startup of recording and alarming is available for all the channels selected when alarming triggered Disconnection interval The PC will automatically cut off from the DVR after a certain time of no operation, including monitoring disconnection, playback disconnection, and disconnection of login. 30 minutes, 1 hour, 2 hours and no disconnection are optional. However no disconnection is not encouraged Circular monitoring Set the total time of monitoring, and the monitoring length of each recorder keeps. 23

25 If the number of the circular channel in 16-channel DVR is more than 8, the circular time of each channel is two times longer than which set in the circular channel time setting dialog box Electronic map setting This setting includes map selection and map editing. Map selection: Select the DVR to be modified whose distribution is shown or not shown. Click on Browse term to flick up the selection box. Select the relative map on channels distribution. The general map represents the distribution map of all recorders. After selection, return to the dialogue box and display all file directories selected. Map editing: after select the general map and DVR channels distribution map, the actual condition of distribution needs to be edited. Select the DVR you wanted, click on the Edit term to flick up the dialogue box for editing. Click on Confirm and return to the dialogue box. In this way, setting the other channels distribution one by one. 24

26 4.7.5 OSD information While monitoring on PC or in the processing of network playback, time of the recorder and its name and channels, and the speed of code stream of the video channel to which the current channel belongs, can be displayed on the video channel. Terms selected in the video added settings will be displayed on the channel. All the terms are default to be displayed. 25


27 4.7.6 Local system log Local system log, which includes local system operation log and remote system alarm log, records modifications of remote DVR parameters and remote alarming signal transmited from DVRs to PC. Local system operation log: It records modification of DVRs parameter in the process of operation. Remote system alarm log: It records alarm signal sent out by a certain channel, after administrator logs in the recorder. 26
28 4.8 Local Playback on PC Click on icon to startup the local playback, which will be described later in the manual. 4.9 USB Click on iron to startup USB client program, which will be described later in the manual Network backup Select the record qualified to be backed up and click Download icon to jump out the following dialogue box. Input the start/end time of recording and select the channel. the qualified record will be displayed by clicking on Search term. 27
29 Select the backup folder, the records will be saved under the file folder of download. Select record in the dialogue box, and click on record download term. Multi-records-download is available to be achieved by Ctrl+ left key of mouse. 28

30 seconds. During the file downloading, the system will show the progress of the downloading. Please wait for a few Warning Max records are available for each search.other records can be searched by changing search conditions 4.11 Electronic map The direct connection for monitoring and disconnection with remote channel can be achieved on this electronic map. Click on icon to jump up the dialogue box. The general map displays all the DVRs distribution in the whole monitoring system. Zoom in the map in the 29

31 dialogue box for precise location of each DVR. Double-click on icon to see the channel distribution. Zoom in the map in the dialogue box for precise location of each channel. 30

32 Icon : DVR Icon : indicates disconnection Icon : indicates connection When under disconnection mode with icon showing as, click the right key of mouse to jumps out the menu, then click the Connect term. During the connecting, the system will show the progress of the connecting. Please refer to Remote monitor2.2 for detail. The monitor connection is not available, if no vacant video channel left. When under connection mode with icon showing as, click the right key of the mouse to flick up the menu, and click on Disconnect term to stop monitoring on this channel. After video channel selection or during the process of connecting channel with PC, all the related icons will be displayed in bright-green. When selected the channel on the electronic map, the connection of which is ongoing, its video channel displayed on the video zone will be displayed in bright-green Circular monitoring The circular monitoring is used to monitor by sequence each recorder connected. 31
33 Cutting off all the connections of channel on the video area first. Click on icon, then begin to perform this function on your PC. Connect all the channels of the first DVR connected with your PC, after a certain period, cutting off its all connection, and continue to connect the next DVR. All DVRs connected will follow this way to achieve the circular monitoring one by one. indicates stopping the circular monitoring. If the recorder with administrator login outputs alarm signal, the monitoring will make way for recording, after which, the monitoring will continue. If mal-connection with any DVR happens the monitoring will stop with producing error signal on your PC. Manual stopping this monitoring manner is available by clicking on by hand. Connection with current DVR will not cut off and continue in the monitoring state. Capter 5 :Splitting control operation There are four display modes available: 4 window splitting, 6 window splitting, 9 window splitting and single window display. Single window display : switch screen to single window 4 window splitting : switch screen to 4 windows 6 window splitting : switch screen to 6 windows 9 window splitting : switch screen to 9 windows. Capter 6 :Video channel selection area operation The video channel selection zone consists of 8 video channel selection icons and 8 channel indicator lights. 32
34 Video channel selection: These 8 icons are used to select video channels. Select one, displaying its relative channel on the screen. Channel indicator light: the light represents the state of its current channel The video channel is in vacancy, being able to be connected for monitoring and playing. The video channel is under connection. The network playback is ongoing. In the process of recording. + Yellow light twinkling indicates alarm co-action recording is ongoing. without alarm co-action setting. + Red light is twinkling when the channel under monitoring sends out alarm signal monitoring is ongoing. + Eight lights are twinkling simultaneously indicates the function of circular Capter 7 :Information area operation After administrator logins in, the remote host sends realtime status information to PC for display, these information includes: Recorder ID, on-line user information, channel state, system alarm information, system external alarm input information and HDD state. Host Title 33

35 Recorder ID: Title of the current recorder On-line user info: Display the user information of the DVR, including IP address, level of user, control power and login time. Connecting recorder in type of Video user to perform functions of network monitor and playback. After login, administer controls the recorder in type of Control user. The user in type of Download user is to perform the functions of download and backup from the recorder onto your PC. The user in type of Rmote talking user is to perform the functions of talking onto your PC.Control power includes non-login, browser, operator and administrator. Channel state: click on Channel state to show condition and working state of all channels, including channel title, channel event, and video signal output. Warning information: Display the warning information which is transmitted in real time from recorder to PC. External alarm input information: Display the external alarm input information which is transmitted in real time from recorder to PC. HDD state: display HDD capacity and remaining space All the above-mentioned information will not be displayed after administer logs out. Capter 8 :Local playback 34

36 The function is used to playback all the record files saved on the PC s HD. These files include: monitoring recording, remote playback, alarm co-action, network download, USB backup, and local records. 8.1 Local Player startup Local Player is achievable through system menu, or by Net Client at network terminal with interface jumped Menu out as following. Video Interface Result Playback Control Bar File Information This interface consists of following parts, system menu, video window, result of research, playback control bar and file information. Menu: Menu option includes Open, Search, Playback, Full-screen display, select language and Exit. Video window: display video screen. 35

37 Result of research: display in details the information of record, including the channel title, recording start time and recording end time, recording type, recording quality, and audio output. Playback control bar: It consists of Start/Pause/Stop, Previous /Next, Speed, Single frame capture, Record, and Mute. File information: Display its channel title, start time, end time, recording quality, record type, and speed. 8.2 Local Playback on PC Record will be saved under the file folder. Enter the menu and click on Open file term to pop up a dialogue box. Select the file you wanted and click Open to begin the playback function. Please refer to the section of 3.6 Remote playback control for similar details. 8.3 Recording search Enter the menu and click on Open file term to pop up a dialogue box. Select channel and its recording start/end time you want to search. Only files saved under the Directory- software installation directory\mpeg are searchable. 36

38 Back to the main interface with results displaying on the screen. Select one record or more and click on Play to start the function of playback. Please refer to Network playback 2.6 for similar details. Capter 9 :USB Client Able to read the files saved in the USB devices and backup into the PC s HD. Starting USB client is available through system menu or through Net Client on your PC. The following main interface consists of four parts: System menu, Backup List, Backup records, and Backup information. System menu is used to open/close USB disks, and exit from USB client. Backup List displays all the records in USB devices. Each DVR backup into USB device results in an auto creation of record saved in the USB device. 37


39 Backup records save information of recording, includes its channel title, starting/ending time, recording type, recording quality and audio signal. Backup information saves information about starting time, starting/ending time of search, total number of backup file, total size of file. Menu Records information Backup List Backup Time/Date 9.1 Backup records download This function is performed to copy the record from USB into the harddisk of your PC. Connect the USB device right, and select open up the backup disk. Click on Open up disk tool bar, or click on, the dialogue box jumps out as following. 38


40 Move the cursor to select the backup device you wanted and click on Confirm. The system will list the information about USB device on the screen. Select the USB device you wanted, then display all the records. Use Ctrl + left key of mouse for multi records, after which click the right key to jump out the menu seconds., and select Download. The record will be saved under the file folder of download. During the file downloading, the system will show the progress of the downloading. Please wait for a few Be sure the USB devices are well connected during the process of downloading. 9.2 Backup records playback This function is used to playback the backup records directly from the USB devices by using the function on the control bar, start/pause/stop, speed shift, capture picture, record on PC, mute, and full screen. During the process of playback, make sure the USB devices are well connected, and open up the USB disk (please refer to Backup records download 9.1) to find out the record you wanted. Click the right key of mouse to 39

41 jump out a menu, and then select Play term. Note: simultaneous multi records playback is not available. Video Interface Playback Control Bar File information Video Window: Display video information. Playback control bar: Please refer to Network playback 3.6 for detail. Double click the left key of mouse to return back to the initial state from the full screen. Records information: To display the title, recording quality, recording type, starting/ending time and speed of the current channel. Be sure the USB devices are well connected during the process of playing. In case any discontinuity happens, please wait for a while for its auto recovery. 40
42 Capter 10 :Remote bidirectional talking The function provides bidirectional talking between administrator of PC and administrator of remote host. It is required to be equipped with microphone and sound box both on the DVR and PC Remote bidirectional Talking Operation Click on icon, when the icon becomes, administrator may talk with remote host. During the bidirectional talking, remote host can only hear voice from administrator instead of live audio at site. Click on icon to quit bidirectional talking. Note 1 Press Esc on the front panel of DVR to quit bidirectional talking. 2 To activate bidirectional talking successfully, microphone item must be set in recording control dialogue box of volume control in PC. Capter 11 :Alarm center An alarm center is provided for the whole DVR systems. When set the alarm center IP address of DVR to a PC, as alarm occurs at the DVR, alarm information will be transmitted the the alarm center, alarm sound are used to prompt alarm informations configuration of alarm center Please refer to remote system parameter setup for configuration of alarm center. 41

43 11.2 starting alarm center Run the alarm center program from system startup menu, it will be added to the system task bar automatically. Click on the icon on task bar by left key of mouse, alarm center control menu pops up setup port of alarm center Click icon on the task bar with left key of mouse, select the set item in the menu, the alarm center port setup menu appears. UDP port value defaults to check alarm center information Click icon on the task bar with left key of mouse, select the check alarm center information item in the menu, alarm center information menu pops up which includes: alarm information from DVRs, on-line user information, channel status, and HDD info. 42


44 Capter 12 : Syncronization of DVRs Time When excessive recorders are connected, it is difficult to make the time of recorders identical. This function is designed to solve this problem. Select the Host Time term on the system menu, after which this function will be automatically added in, showing the icon of on you computer. 43


45 Time setting: Select Time setup term. Then jumps out a dialogue box for your setting. Click on Confirm after your selection. Simultaneous timing: To time all the recorders through your computer. Cancel timing: to stop this function. Language setup: select language setup on the control menu, when the selection menu pops up, selects the language wanted and press OK to activate. Exit: Select exit to quit. DOVOZCE a DISTRIBUTOR do eské Republiky VIAKOM s.r.o., Slovenská 891/5, Praha Peklad: Aleš Mrkáek, Alena Hellerová 44
USER MANUAL. Mac Version
 USER MANUAL Mac Version Contents 1 Software Introduction... 1 1.1 Summary... 1 1.2 Install and Uninstall... 1 1.2.1 Install the Software... 1 2 Login Software... 3 2.1 Login... 3 2.2 Control Panel Instruction...
NVMS User Manual. Version 2.1.0
 NVMS-1000 User Manual Version 2.1.0 Contents 1 Software Introduction... 1 1.1 Summary... 1 1.2 Operation Environment... 1 1.3 Install and Uninstall... 2 1.3.1 Install the Software... 2 1.3.2 Uninstall
User s Manual of DVR ULTIMAX. Remote Client Software V wersja 2.40
 User s Manual of DVR ULTIMAX Remote Client Software V 4.0.1 ULTIMAX-304 ULTIMAX-308 ULTIMAX-316 ULTIMAX-504 ULTIMAX-508 ULTIMAX-516 ULTIMAX-704 ULTIMAX-708 ULTIMAX-716 wersja 2.40 Index 1 Software Install,
Figure 4-9. Click Finish button, system pops up a dialogue box. Click the OK button, the startup wizard is complete. See Figure 4-10.
 For detailed information, please refer to chapter 4.11.4.1.1. Figure 4-9 Finish button, system pops up a dialogue box. the OK button, the startup wizard is complete. See Figure 4-10. Figure 4-10 4.4 Preview
NVMS User Manual
 NVMS-1000 User Manual Contents 1 Software Introduction...1 1.1 Summary... 1 1.2 Operation Environment... 1 1.3 Install and Uninstall... 2 1.3.1 Install the Software... 2 1.3.2 Uninstall the Software...
1 - Introduction About this this manual Configuration SMS Functions Product Information System Requirements 2
 Contents 1 - Introduction. 2 1.1 About this this manual... 2 1.2 Configuration 2 1.3 SMS Functions 2 1.4 Product Information 2 1.5 System Requirements 2 2 SMS Installation... 3 2.1 How to install 3 3 -
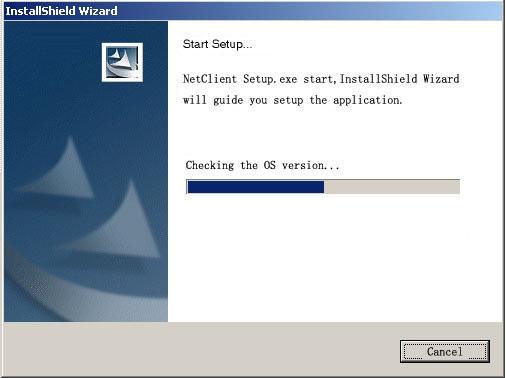
NetClient software user manual
 NetClient software user manual 1-1. General information Net Client is an application which provides users not only viewing and controling remote DVRs, but also receiving realtime event data or alarm signals
NVMS User Manual
 NVMS-1000 User Manual Contents 1 Software Introduction...1 1.1 Summary... 1 1.2 Operation Environment... 1 1.3 Install and Uninstall... 2 1.3.1 Install the Software... 2 1.3.2 Uninstall the Software...
Video Surveillance Management Software NVClient V5 User Manual
 Video Surveillance Management Software NVClient V5 User Manual Version: V5.0 Update Date: 2013-12-12 Welcome Thanks for using the Company's digital video surveillance management software. Please read this
PIVOT CMS CLIENT SOFTWARE USER MANUAL
 PIVOT CMS CLIENT SOFTWARE USER MANUAL 1 CMS USER GUIDE 1.1 PC REQUIREMENT Recommended PC Requirement OS CPU VGA RAM HDD Graphics Card OS CPU VGA RAM HDD Windows Vista, 7 or higher Intel Core2Quad Q9400
VMS-A1 Client Software. User Manual
 VMS-A1 Client Software User Manual Contents Contents... 2 Chapter1. Overview... 4 1.1 Description... 4 1.2 Features & Functions... 4 Chapter2. Update Info... 6 Chapter3. Starting VMS-A1... 7 3.1 Installing
NVMS1000. User Manual
 NVMS1000 User Manual Contents 1 Software Introduction... 1 1.1 Summary... 1 1.2 Operation Environment... 1 1.3 Install and Uninstall... 2 1.3.1 Install the Software... 2 1.3.2 Uninstall the Software...
Quick Start Guide (V1.03) UD.6L0201B1064A01
 UD.6L0201B1064A01") ivms-4200 PCNVR Quick Start Guide (V1.03) UD.6L0201B1064A01 Thank you for purchasing our product. If there is any question or request, please do not hesitate to contact the dealer. This manual applies
ivms-4200 PCNVR Quick Start Guide (V1.03) UD.6L0201B1064A01 Thank you for purchasing our product. If there is any question or request, please do not hesitate to contact the dealer. This manual applies
HIP2P Network Video Camera Client Terminal User Manual
 HIP2P Network Video Camera Client Terminal User Manual Document version:5.1 Page 1 of 34 } Preface Thank you for using our company's products. The network video camera client terminal is used to implement
User Manual. CENTRAL MANAGEMENT SYSTEM of H.264 NETWORK VIDEO RECORDE H.264 DIGITAL VIDEO RECORDER
 User Manual CENTRAL MANAGEMENT SYSTEM of H.264 NETWORK VIDEO RECORDE H.264 DIGITAL VIDEO RECORDER 1 TABLE of CONTENTS I. SPECIFICATION... 3 II. HARDWARE REQUIREMENTS... 5 A. MINIMUM REQUIREMENTS... 5 B.
Manual Version: V1.15. Video Management Software Guard Station User Manual
 Manual Version: V1.15 Video Management Software Guard Station User Manual Thank you for purchasing our product. If there are any questions, or requests, please do not hesitate to contact the dealer. Disclaimer
Grandstream Networks, Inc. GSurf User Manual
 Grandstream Networks, Inc. GSurf User Manual GSurf Contents Contents Introduction 3 Installation 4 Minimum Recommended Requirements 4 Login 4 Main Window 5 Menu Items 5 Toolbar Items 6 Play Bar Items 7
DCMS. User Manual. Version V1.0
 DCMS User Manual Version V1.0 About This Document About This Document About This User Manual Please note the following points before using this user manual: This user manual is intended for persons who
NVMS-5000 NVMS User Manual
 NVMS-5000 NVMS-5000 User Manual NVMS-5000 User Manual Contents 1 Introduction... 4 1.1 NVMS-5000 Brief Introduction... 4 1.1.1 Summerization... 4 1.1.2 Software Architecture... 4 1.2 System Components...
Manual Version: V1.01. ISS Manager Video Management Software User Manual
 Manual Version: V1.01 ISS Manager Video Management Software User Manual Notice The information in this manual is subject to change without notice. Every effort has been made in the preparation of this
RemoteManager Software
 RMS RemoteManager Software User Manual Contents of this user manual are protected under copyrights and computer program laws. Functions or configurations are subject to be changed or modified without prior
VMS2.0 Client Software. User Manual
 VMS2.0 Client Software User Manual Chapter 1 Contents Brief Introduction...1 1.1 Description... 1 1.2 Running Environment...1 Chapter 2 Installation... 2 Chapter 3 Live View... 4 3.1 User Login...4 3.2
LOREX CLIENT 3.0 SOFTWARE MANUAL IRMS Integrated Remote Management Software
 LOREX CLIENT 3.0 SOFTWARE MANUAL IRMS Integrated Remote Management Software Instruction Manual English Version 2.0 Copyright 2007 Lorex Technology Inc. www.lorexcctv.com Table of Contents Overview... -
SecuGuard. Basic 5.0. User s manual. Dec Version: 5.0.x
 SecuGuard Basic 5.0 User s manual Dec. 2009 Version: 5.0.x SecuGuard Basic System Requirement...5 Installation...6 Before Installing the Software... 6 Starting the Installation... 6 Quick Start...9 Install
IP Solution Intelligent Surveillance Solution
 IP Solution Intelligent Surveillance Solution user s manual Table of Contents TABLE OF CONTENTS TABLE OF CONTENTS...1 SYSTEM REQUIREMENT...5 INSTALLATION...6 QUICK START...10 1. MAIN CONSOLE...14 1.1 Start...16
NVMS1000. User Manual
 NVMS1000 User Manual Contents 1 Software Introduction... 1 1.1 Summary... 1 1.2 Operation Environment... 1 1.3 Install and Uninstall... 2 1.3.1 Install the Software... 2 1.3.2 Uninstall the Software...
Central Management Software. Cam Viewer 3 Lite. User Manual
 Central Management Software Cam Viewer 3 Lite User Manual Version 1.0.0 Table of Contents 1. System Requirement...4 2. Software Installation...5 3. Configuration Wizard...9 3.1 Channel...10 3.1.1 Adding
Central Management Software for NVR-915 / NVR-1615 CV5-M256
 Central Management Software for NVR-915 / NVR-1615 Table of Contents Chapter 1. Main Console... 4 1.1 Tool Bar... 4 1.2 NVR List... 5 1.3 Division List... 7 1.4 Group List... 9 1.5 PTZ Panel...11 1.6 Operation
Video Management Software
 Video Management Software User Manual Web: europesecurity.eu Mail: info@europesecurity.eu Tel.: 0541 352 952 User s Manual 2 Contents CHAPTER : XMS CENTRAL USER MANUAL 1 PC REQUIREMENT 3 2 INSTALL 3 3
The SW can manage 16CH devices and support 16Ch live view simultaneously. Supported functions are
 RMS User Manual 1. Introduction 1.1 Introduce This SW can manage and control several DVRs from Remote site through network at the same time. This SW provides live image monitoring, Playback and DVR configuration.
IMS Client Operation Guide Version V1.1 Date
 Version V1.1 Date 2015-10-20 About This Document About This Document About This User Manual Please note the following points before using this user manual: This user manual is intended for persons who
Installation And User Guide DVR-EZ. 4 Channel Digital Video Recorder
 Installation And User Guide DVR-EZ 4 Channel Digital Video Recorder Regulatory FCC Certification This equipment has been tested and found to comply with the limits for a class A digital device, pursuant
Digital Video Surveillance Center Management Software
 Digital Video Surveillance Center Management Software NVClient User Manual Revision: V3.2 Updated: 12-2011 Contents Chapter I General...- 3-1.1 INTRODUCTION... - 3-1.2 MAIN FUNCTIONS... - 3 - Chapter II
Manual FOR Remote surveillance MODEL QSNDVR9M AND QSNDVR16M
 Manual FOR Remote surveillance MODEL QSNDVR9M AND QSNDVR16M *This manual is tailored for 4/9/16 channels digital video recorder *This manual takes 16-channel digital video recorder as example 1 Table of
RMS RemoteManager Software
 RMS RemoteManager Software This is a brief manual for quick and convenient reference. Please refer to the User Manual contained in CD for details. Quick Manual 1 st Edition : 31 Mar 2009 The picture might
NVR Client system. User Guide
 NVR Client system User Guide Content Chapter1 Start up and Main interface 2 1.1 Start up 2 1.2 Main interface 6 1.2.1 Interface description 6 1.2.2 Select playback channel 8 1.3 System Menu 11 1.3.1 Remote
Video Capture Card Manual
 Video Capture Card Manual 1. System Login System installation is completed, will generate desktop < DVR Surveillance System> icon, please double-click operation. Or choose Start -> All Programs -> DVR
Error! Bookmark not defined.
 HD-NVR user manual Directory Part one Basic Operation... 3 1. Basic Installation... 3 1.1 Hard Disk Installation... 3 1.2 Mouse Connection... 3 2. Starting... 3 3.Turn Off... 3 4.Login... 4 5.Preview...
CMS USER S MANUAL VER:
 CMS USER S MANUAL VER: 1.0 2009-1-6 1 INDEX INDEX... 2 Preface... 3 1. Introduction... 4 2. Install and uninstall CMS... 4 2.1 System requirement... 4 2.2 Computer Hardware Requirements... 5 2.3 Process
CMS USER S MANUAL VER:
 CMS USER S MANUAL VER: 1.0 2009-1-6 1 INDEX INDEX... 2 Preface... 3 1. Introduction... 4 2. Install and uninstall CMS... 4 2.1 System requirement... 4 2.2 Computer Hardware Requirements... 5 2.3 Process
Quick Start. H.264 Network DVR 303Z
 303Z H.264 Network DVR Quick Start Please read instructions thoroughly before operation and retain it for future reference. The image shown above may differ from the actual product appearance. 792_Quick_V0.9
Central Manager System
 Central Manager System User s Manual 3.42 i 2 nd Edition (Aug-17-11) Content CCOONNTTEENNTT...I 1. PREFACE...1 2. INSTALLATION...2 2-1. Install CMS...3 3. PROFILE MANAGER...5 3-1. Create a New User Profile...5
Lorex Client 7.0 & Lorex Message Master
 Lorex Client 7.0 & Lorex Message Master Software Manual English Version 1.0 MODELS: L19WD Series www.lorexcctv.com Includes L19WD800 & L19WD1600 Copyright 2008 Lorex Technology Inc. Table of Contents Table
User Manual. Central Monitoring Software for TER-series recorders. CenPro
 EN User Manual Central Monitoring Software for TER-series recorders CenPro Contents CENPRO USER MANUAL 1 PC REQUIREMENT 3 2 INSTALL 3 3 UNINSTALL 5 4 BASIC OPERATION 7 4.1 Log In 7 4.2 Screen Layout 8
SecuGuard. Basic 5.0. Version: xxx
 SecuGuard Basic 5.0 Ł` ˆª Ø Version: 5.0.2.xxx SecuGuard Basic ` Ø ˆ ˆ...6 ˆ Ø...7 Ł ˆ Ø»ˆÆ ˆ`... 7 ˆŁ` ˆ Ø»ˆÆ ˆ`... 7 Ø Æ Ł...10 Ø IP Camera(s)... 10 Ł` IP Camera(s)... 10 ˆ Ø Ł ˆ ˆ :... 14 Playback:...
W Box VMS BOX T E C H N O L O G I E S.
 W Box VMS BOX T E C H N O L O G I E S www.wboxtech.eu Contents Contents... 1 Overview... 3 1.1 Description... 3 1.2 Running Environment... 3 1.3 Function Modules... 3 Live view... 6 2.1 User Registration
Multiviewer Stream Media Player User Manual
 Multiviewer Stream Media Player User Manual Contents Chapter One: Installation of Multiviewer... 2 Chapter Two: Multiviewer stream media player... 3 Chapter Three: Instruction of MultiVewer interface...
Product and company names appearing in this document are trademarks of each respective company or organization.
 . CMS_beta LEGAL INFORMATION Reproduction, transfer, distribution or storage of part or all of the contents in this document in any form without the prior written permission of the company is prohibited.
LOREX CLIENT Remote Agent Software
 LOREX CLIENT Remote Agent Software Instruction Manual English Version 1.0 MODEL: L500 Series www.lorexcctv.com Copyright 2006 LOREX Technology Inc. Table of Contents Table of Contents About the Lorex Client...
Table of Contents. Chapter 1 Overview In This Manual RASplus Features Product Information Chapter 2 Installation...
 Remote Administration System Plus (RASplus) Table of Contents Chapter 1 Overview... 1 1.1 In This Manual... 1 1.2 RASplus Features... 1 1.3 Product Information... 1 Chapter 2 Installation... 3 Chapter
Chapter 1 Features FEATURES
 Chapter 1 Features Operation Playback, recording and network transmission simultaneously Real time full screen or quad screen display 2X digital zoom and Picture-in-picture display Easy operations by shuttle
Central Monitoring by Center V2
 CHAPTER 9 Central Monitoring by Center V2 With Center V2, central monitoring station (CMS) can be deployed immediately because it brings multiple GV systems together into an integrated interface, allowing
NCMP85IP. Megapixel Cameras
 Megapixel Cameras NCMP85IP 1080 x 1024 HD 5.0 Megapixel Camera RS 485 Compatible H264 Algorithm Hardware Compression Supports SD Card 4GB - 16GB Manual Focus 4.5mm ~ 10mm Megapixel Lens DC12V Specification
Two-way Audio IP Cam w/night-vision Software User Guide
 Two-way Audio IP Cam w/night-vision Software User Guide Version 1.0 Contents Introduction...2 Installation...3 Using Ultra View...6 To launch the program...6 Item features...7 To add a camera... 12 To
SURVEILLANCE KIT USER MANUAL. All in One Series
 SURVEILLANCE KIT USER MANUAL All in One Series Contents Part one Basic Operation 1 1. Basic Installation 1 1. Hard Disk Installation 1 2. Mouse Connection 1 2. Starting 1 3. Turn Off 1 4. Login 2 5. Preview
RAS (Remote Administration System)
") RAS (Remote Administration System) Digital Video Recorder Software User Guide Document 900.0314 Rev 2.00 RAS User Guide Revisions Issue Date Revisions 1.00 08/04 New document. 1.01 04/05 Update template,
RAS (Remote Administration System) Digital Video Recorder Software User Guide Document 900.0314 Rev 2.00 RAS User Guide Revisions Issue Date Revisions 1.00 08/04 New document. 1.01 04/05 Update template,
User Manual of Client Software for Embedded DVRDVS (Version 1.4)
") User Manual of Client Software for Embedded DVRDVS (Version 1.4) 1 Index Version Description...3 Chapter 1 Client Software Installation...6 1.1 Notice...6 1.2 Installation...7 Chapter 2 Client Software
User Manual of Client Software for Embedded DVRDVS (Version 1.4) 1 Index Version Description...3 Chapter 1 Client Software Installation...6 1.1 Notice...6 1.2 Installation...7 Chapter 2 Client Software
S-Series Multi-Site Client Software OPERATION MANUAL
 S-Series Multi-Site Client Software OPERATION MANUAL Copyright 2005 All rights reserved Reproduction, adaptation, or translation without prior written permission is prohibited, except as allowed under
Vivotek ST3402 User s Manual
 Vivotek ST3402 User s Manual 0 Contents Chapter 1 Installation... 1-3 1.1 System Hardware Requirements... 1-3 1.1.1 Recommended minimum system hardware requirements... 1-3 1.2 Software Installation...
IMS200 SURVEILLANCE SYSTEM USER MANUAL
 IMS200 SURVEILLANCE SYSTEM USER MANUAL 1 PRECAUTIONS The contents of this manual may change due to product upgrades or other reasons. We have the right to make changes of the contents without notice. This
Contents Contents. Chapter 1. Program Installation. Chapter 2. For the start of CMS. Chapter 3. Monitoring. Chapter 4. E-Map Mode
 CMS User's Manual Contents 0 Contents Chapter 1. Program Installation 1.1 PC specifications 1.2 Program Installation Chapter 2. For the start of CMS 2.1 Site Registration Setup (Network Camera Registration)
Central Management System User s Manual
 Central Management System User s Manual Version 1.4.0 Table of Contents 1. Overview...3 1.1 System Requirement...4 1.2 Supported IP Camera...5 2. Software Installation...6 3. Software Upgrade...10 4. Start
DNVR(Digital Network Video Recorder) USER MANUAL. Before using this system, please read the user manual. carefully.
 USER MANUAL. Before using this system, please read the user manual. carefully.") DNVR(Digital Network Video Recorder) USER MANUAL DVR-104M9/DVR-416M9 DVR-816M9/DVR-832M9 Before using this system, please read the user manual carefully. 1 Attention: *Don t use the system at place with
DNVR(Digital Network Video Recorder) USER MANUAL DVR-104M9/DVR-416M9 DVR-816M9/DVR-832M9 Before using this system, please read the user manual carefully. 1 Attention: *Don t use the system at place with
DIGITAL VIDEO RECORDER INSTRUCTION MANUAL VER J1.2
 DIGITAL VIDEO RECORDER INSTRUCTION MANUAL VER J1.2 1. Unit Description (1) Front Panel 1 2 3 4 5 7 6 1) REMOVABLE HARD DISK DRIVE BAY 2) PLAY / STOP / FAST REWIND / FAST FORWARD / RECORD / POWER From left
Mobile DVR Record File Manager Software User s Manual
 Mobile DVR Record File Manager Software User s Manual Version 1.0.0 Table of Contents 1 General Introduction...4 1.1 Overview...4 1.2 General Performance...4 2 Installation...5 2.1 Installation Steps...5
Siera CMS Panther v3.0
 1 This manual maybe exist inexact in technology, product feature, operation discrepancy or misprint. The content of the manual will renew according to the product function enhance, and regular change or
Control Software centralized HEM. User Manual
 Control Software centralized HEM User Manual Page: - 2-1. Product Overview This software (HEM-HyperElectronicsMappers) for remote control is designed to be installed into a PC for use within a surveillance
User Manual. Contents 1 WELCOME Features Installation Requirements Software Installation Software Operation...
 CMS User Manual Contents 1 WELCOME... 3 1.1Features... 3 1.2Installation Requirements... 3 1.3 Software Installation...4 2 Software Operation... 5 2.1 Menu bar... 6 2.2 Camera list tree... 7 2.3 Camera
SunEyes V Series IP Camera P2P CMS user manual
 SunEyes V Series IP Camera P2P CMS user manual Version: 2.0 Date: July. 2015 This document is applicable to all series devices in our company. Page 1 ON page 40 foreword The HiP2P client of IP Camera is
Fseye Mobilephone Client User Manual V1.0.0
 Fseye Mobilephone Client User Manual V1.0.0 1 Contents Contents... 2 1. Product Introduction... 3 1.1 Product overview... 3 1.2 Product main functions... 3 2. Software Installation... 3 2.1 Operating environment
Digital Recorder End User Guide. Official UK distribution partner
 Digital Recorder End User Guide Official UK distribution partner 2 Installer Information Contents General Operation Mouse Operation Logging into the System Quick Menu PTZ Control 4 5 5 6 Playback Operation
ENFORCER. DVRJavaView Software. User s Manual SECO-LARM. Version 0.3.9
 ENFORCER DVRJavaView Software User s Manual Version 0.3.9 SECO-LARM Table of Content 1. Overview...2 1.1 System Requirements...2 1.2 Software Limitation...2 2 Startup DVRJavaView Software...3 2.1 Main
User s Guide. Combo DVR. Thank you for purchasing our product. Please read this User s Manual before using the product. Change without Notice
 Thank you for purchasing our product. Please read this User s Manual before using the product. Change without Notice Combo DVR User s Guide User please operate according to the DVR model that you purchased
CMS Client Software Operation
 CMS Client Software Operation 1. Download CMS...2 2. Add,delete,connect the NVR IP...2 2. View many DVR images at the same time...3 3. Intercom...5 4. Capture...6 5. PTZ control...6 6. NVR Status...7 7.
INSTRUCTION MANUAL. NC-Titanium. Please read this manual thoroughly before use, and keep it handy for future reference.
 INSTRUCTION MANUAL NC-Titanium Please read this manual thoroughly before use, and keep it handy for future reference. Table of Contents Chapter 1 Introduction... 1 1.1 Features... 1 1.2 System Requirements...
Local Playback Software User Manual V1.0
 Local Playback Software User Manual V1.0 Index Chapter 1 Introduction... 3 1.1 Overview... 3 1.2 System Requirements... 3 Chapter 2 Install & Uninstall... 4 2.1 Install the Software... 4 2.2 Uninstall...
CAMERAS IP START SERIES
 CAMERAS IP START SERIES Contents 1. Login Interface... 3 2. Preview... 4 2.1 Open/Close Preview... 5 2.2 Full-screen Preview... 5 2.3 Electronic Zoom-in... 5 2.3 PTZ Control... 6 3. File Management...
Pro7400H1 Hybrid DVR User Manual
 Pro7400H1 Hybrid DVR User Manual User Information Admin User Name: Admin Password: IP Address: System Name: Table Of Contents 1. Menu Operation... 4 1.1 Main Menu... 4 2. Start Up/Shutdown System... 5
Quick Operation Guide of ivms-4200
 Quick Operation Guide of ivms-4200 V1.02 2012-02-22 Description ivms-4200 is a video management software using a distributed structure to manage all the connectable devices. It can manage the NVR, DVR,
DDR-08 DDR-16 Full D1 Realtime H.264 DVR 8 / 16 CH. Quick Setup Guide
 DDR-08 DDR-16 Full D1 Realtime H.264 DVR 8 / 16 CH. Quick Setup Guide PACKAGE CONTENTS A. One (1) DDR-08 / DDR-16 DVR B. One (1) Remote Controller C. Two (2) AAA Battery for Remote Controller D. One (1)
Multi-NVR Manager. Quick Start Configuration Usage
 Multi-NVR Manager Quick Start Configuration Usage 2014. All rights are reserved. No portion of this document may be reproduced without permission. All trademarks and brand names mentioned in this publication
VIPER. Quick User Guide
 VIPER Quick User Guide 1 2 Please read this manual thoroughly before use and keep it handy for future reference. Contents 1. Overview... 1 1.1 DVR Description... 1 1.2 DVR power up... 1 1.2.1 Login...
- Image search. - Duplex audio
 2 3 M-Client is a remote monitoring program that enables user to monitor and record image of many DVRs installed in remote sites and to search recorded image in server DVR. 1. Functions - Connection to
HD IPCameras User's Mannual
 Thank you for purchasing our products, if you have any questions or need, please feel free to contact us. This manual applies to IPC-XXX series of network cameras. This manual may contain technical inaccuracies
JVS-D7216 Standalone DVR User Manual
 Menu JVS-D7216 Standalone DVR User Manual JVS-D7216 Standalone DVR Instructions 1. Introduction..4 1.1 Product Description...4 1.2 Features..4 1.3 Specifications...4 2. Product Features....6 2.1 Panel
Blue v2 INSPIRE DVR RANGE USER MANUAL
 INSPIRE Blue v2 DVR RANGE USER MANUAL Contents Logging into the DVR Mouse menu Live viewing Playback Smartphone viewing setup Smartphone viewing Copy to USB/Disc Using Cop player 2 playback software Using
Digital Recorder End User Guide
 Digital Recorder End User Guide metcalfeallen www.metcalfeallen.co.uk - 01884 38222 - admin@metcalfeallen.co.uk Installer Information Metcalfe Allen Ltd Unit 7 Saunders Way Kingsmill Industrial Estate
User s Manual. Surveillance Client PC Software for Windows OS & Mac OS Central Management Software. Surveillance Client
 User s Manual Surveillance Client PC Software for Windows OS & Mac OS Central Management Software Surveillance Client Contents 1 Product Description...4 1.1 Important Disclaimer...4 1.2 Software Related
H.264 Network DVR. Quick Start. GUI Display with USB Mouse Control 336Z
 336Z H.264 Network DVR Quick Start GUI Display with USB Mouse Control Please read instructions thoroughly before operation and retain it for future reference. For the actual display & operation, please
Local Playback Software User Manual
 Local Playback Software User Manual UD.6L0202D1299A01 Thank you for purchasing our product. This manual applies to Local Playback software, please read it carefully for the better use of this software.
Central Management System User s Manual
 Central Management System User s Manual Version 3.4.0 rel. date: 2/23/09 Optiview Inc. Table of Contents 1. Overview...3 1.1 System Requirement...4 1.2 Supported IP Cameras...5 2. Software Installation...6
261Z. DR040_Quick_V1.0 PLAY RE C
 261Z MPEG4 4CH DVR Quick Guide REC PLAY PA USE ST OP REW FF HDD HD D Fu ll ALAR M TIMER PLAY RE C MENU ENTER LIST SLOW ZOOM SEQ Please read instructions thoroughly before operation and retain it for future
Quick Start Guide 4/8-CH DVR
 Quick Start Guide 4/8-CH DVR 1 1. Install Hard Drive &DVD Writer 1.1 Install Hard Drive Notice: 1. this series support one SATA hard drives. Please use the hard drive the manufacturers recommend specially
Remote DVR Manager. User s Guide. v 1.1
 Remote DVR Manager User s Guide v 1.1 DVR Manager TABLE OF CONTENTS OVERVIEW...5 1. PC system requirements...5 2. Installing Program... 6 DVR Manager Monitor...8 3. Screen mode...8 3.1. Screens split...
Central Management System User s Manual
 Central Management System User s Manual Version 3.8.0 Table of Contents 1. Overview...3 1.1 System Requirement...4 1.2 Supported IP Cameras...5 2. Software Installation...6 3. Software Upgrade...11 3.1
H.264 Network DVR. Quick Start
 341Z H.264 Network DVR Quick Start GUI Display with USB Mouse Control Please read instructions thoroughly before operation and retain it for future reference. For the actual display & operation, please
H.264 Digital Video Recorder
 H.264 Digital Video Recorder User Manual 1/73 Contents 1. Production Introduction... 4 2. Installation...4 2.1. HDD Installation... 4 3. Fast Operation...5 3.1. Login...5 3.2. Starup Wizard... 6 3.3. Menu
CHAPTER 1. Welcome to WalkGuard- IPCam
 CHAPTER 1 Welcome to WalkGuard- IPCam Digital Surveillance software with Digital MPEG 4 Recording 1.1 Introduction The WalkGuard-IPCam is an ideal solution for Internet or Wi-Fi Camera, it also allows
CMS User's Manual. Version 1.9
 CMS User's Manual Version 1.9 Introduction 0 Introduction [ Principal function ] This CMS Interlocked with megapixel camera. This CMS supports easy connection and registration of the site(camera) This
Network Video Monitor Software
 Network Video Monitor Software V2.0.0.7 Operation menu 1 www.opax.com Chapter 1 Product Overview 1.1 Performance instruction Network video monitoring software is a centralized management software for I8