Bonanza Integration - User Guide
|
|
|
- Leonard Carson
- 5 years ago
- Views:
Transcription
1 by CedCommerce Products Documentation 1 / 53
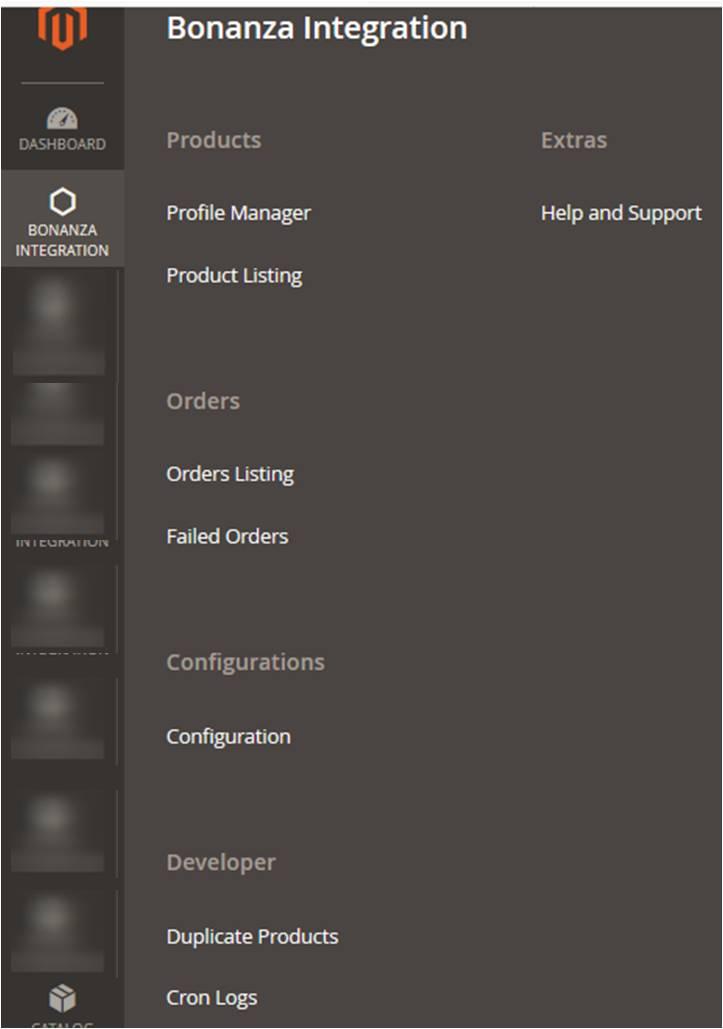
2 1. Overview Bonanza Integration for Magento 2 Extension Installation Retrieve API Credentials from the Bonanza Seller Account Bonanza Configuration Settings Manage Bonanza Profiles Add a New Profile Edit the Existing Profile Submit Bulk Action on the Selected Profiles Bonanza Product Listing View the Product Details Edit the Bonanza Products Validate the Single Product Submit Bulk Action on the Selected Products Manage Bonanza Orders Ship and Delete the Bonanza Orders View and Delete the Bonanza Failed Orders Bonanza Duplicate Products Bonanza Cron Details Bonanza Help And Support / 53
3 1. Overview Bonanza is the marketplace, which is well known for its unique collection of crafts, fashion, vintage, and so on. Now, the Magento 2 store owners can get integrated their Magneto 2 stores with the Bonanza marketplace with the help of CedCommerce and provide more benefits to the seller of your store and thus increase the sale of your business. Admin gets the authority to create Bonanza Categories and the dependent attributes on the Magento 2 store. It also enables the store owners to establish a mapping of the desired product category on the Magento 2 stores for automatic submission of the selected product to the same category on bonanza.com. Bonanza Integration for the Magento 2 Stores enables the admin to manage the Bonanza orders in their Magento 2 stores without making any significant changes to the operational functionalities. This extension interacts with the Bonanza Marketplace to integrate the synchronized product listing between Magento 2 store and the bonanza.com retailers. It synchronizes the orders, products, pricing, and inventory through establishing the communication between Bonanza APIs and the Magento 2 store. Key Features of Bonanza Integration Extension by CedCommerce: Profile Based Product Upload: Admin can create a profile and map the category and attributes to Magento 2 store category and attributes. Then, after assigning the product to the profile can easily upload the product to Bonanza. Product Category Mapping: Follows many-to-one category mapping philosophy. Enables the admin to map many categories of the Magento 2 stores to the single category of Bonanza. Synchronized Inventory and Profile Based Pricing: Auto synchronization of the inventory at regular intervals and product listings along with all the details is established between Magento 2 store and Bonanza.com. Profile-based price increase or decrease. Low Stock Notifications: Whenever the stock diminishes lower than the threshold, a notification is sent informing the status of the same. New Order Notifications: Whenever a new order is fetched from Bonanza.com, the admin receives a notification. Rejected products notification: If any product containing some invalid details is rejected, then its information is fetched from the auto synchronization request along with the error due to which it is rejected. Simple and Configurable Product Upload: Admin can upload the Simple and Configurable types of Magento 2 store product on Bonanza.com. The configurable product in Magento 2 stores is treated as variation product on Bonanza.com. Easy Debug: Easy debug process for hassle-free products upload on the Bonanza website. Creation of Magento Orders: Newly placed orders on Bonanza.com are automatically created in the Magento store as well with all the required details as on Bonanza.com. Automated Shipment: The shipment process can be automated with Shipstation, Shipworks, Stamps.com, Linnworks, Xtento, ShipRush. Crons: Cron job automates the process for Inventory, Price, and Order management. Archive and Unarchive Products: Merchants can close and reopen the products on Bonanza using Archive and Unarchive feature. Archive disables the products on Bonanza whereas unarchive enables the archived product. 2. Bonanza Integration for Magento 2 Extension Installation To install the extension 3 / 53
4 1. Log in the ftp, and then go to Magento 2 root folder (generally present under the public_html folder). 2. Create a new folder named code under the app folder; under code folder, create a folder named Ced. a. Upload or Drag and Drop app/code/ced/bonanza directory. b. After successfully uploading the directory, the extension will be installed/upgraded. c. Now run the following upgrade command in cmd php bin/magento setup:upgrade 3. Retrieve API Credentials from the Bonanza Seller Account Once the extension is successfully installed in the Magento store, the Bonanza menu appears on the top navigation bar of the Admin Panel. The store owner has to fill out the retrieved the Bonanza DEVELOPER ID and BONAPITIT CERTIFICATE ID details in the respective fields displayed on the Bonanza Configuration page of the admin panel. To retrieve the API credentials from the Bonanza Seller Account 1. Go to the link. The page appears as shown in the following figure: 2. In the right-upper corner, click the Log in link. The login page appears as shown in the following figure: 4 / 53

5 3. Enter the login credentials to log into the Bonanza seller account. The seller account page appears. 4. Scroll down to the API link. 5. Click the API link. The Bonanza API page appears. 6. Click the My Account link. The page appears as shown in the following figure: 5 / 53

6 7. Copy the DEVELOPER ID and the BONAPITIT CERTIFICATE ID values. 8. Save the corresponding values in some text editor or the in Word file to use it later on while setting up the configuration in the Magento 2 store admin panel. 4. Bonanza Configuration Settings After obtaining the API Key values from the Bonanza Seller account, the Magento 2 store owner has to paste it in the respective field displayed on the Bonanza Configuration page of the admin panel. To set up the configuration settings in the Magento Store Admin panel 1. Go to the Magento 2 Store Admin panel. 2. On the left navigation bar, click the BONANZA INTEGRATION menu. The menu appears as shown in the following figure: 6 / 53
7 7 / 53
8 3. Click Configuration. The Configuration page appears as shown in the following figure: 4. In the right panel, click the Bonanza Seller/Developer Settings tab. The Bonanza Seller/Developer Settings tab is expanded and the relevant fields appear as shown in the following figure: 5. Under Bonanza Seller/Developer Settings, do the following steps: a. In the Enabled list, select the Yes option. The relevant fields are expanded, and the section appears as shown in the following figure: 8 / 53
9 b. In the API MODE list, select the Live API option. c. In the Cert Id box, enter the corresponding value copied from the Bonanza Seller account. d. In the Dev Id box, enter the corresponding value copied from the Bonanza Seller account. e. In the Count of Specific Attributes box, enter the count number. f. In the Select Store list, select the required store. g. Click the Generate Token button to create the token and complete the synchronization process. The token is gerated and appears in the Token box. Also, the Token expiry date appears next to the Token Expires field. 6. Click the Save Config button to save the entered values. 7. Scroll down to the Bonanza Product Settings tab, and then click the tab. The Bonanza Product Settings tab is expanded and the expanded section appears as shown in the following figure: 9 / 53
10 Under Bonanza Product Settings, do the following steps: 1. Click the Bonanza Price Settings tab. The Bonanza Price Settings tab is expanded and the section appears as shown in the following figure: 2. Under Bonanza Price Settings, do the following step: a. In the Product Price list, select one of the following options: `. Increase by Fixed Price: If selected, then the Modify by Fix Pricefield appears. `. Increase by Fixed Percentage: If selected, then the Modify by Percentage Price field appears. Enter the numeric value to increase the price of the Bonanza, product price by the entered value % of Magento 2 store price. For Example, Magento 2 price + 5% of Magento 2 price. Magento 2 Price = 100 Select Increase By Fixed Percentage option Modify by Percentage Price = % of 100 = = 105 Thus, Bonanza Product Price = 105 `. Decrease by Fixed Price: If selected, then the Modify by Fix Price field appears. `. Decrease by Fixed Percentage: If selected, then the Modify by Percentage Price field appears. Enter the numeric value to decrease the price of the Bonanza product price by the entered value % of Magento 2 store price For Example, Magento 2 price 5% of Magento 2 price. Magento 2 Price = / 53
11 Select Decrease By Fixed Percentage option Modify by Fix Price = % of 100 = = 95 Thus, Bonanza Product Price = Click the Bonanza Inventory Settings tab. The Bonanza Inventory Settings tab is expanded and the section appears as shown in the following figure: 4. Under Bonanza Inventory Settings tab, do the following steps: a. In the Set Inventory on Basis of Threshold list, select the Enable option if required to set the inventory based on threshold. Note: Only when the admin selects Enable, the other fields appear. Threshold Inventory is the minimum count of an item that the store owner wants to keep in stock. The section appears as shown in the following figure: b. In the Inventory Threshold Value box, enter the required value. c. In the Send Inventory for Lesser Than Threshold Case box, enter the required value. d. In the Send Inventory for Greater Than Threshold Case box, enter the required value. 5. Click the Save Config button to save the entered values. 6. Scroll down to the Bonanza Order Settings tab, and then click the tab. 11 / 53
12 The tab is expanded and the section appears as shown in the following figure: 7. Under Bonanza Order Settings, do the following steps: a. In the Bonanza Order Id Prefix box, enter the required order Id prefix. b. In the Order Notification box, enter the required Id. c. In the Enable Default Customer list, select the Yes option to enable the default customer. The field appears as shown in the following figure: d. In the Default Customer list, select the required customer name. 8. Click the Save Config button to save the entered values. 9. Scroll down to the Bonanza Cron Settings tab, and then click the tab. The tab is expanded and the section appears as shown in the following figure: 10. Under Bonanza Cron Settings, do the following steps: a. In the Order Cron list, select Enable to enable the fetch order cron. b. In the Inventory Price Cron list, select Enable to enable the Inventory and Price Sync cron. 11. Click the Save Config button to save the entered values. 12 / 53
13 5. Manage Bonanza Profiles Admin can create a new profile and assign the required products to the profile. While creating and editing the profile, admin can map the Magento 2 store attributes to the Bonanza attributes. These attributes are applicable to all the products that are assigned to the profile. Admin can do the following tasks: Add new profile( Edit the existing profile( Bulk Action on the Selected Profiles( Add a New Profile To add a new profile 1. Go to the Magento 2 Store Admin panel. 2. On the left navigation bar, click the BONANZA INTEGRATION menu, and then click Profile Manager. The Manage Profile page appears as shown in the following figure: 3. Click the Add New Profile button. The Add New Profile page appears as shown in the following figure: 13 / 53

14 4. In the right panel, under General Information, do the following steps: a. In the Profile Code box, enter a profile code. Note: It is only for the internal use. Use the unique profile code with no spaces. Start with small letters. b. In the Profile Name box, enter the name of the profile. Note: Use the unique name to identify the profile. c. In the Profile Status list, select Enabled to enable the profile. Note: The Disabled option disables the profile. 5. In the left navigation panel, click the Attribute Mappings menu. In the right panel, the page appears as shown in the following figure: 6. Under Attribute Mappings, do the following steps: a. In the Magento Catalog Attribute column, select the required Magento attribute from the corresponding list to map it with the corresponding Lazada attribute. b. Repeat the mapping of all the required or optional Magento attributes listed with the corresponding Lazada attributes. c. Click the Add Attribute button to add more attributes if required. 14 / 53
15 7. In the left navigation panel, click the Store Categories menu. In the right panel, the page appears as shown in the following figure: 8. Under Store Categories, do the following steps: a. In the Choose Store Categories list, click to select the required category. The list appears as shown in the following figure: 15 / 53
16 b. Select the required category, and then click the Done button or outside the list. The selected category appears in the box. 9. In the left navigation panel, click the Bonanza Category menu. In the right panel, the page appears as shown in the following figure: 10. Under Bonanza Category,do the following steps: a. In the Category list, select the required parent category. If the selected category has the child categories then the relevant sub-category list appears below to it. b. Select the required subcategories as shown in the figure. 11. In the left navigation panel, click the Bonanza Shipping menu. In the right panel, the page appears as shown in the following figure: 16 / 53
17 12. Under Bonanza Shipping, do the following steps: a. In the Shipping Type list, select the required shipping type. Based on the selected option, the relevant field appears. For example, if the Free shipping type is selected, then the relevant fields appear as shown in the following figure: b. In the Shipping Method list, select the required method. 13. In the left navigation panel, click the Return Policy menu. In the right panel, the page appears as shown in the following figure: 17 / 53
18 14. Under Return Policy, do the following steps: a. In the Description box, enter the return policy description. b. In the Within Duration box, enter the number of days within which the customer can return the product. c. In the Accepted Option list, select option whether to accept the return or not. d. In the Shipping Cost Paid By list, select the payer of the shipping cost. 15. Click the Save button. The profile is created and listed on the Manage Profile page Edit the Existing Profile To edit the existing profile 1. Go to the Magento 2 Store Admin panel. 2. On the left navigation bar, click the BONANZA INTEGRATION menu, and then click Profile Manager. The Manage Profile page appears as shown in the following figure: 3. Scroll down to the required profile row. 4. In the Action column of the respective row, click the Edit link. The profile editing page appears as shown in the following figure: 18 / 53
19 5. In the left navigation panel, click the required menu, and then make the changes as per requirement in the respective section. 6. Click the Save button. The edited profile is saved and the success message appears on the Manage Profile page Submit Bulk Action on the Selected Profiles Admin can delete the selected profiles and also can change the status of the profiles in bulk. To submit the selected action on the selected profiles in Bulk 1. Go to the Magento 2 Store Admin panel. 2. On the left navigation bar, click the BONANZA INTEGRATION menu, and then click Profile Manager. The Manage Profile page appears as shown in the following figure: On this page, all the available profiles are listed. 3. To delete the selected profiles, do the following steps: a. Select the profiles those are no more required. b. Click the Arrow button next to the Actions field. 19 / 53
20 The Actions list appear as shown in the following figure: c. Click the Delete option. A confirmation dialog box appears. d. Click the OK button. The selected profiles are deleted. 4. To disable the selected profiles, do the following steps: a. Select the required profiles. b. Click the Arrow button next to the Actions field. The Actions list appear as shown in the following figure: c. Click the Disable option. The selected profiles are disabled. 5. To enable the selected profiles, do the following steps: a. Select the required profiles. b. Click the Arrow button next to the Actions field. The Actions list appear as shown in the following figure: c. Click the Enable option. The selected profiles are enabled. 20 / 53
21 6. Bonanza Product Listing On this page, admin can view, edit, and validate the individual product. Also, the admin can view the error message if any error exists in any product details. After uploading the product on Bonanza or after updating the product inventory or the product price, the user can check the status of the feed, Also, can view the feed error if any. The admin can also submit certain actions on the selected products available on the Bonanza Product Listing page. This section covers the following topics: View the Product Details( Edit the Bonanza Products( Validate the Single Product( Submit Bulk Action on the Selected Products( View the Product Details To view the product details 1. Go to the Magento 2 Store Admin panel. 2. On the left navigation bar, click the BONANZA INTEGRATION menu. The menu appears as shown in the following figure: 21 / 53
22 22 / 53

23 3. Click Product Listing. The Bonanza Product Listing page appears as shown in the following figure: 4. Scroll down to the required product row. 5. In the Action column of the respective row, click the View icon. A page appears as shown in the following figure: 6. Click the Cancel button to close the page Edit the Bonanza Products To edit the Bonanza product details 1. Go to the Magento 2 Store Admin panel. 2. On the left navigation bar, click the BONANZA INTEGRATION menu. The menu appears as shown in the following figure: 23 / 53
24 24 / 53
25 3. Click Product Listing. The Bonanza Product Listing page appears as shown in the following figure: 4. Scroll down to the required product row. 5. In the Action column of the respective row, click the Edit icon. The product editing page appears. 6. Scroll down to the Bonanza tab, and then click the tab. The tab is expanded and the expanded section appears as shown in the following figure: 7. Enter the required information or edit the values in the required fields, and then click the Save button. The changes are saved and the success message appears on the Bonanza Product Listing page. 25 / 53
26 6.3. Validate the Single Product To validate single the product 1. Go to the Magento 2 Store Admin panel. 2. On the left navigation bar, click the BONANZA INTEGRATION menu. The menu appears as shown in the following figure: 26 / 53
27 27 / 53

28 3. Click Product Listing. The Bonanza Product Listing page appears as shown in the following figure: 4. Scroll down to the required product row. 5. In the Action column of the respective row, click the Validate icon. If the product is validated successfully and a success message appears on the top of the page. If there is an error, then an INVALID button appears in the Validation column of the respective product row. 6. To view the cause of product invalidation, click teh respective INVALID button. A dailog box appears as shown in the foloowing figure, which dispalys the errors related to the product. 28 / 53
29 7. Correct the issues and then again click the Validate icon to validate the product Submit Bulk Action on the Selected Products Admin can perform the following tasks through the Bulk Action feature: Validate Product: To validate the selected products before uploading to the Bonanza website. It displays the corresponding validation error if any. If there is no error, it confirms that the product is ready to upload. Upload Products: To validate and upload the selected products to the Bonanza website. It displays the corresponding validation error if any. If there is no error, then the selected products are validated and uploaded, and a success message appears. Update Products: To update the products edits on the Bonanza website. Delete Products: Removes the selected products from the Bonanza website. To submit the selected bulk action on the selected products 1. Go to the Magento 2 Store Admin panel. 2. On the left navigation bar, click the BONANZA INTEGRATION menu. The menu appears as shown in the following figure: 29 / 53
30 30 / 53
31 3. Click Product Listing. The Bonanza Product Listing page appears as shown in the following figure: 4. To validate the selected products, do the following steps: a. Select the checkboxes associated with the required products. b. In the Actions list, click the arrow button. A list appears as shown in the figure: c. Click Validate Product. A confirmation dialog box appears. d. Click the OK button. The selected products validation process is executed and the page appears as shown in the following figure: 31 / 53

. A confirmation dialog box appears. d. Click the OK button.")
32 The selected products are validated. e. Click the Back button to go back to the Bonanza Product Listing page. If there is an error, then the INVALID buttons appear in the Validation column of the respective product rows. Note: Click the INVALID buttons to view the error details. 5. To upload the selected products, do the following steps: a. Select the check boxes associated with the required products. b. In the Actions list, click the arrow button. A list appears as shown in the figure: c. Click Upload Product(s). A confirmation dialog box appears. d. Click the OK button. The selected products uploading process is executed and the page appears as shown in the following figure: 32 / 53

33 If the selected products are uploaded successfully, then a success message appears on the page. If there is an error and the upload is failed, then the error is intimated on the page as shown in the figure. 6. To update the selected products, do the following steps: a. Select the check boxes associated with the required products. b. In the Actions list, click the arrow button. A list appears as shown in the figure: c. Click Update Products. A confirmation dialog box appears. d. Click the OK button. The selected products updating process is executed and the page appears as shown in the following figure: If the selected products are updated successfully on the Bonanza marketplace, then a success message appears on the page. If there is an error and the updating process is failed, then the error is intimated on the page as shown in the figure. 7. To delete the selected products, do the following steps: a. Select the check boxes associated with the required products. b. In the Actions list, click the arrow button. A list appears as shown in the figure: c. Click Delete Products. A confirmation dialog box appears. d. Click the OK button. The selected products are deleted and a success message appears on the page. 33 / 53
34 7. Manage Bonanza Orders Admin can do the following tasks while managing the Bonanza orders: Fetch, View, Ship, and delete the Bonanza Orders( View and delete the Failed Orders( Ship and Delete the Bonanza Orders The Magento 2 store owners can fetch the new orders and view all the order details fetched from Bonanza. They can also ship the required orders and can delete the orders those are no more required. To fetch and view new orders 1. Go to the Magento 2 Store Admin panel. 2. On the left navigation bar, click the BONANZA INTEGRATION menu. The menu appears as shown in the following figure: 34 / 53
35 35 / 53
36 3. Click Orders Listing. The Bonanza Order List page appears as shown in the following figure: 4. Click the Fetch Bonanza Orders button. If the order is imported successfully then, a new record is found in the Orders Grid table as shown in the figure. Notes: Orders are automatically imported through CRON in every 10 minutes. Whenever the latest orders are imported from Bonanza, a Notification appears in the notification area of the Admin panel for those orders and they are Auto-Acknowledged as soon as they are imported in the Magento 2 store admin panel. If no Order is imported, then check the Failed orders listed on the Bonanza Failed Order page. Order are auto-rejected on Bonanza in the following conditions: When Bonanza Product SKU does not exist in Magento 2 store. When Product is Out of Stock in Magento 2 store. When a product is disabled in Magento 2 store. To ship the Bonanza Order 1. Go to the Magento 2 Admin panel. 2. On the left navigation bar, click the BONANZA INTEGRATION menu, and then click Orders Listing. The Bonanza Order List page appears as shown in the following figure: 3. Scroll down to the required row of the order to ship. 4. In the Action column of the respective row, click the Edit 36 / 53
37 icon. The Order view page appears 5. In the left navigation panel, click the Bonanza menu. The page appears in the right panel as shown in the following figure: 6. Under the Bonanza Order Information section, do the following steps: a. In the Shipping Provider list, select the required carrier. b. In the Tracking Number box, enter the required value. c. In the PrivateNote box, enter the required private notes. d. In the notes box, enter the required private notes. 7. Click the Submit Shipment button. The success message appears if the order is shipped successfully. To delete the Bonanza orders 1. Go to the Magento 2 Admin panel. 2. On the left navigation bar, click the BONANZA INTEGRATION menu, and then click Orders Listing. The Bonanza Order List page appears as shown in the following figure: 37 / 53
38 3. To delete the single order, do the following steps: a. Scroll down to the order row no more required. b. In the Action column of the respective row, click the Delete icon. A confirmation dialog box appears. c. Click the OK button. The order is deleted from the Bonanza Marketplace. 4. To delete the selected Bonanza orders in bulk, do the following steps: a. Select the check boxes associated with the orders those are no more required. b. Click the Arrow button next to the Actions list. A menu appears as shown in the following figure: c. Click Delete Order(s). A confirmation dialog box appears. d. Click the OK button. The selected orders are deleted from the Bonanza Marketplace View and Delete the Bonanza Failed Orders The users can view the list of failed Bonanza orders on the Bonanza Failed Orders page. In the following conditions, Orders are not imported from Bonanza : If any product in the Bonanza Order is Out of Stock in the Magento 2 store. If any product in the Bonanza Order is disabled in the Magento 2 store. If any Product does not exist in Magento 2 or is deleted from the Magneto 2 store after uploading on Bonanza. If the selected Payment Method in Bonanza System Configuration Setting is not available in the Magento 2 store. To view Bonanza failed orders 1. Go to the Magento 2 Store Admin panel. 2. On the left navigation bar, click the BONANZA INTEGRATION menu. The menu appears as shown in the following figure: 38 / 53
39 39 / 53
40 3. Click Failed Orders. The Bonanza Failed Order page appears as shown in the following figure: This page displays the failed orders with the order id and the reason for the failure. 4. To view the order data details, do the following steps: a. Scroll down to the required failed order row. b. In the Order Data column of the respective row, click the View icon. The Order Data page appears as shown in the following figure: The specific order data details appear on this page. c. Click the Cancel button to close the page. 5. To view the order item details, do the following steps: a. Scroll down to the required failed order row. b. In the Order Items column of the respective row, click the View icon. The Order Data page appears as shown in the following figure: 40 / 53

41 The specific order item details appear on this page. c. Click the Cancel button to close the page. 6. To delete the selected failed orders, do the following steps: a. Go to the Bonanza Failed Order page. b. Select the check boxes associated with the failed orders those are no more required. c. Click the Actions list Arrow button. A menu appears as shown in the following figure: d. Click Delete. A confirmation dialog box appears. e. Click the OK button. The selected failed orders are deleted. 8. Bonanza Duplicate Products On the Bonanza Duplicate Products page, the store owners can fetch all the items from Bonanza and analyze them and set the status of the fetched items. They can find the duplicate products and can also delete all the fetched and analyzed items on one click. Also, they have facility to delete the selected products from Bonanza. To fetch all the items from Bonanza 1. Go to the Magento 2 Store Admin panel. 41 / 53
42 2. On the left navigation bar, click the BONANZA INTEGRATION menu. The menu appears as shown in the following figure: 42 / 53
43 43 / 53
44 3. Click Duplicate Products. The Bonanza Duplicate Products page appears as shown in the following figure: 4. Click the Fetch Booth Item(s) button. All the items from Bonanza are fetched and listed on the Bonanza Duplicate Products page. To analyze the fetched items 1. Go to the Magento 2 Store Admin panel. 2. On the left navigation bar, click the BONANZA INTEGRATION menu. The menu appears as shown in the following figure: 44 / 53
45 45 / 53
 page appears and the process of analyzing items is executed as shown in the following figure: 5.")

46 3. Click Duplicate Products. The Bonanza Duplicate Products page appears as shown in the following figure: 4. Click the Analyze button. The Analyze Items(s) page appears and the process of analyzing items is executed as shown in the following figure: 5. Click the Back button to go back to the Bonanza Duplicate Products page. To delete all the analyzed and fetched items from the Bonanza Duplicate Products page 1. Go to the Magento 2 Store Admin panel. 2. On the left navigation bar, click the BONANZA INTEGRATION menu. The menu appears as shown in the following figure: 46 / 53
47 47 / 53
48 3. Click Duplicate Products. The Bonanza Duplicate Products page appears as shown in the following figure: 4. Click the Truncate button. All the fetched and anlayzed items are deleted, that is, it makes the Bonanza Duplicate Products grid empty. To delete the selected Items 1. Go to the Magento 2 Store Admin panel. 2. On the left navigation bar, click the BONANZA INTEGRATION menu, and then click Duplicate Products. The Bonanza Duplicate Products page appears as shown in the following figure: 48 / 53
49 3. Select the checkboxes associated with the required items. 4. In the Bulk Actions list, click the Arrow button. A menu appears as shown in the following figure: 5. Click Delete Entry(s). A confirmation dialog box appears. 6. Click the OK button. The selected items are deleted. 9. Bonanza Cron Details To view Bonanza Cron Details 1. Go to the Magento 2 store Admin panel. 2. On the left navigation bar, click the BONANZA INTEGRATION menu. A menu appears as shown in the following figure: 49 / 53
50 50 / 53
51 3. Click Cron Logs. The Bonanza Crons page appears as shown in the following figure: 10. Bonanza Help And Support To view Help and Support 1. Go to the Magento 2 store Admin panel. 2. On the left navigation bar, click the BONANZA INTEGRATION menu. A menu appears as shown in the following figure: 51 / 53
52 52 / 53
53 3. Click Help and Support. The Bonanza Help and Support page appears as shown in the following figure: 53 / 53 Powered by TCPDF (
Cdiscount Integration - User Guide
 by CedCommerce Docs - Products User Guides 1 / 45 1. Overview... 3 2. Cdiscount Integration for Magento Extension Installation... 3 3. Cdiscount Configuration Settings... 4 4. Manage Cdiscount Profiles...
Catch Integration - User Guide
 by CedCommerce Products Documentation 1 / 50 1. Overview... 3 2. Catch Magento 2 Store Integration Extension Installation... 3 3. Retrieve API Credentials from the Catch Seller Account... 4 4. Catch Configuration
Ebay Integration User Guide 0.0.1
 by CedCommerce Products User Guides 1 / 34 1. Ebay Integration for Magento 2 store Overview... 3 2. Ebay Integration for Magento 2 store extension Installation... 4 3. ebay Configuration Settings... 4
Ebay Integration User Guide 0.0.1
 by CedCommerce Products User Guides 1 / 39 1. Ebay Integration for Magento 2 store Overview... 3 2. Ebay Integration for Magento 2 store extension Installation... 4 3. ebay Configuration Settings... 4
Sears Integration for Magento 2-User Guide 0.0.1
 by CedCommerce Docs - Products User Guides 1 / 36 1. Overview... 3 2. Sears Magento 2 Integration Extension Installation... 4 3. Sears Configuration Settings... 4 4. Manage Profiles... 10 4.1. Add a New
Sears-Magento Integration Guide 0.0.1
 by CedCommerce Docs - Products User Guides 1 / 34 1. Overview... 3 2. Sears Integration Extension Installation... 4 3. Sears Configuration Settings... 4 4. Manage Sears Profiles... 9 4.1. Add New Profile...
Jet-Magento Integration Guide
 Jet-Magento Integration Guide by CedCommerce Technical Publications 1 / 47 1. Overview... 3 2. Jet Integration Extension Installation... 3 3. Jet Configuration Settings... 4 4. Manage Profile... 13 4.1.
Cdiscount Integration for Magento User Guide
 by CedCommerce Docs - Products User Guides 1 / 26 1. Overview... 3 2. Cdiscount Integration Extension Installation... 3 3. Cdiscount Configuration Settings... 6 4. Manage Cdiscount Profiles... 7 4.1. Add
Newegg-Magento. Integration Guide. Abstract. CedCommerce Version CedCommerce. All Rights Reserved.
 Newegg-Magento Integration Guide Version 1.9.1 CedCommerce. All Rights Reserved. Abstract Newegg Integration, an extension by CedCommerce, is a one-stop integration, which establishes synchronization of
MercadoLibre Integration for Magento Guide
 by CedCommerce Products Documentation 1 / 33 1. Overview... 3 2. Configuration... 3 3. Profile Management... 10 3.1. Adding a Profile... 10 3.2. Editing a Profile... 15 3.3. Change the Status of Profile...
Walmart Marketplace Integration with Magento Version: 1.0
 User Guide for Walmart Marketplace Integration with Magento Version: 1.0 OVERVIEW Walmart Integration, helps to integrate your Magento store with Walmart by establishing a synchronization of products,
Jet Marketplace Integration with Magento Version: 1.0
 User Guide for Jet Marketplace Integration with Magento Version: 1.0 OVERVIEW Jet Integration, helps to integrate your Magento store with Jet by establishing a synchronization of products, orders and refunds
Facebook Store Integration - User Guide
 by CedCommerce Docs - Products User Guides 1 / 12 1. Overview... 3 2. Facebook Configuration Settings... 3 3. Manage Product Listing... 7 2 / 12 1. Overview Facebook has around 1,550 million active users.
Pincode Checker - Admin Guide
 Pincode Checker - Admin Guide by CedCommerce Technical Publications 1 / 13 1. Overview... 3 2. Pincode Checker Configuration Settings... 3 3. Manage Pincodes... 4 3.1. Actions... 9 4. Front-end View...
Magento 2 Vendor Group Addon - Admin Guide
 Magento 2 Vendor Group Addon - Admin Guide by CedCommerce Docs - Products User Guides 1 / 16 1. Overview... 3 2. Vendor Group Configuration... 3 3. Manage Vendor Groups... 4 3.1. Add a New Vendor Group...
Walmart Integration for Magento
 Walmart Integration for Magento User Manual/Installation Manual v1.0.0 1.0 Introduction Today, marketplaces are playing a vital role in the growth of the e-commerce. Amazon, ebay, Etsy, Jet.com, Walmart,
Appointment Booking System - Admin Guide
 by demo_doc 1 / 20 1. Overview... 3 2. Manage Booking Location... 3 2.1. Add a New Location... 4 2.2. Edit the Location... 5 2.3. Delete the Location... 6 3. Manage Appointment Booking Products... 7 3.1.
Magento 2 Vendor Split Cart Addon - User Guide
 by CedCommerce Docs - Products User Guides 1 / 11 1. Overview... 3 2. Vendor Split Cart Configuration... 3 3. Front-End View... 4 2 / 11 1. Overview Vendor Split Cart Addon is an add-on of CedCommerce
ebay Connector Features Module Configuration
 ebay Connector webkul.com/blog/ebay-connector-for-magento2/ March 15, 2016 ebay Connector extension allows you to integrate Magento 2 store with ebay store. Import products, categories, and orders from
Fyndiq Magento Extension
 Fyndiq Magento Extension User guide. Version 3.0 Introduction 2 Fyndiq Merchant Support 2 Prerequisites 2 Seller account 3 Create the account 3 Your company 4 Contact information 4 Your webshop on Fyndiq
Stockbase Extension Magento 2.0
 Stockbase Extension Magento 2.0 21 SEPTEMBER 2016 V. 1.0.0 STOCKBASE EXTENSION FOR MAGENTO 2.X WEBSHOP Introduction This module integrates your Stockbase service with your Magento (version 1.x+) shop for
cdiscount version BoostMyShop
 cdiscount version BoostMyShop December 07, 2017 Contents cdiscount 1 1. Overview 1 2. Installation 1 Installation steps 1 Requirements 1 Product #1 1 Product #2 2 3. Configuration 2 1. Account activation
ebay Affiliate Extension - User Guide
 by CedCommerce Docs - Products User Guides 1 / 9 1. Overview... 3 2. ebay Affilate Configuration Settings... 3 3. ebay Affiliate Products Import... 5 3.1. Import the Products through Keywords... 5 3.2.
Amazon Affiliate Program-Magento 1
 by CedCommerce Products Documentation 1 / 18 1. Overview... 3 2. Get Amazon Product Affiliate API Key, Tag Key and Secret Key... 3 3. Amazon Affiliate Configuration Settings... 8 4. Search and Import Products
Fyndiq Prestashop Module
 Fyndiq Prestashop Module User guide. Version 2.0 Introduction 2 Fyndiq Merchant Support 2 Prerequisites 2 Seller account 3 Create the account 4 Your company 4 Contact information 4 Your webshop on Fyndiq
Wholesale Add To Cart Grid. User manual
 Wholesale Add To Cart Grid User manual Table of contents 1. Overview 1.1 General information 1.2 Key features 1.3 About this manual 2. Installation 2.1 Installation requirements 2.2 Installation instructions
Magento 2 Customer Reward Management - Admin Guide
 ento 2 Customer Reward Management - Admin Guide by CedCommerce Docs - Products User Guides 1 / 25 1. Overview... 3 2. Reward System Configuration Settings... 3 3. Catalog Rule... 6 3.1. Set Up the Product
Call For Price extension User Manual
 extension User Manual Magento 2 Call for Price extension helps hiding product price and Add to Cart and replace it with button to encourage visitors to contact you for quote. Table of Content 1. Extension
USER MANUAL. Fooman Connect: Xero - Magento 2. Quick Links. Leave a Review Reviews help to build a trusted Magento community.
 USER MANUAL Fooman Connect: Xero - Magento 2 Quick Links This document is structured in the following sections: 1. 2. 3. 4. Installation Set up in Xero and Magento Using Fooman Connect Troubleshooting
USER MANUAL. Language Translator TABLE OF CONTENTS. Version: 1.0.4
 USER MANUAL TABLE OF CONTENTS Introduction... 2 Benefits of Language Translator... 2 Pre requisite... 2 Installation... 3 Installation Steps... 3 Extension Activation... 8 Configuration... 9 FAQ... 24
Guide PHPro Stock Monitor Module
 Guide PHPro Stock Monitor Module www.phpro.be more info: pieter.caluwaerts@phpro.be Date document: 12/05/2013 Version: 2.2 Owner: PHPro Business Park King Square Veldkant 33A B- 2550 Kontich Author: Pieter
Page 1 of 32. Rewards Points
 Page 1 of 32 Rewards Points Table of Contents Rewards Points... 1 Installation... 2 Configure Reward Points... 3 General Configuration... 4 Earning Points Configuration... 4 Spending Points Configuration:...
WooCommerce izettle Documentation
 WooCommerce izettle Documentation Installation 2 System requirements 2 Downloading and installing the plugin 2 Getting a license key 3 Connecting to izettle 3 Getting started 4 The plugin settings page
USER MANUAL. MageMob Admin TABLE OF CONTENTS. Version: 1.0.0
 USER MANUAL TABLE OF CONTENTS Introduction... 1 Benefits of MageMob Admin... 1 Installation & Activation... 2 Pre-requisite... 2 Installation Steps... 2 Installation via Composer... 4 Extension Activation...
MAGENTO 2 INSTALL EXTENSION MANUALLY
 MAGENTO 2 INSTALL EXTENSION MANUALLY As you may know, there are two most popular ways of installing Magento 2 extension manually. The first one is to use COMMAND LINE (recommended) and the second one is
Magento 2 Extension. ( Version ) STORE.DCKAP.COM
 STORE.DCKAP.COM") Magento 2 Extension ( Version 1.0.0 ) Table of Contents Introduction to Stock Notification 3 Version & Compatibility Support 3 Features 4 How to Install This Module? 4 General Configuration 6 Low Stock
Magento 2 Extension ( Version 1.0.0 ) Table of Contents Introduction to Stock Notification 3 Version & Compatibility Support 3 Features 4 How to Install This Module? 4 General Configuration 6 Low Stock
ebay Affiliate Extension for Magento 1-User Guide
 ebay Affiliate Extension for Magento 1-User Guide by CedCommerce Products Documentation 1 / 8 1. Overview... 3 2. ebay Affiliate Configuration Settings... 3 3. ebay Affiliate Product Import... 5 3.1. Import
Admin Product Grid Category Filter
 Admin Product Grid Category Filter User/Installation Guide Version 2.2.0 www.magevision.com Copyright 2017 MageVision. All rights reserved. 1 1. Overview The Admin Product Grid Category Filter extension
Product Questions/Answers extension for Magento2. User Guide. version 1.0. Website: Page 1
 Product Questions/Answers extension for Magento2 User Guide version 1.0 Website: http://www.itoris.com Page 1 Contents 1. Introduction... 3 2. Installation... 3 2.1. System Requirements... 3 2.2. Installation...
Stock Notification Magento2 Extension
 Stock Notification Magento2 Extension Table of Contents Stock Notification - Overview... 3 Version & Compatibility Support... 3 Features... 4 How to Install This Module?... 4 General Configuration... 5
User Manual for Market Place. Version 2.0 & above
 User Manual for Market Place Version 2.0 & above Multi Vendor Medma Marketplace Magento 2 Extension Magento 2 marketplace extension coverts you ecommerce Magento store into a complete online multi vendor
Web Push Notification
 Web Push Notification webkul.com/blog/web-push-notification-for-magento2/ On - January 13, 2017 This impressive module allows you to send push notification messages directly to the web browser. The biggest
Rewards Points for Magento 2.0
 Rewards Points for Magento 2.0 USER GUIDE Version 1.0 support@exto.io https://exto.io/rewards-points-for-magento-2.html Magento 2 Reward Points extension provides you with effective rewards program, customizable
USER MANUAL. SEO Hub TABLE OF CONTENTS. Version: 0.1.1
 USER MANUAL TABLE OF CONTENTS Introduction... 1 Benefits of SEO Hub... 1 Installation& Activation... 2 Installation Steps... 2 Extension Activation... 4 How it Works?... 5 Back End Configuration... 5 Points
Easily communicate with customers using up-to-date, customized templates. Allow customers to return products as an existing customer or guest.
 .0 USER GUIDE Version 1.0 support@exto.io http://exto.io/rma-for-magento-2.html Keep your staff informed with RMA s power Admin interface. Easily communicate with customers using up-to-date, customized
Best Practice / Home Extension Installation/Upgrade. Help & Support
 Best Practice / Home Extension Installation/Upgrade To start using M2E Pro Extension in your Magento, it should be installed first. However, M2E Pro Extension is being improved on a constant basis, so
Twitter & Facebook Login v2.x Extension Installation for Magento 2 From Plumrocket Documentation
 Twitter & Facebook Login v2.x Extension Installation for Magento 2 From Plumrocket Documentation Contents 1. Installation 2. Uploading Magento 2 extension files 2.1. SSH Installation (requires SSH access
EMARSYS FOR MAGENTO 2
 EMARSYS FOR MAGENTO 2 Integration Manual July 2017 Important Note: This PDF was uploaded in July, 2017 and will not be maintained. For the latest version of this manual, please visit our online help portal:
Quickbooks Connector Quick Start Guide
 Quickbooks Connector Quick Start Guide Installation (from a Zip file) Configuration & Setup Customer Synchronization Customer Grid Customer Detail Page Product Synchronization Product Grid Product Detail
Magento 2 Integration Manual (Version /10/2017)
") Magento 2 Integration Manual (Version 1.1.0-13/10/2017) Copyright Notice The software that this user documentation manual refers to, contains proprietary content of Megaventory Inc. and Magento (an ebay
Magento 2 Integration Manual (Version 1.1.0-13/10/2017) Copyright Notice The software that this user documentation manual refers to, contains proprietary content of Megaventory Inc. and Magento (an ebay
Table of Contents. Introduction Technical Support Getting Started Data Synchronization General Website Settings...
 E-Commerce Table of Contents Introduction... 1 Technical Support... 1 Introduction... 1 Getting Started... 2 Data Synchronization... 2 General Website Settings... 3 Customer Groups Settings... 4 New Accounts
USER MANUAL. Star Track Shipping TABLE OF CONTENTS. Version: 2.0.0
 USER MANUAL TABLE OF CONTENTS Introduction... 2 Benefits of Star Track Shipping... 2 Pre-requisites... 2 Installation... 3 Installation Steps... 3 Extension Activation... 7 Configuration... 8 Contact Us...14
Manual FCPM for Magento 2 Version 1.2.1
 INSTALLATION OF THE EXTENSION Please make sure you ve downloaded extension package compliant with your Magento version. The compliance information is stated in the package filename. Once you ve downloaded
Mobile Login extension User Manual
 extension User Manual Magento 2 allows your customers convenience and security of login through mobile number and OTP. Table of Content 1. Extension Installation Guide 2. Configuration 3. API Settings
Automatic Customer Group Switching Magento Extension
 Automatic Customer Group Switching Magento Extension User Manual This is the user manual of Automatic Customer Group Switching v1.9.3 and was last updated on 26-07-2017. To see what this extension can
Preorder Payment Gateway Extension
 Preorder Payment Gateway Extension Magento Extension User Guide Page 1 1. How to Install Table of contents: 1. How to Install....3 2. General Settings...6 3. Use as Payment option.....9 4. Preorder Installment
Updated PDF Support Manual:
 Version 2.7.0 Table of Contents Installing DT Register... 4 Component Installation... 4 Install the Upcoming Events Module...4 Joom!Fish Integration...5 Configuring DT Register...6 General... 6 Display...7
Trellis Magento 2 Salsify Connector
 Trellis Magento 2 Salsify Connector Version 0.x 09/01/2018 Table of Contents Introduction 3 Overview 3 Purpose of The Magento 2 Salsify Connector 3 Compatibility 4 Installation & Configuration 5 Magento
1. Installation Instructions
 Table of Contents 1. Extension Installation 2. Custom Options Templates 3. Dependent Custom Options 4. Stock Management 5. Custom Options Inventory 6. Options Inventory Report 7. Individual Product Custom
This guide will show you how to install and configure Fastly CDN extension for Magento 2.
 INSTALLATION.md Installation guide This guide will show you how to install and configure Fastly CDN extension for Magento 2. You may choose between three installation methods composer installation, installation
Log Monitoring And Notification User Guide
 Log Monitoring And Notification User Guide Introduction Magento Log Monitoring And Notification is an advanced extension for Magento which allows to monitor Magento Logs and Reports in a convenient grid
You can use these quick links, and the links on the left sidebar to navigate quickly around this User Manual.
 USER MANUAL Fooman Connect: Xero - Magento 2 Quick Links This document is structured in the following sections: 1. 2. 3. Set up in Xero and Magento Using Fooman Connect: Xero Troubleshooting You can use
Gift Card Manager Extension
 Ph: +91-120-4243310 Gift Card Manager Extension User Manual v1.0.0 Prepared by E-mail: support@knowband.com E-23, Sector-63, Noida. Phone: +91-120-4243310 1 Ph: +91-120-4243310 Contents 1.0 Introduction
Automatic Customer Group Switching Magento 2 Extension
 Automatic Customer Group Switching Magento 2 Extension User Manual This is the user manual of Magento 2 Automatic Customer Group Switching v100.1.2 and was last updated on 14-11-2017. To see what this
Import Export Products Attributes
 Import Export Products Attributes Extension for Magento2 Installation Guide https://www.magebees.com/magento2-import-export-products-attributesextension.html Import Export Products Attributes By Our Websites
Manage and Generate Reports
 Report Manager, page 1 Generate Reports, page 3 Trust Self-Signed Certificate for Live Data Reports, page 4 Report Viewer, page 4 Save an Existing Stock Report, page 7 Import Reports, page 7 Export Reports,
[Attribute Mapping In Jet- Magento 2 Integration]
![[Attribute Mapping In Jet- Magento 2 Integration]](/thumbs/83/88168987.jpg "[Attribute Mapping In Jet- Magento 2 Integration]") CedCommerce. All rights reserved. SUPPORT@CEDCOMMERCE.COM [Attribute Mapping In Jet- Magento 2 Integration] CedCommerce Jet-Magento 2 Integration, an extension by CedCommerce, establishes synchronization
CedCommerce. All rights reserved. SUPPORT@CEDCOMMERCE.COM [Attribute Mapping In Jet- Magento 2 Integration] CedCommerce Jet-Magento 2 Integration, an extension by CedCommerce, establishes synchronization
Magento Integration Manual (Version /15/2017)
") Magento Integration Manual (Version 2.1.1-05/15/2017) Copyright Notice The software that this user documentation manual refers to, contains proprietary content of Megaventory Inc. and Magento (an ebay
Magento Integration Manual (Version 2.1.1-05/15/2017) Copyright Notice The software that this user documentation manual refers to, contains proprietary content of Megaventory Inc. and Magento (an ebay
USER MANUAL Setting Up Fooman Connect: Xero
 USER MANUAL Setting Up Fooman Connect: Xero This user manual will take you through the set up process for Fooman Connect: Xero. The set up video provides screencasts and takes you through a simplified
USER MANUAL LANGUAGE TRANSLATOR TABLE OF CONTENTS. Version: 1.1.6
 USER MANUAL TABLE OF CONTENTS Introduction... 1 Benefits of Language Translator... 1 Installation... 2 Installation Steps... 2 Extension Activation... 3 Configuration... 4 FAQ... 16 General FAQs... 16
1. Installation Instructions
 Table of Contents 1. Extension Installation Instructions 2. Accessing the Extension Main Settings 3. Product Custom Option Templates 4. Individual Product Custom Options 5. Front-End View 6. User Agreement
Facebook Pixel for Remarketing for Magento 2
 Facebook Pixel for Remarketing for Magento 2 Facebook Pixel for Remarketing can be configured in few simple steps. We will guide through each step in this document. Installation Instructions Manual Installation
Magento 2 Extension. ( Version ) STORE.DCKAP.COM
 STORE.DCKAP.COM") Magento 2 Extension ( Version 1.0.0 ) Table of Contents Introduction to Review Coupons 3 Version & Compatibility Support 3 How to Install This Module? 4 General Configuration 5 Email Template Configuration
Magento 2 Extension ( Version 1.0.0 ) Table of Contents Introduction to Review Coupons 3 Version & Compatibility Support 3 How to Install This Module? 4 General Configuration 5 Email Template Configuration
Rakuten.com Merchant Manual
 Rakuten.com Merchant Manual 1 Table of Contents Signing into your Account..3-4 Manage Shipping Settings 5 Adding Header & Footer.6-9 List/Create a Product..10-17 o Create listing.11 o Create New Product...12
SIMICART USER GUIDE SERIES. SimiCart Install SimiConnector
 SIMICART USER GUIDE SERIES Install SimiConnector TABLE OF CONTENTS I. INSTALL SIMICONNECTOR 3 II. CHECK CONNECTOR AFTER INSTALL 12 I. INSTALL SIMICONNECTOR 1) Download SimiConnector: https://github.com/simicart/simicart-magento2.x
MageNative Apps User Guide Series
 MageNative Apps User Guide Series App Submission on Google Play Store Version 1.0 CedCommerce. All Rights Reserved. CedCommerce support@cedcommerce.com Abstract The App Submission on Google Play Store
Ebay Product Lister, an extension by CedCommerce allows sellers to feed their product data from their Woocommerce Store to Ebay.
 1 CedCommerce. All rights reserved. SUPPORT@CEDCOMMERCE.COM [Ebay Product Lister] Ebay Product Lister, an extension by CedCommerce allows sellers to feed their product data from their Woocommerce Store
Setting Up Your SkySlope Account
 Training Workbook Setting Up Your SkySlope Account Click Your Name in the upper-right hand corner of the home screen Click My Account 1st tab = Personal Information. Ensure all information is correct Note
PHPBasket 4 Administrator Documentation
 PHPBasket 4 Please ensure you have the latest version of this document from http://www.phpbasket.com Contents CONTENTS 2 REQUIREMENTS 3 INSTALLATION 4 PREPARATION 4 UPLOAD 4 INSTALLATION 4 ADMINISTRATOR
You can use these quick links, and the links on the left sidebar to navigate quickly around this User Manual.
 USER MANUAL Fooman Connect: Xero (Magento 1) Quick Links This document is structured in the following sections: 1. 2. 3. Installation Set up in Xero and Magento Troubleshooting You can use these quick
skype ID: store.belvg US phone number:
 1 Table of Contents Table of Contents: 1. Introduction to Products Sorting... 3 2. How to Install... 4 3. How to Configure... 5 3.1. How to create sorting attributes... 5 3.2. How to manage sorting attributes...
Purchase Order Processor
 Purchase Order Processor Last Update: 6/26/13 Digital Gateway, Inc. All rights reserved ii Table of Contents PO PROCESSOR... 1 SETUP... 5 CONNECTION SETTINGS... 5 Overview... 5 PO Processor Settings Manager...
Magento 2 Extension. ( Version ) STORE.DCKAP.COM
 STORE.DCKAP.COM") Magento 2 Extension ( Version 1.0.0 ) Table of Contents Introduction to Advanced Sample Orders 3 Features 3 Version & Compatibility Support 4 How to Install This Module? 4 General Configuration 6 Price
Magento 2 Extension ( Version 1.0.0 ) Table of Contents Introduction to Advanced Sample Orders 3 Features 3 Version & Compatibility Support 4 How to Install This Module? 4 General Configuration 6 Price
Magento Pinterest Extension User Guide
 Magento Pinterest Extension User Guide Welcome to the Pinterest extension for Magento User Guide. Thank you for choosing our product. This user guide describes the functionality of Pinterest extension
Dynamic Product Options extension for Magento2. User Guide
 Dynamic Product Options extension for Magento2 User Guide version 2.0 Website: http://www.itoris.com Page 1 Contents 1. Introduction... 4 2. Installation... 5 2.1. System Requirements... 5 2.2. Installation...
Printed Documentation
 Printed Documentation Table of Contents Getting Started... 1 Technical Support... 1 Introduction... 1 Getting Started... 3 Payment Option:... 3 Data Synchronization... 4 General Website settings... 5
amazon version BoostMyShop
 amazon version BoostMyShop January 23, 2018 Contents amazon 1 1. Introduction 1 Available Marketplaces 1 Features 1 Requirements 1 2. Installation 2 Installation process 2 Upgrade process 2 How to uninstall
rma_product_return_magento2
 rma_product_return_magento2 version BoostMyShop avril 19, 2019 Contents RMA Product Return for Magento2 1 1. Overview 1 2. Installation 1 First Installation 1 Upgrade 1 Disable extension 1 3. Customer
STORE CREDIT USER GUIDE
 support@magestore.com sales@magestore.com Phone: 084.4.8585.4587 STORE CREDIT USER GUIDE Version 1.0.0 Magento Compatibility: CE 2.0 Table of Contents 1. INTRODUCTION... 3 2. HOW TO USE (Frontend)... 5
Your Cart User Manual v3.6
 Your Cart User Manual v3.6 2 Your Cart User Manual v3.6 Table of Contents Foreword 0 7 Part I Getting Started Overview 11 Part II Categories & Products 1 Manage Categories... Overview 11 Add a New... Category
USER MANUAL. MageMob App Builder TABLE OF CONTENTS. Version: 2.0.0
 USER MANUAL TABLE OF CONTENTS Introduction... 1 Benefits of MageMob App Builder... 1 Installation & Activation... 2 Installation Steps... 2 Extension Activation... 3 How it Works?... 4 Back End Configuration:...
VinNOW/Nexternal Integration Setup Guide
 VinNOW/Nexternal Integration Setup Guide Summary Setting up the Nexternal/VinNOW integration includes the following steps: 1) Security and Connection Setup 2) Product Key Setup 3) Wine Club Setup 4) Setup
Review Reminder extension for Magento2. User Guide
 Review Reminder extension for Magento2 User Guide version 1.0 Website: http://www.itoris.com Page 1 Contents 1. Introduction... 3 2. Installation... 3 2.1. System Requirements... 3 2.2. Installation...
BMS Managing Users in Modelpedia V1.1
 BMS 3.2.0 Managing Users in Modelpedia V1.1 Version Control Version Number Purpose/Change Author Date 1.0 Initial published version Gillian Dass 26/10/2017 1.1 Changes to User roles Gillian Dass 14/11/2017
Vantiv ecommerce for Magento 1 User Guide. Version 1.0.7
 Vantiv ecommerce for Magento 1 User Guide Version 1.0.7 Vantiv ecommerce for Magento 1... 1 User Guide... 1 1. Project... 3 2. Onboarding... 3 3. Installation... 3 4. Configuration... 5 5. Nuances for
TABLE OF CONTENT. Overview Support Versions Getting Started Guide Install by Copying Files Configuration...
 TABLE OF CONTENT Overview... 2 Support... 2 Versions... 2 Getting Started Guide... 3 Install by Copying Files... 3 Configuration... 3 Get Access Token... 6 Add Instagram Hash-Tag... 7 Customer Usage Description...
MexBS Google Invisible Recaptcha v1.0.0 User Guide
 MexBS Google Invisible Recaptcha v1.0.0 User Guide Welcome to the MexBs family, and thank you for purchasing the "Google Invisible Recaptcha v1.0.0" Magento extension! In this document we will guide you
Fyndiq WooCommerce Plugin. User Guide Version 1.0.0
 Fyndiq WooCommerce Plugin User Guide Version 1.0.0 1 Table of Contents Introduction Fyndiq Merchant Support Basic Configuration Required Credentials Connecting the Module Configuring Products General Requirements
Product Questions Magento Extension
 Product Questions Magento Extension User Manual This is the user manual of Magento Product Questions v1.3.1 and was last updated on 23-12-2017. To see what this extension can do, go to the Magento Product
Jira Connector Option - v18
 Jira Connector Option - v18 Copyright 2019 ONEPOINT Projects GmbH. All rights reserved. ONEPOINT Projects, Enterprise Edition, Version 18 ONEPOINT Informationslosungen and the ONEPOINT Logo are registered