Wisdom Master Pro (v2.0) User Guide for Students
|
|
|
- Julia McDowell
- 5 years ago
- Views:
Transcription
1 (v2.0) User Guide for Students
2 e-campus Homepage 4 Log in to e-campus 6 Personal Area 6 I. My Courses... 6 II. My Portal III. My Profile IV. My Assignments V. My Tests VI. My Learning VII. Calendar VIII. Notebook IX. Messages Public Zone 38 I. News II. FAQ III. School Calendar IV. School Questionnaire V. Course Rankings VI. Comments VII. System Suggestions VIII. Chatroom IX. Chatroom Logs Enter a classroom 56 Communication Center 59 I. Announcements II. Enter Course III. Course Discussion IV. Online Discussion V. Topic Discussion VI. Group Discussion Assessment Center 68 I. Assignments II. Tests
3 III. Questionnaires/Polls Information Center 78 I. Contact Info II. Course Calendar III. Course Intro IV. Course Schedule V. Instructor Profile VI. Chatroom Logs VII. Rankings VIII. Grade Info

4 e-campus Homepage Open your Internet browser and type in the URL of e-campus. The e-campus Homepage will display as shown below. This is the entrance of e-campus where the students can log in and pursue their knowledge. The following describes each section of the Homepage. News News is the area to display important announcements published by the e-campus administrator. The Homepage displays the top 3 latest news. Click on the title to read the complete announcement. New Course New Course displays the top 5 latest courses in e-campus and the profiles of the responsible instructors. Click on the course title to view the instructor's course introduction, grading standards, textbooks and other teaching materials to be used. Log in to e-campus Enter your username and password, and click e-campus. Account Application to log in to - 4 -
5 Usernames and passwords are usually created by the e-campus administrator. Some campuses allow students to apply online. In such case, click Account Application to enter the registration page. Note When logging in for the first time, you will be required to fill out your personal information. Please fill out the fields with true information in order to stay connected with the e-campus administrator and the instructors. Name, and Telephone are required fields; others are dependent upon the requirements of e-campus


6 Log in to e-campus Enter your username and password to log in to e-campus. After login, you will see two main menus - Personal Area and Public Zone. The default page will display the first sub-menu of the first main menu, which is My Courses under Personal Area. If you have enrolled a course, the page will display Enrolled Courses. Click on the course title to enter the classroom. If you have not yet enrolled a course, the page will display All Courses for you to choose from. Personal Area I. My Courses My Courses menu lists all courses in e-campus and the courses that the student has enrolled. Click a course on Enrolled Courses tab to enter the classroom, or view all courses on All Courses tab. You can also add your favorite courses to My Favorites tab in order to gain quick access in the future. The followings describe the three tabs under My Courses: Enrolled Courses: Enrolled Courses tab lists the courses that a student has enrolled. Click the - 6 -

7 course title to enter the classroom. The left pane displays the course groups of the enrolled courses. By default, the page displays all the courses you've enrolled. Click on a group name in the left pane to display the enrolled courses under this particular group only. The number in the Announcements field shows the number of articles added in the discussion forum since your last visit. The numbers in the Undone Assignment(s), Undone Tests and Undone Questionnaire(s) fields show the numbers of assignments, tests and questionnaires to be completed. The Learning Progress bar shows the progress of your learning. For those courses you access frequently, click the asterisks at the very right the course titles to add them to My Favorites tab. All Courses: All Courses tab lists all courses offered in e-campus. Click on a group name in the left pane to display the courses under this particular group only. You can view the information of the courses such as registration period, course period, instructor, etc. Each course has its deadline for enrollment and auditing. Click Auditing allowed to become an Auditor and you will be able to enter the classroom. Tip: To search for a course First, enter the related information such as Course Title, Instructor, Registration Date and Study Date. For example, enter "Technology" in the Course Title field and click. The course(s) matching the searching criteria will display


8 Tip: To enroll If you find any course in the All Courses list that you would like to enroll, follow these steps: 1. Select the check box next to course title to be enrolled and click. 2. When the "Add to Wish List Successful" dialog box appears, click

9 3. The results of your enrollment will display. In the Result field, "This course has been added" means you have successfully enrolled the course. Click Back to My Courses and click on the course title to enter the classroom. In the Result field, "Selected courses still being reviewed" means you need approval to enroll the course. The system will notify the reviewer automatically by sending an request for approval. You will be notified of the result via an . During the review period, you can click Show Elective Result to drop the course. However, if your enrollment has been approved, you can not drop the course online. Instead, you need to contact the instructors or the administration personnel for assistance. My Favorites: You can add the courses you access frequently to My Favorites tab. Tip: To edit My Favorites You can create new folders and organize your courses by categories in My Favorites tab. Example: To create a new folder named "information". 1. Click Edit in the left pane


10 2. Click Add new subfolder under Management Toolkit in the left pane. A new folder named "undefined" will be created. 3. Click on the folder and rename it to "information"


11 4. Click to save the new name. 5. The new folder has been renamed to "information". Make sure you click any changes. under Management Toolkit in the left pane to save Tip: To organize the courses in My Favorites 1. Select the check box next to the courses to be moved (e.g. Information Technology and Management). Click on the bullet next to the destination folder under the Management Toolkit in the left pane, and then click or


12 Definitions : To copy the selected courses to the selected folder. The same course can exist in different folders. : To move the selected courses to the selected folder. The course will no longer exist in its original directory. 2. Click to open the "information" folder and the course "Information Technology and Management" will display. II. My Portal My Portal includes all information related to your learning, providing an overview of your study. You can customize a learning center with personal style by rearranging the order and layout of the windows, or close any unwanted windows. You can adjust the column size by dragging on each column to best fit your needs
13 The followings describe the windows on this page: Undone Reminder Among the courses you take, if there are undone assignments, undone tests, unread messages and posts, the corresponding icon will light on to remind you. Click on the icon to go to the undone list of courses and finish the corresponding jobs. My Classroom It lists the courses that you have enrolled. Click on the course title to enter the classroom. Personal Calendar The date with an event will display in a pink color box. Move the mouse over a color box to show the titles of the events. For details of the events, go to the Calendar under Personal Area. School Calendar It contains the events published by the school. The functions are similar to Personal Calendar. For details of the events, go to the Calendar under Public Zone. Message Center Message Center lists the unread messages the instructors or students sent to you. The read messages will not be displayed on this page. News This is the area where important announcements will be published. The window displays the top 3 latest news. Click more> at the lower-right corner for previous messages. FAQ The e-campus administrator posts the FAQs that many students have experienced while using the e-learning system. Click more> at the lower-right corner for more FAQs. The icon is located at the upper-right corner of the window. Click to close the window. If you wish to restore the window that has been closed, go to Personal Area --> My Profile and change the settings


14 School:?P Course:?P It displays the list of students who are currently online. You can send messages or invite other students to have a conversation in a chatroom. The screen and operations are described as follows : Select from the drop-down list to display the students in a specific course or all students online. 2. : Click to send a message to the student next to this icon. A new window will display as shown below


15 3. : Invite the student to talk in a chatroom. A new window will display as shown below. If the student accepts the invitation, a chatroom window will open for both parties to talk online. 4. : Select the check box next to the student to receive a message and then click to send the same message to different students. 5. : Select the check box next to the student to be invited to and then click to invite many students at once. 6. : The Message Sending Settings window allows you to set whether to receive messages, accept chat invitations or show your online status. The default settings are Yes. If you don't wish to show your name on the online list, or if you don't want to receive messages from others, change your settings on this page

16 7. : You can view the received/sent messages and reply to messages directly. Notes 1. If you choose not to receive messages, accept chat invitations or show your online status in the, you won't be able to receive messages from other students. 2. The messages kept in will be cleared after you log out. 3. The number in the Existence field shows the number of duplicate logins a student has at the current moment. III. My Profile There are three tabs under this menu: Personal Settings, Signature and My Portal


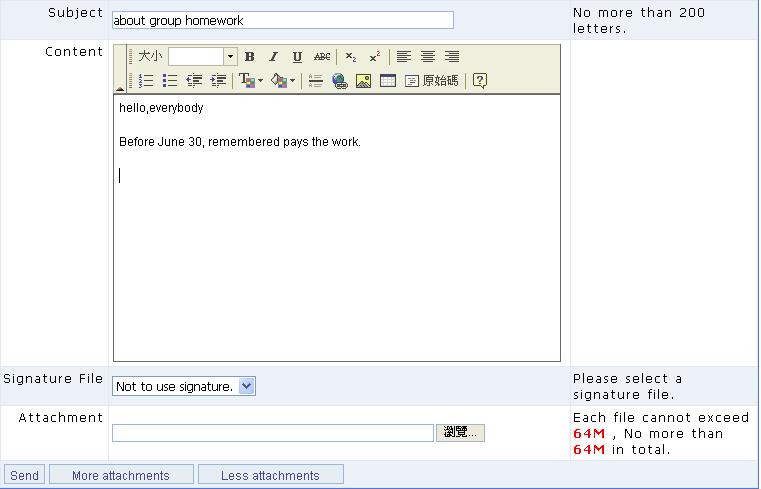
17 The followings describe the three tabs under My Profile: Personal Settings When logging in for the first time, the system will require you to fill out your personal information. You can modify your personal information under this tab. After modification, click to apply the changes. Signature You can create different signature files on this page and choose to attach one when sending or posting a message. Tip: To create a signature file 1. Enter the title and the content, and then click. You can create different signature files at the same time and choose to attach one when sending or posting a message


18 2. You can choose to display your signature file in Text-only or HTML format. If you choose to display in HTML format, you can add HTML syntax to the contents such as <h1>, <br>, etc. My Portal You can choose to show/hide the windows in My Portal under Personal Area. Tip: To show/hide the windows Select the check box next to the module to be displayed. Click the changes. to apply IV. My Assignments


19 My Assignments lists the number of Total Assignments and Undone Assignments for each course. If there are undone assignments, you can submit assignments on this page. Tip: To submit assignments 1. Click at the right end of a course title to enter the Assignments menu under the Assessment Center. 2. Click Do Assignment to continue. V. My Tests My Tests lists the number of Total Tests and Undone Tests for each course. If there are undone texts, you can take tests on this page


20 Tip: To take tests 1. Click at the right end of a course title to enter the Tests menu under the Assessment Center. 2. Click Take Test to continue. VI. My Learning My Learning displays the statistics of your learning, including Last Entry, Course Attendance, Tally of Posts, Discussion Participation and Total Study Time. These statistics are helpful for you to evaluate your study


21 Tip: To sort by the title Click on the name of the title to sort by the specific title. By sorting the statistics, it is easy to tell the courses you have great interest in from the courses you have less interest in. VII. Calendar You can write events in Calendar. In addition to where and when, you can choose to receive an alert when you log in or the events from the instructors and the e-campus administrator by clicking the Advanced button
22 Click Dock Layer to overlap Events tab with Calendar tab, leaving more space for event editing fields. Uncheck Dock Layer to cancel the overlapping. Tip: To add an event in Calendar Example: To add a weekly meeting from 10 am to 11:30 am, on June, Select the year and month first and then click on the date to add an event (e.g. June 25, 2008)


23 2. The events of the day will display on the right pane. Click to continue. 3. The Add Events window will display as shown below


24 4. Select the duration of the event (e.g. 10 am to 11:30 am) and then select whether it is a Single event of Periodic event

25 Definition Periodic event: A periodic event is a recurrence event which holds everyday, every week or every month. For example, if you have a meeting every Wednesday, or every 8 th day of each month, select Periodic event and the Calendar will add the event cycle according to your settings automatically. 5. Enter the Subject and Content. 6. Select to show an alert when you log in or send an alert by , and set the Alert Time (days prior to events). Click to continue. 7. When the "Addition Successful" dialog box appears, click. 8. The new event is created as show below. A blue flag will display on the date with event(s). You can view the details in the right pane and choose edit or delete the events


26 Note The colors of flags represent the different sources of the events: blue for Personal Calendar, green for Course Calendar and purple for School Calendar. By default, the student platform will display Course Calendar and School Calendar. If you do not wish to receive them, use Advanced settings described below to change the settings. Tip: Advanced settings In the Advanced window, you can select to show/hide Course Calendar and School Calendar, and select to be alerted every time you log in or only the first time of the day you log in. 1. Click
27 2. A new window displays as shown below. 3. If you do not wish to receive Course Calendar or School Calendar, clear the check box next to it. 4. Select to be alerted every time you log in or only the first time of the day you log in. 5. Click to apply the settings. 6. If you want to import a Calendar, please refer to Import file formats for more information. VIII. Notebook You can use Notebook to take notes online while attending a class


28 Tip: To take a note 1. Click. 2. Enter the Subject and the Content

29 3. Click and select a file to be attached (if any). 4. If you wish to attach more than one file, click to add an attachment field. You can add as many as 10 attachment fields for each note. 5. Click to save this note. 6. A "Successful" message will display


30 Tip: To edit the notebook directory Example: To create a new directory named "Chinese language". 1. Click Folder Management in the left pane. 2. The Management Toolkit in the left pane will display. 3. Click


31 4. A "Setup folder name" dialog box will appear. Enter "Chinese language" in the field and then click. 5. The "Chinese language" directory is created successfully. 6. Click to save the directories created


32 7. A "Successfully saved" dialog box will appear. Click to close it. 8. You can create several directories and organize your notes by categories for easy access. The procedure of organizing notes is the same as organizing My Favorites as described in I. My Courses. IX. Messages It provides a web mail interface for teachers and students to send and receive messages to and from one another. Tip: To send a message


33 1. Click. 2. Enter the recipient(s) and choose the priority. You can enter a teacher or student's username to send an internal message, or an address to send an Enter the subject and the content. If you want to attach a file, click to select the file to be attached


34 4. If you have created signature files under My Profile, you can choose to use one in your message. Click to send the message. 5. A result screen will display as shown below. Note The size limit of each attachment is 2MB


35 Tip: To manage your folder Example: To create a new folder named "Schoolmate's letters". 1. Click Folder Management in the left pane. 2. The Management Toolkit will display. 3. Click, enter the name of the new folder (e.g. Schoolmate's letters) and then click


36 4. The new folder is created successfully. 5. Click to save the changes
 to a designated folder (e.g. \"Schoolmate's letters\").")
. 2. Click. 3.")
37 6. A "Successfully saved" dialog box will appear. Click to close it. Tip: To organize your messages Example: To move a message (e.g. "Holidays") to a designated folder (e.g. "Schoolmate's letters"). 1. Select the check box next to the message to be moved (e.g. "Holidays"). In the right pane, click the bullet next to the destination folder (e.g. "Schoolmate's letters"). 2. Click. 3. Click on the destination folder and you will see the message has been moved to this folder

38 Public Zone I. News News is the area to display important announcements published by the e-campus administrator. It is also the first page that the students see after entering the Public Zone. The top 3 latest news on this page will also be displayed in the e-campus Homepage. You can read and search for a valid article (the valid date is set by the administrator) on this page but you will not be able to post or reply to an article. Tip: To read news 1. Click on the title to read the news directly. Or select to search by Title, Author, or Body in the Search field. Enter a keyword (e.g. computers) and click to start searching. 2. If you find the article you need in the search result, click on the title to read the contents


39 3. While reading, you can use to send the article to other people or to save a copy of the article. Tip: To subscribe news 1. Click Subscribe on the upper right of the News tab
 3. If you wish to cancel the subscription, click Unsubscribe on the upper right of the News tab. Notes 1.")
40 2. A "Successful Subscribe" message will display to confirm your subscription. From now on, all news will be forwarded to your address. (Please make sure your address is set correctly in My Profile.) 3. If you wish to cancel the subscription, click Unsubscribe on the upper right of the News tab. Notes 1. The news listed on the Essential tab is the important news collected by the administrator. 2. Click to arrange the articles by title. Click to arrange the articles by time posted. II. FAQ The e-campus administrator posts the FAQs that many students have experienced while using the e-learning system. Click on a title to read the article directly. Or select to search by Title, Author, Collector or Body in the Search field. Enter a keyword and start searching. Students are not authorized to post articles on this page. If you do not find the question and answer you are looking for, please go to Comments or System Suggestions under Public Zone to ask a question


41 Tip: To search in FAQ 1. Enter a keyword (e.g. ) and click to search the FAQ by Title, Author, Collector or Body. 2. If you find the article you need in the search result, click on the title to read the contents. III. School Calendar

42 You can view the events on the School Calendar posted by the e-campus administrator. Click Dock Layer to overlap Events tab with Calendar tab, leaving more space for event editing fields. Uncheck Dock Layer to cancel the overlapping. Tip: To view an event in School Calendar 1. Click on a flagged date in School Calendar. 2. The events of the day will display on the right pane

43 IV. School Questionnaire It displays questionnaires designed by the e-campus administrator for the students of e-campus. Students can take questionnaires before their deadlines. Tip: To take a questionnaire 1. Within the valid period, select the questionnaire you would like to take by clicking next to the title of the questionnaire. 2. Answer the questions accordingly. The questions may be in different types such as true-false questions, single/multiple choices and brief descriptions


44 3. If you need to attach a file, click and select the file to be uploaded. If you need to attach more than one file, click to add enough attachment fields. 4. After you complete the questionnaire, click to send the questionnaire and return to School Questionnaire page. 5. In the Result column, you will see Will not be published, Scores published after submission, Published after closure and Set manually to determine whether the result will be open to the public. If you see in the Result column, it means the result has been open to the public

45 6. Click to view the analysis statistics as shown below. V. Course Rankings It shows the rankings of all courses in e-campus by Total Enrolled Students, Total Auditors, Course Attendance, Total Posts, Discussion Attendance, Total Read Time, etc. The Course Rankings page is helpful for students to find out the information they need, such as the courses they have great interests in or the most popular courses


46 Tip: To sort by category Click on a category such as Total Enrolled Students or Course Attendance to sort by the category. Click the category again to toggle between sort ascending and descending. VI. Comments If you have any questions or comments regarding the courses or announcements of e-campus, you can post them here and the administrator will reply to your questions or comments. Tip: To read comments

47 1. Click on a title to read the comment. Notes 1. Only the authors and the administrator can edit or delete the comments. If you are not the author, you can not use the Edit and the Delete buttons. 2. Students can rate the comments by giving stars. Tip: To post a comment 1. Click


48 2. In the editing screen, enter the Subject and the Contents, or select the files to be uploaded. 3. Click. 4. It will return to the Comments page with your comment posted. Notes 1. The size limit of each attachment is 64 MB. 2. You can enter a keyword and search for a comment by Title, Author or Body


49 VII. System Suggestions If you have any questions or comments regarding the use of the e-campus platform, you can post them here and the administrator will collect them for RD engineers to improve. Tip: To post a comment The procedure of posting a comment is the same as described in VI. Comments. VIII. Chatroom It displays the online chatrooms with different subjects set by the administrator for the teachers and students of e-campus. Within the valid time, students can enter the real-time chatrooms and interact with other students online. Tip: To enter a chatroom 1. Within the valid time, click at the right end of a chatroom name


50 2. A new window will open as shown below. 3. A chatroom window contains of the following panes. > 1. Participants' Action Logs > 2. Chatroom List and Participant Lists The name with a * in the front is the host of the chatroom. Normally he/she is the one who creates the chatroom. If the one who creates the chatroom is not currently in the chatroom, the first participant who enters the chatroom will be the


51 host. The host can control the right of speak. If you want to withdraw the right of speak from a participant, select the "Mute" checkbox next to a participant and then click. > 3. Whisper Click next to a participant to open a whisper message window. Enter your message and click to send it to the participant. > 4. Main Screen It displays the contents the participants entered. If there is a shared file, click on the filename to open it in a new window, or right-click on the file and choose "Save as " to download the file

52 > 5. Input Toolbar Enter your opinion in the text field and then click Sent. Click to adjust the font style: B for Bold, I for Italic and U for Underlined. Select a tone of speech from. The options include Ask, Answer, Discuss, Recommend, Share, Announce and Help. Select the receiver from. By default, your message will be sent to all receivers. If you wish to speck to a specific person, select the person from the drop-down list. If the messages in the chatroom move too fast, you can click to freeze the screen. Once you finish reading the messages, click to resume updating messages. Click to upload a file and share it with other participants. The Upload window will display as shown below. Enter the description in the Notes field and click to select the file to be uploaded. Click to post the file and its description. If you wish to attach more than one file, click to add enough attachment fields. Click for preferences settings as show below
 from other participants. > 3.")

53 4. Preferences settings > 1. Select to forward the logs to your notebook or delete the logs after you leave the chatroom. > 2. Select if you accept Whispers (private messages) from other participants. > 3. Select if you would like the Participants' Action Logs to be displayed on the top of the chatroom window. > 4. Select the checkbox next to a participant to block the messages from the participant. > 5. Click to apply the settings. 5. Host settings The host in a chatroom will have a Host Settings tab besides the Preferences tab

54 > 1. Modify the name of the chatroom. > 2. Set the limit of participants in the chatroom (leave blank or 0 for unlimited). > 3. Select to forward the logs to your notebook or the discussion forum, or delete the logs after the chatroom is closed. > 4. Set whether you allow participants from other chatrooms to join you. > 5. Host Settings: Set to reassign a host other than yourself. > 6. Host Settings: Set to assign a chatroom administrator other than yourself (for chatroom administrator only). > 7. Host Settings: Set to retrieve the right of being the chatroom administrator after login (for chatroom administrator only). IX. Chatroom Logs After the participants finish the discussions and leave the chatrooms in the Public Zone, the logs of the discussions will be posted in this window for all students to review anytime. Tip: To view a chat log 1. Click on a title to view the chat log in the Public Zone
 column record the list of participants and the contents of the")

55 2. The screen will display as shown below. The files under the Attachment(s) column record the list of participants and the contents of the discussions. Click on a file to open it in a new window. Note The chatroom logs do not include the files the participants uploaded during the discussions. If you need those files shared by the participants, please download them while you are in the chatroom

56 Enter a classroom There are three ways of entering a classroom. 1. Select Personal Area --> My Portal --> My Classroom and click on a course title to enter the classroom. 2. Select Personal Area --> My Courses --> Enrolled Courses and click on a course title to enter the classroom


57 3. Select a course from My Courses drop-down list to enter the classroom. The drop-down list will display all the courses you've enrolled. 4. After entering a classroom, the Main Menu will display three new items: Communication Center, Assessment Center and Information Center. The default page will be the Announcements sub-menu under Communication Center
58 - 58 -


59 Communication Center I. Announcements It is the bulletin board for course related matters. The instructors will post their announcements here to notify the students. On this page, students can only read the announcements without the rights to post or reply. Tip: To read an announcement Click on a title to read the announcement. II. Enter Course You read the studying materials on this page. Tip: To read the studying materials

60 In the left pane, click on a title in the TOC to select a chapter you want to read. The studying materials will display in the right pane or open in a new window depending on the instructor's settings. The icons on this page are described as follows. Making notes. Expend or collapse the chapter nodes. By default, it shows all chapter nodes. Click the icon once to collapse the nodes after the second level, showing only the titles of the top level. Click it again to expend all. Go to the previous chapter node. Go to the next chapter node. Hide the TOC pane leaving more space for the studying materials (as shown below)


61 III. Course Discussion This is the place where students can communicate with their teachers and classmates regarding courses and school lives. Tip: To post an article


62 1. Click. 2. Enter the Subject and the Content, and select to attach a file if necessary. The size limit of each attachment is 64MB


63 3. If you wish to attach more than one file, click to add enough attachment fields. 4. Make sure all fields are completed correctly and click to submit the article. 5. Your article will now be displayed on the Discussion Forum tab. IV. Online Discussion This is the online chatroom created by the course instructor. Within the valid time, students can enter the chatrooms and interact with the instructor and other students online. Tip: To enter a chatroom and talk online Please refer to "VIII. Chatroom" under Public Zone for details. V. Topic Discussion Instructors can create a discussion forum limited to a specific topic. Within the valid time, students can post their opinions or read other students' articles in this forum


64 Tip: To enter a discussion forum and post an article 1. Click on a valid topic to enter the discussion forum. 2. The page will display as shown below. The procedures of posting an article are the same as described in "III. Course Discussion". VI. Group Discussion Sometimes the instructors will divide the class into several groups as needed for group reports or assignments. This page allows the members of each group to enter their own

")

65 discussion forums and chatrooms, or send s to other members of the same group. Students can only enter the discussion forums of their group. Instructors and TAs can enter all discussion forums of all groups. Tip: To enter group discussion forums, chatrooms or send s to group members 1. If the instructor has grouped the class for different tasks, select the task name from the drop-down list (e.g. Group 2). 2. When the page displays the subgroups of the selected task, click Leave Message, Discuss or . (The buttons will be grayed out if you are not a member of the subgroup.) Click to enter the group discussion forum to post and read articles. The procedures of posting an article are the same as described in "III. Discussion Forum"

66 Click to enter the group chatroom. The procedures of using a chatroom were described in the previous chapter. Click to send an to the members of the same group. The procedures are described as follows. Tip: To send an to the members of the same group 1. Select the checkbox next to the members you want to send an to and click. 2. Enter the Subject and the Contents, and select the attachment if necessary. Click to send the to the selected group members
67 - 67 -


68 Assessment Center I. Assignments The assignments published by the instructors will be displayed on this page. Students can do their assignments here by the deadlines or view the best works from other students. Tip: To submit an assignment 1. If the icon is not grayed out and can be clicked, it means the assignment has not been submitted yet. Click to submit your assignment by the deadline. 2. Read the instructions carefully and then click Start


69 3. The page will display as shown below > 1. Enter the answers to the questions. > 2. If you need to attach a file, click and select the file to be uploaded. > 3. If you need to attach more than one file, click to add enough attachment fields, and then select the files to be uploaded. > 4. Click to send your assignment. > 5. The procedure of submitting an assignment is completed

70 Note Whether an assignment can be re-submitted depends on the instructor's settings. If re-submission is allowed, the most recent upload will be saved for grading by the instructor. There are two icons on the assignment list which are described as follows. Assignment submitted. Click on the icon to view the submitted assignments. Assignment not submitted. Tip: To view the best work Whether an assignment is open for review depends on the instructor's settings. There are four possible settings: Will not be published, Scores published after submission, Published after closure and Set manually. If the button at the right end of an assignment is available, it means the assignment is open for review. 1. Click to enter the best works list. 2. The best works list will display. Click View next to a student to view his/her work


71 II. Tests The tests published by the instructors will be displayed on this page. Students can take their tests here by the deadlines. Tip: To take a test 1. If the icon is not grayed out and can be clicked, it means the test has not expired. Click to enter the test page

72 2. The Prepare to take test page will display. It gives detailed rules and instructions such as total score, total number of questions, grading policies, total test time, instructor's messages, etc. Read them thoroughly and then click. 3. Answer the questions accordingly. The questions may be in different types such as true-false, single/multiple choices and brief descriptions. A timer will display on the upper-right corner of the screen. Complete your answers within the time period and then click

73 Notes be graded. Click if you want to abandon this test. All answers will not Click to give up on the questions in the current page and move to the next page (if any). If the test only contains one page, the button functions the same as Give up and exit test. Tip: To check the scores 1. When the test result is published by the instructor, a button will appear at the right end of a test title. Click to view the test result


74 III. Questionnaires/Polls The instructors will design questionnaires according to students' learning needs and publish them on this page. Students can take questionnaires before their deadlines


75 Tip: To take a questionnaire 1. If the button of a questionnaire is not grayed out and can be clicked, it means the questionnaire is not expired. Click to start taking the questionnaire. 2. Read the instructions carefully before taking the questionnaire and then click. 3. Answer the questions accordingly. After you complete the questionnaire, click


76 4. Your answers will be submitted. Tip: To view a poll result 1. In the Result column, you will see Will not be published, Scores published after submission, Published after closure and Set manually to determine whether the result will be open to the public. If you see in the Result column, it means the result has been open to the public. 2. Click to view the analysis statistics as shown below

77 Notes In order to be fair and objective, every student can only take a questionnaire once. Whether a questionnaire can be re-submitted within the valid time depends on the instructor's settings. If re-submission is allowed, the most recent upload will be saved for poll result. Therefore, your opinion will not be double counted even if you submit the same questionnaire several times
, other students of the same course will be able to search your")

78 Information Center I. Contact Info It lists the information of students enrolled in this course. If you would like to make your information public (which can be set at Personal Area --> Personal Settings), other students of the same course will be able to search your information such as birthday, mobile/telephone numbers, address, etc. Tip: To search for a student's information You can search for a specific person by name, username or > 1. Select a role from the drop-down list, such as Auditor, Enrolled Student, TA, Guest Instructor, Instructors or All. > 2. Select to search by Name, Username or . > 3. Enter the keyword to be searched. > 4. Click to start searching

79 > 5. Click to list detailed information, such as telephone number and address. Tip: To send s to students You can send s to specific students on this page > 1. From the students list, select the check box next to the student you would like to send an to. > 2. Click to enter the editing screen. After finish editing, click to send the to the checked recipients, as shown below. > 3. You can also click on a student's address to send an to the student directly

80 II. Course Calendar It contains the events published by the instructor. You can check the events of this course on this page


81 Tip: To view an event in Course Calendar 1. Click on a flagged date in Course Calendar. 2. The events of the day will display on the right pane


82 III. Course Intro It displays the descriptions of the course such as course name, instructor, course objective, textbook used and grading policies. You can gain initial understandings of the course from this page. IV. Course Schedule It displays the course schedule that the instructor has organized. You can take it as a reference and study accordingly


83 V. Instructor Profile It displays the instructor's resume/cv. You can learn about the instructor's professional specialty from this page. VI. Chatroom Logs After the students finish the discussions and leave the chatrooms in the Online Discussion under the Communication Center, the logs of the discussions will be posted on this page automatically (according to the chatroom manager's settings) for all students to review anytime


84 Tip: To download a chatroom log 1. Click on the title of the chatroom log you are looking for. 2. In the Post Content page, right-click on the filename and choose "Save as " to download the file


85 VII. Rankings It shows the rankings of the students of this course by Course Attendance, Tally of Posts, Discussion Participation, Total Study Time, Pages Read, etc. The Rankings page is helpful for students to find out his/her own performance and the difference from the others. Tip: To sort by category Click on a category such as Course Attendance, Tally of Posts, Discussion Participation, Total Study Time and Pages Read to sort by the category. Click the category again to toggle between sort ascending and descending


86 Definitions Course Attendance: the number of times you enter the course. Tally of Posts: the number of articles you've posted in all discussion forums. Discussion Participation: the number of times you entered the discussion forums and posted your comments. Total Study Time: The total time you've spent on reading the studying materials. Pages Read: The total page of the studying materials you've read. VIII. Grade Info You can check the scores of the assignments and the tests as well as the instructor's comments


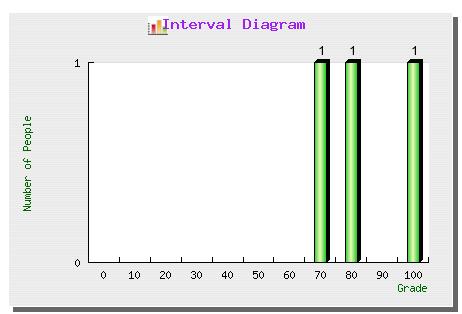
87 Tip: To check the scores of the assignments and the tests, and the instructor's comments After finish grading the assignments and tests, the instructors will import the results and you will be able to check your scores and the instructor's comments on this page. Tip: To view of the interval diagram of the all students' scores 1. Click at the right end of an assignment or a test. 2. The interval diagram of all students' scores will display as shown below
88 - 88 -
AFRICA INTERNATIONAL UNIVERSITY
 AFRICA INTERNATIONAL UNIVERSITY DEPARTMENT OF OPEN, DISTANCE AND elearning (ODeL) STUDENTS MANUAL FOR ACCESSING THE elearning PLATFORM Table of Contents Introduction... 3 Logging in to Moodle... 4 Profile
Visual Guide to Online Campus
 Contents Course Navigation... 2 Avatars..3 Text Editor... 4 Accessing Assignments... 6 Accessing Assessments... 9 Accessing and Participating in Discussions... 12 Discussion Forums and Threads... 14 Creating
Introduction to Blackboard
 Blackboard 9.1: Student Guide Introduction to Blackboard Logging into Blackboard Blackboard Blackboard is an integrated set of web-based tools for course management and delivery. Requirements For web-based
Outlook: Web Access. Outlook: Web Access AIS Vienna
 Outlook: Web Access AIS Vienna Table of Contents Introduction to OWA...1 Log On... 1 OWA Workspace... 2 Hiding/Displaying the Reading Pane... 3 Collapsing/Expanding the Outlook Bar... 4 Log Off... 5 Sending
Lasell College s Moodle 3 Student User Guide. Access to Moodle
 Access to Moodle The first session of this document will show you how to access your Lasell Moodle course, how to login, and how to logout. 1. The homepage of Lasell Learning Management System Moodle is
Table of Contents Tutorials for Faculty... 3 Creating a News Item... 3 Syllabus... 3 Uploading Your Syllabus... 3 Update Your Syllabus
 Table of Contents Tutorials for Faculty... 3 Creating a News Item... 3 Syllabus... 3 Uploading Your Syllabus... 3 Update Your Syllabus... 3 Email... 4 Send an Email to the Entire Class... 4 Send Email
STUDENT PORTAL VIEW LEARNING GUIDE
 STUDENT PORTAL VIEW LEARNING GUIDE Central Susquehanna Intermediate Unit, USA TABLE OF CONTENTS Overview... 3 Logging In... 3 Getting Help... 4 Navigating the Portal... 5 Messages... 5 Profile... 8 Attendance...
BLACKBOARD: Course Management
 BLACKBOARD: Course Management LOGGING IN Note: you will use your Babson username and password to access Blackboard. TO LOGIN TO BLACKBOARD: 1. Open a web browser and type http://blackboard.babson.edu.
Outlook 2007 Web Access User Guide
 Outlook 2007 Web Access User Guide Table of Contents Page i TABLE OF CONTENTS OUTLOOK 2007 MAIL... 1 Launch Outlook Web Access... 1 Screen Elements... 2 Inbox... 3 Read Mail... 3 Delete a Message... 3
D2L: An introduction for FACULTY
 D2L: An introduction for FACULTY REAL. AMAZING. UNIT 1: Introduction to Desire2Learn... 1 WHAT IS D2L... 1 GETTING LOGGED IN TO D2L... 1 UWP PORTAL PAGE... 2 COMPLETING YOUR PROFILE... 2 WHAT IS THE LOCKER...
Introduction to 9.0. Introduction to 9.0. Getting Started Guide. Powering collaborative online communities.
 Introduction to 9.0 Introduction to 9.0 Getting Started Guide Powering collaborative online communities. TABLE OF CONTENTS About FirstClass...3 Connecting to your FirstClass server...3 FirstClass window
esd Portal: Parent View User Guide v
 esd Portal: Parent View User Guide v. 5.0.0 Copyright 2002-2016 eschooldata, LLC All rights reserved. TABLE OF CONTENTS Overview... 3 Parent Portal Registration... 3 Logging In... 5 Getting Help... 7 Navigating
Introduction. Paradigm Publishing. SNAP for Microsoft Office SNAP for Our Digital World. System Requirements
 Introduction Paradigm Publishing Paradigm understands the needs of today s educators and exceeds the demand by offering the latest technological advancements for coursework settings. With the success of
Outlook Web Access Exchange Server
 Outlook Web Access Exchange Server Version 2.0 Information Technology Services 2008 Table of Contents I. INTRODUCTION... 1 II. GETTING STARTED... 1 A. Logging In and Existing Outlook Web Access... 1 B.
TEACHER PAGES USER MANUAL CHAPTER 6 SHARPSCHOOL. For more information, please visit: Chapter 6 Teacher Pages
 SHARPSCHOOL USER MANUAL CHAPTER 6 TEACHER PAGES For more information, please visit: www.customernet.sharpschool.com 0 TABLE OF CONTENTS 1. 2. 3. 4. 5. 6. 7. 8. 9. 10. 11. INTRODUCTION... 1 I. TEACHER PAGE
1. To access the Course settings page, click Edit settings in the Administration block.
 Course Management Managing Course Design Configuring Course Settings The course setting page contains all of the important options for your course such as making the course available to students, and enabling
ASTRA USER GUIDE. 1. Introducing Astra Schedule. 2. Understanding the Data in Astra Schedule. Notes:
 ASTRA USER GUIDE 1. Introducing Astra Schedule Astra Schedule is the application used by Academic Space Scheduling & Utilization to schedule rooms for classes and by academic colleges, schools, and departments
1. Go to https://online.national.edu/ 2. Click the link at the bottom that says Please click here for a System Check before you log in.
 Desire 2 Learn User Guide Desire 2 Learn User Guide Using the System Check Quick Link You can use the quick link on the entry page of the online classroom for a general test of your computer s preparedness
Student Guide INTRODUCTION TO ONLINE RESOURCES
 Student Guide INTRODUCTION TO ONLINE RESOURCES Date: 08. June. 2017 By: Technical Support Team STUDENT GUIDE southwales.unicaf.org 1)Introduction...4 2)Student Panel (SIS)...4 2.1)Student Panel (SIS) Login...4
Office 365. Contents. Features, screen shots, and instructions are subject to change at any time Page 1
 Office 365 Contents Office 365..1 Accessing Your Email...3 First Time Set-Up...4 Changing Your Password. 6 The Email Environment...8 Reading Pane View...9 Reading Your Emails.10 Reading Attachments...11
Microsoft Outlook Basics
 Microsoft Outlook 2010 Basics 2 Microsoft Outlook 2010 Microsoft Outlook 2010 3 Table of Contents Getting Started with Microsoft Outlook 2010... 7 Starting Microsoft Outlook... 7 Outlook 2010 Interface...
esd Portal: Parent View User Guide v
 esd Portal: Parent View User Guide v. 5.9.0 Copyright 2002-2018 eschooldata, LLC All rights reserved. TABLE OF CONTENTS Overview... 3 Parent Portal Login Page... 3 Online Registration...4 Parent Portal
Parent Student Portal User Guide. Version 3.1,
 Parent Student Portal User Guide Version 3.1, 3.21.14 Version 3.1, 3.21.14 Table of Contents 4 The Login Page Students Authorized Users Password Reset 5 The PSP Display Icons Header Side Navigation Panel
SpeechClass User Guide for Students A Speaker s Guidebook, Fourth Edition
 SpeechClass User Guide for Students A Speaker s Guidebook, Fourth Edition Getting Started with SpeechClass for A Speaker s Guidebook, Fourth Edition Table of Contents Overview... 1 Getting Help... 1 System
Introduction. Paradigm Publishing. SNAP for Microsoft Office SNAP for Our Digital World
 Introduction Paradigm Publishing Paradigm understands the needs of today s educators and exceeds the demand by offering the latest technological advancements for coursework settings. With the success of
Student Guide INTRODUCTION TO ONLINE RESOURCES
 Student Guide INTRODUCTION TO ONLINE RESOURCES Date: 12. March. 2018 By: Technical Support Team Table of Contents 1) Introduction 3 2) Student Panel (SIS) 3 2.1) Student Panel (SIS) Login 3 2.1.1) Definitions
V-CUBE Sales & Support. User Manual
 V-CUBE Sales & Support User Manual V-cube, Inc. 2013/12/20 This document is the user manual for V-CUBE Sales & Support. 2013 V-cube, Inc. All Rights Reserved. Revision history Revision date Details 2013/12/20
Instructor User Guide Table Of Contents
 Instructor User Guide Table Of Contents Getting Started...1 Using myitlab...1 Getting Started in myitlab...1 Contacting myitlab Instructor Support...1 myitlab System Requirements...1 Logging in to myitlab...1
Webmail 7.0 is an online client which runs in your web browser. Webmail 7.0 allows you to access your , contact list, and calendar from
 Webmail 7.0 is an online email client which runs in your web browser. Webmail 7.0 allows you to access your email, contact list, and calendar from any computer with an internet connection and a web browser.
Goucher College Online Course Sites: Basic Navigation in Canvas
 Goucher College Online Course Sites: Basic Navigation in Canvas Find Your Course Material Edit a Topic Section Upload a File Drag and Drop Method to Upload a File Create a Content Page Create a Wiki Page
PARENT PORTAL VIEW LEARNING GUIDE
 PARENT PORTAL VIEW LEARNING GUIDE Central Susquehanna Intermediate Unit, USA TABLE OF CONTENTS Overview... 3 Account Registration... 3 Logging In... 5 Getting Help... 7 Navigating the Portal... 8 Messages...
Unified Classroom: Class Pages
 Unified Classroom: Class Pages Unified Classroom April 2018 Release Unified Classroom: Class Pages Basics Contents Unified Classroom: Class Pages Basics... 3 Building Class Pages... 3 Access Class Pages...
There are several formatting conventions used in this document. Please take note of the formatting styles:
 Using Blackboard The majority of the teaching on this course will be delivered using software called Blackboard. Blackboard is one of many Virtual Learning Environments used to teach over the internet.
Student Guide. By UNICAF University
 vnhgfj Student Guide By UNICAF University 1 2 Table of Contents 1) Introduction... 5 2) Student Panel (SIS)... 5 2.1) Student Panel (SIS) Login... 5 2.1.1) Definitions... 5 2.1.2) Registration Email...
Blackboard 5 Level One Student Manual
 Blackboard 5 Level One Student Manual Blackboard, Inc. 1899 L Street NW 5 th Floor Washington DC 20036 Copyright 2000 by Blackboard Inc. All rights reserved. No part of the contents of this manual may
ONLINE CLASSROOM
 ONLINE CLASSROOM - 76 - The Online Classroom is available to all staff members. Online Classroom At anytime you can save your information and at the top right of your OLC page you will see Once a teacher
PowerSchool Student and Parent Portal User Guide. https://powerschool.gpcsd.ca/public
 PowerSchool Student and Parent Portal User Guide https://powerschool.gpcsd.ca/public Released June 2017 Document Owner: Documentation Services This edition applies to Release 11.x of the PowerSchool software
Outlook - an Introduction to Version 2003 Table of Contents
 Outlook - an Introduction to E-mail Version 2003 Table of Contents What is Outlook Starting Outlook The Navigation Pane Getting Help Creating and Sending a Message Using the College Exchange Directory
Student Guide Version /26/10
 Version 2.5.3.13 2/26/10 Key Concepts: General Information Logging in My Workspace How to Use Common Site Tools Announcements Assignments Calendar Drop Box Gradebook Syllabus Resources Chat Assessments
Outlook Web App. Getting Started. QUICK Source. Microsoft. in Exchange Server 2010
 QUICK Source Microsoft Outlook Web App in Exchange Server 2010 Getting Started The Outlook Web App Window u v w x y u v w x y Browser Toolbars allow the user to navigate in the browser. Outlook Web Access
OUTLOOK WEB ACCESS (OWA) USER S GUIDE. Exchange 2003 Version - OWA Guide
 USER S GUIDE. Exchange 2003 Version - OWA Guide") OUTLOOK WEB ACCESS (OWA) USER S GUIDE Exchange 2003 Version - OWA Guide TABLE OF CONTENTS WHAT S NEW IN OWA 2003?...2 General...2 Inbox and Message Composition...2 Tasks...2 INTRODUCTION TO OWA...3 Web-Based
OUTLOOK WEB ACCESS (OWA) USER S GUIDE Exchange 2003 Version - OWA Guide TABLE OF CONTENTS WHAT S NEW IN OWA 2003?...2 General...2 Inbox and Message Composition...2 Tasks...2 INTRODUCTION TO OWA...3 Web-Based
BYU-Idaho Online Knowledgebase
 STUDENT GUIDES Table of Contents Introduction...4 I-Learn Introduction (Video)...5 A Successful Start in Pathway (Video)...6 Student Communication...7 How Do I Set My Time Zone?...8 How Do I Exclude Some
Coastal Bend College Learn Blackboard 9.1 Faculty Instructional Handbook
 Coastal Bend College Learn Blackboard 9.1 Faculty Instructional Handbook Distance Education Table of Contents LOGGING IN TO BLACKBOARD... 1 EXPLORING MY BLACKBOARD... 2 EXPLORING COURSE TOOLS... 5 ANNOUNCEMENTS...
Quick Start Guide for Lotus Notes 8.5.1
 Quick Start Guide for Lotus Notes 8.5.1 ELEMENTS OF LOTUS NOTES... 2 SOME NEW FEATURES:... 2 HOME PAGE... 3 Customize the Home page... 4 SET USER PREFERENCES... 4 Personalizing Your E-mail... 5 Personalizing
HHH Instructional Computing Fall
 Quick Start Guide for School Web Lockers Teacher log-on is the same as for Infinite Campus Student log-on is the same initial log on to the network except no school year is required before their user name
5.0 INTRODUCTION 5.1 OBJECTIVES 5.2 BASIC OPERATIONS
 Lab Course UNIT 5 E-MAIL Stucture Page No. 5.0 Introduction 152 5.1 Objectives 152 5.2 Basic Operations 152 5.3 Managing Contacts 156 5.4 Lab Exercises 162 5.5 Summary 163 5.6 Further Reading 163 5.0 INTRODUCTION
Outlook Web Access (OWA) PTHS District 209
 PTHS District 209") Outlook Web Access (OWA) PTHS District 209 Table of Contents Welcome to Outlook Web Access (OWA)... 1 To Access Your Proviso E-mail:... 1 If You Use Windows 95 or 98 or 2000 at Home... 2 About the Navigation
Outlook Web Access (OWA) PTHS District 209 Table of Contents Welcome to Outlook Web Access (OWA)... 1 To Access Your Proviso E-mail:... 1 If You Use Windows 95 or 98 or 2000 at Home... 2 About the Navigation
TRAININGCENTER HOST GUIDE
 TRAININGCENTER HOST GUIDE TABLE OF CONTENTS How to Set Up and Log Into Your TrainingCenter Account...2 Scheduling a Training Session...2 Using Tests in Training Sessions...6 Setting Up Session and Access
Getting Started The Outlook Web Access Window
 QUICK Source Microsoft Outlook Web Access in Exchange Server 2003 Getting Started The Outlook Web Access Window ❶ ❷ ❸ ❹ ❺ ❻ ❼ ❽ Using the Reading Pane The Reading Pane allows you to view your e-mail messages
TABLE OF CONTENTS CHAPTER
 TABLE OF CONTENTS CHAPTER 1...1 A QUICK OVERVIEW OF THE MICROSOFT EXCHANGE CLIENT...1 BASIC CONCEPTS AND FEATURES...1 STARTING THE MICROSOFT EXCHANGE CLIENT...1 SETTING OPTIONS FOR YOUR MESSAGES...3 LOOKING
OpenSpace provides some important benefits to you. These include:
 Cengage Education A member of Open Colleges Welcome to OpenSpace OpenSpace is our virtual campus. It is our online space for students, tutors and staff to interact. It provides you with a secure, interactive
PowerSchool User Guide For Parents
 PowerSchool User Guide For Parents https://powerschool.gpcsd.ca/public Table of Contents Understanding Power School Parent Portal... 2 Introduction... 2 Let s Get Started... 2 Creating Your PowerSchool
Rutgers. A How-To Guide for Instructors
 Moodle @ Rutgers A How-To Guide for Instructors 7/30/2012 Prepared by the Department of Instructional Technology & elearning Solutions (ITeS) CA/NJDS, Room B725 Page 2 Table of Contents Required Software...
HGC SUPERHUB HOSTED EXCHANGE
 HGC SUPERHUB HOSTED EXCHANGE EMAIL OUTLOOK WEB APP (OWA) 2010 USER GUIDE V2013.6 HGC Superhub Hosted Email OWA User Guide @ 2014 HGC. All right reserved. Table of Contents 1. Get Started... 4 1.1 Log into
Introduction... 4 I-Learn Introduction (Video)... 5 A Successful Start in Pathway (Video)... 6
... 5 A Successful Start in Pathway (Video)... 6") STUDENT GUIDES Table of Contents Introduction... 4 I-Learn Introduction (Video)... 5 A Successful Start in Pathway (Video)... 6 Student Communication... 7 How Do I Set My Time Zone?... 8 How Do I Exclude
STUDENT GUIDES Table of Contents Introduction... 4 I-Learn Introduction (Video)... 5 A Successful Start in Pathway (Video)... 6 Student Communication... 7 How Do I Set My Time Zone?... 8 How Do I Exclude
User Guide. Chapter 6. Teacher Pages
 User Guide Chapter 6 s Table of Contents Introduction... 5 Tips for s... 6 Pitfalls... 7 Key Information... 8 I. How to add a... 8 II. How to Edit... 10 SharpSchool s WYSIWYG Editor... 11 Publish a...
Microsoft Outlook 2003 Microsoft screen shots used in accordance with Microsoft rules to be viewed at URL
 Microsoft Outlook 2003 Microsoft screen shots used in accordance with Microsoft rules to be viewed at URL http://www.microsoft.com/permission/copyrgt/cop-img.htm#screenshot Compiled by: Charmaine Morris
Managing Groups Using InFellowship. A guide for Small Group Leaders
 Managing Groups Using InFellowship A guide for Small Group Leaders 2 3 Managing Groups Using InFellowship Table of Contents MyLifePoint your InFellowship account...4 InFellowship Groups - Your Dashboard...5
EXPLORING COURSE TOOLS
 EXPLORING COURSE TOOLS Now that we have covered the My Blackboard screen, let s explore the different tools that you might find within your course. NOTE: Your instructor controls which tools are available.
Table of Contents. 11:34:59 AM]
![Table of Contents. 11:34:59 AM]](/thumbs/83/87886816.jpg "Table of Contents. 11:34:59 AM]") Glossary Table of Contents GLOSSARY About this Tutorial Creating a Glossary General Grade Common module settings Glosary Main Page To update settings Adding Entries to the Glossary Creating Categories
Glossary Table of Contents GLOSSARY About this Tutorial Creating a Glossary General Grade Common module settings Glosary Main Page To update settings Adding Entries to the Glossary Creating Categories
SAKAI.WFU.EDU. What is Sakai?
 SAKAI.WFU.EDU What is Sakai? Sakai is a free and open source online Collaboration and Learning Environment. Many users of Sakai deploy it to support teaching and learning, ad hoc group collaboration, support
What is epals SchoolMail? Student Accounts. Passwords. Safety. Flag Attachment
 What is epals SchoolMail? http://www.epals.com/ epals Schoolmail is a complete, Internet-based email solution and collaborative toolset designed for the education environment. Student Accounts Students
Open eclass Asynchronous elearning Platform
 Open eclass Asynchronous elearning Platform Student Manual The Open eclass platform is a complete Course Management System. It is the solution offered by the Greek Academic Network GUnet to support Asynchronous
2013 edition (version 1.1)
") 2013 edition (version 1.1) Contents 1 Introduction... 3 2 Signing in to your Office 365 account... 3 2.1 Acceptable Use Policy and Terms of Use... 4 3 Setting your profile and options... 4 3.1 Settings:
2013 edition (version 1.1) Contents 1 Introduction... 3 2 Signing in to your Office 365 account... 3 2.1 Acceptable Use Policy and Terms of Use... 4 3 Setting your profile and options... 4 3.1 Settings:
Symplicity Career Services Manager Student User Reference Guide
 Symplicity Career Services Manager Student User Reference Guide WELCOME TO SYMPLICITY! Wayne State University Law School Career Services Office Symplicity is the new web-based career management system
Figure 1.1 GENESIS Log In Page
 TEACHERVUE User Guide Chapter One OVERVIEW OF THE TEACHERVUE SOFTWARE The TEACHERVUE software, frequently abbreviated TXP and also known as Teacher Experience, provides districts with an easy method to
Important items to note before you get started:
 Engineering econnection Students Help http://www.egr.uh.edu/careert The Table of Contents below is hyperlinked to the section described. Important items to note before you get started: Navigate the Homepage
EVERY NATION OUTLOOK WEB ACCESS (OWA) USER S GUIDE
 USER S GUIDE") EVERY NATION OUTLOOK WEB ACCESS (OWA) USER S GUIDE Exchange 2003 Version Revised September 2005 TABLE OF CONTENTS WHAT S NEW IN OWA 2003?...2 General...2 Inbox and Message Composition...2 Tasks...2 INTRODUCTION
EVERY NATION OUTLOOK WEB ACCESS (OWA) USER S GUIDE Exchange 2003 Version Revised September 2005 TABLE OF CONTENTS WHAT S NEW IN OWA 2003?...2 General...2 Inbox and Message Composition...2 Tasks...2 INTRODUCTION
Gaggle ipad App Overview
 Gaggle ipad App Overview Sharing ipads among several students is a common practice in schools today and although applications that support document editing, file storage, and email are readily available,
Edmodo for Teachers Guide (Taken directly from Edmodo s site.)
") Edmodo for Teachers Guide (Taken directly from Edmodo s site.) Table of Contents: 1. Teacher Sign Up 2. Create a Group 3. Manage Your Groups 4. Small Group 5. Co-Teaching 6. Student Sign up 7. Post a Message
Edmodo for Teachers Guide (Taken directly from Edmodo s site.) Table of Contents: 1. Teacher Sign Up 2. Create a Group 3. Manage Your Groups 4. Small Group 5. Co-Teaching 6. Student Sign up 7. Post a Message
Blackboard 1: Course Sites
 Blackboard 1: Course Sites This handout outlines the material covered in the first of four workshops on teaching with Blackboard. It will help you begin building your Blackboard course site. You will learn
2015 TECHNOLOGY SESSION: ADVANCING YOUR OUTLOOK 2013 SKILLS
 2015 TECHNOLOGY SESSION: ADVANCING YOUR OUTLOOK 2013 SKILLS Here s what you will learn in this session: Creating a professional signature Sort and organize your email using folders Attachments Identifying
CONTENTS. What is Moodle? Logging in to Moodle Introducing the Workspace Customising the Workspace... 8
 Moodle Training March 2012 Material produced by the VLE Group (Monash University) and elearning Services (Faculty of Medicine, Nursing and Health Sciences, Monash University) vle.monash.edu/supporttraining/learnbytech/moodle/
Office365 End User Training & Self-Service Migration Manual Simplified
 Office365 End User Training & Self-Service Migration Manual Simplified Version 1.0 University Systems and Security 5/25/2016 1 P a g e Table of Contents 2 P a g e Table of Contents Introduction to Office365...
RELEASE NOTES. Epic Offline Client Messaging 3. My Account 11. Announcement 12. Discussion Board 13. Exam 14.
 RELEASE NOTES October 5, 2011 Epic Offline Client 2.5.28.17 Inside this issue: Messaging 3 My Account 11 Announcement 12 Discussion Board 13 Exam 14 Update Client 19 Improving Communications and Exam Security
AN INTRODUCTION TO OUTLOOK WEB ACCESS (OWA)
") INFORMATION TECHNOLOGY SERVICES AN INTRODUCTION TO OUTLOOK WEB ACCESS (OWA) The Prince William County School Division does not discriminate in employment or in its educational programs and activities against
INFORMATION TECHNOLOGY SERVICES AN INTRODUCTION TO OUTLOOK WEB ACCESS (OWA) The Prince William County School Division does not discriminate in employment or in its educational programs and activities against
Introduction to Moodle
 Introduction to Moodle Preparing for a Moodle Staff Development Session... 2 Logging in to Moodle... 2 Adding an image to your profile... 4 Navigate to and within a course... 6 Content of the basic template
Getting Started Quick Start Guide
 Getting Started Quick Start Guide This guide provides tips for users new to using the Learning Environment. It discusses how to navigate the main areas and how to change your personal preferences and settings.
Table of Contents COURSE OVERVIEW... 3 LESSON 1: OUTLOOK 2010 CALENDAR INTERFACE... 5
 Table of Contents COURSE OVERVIEW... 3 LESSON 1: OUTLOOK 2010 CALENDAR INTERFACE... 5 OPEN OUTLOOK CALENDAR... 5 Ribbon... 6 Navigation Pane... 6 Appointment Area... 6 Task Pane... 6 To-Do Bar... 6 THE
Center for Faculty Development and Support. Google Docs Tutorial
 Center for Faculty Development and Support Google Docs Tutorial Table of Contents Overview... 3 Learning Objectives... 3 Access Google Drive... 3 Introduction... 4 Create a Google Document... 4 Upload
BRIGHTSPACE (D2L) STUDENT GUIDE
 STUDENT GUIDE") BRIGHTSPACE (D2L) STUDENT GUIDE Brightspace (Desire2Learn) is a way to deliver online courses as well as course components over the web at Atlanta Metropolitan State College. It provides students with
BRIGHTSPACE (D2L) STUDENT GUIDE Brightspace (Desire2Learn) is a way to deliver online courses as well as course components over the web at Atlanta Metropolitan State College. It provides students with
User Manual for Student. Moodle Administrator
 User Manual for Student Moodle Administrator 1.Introduction About this document This document is part of a Moodle Learning Management System(LMS) documentation Start Guides for Students. What is Moodle?
EMS MASTER CALENDAR User Guide
 EMS MASTER CALENDAR User Guide V44.1 Last Updated: May 2018 EMS Software emssoftware.com/help 800.440.3994 2018 EMS Software, LLC. All Rights Reserved. Table of Contents CHAPTER 1: Introduction to the
Campus Community Guide October 2012
 Campus Community Guide October 2012 This document is intended for restricted use only. Infinite Campus asserts that this document contains proprietary information that would give our competitors undue
WPM for Departments Using WPM to Edit Your Department s Website
 Overview Web Profile Manager allows Ithaca College community members to easily edit department sites. All of the specialty language and code has been omitted to provide a consistent format and to make
Google Classroom Help Sheet
 1 Google Classroom Help Sheet Table of Contents Introduction Signing into Google Classroom Creating a Class Changing a Class Theme Adding a Teacher Photo to the Class Renaming or Deleting a Class Adding
KnowlegeTrack User Guide Standard User
 Standard User Standard User Page 1 Standard User Introduction: The Learning portal is designed to manage the subscription and enrollment in the courses, and to provide community features to all of the
Discussion Settings Options
 Discussions Discussions is where you will participate in class discussions with your classmates. Once a discussion is posted, every student in the class will be able to read the comments. Once you post
MOODLE MANUAL TABLE OF CONTENTS
 1 MOODLE MANUAL TABLE OF CONTENTS Introduction to Moodle...1 Logging In... 2 Moodle Icons...6 Course Layout and Blocks...8 Changing Your Profile...10 Create new Course...12 Editing Your Course...15 Adding
Using the Discussion Boards Feature in Blackboard
 Using the Discussion Boards Feature in Blackboard The Discussion Boards feature in Blackboard will allow for asynchronous posting and responding to forum messages. A forum is any main topic to be discussed
MEMBERSHIP & PARTICIPATION
 MEMBERSHIP & PARTICIPATION What types of activities can I expect to participate in? There are a variety of activities for you to participate in such as discussion boards, idea exchanges, contests, surveys,
EFM Community 3.1 Portal Administration Guide
 EFM Community 3.1 Portal Administration Guide WHITE PAPER For technical support please call: 1-800-787-8755 Or visit: Hwww.Vovici.comH Please contact Vovici technical support if you believe any of the
A*STAR SRDB User Guide
 A*STAR SRDB User Guide Document Version: 5.0 Revised Date: 23 rd March 2010 Document name: ASTAR_UserGuide_5.0.doc Page 1 of 43 Revision History Date Version Author Review By Summary of Changes 9 th July
MEMBERSHIP & PARTICIPATION
 MEMBERSHIP & PARTICIPATION What types of activities can I expect to participate in? There are a variety of activities for you to participate in such as discussion boards, idea exchanges, contests, surveys,
Campus Solutions Self Service: Faculty Quick Reference Guide
 Campus Solutions Self Service: Faculty Table of Contents Introduction to Step Sheets... 1 The Faculty Center... 2 View Teaching Schedule... 3 Enter My Textbooks... 9 View Textbook Summary... 19 View Exam
Chat Activity. Moodle: Collaborative Activities & Blocks. Creating Chats
 Chat Activity The Moodle chat tool allows communication between instructors and students in real time. Unlike in discussion forums, which are a means for asynchronous communication, online chat sessions
Welcome to The Wise Woman University
 Welcome to The Wise Woman University Starting a Course The Wise Woman University consists of two websites: www.wisewomanuniversity.org and www.wisewomanuniversity.ning.com. These two websites serve different
HistoryClass User Guide for Students America s History, Sixth Edition. Henretta, Brody, and Dumenil
 HistoryClass User Guide for Students America s History, Sixth Edition Henretta, Brody, and Dumenil Getting Started with HistoryClass for America s History, Sixth Edition Table of Contents Overview...1
Instructor User Guide for EconPortal Macroeconomics, Third Edition
 Instructor User Guide for EconPortal Macroeconomics, Third Edition Krugman/Wells Getting Started with EconPortal for Krugman/Wells Macroeconomics, 3e Table of Contents Overview... 1 Online Help... 1 System
CANVAS BY INSTRUCTURE IOS GUIDE
 CANVAS BY INSTRUCTURE IOS GUIDE This work is licensed under a Creative Commons Attribution-NonCommercial-ShareAlike License Table of Contents All Users...5 What do Canvas text (SMS) message notifications