Lab 2. Task 1 : Learning basic tasks with PowerPoint. Estimated time
|
|
|
- Marcia Lawson
- 5 years ago
- Views:
Transcription
1 Lab 2 Task 1 : Learning basic tasks with PowerPoint Objective : To familiarize with basic tasks in PowerPoint : 1. Create a presentation 2. Find and apply a template 3. Insert a new slide 4. Format text 5. Add a design theme 6. Insert a clip art 7. Add slide transitions 8. Add slide animations 9. Additional features: 11.1 Add shapes to the slide 11.2 Insert pictures 11.3 Modify graphics 11.4 Insert WordArt 11.5 Insert SmartArt 11.6 Insert Tables or Charts 11.7 Insert Hyperlinks 11.8 Create a Photo Album 10. View a slide show 11. Save a presentation 12. Print a presentation 13. Tips for effective presentation Estimated time : 40 minutes

2 Create a Presentation 1. Click the File tab New 2. Click Blank Presentation, and then click Create. 3. In the first text box (labeled as no. 2 in figure above), type in subject code and subject name. 4. Type in your full name, matrix number, and lecturer's name in the next text box. 5. On the notes pane in 4, type Welcome to my presentation. Note: The notes pane is where you type speaker notes that you can refer to when you present. You can also print speaker notes to use when presenting a slide show.

3 Find and Apply a Template 1. Click File tab New 2. Under Available Templates and Themes, do one of the following: To use one of the built-in templates installed with PowerPoint, click Sample Templates, click the template that you want, and then click Create. To use a template that you already have installed, click My Templates, select the template that you want, and then click OK. To find a template on Office.com, under Office.com Templates, click a template category, select the template that you want, and then click Download to download the template from Office.com to your computer To start with a blank slide, click Blank Presentation.

4 Insert a New Slide 1. On the Home tab, in the Slides group, click the arrow below New Slide, and then click the Blank slide.

5 Format text 1. When typing text, PowerPoint will automatically place the text into bulleted lists to make minor points under major points. It will also automatically fit the text by reducing font size and line spacing to fit everything into the placeholder boxes. 2. Use commands in the Font group to change the text font, color and size. Set font to Arial, size 32, font color black. 3. The commands in the Paragraph group is used to change paragraph formatting such as bullet type, text indentation, and line spacing. Type List of Chapters as a title for this slide. Then, click on bullet command on Paragraph group. List down all chapters in subject SK2003 using bullets. Note: See number in figure that shows number according to these steps.


6 Add a design theme 1. Click the Design tab on the Ribbon. The Themes group provides thumbnails of different design options. 2. To see additional themes, click the More arrow button on the right of the group. 3. When you point and hover on any theme thumbnail, a preview of the theme will appear on the slide. To apply the theme to your slides, click on the thumbnail design you like. 4. Select any one of the theme and apply to your slide. Insert a clip art There are two ways to initiate inserting Clip Art depending on where you would like the graphic to be located. 1. Go to the Insert Ribbon and click on the Clip Art command. You can also click on the Audio or Video commands and opt to pick from the Clip Art gallery.

7 2. The second method is to click on the Clip Art icon in a placeholder. The Clip Art task pane will open on the right. Type computer as a keyword in the Search for box that suggests the type of clips you want. Use the Results should be drop down to select the media type to search in then click Go. Clips that fit the keyword will appear in the box below. Click on the clip that you would like on your slide.
8 Add slide transitions 1. The Transition to This Slide group provides thumbnails of various slide transition options. To see all of the transitions options click on the up and down arrows or the More arrow to the right of this group. 2. When you point and hover over any transition thumbnail, a preview of the theme will play. 3. To apply the transition to your slide, click on the thumbnail you like. 4. To apply the same transition to all of your slides click on the Apply To All command after selecting the transition of your choice. 5. To apply a Sound, click on the sound drop down arrow. Then Click on the sound you would like to use during the slide transition. Click the Apply To All command to have the chime occur during each transition. 6. The Advance Slide group, allows you to decide if a transition should appear when the mouse is clicked or after a specified time. Click the On Mouse Click box for transitions to occur only when forced. Click on the After box for the slide to transition at the time specified such as 5 seconds or minute. 7. Preview the current slide by clicking on the Preview command.
9 Add slide animations Slide animations create animated effects to text and graphics during a slide show. There are a variety of animations that can be applied to text or graphics in multiple ways from a single word to all of the text on a slide. 1. To see all of the animation options click on the Up Row, Down Row and More arrows to the right of the Animation group. The Effect Options command provides additional animation options for each animation command in the Animation group. The Add Animation command provides a visual of all of the animation options to animate text and graphics upon Entrance, Exit and as an Emphasis. These commands are the same as the commands in the Animation group. 2. On your previous slide (List of Chapters), highlight first line on the bullet list. Then point and hover over any animation command. It will be highlighted in a golden color and a preview of the animation will appear. To apply an animation, click on the command. The selected command will remain highlighted in a golden color.

10 3. The Timing group allows you to modify the sequence and timing of the animations selected. You can decide if an animation should appear when the mouse is clicked or after a specified time. You can also decide if text should be animated together or separate as well as reordering the animations. Use the Start drop down, select Start on Click. Click on the Duration box for the text or graphic to animate at a specified time. Set as The Animation Pane displays all of the animations you have applied to each slide. It also enables you to modify each animation similar to the Timing group and play the animations applied to the slide. 5. Preview the current slide by clicking on the Preview command.

11 Add shapes to The Slide 1. Create a new blank slide. 2. Go to the Insert tab. 3. Click on the Shapes command. 4. A large selection of shapes will appear in a drop down menu. 5. Double click on the shape you want to insert. 6. The shape will appear on the slide. Double click on the selected shape, type in SK Move the shape to any area of the slide by clicking on the edge of the shape and dragging it. Expand or shrink the shape by clicking on the circles surrounding the shape and drag. NOTE: Inserting a Text Box is done in the same manner except when it is inserted a cursor will appear inside the box so you can enter text.

12 Insert Pictures 1. Create a new blank slide. 2. Go to the Insert tab. 3. Click on the Picture command. 4. A Insert Picture box will appear. 5. Select the picture to insert using the folders on the left of the Insert Picture box. 6. Click Open. 7. The picture will appear on the slide. 8. Move the picture to any area of the slide by clicking on the edge of the picture dragging it. Expand or shrink the picture by clicking on the circles surrounding the picture and drag.


13 Modify Graphics Any graphical element inserted into the PowerPoint can be modified by using the Specialized Tabs that appear when working with graphics. For example the Picture Tools Format tab allows you to change the shape, effects and colors of the picture you inserted. Insert WordArt 1. Create a new blank slide. 2. Go to the Insert tab. 3. Click on the WordArt command. 4. A drop down menu of text options will appear. 5. Click on the text design you prefer and a text box will appear on your slide. 6. Click in the text box to modify the text. Type in SK Move the WordArt to any area of the slide by clicking on the edge of the text and dragging it. Expand or shrink the WordArt by clicking on the circles surrounding the text and drag.

14 Insert SmartArt 1. Create a new blank slide. 2. Go to the Insert tab. 3. Click on the SmartArt command. 4. A Choose a SmartArt Graphic box will appear. 5. Click on the graphic you prefer and it will appear on your slide. 6. Click in the areas of the SmartArt graphic to enter text in the graphic. 7. Type in chapter name for SK2003 on each of the block list.

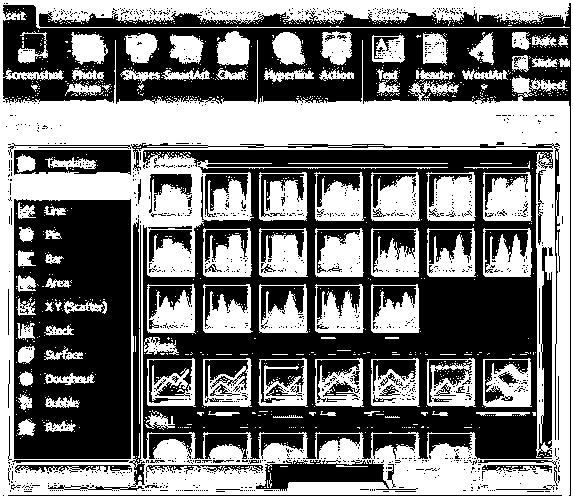
15 Insert Tables or Charts First, go to the Insert Tab: To insert a Chart: 1. Click on the Chart command 2. An Insert Chart box will appear 3. Click on the chart you prefer. 4. An Excel worksheet will open, enter the data in the Excel Document that you want displayed on the chart Note: Use sample data in this figure:
16

17 To insert a Table: 1. Create a new blank slide. 2. Click on the Table command. 3. Highlight the number of cells you want in your table. 4. Click for the table to appear on your slide. 5. Click on each cell to enter the data you need displayed. Note: Use data in previous figure to create a table

18 Insert Hyperlinks 1. On the same slide, press Enter to bring the cursor below the table, then go to the Insert tab. 2. Type in This is hyperlink. Click here. Click or highlight here to set as hyperlink. 3. Click on the Hyperlink command. 4. A Insert Hyperlink box will appear 5. Click on the Existing File or Web Page command on the left of the Insert Hyperlink box. 6. Type in Google in the Text to Display box. 7. Enter the web address as in the Address box, then click OK. 8. The hyperlink will appear in the text on your slide by changing the color of the text to blue and underlined. 9. To use the link you must be viewing the slide show.

19 Create a Photo Album To create a photo album: 1. On new blank slide, click on the Insert tab. 2. Click on the Photo Album command. 3. Click on the New Photo Album option. 4. Save at least 5 images from the Internet into one folder and name it as Your_Matrix_Number. 4. Click on the File/Disk command to select pictures you have saved on your folder that you want to incorporate into your Photo Album. Once you select a picture it will be listed in the Pictures in album box. 5. Click the Create command and your photo album slide show will be created.

20 To modify your photo album: 1. Click on the Edit Photo Album command. 2. Use the Album Layout group to select the Picture layout, Frame shape and add a Theme. 3. Once all changes are complete, click on the Update command and the changes will be applied to your photo album.


21 View a slide show To view your presentation in Slide Show view from the first slide: 1. On the Slide Show tab, in the Start Slide Show group, click From Beginning. To view your presentation in Slide Show view from the current slide: 1. On the Slide Show tab, in the Start Slide Show group, click From Current Slide.
 file format. - To save your presentation in a format other than.")
22 Save a Presentation 1. Click the File tab Save As 2. In the File name box, type a name for your PowerPoint presentation as Matrix_Number Slides, and then click Save. Note: - By default, PowerPoint 2010 saves files in the PowerPoint Presentation (.pptx) file format. - To save your presentation in a format other than.pptx, click the Save as type list, and then select the file format that you want (as shown in red box in figure).

23 Print a presentation 1. Click the File tab, and then click Print. 3.Under Print What, do one of the following: - To print all slides, click All. - To print only the slide that is currently displayed, click Current Slide. - To print specific slides by number, click Custom Range of Slides, and then enter a list of individual slides, a range, or both. NOTE :Use commas to separate the numbers, with no spaces. For example: 1,3, Under Other Settings, click the Color list, and select the setting that you want. 4.When you finish making your selections, click Print. (P/S: Omit this step.)
24 Tips For an Effective Presentation 1. Minimize the number of slides To maintain a clear message and to keep your audience attentive and interested, keep the number of slides in your presentation to a minimum. 2. Choose an audience-friendly font size Choosing the best font size helps communicate your message. Remember that the audience must be able to read your slides from a distance. Generally speaking, a font size smaller than 30 might be too difficult for the audience to see. 3. Keep your slide text simple You want your audience to listen to you present your information, instead of reading the screen. Use bullets or short sentences, and try to keep each to one line; that is, without text wrapping. Some projectors crop slides at the edges, so that long sentences might be cropped. 4. Use visuals to help express your message Pictures, charts, graphs, and SmartArt graphics provide visual cues for your audience to remember. Add meaningful art to complement the text and messaging on your slides. As with text, however, avoid including too many visual aids on your slide. 5. Make labels for charts and graphs understandable Use only enough text to make label elements in a chart or graph comprehensible. 6. Apply subtle, consistent slide backgrounds Choose an appealing, consistent template or theme that is not too eye-catching. You do not want the background or design to detract from your message. However, you also want to provide a contrast between the background color and text color. The built-in themes in PowerPoint 2010 set the contrast between a light background with dark colored text or dark background with light colored text. 7. Check the spelling and grammar To earn and maintain the respect of your audience, always check the spelling and grammar in your presentation.
25 Task 2 : Exploring Beyond the Basics Features in PowerPoint Objective : To make an interactive, non-linear slide shows and enhance formatting 1. Add action buttons 2. Create hidden slides to a presentation 3. Customize slides design 4. Applying customized backgrounds to the slides Estimated Time : 60 minutes
.")
26 Add action buttons 1. In the PowerPoint File menu click on Open. Navigate on your disk to the location of your saved PowerPoint file. 2. In the Slide View toolbar click on Normal View. 3. Then, in the left hand frame of the PowerPoint window, click on Slide #1 (the Title slide). In the Insert Ribbon > Illustrations Group, then click on the Shapes icon to show the selection of Shapes you can use in Office From the Shapes > Action Buttons panel, click on the Action Button for the Forward or Next slide 5. Without clicking, roll the mouse cursor down over the large version of the slide on the right of the PowerPoint window and notice that the arrow pointer changes from a pointer to a cross hair +. Put the cross hair in the lower right corner of the slide and hold down the left mouse button and drag to create a box about a half inch square then let go of the mouse button. Note: If the button you have created looks too large or too small to you, go ahead now and click on it, grab one of the handles and adjust the size to your satisfaction.
 in the box next to Play sound: then click on the down arrow at the end of the Play Sound box and, from the menu of sounds, select Arrow.")
27 6. (If you don t see the Action Settings dialog box as in figure above, right click on the Action Button and from the pop up context menu, select Edit Hyperlink 7. Click to put a check mark (tick) in the box next to Play sound: then click on the down arrow at the end of the Play Sound box and, from the menu of sounds, select Arrow. Click on OK.
28 Create hidden slides to a presentation 1. Create a new blank slide and position it as the second last slide. 2. Type Any Question?' on the text box of the slide. 3. Create another new blank slide and position it as the last slide. 2. In the Slide Show Ribbon > Set Up Group, select Hide Slide. 3. On the text box, type This is a hidden slide. On next text box, type this slide will be unseen. 4. The slide is hidden, so we have to give a way to find it by creating an Action button that links to it. 5. On the second last slide (Any Question slide), in the Slide Show > Insert Group, select the Shapes button > Action Buttons and from the Action Buttons panel click the Action button for Forward or Next slide. Without clicking the mouse button, roll the mouse cursor down over the slide and notice that the arrow pointer changes to crosshair (+). 6. Position the cross hair near the end of the text that you typed in the slide s text placeholder. 7. Let go of the mouse button when you're done you can still adjust the size of the button if you want by clicking on the button to select it and then dragging on the handles around the button 8. The default Hyperlink is to the Next Slide and this is not what we want, so click on the arrow to the right of the Hyperlink to: to show the drop down menu of Hyperlink to: options 9. Choose Slide... from this drop-down menu. Select the hidden slide that we have created. 10. We have to do one more thing to complete the content on the hidden slide. We need to put an action button on there to go to the next slide. Click in the left hand frame on the thumbnail for Any Questions slide. Now click once on the action button in the lower right corner of the slide (the button to go the next slide), then press ctrl-c on the keyboard to copy the action button to the clipboard. Next click in the left hand frame on the thumbnail for the hidden slide, and press ctrl-v on the keyboard to paste the action button onto the hidden slide.

29 Customize slides design 1. Change your view to Slide Sorter View, click on the first slide and then hold down the Ctrl button down as you click on the last slide to select just those two slides. 2. In the Design Ribbon > Themes Group click on the button to see More Design Themes. You'll see thumbnails of the various Design Themes available to you. 3. Click on one of the Theme thumbnails to Live Preview it; Do this for a few themes that look good to you and click on your chosen Theme to select it. Note: Only those slides you selected have that specific Design Theme. You can do this for just one slide or several slides. Applying customized backgrounds to the slides 1. Click on any of your existing PowerPoint slides. 2. Click on the Format Background option at the bottom of this menu to bring up the Format Background dialog box.
30 3. Take a few minutes now to play around with the various options in this Format Background dialog box. Live Preview your ideas. 4. Click on the Close button (Don t click on Apply to All) so it only set the background for the current slide.


31 LESSON: AUTO RUN By using the slides that you have finished before, open the transition menu, and you need to disable on mouse click as shown below. Next, you need click for after and change the timing that you want for the next slides to appear. The timing is related to how long the time that you want to explain regarding the slide.
32 Exercise : Implement Interactive PowerPoint Presentation Objective : Using basic and advanced features in PowerPoint Problem Description : 1. You are as a marketer, you are assigned to create an interactive powerpoint o promote your product. 2. Options for a product would be eatery places (eg:cafe, restaurant) or travel packages (eg: Trip to South Korea) 3. Your powerpoint must have most features learned. Use your creativity to make the slides engaging. 4. The slides must include pictures, slides with customized background, and with animations. 5. Minimum number of slides is 15 slides. Estimated Time : 60 minutes
Introduction to PowerPoint 2010
 Introduction to PowerPoint 2010 PowerPoint is a system in the Microsoft Office Suite that enables you to present information in office meetings, lectures and seminars to create maximum impact in a minimal
New PowerPoint Document
 PowerPoint is a system in the Microsoft Office Suite that enables you to present information in office meetings, lectures and seminars to create maximum impact in a minimal amount of time. PowerPoint presentations
11.1 Create Speaker Notes Print a Presentation Package a Presentation PowerPoint Tips... 44
 Contents 1 Getting Started... 1 1.1 Presentations... 1 1.2 Microsoft Office Button... 1 1.3 Ribbon... 2 1.4 Mini Toolbar... 2 1.5 Navigation... 3 1.6 Slide Views... 4 2 Customize PowerPoint... 5 2.1 Popular...
PowerPoint. Tutorial 1 Creating a Presentation. Tutorial 2 Applying and Modifying Text and Graphic Objects
 PowerPoint Tutorial 1 Creating a Presentation Tutorial 2 Applying and Modifying Text and Graphic Objects Tutorial 3 Adding Special Effects to a Presentation COMPREHENSIVE PowerPoint Tutorial 1 Creating
Microsoft PowerPoint 2007 Tutorial
 Microsoft PowerPoint 2007 Tutorial Prepared By:- Mohammad Murtaza Khan I. T. Expert Sindh Judicial Academy Contents Getting Started... 5 Presentations... 5 Microsoft Office Button... 5 Ribbon... 6 Quick
Welcome. Microsoft PowerPoint 2010 Fundamentals Workshop. Faculty and Staff Development Program
 Faculty and Staff Development Program Welcome Microsoft PowerPoint 2010 Fundamentals Workshop Computing Services and Systems Development Phone: 412-624-HELP (4357) Last Updated: 04/19/13 Technology Help
1. The PowerPoint Window
 1. The PowerPoint Window PowerPoint is a presentation software package. With PowerPoint, you can easily create slide shows. Trainers and other presenters use slide shows to illustrate their presentations.
Microsoft PowerPoint 2016 Basics Unit 9 Final Review - Student Notes Directions: Fill in the blanks.
 Directions: Fill in the blanks. 1. PowerPoint Window Layout 2. File Tab When clicked, opens - automatically opens the Info option by default Holds the following options: - Info - New - Open - Save - Save
1 THE PNP BASIC COMPUTER ESSENTIALS e-learning (MS Powerpoint 2007)
") 1 THE PNP BASIC COMPUTER ESSENTIALS e-learning (MS Powerpoint 2007) 2 THE PNP BASIC COMPUTER ESSENTIALS e-learning (MS Powerpoint 2007) TABLE OF CONTENTS CHAPTER 1: GETTING STARTED... 4 MICROSOFT OFFICE
1 THE PNP BASIC COMPUTER ESSENTIALS e-learning (MS Powerpoint 2007) 2 THE PNP BASIC COMPUTER ESSENTIALS e-learning (MS Powerpoint 2007) TABLE OF CONTENTS CHAPTER 1: GETTING STARTED... 4 MICROSOFT OFFICE
Gloucester County Library System. Microsoft 2010 PowerPoint
 Gloucester County Library System Microsoft 2010 PowerPoint PowerPoint 2010 is a presentation software that allows you to create dynamic slide presentations that may include animation, narration, images,
Introduction to Microsoft PowerPoint 2010
 Introduction to Microsoft PowerPoint 2010 This class is designed to cover the following basics: Creating a presentation Adding new slides Applying design themes Adding text and content Animating text and
BASIC MICROSOFT POWERPOINT
 BASIC MICROSOFT POWERPOINT PART ONE PHONE: 504-838-1144 IT Training Team Jefferson Parish Library EMAIL: jpltrain@jplibrary.net In this class you will learn to: Launch, close, and interact with Microsoft
Part 1. Module 3 MODULE OVERVIEW. Microsoft Office Suite Pt 3. Objectives. MS PowerPoint Screen. Microsoft PowerPoint
 Module 3 Microsoft Office Suite Pt 3 Microsoft PowerPoint MODULE OVERVIEW Part 1 Overview MS PowerPoint Screen Part 2 Creating your PowerPoint Presentation Part 3 Working with content graphics & slides
Microsoft PowerPoint 2013 Beginning
 Microsoft PowerPoint 2013 Beginning PowerPoint Presentations on the Web... 2 Starting PowerPoint... 2 Opening a Presentation... 2 File Tab... 3 Quick Access Toolbar... 3 The Ribbon... 4 Keyboard Shortcuts...
Downloaded from
 Chapter 4 Advance features of MS PowerPoint Inside this chapter : Inserting different objects (i.e. images, Word Arts, audio & video etc.), Transitions in slide, Custom Animation with text. PowerPoint
Microsoft PowerPoint 2016 Part 2: Notes, Links, & Graphics. Choosing a Design. Format Background
 Microsoft PowerPoint 2016 Part 2: Notes, Links, & Graphics Choosing a Design Open PowerPoint. Click on Blank Presentation. Click on the Design tab. Click on the design tab of your choice. In part one we
PowerPoint 2010 Level 1 Computer Training Solutions Student Guide Version Revision Date Course Length
 Level 1 Computer Training Solutions Version 1.2 Revision Date Course Length 2012-Feb-16 6 hours Table of Contents Quick Reference... 3 Frequently Used Commands... 3 Manitoba ehealth Learning Management
Microsoft PowerPoint 2007 Beginning
 Microsoft PowerPoint 2007 Beginning Educational Technology Center PowerPoint Presentations on the Web... 2 Starting PowerPoint... 2 Opening a Presentation... 2 Microsoft Office Button... 3 Quick Access
My Awesome Presentation Exercise
 My Awesome Presentation Exercise Part One: Creating a Photo Album 1. Click on the Insert tab. In the Images group click on the Photo Album command. 2. In the Photo Album window that pops up, look in the
Mary Ann Wallner MICROSOFT POWERPOINT ESSENTIALS
 Mary Ann Wallner MICROSOFT POWERPOINT ESSENTIALS 1 LEARNING OBJECTIVES After studying this lesson, you will be able to: Apply a document theme to a new presentation Insert new slides Add text to a slide
PowerPoint Launching PowerPointX
 PowerPoint 2004 Launching PowerPointX 1. Start PowerPoint by clicking on the PowerPoint icon in the dock or finding it in the hard drive in the Applications folder under Microsoft Office 2004. PowerPoint
Introduction to Microsoft Office PowerPoint 2010
 Introduction to Microsoft Office PowerPoint 2010 TABLE OF CONTENTS Open PowerPoint 2010... 1 About the Editing Screen... 1 Create a Title Slide... 6 Save Your Presentation... 6 Create a New Slide... 7
PowerPoint 2016: Part 1
 PowerPoint 2016: Part 1 Updated: April 2018 Cost: $1.10 PowerPoint is a presentation tool used to create slide-by-slide lectures and visual aids. It can display a combination of text, video, audio, and
GDC MEMORIAL COLLEGE BAHAL (BHIWANI)
") GDC MEMORIAL COLLEGE BAHAL (BHIWANI)-127028 Lab Manual MS-Power Point (B.Com(pass &Voc).;B.Sc.(cs);M.Com) Department of Computer Science The PowerPoint Window Table of Contents PowerPoint is a presentation
GDC MEMORIAL COLLEGE BAHAL (BHIWANI)-127028 Lab Manual MS-Power Point (B.Com(pass &Voc).;B.Sc.(cs);M.Com) Department of Computer Science The PowerPoint Window Table of Contents PowerPoint is a presentation
Beginning PowerPoint: 2010 A Presentation Software
 Beginning PowerPoint: 2010 A Presentation Software Objective 1: Review Screen Layout PowerPoint 2010 offers a similar user interface as 2007. The top portion of the window has a new structure for PowerPoint
Introduction to MS Office Somy Kuriakose Principal Scientist, FRAD, CMFRI
 Introduction to MS Office Somy Kuriakose Principal Scientist, FRAD, CMFRI Email: somycmfri@gmail.com 29 Word, Excel and Power Point Microsoft Office is a productivity suite which integrates office tools
POWERPOINT 2003 OVERVIEW DISCLAIMER:
 DISCLAIMER: POWERPOINT 2003 This reference guide is meant for experienced Microsoft Office users. It provides a list of quick tips and shortcuts for familiar features. This guide does NOT replace training
PowerPoint 2010 Introduction
 PowerPoint 2010 Introduction TOOLBAR RIBBON What is the ribbon? The ribbon contains the commands and other menu items that were on menu and toolbars in PowerPoint 2003 and earlier. The ribbon is designed
Getting Started with. PowerPoint 2010
 Getting Started with 13 PowerPoint 2010 You can use PowerPoint to create presentations for almost any occasion, such as a business meeting, government forum, school project or lecture, church function,
Contents Microsoft PowerPoint Lesson 1: The PowerPoint Window...2 The Quick Access Toolbar...3 The Title Bar...3 Rulers...
 Contents Microsoft PowerPoint 2007...2 Lesson 1: The PowerPoint Window...2 The Quick Access Toolbar...3 The Title Bar...3 Rulers...3 Slides, Placeholders, and Notes...4 Status Bar, Tabs, View Buttons,
PowerPoint X. 1. The Project Gallery window with the PowerPoint presentation icon already selected. 2. Click on OK.
 PowerPoint X Launching PowerPointX 1. Start PowerPointX by clicking on the PowerPoint icon in the dock or finding it in the hard drive in the Applications folder under Microsoft PowerPoint. PowerPoint
Microsoft PowerPoint 2016 Basics Unit 1
 Directions: Fill in the blanks. Creating Professional Presentations Segment 1. Microsoft PowerPoint Is a which allows users to create polished, professional slide based presentations Presentations can
PowerPoint 2016 Building a Presentation
 PowerPoint 2016 Building a Presentation What is PowerPoint? PowerPoint is presentation software that helps users quickly and efficiently create dynamic, professional-looking presentations through the use
Computer Applications Final Exam Study Guide
 Name: Computer Applications Final Exam Study Guide Microsoft Word 1. To use -and-, position the pointer on top of the selected text, and then drag the selected text to the new location. 2. The Clipboard
Presents: PowerPoint 101. Adapted from the Texas State Library s TEAL for All Texans Student Resources Manual
 Presents: PowerPoint 101 Adapted from the Texas State Library s TEAL for All Texans Student Resources Manual PowerPoint Topics Intro to PowerPoint Designing a Presentation The Next Level Goals and Objectives
Creating a PowerPoint Presentation
 powerpoint 1 Creating a PowerPoint Presentation Getting Started 1. Open PowerPoint from the "Start" "Programs" Microsoft Office directory. 2. When starting PowerPoint, it usually starts with a new blank
PowerPoint 2010 Quick Start
 PowerPoint is a slide show presentation program. Use a slide show to convey your message to an audience. PowerPoint can be used for education, employee orientation, business promotion, team motivation,
Microsoft PowerPoint 2010 Beginning
 Microsoft PowerPoint 2010 Beginning PowerPoint Presentations on the Web... 2 Starting PowerPoint... 2 Opening a Presentation... 2 File Tab... 3 Quick Access Toolbar... 3 The Ribbon... 4 Keyboard Shortcuts...
PowerPoint. Creating Presentations
 PowerPoint Creating Presentations Microsoft Office 2016 Contents: When/if things go wrong... 3 Using Help... 3 Preparing a Presentation... 4 Starting PowerPoint and Creating a Presentation... 5 Creating
Fundamentals of PowerPoint 2007 Instructor: Elizabeth-Latta Brother
 Fundamentals of PowerPoint 2007 Instructor: Elizabeth-Latta Brother Getting to know PowerPoint... 1 What happens when you open PowerPoint... 1 Understanding the presentation window... 1 Customizing the
PowerPoint Introduction
 PowerPoint 2010 Introduction PowerPoint 2010 is a presentation software that allows you to create dynamic slide presentations that can include animation, narration, images, and videos. In this lesson,
PowerPoint 2016 Basics for Mac
 1 PowerPoint 2016 Basics for Mac PowerPoint 2016 Basics for Mac Training Objective To learn the tools and features to get started using PowerPoint more efficiently and effectively. What you can expect
By: Ms. Fatima Shannag Ms. Essra Al-Mousa. Edited by: Khawlah Almutlaq
 By: Ms. Fatima Shannag Ms. Essra Al-Mousa 1 PowerPoint web app PowerPoint Web App is a limited version of PowerPoint, enabling you to display information through slide shows A PowerPoint presentation is
Microsoft Power Point Lab Manual
 Microsoft Power Point Lab Manual Table of Contents The PowerPoint Window PowerPoint is a presentation software package. With PowerPoint, you can easily create slide shows. The Microsoft Office Button The
Table of Contents. Contents
 Spring 2009 R.A. Table of Contents Contents Opening PowerPoint... 2 PowerPoint 2007 Interface... 2 PowerPoint Features... 2 Creating, Opening and Saving Presentations... 3 Creating a Presentation... 3
Developing Interactive Lectures with PowerPoint 2007
 Intermediate PowerPoint Developing Interactive Lectures with PowerPoint 2007 [Type the document subtitle] 2 P age Table of Contents Customize Slide Theme and Background... 2 Apply Animated Effects... 3
POWERPOINT BASICS: MICROSOFT OFFICE 2010
 POWERPOINT BASICS: MICROSOFT OFFICE 2010 GETTING STARTED PAGE 02 Prerequisites What You Will Learn USING MICROSOFT POWERPOINT PAGE 03 Microsoft PowerPoint Components SIMPLE TASKS IN MICROSOFT POWERPOINT
Inserting Information into PowerPoint
 LESSON 6 6.1 Inserting Information into PowerPoint After completing this lesson, you will be able to: Change the layout of a slide. Insert a clip art image. Scale an image. Insert and format a table. Insert
COURSE OUTLINE. MS PowerPoint Last Updated: 19 July 2017
 MS PowerPoint 2016 Last Updated: 19 July 2017 1. Table of Contents 1. Table of Contents... 2 A. COURSE OUTLINES... 3 1. Free online pre-training assessments... 3 2. MS PowerPoint 2016 Level 1... 3 3. MS
C omputer D riving L icence
 E uropean C omputer D riving L icence E C D L S y l l a b u s 5. 0 Module 6 Presentation ECDL Syllabus 5 Courseware Module 6 Contents USING THE APPLICATION... 1 OPENING & CLOSING MS POWERPOINT & PRESENTATIONS...
B.Sc. VI SEM (CS+BIO)
") Unit I Creating presentation using Slide master and Template in various Themes & Variants. If you want your presentation to contain more than one theme (layouts that contain backgrounds, colors, fonts,
Unit I Creating presentation using Slide master and Template in various Themes & Variants. If you want your presentation to contain more than one theme (layouts that contain backgrounds, colors, fonts,
MSITA POWERPOINT 2010 REVIEW
 True/False write the word TRUE or FALSE in the blank. TRUE 1. FALSE_ 2. An existing presentation may be opened in PowerPoint 2010 by double-clicking on the file from the storage device. The presentation
Getting Started with Microsoft PowerPoint 2003
 Getting Started with Microsoft PowerPoint 2003 Overview: This handout provides basic introductory information about Microsoft PowerPoint and its application in the classroom. Audience: All instructional
Getting Acquainted with Office 2007 Table of Contents
 Table of Contents Using the New Interface... 1 The Office Button... 1 The Ribbon... 2 Galleries... 2 Microsoft Help with Changes... 2 Viewing Familiar Dialog Boxes... 2 Download Get Started Tabs from Microsoft...
Microsoft PowerPoint 2013 Module
 Microsoft PowerPoint 2013 Module Signing your name below means the work you are turning in is your own work and you haven t given your work to anyone else. Name Period Seat Completed Activity Points Poss.
9/29/2010. Slide title. Bulleted text. Clip art. SmartArt graphic. Microsoft Office Illustrated Introductory, Premium Video Edition
 Microsoft Office 2007- Illustrated Introductory, Premium Video Edition Creating A in PowerPoint 2007 A Typical Slide Bulleted text Slide title Clip art SmartArt graphic 2 Planning an Effective When planning
Introduction. Getting Started. Selecting a Template. 1 of 1
 1 of 1 Introduction Visual materials are one of the most effective means of communicating a message. They can give a presentation a professional quality. Visuals help a speaker to be well prepared, organized,
Chapter 4 Printing and Viewing a Presentation Using Proofing Tools I. Spell Check II. The Thesaurus... 23
 PowerPoint Level 1 Table of Contents Chapter 1 Getting Started... 7 Interacting with PowerPoint... 7 Slides... 7 I. Adding Slides... 8 II. Deleting Slides... 8 III. Cutting, Copying and Pasting Slides...
PowerPoint 2003 Shortcourse Handout
 PowerPoint 2003 Shortcourse Handout February 24, 2003 Technology Support Shortcourses Texas Tech University Copyright 2003 Introduction PowerPoint is the presentation graphics program in Microsoft Office.
INTRODUCTION TO COMPUTER CONCEPTS CSIT 100 LAB: MICROSOFT POWERPOINT (Part 2)
") INTRODUCTION TO COMPUTER CONCEPTS CSIT 100 LAB: MICROSOFT POWERPOINT (Part 2) Adding a Text Box 1. Select Insert on the menu bar and click on Text Box. Notice that the cursor changes shape. 2. Draw the
INTRODUCTION TO COMPUTER CONCEPTS CSIT 100 LAB: MICROSOFT POWERPOINT (Part 2) Adding a Text Box 1. Select Insert on the menu bar and click on Text Box. Notice that the cursor changes shape. 2. Draw the
Power Point. Created with the Freeware Edition of HelpNDoc: Single source CHM, PDF, DOC and HTML Help creation
 Power Point Introduction PowerPoint is a presentation software package. With PowerPoint, you can easily create slide shows. Trainers and other presenters use slide shows to illustrate their presentations.
Center for Faculty Development and Support Creating Powerful and Accessible Presentation
 Creating Powerful and Accessible Presentation PowerPoint 2007 Windows Tutorial Contents Create a New Document... 3 Navigate in the Normal View (default view)... 3 Input and Manipulate Text in a Slide...
Unleashing the Power Of PowerPoint. Break-through classes for brilliant presentations. Workbook. Class 2 ~ Power Enhancements
 Page Unleashing the Power Of PowerPoint Break-through classes for brilliant presentations Workbook Class 2 ~ Power Enhancements 10/16/08 Instructor: David Newbold Information Commons Biomedical Library
Double-click on the PowerPoint icon on the desktop. Another way to access the program is to click on the Start button>programs>powerpoint.
 MS PowerPoint 2013 I. About PowerPoint A. What is it? Microsoft PowerPoint is a powerful tool to create professional looking presentations and slide shows. PowerPoint allows you to construct presentations
EFFECTIVE POWERPOINT FOR BUSINESS PRESENTATIONS. Linda Muchow Alexandria Technical & Community College
 EFFECTIVE POWERPOINT FOR BUSINESS PRESENTATIONS Linda Muchow lindac@alextech.edu Alexandria Technical & Community College 320-762-4539 Table of Contents Compose a Message... 3 What s your Point?... 3
Lesson 22 Enhancing Presentations with Multimedia Effects
 Enhancing Presentations with Multimedia Effects Computer Literacy BASICS: A Comprehensive Guide to IC 3, 4 th Edition 1 Objectives Add clip art, shapes and drawn objects, SmartArt graphics, and pictures
PowerPoint. PowerPoint. Presentation Software. PowerPoint Winter COMP 1270 Computer Usage II 1-1. Presentation Software and Office Integration
 PowerPoint Presentation Software and Office Integration PowerPoint 1. PowerPoint overview 2. PowerPoint Basics 3. Advanced PowerPoint 4. Tips for Effective Presentations 5. Office Integration Presentation
Answer: D. Answer: B. Answer: C. Answer: C. Answer: B
 1. Which of the following software programs is used to create a collection of slides that may contain text, charts, pictures, sound movies, or multimedia, and is often called a presentation graphics program?
PowerPoint 2016 Part II
 PowerPoint 2016 Part II Animations In PowerPoint, any object, shape, image, etc. on a slide can be animated. Animations are a good way to add some attention grabbers to a presentation, but they can also
Using PowerPoint 2011 at Kennesaw State University
 Using PowerPoint 2011 at Kennesaw State University Creating Presentations Information Technology Services Outreach and Distance Learning Technologies Copyright 2011 - Information Technology Services Kennesaw
PowerPoint 2010: Basic Skills
 PowerPoint 2010: Basic Skills Application Support and Training Office of Information Technology, West Virginia University OIT Help Desk (304) 293-4444, oithelp@mail.wvu.edu oit.wvu.edu/training/classmat/ppt/
Interactive Powerpoint. Jessica Stenzel Hunter Singleton
 Interactive Powerpoint Jessica Stenzel Hunter Singleton Table of Contents iii Table of Contents Table of Contents... iii Introduction... 1 Basics of Powerpoint... 3 How to Insert Shapes... 3 How to Insert
Skills covered: Add a Table Insert, Move, and Resize Clip Art Apply a Transition Animate Objects Create a Handout Header and Footer
 HANDS-ON EXERCIS HOE3 Training 3 Presentation Development You decide to strengthen the slide show by adding objects. You know that adding clip art and additional information in a table will help state
Teaching with Primary Sources
 Teaching with Primary Sources Joining Educators and Students with Library of Congress Resources Creating a Presentation with PowerPoint 2007 Benefits of using PowerPoint in lectures: PowerPoint encourages
Rev. D 10/26/2012 Downers Grove Public Library Page 1 of 44
 Table of Contents Introduction... 3 Objectives... 3 PowerPoint Screen Components... 3 Office Button... 4 Quick Access Toolbar... 5 Fluid User Interface aka the Ribbon... 5 Dialog Launcher and Dialog Screens...
PowerPoint : :. PowerPoint
 PowerPoint : :. PowerPoint. PowerPoint. PowerPoint. PowerPoint. PowerPoint PowerPoint.... Microsoft Office.. ( ) PowerPoint PowerPoint Excel Word. Office.. PowerPoint PowerPoint. :. Start. All programs.
Developing a Power Point Presentation
 Load Power Point 1 Select Blank Presentation (figure 1) 2 Select New Slide (figure 2) First slide is the title page. Select First Box as shown in figure 2. Figure 1 Figure 2 3 Add Title and Subtitle (figure
Lesson 8: Presentation Enhancements Microsoft PowerPoint 2016
 Lesson 8: Presentation Enhancements Microsoft PowerPoint 2016 IN THIS CHAPTER, YOU WILL LEARN HOW TO Set up presentations for delivery. View and change slide masters. Add WordArt text. Create hyperlinks.
The Basics of PowerPoint
 MaryBeth Rajczewski The Basics of PowerPoint Microsoft PowerPoint is the premiere presentation software. It enables you to create professional presentations in a short amount of time. Presentations using
COMPUTERIZED OFFICE SUPPORT PROGRAM
 NH113 PowerPoint Level 1 16 Total Hours COURSE TITLE: PowerPoint Level 1 COURSE OVERVIEW: This course provides students with the knowledge and skills to create and deliver engaging multimedia presentations
Contents. I. Starting a New Presentation Try it! II. Choosing a Theme III. Tailoring the theme IV Background Styles...
 Contents PowerPoint 2007... 2 I. Starting a New Presentation... 4... 4 II. Choosing a Theme... 4... 4 III. Tailoring the theme... 5 IV Background Styles... 5... 5 V. Add slides, pick layouts... 6... 6
A Guide to the use of: Power Point Developed by: Customer Support Information Technology. School District of Palm Beach County
 A Guide to the use of: Power Point 2013 Developed by: Customer Support Information Technology School District of Palm Beach County i Table of Contents UPDATES... IV 1 INTRODUCTION... 1-1 1.1 OPENING POWERPOINT...
A tour of new features
 A tour of new features October 2012 Objectives Guide to completing Power Point Presentations Provide overview of functions, settings and tools Advanced features Beyond Basic The use of Hyperlinks Explain
GO! with Microsoft PowerPoint 2016 Comprehensive
 GO! with Microsoft PowerPoint 2016 Comprehensive First Edition Chapter 3 Enhancing a Presentation with Animation, Video, Tables, and Charts Learning Objectives Customize Slide Backgrounds and Themes Animate
PowerPoint Intermediate 2010
 PowerPoint Intermediate 2010 I. Creating a Slide Master A. Using the design feature of PowerPoint essentially sets up similar formatting for all of your slides within a presentation. However, there are
Microsoft Word 2010 Tutorial
 1 Microsoft Word 2010 Tutorial Microsoft Word 2010 is a word-processing program, designed to help you create professional-quality documents. With the finest documentformatting tools, Word helps you organize
Introduction to PowerPoint 2007
 Introduction to PowerPoint 2007 PowerPoint is one of the programs included in the Microsoft Office suite. It s used to create presentations, also called slide shows, that are typically displayed via a
PowerPoint Objective 1: Managing the PowerPoint Environment. Microsoft Office Specialist 2010 Certification Prep. Story/Walls
 PowerPoint Objective 1: Managing the PowerPoint Environment Microsoft Office Specialist 2010 Certification Prep Story/Walls 1 Adjust Views Ribbon and Shortcut Methods: Use the ribbon to adjust views Story/Walls
Getting Started with. PowerPoint 2010
 Getting Started with 13 PowerPoint 2010 You can use PowerPoint to create presentations for almost any occasion, such as a business meeting, government forum, school project or lecture, church function,
Learn about PowerPoint: Create your first presentation
 Learn about PowerPoint: Create your first presentation In this tutorial, you will create a simple presentation to learn the skills basic to working with all presentations. Step 1: Get started Open PowerPoint
Getting Started with. Office 2008
 Getting Started with Office 2008 Copyright 2010 - Information Technology Services Kennesaw State University This document may be downloaded, printed, or copied, for educational use, without further permission
GNS 312 (DIGITAL SKILL ACQUISITION) MODULE 3 OFFICE APPLICATIONS
 MODULE 3 OFFICE APPLICATIONS") GNS 312 (DIGITAL SKILL ACQUISITION) MODULE 3 OFFICE APPLICATIONS WRITTEN BY: 1 B. A. Oluwade, 1 M. A. Mabayoje, 2 A. R. Tomori, 2 M. AbdulRaheem & 1 S. A. Salihu 1 Department of Computer Science Faculty
GNS 312 (DIGITAL SKILL ACQUISITION) MODULE 3 OFFICE APPLICATIONS WRITTEN BY: 1 B. A. Oluwade, 1 M. A. Mabayoje, 2 A. R. Tomori, 2 M. AbdulRaheem & 1 S. A. Salihu 1 Department of Computer Science Faculty
1.1 Considering for Choosing Layout in SmartArt Graphics
 1. SmartArt A SmartArt graphic is a visual representation of your information that you can quickly and easily create, choosing from among many different layouts, to effectively communicate your message
[Not for Circulation] This document provides a variety of shortcuts for working in PowerPoint 2007.
![[Not for Circulation] This document provides a variety of shortcuts for working in PowerPoint 2007.](/thumbs/72/67772637.jpg "[Not for Circulation] This document provides a variety of shortcuts for working in PowerPoint 2007.") PowerPoint Shortcuts This document provides a variety of shortcuts for working in PowerPoint 2007. Using Slides from Other Presentations To add a slide from an existing presentation to the current presentation,
PowerPoint Shortcuts This document provides a variety of shortcuts for working in PowerPoint 2007. Using Slides from Other Presentations To add a slide from an existing presentation to the current presentation,
Microsoft. An Introduction
 Microsoft Amarillo College Revision Date: February 7, 2011 Table of Contents SLIDE MASTER... 2 ACCESSING THE SLIDE MASTER... 2 BACKGROUNDS... 2 FONT COLOR OF SLIDE TITLES... 3 FONT COLOR OF BULLET LEVELS...
PowerPoint Spring 2002
 PowerPoint 2000 Spring 2002 Table of Contents I. INTRODUCTION... 1 II. GETTING STARTED... 1 A. Opening PowerPoint... 1 B. The Mouse Pointer... 1 C. Working with Text... 2 1. Windows Control Buttons...
Introduction to Microsoft PowerPoint 2000
 Introduction to Microsoft PowerPoint 2000 TABLE OF CONTENTS Accessing PowerPoint 2000... 3 Starting a Presentation... 3 About the Editing Screen in Normal Screen View... 4 About Menu Displays in PowerPoint
POWERPOINT Add the Pizzazz to Your Presentation
 POWERPOINT 2007 Add the Pizzazz to Your Presentation Microsoft Office 2007 TABLE OF CONTENTS ADDING GRAPHICS TO YOUR PRESENTATION... 1 DRAWINGS... 1 CLIP ART... 2 PICTURES... 3 SMARTART... 4 WORDART...
PowerPoint Multiple OUTPUT types Paper Onscreen Web presentation 6 x 6 rule 6 points 6 words
 PowerPoint 1 PowerPoint Multiple OUTPUT types: Paper Onscreen Web presentation 6 x 6 rule no more than 6 points per slide No more than 6 words per point Placeholder area of a slide reserved for text or
CHAPTER 01 - INTRODUCTION
 Chapter 01, Introduction to MS PowerPoint 2007 CHAPTER 01 - INTRODUCTION PowerPoint is presentation software that helps you create a slide show presentation and supplements, such as handouts and speaker's