Introducing ArtMatic Voyager 4
|
|
|
- Roxanne Scott
- 5 years ago
- Views:
Transcription


1 Introducing ArtMatic Voyager 4
2 New Features and Changes - Quick Summary ArtMatic Voyager 4 - New Feature Guide Camera can now point straight up or down. See Camera Settings below. Full 360-degree spherical panoramas possible. Amazing for VR applications! Amazing new cities and building elements and more via ArMatic. A host of ArtMatic components were added specifically for expanding Voyager s capabilities. BE SURE to take a look at the extensive examples library to get a sense of the new possibilities. Improved live communication between ArtMatic Voyager and ArtMatic Designer New object shading modes: Gas and Clouds, Volumetric Light. New ambient light mode options. It is now possible to use the Environment Setup dialog to set the ambient light channel to an image or particular color for dramatic new lighting possibilities. Improved and expanded Mist model. New wave model available. New Camera Settings dialog and new icon in the main user interface. Updated Camera Path dialog Elevation slider now relative. For absolute control of the camera elevation, use the new Camera Settings dialog. The range of movement via the sliders is now influenced by the View Map scale. For effective navigation with DFRM cities and objects, set the view range somewhere between 1 and a few kilometers. Land Camera icon added to main user interface to set the camera at the surface level and should be effective for both simple 2D terrains and 3D volumetric (DFRM) terrains. Save Image Options dialog. Cast shadows option added to turn on this option for the render without having it on in the main user interface. Improved Ambient Occlusion. The ambient occlusion has been made faster with improved quality. See details below. Shadows have been improved with a better soft shadow algorithm. Improved object dialog. DFRM object rendering has been optimized. See details. Multiprocessing architecture updated to make use of POSIX calls. Improved top-view of DFRM objects in the surface map mini-preview. Terrain Shader Options icon moved
.")
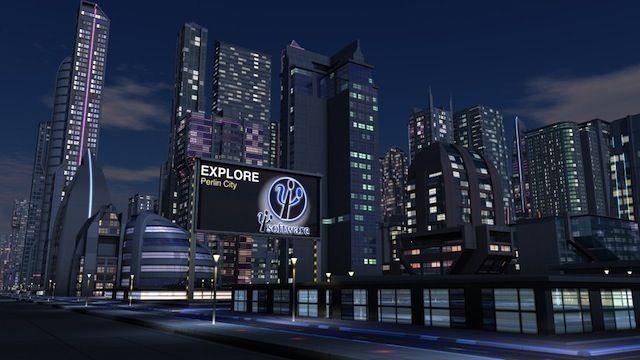
3 New Feature Details ArtMatic Voyager 4 - New Feature Guide CAMERA PROJECTION MODE ArtMatic Voyager now allows the camera to be pointed straight up or down and to create full 360-degree spherical panoramas. To accomplish this, ArtMatic Voyager now has a selectable projection mode that is accessed via the new Camera Settings Dialog (more about this later in this chapter). The modes are cylindrical (the legacy mode), perspective and spherical. The cylindrical projection mode is generally much faster to render than the other modes since it allows for massive optimizations not possible when the camera can point straight up or down. More about these modes and the Camera Settings Dialog are found later in this chapter. IMPROVED MIST MODEL The mist model was improved. It now has two parameters in the Environment Settings dialog: Mist Top Altitude and Mist Range. Mist Range controls the vertical spread and controls the density. The smaller the range, the faster the mist reaches full opacity. Mist density is also affected by the global haze level. NEW WAVE MODEL A new wave model is available in the Environment Settings dialog. The option smaller and rougher has been added to the wave algorithms available from the popup. CITIES AND MUCH MORE VIA NEW ARTMATIC COMPONENTS ArtMatic Designer 7 has a host of new components that enable cities, architectures, spaceships, 3D fractals and more: far beyond what was possible in earlier generations of the software. BE SURE to take a look at the extensive examples library to get a sense of the new possibilities! - 3 -

4 IMPROVED TOP-VIEW OF ARTMATIC OBJECTS The Map s top-view preview shows an improved representation of ArtMatic DFRM objects. A density slice is taken at the terrain s elevation and another slice at the object s center and superimposed on the map. Map preview for the Utopia city TERRAIN SHADER OPTIONS ICON MOVED The icon to call up the Terrain Shader Options dialog has moved to the Color Shader section of the main user interface as shown above. AMBIENT OCCLUSION The ambient occlusion algorithms have been improved. A vertical component has been added. The ambient occlusion is stronger than before so old scenes may require some adjustment. NEW AMBIENT LIGHT SETTINGS - ENVIRONMENT The Environment Setup Dialog offers four options for the ambient light mode: Automatic. Automatic is the mode used in ArtMatic Voyager 3 and earlier. The ambient light is a blurred low-res image (128*64) derived from the scene s map and is recalculated for each frame. Image. When you use an image as the light masp, it is resized to 128*64 and blurred. The image is stored in the Voyager scene s bundle as AmbiantMap.png Image+Constant. The constant color is added to the chosen image. Constant. Constant mode uses a mix of the sun, haze and sky color to create a uniform ambient light. Light map recalculation. When you use the image or constant modes, the ambient light map is fixed and not recalculated with each frame


5 A scene as it appears with the normal automatic ambient light As it appears when an image of a soap film is used as the light map The image chosen as the ambient light map The AmbiantMap.png created by Voyager and stored in the bundle The folder Ambiant Maps provides some images that you might find useful as ambient light maps. It also includes the ArtMatic systems used to generate them. STEREOSCOPIC/BINOCULAR RENDERING When rendering a 360-degree stereoscopic image, the distance of convergence parameter is disabled as it has no effect. CAMERA-RELATED CHANGES Camera Settings Dialog The new Camera Settings Dialog (command-f or clicking on the camera icon) lets you set a number of camera settings including the new projection mode setings. Changes to the settings are reflected in real time in the main user interface. Of particular interest to long-time users is the ability to have the camera point straight up or down and to make true 360-degree spherical panoramas. These new capabilities are accomplished by the new Perspec

6 tive Projection and Spherical Projection modes. ArtMatic Voyager 4 - New Feature Guide Settings: Projection mode: Cylindrical, Perspective, Spherical Horizontal direction Vertical angle Longitude Latitude Elevation Cylindrical Projection. This is the standard projection mode. It is highly optimized for speed and quality. These optimizations, however, prevent the camera from pointing straight up or straight down. Unless you need to point the camera to the vertical extremes, use this mode. Perspective Projection. This mode allows the camera to be pointed straight up or straight down (-90 to +90) something not possible before ArtMatic Voyager 4. All previous versions of ArtMatic Voyager used Cylindric projection. In this mode, the terrain optimizations used in cylindric projection are not possible thus planet terrain rendering will be slower. Some systems with steep slopes (such as those that use the old 2D city components) may not render well in this mode. Spherical Projection. This mode allows you to render a full 360-degree panorama which can be used for VR and viewing in apps that allow viewing of full 360 panoramas (such as Facebook s 360 mode which is especially cool when viewed on a mobile device). When rendering with this mode, make sure to use a 2:1 aspect ratio and to set the Zoom (focal angle) slider all the way to the left (the numerical value is 360). This mode can be used to render images and also for creating environment maps. You can use it to create an accurate ambient light image (low res sender) that takes the objects in the scene into account. See also 2->3 Inverse Projections and 3->2 Spherical projections. More information about creating 360 degree renders can be found on the ArtMatic wiki. 360 Panorama Examples: To fully appreciate this capability, check out some of our examples posted as Facebook 360 panoramas. These are best viewed on a mobile device as the screen is treated like a portal into a 3D world. Click here to view the album. Camera Control Enhancements. When using Perspective or Spherical projection, control-click on the canvas to center the camera on that point. Control+option or command drag will move the camera forward or - 6 -
7 back from the center point. When doing this, dragging left moves the camera further from the point and dragging right moves it closer. Rendering Considerations. Perspective and Spherical projection modes are mathematically more demanding than cylindrical projection mode. For this reason, the terrain rendering quality is more limited in order to prevent radically long rendering times. This limitation does not apply to DFRM objects. Examples: Voyager 4.0 examples/df Modeling /SpaceStationsV7/DF 2C Polyhedron SpaceStation.vy, Voyager 4.0 examples/df Fractales V7 /SI fractales /BFSI spherical.vy, Voyager 4.0 examples/ Cities and Architecture//Utopia/Utopia explore Spherical Proj.vy ArtMatic Voyager + ArtMatic Designer Features VOYAGER/ARTMATIC COMMUNICATION AND FILE SAVING Some major improvements were made to ArtMatic Voyager/ArtMatic Designer communication. Of special importance were changes made so that when you use Save As from Voyager while editing ArtMatic elements that you don t accidentally keep working on the old file s elements. When using Save As from ArtMatic Voyager. (When working with ArtMatic Designer 7 or later). If you use Edit in ArtMatic while working in ArtMatic Voyager then choose Save As (from Voyager), ArtMatic Designer will make sure that you are working with the ArtMatic file associated with your new project rather than the old one. ArtMatic will alert you that it has started working with the new file. For example, imagine that you are working on a Voyager project called My Original Planet whose surface is provided by an ArtMatic system called My Surface. Let s say you click on the Edit button (in Voyager) to start editing the planet s surface in ArtMatic and later choose Save As in Voyager and name the new project My Newer Planet. When this happens, ArtMatic Designer will start using the version of My Surface from the new My Newer Planet. ArtMatic Designer will also display a message File Path Updated to let you know that you are working on a new file. Prior to ArtMatic Designer 7 and Voyager 4, you would have ended up continuing to work with the surface from My Original Planet unless you remembered to press Edit again after choosing Save As. Caveats: if you start editing a Voyager project s ArtMatic element and decide that you don t like your changes to that element, use the Reload button before you edit another ArtMatic element. ArtMatic Voyager occasionally, saves elements being edited when you go to edit another ArtMatic element (in order to make sure you don t lose change if you are going back and forth between different elements). Back up your project! We recommend either making a backup copy of your ArtMatic Voyager project be
8 fore editing or to use Save As before starting to modify your Voyager project to ensure that you can revert back to your original project. Voyager & ArtMatic Communication - TIP - Gradient and Unlocked Parameter Changes ArtMatic Voyager s live updating from ArtMatic works slightly differently when an ArtMatic file has keyframes and when it doesn t. If there are no keyframes in an ArtMatic file, the current view s parameters (whether locked or unlocked) and gradient are displayed in the Voyager mini-preview as you change them. If you edit the current gradient s colors, you need to toggle Send Parameters to Voyager to see the change reflected in the mini-preview. If the ArtMatic file has keyframes, parameter changes that affect the current keyframe (rather than the current view) are sent live from ArtMatic to Voyager to update the mini-preview popup window. If you change the global gradient or an unlocked parameter without updating the keyframe, the change won t be reflected in the mini-preview. To see the change, replace the current keyframe. ArtMatic uses the keyframe rather than the current view as the basis for the mini-preview. Generally, it is advisable to lock parameters that you are manipulating while editing to ensure that you see changes without having to modify a keyframe. It is advisable to use the Indexed Gradient component rather than the Main Gradient if you want to see gradient choices treated more like other parameter changes. DFRM UPDATE DETAILS Object Rendering And Sensitivity To Distance Estimate DFRM rendering has been optimized in order to speed up rendering for well-designed systems. However, if a system is poorly designed (for instance, if it violates our guidlines for space scaling or uses components with poor continuinuty), you may experience longer than render times or surprising artifacts. These artifacts are, in fact, helpful in identifying ArtMatic systems that should be adjusted to improve convergence. They are indications that the ArtMatic system produces a flawed distance estimate (DE). Tips for detecting poor convergence/distance estimate. If part of an object disappears when you switch to Draft mode, the distance estimate is not correct. A simple solution for such a situation is to scale down the object s distance field which will either be a single (scalar) object output for the fourth output when using RGBA until the object is stable in Draft mode. Scale down the scalar value rather than adding scaling before the object (because incorrect space scaling is usually what causes the problem in the first place). If there are only minor artifacts in Draft mode but the object is well behaved in the other quality modes, don t further adjust the distance estimate or rendering time may increase or the ambient occlusion may be thrown off

9 Opaque Objects - Ambient Occlusion Example: Abs mandelbox A0 The Ambient occlusion default algorithm has been made faster and more robust. The new implementation is more sensitive to the accuracy of the distance field/distance estimate. Compatibility Note. Because of these changes, the ambient occlusion in scenes created in earlier versions of Voyager may be darker than in the original version. When this happens, it usually indicates the the distance estimate is lower than it should be. See the comments in the section Object Rendering and Sensitivity to Distance Estimate for tips about adjusting the distance estimate. You may also want to adjust the AO level. Examples: Voyager 4.0 examples/ Ambiant Occlusion/ NEW & UPDATED OBJECT SHADING TYPES Gas and Clouds Strange cloud formation on planet B Gaz forest and smoke pillars In this mode, DFRM objects are shaded as if they are like clouds. This provides a more flexible solution for certain types of clouds and smoke-like objects than the normal sky/cloud method. You can use this mode for making smoke, steam, fog, clouds and even impressionistic vegetation seen from afar

 Volumetric lights can now cast light. A new parameter, light emission range, controls how far light is cast from the object.")
10 This mode s parameters are: ArtMatic Voyager 4 - New Feature Guide Opacity gain Self shadow distance. The length of the self-shadow accumulation ray Self shadow gain. The strength of the self shadow Derivative level. Adds fine details by applying a derivated to the DF field. This may not be realistic for some effects such as gas effects. Contrast Ambient level. Amount of light scattered from the environment Note: the intersection of a gas object and volumetric light can be problematic. Examples: Voyager 4.0 examples/ DF Gaz/Cloud shader/ Volumetric Light (updated) Volumetric lights can now cast light. A new parameter, light emission range, controls how far light is cast from the object. The light direction is taken from the distance field s normal unless you use the Shade as projector mode in which case the object center is the source of the light. The light cast with the DF normal may not make sense in some cases and will cast false shadows. Nevertheless, it is quite efficient to render multiple lights or a complex light field (such as for city street lights). In the Desert Light Field.vy example, you can see an array of lights casting light on the desert. You can create realistic street lamps using the Multi : Opaque and light object shading mode. With Shade as projector and texturing the light with an image, you can implement a working image/ movie projector inside Voyager

11 Examples: See Voyager 4.0 examples/ DF lights fields/. See also Voyager 4.0 examples/ Cities and Architecture/Utopia city by night /Utopia DFLights.vy Utopia DFLights B.vy
What s New in ArtMatic Designer 7
 What s New in ArtMatic Designer 7 Highlights ArtMatic 7 New Features: Overview More than 100 new and updated components for both 2D and 3D graphics. Be sure to see the ArtMatic 7 Component Reference Update.
ARTMATIC VOYAGER 2.0
 ARTMATIC VOYAGER 2.0 New Features Guide Many thanks to Peter Miller and Dick Scherzinger (Eonite) for their invaluable feedback and use of their images. Copyright 2011, U&I Software LLC. All images are
Shadow Casting in World Builder. A step to step tutorial on how to reach decent results on the creation of shadows
 Shadow Casting in World Builder A step to step tutorial on how to reach decent results on the creation of shadows Tutorial on shadow casting in World Builder 3.* Introduction Creating decent shadows in
LIGHTING - 1. Note. Lights. Ambient occlusion
 Note LIGHTING - 1 The creation and use of lights varies greatly between the default Blender renderer and the Cycles renderer. This section refers only to simple lighting in the default renderer. Lights
Chapter 6- Lighting and Cameras
 Lighting Types and Settings When you create a scene in Blender, you start with a few basic elements that will include a camera, but may or may not include a light. Remember that what the camera sees is
Chapter 5- Setting Up a World
 Chapter 5- Setting Up a World Using Color, Stars and Mist You ve created a nice scene for your lighthouse, but we re missing a really nice background. Depending on which release of Blender you re running,
Setting Up Your Environment - Consider the width of your camera view. Large waves may look good from afar but when zoomed in often look too large.
 Introduction Max Sky allows you to present your weather story in the most realistic and visually compelling way possible. This guide is designed to help you get the most out of your Max Sky software and
Visualization Insider A Little Background Information
 Visualization Insider A Little Background Information Visualization Insider 2 Creating Backgrounds for 3D Scenes Backgrounds are a critical part of just about every type of 3D scene. Although they are
AECOsim Building Designer Quick Start Guide
 AECOsim Building Designer Quick Start Guide Chapter A17 Rendering 2012 Bentley Systems, Incorporated www.bentley.com/aecosim Table of Contents Rendering...3 The Camera... 3 Materials... 5 Material Palettes...
AR-media TUTORIALS IMPROVING REALISM AMBIENT OCCLUSION. (June, 2011)
") AR-media TUTORIALS IMPROVING REALISM AMBIENT OCCLUSION (June, 2011) Copyright Copyright 2008/2011 Inglobe Technologies S.r.l. All rights reserved. No part of this publication may be reproduced, transmitted,
AR-media TUTORIALS IMPROVING REALISM AMBIENT OCCLUSION (June, 2011) Copyright Copyright 2008/2011 Inglobe Technologies S.r.l. All rights reserved. No part of this publication may be reproduced, transmitted,
Advanced Distant Light for DAZ Studio
 Contents Advanced Distant Light for DAZ Studio Introduction Important Concepts Quick Start Quick Tips Parameter Settings Light Group Shadow Group Lighting Control Group Known Issues Introduction The Advanced
MotionGraphix. User Guide. Quick Start. Overview
 MotionGraphix User Guide Quick Start Create a Project Add Elements Position, scale and rotate the elements Change the time and reposition, scale and rotate the elements Change the time again, etc. Double
Import / Object modes: 5 Layers for organising your scene are available at the top of the screen.
 LUMION 1 VS LUMION 2 SCENES - In Lumion 2, the sky, clouds, fog, material settings, ambient shadows and reflections have been overhauled, so don't expect your Lumion 1 scenes to look identical when you
Design Visualization with Autodesk Alias, Part 2
 Design Visualization with Autodesk Alias, Part 2 Wonjin John Autodesk Who am I? Wonjin John is an automotive and industrial designer. Born in Seoul, Korea, he moved to United States after finishing engineering
3D Space is one of the most rewarding areas
 Lesson 8 206 3D Space Add a new dimension to your animations. In This Lesson 207 enabling layers for 3D 208 moving and rotating layers in 3D space 210 multiplaning effects 212 3D motion paths 213 multiple
GODRAYS Expanded: Celestial Bodies. By Sickleyield and Marshian. Users Manual
 GODRAYS Expanded: Celestial Bodies By Sickleyield and Marshian Users Manual Table of Contents Introduction...3 1. Finding the Product...4 2: Using The Material Presets...8 3: Process & Fine Tuning...9
There are many kinds of surface shaders, from those that affect basic surface color, to ones that apply bitmap textures and displacement.
 mental ray Overview Mental ray is a powerful renderer which is based on a scene description language. You can use it as a standalone renderer, or even better, integrated with 3D applications. In 3D applications,
 Page 1 of 10 Creating Cigarette Smoke In this tutorial, you use a particle system to create a stream of cigarette smoke trailing from an ashtray. The animation relies on space warps to affect the movement
Art? 2 Computer Graphics 2 The Stages of Production 4 The CG Production Workflow 8 Core Concepts 10 Basic Film Concepts 21 Summary 26
 Contents Introduction xvii Chapter 1 Introduction to Computer Graphics and 3D 1 Art? 2 Computer Graphics 2 The Stages of Production 4 The CG Production Workflow 8 Core Concepts 10 Basic Film Concepts 21
Lesson 03: We will add water and will set the placing conditions for the material. WorldBuilder 3.5. for. About Digital Element Tutorials:
 Lesson 03: We will add water and will set the placing conditions for the material for WorldBuilder 3.5 About Digital Element Tutorials: This tutorial is available both in.pdf format and in Qarbon format,
GLOBAL SNOW Reference Guide
 GLOBAL SNOW Reference Guide Contents Introduction... 3 How it works... 3 Demo Scene... 4 Quick Start... 4 Global Snow Parameters... 5 Scene Setup (Forward Rendering)... 5 Scene Setup (Deferred Rendering)...
User Manual Alpine Navigation
 User Manual Alpine Navigation Navigation software for the Alpine INE-W960/INE-W960S/INE-NAV-60 US English January 2015, ver. 1.0 Thank you for choosing the Alpine unit as your navigator. Start using your
COS 116 The Computational Universe Laboratory 10: Computer Graphics
 COS 116 The Computational Universe Laboratory 10: Computer Graphics As mentioned in lecture, computer graphics has four major parts: imaging, rendering, modeling, and animation. In this lab you will learn
AV Using Autodesk 3ds Max Design, Autodesk Revit, and iray to Render Compelling Photographic Scenes
 AV4672 - Using Autodesk 3ds Max Design, Autodesk Revit, and iray to Render Compelling Photographic Scenes Steven Schain Autodesk Certified Instructor AV4672 This virtual class introduces designers to the
Rendering Smoke & Clouds
 Rendering Smoke & Clouds Game Design Seminar 2007 Jürgen Treml Talk Overview 1. Introduction to Clouds 2. Virtual Clouds based on physical Models 1. Generating Clouds 2. Rendering Clouds using Volume Rendering
Owner's manual NX604. Navigation
 Owner's manual NX604 Navigation Thank you for choosing the Clarion NX604 as your navigator. Start using Clarion NX604 right away. This document is the detailed description of the navigation software. You
AV Bros. Page Curl Pro 2.2
 User Guide for Windows and Mac OS X We are proud to introduce, the filter plug-in (8bf) for Adobe Photoshop and compatible hosts. is targeted to help you create an extremely realistic and sophisticated
lecture 21 volume rendering - blending N layers - OpenGL fog (not on final exam) - transfer functions - rendering level surfaces
 - transfer functions - rendering level surfaces") lecture 21 volume rendering - blending N layers - OpenGL fog (not on final exam) - transfer functions - rendering level surfaces - 3D objects Clouds, fire, smoke, fog, and dust are difficult to model with
lecture 21 volume rendering - blending N layers - OpenGL fog (not on final exam) - transfer functions - rendering level surfaces - 3D objects Clouds, fire, smoke, fog, and dust are difficult to model with
Owner s manual NZ503
 Owner s manual NZ503 US English Thank you for choosing the Clarion NZ503 as your navigator. Start using Clarion NZ503 right away. This document is the detailed description of the navigation software. You
Setting up a 3D Environment for the City of Portland
 Setting up a 3D Environment for the City of Portland www.learn.arcgis.com 380 New York Street Redlands, California 92373 8100 USA Copyright 2018 Esri All rights reserved. Printed in the United States of
THE SAMPLING TAB. Pixel Samples. Ray Variance Antialiasing. H16 Mantra User Guide
 THE SAMPLING TAB The Sampling Tab can be found under the Rendering Tab on the Mantra Node. The parameters found on this tab control the amount of sampling performed by Mantra while generating an image.
MSP Yearbooks Quick Start Guide
 MSP Yearbooks Quick Start Guide March 2017 Contents Quick Start Guide 1 Introduction 1.1 Welcome to MSP Yearbooks 1 1.2 Help at your fingertips 1 2 Before you start... 2.1 Security settings information
Cityscape Generator.. And additional tools
 Cityscape Generator.. And additional tools V3Digitimes - December 2016 1 This product comes with 3 scripts : 1. one to generate a cityscape, 2. the other one allowing to add human beings in front of a
Turn your movie file into the homework folder on the server called Lights, Camera, Action.
 CS32 W11 Homework 3: Due MONDAY, APRIL 18 Now let s put the ball in a world of your making and have some fun. Create a simple AND WE MEAN SIMPLE environment for one of your ball bounces. You will assign
COS 116 The Computational Universe Laboratory 10: Computer Graphics
 COS 116 The Computational Universe Laboratory 10: Computer Graphics As mentioned in lecture, computer graphics has four major parts: imaging, rendering, modeling, and animation. In this lab you will learn
World Builder 3 Tutorial Manual
 World Builder 3 Tutorial Manual Chapter Name & Section Name 1 C2 Basic Concepts Installation 13 Starting World Builder 16 Exiting World Builder 17 Tutorial 1 19 Tutorial 2 24 WorldBuilder is a remarkable
Display. Introduction page 67 2D Images page 68. All Orientations page 69 Single Image page 70 3D Images page 71
 Display Introduction page 67 2D Images page 68 All Orientations page 69 Single Image page 70 3D Images page 71 Intersecting Sections page 71 Cube Sections page 72 Render page 73 1. Tissue Maps page 77
Shadows. COMP 575/770 Spring 2013
 Shadows COMP 575/770 Spring 2013 Shadows in Ray Tracing Shadows are important for realism Basic idea: figure out whether a point on an object is illuminated by a light source Easy for ray tracers Just
Guide Contents Introduction Useful Information Navigating the Scene Hotkeys Placing and Manipulating Objects The Builder Cube Builder Cube Edit
 Guide Contents Introduction Useful Information Navigating the Scene Hotkeys Placing and Manipulating Objects The Builder Cube Builder Cube Edit Geometry Builder Cube Edit UVs Static Meshes Materials Mat.
Version 10 Addendum to the User s Manual
 Version 10 Addendum to the User s Manual Introduction to Version 10 This latest release of the diagram program boasts improved productivity via the new user interface, real-time 3D, a new 3D rendering
Advanced Rendering CHAPTER. Render Window. Learning Objectives. Image Pane
 CHAPTER Advanced Rendering Learning Objectives After completing this chapter, you will be able to: Make advanced rendering settings. Set the resolution for a rendering. Save a rendering to an image file.
SketchUp Tool Basics
 SketchUp Tool Basics Open SketchUp Click the Start Button Click All Programs Open SketchUp Scroll Down to the SketchUp 2013 folder Click on the folder to open. Click on SketchUp. Set Up SketchUp (look
Planets Earth, Mars and Moon Shaders Asset V Documentation (Unity 5 version)
") Planets Earth, Mars and Moon Shaders Asset V0.4.4 Documentation (Unity 5 version) Charles Pérois - 2015 Introduction 2 Table des matières 1. Introduction...3 2. Release Notes...4 3. How to Use...6 1. Set
Planets Earth, Mars and Moon Shaders Asset V0.4.4 Documentation (Unity 5 version) Charles Pérois - 2015 Introduction 2 Table des matières 1. Introduction...3 2. Release Notes...4 3. How to Use...6 1. Set
Education and Training CUFMEM14A. Exercise 2. Create, Manipulate and Incorporate 2D Graphics
 Education and Training CUFMEM14A Exercise 2 Create, Manipulate and Incorporate 2D Graphics Menu Exercise 2 Exercise 2a: Scarecrow Exercise - Painting and Drawing Tools... 3 Exercise 2b: Scarecrow Exercise
The playhead, shown as a vertical red beam, passes each frame when a movie plays back, much like movie fi lm passing in front of a projector bulb.
 The project: AIRPLANE I will show you a completed version of this project.. Introducing keyframes and the Timeline One of the most important panels in the Flash workspace is the Timeline, which is where
diffuse diffuse reflection refraction diffuse mapping diffuse reflection reflection filter mapping mapping reflection
 Matières 1 2 3 mapping diffuse reflection diffuse transparency reflection refraction diffuse mapping diffuse reflection diffuse reflection filter mapping bump mapping mapping mapping diffuse reflection
3ds Max certification prep
 3ds Max certification prep Study online at quizlet.com/_25oorz 1. 24 Frames per second 2. 25 Frames per second, Europe 3. 30 Frames per second, Americas and Japan 4. Absolute mode, off set mode 5. How
ART 268 3D Computer Graphics Texture Mapping and Rendering. Texture Mapping
 ART 268 3D Computer Graphics Texture Mapping and Rendering Texture Mapping Is the way in which a material is wrapped around an object. The default method is UVW mapping (see below). When you drag a material
June 05, 2018, Version 3.0.6
 June 05, 2018, Version 3.0.6 VolViCon is an advanced application for reconstruction of computed tomography (CT), magnetic resonance (MR), ultrasound, and x-rays images. It gives features for exporting
The Animation Process. Lighting: Illusions of Illumination
 The Animation Process Lighting: Illusions of Illumination Lighting = realism Although real people versus real clay/plastic is up to textures Realistic lighting = render time Some properties of lights Colour
Art of the Apps Monthly Membership. SEPTEMBER 2018 Mobile App: LetterGlow. at Scrapaneers.com. Companion Handouts
 Companion Handouts August 2018 : Art of the App Monthly Membership Art of the Apps Monthly Membership Page 1 of 15 at Scrapaneers.com SEPTEMBER 2018 Mobile App: LetterGlow Companion Handouts September
Render - Blender Render Engine - Lighting
 10.2.3 Render - Blender Render Engine - Lighting Lighting...3 Viewing Restrictions...3 Global Influences...3 Lighting Settings...4 Lighting in the Workflow...4 Overriding Materials to Reset Lighting...4
User Manual JRV9000. Navigation software for the JRV9000. English April 2016, ver. 1.0
 User Manual JRV9000 Navigation software for the JRV9000 English April 2016, ver. 1.0 Table of contents 1 Getting started... 5 1.1 Initial set-up... 5 1.2 Screen controls... 6 1.2.1 Using the buttons and
Work with Shapes. Concepts CHAPTER. Concepts, page 3-1 Procedures, page 3-5
 3 CHAPTER Revised: November 15, 2011 Concepts, page 3-1, page 3-5 Concepts The Shapes Tool is Versatile, page 3-2 Guidelines for Shapes, page 3-2 Visual Density Transparent, Translucent, or Opaque?, page
Beginning Paint 3D A Step by Step Tutorial. By Len Nasman
 A Step by Step Tutorial By Len Nasman Table of Contents Introduction... 3 The Paint 3D User Interface...4 Creating 2D Shapes...5 Drawing Lines with Paint 3D...6 Straight Lines...6 Multi-Point Curves...6
Introduction to 3D Concepts
 PART I Introduction to 3D Concepts Chapter 1 Scene... 3 Chapter 2 Rendering: OpenGL (OGL) and Adobe Ray Tracer (ART)...19 1 CHAPTER 1 Scene s0010 1.1. The 3D Scene p0010 A typical 3D scene has several
Version 14 COURSE UNIT 6. Visualisation
 Version 14 COURSE UNIT 6 Visualisation Table of Contents Introduction... 2 Preparation... 3 Materialization... 4 View position... 9 Camera... 10 Create design model view.... 12 Move background image...
Animation Basics. Learning Objectives
 Animation Basics Learning Objectives After completing this chapter, you will be able to: Work with the time slider Understand animation playback controls Understand animation and time controls Morph compound
PRIMAL VIDEO. Steps to Filming. with. iphone PRIMALVIDEO.COM
 PRIMAL VIDEO 12 AMAZING VIDEOS BEFORE YOU START You can check out the video version of this guide here: https://primalvideo.com/complete-guide-filming-content-videos-iphone/ This guide will run you through
Animatron Tutorial. Ronald Bourret
 Animatron Tutorial Ronald Bourret http://www.rpbourret.com Table of Contents License... 2 Lesson 1: Getting Started... 3 1.1 Creating an Animatron account... 3 1.2 Animatron screen... 3 Lesson 2: Drawing...
Working with the BCC 3D Image Shatter Filter
 Working with the BCC 3D Image Shatter Filter 3D Image Shatter shatters the image in 3D space and disperses the image fragments. The Þlter provides a variety of explosion, velocity, and gravity parameters
Mastering Autodesk 3ds Max 2013
 Mastering Autodesk 3ds Max 2013 Harper, J ISBN-13: 9781118129715 Table of Contents Introduction? xxi Chapter 1? Getting to Know Autodesk? 3ds Max? 2013??? 1 Introducing the New 3ds Max 2013 Features????
PART A Three-Dimensional Measurement with iwitness
 PART A Three-Dimensional Measurement with iwitness A1. The Basic Process The iwitness software system enables a user to convert two-dimensional (2D) coordinate (x,y) information of feature points on an
Soft shadows. Steve Marschner Cornell University CS 569 Spring 2008, 21 February
 Soft shadows Steve Marschner Cornell University CS 569 Spring 2008, 21 February Soft shadows are what we normally see in the real world. If you are near a bare halogen bulb, a stage spotlight, or other
Realistic and Fast Cloud Rendering in Computer Games. Niniane Wang Software Engineer Microsoft Flight Simulator (now at Google Inc) Intro Video
 Intro Video") Realistic and Fast Cloud Rendering in Computer Games Niniane Wang Software Engineer Microsoft Flight Simulator (now at Google Inc) Intro Video 1 Agenda Previous Work 3-D Modeling + Art Pipeline Performance
Realistic and Fast Cloud Rendering in Computer Games Niniane Wang Software Engineer Microsoft Flight Simulator (now at Google Inc) Intro Video 1 Agenda Previous Work 3-D Modeling + Art Pipeline Performance
The Auto-MipMapper Shader
 The Auto-MipMapper Shader for CARRARA 4,5 & 6 Version 0.2 The Auto-MipMapper reduces or removes moire patterns and twinklies in both still renders and animations. Unlike the MipMapper the Auto-MipMapper
Using Google SketchUp
 Using Google SketchUp Mike Bailey mjb@cs.oregonstate.edu http://cs.oregonstate.edu/~mjb/sketchup What is Google SketchUp? Google SketchUp is a program which lets you sketch in 3D. It is excellent for creating
Artlantis training for new users
 Artlantis training for new users page 2 This training program reviews the main features of Artlantis. You will learn about the various presentation types such as still images, ivisit 3D panoramas, VR objects
Lighting & 3D Graphics. Images from 3D Creative Magazine
 Lighting & 3D Graphics Images from 3D Creative Magazine Contents Introduction Definitions 3D Lighting Basics 3D Light Sources Lighting Controls & Effects Brightness & Colour Shadows Hotspot And Falloff
Windows 98, Millennium (Me) and Windows 2000 are trademarks of Microsoft Corporation. Other trademarks are the property of their respective owners.
 and Windows 2000 are trademarks of Microsoft Corporation. Other trademarks are the property of their respective owners.") TM Quickly Design & Print Your Own Custom CD/DVD Labels In Just Minutes! Please record responsibly! Before copying anything onto a CD-R or CD-RW disc, please be sure you have rights to do so and are not
TM Quickly Design & Print Your Own Custom CD/DVD Labels In Just Minutes! Please record responsibly! Before copying anything onto a CD-R or CD-RW disc, please be sure you have rights to do so and are not
Orbiter Base Maker Manual
 Orbiter Base Maker Manual A basic guide to the general operation of Orbiter Base Maker (OBM) OBM Version 1.0.7 5/28/2012 0 Contents Preface... 1 Windows, Buttons, and Boxes - the GUI explained... 2 Main
REMEMBER TO BRING YOUR MEMORY STICK TO EVERY LAB!
 CS 1033 Multimedia and Communications Lab 07: Introduction to Animation using Photoshop REMEMBER TO BRING YOUR MEMORY STICK TO EVERY LAB! LAB #7 - Exercise 1 Objectives: Upon completion of Exercise 1 you
Houdini Light, Shade, Render
 Houdini Light, Shade, Render M06: Creating a Light Rig Ari Danesh ari@sidefx.com Agenda More Managing Desktop (A Diversion) Looking at Existing Light Rig Digital Assets (Three Point Light) Creating our
Render methods, Compositing, Post-process and NPR in NX Render
 Render methods, Compositing, Post-process and NPR in NX Render Overview What makes a good rendered image Render methods in NX Render Foregrounds and backgrounds Post-processing effects Compositing models
FLAMINGO CHEAT SHEET FOR ES 305 CLASS 5 Pages of Fresh Flamingo Goodness
 FLAMINGO CHEAT SHEET FOR ES 305 CLASS 5 Pages of Fresh Flamingo Goodness *Keep this PDF with you at all times it will help you to maneuver the vast and confusing ocean that is the Flamingo Materials Editor!
Science & Technology Group
 Cannock Chase U3A Science & Technology Group Programme June 12 th PC fundamentals 1: July 17th Camera fundamentals 1 August Tablet PC fundamentals 1 September PC applications 2 (Word, Excel, Music, Photos,
12 APPLYING EFFECTS. Lesson overview
 12 APPLYING EFFECTS Lesson overview In this lesson, you ll learn how to do the following: Use various effects like Pathfinder, Distort & Transform, Offset Path, and Drop Shadow effects. Use Warp effects
Autodesk Fusion 360: Render. Overview
 Overview Rendering is the process of generating an image by combining geometry, camera, texture, lighting and shading (also called materials) information using a computer program. Before an image can be
Creating a Motion Stabilizer Effect
 1 Creating a Motion Stabilizer Effect In this exercise, you will use Boris FX s new Motion Stabilizer filter to stabilize some shaky video footage. The Motion Stabilizer uses motion trackers to analyze
Chapter Adding 1- T Mo he tio B n le to nde Yo r ur Inte Scerfac ne e Landscape Scene Stormy Night.mp4 End 200 Default Animation frame 1 Location
 1- The Blender Interface Adding Motion to Your Scene Open your Landscape Scene file and go to your scene buttons. It s time to animate our dark and stormy night. We will start by making the correct setting
Working with the BCC 2D Particles Filter
 Working with the BCC 2D Particles Filter 2D Particles breaks the source image into particles and disperses them in 2D space. This Þlter also provides a variety of explosion, velocity, and gravity controls
ossimplanet Users Manual
 ossimplanet Users Manual An accurate 3D Global Visualization System Version 0.1 16 Oct 2006 Overview ossimplanet is an accurate 3D global geo-spatial viewer that is build on top of the OSSIM, OpenSceneGraph,
User Manual Alpine Navigation
 User Manual Alpine Navigation Navigation software for the Alpine INE-W970BT UK English January 2013, ver. 1.0 Thank you for choosing the Alpine unit as your navigator. Start using your device right away.
Radeon ProRender add-in for SOLIDWORKS. User Guide v1.1
 Radeon ProRender add-in for SOLIDWORKS User Guide v1.1 This document is a user and setup guide with tips and tricks on how to render photorealistic images in real-time, apply decals and create animations.
CGS 3220 Lecture 4 Shaders, Textures, and Light
 CGS 3220 Lecture 4 Shaders, Textures, and Light Introduction to Computer Aided Modeling Instructor: Brent Rossen Overview Working with the menu-less UI Working with the Hypershade Creating shading groups
Exercise One: Creating a Title 3D Effect
 1 Tutorials 2 Exercise One: Creating a Title 3D Effect The exercises in this section are designed to give you a hands-on introduction to the Boris Title Generators. You will need a project with some captured
The Wireframe Update Buttons. The Frontface and Backface Buttons. The Project Designer 265
 The Wireframe Update Buttons The speed at which objects can be manipulated in the Project Designer viewport depends in part on the complexity of the object being moved. An object that is made up of many
GPS NAVIGATION SYSTEM NAV USER MANUAL
 GPS NAVIGATION SYSTEM NAV USER MANUAL ENGLISH Thank you for choosing the the Zenec Device as your navigator. Start using your device right away. This document is the detailed description of the navigation
Getting Started with ShowcaseChapter1:
 Chapter 1 Getting Started with ShowcaseChapter1: In this chapter, you learn the purpose of Autodesk Showcase, about its interface, and how to import geometry and adjust imported geometry. Objectives After
Using Google SketchUp
 Using Google SketchUp Mike Bailey mjb@cs.oregonstate.edu http://cs.oregonstate.edu/~mjb/sketchup What is Google SketchUp? Google SketchUp is a program which lets you sketch in 3D. It is excellent for creating
Texture Mapping. Images from 3D Creative Magazine
 Texture Mapping Images from 3D Creative Magazine Contents Introduction Definitions Light And Colour Surface Attributes Surface Attributes: Colour Surface Attributes: Shininess Surface Attributes: Specularity
Copyright All Rights Reserved
 www.kronnect.com Copyright 2016-2018 All Rights Reserved Contents What s X-Frame FPS Accelerator?... 3 Algorithms included in X-Frame... 3 Quick Start... 5 Description of X-Frame parameters... 7 General
Store Visualizer User guide -
 Store Visualizer 16 - User guide - Welcome This user guide will introduce you to Store Visualizer 16. It provides a step-by-step approach to the most commonly used features and will allow you to quickly
AV Bros. Page Curl 2.0
 User Guide for Windows and Mac OS X We are proud to introduce AV Bros. Page Curl 2.0, the filter plug-in (8bf) for Adobe Photoshop and compatible hosts. is targeted to help you create two (2) types of
Adobe Premiere Pro CC 2018
 Course Outline Adobe Premiere Pro CC 2018 1 TOURING ADOBE PREMIERE PRO CC Performing nonlinear editing in Premiere Pro Expanding the workflow Touring the Premiere Pro interface Keyboard shortcuts 2 SETTING
AMD Radeon ProRender add-in for SOLIDWORKS. User Guide
 AMD Radeon ProRender add-in for SOLIDWORKS User Guide This document is a user and setup guide with tips and tricks on how to render photorealistic images in real-time, apply decals and create animations.
How to apply and adjust video effects
 Adobe Premiere Pro CS6 Project 4 guide How to apply and adjust video effects Adobe Premiere Pro CS6 features more than 130 video effects. You apply video effects to clips to give them special visual characteristics
ossimplanet Users Manual
 ossimplanet OSX documentation ossimplanet Users Manual An accurate 3D Global Visualization System Version 0.2 25 Jan 2007 Overview ossimplanet is an accurate 3D global geo-spatial viewer that is build
BRYCE 5 Mini Tutorial
 BRYCE 5 Mini Tutorial How to create Panoramic Caverns by David Brinnen January 2006 HTML Version by Hans-Rudolf Wernli Cavern (above) and Pano-Cavern (below) > Start up Bryce, select «Create» and click
Secure+ Password Manager ver 1.1.1
 Secure+ Password Manager ver 1.1.1 Table of Contents 1. First setup & Auto lock functionality 1. Setup 2. Auto Lock 2. Add new item & edit 1. Icons 2. Edit Fields (Title, Category, ID, Password, URL) 3.