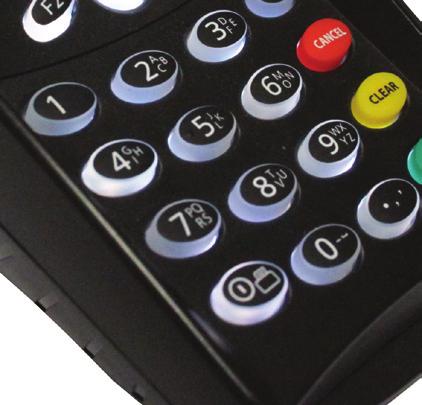
Terminal User Guide EFT930G/B
|
|
|
- Laurence Spencer
- 6 years ago
- Views:
Transcription


1 Terminal User Guide EFT930G/B
2 Contents Section Title Page 1. Introduction 2 2. Important Safety Instructions 2 3. Declaration of Conformity 5 4. Installing the Terminal 6 5. Using the Terminal 7 6. Battery Information 7 7. Signal Information 8 8. Using the Menus 8 9. Starting a Transaction Sale Transactions Voice Referrals Setting the Referral Password Refund Contactless Refunds Purchase with Cashback Cash Advance Add Gratuity as a Percentage Purchase with Gratuity (Restaurants) Refund with Gratuity Pre-Authorisation Key Entering Card Details and Mail Order Transactions Reversal Verify Account PIN Entry Failure Cancelling Transactions Clearing Mistakes X and Z Totals Waiter Totals End of Day Banking Entering Function Codes How to Change the Date and Time How to Set Sleep Parameters How to Print a Transaction Log How to Assign a Terminal to a Base Unit How to Test the Signal Quality How to Change a Paper Roll Insuring the Terminal Security Warning Notice Helpful Hints Miscellaneous Prompts 36
3 1. Introduction This guide will detail how you install and use your EFT930 terminal, including Safety Instructions and instructions on transaction processing, printing reports and general maintenance of the terminal. Important Battery Information Battery Operation The terminal displays the Battery Power status as a number of bars much like those on a mobile phone display. There are a number of factors that can affect the rate of Battery drainage, for example: length of receipt time off the base number of receipts per transaction time before sleep mode is activated time between transactions Depending upon a number of factors, you might experience variation in the number of transactions performed for each bar on the Battery Power display. Please check the battery status prior to initiating any action on the handset. Should it indicate very low (no bars) or no power then you should return the handset to the base to charge the battery. 2. Important Safety Instructions Upon receipt of your terminal you should check for signs of tampering of the equipment. It is strongly advised that these checks are performed regularly after receipt. You should check, for example: that the keypad is firmly in place; that there is no evidence of unusual wires that have been connected to any ports on your terminal or associated equipment, the chip card reader, or any other part of your terminal. Such checks would provide warning of any unauthorised modifications to your terminal, and other suspicious behaviour of individuals that have access to your terminal. Your terminal detects any tampered state. In this state the terminal will repeatedly flash the message Alert Irruption! and further use of the terminal will not be possible. If you observe the Alert Irruption! message, you should contact the terminal helpdesk immediately. You are strongly advised to ensure that privileged access to your terminal is only granted to staff that have been independently verified as being trustworthy. CAUTION : NEVER ask the customer to divulge their PIN Code. Customers should be advised to ensure that they are not being overlooked when entering their PIN Code. Powering down the EFT930 base: Disconnect the EFT930 power supply block adapter from the electrical mains network. Page 2
4 Lithium Battery The EFT930 is fitted with a lithium battery which can only be accessed and serviced by a qualified technician. The EFT930 is fitted with battery specially designed for this terminal. Only use the appropriate chargers and batteries listed in the Ingenico s catalogue. Do not short circuit the battery. Do not attempt to open the battery case as its components cannot be modified. Used batteries must be disposed of at the appropriates sites. Warning There is a risk of explosion if the battery is incorrectly replaced or is placed in a fire Electrical Power Outlet The electrical outlet must meet the following criteria: Must be installed near the equipment and easily accessible; Must meet standards and regulations in the country where used; For type A plug, the protection of the installation must be set to 20 A. Telephone Network The phone jack must comply with standards and regulations in the country where used. On Aircraft Your handset must be switched off by removing the battery pack. Remove the battery from the terminal when on an airplane. Non-compliance with these safety rules may result in legal action and/or a ban on later access to cellular network services. Explosion Areas Certain regulations restrict the use of radio equipment in chemical plants, fuel depots and any site where blasting is carried out. You are urged to comply with these regulations. The terminal shall be protected by a specially fitted and certified cover enabling use in proximity to a fuel pump. Electronic Health Appliances Your handset is a radio transmitter which may interfere with health appliances, such as hearing aids, pacemaker, hospital equipment, etc. Your doctor or the equipment manufacturer will be able to provide you with appropriate advice. CE Marking The CE marking indicates that product EFT930P/G/B/W complies with the requirements of European Directive 1999/5/EC of 9 March 1999 on Radio and Telecommunications Terminal Equipment for: The protection of the health and the safety of the user and any other person. The protection requirements with respect to electromagnetic compatibility Complies with the following harmonised standards: Page 3
5 Specific Absorption Rate (SAR): The model wireless equipment meets the government s requirements for exposure to radio waves. Your wireless equipment is a radio transmitter and receiver. It is designed and manufactured not to exceed limits for exposure to radio frequency (RF) energy set by the Federal Communications Commission (FCC) of the U.S. Government and by the Canadian regulatory authorities. These limits are part of comprehensive guidelines and establish permitted levels of RF energy for the general population. The guidelines are based on standards that were developed by independent scientific organisations through periodic and thorough evaluation of scientific studies. The standards include a substantial safety margin designed to assure the safety of all persons, regardless of age or health. The exposure standard for wireless equipment employs a unit of measurement known as the Specific Absorption Rate, or SAR. The SAR limit set by the FCC and by the Canadian regulatory authorities is 1.6 W/kg. 1. Tests for SAR are conducted using standard operating positions accepted by the FCC and by Industry Canada with the phone transmtting at its highest certified power level in all tested frequency bands. Although the SAR is determined at the highest certified power level, the actual SAR level of the equipment while operating can be well below the maximum value. This is because the equipment is designed to operate at multiple power levels so as to use only the power required to reach th network. In general, the closer you are to a wireless base station, the lower the power output. Before a equipment model is available for sale to the public in the U.S. and Canada, it must be tested and certified to the FCC and Industry Canada that it does not exceed the limit established by each government for safe exposure. The tests are performed in positions and locations (e.g. at the ear and worn on the body) reported to the FCC and available for review by Industry Canada. The highest SAR value for this equipment when tested for use when worn on the body is W/kg. (Body worn measurements differ among phone models, depending upon available accessories and regulatory requirements). 2. While there may be differences between the SAR levels of various terminal and at various positions, they all meet the governmental requirements for safe exposure. The SAR values found for the EFT930G GSM/GPRS Point of sale terminal are below the maximum recommended levels of 1.6 W/Kg as averaged over any 1 g tissue according to the FCC rule , the ANSI/IEEE C 95.1:1999, the NCRP Report Number 86 for uncontrolled environment, according to the Health Canada s Safety Code 6 and the I n d u s t r y Canada R a d i o S t a n d a r d s S p e c i f i c a t i o n RSS 102 f o r G e n e r a l Population/Uncontrolled exposure. For body worn operation, this phone has been tested and meets FCC RF exposure guidelines when used with an accessory that contains no metal and that poitions thedevice a minimum of 0 mm from the body. Page 4
6 3. Declaration of Conformity The CE marking indicates that the EFT930 products complies with the requirements of European Directive 1999/5/EC of 9th March on Radio and Telecommunications Terminal equipment for: The protection of the health and safety of the user and any other person. The protection requirements with respect to electromagnetic compatibility. and complies with the following harmonised standards (where applicable): EFT930 EN / According to 73/23/EEC (Low Voltage Directive) EN /7/ According to 89/336/EEC (EMV Directive) EN301511/ According to 1999/5/EC (R&TTE Directive) EN50360/ According to 1999/519/EEC (R&TTE Directive) EN50360/ According to 1999/519/EEC (Electro Magnetic Directive) And, for the whole range, complies with the European approval specification on connecting terminals with DTMF dialling to the public switched telephone network (Council Decision 1998/482/EC, Council Decision 1999/303/EC) TS /2/3 / TR /2/3/4 / ES / WEEE Directive The product belongs to the family of electrical and electronic equipment. Therefore it is subjected to the WEEE Directive which requires the collection and recycling at the end of the life of the product. Ingenico products present the symbol for the marking of electrical and electronic equipment as required by the WEEE Directive. The crossed through wheeled bin printed on the product gives information about the requirement not to dispose of WEEE as unsorted municipal waste and to collect such WEEE separately. To ensure that the product is collected and recycled with respect to the environment, you must contact your supplier (contact the Ingenico local office or the commercial head office in charge of your country on <<contact us>> page). The abandonment or uncontrolled disposal of waste can harm the environment and human health. So, by recycling your product in a responsible manner you contribute to the preservation of natural resources and the protection of human health. Batteries If your product contains batteries they must be disposed of at the appropriate collection points. Page 5
7 4. Installing the Terminal Ensure the mains supply is connected to the terminal and switched off. Connect the telephone/network cables to the base unit, before connecting them to external sockets. Ensure you have your Merchant ID to hand. This can be found on your Welcome Letter. Place the terminal handset onto the base if you have not already done so. Dual Comms Mode You should use the arrows to highlight the required option to select that option. If using a EFT930G the display will show GRPS Network twice. Now switch on the mains supply. The terminal will display this screen, press ENTER and a number of additional screens will be displayed while the handset assigns to the base. At this screen press the GREEN button and the installation process will continue. Connection Method Telephone <PPP> LOCAL NETWORK PLACE TERMINAL ON A BASE WITH A PHONELINE and press ENTER ONLY APPLIES IF TRANSMITTING VIA TELEPHONE LINE: If your terminal is connected via a direct line, press the YELLOW button to select NO. Terminal Installation Plug in Phone Line If your phone line is connected to a switchboard/pabx, press the GREEN button to select YES. Dial Prefix Required? Enter = YES Clear = NO If you selected YES, key in the number used to get an outside line (often 9) and press the GREEN button. Key in the Number used to get an Outside Line If your telephone line uses the 1571 or call waiting function, press the GREEN button. NOTE: if you select no here and you do use these functions, the terminal will be unable to dial out for authorisations when a call message is waiting. Does the Tel. Line have Call Waiting or 1571 Enter = YES Clear = NO Key in your merchant number and press the GREEN button. The terminal will start to dial the Host computer and a number of communication messages will be displayed. The terminal may contact card acquirers. Terminal Installation Key in Merchant No. and then press Enter Further communications messages will be displayed. An installation report will then be printed displaying the card types that your terminal will accept. Page 6
8 Finally, the terminal will dial the Host computer to report the successful installation. READY Merchant Number Installation is now complete and the terminal will display the READY prompt. Your terminal is now ready for use. Check the date and time on your terminal, if this needs to be corrected refer to Section 31 of this guide for details on how to do this. 5. Using the Terminal Switching the Terminal On and Off To SWITCH ON the terminal when it is off the base, press: If on the base the terminal will always be powered. To SWITCH OFF the terminal, press the yellow CLEAR button and at the same time The Terminal Display The terminal has a colour display and the icons in the banner at the top of the display use colour to indicate their status. Signal Strength and Assigned Base This will indicate the signal strength (see section below Connection Information ) READY Merchant Number Battery Charge Indicator This will indicate the amount of battery charge (see section below Battery Information ) 6. Battery Information Your terminal is supplied with a removable, rechargeable battery. This battery recharges when the terminal is connected to the charger unit. Following installation, the battery charge status is indicated by the battery icon found in the top right hand corner of the terminal display. When you charge the battery for the first time, it should be charged until full capacity is indicated. This may take from 4 to 16 hours. New terminals are dispatched with some charge present. Transactions can be performed providing the terminal is connected to the charger unit so that it can continue charging. Battery low Battery fully charged (off base) One of these Battery Status Symbols will be displayed depending on the charge in the battery and whether the handset is on the Base. If the terminal is on the base unit the battery symbol will display a power cord from the bottom of the battery. Page 7


9 7. Signal Information EFT930GCC: The signal icon represents the strength of the GSM/GPRS mobile signal. The fewer bars indicated represents poorer network strength. Your terminal may not be able to communicate with the acquirer if the signal is very poor. The network name shown next to the signal icon, indicates which network the terminal is communicating by. This symbol indicates that the network and SIM card are fitted. When GPRS is green it shows that the terminal is connected to the network. EFT930BCC: If this symbol is displayed in BLUE, the handset is in range of the base unit and can be used safely. If this symbol is displayed in RED, the handset is out of range of all the base unit and cannot be used. 8. Using the Menus The Transaction Menu enables you to perform a transaction on the terminal. At the READY prompt press the MENU button. The first option on the list will be highlighted. The actual options shown may differ from those shown here. TRANSACTION MENU Refund Sale Purch. with Cashback NOTE: Only three options can be displayed on the terminal screen at any one time. Use the arrow buttons to view the available options. Press the GREEN ENTER button to select a highlighted option. The terminal will return to the READY display if no option is selected within 30 seconds. The System Menu enables you to perform an administration function on the terminal. Select the System Menu by following the instructions below. At the READY prompt press the MENU button until the System Menu is displayed. Other menu options may appear before/after depending on your configuration. Use the up and down arrow buttons to view the available options and press ENTER to make your selection when the required option is highlighted. Throughout the transaction flows in this guide, all your instructions are denoted by this unshaded display. SYSTEM MENU Totals Print Function Codes Select Function Page 8
10 All instructions to be carried out by the customer are denoted by this shaded display. At this time you should hand the terminal to the customer and ask them to follow the instructions displayed. Amount PIN **** Cardholder to key PIN Enter=OK Clear=REKEY Entering Letters You may need to enter letters using your terminal. Most numeric buttons have alphabetical characters allocated to them. e.g. the number 2 button has a, b and c allocated to it e.g. the number 5 button has j, k and l allocated to it To enter a letter, press the relevant number button and then the MENU button to scroll through the letters until you select the character required. To enter the next letter you must again select the relevant number button. To enter a space press the 0 button followed by the MENU key. If a mistake is made when entering numbers or letters, press the YELLOW button until the incorrect numbers or letters have been removed. Then re-key the correct entry. Once all the numbers or letters have been entered press the GREEN button to accept the entry. Inserting a Chip Card The card should be inserted with the chip facing uppermost. The terminal can detect if a chip card has been swiped as a magnetic card. If the card has not been inserted previously, it will prompt you to insert the card. If the card is inserted the wrong way or there is a problem with the chip, the terminal will prompt for the card to be removed and re-inserted. The terminal will prompt you when the card is to be removed. Page 9

11 Swiping a Card The card should be swiped with the black magnetic stripe facing the terminal and running along the bottom of the card. Make sure that the bottom of the card runs firmly along the bottom of the card swipe and that the card is swiped at even speed. The speed of the card swipe should not be too slow as this can sometimes cause problems when the terminal is reading the card. It is important to swipe cards correctly through the terminal so that they can be read by the card reader. Using a Card with the Contactless Reader Where a contactless transaction is allowed, the terminal display will show the contactless symbol. The cardholder should hold their card against the Contactless symbol on the terminal. If the card is removed too quickly a message will appear on the display and the cardholder will be asked to present the card again. LED s will light at the top of the terminal during different parts of the transaction. Present, insert 9.50 or swipe card Re-Printing Receipts Once a re-print has been printed the user will be asked to press ENTER. Check to ensure receipt is correct, if another re-print is required press MENU to re-print. NOTE: This is not the same as printing a duplicate receipts. 9. Starting a Transaction IMPORTANT INFORMATION Your terminal may be configured to start a transaction by either entering the transaction amount first or by inserting/swiping payment card. If your terminal is configured to accept Contactless Cards it will always expect you to enter the transaction amount first for whichever type of transaction you are performing. If your terminal is configured for card details first the customer will be prompted to insert their card into the terminal to start the transaction. Once this is done, enter the transaction amount and continue from the Checking Card prompt for the chosen transaction type. Page 10
12 10. Sale Transactions At the READY PROMPT you may be asked to Key in the amount of the sale or to insert or swipe customer card. If the card is a Chip card, please see Sale (Card Inserted). If the customer s card has been swiped, please see Sale (Card Swiped). If the customer s card is a Contactless card and is to be used for a Contactless transaction, please see Sale (Contactless). Sale (Card Inserted) The terminal will check the card. If the customer presents a card which supports multiple card schemes you may be required to choose which card scheme to use. SALE Checking Card Please Wait Your terminal may be configured to allow Cashback, if Cashback is required press the GREEN button. If Cashback is not required press the YELLOW button and continue from step 3. SALE Cashback? Enter = YES Clear = NO 2. If Cashback was required, enter the Cashback amount and press the GREEN button. 3. Hand the terminal to the customer. The customer should enter their PIN, as they do so asterisks will appear on the screen. Now press the GREEN button. 4. If numbers are entered incorrectly during this process use the YELLOW button to delete and then re-key the correct PIN. Note: Removing the card will VOID the transaction. 5. The terminal will now print a receipt which the CUSTOMER must retain for their records. Tear off the receipt and press the GREEN button to continue. Should you require a reprint of the receipt press the MENU button. 6. You will now be prompted to remove the customer s card. The terminal will then print a MERCHANT receipt which must be kept for your records. 7. Press the GREEN button and the terminal will return to the READY prompt. If a re-print is required press the MENU button. Note: Depending on the terminal configuration the full card number may not be printed on the receipts. PWCB Key in Cash Amount Amount PIN **** Cardholder to key PIN Enter=OK Clear=REKEY Amount PIN: ACCEPTED RETURN TERMINAL Do NOT Remove Card Tear OFF CUSTOMER RECEIPT Press ENTER if OK Press MENU to Reprint SALE Please Remove Card Tear off MERCHANT RECEIPT Press ENTER if OK Press MENU to Reprint 0.00 Page 11
13 Sale (Card Swiped) 1. Swipe the customer s card through the terminal. SALE Checking Card Please Wait You may be prompted to confirm the last four digits of the card number. Key in the last four numbers from the customer s card and then press the GREEN button. 3. The terminal will check the card. FOR CASHBACK PLEASE REFER TO PAGE The terminal will now dial for authorisation and a number of messages will appear on the screen. 6. The terminal will print a Merchant receipt, if a re-print is required press the MENU button. Tear off receipt and ask the customer to sign. Key in last 4 digits of Card Number SALE AUTH CODE: nnnnn <Aquirer Name> Printing MERCHANT RECEIPT Please Wait... Tear off MERCHANT RECEIPT Press ENTER if OK Press MENU to Reprint 7. Check the signature and, if it is OK, press the GREEN button and a Customer receipt will be printed. If a re-print is required press the MENU button. SALE Signature OK? Enter = YES Clear = NO If the signature is not OK press the YELLOW button and the transaction will be cancelled. 8. The transaction is now complete and the terminal will return to the READY prompt. Tear OFF CUSTOMER RECEIPT Press ENTER if OK Press MENU to Reprint Sale (Contactless) 1. The cardholder should present their card against the Contactless symbol on the terminal display. Present, insert 9.50 or swipe card 2. The terminal will now print a Merchant receipt. Press the GREEN button if receipt is correct. If a re-print is required press the MENU button. Printing MERCHANT RECEIPT Please Wait... Page 12
14 4. If the customer requests a receipt press the key and a customer receipt will be printed. This must be done before the next transaction takes place. If receipt is not printed clearly press the MENU button or press the GREEN button to return to the READY prompt. Printing CUSTOMER RECEIPT Please Wait Voice Referrals Sometimes transactions will require you to obtain a voice referral from the Authorisation Centre. As a security measure your terminal may have been set up to request either the swipe of the Supervisor Card or the input of a Referral Password when this situation arises. Please follow the process below if your terminal has been set up to ask for a Referral Password. The following screens will be displayed if the transaction gets a referral message from the acquiring host: The card should be removed from the terminal and handed to the operator who will be contacting the Authorisation Centre. The Authorisation Centre telephone number will be displayed. You may be asked to swipe your Supervisor card or Enter your Referral Password and then press the GREEN button to continue. If you have not set up your Referral Password please see section 12. Once you have spoken to the Authorisation Centre if the transaction is authorised press the GREEN button to continue with the transaction or, if authorisation is declined, press the YELLOW button. If the YELLOW button is pressed, the terminal will display Not Authorised and print a Not Authorised receipt. The terminal will then return to the READY prompt. If the GREEN button is pressed enter the authorisation code provided by the Authorisation Centre and press the GREEN button. <Transaction Type> <Voice Referral Message> <Acquirer Name> Press CLEAR SALE Please remove card for voice referral Please Wait... REFERRAL MID: CALL: nnnn nnnnnnn and then press enter Enter Referral Password and then press enter Please Wait... SALE Authorisation given? ENTER=YES CLEAR=NO SALE Key in Auth. Code <Auth Code> The terminal will now print the receipts and then return to the READY prompt. Page 13
15 Incorrect Code/Password If you enter an incorrect Password this screen will be displayed, press the YELLOW button to retry. INCORRECT REFERRAL PASSWORD Press CLEAR to retry. If an incorrect Password is entered at the second attempt this screen will be displayed, press the GREEN button for a final retry. Enter Referral Password LAST TRY Once the number of tries has been exceeded the terminal will cancel the transaction, print Cancelled receipts and return to the READY prompt. You will have to contact the helpdesk to reset password. NUM TRIES EXCEEDED Please call Help Desk on: nnnn nnn nnnnnnn Press CLEAR 12. Setting the Referral Password Function 23 will allow you to set and change the Referral Password. At the READY prompt, press the MENU button twice. Use the arrow buttons to view the available options and press the GREEN button when the SELECT FUNCTION option is highlighted. Enter the number 23 and then press the GREEN button, the terminal will ask you to swipe the Supervisor card or key in your Supervisor code. Now press the GREEN button to select the option to Set the Referral Password. SYSTEM MENU Totals Print Function Codes Select Function EFT Set Referral Password? Enter=YES Clear=NO Pressing the YELLOW button will return the terminal to the READY prompt. If this is the first time the Password has been set please enter 0000 and then press the GREEN button. If the code is to be changed, key the current code and then press the GREEN button. Enter a new Referral Password and then press the GREEN button. Re-key the new Referral Password to confirm and then press the GREEN button. The terminal will print a receipt to confirm the Password has been changed and will return to the READY prompt. Enter Current Referral Password? Enter New Referral Password? Confirm New Referral Password? Page 14
16 13. Refund 1. At the READY prompt, press the MENU button. 2. Use the arrow keys to highlight refund and press the GREEN button. 3. Either key in the amount of refund transaction and then press GREEN button or swipe/insert card in the terminal and then key in the refund amount. If performing a swiped transaction, your terminal may prompt you to enter the last four digits of the card number. If so, key in the last four digits of the customer s card number and press the GREEN button. TRANSACTION MENU Refund Sale Purch. with Cashback REFUND Key in Amount REFUND Insert or swipe card to continue (or press Cancel key) 0.00 The terminal will check the card. If a customer presents a card that supports multiple card schemes, you may be required to choose which card scheme to use. You may be prompted to either swipe the Supervisor Card or key in Supervisor code. PIN entry is not required on refunds, The transaction will proceed as a signature verified sale. (Please refer to Section 10 of this guide for instructions on how to complete a Sale.) 14. Contactless Refunds To perform a Contactless Refund Amount Entry First must be enabled; the card scheme must be configured to allow it and the transaction amount must be below the maximum contactless transaction limit: Note: A Contactless Refund may be performed either by using credit/debit cards (if configured) or any other contactless devices such as Fobs or Mobile Telephones. If the transaction value is below the maximum Contactless Limit a screen similar to the following will be displayed: If the value is above the Contactless Limit you will be asked to swipe/insert card. REFUND Key in TOTAL Amount: 0.00 Normal card checks will be performed. If refunds are supervisor protected then you will be asked to swipe supervisor card or key in supervisor code. REFUND 9.00 Present / Insert or Swipe Card to continue (or press Cancel key) Page 15
17 15. Purchase with Cashback This menu option only needs to be used to provide Cashback when normal Sale transactions are performed with a gratuity. Selecting this option allows a transaction to be carried out with Cashback instead of with gratuity. Please note: Only certain types of debit cards allow Purchase with Cashback. 1. At the READY prompt press the MENU button. Use the arrow buttons to view the available options and press the GREEN button when the Purchase with Cashback option is highlighted. 2. Key in the amount of the sale and press the GREEN button. 3. Either key in the cashback amount and then press GREEN button or swipe/insert card in the terminal and then key in the cashback amount. The transaction will now continue as a normal sale transaction. TRANSACTION MENU Refund Sale Purch. with Cashback PWCB Key in Amount and then press enter PWCB Key in Cash Amount and then press enter Please refer to Section 10 of this guide for how to complete a Sale transaction. Please note: The full card number may not will be printed on the merchants receipt depending on the terminal configuration. 16. Cash Advance Please note that this option is only available for certain types of business. Please contact Customer Services for further information. Please note: Only certain types of cards allow Cash Advance. 1. Use the arrow buttons to view the available options and press the GREEN button when the Cash Advance option is highlighted. 2. Either key in the transaction amount and then press GREEN button or swipe/insert card in the terminal and then key in the transaction amount. If performing a swiped transaction, your terminal may prompt you to enter the last four digits of the card number. If so, key in the last four digits of the customer s card number and press the GREEN button. 3. The terminal will check the card. TRANSACTION MENU Refund Cash advance Purch. with Cashback CASH ADVANCE Key in Amount: 0.00 CASH ADVANCE Insert or swipe card to continue (or press CANCEL key) Page 16
18 The transaction will now continue as a normal sale transaction. Please refer to Section 10 of this guide for how to complete a Sale transaction. 17. Add Gratuity as a Percentage If the terminal is configured for gratuity this can be added as a percentage of the total or as an actual value. Press ENTER if a gratuity is to be added. Amount Customer to Enter a Gratuity Press ENTER If gratuity with percentage is enabled the following screen will be displayed: Select a Fixed Percentage from the available options or select OTHER to key in the an amount. Gratuity Percentage 1-5 % 2-10 % 3-15 % 4-20 % 5- Other Total Customer to Confirm Total Press ENTER to assist 18. Purchase with Gratuity (Restaurants) At the READY prompt key in the amount of the sale and press the GREEN button. Please note: This option is only available for certain types of business. Please contact Customer Services for further information. READY Merchant Number At the READY prompt either key in the transaction amount and then press GREEN button or swipe/ insert card in the terminal and then key in the transaction amount. The terminal will check the card. If performing a swiped transaction, your terminal may prompt you to enter the last four digits of the card number. If so, key in the last four digits of the customer s card number and press the GREEN button. SALE Checking Card Please Wait Your terminal may prompt you to enter the Waiter ID. If so, enter the relevant Waiter ID and press the GREEN button. You may also be prompted to enter the table number. (Please see Section 30 for more information on Waiter ID s) Page 17
19 4. Pass the terminal to the customer to confirm the amount. If the customer rejects the amount, the customer should return the terminal. You will be prompted to swipe the Supervisor Card or key in your supervisor code and re-enter the amount. 5. If the customer does not want to add a gratuity, they should press the YELLOW button and the transaction will then proceed from step 8. If the customer wishes to add a gratuity, they should press the GREEN button. 6. The customer will now be prompted to key in the gratuity amount and the to press the GREEN button or if the gratuity percentage is available refer to section The customer will then be prompted to confirm the total transaction amount. 8. The customer will be prompted to enter their PIN. Once the PIN has been entered, the customer should press the GREEN button to confirm. 9. The customer should now return the terminal. If the card has been inserted, the card should remain in the terminal. Please Note: Removing the card at this point will VOID the transaction. 10. The terminal will dial the authorisation centre and display the various messages. Cardholder to Confirm Amount Press ENTER to Accept or CLEAR to Reject Amount Do you wish to Add a GRATUITY? Enter=YES Clear=NO Amount Enter GRATUITY 5.00 Enter=OK Clear=REKEY Cardholder to Confirm Total Press ENTER to Accept or CLEAR to Reject Amount PIN: Cardholder to key PIN Enter=OK Clear=REKEY PIN ACCEPTED RETURN TERMINAL Do NOT Remove Card 11. The terminal will now confirm if authorisation has been obtained. The terminal will display PLEASE WAIT while it prints the customer s receipt. Press the GREEN button, if the receipt has been printed correctly and you will be prompted to remove the card. If the receipt is not correct, press MENU key and the receipt will be re-printed. 12. The terminal will then print a MERCHANT receipt which should be retained for your records. If the receipt has been printed incorrectly press the MENU key for a re-print. Press the GREEN button and the terminal will return to the READY prompt. Page 18
20 19. Refund with Gratuity 1. At the READY prompt press the MENU button. Use the arrow buttons to view the available options and press the GREEN button when the Refund option is highlighted. REFUND Key in TOTAL: Key in the total amount including any gratuity and press the GREEN button or insert/swipe the customer s card and then key in the total amount. 3. If the transaction value is below the max Contactless value you may be asked to either present, insert or swipe the customer s card through the terminal. REFUND Insert or Swipe Card to continue (or press CANCEL key) If performing a swiped transaction, your terminal may prompt you to enter the last four digits of the card number. If so, key in the last four digits of the customers card number and press the GREEN button. The terminal will check the card. If a customer presents a card that supports multiple card schemes, you may be required to choose which card scheme to use. You may be prompted to swipe the Supervisor Card or enter supervisor code through the terminal. 4. If a gratuity has been added, press the GREEN button. If no gratuity has been added, press the YELLOW button. REFUND Gratuity Added? Enter=YES Clear=NO 5. If a gratuity has been added, enter the amount of the gratuity and press the GREEN button. REFUND Key in GRATUITY You may be asked to key in the Waiter ID from the original transaction and press the GREEN button. The transaction will now proceed as a normal sale transaction. Please see section 10 for information on how to complete a Sale transaction. REFUND Original Waiter ID: 20. Pre-Authorisation Please note this option is only available for certain types of business. Please contact Customer Services for further information. Where there is the likelihood of a large value transaction, such as a hotel or car hire bill, a pre authorisation transaction for the expected value can be made. If, following a pre authorisation transaction, the value of the transaction increases (e.g. as a result of an extended stay at an hotel) a further pre-authorisation may be required. Page 19
21 1. At the READY prompt press the MENU button. Use the arrow buttons to view the available options and press the GREEN button when the Pre-Auth option is highlighted. 2. Key in the amount of the transaction and press the GREEN button or insert/swipe the customer s card and then key in the transaction amount. 3. If performing a swiped transaction, your terminal may prompt you to enter the last four digits of the card number. If so, key in the last four digits of the customer s card number and press the GREEN button. The transaction will now continue as a normal sale transaction. Please refer to section 10 for information on how to complete a sale transaction. Completion TRANSACTION MENU Refund Purchase. with Cashback Pre-Auth PRE-AUTH Key in Amount: PRE-AUTH Insert or Swipe Card to continue (or press Cancel key) 0.00 Please note: If the final bill is more than the total pre authorised amount, a further pre-authorisation may be required for the difference which must be obtained prior to carrying out the completion transaction. The following procedure will complete a pre-authorised transaction when the final account is confirmed with the customer. 1. At the READY prompt press the MENU button. Use the arrow buttons to view the available options and press the GREEN button when the Completion option is highlighted. 2. Key in the amount of the transaction and press the GREEN button or insert/swipe the customer s card and then key in completion amount. 3. If performing a swiped transaction, your terminal may prompt you to enter the last four digits of the card number. If so, key in the last four digits of the customer s card number and press the GREEN button. 4. You will then be prompted to enter the last Pre-Authorised code and press the GREEN button. The transaction will now continue as a normal sale transaction. Please refer to section 10 for information on how to complete a sale transaction. TRANSACTION MENU Pre-Auth Completion Cash Advance COMPLETION Key in Final Amount 0.00 COMPLETION Insert or swipe card to continue (or press Cancel key) COMPLETION Key in last Pre-Auth Code: Page 20
22 21. Key Entering Card Details and Mail Order Transactions You may need to key enter a customer s card details if their card is faulty or if you are entering a mail order transaction where the customer is not present. A. Mail Order Transactions : Begin at Step 1 if you are performing a Mail Order Transaction. B. Card Read Failure or Key Card Number : Begin at Step 2 if: You have swiped a customer s card at the READY prompt and the terminal displays CARD READ FAILURE. OR If you have selected the Sale option from the Transaction menu and unsuccessfully swiped the card three times, and the terminal displays Key Card No. 1. At the READY prompt press the MENU button. Use the arrow buttons to view the available options and press the GREEN button when the required option is highlighted. TRANSACTION MENU Refund Sale Purch. with Cashback 2. Key in the amount if the transaction and then press the GREEN button or key enter the customer s card number when you see this prompt. The card number will be displayed as it is keyed in. 3. The terminal will check the card number. Key in the card expiry date and press the GREEN button. <transaction type> Insert or Swipe Card to continue (or press Cancel key) <transaction type> Key expiry date MMYY 4. You may be asked to enter the start date or issue number from the card. Enter them as they appear on the card and press the GREEN button. <transaction type> Key start date MMYY <transaction type> Key in issue number 5. If the customer is present, press the GREEN button. If this is a mail order transaction, press the YELLOW button and proceed from number 9 below. <transaction type> Is customer present? ENTER=YES Clear=NO Page 21
23 6. Key in the amount of the transaction and press the GREEN ENTER button. The terminal will now dial for authorisation. The authorisation code will be displayed. Press the GREEN button. NOTE: Not displayed if amount is keyed in first. 7. A receipt will now be printed. Obtain the customer s signature. If the signature is OK, press the GREEN button. If it is not, press the YELLOW button and the transaction will be voided. 8. The signed receipt should be kept for your records. The terminal will now print a receipt for the customer. Pass the receipt to the customer and the transaction is complete. <transaction type> Key in Amount: SALE Signature OK? ENTER=YES 0.00 Clear=NO 9. You may be asked to key in the amount of the transaction and press the GREEN button. IF YOUR TERMINAL IS CONFIGURED FOR CSC/AVS (A CARDHOLDER VERIFICATION SERVICE) PROCEED AS FOLLOWS. If you see this prompt, key in the 3 digit security code, which can be found on the signature strip on the back of the customer s card. Now press the GREEN button. <transaction type> Key in Security Code: Please note: The security code for American Express cards is a four digit code and can be found on the front of the card. Your terminal may then prompt you to do the following: Enter the numeric digits from the customer s Post Code, (i.e EH11 9YE would be entered 119) and then press the GREEN button. Enter the customer s house number, ( i.e Flat 5, 29 High Street would be entered 529) and then press the GREEN button. 10. The terminal will now dial out for authorisation and the authorisation code will be displayed. Press the GREEN button. <transaction type> Key in Numerics from The Post Code: <transaction type> Key in first five digits of the address: <transaction type> AUTH CODE: nnnnn <Aquirer name> press ENTER The terminal will display the results of the address check. The result will be printed on the merchant receipt. The security message will advise the response for any information entered at the Security Code, Address and Post Code prompts. Page 22
24 Message Text ALL MATCH SEC CODE MATCH ONLY ADDRESS MATCH ONLY NO DATA MATCHES DATA NOT CHECKED Result All data entered is correct Only the Security Code is correct Only the address is correct None of the data entered is correct The data has not been checked 11. To accept the transaction press the GREEN button and a customer receipt will be printed. Press the GREEN button again and this will print a copy of the receipt for your records. AUTH CODE: nnnnn <security messages> Press ENTER to Accept Press CLEAR to Decline To decline the transaction press the YELLOW button and a void receipt will be printed for the customer. Press the GREEN button again and a void receipt will be printed for your records. 22. Reversal You can reverse the last previously authorised Sale or Refund transaction provided the reversal is carried out within 30 seconds of completing the original transaction. 1. At the READY prompt press the MENU button. Use the arrow buttons to view the available options and press the GREEN button when the Reversal option is highlighted. 2. The terminal will dial the authorisation centre and display the message CONNECTION MADE. The terminal will now confirm the reversal is successful and print a receipt. 3. Tear off the receipt and give this to the customer as a copy of the transaction. Press the GREEN button. TRANSACTION MENU Refund Duplicate Receipt Reversal REVERSAL Dialling <Aquirer Name> The terminal will now print a copy of the receipt for you to retain for your records. Press the GREEN button and the terminal will return to the READY prompt. If a re-print is required press the MENU button. 23. Verify Account Press the MENU button and then use the arrow keys to highlight the transaction type from the transaction menu and then Press ENTER. TRANSACTION MENU Verify Account Pre-Auth Refund Page 23
25 Insert or Swipe Card VERIFY ACCOUNT Insert or Swipe Card to continue ( or press Cancel key ) Cardholder PIN entry ( * (asterisk) will be displayed as each PIN digit is keyed in ) The terminal will contact the acquirer to verify the account holder. Amount 0.00 PIN: **** Cardholder to key PIN Enter=OK Clear=REKEY Amount 0.00 PIN ACCEPTED RETURN TERMINAL Do NOT Remove Card 24. PIN Entry Failure If an incorrect PIN has been entered the terminal will display INCORRECT RE-ENTER PIN. The cardholder should re-enter their PIN and press the GREEN button. The cardholder has three attempts to enter their PIN after which the terminal will display the message: PIN TRIES EXCEEDED The cardholder should hand the terminal back to you and contact their card issuer. INCORRECT RE-ENTER PIN: **** Cardholder to key PIN Enter=OK Clear=REKEY PIN TRIES EXCEEDED Contact Card Issuer RETURN TERMINAL Do NOT Remove Card PIN TRIES EXCEEDED Press ENTER to Continue with Signature The transaction will continue and seek authorisation with a signature verification. Press the GREEN button to continue the transaction. 25. Cancelling Transactions 1. CANCELLING BEFORE AUTHORISATION A transaction can be cancelled at any time before authorisation has been obtained. Press the RED button. The terminal will display CANCELLED and print a receipt for the customer which will be marked as cancelled. Then press the GREEN button and the terminal will print a merchant receipt for your records. Press the GREEN button again and the terminal will then return to the READY prompt. Page 24
26 2. CANCELLING AFTER AUTHORISATION BUT BEFORE COMPLETION When carrying out a swiped transaction and the transaction requires cancelling after authorisation has been obtained, but before the transaction has been completed, press the YELLOW button at the SIGNATURE OK prompt to select NO and reject the signature. The transaction will be cancelled and a void receipt will be printed. 3. CANCELLING AFTER COMPLETION OF A TRANSACTION If the transaction requires cancelling after the transaction has been completed a REVERSAL or a REFUND will need to be performed. (Please refer to Section 22 for Reversal or Section 13 for Refund) Please note: Reversal transactions can only be carried out within 30 seconds of the transaction taking place. 4. CANCELLING THE TRANSACTION BY THE CUSTOMER If the customer selects to cancel a transaction, they will be asked to confirm if they wish to do so and return the terminal. You should then remove their card and press the GREEN button and the terminal will print out a receipt for the customer and one for your records. 26. Clearing Mistakes If a mistake is made when entering numbers or letters, press the YELLOW button until the incorrect numbers or letters have been removed or press the RED button to erase all input. Now re-key the correct entry. Printing Duplicate Receipts 1. At the READY prompt press the MENU button. Use the arrow buttons to view the available options and press the GREEN button when the Duplicate Receipt option is highlighted. TRANSACTION MENU Refund Reversal Duplicate Receipts 2. Press the GREEN button to print a duplicate receipt. It is not an exact copy of either a customer or merchant receipt and has Duplicate Receipt printed on it. 27. X and Z Totals EFT Duplicate Receipt Enter=YES Clear=NO X Totals can be printed at any time throughout the day and give a sub total of all transactions performed. X totals do not reset the totals within the terminal. Z Totals show the total of all transactions processed through the terminal for each card company since the last Z Totals were performed. Once Z Totals have been completed the totals within the terminal are reset to zero. X Totals will also be reset. Z Totals are not connected to your Banking totals. 1. At the READY prompt, press the MENU button twice. The TOTALS option will be highlighted. Press the GREEN button and the TOTALS menu will be displayed. SYSTEM MENU Totals Print Function Codes Select Function Page 25
27 2. Use the arrow buttons to view the available options and press the GREEN button when the required option is highlighted. 3. You will then be asked to swipe the Supervisor Card or enter your Supervisor code. 4. Press the GREEN button to proceed or the YELLOW button to cancel. TOTALS MENU End-of-Day Banking Z-Totals X-Totals EFT X-Totals? (or Z-Totals?) Enter=YES Clear=NO 5. The terminal will print the report. Press the MENU button if you wish to reprint the report. If not, press the GREEN button and the terminal will return to the READY prompt. 28. Waiter Totals 1. At the READY prompt, press the MENU button twice. The TOTALS option will be highlighted. Press the GREEN button and the TOTALS menu will be displayed. 2. Use the arrow buttons to view the available options and press the GREEN button when the Waiter Totals option is highlighted. You will then be asked to swipe the Supervisor Card or enter Supervisor code through the terminal. 3. Press the GREEN button to print the totals. 4. To reset the Waiter Totals press the GREEN button and the totals will be reset. The terminal will now return to the READY prompt. Tear Off TOTALS RECEIPT Press ENTER if OK Press Menu to Reprint SYSTEM MENU Totals Print Function Codes Select Function TOTALS MENU Z-Totals X-Totals Waiter Totals EFT Print Waiter - Totals Enter=YES WAITER TOTALS Reset Waiter - Totals? Enter=OK Clear=NO Clear=REKEY 29. End of Day Banking Banking should be carried out at the end of each business day once the last customer has left the premises. This is to make checking credits and reconciliation with your bank statements easier. Please note: If your acquirer has set a cut off time for end of day banking, please note the following: To ensure that your statement totals balance, it is important that you carry out your End of Day Banking before the cut off time set by your acquirer. For information regarding these times please contact Customer Services. Page 26
28 1. At the READY prompt, press the MENU button twice. The TOTALS option will be highlighted. Press the GREEN button and the TOTALS menu will be displayed. 2. Use the arrow buttons to view the available options and press the GREEN button when the End of Day option is highlighted. You will then be asked to swipe the Supervisor Card or enter Supervisor code. 3. Press the GREEN button to proceed. 4. You will now have the choice of selecting totals for ALL card types or selecting those card types you wish to bank. SYSTEM MENU Totals Print Function Codes Select Function TOTALS MENU End-of-Day Banking Z-Totals X-Totals EFT End-of-Day Banking? Enter=YES Clear=NO 5. Press the GREEN button to reconcile ALL card types and the terminal will contact each acquirer in turn before printing the report or press the YELLOW button to select the acquirers you wish to reconcile. Please note: This screen will only be displayed if your terminal is set up with more than one acquirer. Select card types to be banked Press ENTER for ALL Press CLEAR to SELECT 6. You will now be shown a list of the individual acquirers. Press the GREEN button to reconcile an acquirer or press the YELLOW button if you do not want to reconcile a particular acquirer. 7. Once the desired acquirers have been selected, the terminal will dial the selected acquirers. You will be prompted to wait while the terminal prints a banking report. 8. After all acquirers have been banked, tear off the receipt and press the GREEN button. The terminal will return to the READY prompt. End-of-Day Banking Bank <aquirier> Enter=YES Clear=NO Please note: If Stored or Session Totals Not Agreed is printed on your End of Day receipt, please contact Customer Services. 30. Entering Function Codes There may be occasions when you have further requirements of your terminal. These can be met through the use of Function Codes. 1. At the READY prompt, press the MENU button twice. Use the arrow buttons to view the available options and press the GREEN button when the Select Function option is highlighted. 2. Key enter the function code required and then press the GREEN button. Page 27
29 Once the function code has been entered, follow the prompts displayed by the terminal. You may be prompted to swipe your Supervisor Card or key in Supervisor code. The following codes are available for you to use: CODE TITLE DESCRIPTION 16 Print Transaction Refer to section Set Date/Time Refer to section Assign to Base Refer to section Sleep Parameters Refer to section Waiter Setup Refer to section Test Radio Signal Refer to section 35 Waiter ID s (Restaurants) Default Waiter 0 A default waiter, Waiter 0: SHARED will be created automatically by the terminal. This can be used if you do not want to create individual Waiter ID s. All Sale transactions with gratuity will add tips/gratuities to this waiter without the need for a waiter ID to be entered during transaction processing. The total of all Waiter 0 tips/gratuities will be printed as part of the Waiter Totals Report showing the total value of tips/gratuities performed. Adding an Individual Waiter ID Your terminal can be configured to recognise individual Waiter ID s. These make it possible to identify which staff member has dealt with the transaction. The Waiter ID will be printed on the receipt. 1. At the READY prompt press the MENU button twice. 2. Using the arrow button select the Select Function option and then press the GREEN button. SYSTEM MENU Totals Print Function Codes Select Function 3. Enter the number 40 and then press the GREEN button. 4. Swipe the Supervisor Card or enter Supervisor code. 5. If you want to proceed to the Waiter Setup menu, press the GREEN button. If not, press the YELLOW button to return to the READY prompt. 6. Using the arrow button select Add and then press the GREEN button. EFT Waiter Setup Enter=YES WAITER SETUP Add Delete Print Clear=NO Page 28 Change Name Delete All Create Defaults
30 7. Your terminal will automatically allocate the next available Waiter ID. Key in the text/name description and press the GREEN button (this field is limited to 10 characters). ADD WAITER Code nn Key in Waiter s Name aaaaaaaaa (Please refer to Section 8 of this guide for instructions on how to enter letters). Deleting a Waiter ID Follow steps one to six above and select Delete from the WAITER SETUP menu, now proceed as follows: 1. Key in the Waiter ID code that is to be deleted and then press the GREEN button. 2. If you want to proceed to delete the Waiter, press the GREEN button. If not, press the YELLOW button. DELETE Waiter Key in Code to Delete DELETE Waiter nn <name> Enter=YES nn Clear=NO Changing a Waiter ID Follow steps one to six of Waiter ID s (Restaurants) and select Change Name from the WAITER SETUP menu. Now proceed as follows: 1. To change a Waiter Name, key in the Code of the Waiter that requires change and then press the GREEN button. CHANGE Name Key in Code to Change nn 2. Amend the Waiter Name by using the RED and YELLOW buttons to erase letters. (Please refer to Section 8 of this guide for instructions on how to enter letters). Press the GREEN button and the terminal will return to the Waiter Setup Menu. CHANGE Name Key in Waiter s Name <existing name> Creating Default ID s When using the Create Defaults option, the terminal automatically creates numbered Waiters from 1-99 instead of named Waiters. Follow steps one to six of Waiter ID (Restaurants) and select Create Defaults from the WAITER SETUP menu. If Waiters Do not yet Exist When asked whether you would like to create defaults on your terminal, press the GREEN button to accept. To decline, press the YELLOW button. CREATE Defaults Are You Sure? Enter=YES Clear=NO Page 29
31 If Waiters Already Exist If Default Waiters exist on your terminal and you wish to add a named waiter, this screen will be displayed. You MUST delete a Default Waiter before a named waiter can be added. Press the GREEN button. Waiters Already Exist Delete ALL if you wish to remove 31. How to Change the Date and Time The terminal has a built in clock which maintains the current date and time. If necessary you can also change the date and time manually. Please note: This may need to be done twice a year when the clocks change. 1. At the READY prompt, press the MENU button twice. Use the arrow buttons to view the available options and press the GREEN button when the Select Function option is highlighted. 2. Key enter the number 30 and press the GREEN button. You will then be asked to swipe the Supervisor Card or key in Supervisor code. SYSTEM MENU Totals Print Function Codes Select Function Key in Function Code 3. The current date will be displayed. Re-key the correct date and press the GREEN button. 4. The current time will be displayed. Re-key the correct time and press the GREEN button. The terminal will return to the READY prompt. SET DATE/TIME Enter Current Date SET DATE/TIME Enter Current Time dd/mm/yy dd/mm/yy 32. How to Set Sleep Parameters This function allows you to set the time when the terminal is not in use before it goes into sleep mode. Having the sleep parameters enabled will save on battery life. 1. At the READY prompt, press the MENU button twice. Use the arrow buttons to view the available options and press the GREEN button when the Select Function option is highlighted. SYSTEM MENU Totals Print Function Codes Select Function 2 Key enter the number 38 and press the GREEN button. You will then be asked to swipe the Supervisor Card or enter Supervisor code. Key in Function Code Page 30
32 3. Press ENTER to continue setting Sleep Parameters or Clear to cancel. SYSTEM Sleep Parameters? 4. Enter the number of minutes before which the terminal goes to sleep and then press the GREEN button. The terminal will return to the READY prompt. Enter=YES Number of Mins before going to sleep (1-30) Clear=NO xx 33. How to Print a Transaction Log This function allows you to print a log of your last 100 transactions, should the need arise for example to check any financial discrepancies. 1. At the READY prompt, press the MENU button twice. Use the arrow buttons to view the available options and press the GREEN button when the Select Function option is highlighted. SYSTEM MENU Totals Print Function Codes Select Function 2. Key enter the number 16 and press the GREEN button. You will then be asked to swipe the Supervisor Card or key in Supervisor code. Key in Function Code 3. To print a transaction log for the selected acquirer, press the GREEN button. If not, press the YELLOW button. Print Transaction Log <Aquirer Name>? 4. Press the GREEN button again and the transaction log for that acquirer will be printed. It will show the previous 20 transactions for that acquirer. Step 3 and 4 will repeat for each acquirer. Once all have been printed, press the GREEN button and the terminal will return to the READY prompt. Enter=YES Print Transaction Log Continue? Enter=YES Clear=NO Clear=NO 34. How to Assign a Terminal to a Base Unit Place the terminal handset onto the base unit. 1. At the READY prompt press the MENU button twice. 2. Use the arrow buttons to view the available options and press the GREEN button when the Select Function option is highlighted. 3. Key enter the number 36 and press the GREEN button. You will then be asked to swipe the Supervisor Card or key in Supervisor code. SYSTEM MENU Totals Print Function Codes Select Function Key in Function Code Page 31
33 4. To assign the terminal to a base unit press the GREEN button. To cancel the operation, press the YELLOW button. 5. Select ASSIGN TO BASE and press the GREEN button. 6. Place the handset onto the base unit if you have not already done so. The terminal will display different screens to confirm that the base unit assignment is in progress. SYSTEM Radio Setup? Enter=YES RADIO SETUP Assign to base Select base Remove base Clear=NO The terminal will finally confirm that the base unit assignment was successful and will automatically return to the ready prompt after three seconds. Assigning a Handset to more than one Base Your handset can be assigned to up to three bases. If you are not in range of your primary base unit, you can select from two others that the handset is assigned to in order to complete your transaction. Follow the prompts below to assign your terminal to more than one base. 1. At the READY prompt press the MENU button twice. 2. Use the arrow buttons to view the available options and press the GREEN button when the Select Function option is highlighted. 3. Key enter the number 36 and press the GREEN button. You will then be asked to swipe the Supervisor Card or key in Supervisor code. 4. To assign the terminal to a base unit press the GREEN button. To cancel the operation, press the YELLOW button. SYSTEM MENU Totals Print Function Codes Select Function Key in Function Code SYSTEM Radio Setup? Enter=YES Clear=NO 5. Choose SELECT BASE and press the GREEN button. 6. Select the number of the base unit you wish to assign your handset to and press the GREEN button. You can now proceed to assign your handset to up to three more base units. Your terminal will return to the READY prompt when each assignment is complete. RADIO SETUP Assign to base Select base Remove base SELECT BASE Page 32
34 35. How to Test the Signal Quality You should make every effort to retain a high signal strength when using the terminal; signal strength is indicated by this symbol on your terminal display: To test the signal strength please proceed as instructed below. This will allow you to determine if you have any bad reception areas. Note: A good reading is 255 and a low reading would be 180. Try to achieve a reading between 200 and At the READY prompt, press the MENU button twice. Using the arrow button select the Select Function option and then press the GREEN button. SYSTEM MENU Totals Print Function Codes Select Function 2. Enter the number 36 and then press the GREEN button. 3. Swipe the Supervisor Card or key in Supervisor code. 4. Using the arrow button select the Test Radio Link option. Key in Function Code 5. To start the test press the GREEN button. If not, press the RED button to abort the test procedure. Signal Quality Test Press ENTER to start or CANCEL to quit Signal Quality Test Running xx seconds remaining press CANCEL to quit 6. The signal test will run for 60 seconds and print the result. If the result is low (ie. 180) move the base to a different location and run the tests again. Press CANCEL to quit the testing and Return to the READY prompt. Signal Quality Test Press ENTER to start or CANCEL to quit Page 33


35 36. How to Change a Paper Roll 1. Hold the terminal securely in one hand. With the other hand, and by using two fingers, lift the printer cover release as shown. Fully open the printer cover and remove the old roll of paper. 2. Unstick the end of the new roll, leaving the end free, hold the paper roll as shown and carefully place into the printer compartment. 3. Holding the free end of the paper and the terminal, close the printer cover and push firmly until it locks. Pressing the YELLOW button will feed the paper through. 37. Insuring the Terminal Although you rent your terminal for a monthly charge it is strongly recommended that you insure the terminal against loss or damage to a value as recommended by your acquirer. 38. Security Warning Notice This terminal is used for the secure transfer of funds using credit and debit cards. As such it is designed as a high security device. Page 34
Contents Section Title Page
 ict200 series Contents Section Title Page 1. Introduction 2 2. Important Safety Instructions 2 3. Declaration of Conformity 5 4. Installing the Terminal 6 5. Using a Payment Card 8 6. Starting a Transaction
Terminal User Guide. ict220 & ipp350
 Terminal User Guide ict220 & ipp350 Contents Section Title Page Introduction 2 Important Safety Instructions 2 Declaration of Conformity 5 4. Installing the Terminal 6 5. Using the Terminal 9 6. Starting
Read me next. Portable card machine. Get ready to trade
 1 Read me next Portable card machine Get ready to trade 2 Useful numbers: (Call charges apply) Customer Services: 0844 811 6666 Authorisation: 0844 822 2000 / 0844 824 5092 Chargebacks: 0844 755 0094 American
DIV434632A COPYRIGHT 2010 Ingenico UK Ltd ALL RIGHTS RESERVED. Date: August 2010 Released for UT
 Date: August 00 Released for UT..05 DIV6A COPYRIGHT 00 Ingenico UK Ltd ALL RIGHTS RESERVED Contents. Introduction. Important Safety Instructions. Declaration of Conformity. Installing the Terminal 5 Installing
ict/iwl Terminal How to use your terminal
 ict/iwl Terminal How to use your terminal The basics Chip and PIN cards Insert the card with the chip facing up and towards the terminal. If the card has been inserted the wrong way or there is a problem
EFT930BEM. Ingenico User Guide PSTN IP. Ingenico (UK) Ltd Office G10, 3000 Cathedral Hill GUILDFORD GU2 7YB
 Ltd Office G10, 3000 Cathedral Hill GUILDFORD GU2 7YB") Image for illustrative purposes only - product may differ from that shown. Part No: DIV434554C Ingenico (UK) Ltd Office G10, 3000 Cathedral Hill GUILDFORD GU2 7YB PSTN IP Ingenico User Guide EFT930BEM Terminal
Image for illustrative purposes only - product may differ from that shown. Part No: DIV434554C Ingenico (UK) Ltd Office G10, 3000 Cathedral Hill GUILDFORD GU2 7YB PSTN IP Ingenico User Guide EFT930BEM Terminal
Ingenico iwl251 (GPRS) Card Sales & Refunds. Quick Guide
 Card Sales & Refunds. Quick Guide") Ingenico iwl251 (GPRS) Card Sales & Refunds Quick Guide TRANSAX Merchant Services. All TMS, rights iwl251 reserved. GPRS, TRANSAX Card is Sales a registered & Refunds trademark Quick of FIS Guide, Payments
Ingenico iwl251 (GPRS) Card Sales & Refunds Quick Guide TRANSAX Merchant Services. All TMS, rights iwl251 reserved. GPRS, TRANSAX Card is Sales a registered & Refunds trademark Quick of FIS Guide, Payments
Move/3500. Telium TETRA
 Move/3500 Telium TETRA Table of contents Table of contents... 2 Introduction... 6 Contents of box... 6 Overview of Move/3500... 7 Keyboard details and functionality... 8 Switching ON / OFF terminal...
Move/5000 Telium TETRA
 Move/5000 Telium TETRA Table of contents Table of contents... 2 Introduction... 6 Contents of box... 6 Overview of Move/5000... 7 Keyboard details and functionality... 8 Switching ON / OFF terminal...
V X 680 Series APACS 40 User Guide
 V X 680 Series APACS 40 User Guide The information contained in this document is subject to change without notice. Although VeriFone has attempted to ensure the accuracy of the contents of this document,
MO-01J. Quick Start Guide
 MO-01J Quick Start Guide 1 LEGAL INFORMATION Copyright 2016 ZTE CORPORATION. All rights reserved. No part of this publication may be quoted, reproduced, translated or used in any form or by any means,
VX 675 Series APACS 40 User Guide
 VX 675 Series APACS 40 User Guide 2010 VeriFone. All rights reserved. VeriFone, the VeriFone logo, VX are either trademarks or registered trademarks of VeriFone. No part of the contents of this document
VX 820 Duet Series APACS 40 User Guide
 VX 820 Duet Series APACS 40 User Guide The information contained in this document is subject to change without notice. Although VeriFone has attempted to ensure the accuracy of the contents of this document,
User Guide. Contents
 1 L5 User Guide Contents Welcome.2 1. Package Contents:... 3 2. Keypad Layout and Display Indicator Lamps... 4 3. Preparing to Use the Product:... 4 4. Charging the Device:... 4 5. About this Device...
FCC Statement Declaration of Conformity
 FCC Statement Declaration of Conformity Sony Ericsson U20i UMTS HSPA band 1 8 GSM GPRS/EDGE 850/900/1800/1900 Important Information United States & Canada THIS PHONE MODEL HAS BEEN CERTIFIED IN COMPLIANCE
Quick Start Guide CJB1950ALAAB
 Quick Start Guide 1 CJB1950ALAAB www.sar-tick.com This product meets applicable national SAR limits of 2.0W/kg. The specific maximum SAR values can be found in the section of this user guide. When carrying
QUICK STARTER GUIDE BURG 16A
 QUICK STARTER GUIDE BURG 16A Burg 16A Index Your BURG The first time you use your BURG Controls Menu Menu features (Manual for Android) (Manual for iphone) Product and safety information FCC Declaration
EFTPOS 1. User guide.
 EFTPOS 1. User guide. Contact Details BankSA Merchant Helpdesk Service, Sales and Support Terminal Difficulties Stationery Orders 1300 780 940 Contents 1 Introduction.... 1 1.1 Merchant Responsibility
NAB EFTPOS USER GUIDE. for Countertop
 NAB EFTPOS USER GUIDE for Countertop & Mobile Terminals About your NAB EFTPOS Terminal NAB EFTPOS Mobile NAB EFTPOS Countertop 2 Table of Contents Getting to know your NAB EFTPOS VeriFone terminal...5
SAM User Manual. EpiValley. Rev 0.1
 SAM User Manual EpiValley Rev 0.1 October 01, 2007 Revision History Rev 0.1 2007. 08. 22 First issue Hyeong Seop Yoon 2 Contents 1. Installation & Setup... 4 2. Getting Started... 10 3. UIM... 11 4. Internet...
VX-670 Series APACS 40 User Guide
 Paper Rolls Plus VX-670 Series APACS 40 User Guide 2006 VeriFone. All rights reserved. VeriFone, the VeriFone logo, Vx are either trademarks or registered trademarks of VeriFone. No part of the contents
CONTENTS. Safety Information Cleaning and Maintenance Function Information Messaging
 CONTENTS Safety Information... - 3 - Cleaning and Maintenance... - 3 - Function Information... - 5 - Messaging... - 7 - Email... - 8 - Camera... - 9 - Music... - 10 - FM Radio... - 12 - Sound Recorder...
Iconia W4 Quick Guide
 Iconia W4 Quick Guide ENJOY THE BENEFITS OF HAVING AN ACER ID With an Acer ID, you can: - Remotely access your PC from your other devices with our free Acer Remote Files app - Get the latest Acer offers
HONGKONG UCLOUDLINK NETWORK TECHNOLOGY LIMITED. 4G Free Roaming Hotspot
 HONGKONG UCLOUDLINK NETWORK TECHNOLOGY LIMITED 4G Free Roaming Hotspot E1 4G High Speed Internet E1 connects to the 4G or 3G local network automatically. It will switch to the best and the most stable
Using your Spire Terminal
 A NetPay Guide to... Using your Spire Terminal Models: SPc50 / SPw60 / SPw70 / SPp10 / SPc5 / SPg7 intelligent payments www.netpay.co.uk www.netpay.ie A guide to using your Spire terminal This booklet
Ingenico ict250 (PSTN/IP) Read Me First. Installation Instructions
 Read Me First. Installation Instructions") Ingenico ict250 (PSTN/IP) Read Me First Installation Instructions TRANSAX Merchant Services. TMS, ict250 All rights PSTN/IP, reserved. TRANSAX Read Me is First a registered Installation trademark Instructions,
Ingenico ict250 (PSTN/IP) Read Me First Installation Instructions TRANSAX Merchant Services. TMS, ict250 All rights PSTN/IP, reserved. TRANSAX Read Me is First a registered Installation trademark Instructions,
Thuraya SatSleeve User Manual
 Thuraya SatSleeve User Manual Thank you for choosing the Thuraya SatSleeve! The SatSleeve allows you to use your iphone in satellite mode. You can now enjoy calls and text messages even if your iphone
Read me f irst. Portable card machine. Quick start guide
 1 Read me f irst Portable card machine Quick start guide 2 Welcome to the world of payments What you need to do in 3 simple steps 1. Connect your equipment 2. Set up your card machine 3. Check it s working
EFTPOS 1. User guide.
 EFTPOS 1. User guide. Contact Details. Westpac Merchant Helpdesk 1800 066 244 Service, Sales and Support Terminal Difficulties Stationery Orders Contents. 1 Introduction...5 1.1 Merchant Responsibility
One Touch Y580 Quick Start
 One Touch Y580 Quick Start Safety and use... 1 1. Overview... 3 1.1 Contents in the package... 3 1.2 Application... 3 1.3 Device overview... 3 1.4 Turn on device... 5 1.5 Screen display... 6 1.6 Connect
mypos Mini - User Manual mypos Europe Ltd. mypos Mini En
 mypos Mini - User Manual mypos Europe Ltd. mypos Mini En CONTENTS Introduction... 2 Scope... 2 Related documentation... 2 Internet connectivity... 2 Using mypos Mini with a mobile phone (via Bluetooth
BTK-A21 Bluetooth Headset User Manual
 BTK-A21 Bluetooth Headset User Manual Thank you for purchasing the Mini Bluetooth Headset BTK-A21, we hope you will be delighted with its operation. Please read this user's guide to get started, and to
D220 - User Manual mypos Europe Ltd. mypos Mini Ice En
 D220 - User Manual mypos Europe Ltd. mypos Mini Ice En CONTENTS Introduction... 2 Scope... 2 Related documentation... 2 Internet connectivity... 2 Using D220 with a mobile phone (via Bluetooth or personal
Federal Communications Commission (FCC) Statement
 Statement") FCC Information This device complies with Part 15 of the FCC rules. Operation is subject to the following two conditions: (1) this device may not cause harmful interference, and (2) this device must accept
FCC Information This device complies with Part 15 of the FCC rules. Operation is subject to the following two conditions: (1) this device may not cause harmful interference, and (2) this device must accept
One Touch W800 Quick Guide
 One Touch W800 Quick Guide 0 Contents Safety and use... 2 1. Overview... 4 1.1 Contents inside this package... 4 1.2 Getting to Know Your Modem... 4 1.3 How to start your modem... 5 1.4 LED Indicates...
mypos Combo - User Manual mypos Europe Ltd. mypos Combo En
 mypos Combo - User Manual mypos Europe Ltd. mypos Combo En CONTENTS Introduction... 2 Scope... 2 Related documentation... 2 Internet connectivity... 2 Using mypos Combo with a mobile phone (via Bluetooth
Contents. Get Started Install SIM Card
 Contents Get Started... 2 Install SIM Card... 2 Insert Micro SD card... 2 Charge Mobile Phone... 3 PC-Phone File Transfer... 4 Keys and Parts... 5 Fingerprint... 7 Lock and Unlock the Screen... 9 Notification
Bluetooth Hands-Free Speaker Phone Custom Accessories 23685
 Bluetooth Hands-Free Speaker Phone Custom Accessories 23685 1. Product Description This versatile Bluetooth speakerphone is specially designed for the user to enjoy convenient and free wireless communication.
Lenovo S60-a. Quick Start Guide. Read this guide carefully before using your smartphone.
 Lenovo S60-a Quick Start Guide Read this guide carefully before using your smartphone. First glance 1 2 3 4 11 12 13 5 6 14 15 7 10 9 8 16 17 13 1 Headset connector 2 Light/Proximity sensor 3 Receiver
Quick Start Guide - Ingenico iwl2xx
 Quick Start Guide - Ingenico iwlxx Getting Started Set up the terminal in a convenient location close to a power source and a telephone socket and/or an Ethernet socket, as required. Connecting the base
Business Function Guide
 Business Function Guide Using Global Passport CDMA For Overseas Use without Anxiety The overseas network condition is available on the au homepage. Make sure to check the condition before leaving Japan.
Figure 20. Screw the cover into position.
 User Manual. Figure 20. Screw the cover into position. 89 16. Energy Efficiency Recommendations on how to save energy: Do not charge a battery when the ambient room temperature is above +40 C or below
Senior Phone BAS User Guide English
 Senior Phone BAS-24100 www.facebook.com/denverelectronics User Guide English ENG-1 Insert the SIM card: The SIM card contains your phone number, PIN code, links to operator services, contacts and SMS messages.
Mobile Phone FAS-18100M
 Mobile Phone FAS-18100M www.facebook.com/denverelectronics User Guide English, Deutsch, Dansk, Suomalainen, Svenska, Français, Nederlands, Español, Italiano, Polski,Português ENG-1 Start to Use Put in/take
Read the safety precautions carefully to ensure the correct and safe use of your wireless device.
 1 Safety Precautions Read the safety precautions carefully to ensure the correct and safe use of your wireless device. Do not switch on your device when the device use is prohibited or when the device
Please store this document safely. You may need to refer to it again in the future. For more information
 READ ME FIRST! Installation Instructions Ingenico iwl221 GPRS 1. List of Parts and Contents 2. Next Steps 3. Terminal Installation n (essential) 4. How Your Machine Connects to a GPRS Network 5. Card Sales
Please store this document safely. You may need to refer to it again in the future. For more information
 READ ME FIRST! Installation Instructions Ingenico ict220 via PSTN / IP 1. List of Parts and Contents 2. Next s 3. Terminal Installation (essential) 4. Checking the Dialling Prefix e.g. 9 (if required)
For more information. Go to Settings > About phone > Legal information to read the legal information.
 Quick Start Guide For more information Go to http://consumer.huawei.com/en/ to download the user guide for your device and read the FAQ, privacy policy, and other information. Go to Settings > About phone
ILLUSTRATION. Base station. Mains power supply / line LED. Earpiece. Display. SOS key. Memory key. On/Off line key. Redial key
 ILLUSTRATION Base station Mains power supply / line LED Earpiece Display Memory key On/Off line key Dialling keypad SOS key Redial key Internal call / music on hold key Recall and Programming key Earpiece
Lenovo VIBE S1. Quick Start Guide. Lenovo S1a40. Read this guide carefully before using your smartphone.
 Lenovo VIBE S1 Quick Start Guide Lenovo S1a40 Read this guide carefully before using your smartphone. Read before using your phone Read first regulatory information Be sure to read the Regulatory Notice
Quick Setup Guide. Semi-Integrated Short and Long Range Restaurant Solution.
 Pay@Table Semi-Integrated Short and Long Range Restaurant Solution Quick Setup Guide Pay@Table-QSG-2017-03 Table of Contents What is Included in the Package? 4 hardware options 4 Setting up the Hardware
User Guide. mpos Readers RP350x & RP457c Mobile Payment Acceptance User Guide for Android
 mpos Readers RP350x & RP457c Mobile Payment Acceptance User Guide for Android Disclosure Statements Confidential Notice The information contained herein is the property of Total System Services, Inc. (TSYS
Breeze FB201 Phone User Guide
 Breeze FB201 Phone User Guide Table of Contents Getting Started... 3 Insert the SIM Card and Battery... 3 Insert the Media Card... 3 Keys and Parts... 4 Basics... 5 Display Indicators... 5 Writing Text...
mypos Go User Manual mypos.com mypos Go - User Manual
 mypos Go User Manual mypos.com mypos Go - User Manual Table of Contents Introduction...2 Related documentation 2 Activation...3 Activation code 4 Getting started...5 Learn about your device 5 Home screen
Copyright Huawei Technologies Co., Ltd
 Copyright Huawei Technologies Co., Ltd. 2009. All rights reserved. No part of this document may be reproduced or transmitted in any form or by any means without prior written consent of Huawei Technologies
Copyright Huawei Technologies Co., Ltd
 Copyright Huawei Technologies Co., Ltd. 2009. All rights reserved. No part of this document may be reproduced or transmitted in any form or by any means without prior written consent of Huawei Technologies
To force your device to restart, press and hold the power button until your device vibrates.
 Quick Start CPN-W09 1 Your device at a glance Before you start, let's take a look at your new device. To power on your device, press and hold the power button until your device vibrates and the screen
1 USB Modem Introduction
 1 USB Modem Introduction 1.1 Introduction Thank you for choosing the ZTE MF636 USB modem. Please read this manual carefully and keep it for future reference. The pictures, symbols and contents in this
Quick Start Guide JKM-LX1 JKM-LX2 JKM-LX3
 Quick Start Guide JKM-LX1 JKM-LX2 JKM-LX3 Your Device at a Glance Before you start, let's take a look at your new device. To power on your device, press and hold the power button until the screen turns
motorola H17 Quick Start Guide
 motorola.com MOTOROLA and the Stylized M Logo are registered in the US Patent & Trademark Office. All other product or service names are the property of their respective owners. The Bluetooth trademark
Export Law Assurances
 HS850 Welcome The Motorola Wireless HS850 makes connectivity invisible and reliable. It is astonishingly advanced and simple to use. Motorola is actively creating Bluetooth solutions for work, play, home,
Quick operation guide
 Quick operation guide Description of functions Stylus for display (Please pull out) Battery charge state Status indicator Colour touchscreen Payment Please enter : EUR Thermal printer paper compartment
NeoIDesc 595. Quick Guide The NeoIDesc 595 is mainly screen driven and easy to use by icons and instructions.
 NeoIDesc 595 Quick Guide The NeoIDesc 595 is mainly screen driven and easy to use by icons and instructions. 1. Content of the box: - NeoIDesc 595 - Charger - USB cable - Headset - Touchscreen pen - Leather
HOMTOM smart phone User Guide
 HOMTOM smart phone User Guide Table of Contents 1. ICONS...3 2. FUNCTIONAL MENU...5 3. FAQS AND SOLUTIONS...9 Icon 1 ICONS Description Indicate the intensity of network signals. Show missed calls. Location
HS6000 Wireless Headset
 HS6000 Wireless Headset OPERATING INSTRUCTIONS SETUP Power On/Off To turn the power on Press and release the power button on the inside of the headset housing, shown in Figure 1. A voice message in the
79 Backup and Reset DRAFT FOR INTERNAL USE ONLY. Factory Data Reset
 Backup and Reset Back up your data to Google servers. You can also reset your device to its factory defaults. Backup and Restore Samsung Account Enable backup of your information to Samsung servers. 2.
mpos Merchant User Guide
 Version 1.0 Mint mpos User Guide: Version 1.0 SEP16 Contents CHAPTER 1: LOGGING INTO THE NETS MPOS MERCHANT PORTAL 6 First time Login 6 Next time Login 6 Forgot your password? 7 CHAPTER 2: MERCHANT PORTAL
Albert. User Guide. Version 6.0 September Albert User Guide Commonwealth Bank 1
 Albert User Guide. Version 6.0 September 2016 Albert User Guide Commonwealth Bank 1 2 Commonwealth Bank Albert User Guide Contents Introducing Albert 4 1. Getting started 5 Getting to know the hardware
Get set, go! Getting to know your go! stick USB modem. The package of your ACN go! stick contains the following items:
 Quick Start Guide Get set, go! Welcome to ACN Mobile Broadband. This guide details the simple steps to install your go! stick USB modem and connect to the Internet - you ll be up and running in no time!
Content. 1 Welcome Your phone Phone overview Functions of Keys Getting started... 6
 User Manual -1- Content 1 Welcome... 3 2 Your phone... 4 2.1 Phone overview... 4 2.2 Functions of Keys... 5 3 Getting started... 6 3.1 Installing the SIM Cards and the Battery... 6 3.2 Linking to the Network...
Card Reader User Guide
 Card Reader User Guide 1 MYOB PayDirect User Guide Getting started in a few easy steps MYOB PayDirect turns your smartphone into a mobile payments terminal, so you can get paid on the spot anywhere, anytime.
Lenovo K6 NOTE. Quick Start Guide. Lenovo K53a48. Read this guide carefully before using your smartphone.
 Lenovo K6 NOTE Quick Start Guide Lenovo K53a48 Read this guide carefully before using your smartphone. Reading before using your smartphone For your safety Before assembling, charging or using your mobile
Ingenico iwl220 Payment Terminal Manual
 Ingenico iwl220 Payment Terminal Manual This payment terminal manual is for merchants to provide them with secure processing of card payments via the payment terminal. This manual constitutes an integral
AIB Merchant Services AIB Merchant Services Quick Reference Guide Verifone
 AIB Merchant Services AIB Merchant Services Quick Reference Guide Verifone AIB Merchant Services AIBMS Quick Reference Guide This quick reference guide has been designed to answer the most common queries
User s Manual. PNG140 Bluetooth Car Kit
 User s Manual PNG140 Bluetooth Car Kit 1 191211R1 Contents: 3 - Overview. 4 - Charging the Battery. 5 - Switching on the car kit. Pairing with phone. 6 - Multipoint. 7 - Call handling. Redialing. Voice
TD ict250. Merchant Guide: UnionPay Cards. without PINpad. For the TD ict250. * PINpad not shown
 TD ict250 Merchant Guide: UnionPay Cards For the TD ict250 with PINpad without PINpad * PINpad not shown COPYRIGHT 2016 by The Toronto-Dominion Bank This publication is confidential and proprietary to
Using your Ingenico Terminal
 A NetPay Guide to... Using your Ingenico Terminal Models: ict250 / iwl252 / iwl251 intelligent payments www.netpay.co.uk www.netpay.ie A guide to using your Ingenico terminal This booklet will explain
ATU-L21 ATU-L22. Quick Start Guide
 ATU-L21 ATU-L22 Quick Start Guide Your Device at a Glance Before you start, let's take a look at your new device. To power on your device, press and hold the power button until the screen turns on. To
GSM-Route BRI 3G. Installation & User Guide
 GSM-Route BRI 3G Installation & User Guide Version 3 December 2010 1 Contents 1 Contents 2 2 Notices 3 2.1 Package Contents... 3 2.2 Guarantee... 3 2.3 Document Control... 3 2.4 Safe and Efficient Use...
Mi A2 Lite. User Guide
 Mi A2 Lite User Guide Saturday, August 16 Volume Buttons Power Button USB Port Thank you for choosing Mi A2 Lite Long press the power button to turn on the device. Follow the on-screen instructions to
CBTH3. Bluetooth Speakerphone User Guide
 Bluetooth Speakerphone User Guide CBTH3 1. Notice Before Using Thank you for purchasing the Cobra Bluetooth Visor Speakerphone CBTH3. Your Cobra CBTH3 is a Bluetooth wireless technology device that enables
Alcatel - Lucent 8115 Audioffice
 Alcatel - Lucent 115 Audioffice User guide R100 AL90050USAAed01 2 Table of contents Important information 3 Safety guidelines 3 1 Discover your Alcatel-Lucent 115 Audioffice dock Box content Your Alcatel-Lucent
Freetalk Bluetooth Speakerphone
 Freetalk Bluetooth Speakerphone USER GUIDE Three Colours Available! 1713164 - Storm Blue 1713168 - Titanium 1713169 - Pure White Contents 1. About Bluetooth Speakerphone...3 2. About Bluetooth Technology...3
Q U I C K S T A R T G U I D E
 QUICKSTART GUIDE 2 Top 4 5 6 3 13 14 18 19 16 17 12 1 20 7 8 9 10 15 Left Side Front Right Side Back 11 Bottom 1 Power Button 2 Earphone Connector 3 Front-Facing Camera 4 Speaker 5 Ambient Light Sensor
Lenovo B. Quick Start Guide. Lenovo A2016b30. Read this guide carefully before using your smartphone.
 Lenovo B Quick Start Guide Lenovo A2016b30 Read this guide carefully before using your smartphone. Reading before using your smartphone For your safety Before assembling, charging or using your mobile
Get to Know Your Tablet
 Get to Know Your Tablet 1 8 My Verizon You re now connected to Verizon 4G LTE. Lightning fast, Lightning strong. For more information, visit verizonwireless.com/4glte. REGISTER at verizonwireless.com/myverizon
Supertooth One Users manual
 Supertooth One Users manual Bluetooth Handsfree Kit For Bluetooth Mobile Phones A. Product Description SUPERTOOTH ONE is a Bluetooth handsfree kit that supports headset or handsfree profile phones. Its
Welcome. Antenna Enclosed on the top-back of the. Menu Key Open a menu when you see in the display. phone.
 Model C136 GSM Welcome. Ear Piece Listen to your voice calls and messages. Left Soft Key Perform functions identified by left display prompt. Send/Answer Key Make and answer calls. in idle screen to see
MF971V Quick Start Guide
 MF971V Quick Start Guide Getting to Know Your Device Appearance The following figure is for your reference only. 1. Power key 2. FUNC key 3. External antenna connector 4. LCD screen 5. External antenna
GETTING TO KNOW YOUR TELSTRA PRE-PAID 3G USB + WI-FI
 FOR MORE INFORMATION CALL 125 8880 or FROM A NON-TELSTRA PHONE, CALL 13 2200 AND SAY PRE-PAID VISIT telstra.com/ppmbb VISIT A TELSTRA STORE OR PARTNER GETTING TO KNOW YOUR TELSTRA PRE-PAID 3G USB + WI-FI
MOVETIME Track&Talk watch. Quick Start Guide CJB1F60ALAAA
 MOVETIME Track&Talk watch Quick Start Guide CJB1F60ALAAA Know your watch Overview A B H C D I E F G J Front Back A Watch-button B Speaker C Volume + On the Home screen: Press to enter the call list, press
SafeNet Reader CT1100. For Windows 7, 8.1 and 10 User Guide
 SafeNet Reader CT1100 For Windows 7, 8.1 and 10 User Guide General Features Device features Button for pairing/ connect Bluetooth Smart LED indicator low battery LED indicator Bluetooth Smart connect Connector
Emmy. User Guide. 1. Emmy Terminal Features. 2. Important information to protect your business. 3. Getting Started
 User Guide 1. Emmy Terminal Features 2. Important information to protect your business The following steps should be followed at all times to protect you and your customers from fraud. You must ensure
ANZ FASTPAY USER GUIDE
 ANZ FASTPAY USER GUIDE WELCOME TO YOUR ANZ FASTPAY USER GUIDE CONTENTS What you need to set up ANZ FastPay 2 What s in your ANZ FastPay box? 2 Where else to find help and information 3 Get to know your
Tank II User s Manual
 Tank II User s Manual -1- Table of Contents Key Functions... 4 Getting Started... 5 Installing the SIM Card, SD Card and Battery... 5 Menu Guide... 7 Messaging... 7 Contact... 7 Audio player... 8 Call
Lenovo B. Quick Start Guide. Lenovo A2016a40. Read this guide carefully before using your smartphone.
 Lenovo B Quick Start Guide Lenovo A2016a40 Read this guide carefully before using your smartphone. Reading before using your smartphone Reading first regulatory information Be sure to read the Regulatory
telstra.com/ppmbb or from a non-telstra phone and say pre-paid visit a telstra store or partner
 telstra.com/ppmbb 125 8880 or from a non-telstra phone 13 2200 and say pre-paid visit a telstra store or partner GETTING TO KNOW YOUR TELSTRA PRE-PAID 4G USB+WI-FI PLUS LET S GET THIS SHOW ON THE ROAD
Copyright Huawei Technologies Co., Ltd All rights reserved.
 Copyright Huawei Technologies Co., Ltd. 2009. All rights reserved. No part of this document may be reproduced or transmitted in any form or by any means without prior written consent of Huawei Technologies
Thuraya SatSleeve. User Guide ENGLISH
 Thuraya SatSleeve User Guide ENGLISH Thank you for choosing the Thuraya SatSleeve! The SatSleeve allows you to use your iphone in satellite mode. You can now enjoy calls, messages, and Internet browsing
Table of Contents. Table of Contents... i Get Started... 2 Your Device at a Glance... 2 Manage Your Account... 2 Set Up Your Device...
 Table of Contents Table of Contents... i Get Started... 2 Your Device at a Glance... 2 Manage Your Account... 2 Set Up Your Device... 2 Your Device at a Glance... 2 Manage Your Account... 3 Set Up Your