Worlde Orca PAD64 MIDI Controller User s Manual
|
|
|
- Norma Hodges
- 5 years ago
- Views:
Transcription


1 Worlde Orca PAD64 MIDI Controller User s Manual - 1 -
2 CONTENTS 1. INTRODUCTION FEATURES PARTS AND THEIR FUNCTIONS Orca PAD64 Overview Top Panel Overview The pads/preset buttons Parameter control buttons Note button Octave button A. TOUCH button Channel button Velocity button Mute button Demo button [MMC] button Memory button [<] and [>] button Back panel overview SETUP Minimum System Requirements Making detailed settings
3 5. USING ORCA PAD64 WITH SOFTWARE Creating MIDI Presets with the Orca PAD64 Software Editor Overview: What is a Orca PAD64 Preset? Assign a Pad to Start/Stop MMC Assign a couple of Pads to MIDI notes Assign a Pad to toggle a MIDI CC # between two values Save the changes to a Preset Recalling a Preset / Switching between Presets Select the Backlit RGB Color of 64 Pads APPENDIX Appendix A- Toxic or Hazardous Substances and Elements SPECIFICATIONS
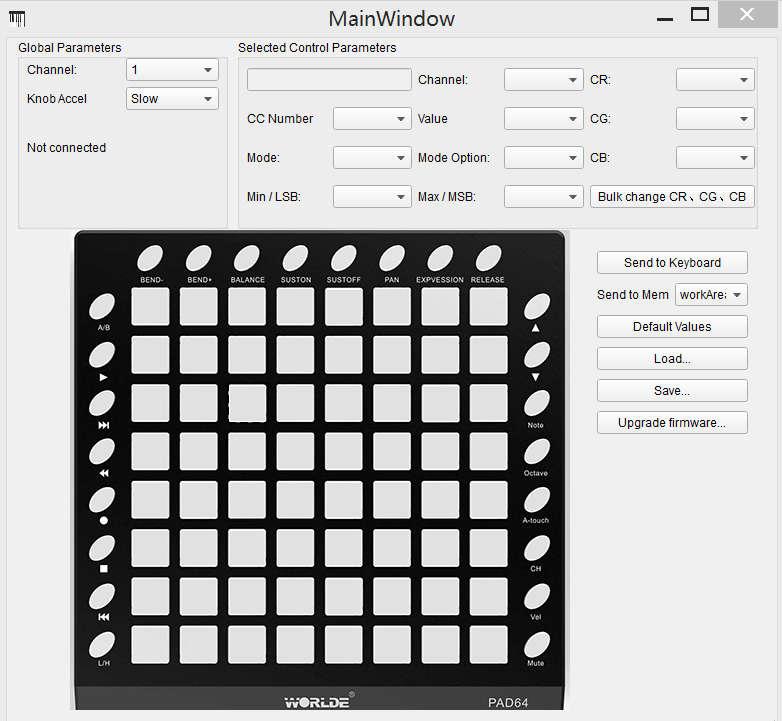
4 1. Introduction Thank you for purchasing the Worlde Orca PAD64 USB MIDI controller. To help you get the most out of your new instrument, please read this manual carefully. In order to use the functions of this product, you ll need to make settings in the application you re using. Make settings as described in the owner s manual for your application. 2. Features 64 high quality velocity & pressure sensitive performance pads with RGB backlit, can be assigned easily as pads, MIDI CC buttons or Program change switches. Function buttons, providing functions like, OCTAVE, AFTERTOUCH, VELOCITY, MUTE and etc. USB interface, adaptable to USB 2.0(FULL SPEED). Power supplied by USB. MIDI IN, MIDI OUT Compatible with Win10/8/7/XP/Vista and Mac OSX. Drive free and hot-plug supported. Edited by the Orca PAD64 Software Editor, the picture below is the main screen. It can be downloaded from for this software editor
5 - 5 -


6 3. Parts and Their Functions 3.1 Orca PAD64 Overview Top Panel Overview - 6 -
7 1. Buttons These buttons can transmit control change messages. Each button can be used to send continuous control data to a desktop audio workstation or external MIDI device. 2. [Memory] button Holding the memory button and pressing one of the pads to recall the parameters in Memory area. Press the MEMORY button. The system enters the storing state, it stores 6 groups setup value. 3. Trigger pads Pads can transmit note messages or control change messages. The pads can be used to trigger drum hits to our software or hardware module. The pads are pressure and velocity sensitive, which makes them very responsive and intuitive to play. Use the Orca PAD64 Software Editor to select the backlit RGB color of 48 pads. We ll show you how to select the backlit RGB color of48 pads in section [Note] button The 48 pads have dual modes: trigger pads mode and key note mode. Click the note button to start the note mode of the 48 pads, press +/-button to increase or decrease the current note by semitone. 5. [Octave] button Click the Octave button to start the Octave function, use+/-button to adjust Octave. Adjustment range is from 0 to 4. Press DATA +/- buttons at the same time to set octave to initial 0 6. [A.Touch] button Click the A.touch button to start the function of channel after touch and keyboard after touch. Channel after touch is on when the LED color is red for the A.touch button. Keyboard after touch is on when it s blue for the A.touch button. When channel after touch in on, the system sends channel after touch info when pressing the pads. When keyboard after touch in on, the system sends keyboard after touch info when pressing the pads. 7. [Channel] button Click the channel button to start the channel function, use+/-button to select the channel. The initial setting is 1, adjusting scale is 1~
8 8. [Velocity]button Click the velocity button to start the velocity selection function, the medium(or normal) velocity is on when the LED color of velocity button is green, heavy velocity is on when it s in red color, and blue for constant velocity. 9.[Mute] button Mute ON/OFF button. Click mute button will start the mute function. No message will be transmitted under Mute mode. 10.[Demo] button Demo ON/OFF button. Click demo button will start the demo function. 11. [MMC] button There are 6 buttons used for MMC-[ <<],[<<],[>>],[O],[stop],[play].It is common to set the 6 buttons as Sequencer remote control buttons, it needs to be working with sequencer software. 12. [<] and [>] button These buttons are used for navigating through fields of menus and options. 13. Full Sized USB connector Connect the Orca PAD64 to your computer with a USB cable via this port. 14. [MIDI OUT] Connector Use a five-pin MIDI cable to connect the MIDI OUT of the Orca PAD64 to the MIDI IN of an external device. 15. [MIDI IN] Connector Use a five-pin MIDI cable to connect the MIDI OUT of an external MIDI device to the MIDI IN of the Orca PAD DC 5V 5V power input interface. 17. [OFF/ON] button Power Off/On button

9 3.1.2 The pads/preset buttons Orca PAD64 has 64 high quality velocity & pressure sensitive performance pads with RGB backlit which can be assigned easily as pads, MIDI CC buttons or Program change switches. The pads can be used to trigger drum hits to our software or hardware module. The pads are pressure and velocity sensitive, which makes them very responsive and intuitive to play. The pads Parameter control buttons These buttonss transmit control change messages. The 8 buttons can be assigned to control any editable parameter on the selected device. Each buttons can be used to send continuous control data to a desktop audio workstation or external MIDI device. The Parameter control buttons Note button The 64 pads have dual modes: trigger pads mode and key note mode. Click the note button to start the note mode of the 64 pads, press +/-button to increase or decrease the current note by semitone


10 Note button Octave button Pushing the Octave buttons will transpose the keyboard by as much as four octaves up or down. The farther from center the keyboard has been transposed, the faster the buttons will flash. Click the Octave button to start the Octave function, use+/-button to adjust Octave. Adjustment range is from 0 to 4. Press DATA +/- buttons at the same time to set octave to initial 0. Octave button A. TOUCH button Click the A.touch button to start the function of channel After touch and keyboard after touch. Channel After touch is on when the LED color is red for the A.touch button. Keyboard After touch is on when it s blue for the A.touch button. When Channel After touch in on, the system sends Channel After touch info when pressing the pads. When Keyboard After touch in on, the system sends Keyboard After touch info when pressing the pads. After touch button


11 3.1.7 Channel button Channel selection function button, selecting current MIDI channel. Click the channel button to start the channel function, use+/-button to select the channel. The initial setting is 1, adjusting scale is 1~16. Channel button Velocity button Every time you press a key, a MIDI note message is sent with a velocity value between 0 and the maximum; this value specifies how hard you pressed the key. Since different people have different playing styles, your Orca PAD64 offers a number of different velocity curves. You should experiment with the different velocity curves to find the curve that best suits your playing style. Click the velocity button to start the velocity selection function, the medium(or normal) velocity is on when the LED color of velocity button is green, heavy velocity is on when it s in red color, and blue for constant velocity. Velocity button Mute button Mute ON/OFF button. Click mute button will start the mute function. No message will be transmitted under Mute mode

![Holding the [PLAY] button and press the ON/OFF button to start the Lighting effect show mode.](/docs-images/86/93810201/images/12-1.jpg "Then Orca PAD64 will display the preset lighting effect automatically. Demo button 3.1.")
12 Mute button Demo button Demo ON/OFF button. Click demo button will start the demo function. Orca PAD64 also has the preset lighting effect show. Holding the [PLAY] button and press the ON/OFF button to start the Lighting effect show mode. Then Orca PAD64 will display the preset lighting effect automatically. Demo button [MMC] button There are 6 buttons used for MMC-[ <<],[<<],[>>],[O],[stop],[play].It is common to set the 6 buttons as Sequencer remote control buttons, it needs to be working with sequencer software
13 MMC button Memory button Holding the memory button and pressing one of the pads to recall the parameters in Memory area. Press the MEMORY button. The system enters the storing state, it stores 6 groups setup value. Memory button [<] and [>] button These buttons are used for navigating through fields of menus and options
14 Navigation button Back panel overview The back panel of the Orca PAD64 contains some important connectors: the USB Type B jack, MIDI IN/MIDI OUT jack, DC 5V jack, ON/OFF button
15 4. Setup 4.1 Minimum System Requirements Windows Pentium MHz or higher (CPU requirement may be higher for laptops) 256MB RAM Direct X 9.0b or higher Windows XP(SP2)or higher Mac OS Macintosh G3*800/G4*733 MHz or higher (CPU requirement may be higher for laptops) OS X with 256 MB RAM, OS X or greater with 512 MB RAM *G3/G4 accelerator cards are not supported (Windows 98,Me,NT or 2000 not supported) 4.2 Making detailed settings The following settings cannot be edited on the Orca PD48 instrument, so you need to use the Worlde Orca PAD64 control Editor. You can download the Worlde Orca PAD64 control Editor from Worlde website 5. Using Orca PAD64 with Software 5.1 Creating MIDI Presets with the Orca PAD64 Software Editor Overview: What is a Orca PAD64 Preset? Thanks to the Orca PAD64 Software Editor it s possible to configure the Orca PAD64 to work with practically any device or software capable of responding to MIDI information. To summarize, here are some examples of what you can do with a Orca PAD64 preset:

16 Assign pads to send MIDI Machine Control commands (MMC) Use the pads to transmit MIDI notes Switch between two values of any MIDI CC# by playing a pad Assign a button to control any MIDI CC# and define its operational range Save the entire set of altered controls to one of Orca PAD64 s eight preset locations Define another seven sets of parameter assignments and save each one to a different memory location Recall any of the eight personalized presets easily and immediately Assign a Pad to Start/Stop MMC One feature that often comes in handy with a controller keyboard is the ability to start and stop a song without having to use the computer keyboard or mouse. It s really easy to set up the Orca PAD64 pads to do that. For example we ll use Pad 7 to send Stop commands and Pad 8 to send Start commands. This is accomplished through the use of MIDI Machine Control commands, which you ve probably seen abbreviated as MMC Select the Pad Mode Let s begin by selecting Pad 7 by clicking on its graphic in the MIDI Control Center or by tapping Pad 7 on the Orca PAD64. Then click the Mode field to activate the pull-down menu: Set the MMC Message number Once the Mode has been set to MMC, the trick is to set both the LSB and MSB to the same number so the pad knows which command to send. MMC Stop command needs the CC number set to 1, like so:

17 Next, select Pad 8 so we can set it to the MMC command for Start. This means the CC number must be set to 2: Now you should have Pad 8 set to start your song and Pad 7 set to stop it. Of course you can assign those functions to any pad you like, now that you know how to do it Assign a couple of Pads to MIDI notes The natural thing to do when you re starting a song is to lay down the kick and snare tracks. The Orca PAD64 pads can be assigned to any MIDI note number that you like, so for this example we ll set Pads 1 and 2 to trigger the General MIDI note numbers for the Bass drum and Snare drum (MIDI note numbers 36 and 38, respectively). By default the pads have their Mode set to MIDI note, so when you select each Pad we ll get right down to selecting the MIDI note number and velocity values. Let s leave the other setting to Gate so the notes shut off when you lift the pad; you can try the Toggle value later if you d like the MIDI note to stay On until you hit the pad a second time Select the MIDI note number: Kick The CC number field is used to set the MIDI note number, which makes sense: there are 128 MIDI Controller numbers and 128 MIDI Note numbers. So click the pull-down menu and set this value to 36 to select the General MIDI Kick drum note number: We ll show you how to set Pad 2 to the Snare drum note number in section
: So now you re ready to lay down the")

18 Select the MIDI note number: Snare Setting Pad 2 to trigger the snare is done the same way, only by choosing a different MIDI note number (38 in this case): So now you re ready to lay down the groove for your song: You have Pads 1 and 2 set to play the Kick and Snare, and Pads 7 and 8 set to Stop and Start the song Assign a Pad to toggle a MIDI CC # between two values One popular musical effect these days is to take an audio loop, filter it heavily for certain sections of a song, and switch it back to the full-open sound later in the song. You can pre-configure one of the Orca PAD64 pads to send those commands to a filter plug-in that should be readily available in your DAW software. We ll use Pad 6 for this example. Select it and then use the pull-down Mode menus to select Switched and Toggle : These settings will allow you to send two different values of a particular MIDI CC number each time you press the pad. There are a couple of MIDI CC numbers that have been assigned the task of controlling filter brightness (CC# 74) or harmonic content (CC# 71). We ll use CC# 74 for this example. Click on the CC number field and select the Brightness controller number as shown:


19 Next we ll set some minimum and maximum values that might work (adjust them to suit the audio source): The first press of Pad 6 will send a CC# 74 command with a value of 78, which will close the filter down part way but still let a lot of the audio pass through. The second press of Pad 6 will send a value of 127, opening the filter completely. Note: Be sure to check the MIDI Channel assignment to make sure it matches that of the receiving device Save the changes to a Preset So let s review what we ve done in section 5.1 so far: The pads have been set up to play kick and snare, toggle the filter settings, and start / stop the song; one of the encoders is controlling the vibrato rate, and the Mod strip is controlling Aftertouch. Not bad! There s a lot more Orca PAD64 can do, but that s a good start. So the next thing to do is make sure this configuration is available when you want it. To do that, you need to save these settings as a group into one of the eight memory locations in the Orca PAD64. The upper right-hand section of the MIDI Control Center software has a button called Send to Keyboard. Right below that is a pull-down menu that allows you to specify which of the TUNAMINI s eight memory locations will be the repository for the Preset you ve created. Before clicking the top button, select a location you know is available. We ll use memory location #2 for this example:

20 Select #2 in the drop-down list as pictured above. Once you re sure where the preset will be stored, click the Send to Keyboard button: Recalling a Preset / Switching between Presets Once you ve created a couple of presets you can switch between your personalized configurations very quickly. This is as simple as it can be: simply hold the Memory button and press one of the 4 pads as shown in picture below. In the picture above the combination of the Memory button and Pad 2 will select Preset #2 from the Orca PAD64 preset memory locations. To switch from Preset #2 to Preset #1, hold Memory again and press Pad 1 instead. 5.2 Select the Backlit RGB Color of 64 Pads Use the Orca PAD64 Software Editor to select the backlit RGB color of 64 pads. You can download the Orca PAD64 Software Editor from Worlde website Press the pad and the red circle button will appear on that, then select the color range No. for CR,CG and CB. Press the Send to Keyboard to send the parameters to the Orca PAD64 and then press the OK button to confirm. The color range is from 0 to 127 for each one
21 Reference RGB No. for some colors: COLOR R. G. B WHITE BLACK RED GREEN BLUE CYAN MAGENTA YELLOW ORANGE
22 6.Appendix Appendix A- Toxic or Hazardous Substances and Elements Part Number, Name and Description Toxic or Hazardous Substances and Elements Pb Hg Cd Cr(VI)) (PBB) (PBDE) PCB PCBA Welding Spot Components Metal Parts Plastic and Polymeric parts Paper Accessory Power Cord :Indicates that this toxic or hazardous substance contained in all the homogeneous materials for this part, according to EIP-A, EIP-B, EIP-C is below the limit requirement in SJ/T :Indicates that this toxic or hazardous substance contained in all the homogeneous materials for this part, according to EIP-A, EIP-B, EIP-C is above the limit requirement in SJ/T (Enterprises may further provide in this box technical explanation for marking X based on their actual conditions.)
23 Specifications Connectors: USB connector Power supply: USB bus power mode Current consumption: 100 ma or less Dimensions (W x D x H):256x256x36mm Weight : 840g: Included items: USB cable, Owner s manual *Specifications and appearance are subject to change without notice. Sales Head Office: Hangzhou Worlde Music Electronic Co., Ltd Add:18Xianxing Rd, Xianlin Industrial Park, Yuhang District, Hangzhou, ,P.R.China Tel: Fax: sales@worlde.com.cn Website:
Worlde TUNA MINI MIDI Controller User s Manual
 HANGZHOU WORLDE DIGITAL PIANO CO.,LTD WEBSITE: WWW.WORLDE.COM.CN EMAIL:SALES@WORLDE.COM.CN TEL:86 571 88730848 Worlde TUNA MINI MIDI Controller User s Manual -1- Contents 1. INTRODUCTION... 3 2. FEATURES...
Worlde Panda MINI Controller User s Manual
 Worlde Panda MINI Controller User s Manual - 1 - Contents Introduction... 3 Features... 3 Parts and their functions... 4 Setup... 7 Making detailed settings... 7 Global MIDI channel... 7 Keyboard CC mode
WORLDE EASYKEY MIDI CONTROLLER USER S MANUAL
 WORLDE EASYKEY MIDI CONTROLLER USER S MANUAL Contents Introduction... 3 Features... 3 Setup... 5 Making detailed settings... 5 Global... 5 Keyboard operation in Edit mode... 6 Specifications... 7 Introduction
MIDIPLUS Co, Ltd.
 MIDIPLUS Co, Ltd. http://www.midiplus.com.tw CONTENTS Preface... 1 What s in the Box?... 1 O62 Keyboard Overview... 1 Chapter 1:Quick Start... 2 1.1 O62 Overview... 2 1.1.1 Front panel Overview... 2 1.1.2
Preface. What s in the Box? BK492 Keyboard Overview
 CONTENTS Preface... 1 What s in the Box?... 1 BK492 Keyboard Overview... 1 Chapter 1:Quick Start... 2 1.1 BK492 Overview... 2 1.1.1 Front panel Overview... 2 1.1.3 Controllers description... 3 1.2 Minimum
MIDIPLUS Co, Ltd.
 MIDIPLUS Co, Ltd. http://www.midiplus.com.tw Index Preface... 1 What s in the Box?... 1 AK490 Keyboard Overview:... 1 Chapter 1:Quick Start... 2 1.1 AK490 Overview... 2 1.1.1 Front panel Overview... 2
Axiom. User Guide. English
 Axiom User Guide Table of Contents.......................................................................... 3 Introduction...................................................................... 3 What
FRONT PANEL OVERVIEW...1 REAR PANEL OVERVIEW...3 HOOKUP DIAGRAM...4 DISPLAYING INFORMATION...6
 TABLE OF CONTENTS FRONT PANEL OVERVIEW...1 REAR PANEL OVERVIEW...3 HOOKUP DIAGRAM...4 DISPLAYING INFORMATION...6 OCTAVE AND TRANSPOSITION...6 NOTE...6 NOTE AFTERTOUCH (Channel Pressure)...6 CONTROL CHANGE...6
WEBSITE: TEL: WORLDE ELECTRONIC DRUM D-M70/80/90 User manual V1.00
 WEBSITE: WWW.WORLDE.COM.CN EMAIL:SALES@WORLDE.COM.CN TEL:86 571 88730848 1 WORLDE ELECTRONIC DRUM D-M70/80/90 User manual V1.00 1 WEBSITE: WWW.WORLDE.COM.CN EMAIL:SALES@WORLDE.COM.CN TEL:86 571 88730848
VAULT IKON PAD MIDI CONTROLLER USER S MANUAL
 VAULT IKON PAD MIDI CONTROLLER USER S MANUAL Contents Introduction... 3 Features... 3 Parts and their functions... 4 Setup... 5 Making detailed settings... 5 Global... 5 Trigger pads... 6 Assignable buttons...
MIDIPLUS Co, Ltd.
 MIDIPLUS Co, Ltd. http://www.midiplus.com.tw CONTENTS Preface... 1 What s in the Box?... 1 SmartPAD introduction... 1 Connection Diagram... 1 Software Setup... 1 Chapter 1:Quick Start... 2 1.1. SmartPAD
User Guide. English. Manual Version 1.0
 User Guide English Manual Version 1.0 Table of Contents (Click a chapter/section to skip to it.) Introduction... 5 Box Contents... 5 Support... 5 About This User Guide... 5 Initial Setup... 6 1. Software/Driver
Main Features. 8 Assignable Knobs Deliver Real-time Control of Your Musical Software
 Table of Contents Main Features... 3 Preparation... 4 Using a Wireless Connection... 4 Using a USB Connection... 5 Software setup... 6 Functions and Operation of Controls... 7 Keyboard... 8 Touchpad...
K-Series Editor Owner's Manual
 K-Series Editor Owner's Manual Table of Contents Introduction...1 Items in the screen...1 Setup...2 Saving scene data to your computer...2 Loading scene data into the K-Series...2 Parameter settings...3
The following items should be in your package. SmartPAD MIDI Controller. Owner s Manual. One standard USB Cable.
 MIDIPLUS Co, Ltd. http://www.midiplus.com.tw CONTENTS Preface...3 What s in the Box?... 3 SmartPAD introduction... 3 Connection Diagram...4 Software Setup... 4 Chapter 1:Quick Start... 6 1.1 SmartPAD Overview...6
User Guide. English. Manual Version 1.1
 User Guide English Manual Version 1.1 Table of Contents Introduction... 4 Editing the Controls... 10 Information & Support... 4 Installation... 4 Overview... 10 Graphical User Interface... 10 Control Panel...
PMIDIPD30 User Manual
 PMIDIPD30 User Manual CONTENTS INTRODUCTION FEATURES PARTS AND THEIR FUNCTIONS SETUP MAKING DETAILED SETTINGS GLOBAL KNOBS SLIDERS ASSIGNABLE BUTTONS TRANSPORT BUTTONS SPECIFICATIONS 3 3 4 5 6 6 6 7 7
Sono 61. English User Guide
 Sono 61 English User Guide 1 Introduction.............................................................. 3 ProKeys Sono 61 Features............................................... 4 What s in the Box?.......................................................
Workshop. Automation ÂØÒňΠMV-8000
 ÂØÒňΠMV-8000 Workshop Automation 2006 Roland Corporation U.S. All rights reserved. No part of this publication may be reproduced in any form without the written permission of Roland Corporation U.S.
KeyStudio 49i. English. User Guide
 KeyStudio 49i English User Guide KeyStudio Table of 49i Contents User Guide 1 Introduction. 3 About this User Guide. 3 KeyStudio 49i Features. 4 Minimum System Requirements. 5 Standalone. 5 Bus-Powered.
The Compact Make-Music-Now Keyboard Studio. English. User Guide
 The Compact Make-Music-Now Keyboard Studio English User Guide 1 Introduction.............................................................. 3 Session KeyStudio Features..............................................
Seaboard RISE Creator Manual
 Seaboard RISE Creator Manual 1 Introduction Hello creator, and welcome to the Creator Manual for the Seaboard RISE. We think of the people who buy and use ROLI s products as creators more than customers.
ControlKey 49, ControlKey 61, ControlKey 88 MIDI keyboard
 ControlKey 49, ControlKey 61, ControlKey 88 MIDI keyboard user manual Musikhaus Thomann Thomann GmbH Hans-Thomann-Straße 1 96138 Burgebrach Germany Telephone: +49 (0) 9546 9223-0 E-mail: info@thomann.de
Sounds of the Delta Kontakt instrument.
 Sounds of the Delta Kontakt instrument. INDEX 1...How to Install/Load presets. 2...Overview of instrument. 3...Sequencer 4...Effects section and controls. 5...Credits. Thank you for buying our latest Kontakt
Push. Figure A4.1 Push.
 Push Figure A4.1 Push. Push is a hardware controller designed by Ableton and Akai to drive Live s Session View. Simply connect the Push unit using the provided USB cable to your computer and off you go.
KORG KROME Music Workstation - Product Specifications
 KORG KROME Music Workstation - Product Specifications Keyboard KROME-73 System 73-key: Natural Touch Semi Weighted keyboard *velocity sensitive is supported, after touch is not supported *Standard C1 -
COPYRIGHT AND LEGAL NOTICES. Trademarks. Disclaimer. English
 Novation A division of Focusrite Audio Engineering Ltd. Windsor House, Turnpike Road, Cressex Business Park, High Wycombe, Bucks, HP12 3FX. United Kingdom Tel: +44 1494 462246 Fax: +44 1494 459920 e-mail:
Crazy8 User Manual Mar 2017
 Crazy8 User Manual Mar 2017 Welcome! Welcome to Crazy8, your crazy companion to handle all your sequencing needs! Be sure to check out the walkthrough videos on the Crazy8 page Twisted-electrons.com/crazy8
PCR-300_500_800_e.book 1 ページ 2007年2月28日 水曜日 午後7時10分 Owner s Manual
 Owner s Manual Contents Names of things and what they do...4 Panel... 4 Side panel... 7 Using control maps...8 What is a control map?... 8 Control maps and the current memory... 8 Switching control maps...
NEW PRODUCT GUIDE. All information is prelimiary and subject to change.
 NEW PRODUCT GUIDE Eight-Piece Electronic Drum Kit with Mesh Snare and Kick Dynamic, comfortable pads for great feel and natural response Command Drum Module with 70 kits and over 600 sounds Load.WAV samples
Sales Manual Part II
 Sales Manual Part II In this sales manual, you ll be able to show how to make a song and create a WAV file of the song. Table of Contents Page 1. Main Features of the Sequencer 2 2. How to Demo the Sequencer
USB / MIDI / CV KEYBOARD CONTROLLER
 USB / MIDI / CV KEYBOARD CONTROLLER 1. MAX49 2. AC 3. USB 4. CD (Vyzex AKAI CONNECT ) 5. DVD (Ableton Live Lite Akai Edition) 6. () AC () () () () 1. CD CD 2. : Windows : CD Vyzex installer (.exe) Mac:
Editor/Plug-In Editor Manual
 Editor/Plug-In Editor Manual E Table of Contents Introduction... 1 Main features...1 Please note before use...1 M50 Editor and M50 Plug-In Editor operating requirements...1 Installation... Installation
MPC1000 Product Overview
 Product Overview Product Description The Akai Professional MPC1000 Music Production Center combines a 64-Track MIDI Sequencer and a 32-voice Stereo Digital Sampler, with 16 velocity and pressure sensitive
NNB Expanse Bridge. User Manual v1.00
 NNB Expanse Bridge User Manual v1.00 2 of 6 Revision History: v1.00 Initial Release Neunaber, Expanse, Slate, Echelon, Chroma, and WET are trademarks of Neunaber Technology. Their use in this document
USB MIDI CONTROLLER OWNER S MANUAL
 USB MIDI CONTROLLER OWNER S MANUAL Copyright 2012 - Samson Technologies V2 Samson Technologies 45 Gilpin Avenue Hauppauge, New York 11788-8816 Phone: 1-800-3-SAMSON (1-800-372-6766) Fax: 631-784-2201 www.samsontech.com
Welcome. Welcome to Channel Robot s Slice Version 4. Thanks for buying the product, and we hope you enjoy your time with it.
 Welcome Welcome to Channel Robot s Slice Version 4. Thanks for buying the product, and we hope you enjoy your time with it. Slice is a loop playing instrument, and has a range of features we think are
KARMA Motif Using the Remote Mode S70/S90 XS
 KARMA Motif Using the Remote Mode S70/S90 XS Revision 07-Oct-2014 by Stephen Kay www.karma-lab.com Overview Note: the use of S90 XS in this document refers to either an S70 XS or an S90 XS. The information
User Guide. English ( 3 16 ) Appendix English ( )
 Appendix English ( )") User Guide English ( 3 16 ) Appendix English ( 17 19 ) USB SUSTAIN C17 POWER ON OFF User Guide (English) Box Contents Oxygen 25 USB Cable Ableton Live Lite Software Download Card Quickstart Guide Safety
User Guide English ( 3 16 ) Appendix English ( 17 19 ) USB SUSTAIN C17 POWER ON OFF User Guide (English) Box Contents Oxygen 25 USB Cable Ableton Live Lite Software Download Card Quickstart Guide Safety
User Guide
 www.nektartech.com www.nektartech.com User Guide Table of Contents Introduction 4 Box Content 4 Panorama T4/T6 Features 4 Minimum System Requirements 4 Getting Started 5 Connection and Power 5 Getting
Keyboard Controllers. 61-Key USB/MIDI Master Controller Keyboard with Motorized Faders and Touch-Sensitive Pads
 61 semi-weighted full-size keys featuring expressive velocity and after-touch functionality 9 motorized 60 mm touch-sensitive faders to control your DAW mixer, drawbar organ, soft synths or effect units
Quick Start Guide. Rugged Android Tablet M101M8 Series V1.0
 Rugged Android Tablet M101M8 Series Quick Start Guide V1.0 For more information on this and other Winmate products, please visit our website at: www.winmate.com Document Part Number: 9152111K1054 Please
USER GUIDE. Congratulations, you re now a proud owner of the Joué instrument!
 USER GUIDE Congratulations, you re now a proud owner of the Joué instrument! Joué is an expressive and modular MIDI controller that feels like a real instrument. It s an innovative and evolving instrument
M101M4 Tablet PC Quick Start Guide V1.0
 M101M4 Tablet PC Quick Start Guide V1.0 Please read these instructions carefully before using this product, and save this manual for future use. Getting Started Congratulations on purchasing this rugged
CALIFORNIA PROP65 WARNING:
 Index Introduction 3 Box Content SE49 Features Minimum System Requirements Getting Started 4 Connection and Power Nektar DAW integration Using SE49 as a Generic USB MIDI Controller Keyboard, Octave, Transpose
Neutron Firmware Update Version (10 December 2018)
") Neutron Firmware Update Version 2.0.0 - (10 December 2018) New Features Added full support for the Neutron Application. For more details please see the updated User Manual. Added Restore Default Parameters
Neutron Firmware Update Version 2.0.0 - (10 December 2018) New Features Added full support for the Neutron Application. For more details please see the updated User Manual. Added Restore Default Parameters
About this manual. Conventions in this manual. The manuals and how to use them
 1 Thank you for purchasing the Korg KROSS SYNTHESIZER WORKSTATION. To help you get the most out of your new instrument, please read. About this manual The manuals and how to use them The KROSS comes with
Shift Light Unit Mk2 User Guide V2.1
 Shift Light Unit Mk2 User Guide V2.1 Disclaimer Disclaimer Although every care is taken with the design of this product, JT Innovations Ltd. can in no way be held responsible for any consequential damage
nativekontrol PXT-Live Plus User Manual Version 1.0.8
 nativekontrol PXT-Live Plus User Manual Version 1.0.8 1 CHANGES IN THIS VERSION 2 GENERAL OVERVIEW 3 SETUP 3.1 Live Settings 3.2 UserPlusPreferences 4 GLOBAL CONTROLS 4.1 Touch Strip 5 PLUS MATRIX MODES
Gotharman s DIY demoon
 Gotharman s DIY demoon Assembly Manual Index Introduction 3 Mainboard Connections 4 Control Panel 5 Assembling The Full Kit 6 Assembling demoon From Mainboard Only 16 Mounting DIY demoon In A Box 18 Troubleshooting
Operating System Version 2.0
 Operating System Version 2.0 MAN0010079 E 4 2 KORG Pa300 Operating System release 2.0 New functions of OS Version 2.0 KORG Pa300 Operating System release 2.0 New functions of OS Version 2.0 Functions added
Procussion operation manual Basic Operation 15 BASIC OPERATION
 Basic Operation 15 BASIC OPERATION 16 Main Controls 17 BASIC OPERATION MAIN CONTROLS MIDI ACTIVITY EDIT MENU SELECT CURSOR CONTROL VOLUME CONTROL I/O MASTER EDIT ENTER C01 Vol127 Pan=K CURSOR DATA VOLUME
Using the 01X with Cubase SX 3. To all 01X users thank you for your continued use of the Yamaha 01X Digital Mixing Studio!
 Supplementary Manual Using the 01X with Cubase SX 3 To all 01X users thank you for your continued use of the Yamaha 01X Digital Mixing Studio! Since the 01X was first released, software programs that can
INDEX. * All specifications are subject to change without prior notice. v2 November 2005
 INDEX 1. Introduction... 2 Key Features... 2 2. Description of M8U... 3 Front Panel... 3 3. System Requirements... 5 PC... 5 Mac... 5 4. Installation... 6 Hardware Installation... 6 Driver Installation
This Guide is available as a PDF file.
 This Guide is available as a PDF file. In the previous post, I looked at the inside of the Alesis Vortex. This time, I examine the messages coming out of the Vortex and look at the programming of the different
CV.OCD USER MANUAL. CV.OCD has four assignable continuous analog CV outputs and twelve assignable gate/trigger outputs. MIDI-TO-CV
 six4pix.com/cvocd CV.OCD USER MANUAL Introduction CV.OCD is a device which converts MIDI signals to the Control Voltage (CV) and Trigger/Gate signals which are used to control traditional analog synthesizers.
KARMA Motif Getting Started
 KARMA Motif Getting Started Revision 07-Oct-2014 by Stephen Kay www.karma-lab.com Prerequisites Please perform the steps in the Installation and First Launch tutorial before beginning this one. Note: the
Artist EDK260 Electronic Drum Kit. User manual V1.00
 Artist EDK260 Electronic Drum Kit User manual V1.00 1 t Contents Introduction... 3 Features...4 Panel Control...5 Front panel... 5 Rear panel...7 Setting up the whole system...8 Setting up the Kick...9
IMPORTANT NOTE: If you are new to using pkcomponents and/or MT Player or if you need Support, please refer to the pkc-general Manual.
 Preset: pkc-lrn v1.0.0 NOTE: There are 2 versions of this Preset. pkc-lrn is the default version. pkc-lrn[thru] is the same as the default version except that it passes Thru MIDI from a 2nd controller.
Downloaded from Bose SoundTrue ON-EAR HEADPHONES. Owner's Guide Guía del usuario Notice d utilisation
 Bose SoundTrue ON-EAR HEADPHONES Owner's Guide Guía del usuario Notice d utilisation Safety Please read this owner s guide carefully and save it for future reference. WARNINGS: Long-term exposure to loud
v1.5 MIDI Implementation guide
 v1.5 MIDI Implementation guide GURU v1.5 MIDI Implementation guide 2007 FXpansion Audio UK Ltd. In this document: 3 Introduction 3 1: MIDI Channel mapping summary 3 2: A note about Pad MIDI Learn 4 3:
QUICKSTART GUIDE ENGLISH
 QUICKSTART GUIDE ENGLISH WWW.AKAIPRO.COM BOX CONTENTS LPK25 USB cable Software CD SOFTWARE CD Safety Instructions & Warranty Information PC Users: To install the Akai Professional LPK25 Editor, open the
About this manual. Conventions in this manual. The manuals and how to use them
 Operation Guide E 1 Thank you for purchasing the Korg KROSS music workstation. To ensure trouble-free enjoyment of your new instrument, please read this manual carefully and use the product as directed.
TWEAKER USER MANUAL
 TWEAKER USER MANUAL WWW.ELECTRIXPRO.COM ELECTRIX TWEAKER User Manual Table of Contents 1 Getting Started 4 1.1 Introduction 4 1.2 What s Included in the Box? 4 1.3 Product Registration 5 1.4 Height Extension
User Guide. Manual Version 1.0
 User Guide Manual Version 1.0 Table of Contents Introduction... 3 System Requirements and Product Support... 3 Installation... 3 Windows... 3 Mac OS X... 3 Quick Start... 4 Operation... 5 Global Controls...
User Guide
 User Guide www.nektartech.com www.nektartech.com Content Introduction 4 Box Content 4 Impact LX Features 4 Minimum System Requirements 4 Getting Started 5 Connection and Power 5 Nektar DAW Integration
MV-8800 Production Studio
 ÂØÒňΠWorkshop MV-8800 Production Studio Working with External MIDI Instruments 2007 Roland Corporation U.S. All rights reserved. No part of this publication may be reproduced in any form without the
Gimbal Camera Handle Manual Please read the user manual carefully before using and keep the manual for future reference
 Gimbal Camera Handle Manual Please read the user manual carefully before using and keep the manual for future reference This product is suitable for Mi Drone Gimbal Camera 4K-YDXJ02FM only 1 Package list
Xtra-PC User Guide. Published: April 2017 Edition: 2 Xtra-PC 4.0. Copyright Xtra-PC. All Rights Reserved.
 Xtra-PC User Guide Published: April 2017 Edition: 2 Xtra-PC 4.0 Copyright 2014-2017 Xtra-PC. All Rights Reserved. Table of Contents Overview of Xtra-PC... 4 Hardware Requirements... 4 Initial Setup...
MPC2000XL-MCD Product Overview
 Product Overview Product Description The Akai Professional MPC2000XL-MCD MIDI Production Center combines a 64-Track MIDI Sequencer and a 32-voice Stereo Digital Sampler, with 16 velocity and pressure sensitive
Using Panorama with Bitwig Studio
 www.nektartech.com www.nektartech.com Using Panorama with Bitwig Studio Bitwig Studio Integration Setup and Configuration The Panorama Bitwig Studio Integration is compatible with Bitwig Studio 1.3.5 and
The MPC Renaissance & MPC Studio Bible - Demo Tutorial (For MPC Software 2.x)
") The MPC Renaissance & MPC Studio Bible - Demo Tutorial (For MPC Software 2.x) This free tutorial is taken from MPC-Tutor s tutorial book The MPC Renaissance & MPC Studio Bible (MPC Software 2.1 Edition).
The MPC Renaissance & MPC Studio Bible - Demo Tutorial (For MPC Software 2.x) This free tutorial is taken from MPC-Tutor s tutorial book The MPC Renaissance & MPC Studio Bible (MPC Software 2.1 Edition).
Vivid (VTB-103) USB 2.0 TV Box Pro Operation Manual
 USB 2.0 TV Box Pro Operation Manual") Vivid (VTB-103) USB 2.0 TV Box Pro Operation Manual Introduction This unit is a portable mini TV box. It enables the user to capture, record, and edit TV programs or films from DVD, VCD, VCR, video camcorders,
Vivid (VTB-103) USB 2.0 TV Box Pro Operation Manual Introduction This unit is a portable mini TV box. It enables the user to capture, record, and edit TV programs or films from DVD, VCD, VCR, video camcorders,
W22IB3S-PCA3 PPC. Quick Start Guide. Version 1.0. January 2015
 W22IB3S-PCA3 PPC Quick Start Guide Version 1.0 January 2015 Please read these instructions carefully before using this product, and save this manual for future use. Introduction Winmate s W22IB3S-PCA3
Mazda Connect Infotainment System
 - The ACPMZ-72Z has a built in Dual-Link module that allows connection of Android and other devices with two-way mirroring control. - Adds a reverse camera input with active parking guidelines. - Adds
is a musical interface for the twenty-first century, featuring a matrix of 16 x 16 LED buttons that allow the performer to compose and perform music
 TNR-W TNR-O T is a musical interface for the twenty-first century, featuring a matrix of 16 x 16 LED buttons that allow the performer to compose and perform music intuitively and visually. With the expandability
Block Camera User s Manual
 Block Camera User s Manual Version 1.0.1 Welcome Thank you for purchasing our block camera! This user s manual is designed to be a reference tool for your system. Please read the following safeguard and
CHANGES AND NEW FEATURES IN PEARL MIMIC PRO UPDATE
 TRIGGERING SETTINGS CHANGES AND NEW FEATURES IN PEARL MIMIC PRO 1.0.4 UPDATE Mimic s 1.0.4 update has new one-fader input settings control instead of dual Amplification/Sensitivity controls. Now it s easier
Quick Start Guide. Rugged Android Tablet M101RK Series V1.0
 Rugged Android Tablet M101RK Series V1.0 For more information on this and other Winmate products, please visit our website at: www.winmate.com Document Part Number: 9152111K1057 Please read these instructions
SUPERSWITCHER 2 USER MANUAL V1.2.
 V1.2 www.ecpedals.com Please read all the warnings and installation instructions thoroughly before using this product. Get to know your switcher Safety & Warnings INPUT TUNER OUT INPUT BUFFER FX LOOP SEND
The all-in-one music production station that goes anywhere you want. USER MANUAL
 The all-in-one music production station that goes anywhere you want. USER MANUAL Contents Table of Contents Contents 2 English 4 Power adapter information 4 irig Keys I/O 4 Register your irig Keys I/O
Manual Version DC
 Manual Version DC20060609-1 2 Table of Contents Cart Setup...4 Laptop Instructions...6 AMX Panel Command Flow...7 AMX Panel Verification Page...8 Source Selection...9 VCR Controls...10 Laptop...11 Presenter
J74 Volca Control - Instructions and FAQ
 J74 Volca Control - Instructions and FAQ http://www.fabriziopoce.com/vc_faq.html [1] - What do I need to make use of the VolcaControl devices (VKeys, VBeats, VBass)? You need the Volca unit or units, a
Exploring the FP-7. Roland Corporation US Exploring the FP-7 page 1
 Exploring the FP-7 1. IT S A PIANO by default (every time you turn it on). a. Touch i. Modeled from grand piano (not vertical) ii. Gravity based system with NO springs iii. Progressively weighted (as a
User Guide M101M8. Rugged Android Tablet. ARM Cortex -A53 Octa-Core, 1.3 GHz Android 7.0 Nougat
 M101M8 Rugged Android Tablet ARM Cortex -A53 Octa-Core, 1.3 GHz Android 7.0 Nougat User Guide Document Part Number: 9152111K1054 Version 1.1 Please read these instructions carefully before using this product,
apple Service Source Xserve RAID Xserve RAID and Xserve RAID (SFP) Updated: 25 May Apple Computer, Inc. All rights reserved.
 Updated: 25 May Apple Computer, Inc. All rights reserved.") apple Service Source Xserve RAID Xserve RAID and Xserve RAID (SFP) Updated: 25 May 2004 2003 Apple Computer, Inc. All rights reserved. apple Service Source Basics Xserve RAID 2003 Apple Computer, Inc.
apple Service Source Xserve RAID Xserve RAID and Xserve RAID (SFP) Updated: 25 May 2004 2003 Apple Computer, Inc. All rights reserved. apple Service Source Basics Xserve RAID 2003 Apple Computer, Inc.
Kameleono. User Guide Ver 2.1
 Kameleono Ver 2.1 Table of Contents Overview...4 MIDI Processing Chart...5 Kameleono Inputs...5 Kameleono Core...5 Kameleono Output...5 Getting Started...6 Installing...6 Manual installation on Windows...6
25/37/49/61-note velocity-sensitive piano-style keys USB MIDI controller keyboard. ikeyboard 3. ikeyboard 4. ikeyboard 5. ikeyboard 6.
 25/37/49/61-note velocity-sensitive piano-style keys USB MIDI controller keyboard ikeyboard 3 ikeyboard 4 ikeyboard 5 ikeyboard 6 User manual Important Safety Instructions 1. Read this manual thoroughly
Read This First! Symphonic Instrument Version Update Notes
 Read This First! Symphonic Instrument Version 1.1.2 Update Notes This booklet provides important installation instructions and late-breaking information about version 1.1.2 features in the MOTU Symphonic
Instruction Manual. Astro-AXS580DS
 Instruction Manual Astro-AXS580DS 1 Congratulations! We at Astro Drums would like to congratulate you on the purchase of the Astro AXE580DS Electronic drum kit. The included module, the AXE800DM, is designed
Main Features. EasyStart Contents. Listening to the demo songs; Selecting/playing Programs and Combinations 2
 EasyStart TR Main Features Main Features 64MB Expanded ROM 2X the size of the classic TRITON and TRITON Le sound engines. Many new expressive and realistic sounds with multi-level dynamics including a
13 x13 Modular. LED Dance Floor. General Description: Specification:
 General Description: features a built in touch pressure sensor. Each dance floor piece can ran separately or combined with WDM Dance Floor Controller the color brightness, color changing speeds, and sensitivity
Data setting software MEXE02
 HM-40143 Data setting software MEXE02 OPERATING MANUAL Before Use Thank you for purchasing an Oriental Motor product. This operating manual describes product handling procedures and safety precautions.
PXR 1506 / WATT MIXER AMPLIFIER
 PXR 1506 / 1508 150-WATT MIXER AMPLIFIER Operating Manual www.peavey.com ENGLISH PXR 1506 / 1508 150-Watt, 8-Channel Mixer Amplifier Designed with the latest Peavey technology, the PXR 1506 / 1508 powered
MV-8000 Production Studio. When asked So what s up with the new MV-8000? Here are the opening points to hit The MV-8000 has:
 The Main Points When asked So what s up with the new MV-8000? Here are the opening points to hit The MV-8000 has: Integrated Sampling, MIDI Sequencing, and Audio Recording 2 Samplers In One High Quality
Karma Music Workstation Main Features. EasyStart CONTENTS
 EasyStart Karma Music Workstation Main Features 62-note polyphony 32 Mbyte wave ROM, expandable to 64 MB w/ 2 EXB-PCM expansion boards 640 Programs, 384 Combis, expandable to 896 Programs and 640 Combis
AeroMouse User s Manual
 UM-160 AeroMouse User s Manual Making the Future a Reality Copyright Copyright 2000 by the manufacturer of this product. All right reserved. No part of this documentation may be reproduced in any form
MIDI Note Numbers Assigned to Pads
 ELECTRONIC DRUM KIT DTX402K DTX432K DTX452K MIDI Reference How to Use This Manual This MIDI Reference will prove useful when transferring MIDI data between the drum module that came with your DTX402K,
adsilent App Manual Bluetooth
 adsilent App Manual Thank you for choosing A. Duetz Handel & Service! This manual explains how to set up the adsilent app, and details how to use its many features. 1. How to connect Bluetooth connection
This manual explains how to use the GeoMIDI software with the ControlDAW MIDI controller.
 1.1 GeoMIDI GeoMIDI MIDI mapping software provides an interface for changing the MIDI assignments of the ControlDAW s buttons, knobs, and sliders. Each slider, button or knob can send out a variety of