Standard Hotline: Dashboard User Guide For assistance, please call ext. 102.
|
|
|
- Archibald Hill
- 5 years ago
- Views:
Transcription
... 7 3. Set up Operator phone number... 8 4. Set up Notification of New Messages... 9 5. Set up Caller ID Block... 14 6. Manage your Greetings... 15 7.")
1 Standard Hotline: Dashboard User Guide For assistance, please call ext With these instructions, you will: PAGE 1. Login to the VoiceConnect site and Change your Password Set up Mobile Connect SM (if part of your plan ) Set up Operator phone number Set up Notification of New Messages Set up Caller ID Block Manage your Greetings Produce Call Detail reports Manage Broadcasts Part 1: Manage Broadcast Files and Lists Part 2: Manage Voice Message Broadcast Schedules Part 3: Manage Fax Message Broadcast Schedules Part 4: View Progress, Cancel, or Suspend a Broadcast View your Statements Use Advanced Features You need: 1. Your 10-digit User Name. To find your User Name, refer to the body text of the that you received from the VoiceConnect Administrator. 2. Your Voic password. 3. The phone numbers that you intend to use for your business.


2 I. Login and Change Your Password Step 1. In your Internet browser, go to to login. You will see the following home page. Step 2. In the middle of the right hand side of the page, click the button that says, Existing Customers Click Here to Login to your Virtual Office. You will be directed to the login screen. 2
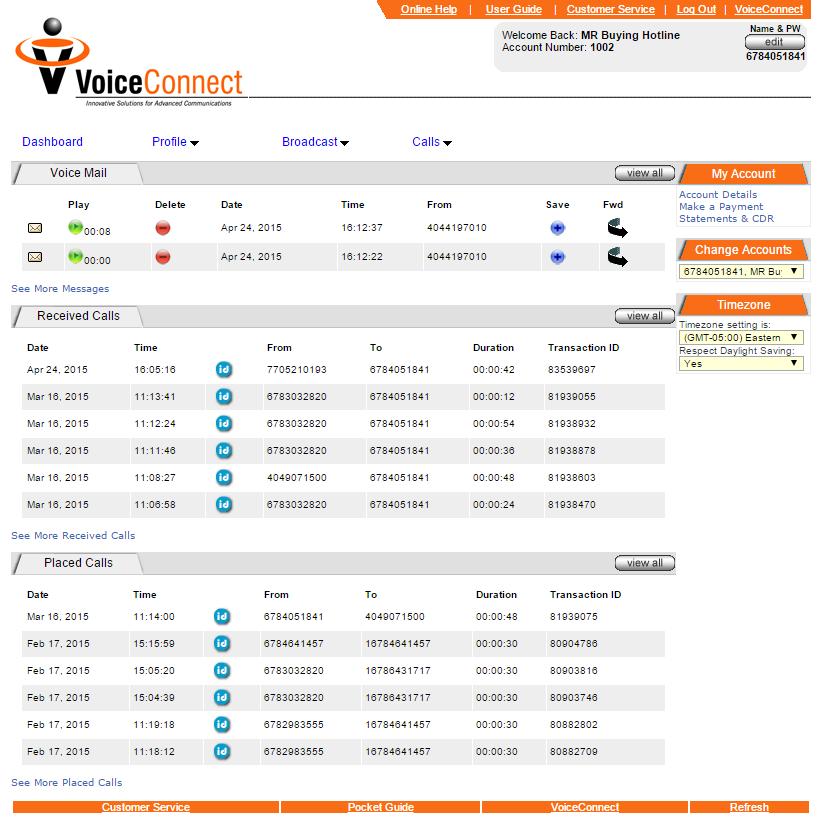
3 Step 3. Enter your 10-digit User Name in the username field. To find your User Name, refer to the body text of the that you received from the VoiceConnect Administrator. Enter your User Name without dashes. Step 4. Enter your Voic password in the Password field. Hit Enter or click the Login button. You will now see your Dashboard, as shown on the next page. At the top of the website, you may access brief Online Help, open this User Guide, or Customer Service at any time. From your dashboard, you may conveniently click to play or delete messages and read or delete faxes. (If your computer pops up a message telling you to click a button to run Active X, please click OK to play the message.) Click See More to view a longer list. To forward a message or fax to another person, simply click on the black arrow. A box will pop up. Enter the phone number to forward to and click to send. Then close the box. To save a message or fax as a Voice or Fax on Demand file, click on the blue + button to the right. A box will pop up. Enter a 3- or 4-digit extension number and click to save the file. Then close the box. Under Received Calls, you may mouse over the blue id buttons to find yellow/white pages information on the caller, if available. This reverse address match function is valuable for direct mail campaigns. 3
4 4

5 Step 5. To change your password, click the edit button in the Welcome Back box at the top of the screen. You will see the screen shown below. Enter your old and new passwords and click Update. Step 6. If you want to change the name that appears after Welcome Back: on your Dashboard, simply enter a User Name in the center of the page and click Update. Now return to your Dashboard. 5
6 Step 7. Locate the Timezone box on the right hand side of your screen. As shown below, select your time zone from the dropdown list, and indicate whether you want to Respect Daylight Savings Time (if in doubt, select Yes ). The setting will automatically update. Above the Timezone box, you will see a few other quick link boxes. In the My Account box, you can click to check your account details or statements, which will be discussed later in these instructions. The Change Accounts box is a handy way to toggle between your accounts simply click on the number of the account to go to. 6


7 II. Set Up Mobile Connect SM (if part of your plan) Mobile Connect SM may allow you to save minutes on international calls. Calls from your cell phone will be routed through our system before going international. Step 8. Move your mouse over Profile / Mobile Connect as shown below and Click. You will see the following screen. Step 9. Click the Add box, then enter your cell phone number in the Caller ID box. Your cell phone is the number from which you will be calling. Step 10. Enter your PIN. Step 11. Click Update. 7
8 III. Set Up Operator Phone Number Step 12. Place your mouse pointer on Profile in the top navigation bar. A menu will drop down under Profile, as shown below. Click on Phones. You will see the set-up screen for Phone Numbers. Step 13. Next to Operator Phone, enter the phone number you intend to use. Do NOT use dashes or spaces. (Example: ) If you choose not to use an operator number, simply leave that field blank. Step 14. Click the drop-down button to the right of # Rings. Scroll down and click 9 as shown in the example above. The system will ring that number of times before disconnecting if no one answers. Step 15. Click Update in order to save your choices. 8

9 IV. Set Up Notification of New Messages Step 16. Position your mouse pointer on Profile in the top navigation bar. A menu will drop down. Slide your pointer down to Notifications and click, as shown below. The following screen will appear. 9
10 Step 17. Consider how you want the system to notify you of new faxes and voice messages. You may receive notice of messages via or cellular call. You may receive notice with or without the message as an attachment. You may also utilize a combination of these options. Step 18. To receive notifications of new messages in HTML format WITHOUT a voice or fax file attachment, click the box next to HTML , enter the address you want to notify in the Address field, and then click the Update button at the bottom of the screen, as shown below. 10

11 Step 19. To receive notifications of new messages in Text format WITHOUT a voice or fax file attachment, click the box next to Text , enter the address you want to notify in the Address field, and then click the Update button at the bottom of the screen, as shown below. Step 20. To receive a call from the system to notify you of a new message, click the box next to Call Me. Enter the telephone number that you would like for the system to call in the Phone Number field. Then click the drop-down button to the right of Minutes Between Attempts and select the length of time the system will wait between attempts to notify you of a new voice message. Click the button to the right of Notification Type and select All Messages. Then click the button to the right of Notification Attempts and select the number of times you want the system to notify you each time you receive a new voice message. If you want another subscriber on our system to be notified in the event that you do not check your message after all system notification attempts are made, then enter the 11
12 voic number of the subscriber to be notified in the Next User to Notify field and click Update. An example is shown below. Step 21. To forward voice messages to your AS ATTACHMENTS, click the box to the left of Voice Mail w/.pdf attachment. In the Address field, enter the address to be notified, as shown below. Then click the Update button located at the bottom of the screen. If you do NOT want to receive voic s as attachments, then leave the box unchecked. You may still receive notice via without the attachment, as explained a few steps earlier. 12
13 Step 22. To forward fax messages to your AS ATTACHMENTS, click the box to the left of Fax Mail w/.pdf attachment. In the Address field, enter the address to be notified, as shown below. Then click the Update at the bottom of the screen. If you do NOT want to receive fax messages as attachments, then leave the box unchecked. You may still receive notice via without the attachment, as explained earlier. Step 23. To send an automatic response to a caller in the event that you did not answer the call, click the box next to Enable AutoResponder and select the greeting that will play when that caller answers. If you have not yet created this greeting, you must do so before you can select it from the drop-down box. Then select the number of minutes you want the system to delay before calling with your greeting. Then click Update to save this change. Step 24. Utilize a combination of the above options as appropriate for your needs. 13
14 V. Set Up Caller ID Block Step 25. Mouse over Profile on your Dashboard and click on Caller ID Blocking as shown. If you do not want to block any calls, please skip to the next section. Step 26. Click on the Add box. Step 27. Enter the number you want to block in the field under Caller ID, as shown below. Step 28. Then click Update to save your changes. Congratulations! Your setup is complete. Refer to the next section of these instructions to manage Greetings and Broadcasts and view details of calls to your account. 14
15 VI. Manage Your Greetings Step 1. Use your phone to create your Greetings. Then Step 2. In your Internet browser, go to and click the login button in the middle, right hand side of your screen. Step 3. Enter your 10-digit User Name in the Username field. To find your User Name, refer to the body text of the that you received from the VoiceConnect Administrator. Enter your User Name without dashes. Step 4. Enter your Voic password in the Password field. Step 5. Hit Enter or click the Login button. You will now see your Dashboard. At the top of the page, you may access brief Online Help, open this User Guide, or Customer Service at any time. Step 6. Position your mouse pointer on Profile in the top navigation bar. A menu will drop down. Slide the pointer down to Greetings as shown below. Step 7. Now click. You will see the Greetings screen, as shown below. If you do not want to upload a.wav file to be used as a greeting, skip to Step 9. 15

16 Step 8. Under the Greetings Upload tab, click Choose File to search for a Greeting file on your computer. (This file must be a.wav file.) Select the file you want to upload and click Upload. Repeat this process for all greeting files you want to upload. Step 9. If you do not want to remove a Greeting file, skip to Step 11. Warning: Do not delete files if you do not know what you are deleting! To remove a Greeting file, under the Greetings Remove tab, use the drop-down box to select the file to delete. Step 10. Do not delete a file if you are unsure. You can leave the file and simply not use it. Click Delete to remove the file. 16

17 Step 11. To select a Greeting file, click on the various drop-down menus found under the Greetings Select tab to choose files for the various types of greeting. If these files do not exist, then you must record or upload files. Step 12. Click the green buttons to the right of the selected files to hear the greetings. Be sure you have the correct greetings before saving your changes. Step 13. Click Update to save your changes. 17

18 VII. Call Detail Report Step 1. In your Internet browser, go to and click the login button in the middle, right hand side of your screen. Step 2. Enter your 10-digit User Name in the Username field. To find your User Name, refer to the body text of the that you received from the VoiceConnect Administrator. Enter your User Name without dashes. Step 3. Enter your Voic password in the Password field. Step 4. Hit Enter or click the Login button. You will now see your Dashboard. At the top of the page, you may access brief Online Help, open this User Guide, or Customer Service at any time. Step 5. Position your mouse pointer on Calls in the top navigation bar. A menu will drop down under Calls. Slide the mouse pointer over Call Detail, as shown below. Step 6. Now click. You will see this screen. 18

19 Step 7. Enter a Start Date and End Date for the report you want to view. Enter dates in the format YYYY-MM-DD (where Y is year, M is month, and D is day ). Step 8. Click on the drop-down menu to the right of Output and choose an output method. If you choose to output to a file, then your report will open in Microsoft Excel. You may then save the report in Excel. Step 9. Click Proceed to run your report. The report will appear onscreen. A sample Call Detail page is shown below, along with an explanation of key terms. Caller ID The phone number from which the call originated. Time Date and time of the call, formatted as: YYYY-MM-DD (year, month, day) HH:MM:SS (hours, minutes, seconds) To Your Voic Box Number. Duration The elapsed time of the call, formatted as: HH:MM:SS (hours, minutes, seconds) Charges The amount billed for the call. 19


20 VIII. Part 1: Manage Broadcast Files and Lists Step 1. In your Internet browser, go to and click the login button in the middle, right hand side of your screen. Step 2. Enter your 10-digit User Name in the Username field. To find your User Name, refer to the body text of the that you received from the VoiceConnect Administrator. Enter your User Name without dashes. Step 3. Enter your Voic password in the Password field. Step 4. Hit Enter or click the Login button. You will now see your Dashboard. At the top of the page, you may access brief Online Help, open this User Guide, or Customer Service at any time. Step 5. To view your list of available Voice on Demand files, position your mouse pointer over Broadcast in the navigation bar. Slide the pointer down and click on Voice Files, as shown below. You will see your Voice on Demand screen. From here, you may Play, Delete, Copy, or Forward a file. 20

21 Step 6. To copy a Voice on Demand file, click on the blue + button. A window will pop up. Enter a 3- or 4-digit extension number and click Save. Close the pop-up box. Step 7. To Forward a Voice on Demand file, click on the black arrow. A window will pop up. Enter the phone number of the person you would like to receive the file. Click Forward. Close the pop-up box. Step 8. To upload a fax file, position your mouse pointer over Broadcast in the navigation bar. Slide the pointer down to Upload Fax File and click. You will see your Fax File Upload screen. Step 9. Click the Choose File button and select a file from your computer. The.pdf and.tif file formats are preferred. (If you plan to use a Word file, you should run a test, as the document may be distorted or not received.) The system will tell you if your file is valid or not. Click Upload. Step 10. To view your list of available Fax on Demand files, position your mouse pointer over Broadcast in the navigation bar. Slide the pointer down to Fax Files and click. You will see your Fax on Demand screen. From here, you may Read, Delete, Copy, or Forward a file. 21

22 Step 11. To copy a Fax on Demand file, click on the blue + button. A window will pop up. Enter a 3- or 4-digit extension number and click Save. Close the pop-up box. Step 12. To Forward a Fax on Demand file, click on the black arrow. A window will pop up. Enter the phone number of the person you would like to receive the file. Click Forward. Close the pop-up box. 22

23 Step 13. To create a Broadcast list, you may enter phone numbers manually, upload numbers from a data file, or build a file from your received calls. You may modify existing lists. Step 14. To create a Broadcast list manually, position your mouse pointer on Broadcast in the top navigation bar. Slide your pointer down to List in the drop-down menu, as shown below, and click. You will see the screen below. Step 15. Slide the mouse pointer over to Create New List (Manually) in the middle of the left-hand side of the screen. Now click. You will see a List Creation screen. Step 16. Enter a Broadcast List Number and a Broadcast List Description. Choose meaningful names to aid your memory regarding the list contents, as in this example. 23


24 Step 17. Enter up to 100 telephone numbers. Step 18. Click Create. Step 19. To create a Broadcast list by uploading a data file, position your mouse pointer on Broadcast in the top navigation bar. Slide the mouse pointer down to List in the drop-down menu and click. You will see the following screen. Step 20. Click on Create List From File (Upload) in the middle of the left-hand side of the screen. You will see the List Upload screen. 24
. Click the online help button for more specifics. Step 23.")
25 Step 21. Enter a Broadcast List Number and a Broadcast List Description. Choose meaningful names to aid your memory regarding the list contents. Step 22. Click Choose file to find the data file on your computer. The file must be Comma Delimited (Comma Separated, or CSV). Click the online help button for more specifics. Step 23. Select the file and click Upload. Step 24. To create a Broadcast list from received calls, position your mouse pointer on Broadcast in the top navigation bar. Slide the mouse pointer down to List in the drop-down menu and click. You will see the following screen. 25

26 Step 25. Click on Create List From Rcvd Calls in the middle of the left-hand side of the screen. You will see a List Creation screen. Step 26. Enter a Broadcast List Number and a Broadcast List Description. Choose meaningful names to aid your memory regarding the list contents. See the example above. Step 27. Enter a Start Date and an End Date to see a list of callers who fall within the requested time range. Step 28. Click Create. You will see the List Update screen. 26
27 Step 29. Review the list and click Update to save this broadcast list. All redundant numbers are automatically removed. You may download this list to Excel. Step 30. To remove a phone number from the list, highlight it with your mouse and hit Backspace on your keyboard. Then click Update. Warning: If you click the Delete button, you will delete the entire list. 27

28 VIII. Part 2: Manage Voice Message Broadcast Schedules Step 31. To schedule a Broadcast Voice Message, position your mouse pointer on Broadcast in the top navigation bar, and then slide down to Schedule. Do NOT click. Now slide your pointer over to Message, as shown below. Click. You will see the Schedule a Voice Message Broadcast Screen. 28

29 Step 32. Type the name you want to assign to this broadcast in the Broadcast Name box. Step 33. Use the drop-down menu to the right of Select a Broadcast List to select the name of the list to which you will broadcast. You named this list earlier. Step 34. Select a file from the drop-down box next to Live Answer File that you would like to play should a person answer the phone during your broadcast. The file must be.wav format. Step 35. Similarly, select a file from the drop-down box next to VM Answer File that you would like to play when a person s voic answers during your broadcast. This file must also be.wav format. Step 36. To make a specific phone number show on Caller ID, enter the number you want to display in the field next to Force CID. Enter the number without dashes. If you do not want to display a different number, simply leave this field blank. Step 37. In the Max Attempts field, enter the number of times you would like for the system to call when a particular number on your broadcast list gives a busy signal or no answer. A typical setting is 2 to 3 attempts. Step 38. Leave the Max Ports field set at 40. Please do not change this setting. Step 39. Enter a Broadcast Start Date in the format: YYYY-MM-DD HH:MM:SS (year, month, day, hours, minutes, seconds) as shown below. Here, the time the broadcast will begin is highlighted in blue. 29
30 Note: The time you enter in Broadcast Start Date is based on the Time Zone you selected in your virtual office. To check your time zone setting, return to your Dashboard and locate the Time Zone box on the right hand side of your screen. As shown below, select your time zone from the dropdown list, and indicate whether you want to Respect Daylight Savings Time (if in doubt, select Yes ). Then return to this step. 30
31 Step 40. If you wish to limit broadcast calls to certain hours during the day, click the box to the left of Restrict Broadcast to the following times. Then enter the Start Time and End Time for calls to be made. Use the 24-hour time format when entering these times. For example, the default setting is 08:00:00 (8am) to 18:00:00 (6pm). Please see below. Step 41. If you wish to suspend your broadcast for a specific period during the day, click the box to the left of Suspend Broadcast. Then enter the Start Time and End Time during which calls will NOT be made. Use the 24-hour time format when entering these times. For example, the default setting is a one-hour lunch window beginning at 12:00:00 (noon). See below. 31
32 Step 42. To allow broadcast recipients to press a key and transfer to an operator, click the box to the left of Permit route to Live Operator, as shown below. If you do NOT want to utilize the live operator option, please skip to Step 45. Note: If you did not include this option and key when you recorded your voice file, please re-record the voice file. Step 43. Enter the operator number to which broadcast recipients will be transferred in the field to the right of Operator Number. Place a 1 before the area code if you are outside the Atlanta area. Step 44. Enter the one-digit number that recipients should press to transfer to the operator in the field to the right of Operator Key. The default key is 0. See the completed example below. Note: Operator Ports should remain set to 10. Please do not change this setting. Step 45. To allow broadcast recipients to opt-out of future broadcasts, click the box to the left of Permit Opt-Out of broadcast list, as shown below. Then enter the key they should press in the field to the right of Opt-out Key. The default key is 9. Note: If you did not include this option and key when you recorded your voice file, please re-record the voice file. 32
33 Step 46. To allow recipients to listen to your message again, click the box to the left of Permit Re-broadcast of file. Enter the key they should press. The default key is 8. Then select the same file to play, from the drop-down box. Or you may choose to record and play a somewhat different message for those people who are interested enough to listen again. Step 47. To have the broadcast stop at a certain time of day, click the box to the left of Force broadcast termination on Time Restriction. For example, you may tell the system to stop broadcasting at 7:00pm, even if the entire list has not been called, and the system will pick up where it left off the next day. Step 48. To leave a message even if someone answers, click the box to the left of Ignore Answering Machine Detection. Step 49. Click the box to the left of Record calls routed to Operator if you would like the ability to listen later. Step 50. Click Schedule. Your broadcast is now scheduled. 33
34 VIII. Part 3: Manage Fax Broadcast Schedules Step 51. To schedule a Broadcast Fax, position your mouse pointer on Broadcast in the top navigation bar, and then slide down to Schedule. Do NOT click. Now slide your pointer over to Fax, as shown below. Click. You will see the Schedule Fax Screen. Step 52. Use the drop-down menu to the right of Select a Broadcast List to select the name of the list to which you will broadcast. You must have already created a list, as explained previously. Step 53. Select a file from the drop-down box next to Select a File. The.pdf and.tif file formats are preferred. (If you plan to use a Word file, you should run a test, as the document may be distorted or not received.) If you do not have a file to select, you must Upload a Fax or save one via your dashboard, as explained previously. 34
35 Step 54. Enter a Broadcast Time in the format: YYYY-MM-DD HH:MM:SS (year, month, day, hours, minutes, seconds) as shown below. Note: The time you enter in Broadcast Time is based on the Time Zone you selected in your virtual office. To check your time zone setting, return to your Dashboard and locate the Time Zone box on the right hand side of your screen. As shown below, select your time zone from the dropdown list, and indicate whether you want to Respect Daylight Savings Time (if in doubt, select Yes ). Then return to this step. Step 55. Click Schedule. Your broadcast is now scheduled. 35
36 VIII. Part 4: View the Progress of, Cancel/Kill, or Suspend a Broadcast Step 1. From your Dashboard, position your mouse pointer over Broadcast in the navigation bar, and slide the pointer down to View Broadcasts, as shown below. You will see your View Schedules screen. Step 2. Select either All, (Voice) Message, or Fax in the drop-down box to the right of Select a Broadcast Type, depending on what you want to view. All will show you both message and fax schedules. Step 3. IF your message is scheduled to broadcast today, click View. You will see a screen of scheduled broadcasts. IF you want to view a broadcast that is scheduled for a future date, enter that date and the time the broadcast is to BEGIN in the box to the right of Broadcast Time End on the View Scheduled Broadcasts screen. Enter the date and time in the format: YYYY-MM-DD HH:MM:SS (year, month, day, hours, minutes, seconds). 36

37 Use the 24-hour time format when entering these times. For example, 2:00 PM should be entered as 14:00. Click View. IF you want to view a previous broadcast, enter the date that the broadcast began in the box to the right of Broadcast Start Time. Click View. In summary, the start time of the broadcast you want to view must fall within the timeframes found in the Broadcast Start Time and Broadcast End Time boxes. Then you will see your scheduled broadcasts, as in the sample below. Step 4. If your broadcast is already in progress or completed, click the icon under Rep next to the broadcast ID to generate a broadcast report. If the broadcast is in progress, you may click Refresh on the report screen to update the report. Step 5. To change a scheduled broadcast that is not already in progress, click the icon under Sel next to the broadcast ID that you want to modify. The Display Broadcast settings will appear, and you may make changes as necessary. Bear in mind that all of these options do not apply to faxes. 37
38 Step 6. To save your changes, click Update at the bottom of the screen. Step 7. To suspend the broadcast until a later time, click Suspend at the bottom of the screen. To cancel/kill the scheduled broadcast, click Kill at the bottom of the screen. 38

39 IX. Statements, Payment, and Account Details Step 1. In your Internet browser, go to and click the login button in the middle, right hand side of your screen. Step 2. Enter your 10-digit User Name in the Username field. To find your User Name, refer to the body text of the that you received from the VoiceConnect Administrator. Enter your User Name without dashes. Step 3. Enter your Voic password in the Password field and hit Enter or click the Login button. You will see your Dashboard. Step 4. Look to the right hand side of your screen. Under My Account, you will see some options (highlighted in blue below). Account Details and Make a Payment are selfexplanatory once you click through. Step 5. To check your statements, click on Statements & CDR. You will see the Statements Screen, as shown below. Note: Statements include Call Detail Records. However, should you wish to view the Call Detail Records for a particular statement separately from the statement summary, you may utilize the tab labeled Statement CDR instead. Data will be output as Comma Separated Values (CSV) that you may save in Excel. 39

40 Step 6. Click on the drop-down menu to the right of Statement: and choose the billing period of the statement that you would like to retrieve. Step 7. Click Proceed to run your report. You will see the screen below. 40

41 Step 8. Click on the Click here to see statements link. Your invoice will appear as demonstrated here, along with call details. 41
42 X. Advanced Features Step 1. Under Profile on your Dashboard, click on Advanced Features. You will see the following screen. Here we explain what these features are. Step 2. Call VoiceConnect Customer Service with questions if you do not fully understand the effect these choices will have on your service. Suppress Brand Announcement Suppresses the VoiceConnect Brand Announcement. (Only used on Zero Option.) Suppress Subscriber Announcement Suppresses the name of the individual User that was recorded by the user when they first set up the mailbox. (Only used on Zero Option.) Suppress Caller Announcement Suppresses the name of the Caller during the delivery of a live call. Otherwise, the system will automatically prompt the subscriber with the name of the person that is trying to connect to the subscriber. (Only used on Zero Option.) Suppress Acceptance Query Suppresses the Query to the subscriber that says, Press 1 to connect to the caller or press 2 to send the call to voic . When the query is suppressed, the caller is transferred to the subscriber with no warning. Suppress Incoming Faxes Disables inbound faxing to this mailbox. 42
43 Suppress (Incoming) Voic Disables the ability to leave voic s on this mailbox. Save Name as Voic If caller announcements are enabled and the caller records their name on the system when prompted, but hangs up before connecting to the subscriber, then the system will leave the name recording as a voic in the mailbox. Caller ID Blocking Enables the Caller ID Blocking feature, which works with the Caller ID Blocking Portal located in the Profile menu of the Virtual Office. Inbound CID Number Allows you to choose the Caller ID number displayed when a caller calls. This option is excellent for subscribers who take calls for multiple clients. Inbound CID Name Allows you to choose the Caller ID name displayed when a caller calls. This option is excellent for subscribers who take calls for multiple clients. END OF MANUAL For assistance, please call ext
Dashboard User Guide For assistance, please call
 Dashboard User Guide For assistance, please call 1-866-399-8647. With these instructions, you will: PAGE 1. Login to the Clarity site, Configure 911, and Change your Password... 2 2. Set up Mobile Connect
End User Guide. FastFind Links. Using Your Desk Phone. Using the User Web Portal. Voic . Answering Rules and Time Frames. Contacts.
 End User Guide Using Your Desk Phone FastFind Links Using the User Web Portal Voicemail Answering Rules and Time Frames Contacts Phones Music On Hold Call History Profile CONTENTS Contents... ii Introduction...
Logging into CommPortal for the first time
 Logging into for the first time Go to http://myphone.bayring.com Number: Your 10-digit telephone number (no dashes) Password: 112233 (temp pin) At this screen, click Next Enter Old password (temp pin is
BUSINESS LINE COMMPORTAL GUIDE
 wowforbusiness.com BUSINESS LINE COMMPORTAL GUIDE WOW! Business BCSE.U.1505.O Business Line CommPortal Guide Table of Contents Getting Started...3 Dashboard...4 Messages and Calls...5 Messages...5 Missed
vsuite Home Phone Feature Reference
 vsuite Home Phone Feature Reference Below is a list of features that are included with you new vsuite telephone service. Should you have any questions or problems with a feature please feel free to contact
Hosted Voice End User Guide Version 1.0 April End User Guide
 Hosted Voice End User Guide Version 1.0 April 2013 End User Guide Contents 1 Introduction... 1 2 Introducing CommPortal... 2 2.1 Accessing and Logging In... 2 2.2 Using CommPortal... 2 2.3 Getting help...
CommPortal Portal Guide
 CommPortal Portal Guide The User Portal is available at https://userportal.appiaservices.com. Please contact Appia Support at 877-277-4297, option 3, or support@appiaservices.com if you need login information.
End User Guide - Commportal
 End User Guide - Commportal Table of contents Table of contents 3 1 Introducing CommPortal 6 1.1 Accessing 6 1.2 Logging In 6 1.3 Using CommPortal 7 1.4 Getting Help 9 1.5 Refreshing a Page 9 1.6 Logging
East-Central Vermont Community Fiber-Optic Network
 East-Central Vermont Community Fiber-Optic Network www.ecfiber.net support@ecfiber.net TELEPHONE SERVICE USER GUIDE Your ECFiber telephone service is an advanced Voice Over Internet Protocol (VOIP) system
CommPortal User Guide
 CommPortal User Guide Broadband and Voice Applications Turn your web browser into your personal call center CommPortal is an interactive web program that allows you to check your VoiceMail, set preferences
Accessing VXView 3. Checking Messages 4. Folder Tabs/Toolbar 5. Message Area 6. Almost Full Warning 7. Managing Address Books 8. Adding a Contact 9
 CONTENTS Accessing VXView 3 Checking Messages 4 Folder Tabs/Toolbar 5 Message Area 6 Almost Full Warning 7 Managing Address Books 8 Adding a Contact 9 Modifying a Contact 10 Importing Contacts 11 Exporting
Digital Voice Services Residential User Guide
 Digital Voice Services Residential User Guide TECH SUPPORT - 888.855.9997 734.324.7190 WYANDOTTECABLE.COM Feature Access Codes *62 Voice Portal *86 Direct Voice Mail Retrieval *77 Anonymous Call Rejection
Residential Voice SUBSCRIBER GUIDE
 Residential Voice SUBSCRIBER GUIDE RESIDENTIAL VOICE SUBSCRIBER GUIDE TABLE OF CONTENTS Table of Contents Getting Started... 6 Requirements... 6 First Login... 6 Features Management... 0 Basic Features...
Telecommunication Systems. CallXpress. Web PhoneManager. Page
 Telecommunication Systems CallXpress Web PhoneManager Page CallXpress Table of Contents Web PhoneManager Logging In... 3 Home Listening to your messages...... 4 Replying to a message...... 4 Forwarding
COMMPORTAL. A better way to stay connected. SELF SERVICE GUIDE
 COMMPORTAL A better way to stay connected. SELF SERVICE GUIDE 1 TABLE OF CONTENTS WHAT IS COMMPORTAL... HOME TAB... ACCOUNT PHONE + SETTINGS, NO REPLY + BUSY STATUS, + ADVANCED SETTINGS. MESSAGES TAB...
Easy Attendant User Guide
 Welcome Easy Attendant will provide your business with a convenient and virtual means to answer your business incoming telephone calls. Easy Attendant is an easy to use solution that combines advanced
Hosted PBX Administrator Guide
 Hosted PBX Administrator Guide Table of Contents 1 INTRODUCTION... 1-1 1.1 PURPOSE OF THIS GUIDE... 1-1 1.2 OTHER GUIDES... 1-1 2 COMMPORTAL BUSINESS GROUP ADMINISTRATOR (BG ADMIN)... 2-1 2.1 ACCESSING
VOICE MAIL USER GUIDE
 VOICE MAIL USER GUIDE VOICE MAIL USER GUIDE NEVER MISS A MESSAGE NEVER MISS A MESSAGE Table Of Contents How to Use Your Voice Mail 2 Setting Up Your Account 4 Collecting Your Messages 5 Sending Messages
2. From the Dashboard, scroll down to the Auto Attendant, and click the Settings Button, then click Detailed Settings.
 Call Detail Records (CDR) for Auto Attendants PURPOSE: Explain how to pull, export and understand the Call Detail Records in relation to the Auto Attendant Service. Pull Call Detail Reports (CDR) Call
Digital Telephone User Guide
 Digital Telephone User Guide 1 P. O. Box 99, Conway, AR 72033 (501) 450-6000 ConwayCorp.com * Feature Access Codes *11 Broadworks Anywhere (pulling call to alternate phone) *62 Access Voicemail *72 Call
VOICE MAIL VOICE MAIL USER GUIDE USER GUIDE NEVER MISS A MESSAGE NEVER MISS A MESSAGE. windstream.com
 VOICE MAIL USER GUIDE VOICE MAIL USER GUIDE NEVER MISS A MESSAGE NEVER MISS A MESSAGE windstream.com 1.877.481.9463 Windstream is a registered service mark of Windstream Corporation. 2009 Windstream Corporation
Digital Home. Information & FAQs
 Digital Phone @ Home Information & FAQs @ For a complete tutorial on the Customer Portal, Digital Phone @ Home Features & Voicemail, and FAQs, please click on the link Digital Phone @ Home Tutorial on
ENA SmartVoice User Guide
 TABLE OF CONTENTS SECTION 1: INTRODUCTION... 1 SECTION 2: MAKING CALLS... 2 Internally... 2 Externally... 2 Emergency Calls... 2 Speaker Phone... 2 Ending Calls... 2 SECTION 3: ANSWERING CALLS... 3 Using
User's Guide. Voice Messaging and Fax Software. FaxTalk Communicator SETM
 User's Guide Voice Messaging and Fax Software FaxTalk Communicator SETM FaxTalk Communicator SE for Windows Version 4.7 Telephone Consumer Protection Act of 1991 "It shall be unlawful for any person within
Voic . Glossary of Terms. Click here to access your voic online.
 Voicemail Click here to access your voicemail online. Voicemail from Arvig will enhance the way you communicate! Our voicemail allows you to play, send, answer and forward voice messages from any touch-tone
HOSTED VOIP COMMPORTAL GUIDE
 wowforbusiness.com HOSTED VOIP COMMPORTAL GUIDE WOW! Business CPSP.U.1506.R-ICM CommPortal Guide Table of Contents Getting Started...3 Dashboard...4 Messages and Calls...5 Messages...5 Missed Calls...5
Cloud PBX User Guide
 SpectrumVolP FastFind Links Using Your Desk Phone Voicemail Answering Rules and Time Frames Contacts Phones Music On Hold Call History Profile 972.312.0388 sales@spectrumvoip.com Spectrumvoip.com 2900
My Phone. My Phone - Overview. Signing In
 My Phone - Overview The Optus Loop My Phone portal gives you full access to your personal phone service settings, allowing you to customise and manage your service to suit your specific requirements. Within
1 Page. Digital Voice Services Business User Guide
 1 Page Digital Voice Services Business User Guide Feature Access Codes *62 Voice Portal *86 Direct Voice Mail Retrieval *77 Anonymous Call Rejection Activation *87 Anonymous Call Rejection Deactivation
AirePBX End User Guide
 AirePBX End User Guide Third Quarter 2012 Contents 1 Introduction 1-1 2 Making calls 2-1 1. Internally 2-1 2. Externally 2-1 3. Emergency calls 2-1 4. Speaker phone 2-1 5. Ending calls 2-1 3 Answering
Voic to (including Voic )
") table of contents 2 Step 1 Initializing your Voicemail Step 2 Configuring rapid access to your message 2 6 7 What you will find in the Call Feature Manager Call Feature Manager by Internet and by phone
table of contents 2 Step 1 Initializing your Voicemail Step 2 Configuring rapid access to your message 2 6 7 What you will find in the Call Feature Manager Call Feature Manager by Internet and by phone
Table of Contents. Phone Configuration
 User Manual 3.60 Table of Contents Phone Configuration... 1-5 Buttons... 1 Placing a Call... 1 Answering a Call... 2 DND... 2 Redial... 2 Call List / Callers... 2 Contacts... 2 Paging... 3 Transferring
2. From the Dashboard, scroll down to the Hunt Group, and click the Settings Button, then click Detailed Settings.
 Call Detail Records (CDR) for Hunt Groups PURPOSE: Explain how to pull, export and understand the Call Detail Records in relation to the Hunt Group Service. Pull Call Detail Reports (CDR) Call Detail Records
Fusion Voic Plus User Guide For the iphone
 Fusion Voicemail Plus User Guide For the iphone Welcome to Fusion Voicemail Plus! Fusion Voicemail Plus (FVM+) is a replacement for the ordinary voicemail that you use with your cellular phone company.
For customers in Newnan, GA WEB PORTAL GUIDE. NuLink. NuLink_RES_0117
 WEB PORTAL GUIDE NuLink NuLink_RES_0117 Web Portal Guide Table of Contents Getting Started...3 Dashboard...4 Messages and Calls...5 Messages...5 Missed Calls...5 Dialed Calls...5 Received Calls...5 Contacts...6
Solutions Reference Guide. IP TalkSM. Voic & Navigator Web Portal
 IP Talk SM Solutions Reference Guide IP TalkSM Voicemail & Navigator Web Portal Table of Contents Voicemail Accessing Your Voicemail................... 1 Voicemail Main Menu........................ 2
PREMIUM ATTENDANT GUIDE
 wowforbusiness.com PREMIUM ATTENDANT GUIDE WOW! Business PAGM.U.1408.O Premium Attendant Table of Contents Product Overview...3 CommPortal Login Screen...4 Main Page...5 Schedule...6 Special Days...8 Menus
Digital Voice Services Residential User Guide
 Digital Voice Services Residential User Guide 2 P a g e * Feature Access Codes *11 Broadworks Anywhere (pulling call to alternate phone) *62 Access Voicemail *72 Call Forwarding Always Activation *73 Call
Voice Messaging User Guide from Level 3. Updated April Level 3 Communications, LLC. All rights reserved. 1
 Voice Messaging User Guide from Level 3 Updated April 2017 Level 3 Communications, LLC. All rights reserved. 1 Table of Contents 1 Introduction... 4 1.1 Voice Mailbox... 4 1.2 Additional Voice Mailbox
User Guide. 3CX Robo Dialer. Version
 User Guide 3CX Robo Dialer Version 15.5.143 "Copyright VoIPTools, LLC 2011-2018" Information in this document is subject to change without notice. No part of this document may be reproduced or transmitted
Hosted Fax Mail. Blue Platform. User Guide
 Hosted Fax Mail Blue Platform Hosted Fax Mail User Guide Contents 1 About this Guide... 2 2 Hosted Fax Mail... 3 3 Getting Started... 4 3.1 Logging On to the Web Portal... 4 4 Web Portal Mailbox... 6 4.1
Managing your PBX- Administrator
 Managing your PBX- Administrator ACCESSING YOUR PBX ACCOUNT Navigate to https://voip.ancero.com/ and log in to the Ancero Utility VoIP portal account. If you would like your web browser to keep you logged
1 P age NEXTIVA CALL CENTER. Supervisor User Guide. nextiva.com/support 2015 NEXTIVA, ALL RIGHTS RESERVED
 1 P age NEXTIVA CALL CENTER Supervisor User Guide nextiva.com/support 2015 NEXTIVA, ALL RIGHTS RESERVED 2 P age Creating Employees... 3 Creating an Employee... 3 Assigning Licenses to Employees... 7 Schedules...
ENTERPRISE SUBSCRIBER GUIDE
 ENTERPRISE SUBSCRIBER GUIDE Enterprise Subscriber Guide 880 Montclair Road Suite 400 Birmingham, AL 353 www. TABLE OF CONTENTS Table of Contents Introduction...6 Logging In...6 Navigation Bar, Sub-Menu
Logging Into the Web Portal
 V0610 Logging Into the Web Portal Open your Web browser application. In the address field, enter the external WebPortal address, https://lightpathvoice.com Click Go. In the Phone Number field, enter your
OpenTouch Message Center R2.x User Manual
 OpenTouch Message Center R.x User Manual 8AL90USAAed03 September 06 Table of content INTRODUCTION... 3 MESSAGING SERVICES TELEPHONE USER INTERFACE... 4. ACCESSING THE TELEPHONE USER INTERFACE... 4. LISTENING
ConnectDirect User Guide
 ConnectDirect User Guide For questions contact ConnectMe Customer Service Email: custsvc@connectmevoice.com Phone: 800-743-1208 Ext. 2 ConnectDirect Instructions SMP5 v2015 Page - 1 - Contents SECTION
Voice Forms Mailbox User Guide
 Voice Forms Mailbox User Guide Overview Voice Forms allows callers to give specific voice response to individual questions. Callers can be asked up to 25 separate questions, with the allowable length of
Digital Phone System User Guide v4.8
 Digital Phone System User Guide v4.8 169 Saxony Road, Suite 212 Encinitas, CA 92024 Phone & Fax: (888) 955-3520 Page 1 Welcome! Thank you for choosing FreedomVoice. This User Guide is designed to help
Virtual Office Phone Service Setup Guide
 Setup Guide A guide for the Phone System Administrator Version 4.0, July 2010 Table of Contents Welcome to 8x8 Virtual Office!...3 Activate Your 8x8 IP Phones...3 The 8x8 Self Service Portal...4 Set Up
Vertical 2-Line Desk Phone Quick Reference Guide
 Contact your Sales Representative for more information. Table of Contents Introduction to your Xcelerator Desk Phone... 3 How to use your Xcelerator Desk Phone... 3 Answering and making calls... 3 Handling
Auto Attendant Guide - Proprietary Nextera Communications. Auto Attendant Guide
 - Proprietary - Auto Attendant Guide TABLE OF CONTENTS 1 INTRODUCTION 3 2 PLANNING YOUR AUTO ATTENDANT STRUCTURE.. 3 3 PLANNING YOUR ANNOUNCEMENTS. 3 4 RECORDING ANNOUNCEMENTS AND NAMES 4 5 CONFIGURING
Hosted VOIP CommPortal
 Business Services Hosted VOIP CommPortal User Guide wowforbusiness.com CommPortal Guide Table of Contents Getting Started... 4 Dashboard... 5 Messages and Calls... 6 Messages... 6 Missed Calls... 6 Dialed
ActivePBX Administrator s Guide
 ActivePBX Administrator s Guide CONTENTS Preface... v Document Conventions... v Glossary Conventions... v 1. Accessing the Admin Web Portal... 6 Logging in to the Web Portal... 7 Understanding the Admin
Hosted Voice Product Training Premium Auto Attendant
 Hosted Voice Product Training Premium Auto Attendant 1 Agenda 1. What is an Auto Attendant? 2. Auto Attendant Flow Chart 3. Getting Started 4. Time & Day Routing 5. Premium Attendant Icons 6. Premium Offering
Voic Instructions
 NUMBER: PIN: TELEPHONE VOICEMAIL ACCESS To log into your voicemail box from your greeting: 1. Dial your phone number and let it ring to voicemail. 2. Press * to interrupt your greeting. 3. Enter your PIN
Cisco 8841/8851/8861 Dial Plan
 Cisco 8841/8851/8861 Dial Plan Internal Calls: Dial 5-digit extension External Calls: Site-to Site 5-digit number Domestic: 9+1 Area Code + Number Int l: 9+011+Country Code + Number Emergency External:
PortaOne. Customer Self-care Interface MR50
 PortaOne Customer Self-care Interface MR50 Publication History Date Version Author =============== ====== ============ December 17, 2015 1 Jeffrey K Brady July 12, 2016 2 Jeffrey K. Brady 2000-2014 PortaOne,
Hosted VoIP Administrator User Guide
 Hosted VoIP Administrator User Guide Table of Contents: 1. Call Continuity..... pg 1 2. Call Groups..... pg 2 3. Call Queues... pg 5 4. Caller ID... pg 9 5. Company Call Recording... pg 12 6. Conference
The Complete Pegasus Communication Solutions User Guide and How-To Manual
 The Complete Pegasus Communication Solutions User Guide and How-To Manual Revised June 2012 ABOUT US ABOUT OUR SOFTWARE ACCESS USER LEVELS AND PERMISSIONS GETTING STARTED UNDERSTANDING THE SCREEN LAYOUT
Follow us on Twitter to stay in touch with the latest news, articles, product developments, and promotions for FreedomVOICE service.
 WELCOME! Thank you for choosing FreedomVOICE. This User Guide is designed to help you understand the features included with your service and walk you through configuring these features through your WebLINK
Basic Seat User Training
 Basic Seat User Training Welcome to VoiceConnect This training will help you get comfortable with your new VoiceConnect solution There are a vast number of features you can use with this new telephone
Enterprise Voice SUBSCRIBER GUIDE
 Enterprise Voice SUBSCRIBER GUIDE Conterra Networks Enterprise Voice SUBSCRIBER GUIDE 3 TABLE OF CONTENTS Table of Contents Introduction... 6 Logging in... 6 Navigation Bar, Sub-Menu and Page Layout...
HughesFlex Cloud PBX Quick Start Guide
 HughesFlex Cloud PBX Quick Start Guide www.hughesflex.com 309-277-4111 info@hughestel.com WELCOME Welcome to HughesFlex Cloud PBX! This guide is intended to get you up and running with the basic features
Voice Mail with E-Forward Online User Guide
 Voice Mail with E-Forward Online User Guide Check voice messages from any phone, your e-mail or online! Discover the ultimate convenience of managing your home and family life using Ponderosa Voice Mail
User Guide. Maximize your voic with MAXmail
 User Guide Maximize your voicemail with MAXmail 1 HOME TOWN MAXmail features With the HOME TOWN MAXmail service, managing your calls is easy. The service answers calls even when you cannot answer them.
Auto Attendant. Blue Platform. Administration. User Guide
 Blue Platform Administration User Guide Contents 1 About Auto Attendant... 3 1.1 Benefits... 3 2 Accessing the Auto Attendant Admin Portal... 4 3 Auto Attendant Admin Portal Interface... 5 4 Auto Attendant
Cisco 504G, 514G, 508G, and 303G Initial Setup
 Cisco 504G, 514G, 508G, and 303G Initial Setup 1 Handset 2 Message Waiting Indicator 3 LCD Screen 4 Line keys 5 Softkey buttons 6 Navigation button 7 Messages button 8 Hold button 9 Setup button 10 Mute
Premium Auto Attendant User Guide
 Premium Auto Attendant User Guide Contents Introduction to Premium Attendant... 1 Setting up Premium Attendant for the First Time...1 Working with the Premium Attendant Interface... 2 Names and Descriptions...2
Unified Communicator Mobile
 MITEL Unified Communicator Mobile Mobile Client Handset User Guide Release 2.2 Mobile Client Handset User Guide NOTICE The information contained in this document is believed to be accurate in all respects
Virtual Office Phone Service Setup Guide
 Setup Guide A guide for the Phone System Administrator Version 6.0, November 2010 Table of Contents Welcome to 8x8 Virtual Office!...3 8x8 Virtual Office Softphone...3 Activate Your 8x8 IP Phones...3 The
Administrator Guide. Start-up Guide for Administrators
 Administrator Guide Start-up Guide for Administrators RingCentral Office@Hand from AT&T Start-up Guide for Administrators Table of Contents Table of Contents Welcome to RingCentral Office@Hand from AT&T...
NEXTOS 3.0 USER QUICK START GUIDE. nextiva.com/support
 NEXTOS 3.0 USER QUICK START GUIDE nextiva.com/support The NextOS 3.0 portal is a web-based application for managing your Nextiva call features and settings. You will be able to manage call forwarding,
Allworx User s Guide. (Release 7.3)
") Allworx User s Guide (Release 7.3) No part of this publication may be reproduced, stored in a retrieval system, or transmitted, in any form or by any means, electronic, mechanical, photocopy, recording,
Allworx User s Guide (Release 7.3) No part of this publication may be reproduced, stored in a retrieval system, or transmitted, in any form or by any means, electronic, mechanical, photocopy, recording,
3CX Phone System User Guide
 3CX Phone System User Guide 31 Gloster Court, Dartmouth, NS B3B 1X9 Canada Toll free: 1-800-675-4025 Tel: 902-468-2252 Fax: 902-468-2557 cabcosales@cabco.ca 1 cabco.ca Contents Page Quick Start Guide 3
Hosted IP Phone System Administrator Portal User Guide (Polycom)
") Log into the Administrator Portal Open Internet browser (e.g., Internet Explorer) Browse to http://portal.popp.com/bg/ Enter the following: Number: administrator s 10-digit phone number Password: initial
Log into the Administrator Portal Open Internet browser (e.g., Internet Explorer) Browse to http://portal.popp.com/bg/ Enter the following: Number: administrator s 10-digit phone number Password: initial
Allworx User s Guide (Release x)
") Allworx User s Guide (Release 6.8.1.x) -PAGE INTENTIONALLY LEFT BLANK- Table of Contents 1 VOICEMAIL...1 1.1 ACCESSING YOUR MESSAGE CENTER INBOX...1 1.2 LISTENING TO YOUR VOICEMAIL...2 1.3 SENDING VOICEMAIL
Allworx User s Guide (Release 6.8.1.x) -PAGE INTENTIONALLY LEFT BLANK- Table of Contents 1 VOICEMAIL...1 1.1 ACCESSING YOUR MESSAGE CENTER INBOX...1 1.2 LISTENING TO YOUR VOICEMAIL...2 1.3 SENDING VOICEMAIL
QUICK START GUIDE NTS HOSTED PBX CALL MANAGER. Welcome. Getting Oriented
 QUICK START GUIDE NTS HOSTED PBX Welcome Welcome to NTS Hosted PBX! This guide is intended to get you up and running with the basic features associated with the product. For more in-depth information,
Enter your password. When you first login, your password will be Jag! followed by your account number with no spaces. Example: Jag!
 Jaguar Communications Voicemail - Online Access 01/10/19 REV 2 Go to https://commportal.jagcom.net in a web browser. Enter your ten digit VM enabled telephone number and the password for this number. Enter
NOTIFY PLUS - MY SERVICES MANAGEMENT
 Set Up Fee...$50 51-250 Phone Book Entries...$9.95/mo. 1-50 Phone Book Entries...$ 4.95/mo. 251-1000 Phone Book Entries...$19.95/mo. LOGIN TO MY SERVICES In your web browser type in myservices.gondtc.com.
Portal User Guide. Portal Release 3.13
 Portal User Guide Portal Release 3.13 https://portal.3starsnet.com Page 1 01-08-2018 Contents 1 Introduction 4 2 Accessing Messages on the Web Interface 4 2.1 Searching for Messages 4 2.2 Sorting Messages
Getting Started 3. Using this Guide 3 Connecting Your Phone 4
 Table of Contents Getting Started 3 Using this Guide 3 Connecting Your Phone 4 Adjusting the Footstand / Handset Rest 5 Signing In to Your Phone 5 Choosing the Proper Headset 5 An Overview of Your Phone
Hosted Phone Quick Start Guide. Get the most out of our Hosted Phone service with these handy instructions for the Polycom VVX phone.
 Hosted Phone Quick Start Guide Get the most out of our Hosted Phone service with these handy instructions for the Polycom VVX 300-310 phone. 1 Contents Equipment......................................................................
The TELUS Business Connect Mobile solution. Admin guide
 The TELUS Business Connect Mobile solution Admin guide Table of contents. Part Getting started 4 Introduction 5 Admin homepage 5 Main functions 5 Admin Portal 5 My Extension 6 Do Not Disturb 7 RingOut
Hosted PBX Administrator s Guide. IVR DID Management CALL QUEUES. 1 Ally Communications Hosted PBX Administrator's Guide
 Hosted PBX Administrator s Guide CALL QUEUES IVR DID Management 1 CONTENTS Preface Document Conventions Glossary Conventions 1. Accessing the Admin Web Portal Logging in to the Web Portal Understanding
Cisco 8811 Dial Plan. Place a Call. Answer a Call. Put a Call on Hold. Feature and Session Buttons. Your Phone
 Cisco 8811 Dial Plan Internal Calls: Dial 5-digit extension External Calls: Site-to Site 5-digit number Domestic: 9+1+ Area Code + Number Int l: 9+011+Country Code + Number Emergency External: 9+911 or
Premium Auto Attendant USER GUIDE
 Premium Auto Attendant USER GUIDE CONTENTS 1.0 Introduction 4 2.0 Setting up for the First Time 4 3.0 Working with the Interface 5 3.1 Names and Descriptions 5 3.2 Error Icons 6 4.0 Configuring your Schedule
Group Administrators
 Hosted VoIP Phone System Blue Platform Admin Portal Guide for Group Administrators Table of Contents 1 About this Guide... 6 2 Accessing the Hosted VoIP Phone System Admin Portal... 7 3 Hosted VoIP Admin
Brand New in WebLink. Configure Phones. Phone Directory
 Brand New in WebLink In addition to overhauling the look and feel, we ve taken this opportunity to add a number of brand new features and new functionality to your WebLink interface. Configure Phones (Settings
Using the Web Portal to Access Voic Messages
 Using the Web Portal to Access VoiceMail Messages (Revised October 2009) Logging in to the Web Portal (If you do not have a Web Portal username and password, contact the F&B Communications office or request
Getting Started Guidebook
 Onebox Receptionist Getting Started Guidebook for Onebox Receptionist O N E B O X C O N N E C T S T H E W O R L D T O Y O U. S M Welcome Message Congratulations! You re about to begin using Onebox Receptionist.
New SIP Trunking Admin Portal User Guide
 New SIP Trunking Admin Portal User Guide Contents Welcome... 3 Viewing Your Locations... 4 Viewing location general information... 6 Viewing and editing location Caller ID... 7 Viewing and editing location
Hosted VoIP End User Guide
 Hosted VoIP End User Guide Table of Contents: 1. Online Portal User Guide...pg 1 2. System Dial Codes... pg 6 3. Phone User Guides: a. PolyCom Guide... pg 7 b. Cisco Guide... pg 10 c. Yealink Guide...
Avaya one-x Mobile User Guide for Windows Mobile
 Avaya one-x Mobile User Guide for Windows Mobile 18-602903 Issue 2 December 2008 2008 Avaya Inc. All Rights Reserved. Notice While reasonable efforts were made to ensure that the information in this document
Today we ll be demonstrating Clarity's web portal where you can access all the features of Clarity s Phone System.
 Title: Introduction to Clarity Voice Phone Service Portal Hello and welcome to Clarity s Support Portal training. At Clarity Voice, we want to help you use your phones to make more sales and improve your
Call Detail Reporting
 Hosted VoIP Phone System Blue Platform User Guide Table of Contents 1 Call Details... 2 2 Accessing Call Details... 2 3 Query Call Details... 3 3.1 User Field (Group Administrator Access Required)... 4
Welcome to homextend for Android
 Welcome to Everything you need to to set up and use your homextend mobile phone client This guide is for users that have subscribed to a residential service that includes the homextend client. The client
Auto Attendant. Administrator Guide
 Auto Attendant Administrator Guide Version 1.1 August 3, 2018 Revision History Revision Date Description Initials 1.0 8/21/17 First published version. CS 1.1 8/3/18 Revised version for new interface (EAS
Dear Valued Customer:
 *Revised 5/08 Dear Valued Customer: We proudly welcome you to the Troy Cable Unlimited calling plan. Your Troy Cable Unlimited Voice plan provides digital quality features and affordability you won t find
Extension User Guide. S-Series Extension User Guide
 Extension User Guide Sales Tel: +86-592-5503309 E-mail: sales@yeastar.com Support Tel:+86-592-5503301 E-mail: support@yeastar.com Web: http://www.yeastar.com Version: 1.0 Revised: 2016.06 1 Contents 1.